


marktiedens
-
Posts
1,737 -
Joined
-
Last visited
Content Type
Profiles
Forums
Gallery
Events
Everything posted by marktiedens
-
Hi everyone - another little update. The upper decks are now in place & finished off with a coat of polyurethane. Mark
- 331 replies
-
- 12
-

-
- nuestra senora del pilar
- occre
- (and 1 more)
-
Thanks zappto - yes,just a slight indentation with a very small #77 bit. They will show up a little better after the finish is applied,but will not be overly noticeable. Mark
- 331 replies
-
- 1
-
-
- nuestra senora del pilar
- occre
- (and 1 more)
-
Hi Peter - welcome aboard! Actually,I went longer between builds this time than I usually do. Any progress on your Cutty? Mark
-
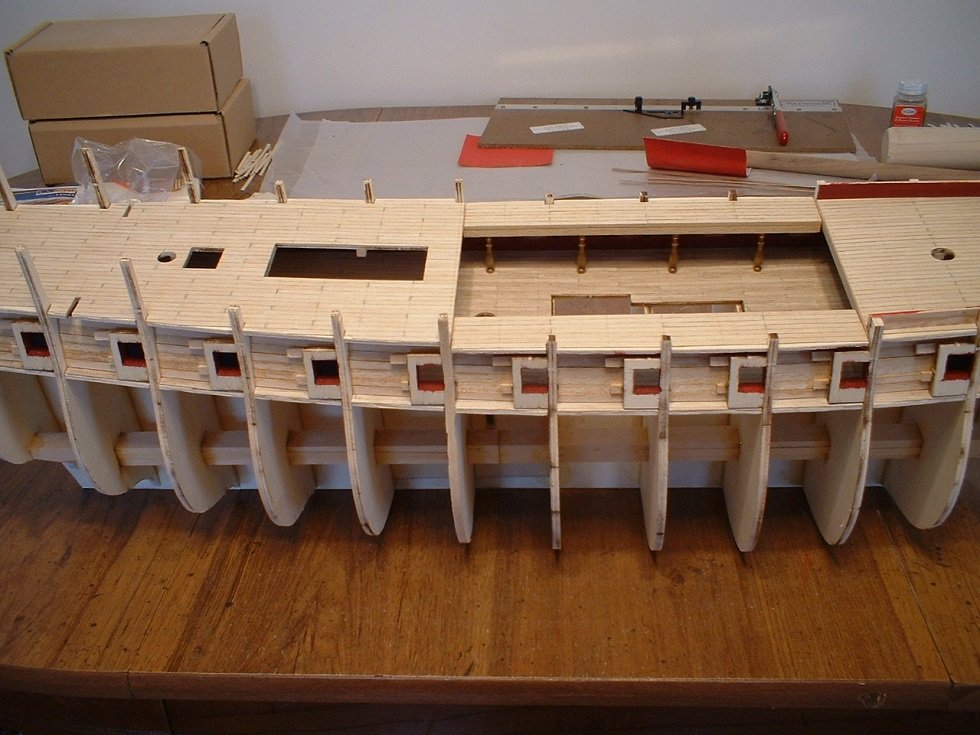
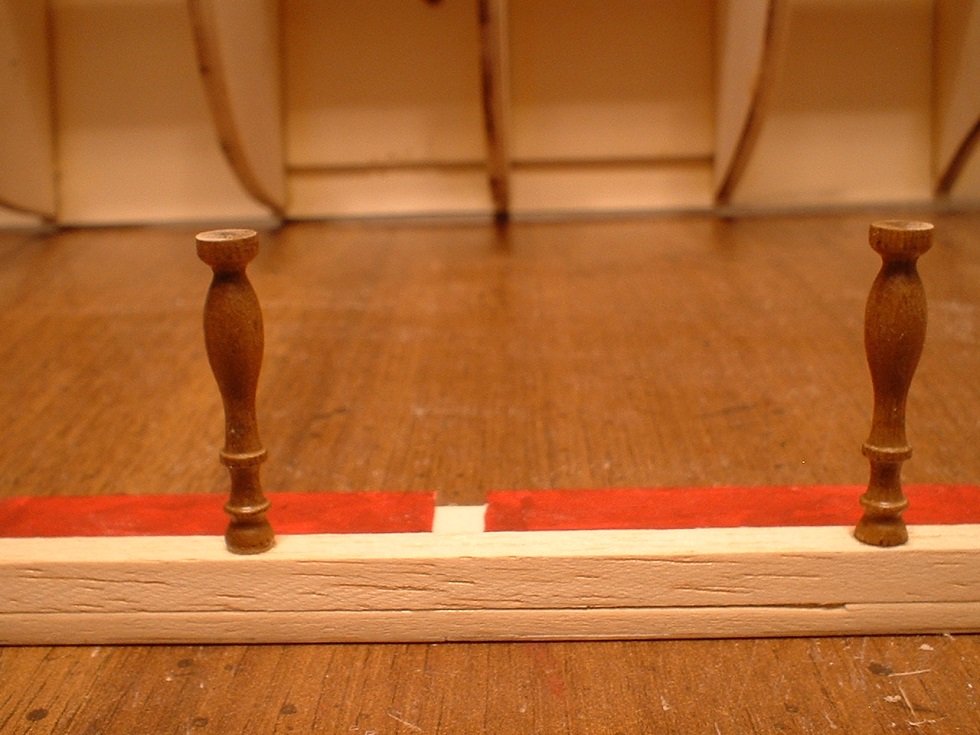
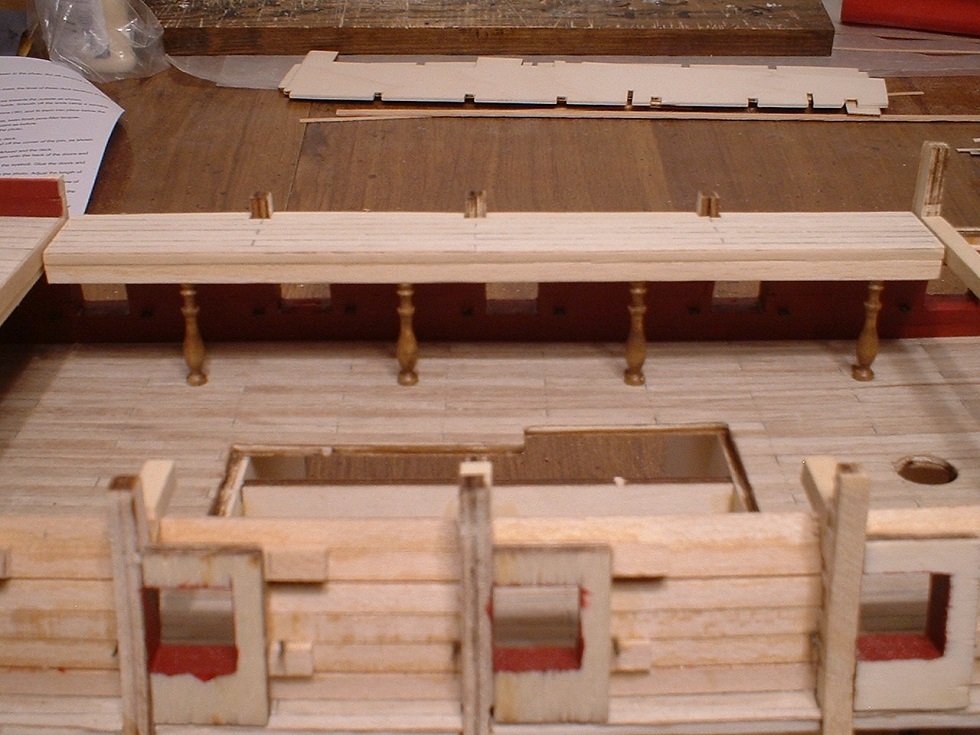
Hi everyone - a small update. Been working on the small deck sections at the waist. I decided to do them a little differently than the instructions called for - they said to glue the decks to the beams,add short sections along the length,cut some columns out of square stock & glue them in place,then cut the previously installed beams off where they span the opening over the lower deck. Seemed like an odd way to do it. What I did was cut off the support beams first,then glued a beam to the edge of the deck sections their full length. I didn`t much care for the look of plain square columns,so after some searching I found some nice turned columns at Ages of Sail. The columns were then glued to beams under the deck sections before I glued the decks in place so I could get them nice & vertical,then the decks were glued in place as a complete assembly. Just a note about the columns - I ordered them on Saturday morning & they were in my mailbox Monday afternoon! Now that`s service!!! Mark
- 331 replies
-
- 6
-
-
- nuestra senora del pilar
- occre
- (and 1 more)
-
Thanks Oscar - the finished ship will be just over 1100mm long. Mark
- 331 replies
-
- 1
-
-
- nuestra senora del pilar
- occre
- (and 1 more)
-
I`m currently working on the Nuestra Senora - the instructions are brief,but adequate to go along with the many color pictures. My biggest issue is the wood - the plywood tends to de-laminate if sanded or filed the wrong direction & most of the plywood is warped to some degree - the deck planking is so bad it is unusable. In spite of that it`s still not a bad kit,just needs a bit of extra work. Don`t know why the plywood is warped - most of the plywood sheets were sealed in shrink wrap,so weather or humidity should not have affected it. Mark
-
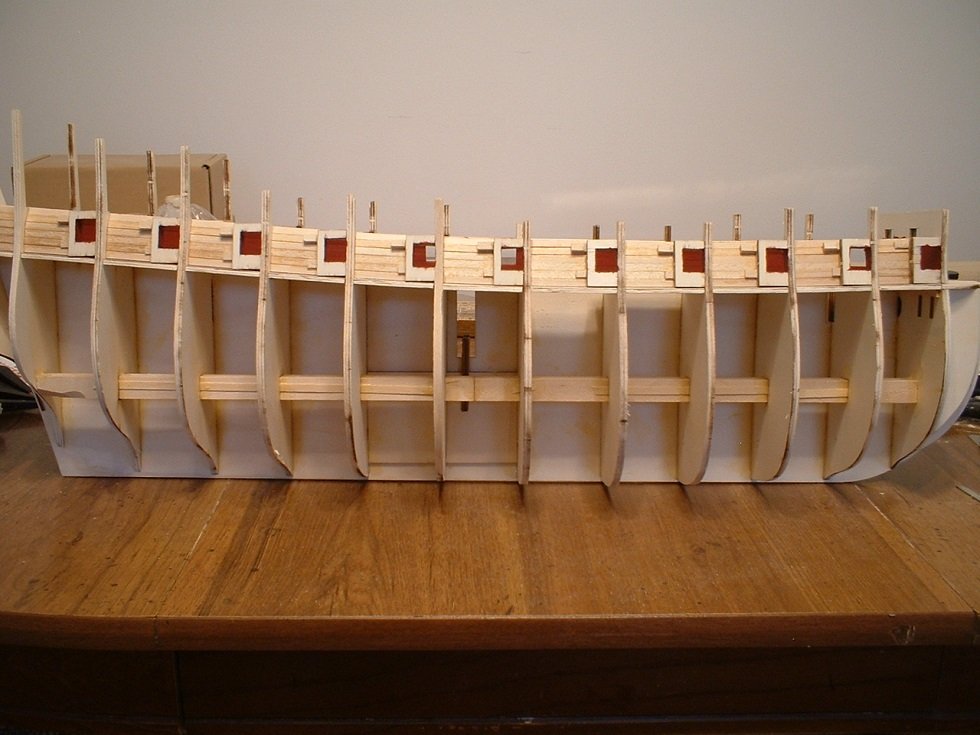
Hi everyone - a little more progress. The upper deck support beams are now in place as well as the forecastle deck & it`s planking. These deck planks came out much better than the previous batch {used tanganyika instead of walnut).No finish will be applied until all the upper decks are in place. Mark

- 331 replies
-
- 8
-
-
- nuestra senora del pilar
- occre
- (and 1 more)
-
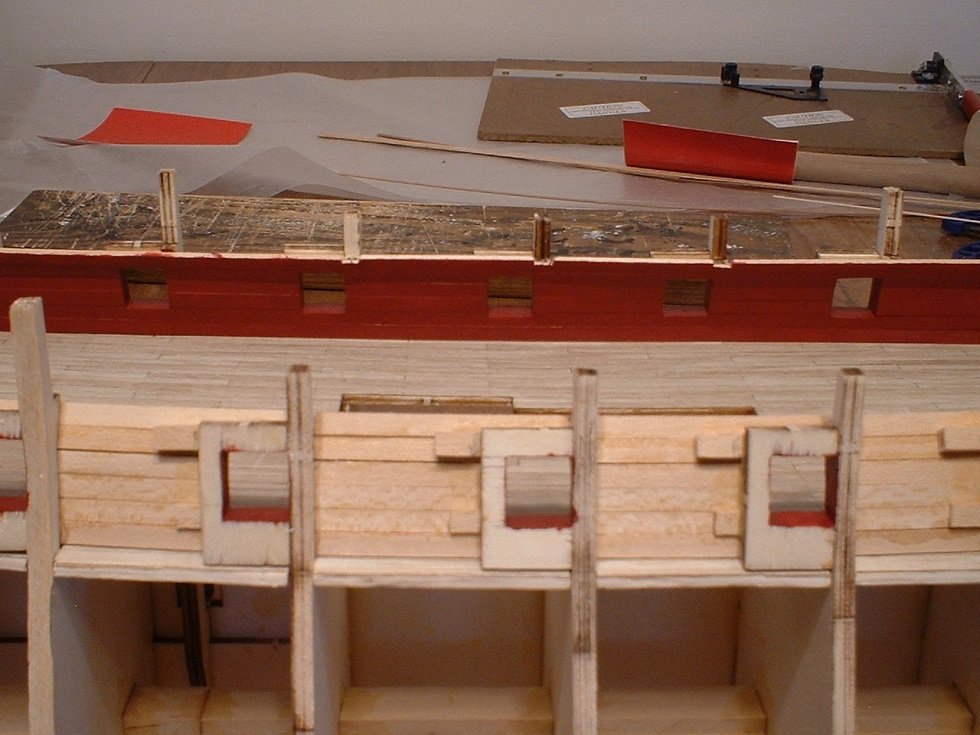
Hi everyone - another update. The inner bulwarks were planked & small gaps between the bulwarks & the gunports frames were filled with scrap pieces as per the instructions. Then the gunports were cut out of the planking & the bulwarks were painted red (a Vallejo paint called gory red). Mark
- 331 replies
-
- 5
-
-
- nuestra senora del pilar
- occre
- (and 1 more)
-
Yes,plain old Clorox bleach (about 45 minutes). It doesn`t seem to hurt the wood any. I just make sure to rinse the wood very well afterward & let dry overnight. I think the uneven look was from not stirring the wood strips occasionally while soaking. Most of this deck will be covered by the upper deck - only the area where the opening is will show. some gratings will go in the opening in this deck,so I guess I didn`t need to "nail" the whole deck. I`m trying to be very careful as I work - those bulkhead extensions are very fragile. Mark
- 331 replies
-
- 2
-
-
- nuestra senora del pilar
- occre
- (and 1 more)
-
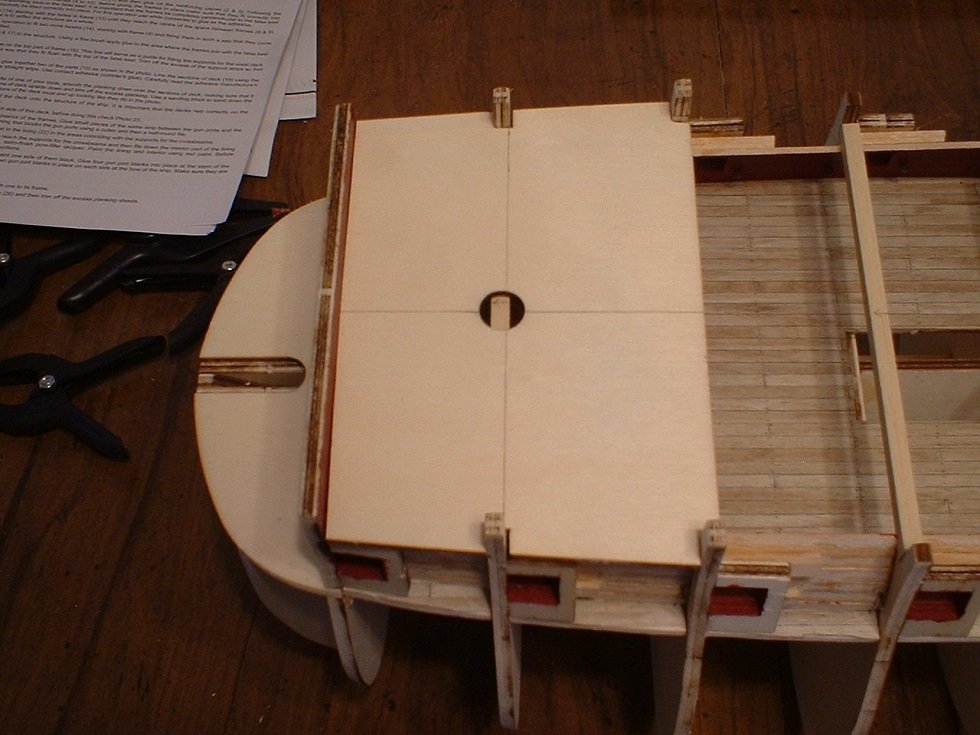
Hi zappto - welcome aboard! Yes, the kit comes with a full set of pre-made sails. Also,a small update. A coat of poly has been applied to the deck. The look is a little more uneven than I would have liked,but that`s ok because most of this deck is not visible. It still looks way better than the kit supplied strips which were unusable anyway. The last batch of planks I treated this way came out really nice & even,so I figure I must have messed something up. Also the gunport frames for this deck were glued in place. Mark

- 331 replies
-
- 4
-
-
- nuestra senora del pilar
- occre
- (and 1 more)
-
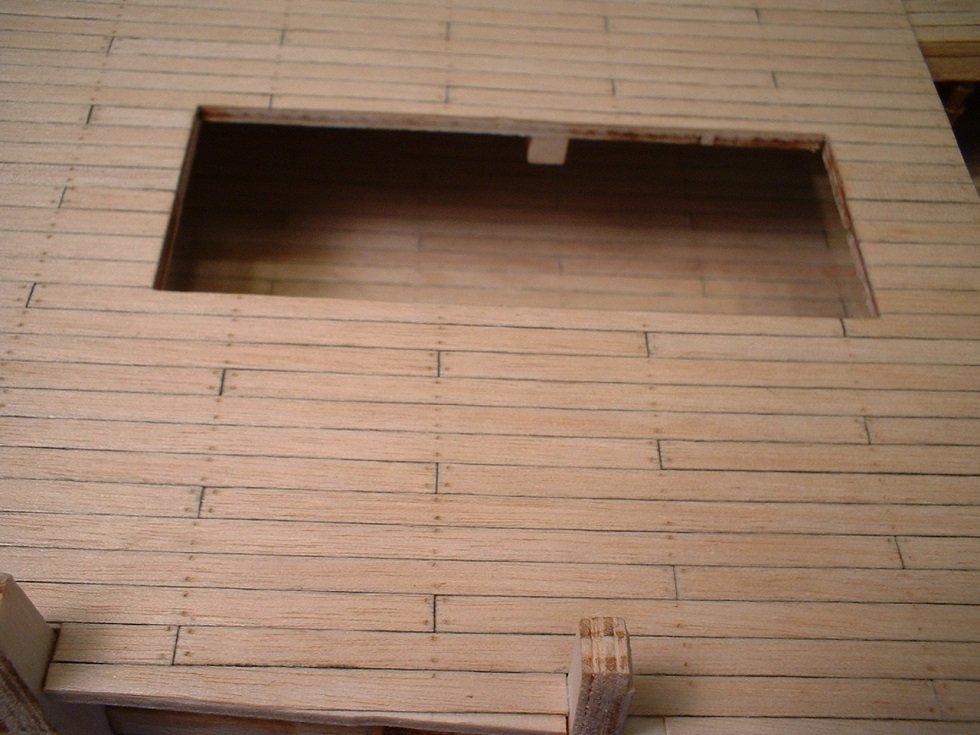
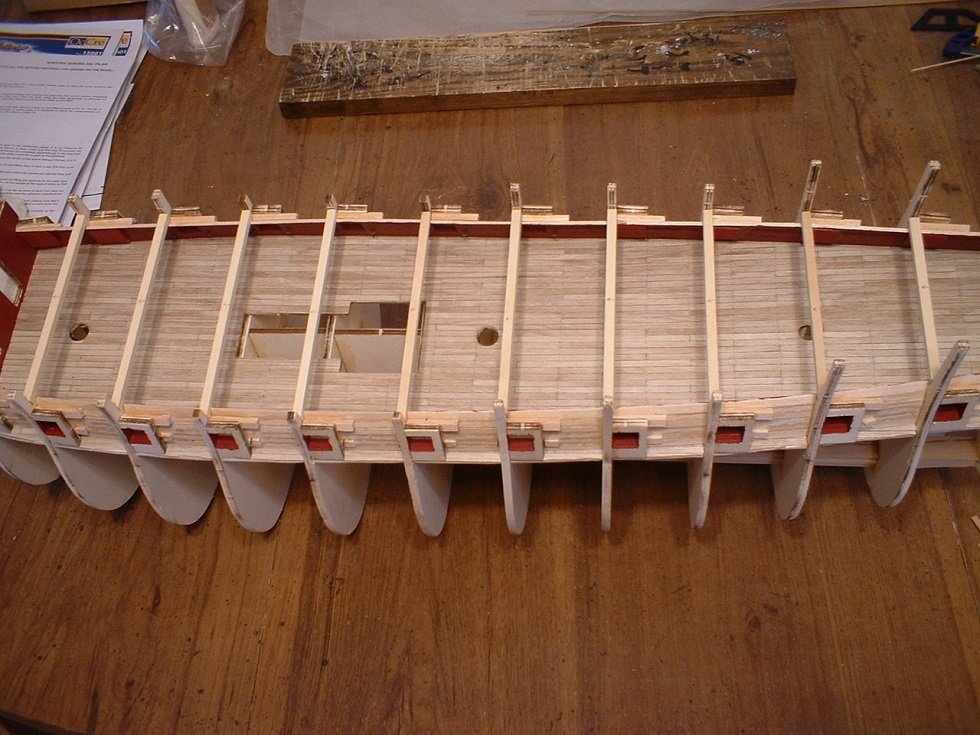
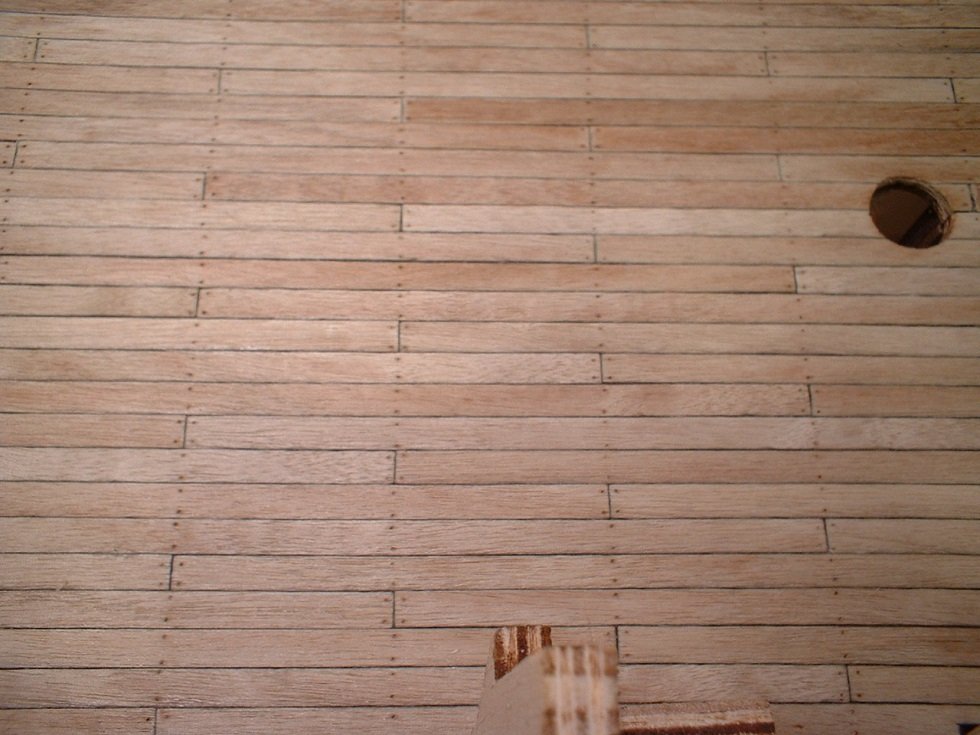
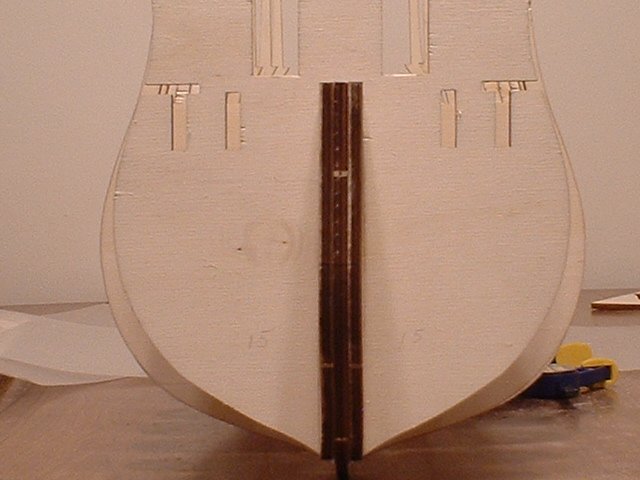
Hi everyone - time for an update. The lower deck sections were glued in place & planked with bleached walnut which turned to a light grey & a #2 pencil was run along the edges. Nailing was simulated by using a half twist of a #78 drill bit to make a tiny indentation. No finish is applied yet. The kit supplied deck planking will be used for kindling. Also did some fairing of the bulkheads. Mark

- 331 replies
-
- 10
-
-
- nuestra senora del pilar
- occre
- (and 1 more)
-
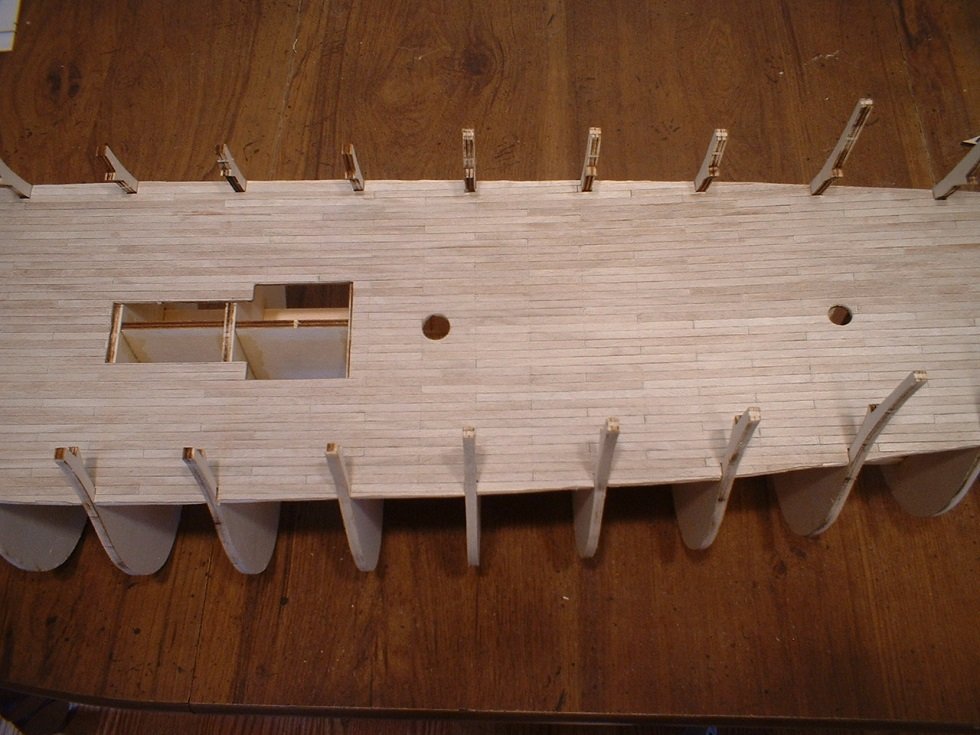
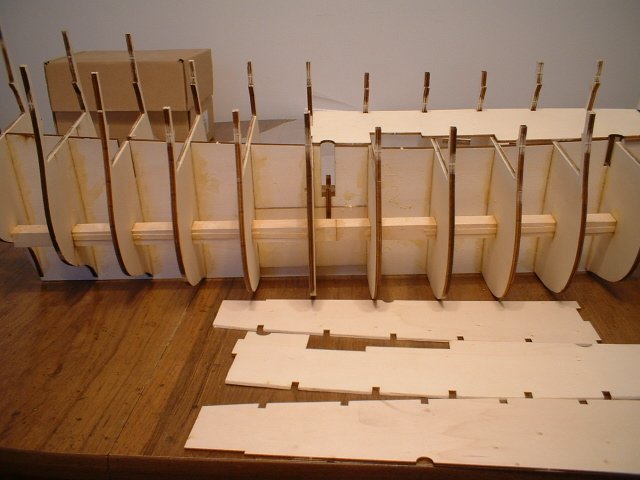
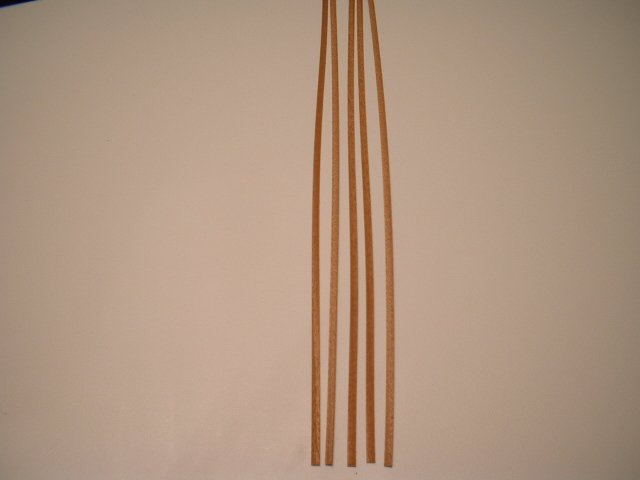
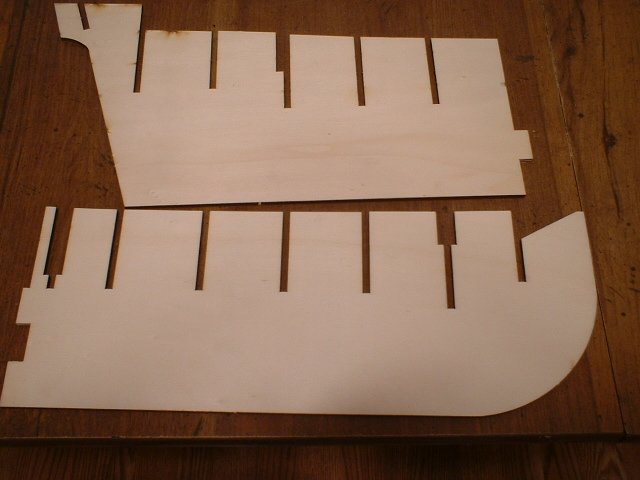
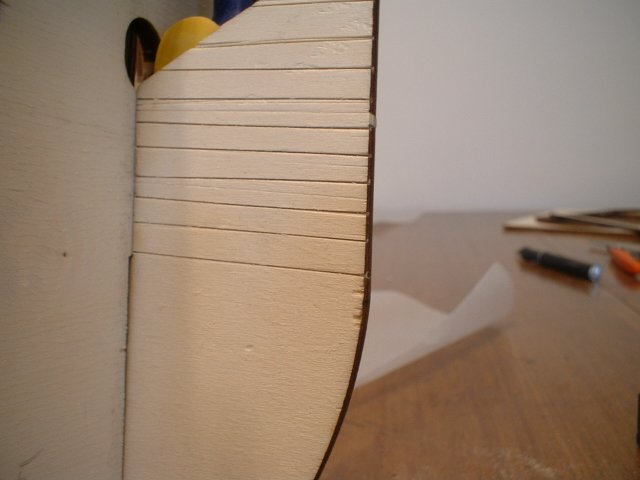
Hi everyone - just a small update. The lower deck is provided in 4 pieces which the instructions say to plank before gluing them in place. I prefer to plank the decks after they are glued in place,so I glued all 4 sections to the bulkheads - they fit almost perfect. Next will be to plank that deck,but there is a slight problem - every single strip of wood provided to plank the deck is terribly warped as you can see in the picture. I just happen to have a bunch of leftover walnut strips which are nice & straight,so I will bleach them to a light grey & use them Mark
- 331 replies
-
- 7
-
-
- nuestra senora del pilar
- occre
- (and 1 more)
-
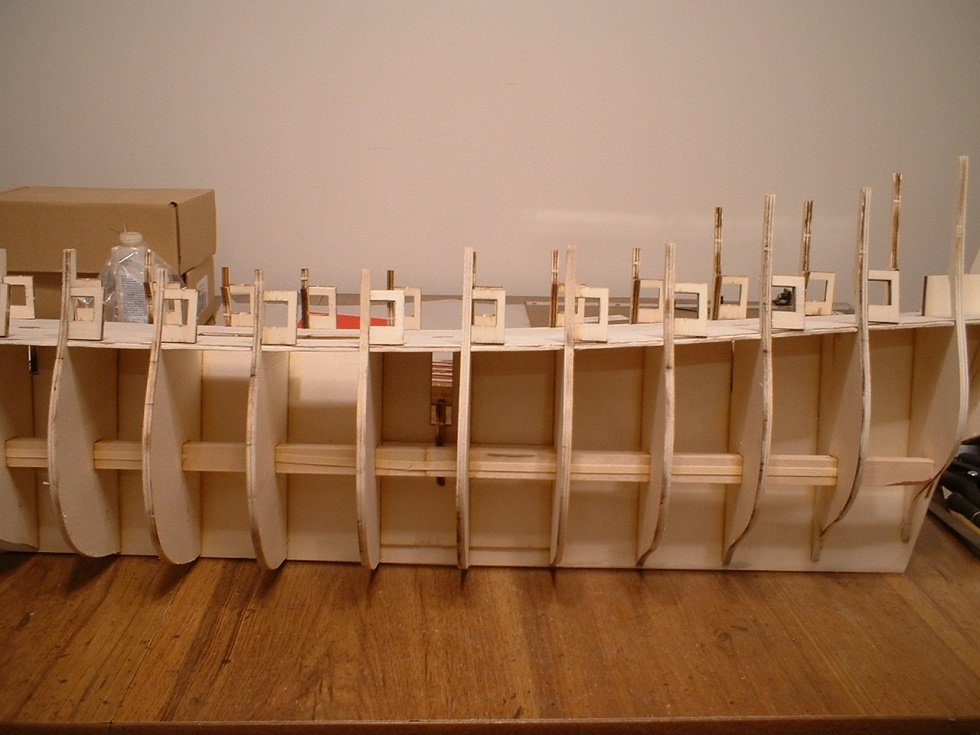
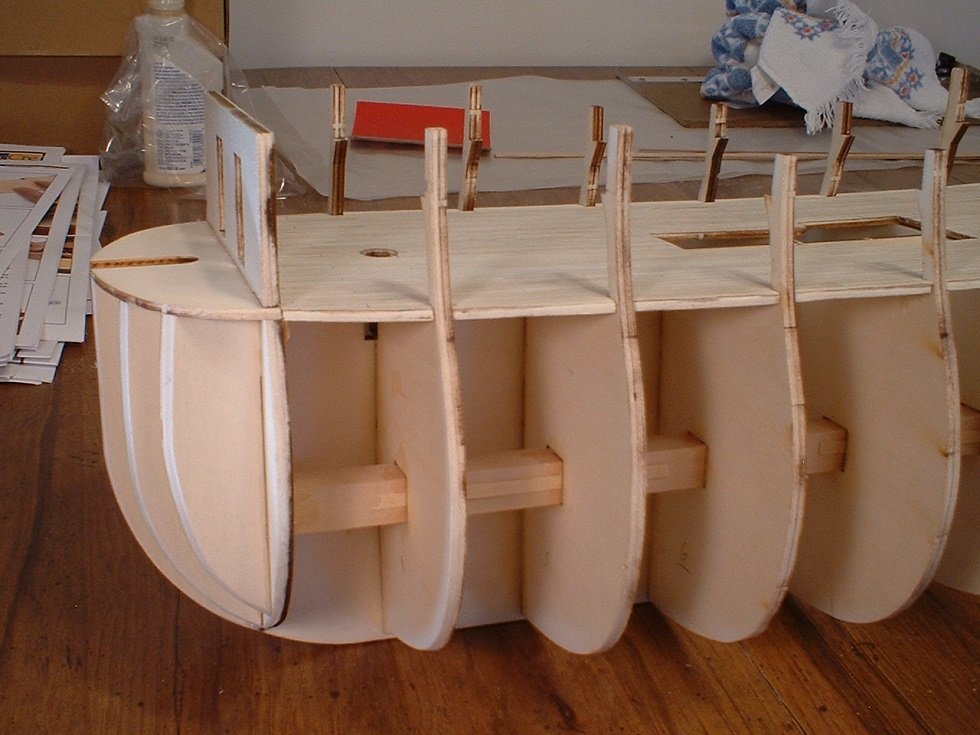
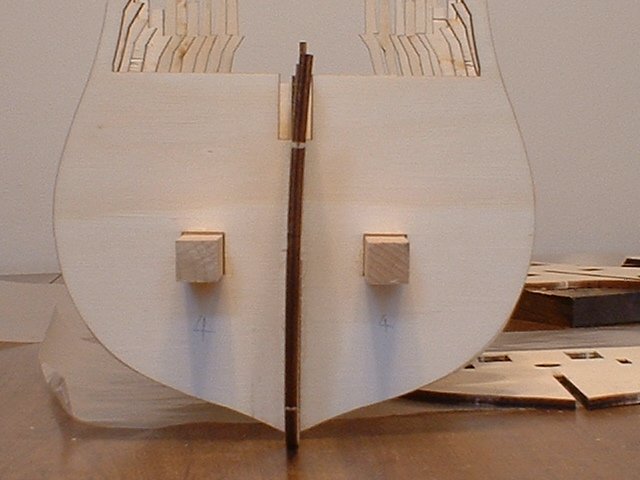
Hi everyone. Getting started,I located the keel former which is in 2 pieces. The bad news is the front section has a nasty warp in it. Using the lower gun deck & the stiffening bars along with some creative clamping,the bulkheads lined up acceptably & were glued in place. To straighten the warp some slots were cut into the stem section so it would bend more easily & the 2 reinforcements were glued & clamped to the sides,eliminating the warp. Many of the wood sheets were enclosed in shrink wrap,so moisture or dryness should not have been a problem. The shrink wrap was pretty tight,so maybe that caused the warping. There was more warping further back on the former,but did not affect the bulkhead alignment. A little disappointed that pretty much all the wood in the kit is plywood except for the planking strips,so a little creative painting or veneering will be needed in some areas. Also,I found some more plan sheets hidden in the bottom of a couple of boxes so the kit does contain the usual number of plans showing the deck layout & etc. Mark
- 331 replies
-
- 8
-
-
- nuestra senora del pilar
- occre
- (and 1 more)
-
The scale is listed as 1:46 - kind of an odd scale,but it makes into a nice size ship(don`t know where i`m going to put when I am done). Mark
- 331 replies
-
- 3
-
-
- nuestra senora del pilar
- occre
- (and 1 more)
-
I posted that question in the topic of how to use & post to the forum,but deleted it after 30-some people looked at over 3 or 4 days but I got no replies. Maybe a moderator or admin. can chime in if they see this. I have a print out of the original instructions to add a link which the first step is to right click on the first post number,but since the posts are no longer numbered I don`t know where to start. Mark
- 331 replies
-
- 2
-
-
- nuestra senora del pilar
- occre
- (and 1 more)
-
Thanks Don & Nigel - I still need to stock the fridge & find a popcorn machine. Does anyone know how to create a link to my signature? There are no post numbers,so I don`t know where to start. When I started my last ship the posts were numbered,so creating a link was pretty straightforward. Mark
- 331 replies
-
- 2
-
-
- nuestra senora del pilar
- occre
- (and 1 more)
-
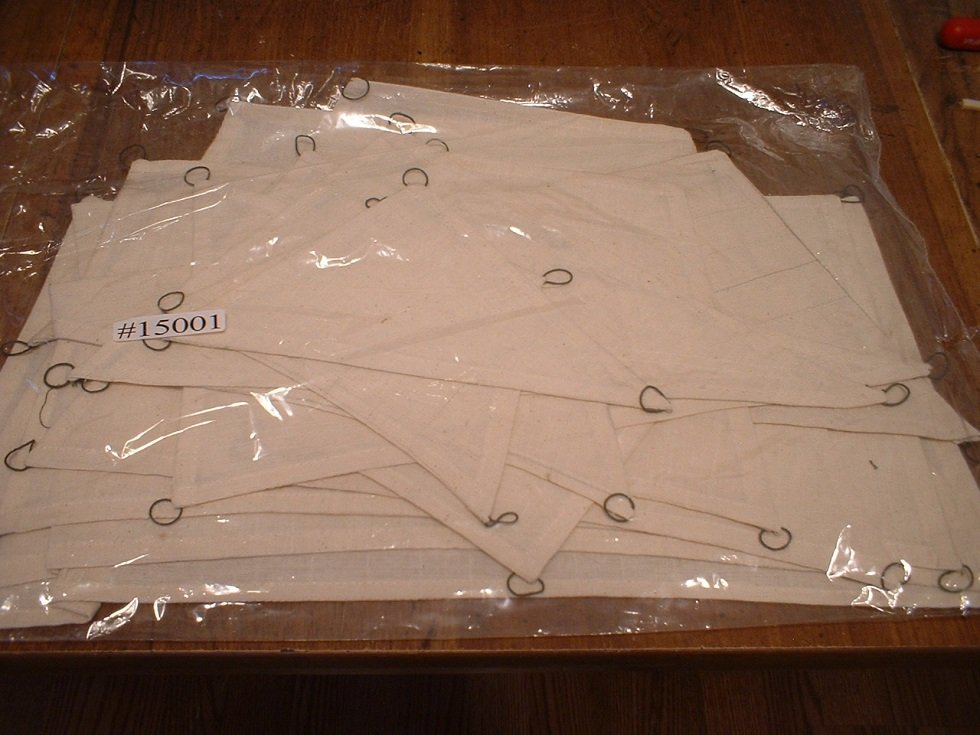
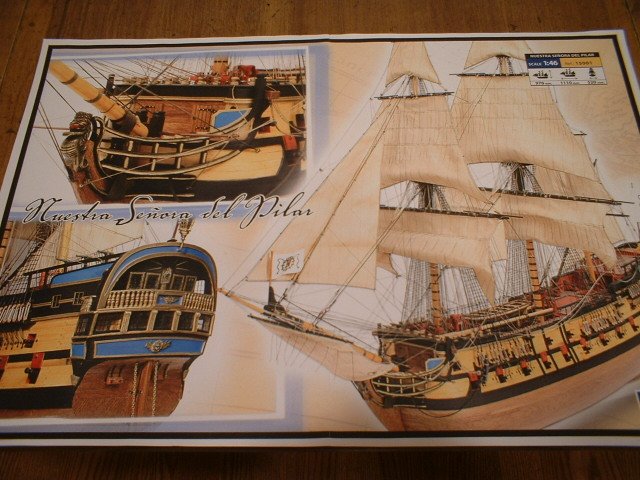
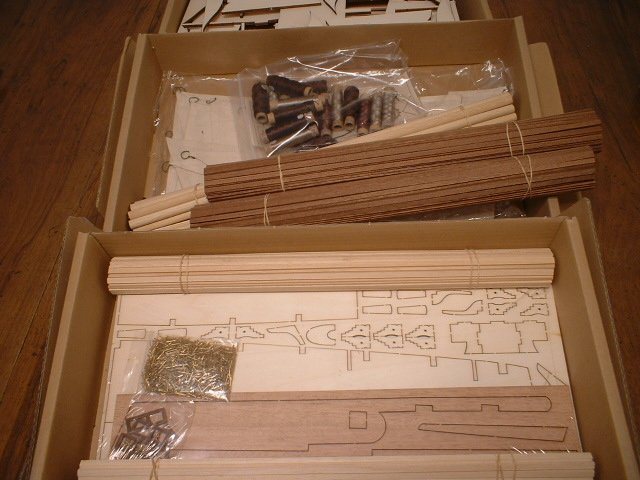
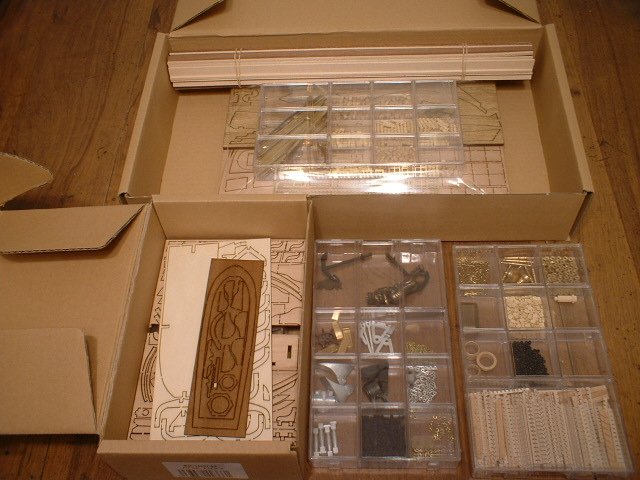
Hi everyone - I have had this kit in the closet for quite awhile from Model Expo,so now is a good time to start it. After doing a little searching on the internet,this appears to be an actual ship - a Manila galleon of 50 guns that sank in 1750. The kit came in 6 boxes & upon opening the boxes there a number of laser cut wood sheets(mostly plywood) along with several plastic containers containing fittings & other small pieces. There are also the usual bundles of strip wood & dowels. Some of the wood will likely be replaced since much of it is a coarse grained reddish brown wood. One nice feature is it comes with pre-sewn sails ready to mount(no excuse for not putting sails on this one). It builds into a ship just over 1100mm long,so it shouldn`t be too hard to add some detail.it comes with written & pictorial instructions,but the only plan sheets provided are for the masting & rigging - none for the actual ship structures(not really needed because of the many pictures. Mark

- 331 replies
-
- 15
-
-
- nuestra senora del pilar
- occre
- (and 1 more)
-
Thanks very much,Nigel! Good to see you back. Mark
- 652 replies
-
- 2
-
-
- royal william
- euromodel
- (and 1 more)
-
Thanks,Peter - that`s exactly what I am doing. Mark
- 652 replies
-
- 1
-
-
- royal william
- euromodel
- (and 1 more)