
HOLIDAY DONATION DRIVE - SUPPORT MSW - DO YOUR PART TO KEEP THIS GREAT FORUM GOING! (Only 20 donations so far - C'mon guys!)
×


marktiedens
-
Posts
1,737 -
Joined
-
Last visited
Content Type
Profiles
Forums
Gallery
Events
Everything posted by marktiedens
-
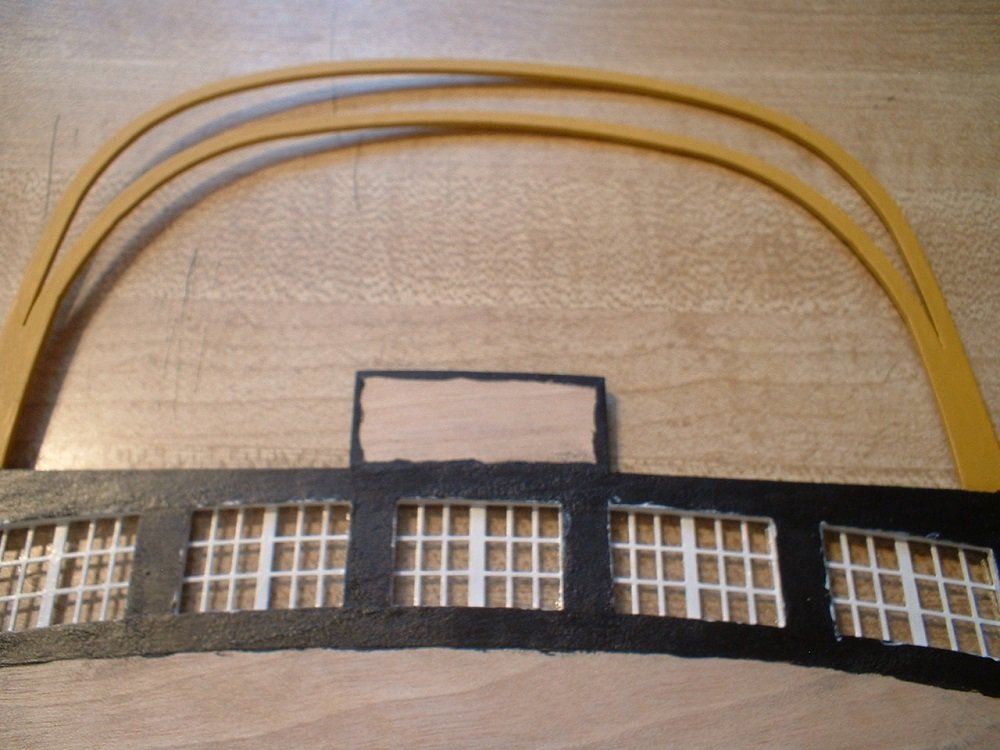
Thanks Mike - a railing will go on the outer part of that ledge. I also added some of the mouldings on the edges to hide the plywood. The plans showed the edge mouldings in some places,but not in others. This is just about the worst design of the galleries I have seen - the brass etched windows did not fit in the places like the plans show,so I had to do a bit of filing on them as well as some major surgery on the framework. The problem is the window sections are made straight - they should have been made with a bow in them so they would lay flat when bent to fit the curve of the floors. I`m not totally happy with how they came out, but I will leave them as is. Mark
- 331 replies
-
- 2
-

-
- nuestra senora del pilar
- occre
- (and 1 more)
-
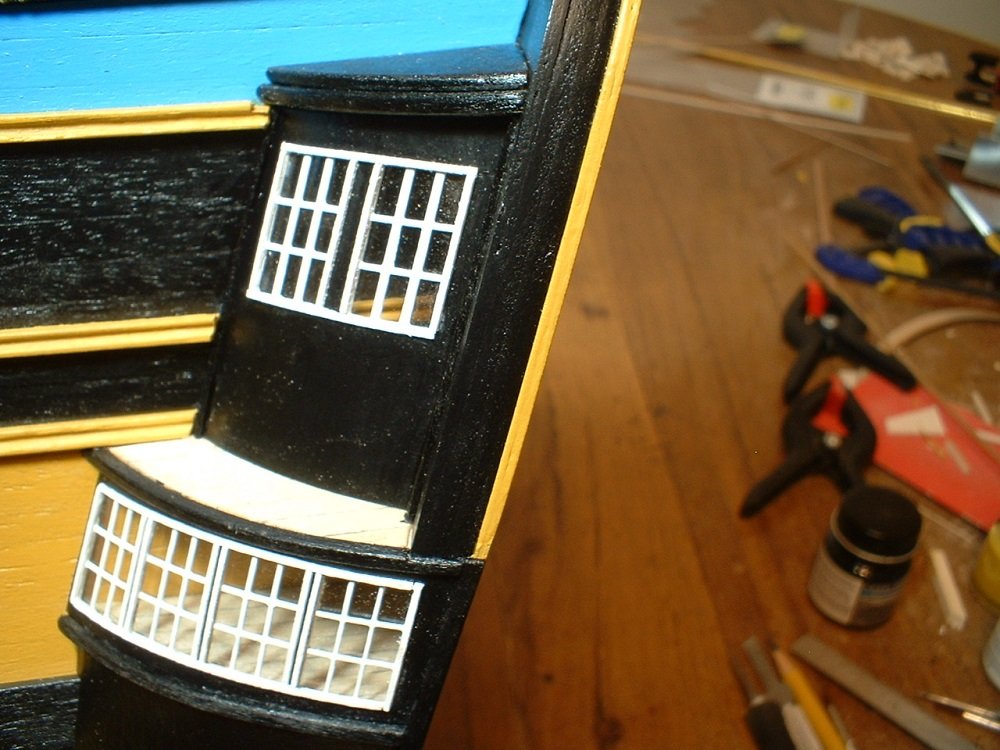
Update - the side gallery windows are now in place. All the windows are PE brass & rather plain looking,so I framed them with some .6mm strips. Still have some railings to add & a bunch more trim work to do on the stern fascia. Mark

- 331 replies
-
- 7
-
-
- nuestra senora del pilar
- occre
- (and 1 more)
-
Hi everyone - after a lot of shimming & re-shaping (plus a few choice words)I got the framework for the side galleries on.In order for the wedge shaped pieces to fit the hull and the stern fascia plus the PE windows,they had to be modified quite a bit. Mark

- 331 replies
-
- 7
-
-
- nuestra senora del pilar
- occre
- (and 1 more)
-
Awesome job - a real beauty. Mark
-
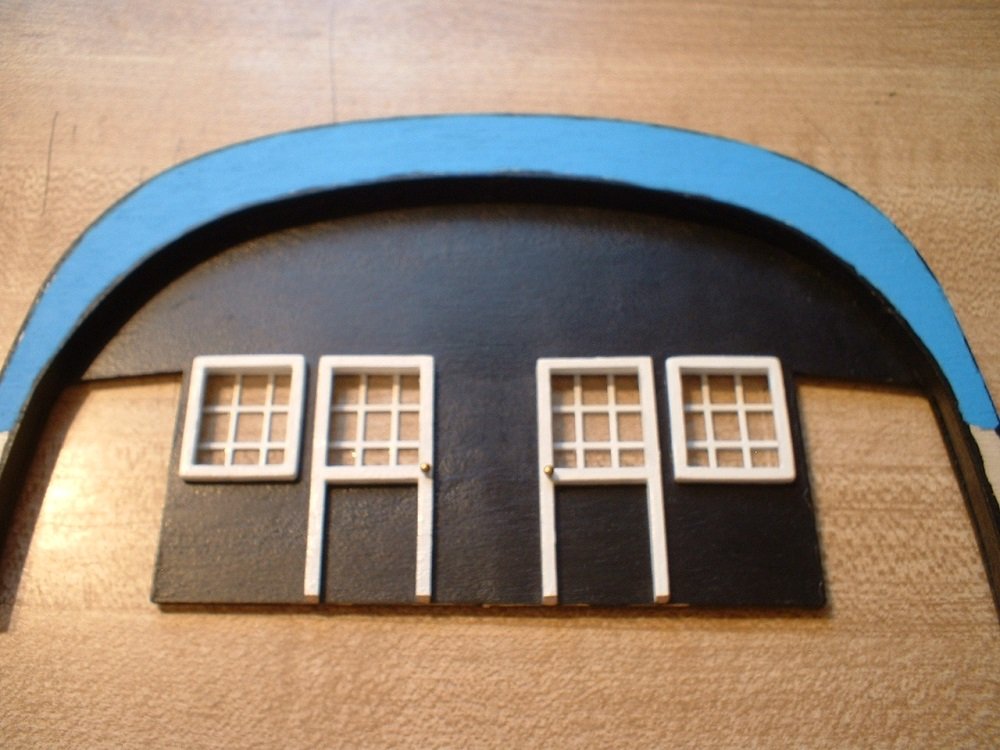
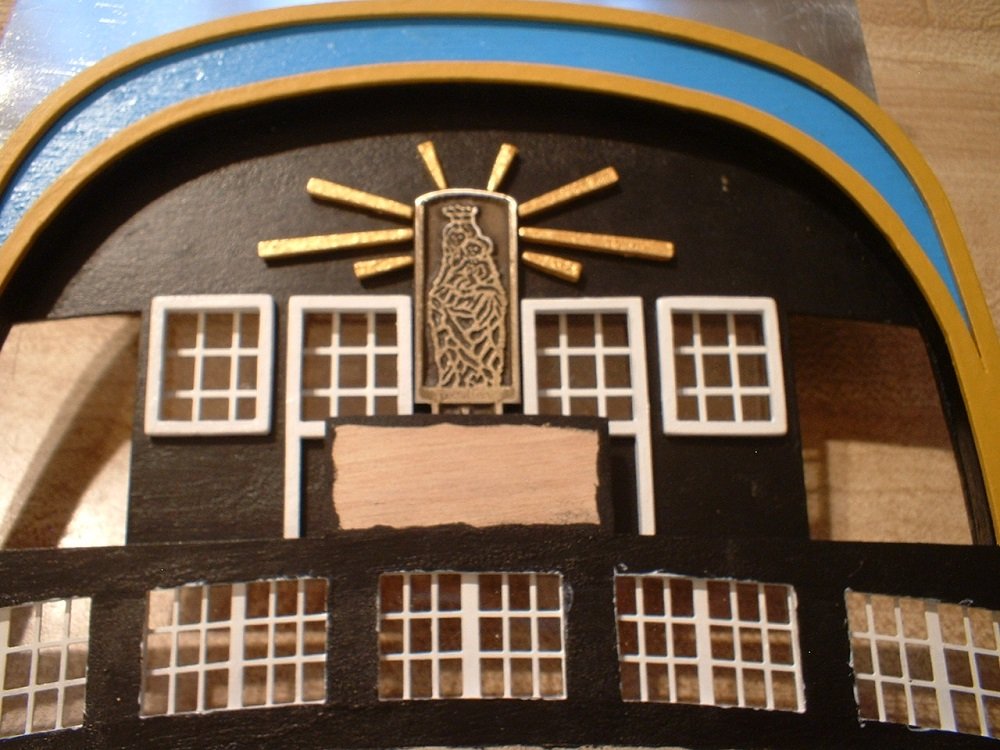
Hi everyone - been working on the stern. The stern fascia is in 2 pieces which are glued together after adding a spacer & some PE windows. One thing that was puzzling me was the instructions said to paint the window frames black along with the outside frames,while the enclosed photos of the finished ship has the frames painted gold. I decided to just paint the windows & frames white. The decorations on the inner fascia were added also. Hard to tell from my picture,but there is a space of about 10mm between the 2 pieces at the deck level. I don`t know why,but the windows look uneven in the last picture - may have something to do with the zoom on my cheapo camera. In the third picture you can see that they are in reality nice & even. Mark

- 331 replies
-
- 14
-
-
- nuestra senora del pilar
- occre
- (and 1 more)
-
Thanks zappto & to everyone for the "likes". Mark
- 331 replies
-
- 1
-
-
- nuestra senora del pilar
- occre
- (and 1 more)
-
Looking really nice,Michael. If you think the rocks are too large, you might check out aquarium or model railroad rocks. I don`t think they would be larger than one man could carry - maybe at this scale about the size of cat litter? Mark
-
Looking sharp,Don. What kind of wood is the filler block? Looks like basswood or balsa - either way it looks like a lot of work to carve that out. Mark
-
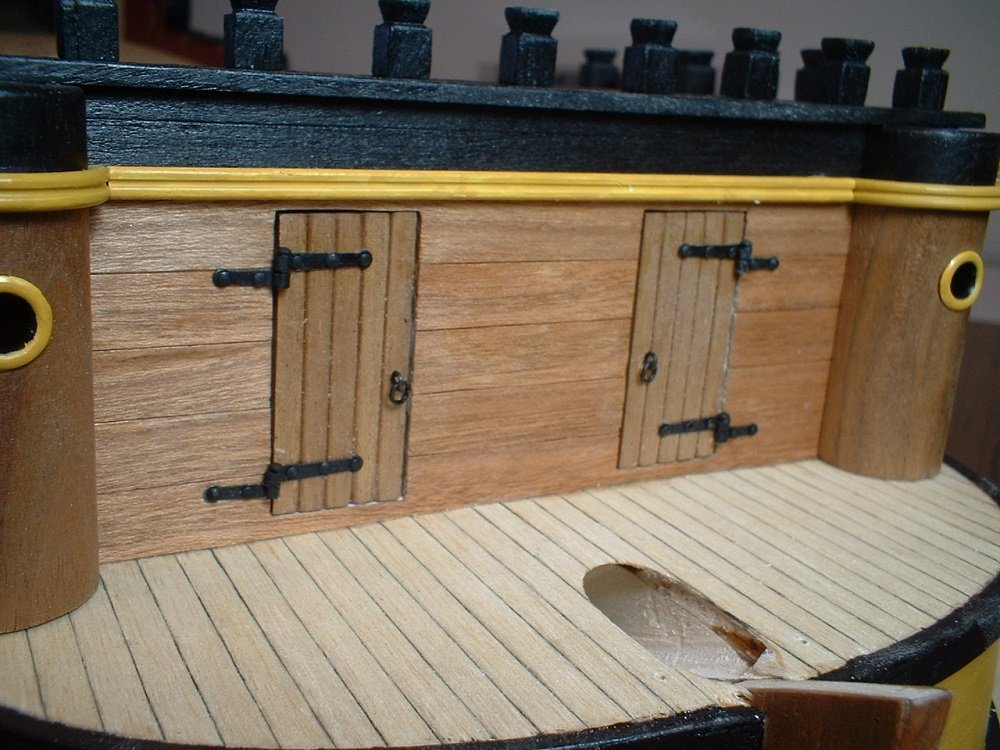
Thanks Bob! While I`m here,the bow entry doors are done. They were made sanding the edges of 3x3mm timber & glueing them together. The hinges were kit supplied items. There was nothing behind the doors to keep them in place,so I added a strip of wood on the inside to glue them to. Mark
- 331 replies
-
- 14
-
-
- nuestra senora del pilar
- occre
- (and 1 more)
-
Nice clean work O.C. I really like the colors you are using. Mark
- 455 replies
-
- 5
-
-
- slightly modified
- greyhound
- (and 1 more)
-
Yes,I had to shape them myself from the provided wood strips - something called "koto",a light colored wood similar in hardness to basswood. They were not hard to shape - I just used a small file to shape them & then sanded the edges a little. I did notice something while looking ahead through the pictorial instructions - there are no gunport lid hinges provided. They look to be glued wide open against the hull. Well,I think I have enough hinges left over from my last build,so the lids WILL have hinges when I get to that point in the build. Mark
- 331 replies
-
- 1
-
-
- nuestra senora del pilar
- occre
- (and 1 more)
-
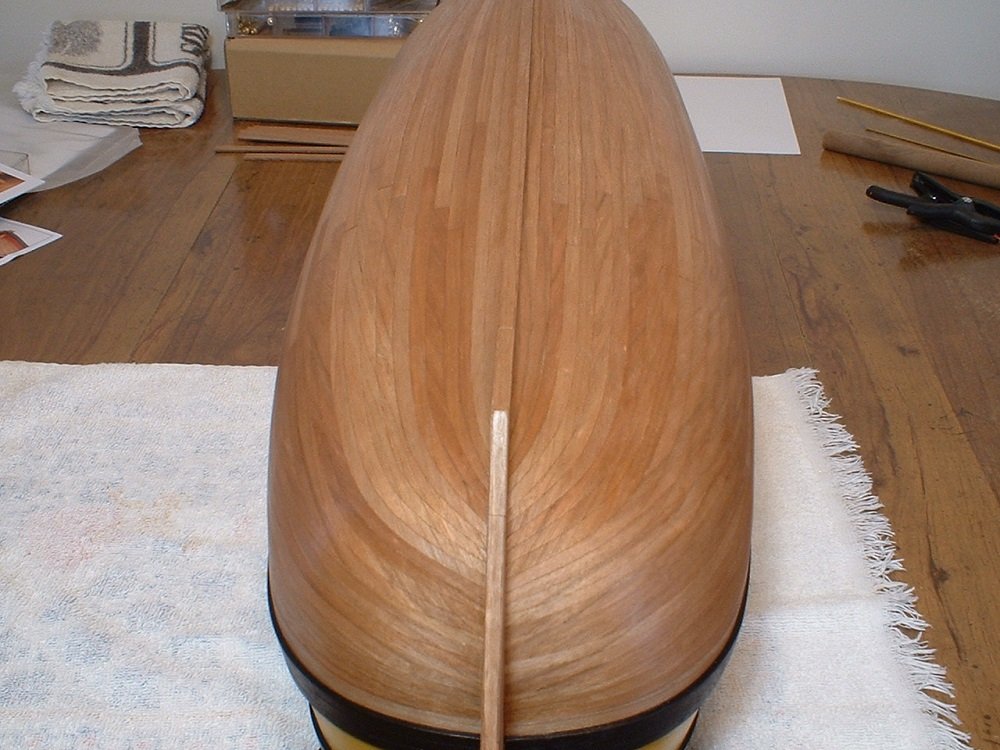
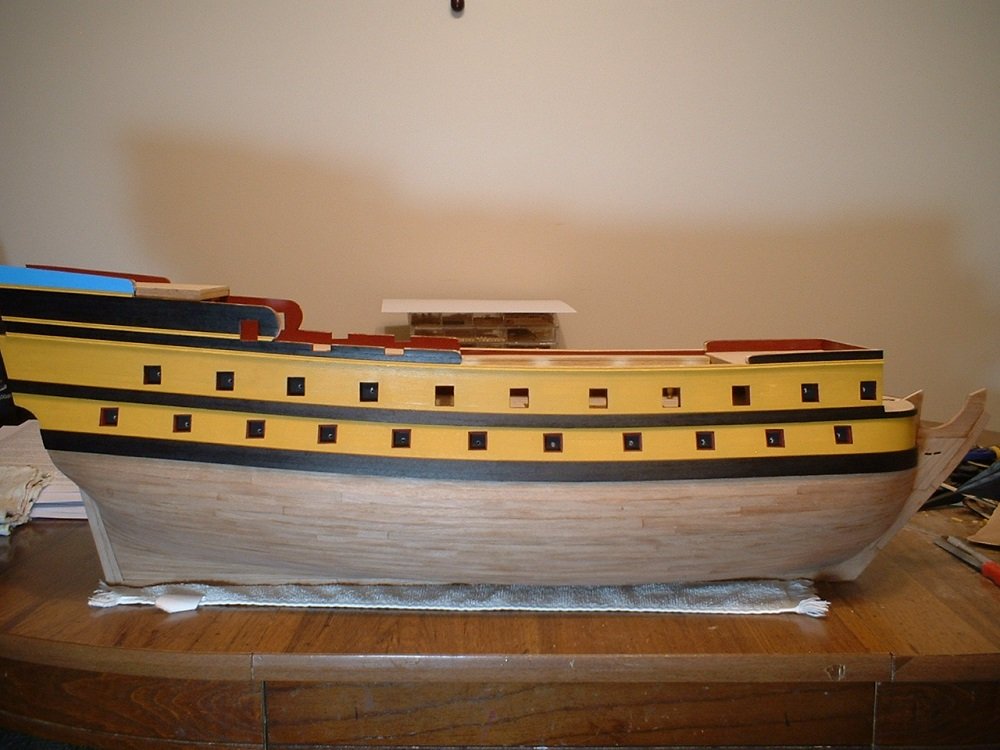
Hi everyone - the hull has now been finished with polyurethane. There is a bit of variation of the color of the wood once the finish was applied, but that`s ok - adds a bit of character. While the finish was drying,I made up the timberheads on the forecastle railing & they were pinned & glued in place. Mark

- 331 replies
-
- 12
-
-
- nuestra senora del pilar
- occre
- (and 1 more)
-
Thanks O.C.! Thanks Mike - after sitting a few days,the test strip with the Danish oil was slightly darker than the one with the poly.I just finished applying the poly to the hull & will have some pics as soon as it is dry enough to handle. Mark
- 331 replies
-
- 2
-
-
- nuestra senora del pilar
- occre
- (and 1 more)
-
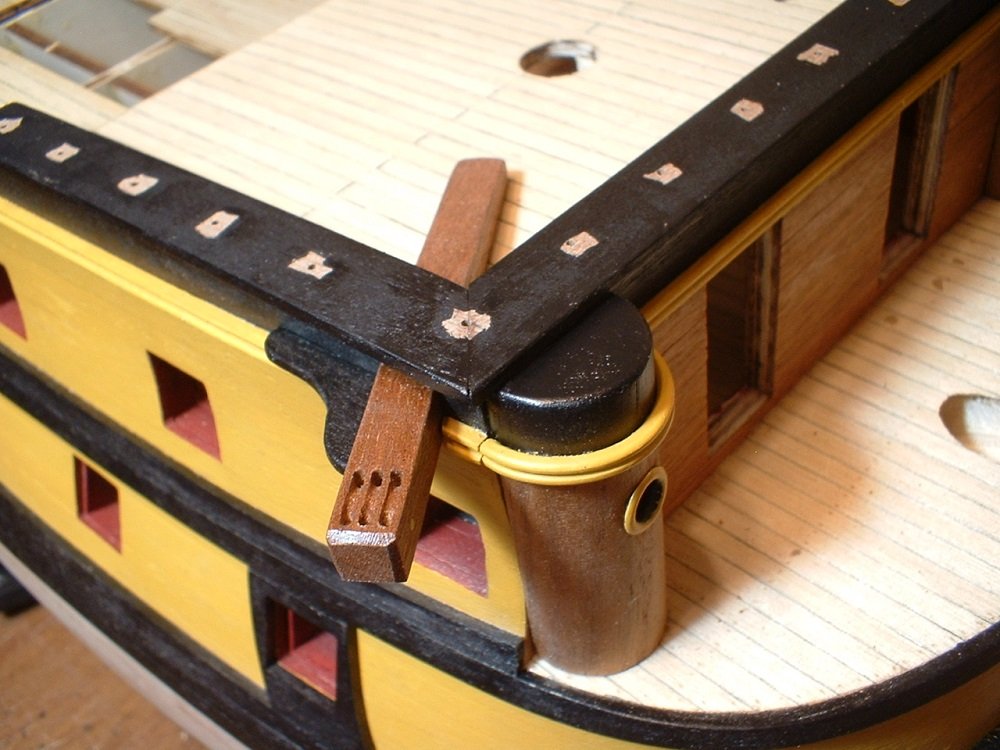
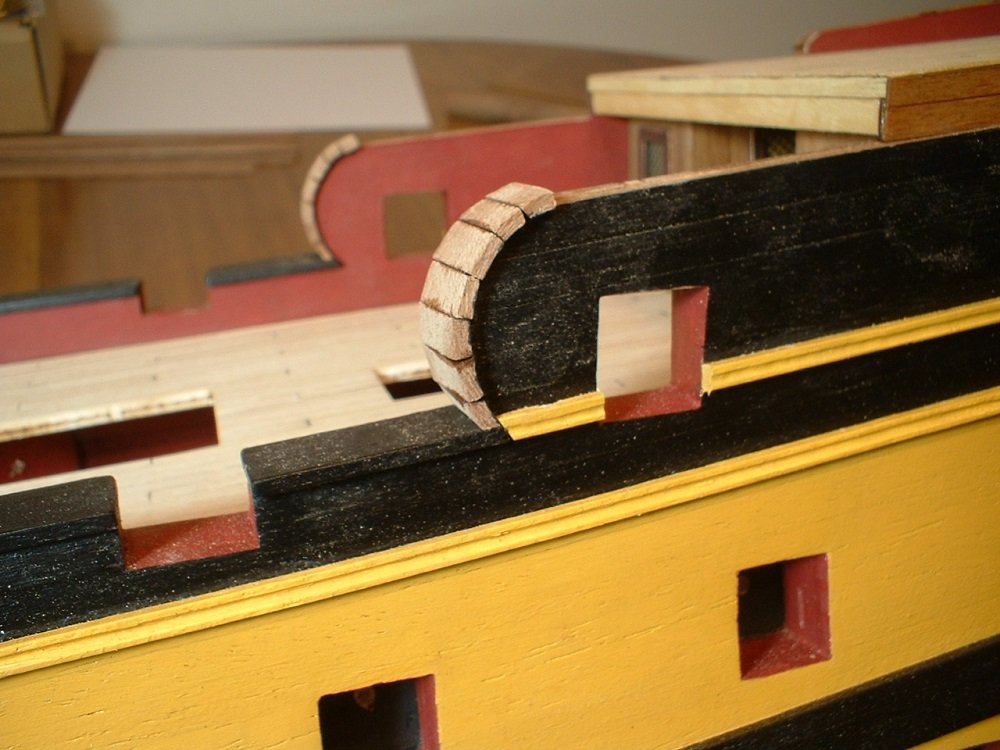
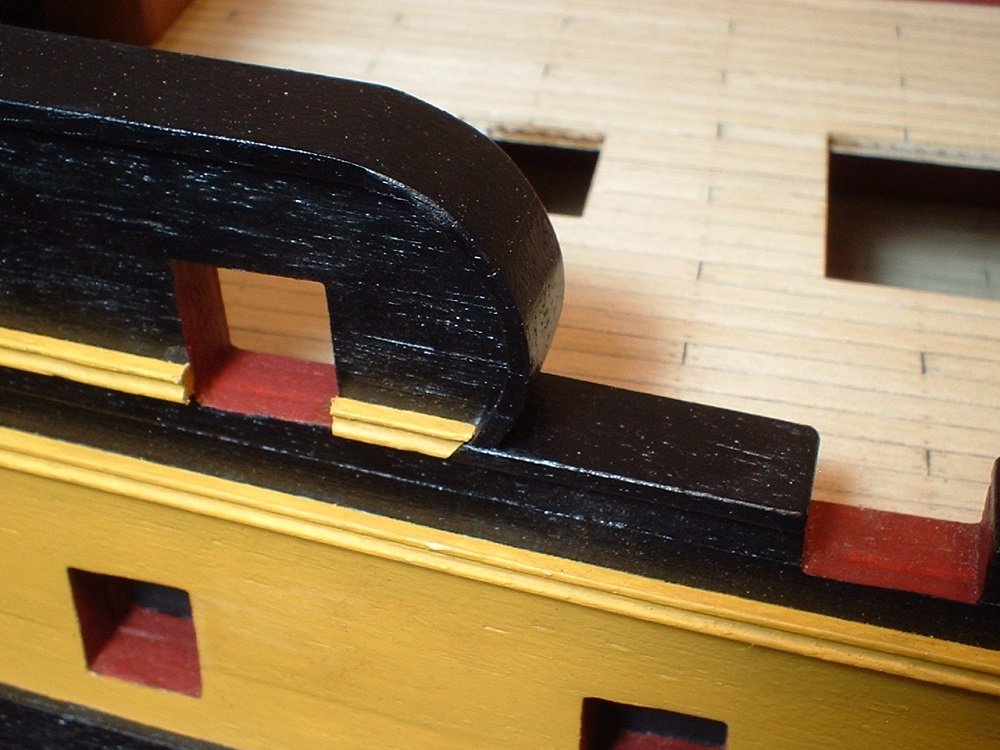
Hi everyone - more progress! Fist, the anchor davits were made from the supplied wood - the simulated sheaves were formed with a small round file after drilling the holes. Then the openings were made in the bulwarks & the davits were glued in place along with the knees. Next, I thought it would be a good time to do the roundhouses. The parts list showed them as pre-formed pieces,but darned if I could find them,so I made them from a walnut dowel cut in half & added some brass eyelets from the fabric shop. Finally the mouldings were added - they were made from some leftover brass moulding from another build The caprails were then made from the supplied wood(sapelli). Since this wood is 2x12mm it was pretty much impossible to bend around the tight curves. The tightly curved areas were done by cutting small pieces to go around the curves,then after a lot of filing & sanding the joints they were painted black. You can see the joints in the close-up,but at arm`s length they look just fine. I think they pass the running horse test. Mark Mark
- 331 replies
-
- 13
-
-
- nuestra senora del pilar
- occre
- (and 1 more)
-
That hull is looking nice & smooth - should be a good base for the second planking. In my opinion,I think walnut would be good to use with the cherry rather than mahogany. People may think I`m nuts, but I really don`t care for mahogany that much. Also,I think that REAL walnut looks much better than most of the kit supplied "walnut". Either way,it`s your ship so do it to your liking! Mark
-
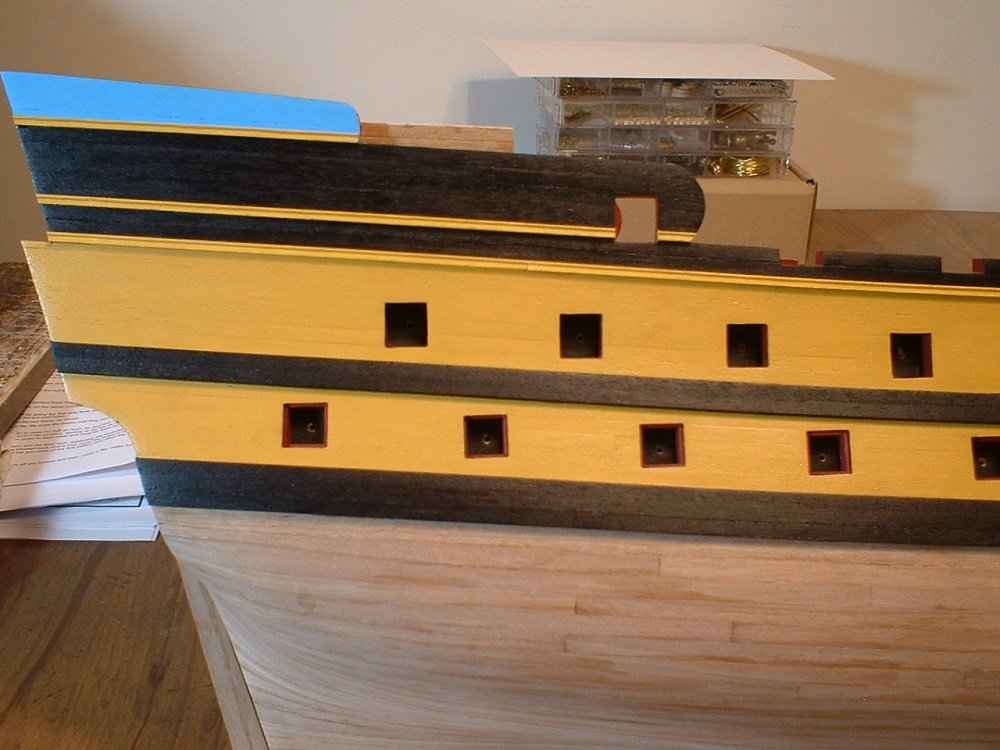
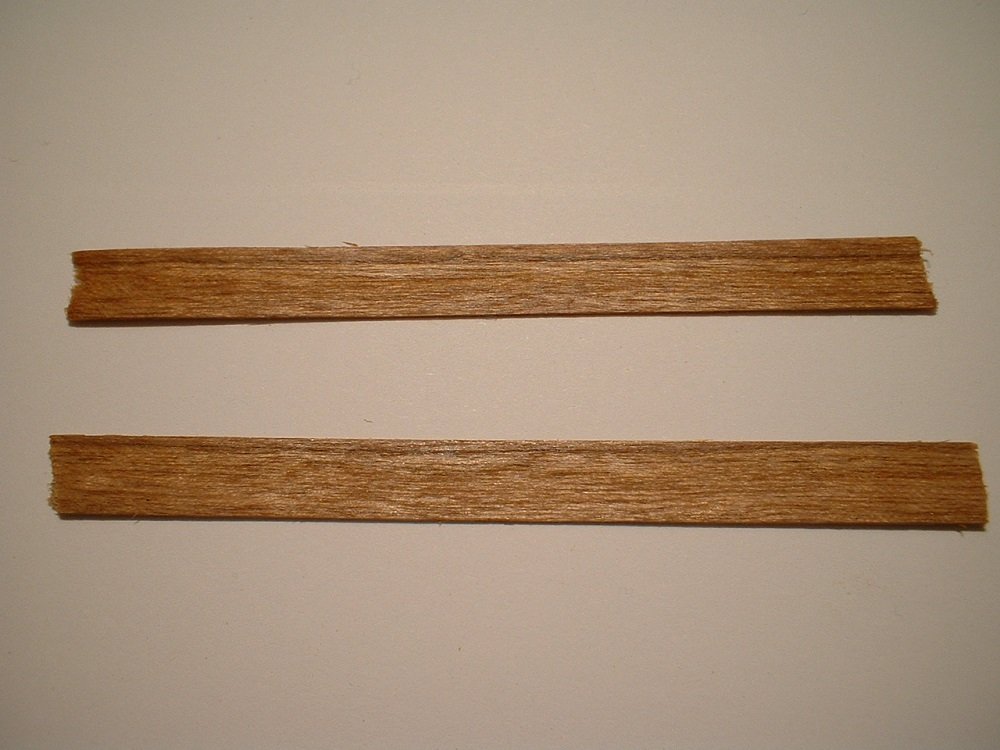
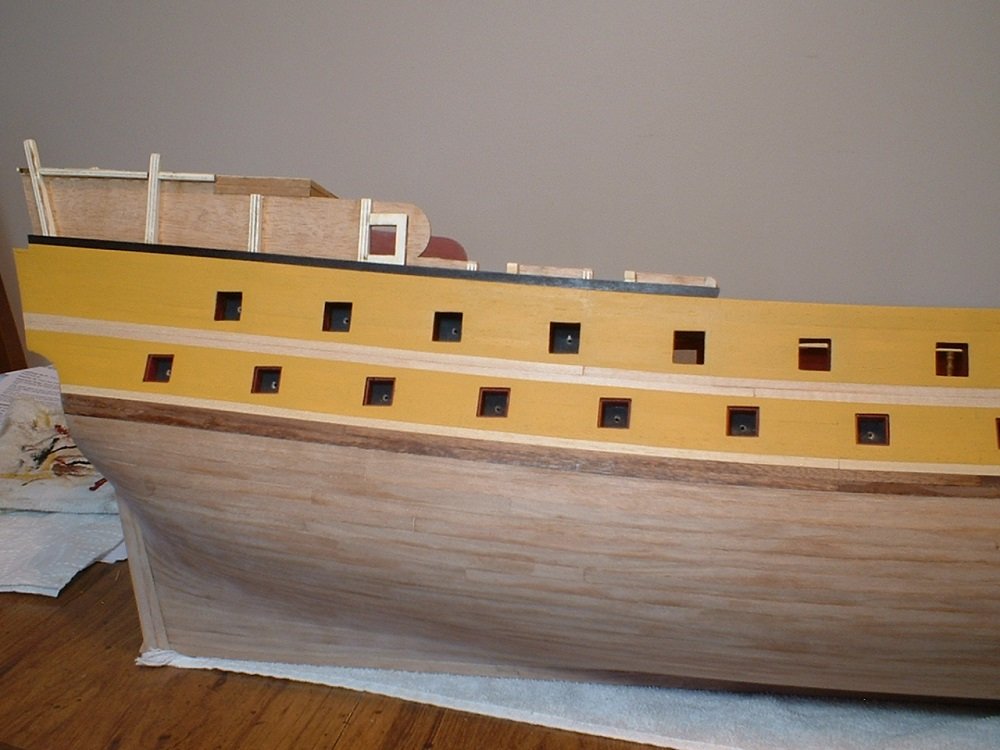
Update - the wales have now been added. I painted the edges black before gluing them on,then finished the painting after installing them. Also,some mouldings were added on the upper part of the hull. The instructions said to file a groove in some strips then round off the edges with sandpaper to make the mouldings. I have a better way - I got some of those micro shapers & had them made in no time at all. As far as finishing the lower part of the hull,I coated some scrap pieces with Danish oil & polyurethane to see the difference. The upper one is the Danish oil finish,& the lower one is the poly finish. As you can see,there is very little difference. I am probably going to use the polyurethane because of the toughness of the finish. The oil finish looks nice,but any little glue spots(which there are a few) will show up as light spots because the oil won`t soak in. I`m afraid that I will sand clear through the veneer in places to get 100% of the glue spots off. Mark
.JPG.8db3ff443f597f90f356cfd350838344.JPG)
- 331 replies
-
- 8
-
-
- nuestra senora del pilar
- occre
- (and 1 more)
-
Thanks Don. First I will have to go get some oil - I thought I had some but can`t find it. Mark
- 331 replies
-
- 1
-
-
- nuestra senora del pilar
- occre
- (and 1 more)
-
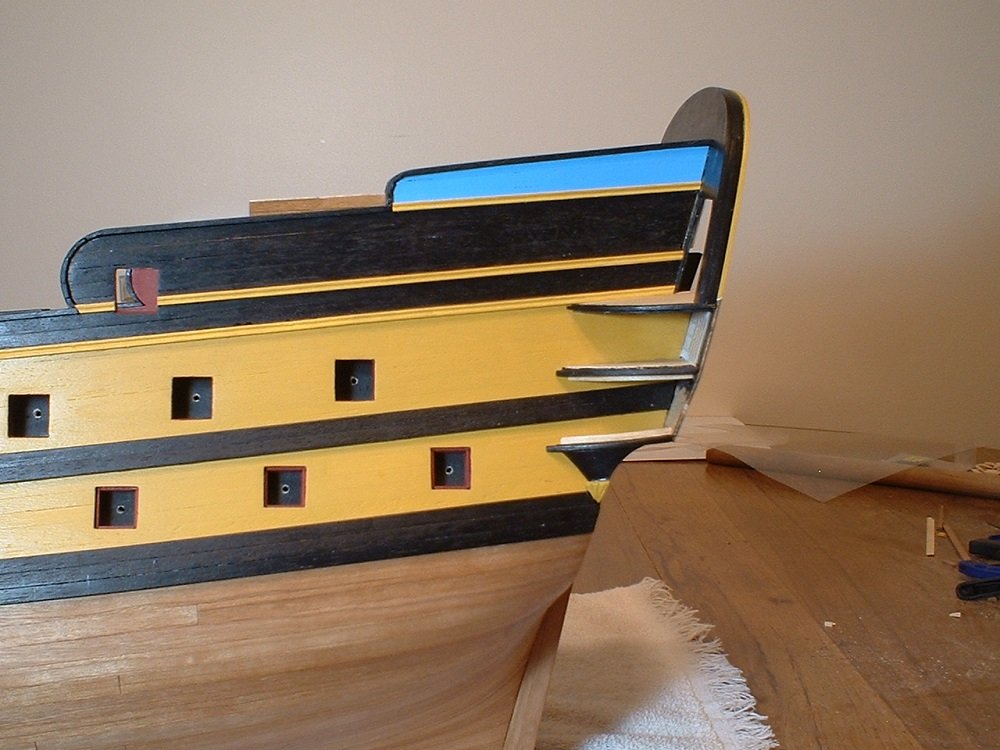
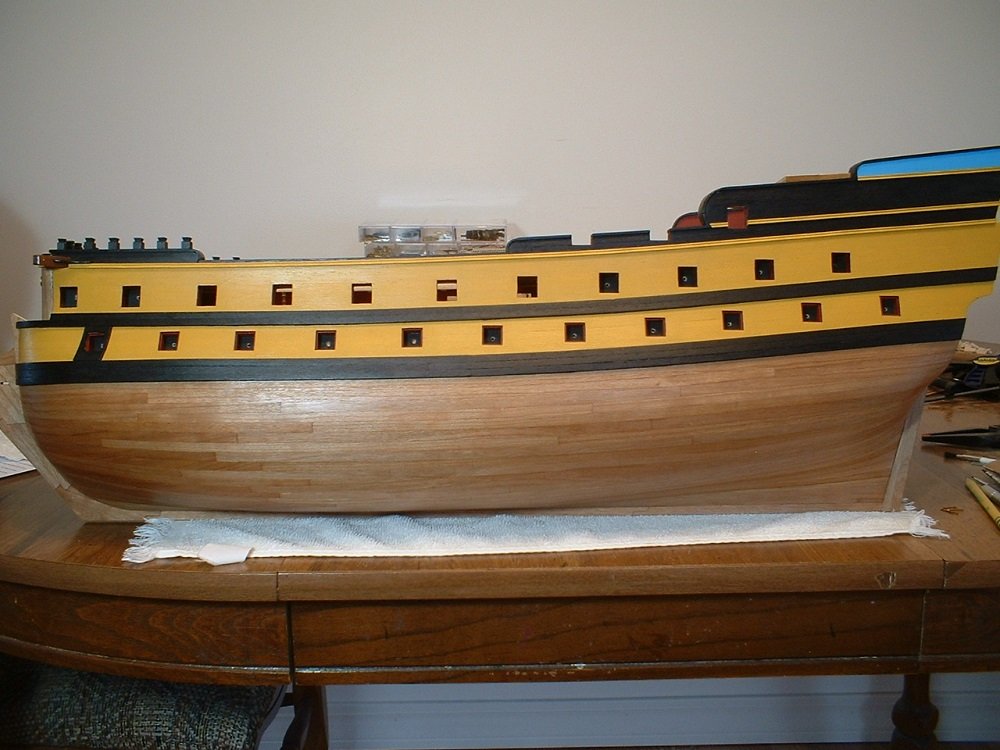
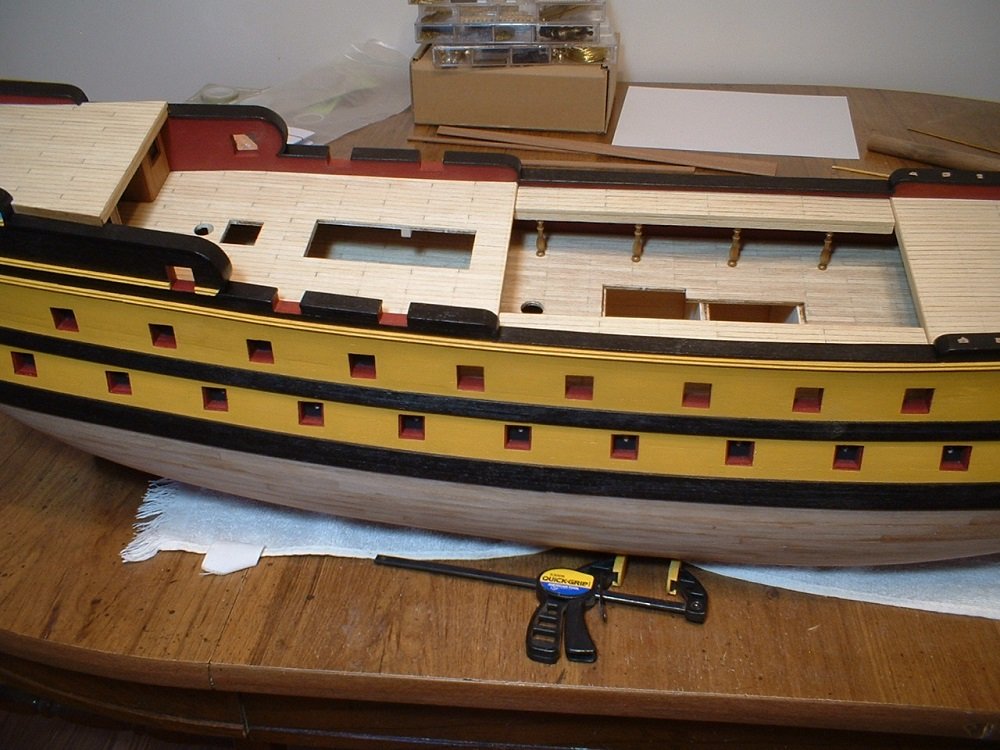
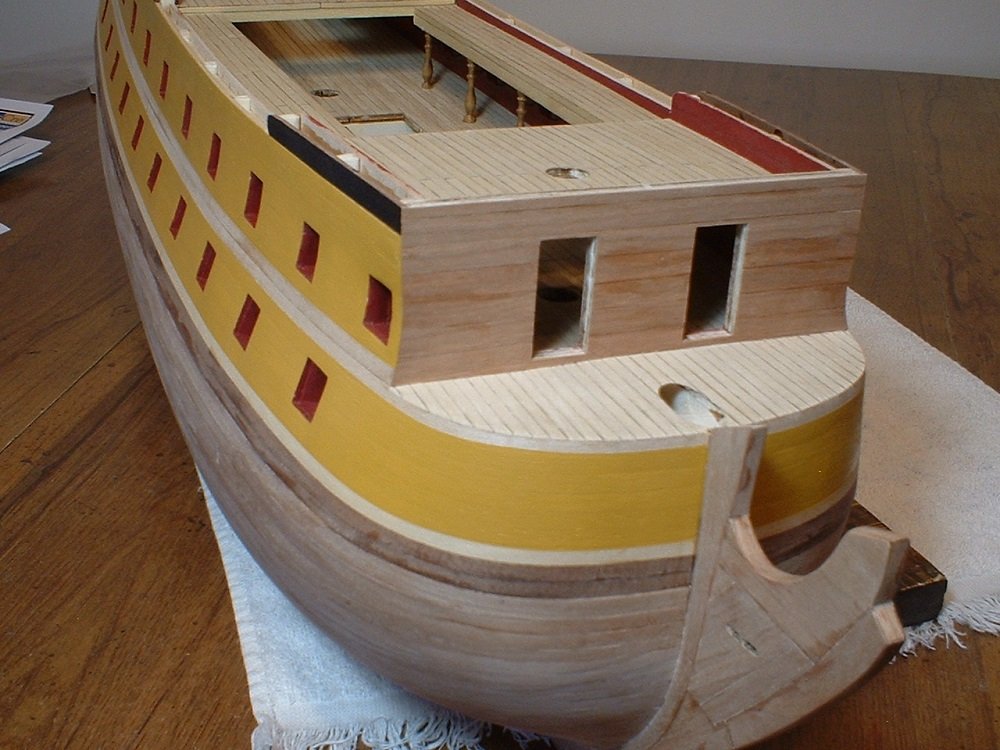
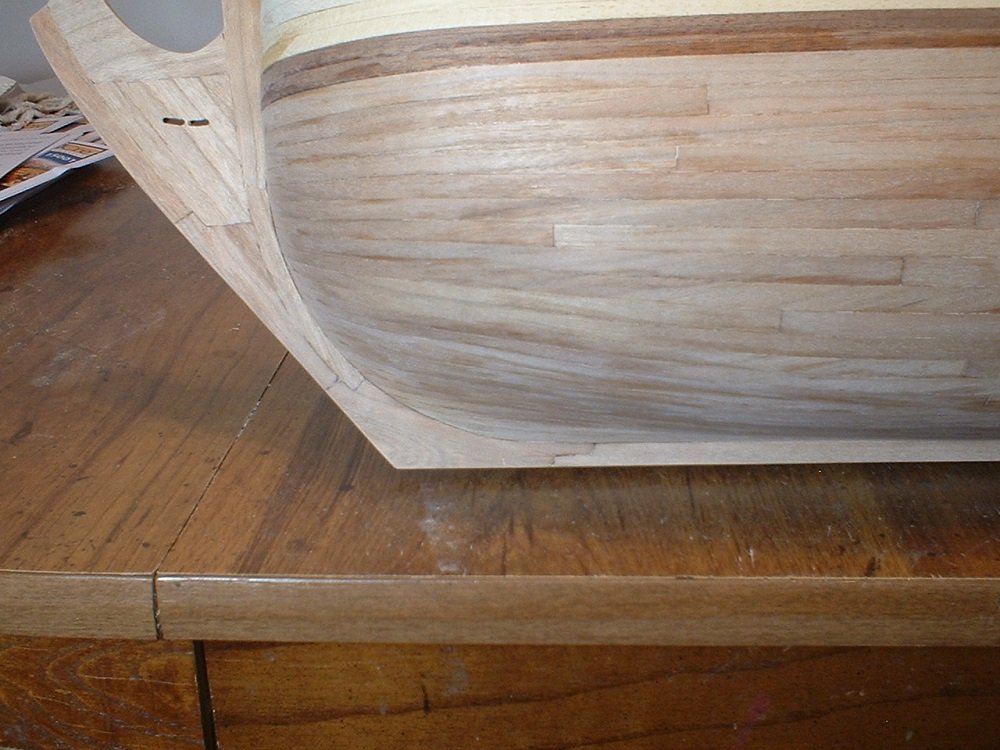
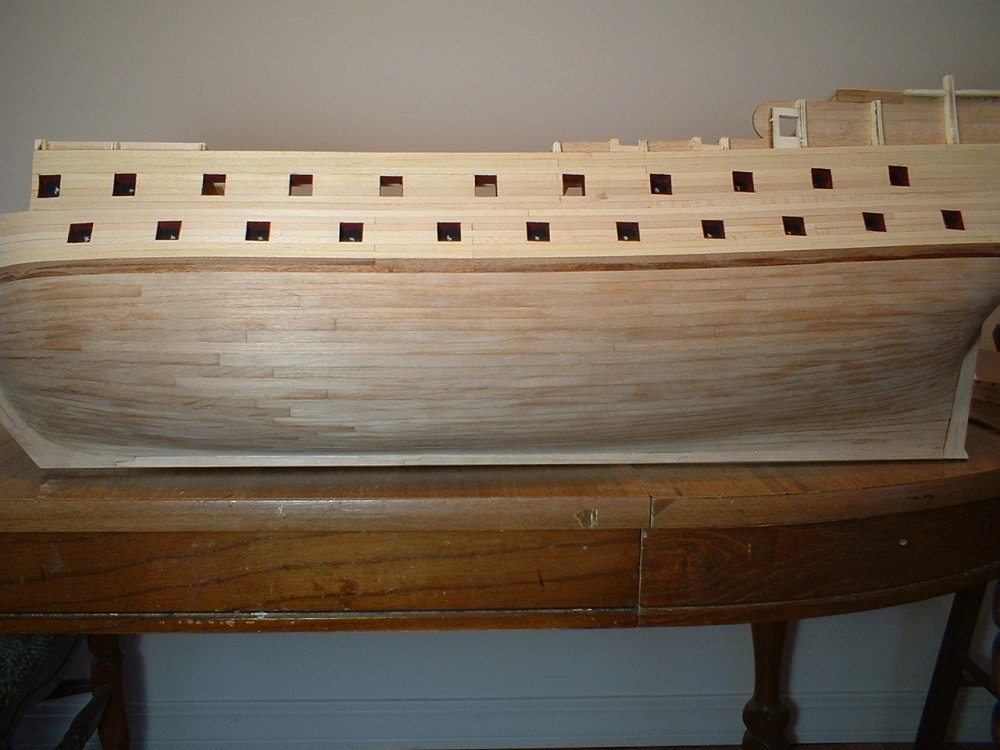
Hi everyone - a little more progress. The sides of the ship between the wales was painted yellow ochre.Then the lower line of gunports(the ones with lids)were lined. Then the upper planking was started & the bow deck and beakhead bulkhead were planked. Next will be finishing the planking aft of the waist & adding the wales. After all that,I may go ahead & put a finish on all that cherry. Haven't decided whether to use polyurethane or Danish oil - will do some experimenting to see what looks good. Mark

- 331 replies
-
- 13
-
-
- nuestra senora del pilar
- occre
- (and 1 more)
-
Yep - basically everything that shows was covered. Being made of plywood, the edges looked worse than the sides. Mark
- 331 replies
-
- 6
-
-
- nuestra senora del pilar
- occre
- (and 1 more)
-
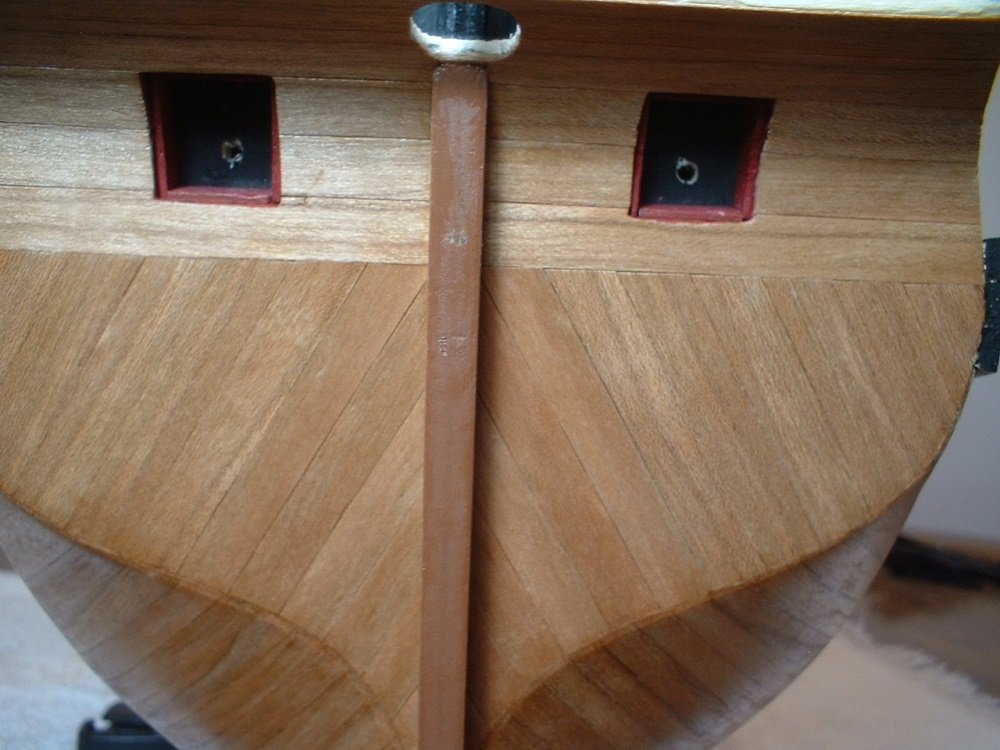
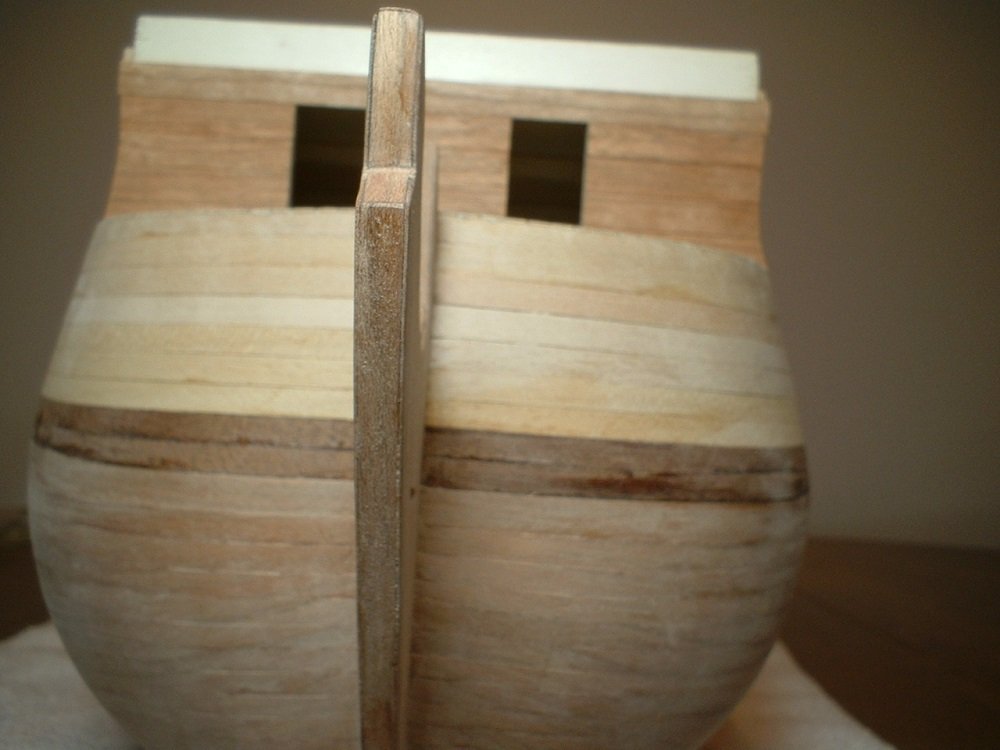
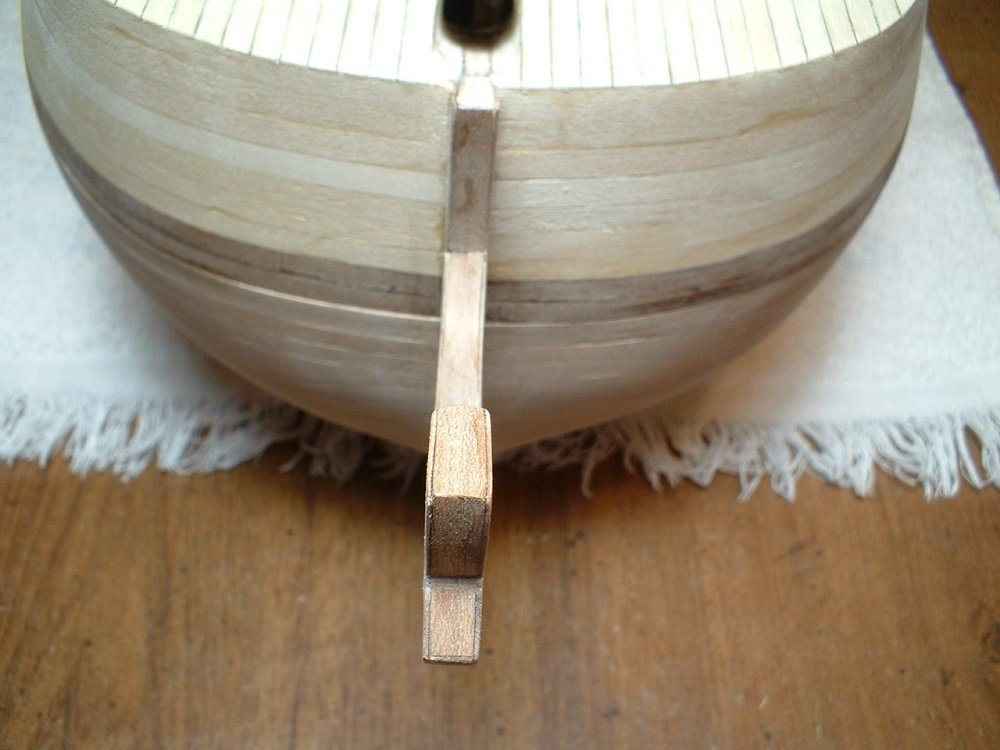
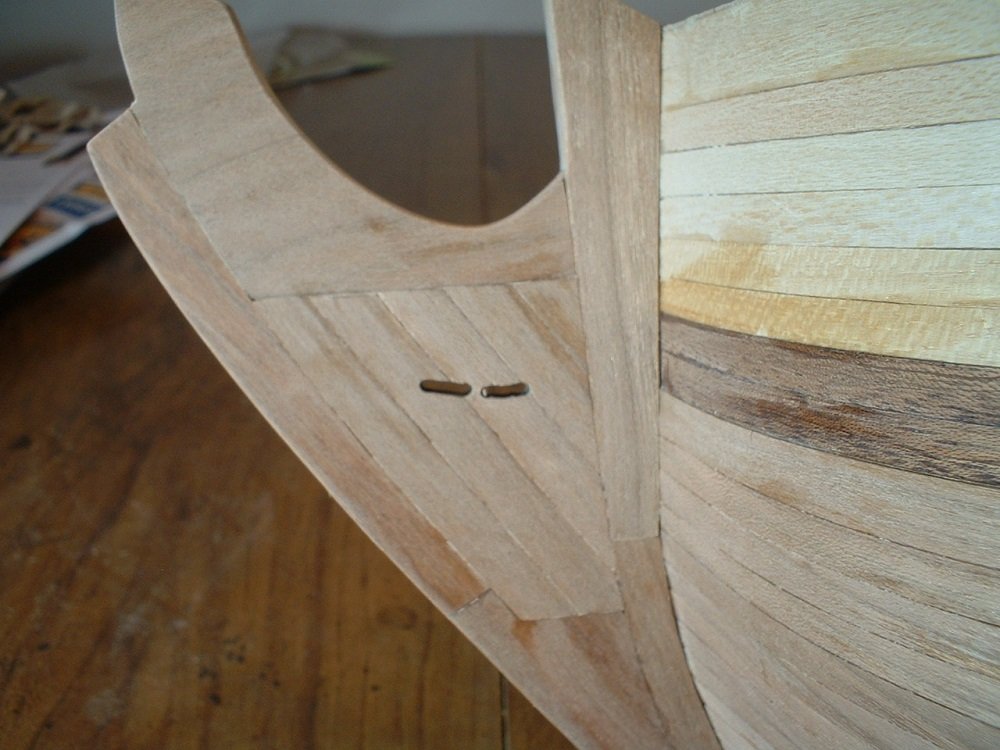
Well, that keel & stem just kept getting uglier & uglier the more I looked at it,so I used what I had left of the larger scraps of the cherry veneer to laminate them - much better! Still a little final sanding to do. Mark
- 331 replies
-
- 7
-
-
- nuestra senora del pilar
- occre
- (and 1 more)
-
Thanks Snow! Mark
-
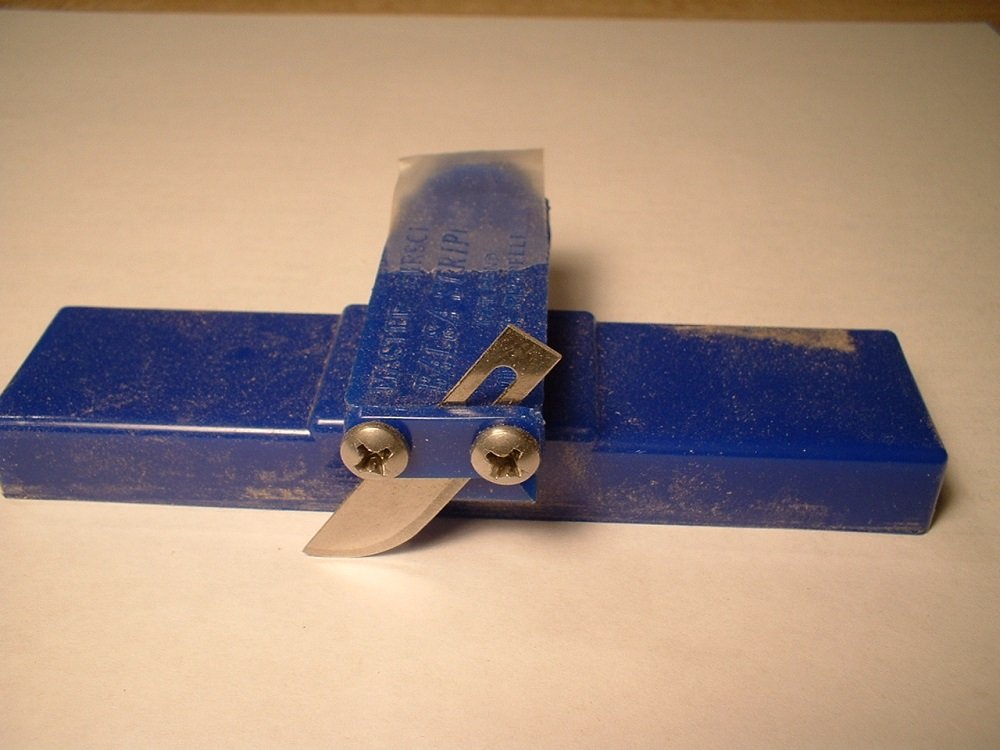
Laminating the stem & keel is still a possibility - I will have to see if the extra thickness will be a problem. On my Royal William the keel,stem,stern post,& rudder are darker than the hull planking - laminating them would have made them way too thick & cause other problems,so I left them as is. It`s not really hard to cut,just hard to cut straight strips off of. I found a strip cutter at Micro Mark that worked pretty good once I got the hang of it. The tool instructions say to use a #2 or 11 blade,but I found that a curved blade worked much better - the straight blade wanted to follow the wood grain,but the curved blade didn`t. As far as cutting the spiled planks,I would cut templates from card stock to fit the curves & cut the veneer freehand with the curved blade in my exacto handle. After a bit of sanding on the edges,I got them to fit pretty good. Needless to say,I broke numerous pieces while cutting & sanding - I lost count of how many times I had a piece almost fitted & then -oops,I pressed a little too hard on the sandpaper & broke the piece! I don`t have a small table saw,so I don`t know if that would work any better or not - it might work if you had an extremely fine blade & zero clearance insert for the saw plus a way to keep the veneer very flat on the saw. My veneer had a curl in one area too,but I just worked around it Also,I cut the strips about 7mm wide which made them a little easier to work with. Mark
- 331 replies
-
- 2
-
-
- nuestra senora del pilar
- occre
- (and 1 more)