marktiedens
-
Posts
1,737 -
Joined
-
Last visited
Content Type
Profiles
Forums
Gallery
Events
Everything posted by marktiedens
-
Hi everyone - took a little break while trying to figure out how to make the deadeye strops(not included in the kit). After trying numerous ways,I ended up bending some 20 gauge black copper wire around a drill bit that closely matched the size of the groove in the deadeyes,then inserted the deadeyes,soldered the legs together,& drilled a hole for the chain. The links for the chainplates are not provided either,so rather than try to make all the links I used actual chain - found the chain at the local Michaels store which came on a large spool. The deadeyes are only provided in 4 & 5mm sizes which are a bit small for this scale. I didn`t want to buy a whole new set of larger deadeyes,so I just used what was in the kit. Then I cut the lower mast sections to the correct length so I could get the angles of the chainplates - another problem - the overall length of the main lower mast including below deck level where it seats in the keel is 490mm according to the plans but all the supplied dowels are only 450mm. Looks like they just cut the dowels to fit in the box,ignoring the plans. I had one long enough in my stash,so I used it. Only about 60 more strops to make. Also,I managed to make all the gunport lids - another issue - the inner parts of the lids are 14mm & the outer parts are 16mm. the gunports are 14mm .so I used the inner parts for the outside & cut the outside parts down to 12mm & used them for the inside of the lids. Lid hinges are not provided,either,so I salvaged some leftovers I had - a little short,but they are difficult to see after the lids are in place( also didn`t want to spend more for a whole set of hinges). Mark
- 331 replies
-
- 11
-

-
- nuestra senora del pilar
- occre
- (and 1 more)
-
Another beauty!!! Mark
-
Wow - that`s a real beauty! Mark
-
Forgot to say - I did use CA to glue my planking,BUT,the CA I`m using is odorless & seems to be fumeless - no more bad reactions. The only drawback is that it`s a bit more expensive than the usual stuff. Mark
-
Hi Mike - I used cherry veneer to plank the lower hull on my present build & it came out great. My only issue was cutting strips off the veneer sheet without a wavy edge. I got a strip cutter from Micro-Mark that worked pretty good after changing the blade from a pointed one to a rounded one - the pointed blade wanted to follow the grain while the rounded one didn`t. A metal straight edge clamped down on the veneer would probably work also. I did have to cut spiled planks for the bow area - as flexible as this stuff is,It still doesn`t like to edge bend. Obviously, the underlayment needs to be very smooth - any little bumps or dips will show. The best part is - a package of 4 sheets from my local wood store is only about 15$ US. Mark
-
I would say do it whichever way is most comfortable for you - there is really no right or wrong way to do it as long as the end result is satisfactory to you! The only real problem I have when planking my way is fitting the last garboard plank at the keel - a lot of fiddly shaping to do. However,your hull is not shaped anything like what I have done,so the plank first method might be just as easy. I am no expert by any means,so it`s just my opinion. Mark
- 510 replies
-
- 1
-
-
- reale de france
- corel
- (and 1 more)
-
puckotred - I don`t know why they call those strips gun port linings. The instructions don`t actually show any gun port linings,although I did add linings for the bottom row of gun ports - the ones with lids. I didn`t count how many of those strips I had before starting the build,but as of right now I still have 15 strips left. Most of those strips seem to be for the upper hull planking & other small things like the belaying pin rails & inner bulwark planking. Mark
- 331 replies
-
- 2
-
-
- nuestra senora del pilar
- occre
- (and 1 more)
-
Thanks Frank! The red I am using is a Vallejo game color paint called "gory red". It`s a pure red that I think is supposed to look like blood. The sci-fi people seem to like it for painting "blood" on figures. The middle picture looking toward the forecastle from the left side is very close to what it looks like in person. It looks a little brighter in some pictures due to the bright "daylight" bulb I`m using to light the ship for photos. I try to always use a daylight bulb for pictures - a normal soft white bulb gives everything a yellowish tint. Most other reds I have tried seem to have a slight pink or orange tint to them or they are just too bright. This paint looks a bit bright when wet,but it darkens as it dries to a really nice color - very close to red ochre. Mark
- 331 replies
-
- 2
-
-
- nuestra senora del pilar
- occre
- (and 1 more)
-
That is one long,narrow hull. Corel was wise to make the keel former triple thick - should be very stable as you plank. Interesting that you are using the plank first method - I tried it once & had a lot of trouble filing the slot in a straight enough line not to have gaps where the planks meet the outer keel,let alone taking hours to file it out. Is this a double planked hull, and if so,will you be doing both layers before filing out the keel slot? Mark
- 510 replies
-
- 1
-
-
- reale de france
- corel
- (and 1 more)
-
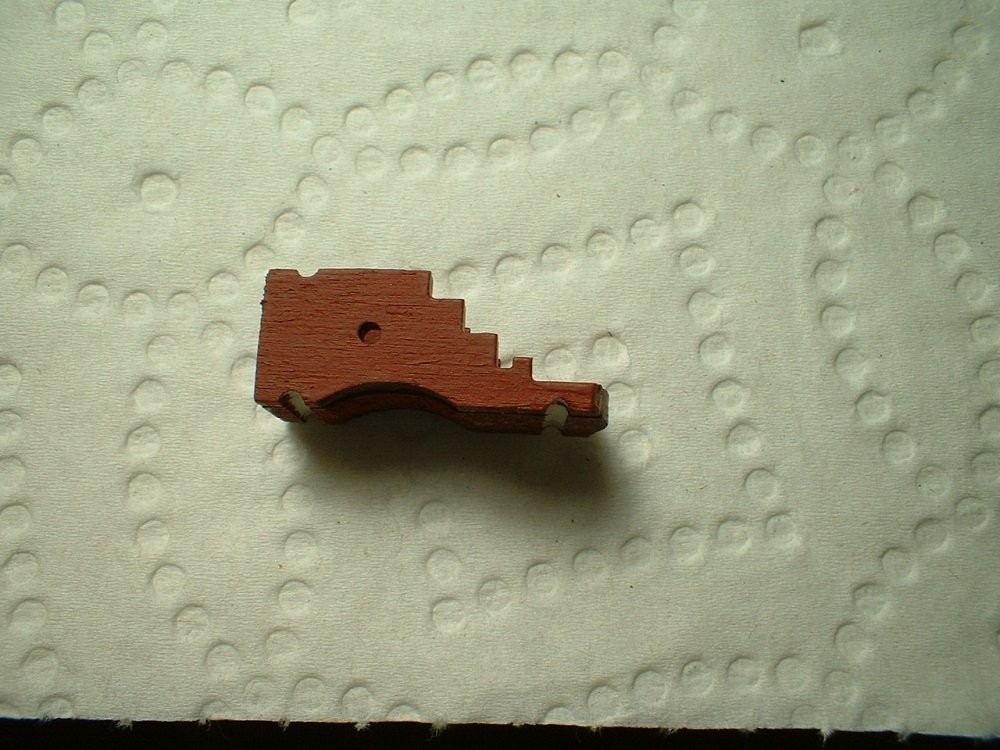
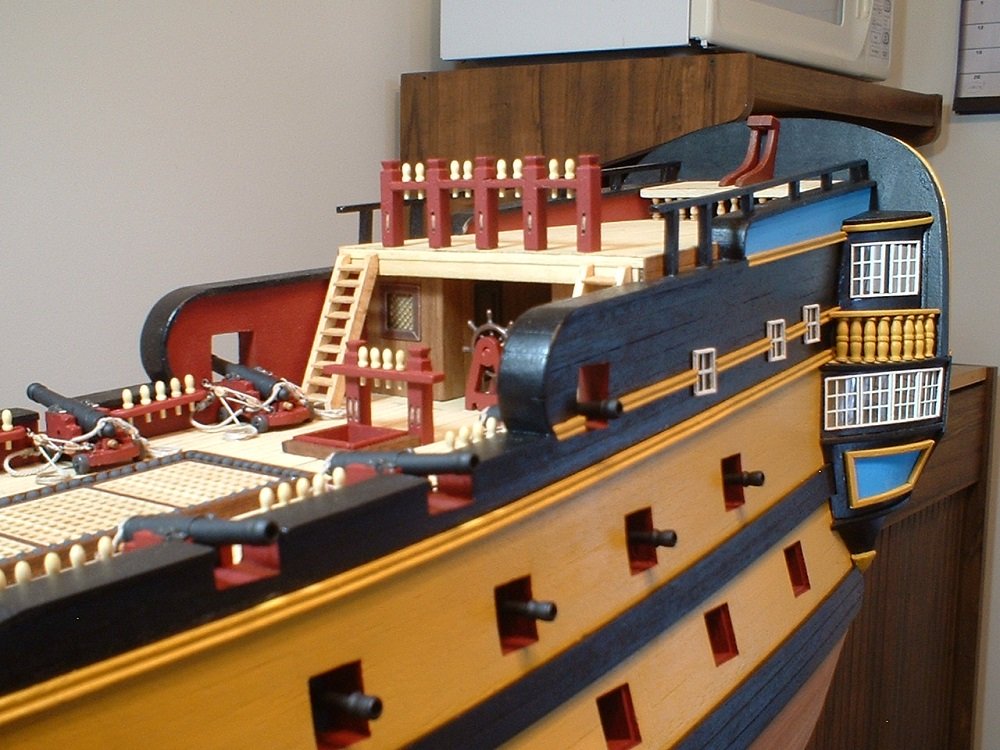
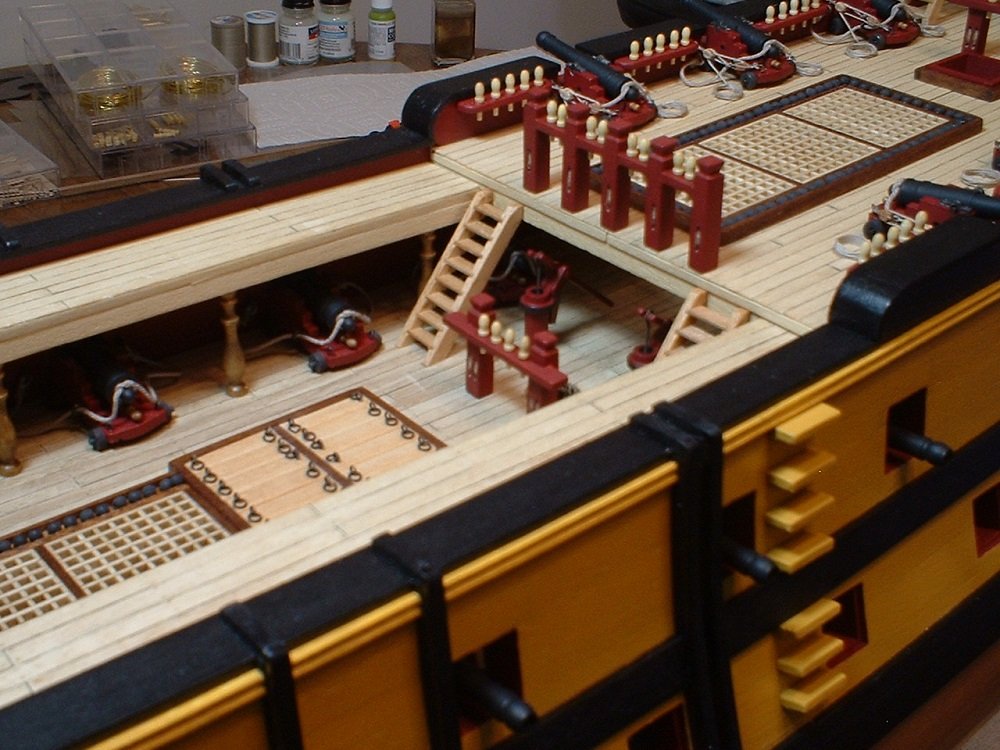
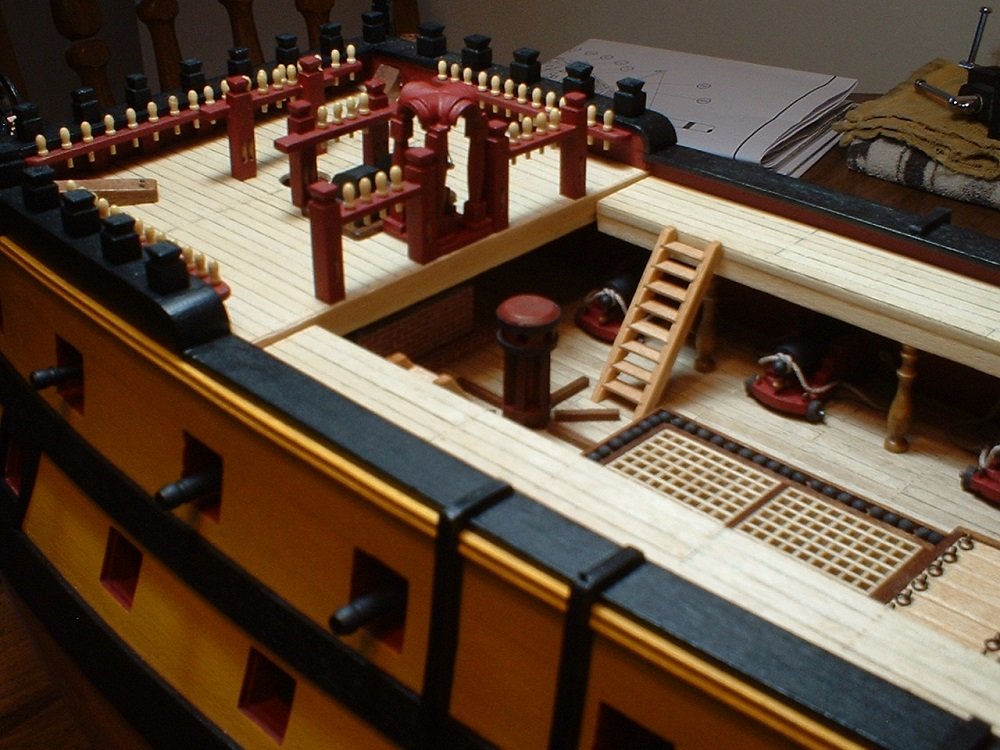
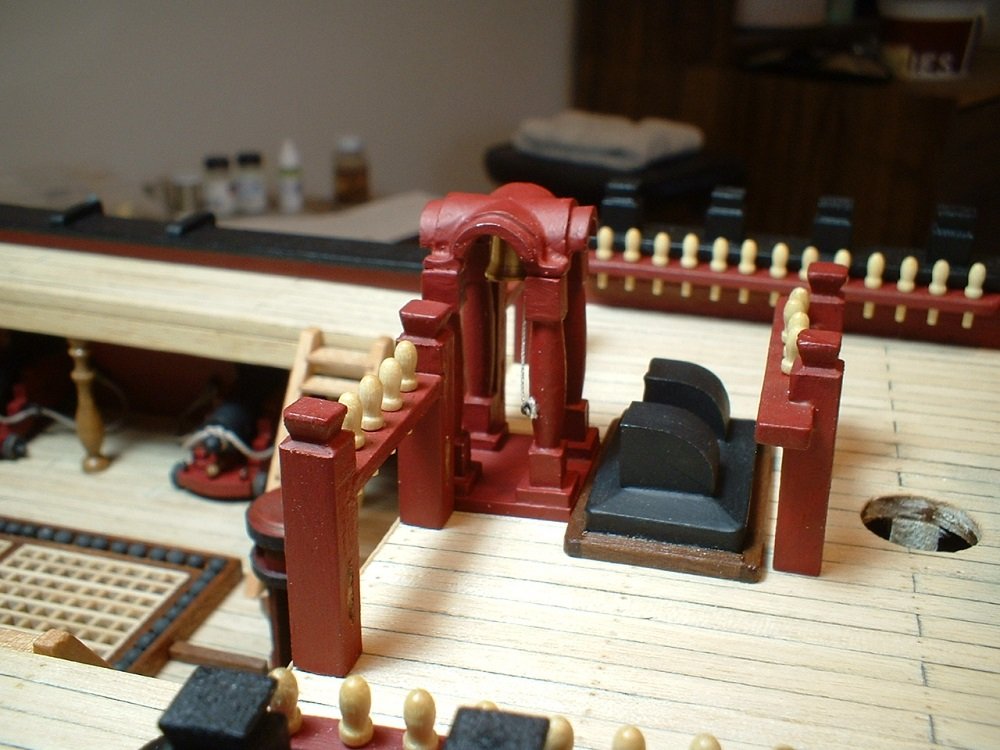
All the sub-assemblies I`ve been building are now in place on the decks - ship`s wheel,capstan,all the pinrails for the masts,poop railings,ship`s bell,etc.,etc. I re-did the knee on the poop deck where the flagstaff goes - it was not shown in the instructions,but was shown on the plans. The problem was the parts in the kit did not match the plans & didn`t fit - the finished stern is almost 10mm higher than the plans show! They showed the flagstaff wedged between the knee & the stern face - a very unlikely situation. I made a second knee & made a spacer & cap so the flagstaff would fit neatly between the two knees. Just a few misc. eyebolts & cleats to add. Mark
.JPG.788eb29461d1ad22c02c5abcf59bdd51.JPG)

- 331 replies
-
- 15
-
-
- nuestra senora del pilar
- occre
- (and 1 more)
-
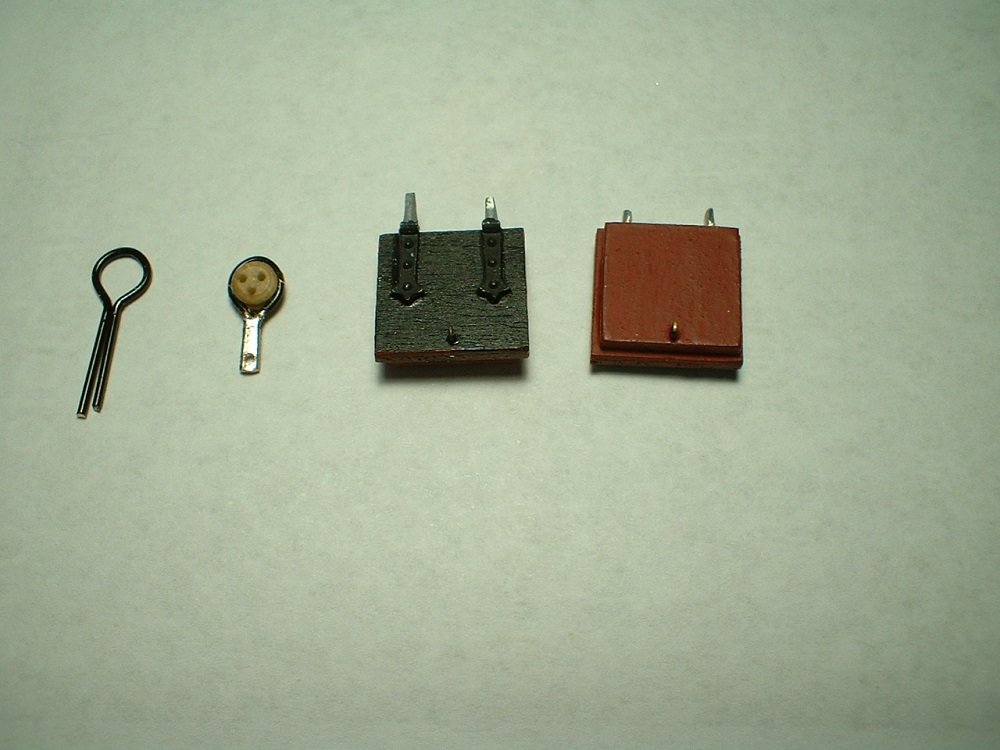
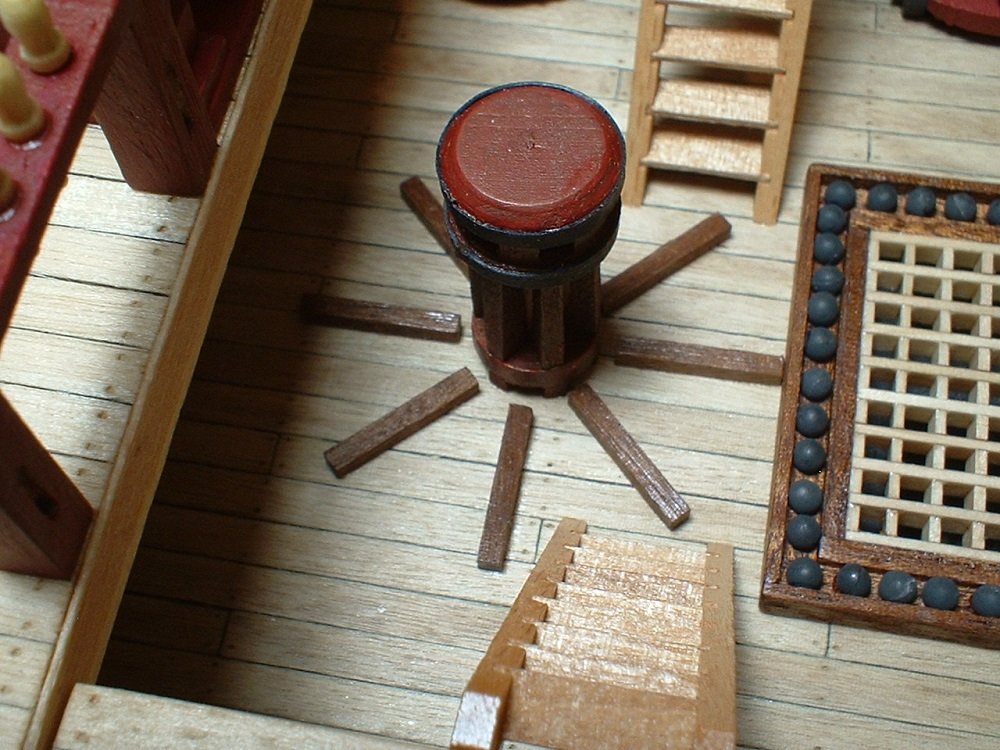
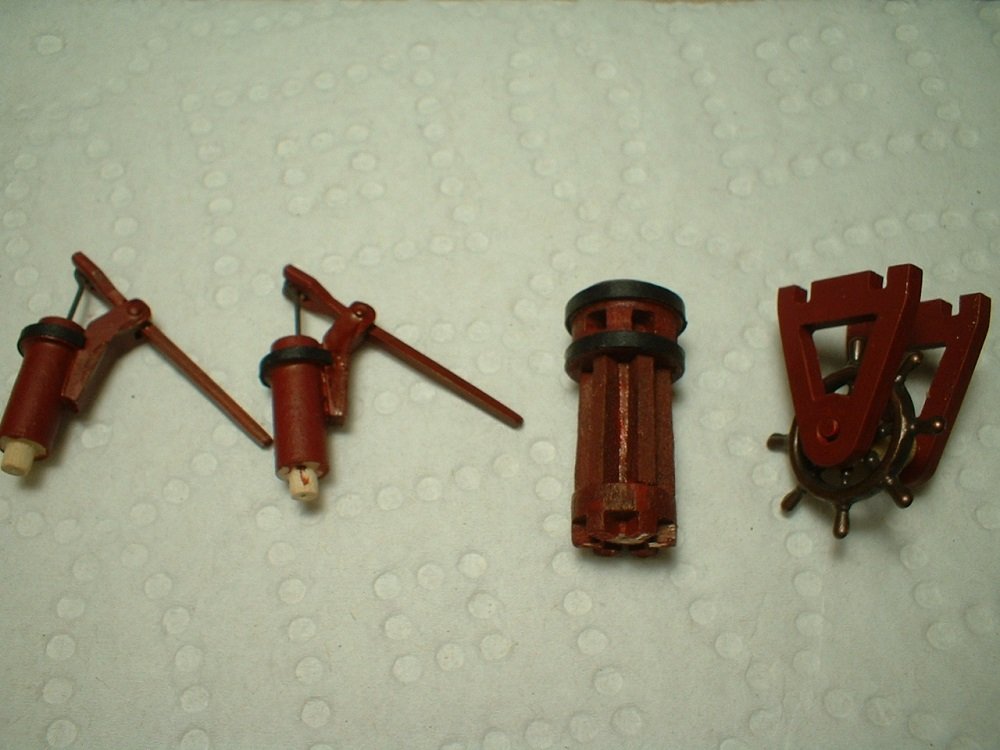
Hi - finished up a couple more sub-assemblies today. The pumps were made using the kit parts - the pump bodies are wood with the brackets & handles metal,so they were painted red. There were no holes for the handle pivots,so I drilled them & used a small pin. A blackened eyebolt was used for the plunger rod. The capstan body is wood,with the whelps made from the supplied strip stock & also painted red. The ship`s wheel was made of bronzed metal & the brackets were plain white metal,so it was also painted red except for the wheel which I left as it was. The supplied axle for the wheel was way too small,so I used some larger diameter brass rod from my stash - still a little small for the holes in the brackets,but fit the wheel & drum good. The capstan bar holes were drilled using a square drill bit(just kidding - they were made with a regular drill & squared off with a small file). The black bands on the pumps & capstan were made from black card stock. Still need to do a little paint touch-up. Mark
- 331 replies
-
- 12
-
-
- nuestra senora del pilar
- occre
- (and 1 more)
-
Thanks Frank - I think maybe it was unhooked & stowed somewhere unless they were actually firing the guns,although I would bet there were a lot of stubbed toes & bruised shins. Mark
- 331 replies
-
- 2
-
-
- nuestra senora del pilar
- occre
- (and 1 more)
-
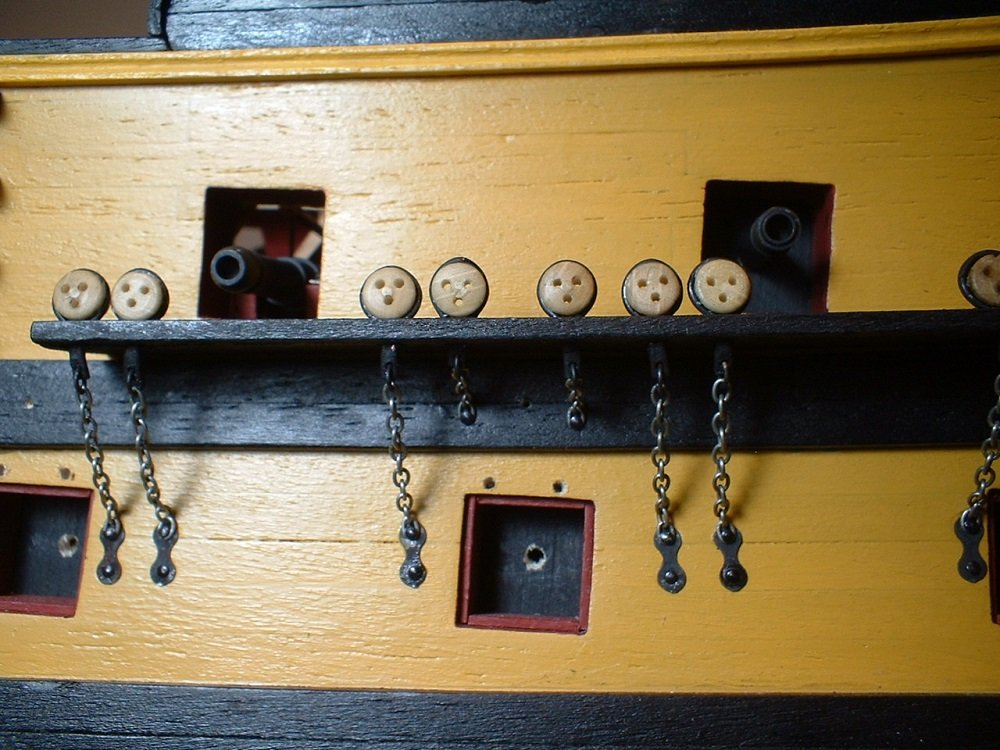
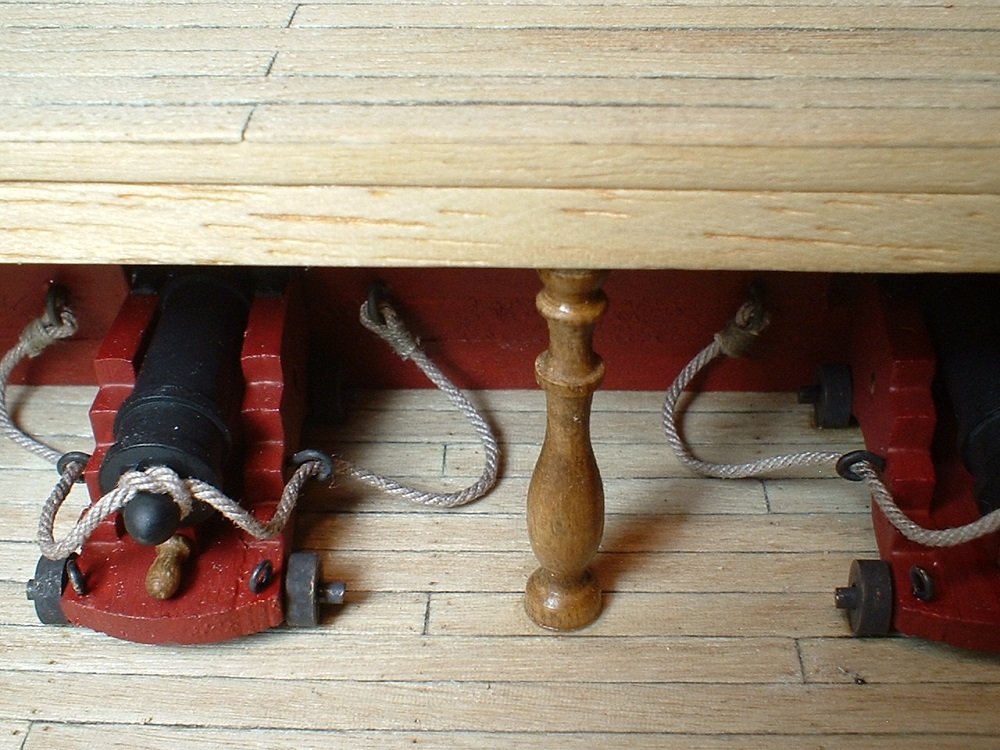
Thanks guys - much appreciated😊. I forgot to mention that the cannon trunnion caps on the middle gun deck guns were made from some 2mm wide copper strip I had & the caps for the quarterdeck guns were some small cast ones I had in my stash. The kit provides some 3mm brass strips to make the caps,but they are too wide. The carriage sides are 2.5mm thick🤨. Mark
- 331 replies
-
- 2
-
-
- nuestra senora del pilar
- occre
- (and 1 more)
-
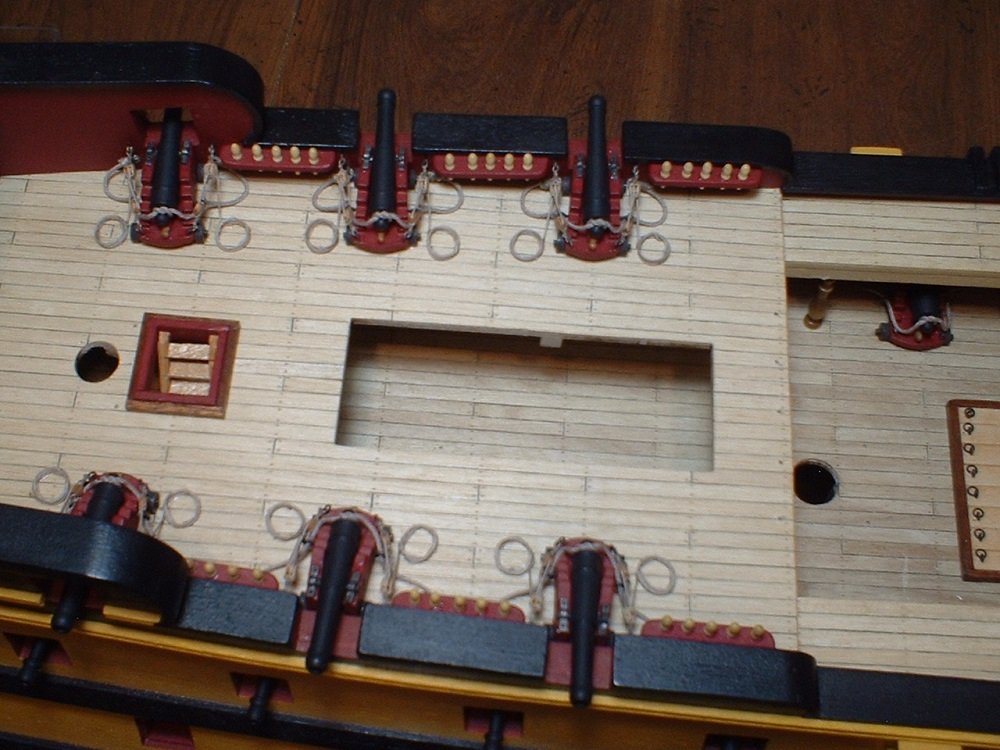
Not a lot of progress,but I have managed to get the guns on the quarterdeck installed. I hate rigging guns - I would rather do ratlines😉. The tackle ropes were simply glued to the deck,the ends were cut off,& rope coils were then glued to the deck on top of the rope ends. I did not do the inhauls. Mark
- 331 replies
-
- 14
-
-
- nuestra senora del pilar
- occre
- (and 1 more)
-
Thanks guys🙂. Still have 6 more guns to mount on the quarterdeck. Mark
- 331 replies
-
- 1
-
-
- nuestra senora del pilar
- occre
- (and 1 more)
-
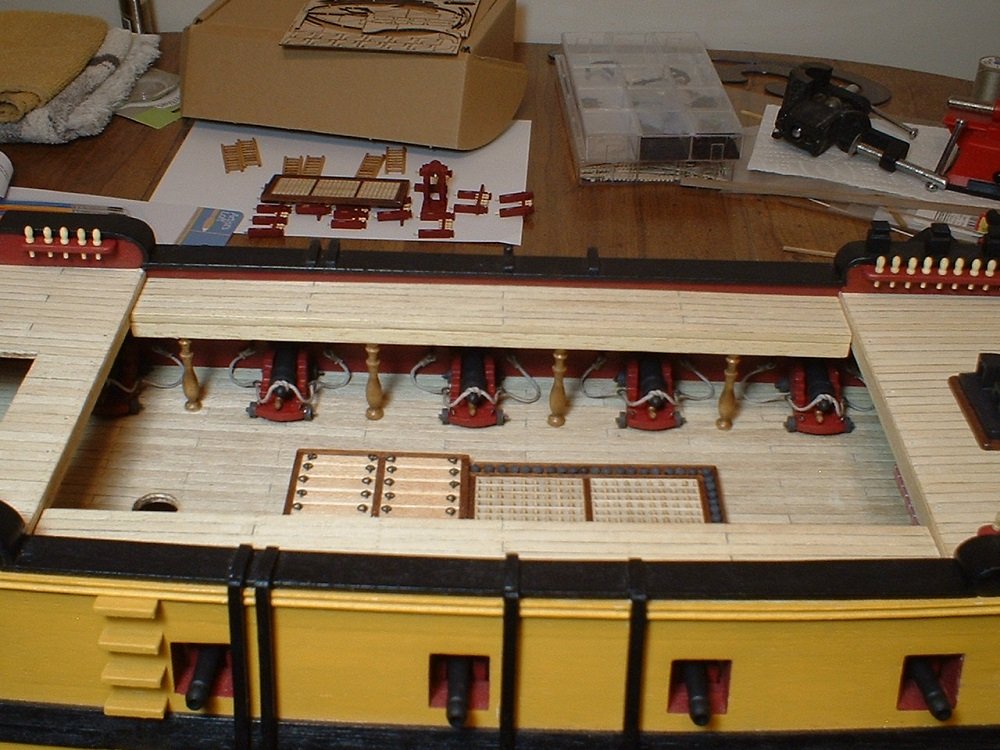
Well,anyway,I finished up the guns with carriages for the second gun deck. I forgot to take pictures of assembling them,but they were pretty simple - just 2 sides,a bottom,& a front piece along with axles & wheels. The axles & wheels were brass,which I blackened. Only the breech ropes were added since it would be near impossible to rig the tackles with the decks in place. The guns on the carriages were actually pretty well made. They were also brass,which I blackened,but I went ahead & painted them flat black because the blackening was a little uneven. The breech ropes are from Syren - great looking rope. Now I can start putting more "stuff"on the decks..... Mark
- 331 replies
-
- 8
-
-
- nuestra senora del pilar
- occre
- (and 1 more)
-
Looks like they just grabbed the cannons out of some old drawers in their back room😀 Mark
- 331 replies
-
- 3
-
-
- nuestra senora del pilar
- occre
- (and 1 more)
-
A lot of difference - I have never seen a cannon barrel shaped like the dummy barrel🤨 Mark
- 331 replies
-
- 1
-
-
- nuestra senora del pilar
- occre
- (and 1 more)
-
These guns are side by side on the same gun deck🙁 Mark

- 331 replies
-
- 2
-
-
- nuestra senora del pilar
- occre
- (and 1 more)
-
Hi Sjors - thanks & welcome to my log! As you can see, I have changed a number of things about the kit such as the hull planking. My belaying pins are wood,but not long enough to go through the pin racks,so I made the racks thinner☺️. My wood sheets seem to match the drawings,but some parts don`t match the picture instructions or the photos of the finished model🤨. I see that you have taken over the build from your wife - nice of you to continue a great looking build. I`m working on the gun carriages & just found out that the dummy barrels for the second gun deck don`t match the barrels of the full size guns of that deck - different size & different shape😥. Also,the order of building does not seem logical to me in some places,so I am skipping around a bit. Thanks for bringing the popcorn - I was getting a bit hungry😊. Mark
- 331 replies
-
- 2
-
-
- nuestra senora del pilar
- occre
- (and 1 more)
-
Thanks guys - I will then most likely rig them the "usual" way & just ignore the hole in the carriage. Just seems odd that the instructions show all the eyebolts in place on the carriages,but no rigging - not even on the plans. Mark
-
I am building the Nuestra Senora of 1750 & have a question about the gun rigging - in particular the breech ropes. The plans don`t show any kind of rigging for the guns,but there are laser cut holes in the sides of the gun carriages which may be for the ropes to go through instead of being fastened to the cascabel of the cannons. Anyone know what would be correct? Did some searching online,but I couldn`t find any actual pictures or diagrams. Mark