HOLIDAY DONATION DRIVE - SUPPORT MSW - DO YOUR PART TO KEEP THIS GREAT FORUM GOING! (Only 20 donations so far - C'mon guys!)
×


Patrick Haw
-
Posts
416 -
Joined
-
Last visited
Content Type
Profiles
Forums
Gallery
Events
Everything posted by Patrick Haw
-
Hello Woody, and thanks for visiting my log. You're right about having some sort of "safety net" when dry fitting or installing the fiddly bits that can disappear. The ladder though is gone, gone, gone, somewhere on the middle gun deck and irretrievable. I made a new companionway ladder and took extra care when fitting it. It's solidly glued in place now! Good luck when you start your Victory build. Please start a log so we can follow your progress. There are plenty of Victory experts here to help you if you get stuck! Good luck! Patrick
-
Grant, Congratulations on completing the rigging. She looks simply amazing, everything so clean and neat. Your build log is an inspiration and your tips and techniques are definite 'keepers'. Thanks for sharing your work with us. Patrick
-
Hi Jerry, Just catching up on your build. You're making tremendous progress and I can't believe how fast you've worked. I'm going for the slowest Victory build in history myself! Oh well, it took 7 years to build the real thing so I think I might just beat that! Great job on your mast repair...scotch and prayer usually solve all problems! Patrick
-
Hi Glenn, You've made fantastic progress and she really looks great. The joy of coppering is fast approaching! One suggestion regarding glazing the stern gallery windows...The openings for those windows at present are very large and it will be very difficult to get the Micro Glaze to "seal" across such large areas. I plan to use Micro Glaze on the individual brass etched window frames prior to installing them. I think you will find it much easier to get the glaze to set doing it that way. Keep up the great work! Patrick
-
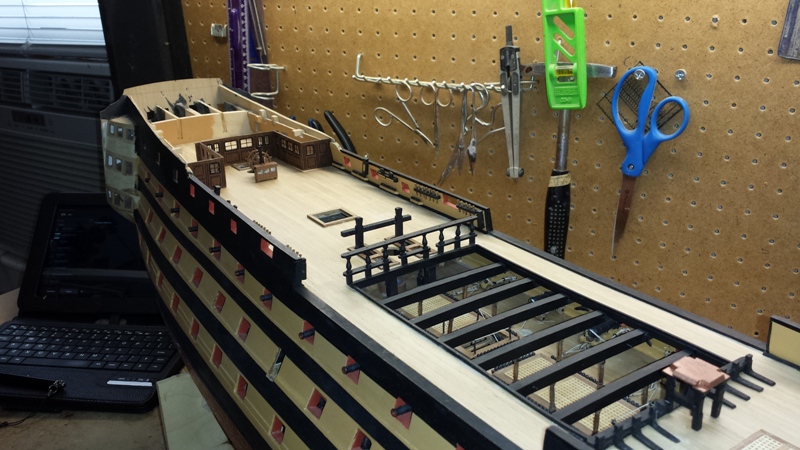
Not really an update, but I have a question for my fellow Caldercraft Victory builders. I've made all the quarterdeck guns and carronades but have decided not to fix and rig them yet, but to wait and work on the bows and stern before doing so. I've started on the bows and dry-fitting the bow curved rails and the hair bracket and lower bow cheek rails (above and below the hawse holes). While the instructions say to fit the hawse bolsters against the lower bow cheek rail, they make no mention of what else is fitted between the hair brackets and lower bow cheek rails. It's obvious from the manual photos and everone else's build logs that the space between the hair bracket and lower bow cheek rails is planked with something, but the manual doesn't mention it at all. So, what is it? Thanks for any help. Patrick
-
Grant, She looks just amazing. Really, really well done! Wonders what you need a 10" bandsaw for? Is there a new project in the works? Can't wait to see what it might be. Patrick
-
Thanks David, Glenn, and Sjors. Your comments and encouragement mean a lot and it's a pleasure to be in the company of such good model builders as yourselves. Glenn, for an "inexperienced modeller" you're doing a fantastic job with your Victory. Keep it up and I will be following your progress. Patrick
-
Hi Glenn, You're moving along really well with your planking and your gun port linings look fantastic. Well done. As for waterway, stringer, and beam shelf. I sorta kinda copied from Gil too, but only did waterway and stringer. The stringer on mine is styrene quarter round. I think putting the waterway and stringer on give you a really clean looking deck to bulwark joint...and also covers up any mistakes around the edges of the deck. Here's a pic of my efforts there. Patrick

-
Hi Sjors, Really beautiful work on your first planking. You've got a very smooth surface for the second planking and it should go on very easily. I get the feeling this is going to be a special build. Keep up the great work. Patrick
-
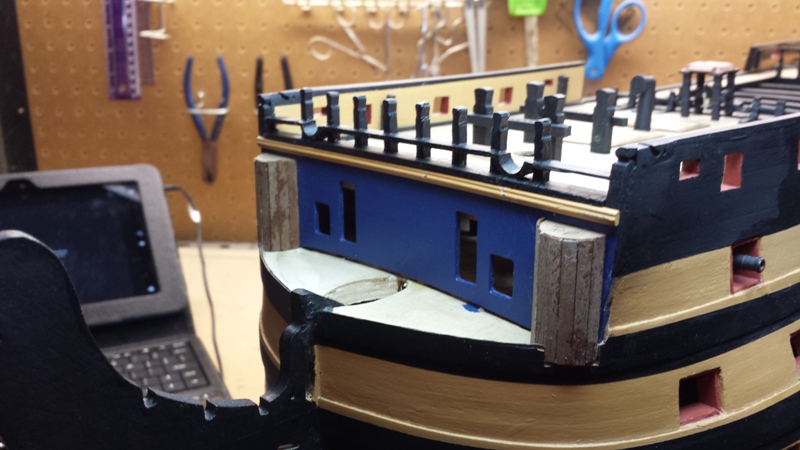
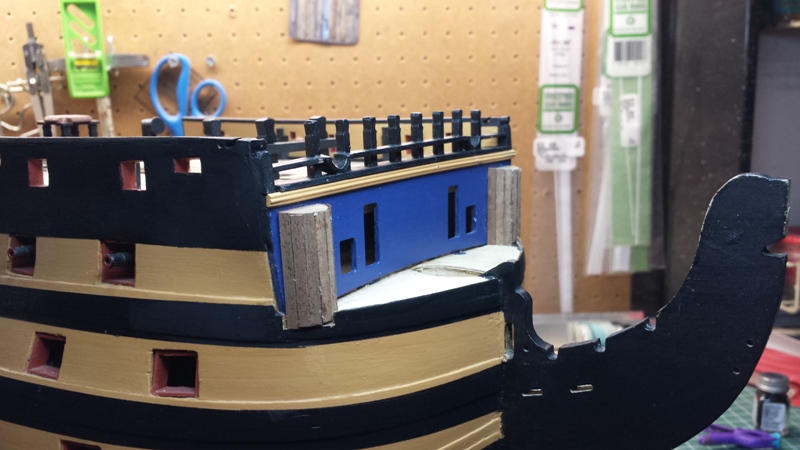
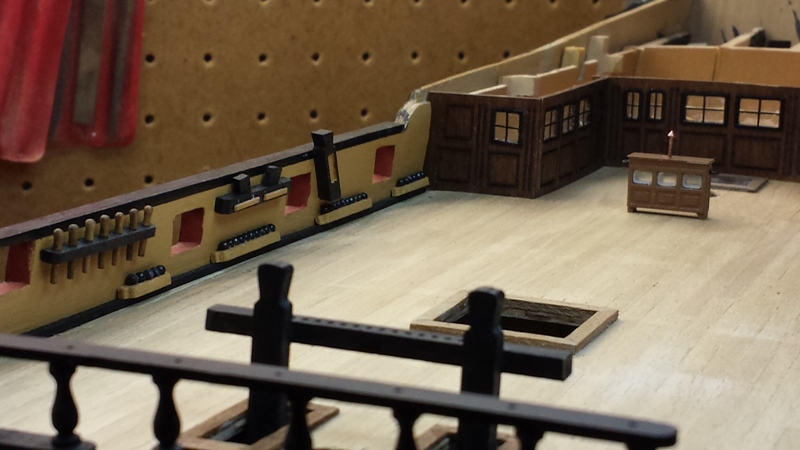
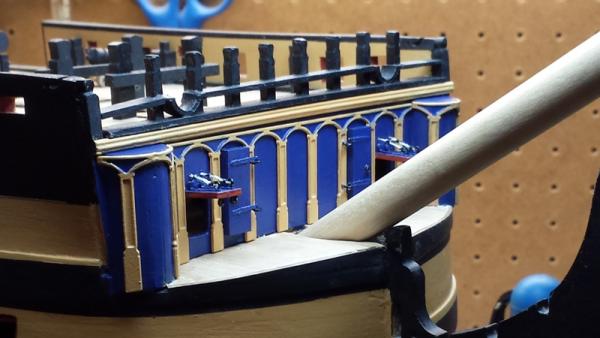
Time for an update. In between doing other (non-Victory) things I've been working on the beakhead bulk head and building the quarterdeck guns. Finished with the beakhead bulkhead I think...perhaps some touching up to do. Fairly pleased with the result. You'll notice that my roundhouses don't have the ports in them yet. I painted and then glazed the ports with Micro Glaze and as I was going to fit one of them it made a desperate escape attempt and launched itself from the work bench, never to be seen again...well not yet anyway. I'm still looking for it! Patrick


-
Hi Glenn. Coming along very nicely and you're encountering the same issues all of us have had at this stage with aligning the inner and outer gun port openings. I agree with David's advice to trim/sand the bottom of the inner bulwark patterns to get the correct alignment. The top edges of these patterns aren't visible once the quarterdeck goes on. As for cutting the upper gun deck in two for ease of installation, that was me who ran into the problem of narrowing the companionway and grating openings (my log is a litany of uh-oh moments!). It was an easy fix and everything is centered but you're wise to keep checking those measurements as you proceed. Keep up the great work, your build is very enjoyable. Patrick
-
Thanks Grant. The First Lieutenant calls for sweepers all the time. Well actually he has cases of this stuff stowed below! Patrick

-
Hi Glenn, Your second planking is looking very good. It's a good idea to put primer on the hull below the waterline, it will really show up any dings and divots that need to be filled and give you a really good surface for coppering. Remember to install at least the lower wales before you start coppering. See my log for the the consquences of not doing so! It worked out in the end, but caused a lot of extra work. What kind of glue are you planning to use for the copper plates? I had good results with contact cement, it gives you time to move the plates into position, unlike the CA recommended in the manual. It might also be a good idea to order extra tiles as I found there was quite a bit of wastage. Plan on a couple of months of living and sleeping copper tiles! Enjoy! Patrick
-
Thanks Nick, Glenn, Sjors, David, and Lawrence. You're right David, in retrospect it might have been easier to build the whole beakhead structure off the ship and then install a la Yon. Too late now and I think it's going ok. I really am enjoying fitting out the quarter deck and like doing these one-off features. It'll be back to repetitive stuff soon enough, and I'm sure you'll remind me how many clove hitches there are to tie for the ratlines! Patrick
-
Wow David! She looks fantastic. You're really setiing the standard for rigging here. It's still a long way off for me, but believe me your rigging work will be a "go to" must for tips and advice when I get there. Keep up the great work. Patrick
- 439 replies
-
- 1
-

-
- victory
- caldercraft
- (and 1 more)
-
Very nice work on your pin rail Grant. All of your little fixes and mods to your build are carefully filed away for my future use! Patrick
-
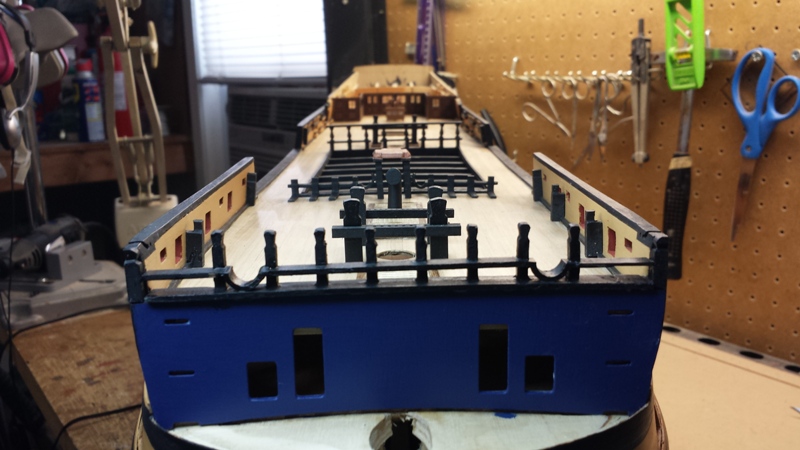
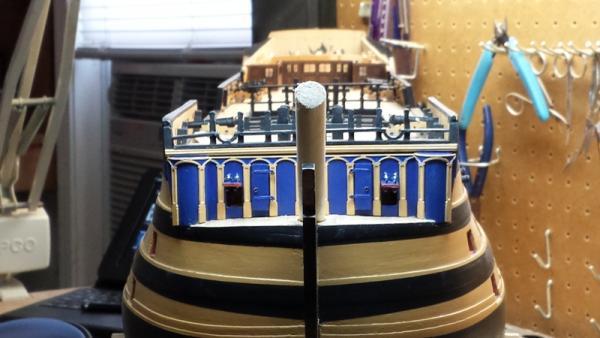
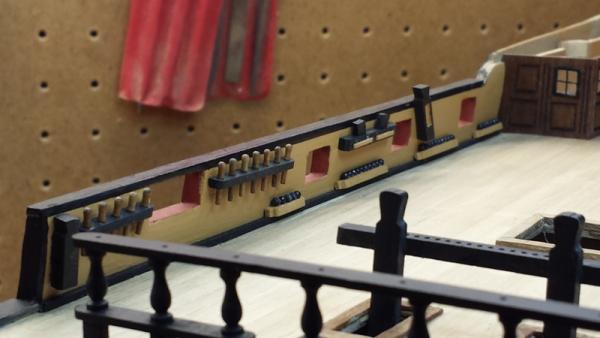
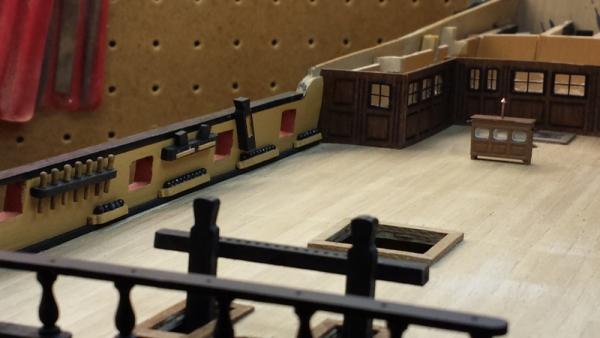
In between re-decorating a bedroom and waiting for my new companionway ladder to be deivered I've had some time to keep moving ahead on my build. Finished the beakhead capping assembly and am now building the roundhouses and hopefully will get the beakhead decked and finished in the next couple of days. So here are some pictures, the quarterdeck screen, wheel, and ninnacle or just dry fitted right now. Patrick


-
Just wonderful Kevin. So glad the weather's good enough for you to take her outside again. She looks majestic! Patrick
-
Thanks David. I go through a lot of cans of that computer keyboard dust spray they sell in office supply stores to try and keep the ship as clean as I can. And of course I clean it up before I take photos...you wouldn't want to see it beforehand! Patrick
-
Hi Glenn, Fantastic job with the second planking and you got the result you were looking for. Take lots of pictures before you start covering it up with copper and paint. Once I'd filled and sanded my second planking smooth I put on a couple of coats of primer below the water line and sanded it again. It gave a really smooth surface for the coppering, so you might want to consider that. Keep up the great work, and enjoy. Patrick
-
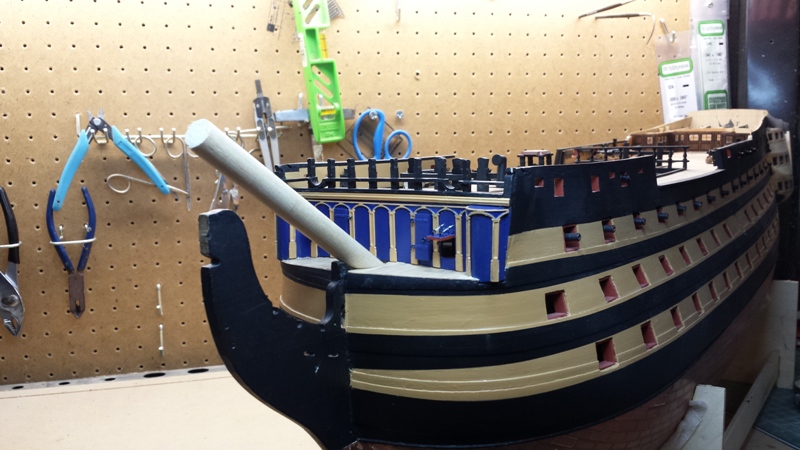
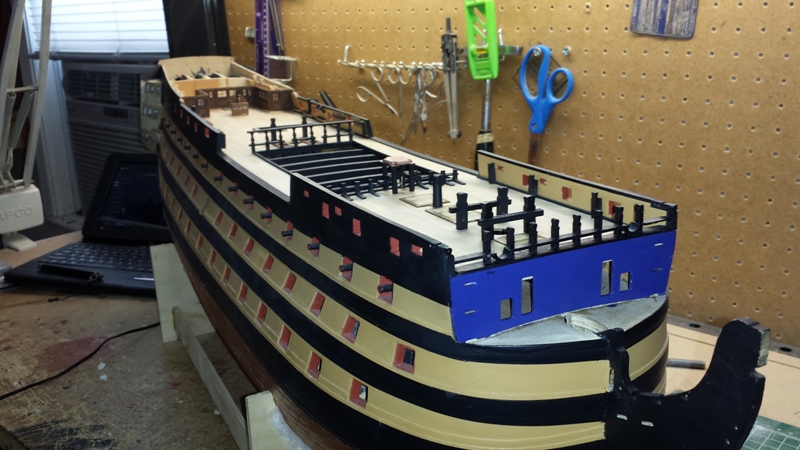
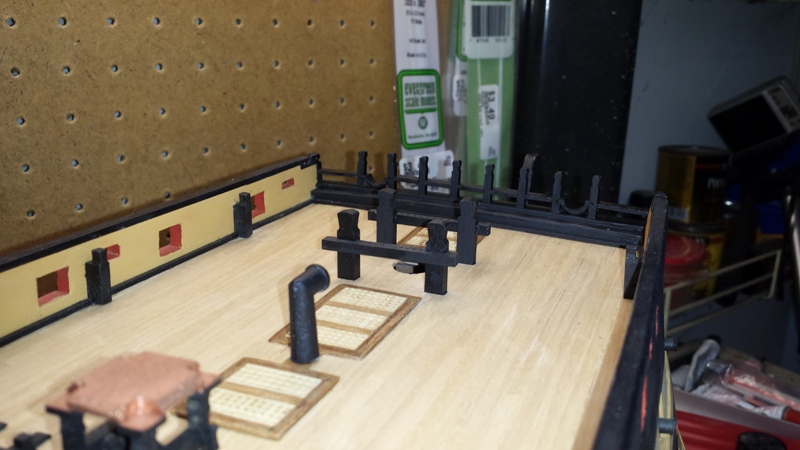
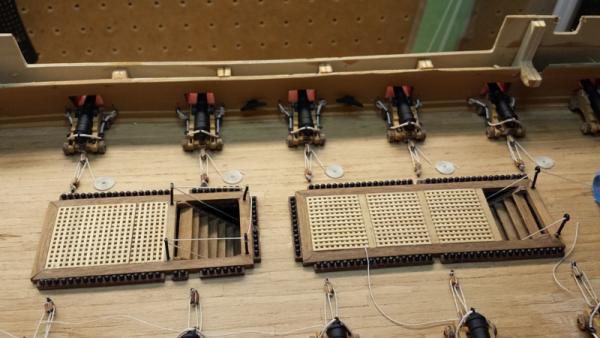
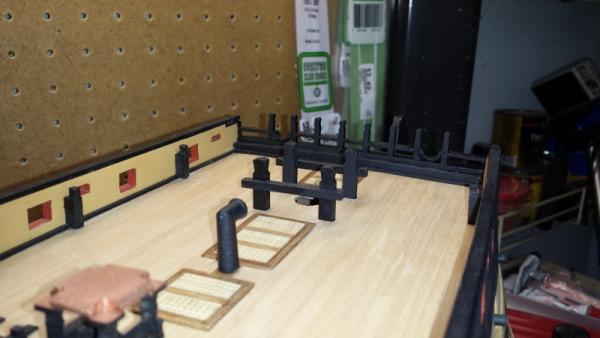
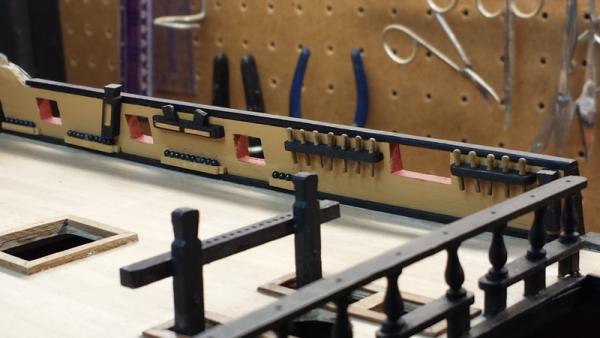
Quarter deck pin rails, shot garlands, kevels and staghorns installed. Need a bit of paint touch up but I'm happy. Quarter deck screen and binnacle are dry fitted. The shot garlands required 62 cannon balls, I had 63. Dropped two of them amd spent half an hour on my knees to find one. Got it! I decided to paint the shot garlands yellow instead of black as I think it highlights the cannon balls better. Patrick
-
Hello David, Glad to see you back. I hope everything went ok with the hospital treatment. Fantastic work with your rigging, it sure does get very "busy" in there doesn't it? It's a pity about the damage to the bowsprit, but consider the damage she suffered at Trafalgar. According to a report of a midshipman on board: "The hull is much damaged by shot in a number of different places, particularly in the wales, strings and spirketing, and some between wind and water. several beams , knees and riders, shot through and broke; the starboard cathead shot away; the rails and timbers at the head and stern cut by shot, several of the ports damaged and port timbers cut off; the channels and chain plate damaged by shot and the falling of the mizzen mast; the principal part of the bulkheads, half ports and port sashes thrown overboard in clearing ship for action. the mizzen mast shot away about nine feet above the deck; the mainmast shot through and sprung; the main yard gone; main top mast and cap shot in different places and reefed; the main topsail yard shot away; the foremast shot through in a number of different places and is at present supported by a top mast, and a part of the topsail and crossjack yards; the fore yard shot away, the bowsprit jibboom and cap shot, and the sprit sail and spirtsail topsail yards, and flying jibboom gone; the fore and main tops damaged; the whole of the spare top mast yards, hand-mast fishes shot in different places, and converted into jury gear." They managed to get her into Gibraltar by October 28th and she was ready for sea again on November 4th 1805. Seven days to get her fit for sea and the return voyage to England! So repairing your bowsprit in your well-equipped shipyard should be a piece of cake! Patrick
- 439 replies
-
- 2
-
-
- victory
- caldercraft
- (and 1 more)
-
Gil, Good luck with your preparations and hope you have a fantastic cruise. You'll be missed while you're away but I will be all over your log as I move ahead with my Victory. Yours is one of the logs I could not get anything done without! Patrick
-
Hi Kevin, Don't know how that happened, but glad you made it back to my build. Your insight and advice are always invaluable. Patrick
-
Hi Mobbsie. Just catching up on your Agamemnon and your work is simply stunning. The precision and symmetry of your rigging is just amazing and sets a high standard for the rest of us to try and achieve. Thanks for all your photos and tips. Definitley a log to file away for future reference. Patrick
- 1,279 replies
-
- 1
-
-
- agamemnon
- caldercraft
- (and 1 more)