NenadM
-
Posts
3,254 -
Joined
-
Last visited
Content Type
Profiles
Forums
Gallery
Events
Everything posted by NenadM
-
 Nice. And clean. And precise. And I like it
- 1,354 replies
-
- 2
-

-
- constitution
- model shipways
- (and 1 more)
-
Cutty Sark by NenadM
NenadM replied to NenadM's topic in - Build logs for subjects built 1851 - 1900
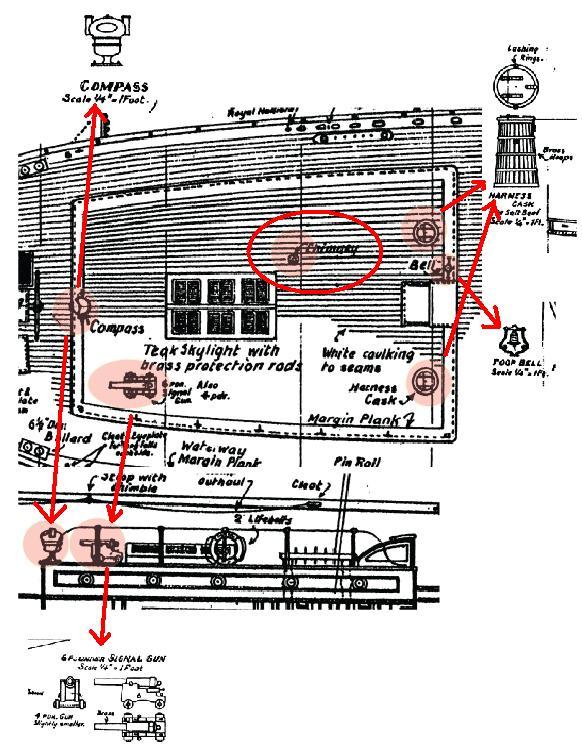
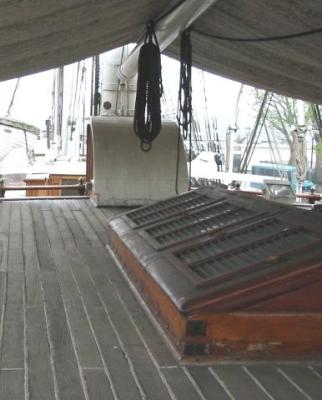
Keep on playing and prolonging with making standing for Her Little analytic and thoughts about another details on aft deck. Not all of them are presented in today stage and on photos, but to me it seems that adding them can be sweet Compass, Signal gun, two Harness Gasks for salt beef, Poop Bell, and Chimney Considering to photos, it seems that on C-plans, compass is a bit out of scale And obviously, I have to walk further on microsurgery road In scale, Gun is only 10 mm long ?!?!?!?!?!? (Measured in AI) And bell is .... just ... microscopic ! Maybe just to cannibalize still standing ( in bad condition) my old Jolly Roger ?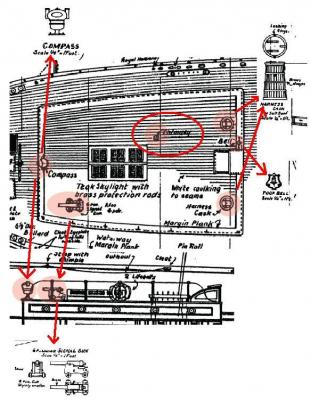

- 4,152 replies
-
- 11
-
-
- cutty sark
- tehnodidakta
- (and 1 more)
-
This story sounds so familiar to my story ... to have a own man cave is very significant ... we can spread chaos and dust wherever we want and work in peace. Can I join to watch ? Nenad
-
Cutty Sark by NenadM
NenadM replied to NenadM's topic in - Build logs for subjects built 1851 - 1900
Thank you dear friend. There is no reason not to be confident The point is in patience. You can write with pencil by hand ? Thin lines exactly where you want? There is no reason not to repeat this with top of scalpel. There is one difference - you use pencil last 10-20-30-40-50 years, and just "start" to use scalpel. Believe me, if you write with scalpel next 10-20-30-40-50 years often as with pencile, you can make wonders. So, patience and exercise. Thanks for nice words Michael. Situation calmed down, new Hothead`s flat resolved, Princess have got her employment contract renewal, Old Lady ... things go where it has to go, in time schedule which no one can know - up and down, and up and down, down and up ... everything seems to be under control- 4,152 replies
-
- 7
-
-
- cutty sark
- tehnodidakta
- (and 1 more)
-
Sometimes only with fingers you can sense little deviations which need some action
-
Cutty Sark by NenadM
NenadM replied to NenadM's topic in - Build logs for subjects built 1851 - 1900
Thank you George. Just thinking about to get "roof" of skylight a bit darker Thank you Patrick. Showing skylight to my twin-brother and his wife yesterday, I get my first "woooaaaaah" Than you Piet. For now, everything is quite under control, adding temporary loosing sense for time of year ... Thank you very much for nice words. I saw somewhere very nice and very small compass, and I have some ideas to try ... obviously prolonging to make Her standing, because I do not want to make temporary stand, and woods I have I do not like to be final solution. On the other side, I added into her extra weight when I re-planked main deck, and that get me in the some kind of rebus ... Personally I like thin and elegant metal standing, but I am not sure this is applicable at all, considering bad quality of wood I used for keel (now covered with "coopering") and a lot gymnastics with Her that will come in future. It would be really bad to crack hull and keel somewhere in the middle of masting/rigging job- 4,152 replies
-
- 5
-
-
- cutty sark
- tehnodidakta
- (and 1 more)
-
I used different bases for sandpaper, mainly hand-made (hard base - wood, soft base - rubber and styrene ) with different sand paper granulation (60-400) and with different width of base with sandpaper over, glued or just attached. In some positions, only sandpaper with finger as base, and on another, little strips of sand paper caught with a top of medical pean. In my opinion, there is not only mechanical approach, you just have to feel curvatures at piece/surface you are working with - what it actually "requires". But, i am not a master, rather a kind of artist There are many most experienced and master builders here to answer your question This is only one possible approach
-
Cutty Sark by NenadM
NenadM replied to NenadM's topic in - Build logs for subjects built 1851 - 1900
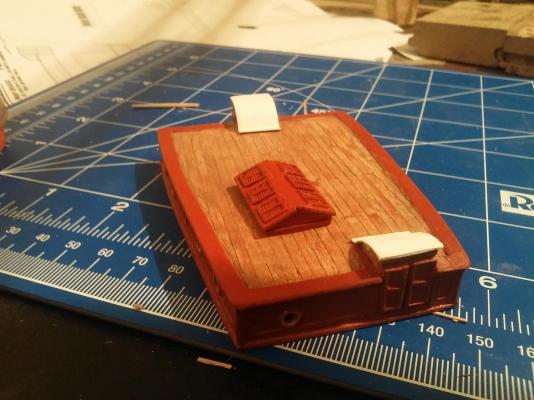
Skylight done. Spice flow again

- 4,152 replies
-
- 12
-
-
- cutty sark
- tehnodidakta
- (and 1 more)
-
Cutty Sark by NenadM
NenadM replied to NenadM's topic in - Build logs for subjects built 1851 - 1900
I have to turn myself in one of my windows, and dissapear when sneezing No way for anybody to find me. Even two days ...- 4,152 replies
-
- 7
-
-
- cutty sark
- tehnodidakta
- (and 1 more)
-
Helo! Where were you with this rules three years ago? Just joined to watch and learn Nenad
-
Cutty Sark by NenadM
NenadM replied to NenadM's topic in - Build logs for subjects built 1851 - 1900
What a nervous days ... I simply had no time to play and to try my new toy ... preparing me and my client for hard and money weight probate hearings legacy tomorrow between brothers not in good relation ... Hothead comes home for a weekend with ideas for new descent apartment to rent from new year ... Princess and all of us are nervous about her labor contract extension ... Old Lady has very bad blood testing results ... six months when Admiral passed away are this weekend ... a man is just not aware of what can withstand ... Maybe I`ll find some time for myself late in the evening ...- 4,152 replies
-
- 8
-
-
- cutty sark
- tehnodidakta
- (and 1 more)
-
Cutty Sark by NenadM
NenadM replied to NenadM's topic in - Build logs for subjects built 1851 - 1900
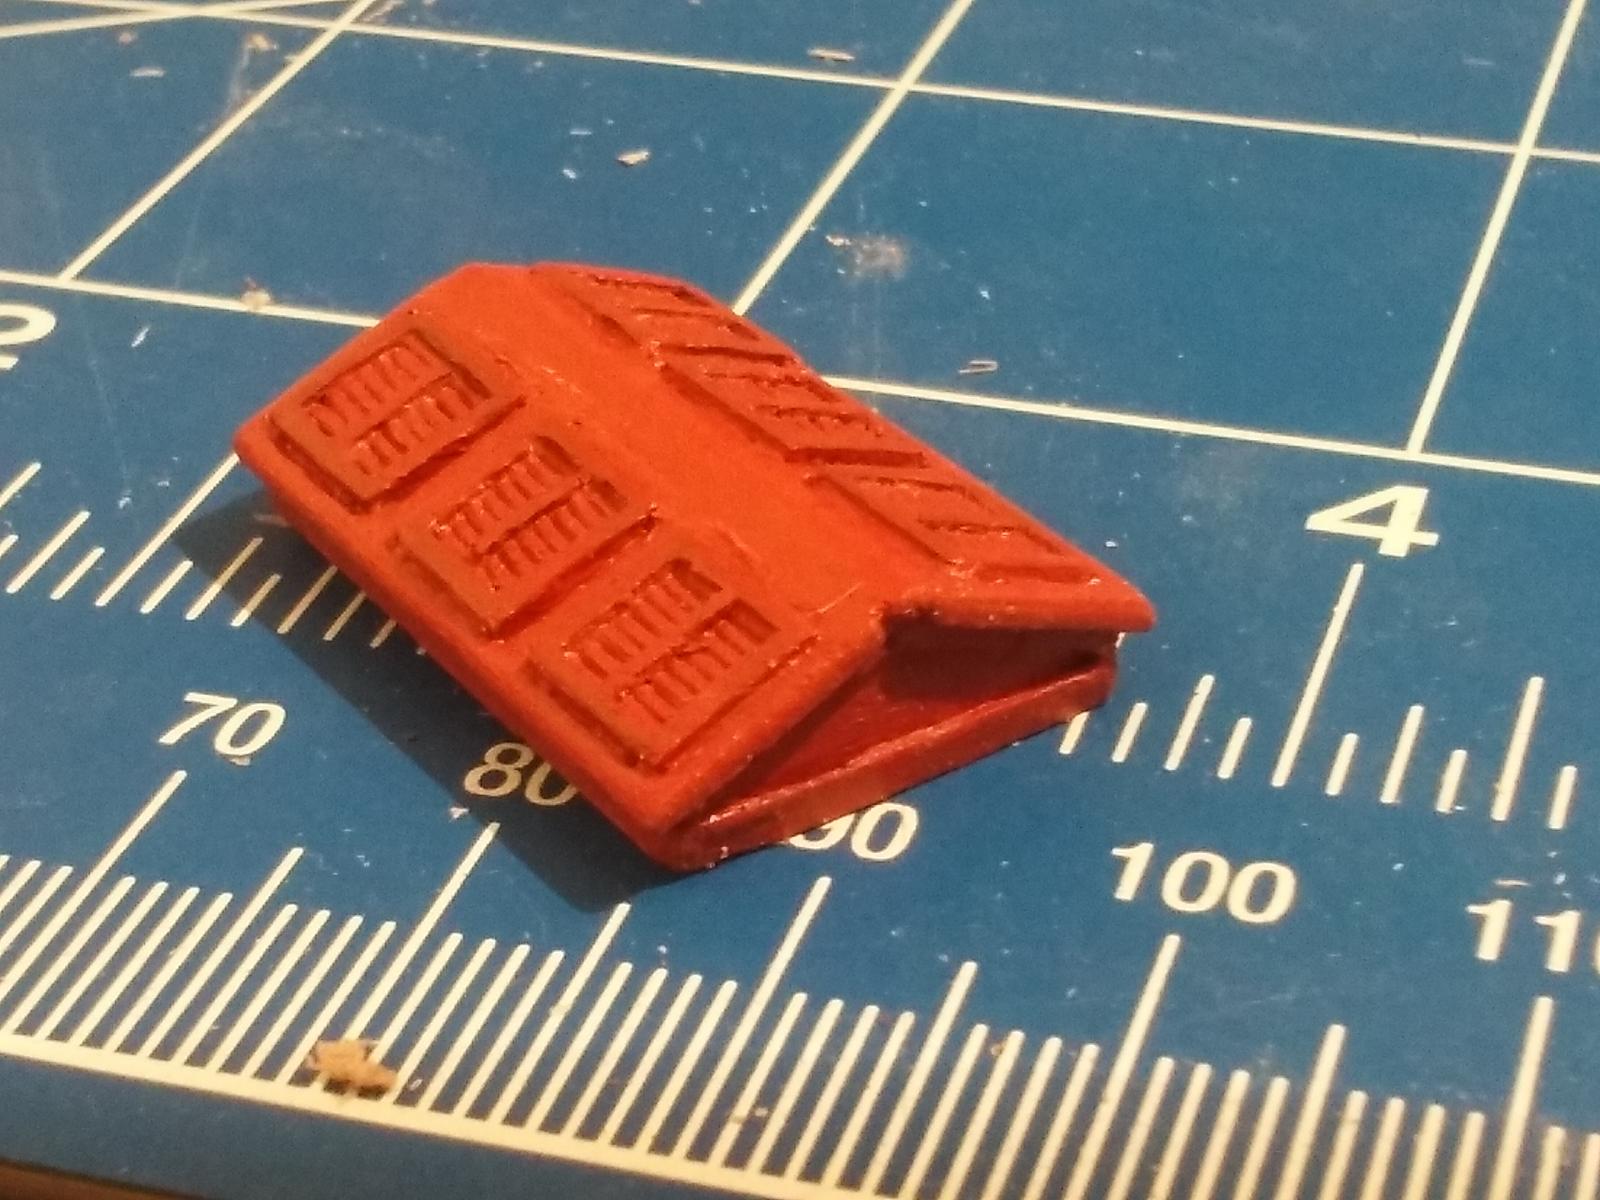
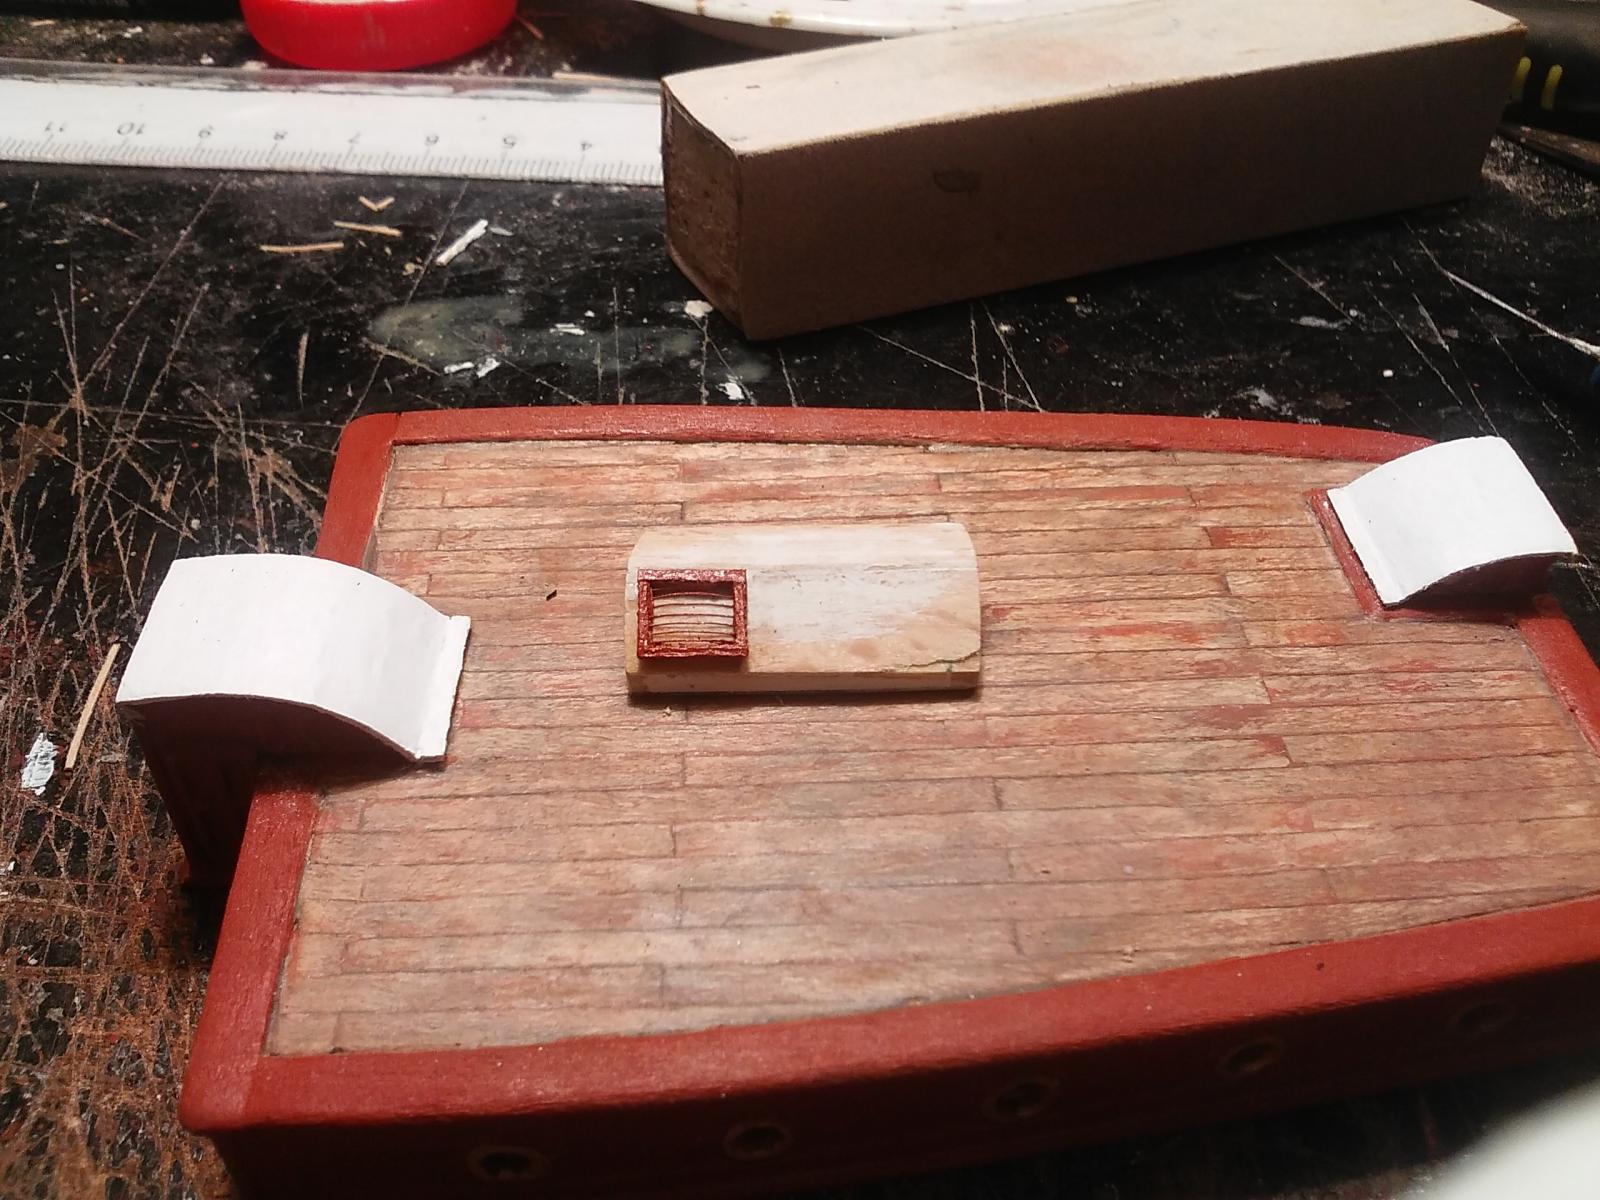
Thank you Piet. I`ll try to make surrounding surface thicker, making a new surface from veneer to overcome existing roof about 1 mm on each side, on which I`ll glue windows, and add some strips of veneer around windows and at the edge. That will allow me to round edges of surface a bit as on picture, and to level them visually to roof. I have already thinned whole windows construction to less than a 1 mm, and don`t dare to thin them more Little improvement to my shipyard I was borred from filling, repairing and repainting scarps cuts and holes on the workbench in front of me, find this for 5€ in toy store hidden between Revell models, and bye it
- 4,152 replies
-
- 9
-
-
- cutty sark
- tehnodidakta
- (and 1 more)
-
Cutty Sark by NenadM
NenadM replied to NenadM's topic in - Build logs for subjects built 1851 - 1900
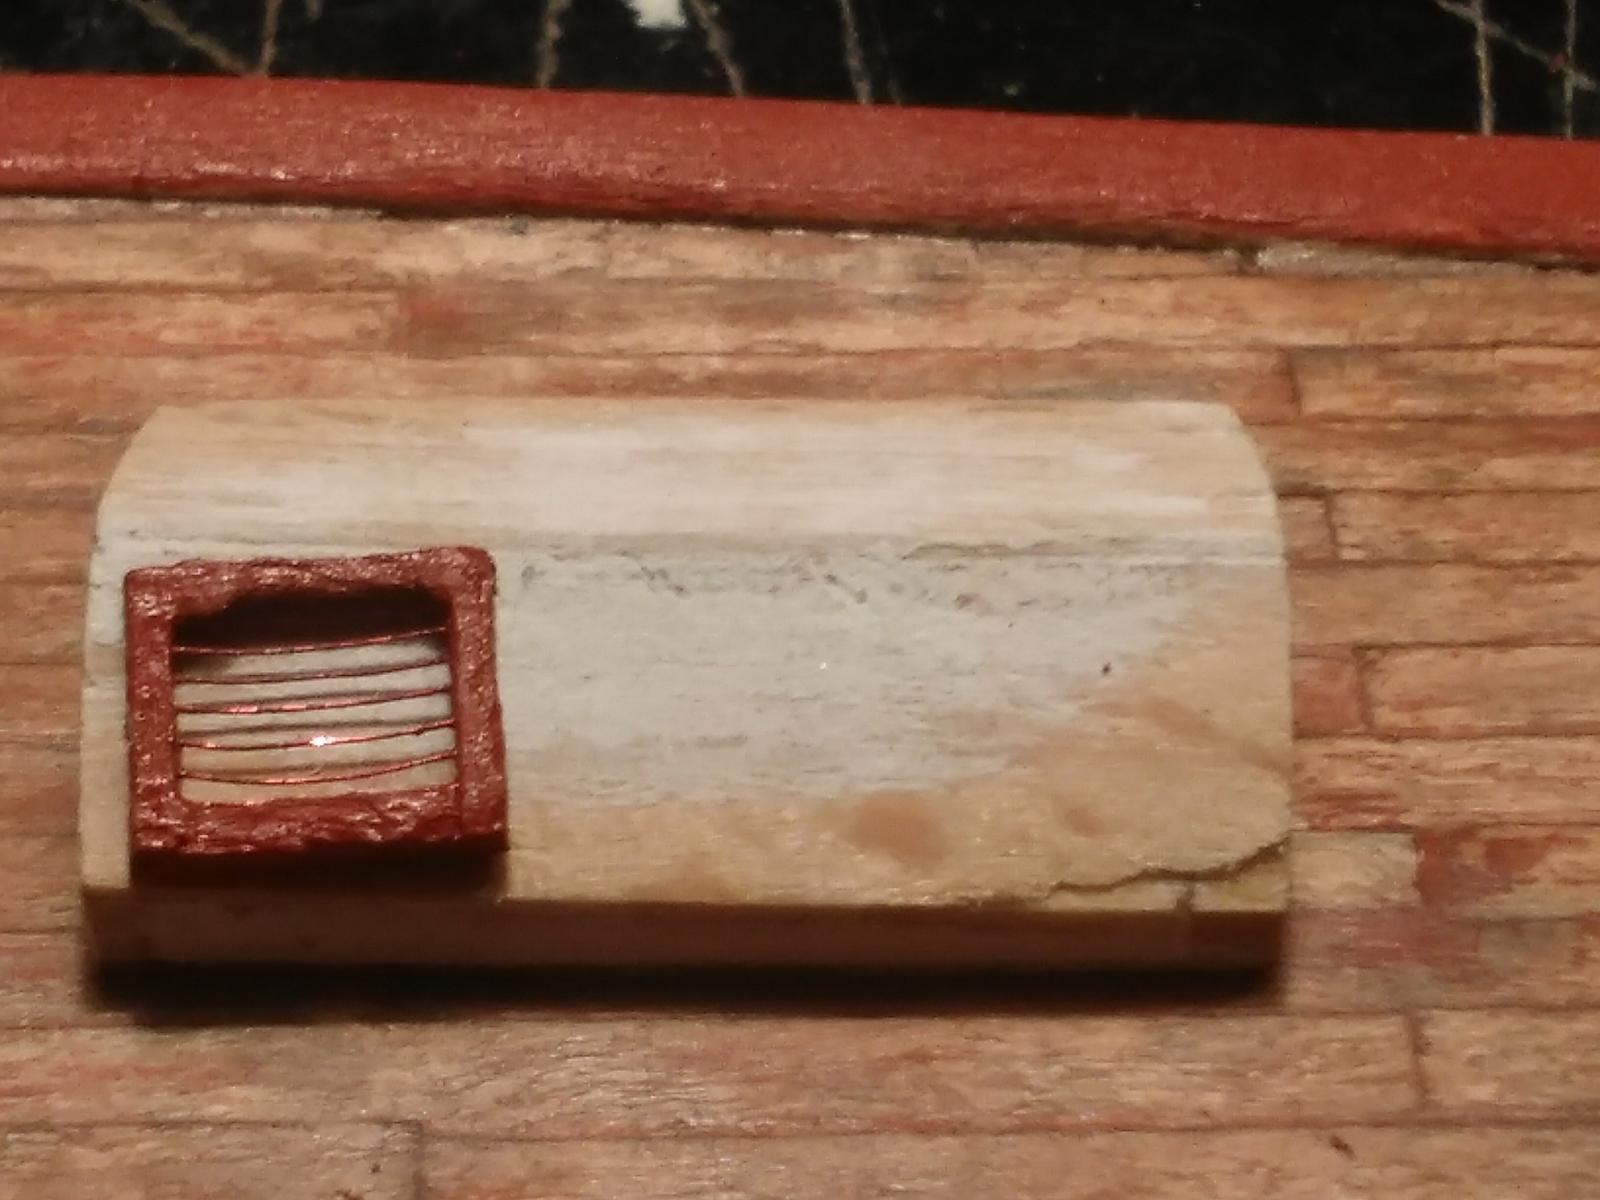
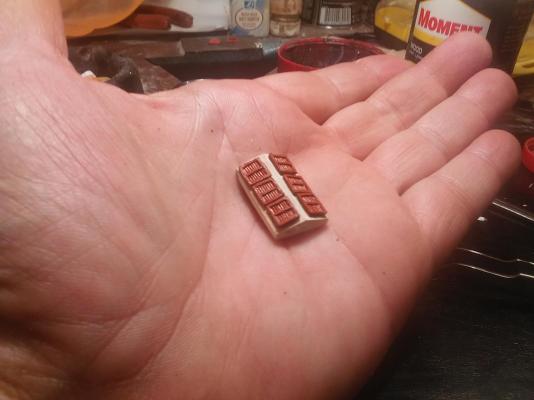
All six done Roof panel of skylight on photo in post above seems to be a bit massive, so windows surface is at almost at the same level as panel surface. Something to think about before glueing
- 4,152 replies
-
- 13
-
-
- cutty sark
- tehnodidakta
- (and 1 more)
-
My vote for acrylic. You can mix them. You can make them transparent if you want/need You can plasticize surface/piece with them if you need it. You can even use them as putty if you need/want for little gasps You can sand them. You can paint over them ( useful if you want really straight line when contrast is essential between two surfaces with different color. You can make little relief applying dot-by-dot. With only dots, you can even imitate little rivets on hull You can ... For large surfaces - attention - very fast drying, and must use adequate substance to slow it If you use hand brushes, particularity small ones, acrylic "eats" them, so often wash and clean brushes as good as you are able to Strongly suggest to test always before applying
-
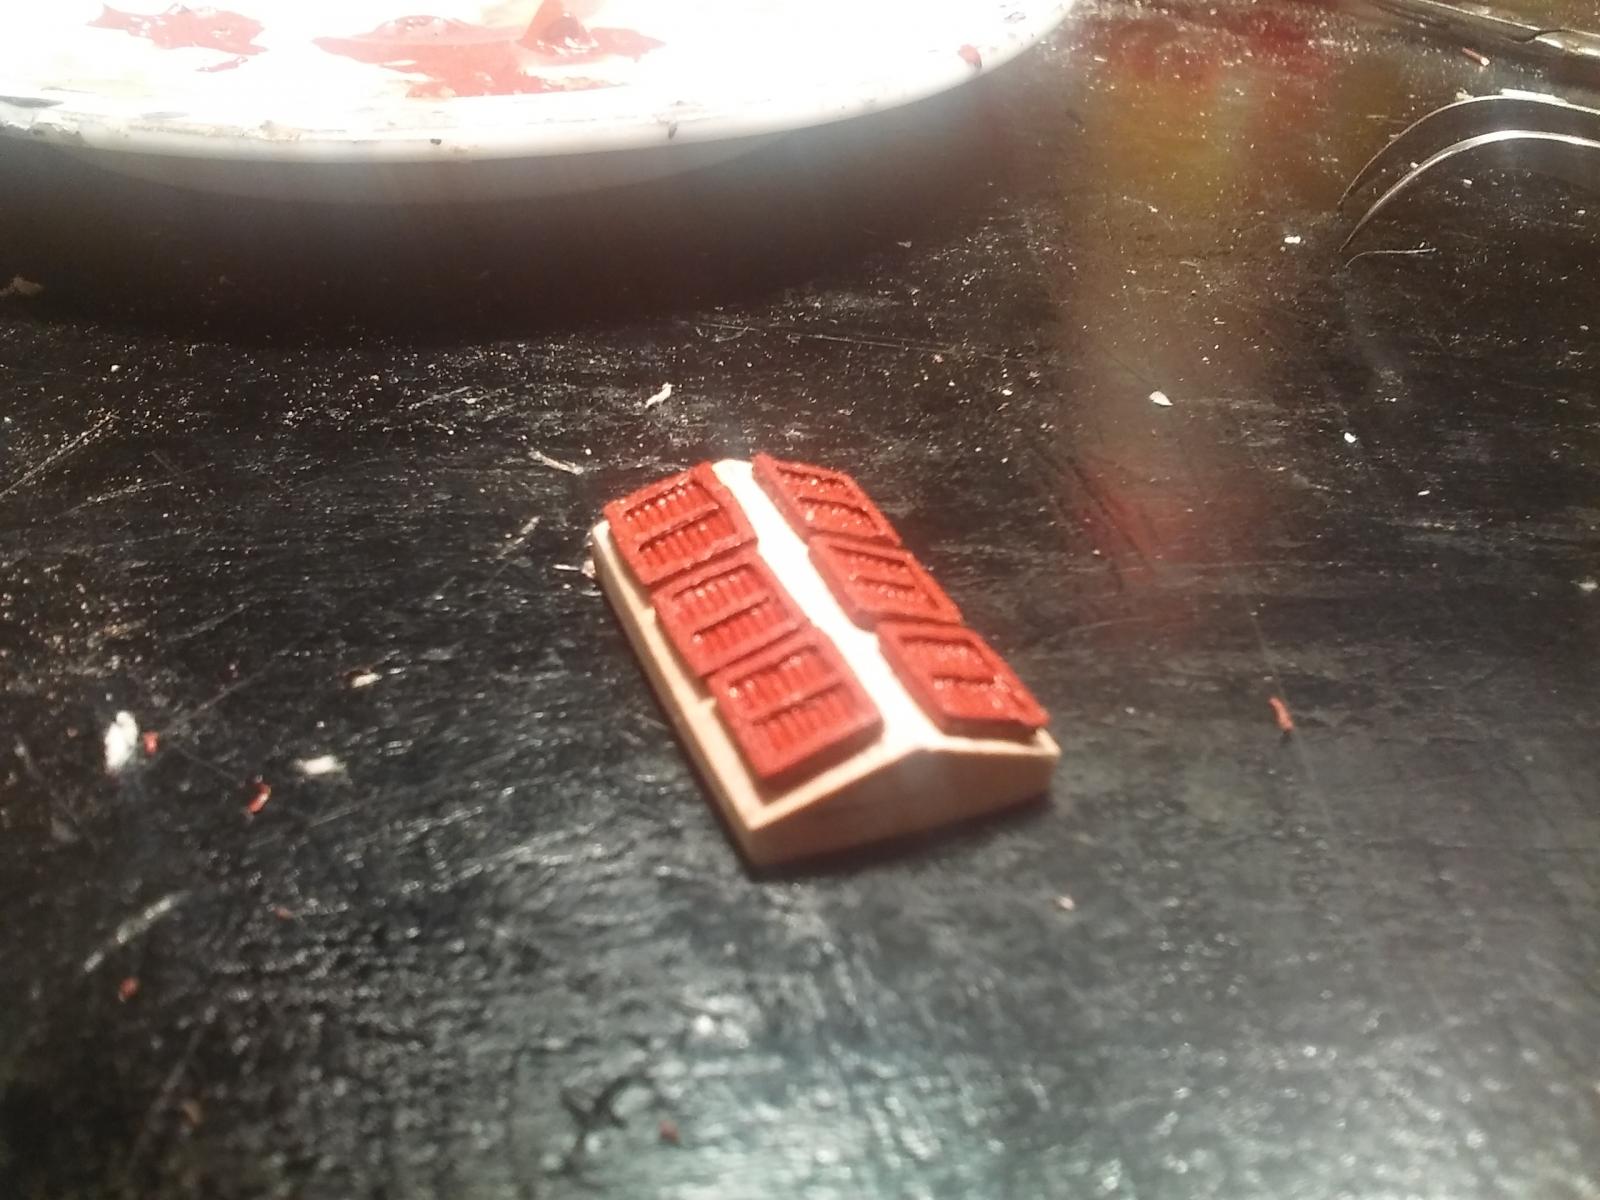
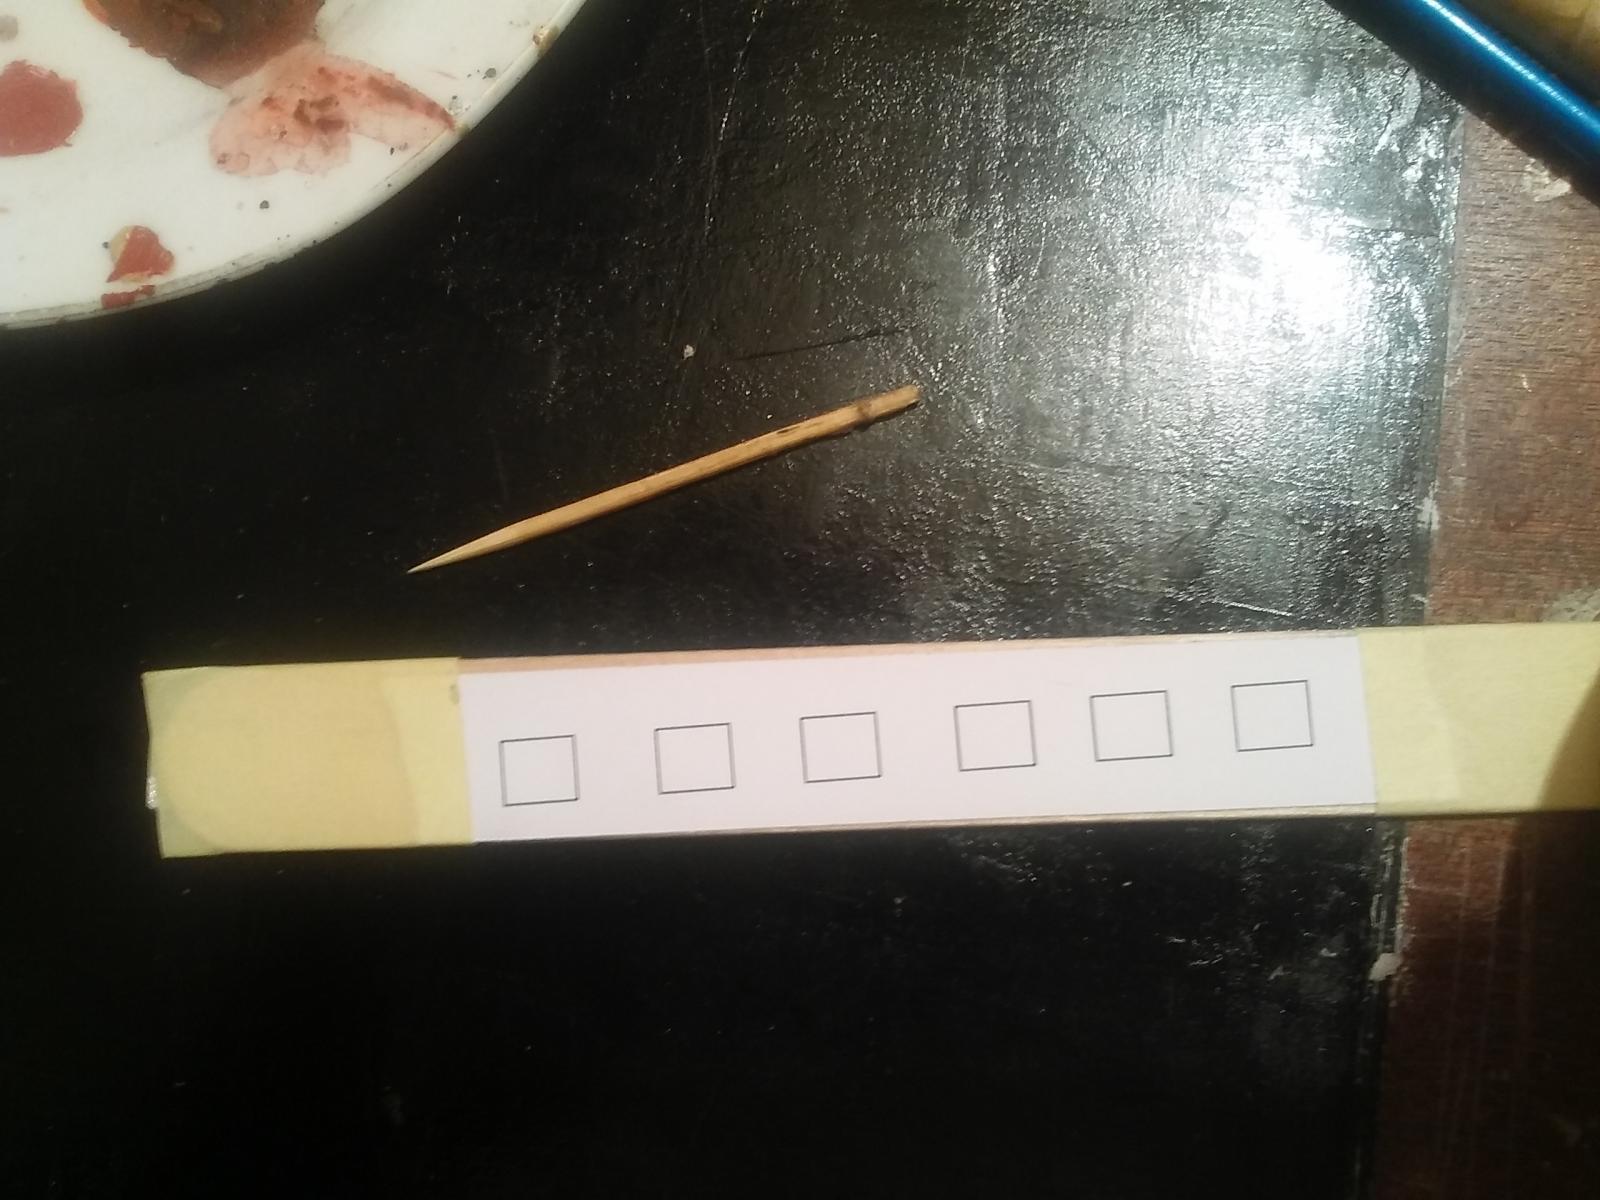
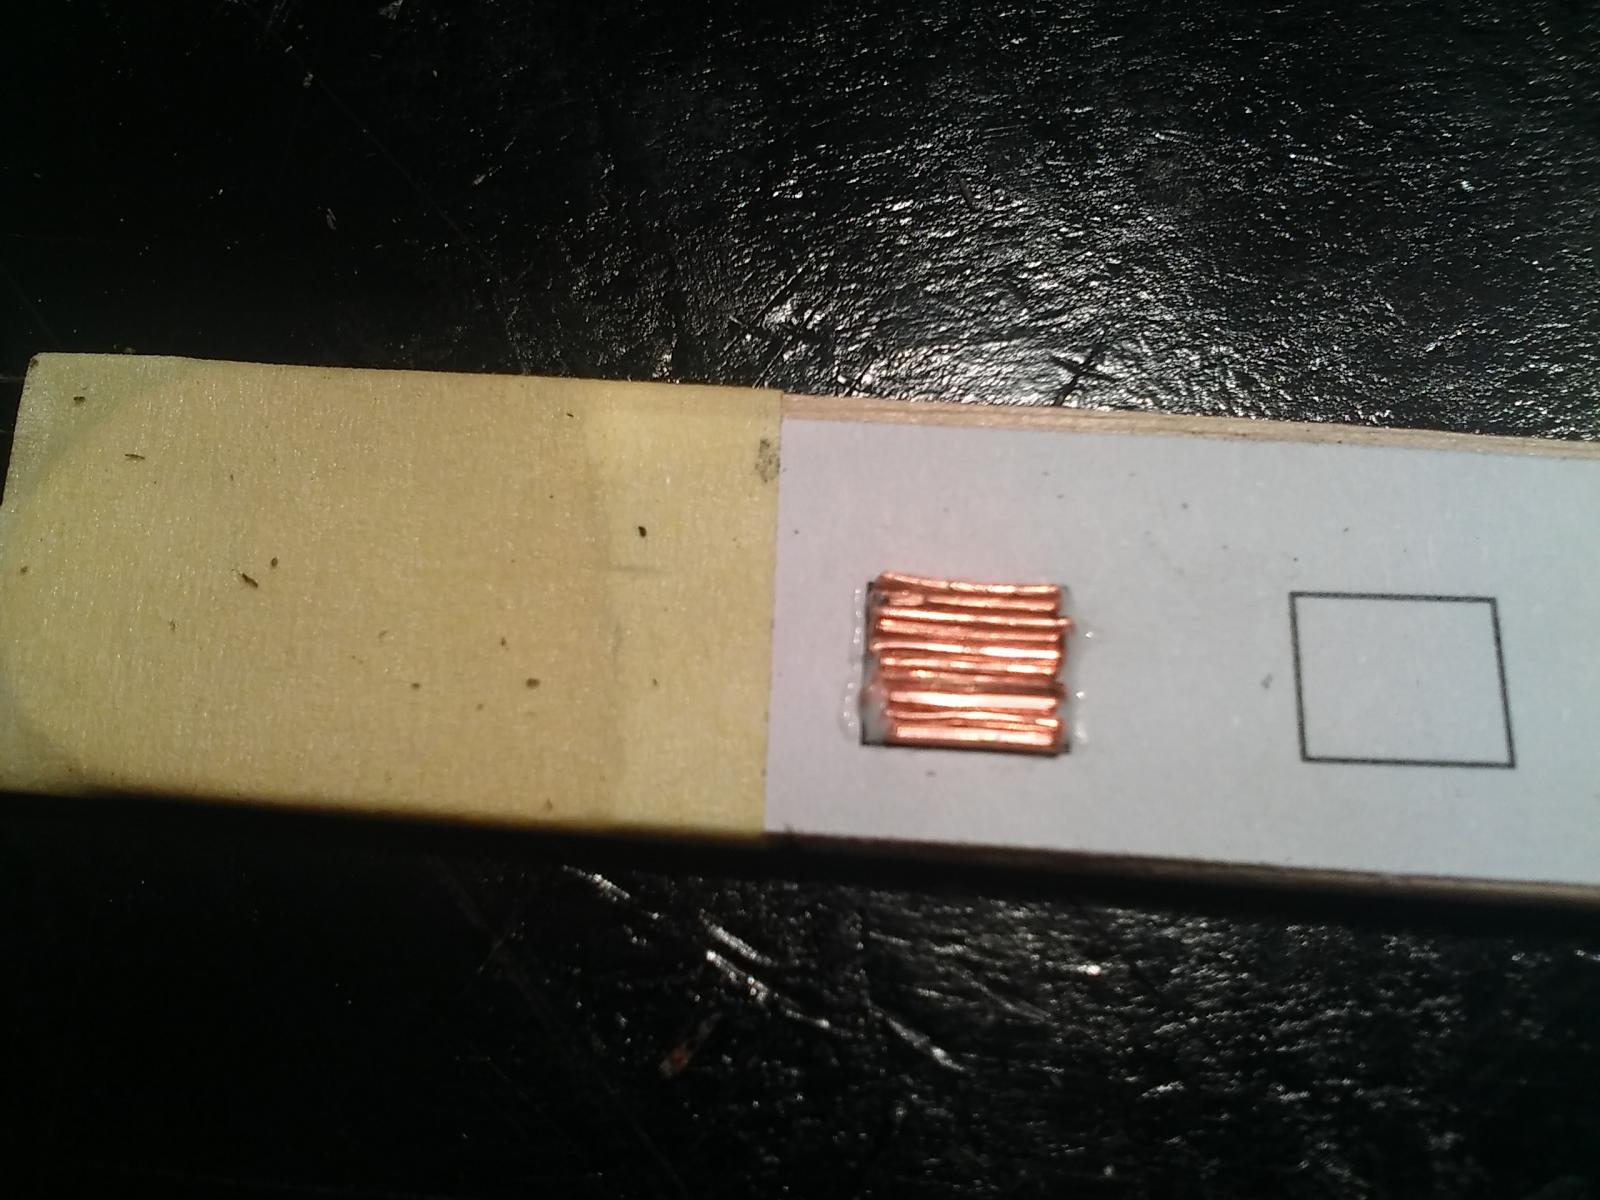
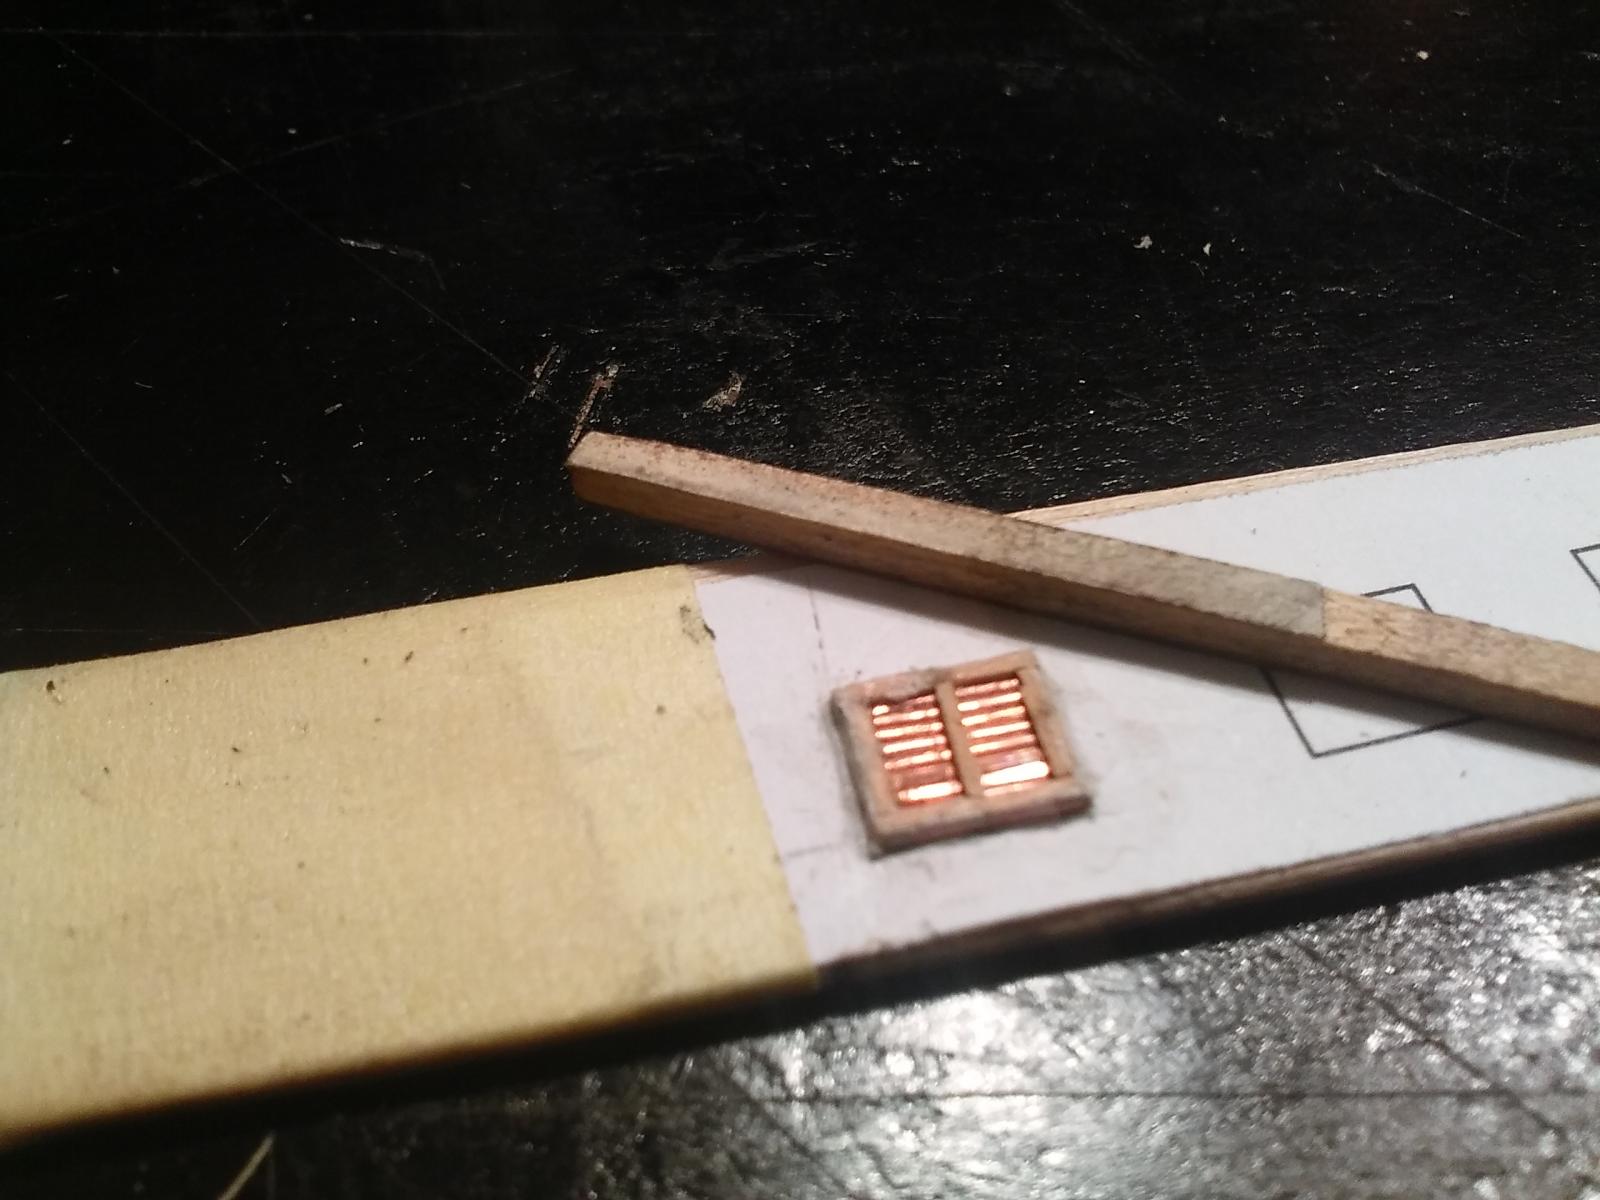
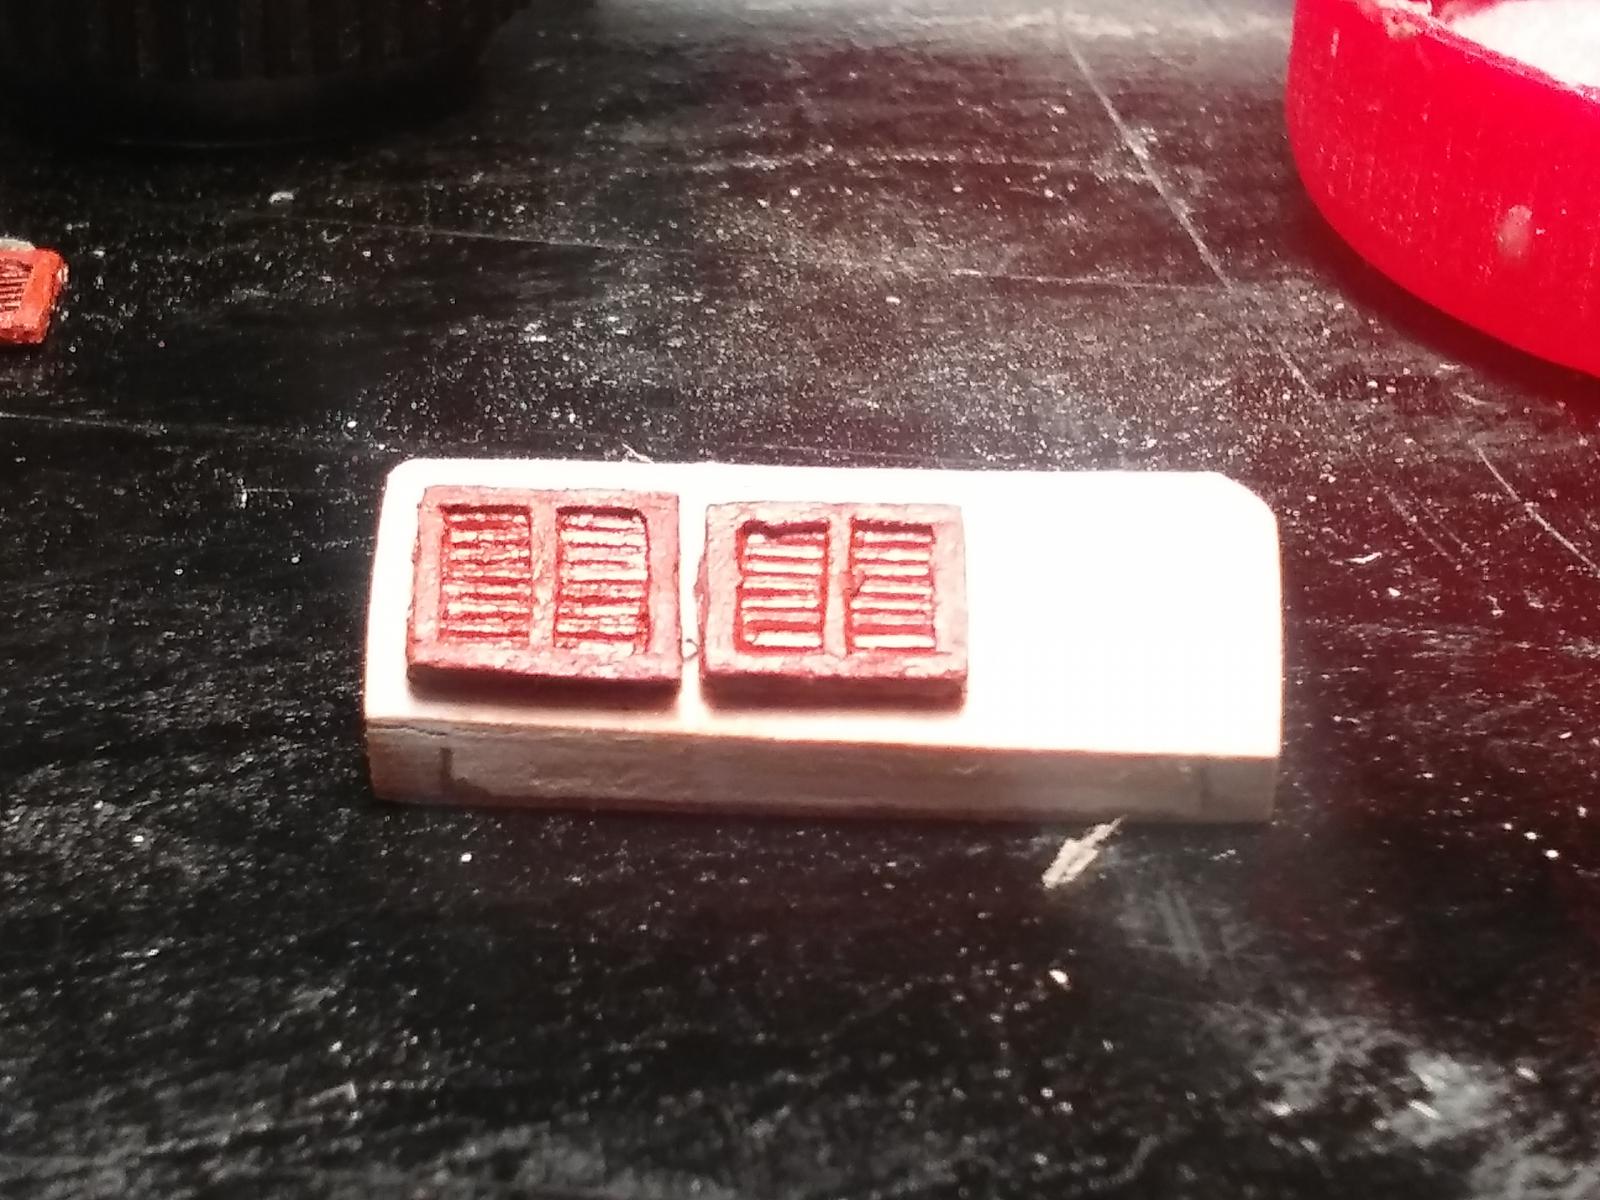
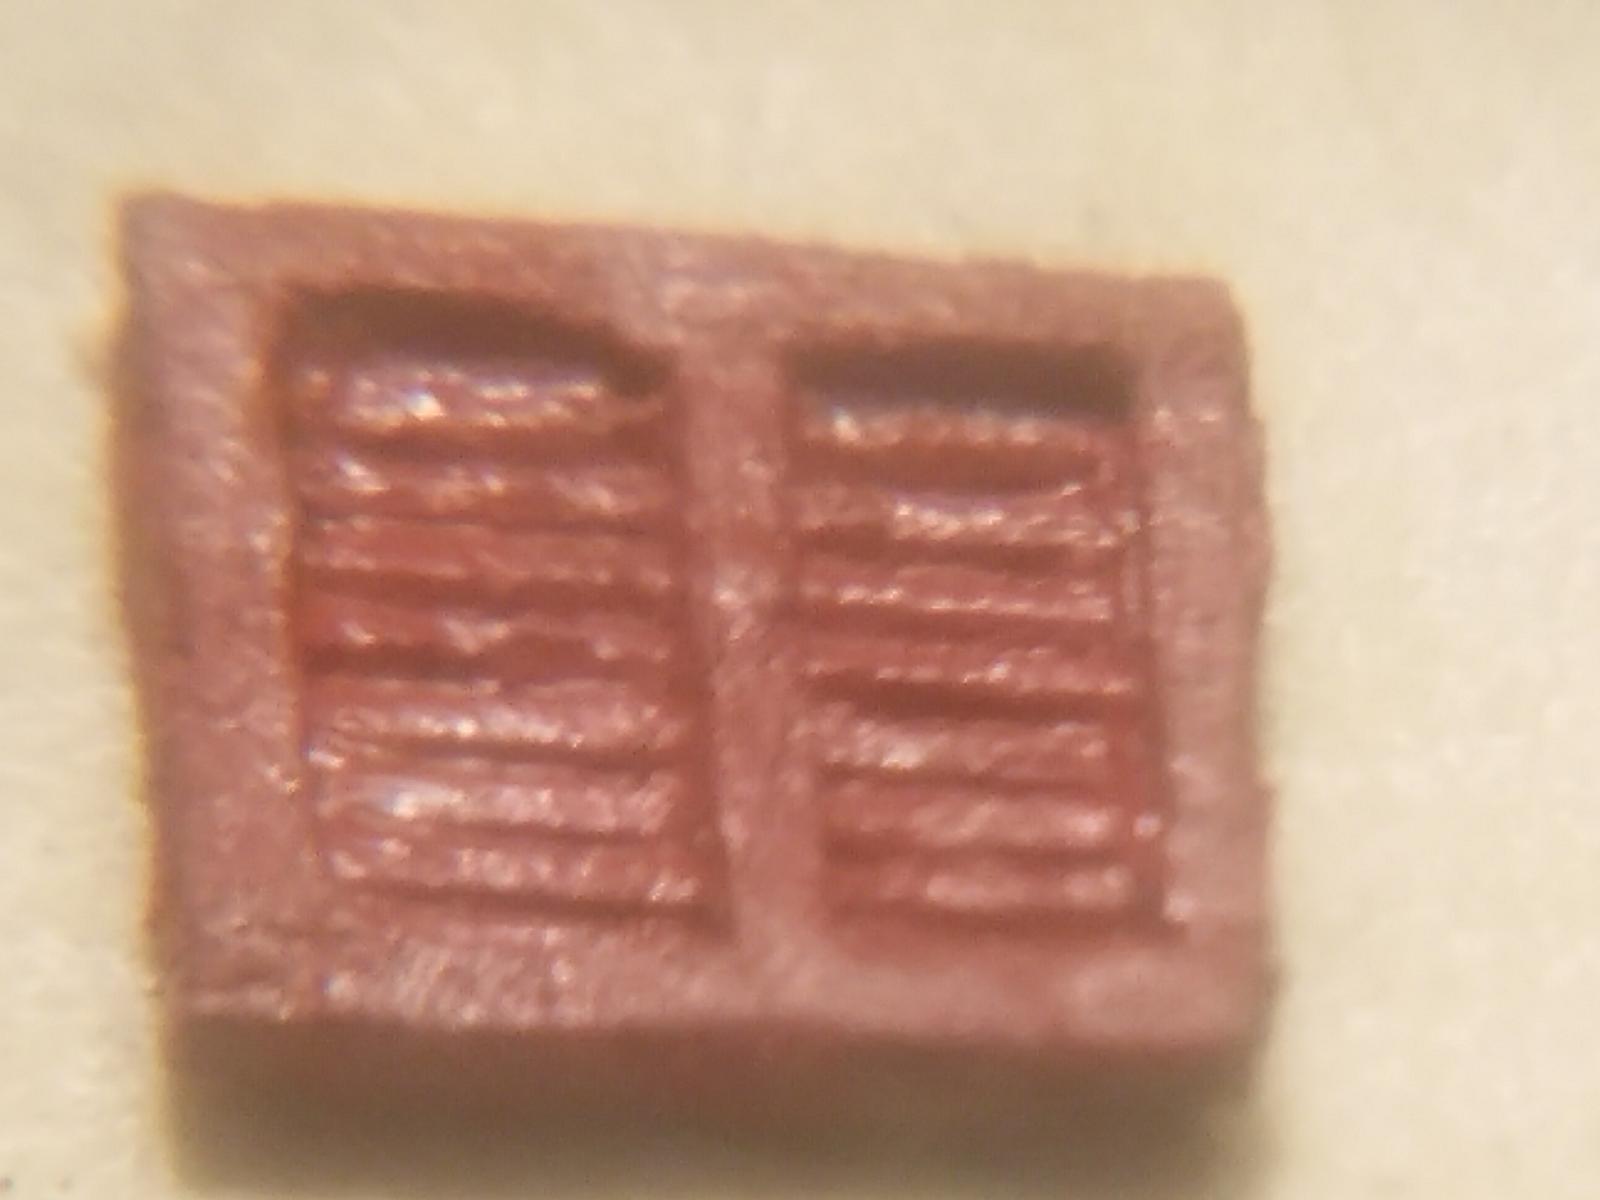
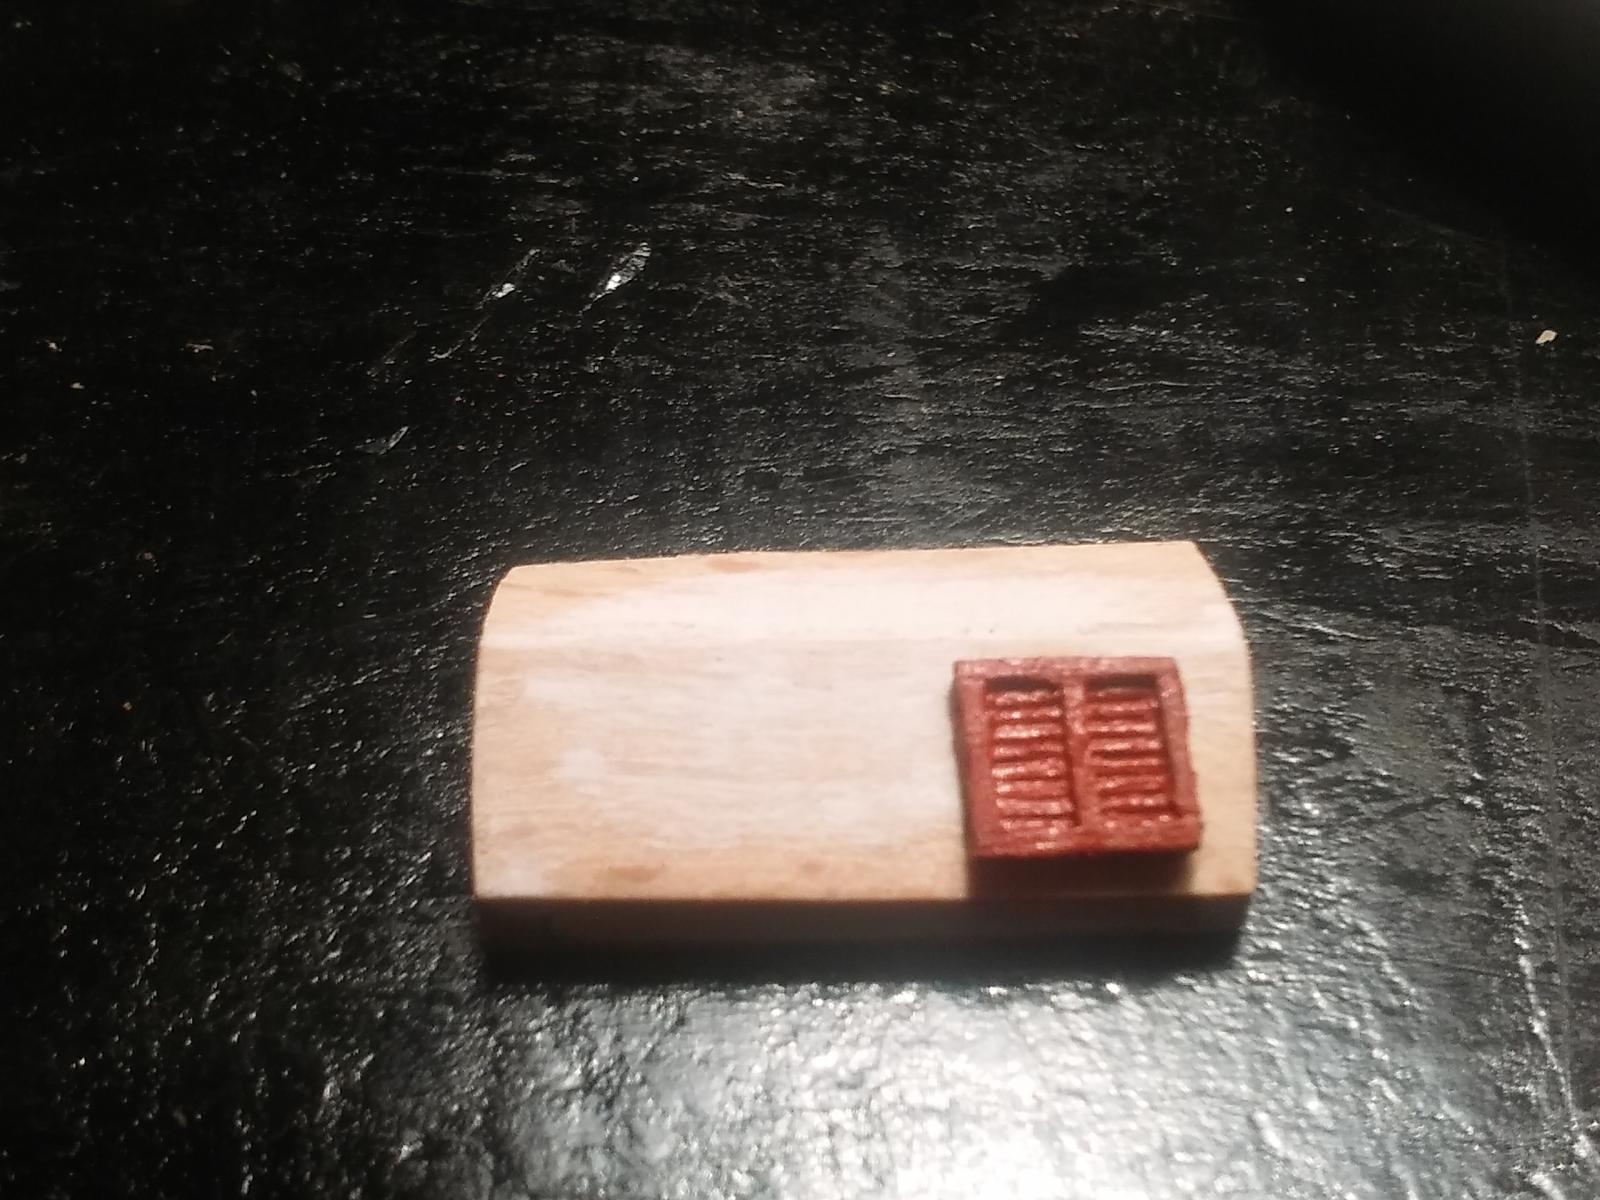
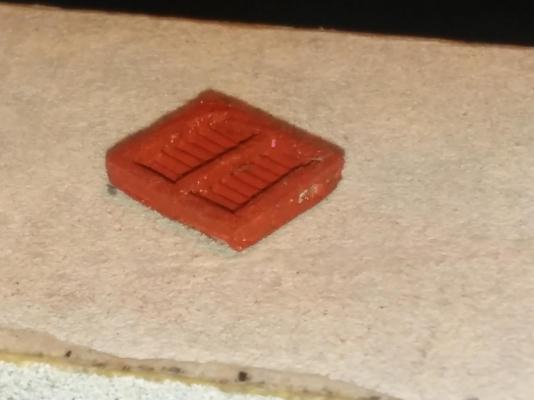
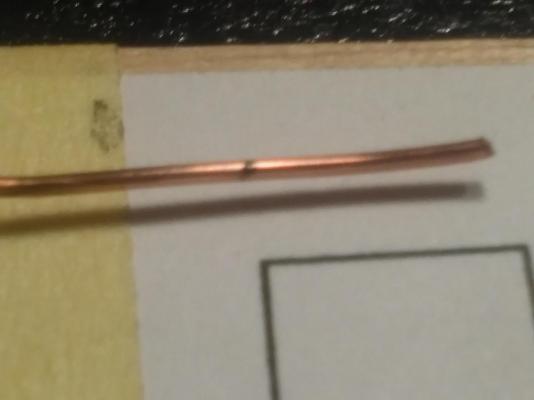
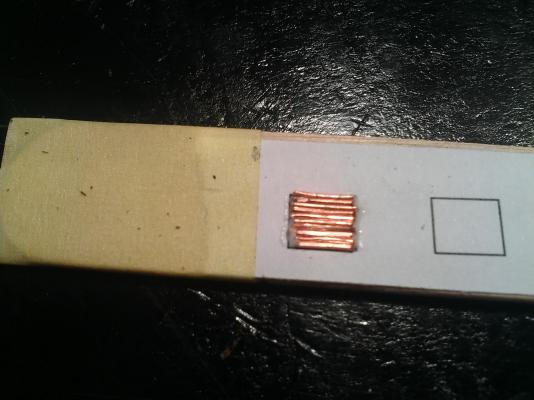
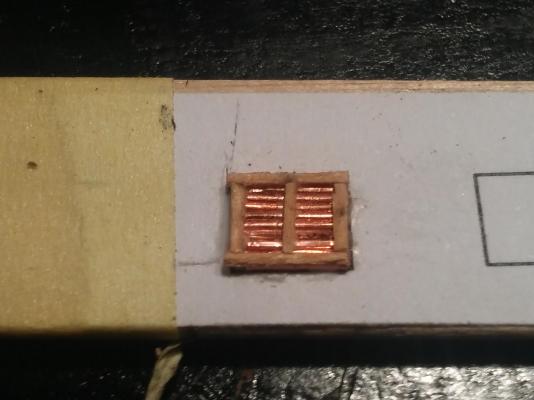
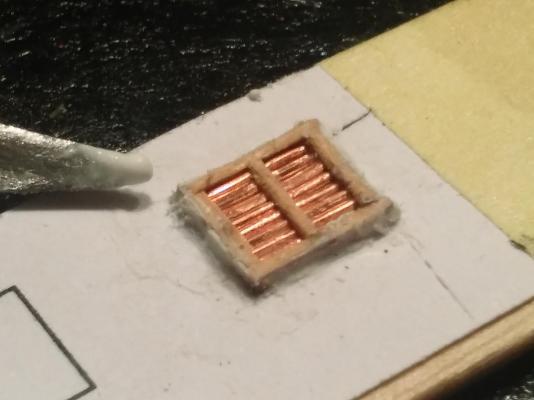
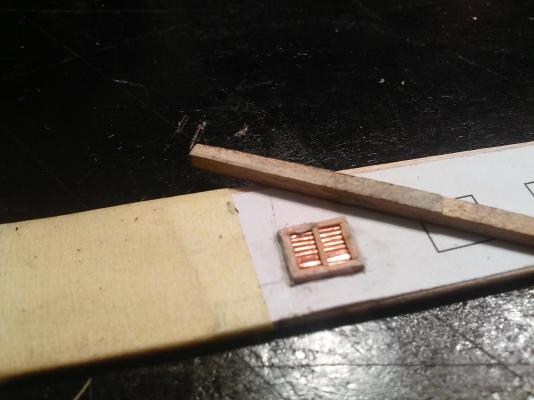
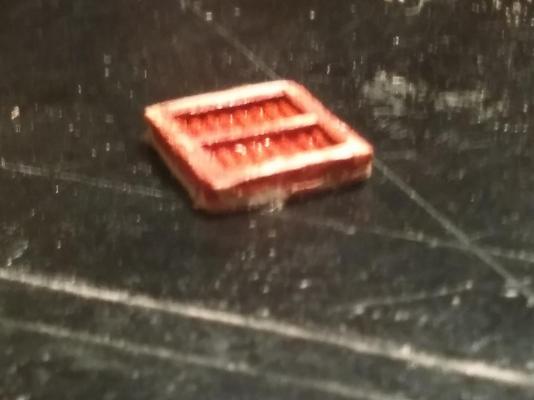
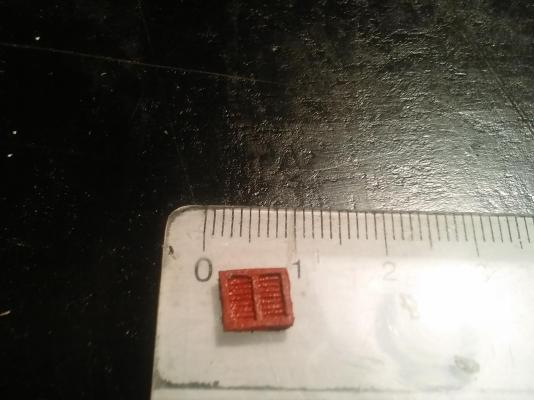
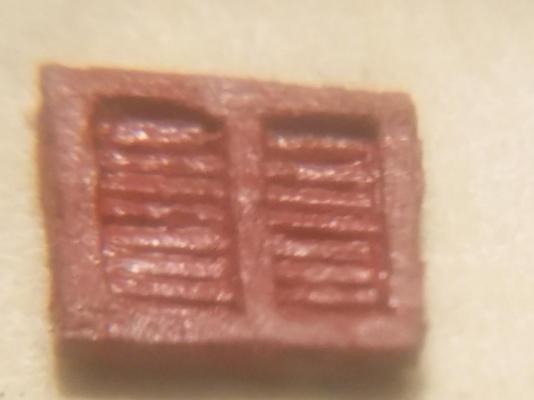
Cu TELEPHONY WIRE ( my favorite ) for WINDOWS SHUTTERS On the Cutty Sark`s aft deck house, there is a nice skylight with six nice windows ( three on each side) with nice doubled shutters. And I wanted that shutters badly !!! Even if it looks like shutters Problem was in scale ( cca 1:100), which means that every window is only 6 x 7 mm, and individual shutter is 6x3,5mm, which means that inside panel, considering cca 0,5 mm for frame is 5x2,5mm. Reaaaalllllllly small for my skills to make this from wood. I tried something with 0,1mm wire from old toy transformer winding I cannibalized long ago, and I was not satisfied with After two days of thinking, expected brain storm hit me, and I got satisfied results Drawing with hands, I just can not draw six completely equal squares 6x7mm with 0,1 mm felt pen. So I use Adobe Illustrator and drown 6 squares 6x7mm , cut arround and temporary fix strip with squares with self adhesive paper tape - only on edges to medical stick for throat overview. Important - paper under squares is not glued to surface ! On this picture you can see main tool for this operation - toothpick with sharpened and thinned top Carefully pointed cutting marks to wire with 0,5 mm felt pen, and cut with blade several pieces. If they twist a little, I straightened them. It does not matter if edges are not vertical Only with a bit of white glue on a same tom of sharpened toothpick, glue every piece of wire inside drawn square Thin veneer by the depth as much as you can, and cut slices as narrow as you can (cca 0,5 mm) and glue them on position as on picture above, also only with a bit of white glue on top of toothpick Add little drops of white glue around structure After glue dry, only with a top of blade, apply putty around to fill all gasps When putty dry, carefully sand excess of putty. I used a little rasp I made from 2x2mm strip with sandpaper I glued on two surfaces If it is necessary, repeat putty and sanding. When you are satisfied, cover with acrylic. And here is explanation of main idea. Paper can not hold pieces together. But, putty can. Also, considering that acrylic paint turn on to plastic, whole structure is plasticized, and firmly enough for manipulating After paint dry, carefully cut paper around window, and pull out window. Carefully sand edges, and thin whole structure a bit to get right surfaces Then apply final coat of acrylic And here is result


- 396 replies
-
- 10
-
-
- Idea
- Bright Idea
- (and 1 more)
-
Cutty Sark by NenadM
NenadM replied to NenadM's topic in - Build logs for subjects built 1851 - 1900
Thanks Nils and likes. Looking at picture of skylight ... thinking ... pathetic try ... how to make to look as this: brain-storm hit me, and here is final test If anybody is interested, step by step instructions are posted there http://modelshipworld.com/index.php/topic/4679-the-kit-bashers-guide-to-the-galaxy/#entry134594 And a new appearance of shipmodeling laws: More tricky detail, more times to repeat. Six windows on skylight to go


- 4,152 replies
-
- 14
-
-
- cutty sark
- tehnodidakta
- (and 1 more)
-
Cutty Sark by NenadM
NenadM replied to NenadM's topic in - Build logs for subjects built 1851 - 1900
Baby learn to walk- 4,152 replies
-
- 6
-
-
- cutty sark
- tehnodidakta
- (and 1 more)
-
Whatever you decide, Campbell`s plans and photos will be of great help. Do you plan to open build log ?
-
Hey Denis! Sweet doors! Can you resize it to 1/10 and send by working ants?
-
For REAL carpenter ants ... I had them in roof ... I used something known as "etiol" (active supstance is malathion) and all of them dissapeared after two days. Apply in all their paths, nest if you can find, and attacked wood pieces. It smelts very bad, strong and long, but it successful converted all carpenter ants to virtual friendly shipworking ants
-
Cutty Sark by NenadM
NenadM replied to NenadM's topic in - Build logs for subjects built 1851 - 1900
Thank you Denis for your kind and supporting words As I mentioned somewhere earlier in my log, here in MSW there is, and has to be a place, and a space for modelers as me, who are not masters of modeling. Point is to enjoy in working, and have a great creative time which is 100^100 times better than everyday evening nailing in front of TV. If somebody likes your work, that is nice. If don't , nice again. You love your work, and like sharing, and that counts. And if you like learning, even better when you get advice or tip or help to understand some point When I finish deck houses and standing, a lot (but not so many) tiny little details remains, and then comes - masting On that point really entertainment starts - masts yards and sails are essential part of look for every sail ship. Particularly clippers and tall ships as CS is/was I also can not wait this stage. Everything before is just preparing for masting and rigging- 4,152 replies
-
- 13
-
-
- cutty sark
- tehnodidakta
- (and 1 more)
-
I am here almost every day watching and following every progress, but - just had nothing clever to say. Rather follow in silence from shadow master's words and wisdom and learn
- 2,250 replies
-
- 3
-
-
- model shipways
- Charles W Morgan
- (and 1 more)
-
Cutty Sark by NenadM
NenadM replied to NenadM's topic in - Build logs for subjects built 1851 - 1900
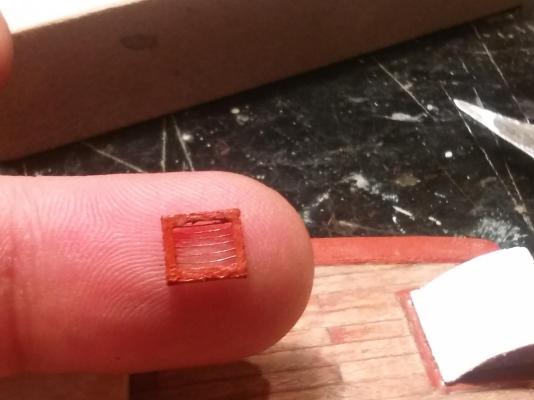
Playing and testing, part two: One of the six windows for skylight on aftdeck house Used very thin Cu wire from some canibalized (Mark's quote) traffo taken I can not remember where and when, on 0,5mm doubled veneer strips for frame

- 4,152 replies
-
- 15
-
-
- cutty sark
- tehnodidakta
- (and 1 more)