SJSoane
-
Posts
1,655 -
Joined
-
Last visited
Content Type
Profiles
Forums
Gallery
Events
Everything posted by SJSoane
-
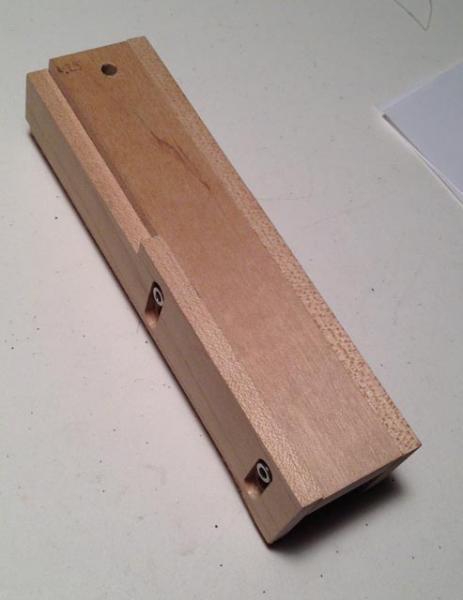
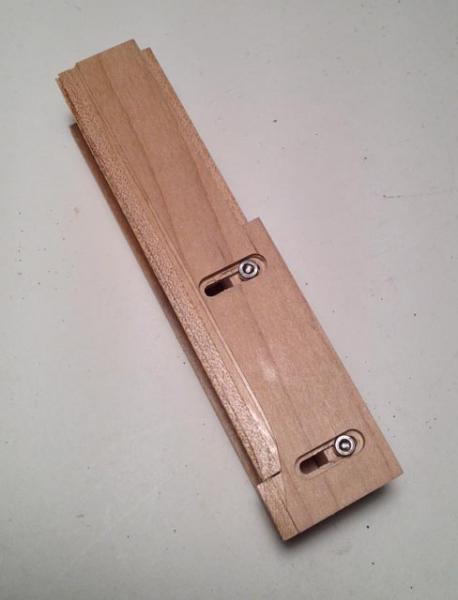
 Hi Jeff, these are exceptionally helpful comments. Would you mind posting a photo of the block you use for holding the wood down? I have discovered that keeping the leading edge of the wood flat on the table really helps stabilize things. Your block sounds like just the thing. It also helps, I have discovered, to cut off the strips on the side of the blade opposite the fence. But the trick is how to make a repeatable cut when the fence has to be moved in every time. I use a basic jig shown here, which clamps a stop in the right spot. Then just move the fence and wood up to the stop and cut again. It works, but it is fiddly for mounting and adjusting. I am thinking about better jig that can clamp onto the table, and have a sliding arm to accommodate different wides of cutoffs. And a little micro-adjuster in the end would allow perfect sneaking up the exact right dimension. Has anyone built something like this? Best wishes, Mark
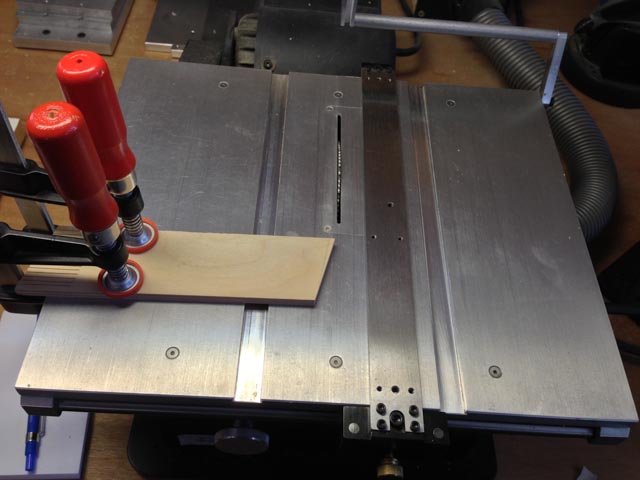
-
. But I am still not 'scared' and will react cautiously if something is not quite right. This is really important advice. I remember reading many years ago in Fine Woodworking Magazine some advice that I have always tried to heed. When the little birdie on your shoulder says "this doesn't feel right", always, always listen to it. Before I read that, the few times I got impatient and thought just this time I'll risk it, it will be OK, my intuition had turned out to be right. It wasn't OK. Nothing irreparable, but close. Mark
-
Michael, Words escape me. The metal work is exquisite, and it is exceptionally helpful to see how you did it. Are you using a small jeweler's torch? Mark
-
Hi Gaetan, As usual for your exceptional work, the photos look like real ships. You are an inspiration. Mark
-
ROYAL CAROLINE 1749 by Doris - 1:40 - CARD
SJSoane replied to DORIS's topic in - Build logs for subjects built 1501 - 1750
Hi Doris, I just came across your build. Fabulous work! I see in your pictures how you built this from card, but it looks exactly like a wooden model in the end. Exceptional craftsmanship. Mark- 883 replies
-
- 1
-

-
- royal caroline
- ship of the line
- (and 1 more)
-
Michael, Beautiful work! Can I borrow your scaled down shipwright? ;-) The metalwork is exquisite. Can you say a little more about how you are fabricating those pieces? Best wishes, Mark
-
Hi Toni, What gas are you using for the Little Torch? I have been contemplating getting a small torch like this, but have read different things about propane, acetylene, etc. Any advice? Also, I missed somewhere, what finish are you applying to the wood? the ship is looking great! Best wishes, Mark
-
Thanks, B.E. and thanks for your help on the backstay question I posted in the rigging forum. Mark
-
I forgot to ask, perhaps druxey. Are they the same size on all masts? I don't think I have seen anything specifying their sizes.
-
Remco, Nice, nice, nice. It is a pleasure to see your work! Mark
-
I second druxey's observation. Your work continues to inspire me. Mark
-
Backstays, Breast Backstays, and Running Backstays
SJSoane replied to SJSoane's topic in Masting, rigging and sails
Thanks, B.E., it does sound like the Lees' running backstay is the same as Steel's breast backstay with a tackle rather than deadeyes. I read somewhere that the tackle on a backstay was used to bring the upper masts rather more upright in certain points of sailing. I need to re-read Harlands' Seamanship in the Age of Sail to see if he has anything to say about that. Best wishes, Mark -
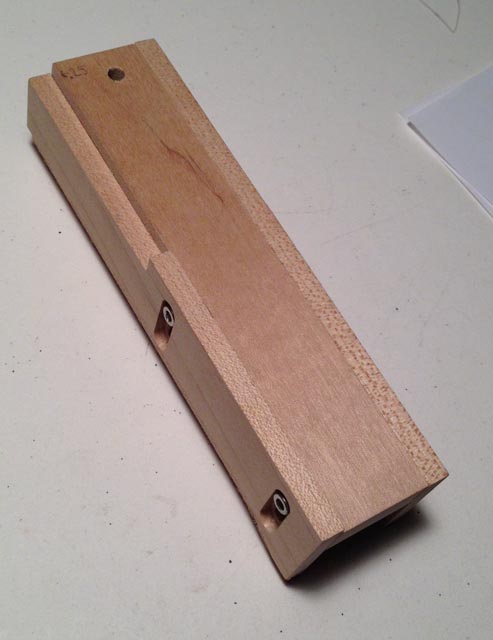
Cole. Definitely look up pushsticks and feather boards as well as cutting small pieces on a table saw with Google. There used to be a link to a great video from the old site on how to deal with small pieces. I am showing a pushstick that is now well used, to fit the higher Byrnes rip fence. It rides along the fence, and has an adjustable hook at the back that pulls the piece along the fence while your hand is safely up above. It also has sandpaper on the bottom edge, so it grips the wood all along its length. You can see it has been chewed up with a lot of close cuts. the hook is adjustable up and down for a precise fit with whatever thickness of wood you are cutting. Best wishes, Mark
-
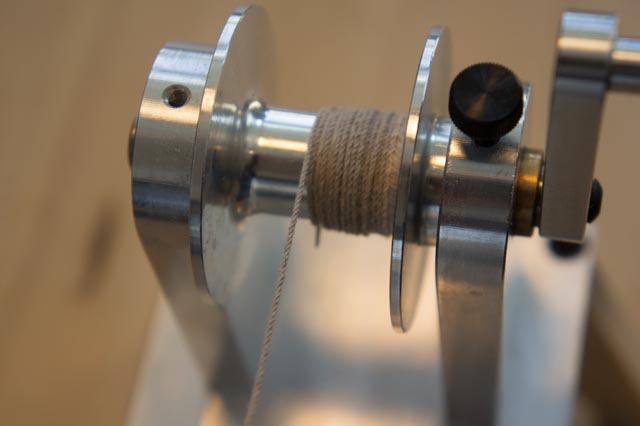
Hi Floyd, The die size makes a big difference and is a challenge to thread tightly. I have drilled a .025" and .035" to add to the .04" that came. I struggle to get all threads through when it is 6 or 9 threads. I tried supergluing the group in order to thread it all through, but that is larger than the combined threads by far. I suspect that I am still using too large a die opening, mainly because of the threading issue. Anyone have good ideas about how to thread it when it is tight? I haven't figured out why I would ever let go of the large knob. letting it spin a bit doesn't do anything for adjusting while making rope. Still much to learn! Best wishes, Mark
-
Thanks, Mark and Grant. My wife asked me if we would ever see this when the model is done. I explained that the modelmaker of the original 1760 Bellona model is likely looking over my shoulder, making sure I keep standards up... Guy, it is probably late for me at this point. I lofted all of the frames back in the 90s before I started using CAD. And the details are now half a lifetime of research based on dozens of sources. It would be interesting to see someone else's reconstruction of the ship. Are the drawings published anywhere? I am taking a break from the hull for a short time, while I sort out the Byrnes ropewalk and set up a rigging table based on Steel. I have posted a few questions over in Tools and in Rigging. I thought it better to keep these off the build log. Best wishes, Mark
-
In setting up a rigging table for my 1760 English 74 HMS Bellona, I came across some ambiguities regarding backstays for the topmasts. Can someone help me figure this out? Steel's tables for a 74 ca. 1800 list 3 pairs of standing backstays on the fore topmast set up with deadeyes, and also 1 pair of breast backstays set up with tackles. Lee's Masting and Rigging book confirms 3 pair of standing backstays for ca 1760, but says that there were no breast backstays between 1733 and 1839; the foremost backstay likely served as a breast backstay. Lees also refers to a running breast backstay set up with tackles, which sounds like Steel's breast backstays. Are Steel and Lees referring to the same thing with different names? Best wishes, Mark
-
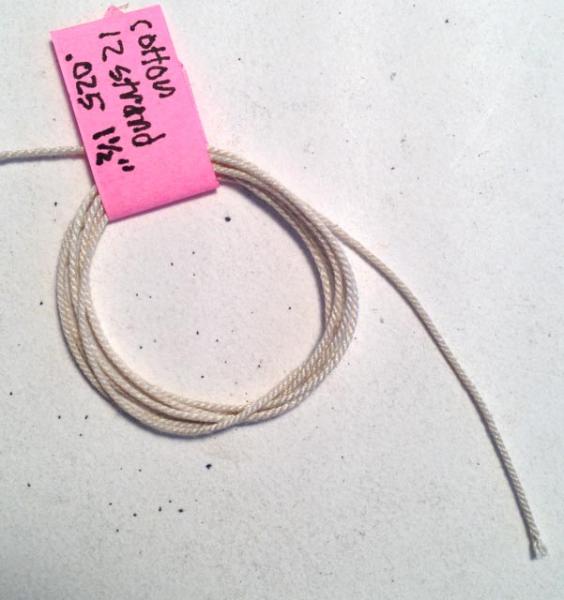
Hi everyone, More experiments. I am showing DMC cotton size 50 on the left, and linen on the right. The linen does not lay up nearly as well as the cotton. Interestingly, I made the linen with 3 strands on each supply bobbin right hand (CW on the ropewalk), and it looked better than another I made CWW which was moe uneven and lumpy. But when I tried CW on one strand on each bobbin, it failed altogether. The strands unwound, then wrapped up in strange ways and broke. I wonder why it works so much better with multiple strands. I don't see a pattern yet in how many strands make how large a rope. The linen is .010 off the spool; laid up 6 strands it makes a rope .28 in diameter; and laid up 9 strands it is .035. I need to do more experiments to see a pattern. Does someone know of a supplier of DMC egyptian cotton in the US in various sizes? Best wishes, Mark
-
Thanks, Michael and druxey, that was a steep learning curve. But the great thing is, I figured it out and learned some new skills along the way. I had to be even more patient than usual, and walk away when I got impatient. And I had to be more systematic than usual, while carefully adjusting each face. I made a few sanding jigs that helped; I'll try to post those later. I also learned that I have to get even more tools....a few more files to expand my range of coarseness, and Michael, I look forward to seeing the watchmaker tweezers. Those could really come in handy! Mark
-
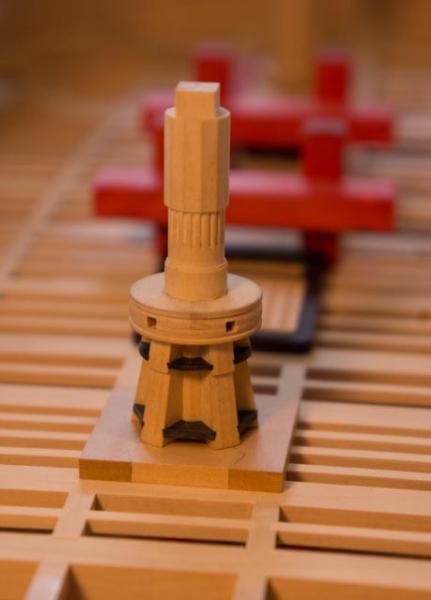
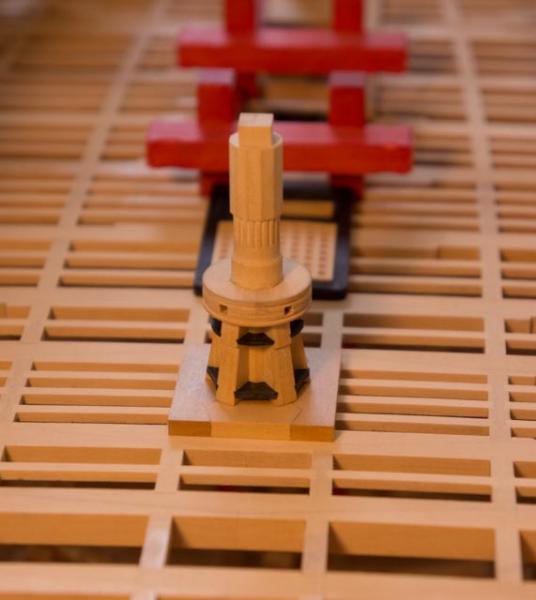
Hi everyone, Here is the capstan, with lower chocks. Done. Mark
-
Ed, Looking at these lovely photos again reminds me of an issue that is becoming more important for me as I begin to close up a deck. How do you keep a lower deck clean, when you are sanding an upper deck or otherwise making sawdust? Did you cover the lower deck with something? And do you have a small vacuum of some kind, for cleaning up? I remember in the pre-crash days of a comment you made about turning the model upside down every once in a while... Mark
-
Remco, that was a fabulous description. It is daunting to think how many more of those there are to make....;-) Mark
- 1,215 replies
-
- 1
-
-
- sloop
- kingfisher
- (and 1 more)
-
Gary, it is great to see these details again! Mark
-
Hi Remco, Could you explain a little more how you did the splice and stropping? Mark
-
ancre Le Fleuron 1729 by rekon54 - 1:24
SJSoane replied to rekon54's topic in - Build logs for subjects built 1501 - 1750
How nice to see this. I agree with Greg. The metalwork and wood joinery are exceptional. Mark