


mobbsie
-
Posts
1,493 -
Joined
-
Last visited
Content Type
Profiles
Forums
Gallery
Events
Posts posted by mobbsie
-
-
Hi Guys,
Thanks all for your comments and likes.
Nigel, The masts were indeed lowered and the winches could have been used for that purpose, it does make sense, it wasn't only the Thames these barges sailed up, they frequently used to sail in the Norfolk Broads for all manner of cargoes, those bridges are pretty low as well. As well as the masts being lowered the Bowsprit could be raised for berthing if space was short, all pretty resourceful really.
John, You are right about the life ring grab ropes, I hadn't done my research and the plastic ropes looked awful, I could have done the same as Popeye and put real ropes on but I wasn't thinking right at the time.
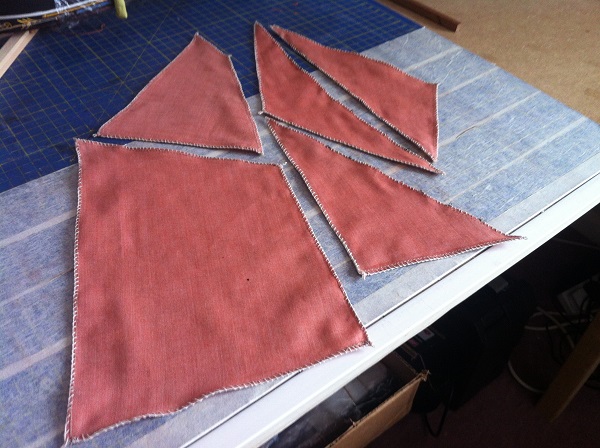
Patrick, I didn't answer your question about the sails mate, I marked and cut out the sails and glued the hems, my Admiral then used the sewing machine to sew the hems in. I went round the outer edge sewing the rope on, I just wish I'd used a darker rope, still always a next time.
Be Good
mobbsie
-
-
Thanks Gents,
The Winch, I haven't gone into the research for this boat too much but I would have thought the winch would have been used for helping to furl the main sail which was quite a heavy construction, the crew being very scarce would have needed some sort of assistance, there may also have been a small crane fixed up for loading some cargoes.
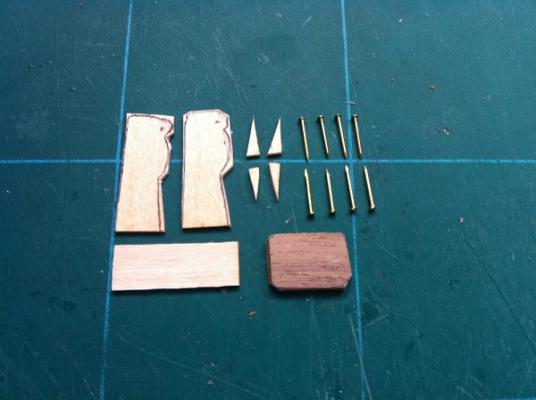
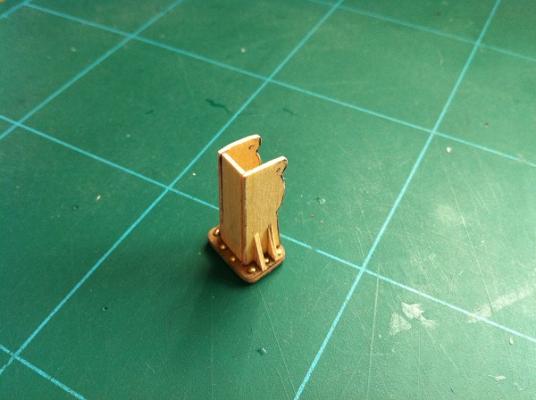
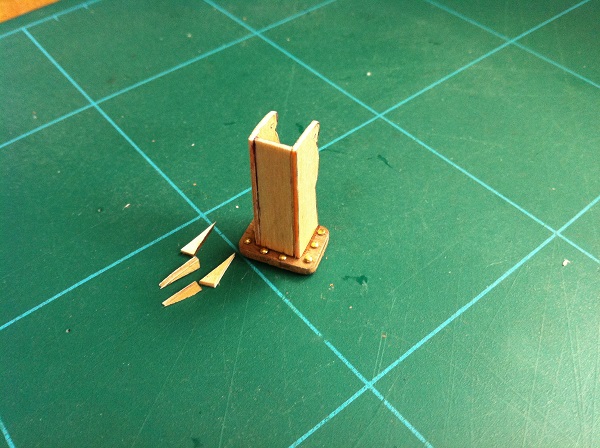
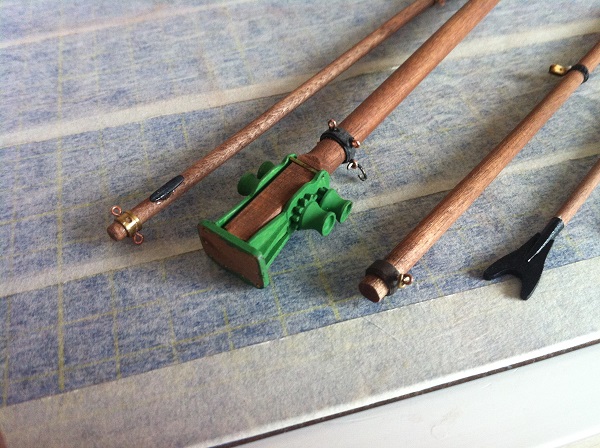
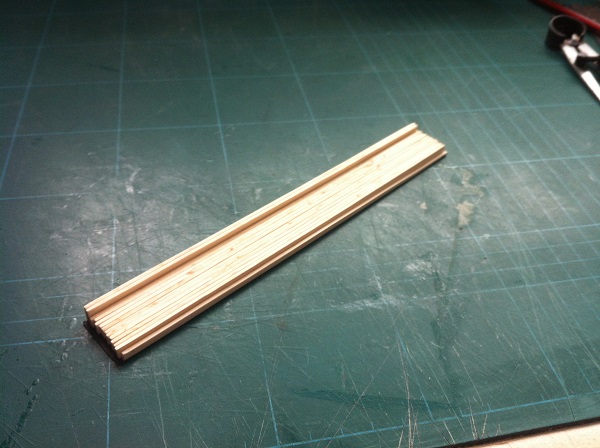
Patrick, The mast base, I have knocked up a quick base just to show the parts used and how their put together, all from 1mm and 3mm ply with 8 round head pins, it took me longer to download and resize the pictures than to make it.
All the parts
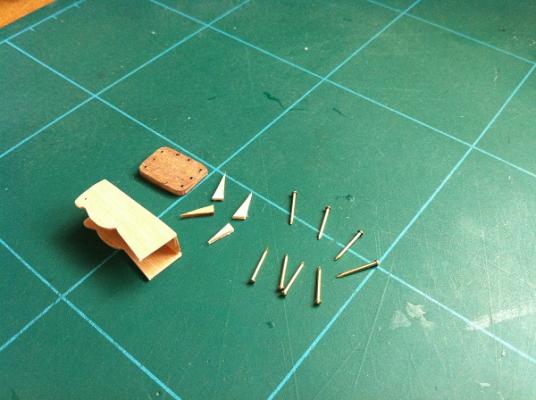
Body of the base glued up
The base with pins in
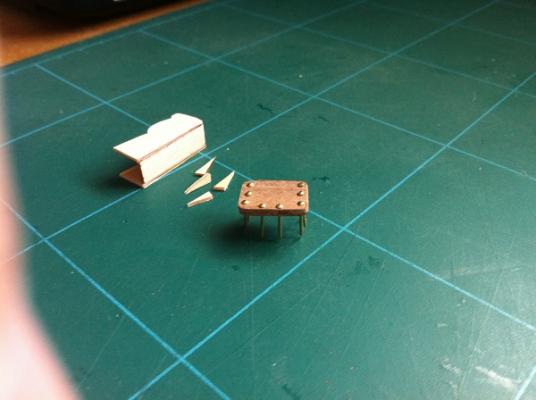
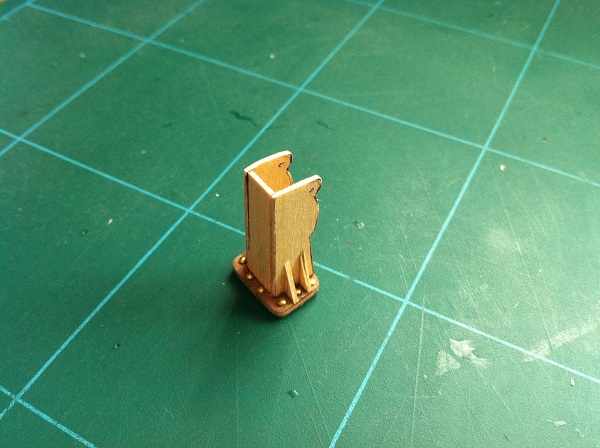
Body and base together
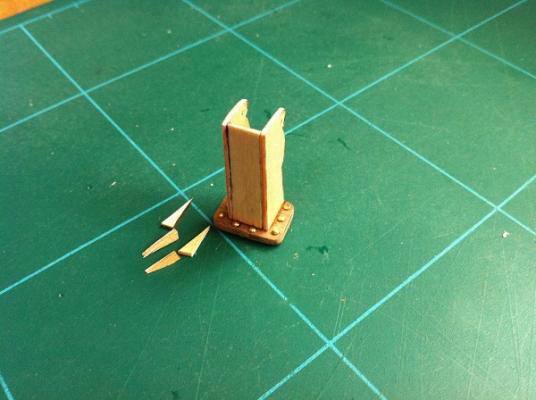
Just the braces to fit
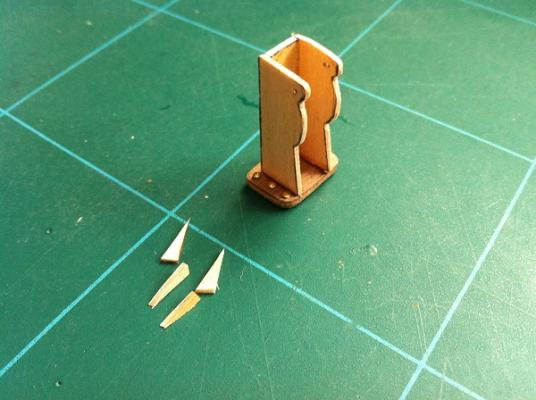
The finished item, the winch drums were taken from the old base
Hope that helps mate
Be Good
mobbsie
-
Hi Guys,
It's update time again, though not too much to see really.
Progress has been made with a full set of sails made up, this set is much better than the originals.
So with the sails made up we need something to hang them from. All the news parts were made up and then I hit a problem in that the base housing for the Main mast would not under any circumstances release from the old mast, a new base had to be made up.
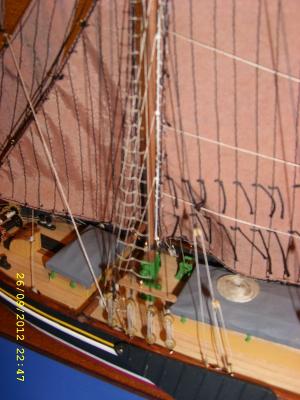
All the blocks and rigging were placed and the Spanker fitted before being put on the boat, this has made life a whole lot easier. All that remained was for the shrouds / stays to be positioned.
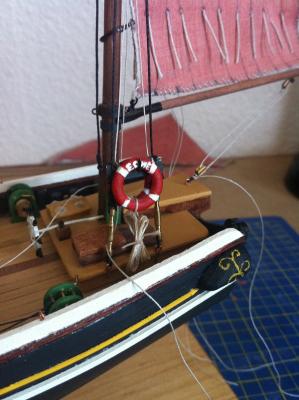
There has been a lot of discussion lately on other logs regarding Life rings, Billings do life rings with a terrible plastic grab rope, I just cut the grab rope away and left it at that, without doing any research into the development of the life ring I'm sure grab ropes were introduced much later.
So some pictures, ( not many mind ).
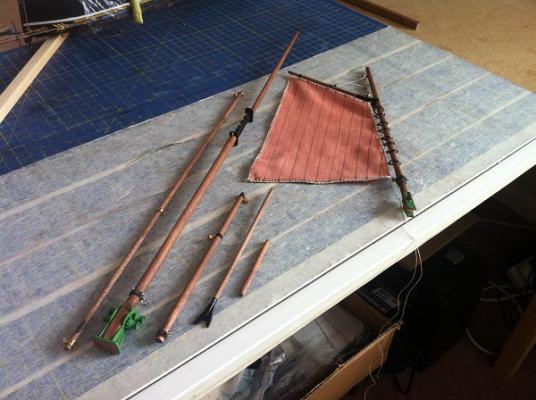
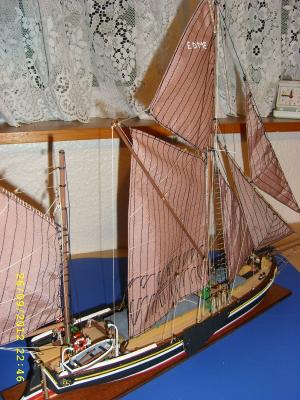
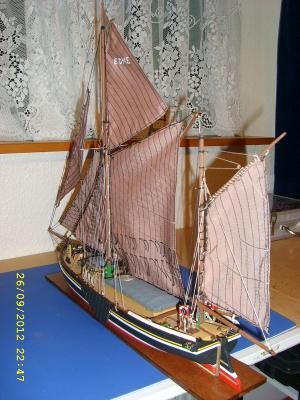
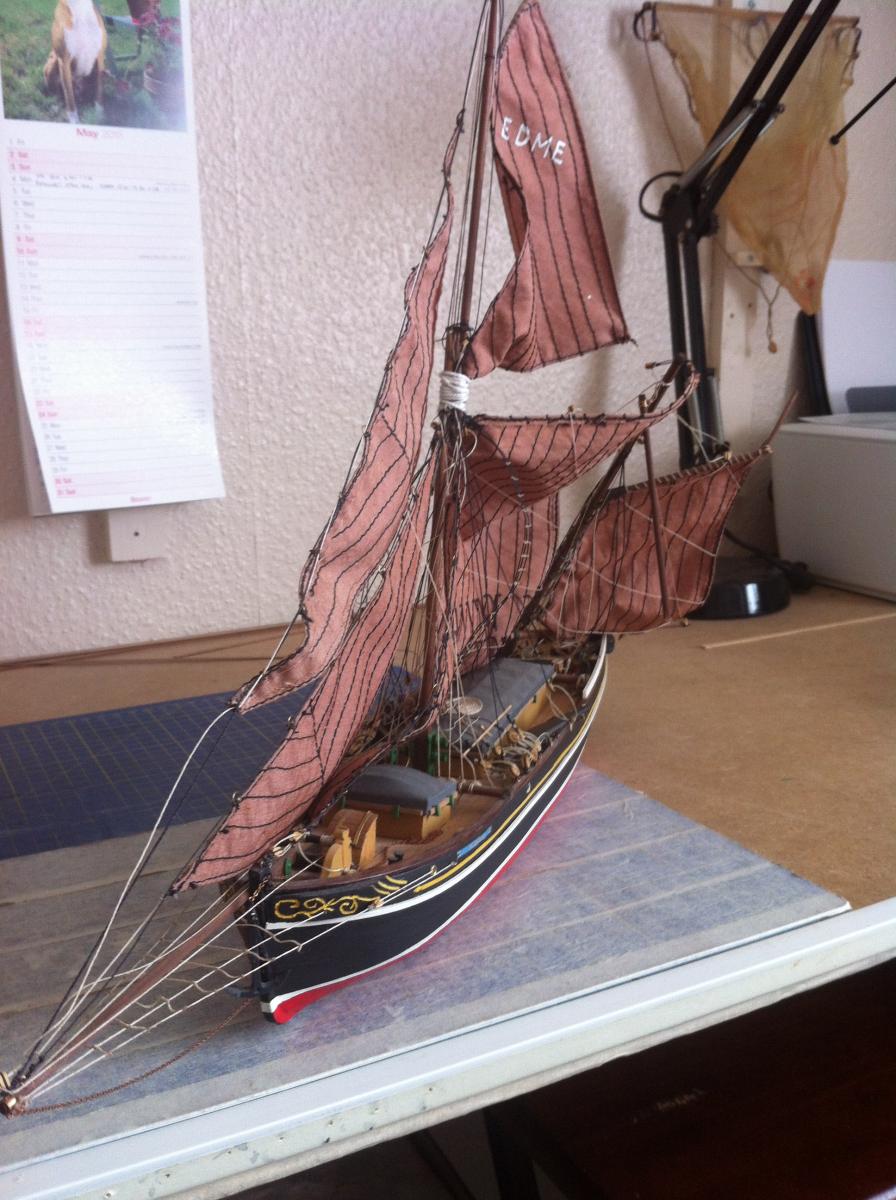
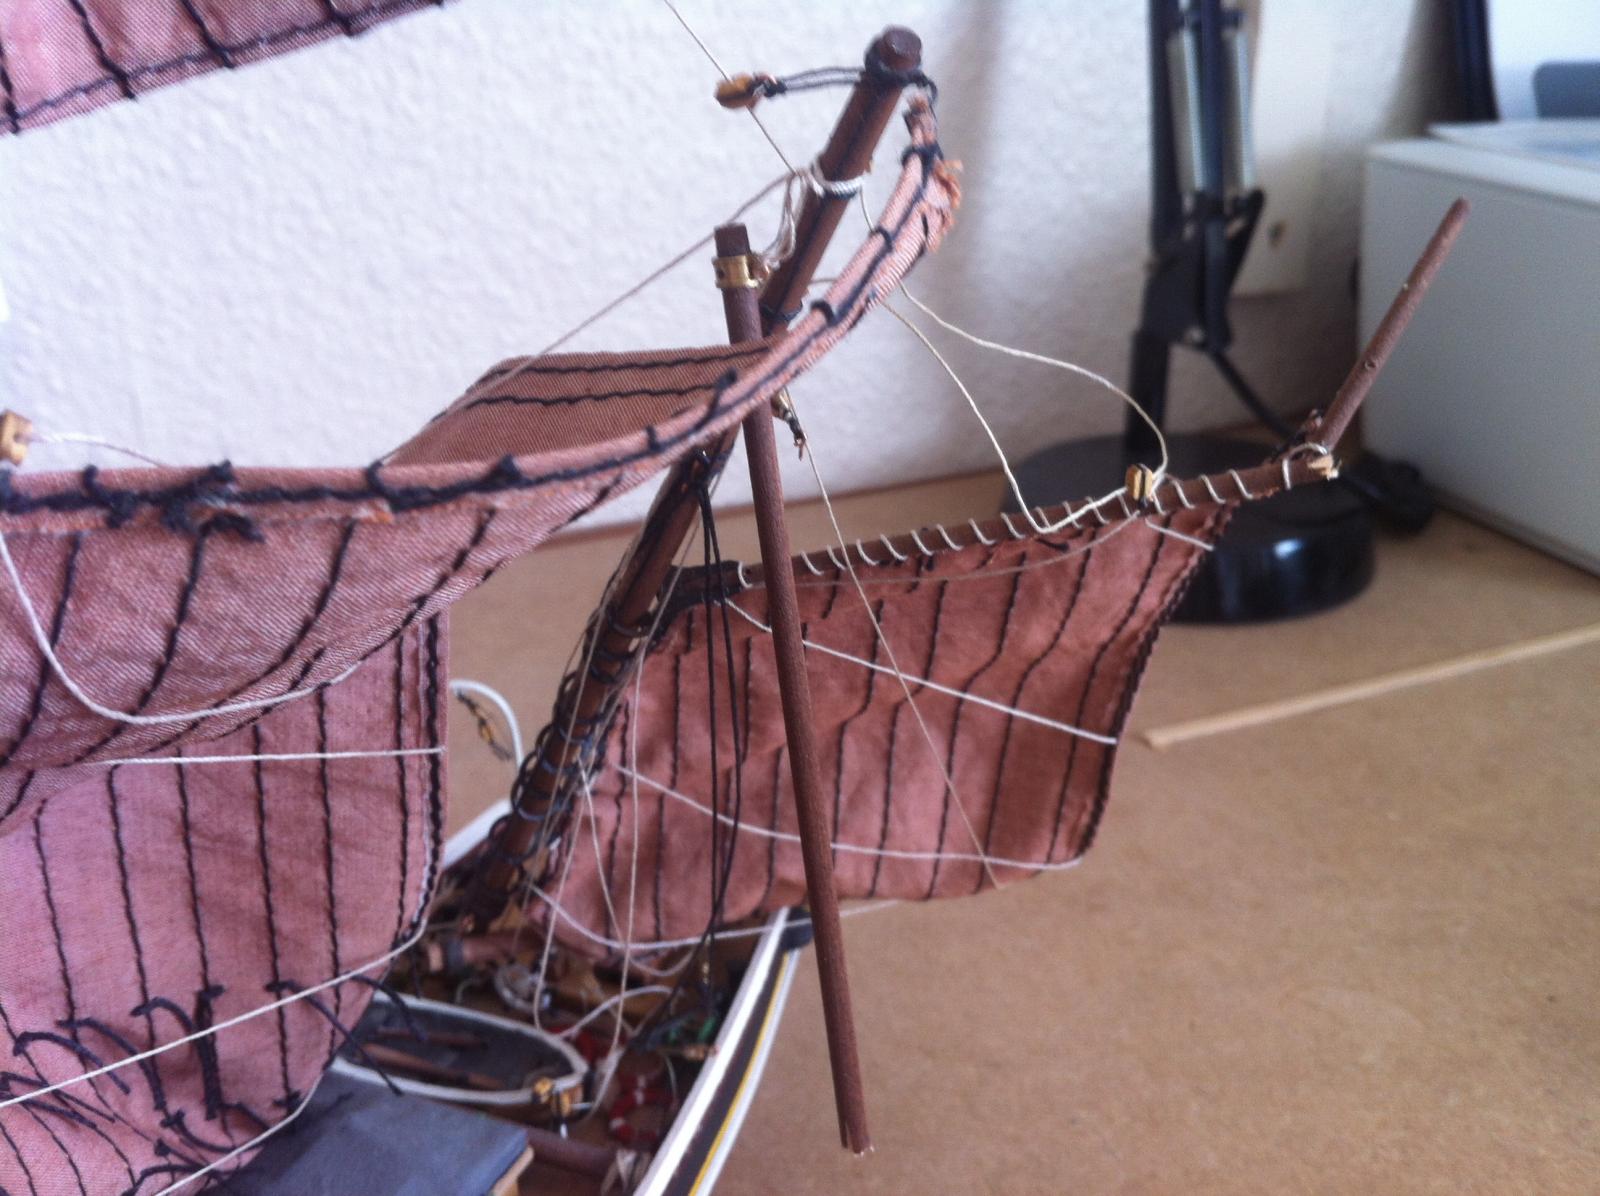
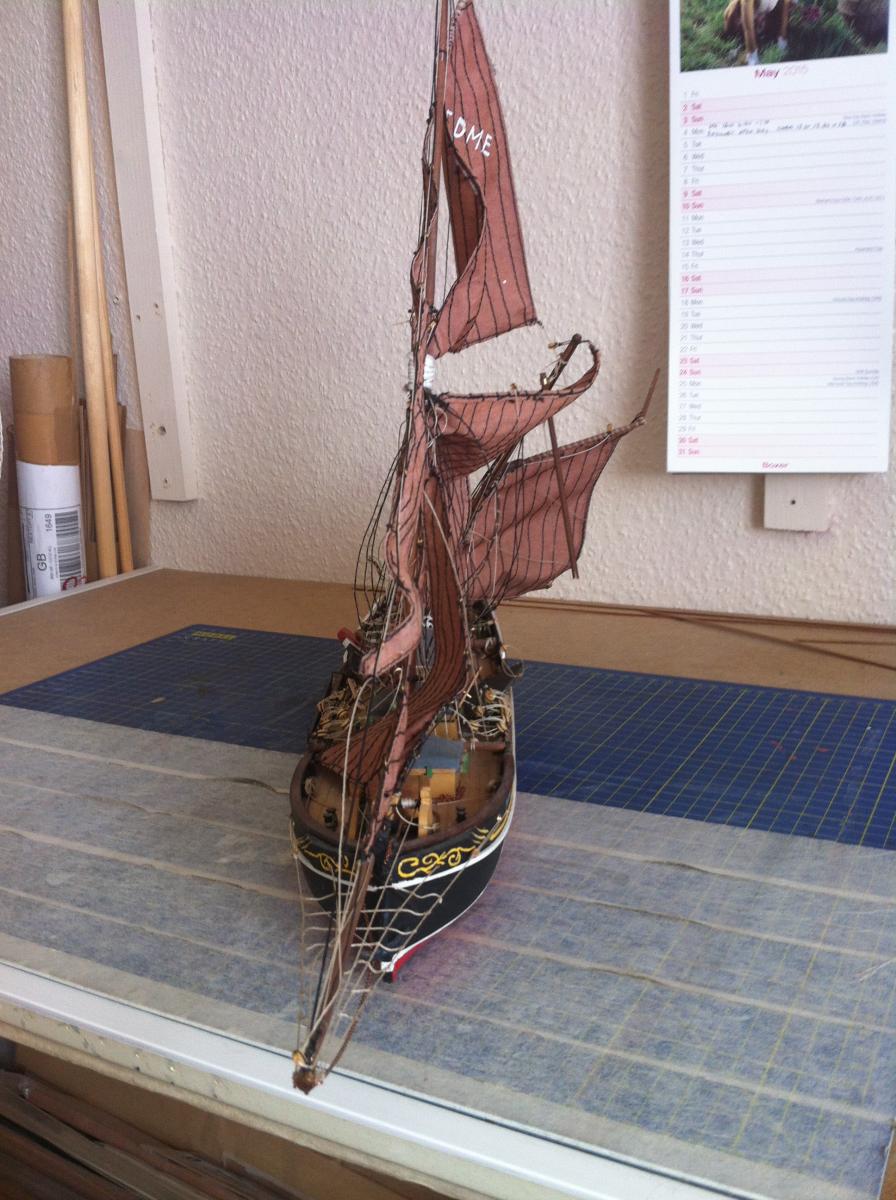
The full set of sails

All the sticks are made and the new Main base is fitted

Spanker sail is attached
Fixed to the boat with the stays being put on the bottle screws
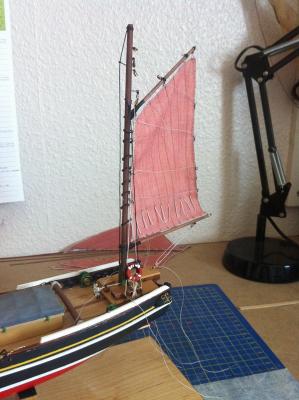
Port side life ring fitted to the stays, now to do the starboard side.
So that's it for now guys, any comments, good or bad are always welcome.
Be Good
mobbsie
-
-
-
-
Hi Guys,
Time for another update.
A lot has happened since my last post not least the loss of my pictorial record of the build, it just disappeared. I searched my Laptop to the best of my ability but no luck, fortunately I still have them on my phone but because they had already been downloaded the laptop didn't want to copy the pictures, several hours later I have managed to recover 215 pictures plus the latest photos, I just have to organise them into some sort of order.
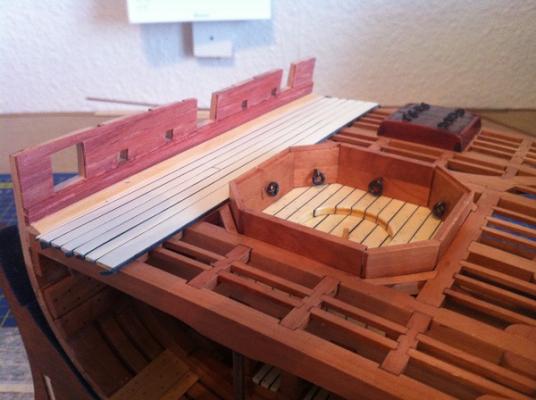
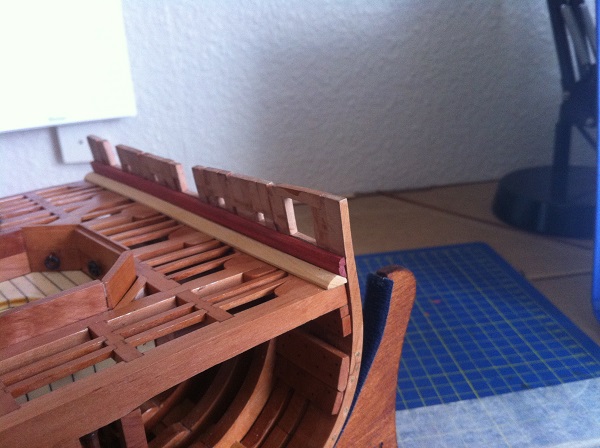
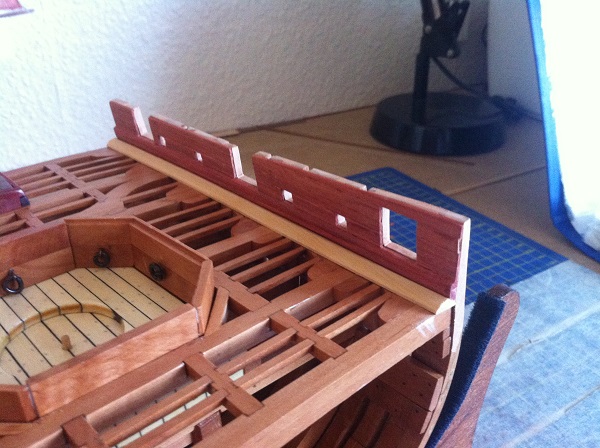
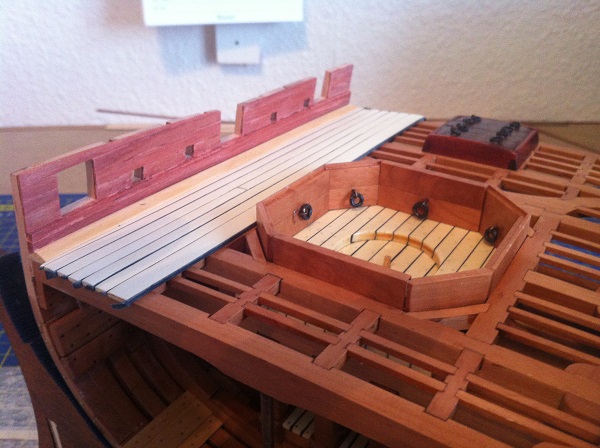
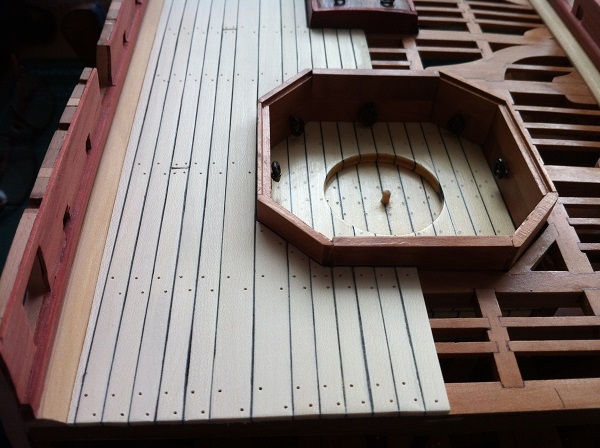
OK, progress made so-far is as follows:- Waterways ( Box ) are made and fitted, Spirketing ( Redheart ) made and fitted and the Deck Planking ( Holly ) has been laid and drilled out for treenails. The Bulwarks ( Redheart ) have been fitted and made ready for drilling out for the bolts, this will have to wait until the deck is treenailed and given a coat of WOP.
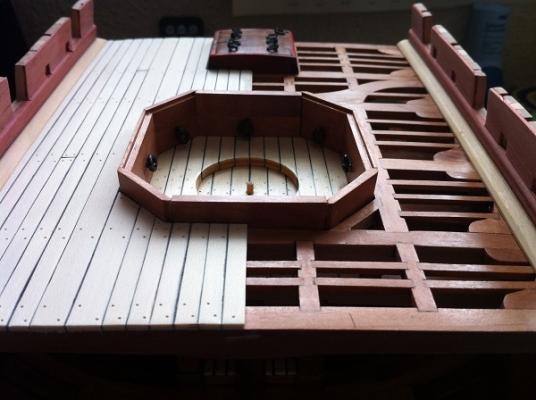
I mustn't forget the rings on the hatch have been changed to smaller ones.
Time for some pictures I hope.
Waterway and Spirketing on the Starboard side

The Portside
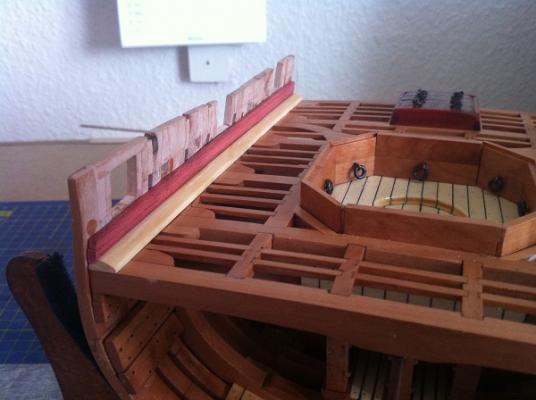
Portside Bulwarks

Starboard Bulwarks

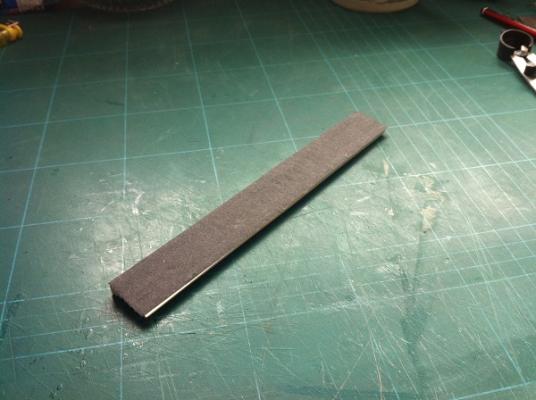
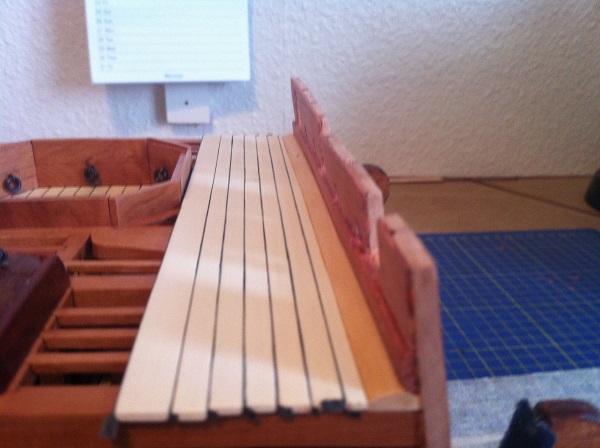
The deck planks were cut to size and black paper glued to one side for Caulking.
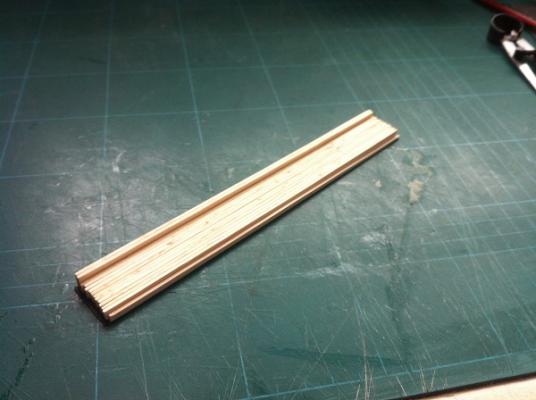
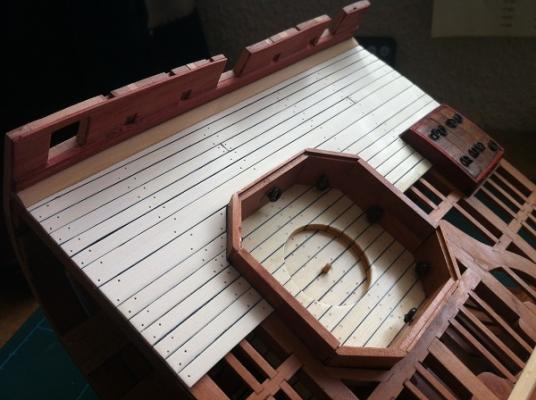
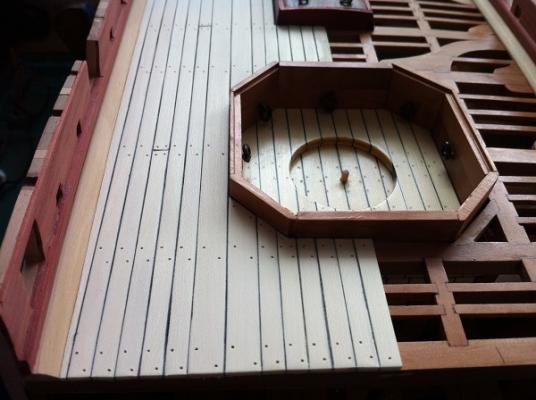
The first seven planks have been laid, the first plank alongside the waterway required tapering.

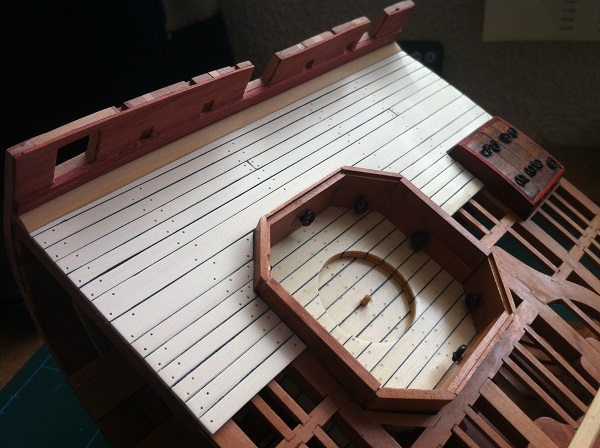
The next three pics are of the completed planking and drilled out ready for the treenails, (a mix of sanding dust).
So that's where I am at the moment, still behind the boss and nowhere near catching up, I have been busy watching the cricket though, oooops.
That's it for now gents, any and all comments, remarks and criticisms are welcome.
Be Good
mobbsie
- Rustyj, Landlubber Mike, cog and 14 others
-
 17
17
-
-
-
Hi Patrick,
Thanks for your question mate.
I built Edme in the August of 2012. I wanted a Thames Barge and the only one I could find was the Will Everard ( now known as the "Will" ), my research showed that a local Malt works ordered a barge from Cann's boatyard in Harwich, about 1.5 miles from where I live so this was a no brainer to me.
The Will Everard is a steel construction whereas the Edme is all timber and a lot smaller to boot and so a lot of cutting about and scratch work was going to be involved.
The Edme is still afloat today and takes day trippers out. She was built in 1898 and is 1 of 3 barges left that are engineless.
Hope that answers your question mate.
Be Good
mobbsie
-
Thank you Gentlemen for your kind comments, support and encouragement.
The repairs will not take too long to do as it's all up top so this will not be a big log and you know what I'm like, I get carried away and miss big chunks of the progress made.
I will be posting a further update over the next day or so.
Take care my friends and be good
mobbsie
-
-
Hi Guys,
This log is about the repair and improvement ( I hope ) of the Thames Barge Edme. Edme started out as the Barge Will Everard but was cut down and the boat was mostly a scratch build.
Damage occurred during pre-season cleaning and redecorating of the museum, she was dragged from a table by a dust sheet.
The damage is mostly to the Masts and Rigging and although annoying at the time it has allowed me to correct a few mistakes.
What has made me angry was the need to reduce the visual damage by bending a metal Cross Tree around the main mast, this particular piece could have been used again but not any more, as if that wasn't bad enough string was also wound around the mast and what appears to be about half a bottle of CA poured over the top.
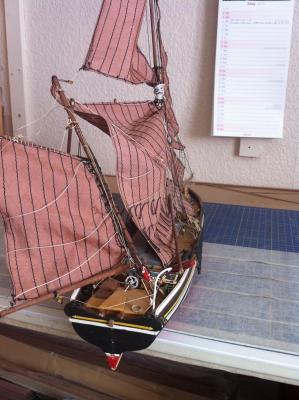
Originally Edme didn't have a stand, she was just free standing but I have now made a stand for her which I hope compliments the boat.
The first series of pictures will show Edme pre damage and it will show evidence of my inexperience in boat building.
This is one of my major mistakes, The Edme only has 3 shrouds, here I have 4
Now we have a few pics of the damage, I'll let you make your own minds up on these.


The pictorial story goes a lame from here on, progress made wasn't fully documented and so will have some large gaps.
As stated most of the damage was with the masts and rigging so the old has been removed, the first thing I wanted to do was to make a stand for her.
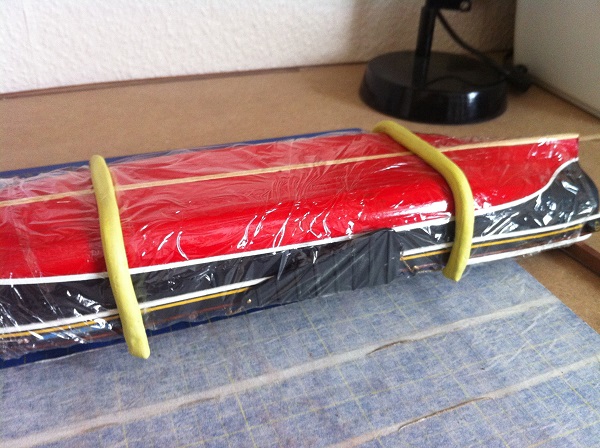
Here I covered the hull with cling film and using modelling clay to give me a profile, the stand was started.

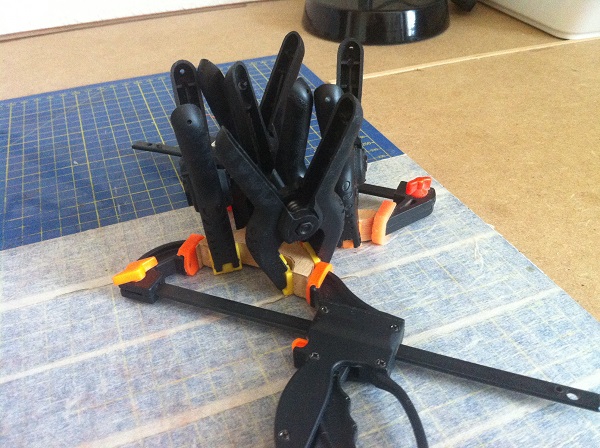
Using MDF the uprights were cut out and Beech laminate glued on, a few clamps, believe me there is an upright in there somewhere.

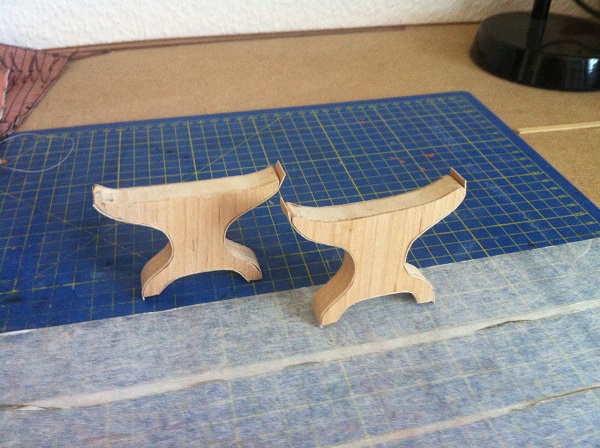
Both upright are now laminated, they just need to be cleaned up.

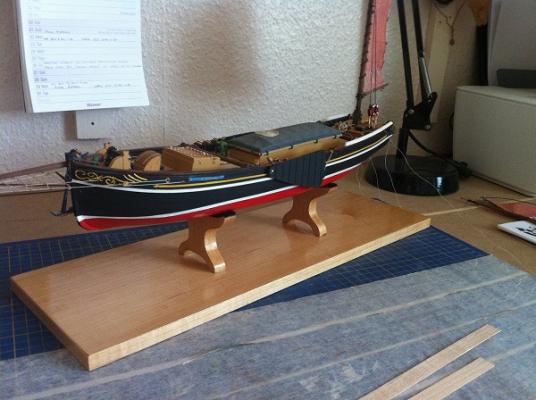
The completed stand, again the base is MDF with a Beech Laminate and double coated with POLY, the cradles were covered with the fibre part of Velcro, they were then drilled and dowel glued in place.
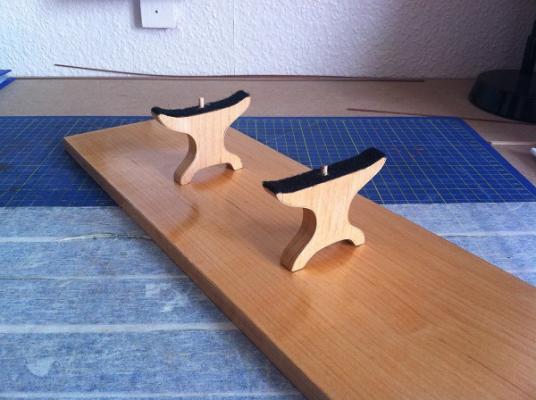
Edme now has a nice ? new stand
That's enough for now, I will post further updates shortly.
I do hope this all makes sense.
Be Good
mobbsie
-
Hi Grant,
I cant quite believe it but my build partner has given me the hurry-up. I think that's a bit ironic as I've been playing the waiting game for weeks now.


It all looks really good mate, the waterway shape looks right and they fit nice and snug.

Your hatch coaming and boards look great although I still don't like Redheart.

I will catch up soon enough but at the moment were experiencing a mini heat wave and its sapping what little energy I have, and jees that aint much to start with. Temperatures are up around the high 20s with the highest in London of 37 degrees C. Not very hot I hear some of you say, hot enough for me, time to sit in a ice tub.

Chat soon mate and well done on taking the lead
 :P
:P Be Good
mobbsie
- gjdale, cog, Jack Panzeca and 5 others
-
8
-
-
Hi Denis,
Now that things have quietened down a bit I can also add my own congratulations on your wedding anniversary, I can only imagine the things that poor Phyllis has had to put up with over the years, your a lucky guy Denis, I'd keep her if I were you.
Good progress on Titanic mate. Looking splendid.
Be Good
mobbsie
P.S. I'm a few days away from my 41st, you get less for murder these days.
-
-
Photography is a funny old thing, three pictures all of the same object and three different colours, I prefer the 3rd picture.
I'll tell you what though Eric it really looks nice, pity 99.5% of it is going to be covered up, still it's good practice mate.
With this standard of work your turning out mate your Aggy is going to be a corker, keep it up.
I hope work around the farm is going well, it seems to keep you busy, it does however allow some time for Rugby, strange that, no time for Cricket.
Be Good
mobbsie
-
Hello Mate,
Despite a difficult start it looks to have worked out well for you. I think that that was one of the hardest parts of the build so far, at least it was for me.
After you have completed the Hatch the next big step will be the Waterway, it's too small to shape with power tools and so a bit of thought will be needed to get it right.
Well done on the Mortar Pit mate, it really does look good.
Be Good
mobbsie
-
-
Hi Eric,
I'm pleased that Frank is able to help mate, he really is the best.
To answer your question regarding Caulking, I started to use a softish pencil, I would glue the plank in place and then run the pencil down the length of plank, the main problem with this is that when sanding down the lead can smudge the surrounding wood which is not the effect you want.
I now use black card or paper, I cut the length of plank and using PVA glue the paper/card to the plank, when dry cut the strip away from the main sheet and lightly sand the edge flush. This can then be glued to the deck, when your happy with the process it is possible to do 5/6 planks at a time.
Regarding scale planks, using scale planks on this beast is advisable, I cut my planks 120mm, that was the same for both hull and deck planks.
Have you given any thought to the Butt Joints, this is the stagger between each row of planks and the pattern repeats after 4/5 rows. Also the length of overlap of the Butt joints.
I would advise that when doing your treenails that you keep the sanding dust of your deck planking, when it comes to doing the treenails you can mix the sanding dust with a darker dust and when your happy with the result i.e. colour, apply this mixture into the holes drilled for the treenails.
I may be a bit previous here but these are questions that need to be given some thought.
Hopefully you have also sorted out the problem of the warped keel.
Hope this helps and hasn't confused you mate.
Be Good
mobbsie
-
Titanic is asking as many questions as your AG but obviously in a different medium, I love the thought process's and solutions mate.
She's gonna look awesome.
Be Good
mobbsie
- mtaylor, GLakie and popeye the sailor
-
3
-


Licorne 1755 by mtaylor - 3/16" scale - French Frigate - from Hahn plans - Version 2.0 - TERMINATED
in - Build logs for subjects built 1751 - 1800
Posted
Lovely bit of planking so far Mark, looking forward to seeing further progress mate.
I'm a bit confused as to why the black around the for'ard Gunports ends the way it does, is there a reason or am I just being stupid.
Be Good
mobbsie