
vvvjames
-
Posts
168 -
Joined
-
Last visited
Content Type
Profiles
Forums
Gallery
Events
Everything posted by vvvjames
-
 You and Maggie have my best wishes Keith❤️. I hope rehab goes well, and if a downsize is needed, I hope you find a lovely spot to settle. The weather will even out soon my friend. Fair winds and following seas.
 -
Welcome:) I hope you enjoy your first kit, there's a wealth of knowledge here on this forum for you when you start!
-
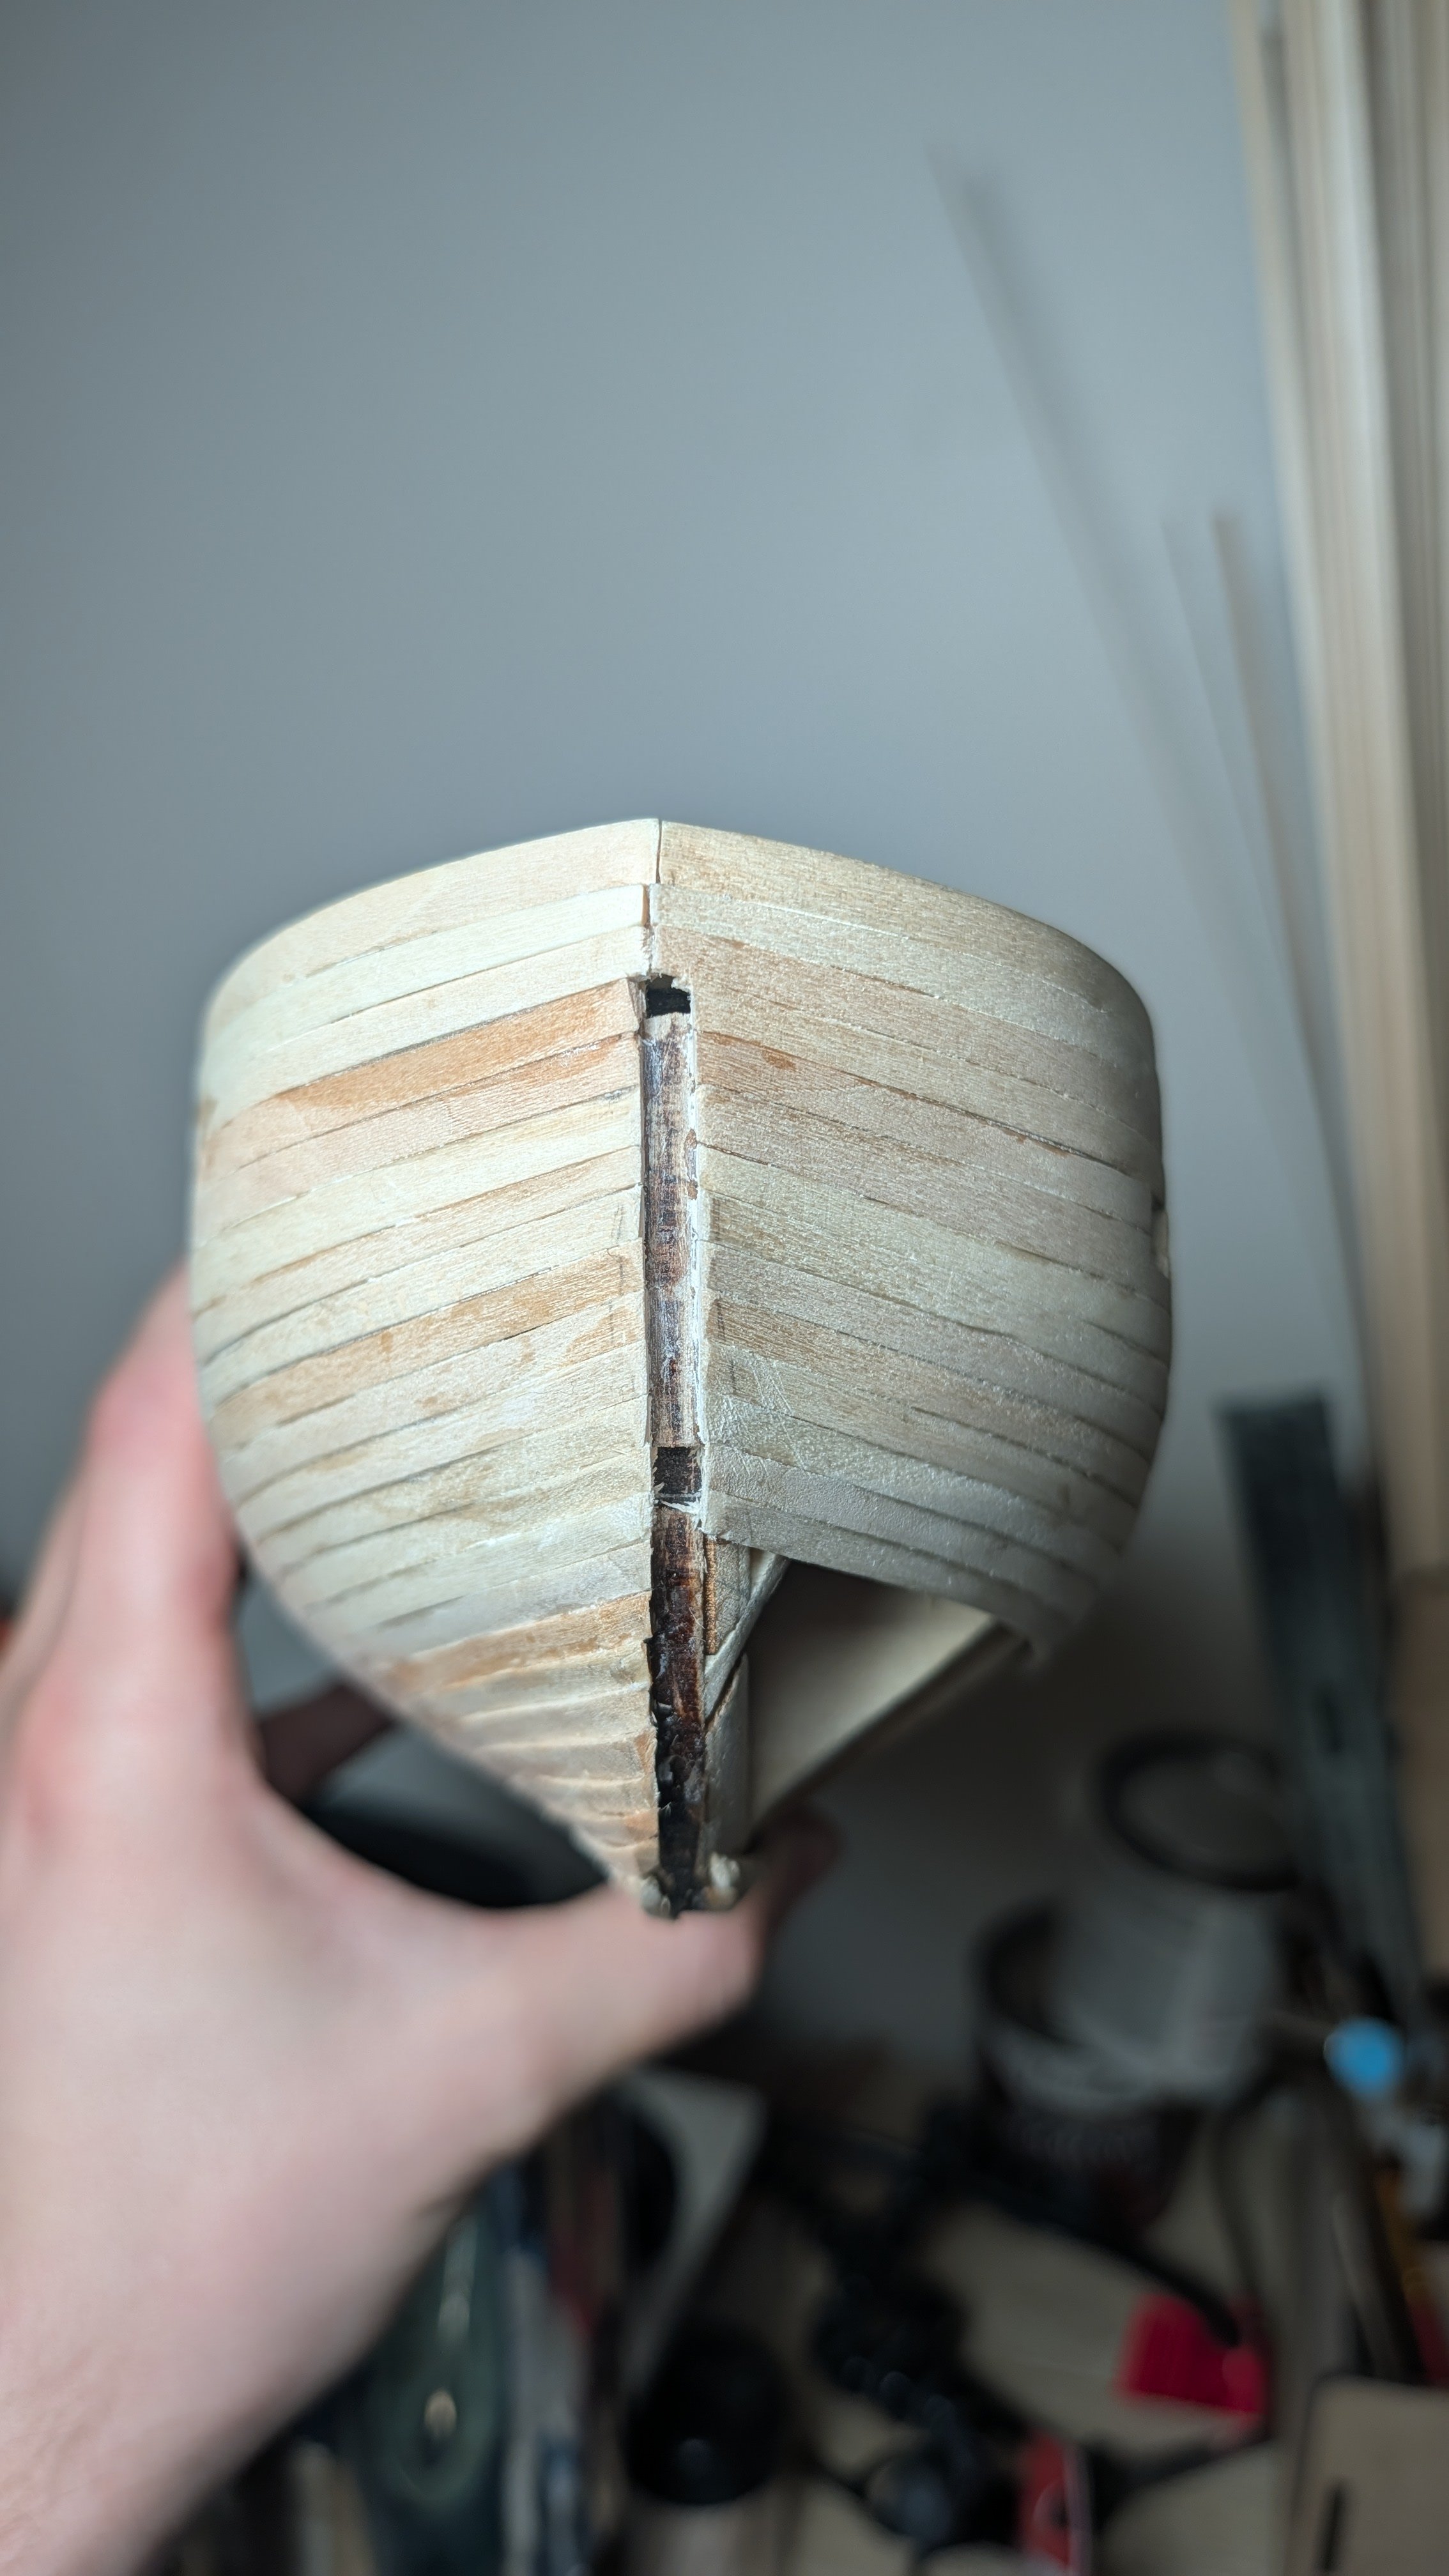
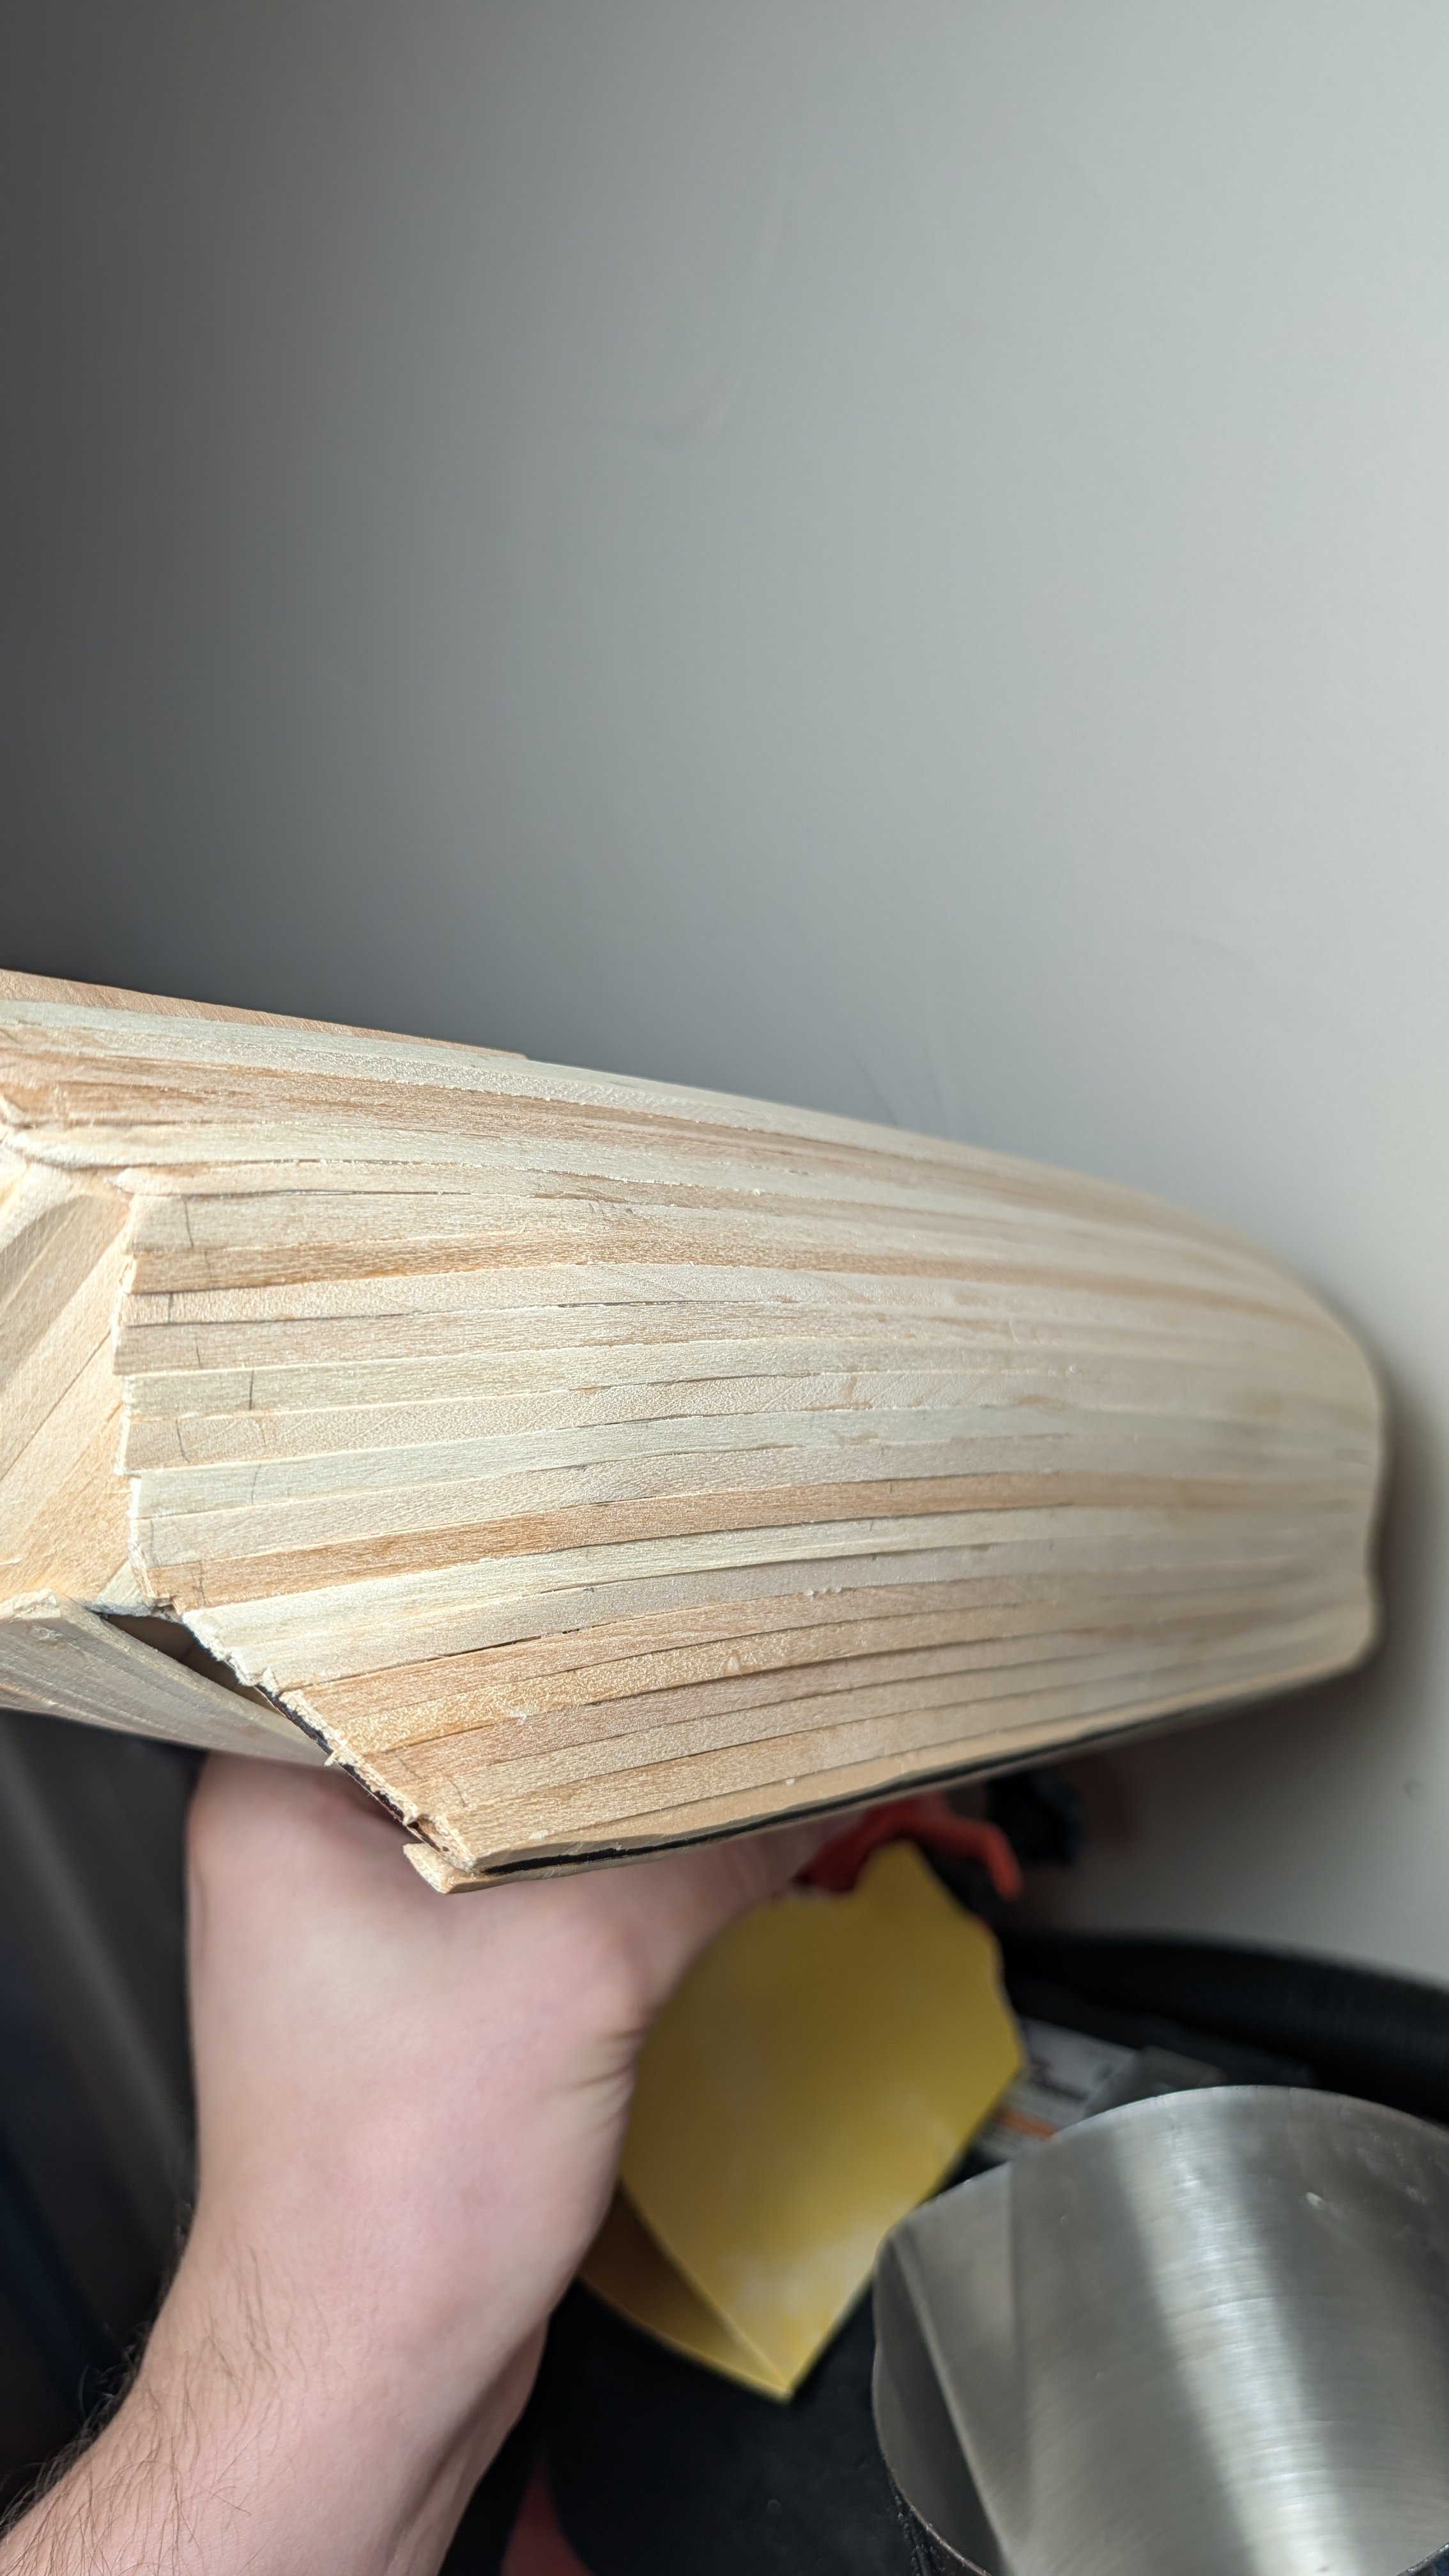
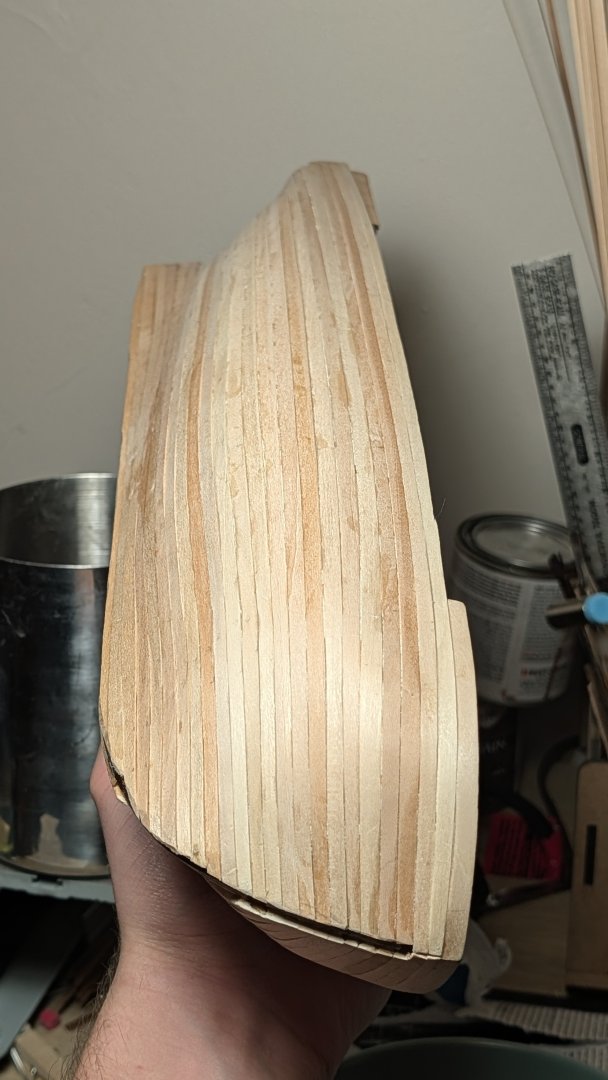
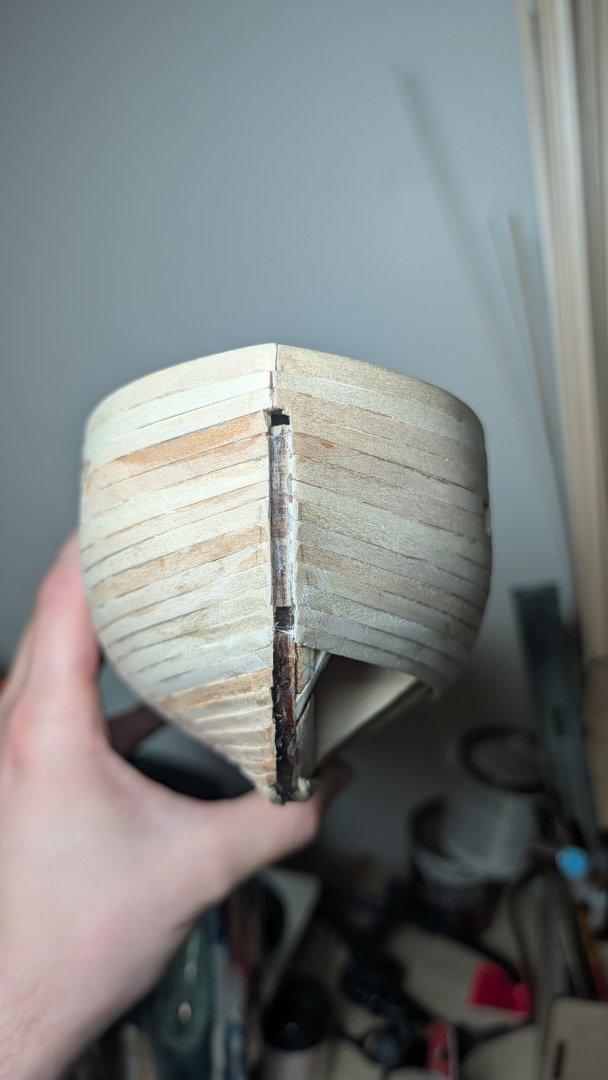
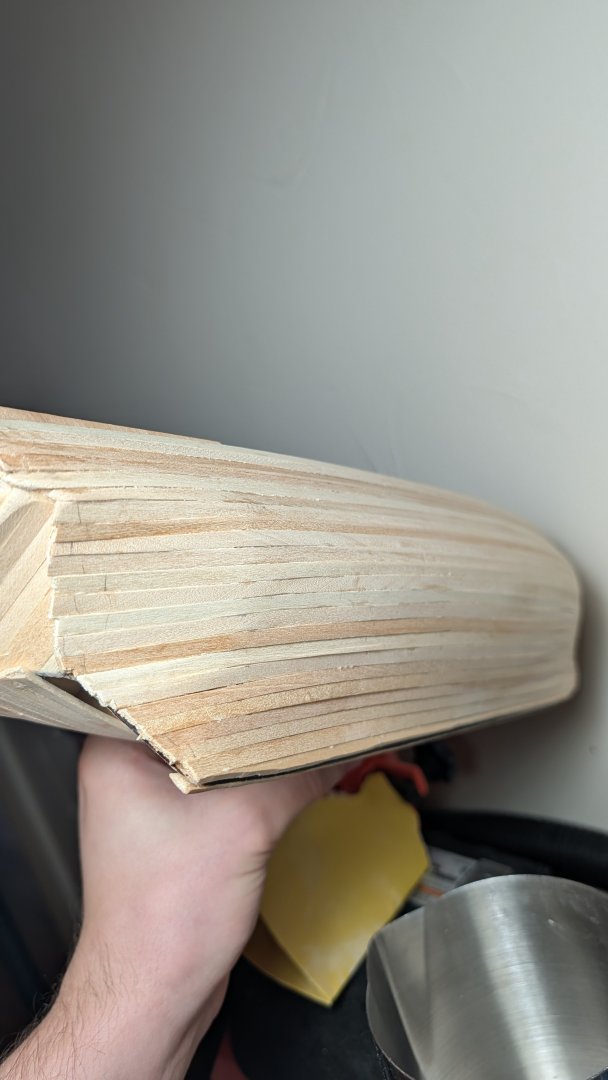
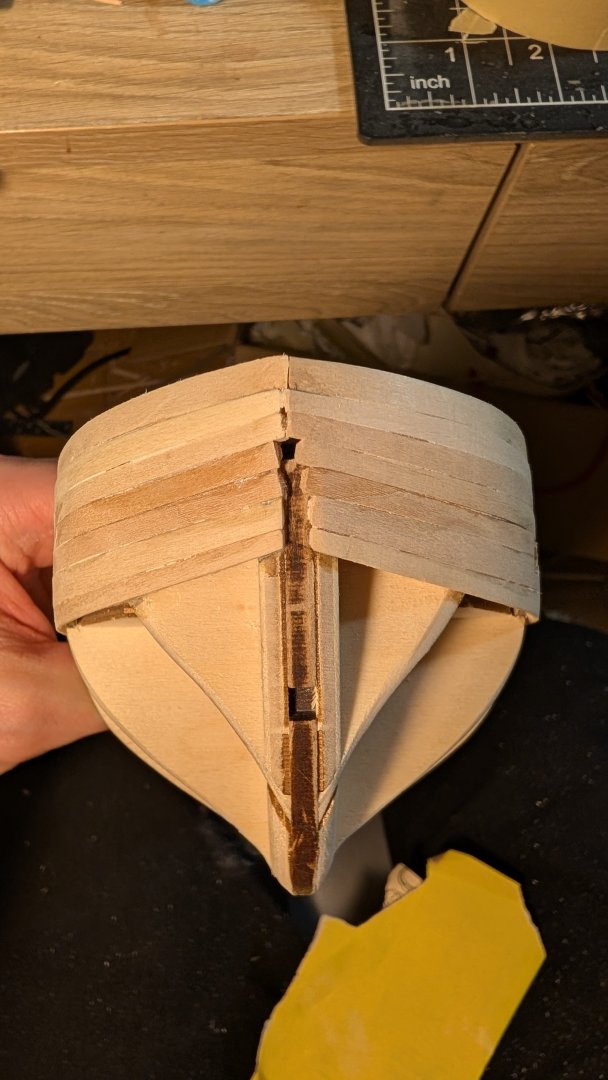
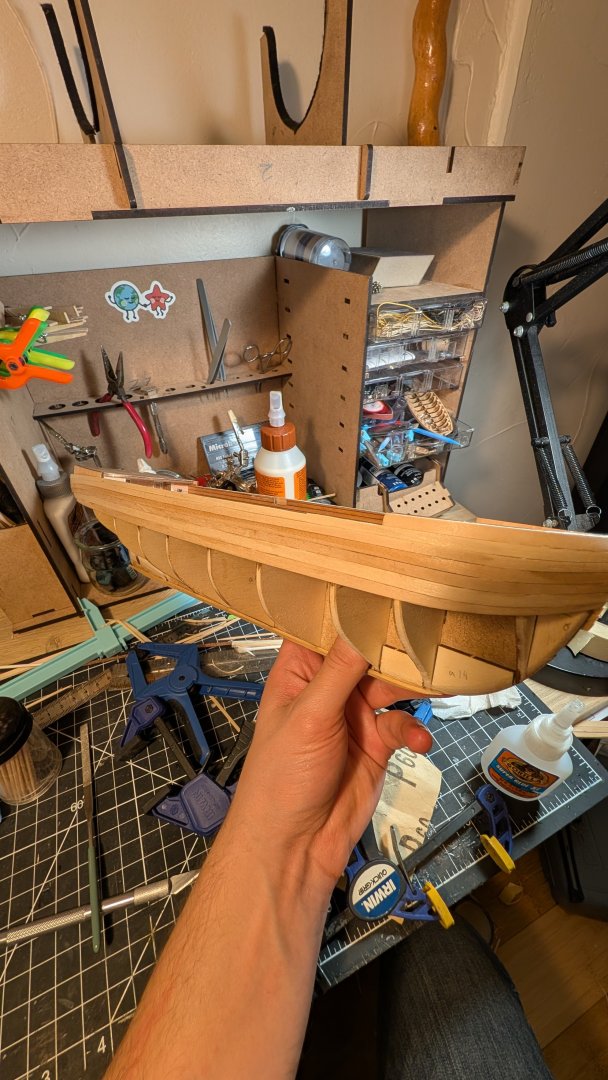
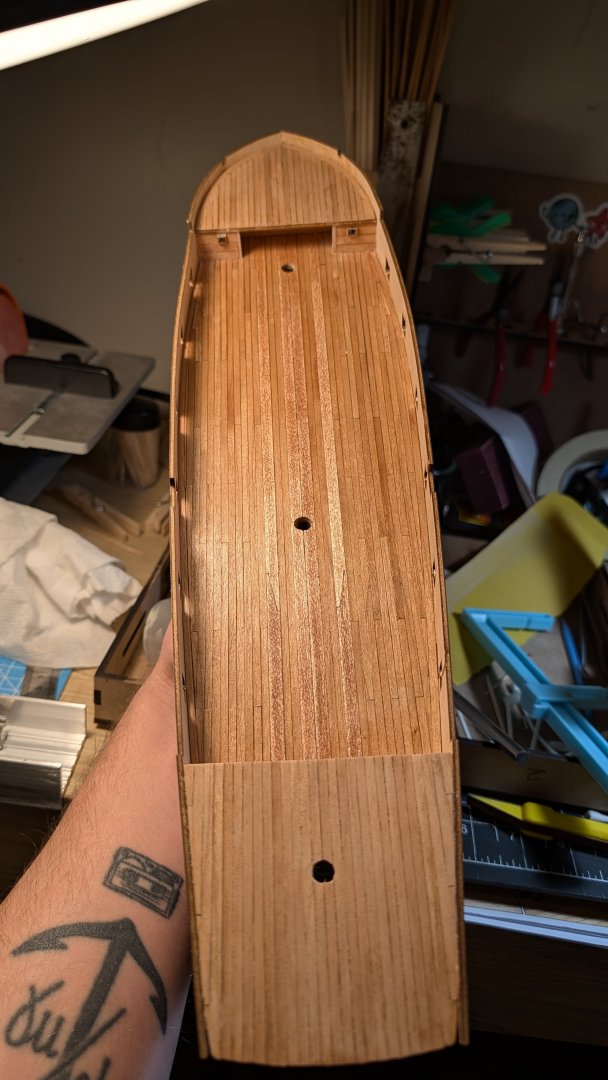
Yo ho all, I wanted to hop on and give a quick update on the planking before I take a trip to Seattle to be with my sister! I'm excited to see all the nautical museums and ship-watch as much as possible:) Let me know if you have any recommendations. Starboard Planking: Nothing is sanded yet. Overall I'm proud of how my first bow to stern planking is going so far. I do wish I had added the keel and a rabbet, but I'll add the keel at least for the second layer so everything can be nice and flush. I hope the port side ends up looking about the same, I may or may not finish before my flight. This has been great practice for the second layer:) Fair winds, James
-
Congratulations on a fantastic build Keith, you've done this unique ship justice, Engle would be proud and probably drunk. It was a pleasure to follow along looking forward to the next already.
- 407 replies
-
- 5
-

-

-
- Billy
- sternwheeler
- (and 1 more)
-
Welcome Remus!
-
Excited to follow along:) looks like a lovely kit.
-
You talk too poorly of your build, it looks fantastic:) and I'm just connecting the dots, I've been following your entertaining Indefatigable log with excitement, it's off to a great start. Glad you decided to do a build log for it. Thank you for this warning, I have heard others mention this and will have to keep it in mind when setting up the pins. Thank you for your offer of suggestions I will definitely take you up on that when I get past the planking:)
-
Hello Embojo! Thank you for the kind words:) Being my first model of an actual ship rather than a "typical" ship, I have been enjoying having detailed references like the Anatomy of a Ship book. The amount of details you could put in are endless, I hope to capture some of the big ones like the wider wale plank. I am lucky to had Lucien and usedtosail (and others) build logs as reference. So many great ideas. I will keep an eye out for your build log when you start your Beagle:) Thank you so much Mowzer, I really appreciate hearing that. I have read a few deck debates and was second guessing my wood choice. But dang the cherry wood looks great, I'm glad I went that route. Congratulations on finishing your model, do you have a build log for it?
-
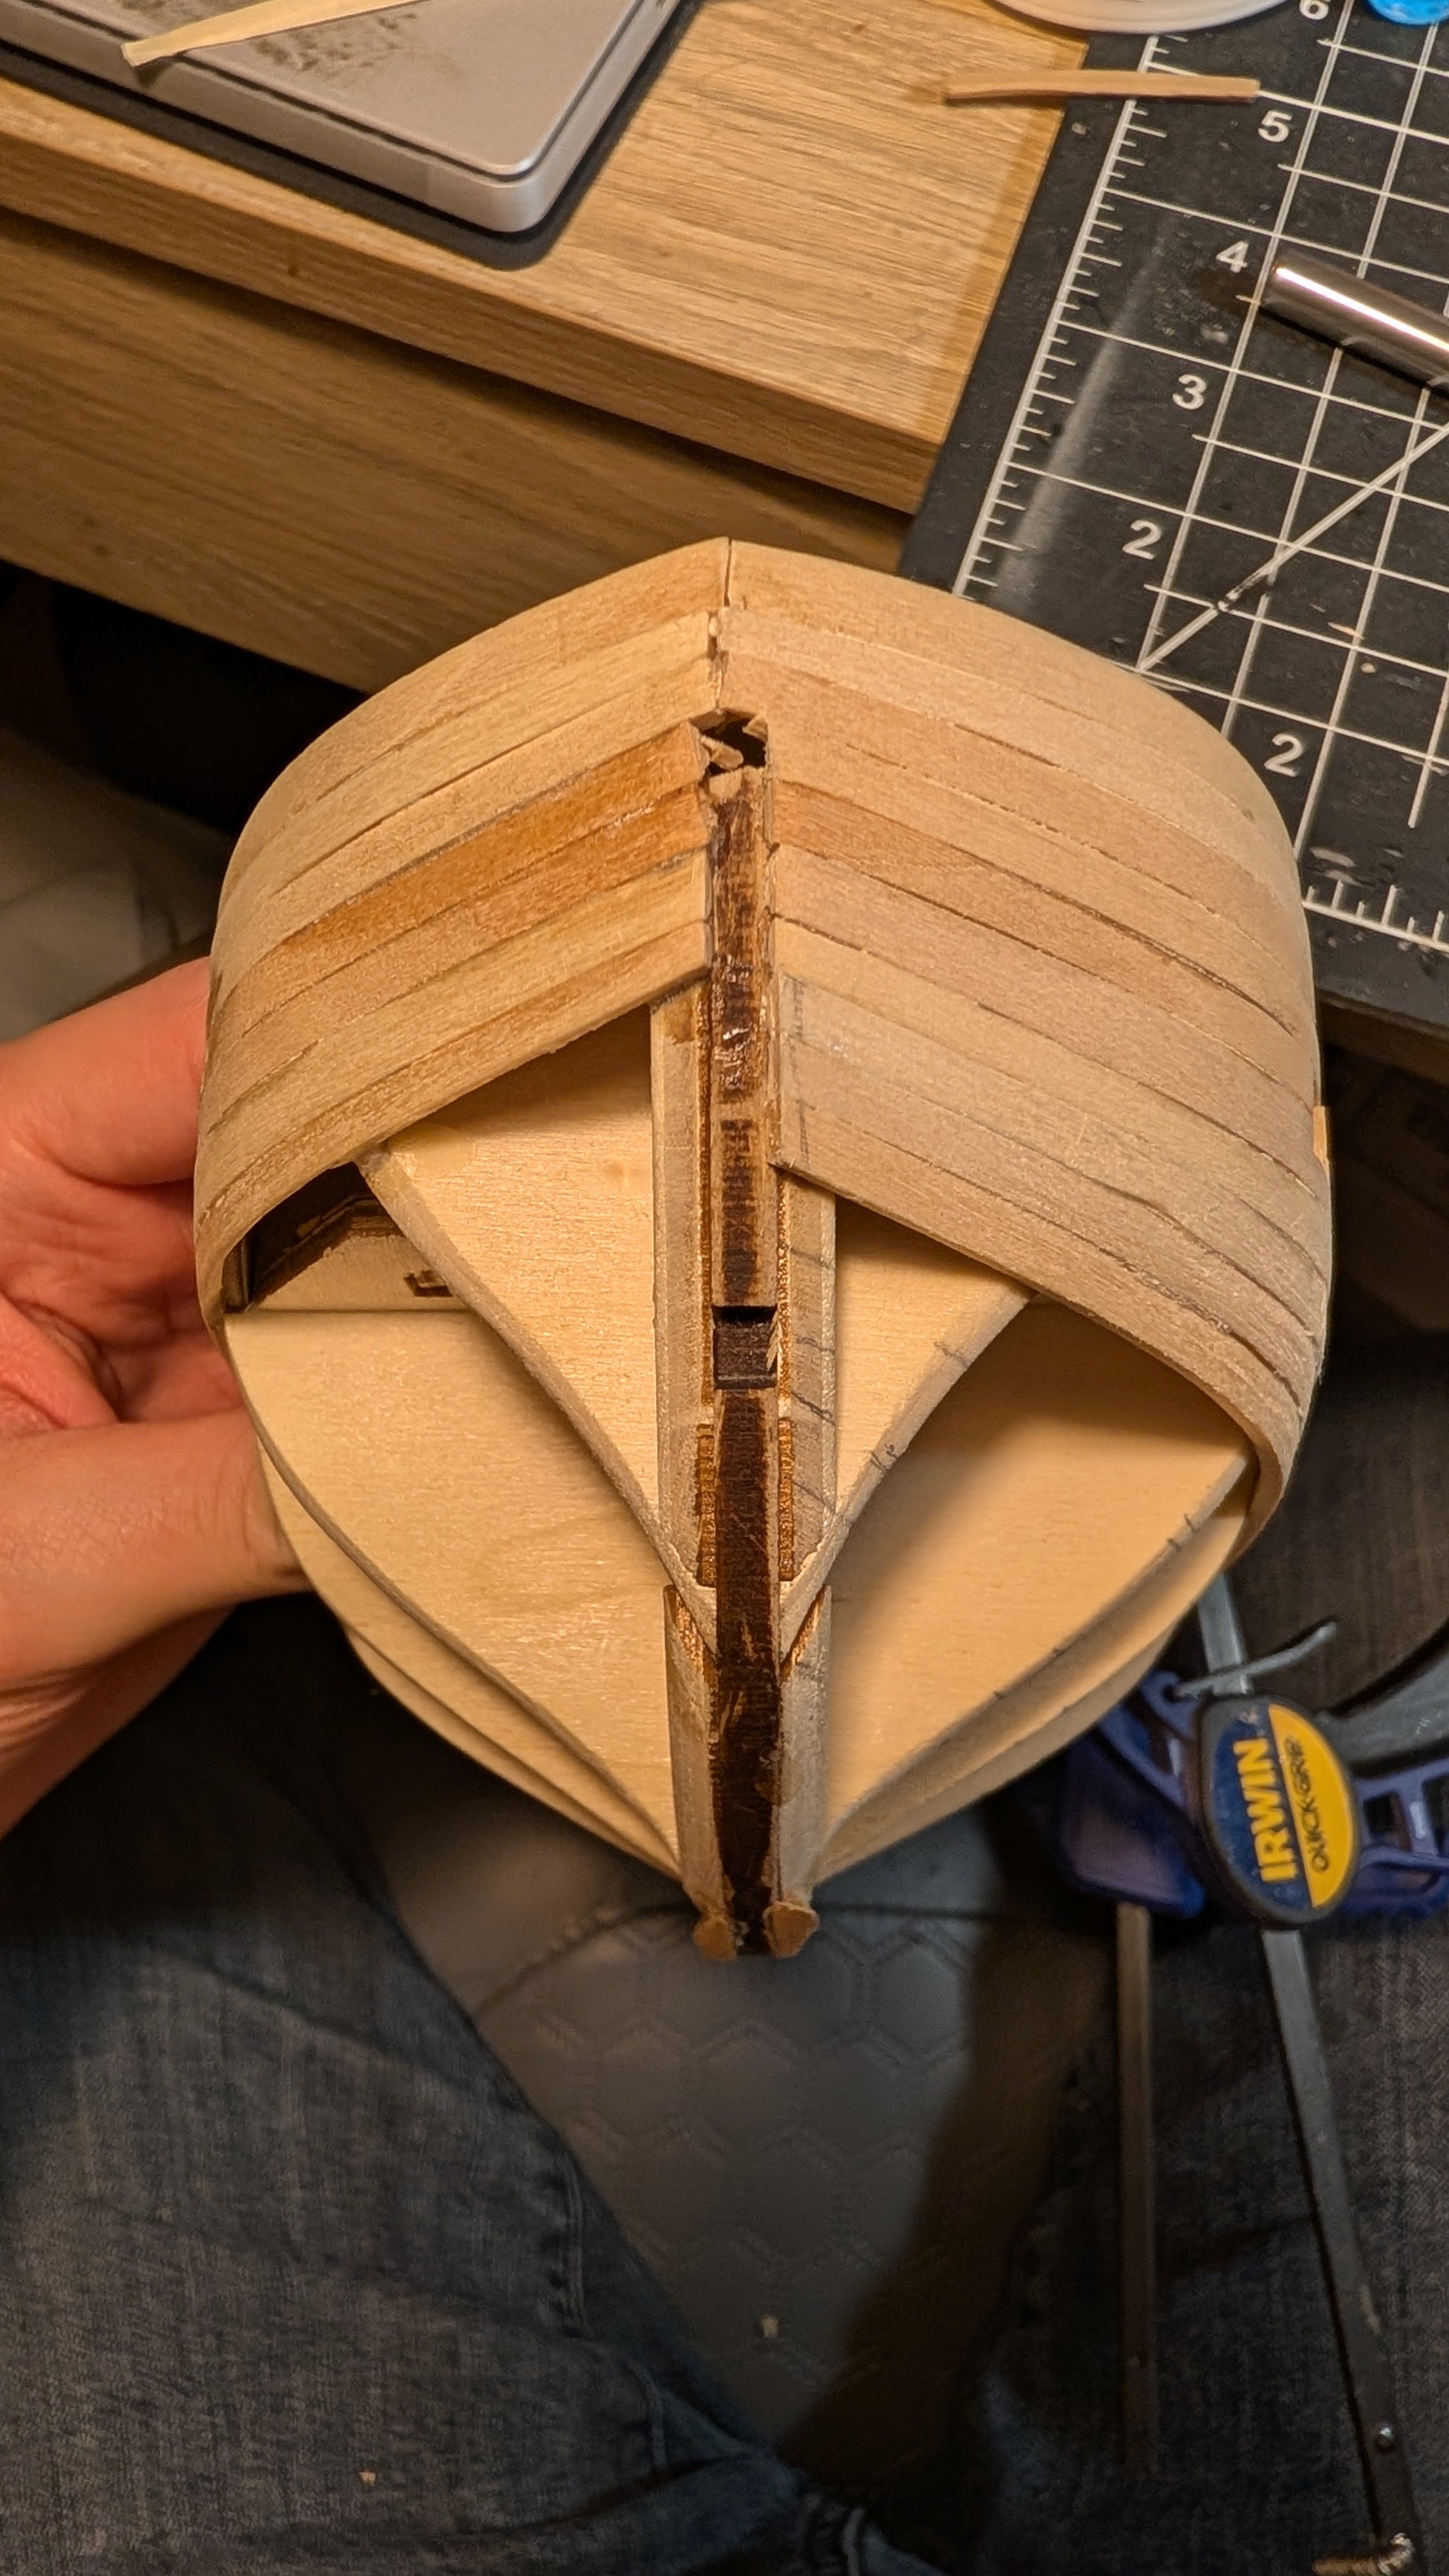
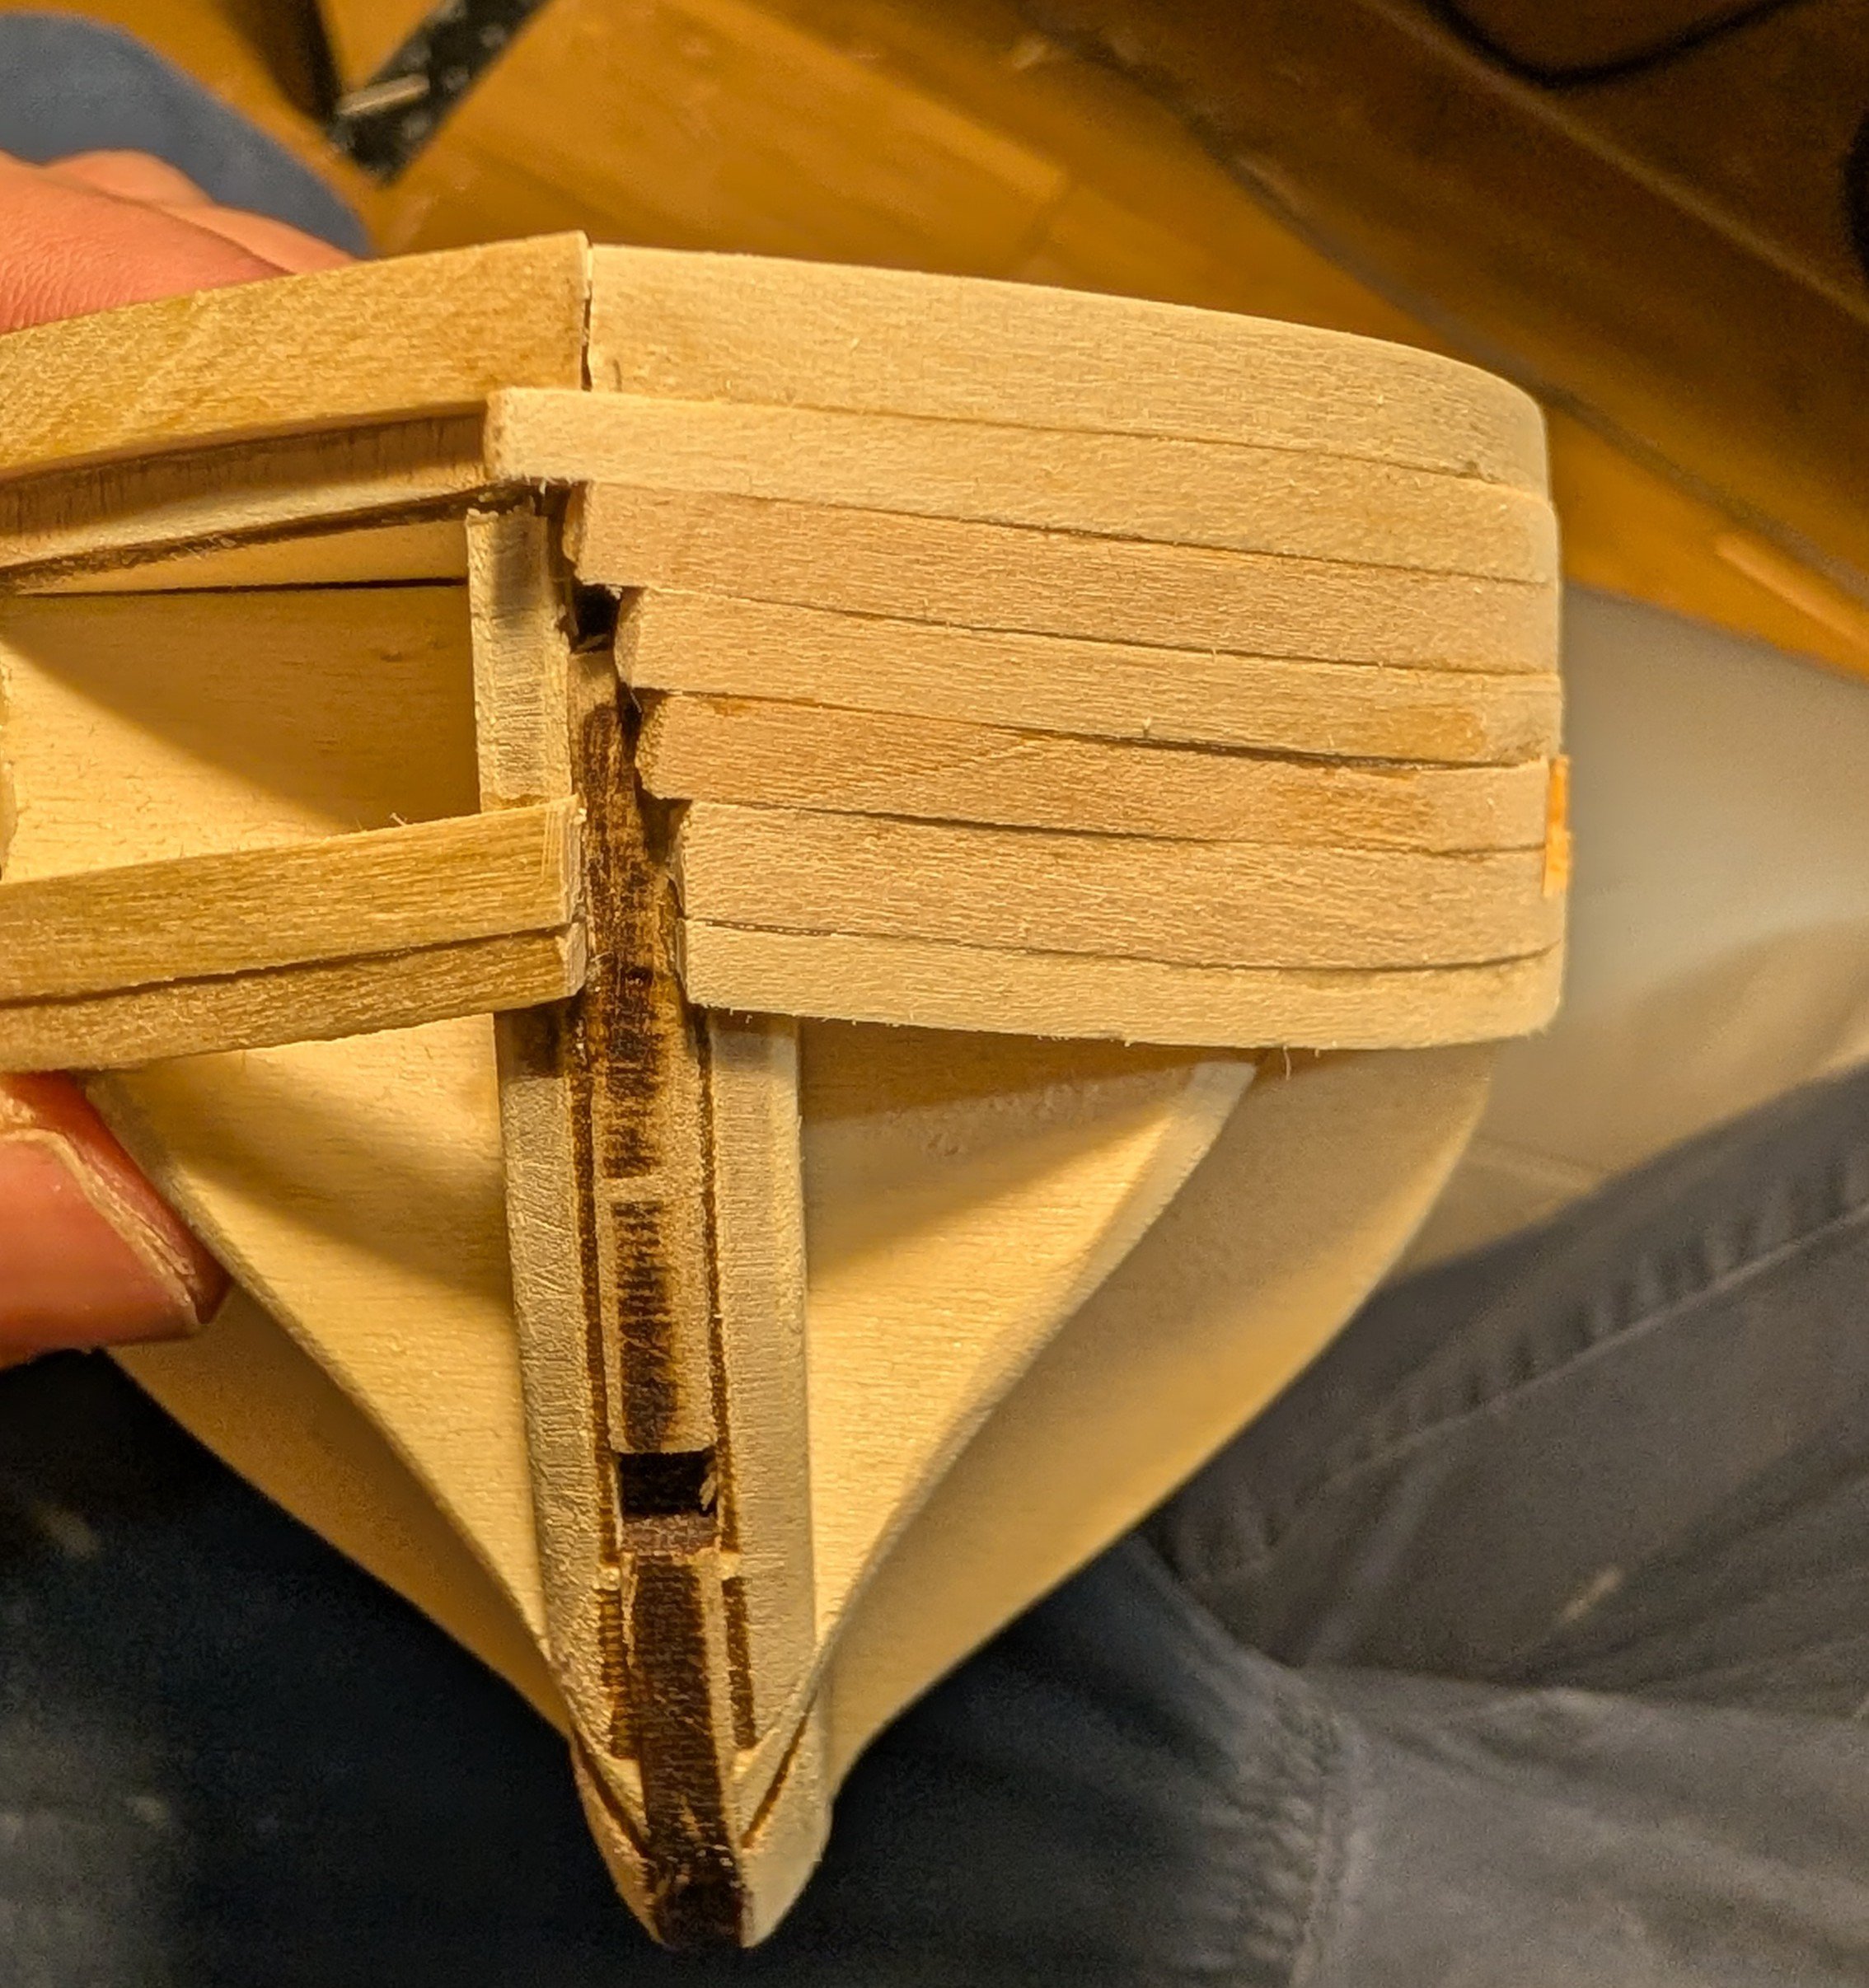
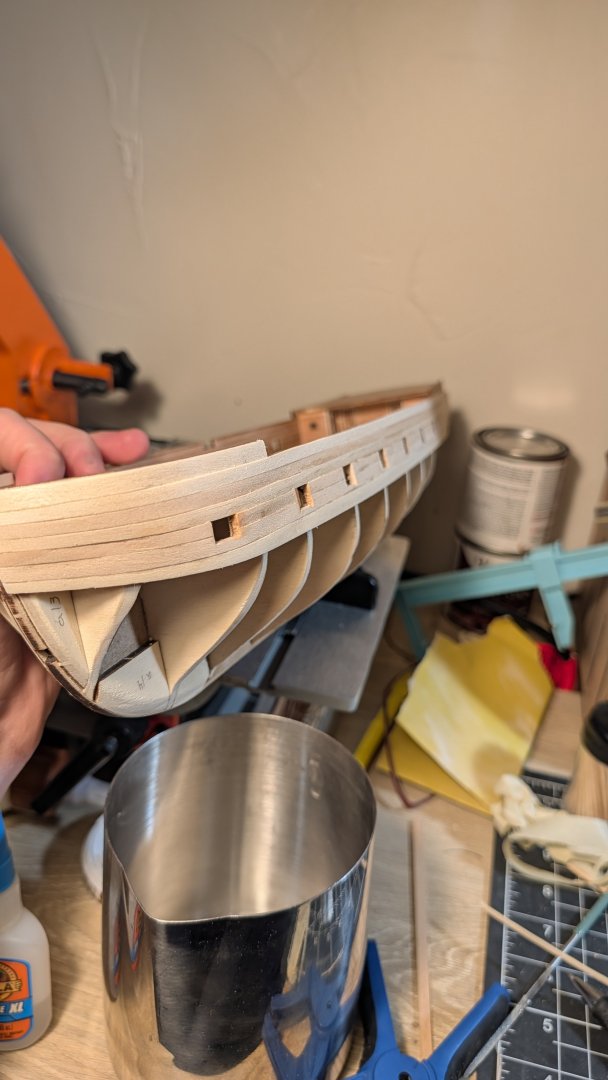
Ahoy all, It feels like its been ages since the last post but I just checked and it was actually only a week ago. Time is moving very weird lately, and I feel all out of wack. I haven't gotten much done, but have been thoroughly planning out the hull planking and reviewing tutorials. I think I'm getting the hang of it? We'll see. Bulwarks I have (mostly) finished the outer bulwarks. Gun ports on the starboard side still need to be cut. Hull Planking: I tick-marked the hull to the best of my abilities, and have finally begun planking the hull! 3 careful planks on the port side and the garboard strakes are all I have so far. Not much but it's a good start:) Installing the garboard strake is quite challenging, I do hope it is easier on the next boat whatever that may be. Still a sad shipyard here, but things are getting a bit better. Work time: 71:10:12 Best and well wishes, James

-
In which offense is taken (or, "hey! I resemble that remark")
vvvjames replied to Cena's topic in New member Introductions
Welcome Cena! Definitely start a build log, I'll be on the lookout for it! -
HMS Beagle by Tecko - OcCre - 1:60
vvvjames replied to Tecko's topic in - Kit build logs for subjects built from 1801 - 1850
Get well soon Peter! -
Stunning work Keith. I saved one of your pictures and put a black and white filter over it, I gotta say It looks quite close to the original. Can't wait to see it with the weathering.
- 407 replies
-
- 3
-
-
-
- Billy
- sternwheeler
- (and 1 more)
-
Very impressive, the waterline planking looked so challenging but I love how it ended up.
- 148 replies
-
- 2
-
-
-
- Christiania
- Vanguard Models
- (and 1 more)
-
Hello all, Thank you all so much for the kind words, and it is good to know that there is precedence for dedicating models. I have been working on the boat off and on when I feel up for it. It has been a great distraction when things get overwhelming. Here's some progress: Inner bulwarks lined: As mentioned previously, I used the smaller cherry planks to line the hull, it looks very nice alongside the deck I think. I need to repair a few planks that splintered while cutting out the cannon holes, that step continues to challenge me. Planking Begins: I decided to plank the outer bulwarks first, and then go garboard plank up once they are done. I am attempting bow to stern planking, with no sharp ends like the kit instructions. If I had used 4 full sized planks above the first one I placed, there would have been a 1mm gap at the top, so I ended up thinning 5 planks instead. Challenging, but the result looks great. I will finish the starboard side, then on to the hull! Work time: 61:17:19 Best, James


-
Welcome Brant! And double welcome to the Beagle club, I hope you start a build log soon:)
-
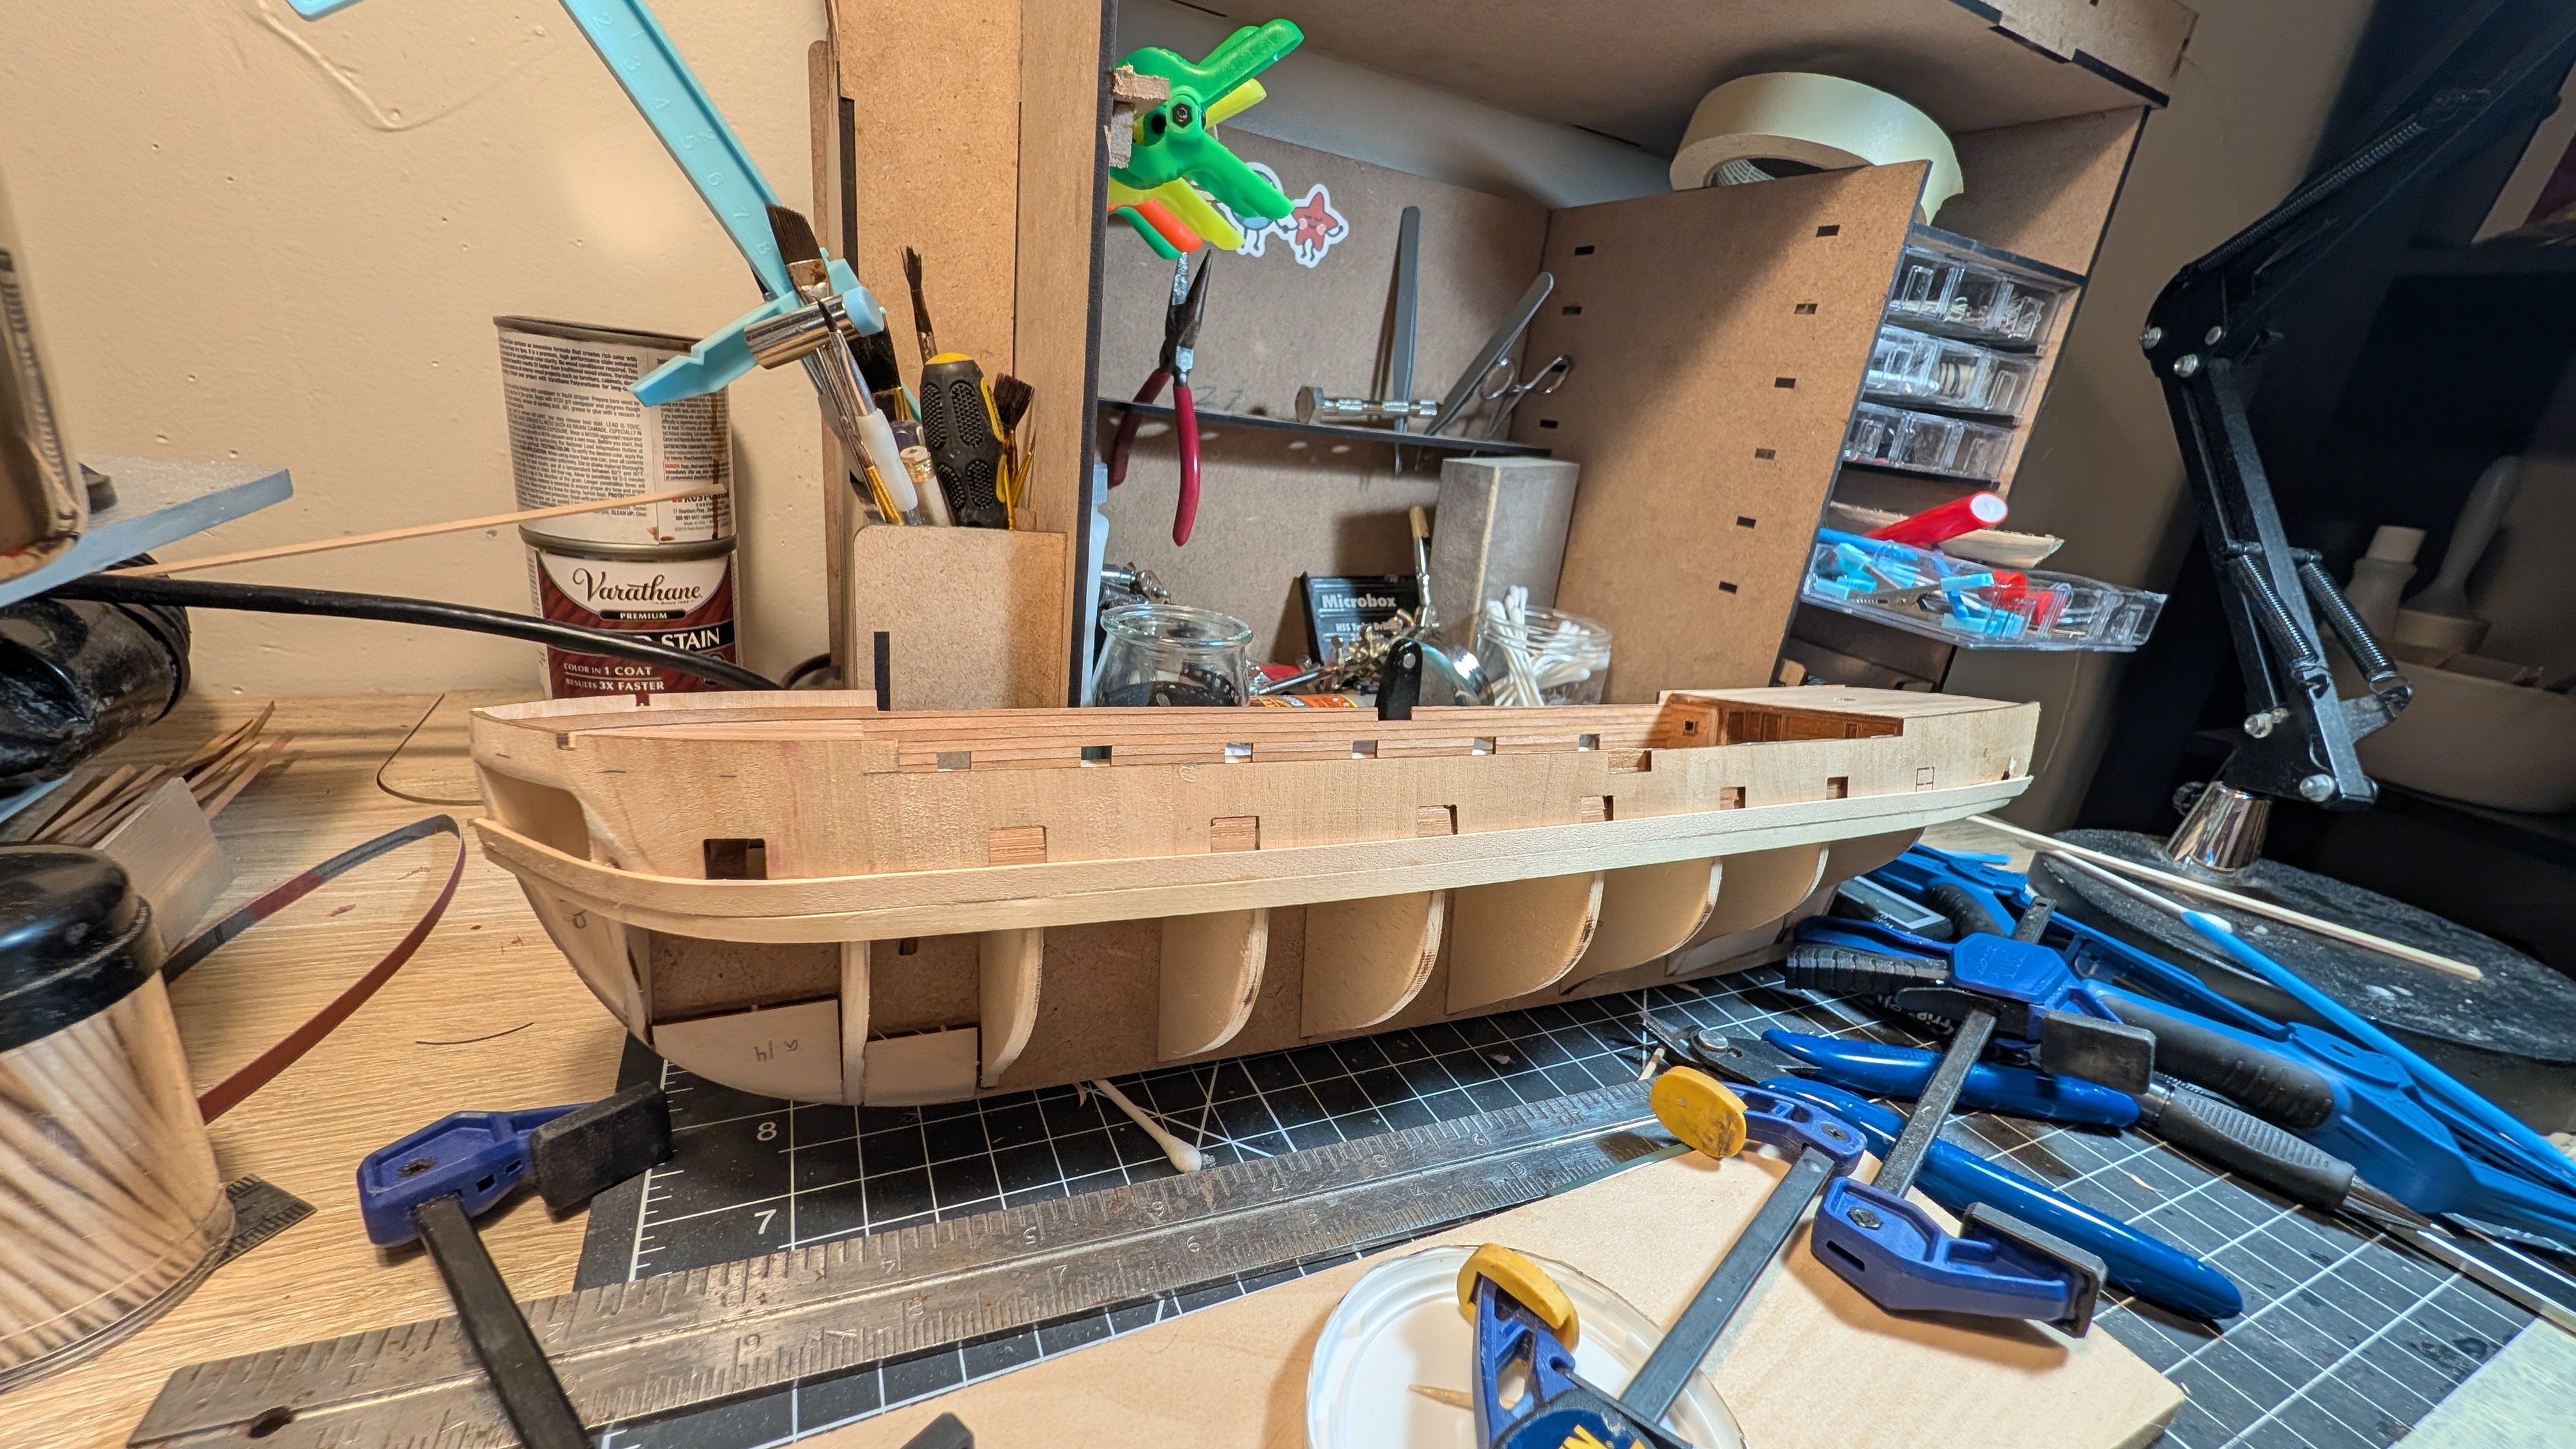
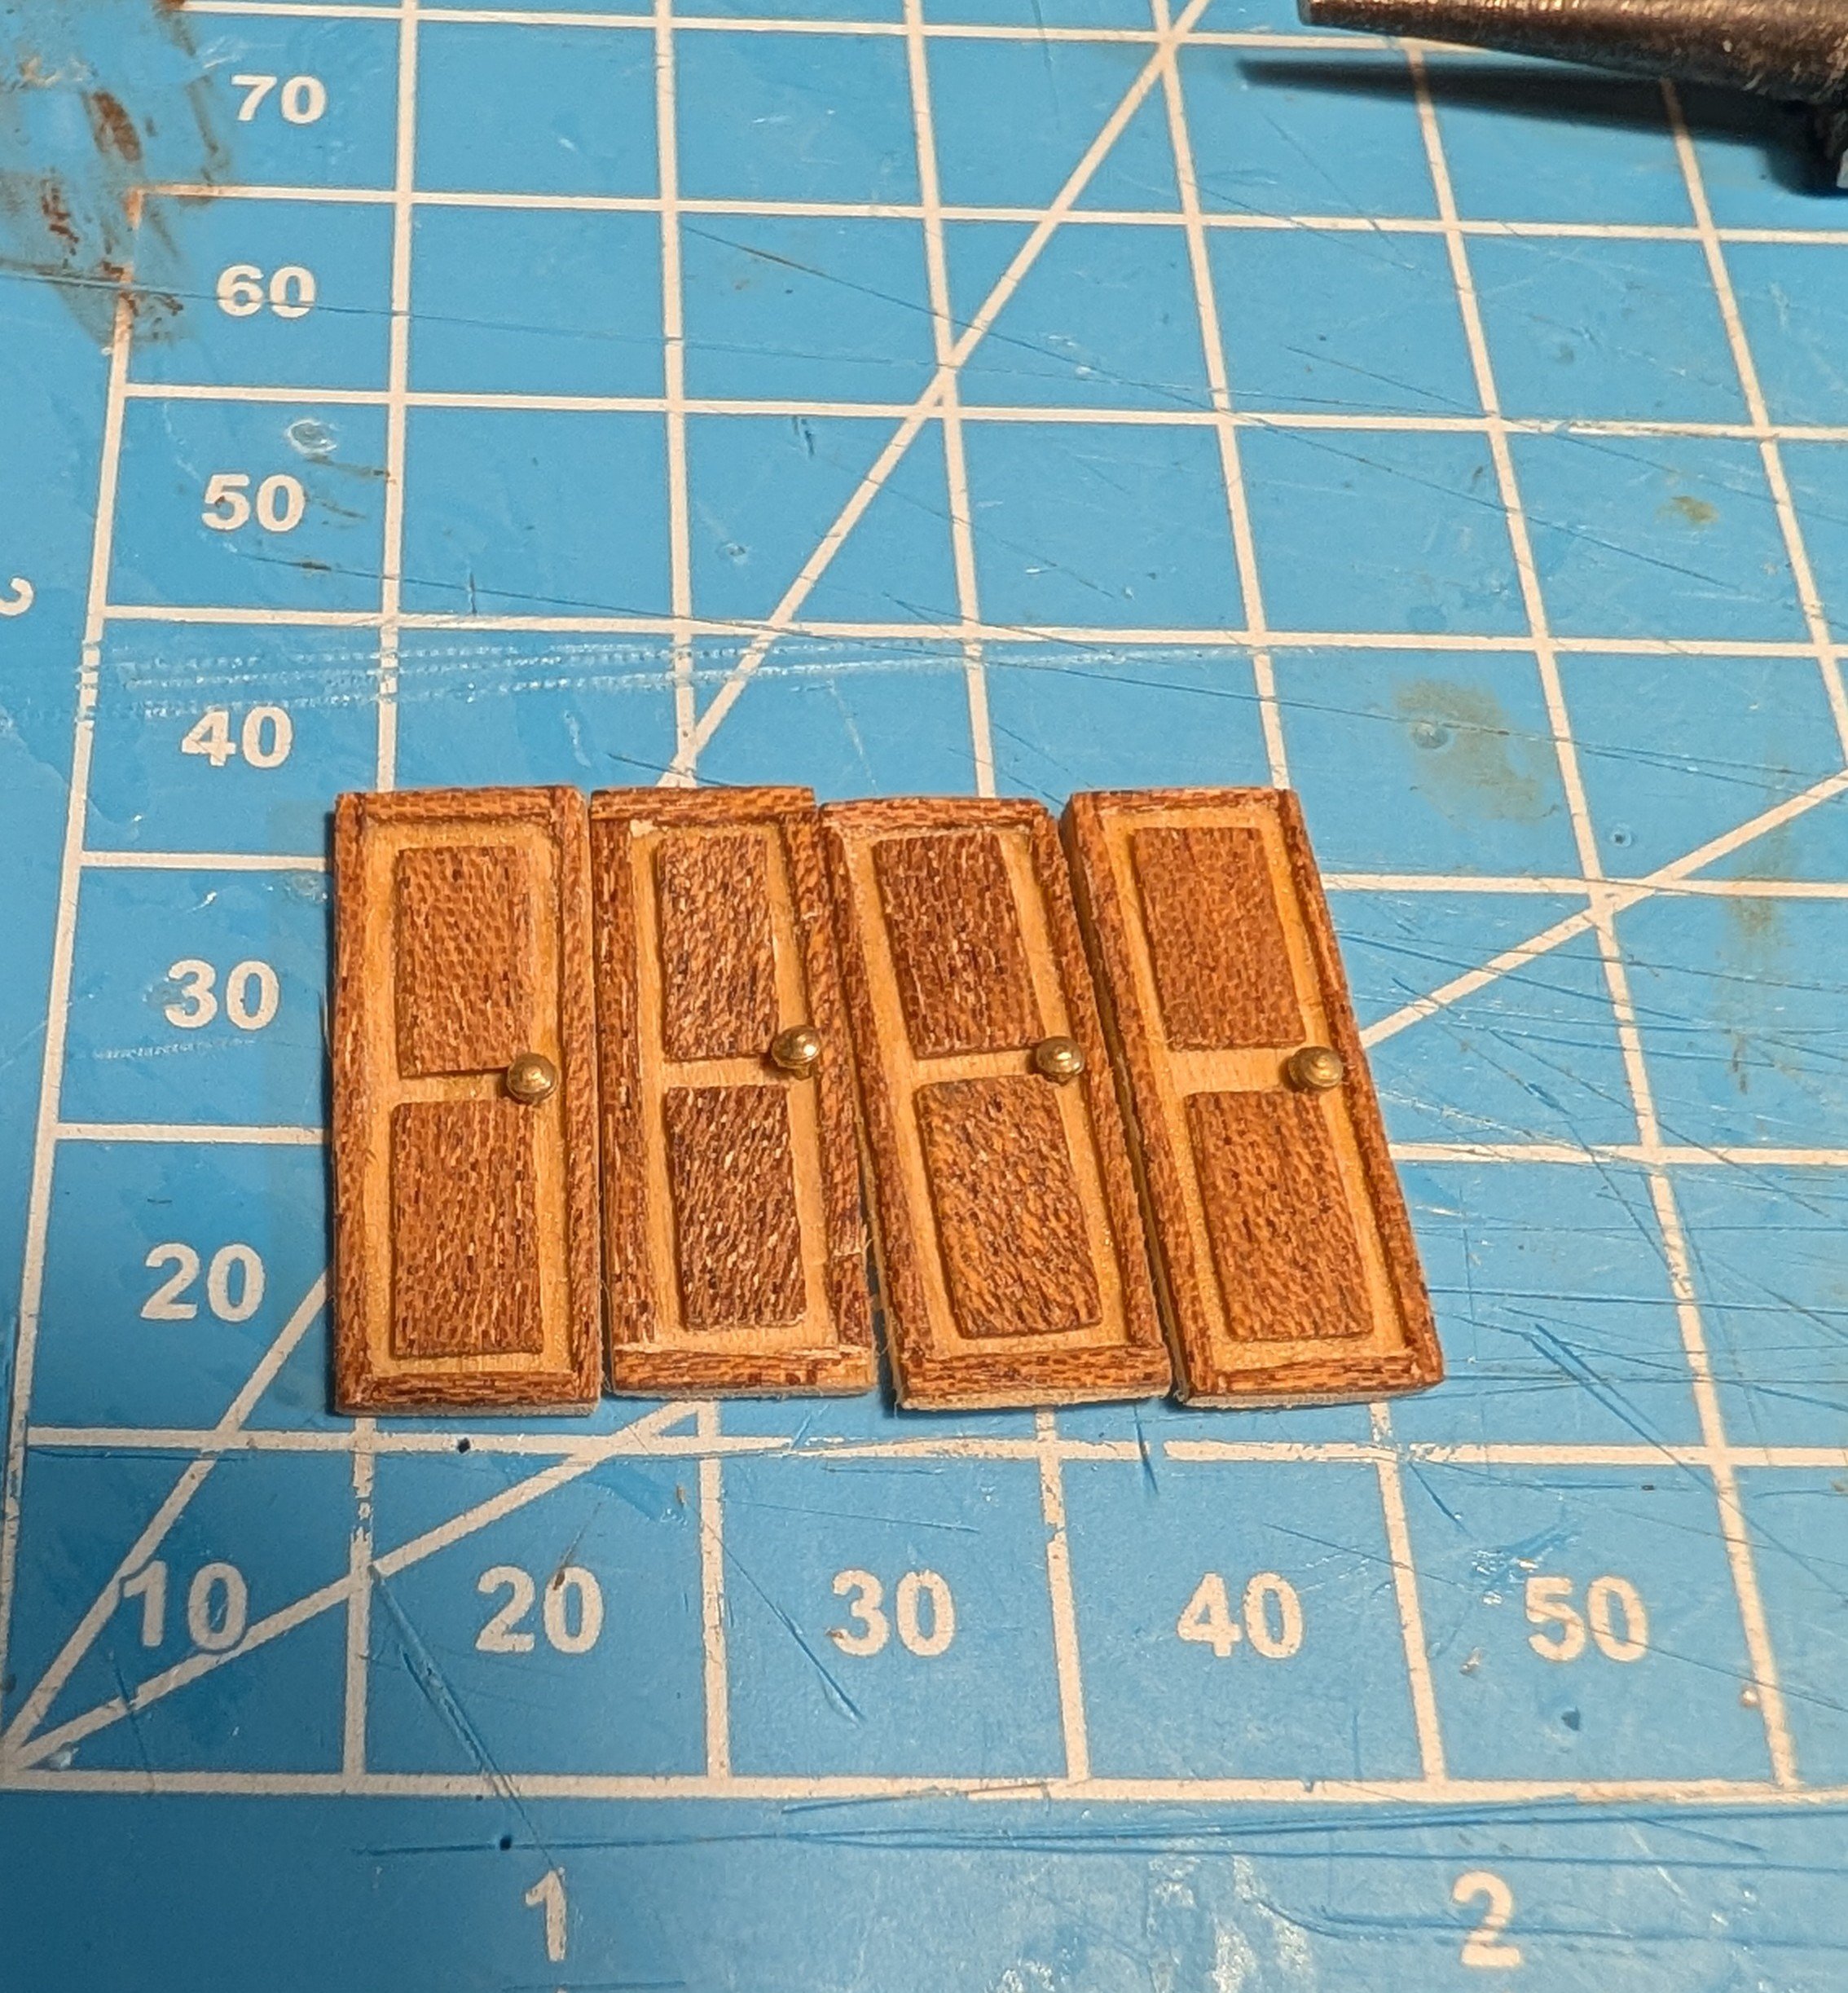
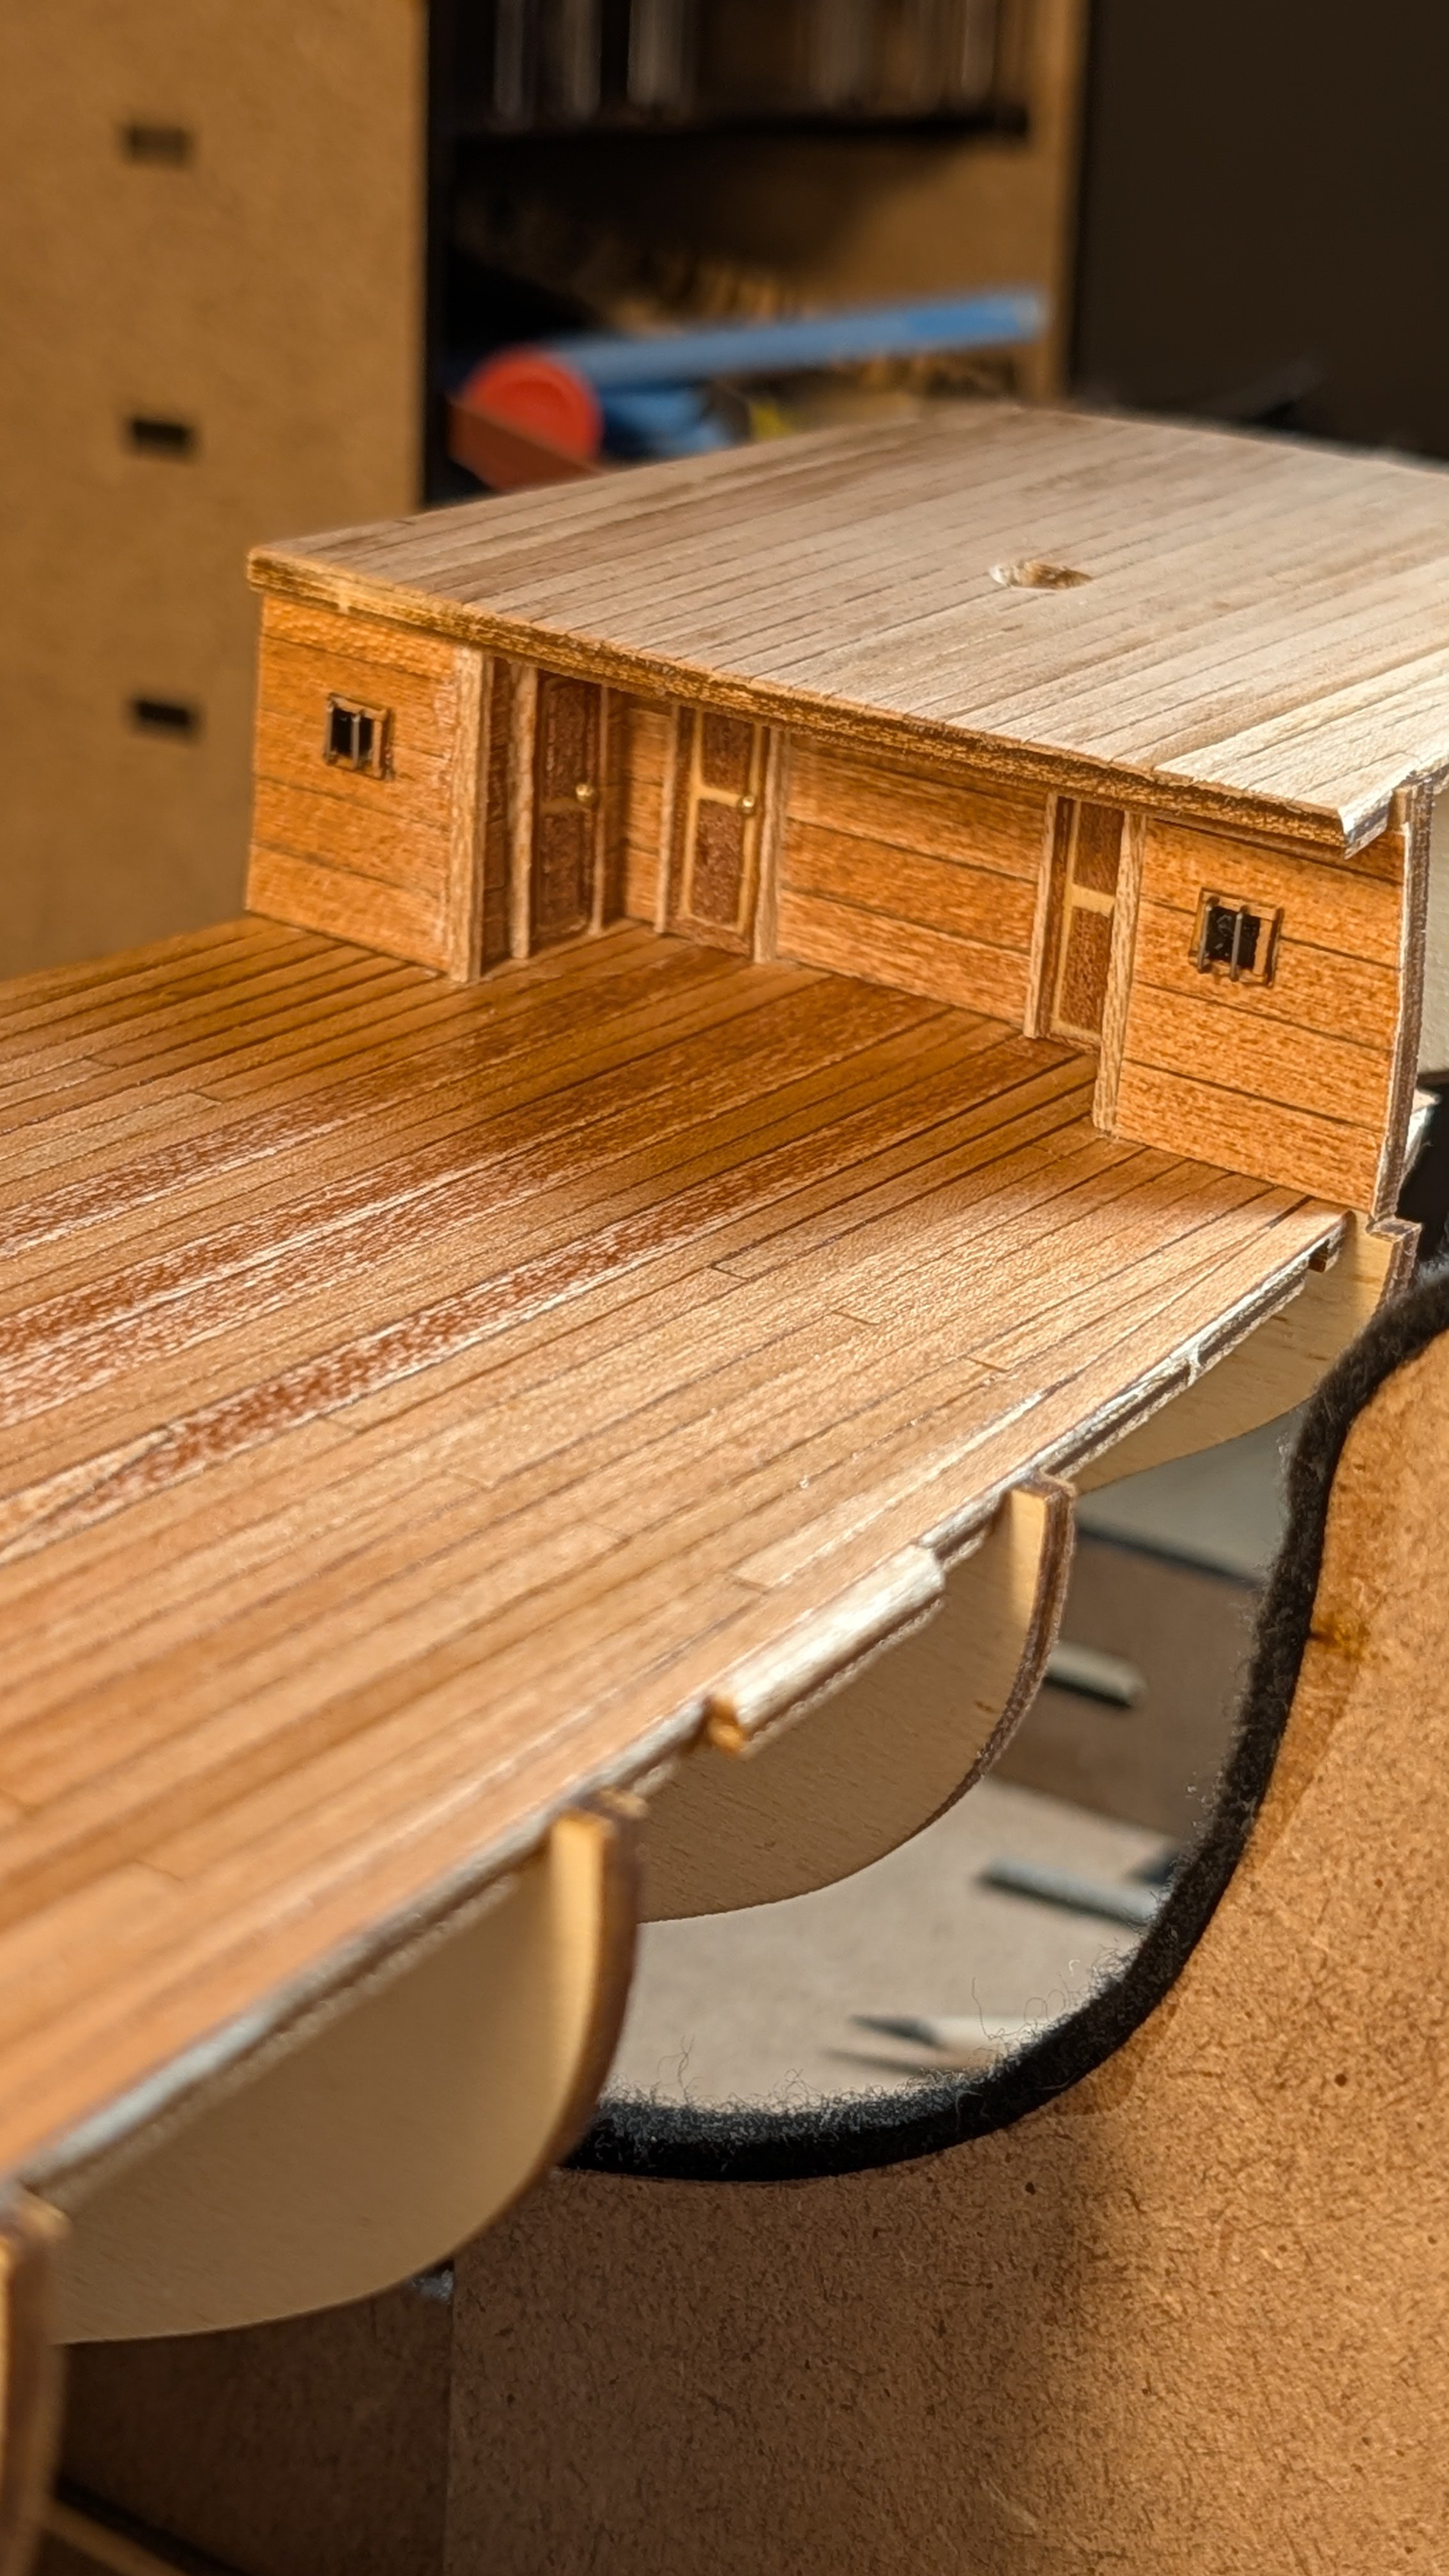
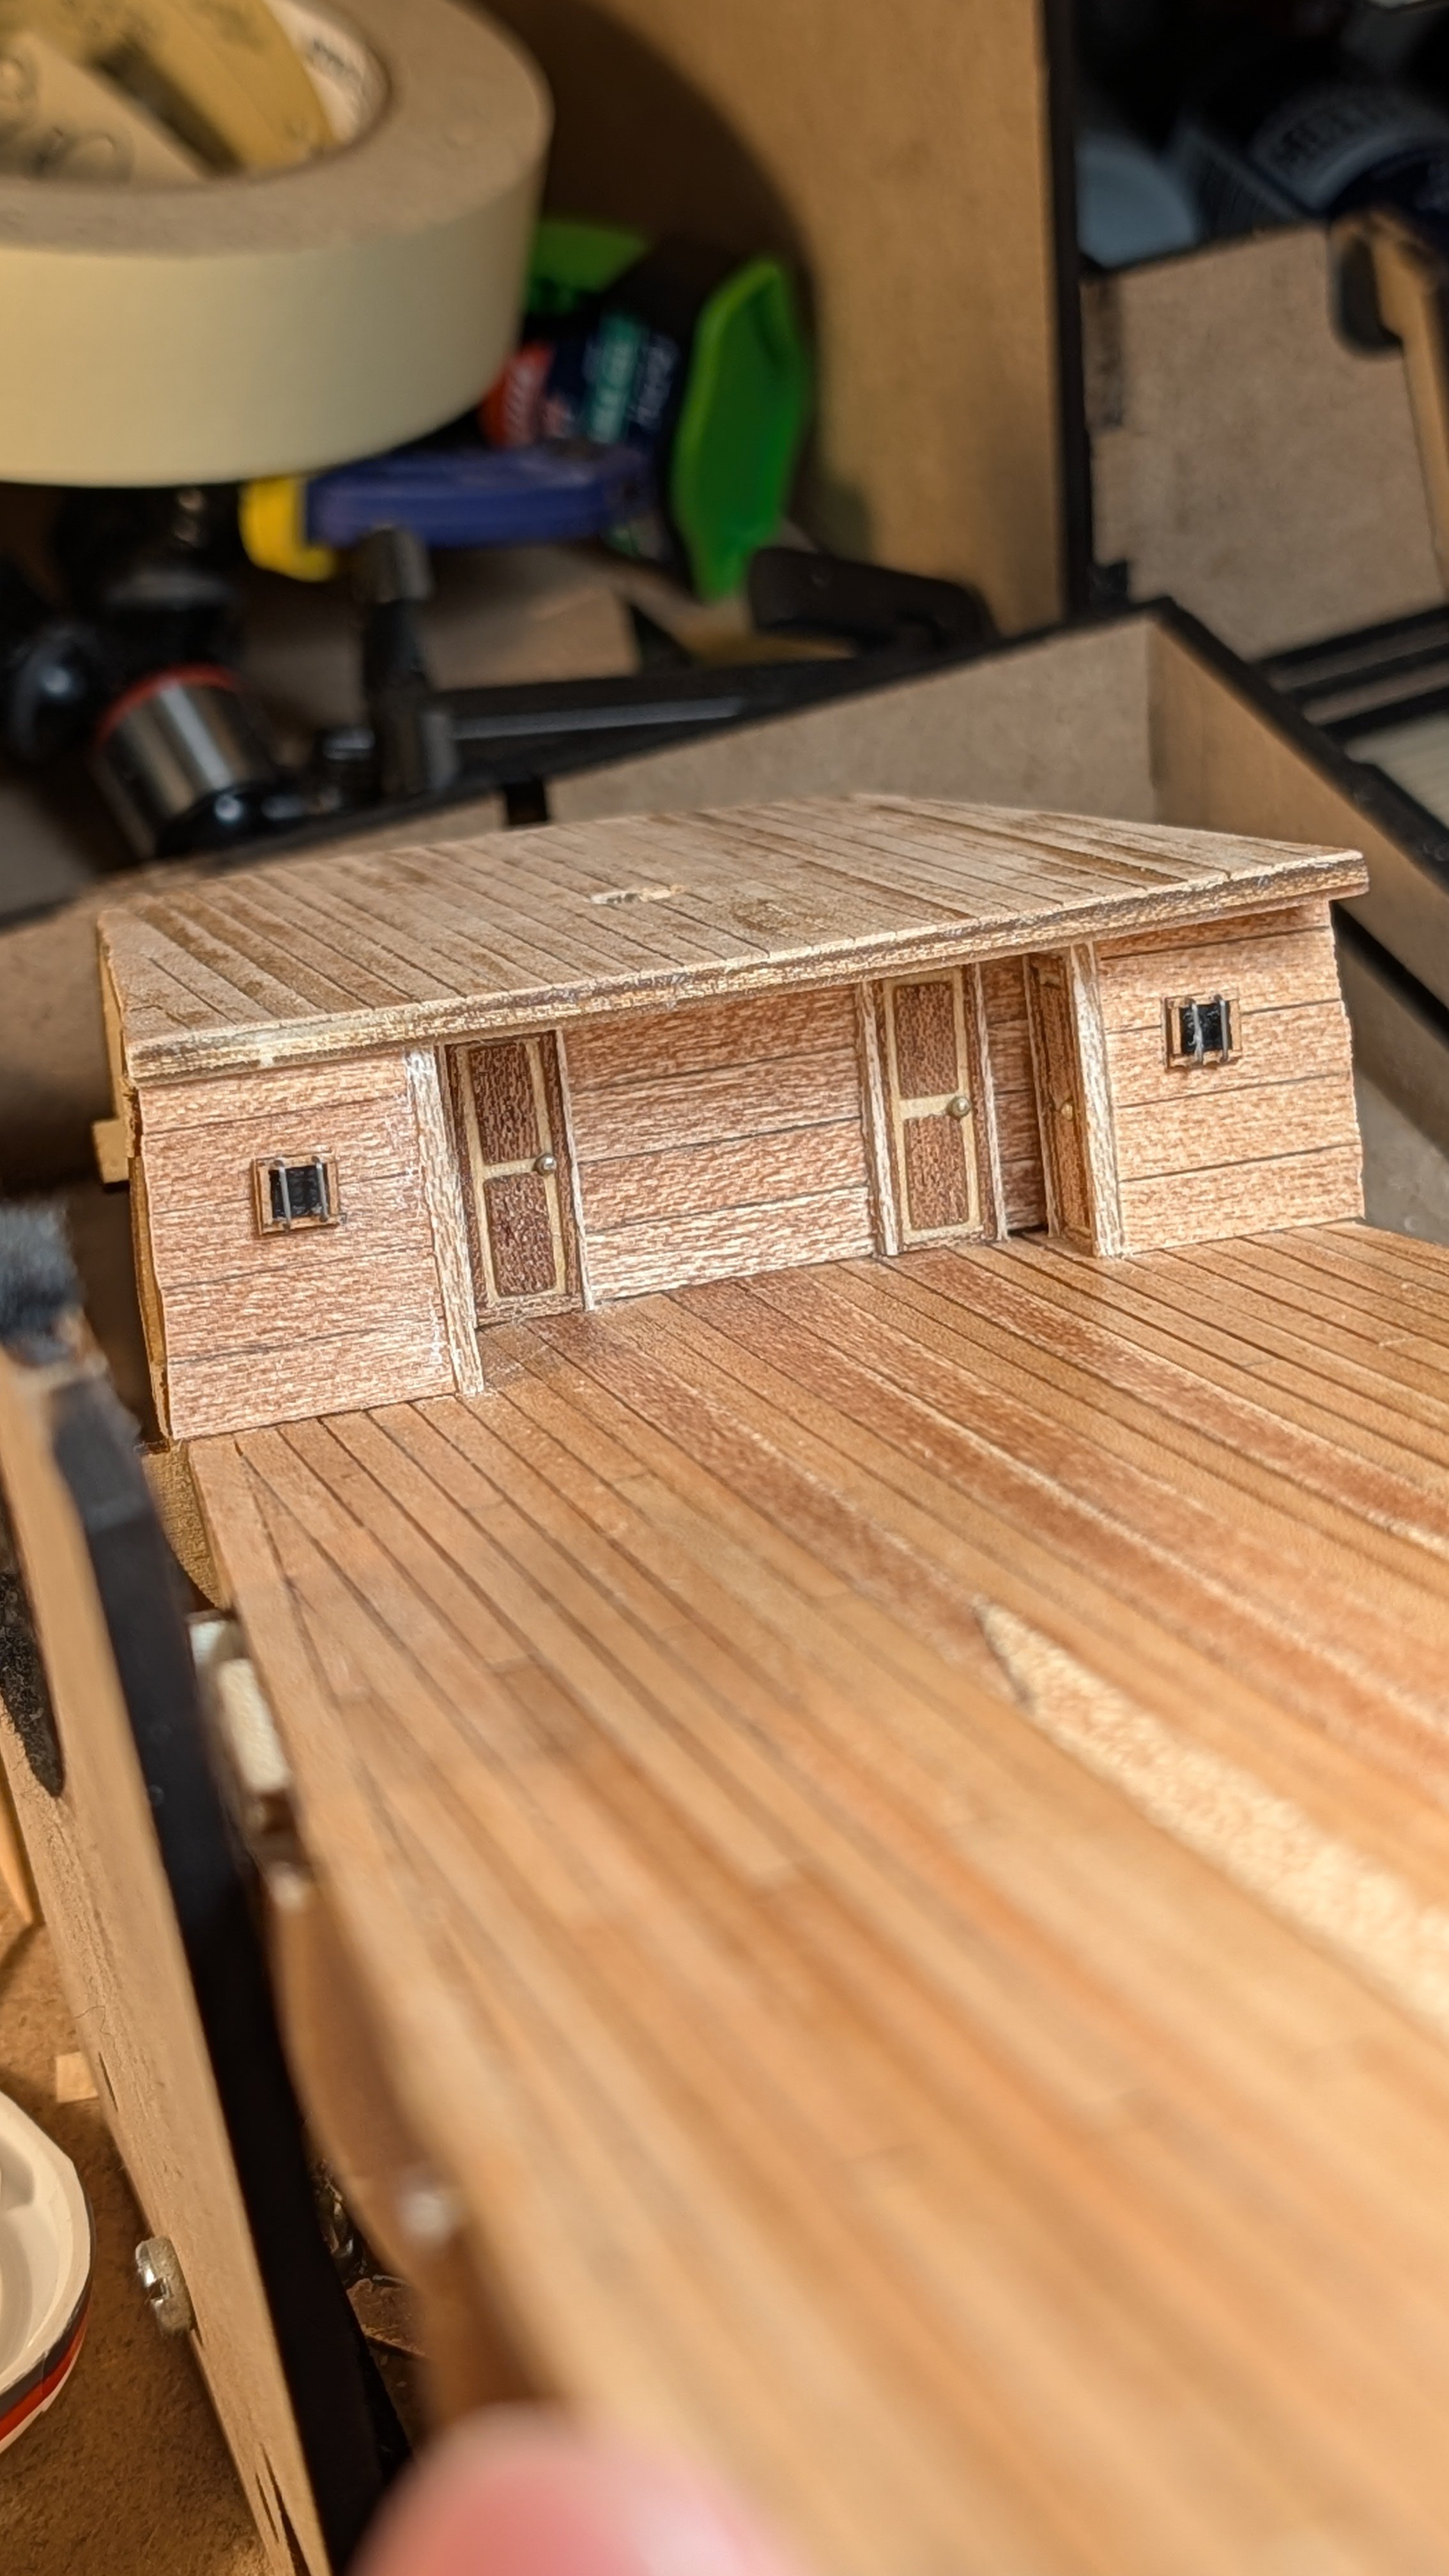
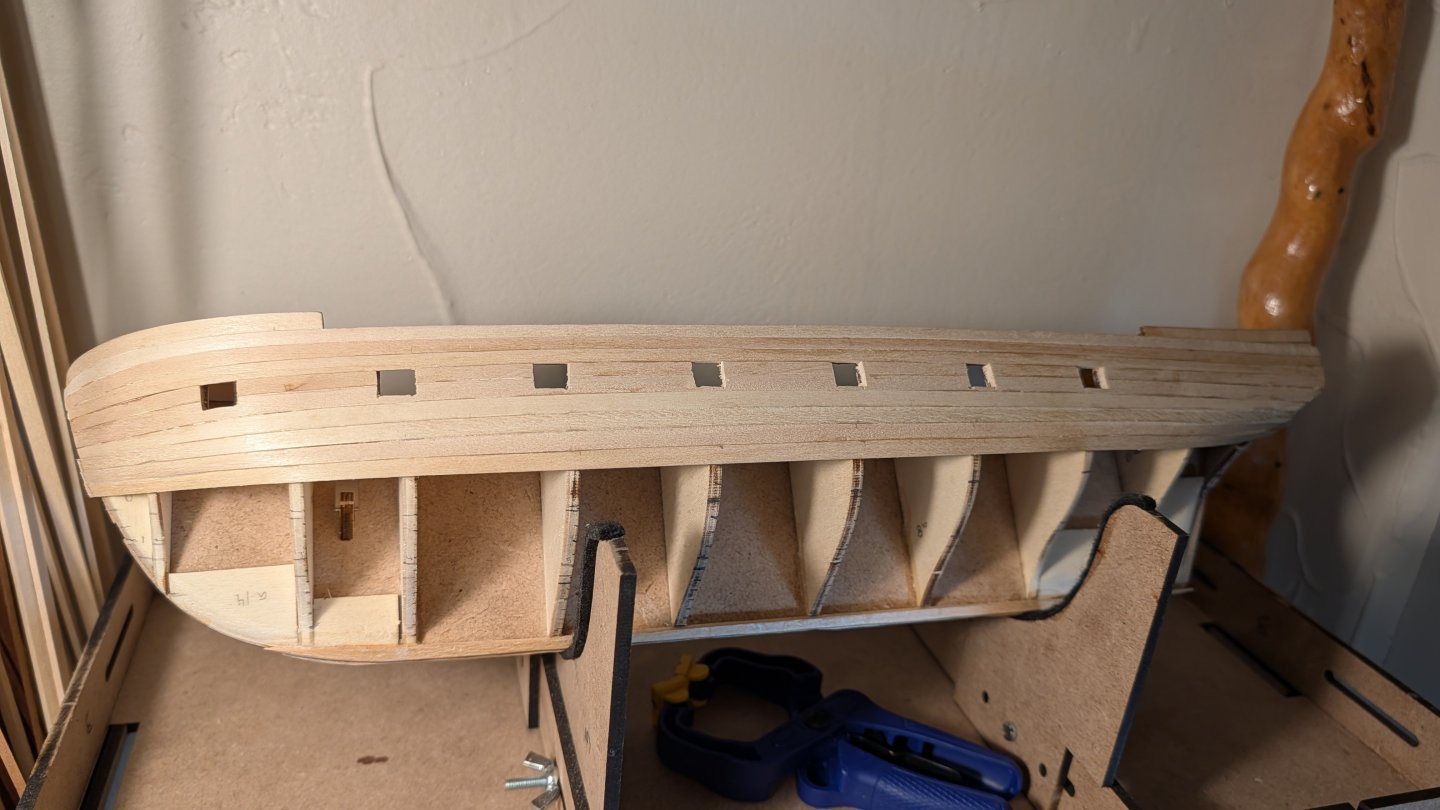
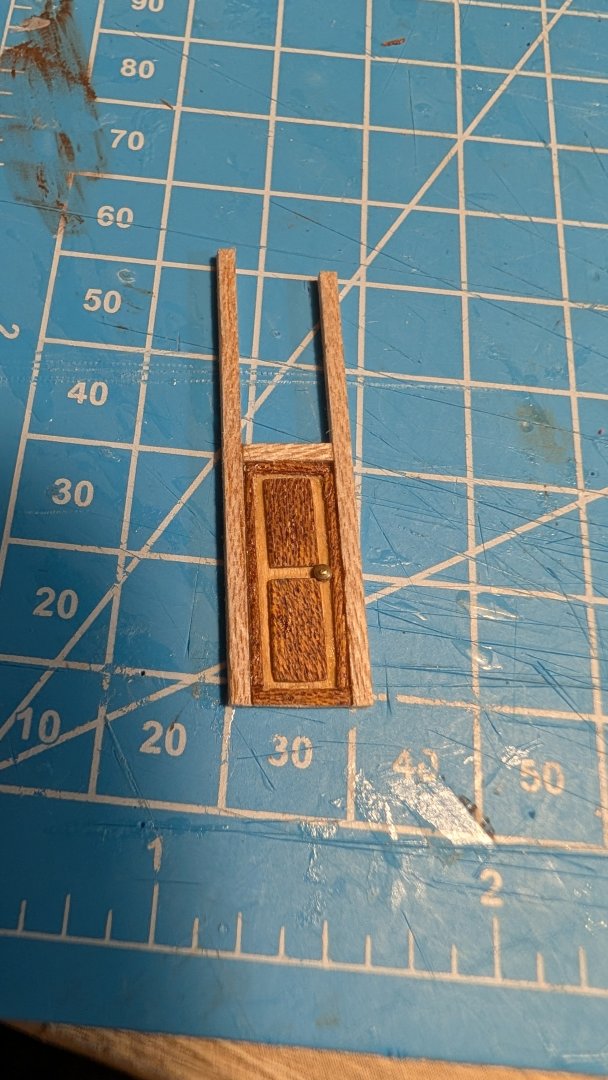
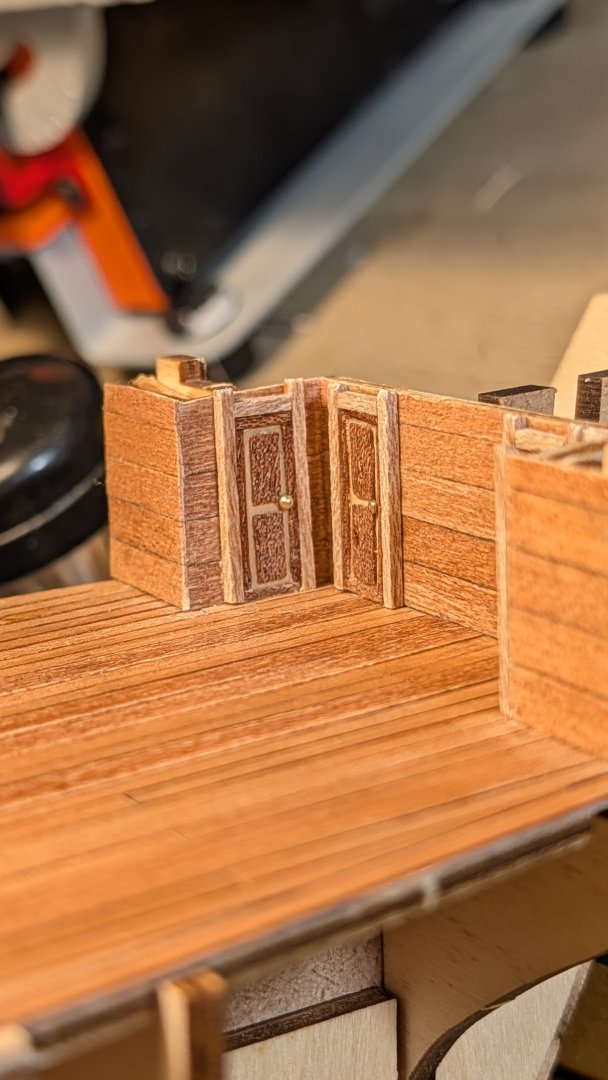
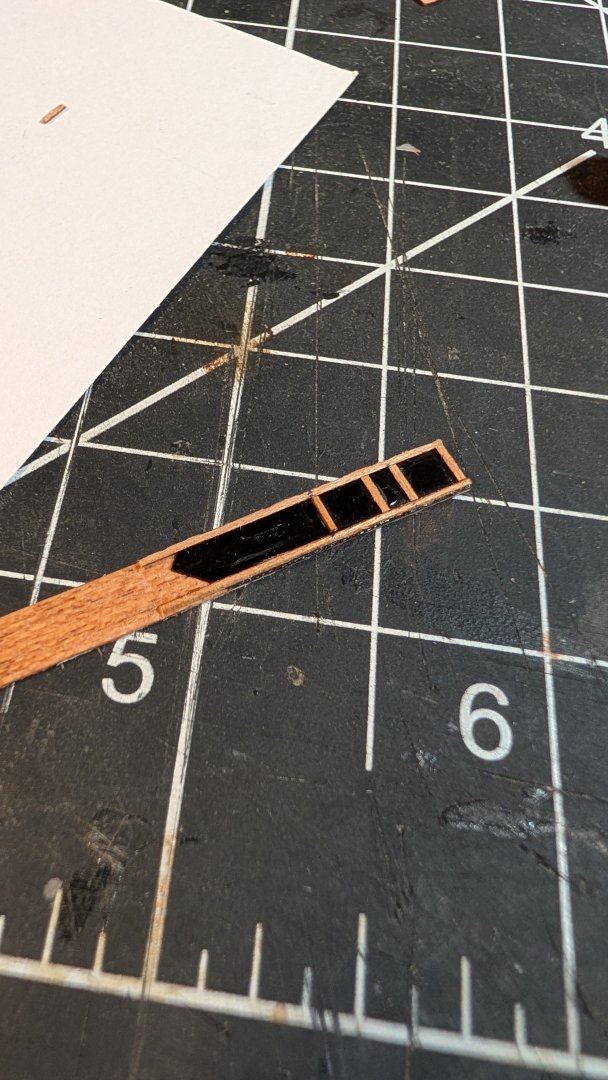
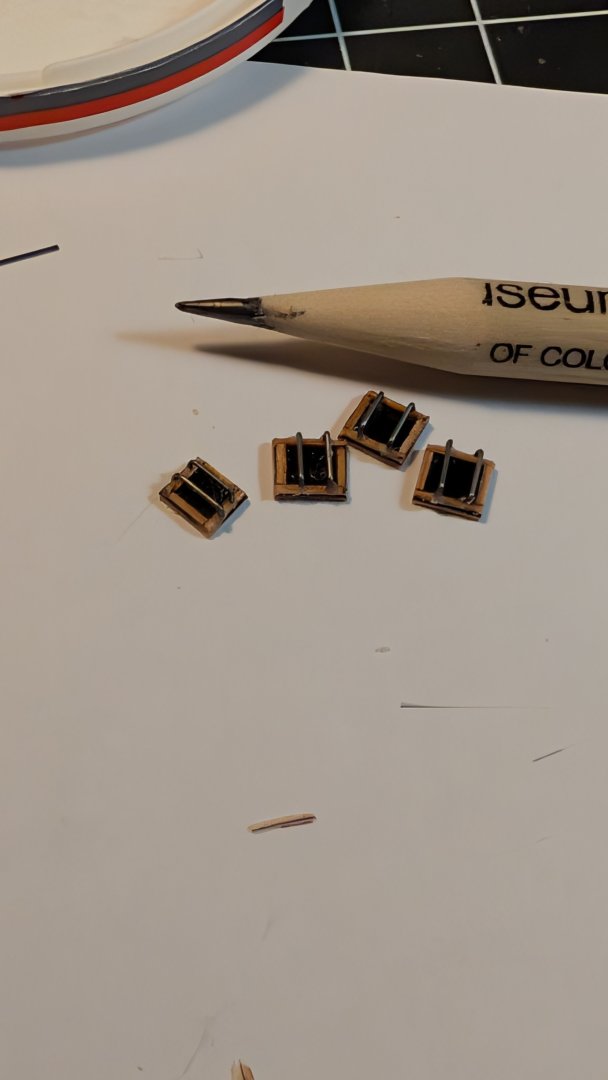
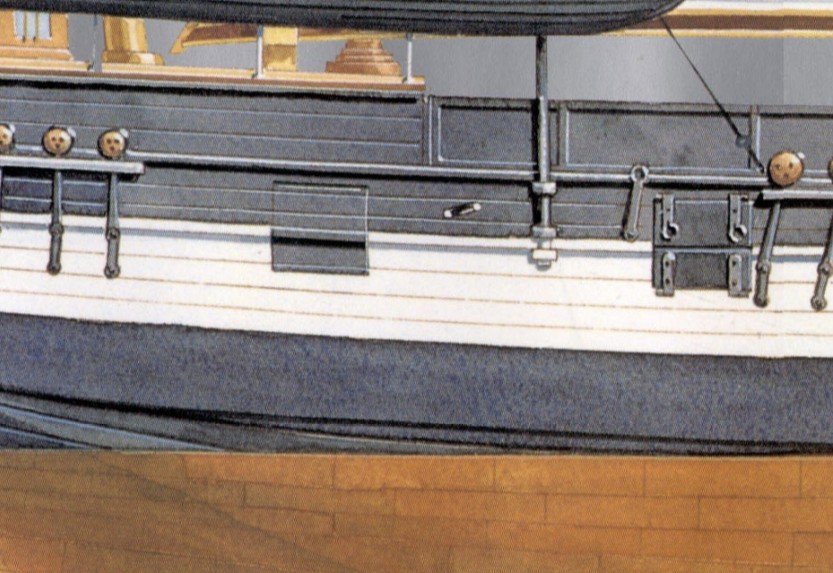
Hello all, First of all, thank you @Snug Harbor Johnny, @Geordie Tyne, @Baker, @tmj, and @Cathead for the lovely comments, your encouragement means a lot. Second of all, its been a sad week in the workshop as my mom passed on Sunday and I've been using the Beagle as a distraction. I am thankful to have it and this forum to keep my hands and head occupied. I don't know why I decided to mention it here, but build logs are a journal of sorts, and I'd like to dedicate this ship and its log to my mom, as the Albatros was dedicated to my dad. Speaking of, here's some progress: Doors: If you remember earlier in the log, I had already made some, I made two more to match the best two from earlier, then sanded them all down to be as thin as possible. Door Framing: I wanted to add some framing to the doors, and used 1.5 x 1.5mm balsa. Here's how it looks on the cabin: Now, I liked the look but upon review of the AOS book, the door frames were much too big. I took a exacto blade to them and thinned them out, which you'll be able to see later in the post. Windows: So these are more kit provided brass parts that I wanted to make myself. I glued some film to a strip of veneer, I was hoping the film would have a window-like sheen: I then bent and glued music wire to act as bars: There is some glue to clean up but it really isn't noticeable because of how small these things are. Here's the final results (thin door frames included): Bulwarks: I pre-bent the bulwarks quite well this time to avoid my mishap with the Albatros, they were much easier to glue on, still a bit finicky but not stressful. Keen eyes may note one of the cannons holes is not cut out. I did this on purpose because the layout of this aft-most cannon hole is different in the AOS book, and it will be easier to replicate with that frame still attached. Here's how it looks in the book: Look at me thinking ahead. Anyway that's where I am currently. Planking of the inner bulwarks is in progress, I'm using the thinner 3mm cherry planks to match the book. Current work time: 50:05:57 Best and well wishes, James


-
Welcome Alexa and well done on your first model! As for the planking question, I used pins that came with the kit on my Occre build and didn't have too much splinting, but pre-bending your planks might be enough to not have to use pins at all. Would highly recommend the planking tutorials by Chuck here on the forum. Also, side note, you should watch the show "Terror" (or read the book) it seems right up your alley. I'll keep an eye out for your build log of the Frame:)
-
Welcome and good luck with the beginner kits:) it's a lovely hobby I hope you stick with it!
-
Will be on the lookout for a rogue 30lb Maine Tabby Coon recently spotted in the region Admiral 🫡
-
Great work Keith! I've been looking forward to seeing the wheels.
- 407 replies
-
- 3
-
-
-
- Billy
- sternwheeler
- (and 1 more)
-
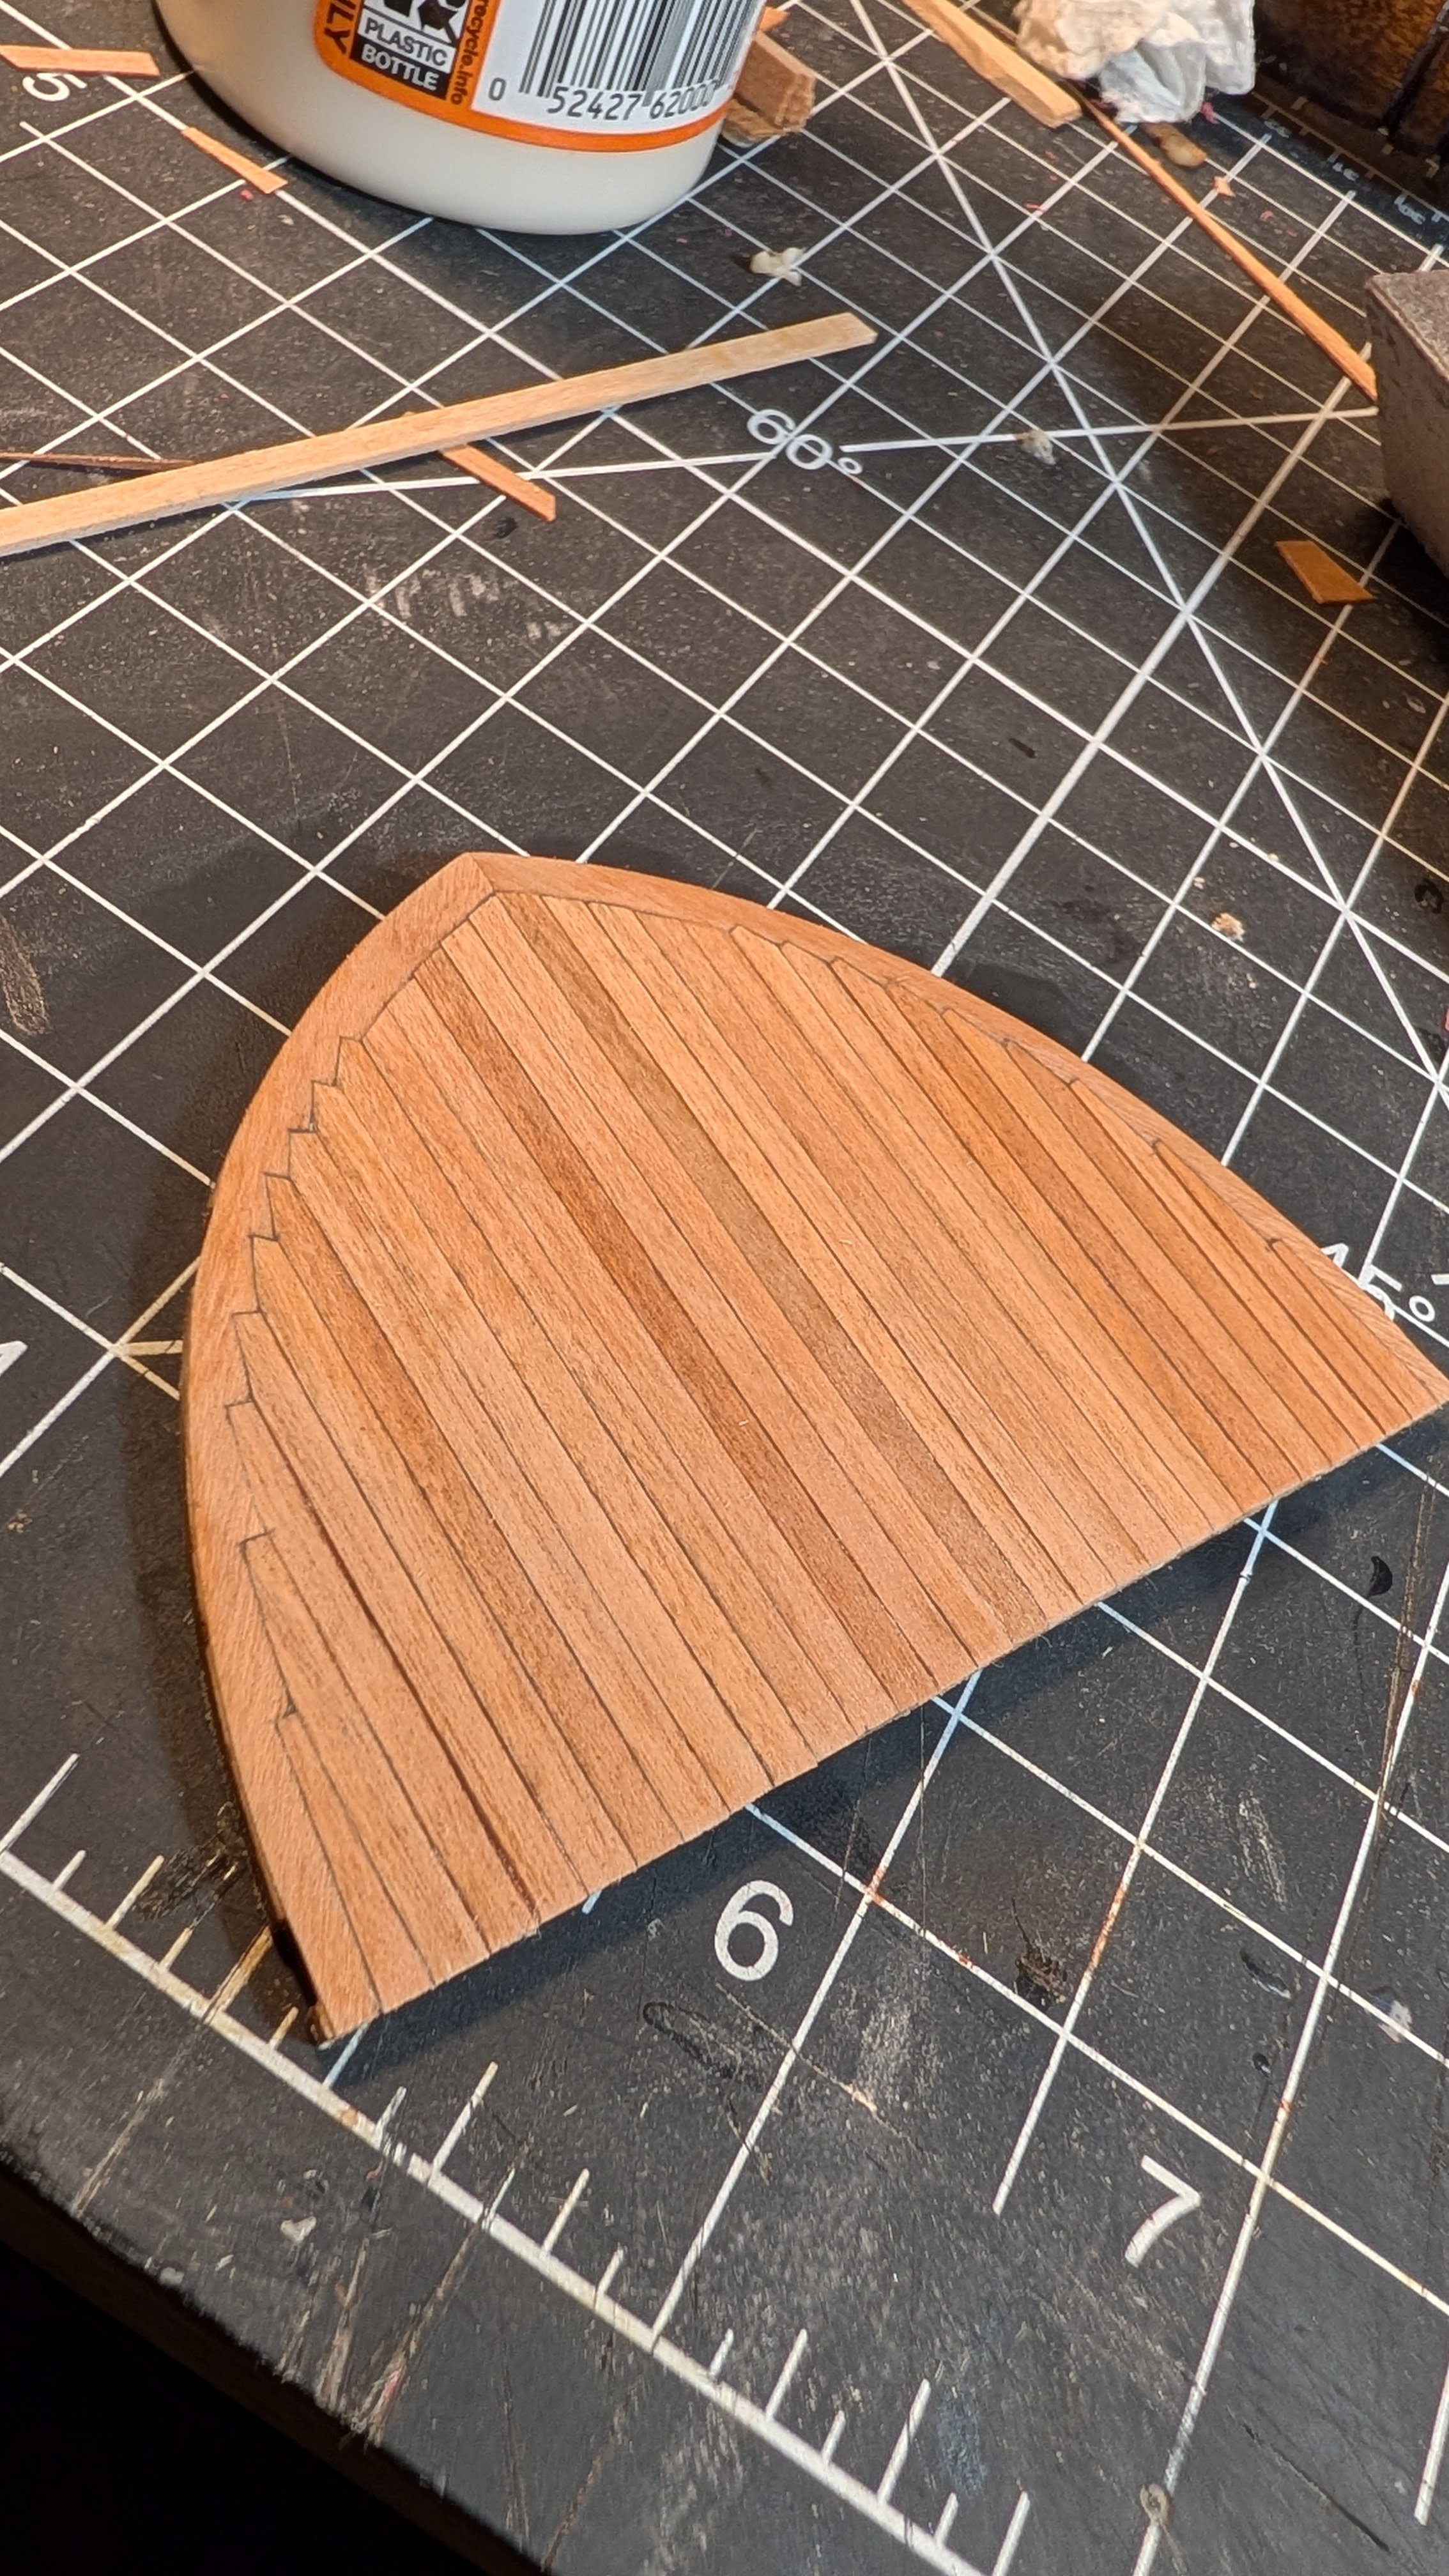
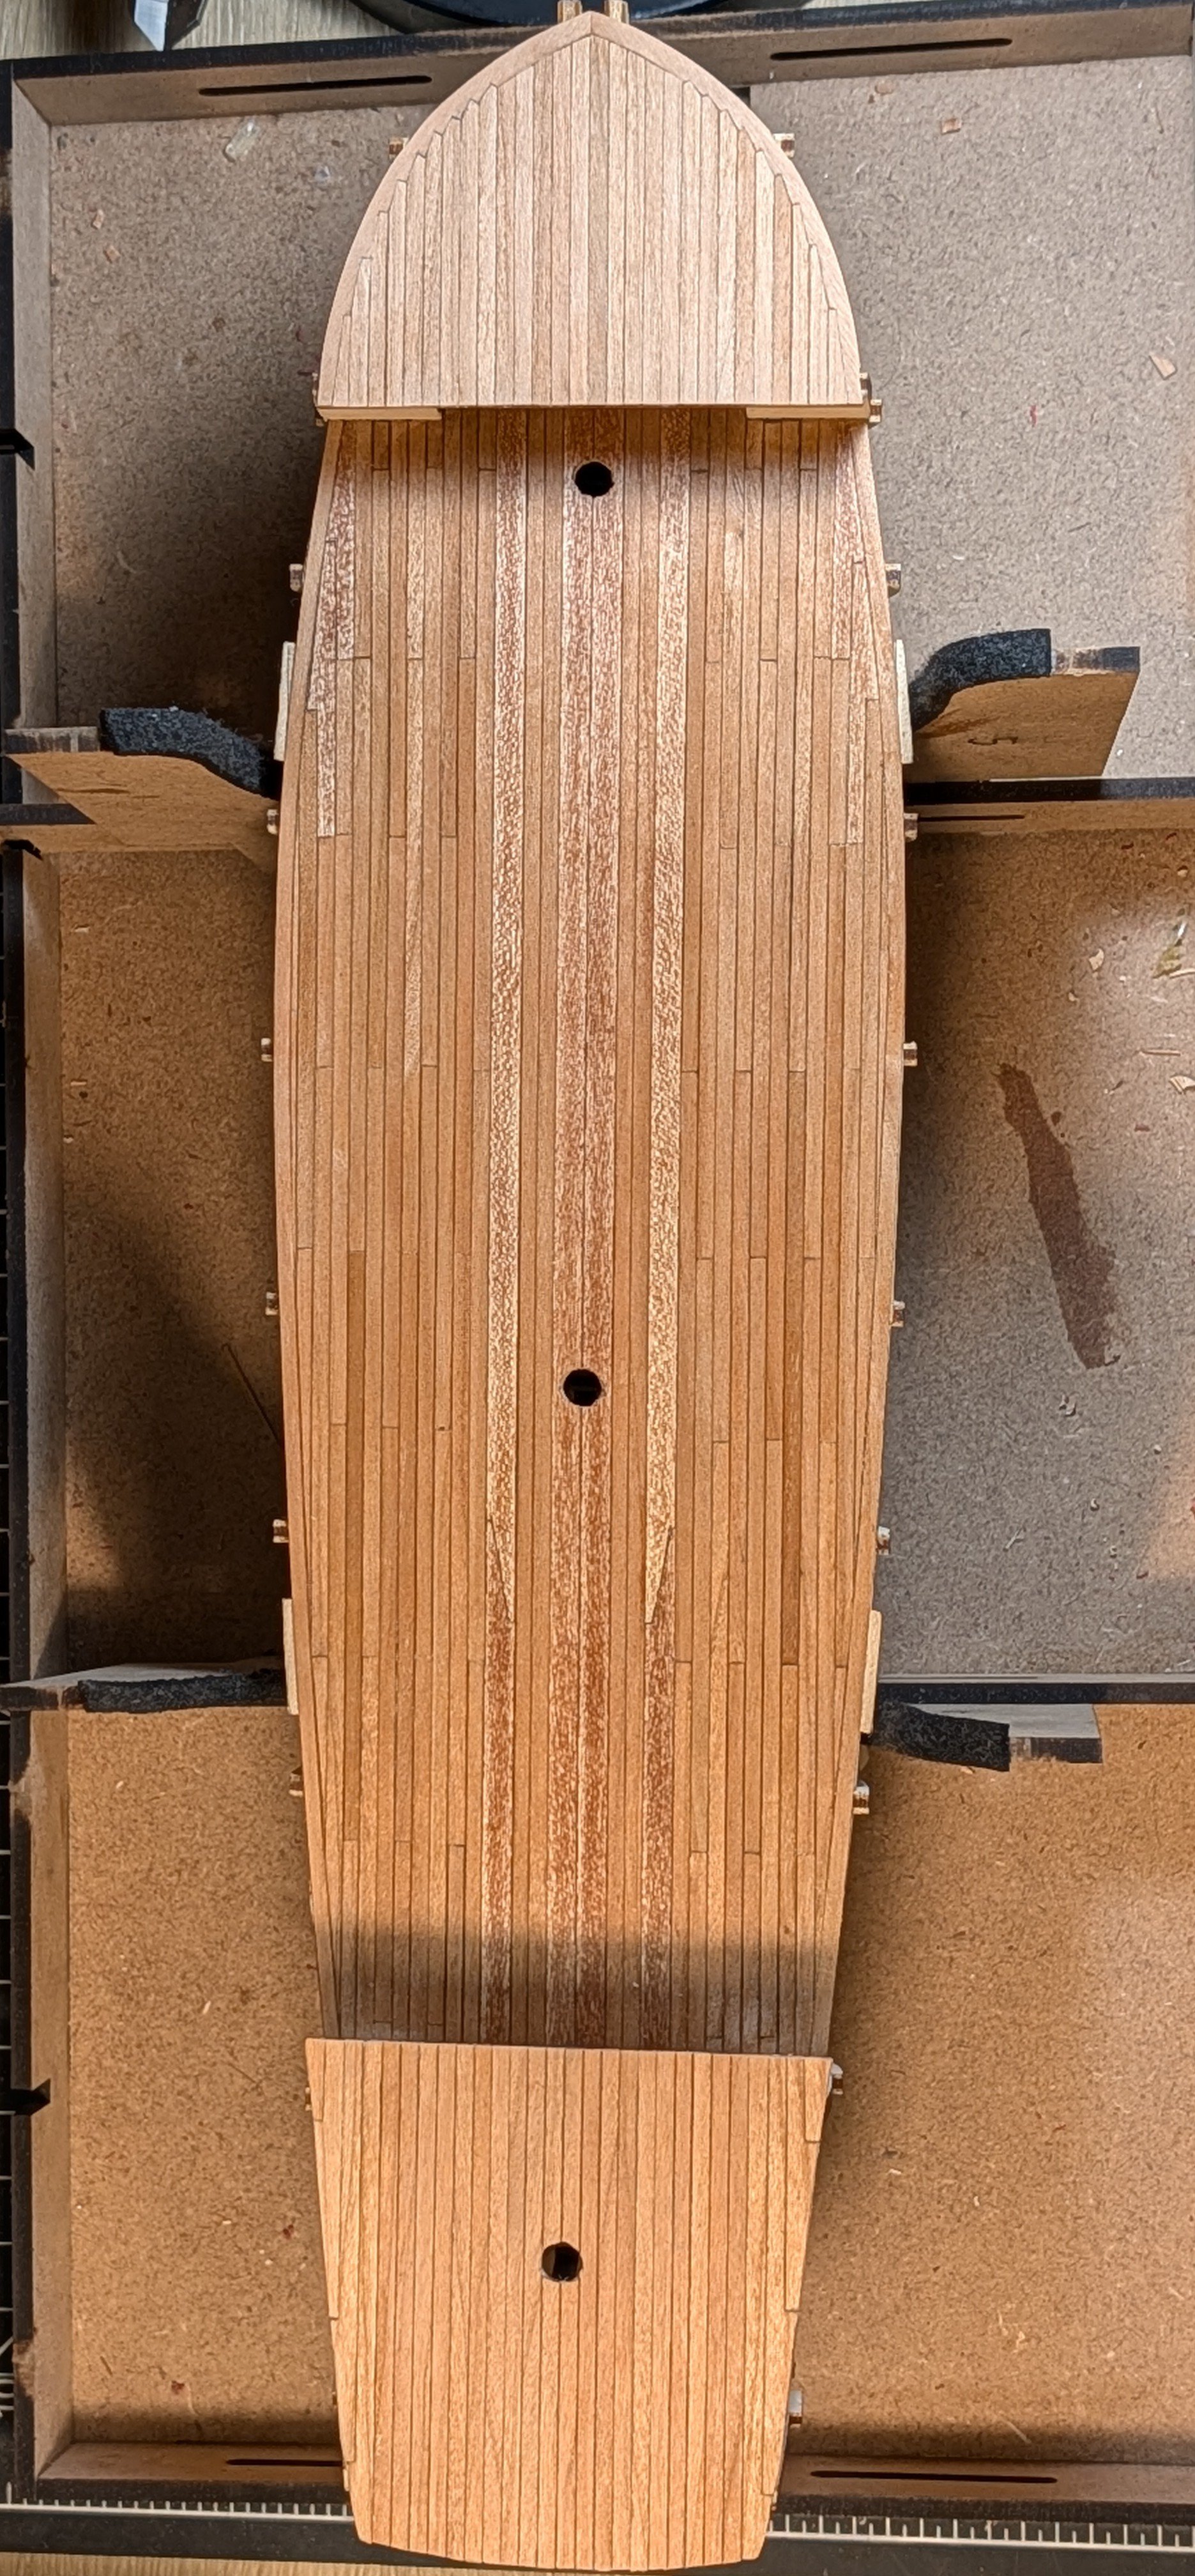
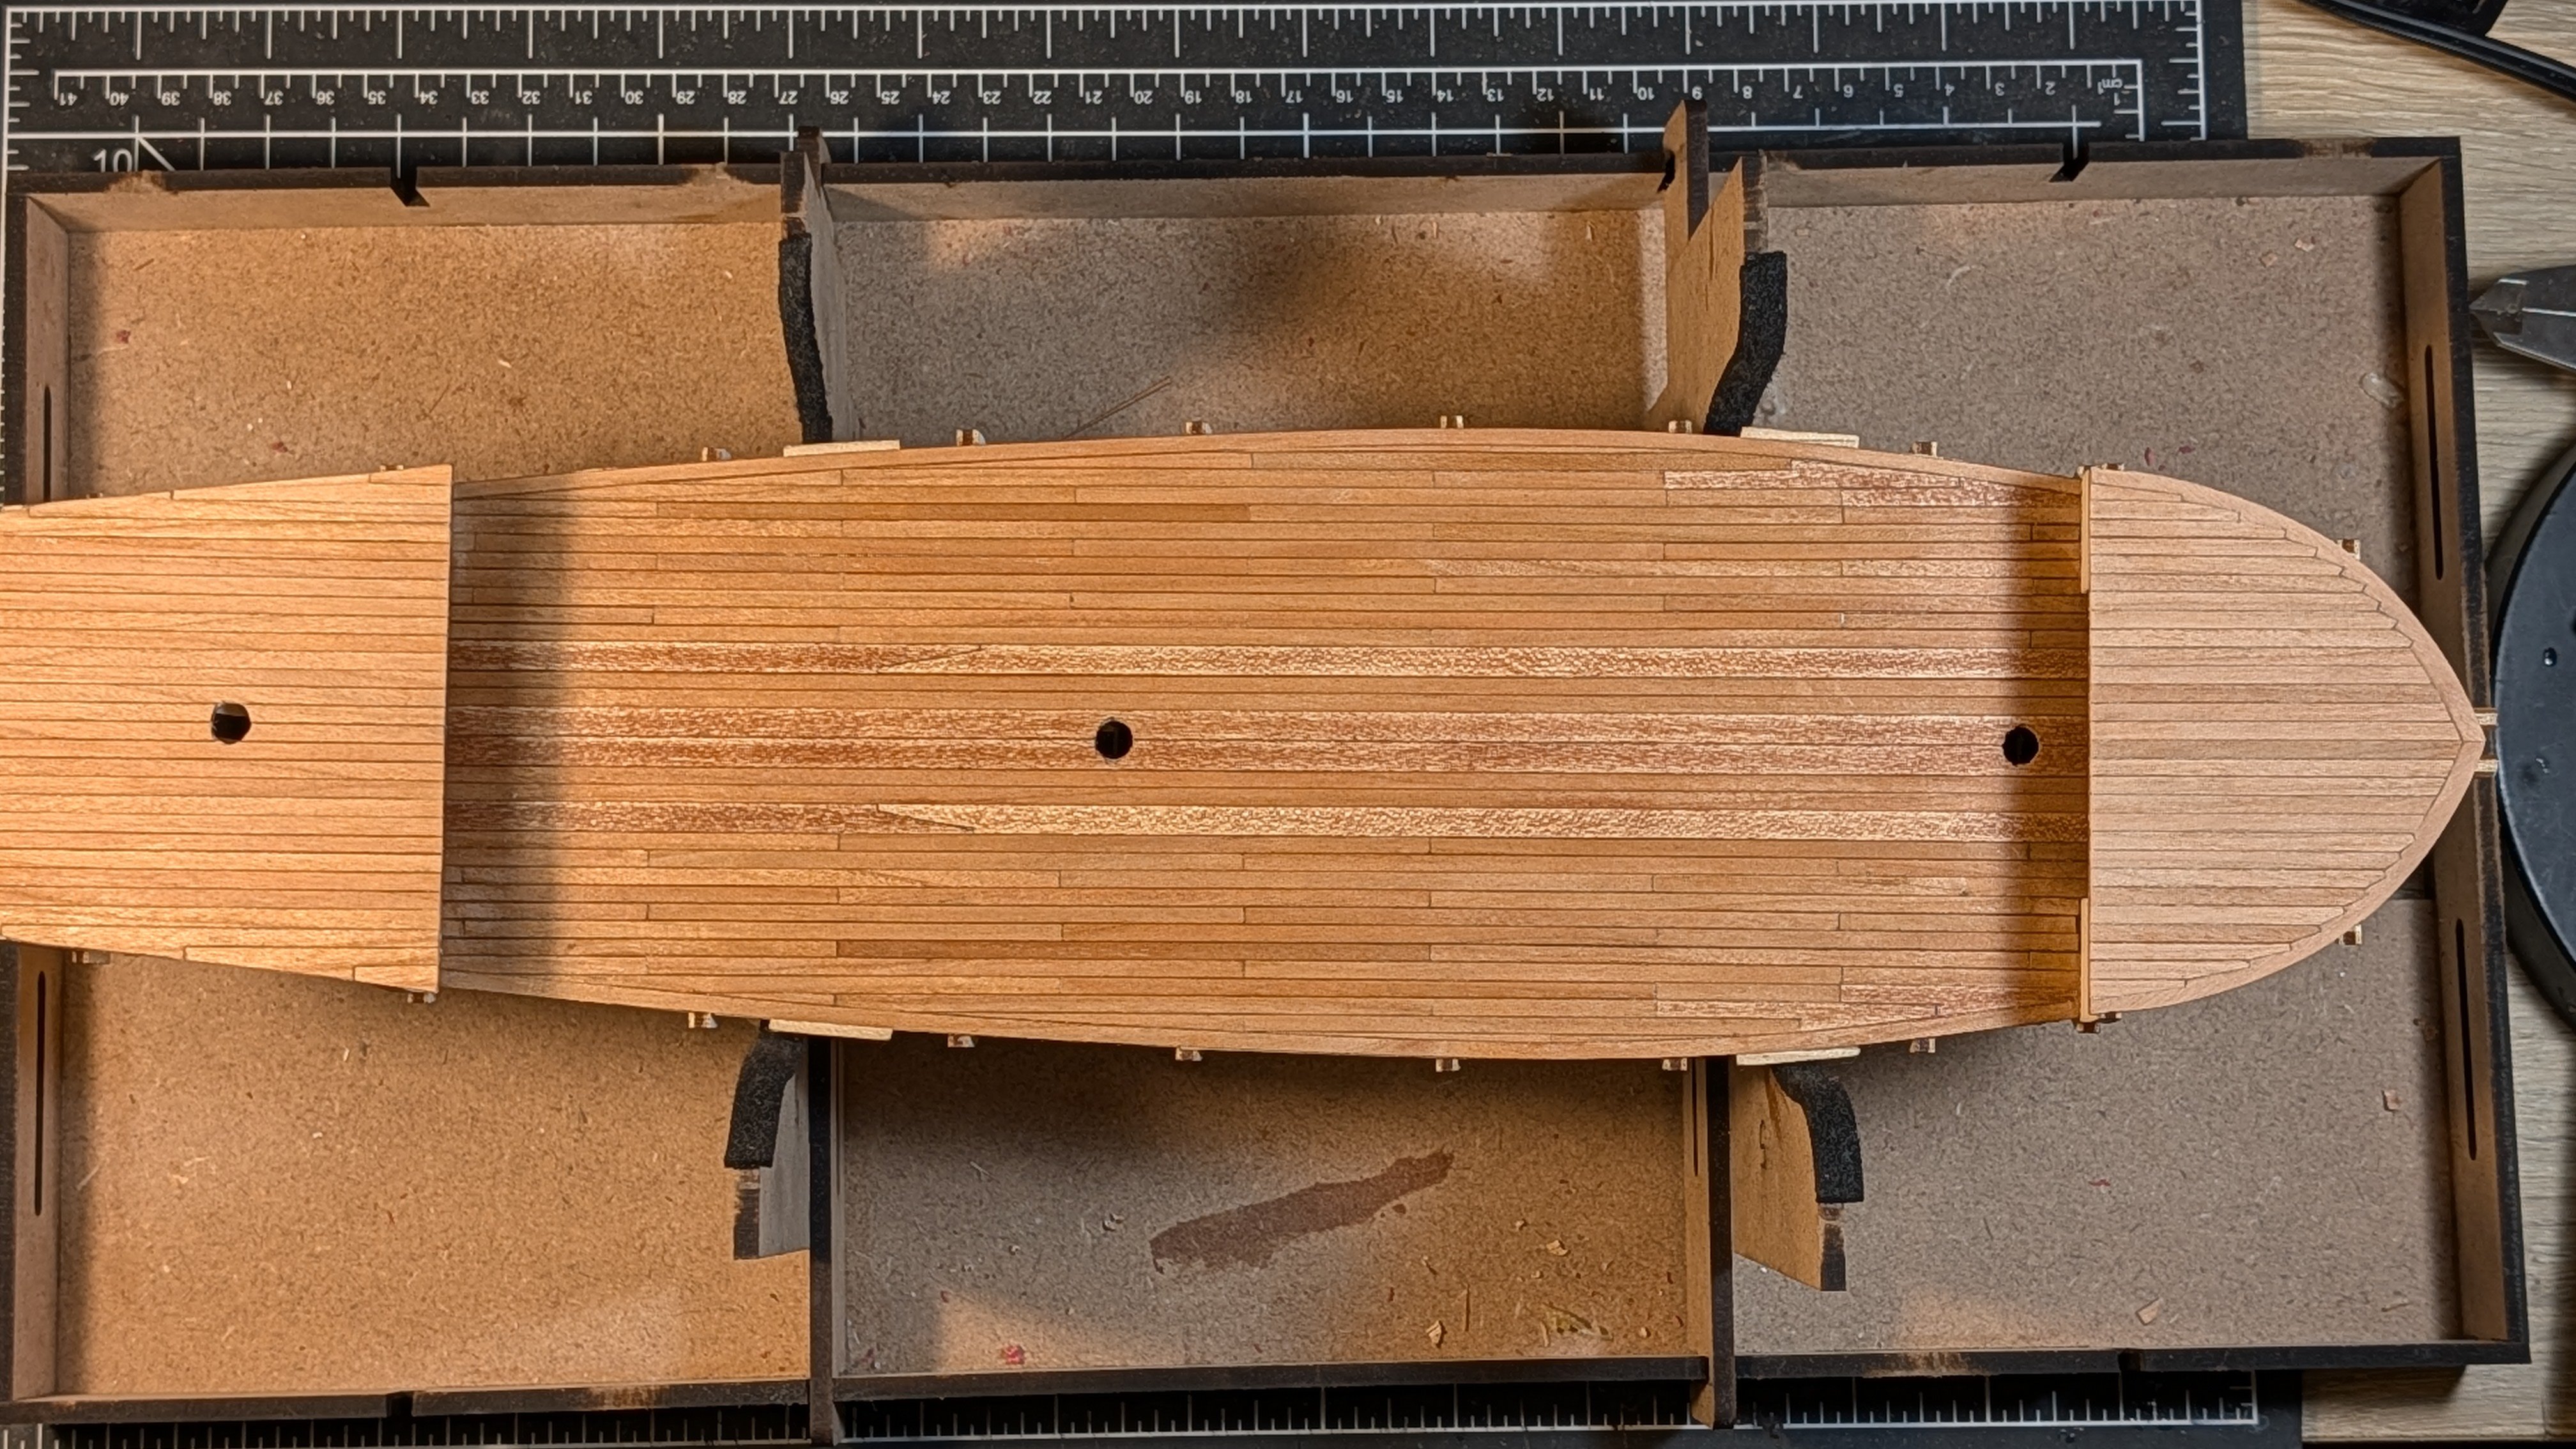
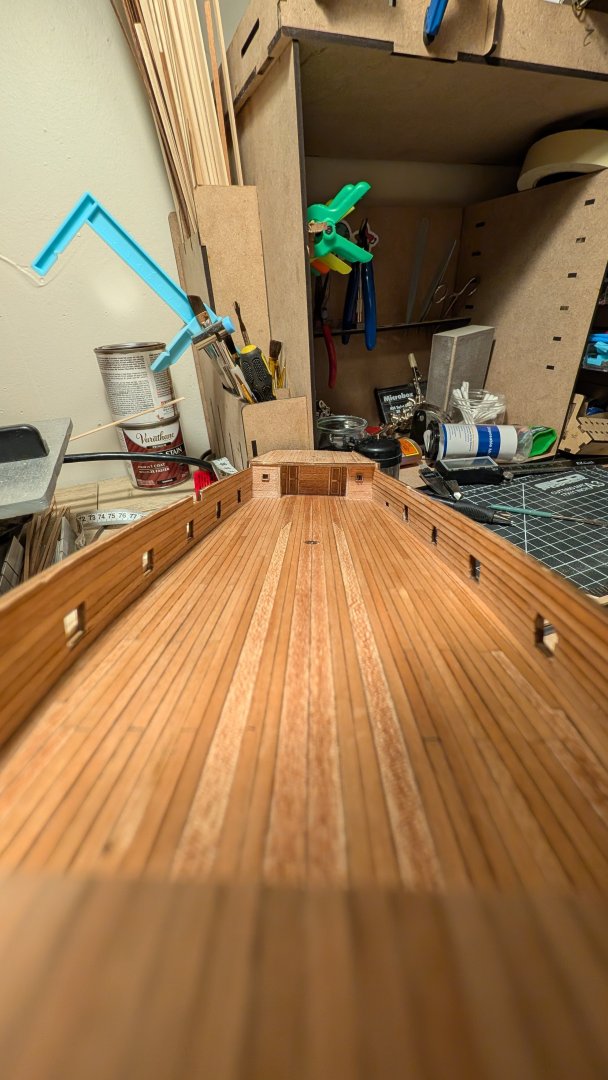
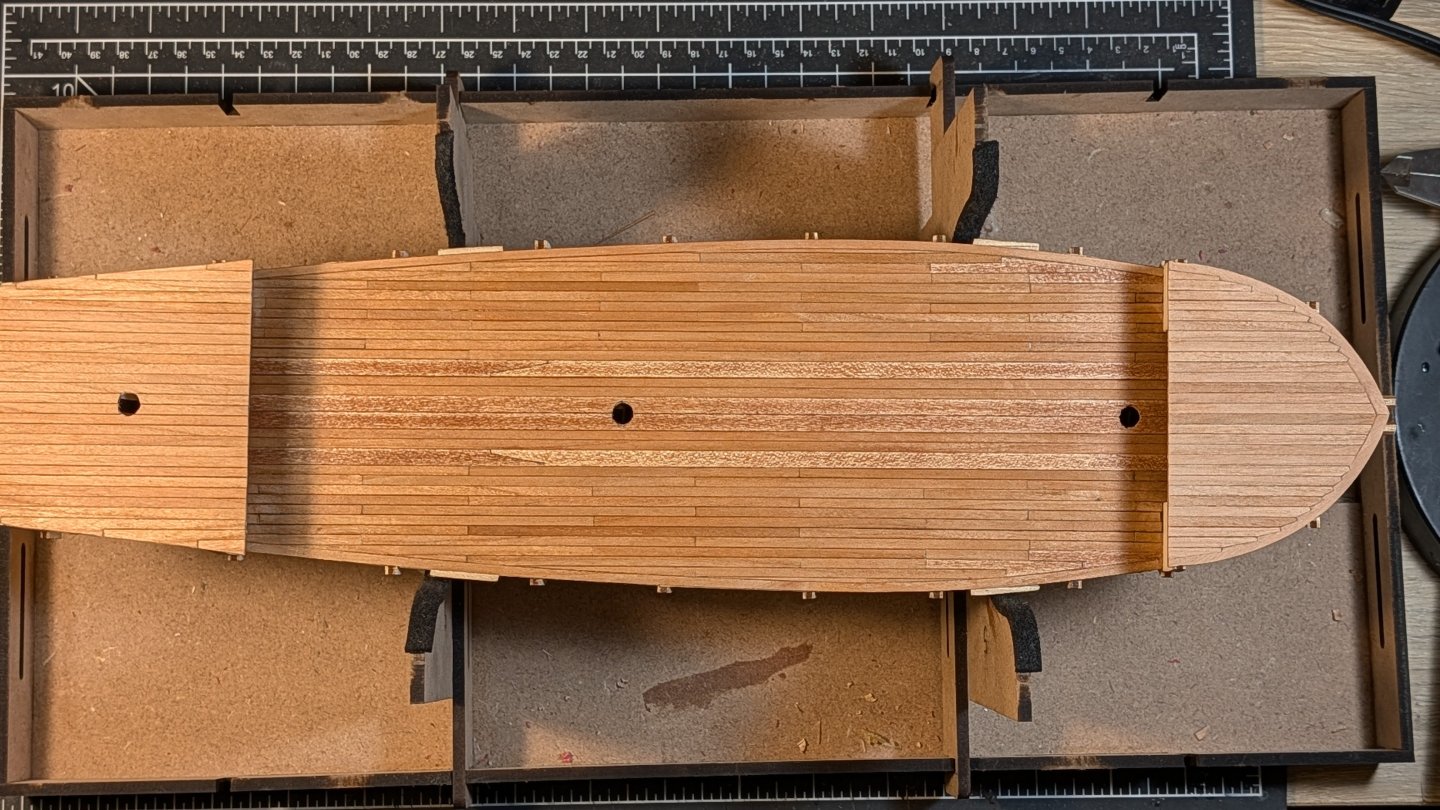
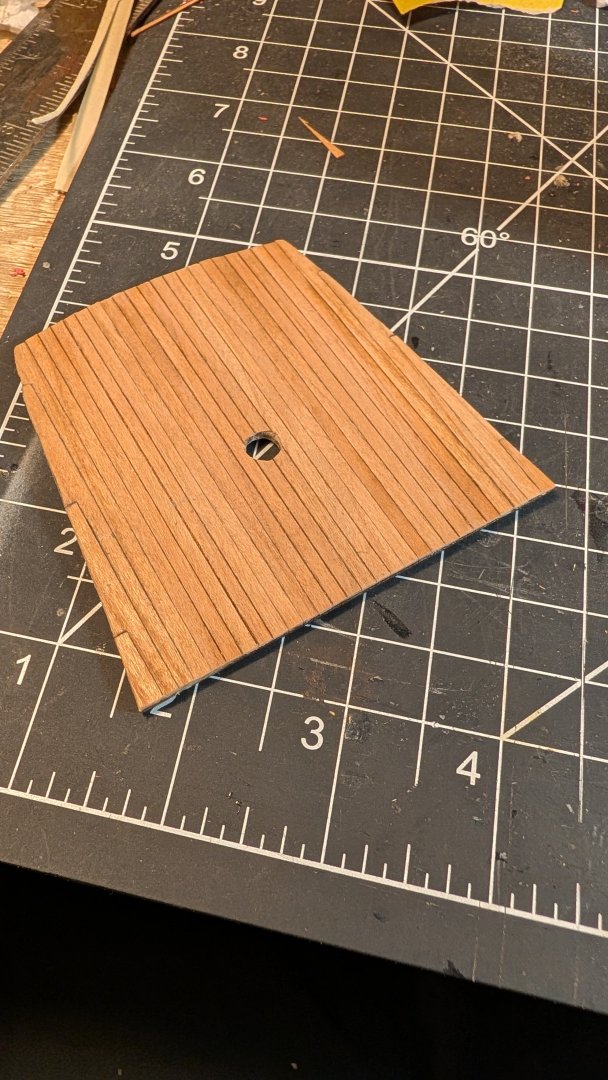
Yarg all, I applied some wipe-on poly to the main deck, and while it dried I decided to have a go at planking the forecastle and poop deck! Forecastle Boy oh boy I was really struggling to try and bend some planks laterally to make up the margin plank. I finally had enough and ran to my local woodshop and picked up some cherry veneer sheets in order to cut the margin planks. This was attempt #3 I believe, these are some tough cuts to make smooth with just an exacto knife, I yearn for a mini router, or a drill press (@tmj does wonders with a drill press). Anyway TIME TO JOGGLE This was incredibly satisfying to do, challenging and tastefully repetitive. Poop deck According to the AOAS book, joggling for the foredeck, hooked planks for the poop deck! No margin plank on this one. I was just a tiny bit off center, and it meant the hook planks lack a bit of symmetry, but they make up for it in heart. And I couldn't help but dry fit all the decks just to get a peek at the future: I'm so glad I redid the deck, the cherry looks fantastic and the extra detailing feels worth it. Next, cabins and bulwarks (wish me luck). Best, James Work time: 33:34:10


-
You know I sometimes wish I could view the deck details without the masts/sails/rigging getting in the way, especially with your build and the work you've put into the deck. I like what you did with the masts, that's a lovely way to present it. Great work on the Beagle and congrats on finishing! Will definitely keep an eye out for the next build log👀