MORE HANDBOOKS ARE ON THEIR WAY! We will let you know when they get here.
×


flyer
-
Posts
1,016 -
Joined
-
Last visited
Content Type
Profiles
Forums
Gallery
Events
Everything posted by flyer
-
 Hi Nils Are you oversaturated with compliments yet? No? OK, truly great work and your details are getting neater and neater! I found your question about bracing the yards quite intriguing. The missing space to brace the yards did in fact disturb me a bit but I just put it down to mistakes in my builds and ignored the fact that the kits must represent the true conditions considering their quality. Browsing through John Harland’s Seamanship in the age of sails I find that for example the sequence of orders to wear a ship included: Let go lee truss-tackle fall! and Weather truss tackle fall! In seems your assumption is correct and the yard was allowed to move away from the mast. This however looks strange to me as it then would rest against the foremost shroud on the lee side, putting some strain onto and chafing it. But perhaps the whole rigging was much more dynamic and put to stress and wear as I can imagine when meticulously setting up one rigid rope or line after the other. Very good question! Perhaps some other member knows more and where are the administrators anyway? Cheers Peter
 -
The sail was attached to the yard and that to the mast similar to the main topgallant sail. No special problems there. Only that I found somewhere halfway through this work that I did overlook the bowlines which the plans show attached to the bare yard but of course should have been bent to the sails before furling them. Well, you live and learn (and use bad language). It is another fine detail of the kit to include them in the plans and I will find a way to include them in my build. I’m now finishing all the lines and ropes which are belayed along the centre line (centerline for those who don’t have the happiness to count themselves as one of Her Majesties subjects) and continue then outwards and forward finishing the rigging.
- 431 replies
-
- 10
-

-
- pegasus
- victory models
- (and 1 more)
-
Hi Martin Hi Ken Thank you for the compliments – using me as a reference is a big one. The visit I paid to your Fair American was well worth it. That’s a lovely vessel and a fine build. I found that ‘Amati cloth’ you used for sails very interesting. It seems thin and light which is perfect. But on the other hand the texture of the fabric is still too visible for that scale. That means the search for the perfect cloth continues. But anyhow – ‘…almost presentable sail…’ might be a tiny little bit of slight underestimation of your own work. Hi Pucko Thank you for the visit and the compliments. Sorry for the long time it took to answer but I was abroad again. No, just to about every second shroud to avoid the problem you mention. Cheers Peter
-
Hi Martin Unfortunately only the running rigging for that sail is done. On the other hand there are only 3 more yards remaining to finish and of those, the spritsail yard, will carry no sail – only the upper sprit topsail will be there in furled condition. And then only two jibs will remain and the finishing of the deck equipment with spare spars and boats and the gun port lids, the lantern, the hammock nets, all the braces on the lower yards and a few odds and ends – yes, I’m nearly there. But seriously, I can begin to think about the next build as it should start in less than a year. Hi Ian Thank you for the compliment. I’m glad, if I can be of any help. Hi Nils Sure. But of course there are still mistakes and shortcuts in my rigging. If in doubt, feel free to ask. Cheers Peter
- 431 replies
-
- 2
-
-
- pegasus
- victory models
- (and 1 more)
-
Hi Nils Your Pegasus is really taking off! Regarding slings: I would hold the two largest yards – main and fore yard – with slings. I did the same on my Pegasus after consulting my external brain (Lees). Weeks? You must be running in some kick down-over boost-afterburner-mode! Mere mortals as me need months if not years. Take care, excessive speeds may be dangerous Peter
-
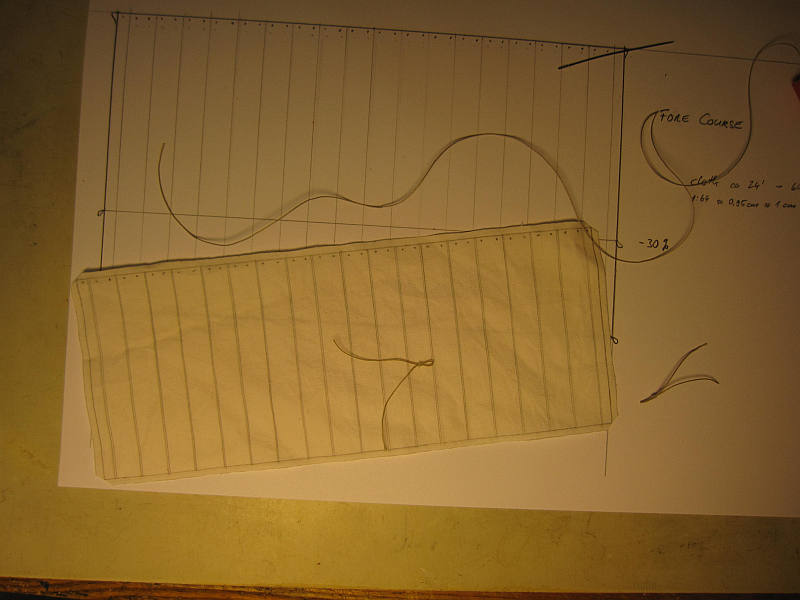
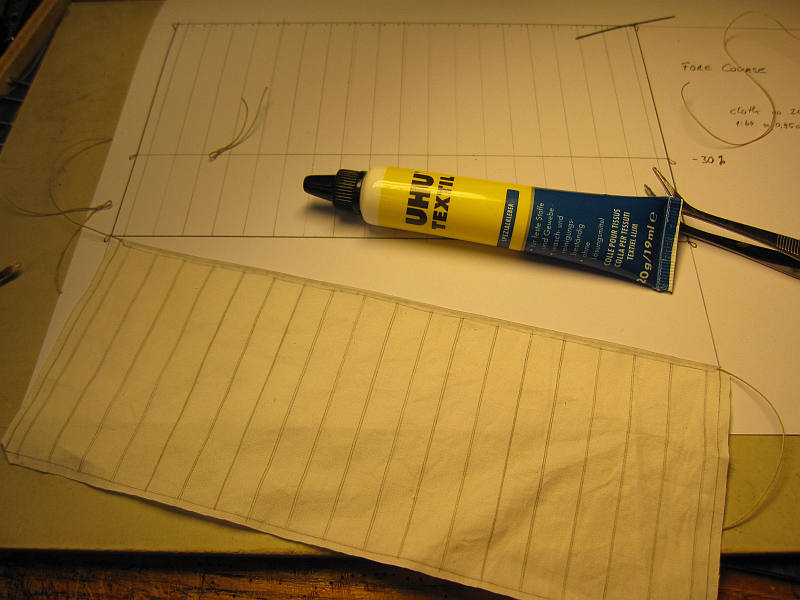
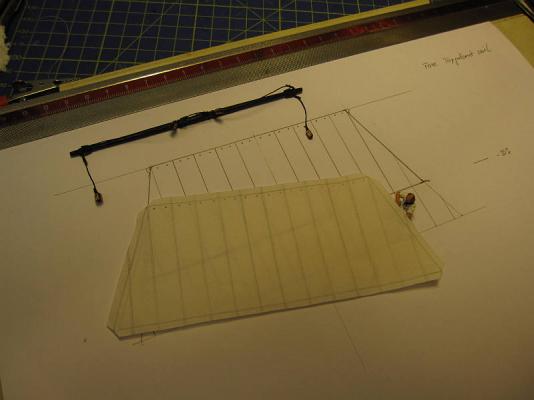
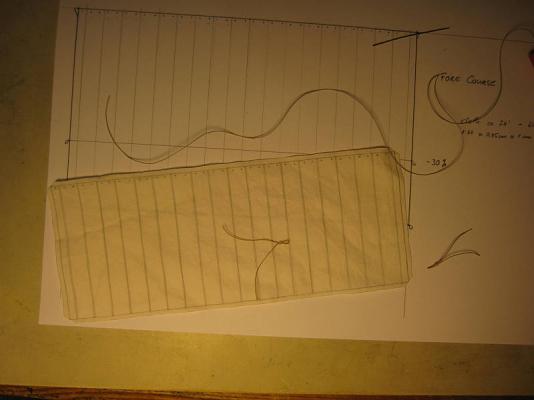
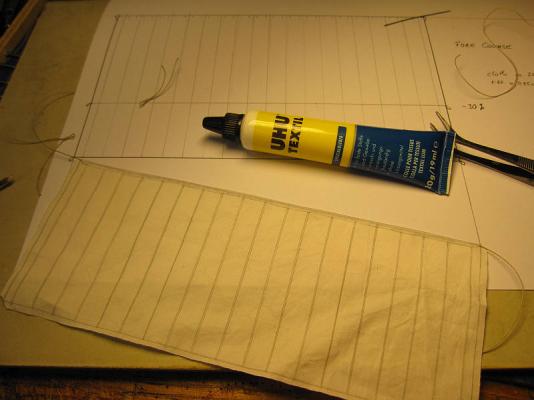
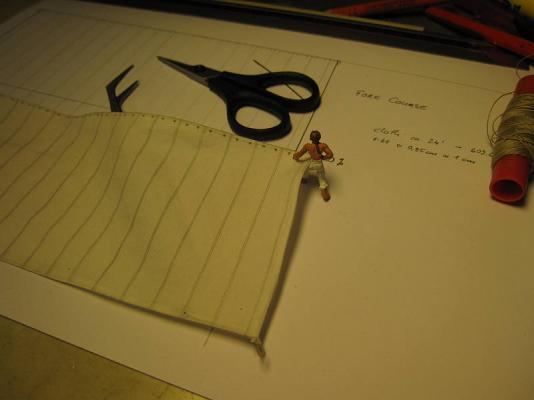
The fore topgallant sail was reduced in size by 30%. This is the same amount as on the main topgallant sail. On future projects I will probably reduce all furled sails by 40% but here I will stick to the slightly larger variant to keep the proportions. The sail maker is already working on the fore topgallant sail
- 431 replies
-
- 8
-
-
- pegasus
- victory models
- (and 1 more)
-
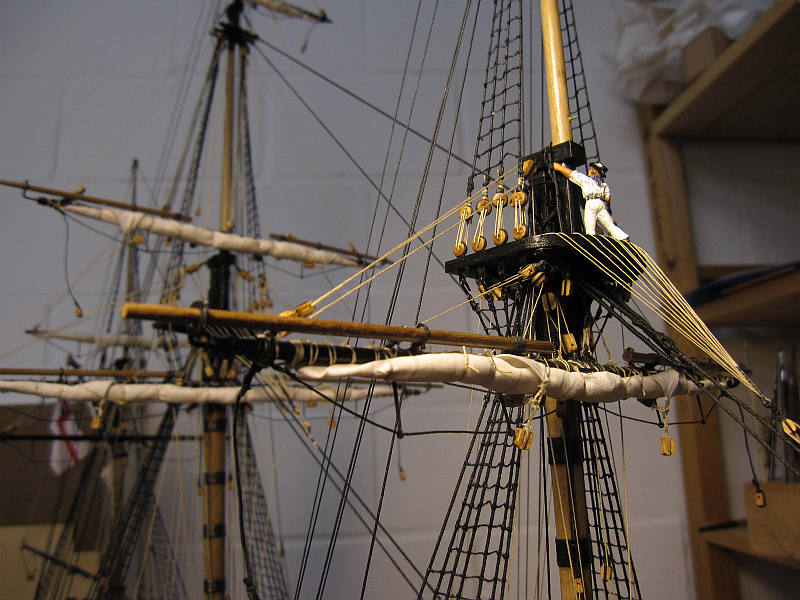
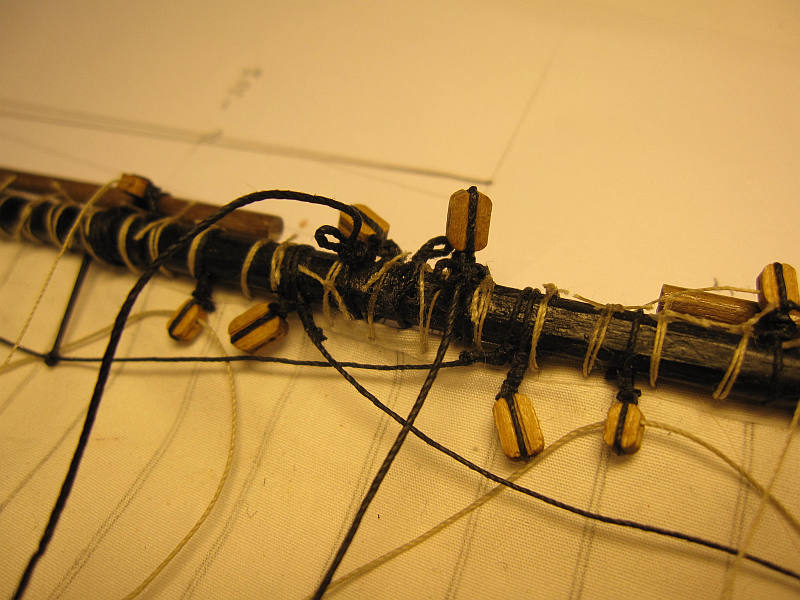
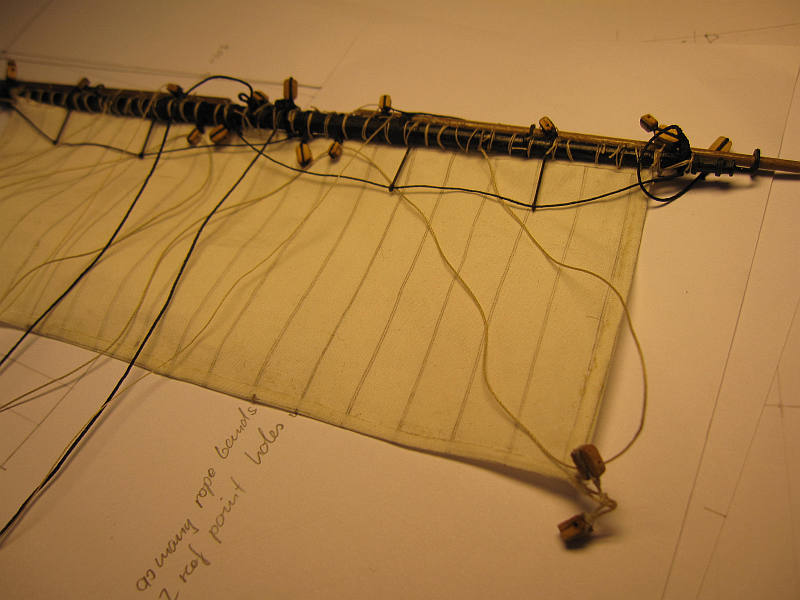
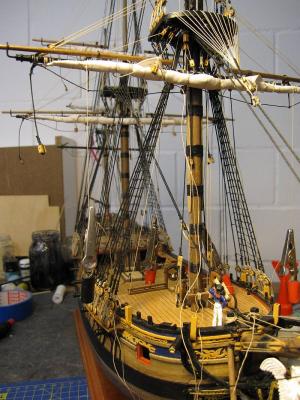
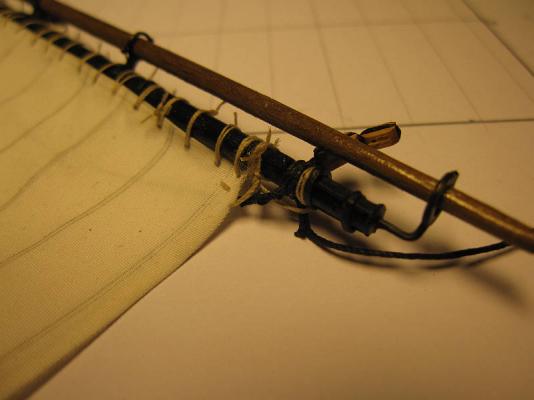
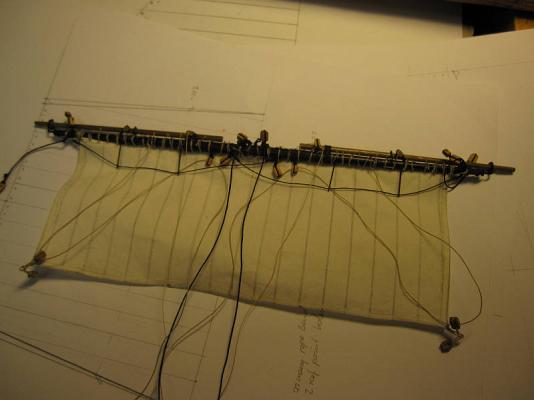
The fore topsail is one of the largest sails. It was therefore again reduced in size by 40%. Then it was bent to the yard and the yard brought to the foremast in a similar way as the main topsail yard. A buntline was again installed in addition to the rigging according to the kit’s plans. I was running out of space on the bitts as more and more rigging lines were belayed on it and I decided to finish all the running rigging of the foremast before coiling up the lines. Fore topsail ready to be bent it to its yard Detail of the fore topsail Ready to furl Parrels and ties installed Running rigging finished (for now, braces will follow later)
- 431 replies
-
- 10
-
-
- pegasus
- victory models
- (and 1 more)
-
Hi Nils Yes, I hope so. At the moment I lean towards a slightly altered Pickle. To correct that ugly stern and the placing of the masts (in my opinion the foremast should move a bit forward) I think of using plans of a similar schooner from NMM. Hi Martin and Timmo thanks Cheers Peter
-
Hi Mike That’s great, how you are going to build a good model out of an average kit. I especially like the way you do your own research digging into the treasure easily available at NMM. This should be motivation for all of us to look a bit deeper into what additional information might be available when starting a new kit – even when buying from an excellent provider like CC or Victory. Keep up the good work Peter
-
Hallo Nils About ship modeling being an art form: Yes. Maybe a bit less if you just put a kit together as an exact copy of 200 similar models but then again it will never be an exact copy and always show traces of your individual style, your artistic skills. I like the definition of art according to the German Wikipedia which supports a more general understanding of what it is: ‘Das Wort Kunst bezeichnet im weitesten Sinne jede entwickelte Tätigkeit, die auf Wissen, Übung, Wahrnehmung, Vorstellung und Intuition gegründet ist.‘ That roughly translates as: Art describes in the broadest sense every advanced activity which is based on knowledge, practice, cognition, imagination and intuition. Yes, Nils, you are definitely an artist. I read about your intention to rig a full set of sails – great, this will certainly improve your artistic skills even further. Adding the details of the rigging with the same meticulousness you already demonstrated will make your Pegasus a really outstanding object of art – and will be quite a challenge requiring all your knowledge, practice, cognition, imagination and intuition. Cheers (Just asking myself if thoughtfully and carefully drinking a cool, fine beer with all the practice you have and the entire appraisal the brewer deserves could be defined as art?) Peter
-
Thank you B.E. Getting a compliment from somebody who is capable of carving a beautiful and completely detailed longboat in 1/64 out of a toothpick really is something. Cheers Peter
- 431 replies
-
- 2
-
-
- pegasus
- victory models
- (and 1 more)
-
Hallo Nils Thank you. And yes, I would like to see fully rigged sails done that way as well. That’s why I’m thinking of a small kit as a next project but with fully rigged sails. At the moment CC’s HMC Sherbourne is the favorite but Pickle or even Badger are not completely out of the race yet. Cheers Peter
- 431 replies
-
- 2
-
-
- pegasus
- victory models
- (and 1 more)
-
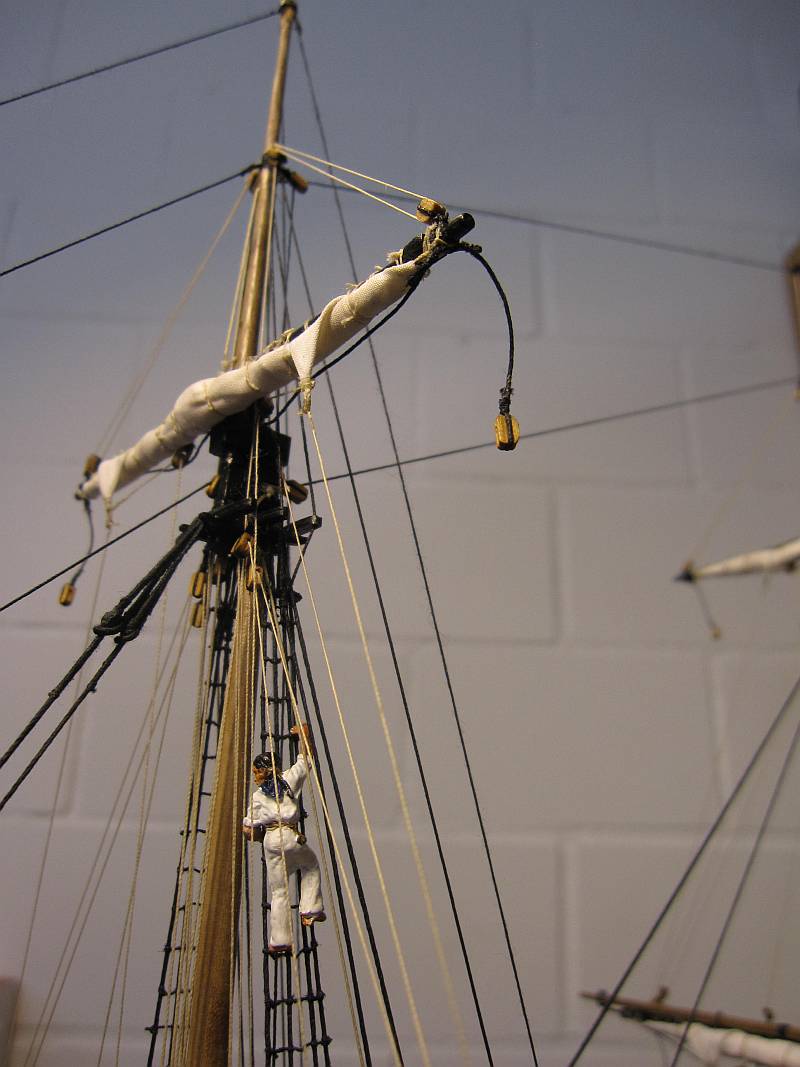
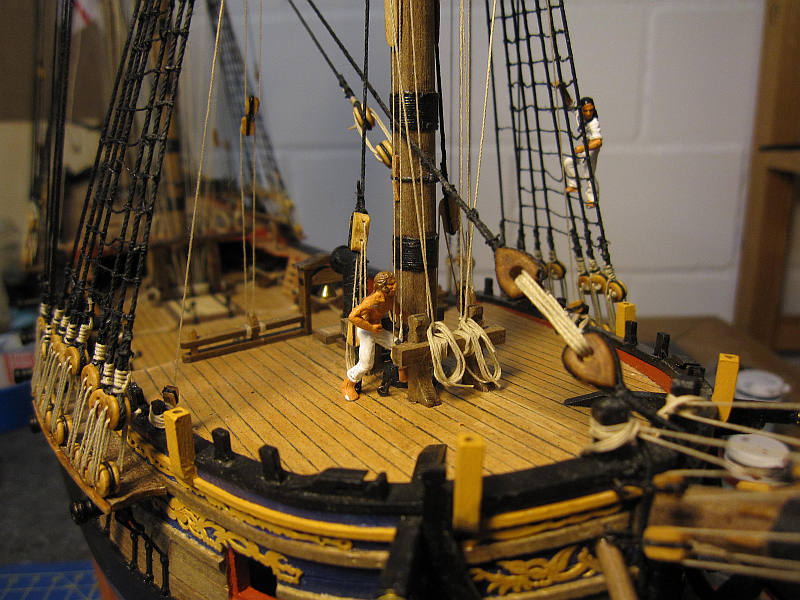
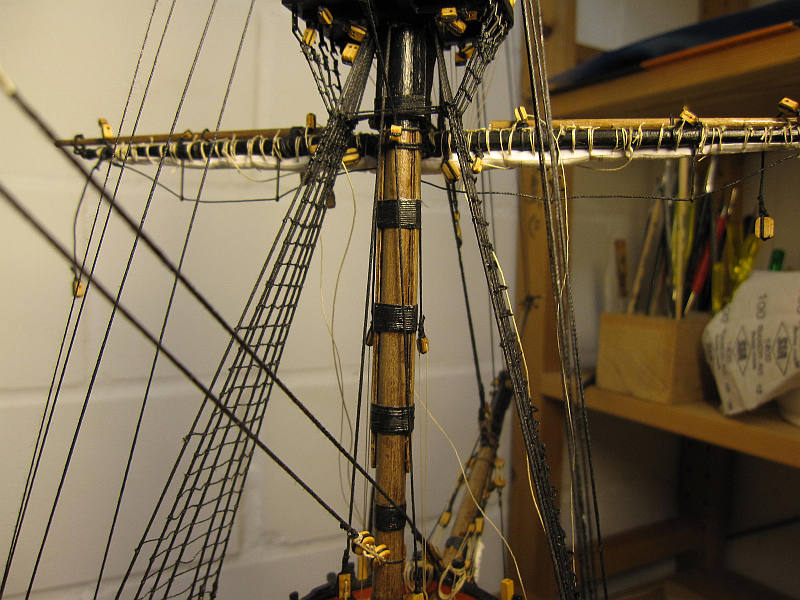
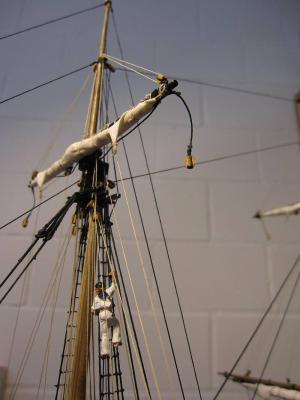
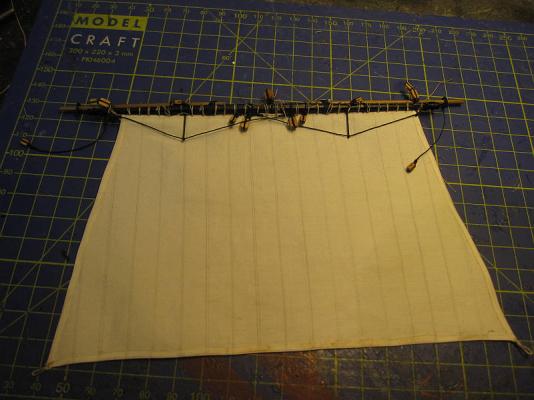
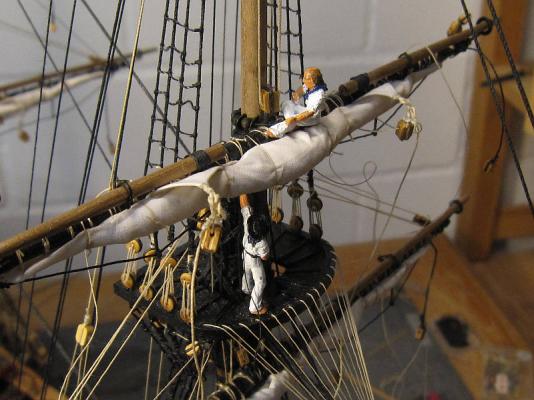
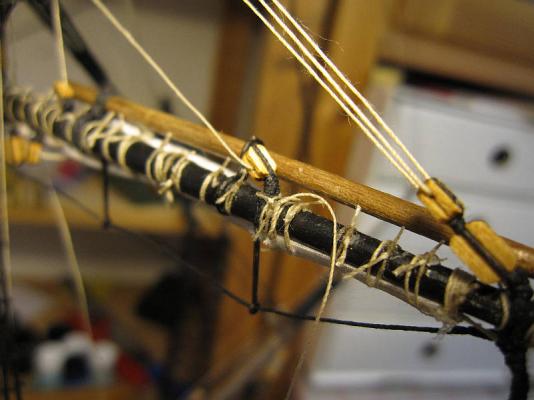
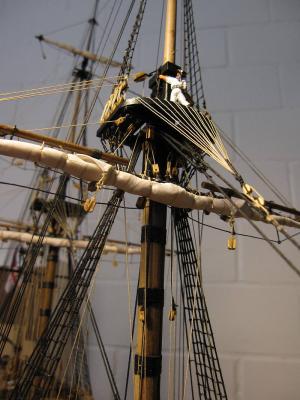
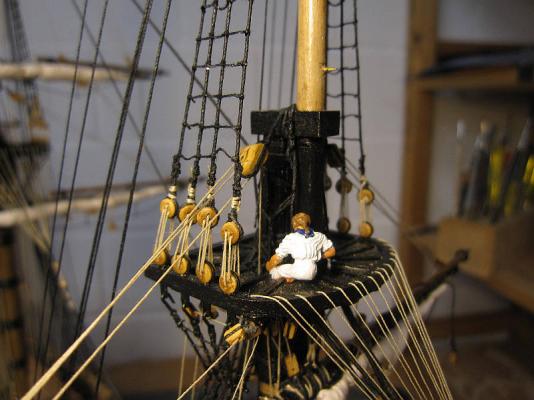
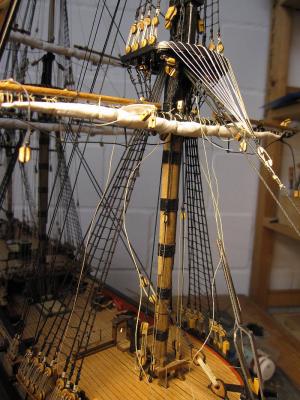
After installing the sling and the lifts the next task were the buntlines. I had only one end of them attached to the foot of the sail. The loose end was now thread through the block on the yard, the dedicated blocks under the top, through the upper of two single blocks stropped together head by head (similar to a shoe block) and back to the top and yard. This arrangement with the ‘shoe block’ is according Lees. A line leads to the lower part of the shoe block, hanging under the yard but close to the deck, with both ends belayed according the plans on the forecastle rails. I used a short end just fixed with a rolling hitch and a long end with a coil of line for working the whole arrangement. The lose end of the buntline - after threading it through its block on the yard - was brought below the furled sail and then discreetly fixed around the yard as the correct fixing to the foot of the sail was impossible now. This should be overlooked. The last line was the clue line. It was installed according to the kits plans. Sheets and braces of the lower yards will be among the last things to be fixed as they will hinder the access to the deck too much otherwise. Sling and lifts installed, the loose end of the double buntline still hangs over the sail. The black clip holds the free end of the buntline, while the red in the middle ground hangs on the lower of the two blocks stropped together. The incorrectly fixed end of the buntline. Clue lines belayed on the bitts Some adjustment of the sling is done Scary work without safety line The fore top starts to look businesslike. That pin above the cap waits for the next task: Fore topsail yard with sail.

- 431 replies
-
- 10
-
-
- pegasus
- victory models
- (and 1 more)
-
Hi at-least-able-seaman Mike Yes, improving the understanding of what you build is one point. And it never ceases to astonish me how they could sail such a complicated machine and even more often with success than failure. Steven Maturin, I feel with you and all other landlubbers! Have you seen what astonishing things others do with their guns or their boats? Adding a little fabric seems comparatively easy. Take care Peter
- 431 replies
-
- 1
-
-
- pegasus
- victory models
- (and 1 more)
-
Hi Martin No safety lines and no wings either! Rather scary – but fortunately the feeling is scaled down to 1/64th as well. Cheers Peter
- 431 replies
-
- 1
-
-
- pegasus
- victory models
- (and 1 more)
-
Thank you B.E. Sometimes holding the camera somehow between all those lines while hoping not to tear one and trying to force to focus it on the part you wish to show while illuminating the model with all sorts of old leftover desk lamps and pushing the trigger blindly several times produces surprisingly satisfying results. Cheers Peter
- 431 replies
-
- 1
-
-
- pegasus
- victory models
- (and 1 more)
-
Hi Martin Nice compliment.Thank you. And yes, I try to follow the original way with the furling – except that I don’t try it balancing on a flimsy yard with 30m of empty space below and no safety lines attached. It seems the logical way and produces quite acceptable results with a reasonable effort. Cheers Peter
- 431 replies
-
- 1
-
-
- pegasus
- victory models
- (and 1 more)
-
Hi Alistair Thank you for your compliment. Yesss! And all that masting and rigging work will suddenly have a raison d’être. Take care Peter
-
Hi Michael After admiring your work silently for some time I have to say it once again: Brilliant. Your example really tempts me to build the Vasa a second time. Cheers Peter
-
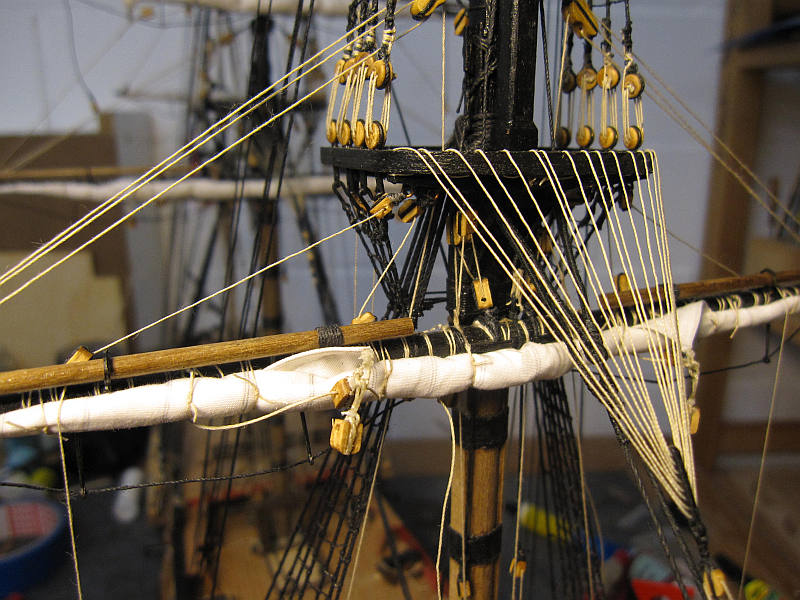
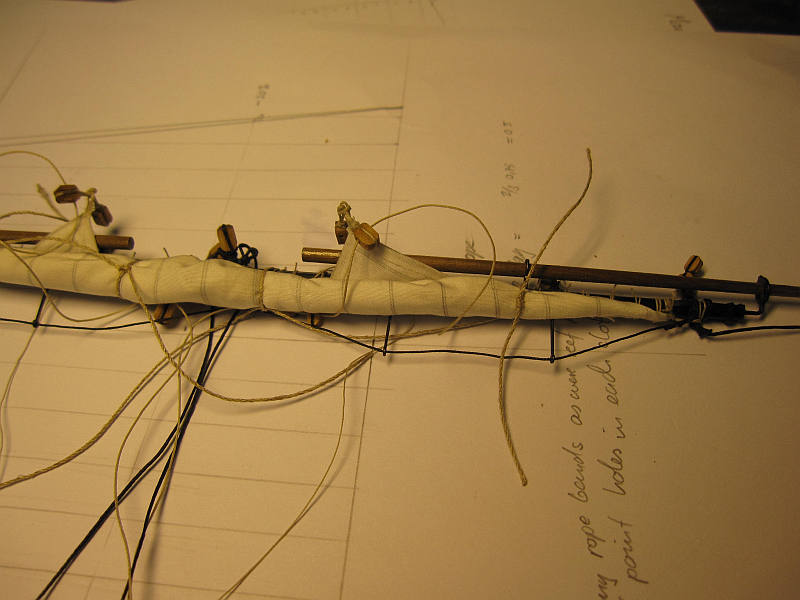
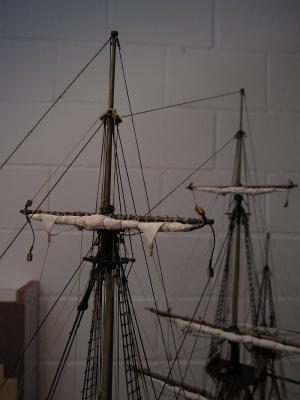
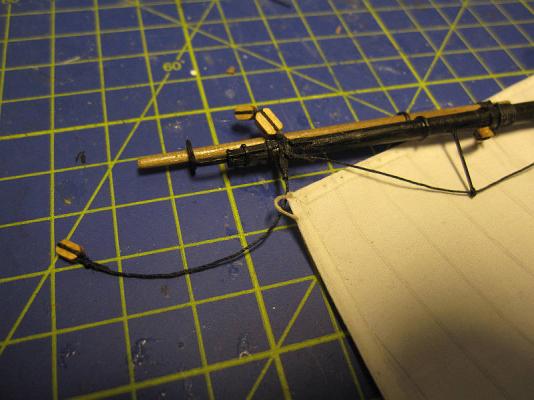
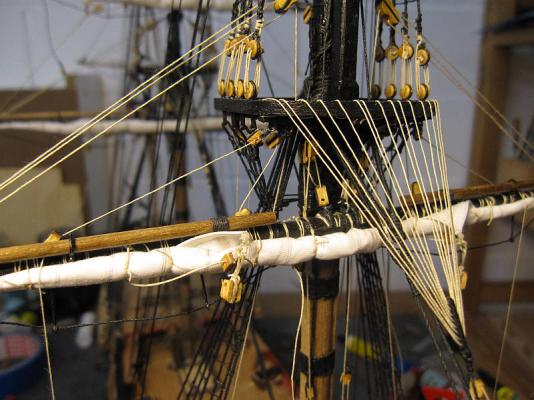
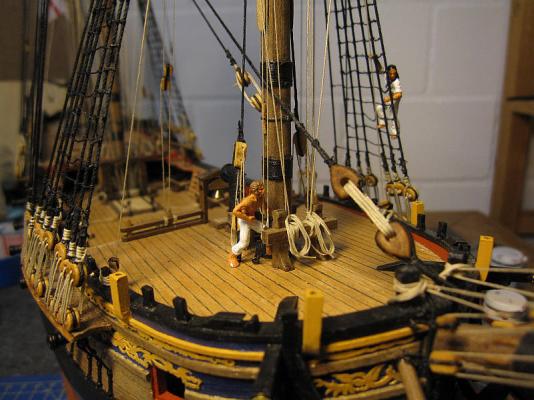
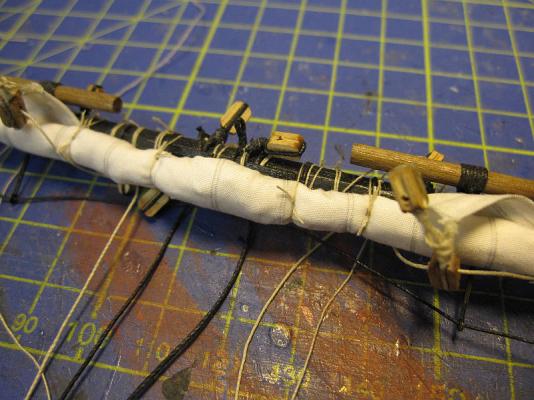
Now I furled the sail by first pulling it up with the buntlines over the front while leaving the two edges protruding. Then it was rolled up – again over the front of the sail – with the help of clumsy fingers, pincers and censured language and provisionally held with a few strings. Provisionally furled and bound with a few strings At length the sail could definitely be bound. Working again from the ends to the middle I tried to tighten the sail even more to create a roll as small as possible. By working towards the middle I tried to get a visible bulk there. Dampening the sail carefully where the gaskets became to hold it helps. While furling you have to check constantly the correct run of the attached lines. A few gaskets will nevertheless have to be tied twice because something is always overlooked. Sail furled Now the yard was brought to the mast and fixed there first with the parrel ropes. Blocks were spliced into the ends of those and a simple tackle set up with a block on a ringbolt beside the mast. Parrel ropes and their tackles on both sides of the mast

- 431 replies
-
- 10
-
-
- pegasus
- victory models
- (and 1 more)
-
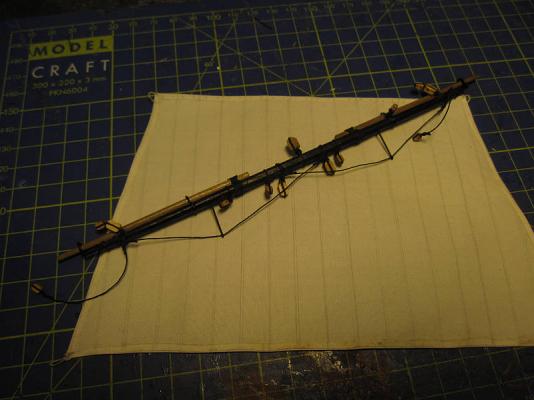
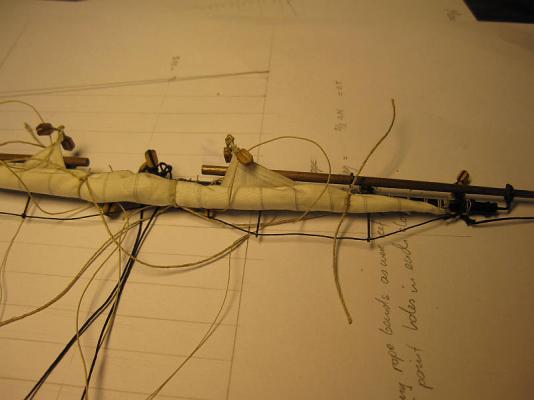
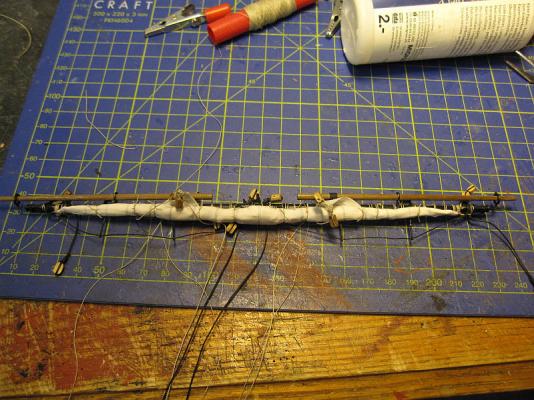
After a longer brake for some gardening, hiking, holydays on Mallorca and even some genuine work (flying) I found finally some time to spend with the little helpers in my wharf. The sail was bound to the yard. I tried to do it as close as possible to the description in Lees’ book. It is repetitive work again but much, much faster done than ratlines. Sail at the yard Now all the lines had to be attached to sail and yard. Again only one end per side of the double buntline could be fixed as it leads trough several blocks before returning to the foot of the sail. It can only be finished after fixing the yard to the mast. This time I even thought of attaching the parrel ropes before furling the sail – much easier that way. All the lines, including parrel ropes attached The sling was also prepared and its parts fixed to the yard respective masthead. Parrel ropes and sling on the yard Sling lying on the sail Ready to furl


- 431 replies
-
- 5
-
-
- pegasus
- victory models
- (and 1 more)
-
Hallo Nils While catching up on your fantastic build I noticed your remark about eyesight being limiting when working on small details. My simple solution is wearing a second cheap standard pair of reading glasses (correction e.g. 2.5) over (or below) my normal glasses. The corrections of the two pairs add up and while the depth of focus may be a bit shallow you move your super eyesight freely where you need it without cumbersome magnifying lenses. Of course my 4-eyed look is a source of amusement for my family but here the end justifies the means. (Uups – now I introduced Machiavelli into ship modeling. Anyhow this is certainly a better place for him to be than in politics or – heaven forbid – banking.) Take care Peter
-
Thank you, Alistair :blush: Yes Nils, I’m very glad to have him. Just think of all the work I had to do myself otherwise… Martin, you are right, of course. The Captain Jack appearing occasionally in my pictures is blond haired (not grizzled yet) and a regular sea officer but sometimes one fails to ignore that other likeable ruffian. Thank you all for the comments and the likes. Peter
- 431 replies
-
- 2
-
-
- pegasus
- victory models
- (and 1 more)
-
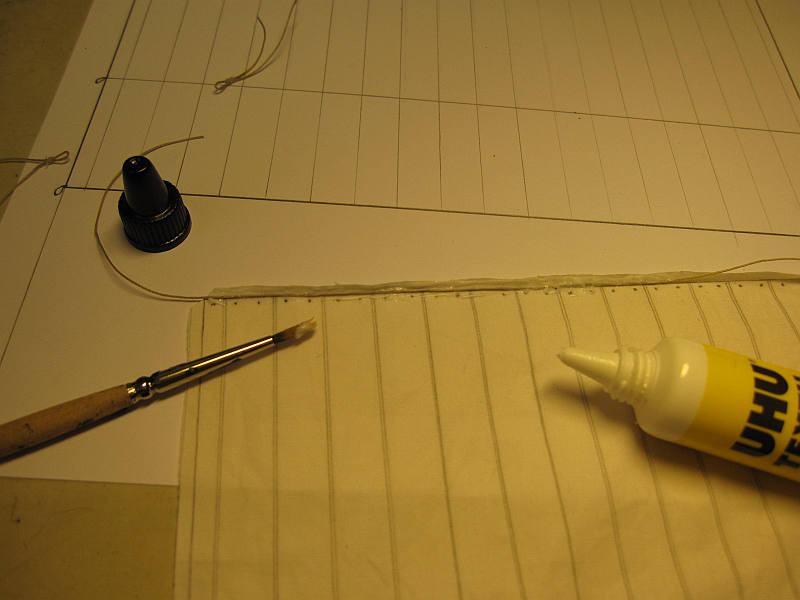
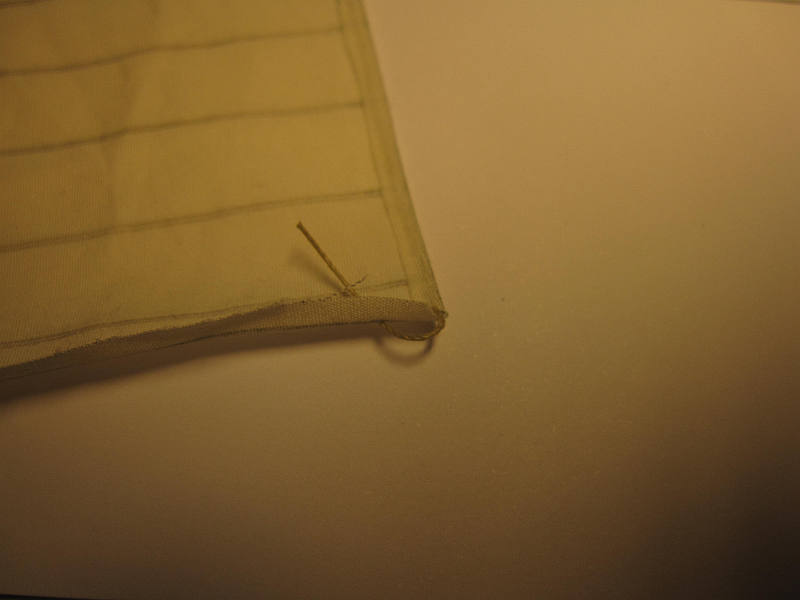
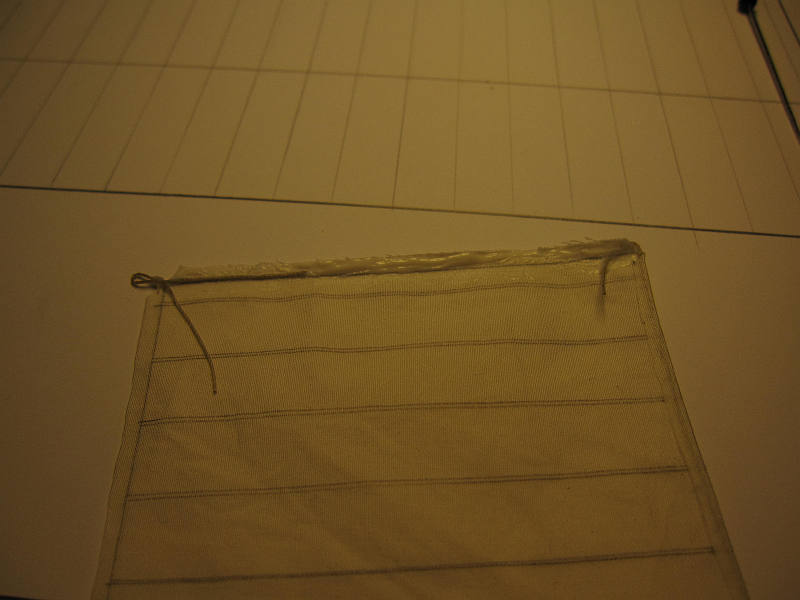
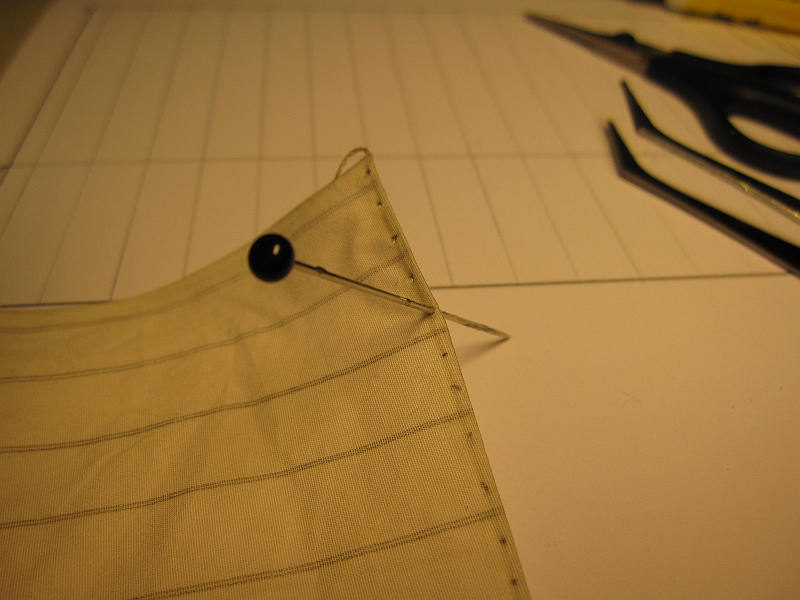
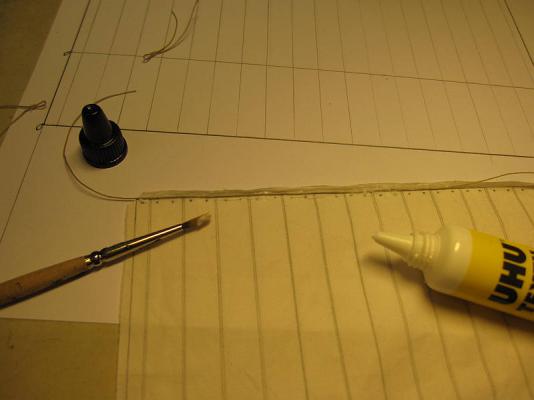
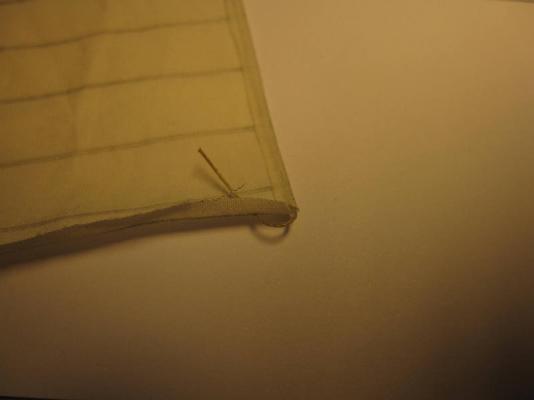
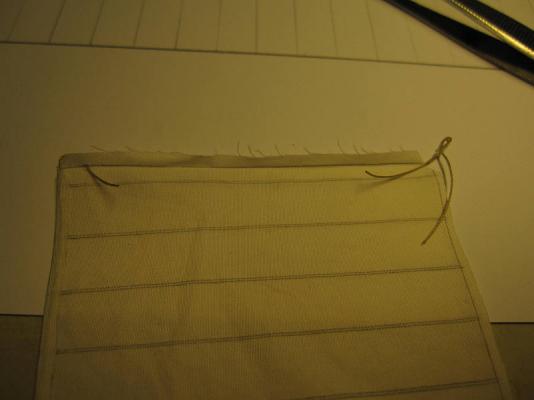
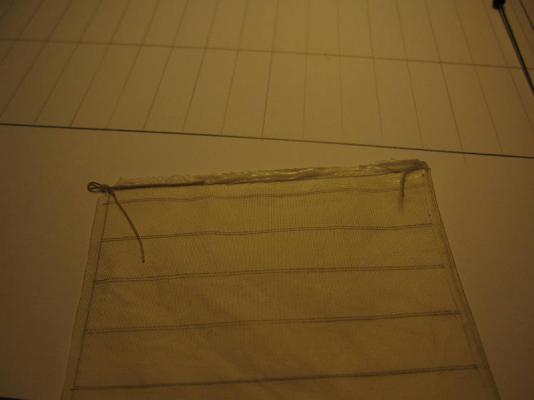
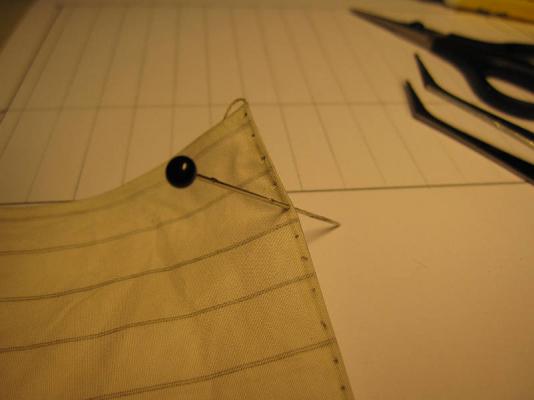
Now the hem with the boltrope inside was glued. To lessen the bulk of the furled sails the rope was only included where visible: along the top edge and the two lower corners. The holes for the robands were made with a large pin and finally the whole glue fixed with a hot iron. According to the manufacturers information this should make the glued parts washable but in fact it’s only marginally water-resistant. Furling the sail would be easier when the fabric is damp but I have to be careful when applying water in order not to dissolve the hem. Boltrope parts for the top edge and the lower corners were prepared Top edge being glued... ...and finished To form the head cringle the top boltrope is pushed back into the side hem through a hole Preparing one side Gluing it Pushing holes for the robands (2 per cloth) The sail maker is closely checking the finished sail
- 431 replies
-
- 8
-
-
- pegasus
- victory models
- (and 1 more)
-
Me too, B.E., me too. Still it looks a bit hazy and things are hard to see in that great distance. But I will stubbornly continue like the one and only CAPTAIN Jack Sparrow: Towards the horizon and beyond… Cheers Peter