HOLIDAY DONATION DRIVE - SUPPORT MSW - DO YOUR PART TO KEEP THIS GREAT FORUM GOING! (Only 24 donations so far out of 49,000 members - C'mon guys!)
×


bbrockel
-
Posts
103 -
Joined
-
Last visited
Content Type
Profiles
Forums
Gallery
Events
Everything posted by bbrockel
-
 Patrick, if you have a small v-parting tool from Pfiel, by all means use it. Just be careful. These are extremely sharp and use a light touch. Practice on a piece of scrap wood to get the feel for your chisel before tackling the project keel. I made a couple of copies of the edge diagram if the keel and cut them out, glued them to either end of the keel and marked a line with a pencil showing the middle of the rabbit. I then scribed over the pencil line a stylus to give the parting tool a line to follow. Take your time and you will have a fine looking rabbit line.
 -
Very nice treenailing and frame construction.
-
Toni, I have really enjoyed reading your build log. For a 'darkside newbie' builds like your, Dan Vad and EdT are a real inspiration for me. Some day. Thank you for taking the time to re-post your build log.
-
Great advice Jay. And this from one who knows. Thnks for the picture, also, worth a thousand words. Sorry it happened to you. Reminds me of a advertisment for a table saw in one of my WoodCraft magazines. It shows a guy with his hand in the foreground, three of his fingers are missing at the first knuckle and the caption reads "and this guy is good."
-
Patrick, take your time on your gantry build board. Make sure everything is square to the board. You're going to use this board on many future builds and you want to get it right the first time.
-
Echo by Maury S - FINISHED - Cross-Section
bbrockel replied to Maury S's topic in - Build logs for subjects built 1751 - 1800
I think you'll be fine with the alchohol as long as you don't flood the temp spacers with it. I use a artist's brush to apply the alcohol to the area I want to loosen. Sometimes takes a couple of applications to loosen the piece, but eventually the glue gives up. -
One of the reasons for the kick back on any table saw, particularly when cutting a longer piece, is that the wood pieces on the run out side of the blade tend to pinch together. This will bind the blade a little causing the piece to lift and kick back. Any sort of rifing on the run out side will help minimise this a lot. Nice piece of work on the push stick, Mark. Will have to construct somethin like that for those small cuts on the Byrnes table saw. Currently, I use push sticks that are approx. the same width as the piece I'm cutting. I also use sandpaper on each stick to assist in the guiding of the piece being cut.
-
That is one very fine cross section build. Congratulations. Did you draft the plans yourself?
-
MicroMark MicroMill - Review
bbrockel replied to mtaylor's topic in Modeling tools and Workshop Equipment
JPett, it wasn't mentioned because the title of the thread is MICROMARK MINIMILL REVIEW, not Proxxon review. -
I do to, the ham sandwich goes in the galley.
- 552 replies
-
- 2
-

-
- maine lobster boat
- Midwest Products
- (and 1 more)
-
Popeye, I learn something new with every one of your builds. Had never heard of a steadyin sail before. See, it does pay to get up every day! Nice looking boat. You must be running out of space in the "marina" with all your builds.
-
Beautiful work Augie. Nice night for staying in and ship building.
-
Nice work, Ron. Love the thickness sander. Very well build. Thanks for wharing. Now you get to stand in front of your scroll saw for a while.. LOL
-
What is your favorite hand tool(s)??
bbrockel replied to Modeler12's topic in Modeling tools and Workshop Equipment
Pete, I do a tool review column for MSB site and I'm in the middle of putting your last 'tool' through it's paces for my next review. Clever 'favorite tool' post, my friend. -
Thank you Joss and Grant for your guidance. Grant, I have the TFFM series and will refer to them. Also Just acquired a copy of Peter Goodwin's "The Construction and Fitting of the English Man-of-War". Both very good references. Joss, Uweks build is also a great reference. Have been following it as it develops here on MSW 2.0.
-
Thanks, Pete. Sounds like good advice. I was just curious.
-
I have a question for the TRITON Cross Setion builders. Is there a practicum for this build? I have seen it mentioned in a couple of the builds, but have not been able to find one. I have all the plans printed and placed in a notebook but nothing on a practicum.
-
Rocker, the caulking on the hull planks is black construction paper, cut into thin strips and glued to the thin edge of a plank. Once I have several planks with the caulking, I use 220-grit sand paper to sand the 'caulking' flush with the planks. Take a brush and occasionaly brush away the fine paper dust left from sanding so you don't grind the paper dust into the wood.
-
Don't apoligize, Grant. You didn't highjack my thread in any way. Great jig for lending curve to the deck beams. Thanks for the pics. Ron, please feel free to point out anything you see amiss. Daniel is right, good catch. I might have missed something. That's why the many eyes here on the forum are so valuable. Particularly to a novice like me.
-
Very nicely done, Dan. Real glad to see your build log taking shape once again. I followed your craftsmanship on this build back on MSW 1.0. Thanks for taking the time and energy to rebuild the log. We all enjoy watching your work.
-
Ron, If you are referring to the second lower deck beam, its the paper template coming unglued from the wood, but no split. Thanks for keeping an eye out. Thank you Russ. Just trying to keep up with your quality level of work. I'm really enjoying your Biloxi Schooner build.
-
Thank you all for looking in on the build. Appreciate the encouraging words.
-
Nice job, Grant. Really like the way your cannons turned out. And your tutorial on ring making will go in my 'need to know' file.
-
Thank you Rusty. It's repurposed douglas fir (approx 50 years old, very nice to work with) from a remodel project in the house. You bet Grant. I'm always interested in new ways to do a task. And pictures are a great help. Thanks.
-
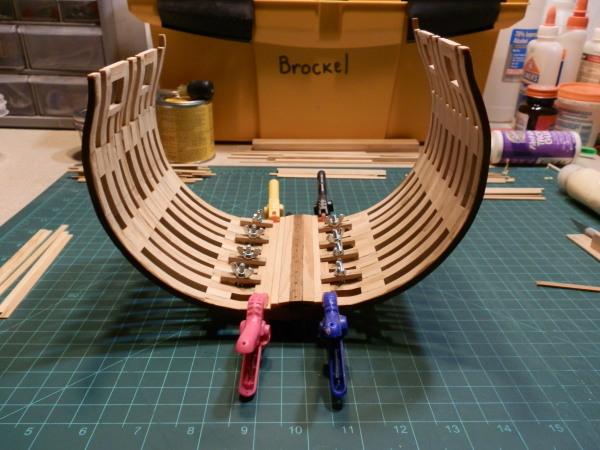
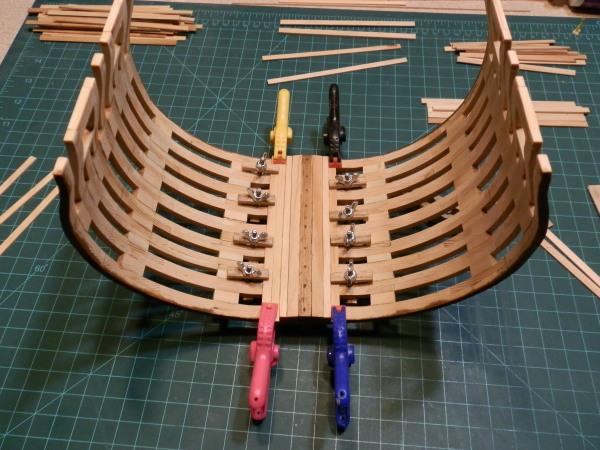
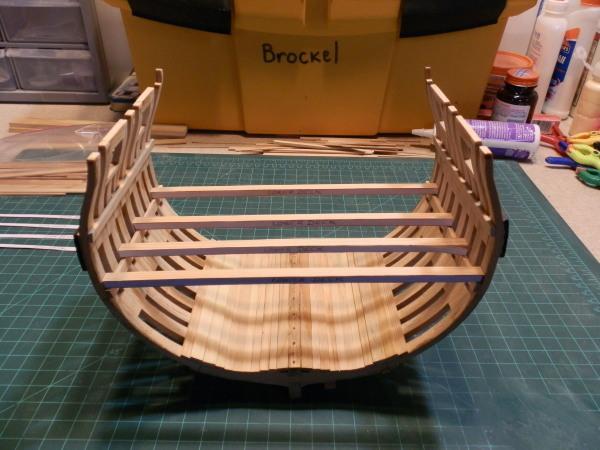
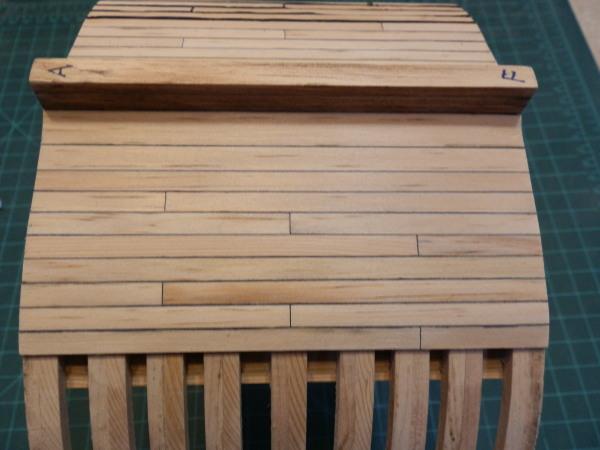
A little more progress on the TRITON. Adding the floor planks, some of the hull planks and shaping and dry fitting the lower gun deck beams. Little bit at a time.