Mike Y
-
Posts
1,557 -
Joined
-
Last visited
Content Type
Profiles
Forums
Gallery
Events
Everything posted by Mike Y
-
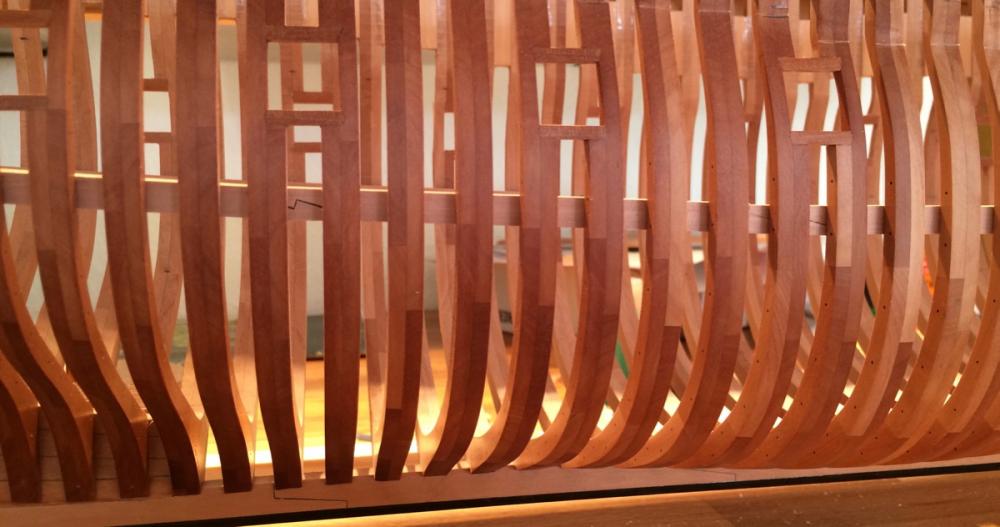
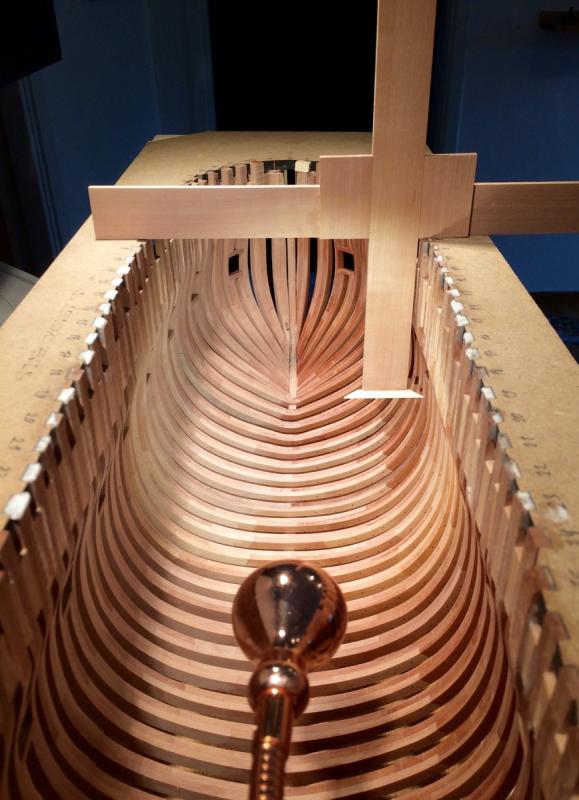
 Very elegant! Like how smooth an thin the top parts of the frames are.
- 504 replies
-
- 4
-

-
- washington
- galley
- (and 1 more)
-
The building of a new Swedish East Indiaman "Gotheborg"
Mike Y replied to PeteB's topic in Nautical/Naval History
Thank you, amazing videos! Sadly, the replica is now up for sale. Hope a good buyer will show up! http://www.thelocal.se/20160527/giant-replica-of-swedish-18th-century-ship-up-for-sale -
Chuck, thank you for the very detailed explanation, it is totally clear now. Makes sense, and both models and the approach you have is amazing. Best wishes and hope to see them both in the market! And especially thanks for introducing a proper wood out of the box. Hope it will hit the market soon and would be a success!
- 269 replies
-
- 5
-
-
- Queen Anne Barge
- Syren Ship Model Company
- (and 1 more)
-
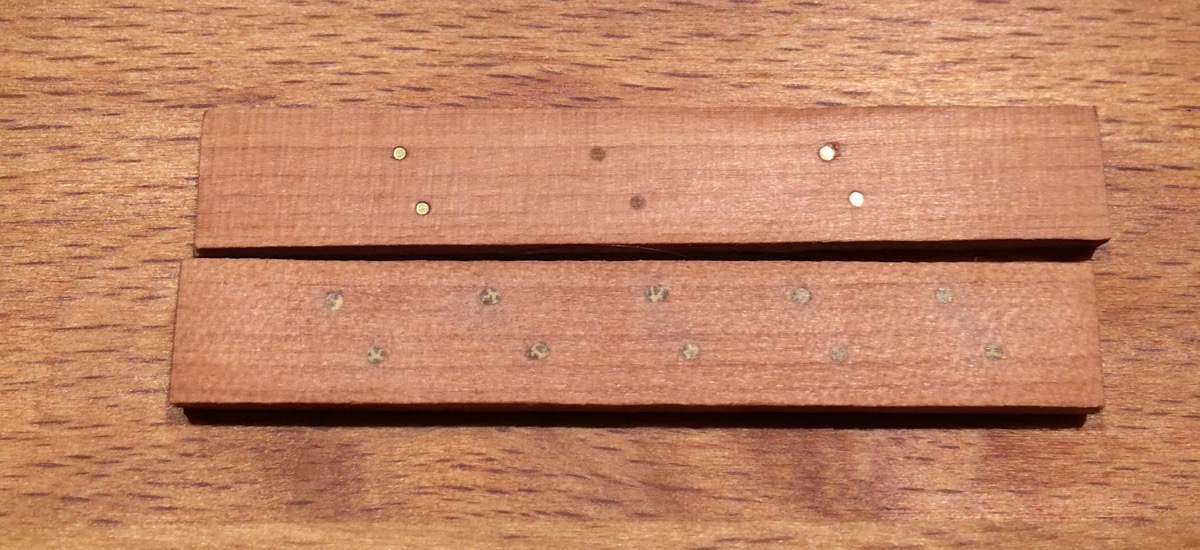
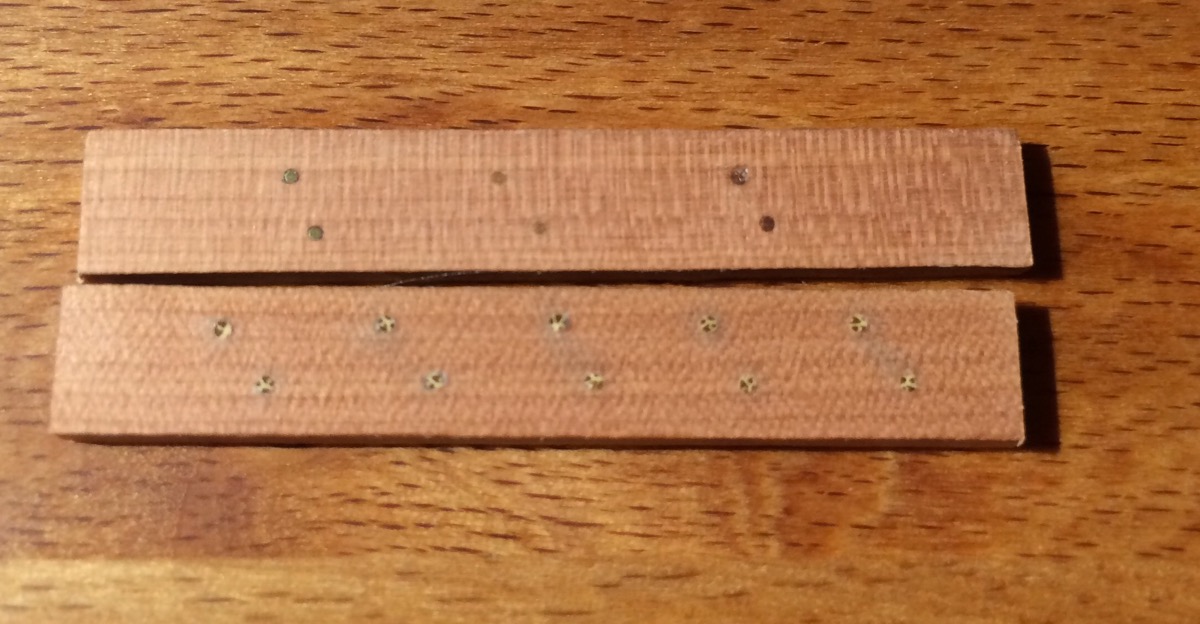
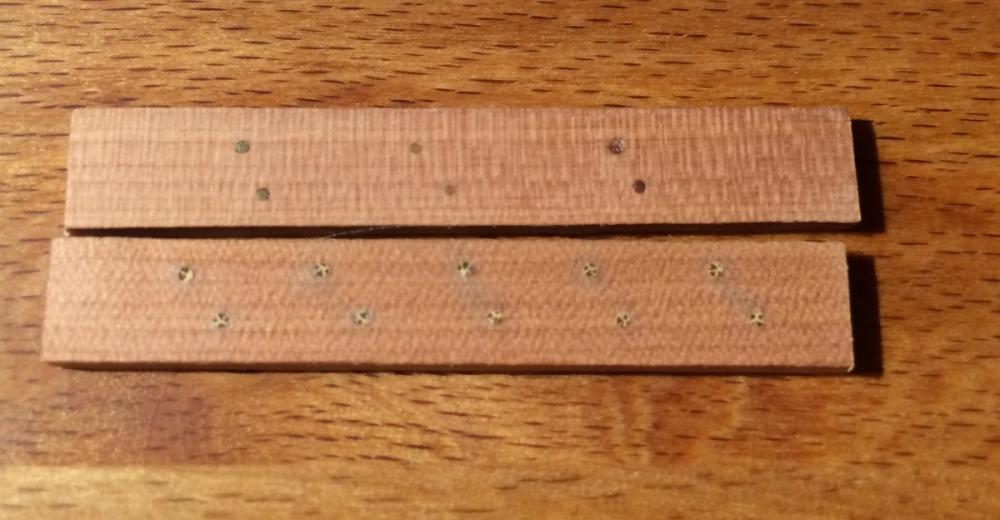
Maybe I have some wrong bamboo... It looks very uneven. Did a test. Swiss pear, tung oil as finish. Two photos done with different lightning. Top plank, left: brass Top plank, middle: castello boxwood Top plank, right: copper Bottom plank: bamboo

- 969 replies
-
- 11
-
-
- hahn
- oliver cromwell
- (and 1 more)
-
Horray, innovation! I will truly miss the Lego jigs and pesky wood strips, they were a small bits of fun Based on the explanation it all sounds very smart, especially the vertical line idea combined with such a board. Just a bit worried if the kit will end up too simple? Looking on a photos, where is the challenge? No jokes intended, would be interesting to hear your thoughts about the right balance when it comes to difficulty. Longboat or pinnace was a very fun build because it was just on a sweet spot!
- 269 replies
-
- 4
-
-
- Queen Anne Barge
- Syren Ship Model Company
- (and 1 more)
-
Yes, the grain is not perfectly straight in the pieces I tried. Bamboo seems a bit too grainy when used as a treenail.. Will try it again though, thanks for the advice! Current status: need more clamps to install the deck clamps! I fitted joints to be a bit loose, so they are clearly visible from the outside: The only problem is a not perfectly smooth run of the clamps around midship. I made them out of 100% straight planks, instead should have curved them just a little bit. Well, next time, on the next model
- 969 replies
-
- 20
-
-
- hahn
- oliver cromwell
- (and 1 more)
-
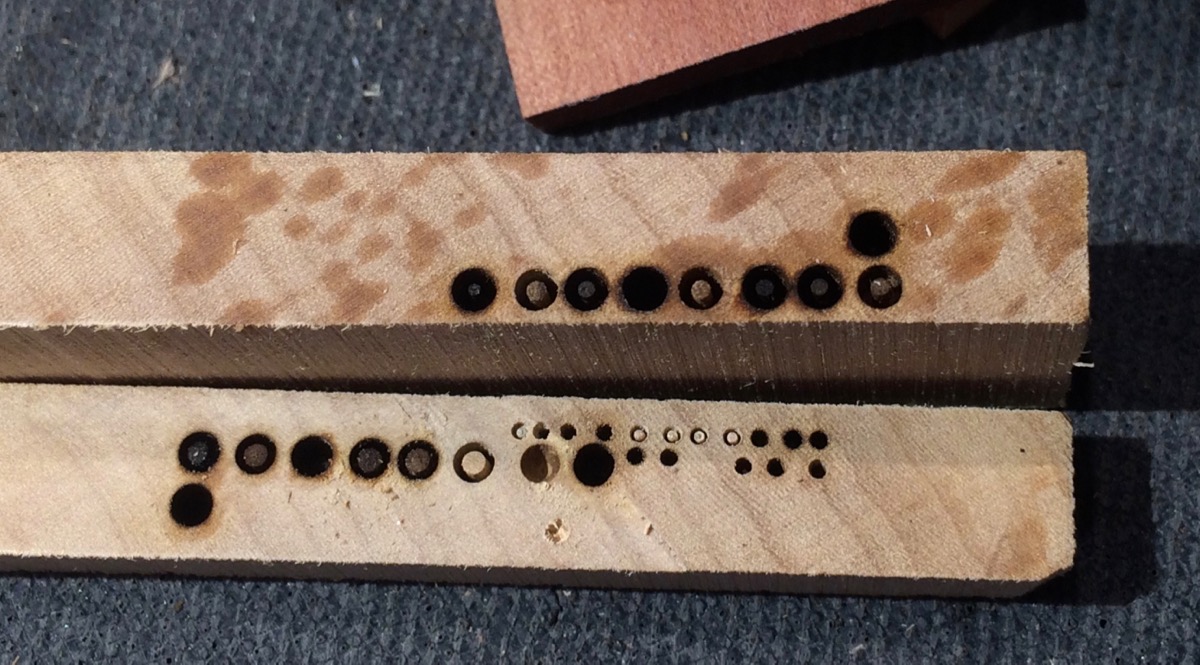
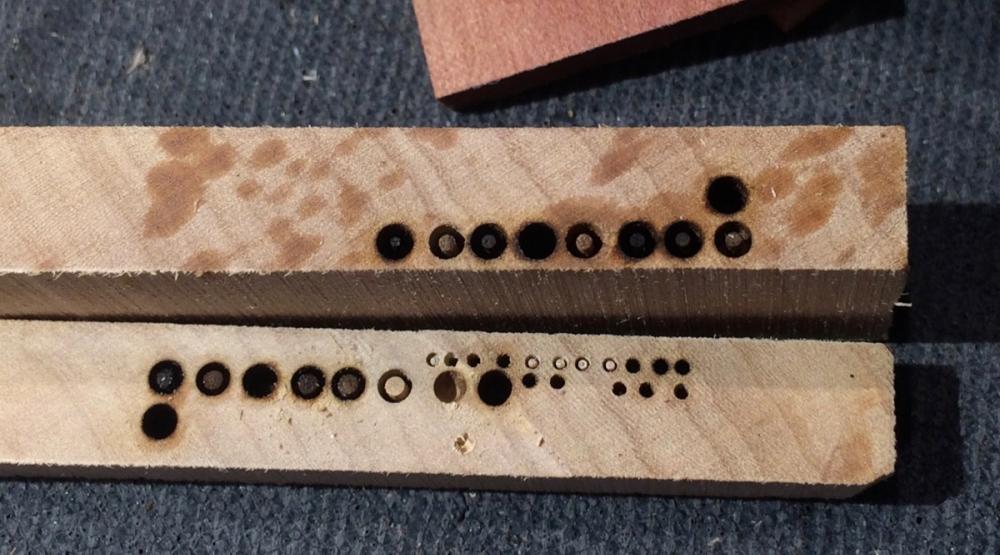
Thanks for the advice! I experimented with brass wire, copper wire and a boxwood treenail on the pear plank with tung oil on top. Copper looks a bit not how I want it, brass looks better, but both are very difficult to sand/file if it is a concave surface inside the hull. Also, I am not confident in the glue bond between the nail and wood if using CA, and do not have an experience with CA. So boxwood is the safest way to go. Bamboo is too grainy when exposed cross-grain. Yes, I was reading that topic and followed advices from it. Hope that method will work with a larger needle, waiting for it to arrive.
- 969 replies
-
- 3
-
-
- hahn
- oliver cromwell
- (and 1 more)
-
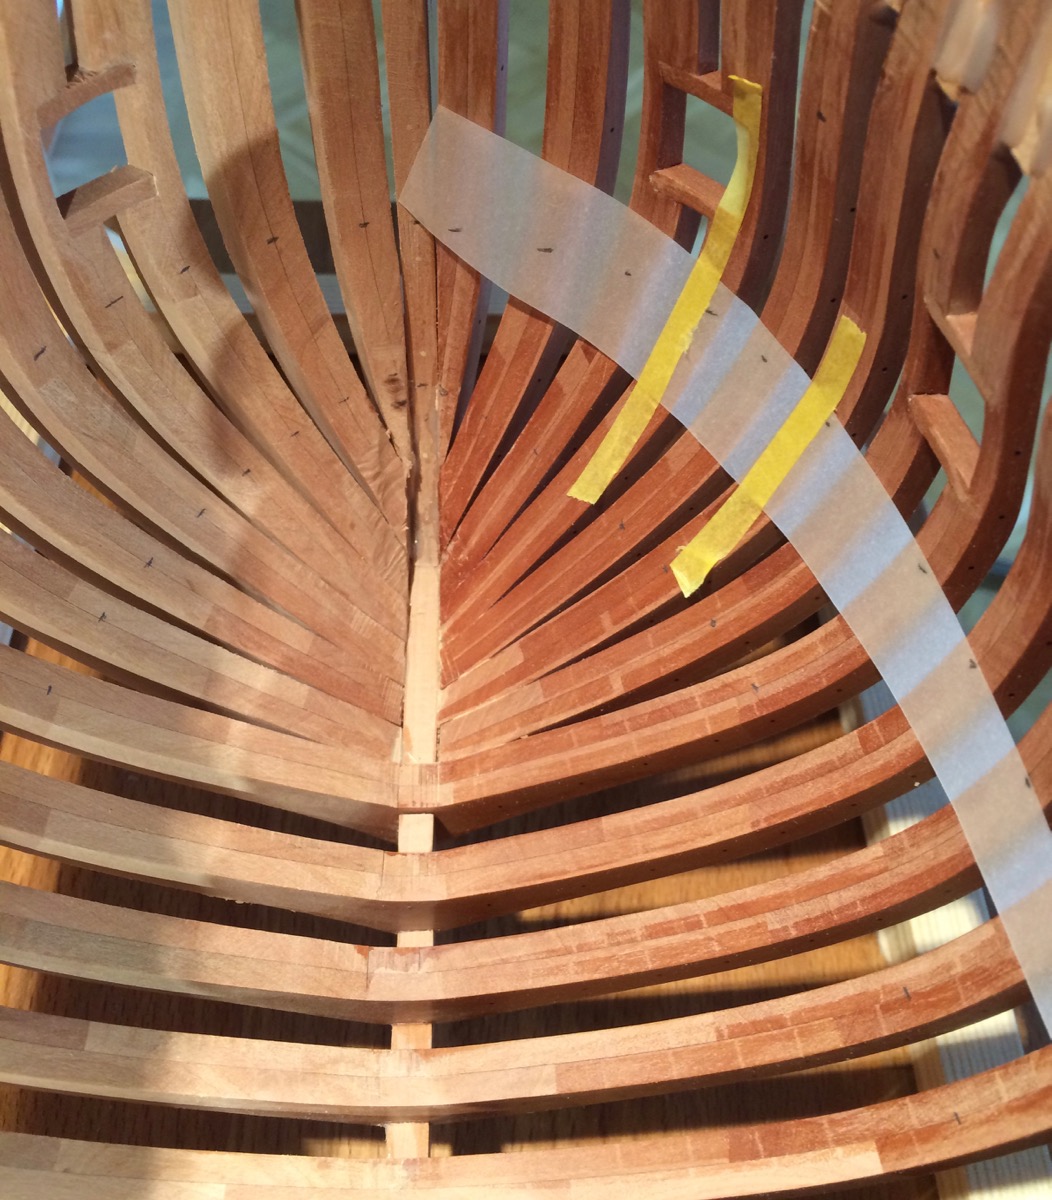
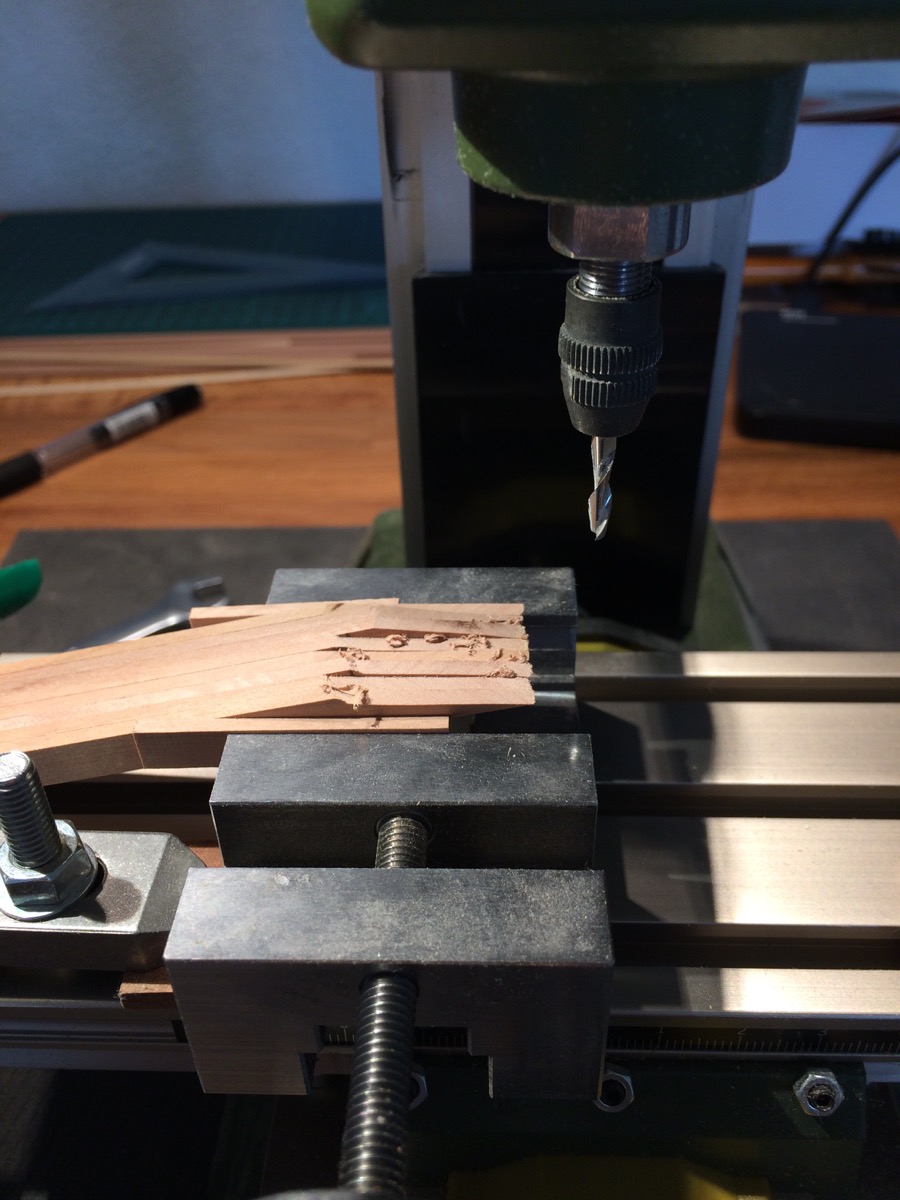
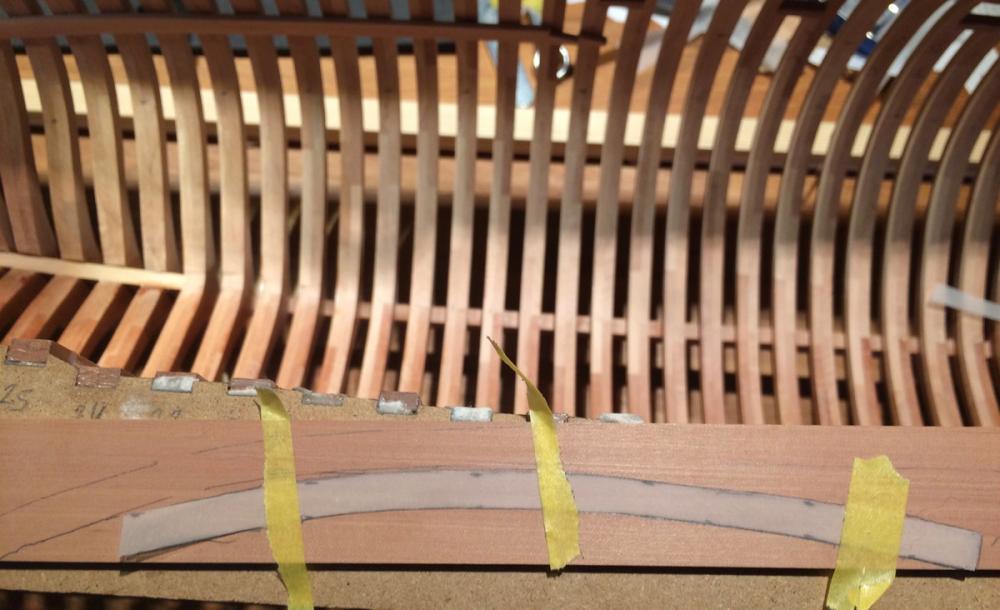
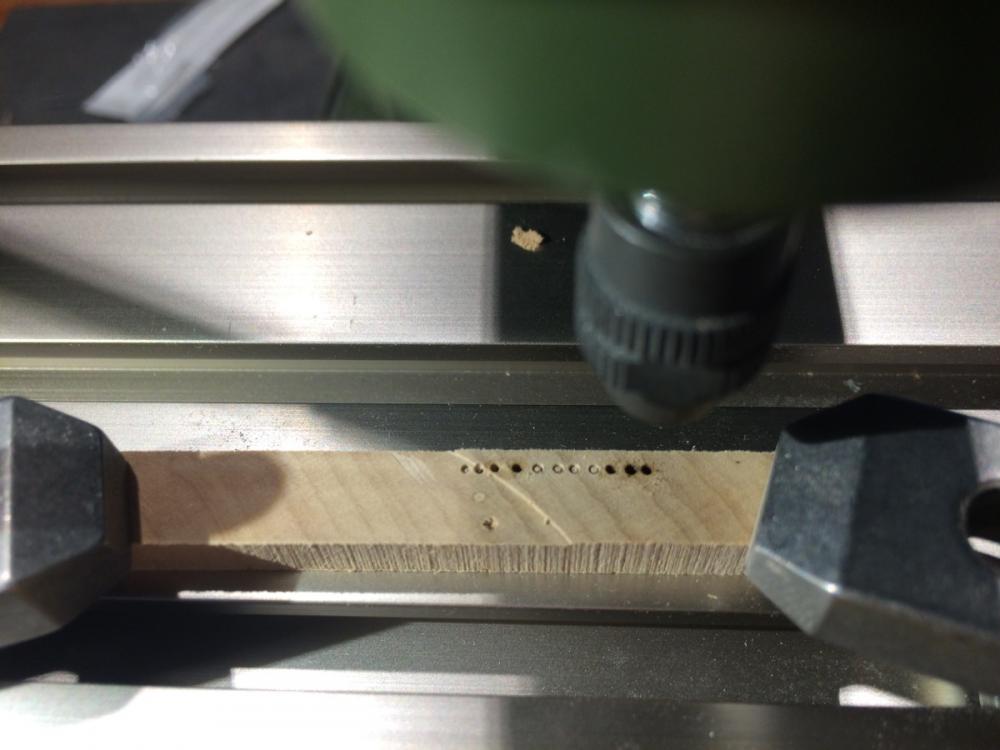
Deck clamp installation is in progress. Some clamps are curved (bow and stern), edge bending will not really work with such thick planks, so cut them to shape. Tracing paper helps a lot, just make sure it is fixed in place and will not move: In a meanwhile, was trying to make treenails. I do not trust the glue joint between the deck clamps and the frames, it might be too weak for the humidity varations. So will reinforce it with a boxwood treenails, brass nails would be really hard to sand inside the hull. Drawing through drawplate is really difficult after 0.7mm diameter, and is also very time consuming. Tried another method - drilling with a hypodermic needle, sharpened as a crown. So far my experiments failed - after first few nails wood gets stuck inside the nail and you get burned holes. After careful reading, seems like the trick is to bend the edges of the needle to the inside, so there would be a gap between the inner surface of a needle and a treenail. Tried the same idea with a large needle (designed to inflate balls) - but it is not polished inside, so I get burned wood again. Also, dremel drilling stand vibrates too much, so mill is the only option for that method. Test results, fail: Ordered a bigger hypodermic needles, will try again.

- 969 replies
-
- 14
-
-
- hahn
- oliver cromwell
- (and 1 more)
-
Metric vs English
Mike Y replied to jdiven's topic in Building, Framing, Planking and plating a ships hull and deck
There is also a good model scale converter for the iphone, that can also convert between different units at the same time: https://itunes.apple.com/us/app/model-scaler/id528641484?mt=8 -
HMS Naiad 1797 by albert - FINISHED - 1/48
Mike Y replied to albert's topic in - Build logs for subjects built 1751 - 1800
You are truly a master of wood tone selection! And it is an eye candy to see how precise and sharp your woodwork is. -
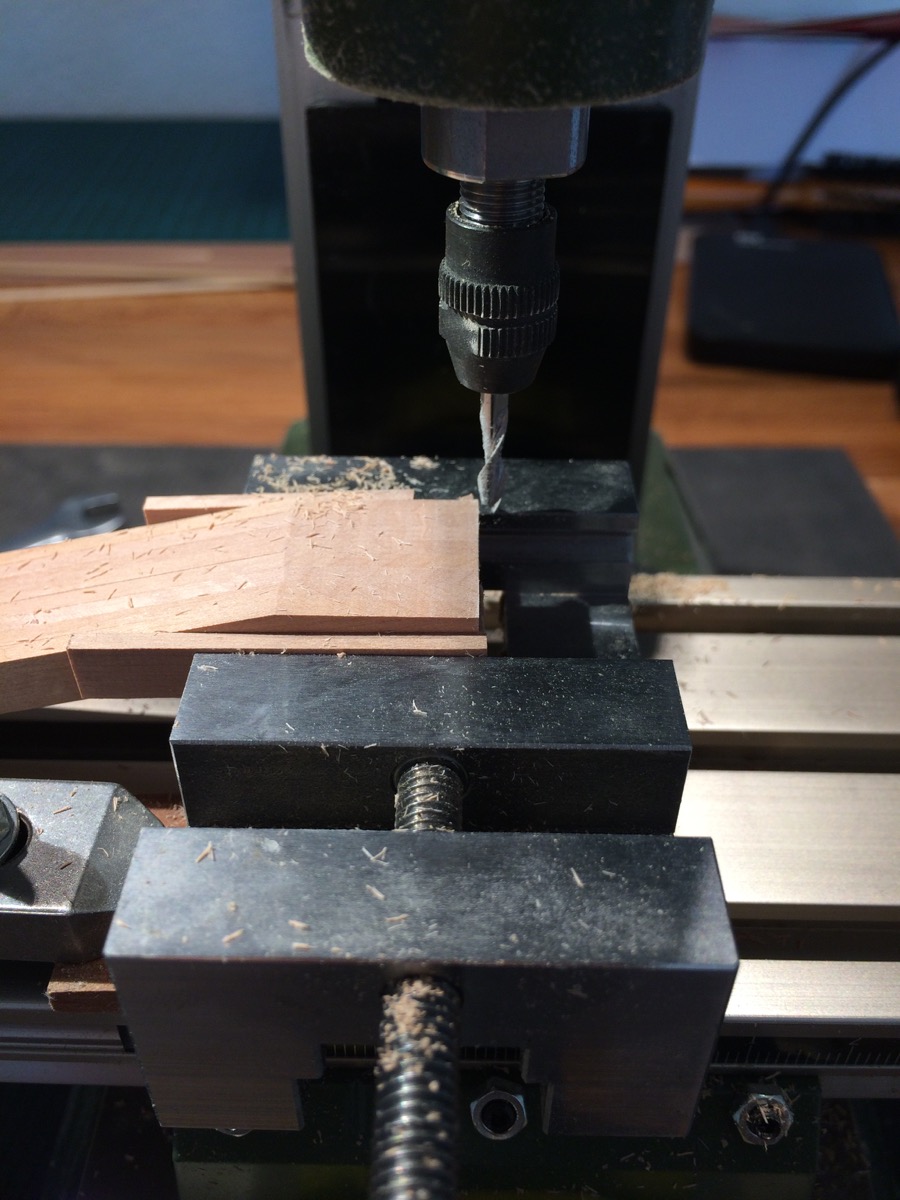
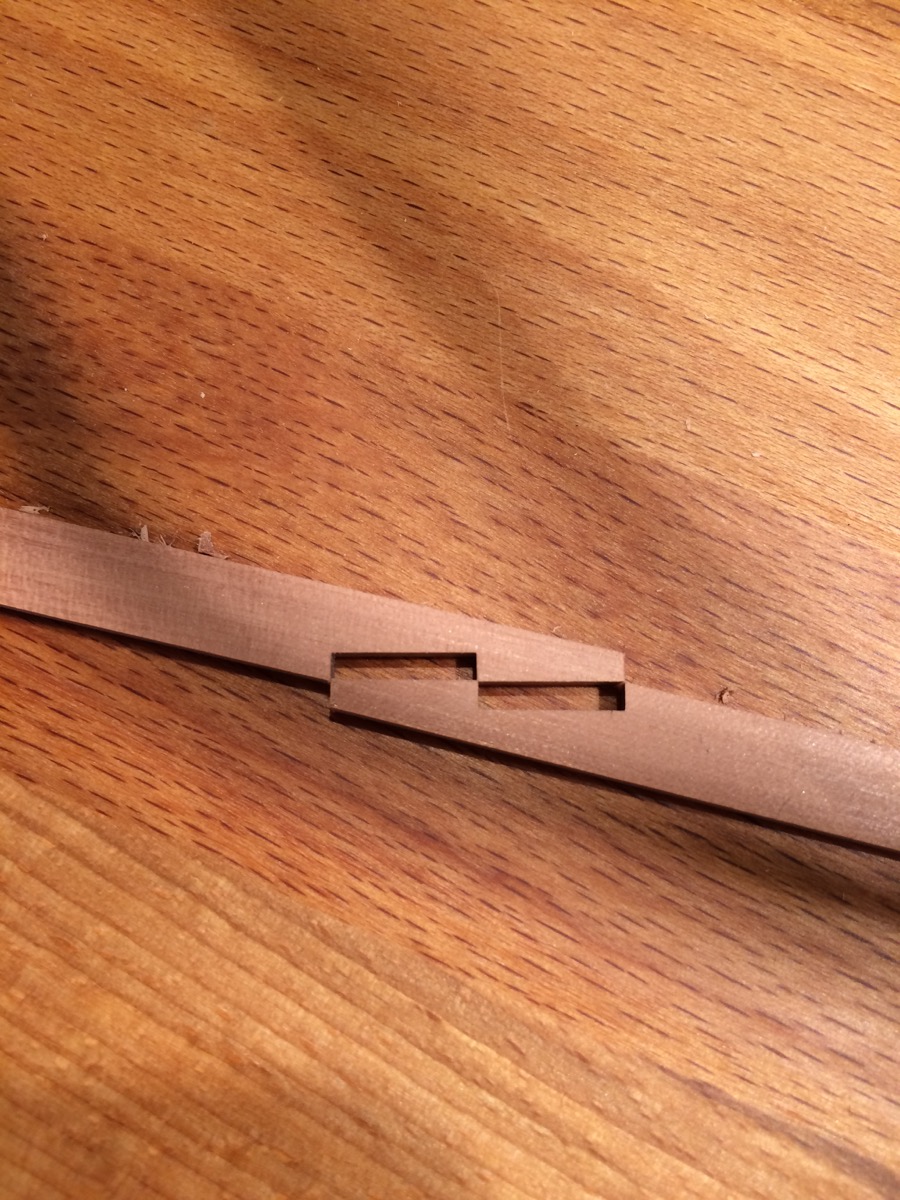
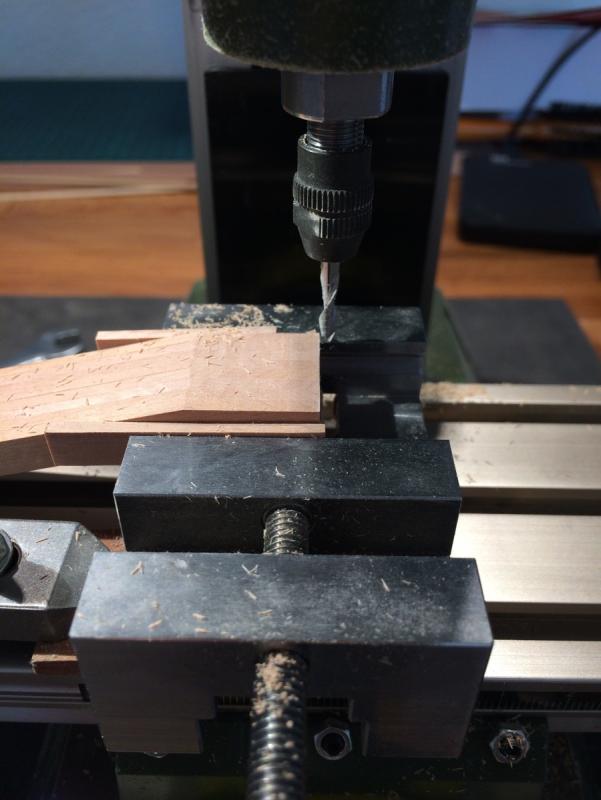
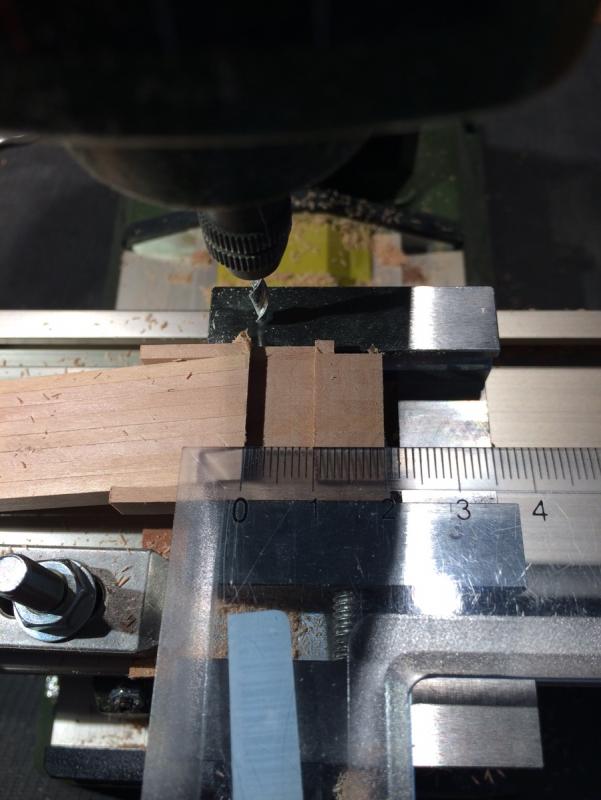
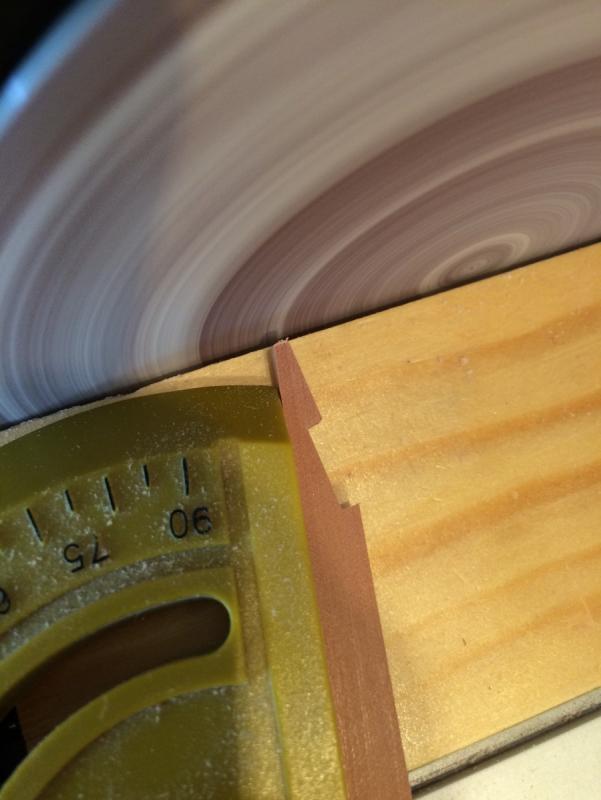
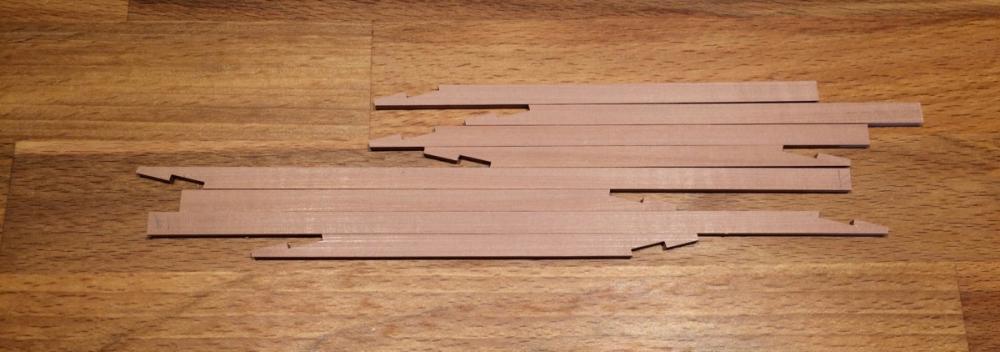
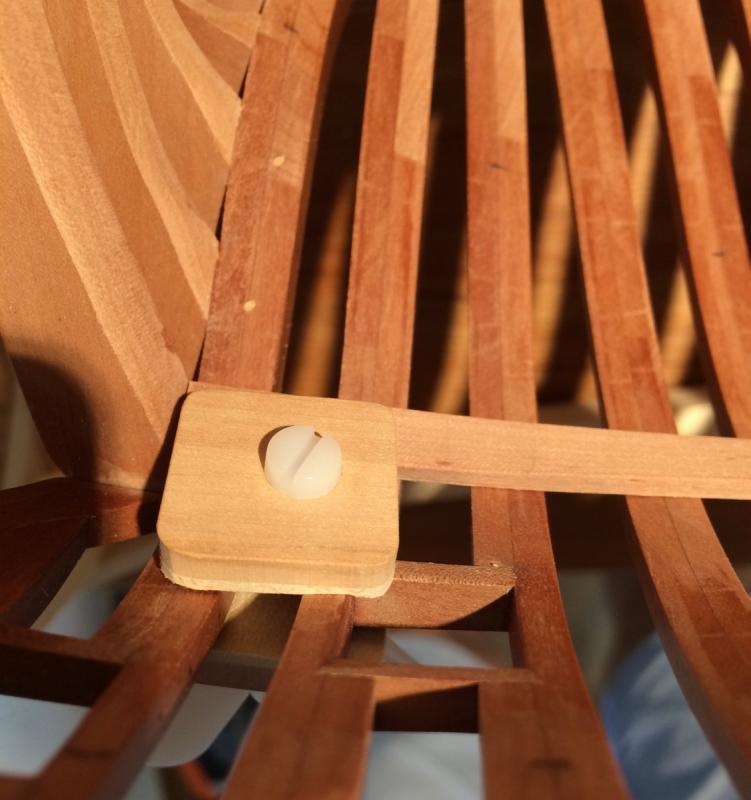
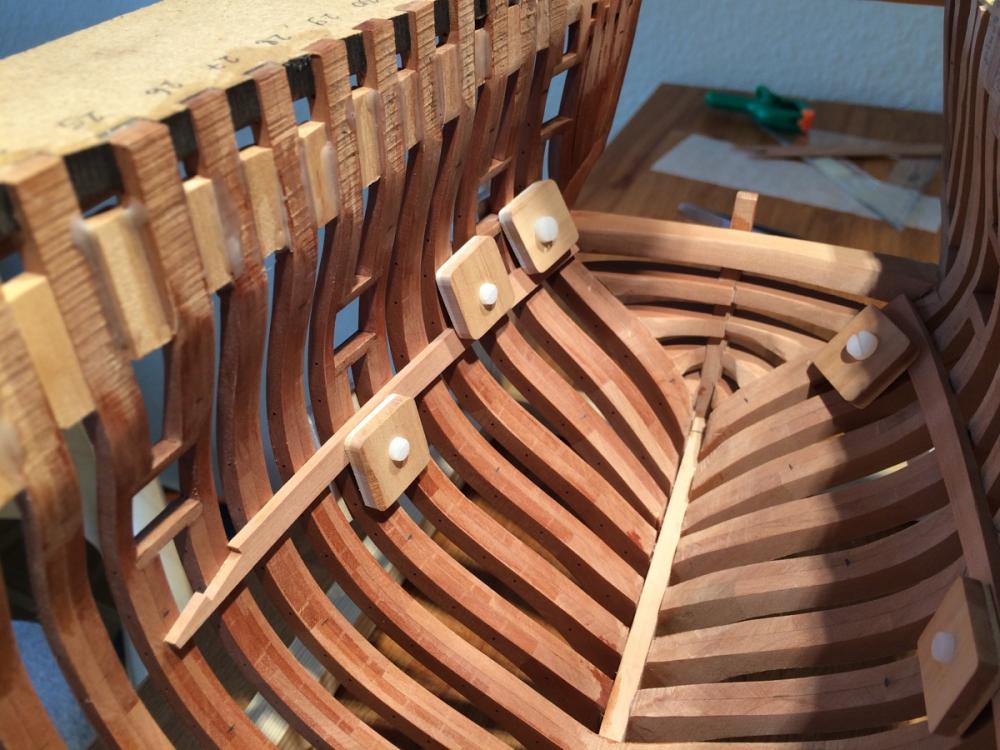
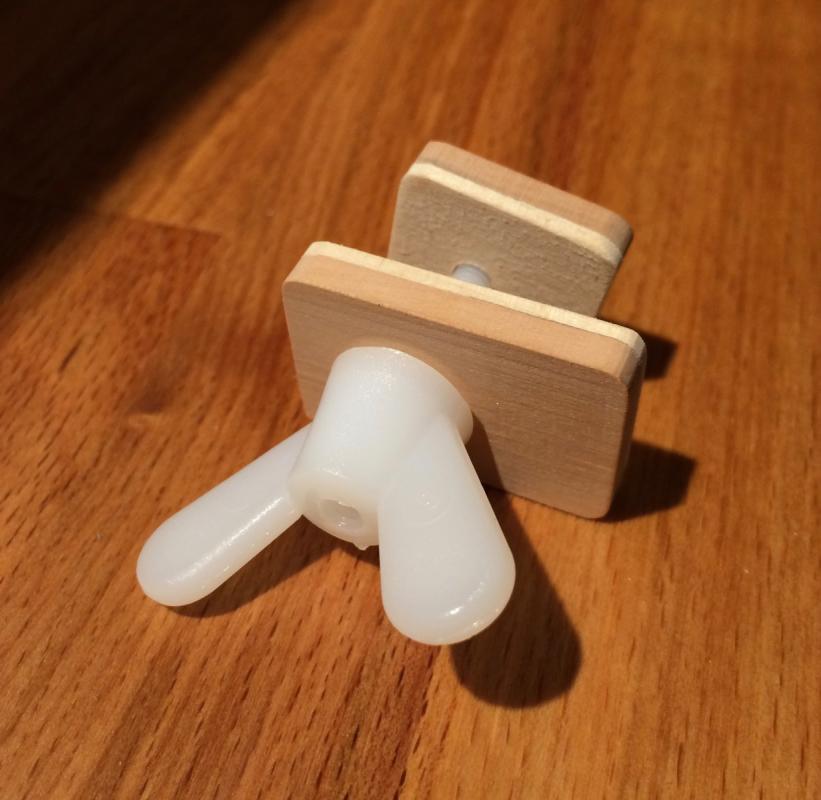
Thanks for the comments and likes! The idea with soft inner side of the clamps paid off, it flexes in difficult tight corners, no damage to the wood or to the finish: Just need to make more of them, waiting for the shipment of nylon screws. In a meanwhile, used my mill for the mass production of the scarph joints. Took 40min for two batches, including mill setup and a cleanup! Rough cut angle planks are fixed in the mill: First some passes to make them all level. Then cutting the ends to the depth of the joint (2mm in my case): Dividing the remaining joint in 2 equal parts, using mill table to measure the distance (do not forget to offset the cutter diameter). Cutting with the same 2mm depth: The resulting joint is perfect, but a bit too tight, needs force to be assembled, no space for glue. Sliiightly trimming ends of the planks on a disk sander, carefully with the angles: And that's it! Without a mill, it would take me half a day to make all these joints with chisel and file, and they would not be so straight.. Result of the day: clamps are steamed and fixed into place, left overnight to dry


- 969 replies
-
- 23
-
-
- hahn
- oliver cromwell
- (and 1 more)
-
The table on the first photo looks very good, like a fullsize slab table
- 728 replies
-
- 1
-
-
- le fleuron
- 64 gun
- (and 1 more)
-
Ben, maybe dissolving some glue joints and inserting extra spacers will solve the problem? The hull is so great!
-
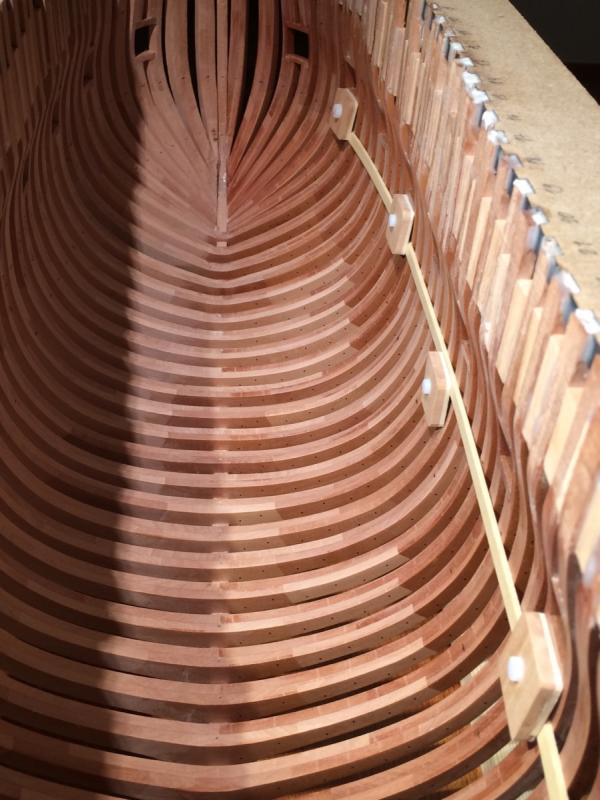
Marked all deck clamps locations and now playing with a small simple clamps that will help to glue deck clamps in place (no pun intended). The inner surface of the clamp is the extra soft basswood from the longboat kit, it is very good for clamping because it will never scratch the surface. But it can't hold anything in place, so the back side of the clamps is made of pear. Seems to work! The screws are nylon to avoid scratching the frames. (this is a temporary strip, not a real clamp. Just to mark a nice curve)

- 969 replies
-
- 25
-
-
- hahn
- oliver cromwell
- (and 1 more)
-
Metric vs English
Mike Y replied to jdiven's topic in Building, Framing, Planking and plating a ships hull and deck
Oh please not this again... -
Ben, it is still an incredible model! Maybe replace the cracked frames with a slightly thicker ones?
-
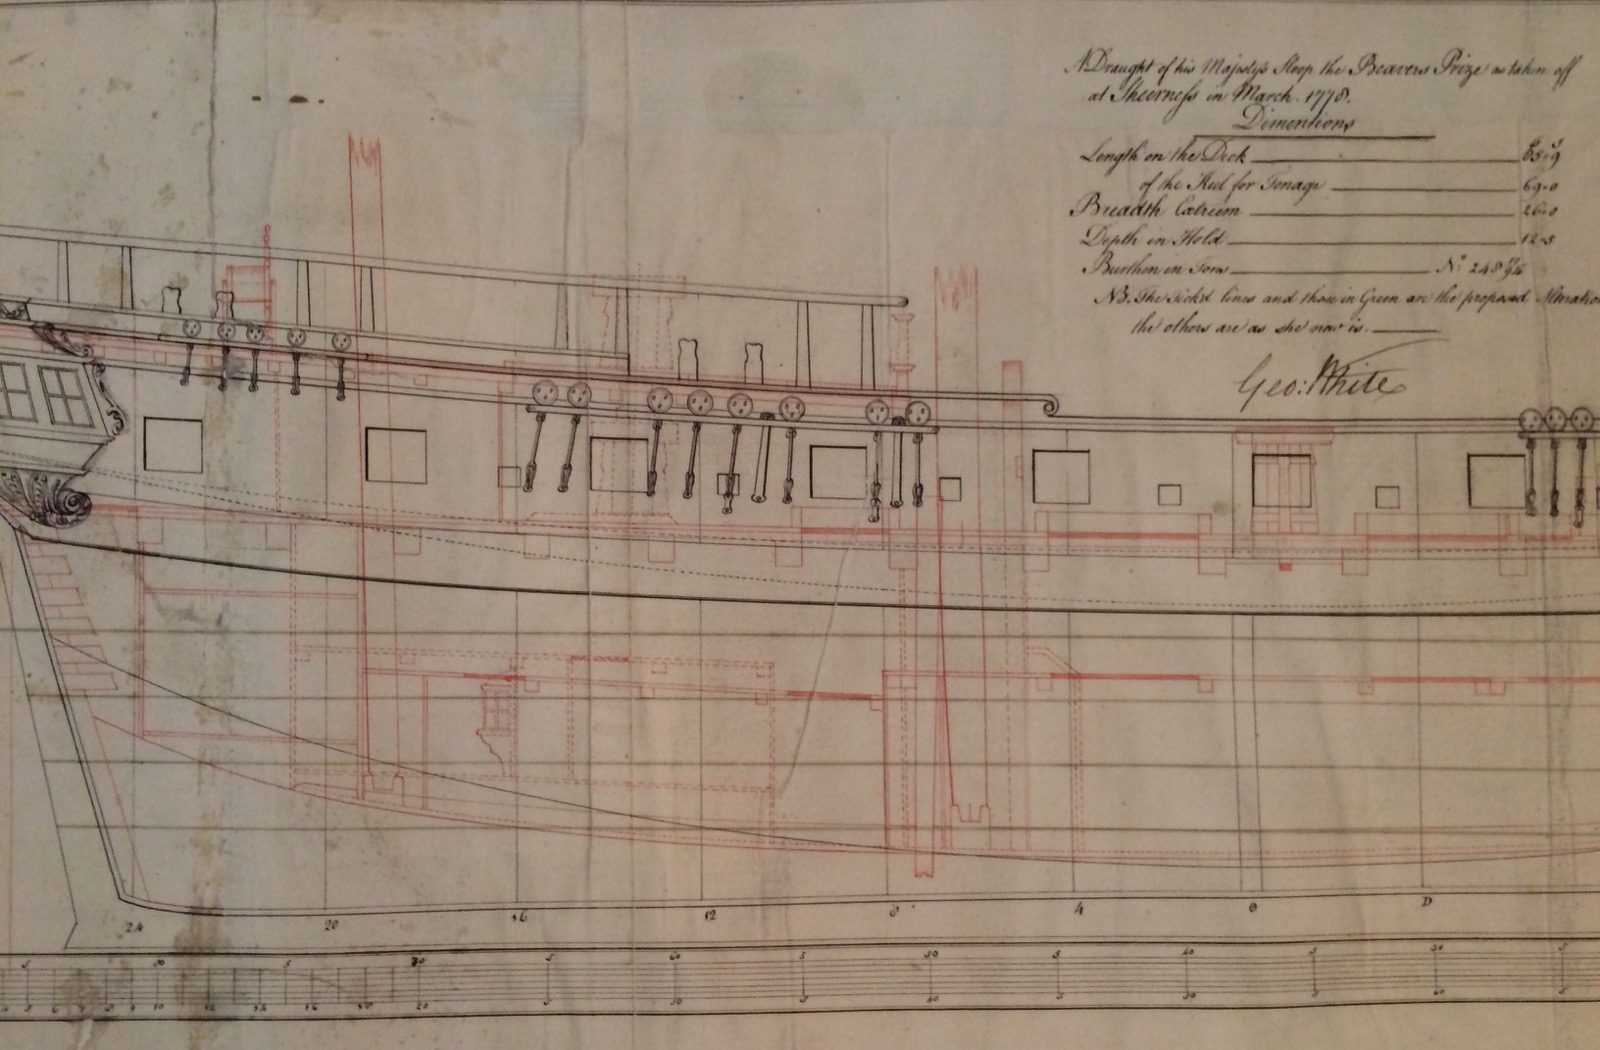
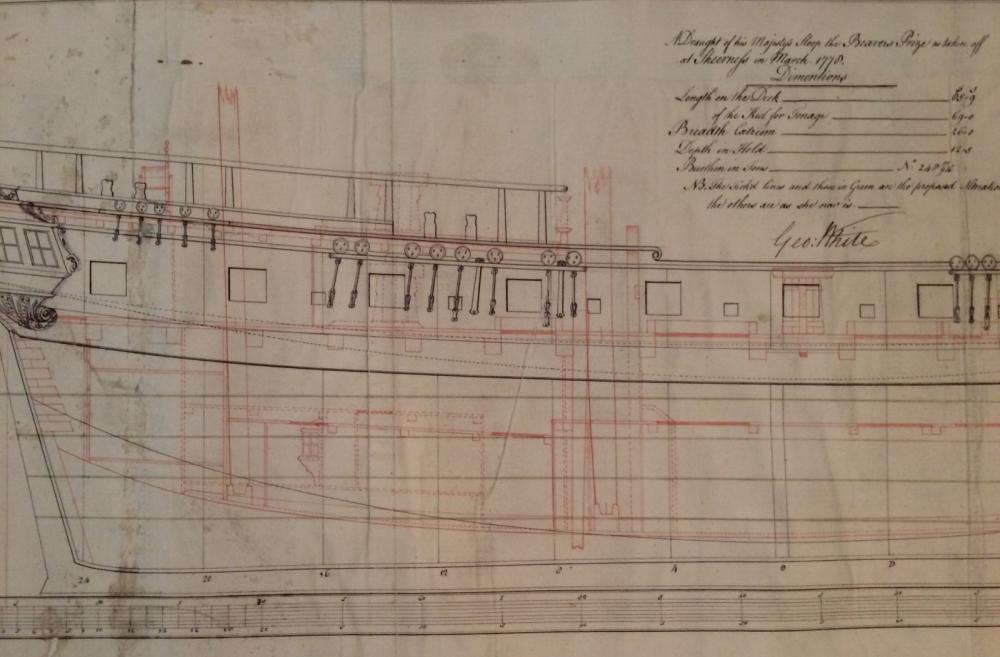
Robin, you are right, it is a magazine. I am not very familiar with the internal rooms yet... Siggi, you helped a lot, thank you! Will build an english version, with a smooth line of the lower deck clamp
- 969 replies
-
- 7
-
-
- hahn
- oliver cromwell
- (and 1 more)
-
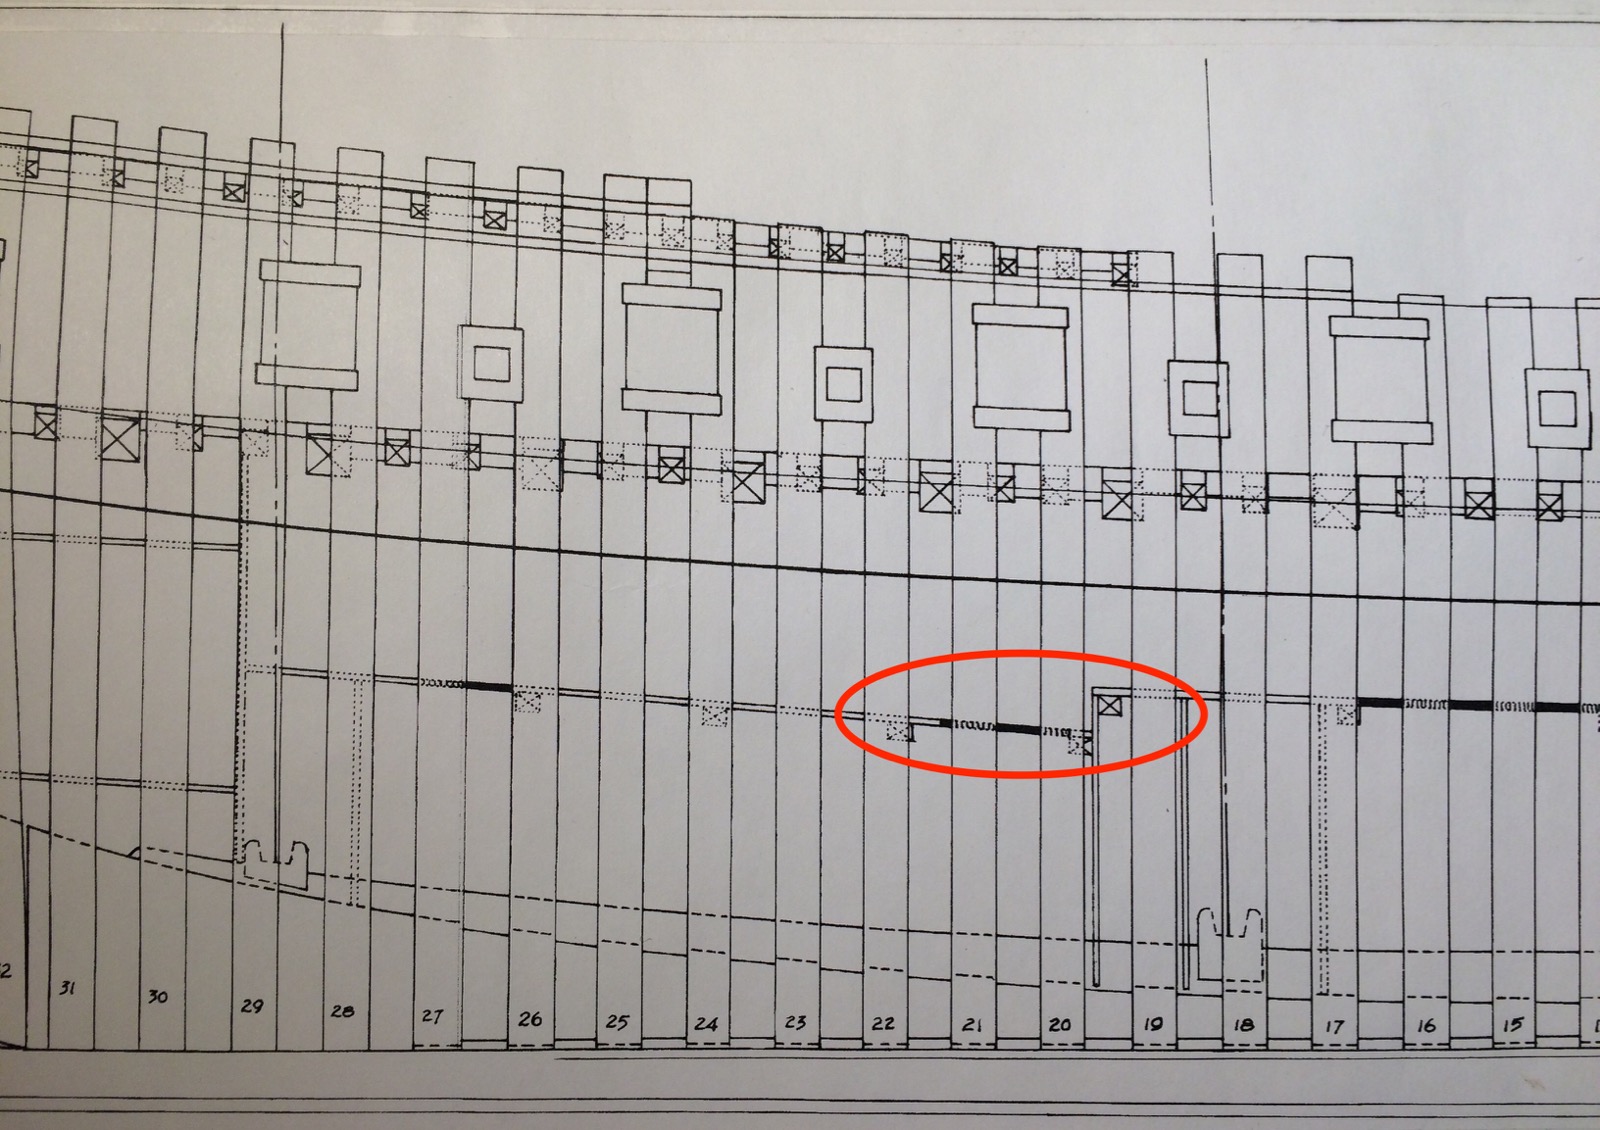
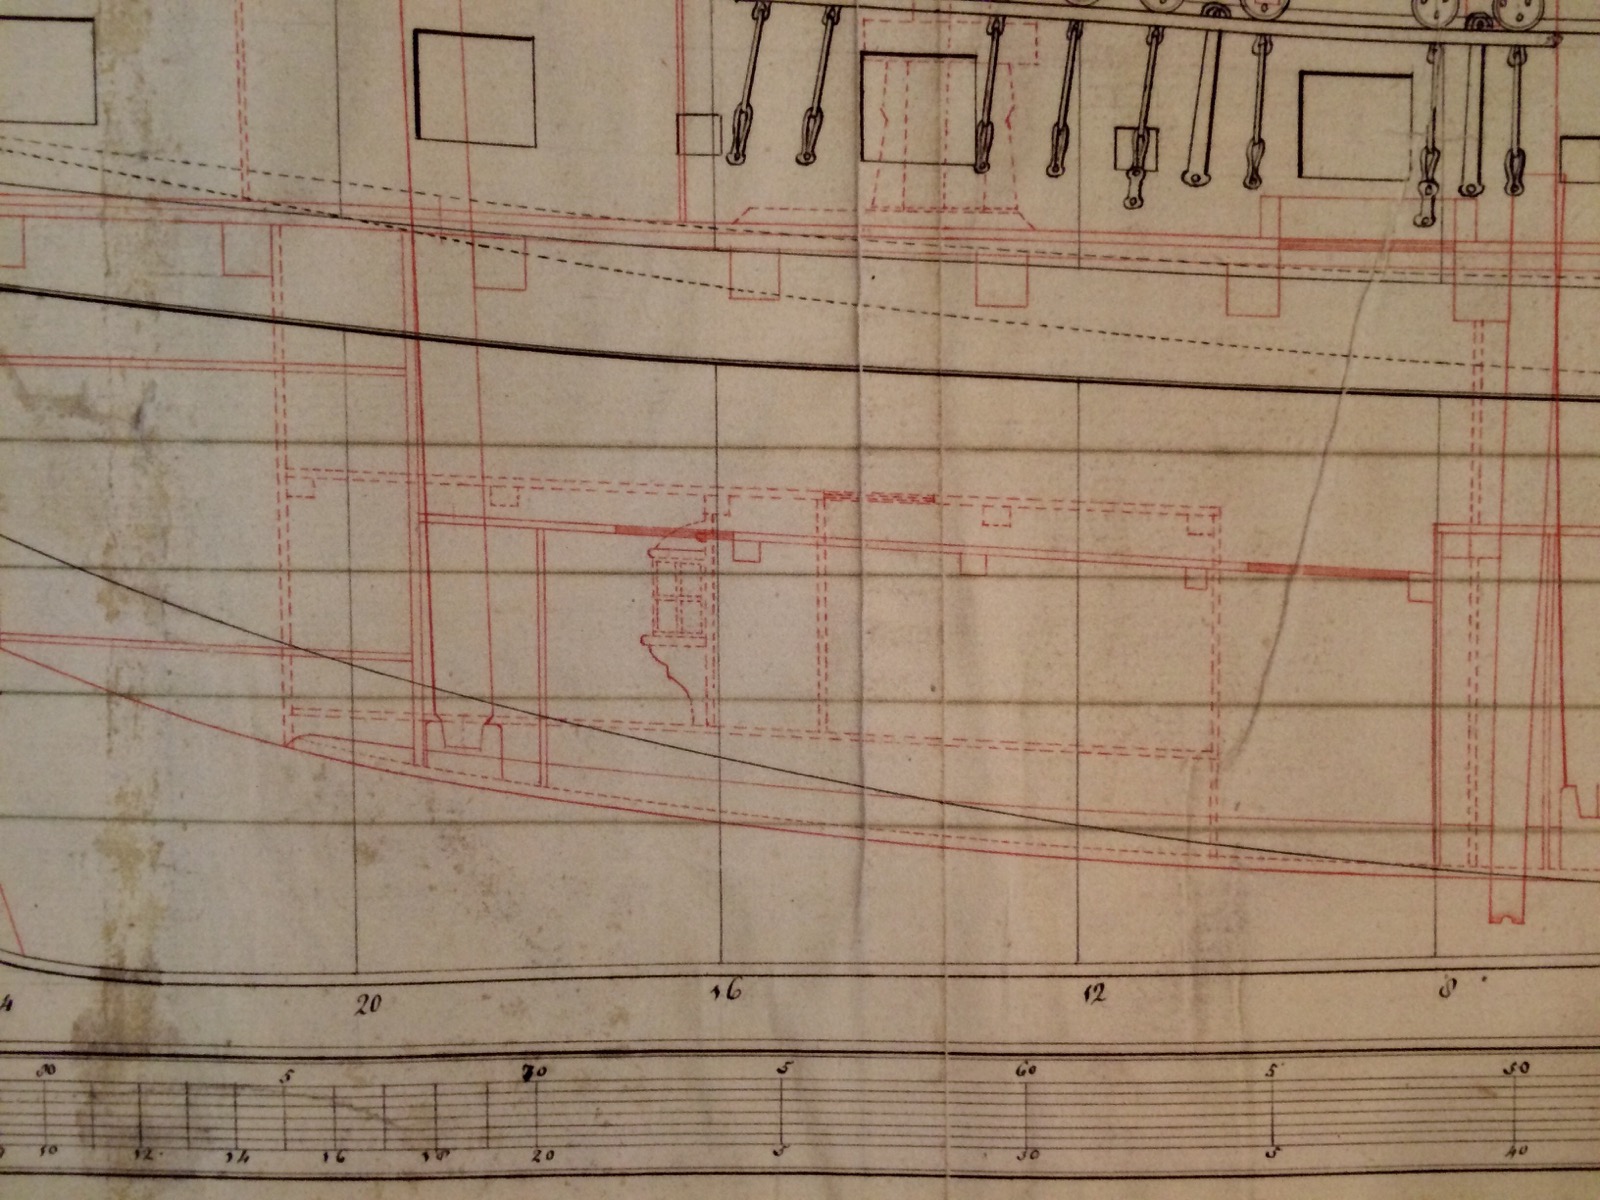
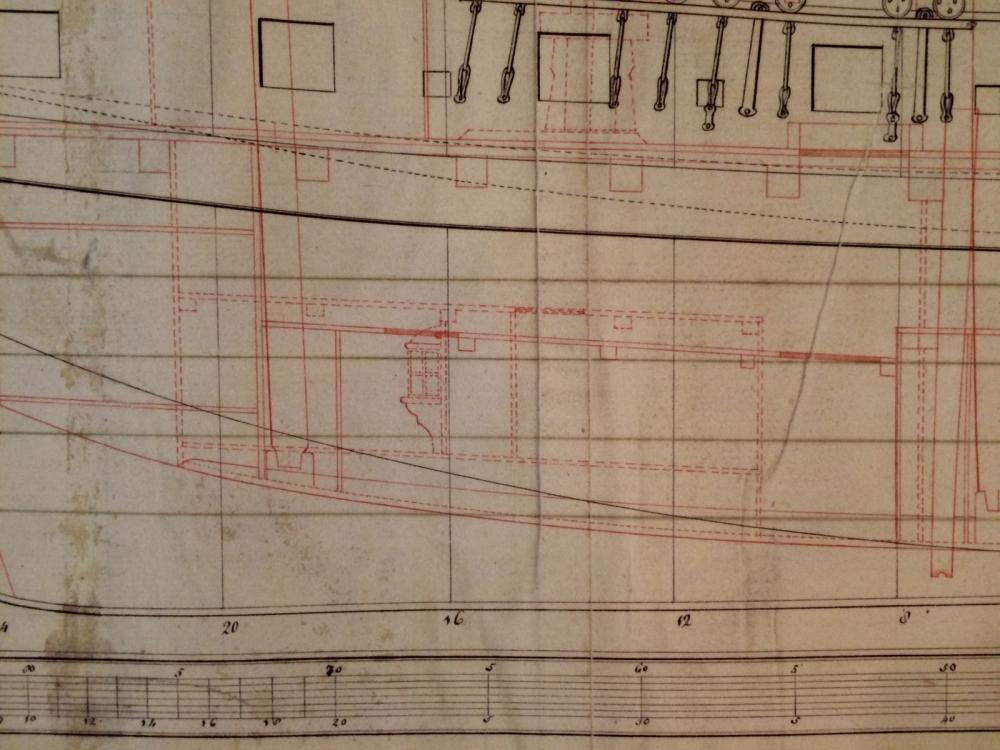
Carl, I agree, but I am a bit confused with the meaning of these dotted lines on the NNM blueprint. What are they? If I remember correctly, the powder room has a tiled floor for various reasons, there should be a space for this floor. So the shape of the powder room outlined with dotted lines make more sense.
- 969 replies
-
- 4
-
-
- hahn
- oliver cromwell
- (and 1 more)
-
It is a very charming photo, the man and his model. Agree, it would be perfect on a book cover!
- 3,618 replies
-
- 5
-
-
- young america
- clipper
- (and 1 more)
-
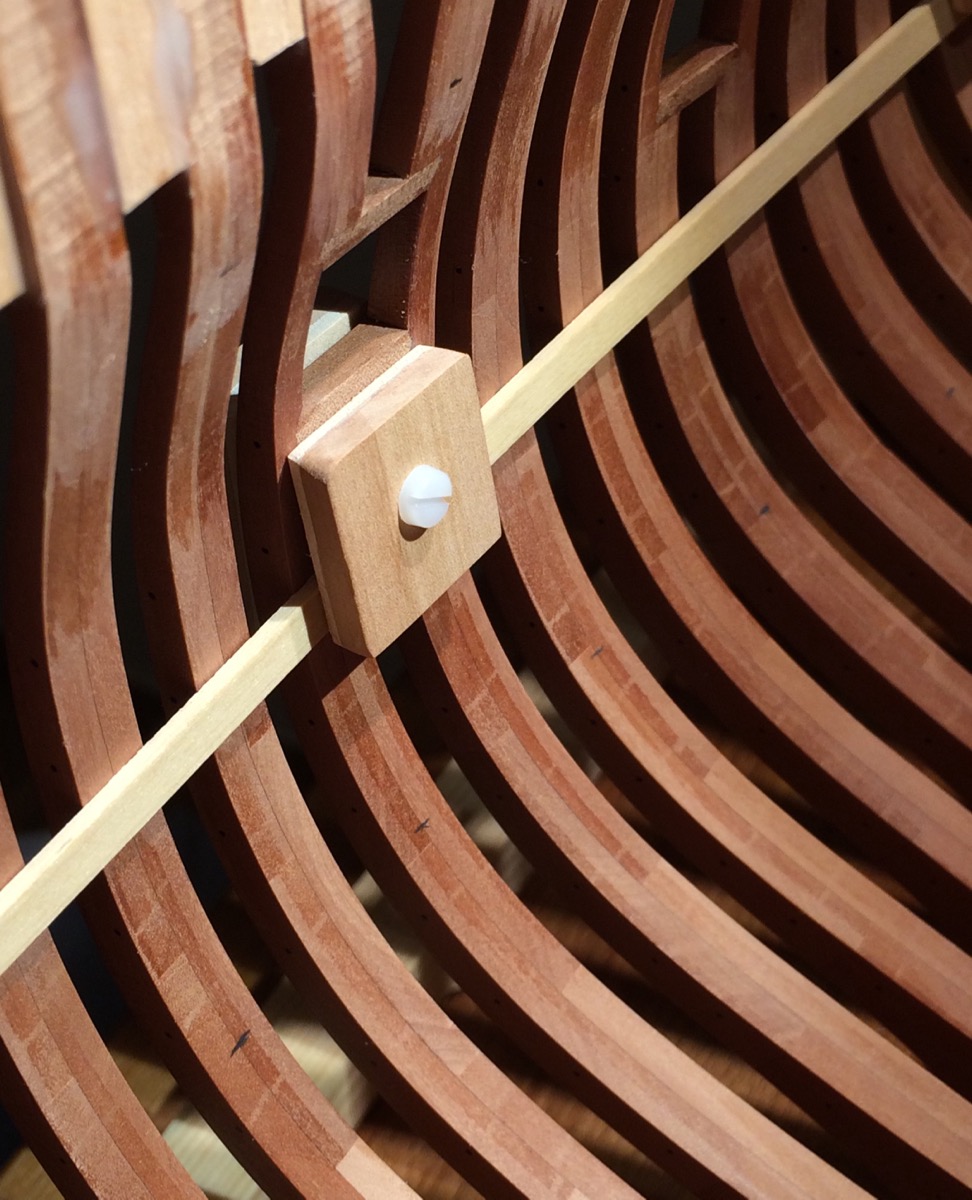
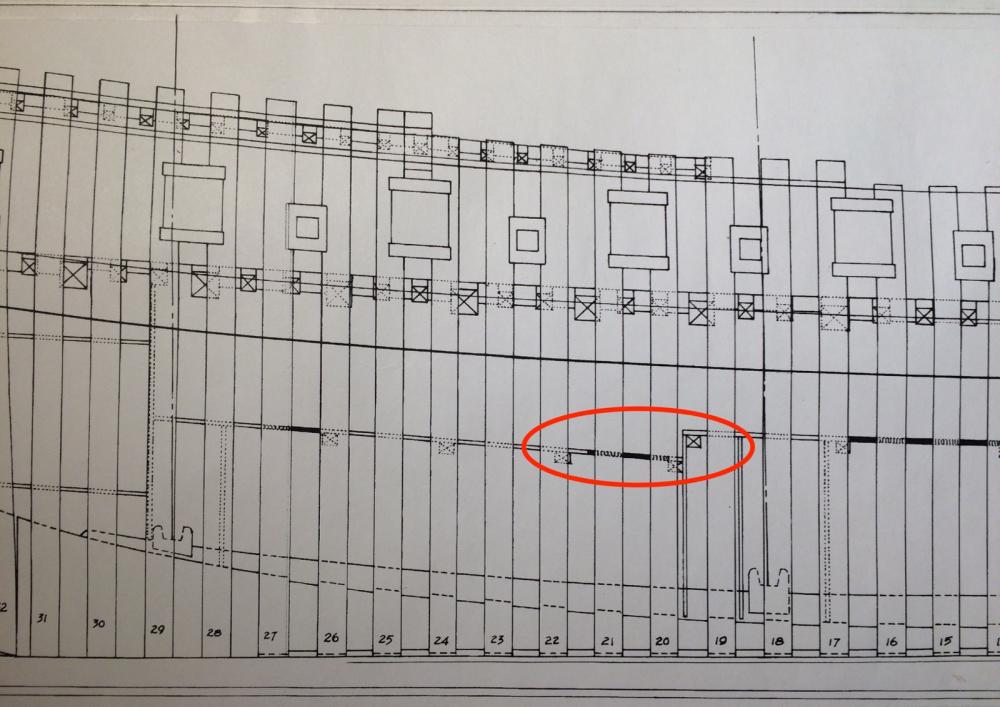
Started marking the deck clamp positions, seems pretty straightforward: But I am really confused about the location of the lower deck clamp. The method is very simple - take the deck beams locations, make an offset because they are inserted into 1'' recesses in the clamps, mark the clamp position accordingly. However, the lower deck beams line has some weird step, according to Hahn plans: Original NNM plans have two sets of beams pictured, one of them is in dotted lines: Close-up: I am really confused about the meaning of it. With an open and unplanked hull, I do not want to make a stepped lower deck clamp, it will not look nice. Would really appreciate an advice!
- 969 replies
-
- 8
-
-
- hahn
- oliver cromwell
- (and 1 more)
-
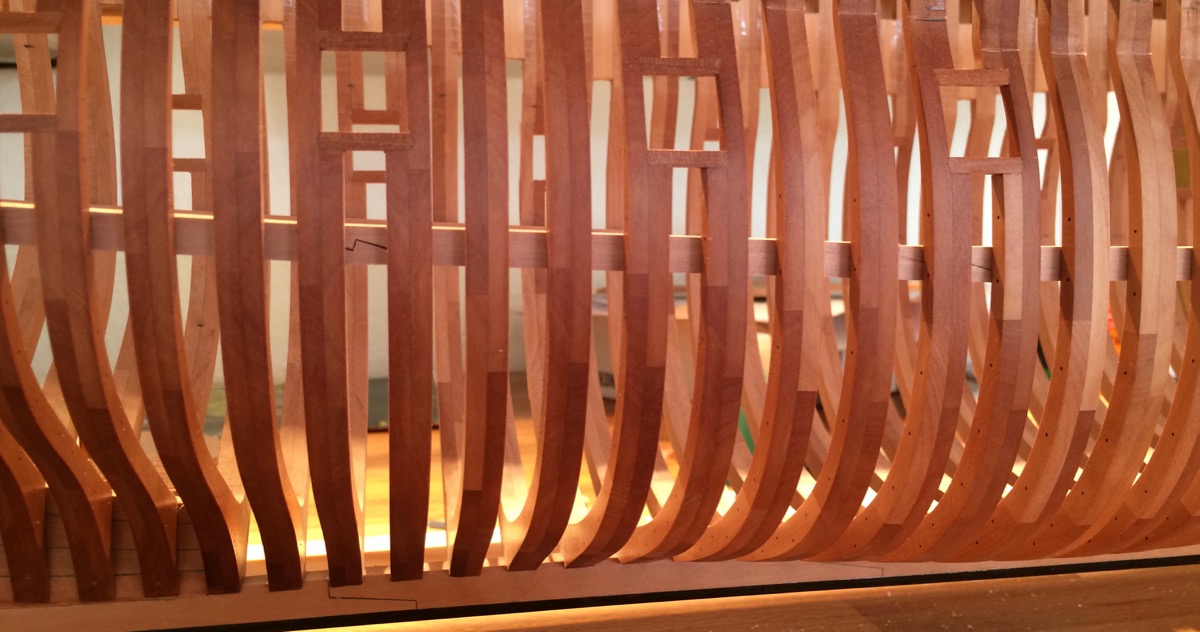
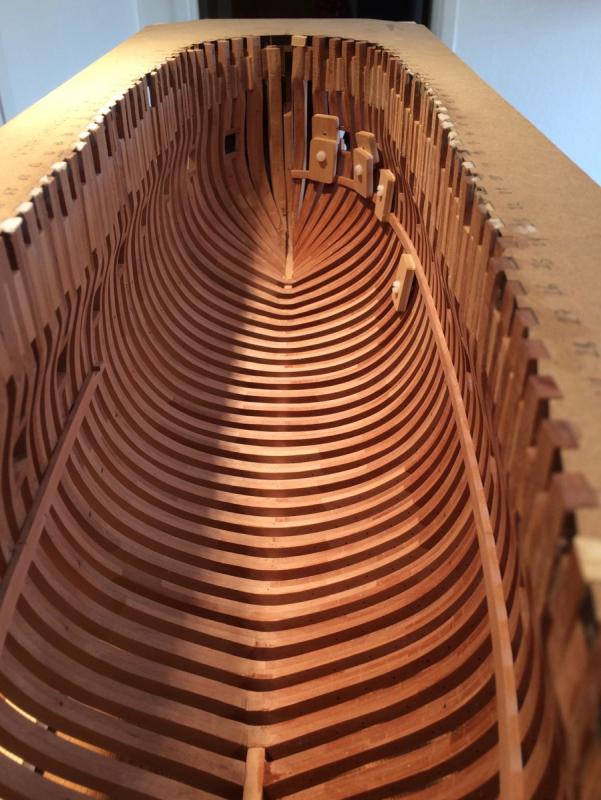
Looks really great! Just a little bit of a feedback - don't you think that frames are a little bit too thin, cut very close to the lines? It leaves a very small margin for fairing, and especially around midship it is easy to get slight mis-alignment on top part of the frame. Lots of experienced builders advised to cut a frame with 1mm margin from the lines, which would be needed when fairing. Also, I was surprised how much material is gone when fairing is finished, and you just sand it or with fine paper to make a smooth surface without scratches. Just my 2 cents, maybe you already thought it through
-
Heh, sounds like a good problem to deal with! Saw some build logs where plank seams were made more visible by scribing them with some sharp tool, on an already planked hull (not before the planks are glued, but after). It was looking quite good! But must be tested first, of course.
-
Thanks a lot for likes and good words, it is really encouraging! Now playing with different tools to properly transfer height/depth from plans to the inside of the hull. Height gauge only works outside, but thanks to MSW, there are lots of different jigs posted in other build logs
- 969 replies
-
- 7
-
-
- hahn
- oliver cromwell
- (and 1 more)
-
Thank you!The oiled side would not be planked at all, the other side would be fully planked, so it was not oiled
- 969 replies
-
- 8
-
-
- hahn
- oliver cromwell
- (and 1 more)