Mike Y
-
Posts
1,557 -
Joined
-
Last visited
Content Type
Profiles
Forums
Gallery
Events
Everything posted by Mike Y
-
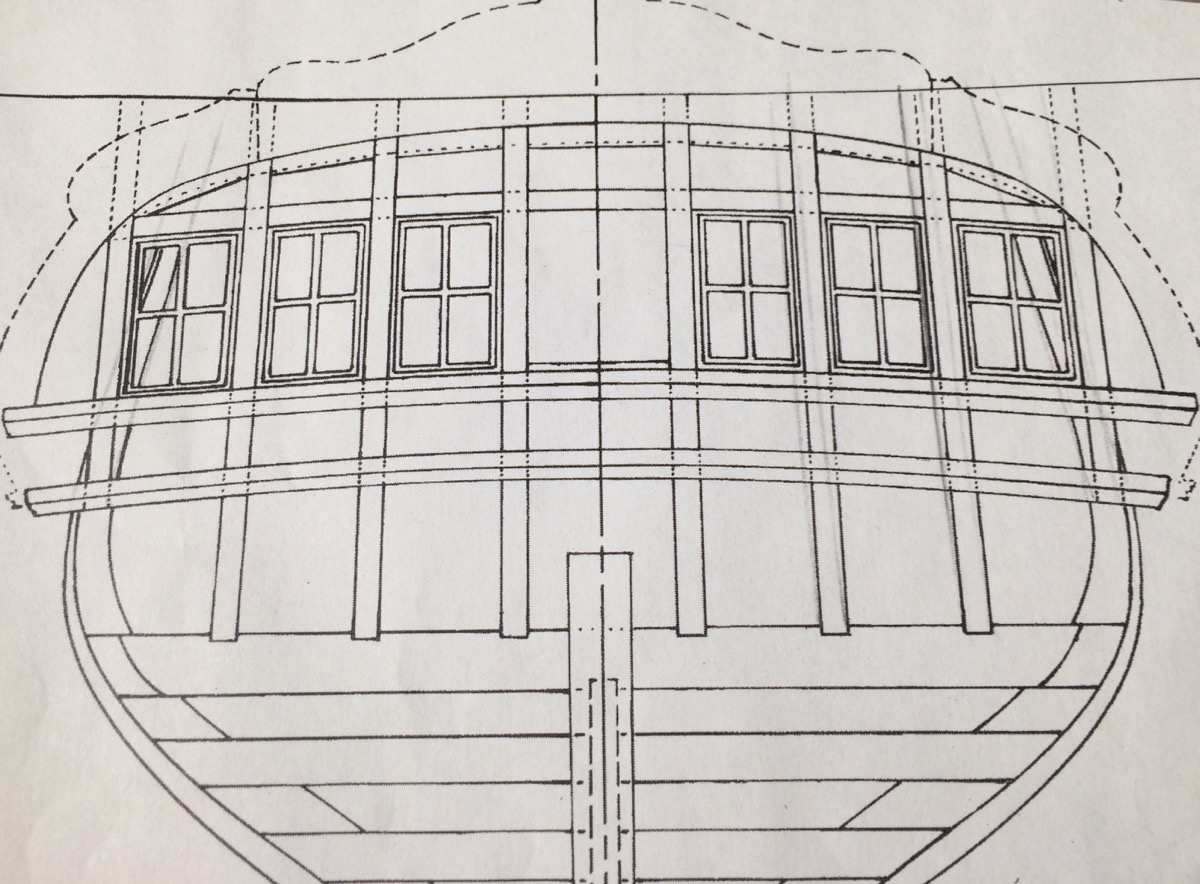
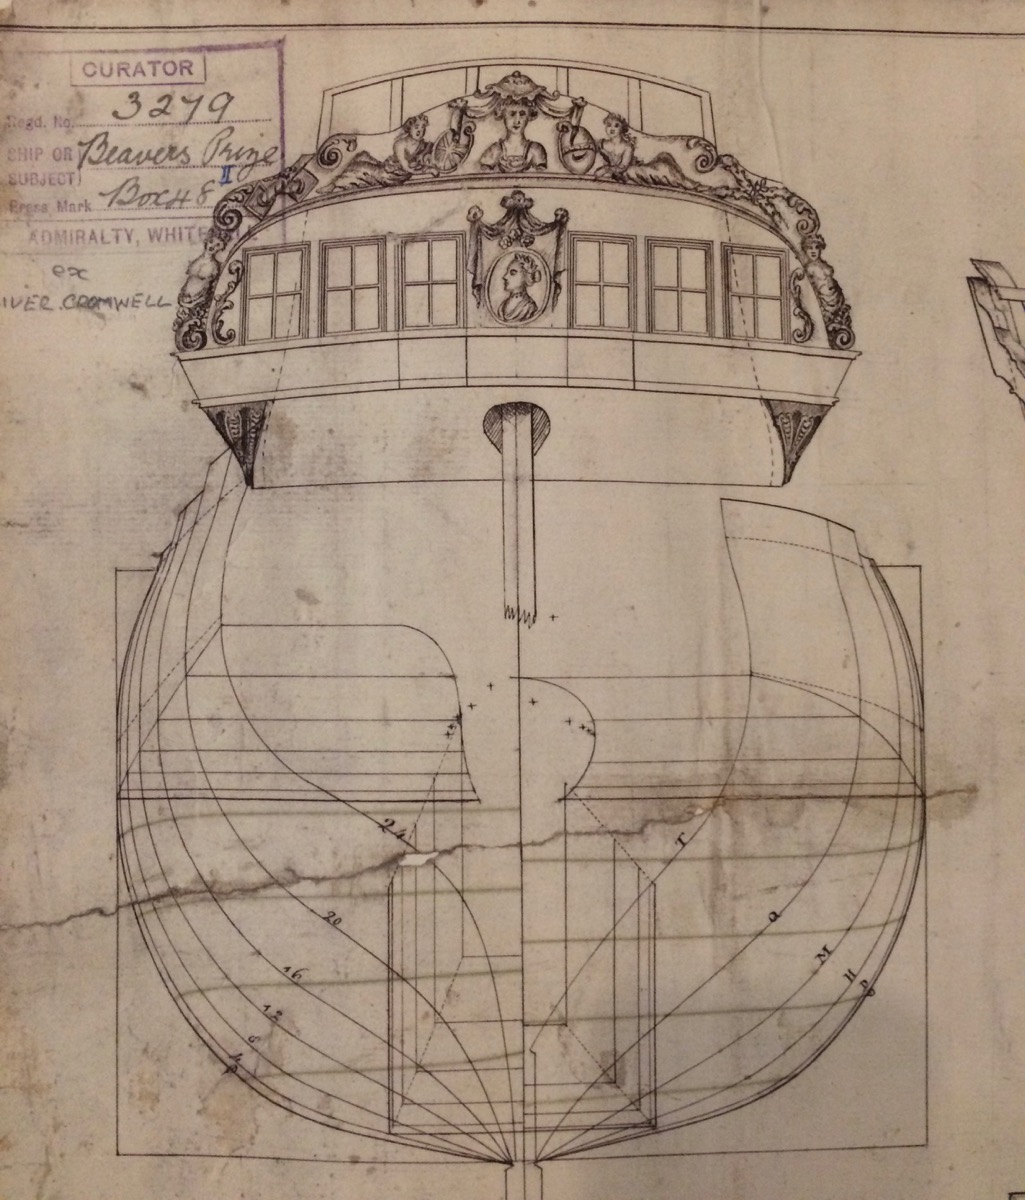
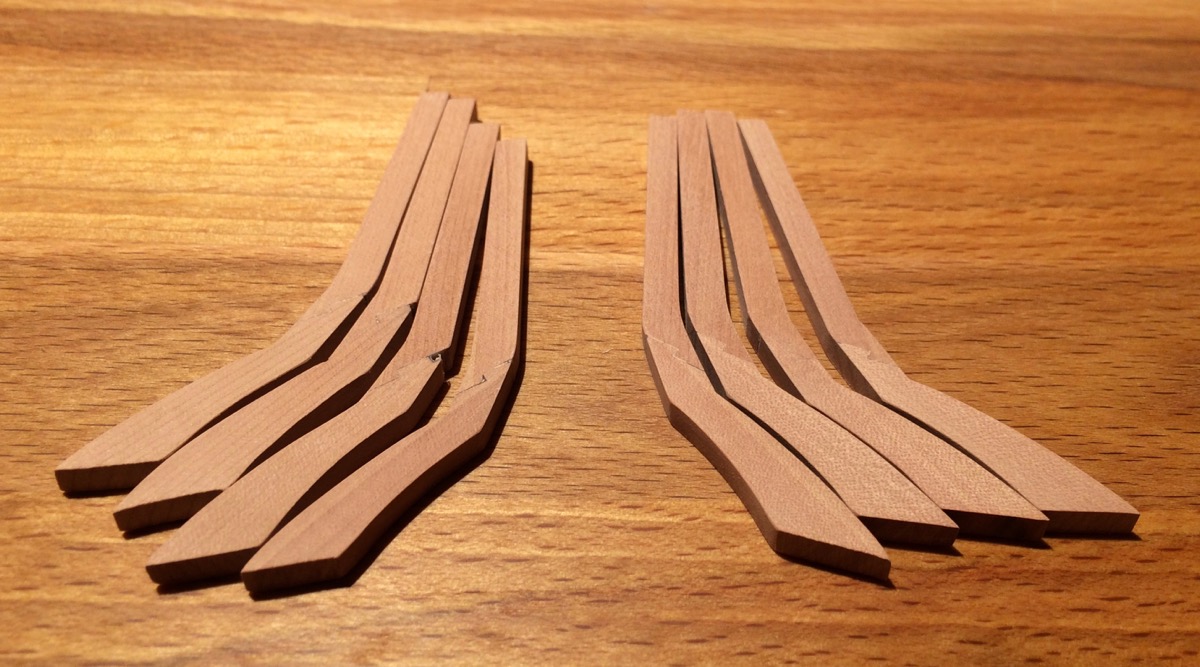
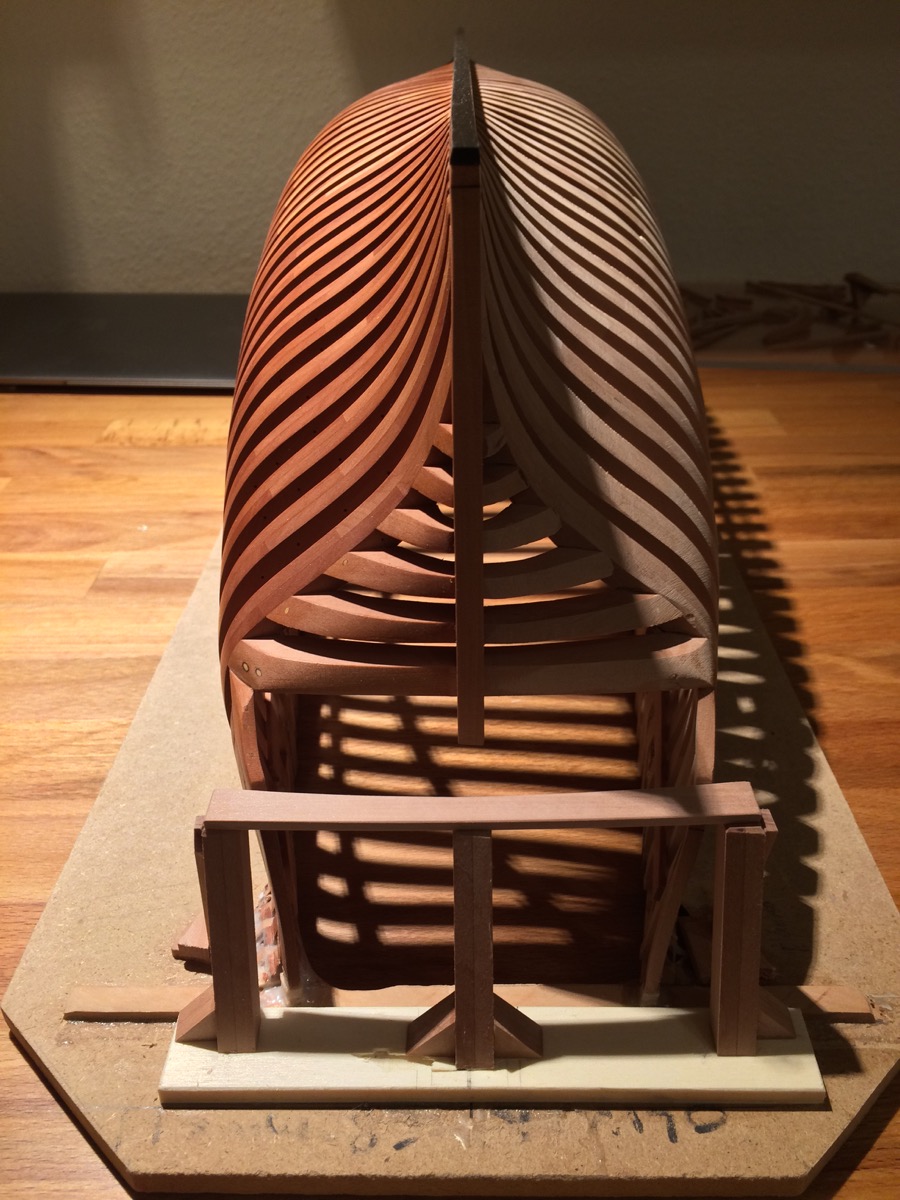
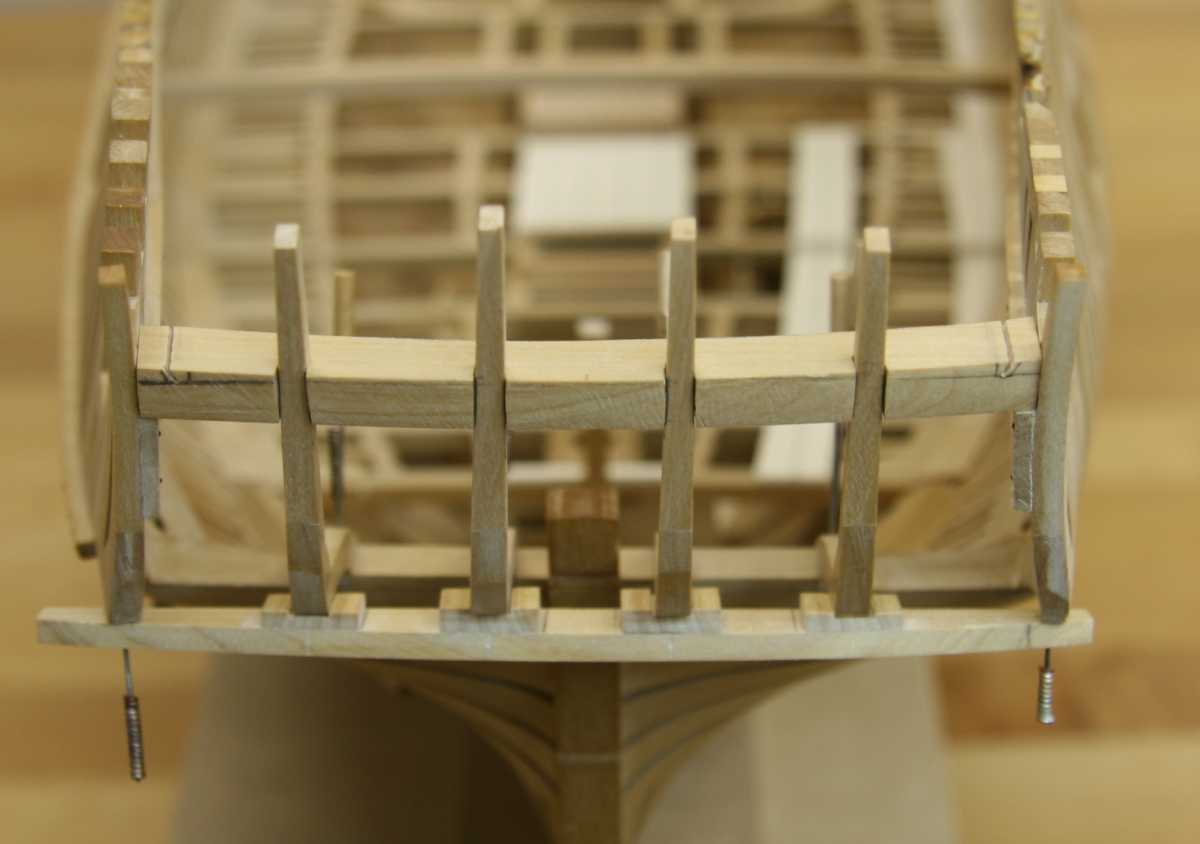
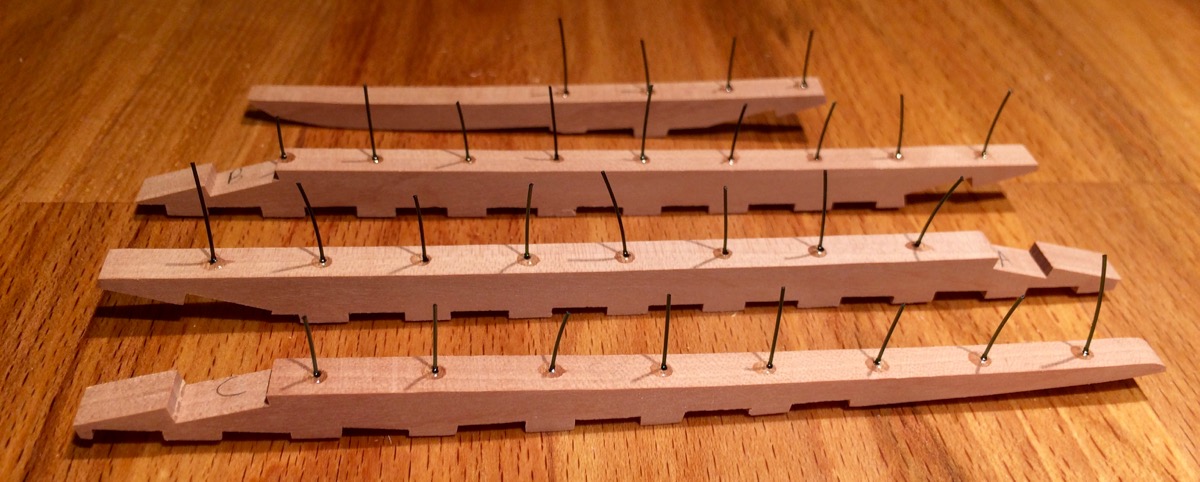
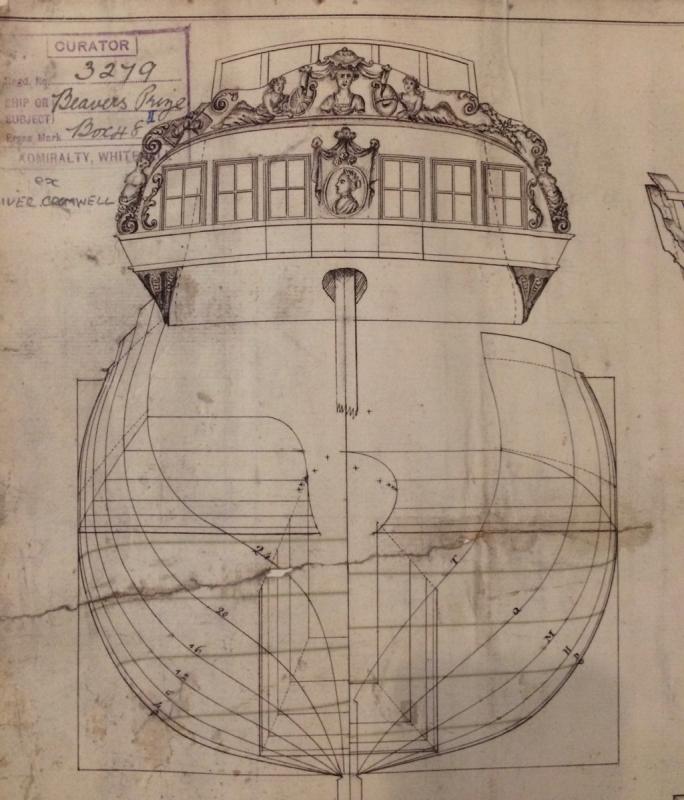
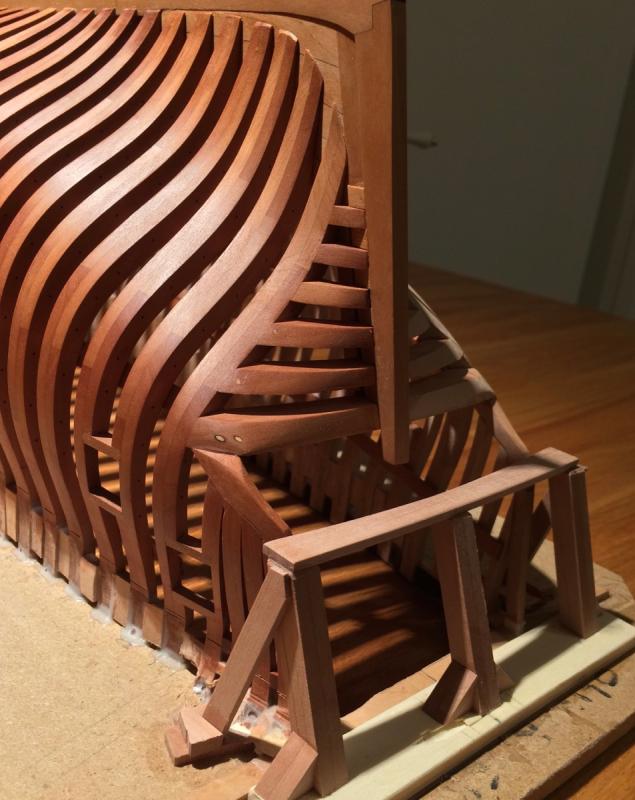
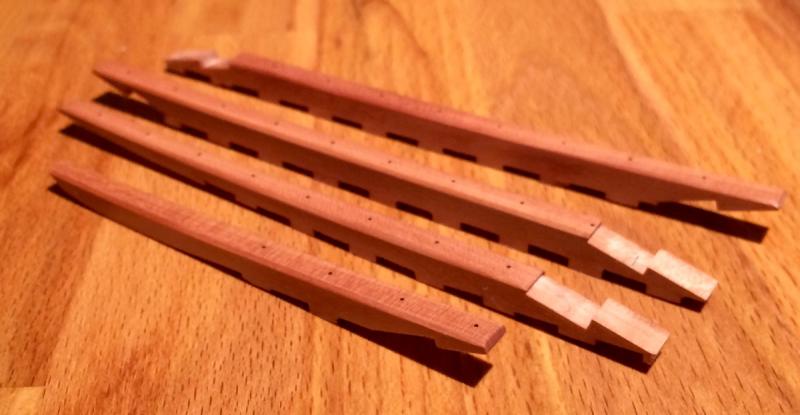
 Started a work on counter timbers and transom, Hahn jig allows to build it pretty early, since all counter timbers would be glued to the jig and there is a little chance of damaging them. Oliver Cromwell has a pretty weird counter timbers / windows framing. On most of the other models I saw, counter timbers follow the lines of the hull and transom wings. For example, here is a Remco's Kingfisher (http://modelshipworld.com/index.php/topic/18-hms-kingfisher-by-remco-1770-english-14-gun-sloop-pof-148): In my case, however, both NMM drawing and Hahn's interpretation of it show that windows (and, hence, counter timbers) are basically square and vertical, and do not follow the hull shape: I already made transom wings following the dotted line on these drawings, which follows the shape of the hull. Now I have only one realistic option - make counter timbers evenly spaced and end up with framing similar to the other models of this period (like Swan class). And windows will not be as square as they are on Hahn's model. So be it. Or I am missing something obvious in this problem? Would apperciate a second look, I might be misinterpreting all that drawings? In a meanwhile, made some assisting construction to help with alignment of the counter timbers. True redneck engineering! But better than nothing: And made the counter timbers themselves. Left group is a second-tier, where I made few mistakes (joints with gaps, etc). It will go to the planked side of the model where all these mistakes would be covered. The right group are a prime timbers that would go to the exposed side of the hull. So good to have a side where all mistakes would be hidden!
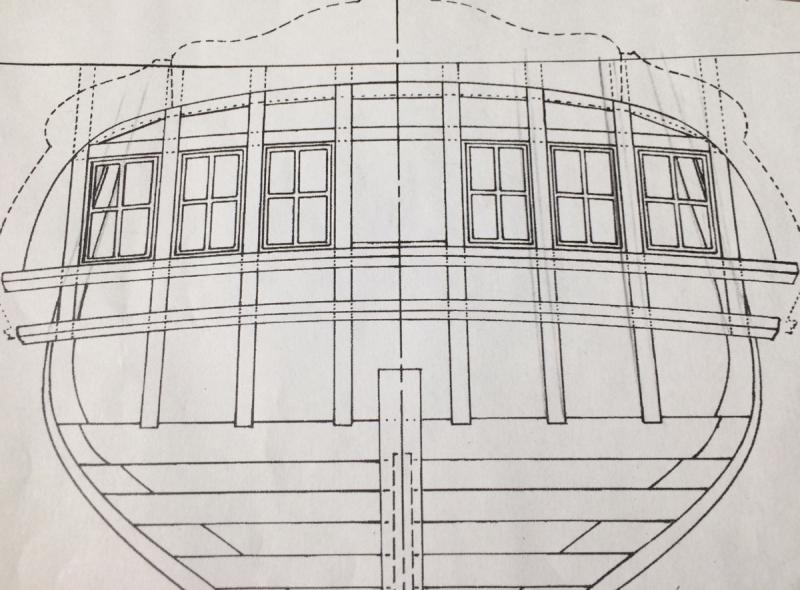


- 969 replies
-
- 32
-

-
- hahn
- oliver cromwell
- (and 1 more)
-
Thanks for sharing! Totally missed the news about this book. Pre-ordered now. I have a "sailing frigate" and "ship of the line", they are both quite good! I am a little bit afraid that there would be lots of duplicated photos between those books, but let's hope for the best
-
It really puzzles me how do you manage to keep it all assembled using pins... Looks very tight, like it is already permanently glued in place!
-
Great model, looking forward to see the LED lights through the cutoff area!
- 572 replies
-
- 2
-
-
- constitution
- frigate
- (and 1 more)
-
Power Tools for a Fully Framed Build
Mike Y replied to ChrisLBren's topic in Modeling tools and Workshop Equipment
There is also a question of space, Proxxon is the smallest and can easily sit on the table, while larger mills typically require much more space. Hard to beat a mill in precision and speed of milling joints, if you would like to show them in your model It is one of the most frequently used tools I have, probably after the disk sander A vice is a must for the mill (for joint cutting as well). -
The colours are incredible! You made me change my mind and go with pear planking above the wales Really love the black parts as well, you mentioned it is a Fiebings dyed swiss pear, but what finish do you use on top of it to seal the dye? As I understand, it would mar if not finished in top? Truly looking forward for the next build!
- 290 replies
-
- 2
-
-
- confederacy
- frigate
- (and 1 more)
-
The devil is in the details ©
-
The inside of the hull looks already faired! So precise!
-
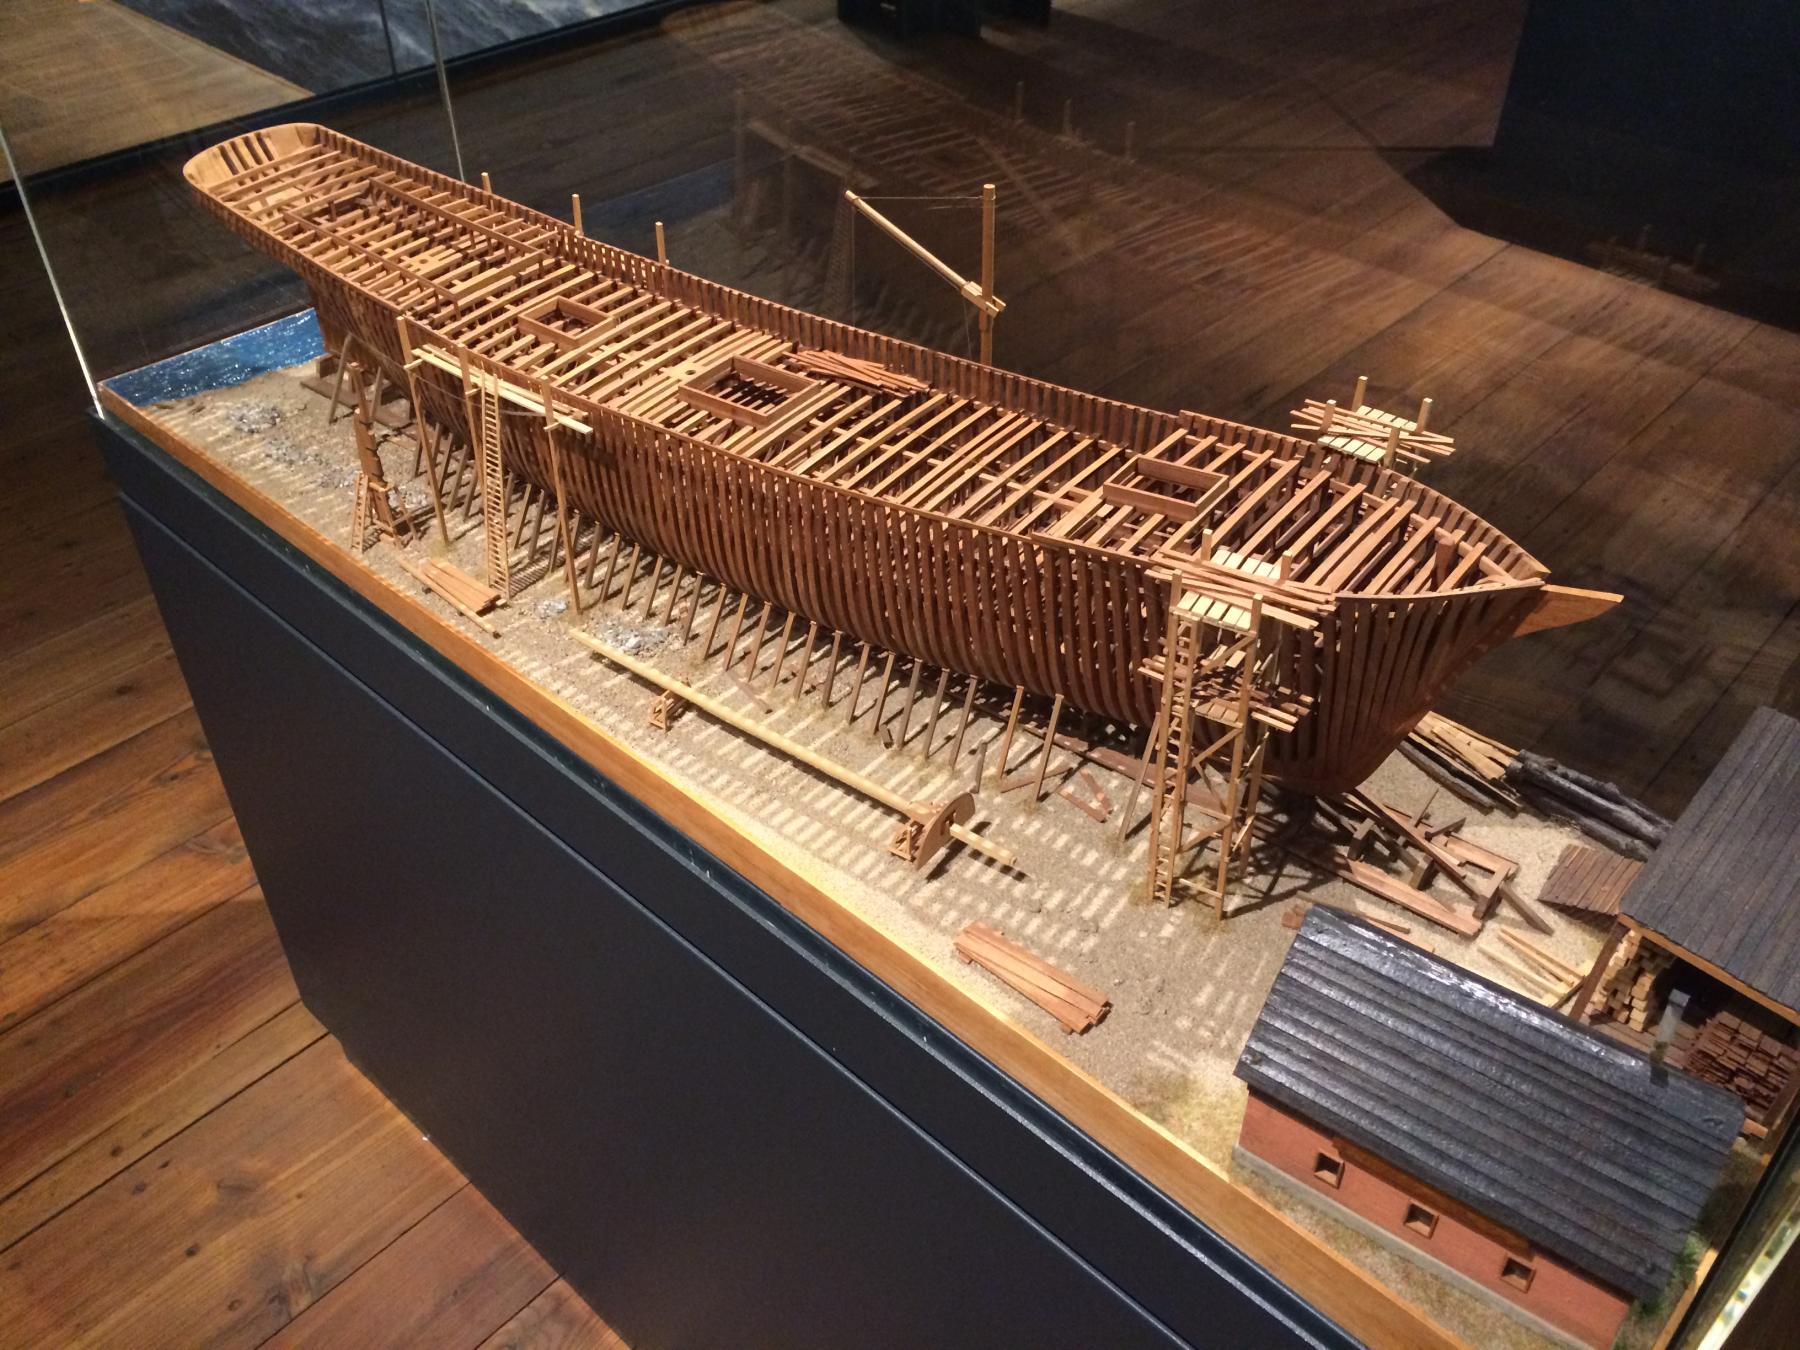
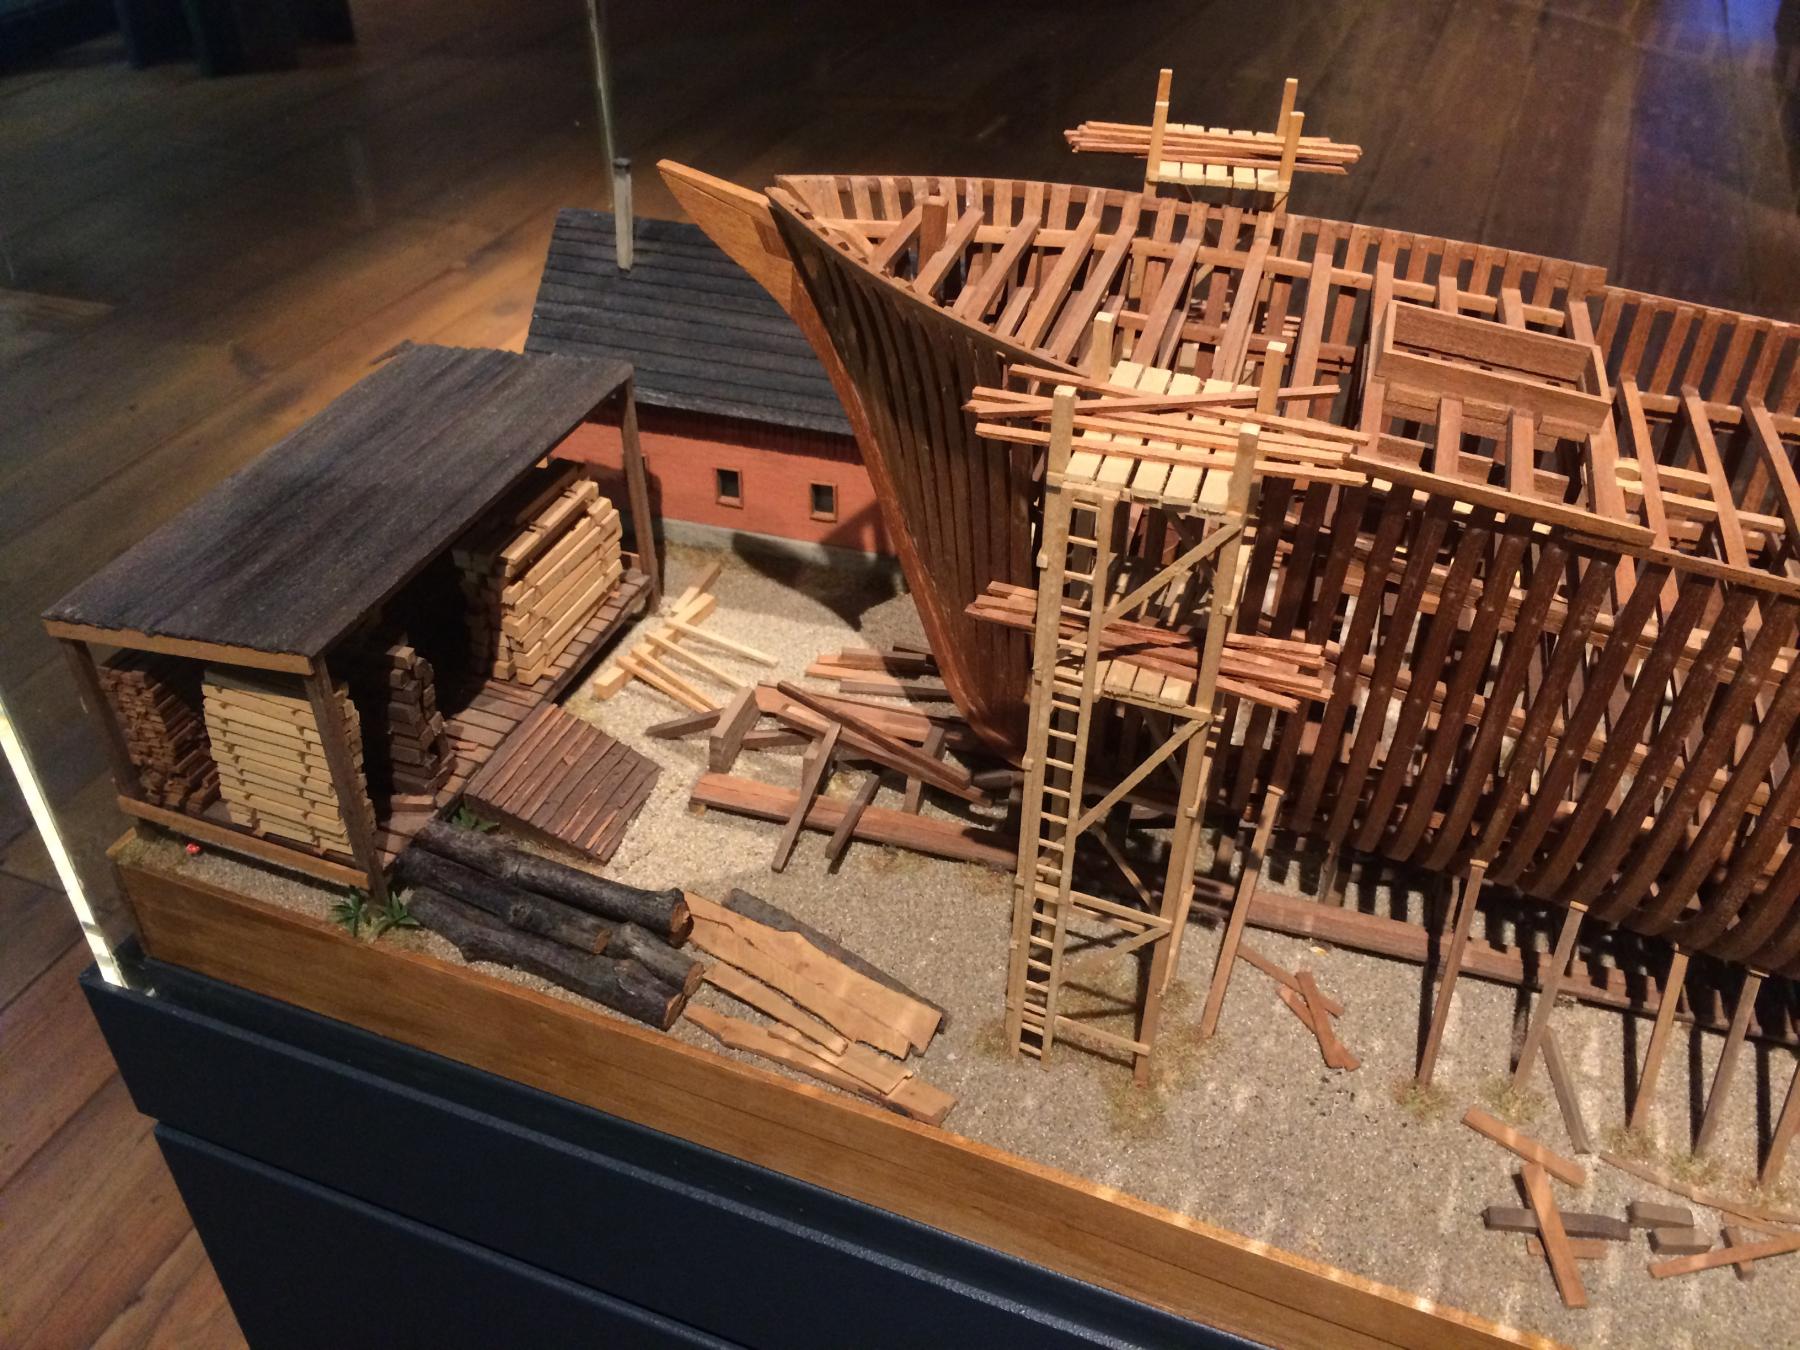
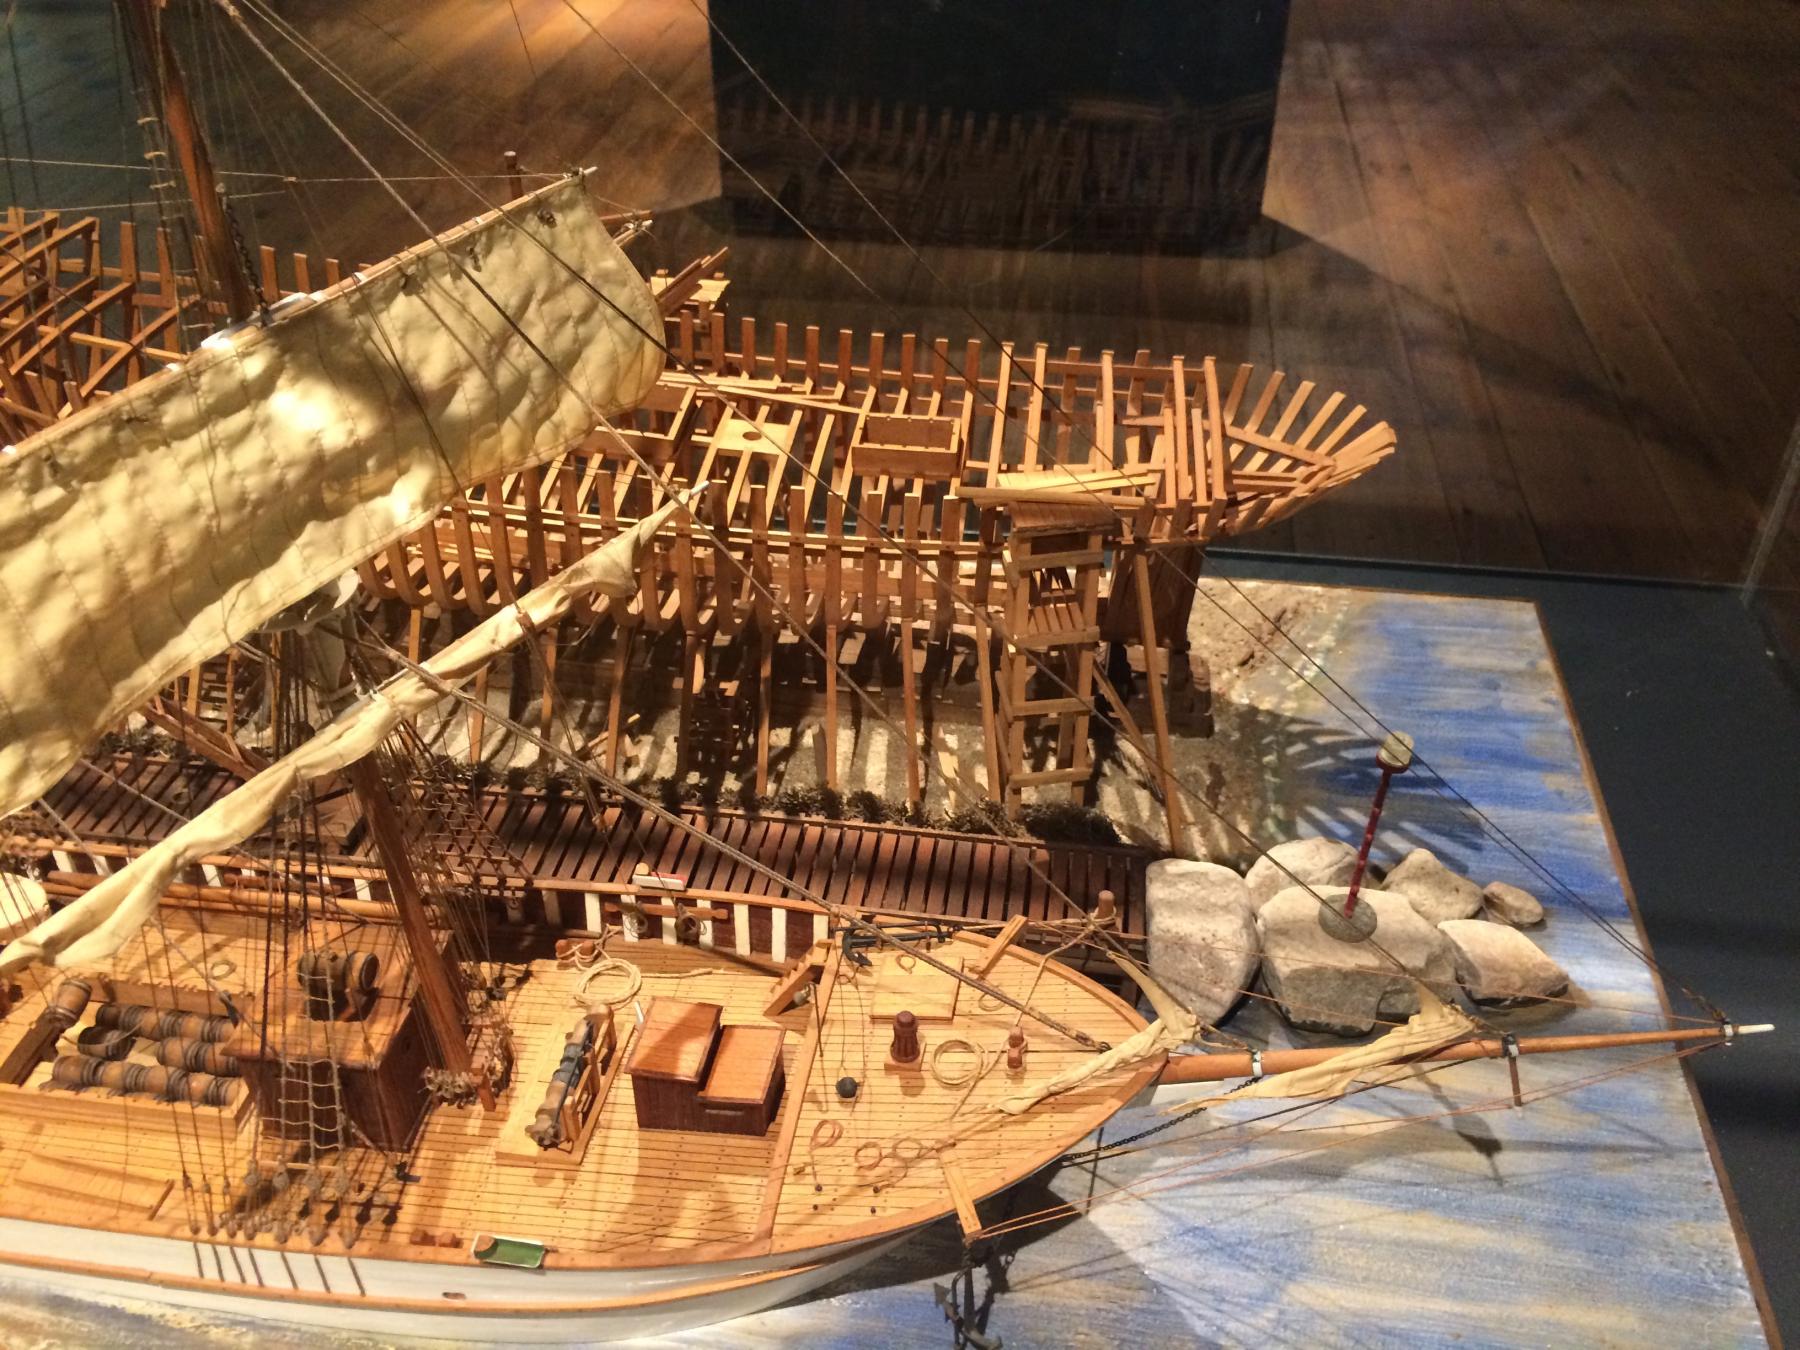
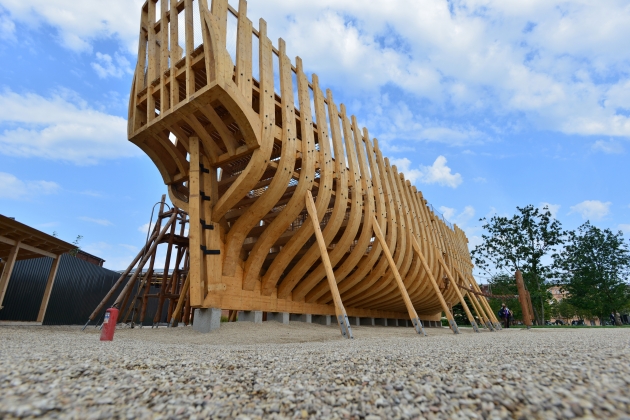
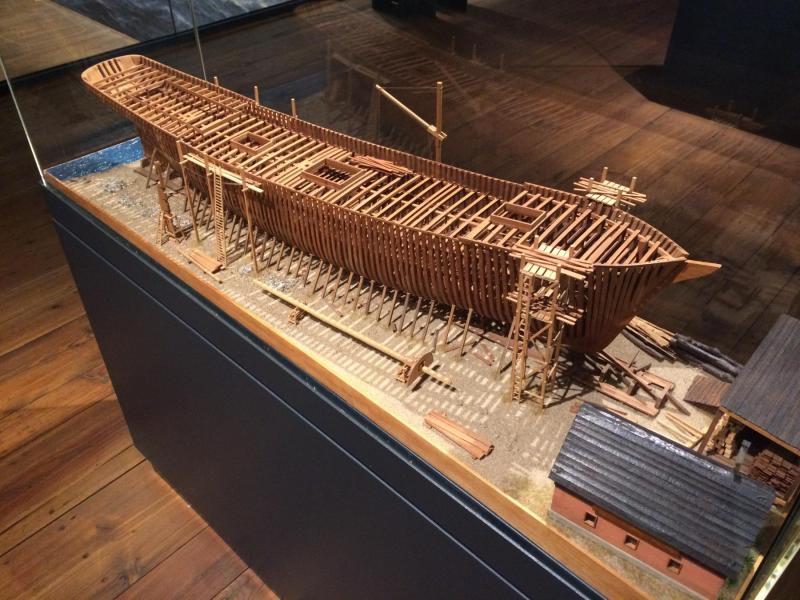
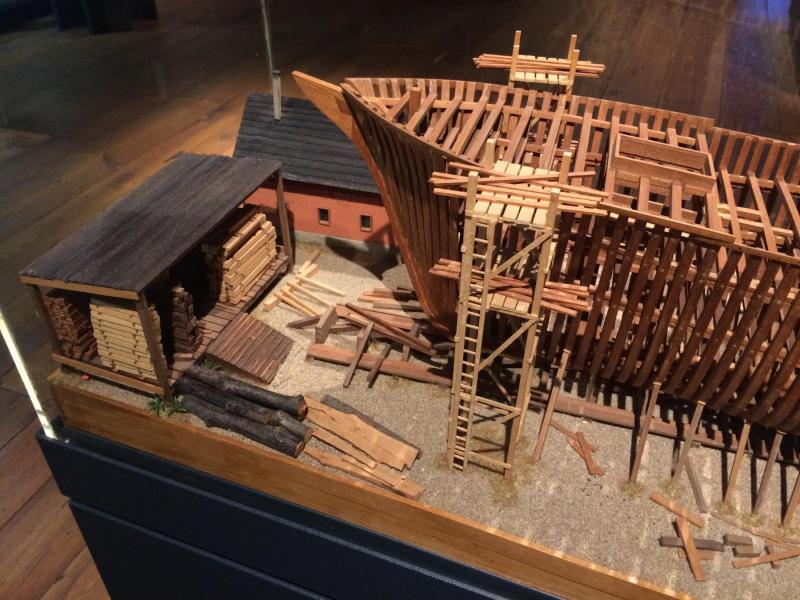
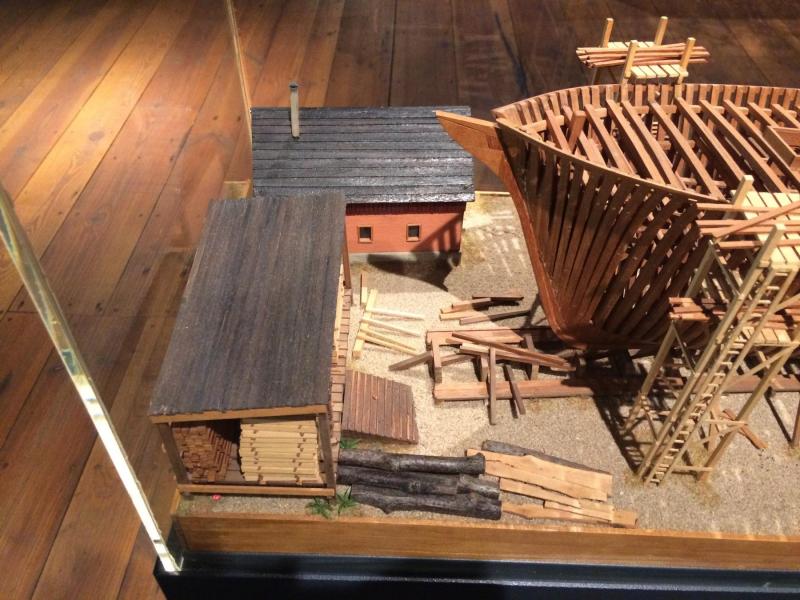
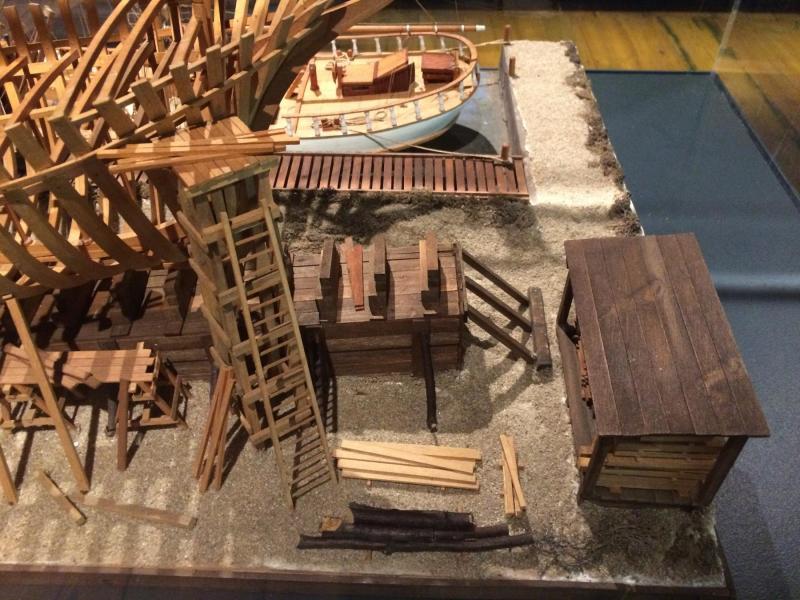
A bit of offtopic, but not big enough to create a separate thread for it. Friends from St.Petersburg sent these photos. A new playground in a bit of a hipster spot located next to the Naval Museum. This area is an old navy storage facilities built 300 years ago, they were surrounded by channels to be accessible from boats. Semi-abandoned for years, with a lot of city myths surrounding the place. Today a part of it is given to hipsters, and the place is filled with people again. One of the things built recently is a playground that consists of a pretty nice replica of a period ship! The thing is big, and kids can go inside and play. Fascinating! Of course, the framing is a bit simplified, but it is still impressive:


- 969 replies
-
- 20
-
-
- hahn
- oliver cromwell
- (and 1 more)
-
Wales
Mike Y replied to -Dallen's topic in Building, Framing, Planking and plating a ships hull and deck
Got it! -
ancre le rochefort by cabrapente
Mike Y replied to cabrapente's topic in - Build logs for subjects built 1751 - 1800
Smart way to make ladders, thanks for sharing! -
Wales
Mike Y replied to -Dallen's topic in Building, Framing, Planking and plating a ships hull and deck
Mark, thanks for the great explainer! Any thought on why the curvature was reduced over time? -
Trying to find a good spot to display my model. Unfortunately, the living room faces south and have a large windows. It is really great for all purposes except displaying the ship model I understand that direct sunlight is not very good, but what are the effects exactly, if the model is exposed to the sunlight few hours per day, typically in the end of the day? I have a pinnace model in that spot, it is in the plexiglas case, made out of basswood, stained and painted, finished with WOP, white PVA as a wood glue. It is there for 2 years already, and no signs of any issues. If I compare the side that is always in the shade vs the one that is exposed to the sun - I can't spot any differences in colour or any problems with wood joints. So how bad would it be if I keep my Cromwell model in that spot for few years? I am planning to upgrade the apartment in max 5 years time, so it is not forever.. I will use the gallery grade Plexiglas that blocks a bit of UV light, but then there is a temperature increase when sun shines on a dark pear, can it cause some deformations, oil discolouration or glue deterioration? In theory it is all bad, but in practice? Would appreciate some experience! The model in question is primarily swiss pear with tung oil finish, anybody had experienced such combination being exposed to the sun for years?
-
Looks square! It still surprises me how period shipbuilders managed to build the transom in a right way, with basic tools only, without CAD. They could not fallback to "install oversized parts and then sand them to shape".
-
Druxey, I am kind of worried about oling the deck framing (beams, karlings, knees, etc). Once assembled, it would be hard to properly oil all corners and impossible to reach the underside of the deck. But if I oil before assembly, before cutting the mortises - then oil will penetrate some parts completely (since they are quite thin), making the glue bond too weak. So far the plan is to oil the underside only, then glue everything in place, and then oil the sides with brush and top side with a coth. Unfortunately all build log skip the finish application part, so no experience to refer to Would really appreciate some advice!
- 969 replies
-
- 4
-
-
- hahn
- oliver cromwell
- (and 1 more)
-
Carl, I fully agree that it is better to oil after the installation, but these pieces are going into the very confined places, reaching them after the installation would be very hard. Oil sips a bit, roughly 1mm from each side. Scraping and filing easily removes unnecesary oil from the surfaces that would be glued, if the oil was not applied directly to that surface, otherwise it can sip to deep, escpecially cross grain.
- 969 replies
-
- 5
-
-
- hahn
- oliver cromwell
- (and 1 more)
-
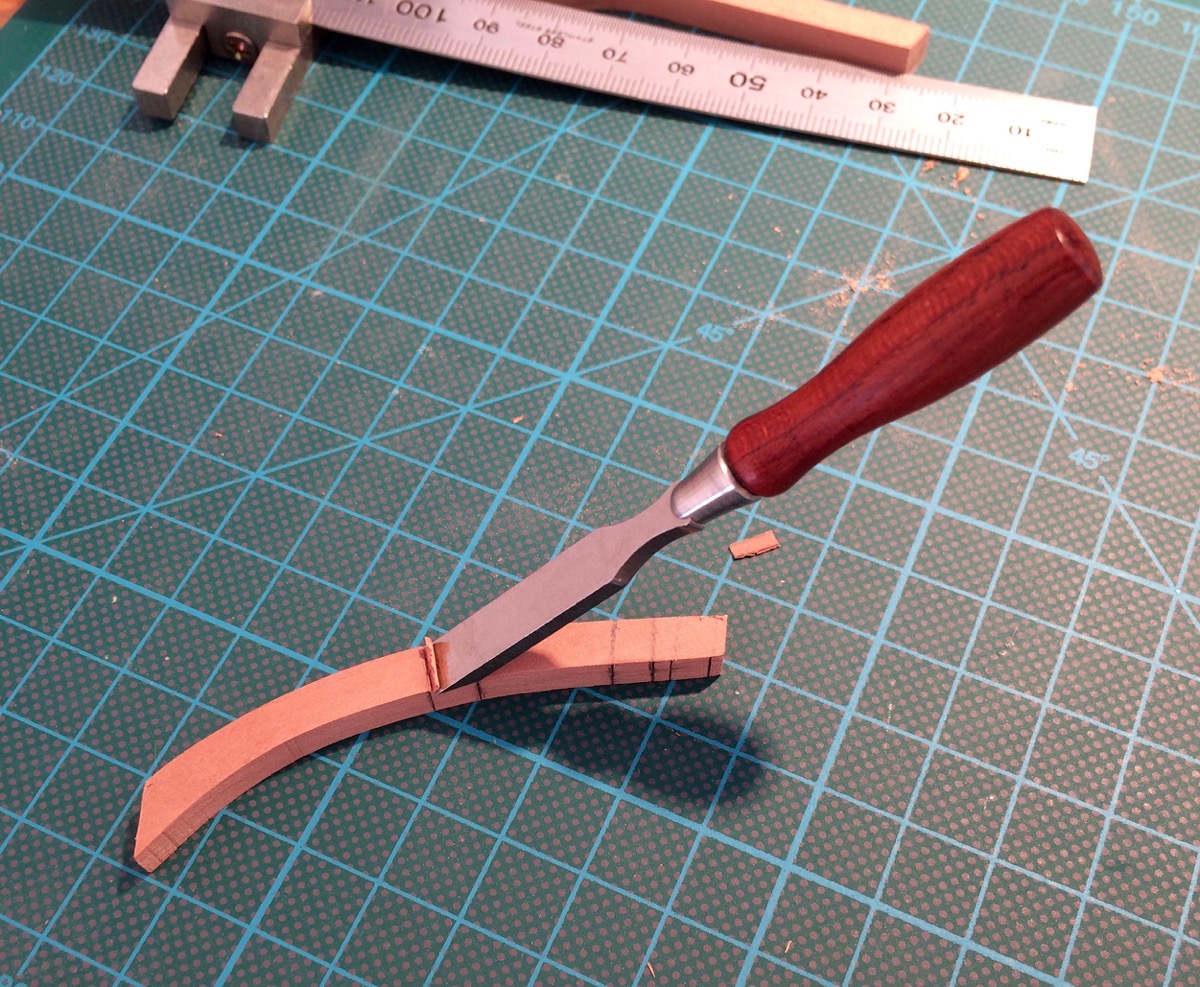
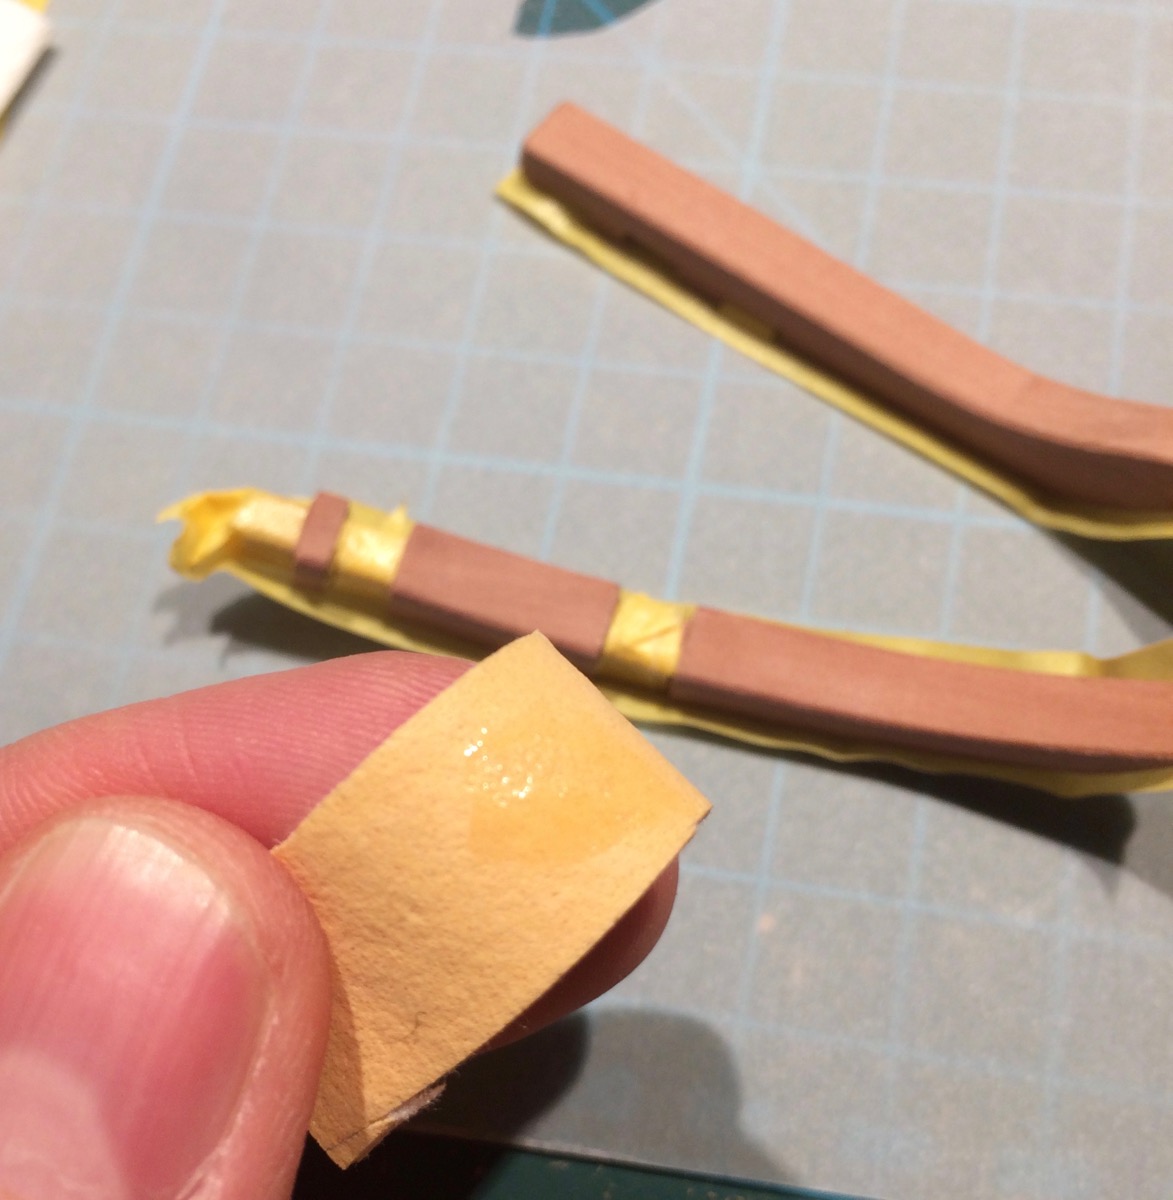
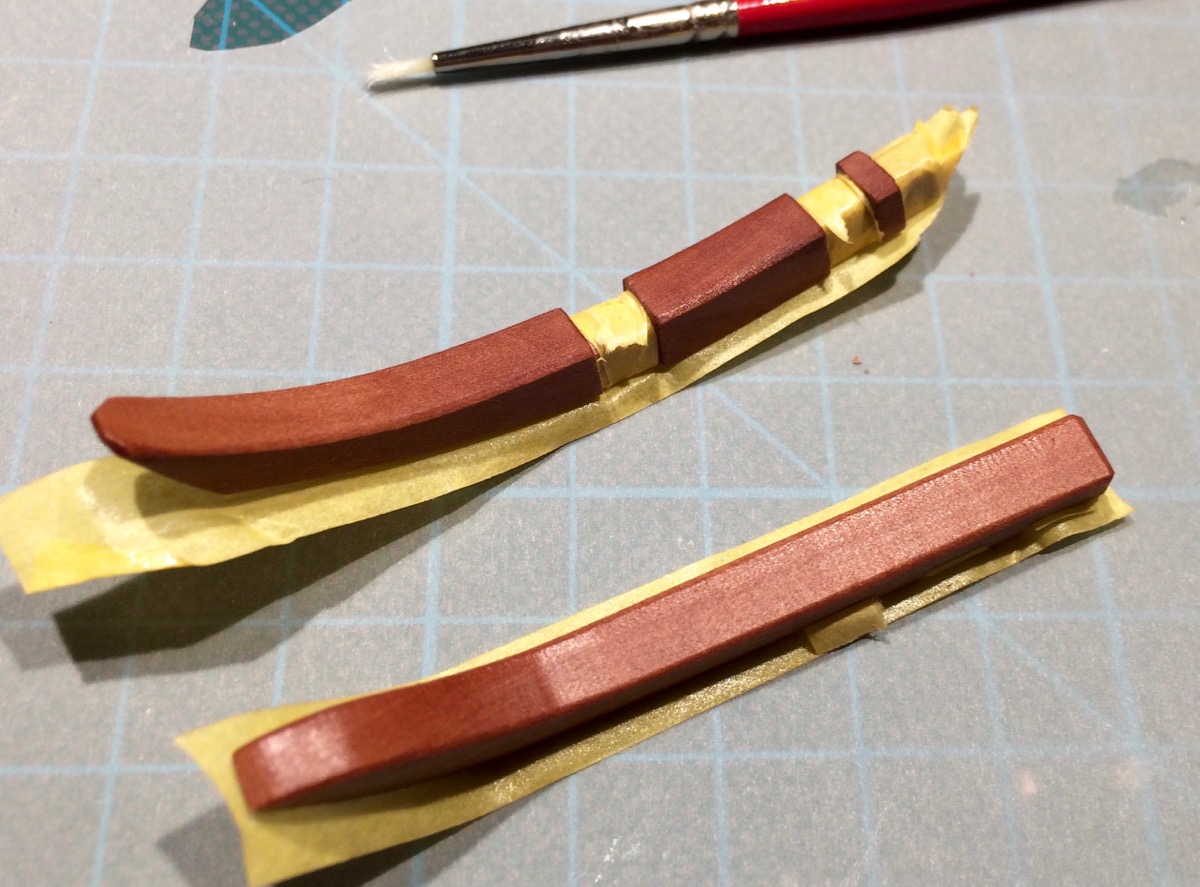
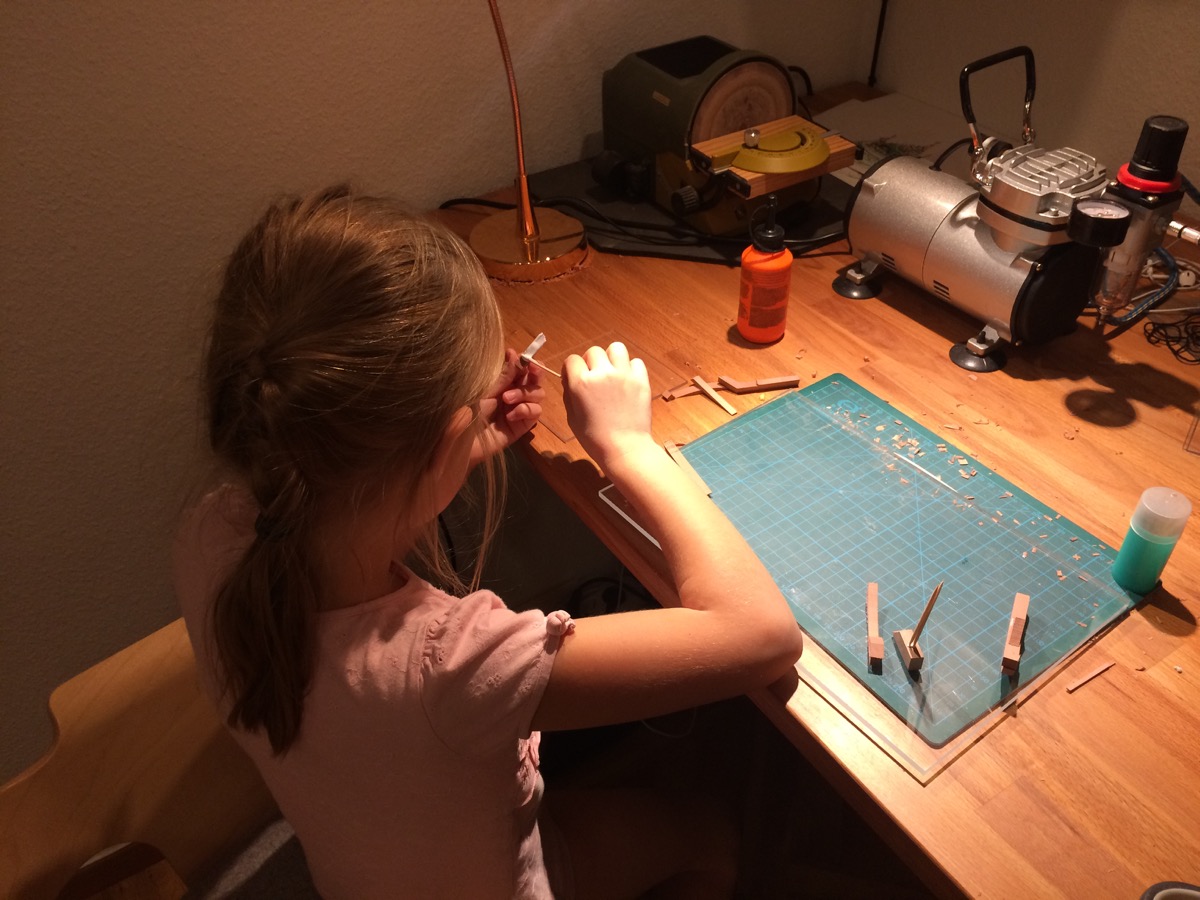
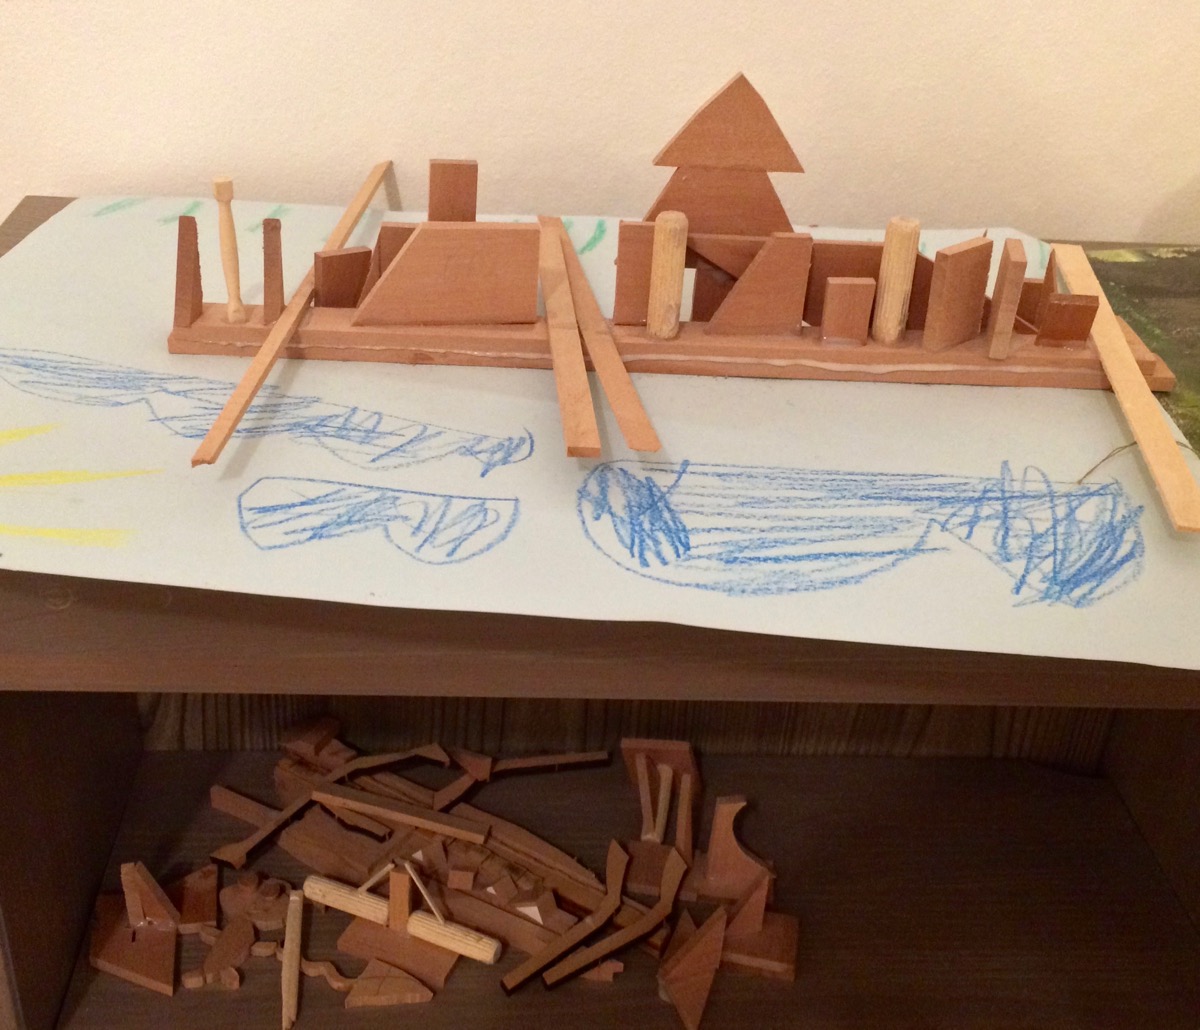
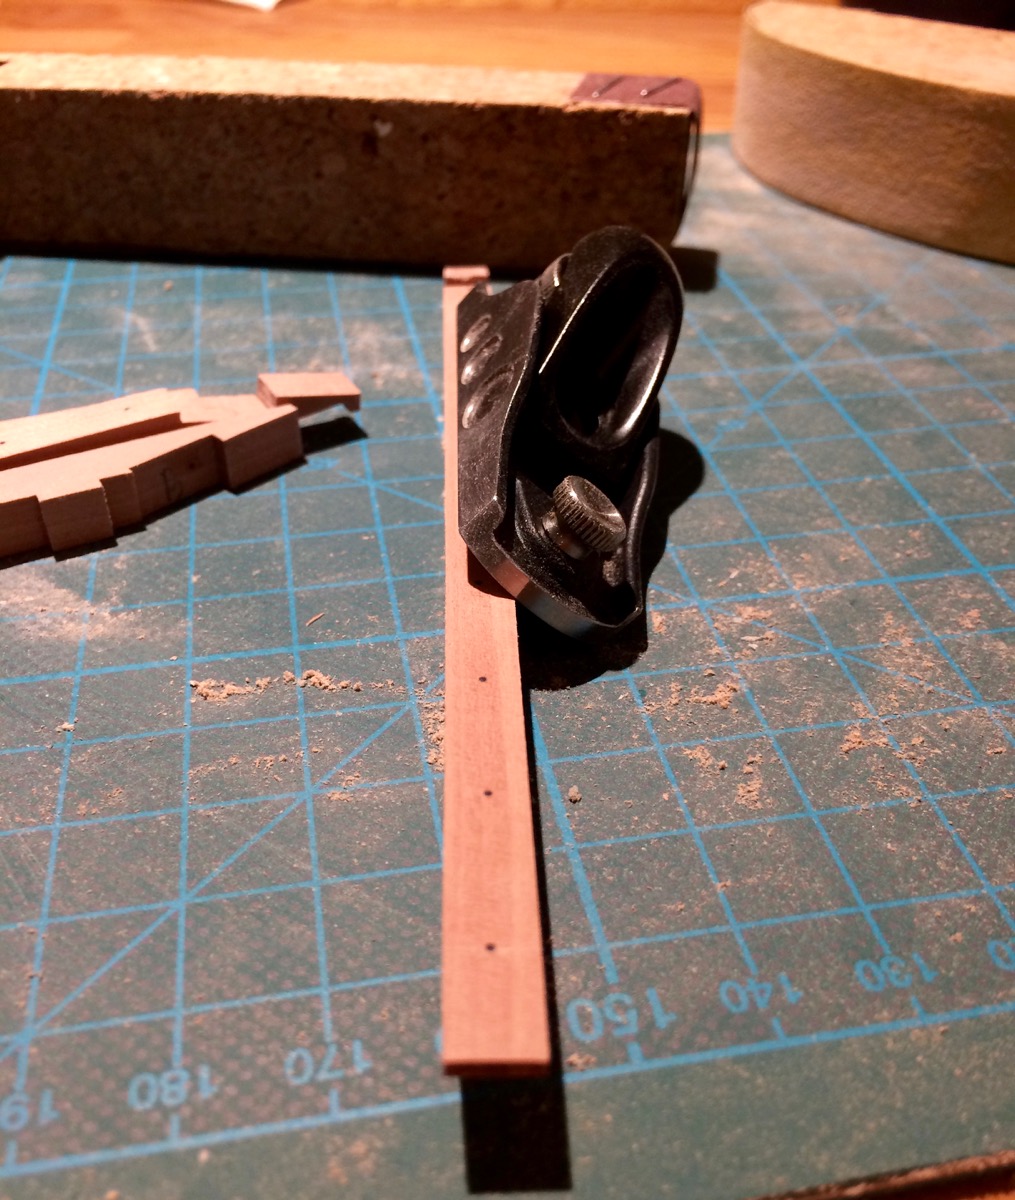
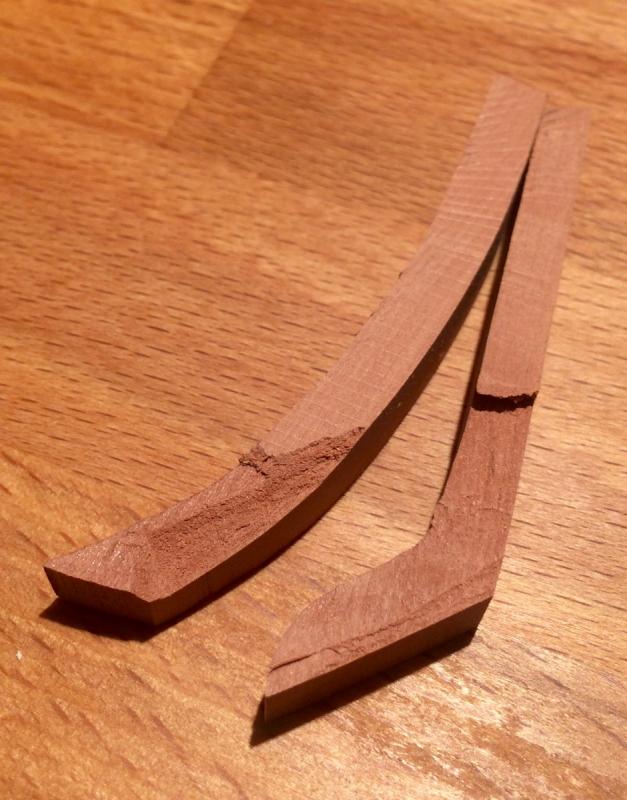
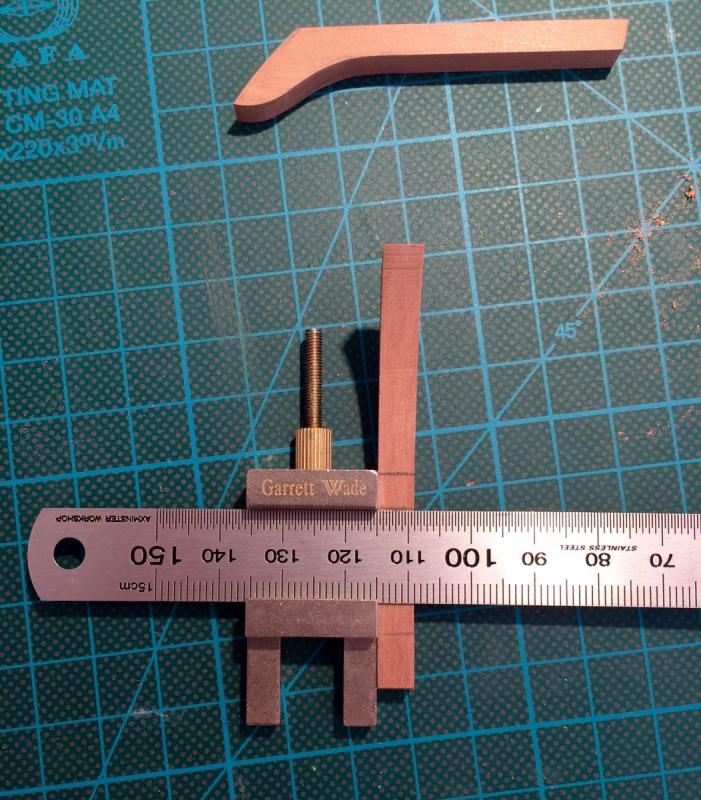
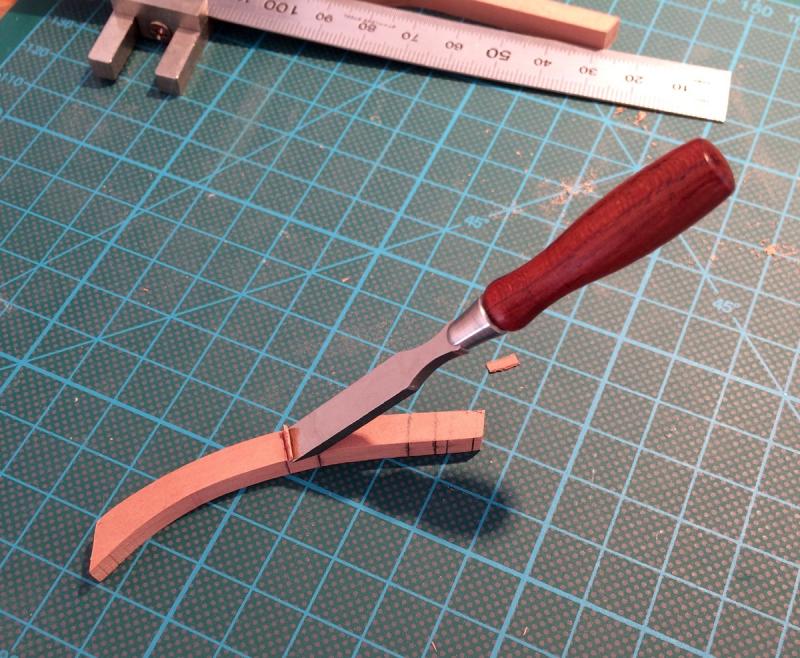
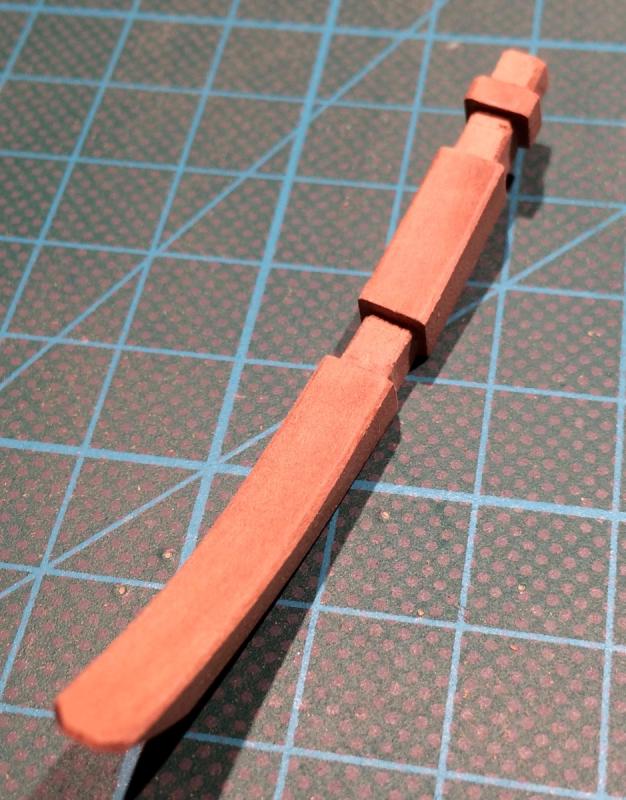
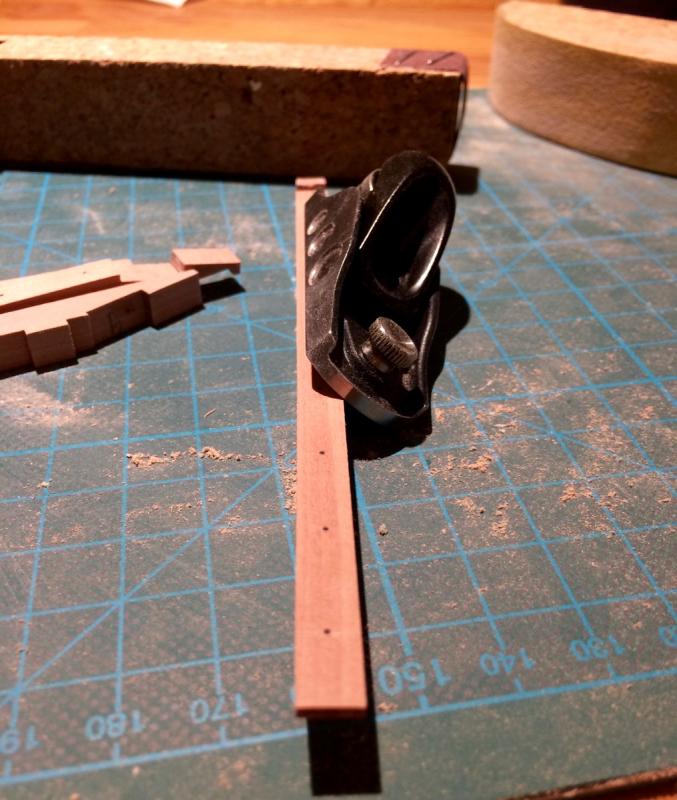
Worked on stemson and sternson today. Hahn plans omit both, so it is another thing that is up to the builder. TFFM depicts stemson in a quite detailed way, and I found sternson in Ed Tosti's Naiad build log: http://modelshipworld.com/index.php/topic/232-hms-naiad-by-edt-160-frigate-38-1797/?view=findpost&p=11542 http://modelshipworld.com/index.php/topic/232-hms-naiad-by-edt-160-frigate-38-1797/?view=findpost&p=5659 Nobody knows if Oliver Cromwell had a sternson, but decided to make it anyway to cover mistakes done in the center of transom wings. First attempt was an epic failure. Tip: do not put small pieces into the thickness planer - they might rotate and be chewed by the planer blades. Ouch! Practiced with small chisels (will need the chiseling skill for deck framing anyway): Result: Now applying tung oil. Masking is not very effective with oil, since it sips through the wood grain, but better than nothing. Where possible, was using a window cleaning cloth to apply the oil: Otherwise, small brush is also fine (need to wipe with a cloth later): The oil is surprisingly forgiving to different application methods. Freshly oiled pieces: The last part is a cleanup and recycling of the scrap pieces - my daughter helps with that. She has a good enough imagination to build stuff out of scrap and then play with it For example, this was her salvaging the frame blank cutoff pile a year ago. She says it is a city skyline with a giant cristmas tree on the main square:


- 969 replies
-
- 27
-
-
- hahn
- oliver cromwell
- (and 1 more)
-
Nice explainer on the gratings! Quick start, and you already have frames in place, nice!
- 132 replies
-
- 3
-
-
- triton cross-section
- cross-section
- (and 1 more)
-
The comments made me blush But it is really because of MSW - there are so many great build logs to learn on, especially the ones where people share the process, show how a certain part is done, different tricks and jigs, etc. That is one of the most fascinating parts of this hobby for me. Some people can do magic with just a few tools, sharp blade and a chisel. And steady hand and an eagle eye. But some come up with a clever jig that does not require a sharp eye or hand skill, but will produce a stable and good result. This is engineering at its best. Such build logs and Remco's motto are an information treasure! That is why I am always pedantically documenting the build process. It might be very trivial and boring for some readers, but could be interesting for others.
- 969 replies
-
- 8
-
-
- hahn
- oliver cromwell
- (and 1 more)
-
It is just perfect in all aspects!
-
Well, I sometimes see deers around, and there are 3 sheeps, 2 pigs, some chicken and few rabbits in 500m from my apartment. Does it count? Anyway, you are welcome and I'm not joking.
- 969 replies
-
- 4
-
-
- hahn
- oliver cromwell
- (and 1 more)
-
At home, so far. I am greedy Even if I will decide to donate it to the museum - do not think they will take it. Stockholm maritime museum has more models in their collection that they want to display. Some of them are top notch, way better then mine, but still not on display. Carl, but you are always welcome to see it, you live fairly close by Hope you enjoy them! They are not smooth enough for the finishing work, but nothing can compete with tiny xacto blades for finish scraping. No nicks or dents, super clean surface left Patrick, thanks a lot! You hit the nail - it is a lot about engineering, I am really attracted to this period and style because it shows a pretty complex, but beautiful curves of the ship hull. Shipbuilding industry of that centuries was closer to a large-scale workmanship, with aesthetics being a big part of it.
- 969 replies
-
- 3
-
-
- hahn
- oliver cromwell
- (and 1 more)
-
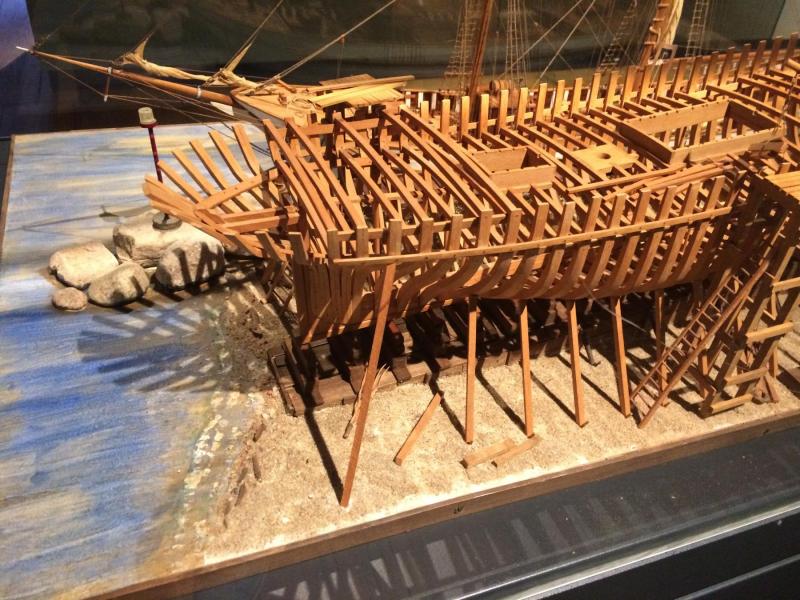
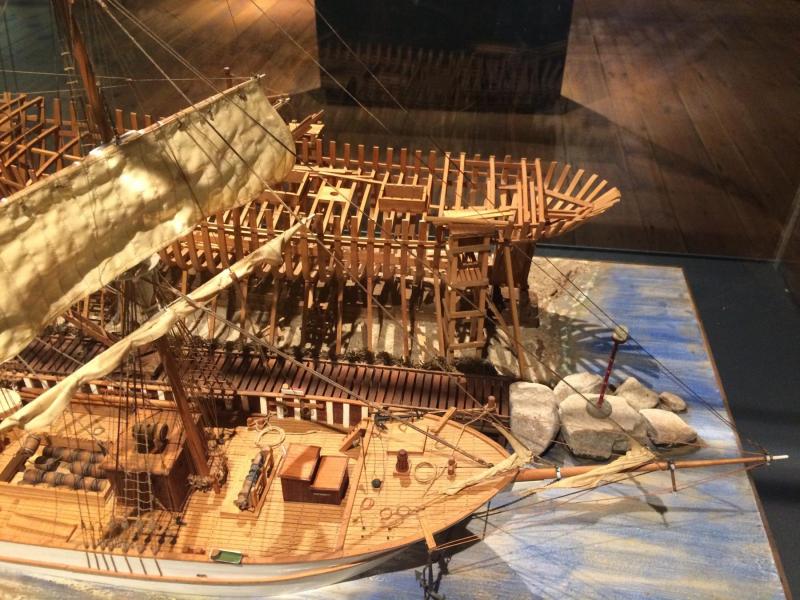
Thanks a lot again! It is always a pleasure to see the new posts here Speaking of the dockyards - sorry for hijacking your topic, hope you do not mind a few photos from Hamburg maritime museum:

-
Yes, that is comforting - once I reach the top decks - I will already learn enough on mistakes done in the bottom of the hull. Nobody will see the deep parts of the hull anyway I would be super happy if anybody will ever look deep enough into the model to find a loose joint in the keelson.
- 969 replies
-
- 6
-
-
- hahn
- oliver cromwell
- (and 1 more)
-
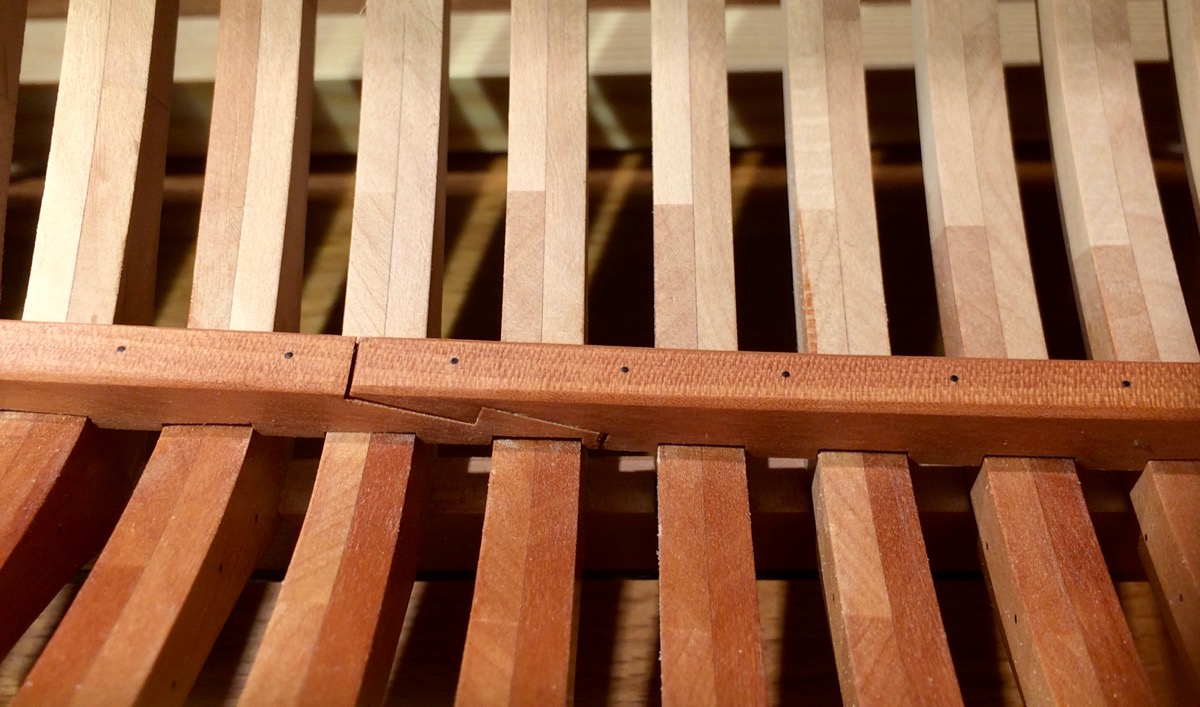
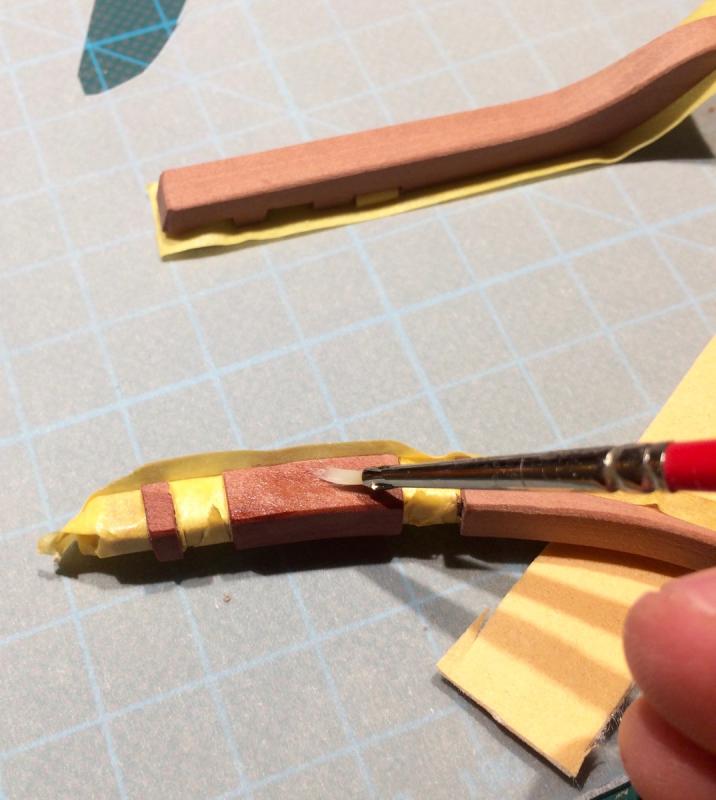
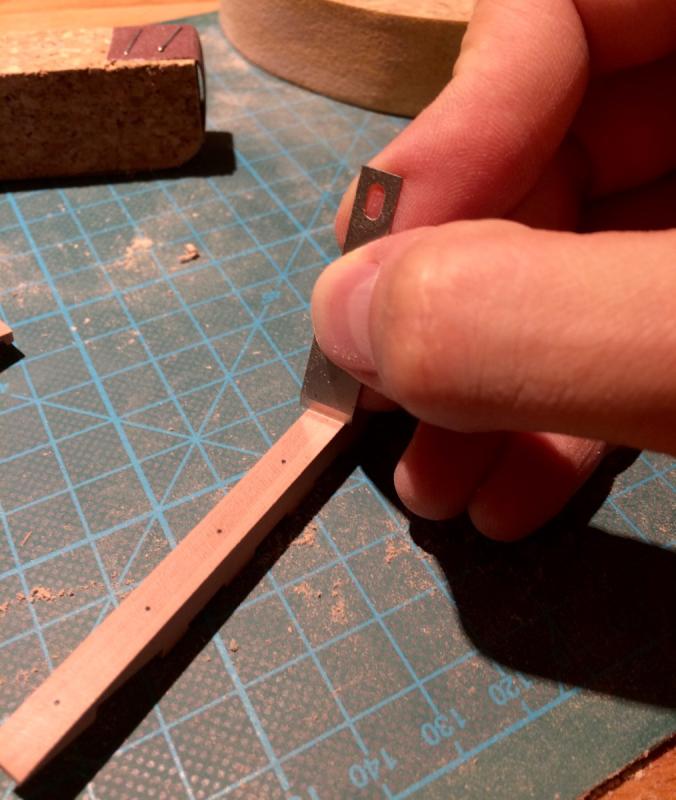
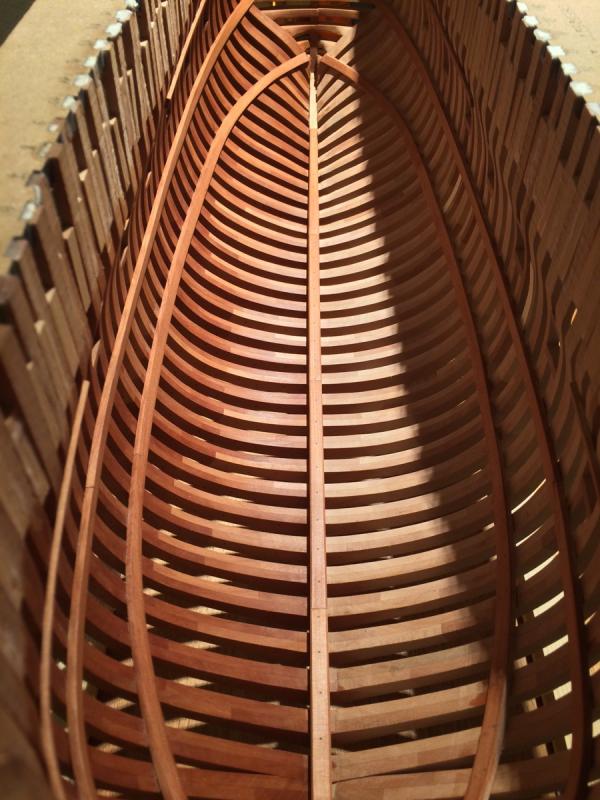
Keelson is done. Bolts are simulated with black monofilament that is glued with gel CA. Then CA is sanded away and the wood is scraped with xacto blade to the desired finish: I start to like scraping more than sanding with fine sandpaper - paper leaves some super fine sawdust in the wood pores, while scraping removes it and leaves a better finish. Edges are chamfered with the plane and fine shaped by scraping (because keelson is a bit curved, plane is not perfect for it): Tung oil applied: Applied the oil before gluing - it would be really hard to reach the corners between the frames and the keelson when keelson is installed. I find the oil really forgiving - you can scrape some parts after the installation to make sure they fit perfectly, and then re-apply oil there - it will perfectly blend with the previously finished areas. Very forgiving finish. End result: I am not happy with the fit quality - everything was perfectly fitting when not on a hull, but on a hull the join angles got a bit out of alignment, leading to gaps: Will spend more time fine-fitting on the hull next time!


- 969 replies
-
- 28
-
-
- hahn
- oliver cromwell
- (and 1 more)