Mike Y
-
Posts
1,557 -
Joined
-
Last visited
Content Type
Profiles
Forums
Gallery
Events
Everything posted by Mike Y
-
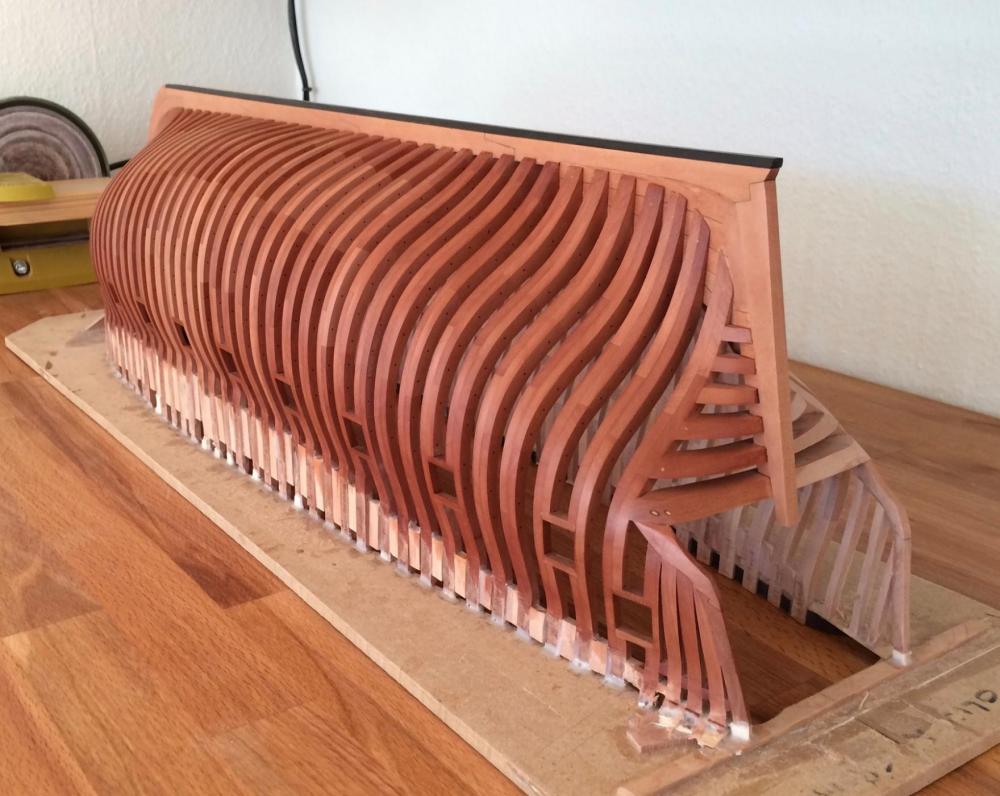
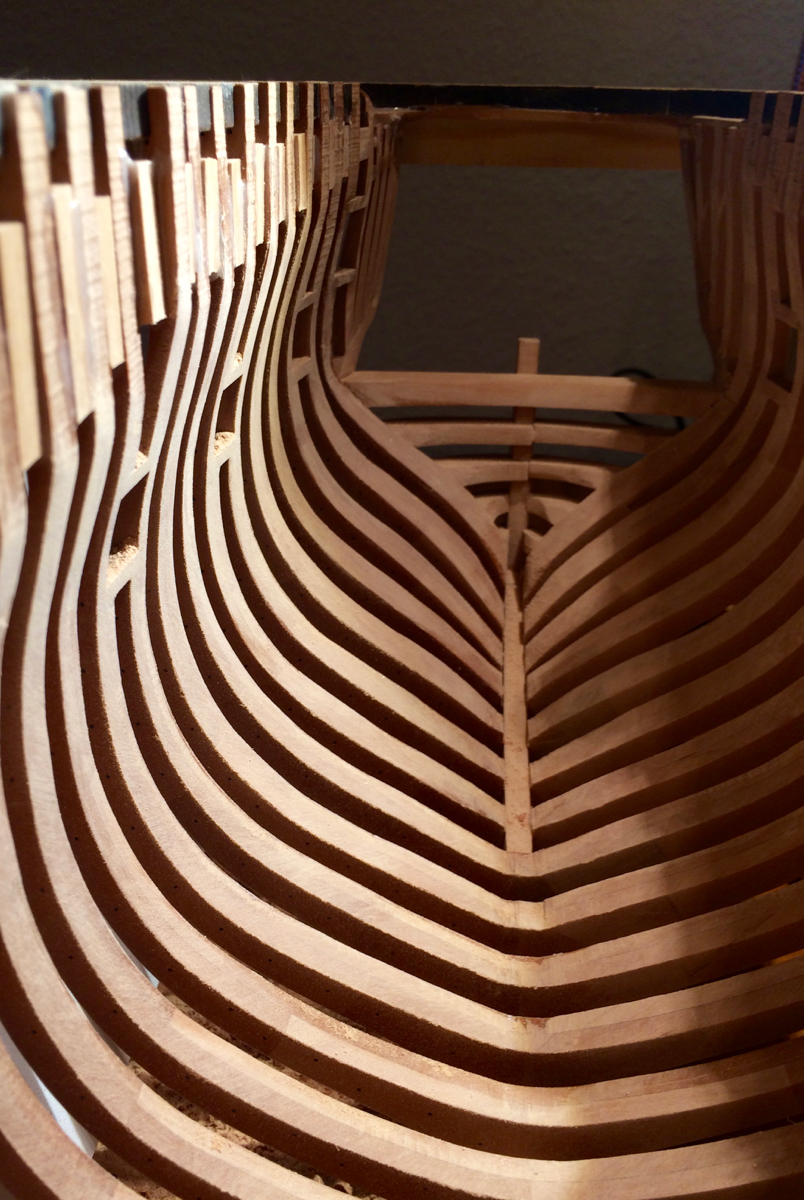
 Final result. As you can see, I was not really careful with the wood selection in the beginning, so there is a spot of lighter pear around the midship. I began to sort the wood into lighter and darker color later on, and now it is visible. Forever. Well.. Let's call it an artistic touch Overall, I am pleased with the colour, but surprised it became reddish. It will probably get darker and fade away over time. There is also a big contrast between the along-the-grain wood covered with WOP (all the parts of the keel) and cross-grain wood with oil applied. It is literally the same wood, where I selected a pretty dark pieces for the keel! I swear! Now it looks like two different woods. Let's call this a feature too I am done with the fairing, and done with the hull structure. HOORRAY! Now I can finally relax, watch the oil dry and start making the deck clamps. Big relief! The hull is not screwed up while fairing, the viking funeral is cancelled


- 969 replies
-
- 30
-

-
- hahn
- oliver cromwell
- (and 1 more)
-
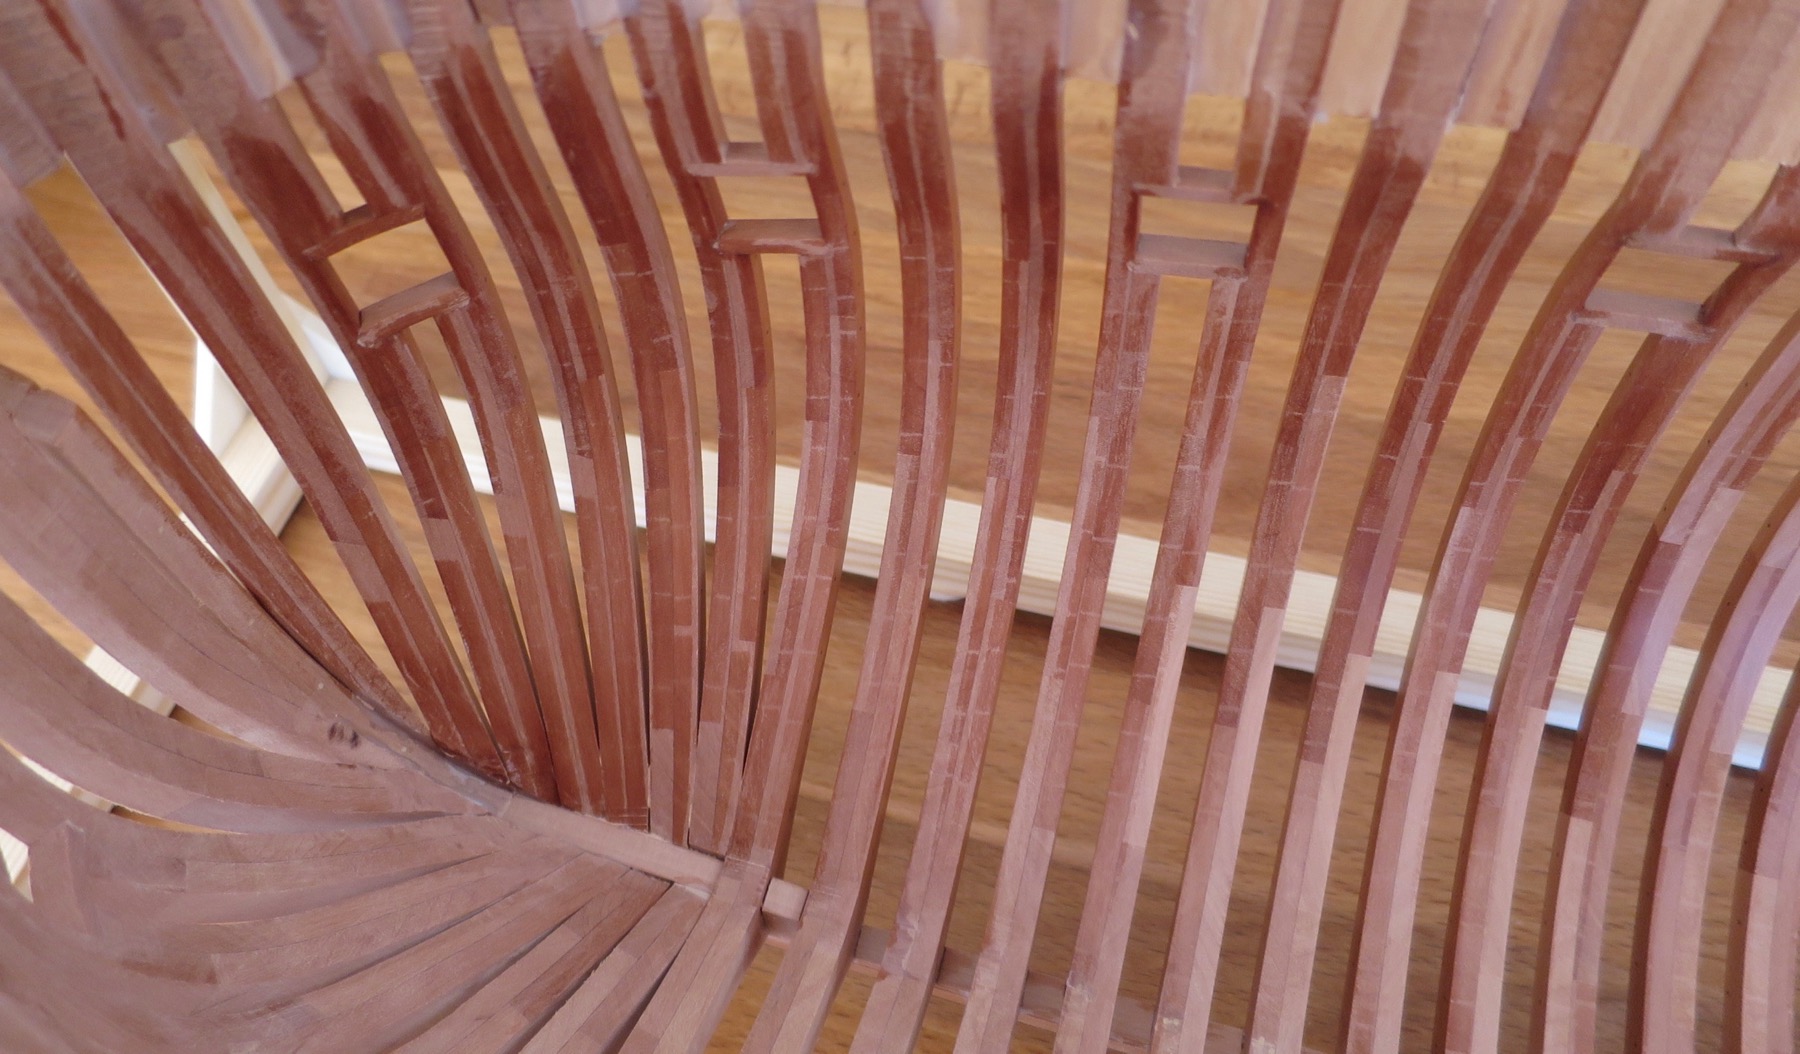
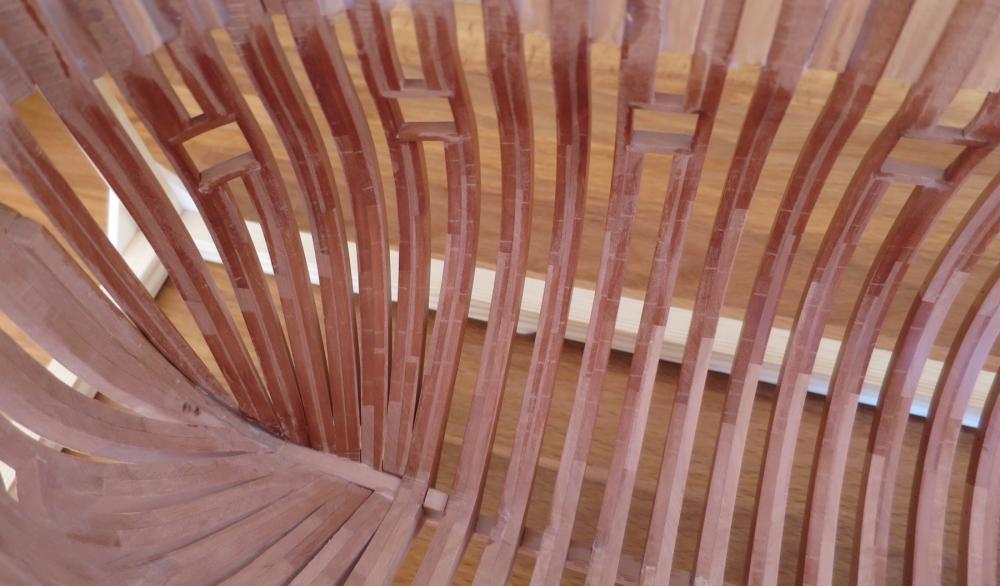
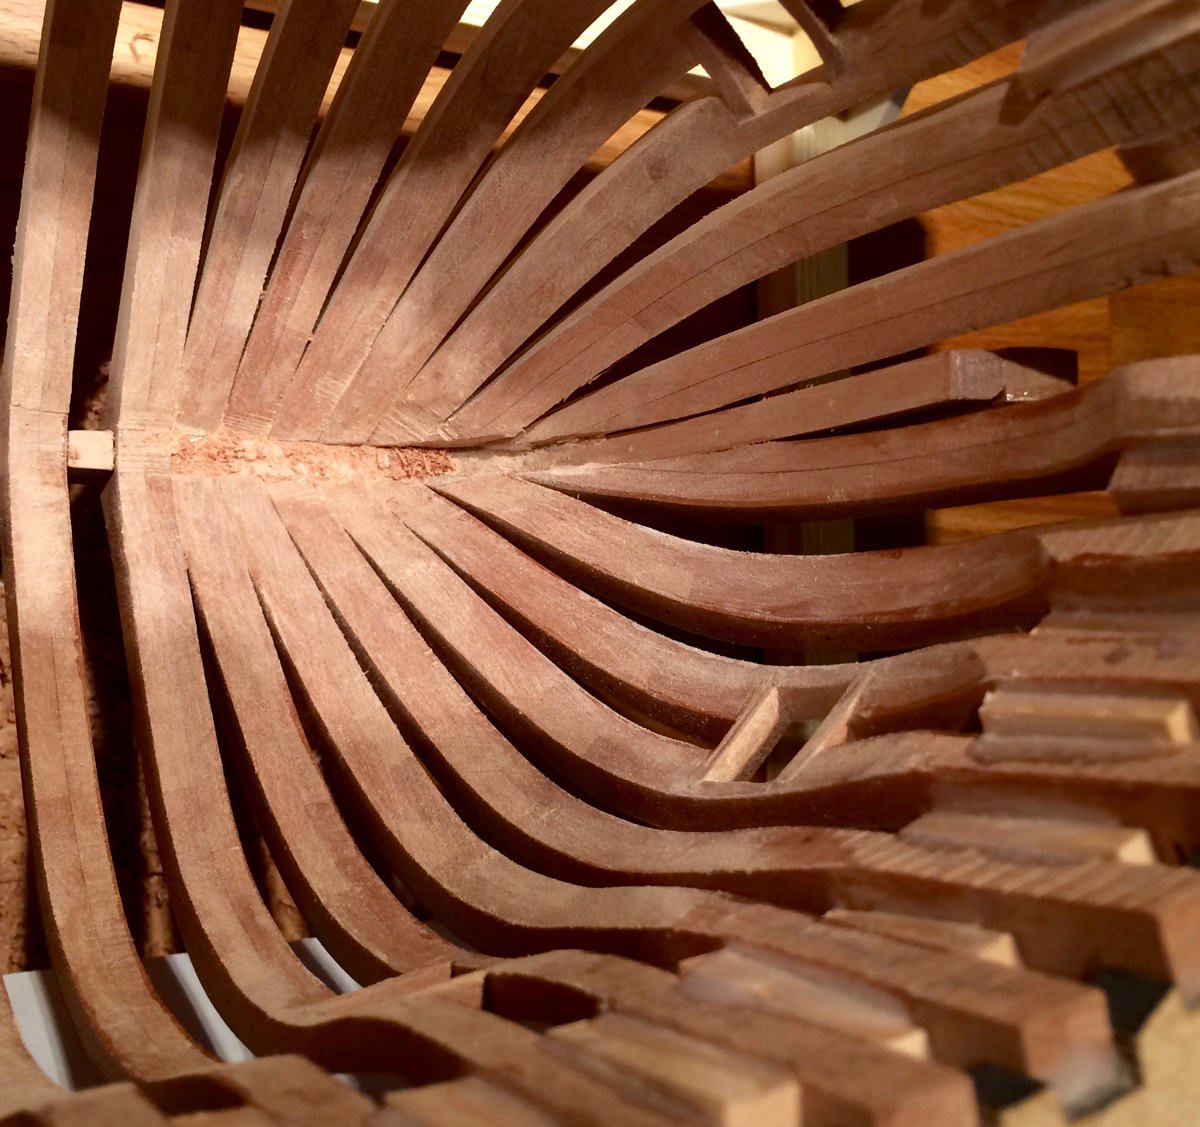
Yay, the fairing is finally finished! It was a nasty process with lots of curves, and final finish done by scraping with xacto blades. But in the end no frame got hurt, no iron bolts got exposed (though some come really close to the edge). Applied one coat of a non-diluted, 100% pure tung oil (tried diluted oil - result was blotchy, meh). I was applying a very moderate amount of oil and wiping it with a cloth quickly to prevent uneven result. Covering only the outside surface, no oil at all was applied inside the hull (because deck clamps would be glued to it). The process was very relaxing, finished in the middle of the night.. And you can imagine my surprise when I checked the inside of the hull and saw OIL there! Seems like it really penetrated through the entire frame, except the thicker floor timbers. You can see the oil avoiding the lamination seems, where glue blocks the oil from penetrating. I really thought it goes just 1-2mm inside the wood, but no, it is more like 5mm, and maybe even 10mm if you take the grain direction into account. At the same time, it is fairly simple to scrape it away with xacto blade. Miracle. Capillary suction sucked a pretty thick oil, which was applied in a very moderate amounts.. Who could have guessed.
- 969 replies
-
- 16
-
-
- hahn
- oliver cromwell
- (and 1 more)
-
If working with wood and moving the table manually, I have a hard time imagining a need for a high speed. 1mm cutter on pear on 5k rpm gives a super clean cut, why should I spin it faster? I am a beginner when it comes to milling, would appreciate an explanation from some more experienced members!
-
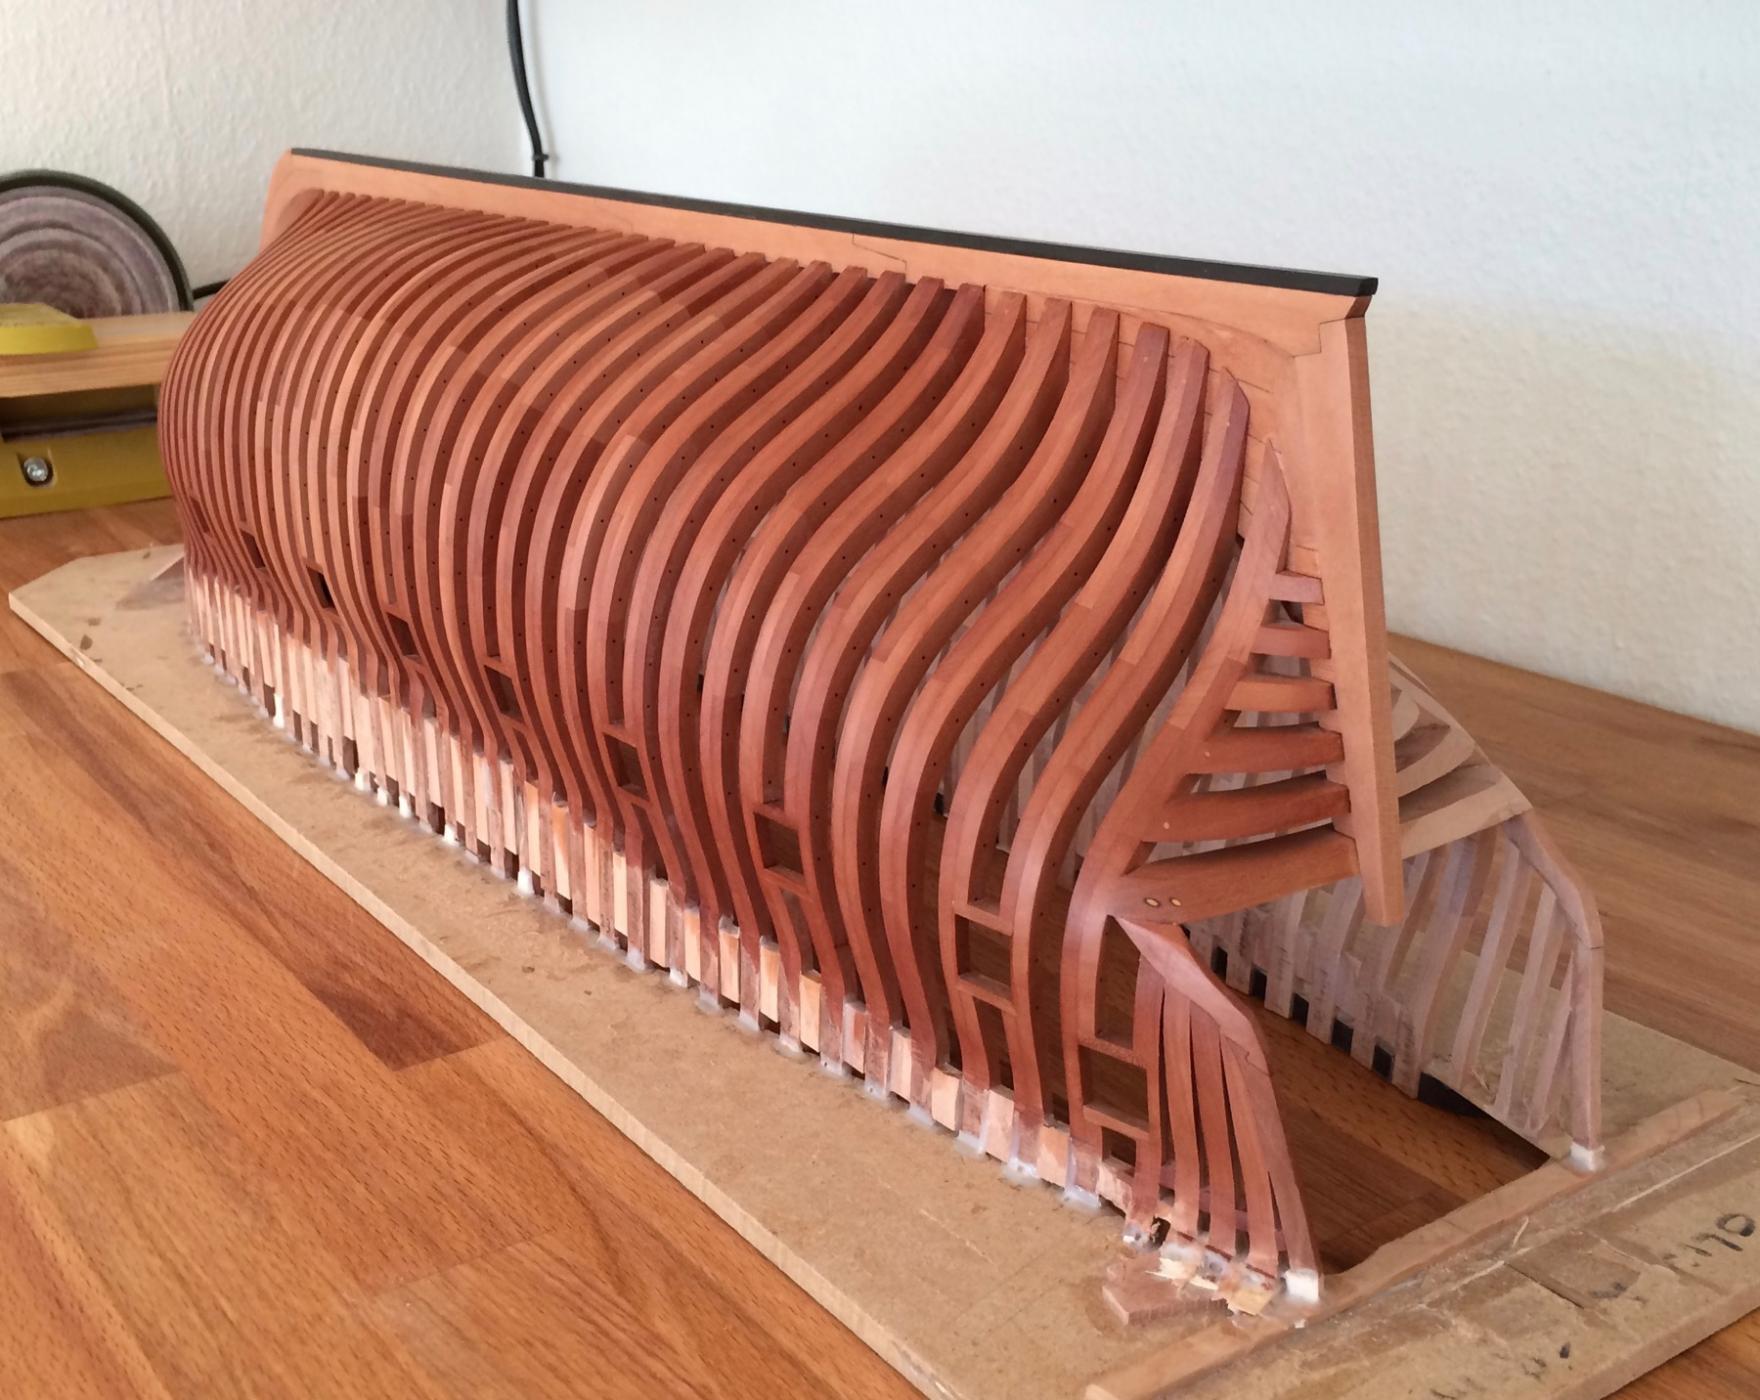
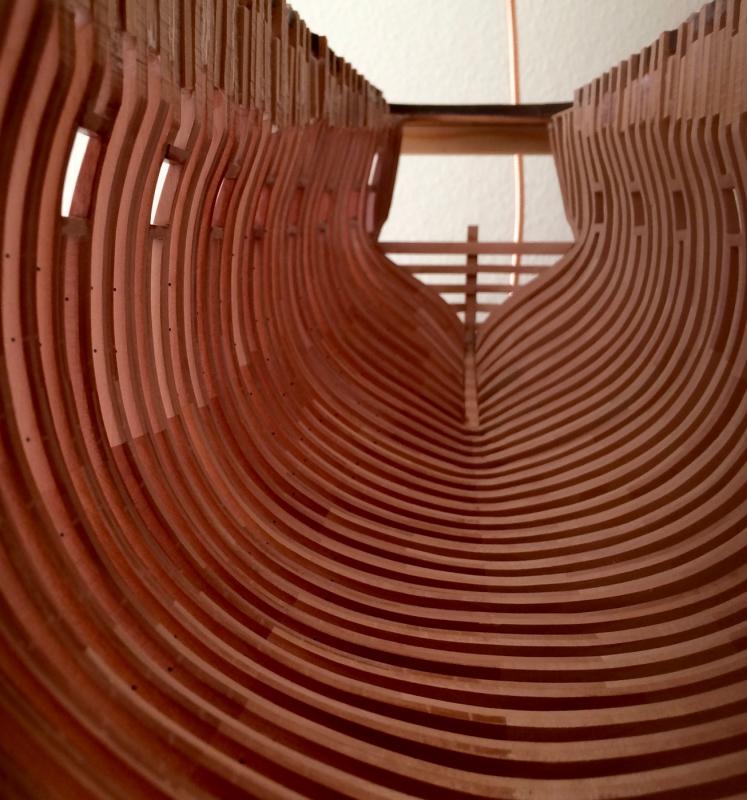
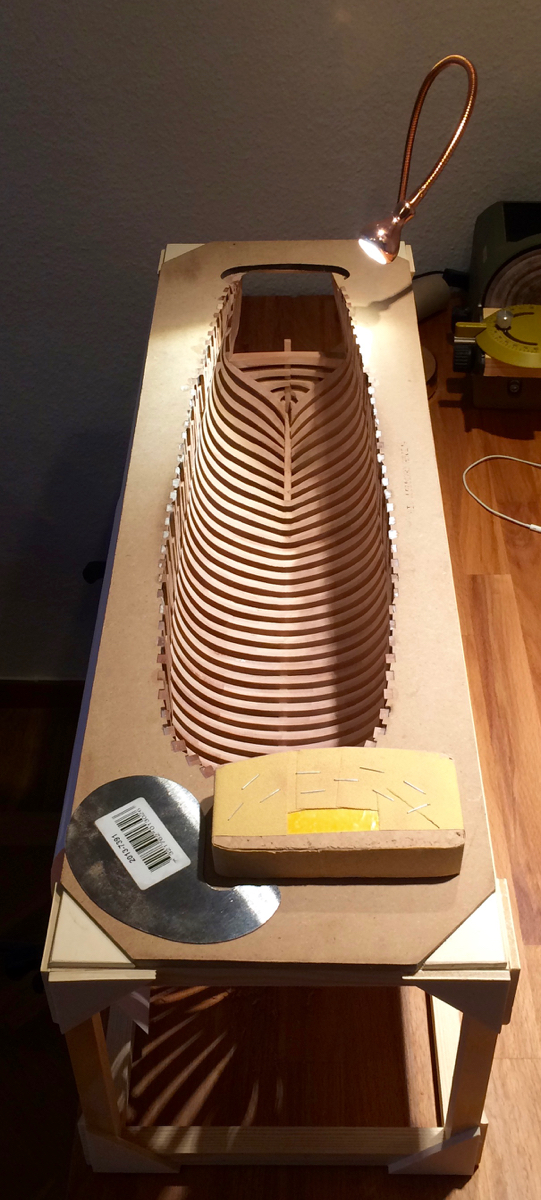
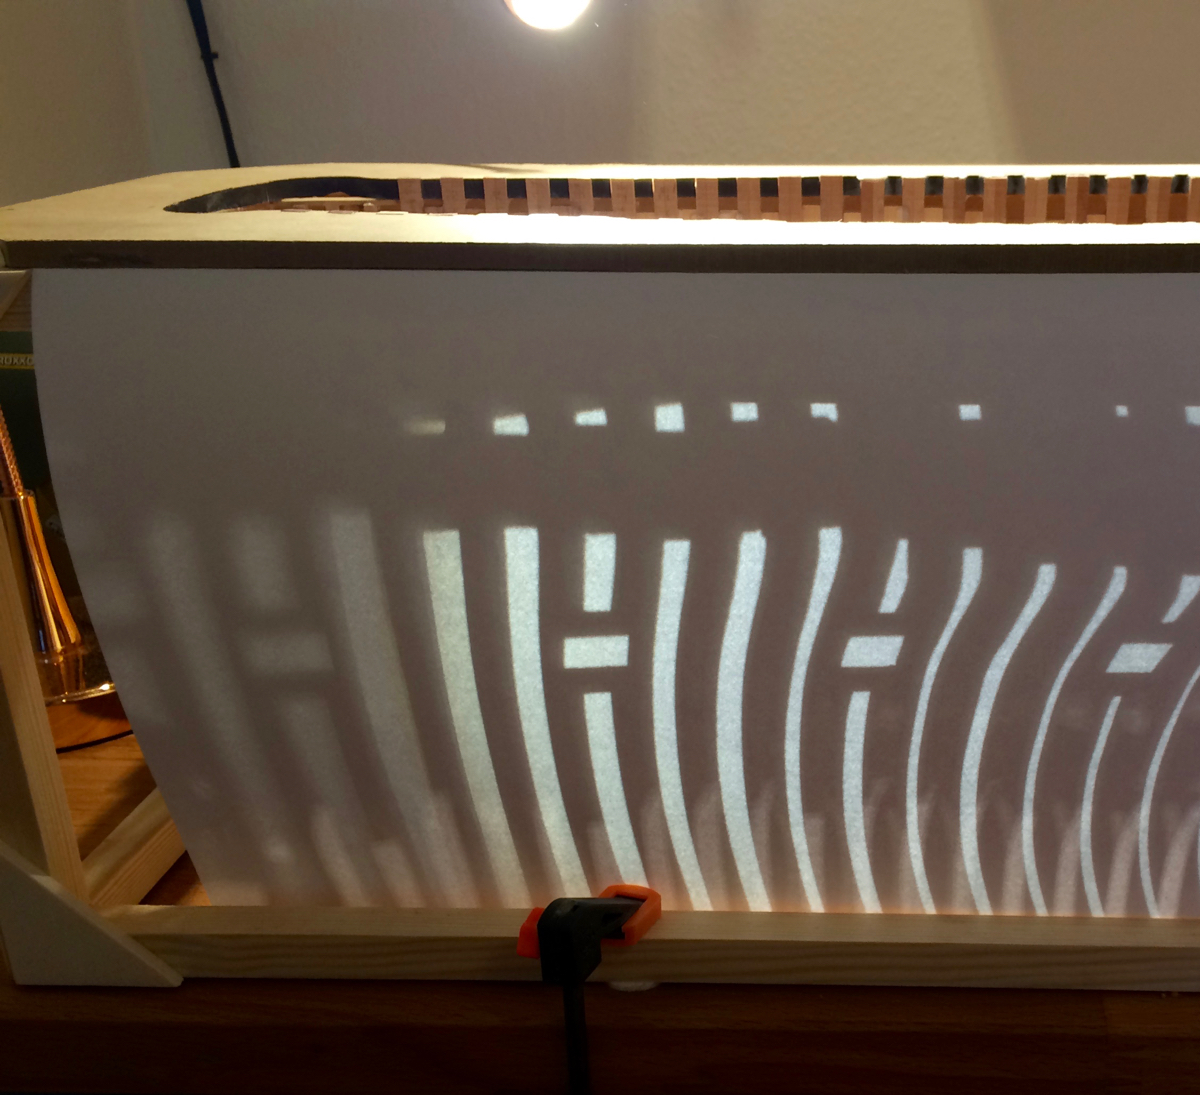
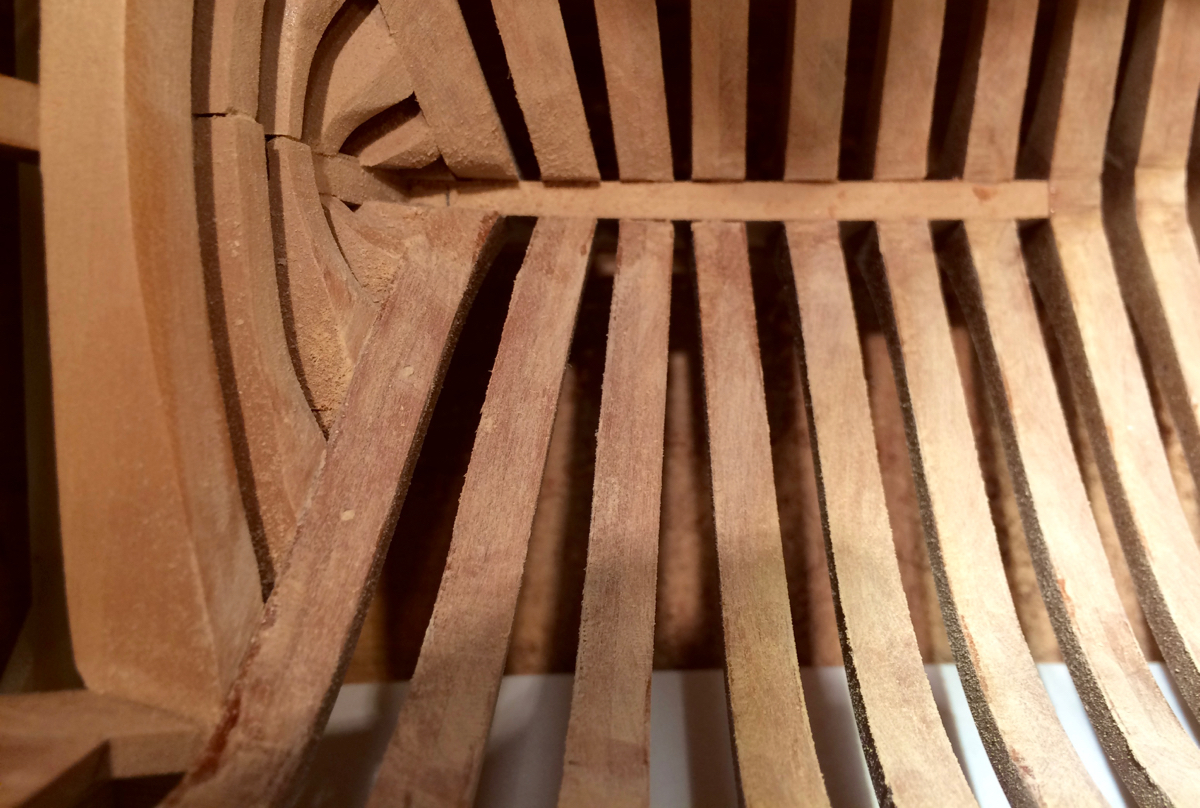
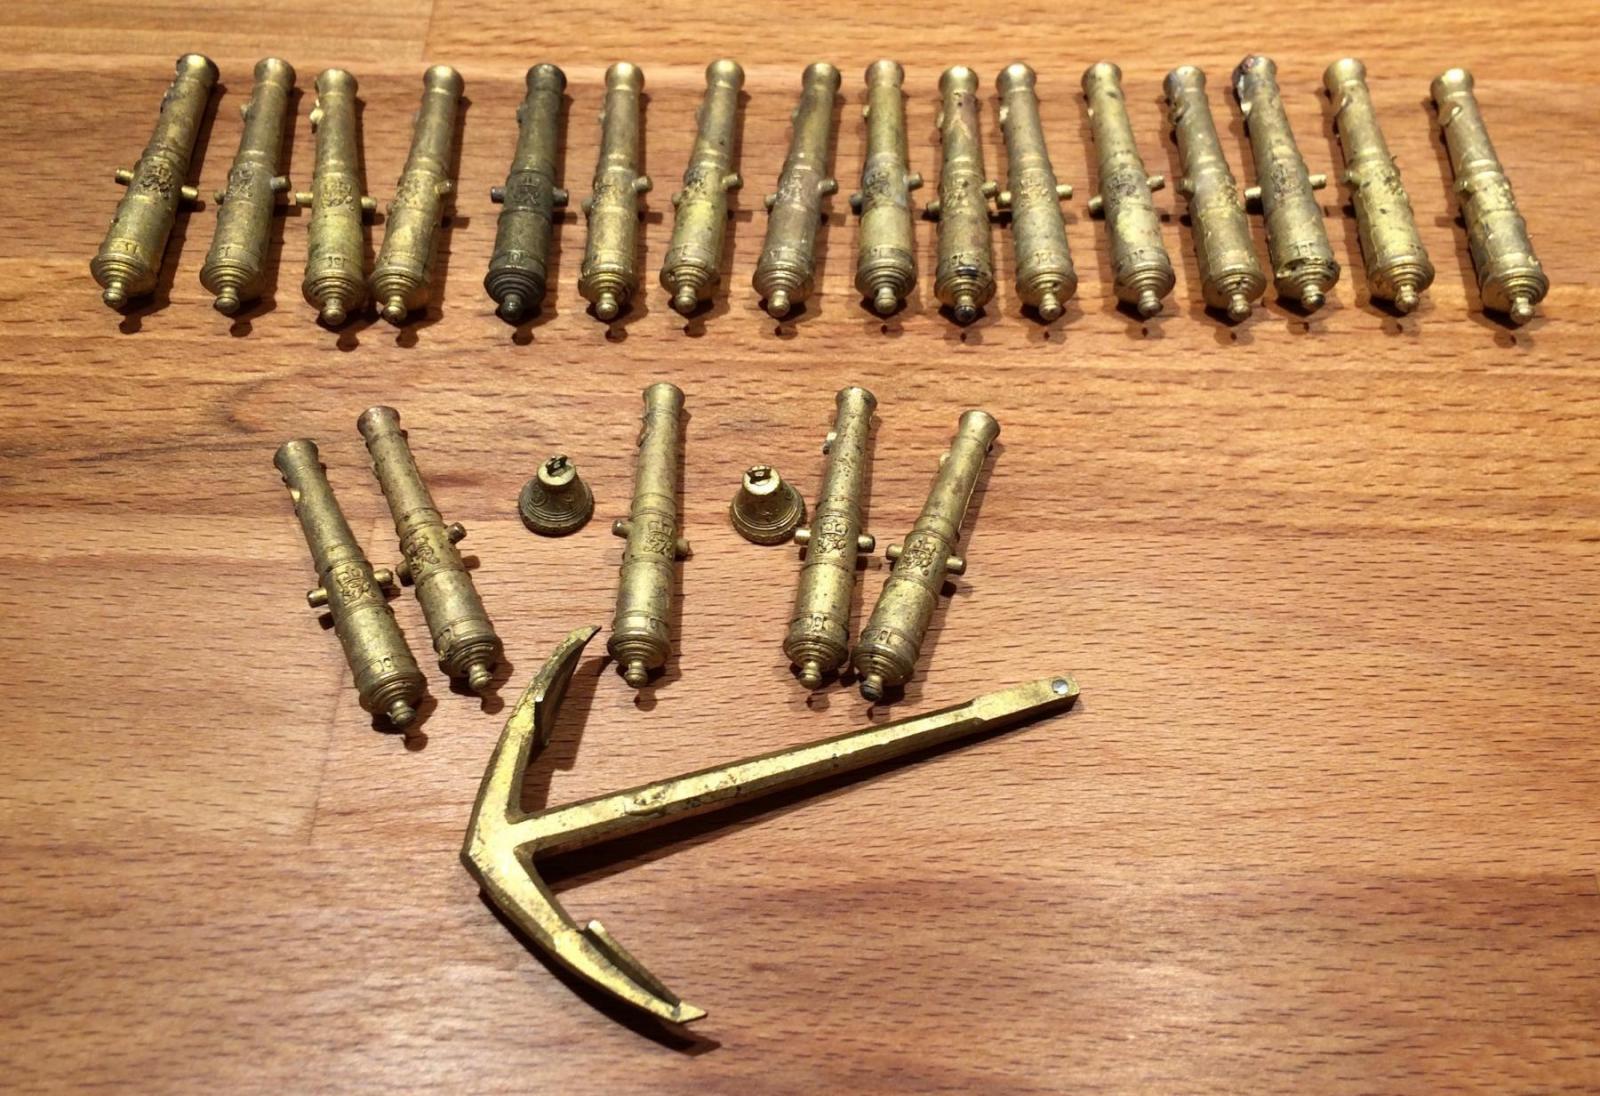
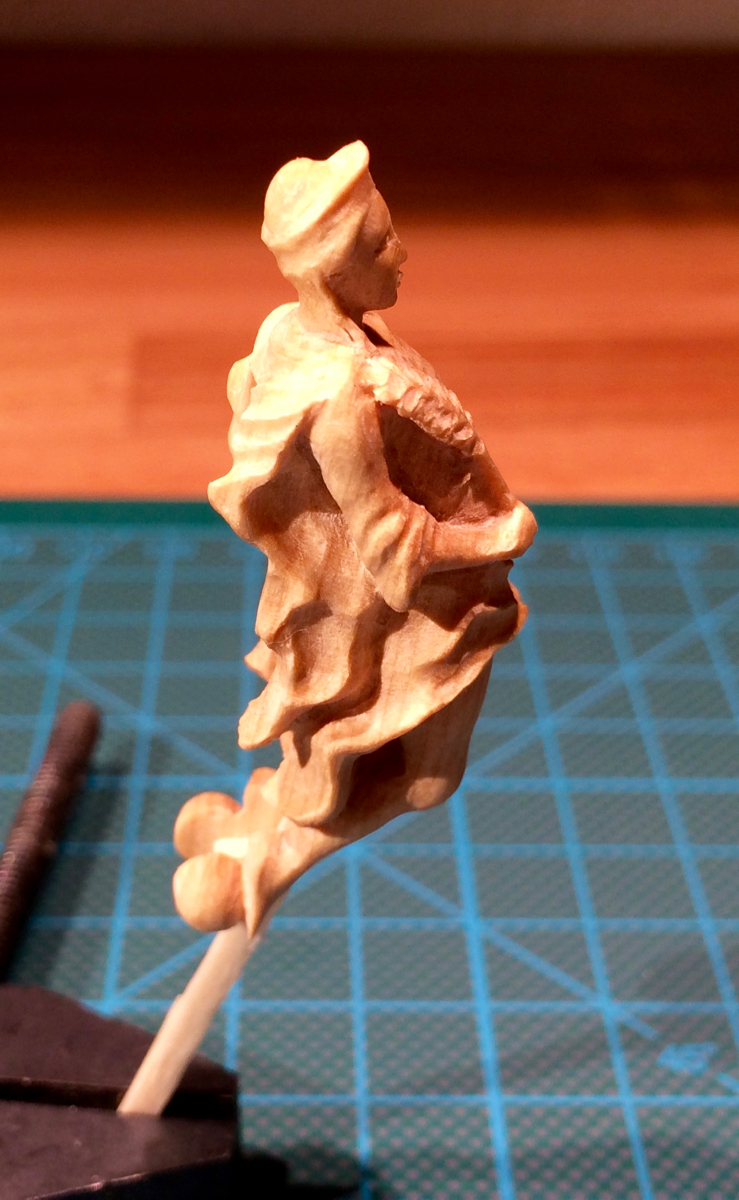
Latest updates: Got a shipment of cast cannons (from http://shipmodels.com.ua/) andanchor and also a cnc milled figurehead (from igorcap) Very little time for modelling, but briefly visited Paris to admire the great collection of fully framed models in its maritime museum. Still fairing the inside of the hull. The "planked" side fairing is finished, but the "prime" fully opened side will take more time. It is a nasty process, I will really follow a traditional build sequence next time - fairing bow and stern first, before midship is assembled. Out of all my tools, just two are usable for it - curved scraper and a similarly shaped sanding block. Also some xacto blades for a fine scraping later during the process: Found a super simple way to keep the dust away - two sheets of paper - and it is collecting under the hull, not getting onto the floor. Also looks spooky These parts are really tricky due to very convex curves: My frame alignment was not perfect, some ended up too thin, but I will cheat a beat and leave them slightly unfair on the internal side - it would be hard to see anyway. Lesson for the future - build in the upright position, where it is much easier to control the alignment of the thin top timbers. If building in Hahn way, upside down - leave a lot of margin around top timbers, where they are thin and sensible to misalignment, when you cut the frames.
- 969 replies
-
- 24
-
-
- hahn
- oliver cromwell
- (and 1 more)
-
Love the photo that is 2nd from the bottom. Very elegant lines of the frames, and a beautiful finish! Sweeet!
-
Allan, Druxey, thanks for the info. Looking forward to see more of that "typically omitted details"
-
Hmmm, something is fishy, sounds too good to be true! Best wishes, hope this project will go smooth!
-
Can you tell more about that staples? Never saw them on any model. Why they were used instead of just bolting the false keel to the keel? To make it easier to replace the false keel?
-
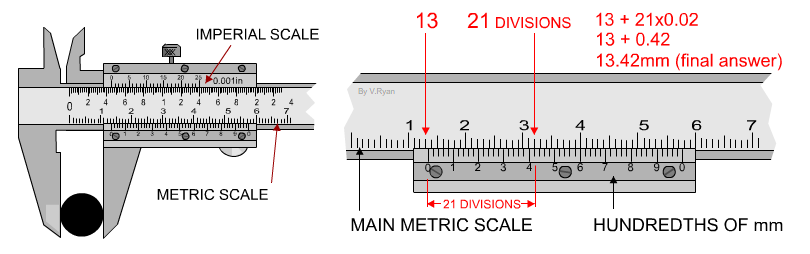
Vernier calipers never lie.. Never trusted that cheap electrical ones, with a two-cent parts they can't be trustworthy. And proper proffessional calipers cost a fortune.

- 525 replies
-
- 6
-
-
- anchor hoy
- hoy
- (and 1 more)
-
Would be great if you can show some pictures of the process, very curious!
-
Robin, that is very easy - click on the image to open a fullsize version, right click -> save image, then post it to your thread.
- 969 replies
-
- 5
-
-
- hahn
- oliver cromwell
- (and 1 more)
-
ancre Le Rochefort 1787 by Niklas - 1:36
Mike Y replied to Niklas's topic in - Build logs for subjects built 1751 - 1800
Yaay, finally somebody in Stockholm builds a fully framed model! Let me pull the chair. How about some beer? -
ancre Le Rochefort 1787 by Niklas - 1:36
Mike Y replied to Niklas's topic in - Build logs for subjects built 1751 - 1800
Very accurate! What are those tiny round "holes" in the deadwood? -
Glenn, your model seems to be built with a much higher accuracy than the original vessel A pleasure to follow. The use of CNC looks very effective! Oh, forgot that you also need to make a CAD model before it is machined How noisy is the cnc cutter? Is it something you can tolerare for a few hours, or you schedule some overnight batch and have a freshly baked parts next morning?
-
Chris, thanks for the advice, will take a wool. I sanded away most of the old oil. In some spots is penetrated too deep, but it is mostly gone. Waiting for the surface to get dry, and will start over with a proper technology.
-
May I ask another newbie question? What would you recommend to do between coats to achieve a non-glossy, but nice look, if using diluted tung oil on this wood? 1) Lightly sand with 600 grit sandpaper 2) "Sand" with 0000 steel wool 3) Do nothing
-
Got it, will do. Thanks for helphing to recover the damage after an idiotic move
-
Gaetan, thanks for advices. I understand now how much of an idiot I am.. Lesson learned! I really had very little understanding of the mechanics of oil. Already tried regular turpentine as a dilution liquid on some scrap wood - even I can't stand that smell, threw away the entire bottle next morning! Will test white spirit (mineral spirit) solution on a scrap wood today. And for the table top - will just leave it as is. Question: would it be beneficial to sand it with very fine paper from time to time, to smoothen the grain? Or it will cause more harm by removing the top layer that is drying?
-
Proxxon Micro Planer DH40 - owner feedback??
Mike Y replied to rtropp's topic in Modeling tools and Workshop Equipment
Bill, thanks for the info. I really missed this one when selecting the planer.It is, however, too large. Proxxon has no competition when it comes to small tools designed for people who work in a tiny room corners. If you have a full scale workshop - buying proxxon planer or bandsaw makes little sense, there are better options if you can afford a larger size. -
Hm, I was thinking that new coat (diluted one) will dry in like 48hrs, on top of the old coat. Does not matter if the old coat inside the wood will not dry. Because how I understood it - pure oil dries forever, but diluted dries faster. Or I got it wrong?
-
Chris, Buce, thank you for the feedback. I will mix pure oil 50/50 and apply a new coat, which should finally dry in a reasonable time.
-
I have a bottle of the "Danish Oil", this one: http://www.wood-finishes-direct.com/product/rustins-danish-oil It contains "purified Tung Oil, vegetable oils and resins." Does it make sense to apply it on top of tung oil, as a second coat? Danish oil should dry much faster. Or it is better to avoid mixing different oils together?
-
Jaager, thanks for the detailed explanation! No, I used a pure oil. Understood the idea, will wait more, if it will fail to dry - will follow your instructions on removal and re-application. Oil might not be not ideal for the working surface, but I really do not want to have a glossy look of the typical varnishes, that create a transparent layer on top of the wood. Probably will end up sanding and re-finishing the table top once or twice a year, it is fine.