Mike Y
-
Posts
1,557 -
Joined
-
Last visited
Content Type
Profiles
Forums
Gallery
Events
Everything posted by Mike Y
-
 Hm, that is a good idea, thanks! Yes, they should be square to the keel.
- 969 replies
-
- 2
-

-
- hahn
- oliver cromwell
- (and 1 more)
-
SCHOONER ENTERPRIZE by GConiglio - POF
Mike Y replied to GConiglio's topic in - Build logs for subjects built 1801 - 1850
Very fine wood, I am using the same pear from Arkowood, it finishes nicely and is perfect! Please keep it coming! -
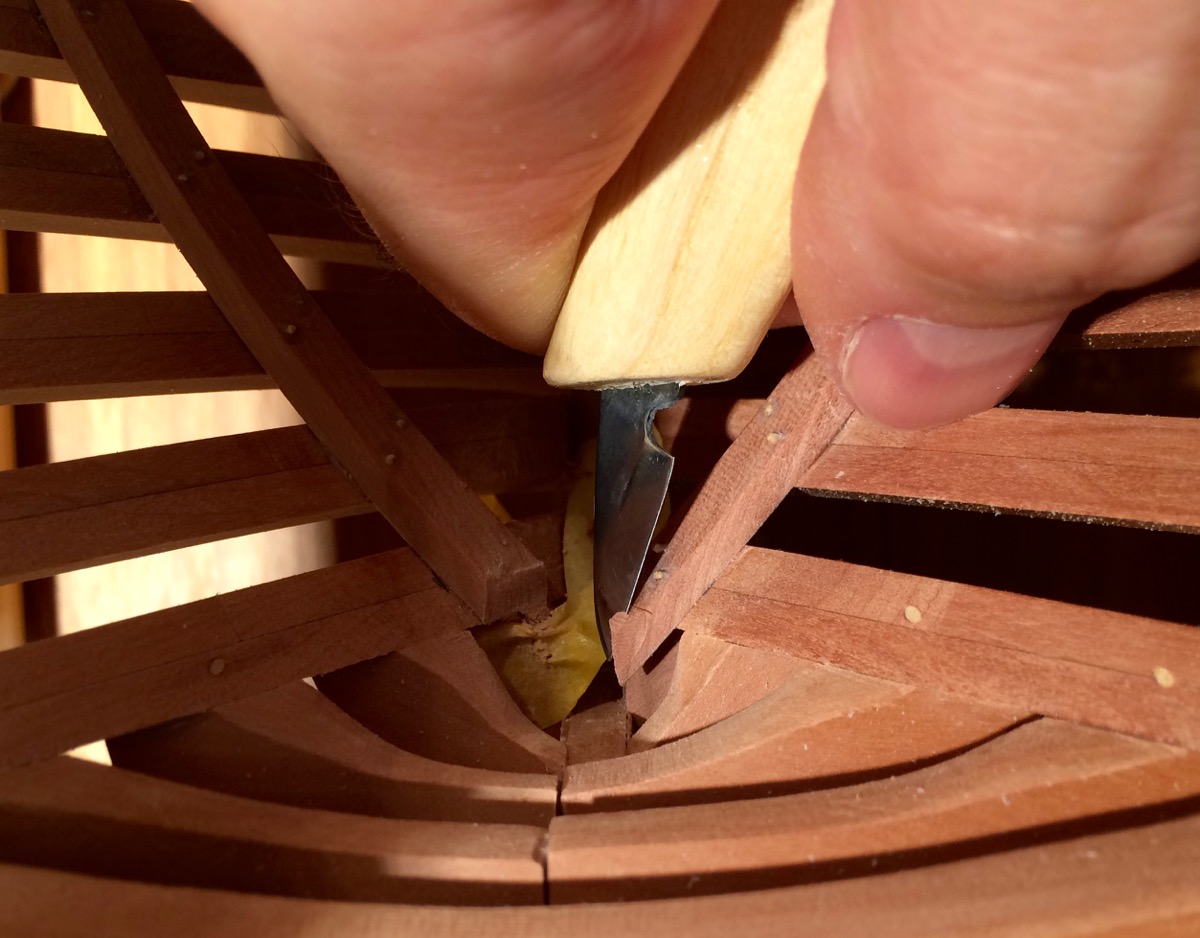
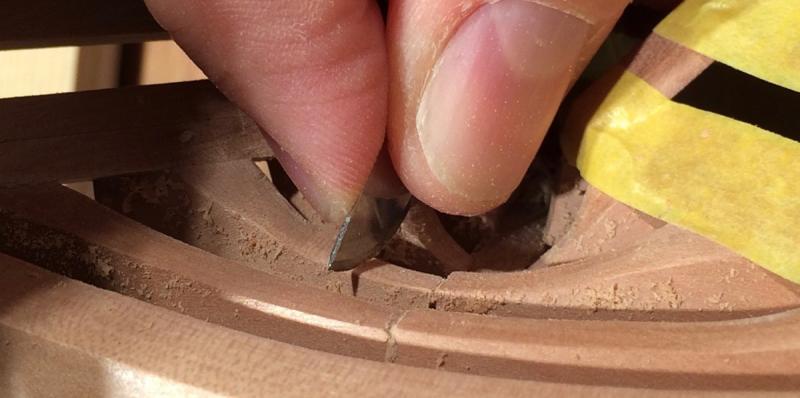
Grant, I just realised that I am an idiot - thin knife should fit if you poke it from the outside, not from the inside of the hull. Thanks for the comment that pushed me in the right direction. Will re-mark the remaining pieces of the keel, should save some time for fit-and-cut iterations.
- 969 replies
-
- 5
-
-
- hahn
- oliver cromwell
- (and 1 more)
-
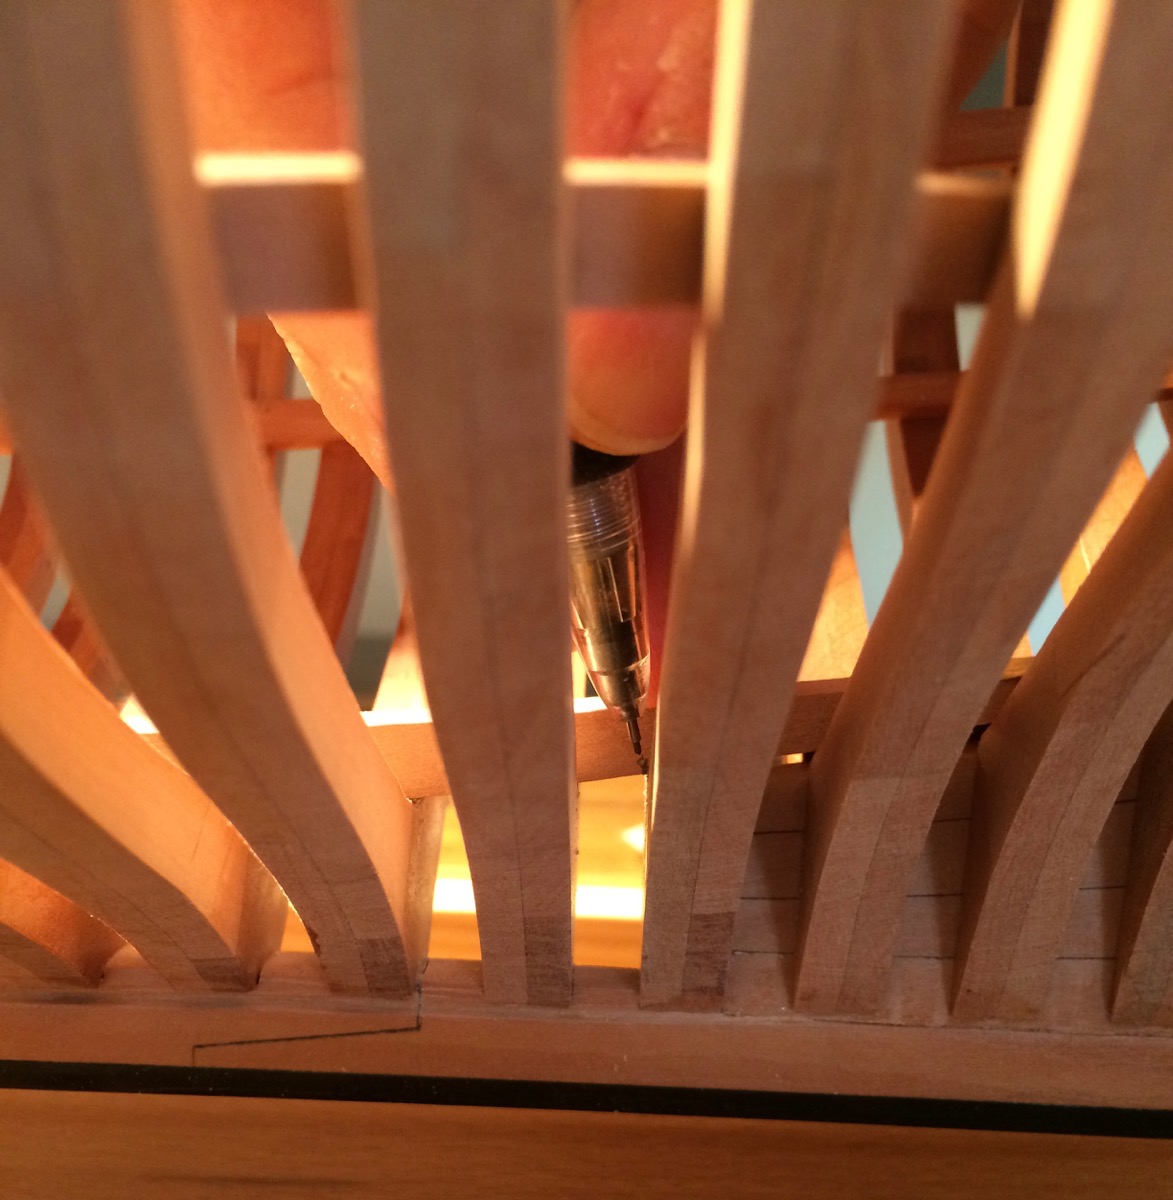
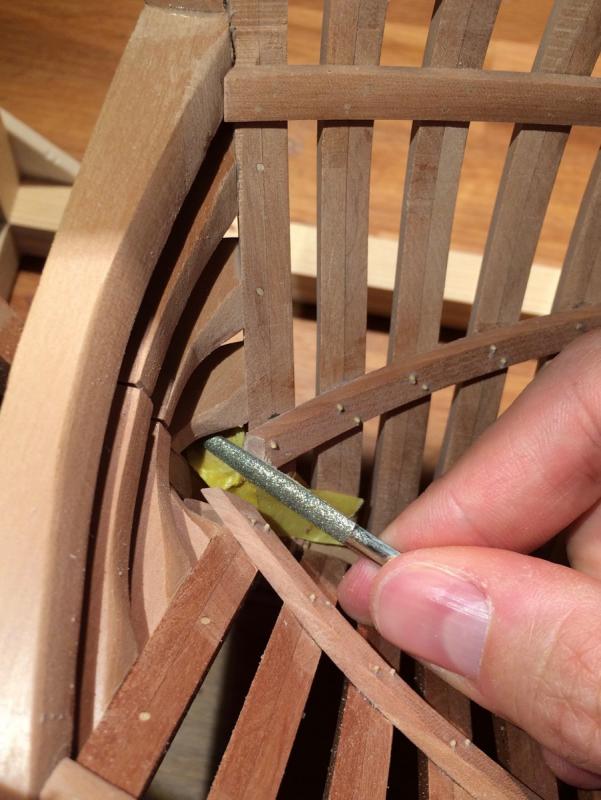
Grant, I have a scriber, but the sharp angle between the marking tool and frames and keelson makes it really hard to use anything except pencil. Ideally some hook-shaped scriber could be used, but I was too lazy to make one just for a single use.
- 969 replies
-
- 4
-
-
- hahn
- oliver cromwell
- (and 1 more)
-
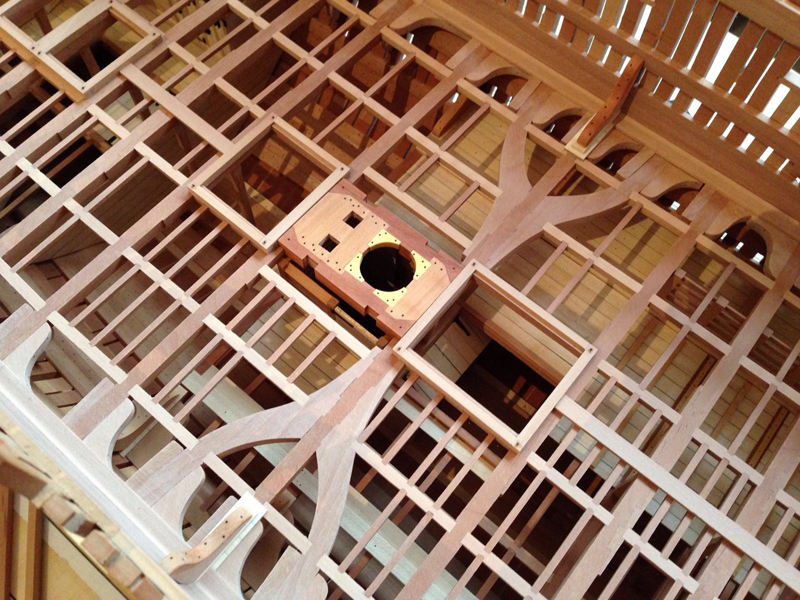
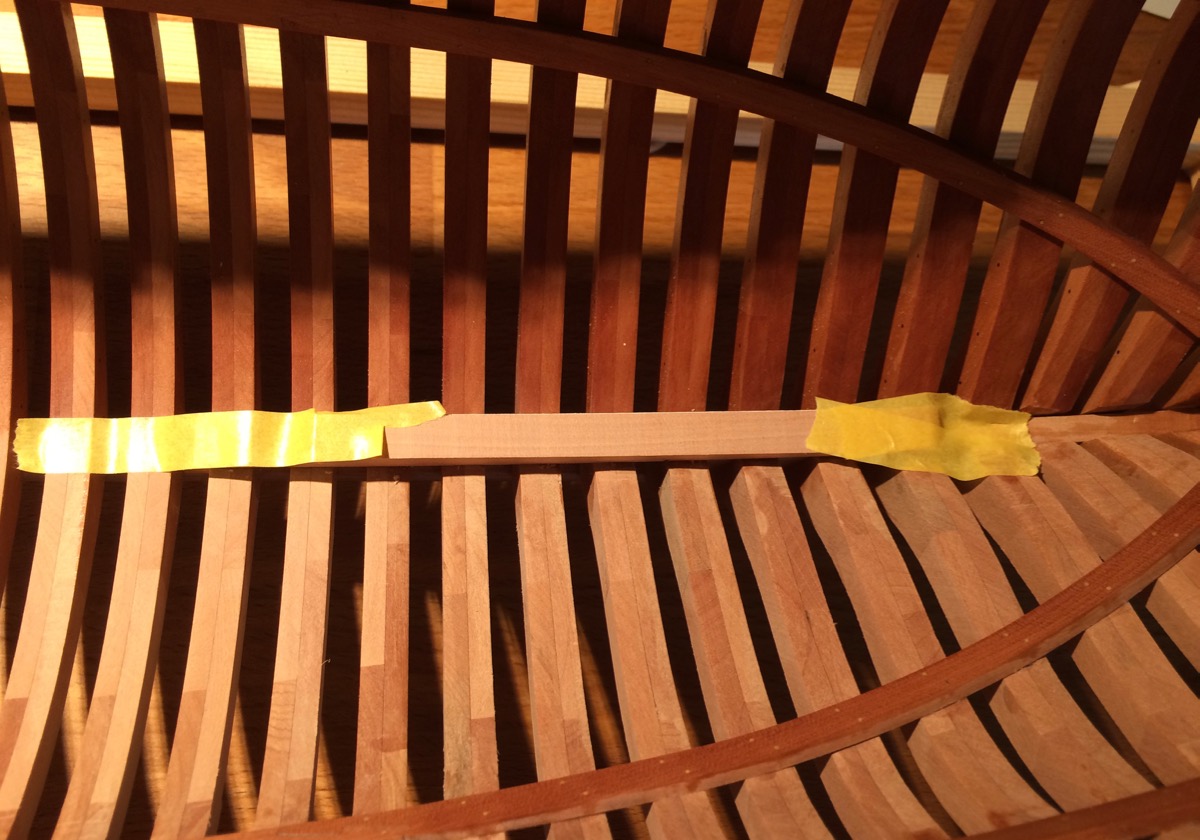
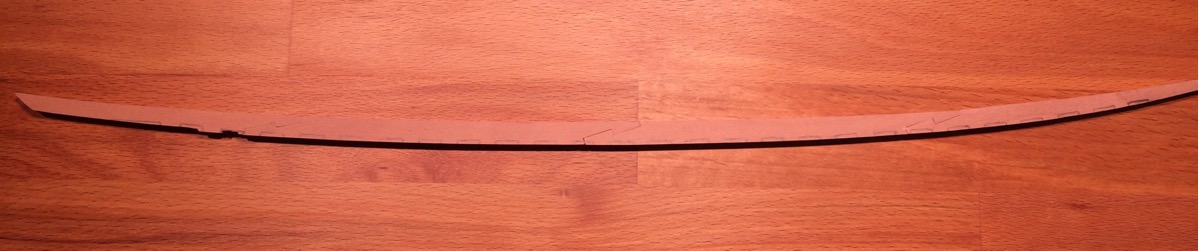
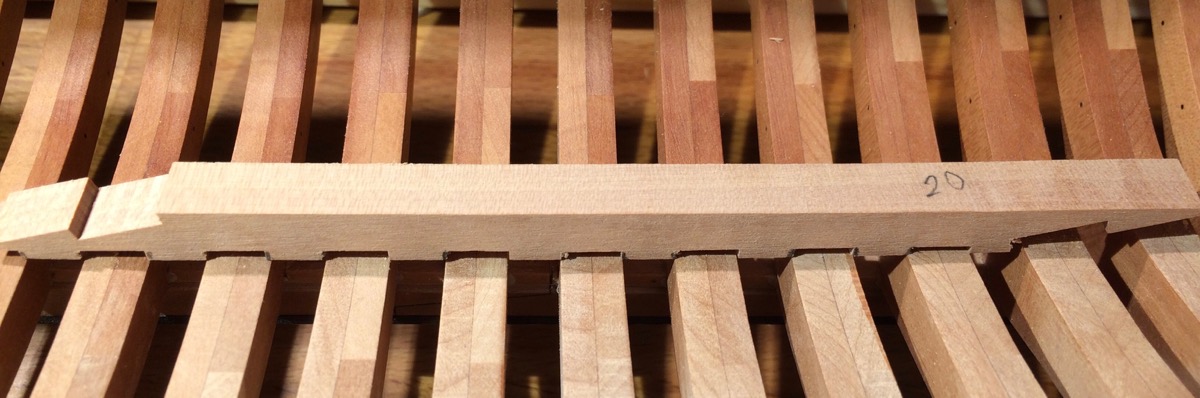
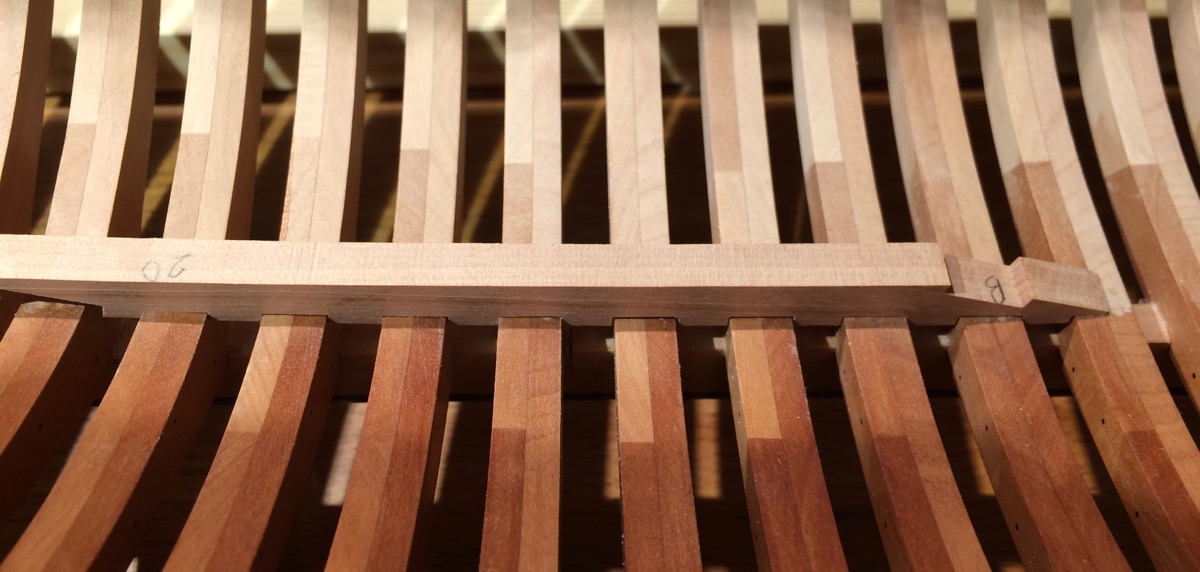
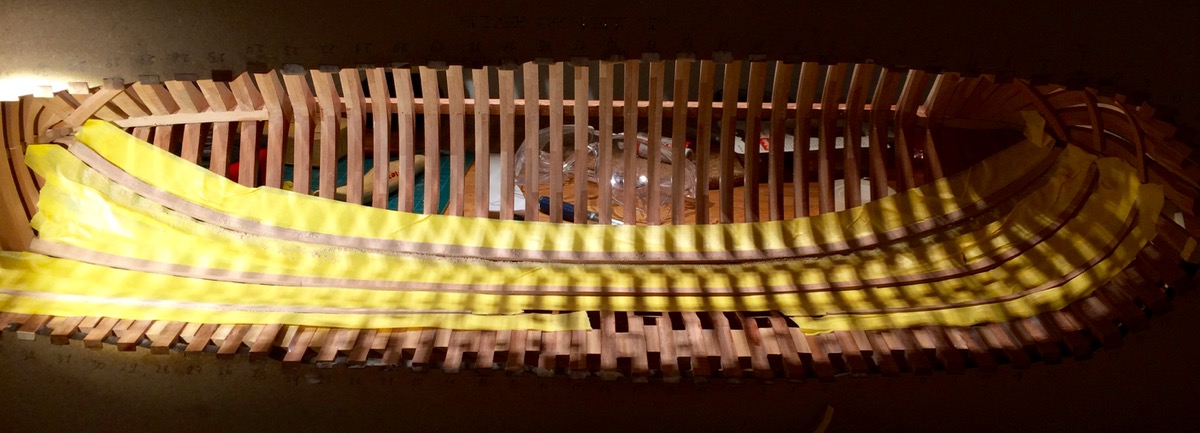
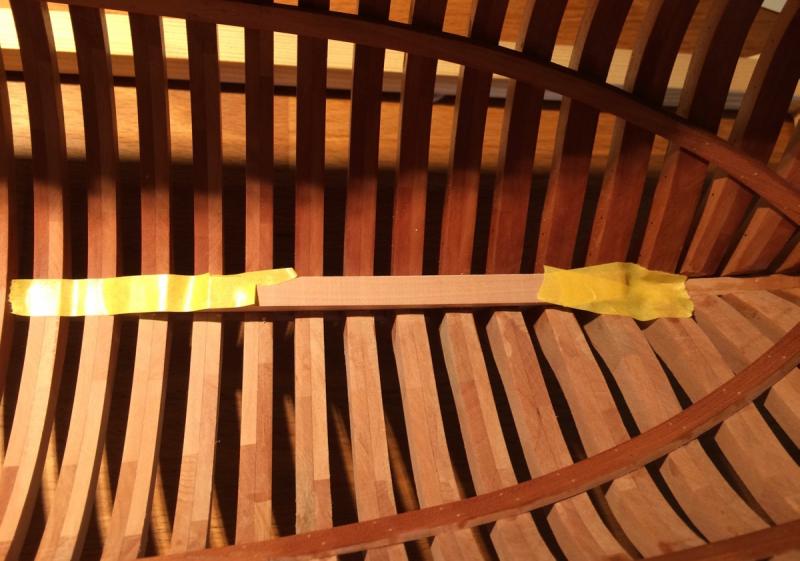
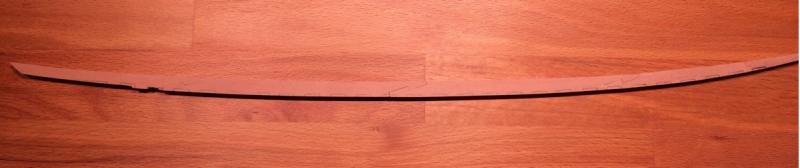
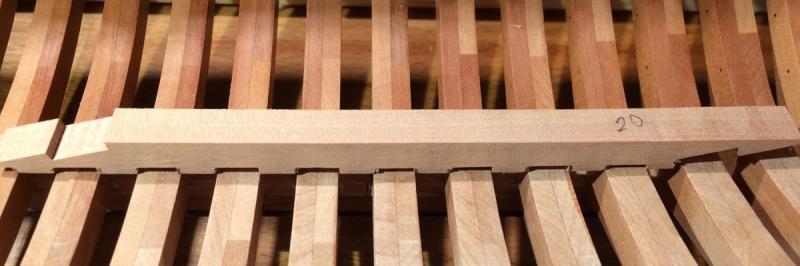
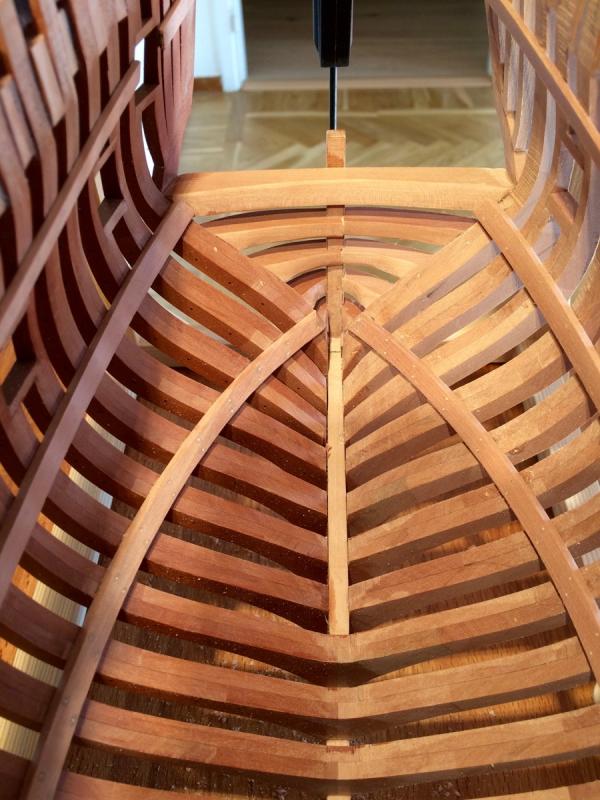
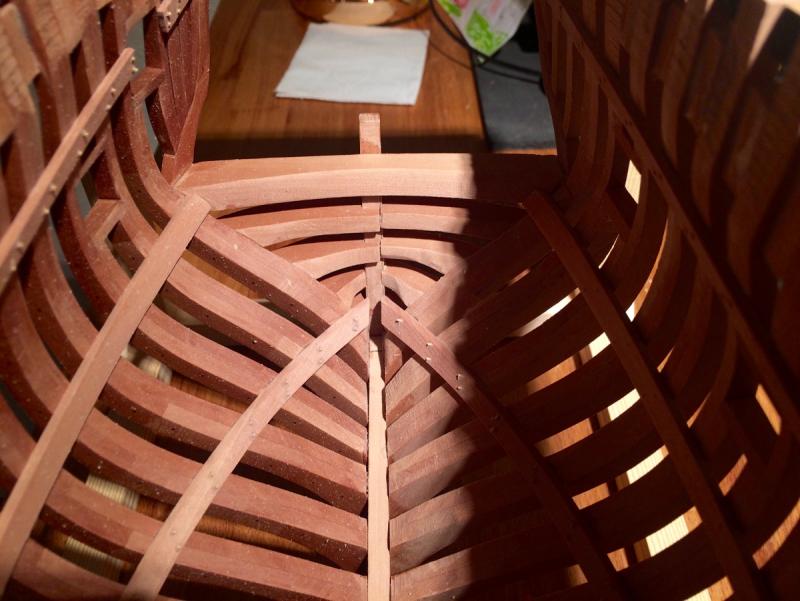
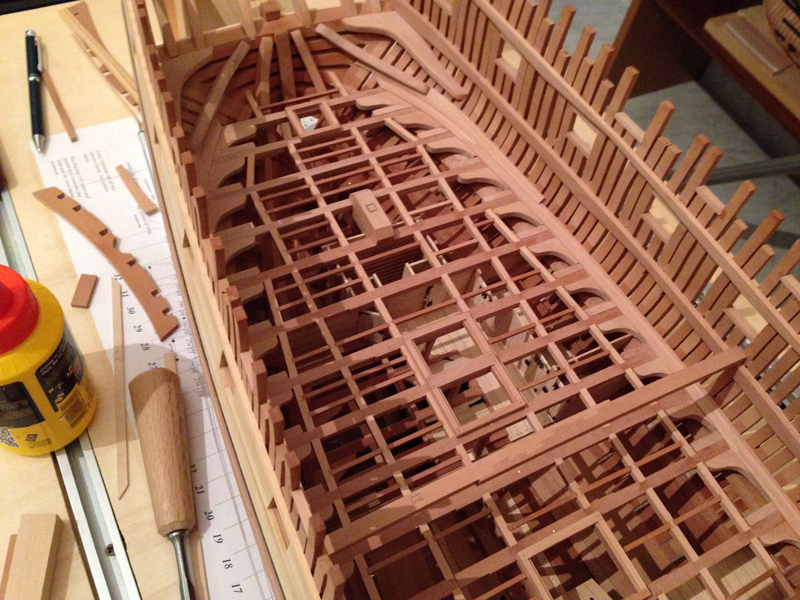
Working on the keelson. Decided not to rely on the plans due to possible error here and there, and fit it to the hull instead. Fixing the keelson parts to the hull with masking tape: Marking frame boundaries: Keelson markup completed: First fit after milling, some notches are not wide enough. Three iterations on a mill were required, because these pencil marks are not precise enough (hard to get the pencil right, the angle was awkward): After the fitting. Will need to make some notches deeper to avoid gaps: Now rinse and repeat!


- 969 replies
-
- 26
-
-
- hahn
- oliver cromwell
- (and 1 more)
-
Scroll saw for bow pieces and frames
Mike Y replied to Brucealanevans's topic in Modeling tools and Workshop Equipment
You mean DS115? I bought one for my 10yr old nephew, and tested it a bit before giving it to him. With stock blades it is very weak, tried to cut 8mm piece of pear - you need to push quite a lot, which leads to innacurate curves due to twisting blade. Or be reeeeally patient. -
Scroll saw for bow pieces and frames
Mike Y replied to Brucealanevans's topic in Modeling tools and Workshop Equipment
Frames have a pretty smooth curves, maybe bandsaw is good enough? Especially if the blade is narrow. I use Proxxon band saw, and it is perfect for frames. Never needed any scroll saw. -
Pardon a few questions, but is it already glued, or you will remove the paper templates and glue everything together later? How are you going to fair the inside of the frames? Looks like a lot of material to remove! Watching with interest, quite a new method!
-
Very interesting method, looking forward to see how it will look like once framing is completed!
-
Few cents: I am not sure if simplification is a part of the style (except framing). I thought it is more of "let's leave some details up to the builder". Bill, here is a link to the Oliver Cromwell plans preview from Lumberyard website (the preview is distorted and not suitavle for building, you need to purchase real plans to build): http://www.dlumberyard.com/Plans/cromwell.pdf As you can see, some things are simplified. Like Mark mentolned - knees, carlings, deadwood, stem, stern, But nothing stops the builder from reading up and making a correct version instead of simplified one, like I did. It will not change the "style". However if you change the framing style - it would not be a Hahn style anymore. But it is really a fuzzy term. Hahn was "anti-purist", so hope he would not mind people deviating from his plans even if building from them
- 969 replies
-
- 4
-
-
- hahn
- oliver cromwell
- (and 1 more)
-
Bill, I do not think this term is clearly defined, but it is typically equally spaced frames with no shifts. Also, he popularised the jig that helps to build the hull upside-down, as you see in the beginning of the log.
- 969 replies
-
- 5
-
-
- hahn
- oliver cromwell
- (and 1 more)
-
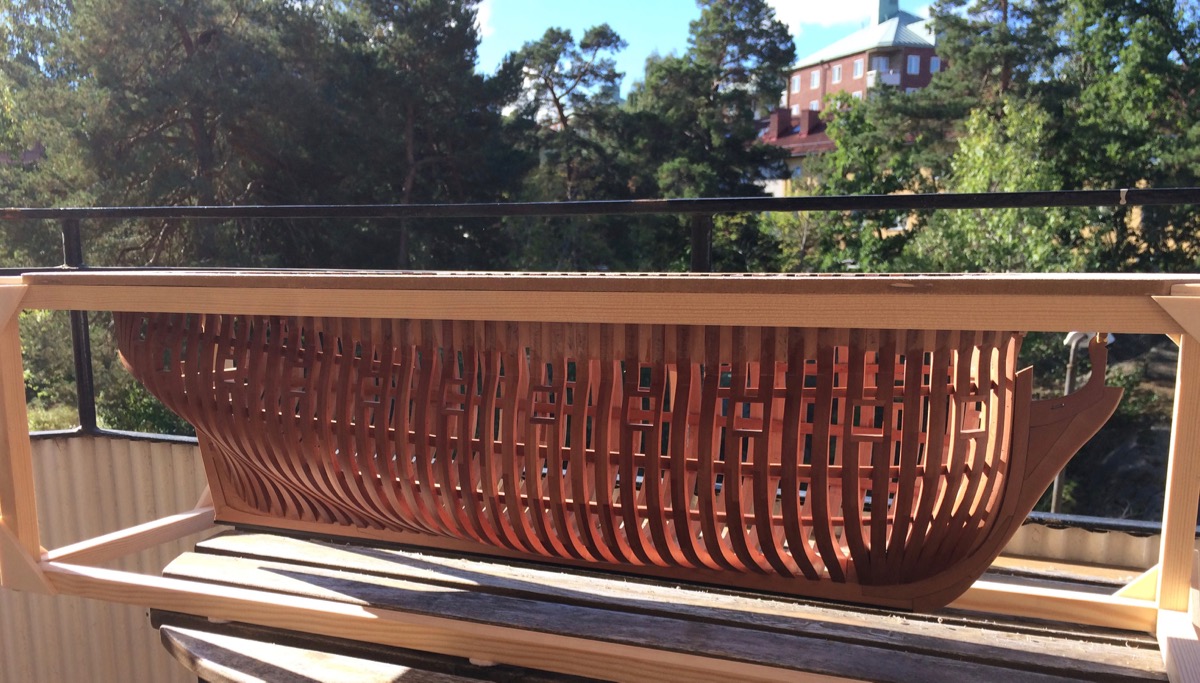
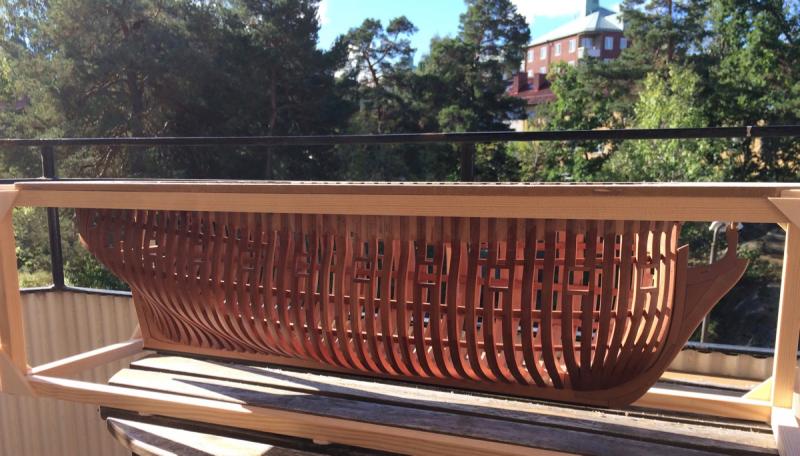
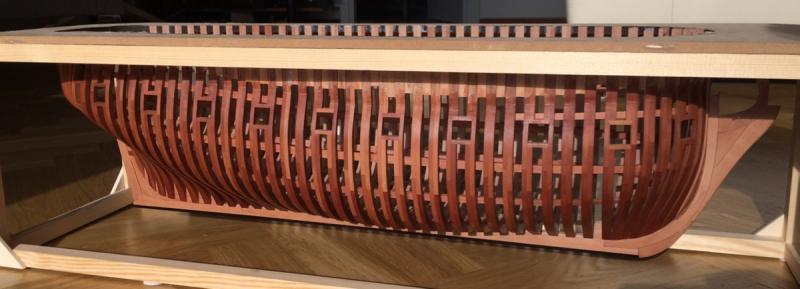
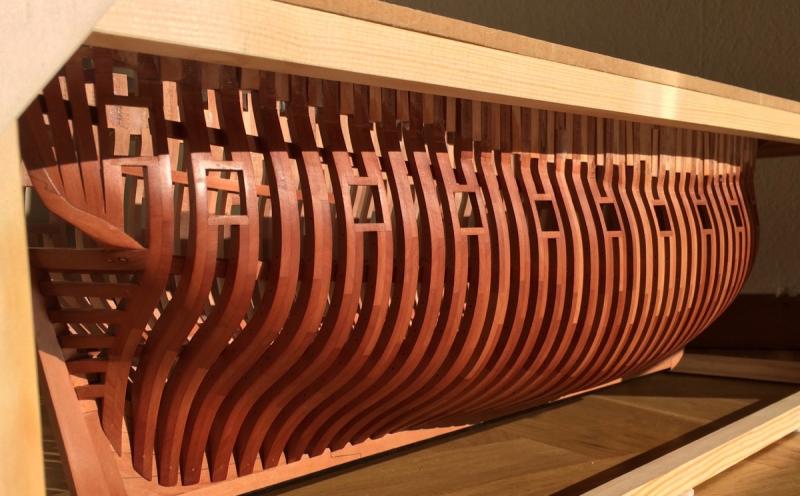
Some "build snapshot" photos. Tung oil finish is especially beautiful under direct sunlight. It is such a pity that it is a not a good idea to display the model in the sunny place Damn physics!
- 969 replies
-
- 34
-
-
- hahn
- oliver cromwell
- (and 1 more)
-
Hi John, Thanks! The scrapers are amazing, I am using them very often now. They are removing much more material than xacto blades, and they can get into any small places because of the small size. The edge do not have any dents. Bought them here: http://www.axminster.co.uk/lynx-mini-cabinet-scraper-set-504698 I also discovered them on MSW in somebody's build log, but forgot who that was... Quick googling shows that you can buy them in US, for example, here: http://www.woodcraft.com/product/158977/lynx-mini-scraper-set-4pc.aspx http://www.grizzly.com/products/Lynx-Mini-Scraper-Set/T26658?utm_campaign=zPage http://www.japanwoodworker.com/Product/158977/Lynx-Mini-Scraper-Set-4pc.aspx etc etc
- 969 replies
-
- 4
-
-
- hahn
- oliver cromwell
- (and 1 more)
-
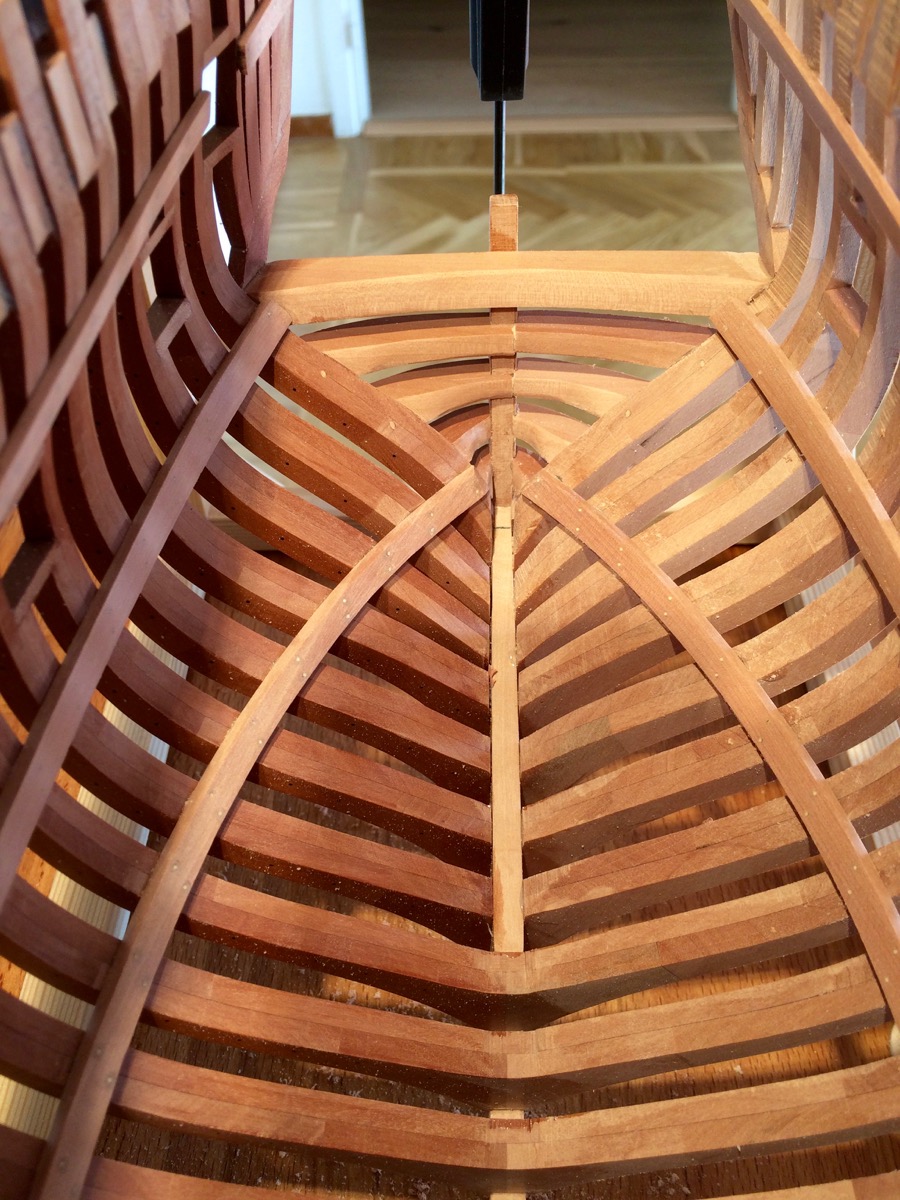
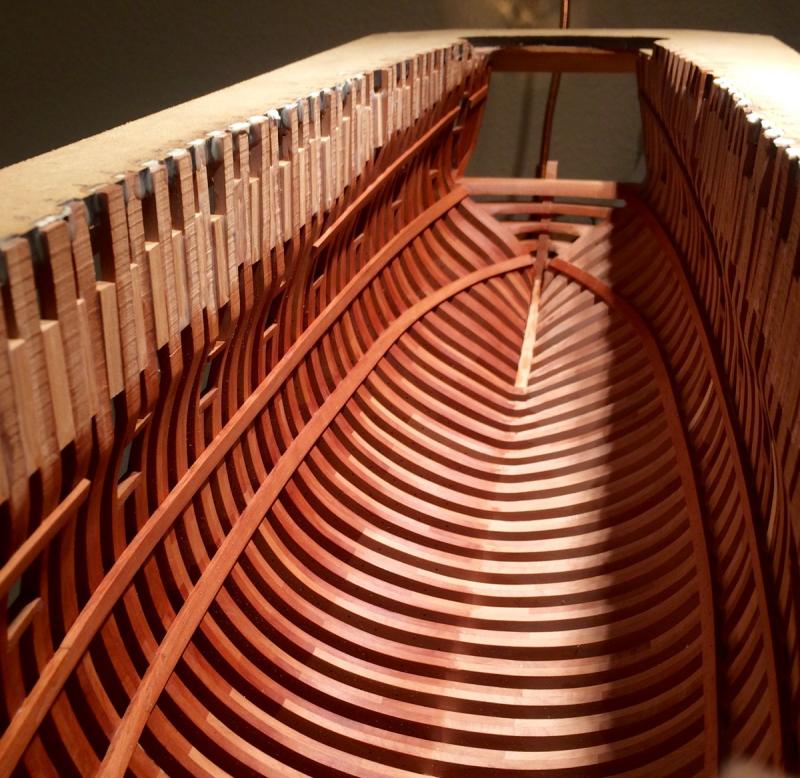
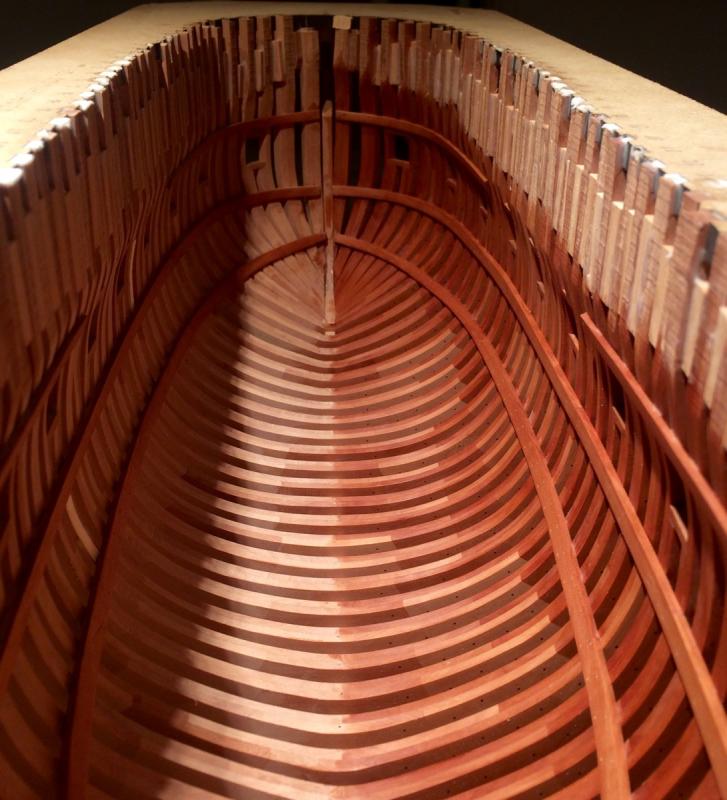
Or the plug is single-use and would be cut into pieces like frame centers in Chuck's longboat? Very impressive fairing and keel slot. Looks so accurate as it is milled on the completed hull. Incredible precision!
-
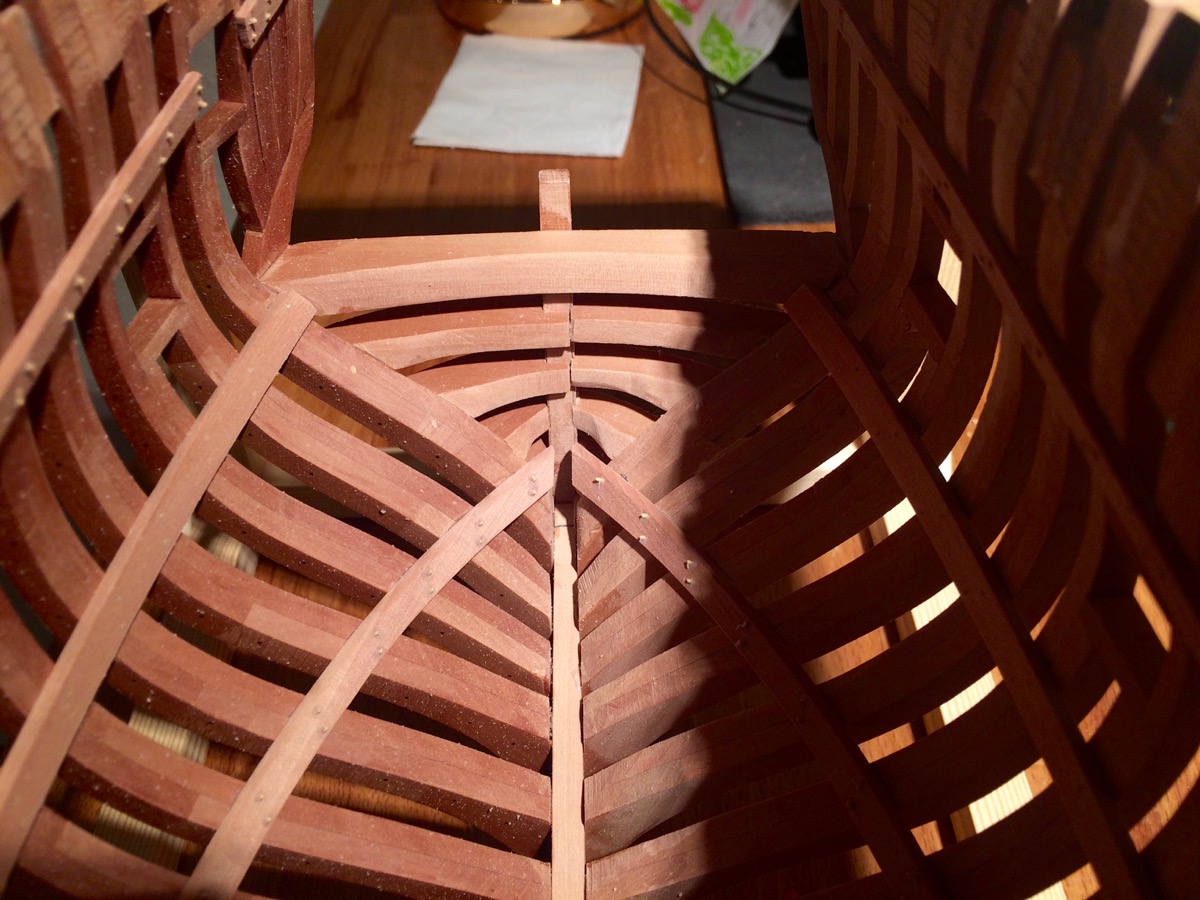
Magnificent! Love that "light through the frames" shots
-
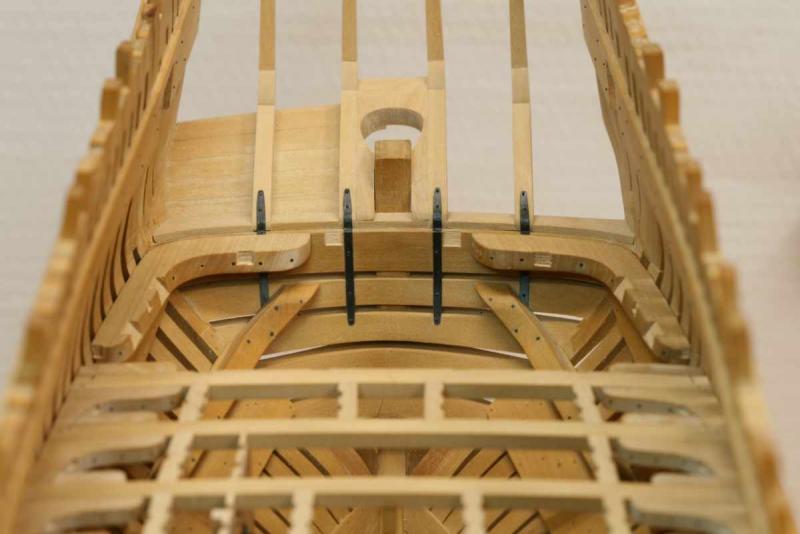
They are not perfectly symmetrical where the bending is significant (+/- 1mm, not more), but this would not be visible if I manage to make nice and even deck framing, perfectly aligned in all projections (because the deck beams are higher than deck clamps, recessed by roughly 1 inch). How hard could it be, right?
- 969 replies
-
- 5
-
-
- hahn
- oliver cromwell
- (and 1 more)
-
Hm! Amazing bending, will try that as well. Maybe ebony wales are not as messy as I thought? Two cents about pink ivory: Stiles and Bates does not ship wood outside UK. I bought it here instead: http://www.exotichardwoodsukltd.com Not sure about US, but shipping to Sweden was not a problem. Got two big fat billets, they are amazing!
- 504 replies
-
- 6
-
-
- washington
- galley
- (and 1 more)
-
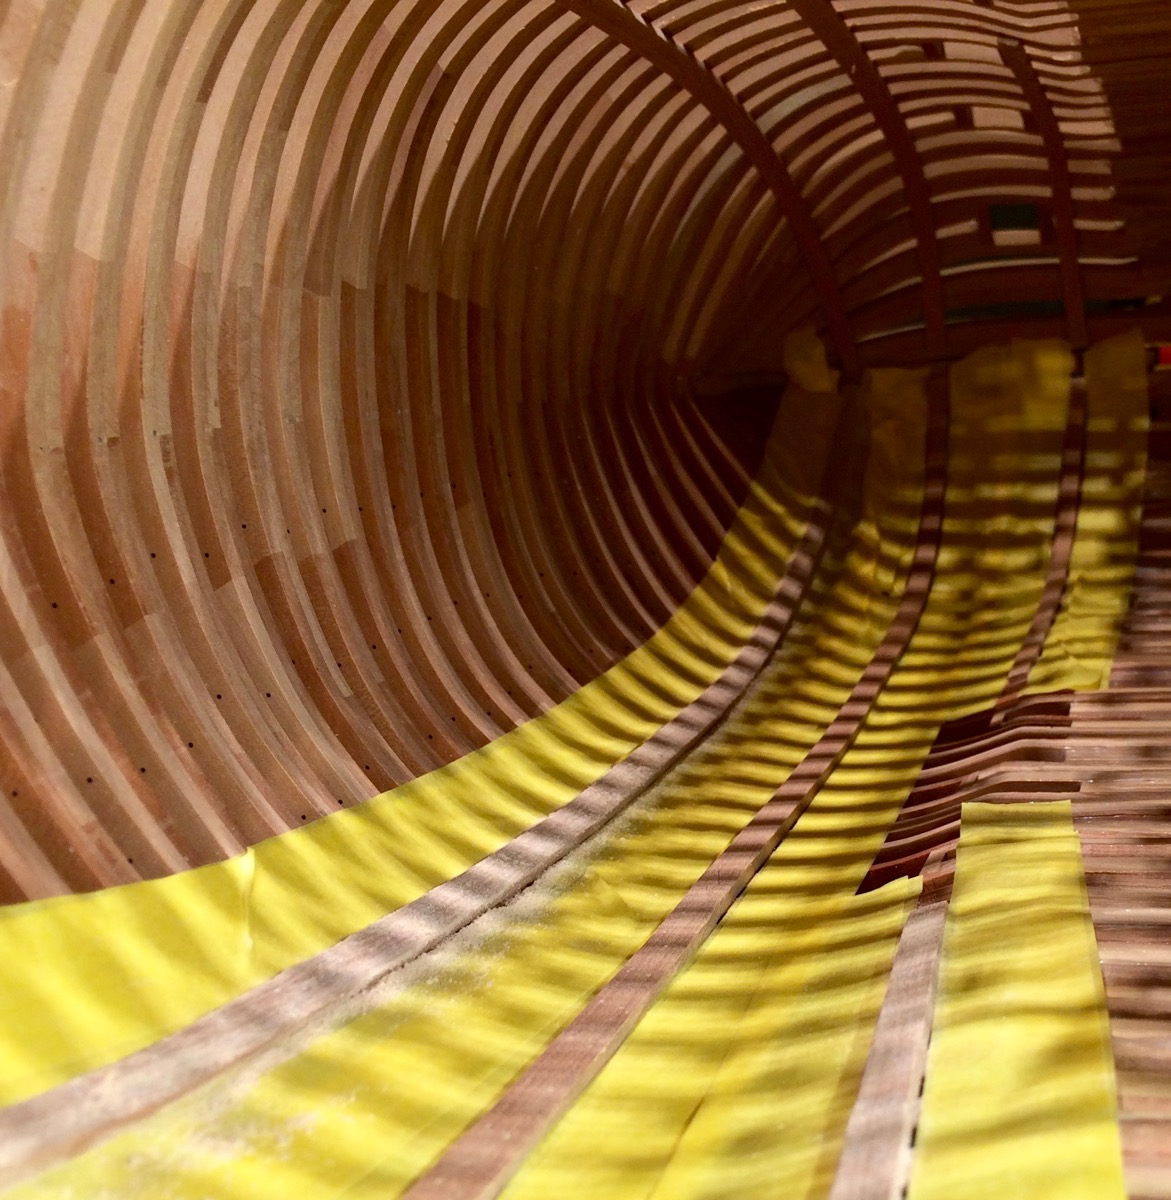
Thanks John! Finishing the planks with some sandpaper, mini scrapers and xacto blades. The mini scrapers were surprisingly useful! Covered the frames with the masking tape to avoid scratching them accidentally: Final result, with tung oil applied. The exposed side of the hull would be left as is (with deck framing, of course), things like breasthook, fore and mizen mast steps, etc - would be cut in half with one side omitted. That is to avoid obstructing the view through the hull. If something will need to be glued to the finished side - will use treenails and/or monofilament. Or epoxy. But hope it will not happen


- 969 replies
-
- 23
-
-
- hahn
- oliver cromwell
- (and 1 more)
-
Fantastic!
-
Shaping the clamp ends in situ was a bit tricky.. Transom wings were shaped with sandpaper and scrapers and finished with xacto blade: Result: It is still clear that transom wings are made out of two pieces, and the gap between the pieces is still visible, but it is kind of better than it was. Sigh... Will do better transom on the next model! Luckily it looks good from the outside, and the inner part of the transom would be barely visible under three layers of deck framing

- 969 replies
-
- 23
-
-
- hahn
- oliver cromwell
- (and 1 more)
-
As a software engineer myself, I know this saying, it is too true and people hit assumption-based problems too frequently...
- 969 replies
-
- 6
-
-
- hahn
- oliver cromwell
- (and 1 more)
-
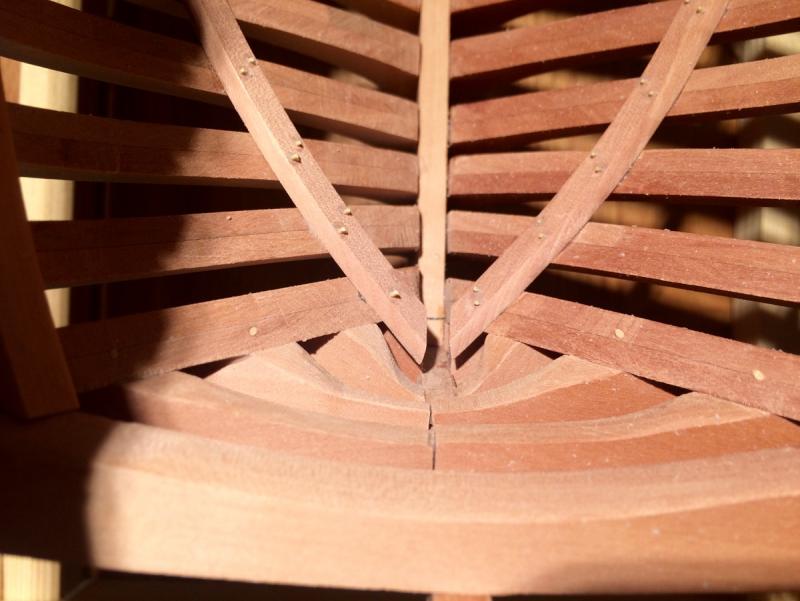
Just realised that I screwed up the transom a bit. For some reason I thought that inner planking and deck clamps in that area fully cover the transom wings. Also, I was expecting some sort of stemson, but at the stern. I thought that inner planking will terminate there. Well, I was wrong. TFFM and other build logs indicate that transom wings are just left open, and inner planking terminates on the rear-most cant frame. Like here, on Remco's Kingfisher: Or on Albert's Naiad: And here is what I have. Nevermind the glue spots on the clamps, they are not sanded or scraped yet, but you can see that they expect to terminate on some big timber in the middle of the transom (which, apparenly, does not exist), and the wings are ugly on the right side, because I was going to hide them under planking. Whoops! Will try to reduce the impact of the screw-up by shaping the transom wings carefully, so they will look nicer. Shaping them in such confined space is a challenge, but seems like I have no choice. Luckily, that area would be barely visible under multiple layers of deck framing, but it is not an excuse to leave it in such a bad shape!
- 969 replies
-
- 16
-
-
- hahn
- oliver cromwell
- (and 1 more)
-
Found a nice color scheme in this beautiful cross section, made by Maurys. Darker wood above wales (looks like pear), lighter below. With a subtle colour variation where lighter pear goes lower, and darker pear is higher. Or it is just a lighting? Anyway: Link to his build log with the rest of the photos: http://modelshipworld.com/index.php?/topic/513-echo-cross-section-by-maury/ Another one is Naiad by Albert. Careful mix of lighter and darker pear in the deck framing: The full log: http://modelshipworld.com/index.php/topic/3443-hms-naiad-1797-by-albert-148