Mike Y
-
Posts
1,557 -
Joined
-
Last visited
Content Type
Profiles
Forums
Gallery
Events
Everything posted by Mike Y
-
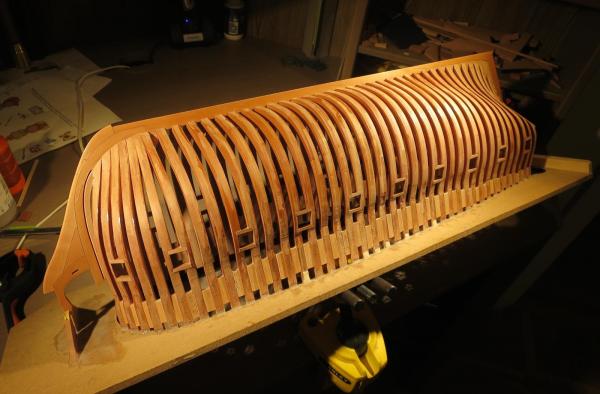
 Hoorray, gunports are done! Practice is the key, the last ports were made twice faster than the first ones I also changed the lights in the room and working table to a warmer ones, and now my camera switched to some sort of warm mode when in auto. Photos look weird now, need to find how to adjust the brightness settings on the camera... The next step should be fun - hull fairing! Really worried I screwed up the frame alignment, and I added complexity when installed that "iron bolts" that hold the "timbers" together. Which gives a smaller margin for fairing - bolts can't become too close to the frame edge.
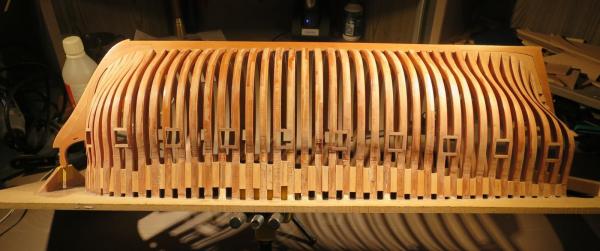

- 969 replies
-
- 27
-

-
- hahn
- oliver cromwell
- (and 1 more)
-
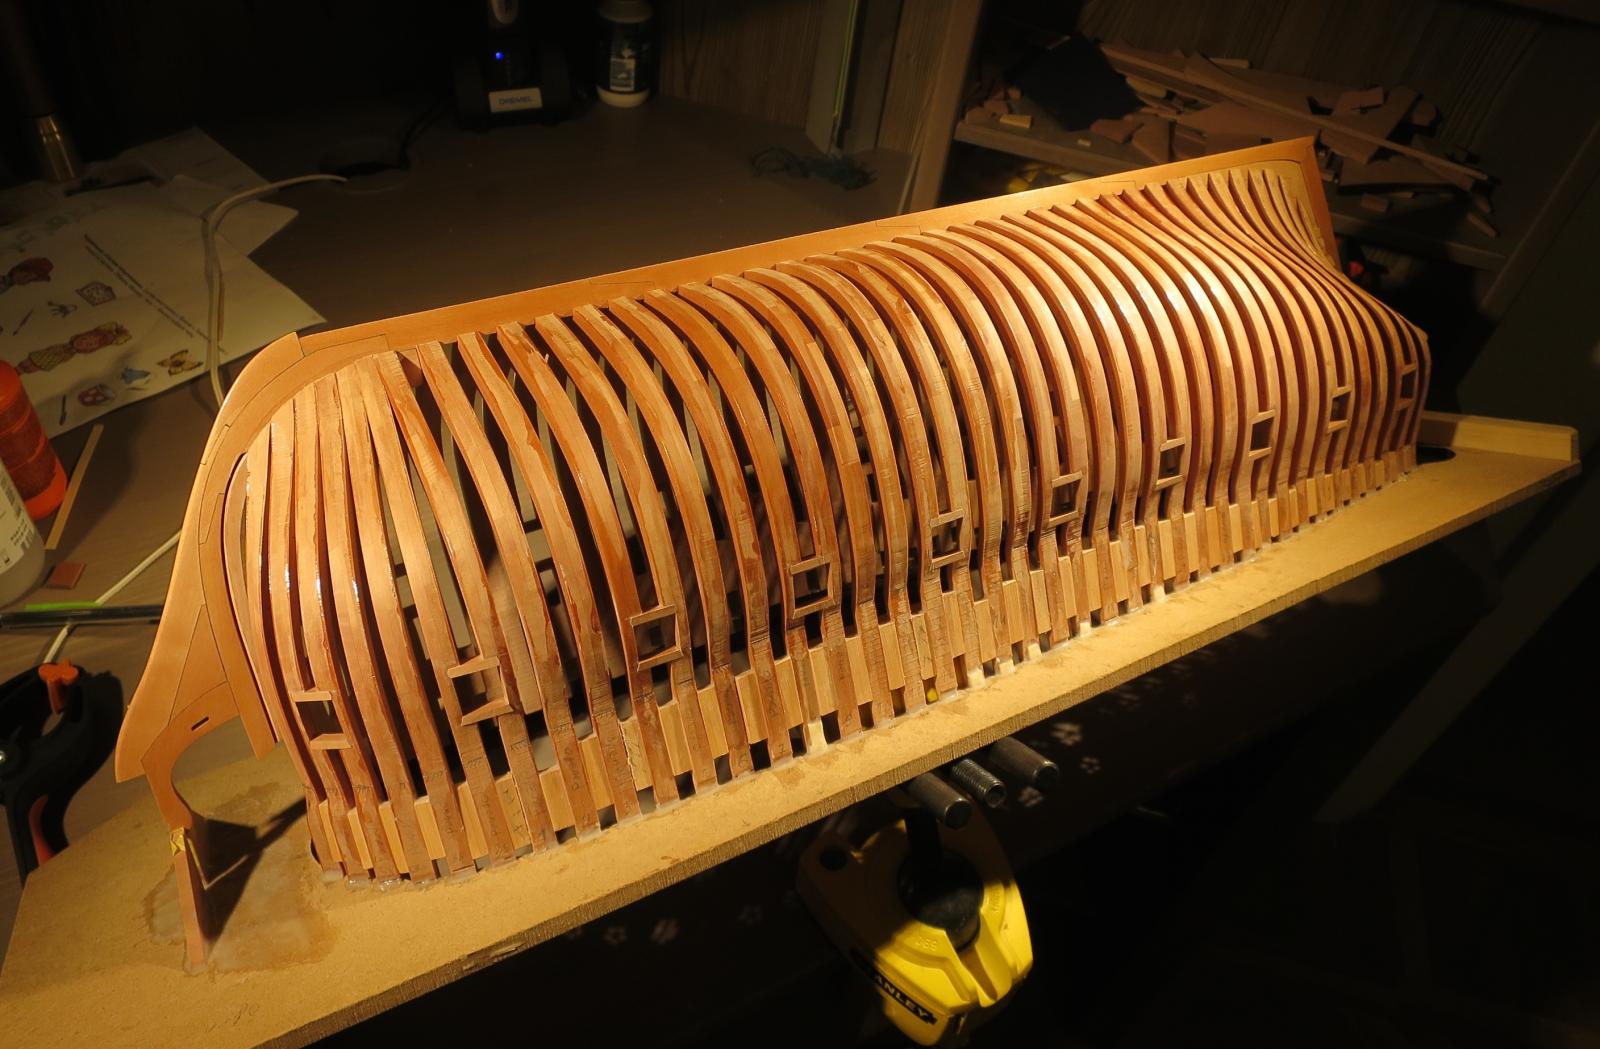
They look incredible even when unplanked!
-
Whoops! Damn it! Gone shopping for the wine saver vaccuum pump.
- 969 replies
-
- 4
-
-
- hahn
- oliver cromwell
- (and 1 more)
-
Druxey, Remco, thanks for the knowledge! Does it polymerise as a film on the surface, that could be later removed, or I seriously need to use the wine saver or a gas, otherwise the whole bottle will polymerise?
- 969 replies
-
- 3
-
-
- hahn
- oliver cromwell
- (and 1 more)
-
Remco, do you mind a question? I read in your log that you used to dilute the tung oil with white spirit, but now you suggest turpentine. What is the difference between that substances for dilution? Is it possible to store a diluted oil in some can for months, or it should be stored in the original form and diluted right before the application?
- 969 replies
-
- 1
-
-
- hahn
- oliver cromwell
- (and 1 more)
-
Gaetan, you are definitely welcome! It is not intrusive at all. Interesting approach. I miss the idea - what is the benefit of raising the grain?
- 969 replies
-
- 3
-
-
- hahn
- oliver cromwell
- (and 1 more)
-
Harbor Freight Mini Wood Planes
Mike Y replied to grsjax's topic in Modeling tools and Workshop Equipment
Update: got the honing guide from Richard Kell, it is amazing! Can handle my tiiiiiny chisels without any issues -
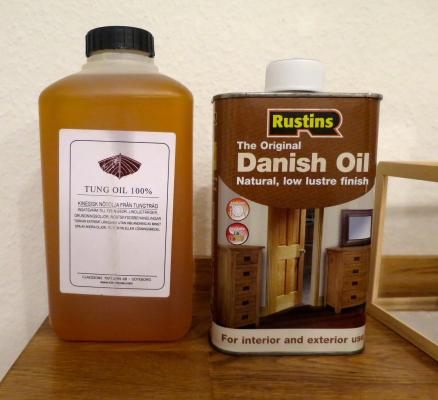
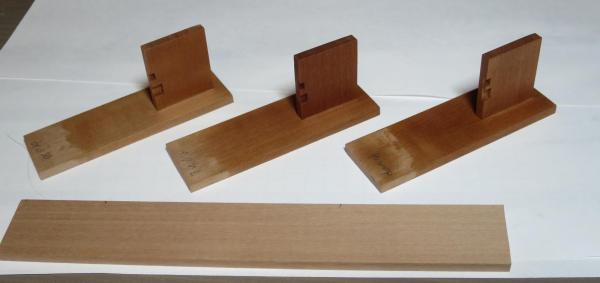
Thanks for the info, Gaetan! It is definitely a food for thought. While cutting the gunports, tested few finishes. Getting tired of wipe on poly - it is tricky to apply (sticky, needs careful buffing, otherwise the surface is not even). Disclaimer: it is hard to find Minwax here, so I use some local brand. Tried tung oil (locally produced, but well respected brand) and some danish oil: Tung oil seems like the right choice, because it has a boat on the canister, not like some typical "furniture piece" on the can of the danish oil I use pear for the structural element of the hull, not planking. So I was emulating small surface, but with some edges, milled mortises, etc. It was also important to check how it works with the residual glue (if I used too much glue and immediately wiped the excess away). One coat for all finishes, because I do not want to bother with multiple coats for every single part that goes onto the model. Results: Left - wipe on poly, center - tung oil, right - danish oil. Bottom - untreated pear, no finish. Seems like the tung oil is a clear winner. Hard to see on the photo, though.. It is also less glossy than any other finish. It makes pear much darker though, so maybe I need to try to dilute it. Danish oil seems ok, but failed to penetrate the wood properly in the mortises and where the residual glue was present. Also tested how easy it is to scrape away the oil and glue something, just in case I will need to install some part after the finish is already applied. Tung oil and WOP are the winners, because they are thick and do not penetrate the wood deep enough (WOP do not penetrate at all, and Tung oil is easy enough to scrape away). Danish oil is penetrating quite deep, but also possible to scrape away.
- 969 replies
-
- 11
-
-
- hahn
- oliver cromwell
- (and 1 more)
-
Do not forget The White Towel to make a photos of the model for the log! Heard it brings luck, +3% to the accuracy, -20% chance of measurement mistakes P.S: watching with envy, it is such a joy to have a build buddies building the same ship in parallel!
-
Remco, you are also a master of inspiration - for example, that build log was a tipping point for me to start a fully framed model Please keep up the great build! Somebody need to set the bar for the accuracy and quality
- 1,215 replies
-
- 8
-
-
- sloop
- kingfisher
- (and 1 more)
-
Hmm, have you thought about organising a "tours" inside the ship using that webcamera? You know, kids nowadays stream the live video of them playing games, it would be interesting to see a live stream of your camera walking around the ship! ok, just joking. It is really impressive to see one of that rare ship models, not ship model models. Now a lot of things make sense, after looking on your photos!
- 728 replies
-
- 4
-
-
- le fleuron
- 64 gun
- (and 1 more)
-
Yep, tried it. But my hunidifier is too small for that livingroom (it is also an openly spaced room connected with other rooms, I hate doors except for bedroom). So I need to invest into some sort of apartment-wide humidifying system. Not on the shopping list so far.. Also, luckily there is no low humidity except winter - the area where Stockholm is located is between the sea and a large lake, so when this water is in the wet form - it is very consistent medium humidity. With a rare and short spikes up when it is really raining. So I guess it is better to just keep it in mind and prepare the "shrinkage" points, so the hull can shrink evenly without any twists or deformations.
- 969 replies
-
- 4
-
-
- hahn
- oliver cromwell
- (and 1 more)
-
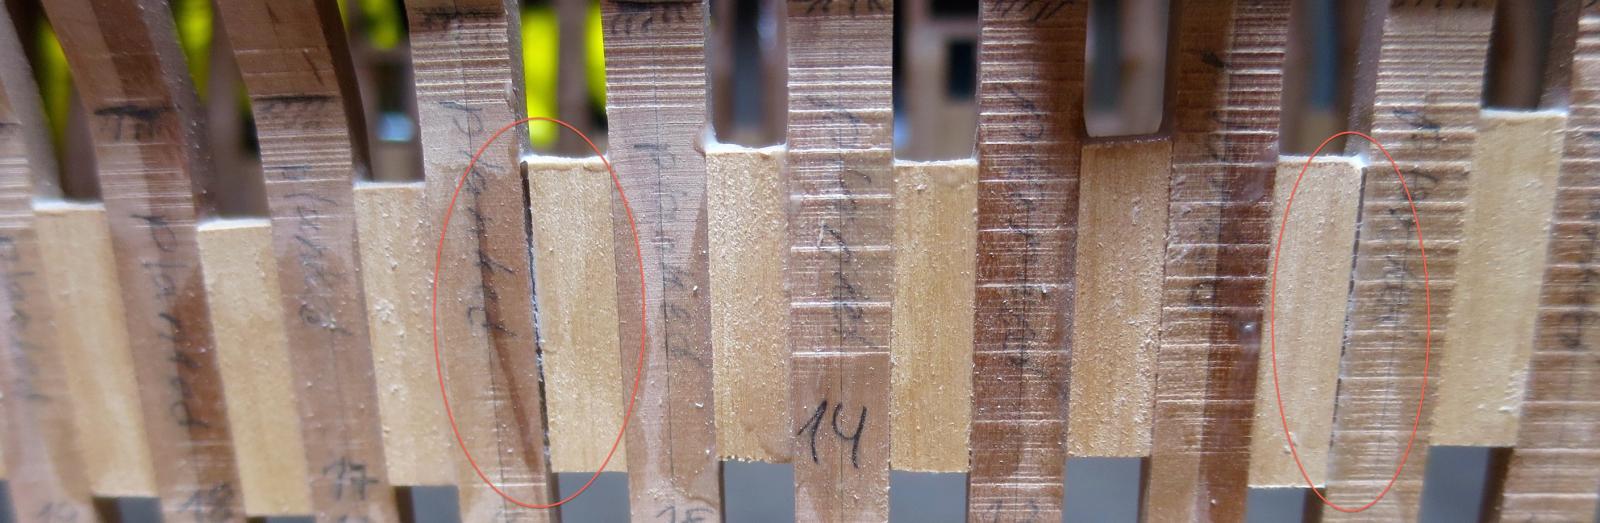
Greg, nice story I guess if you want to make a full set of fillers - some of them should be glued only from the one side. Or buy the humidity controlling equipment? I heard they are widely used by the people who are into wooden musical instruments - guitars, violins, etc. They are a solid objects made out of thin wood, I can only imagine how it will be stressed when humidity changes dramatically. After careful inspection, I found around 8 cracks per side. Made a symmetrical cracks on the other side too, to reduce the twist and relief the stress in the hull. Next time will do it from the very beginning. A single-side glued spacer every 3 frames or so. The whole point of that spacers was to lock frames (avoid twisting and keep a clear 90deg angle) and to have a more solid hull when fairing. Lesson learned! Hope the frames will go back to normal when the winter ends. Reeeally hope so
- 969 replies
-
- 5
-
-
- hahn
- oliver cromwell
- (and 1 more)
-
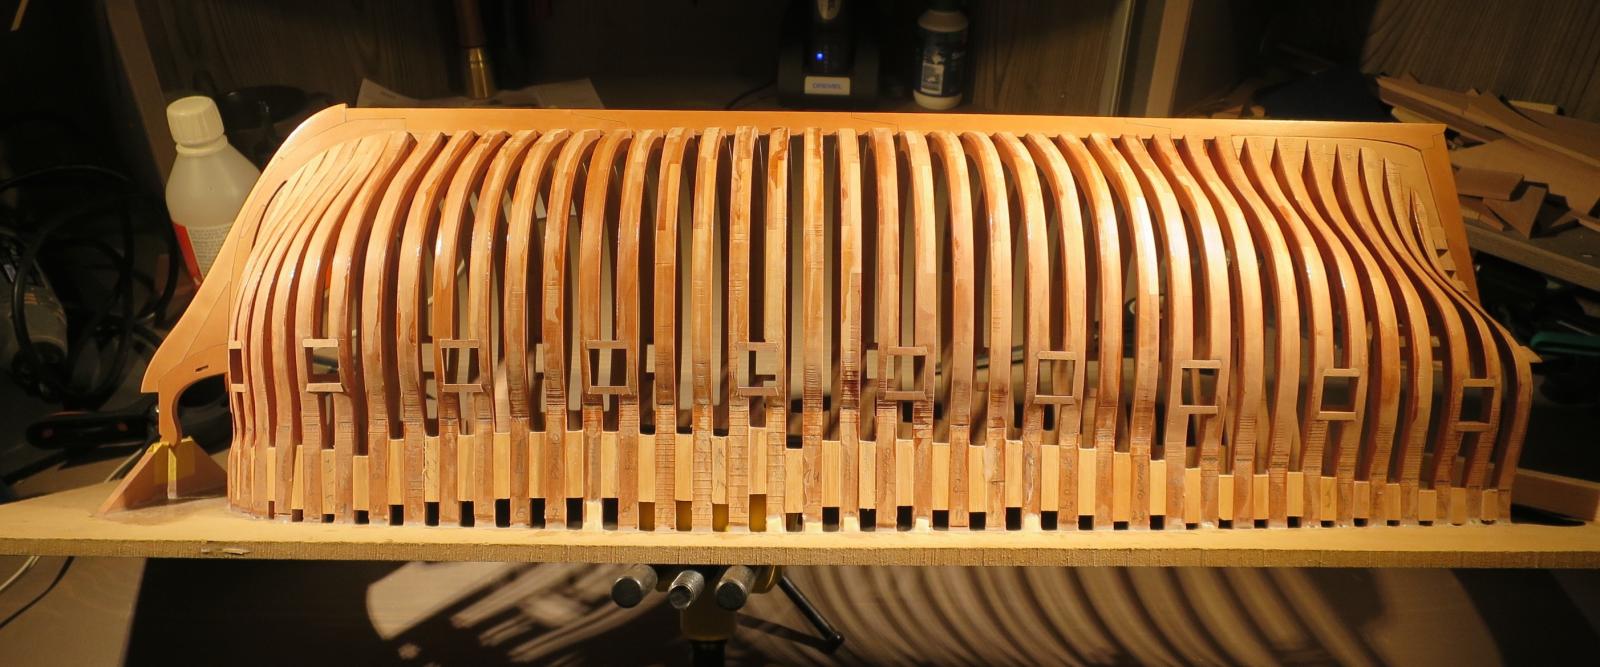
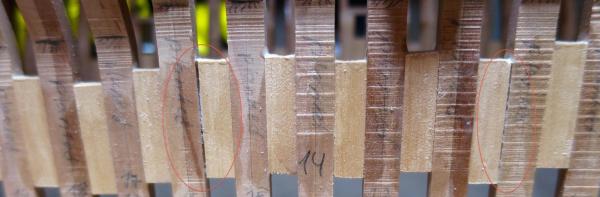
Winter finally arrived to Stockholm => humidity dropped => some ugly gaps opened between the frames.. (the spacers are glued on the "dead" part of the frames, that would be cut off when the hull would be removed from the jig. The cutoff marks are visible. This glue mess definitely does not belong to the hull!) These spacers were tightly glued previously. As a result, some frames are twisted, leading to uneven spacing Hope it will return back to norm when humidity will reach the normal levels. I was worried about it, and was thinking of leaving every 4th spacer unglued on one side, to allow for a predictable shrinkage. But discarded this idea as an overthinking. No, it was actually a smart idea. Even with 60cm hull, humidity changes cause problems. On a positive note - it means I have the entire winter to finish the gunports, fair the hull and prepare the keelson. I can't install the deck clamps before the end of the winter, otherwise I will end up fixing that twisted frames permanently. No rush!
- 969 replies
-
- 9
-
-
- hahn
- oliver cromwell
- (and 1 more)
-
That was a year well spent! The photos are a pleasure to an eye... Such a perfect alignment of the deck elements
- 1,215 replies
-
- 8
-
-
- sloop
- kingfisher
- (and 1 more)
-
Harbor Freight Mini Wood Planes
Mike Y replied to grsjax's topic in Modeling tools and Workshop Equipment
It is not a required tool, you can achieve the same with files, sandpaper, knife, disk sander and a dozen of other methods. But a good plane will leave a very crisp edge, flat and smooth surface. And no sawdust or noise, working with plane is quiet, clean and satisfactory. Task examples: tapering, reducing thickness, creating hexagonal/octagonal stock from square stock, carefully resizing the objects, etc. -
Your "under construction" "mess" on the deck is very charming!
- 728 replies
-
- 3
-
-
- le fleuron
- 64 gun
- (and 1 more)
-
Hm, so the buckets were exposed to rain, and some rope was stored inside. Shouldn't it just end up with rotten ropes inside the wet bucket?
-
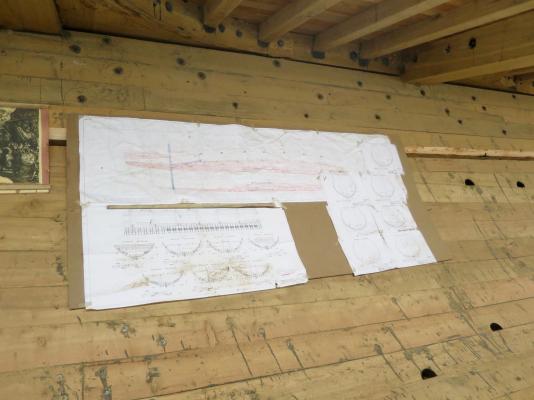
This is a very professional building board, for sure!
-
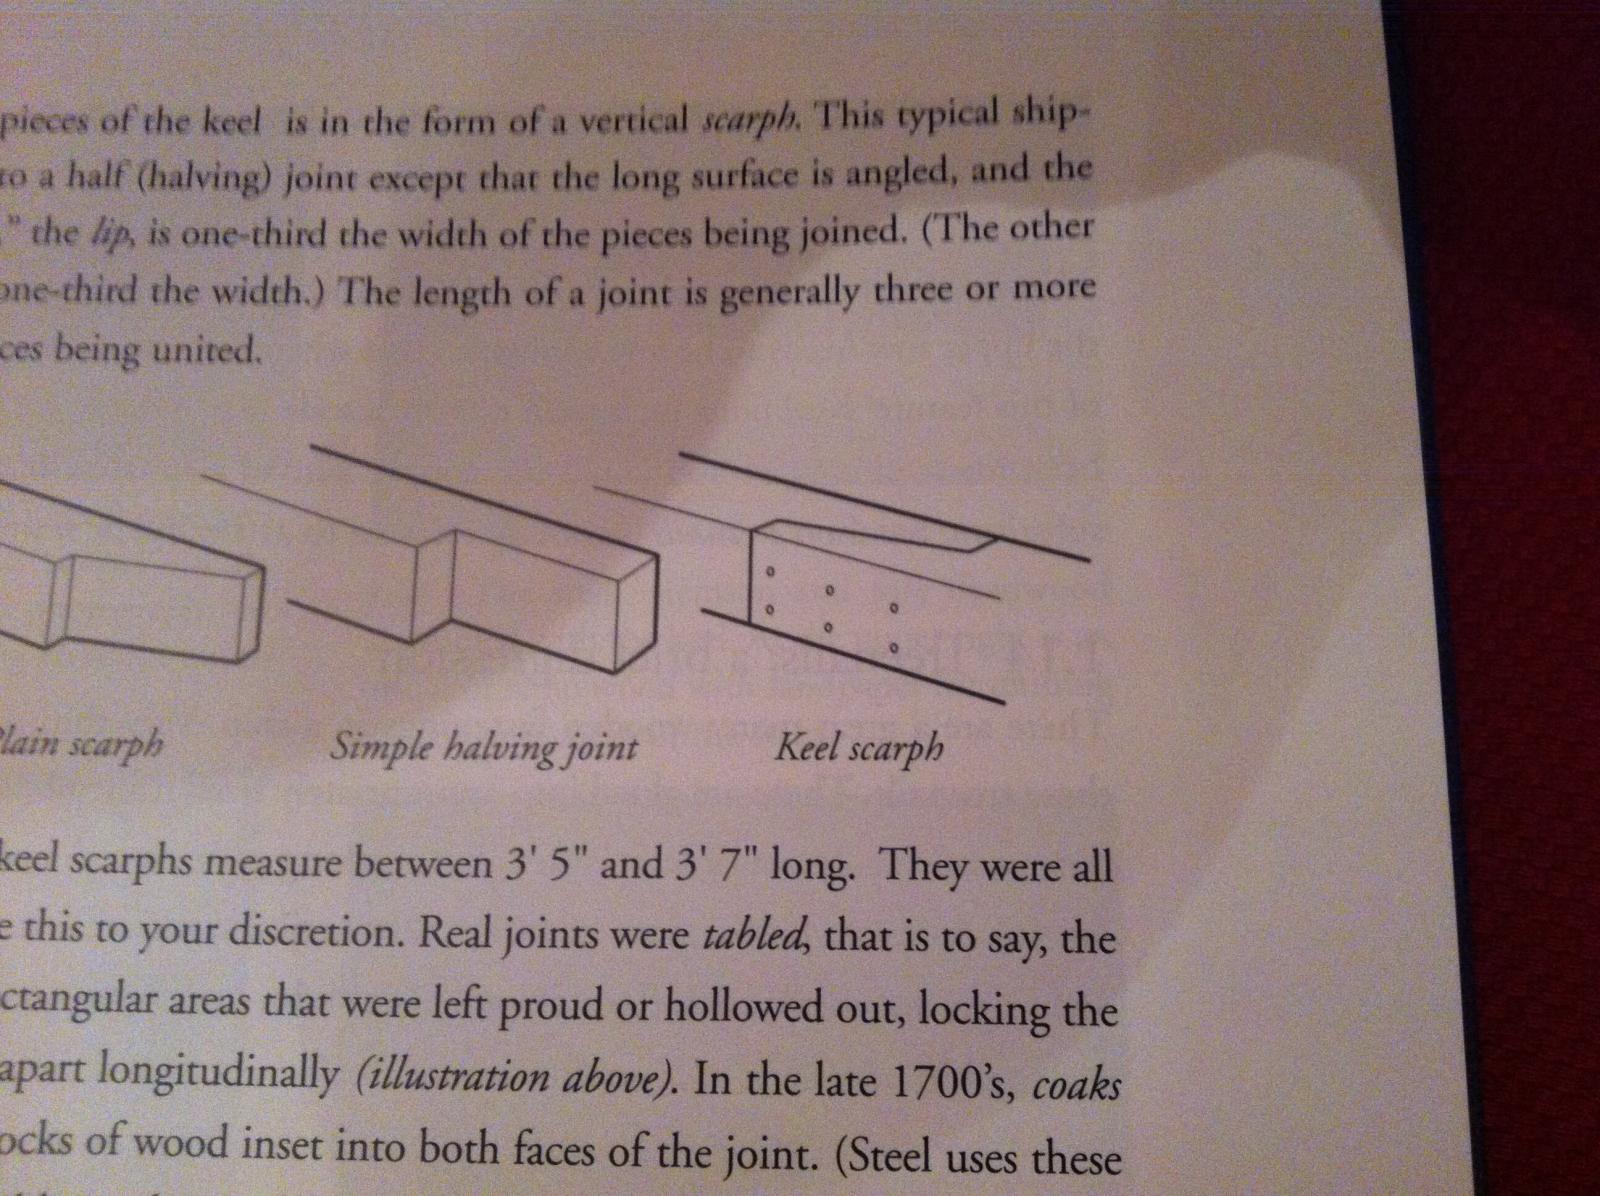
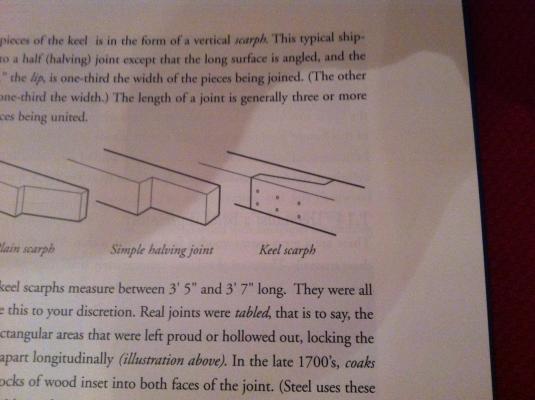
So about the keel joint - I am still puzzled. TFFM says it is vertical: While the replica builders put it horizontally, like I did (unintentionally). Some joints are even locked (is it the right term?): So which way is correct? Or both are fine? Or I misinterpreted TFFM, and the keel there is drawn "on the side"? I do not have the book with me now, so can't check for sure..

- 969 replies
-
- 6
-
-
- hahn
- oliver cromwell
- (and 1 more)
-
Apparently, they even have a live video camera! You can watch the build process live, during the working hours in UTC+3 timezone https://www.ivideon.com/tv/camera/200-27795e76f5256934b23c11ba66143f06/393216/?lang=ru Also created a topic according to Mark's advice, it is here: http://modelshipworld.com/index.php/topic/12395-replica-poltava-1712-russian-ship-of-the-line/
- 969 replies
-
- 3
-
-
- hahn
- oliver cromwell
- (and 1 more)
-
Mark, right, will create a topic there. It is probably interesting not only for the readers of that log.. One of the youtubes mentions the construction of the transom: Apparently, the ship's builders were very annoyed by the complexity of it. And said something like "promise this is the last time you draft such fashionpieces" Seems like you can't go with our "make an oversized detail and fair it to shape" approach when you build a real ship..

- 969 replies
-
- 8
-
-
- hahn
- oliver cromwell
- (and 1 more)
-
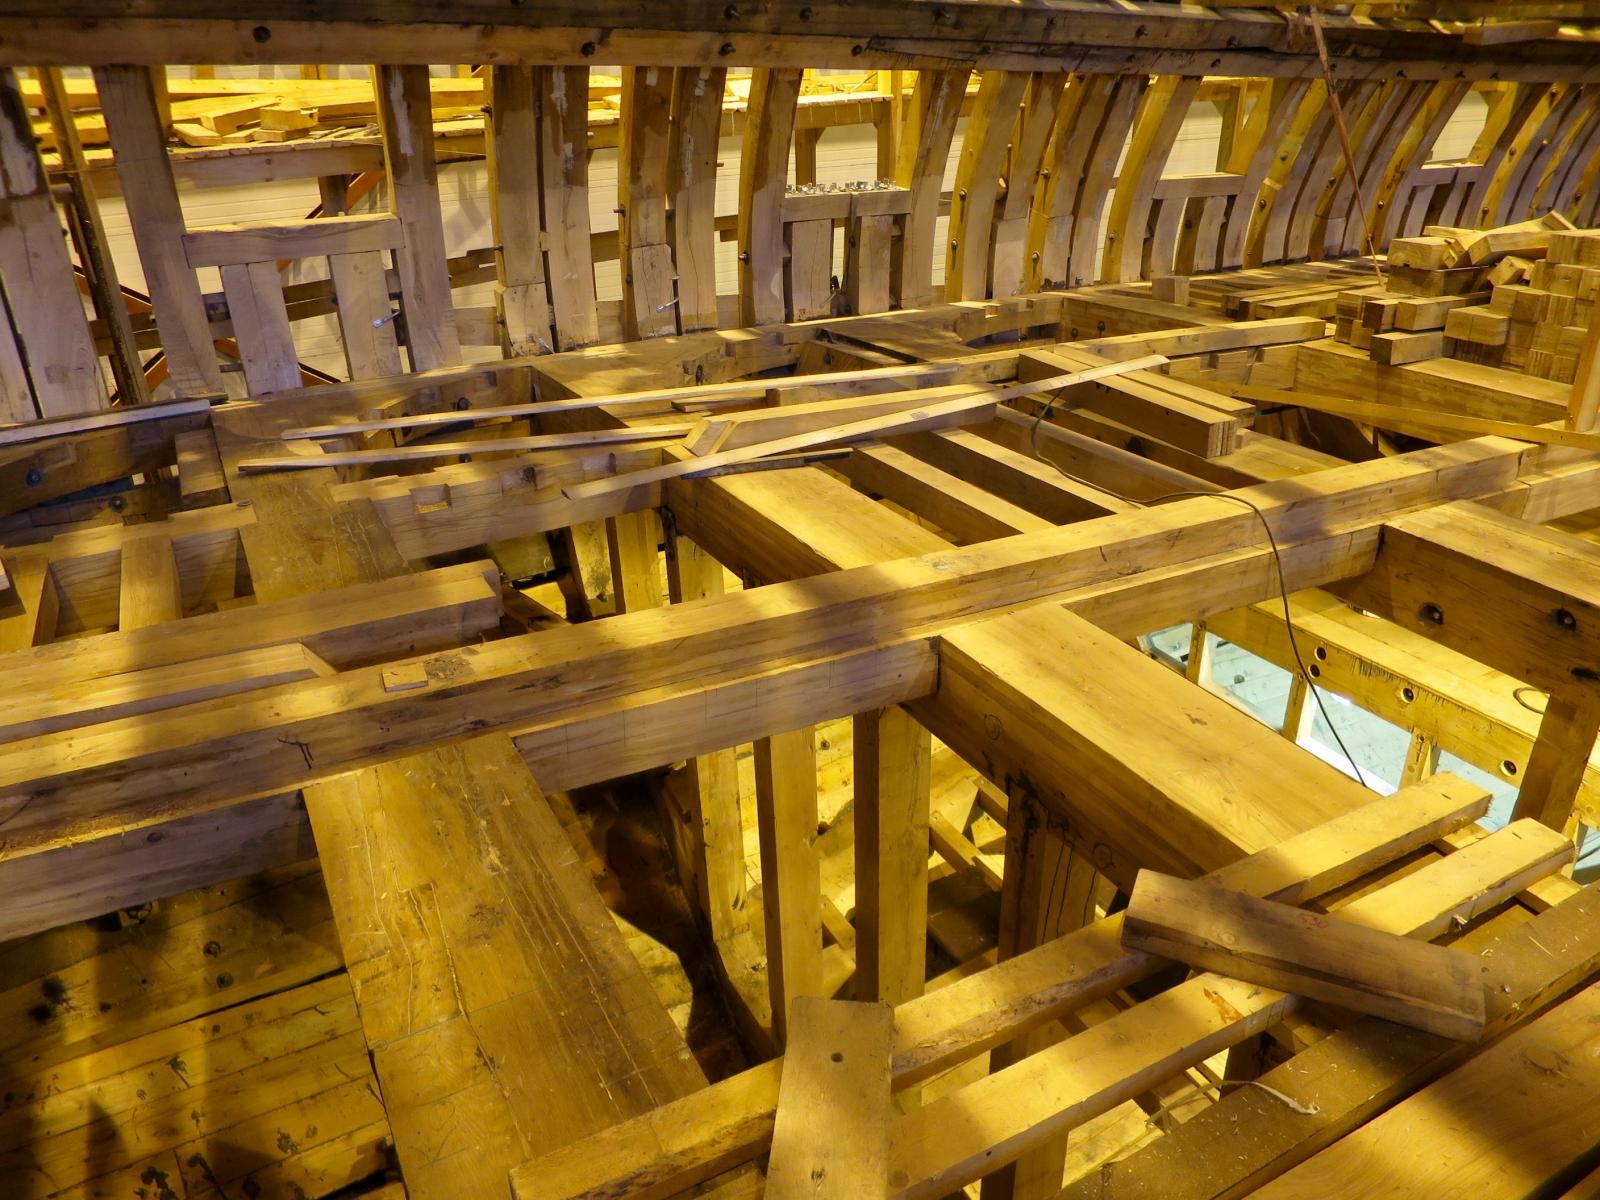
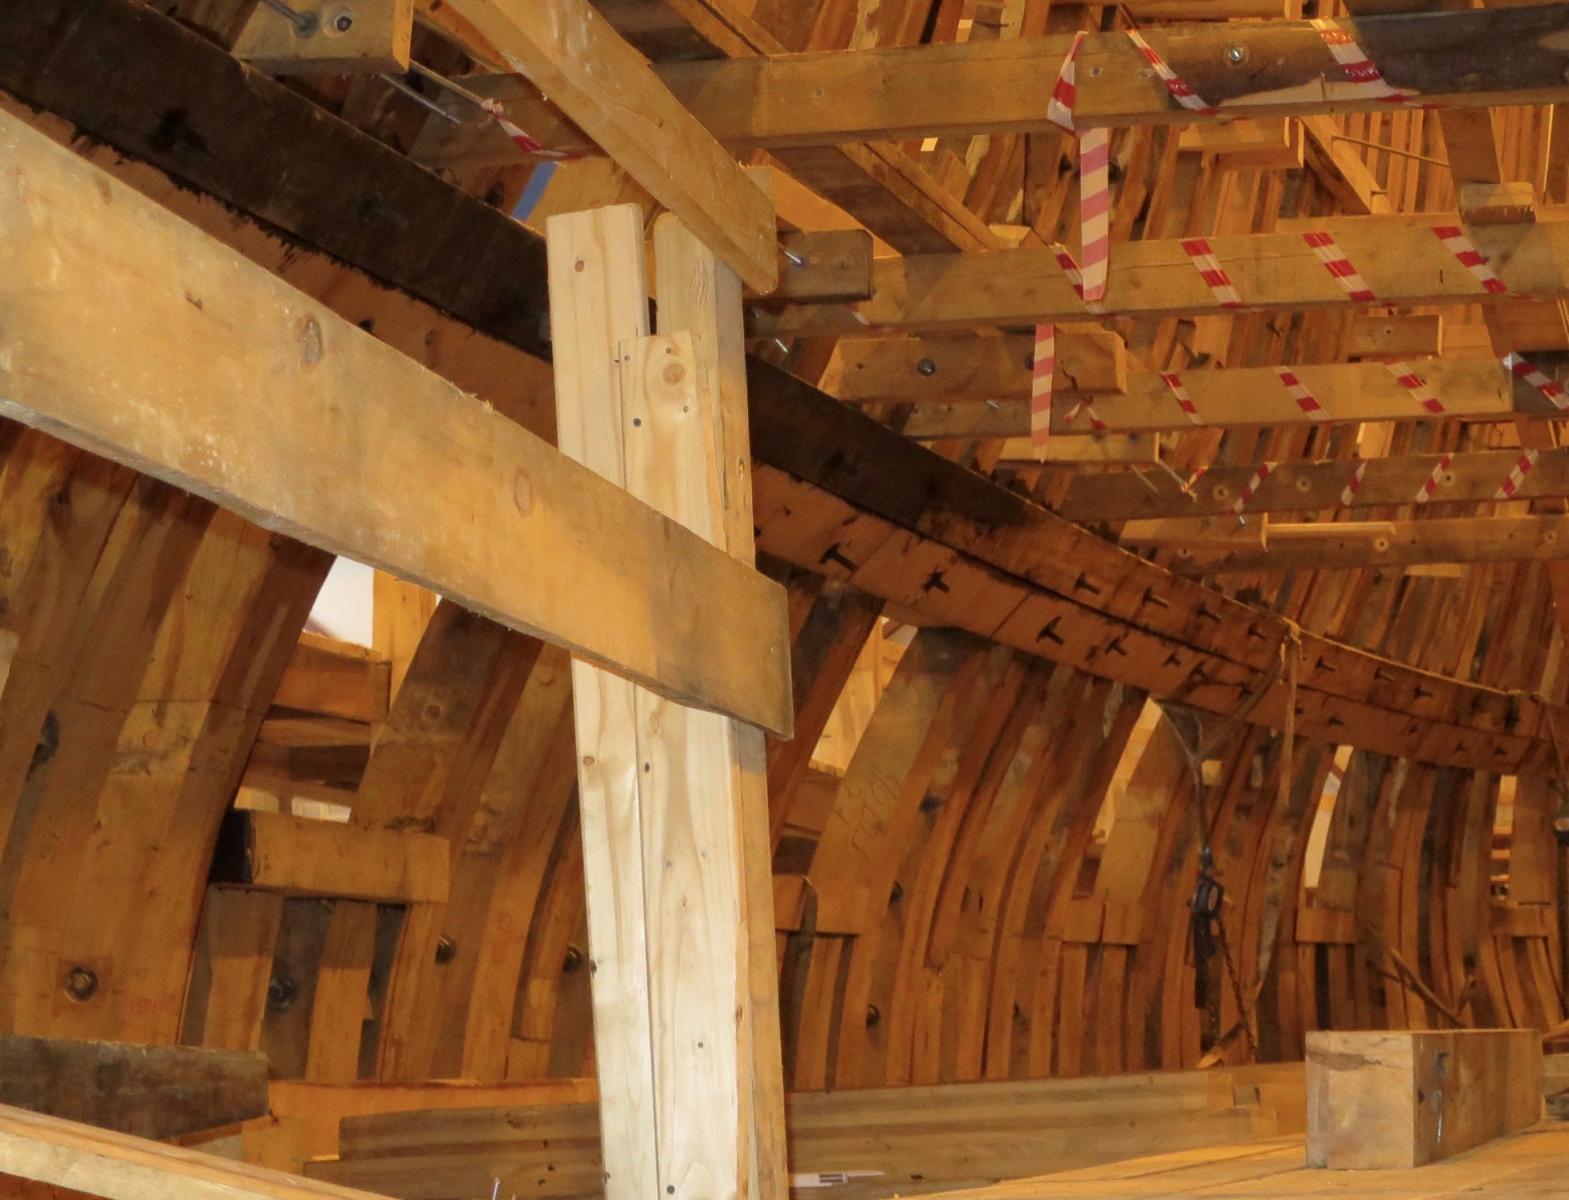
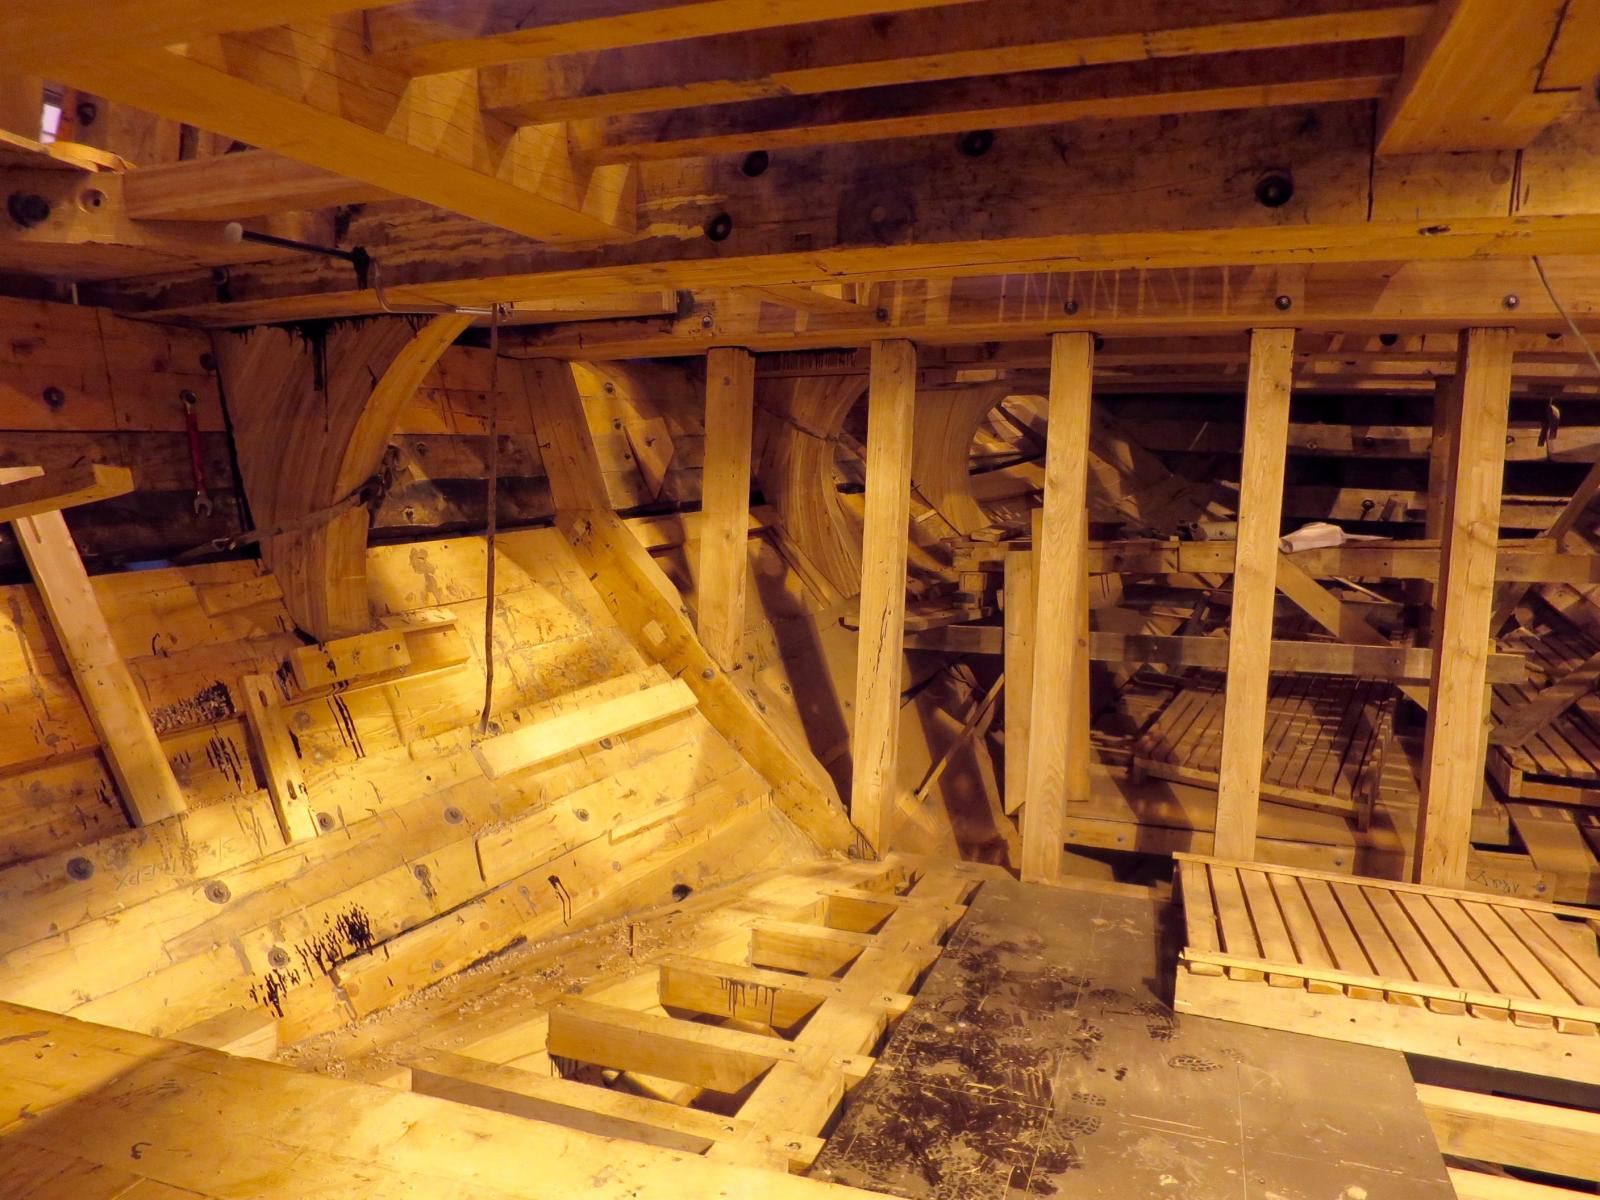
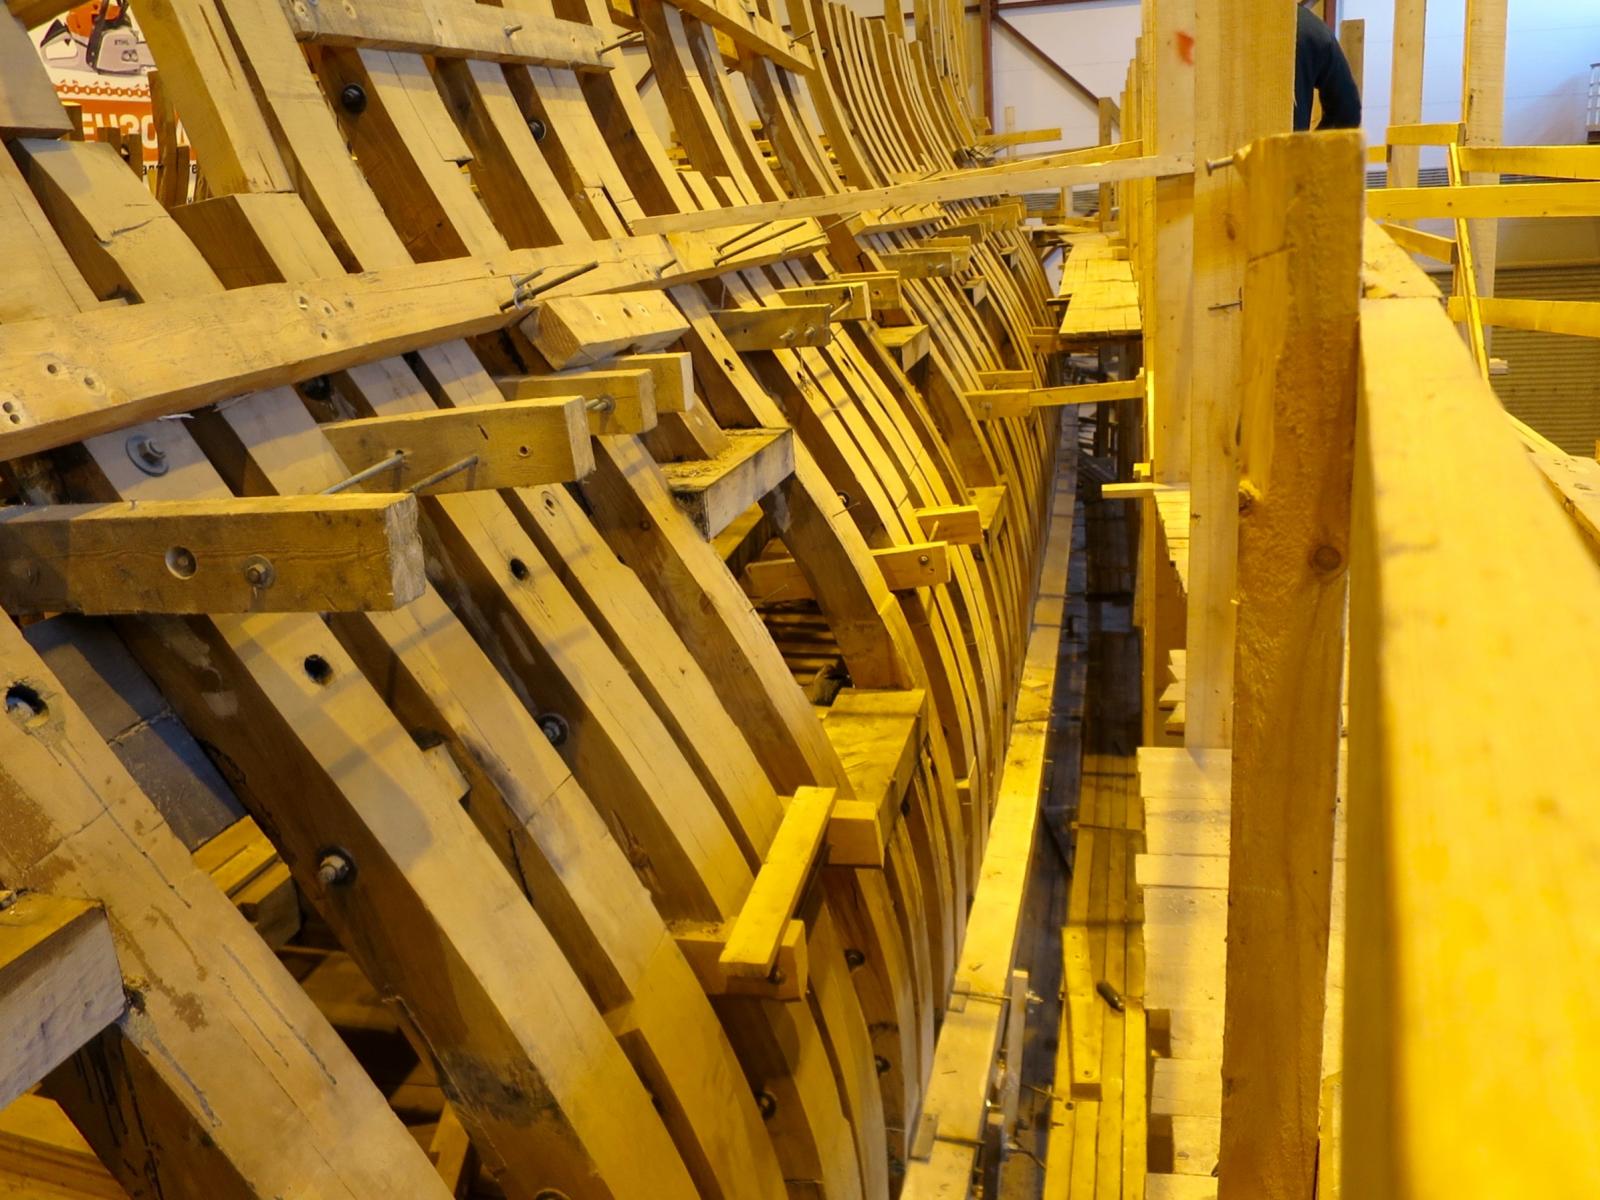
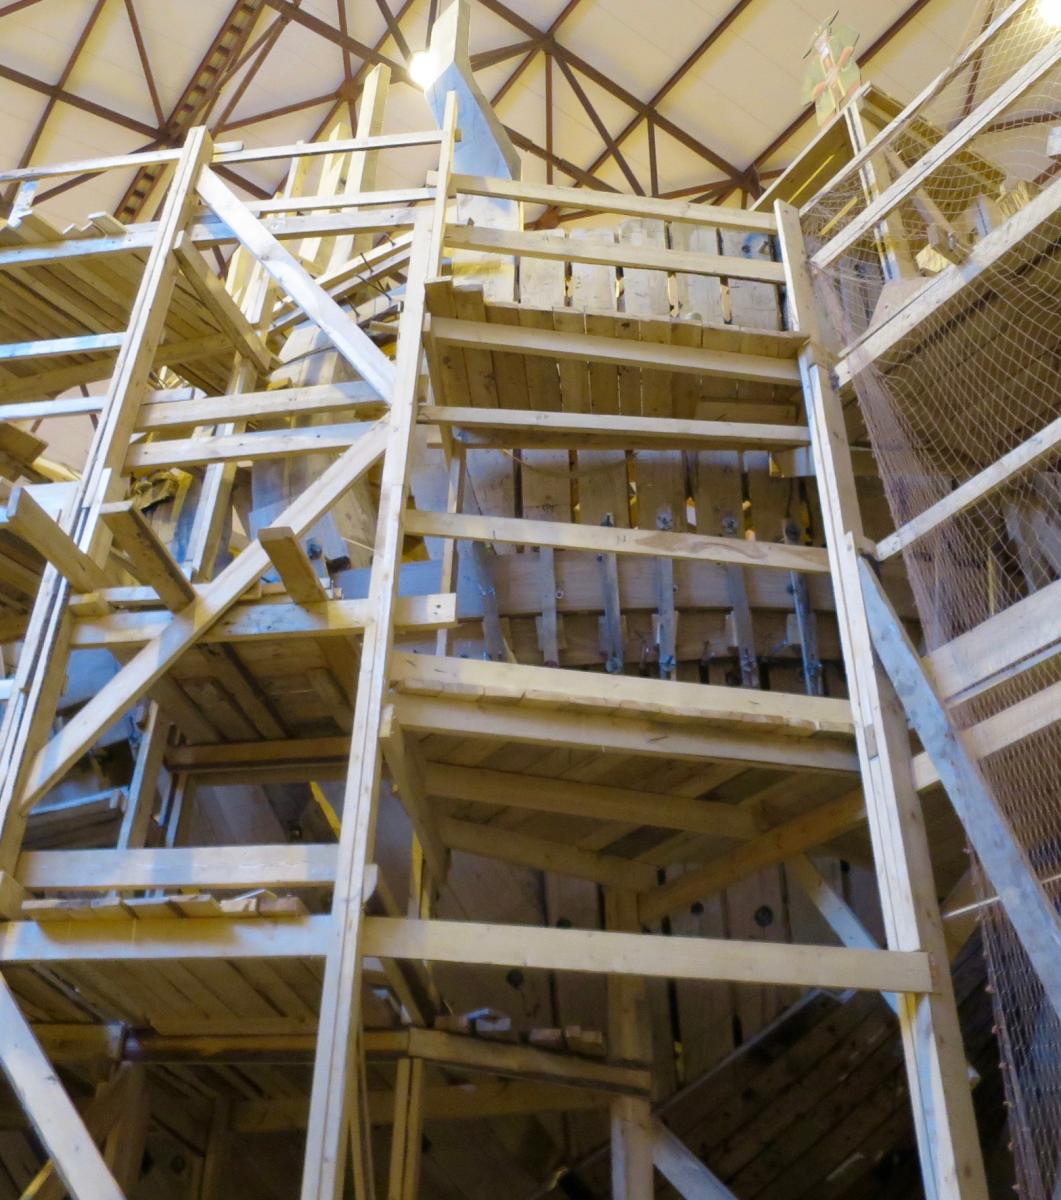
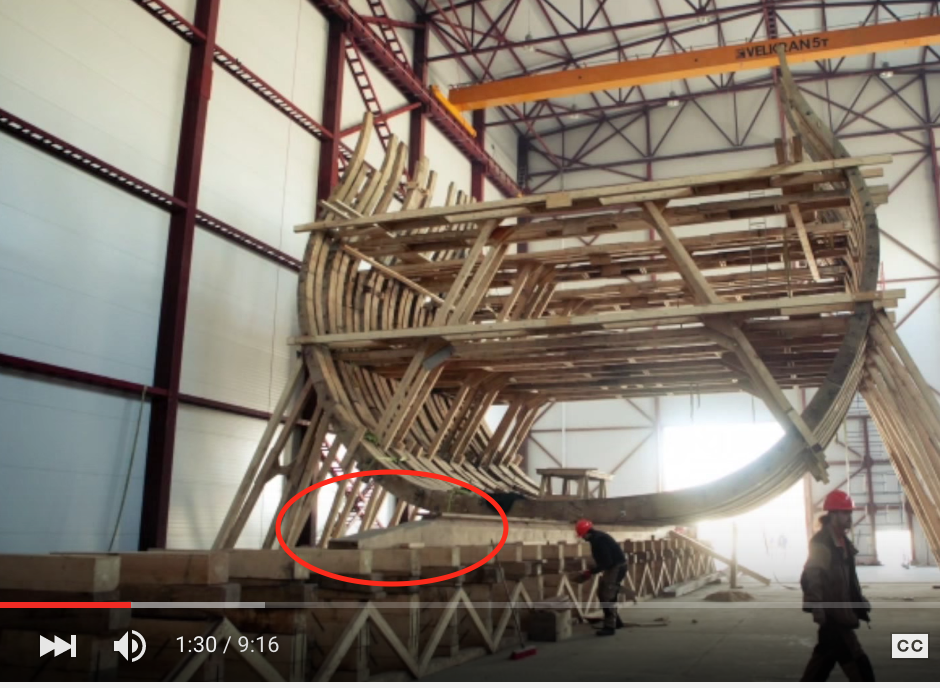
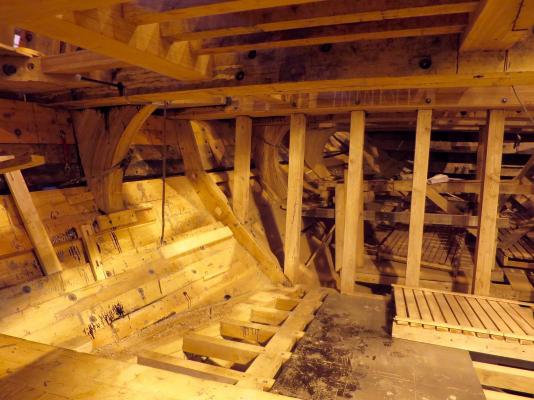
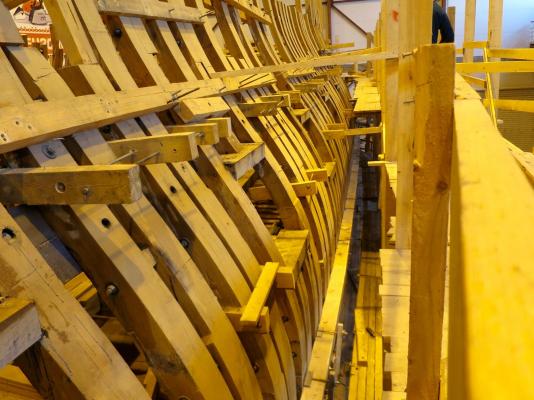
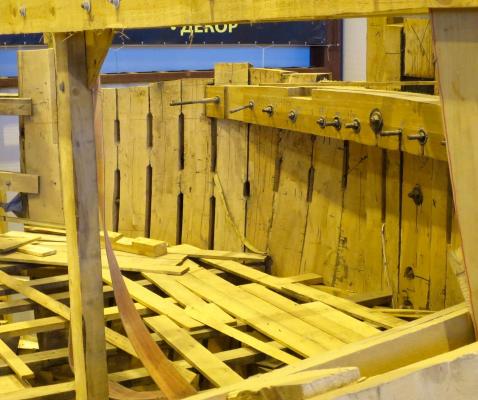
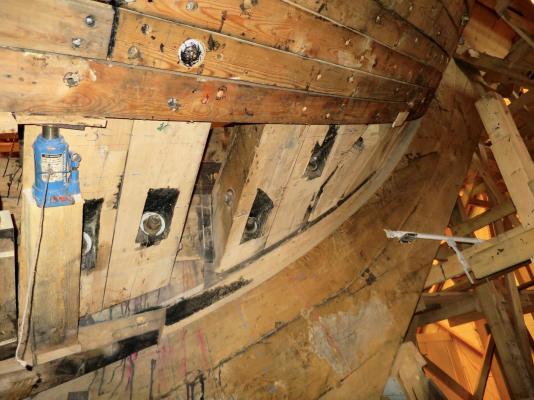
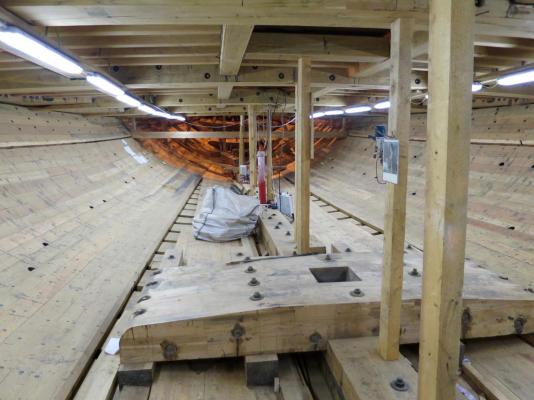
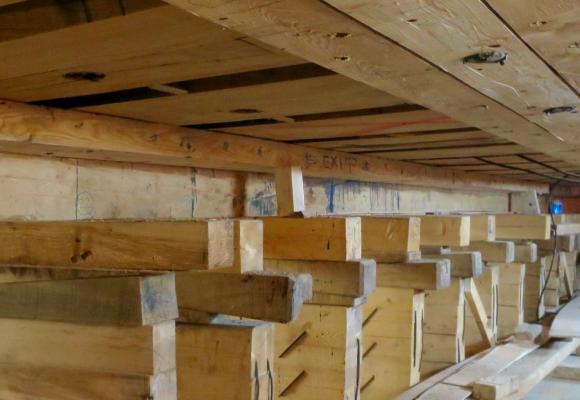
Other photos are without comments, just a bulk of what I managed to record while being in the hull. I was only allowed into the hull for 5min, so was shooting photos all around, just in case Also, if you are interested - do not miss the youtubes by the builders of the replica. They are in russian, but nevermind the narrative.


- 969 replies
-
- 18
-
-
- hahn
- oliver cromwell
- (and 1 more)
-
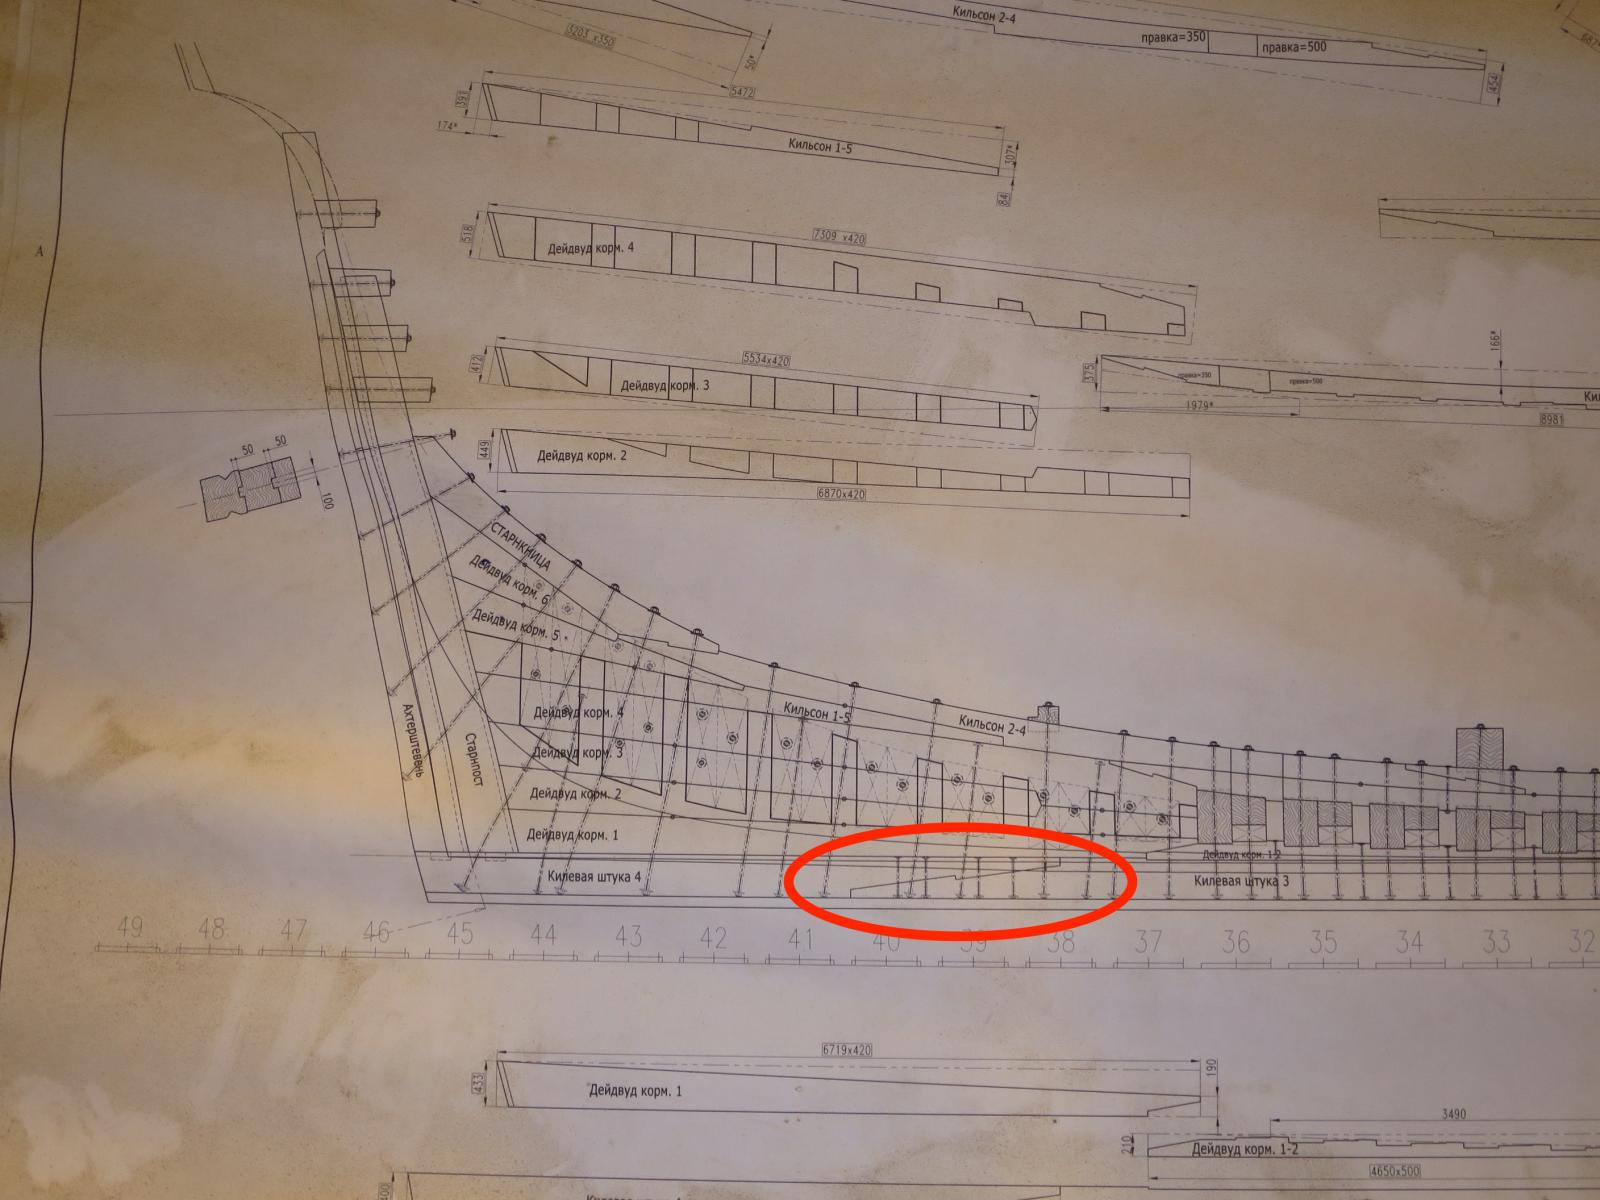
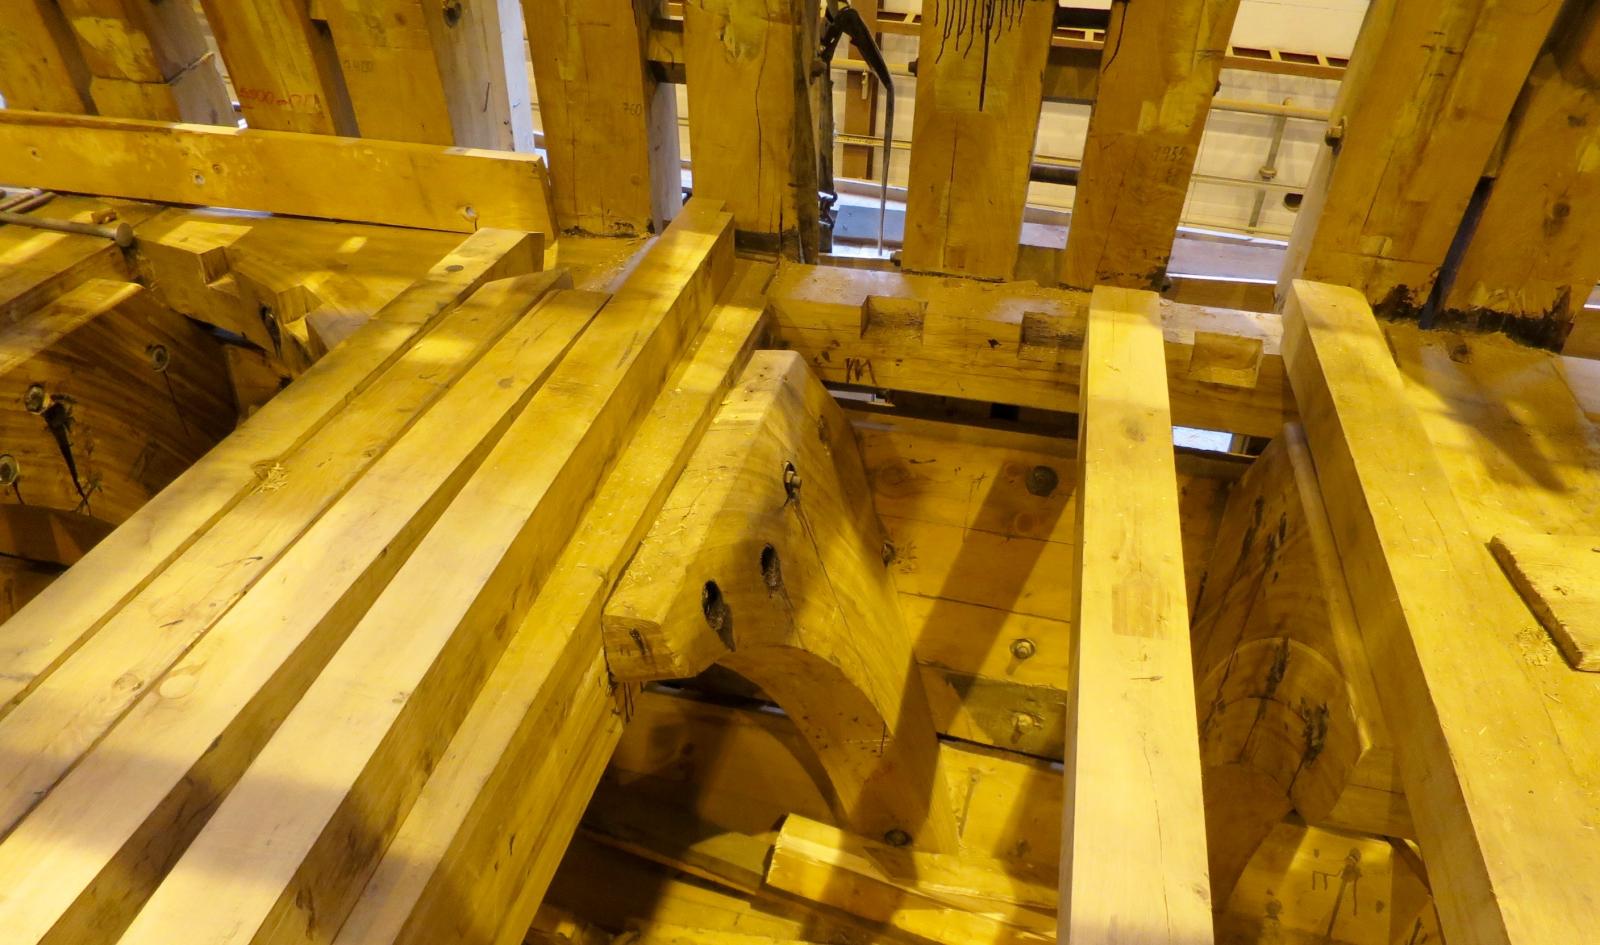
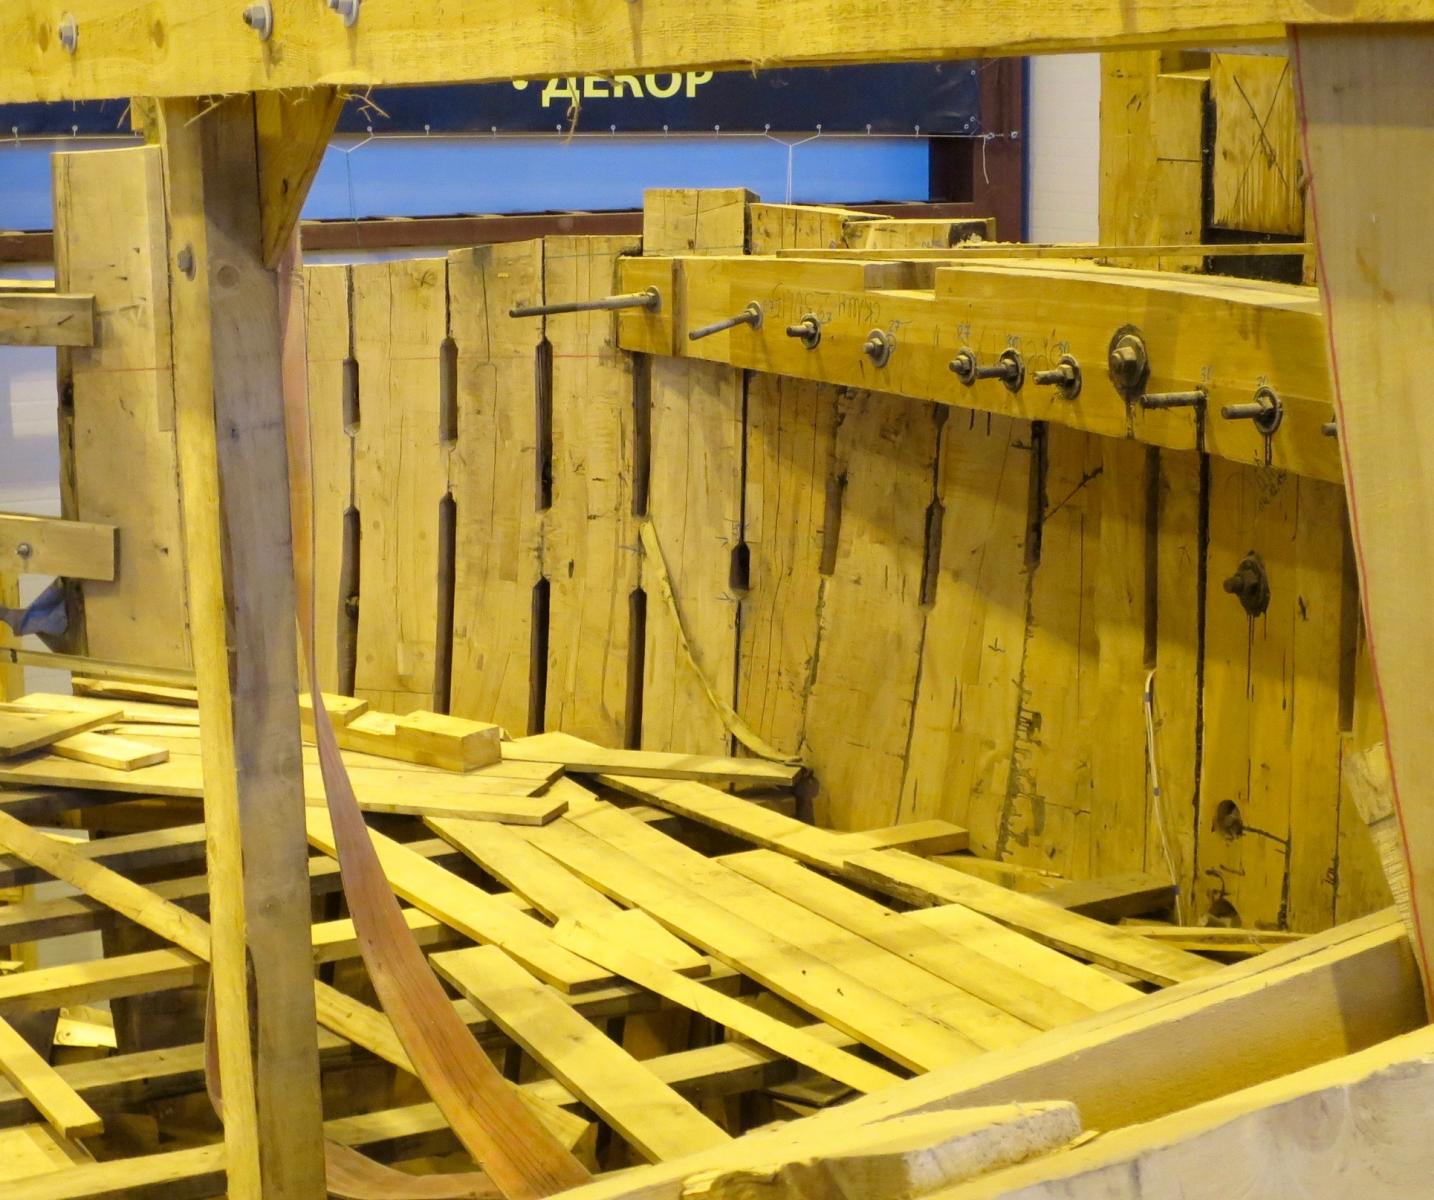
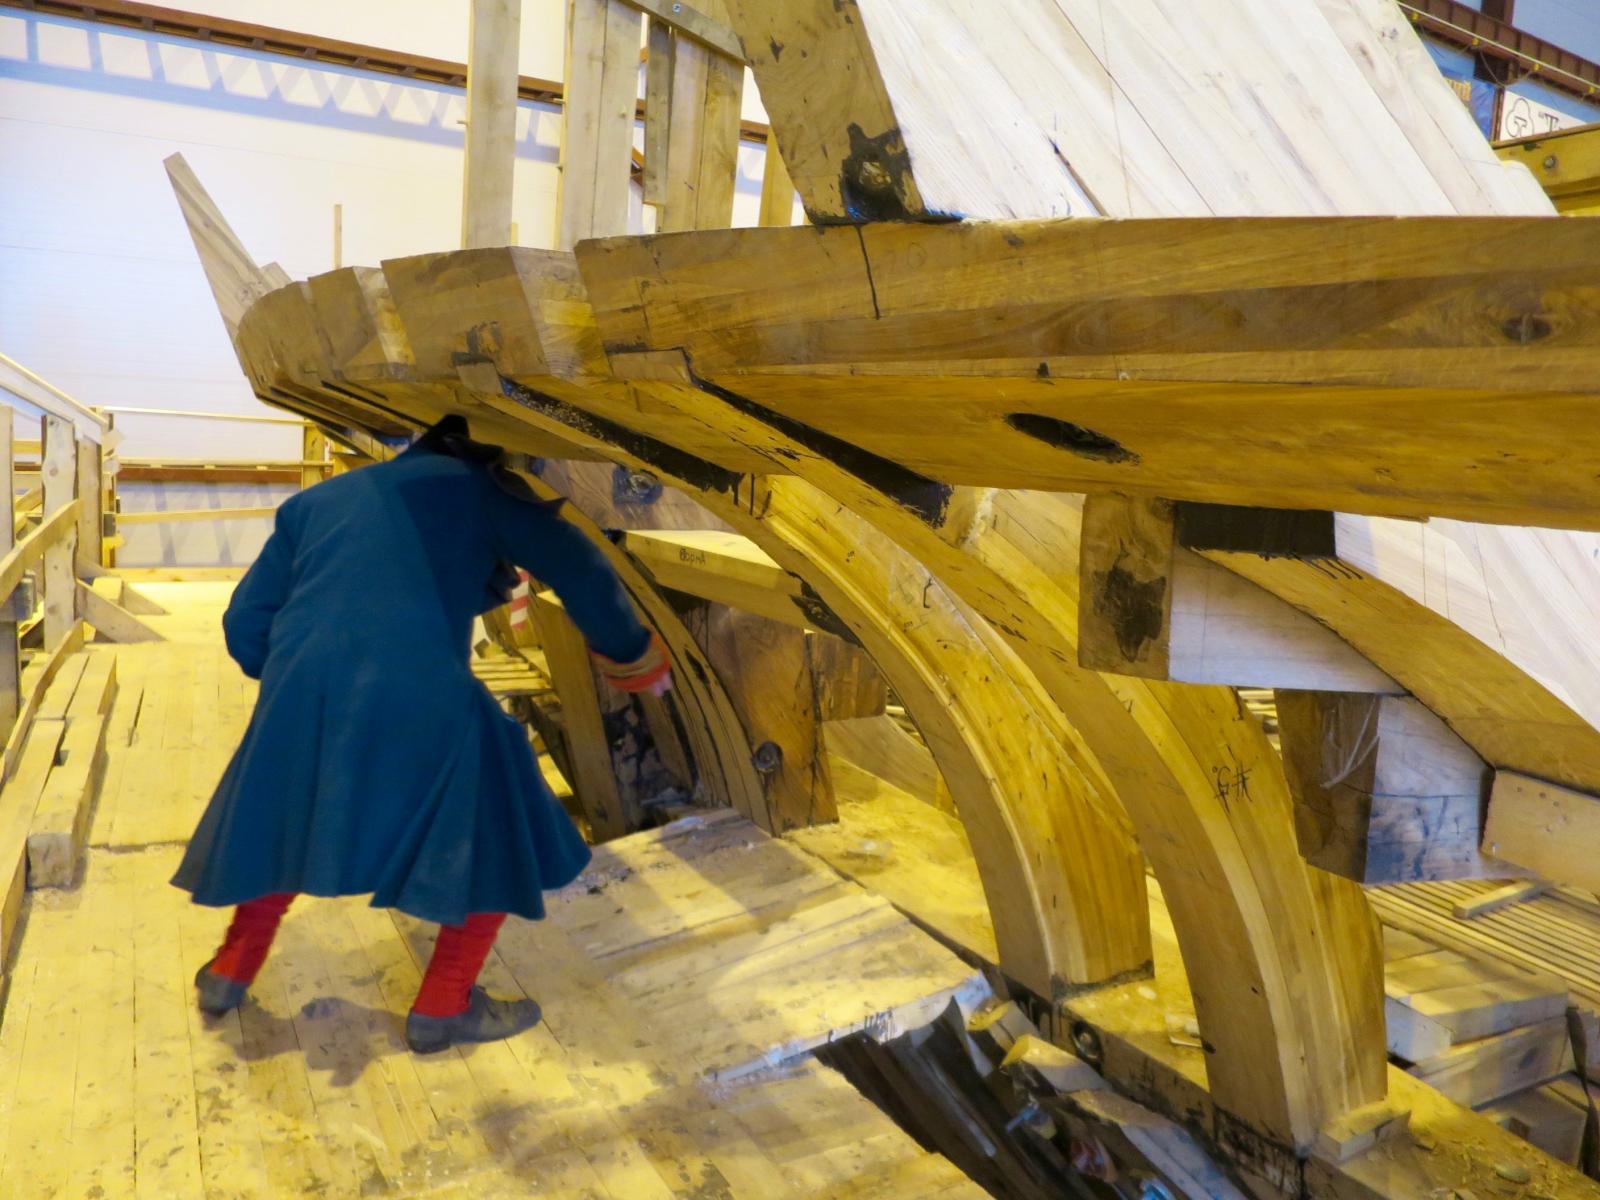
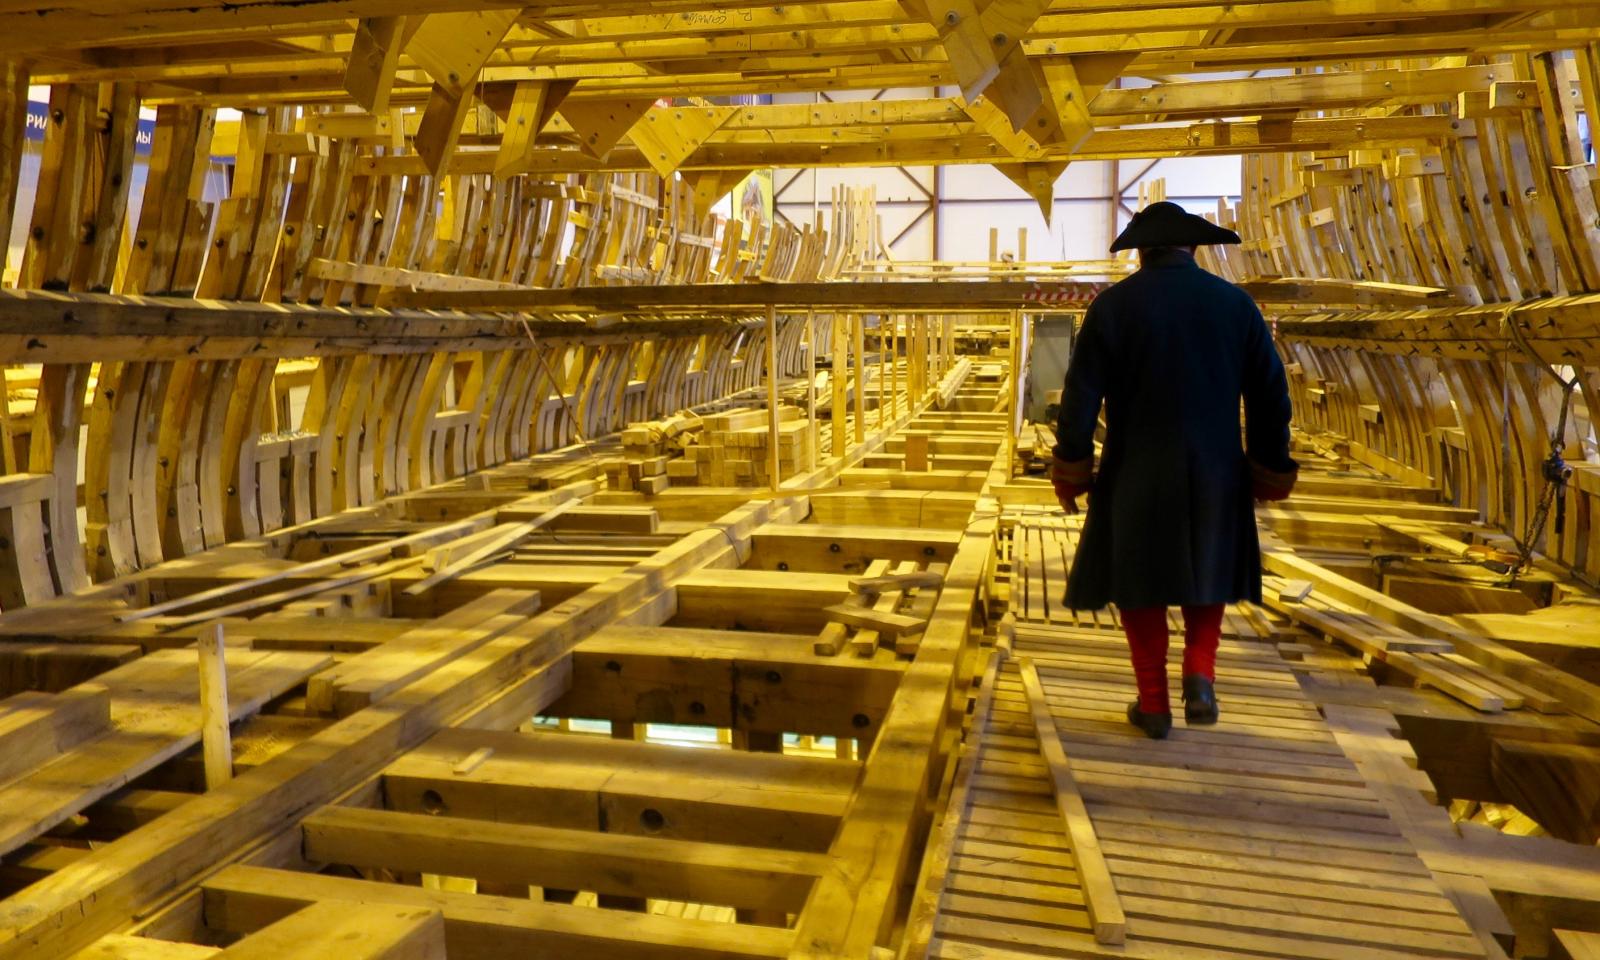
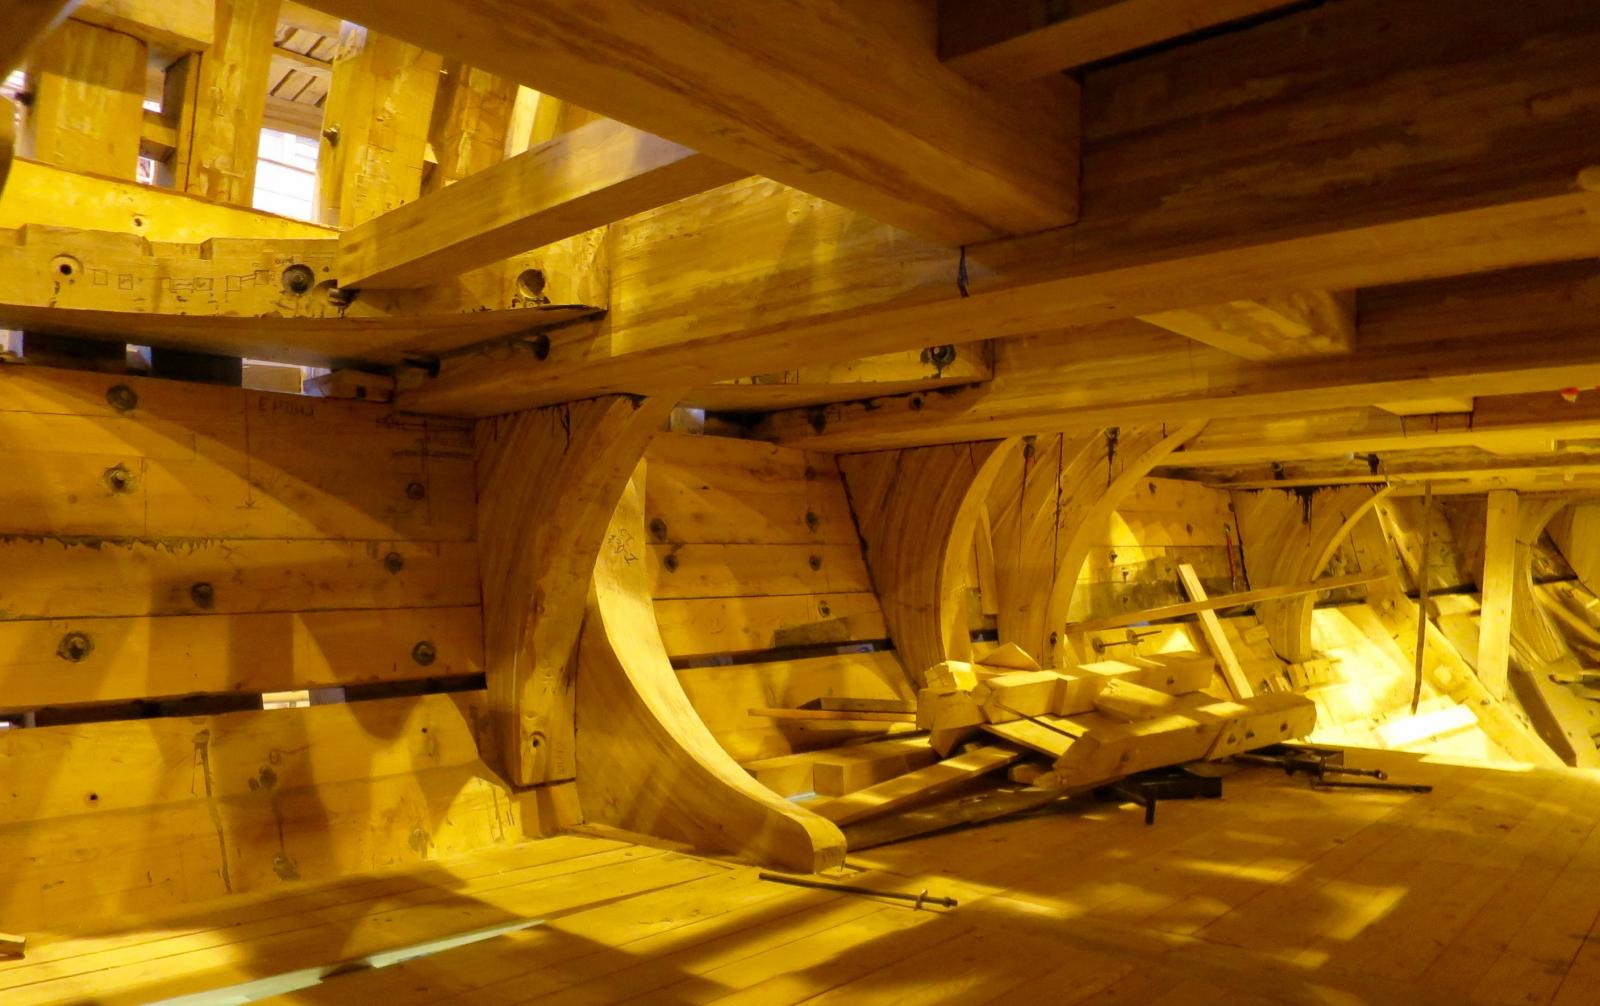
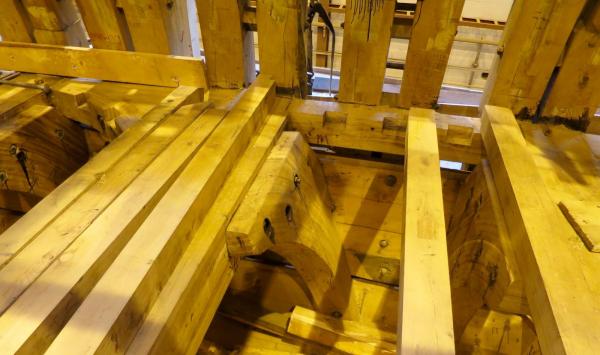
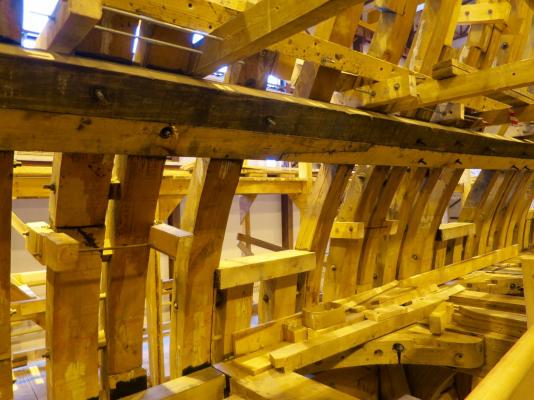
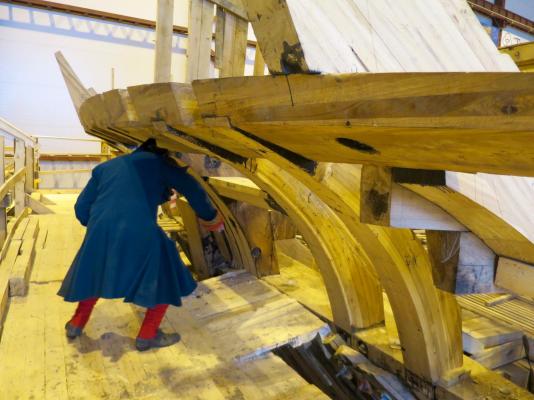
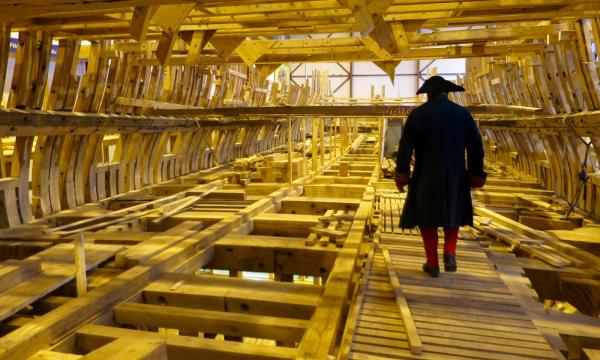
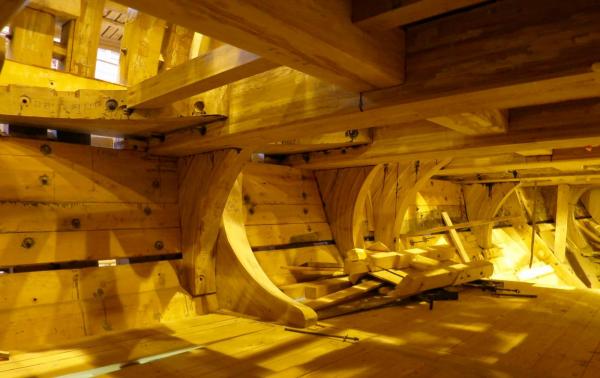
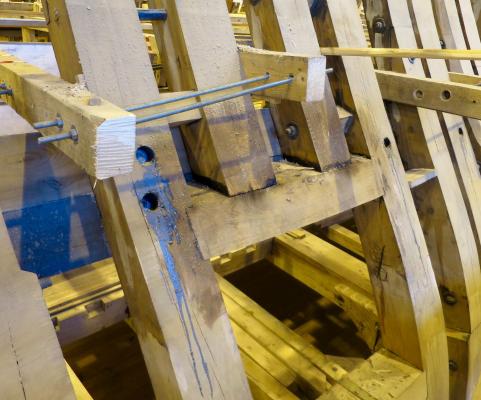
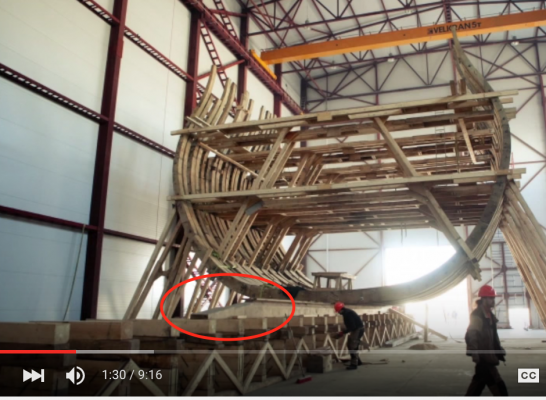
Here comes the most interesting part of the tour! Only for shipmodelling geeks, regular visitors are not allowed inside the hull yet - you can fall from the deck beams. Follow the guide! He is dressed according to the Ship's period, and is a real enthusiast. Knees are made out of laminated oak planks, because it is too hard to find properly bent oak trees: Mast post and internal planking. Note the ventilation holes, interesting detail: Gunport sills are made in a simplified manner, without any angled mortises. Cheaters! Also, they made the keel joints in the same way as I did, same projection. Not side-to-side, but top-to-bottom. I noticed it only on the photos, not when I was onsite, so do not have a really good photo. But it is visible here: And a screenshot from the early construction video, where it is also visible: So TFFM is wrong? Or both ways of making that joints are valid? Anyway, now I am not worried that my keel is wrong. Hey, 1:1 model is assembled in the same manner!
- 969 replies
-
- 12
-
-
- hahn
- oliver cromwell
- (and 1 more)