Mike Y
-
Posts
1,557 -
Joined
-
Last visited
Content Type
Profiles
Forums
Gallery
Events
Everything posted by Mike Y
-
 Thanke for the info! I am not sure this counts as coats, was just evenly distributing oil to dry spots, and occasionally adding more oil it if some spots that were too dry. Just fed the wood with oil. So it was like one big coat..
 -
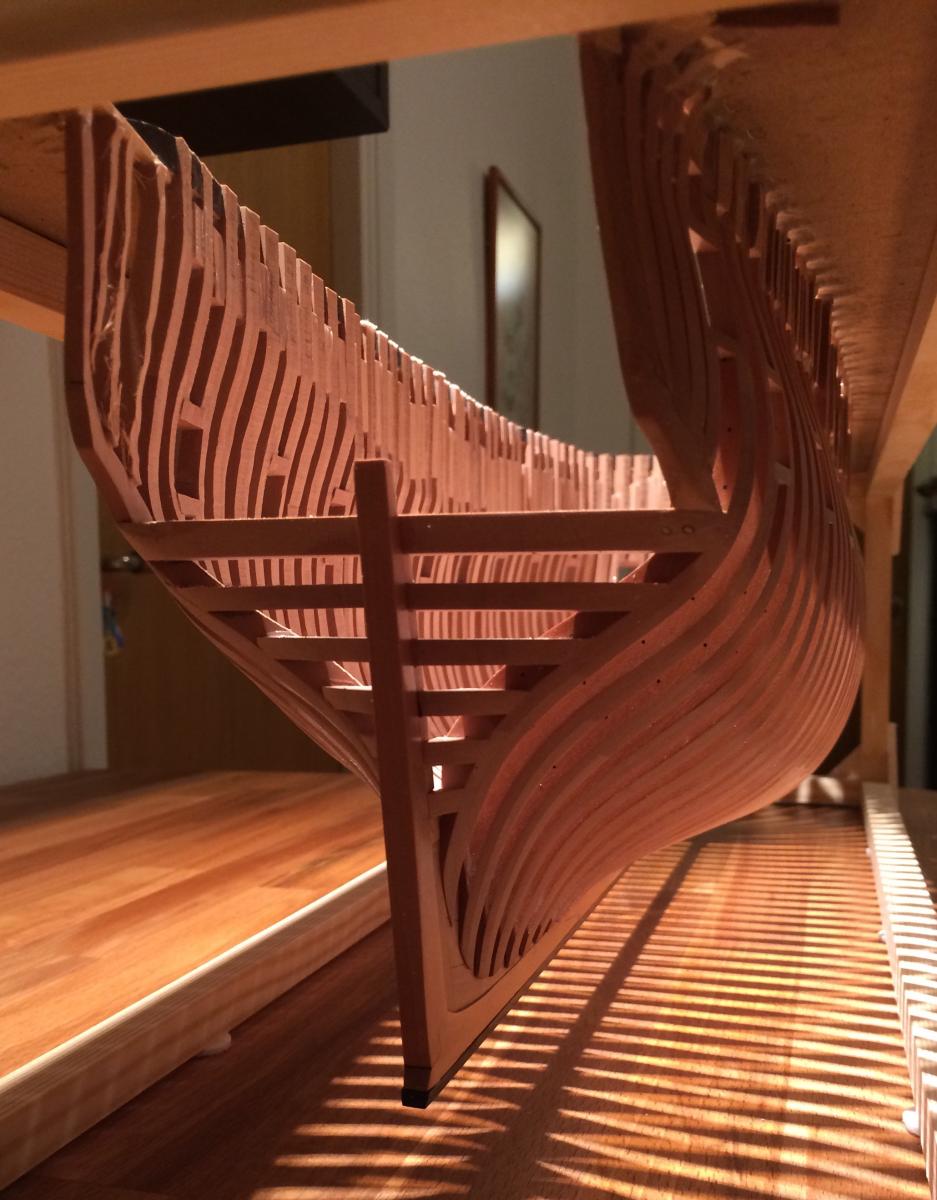
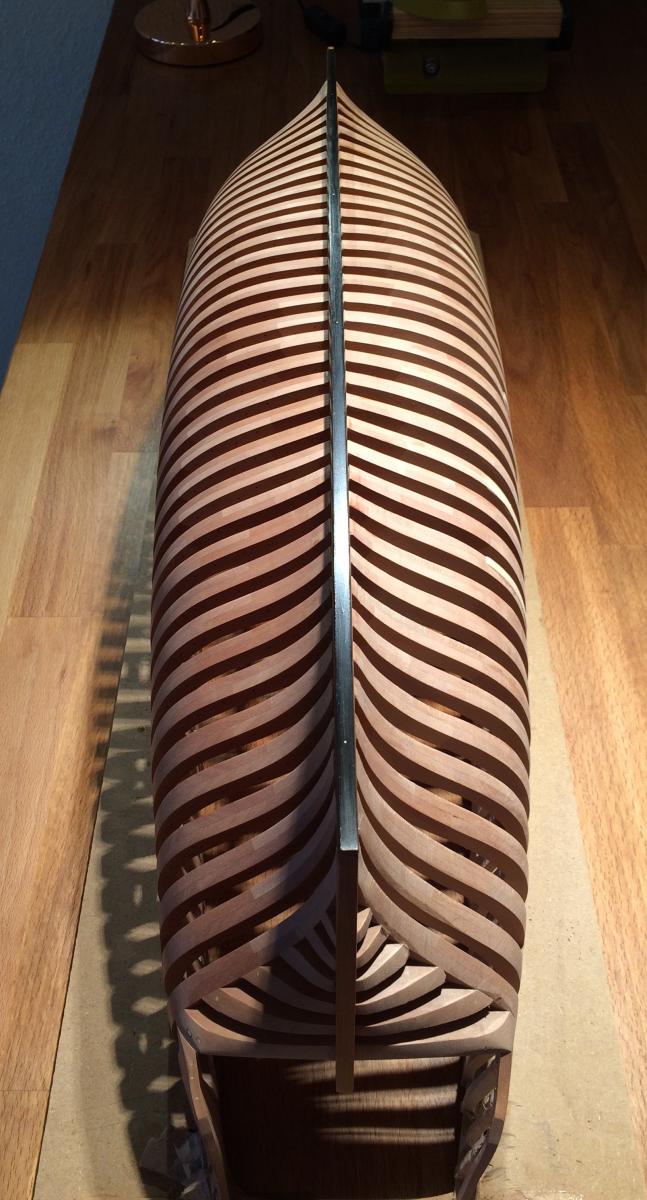
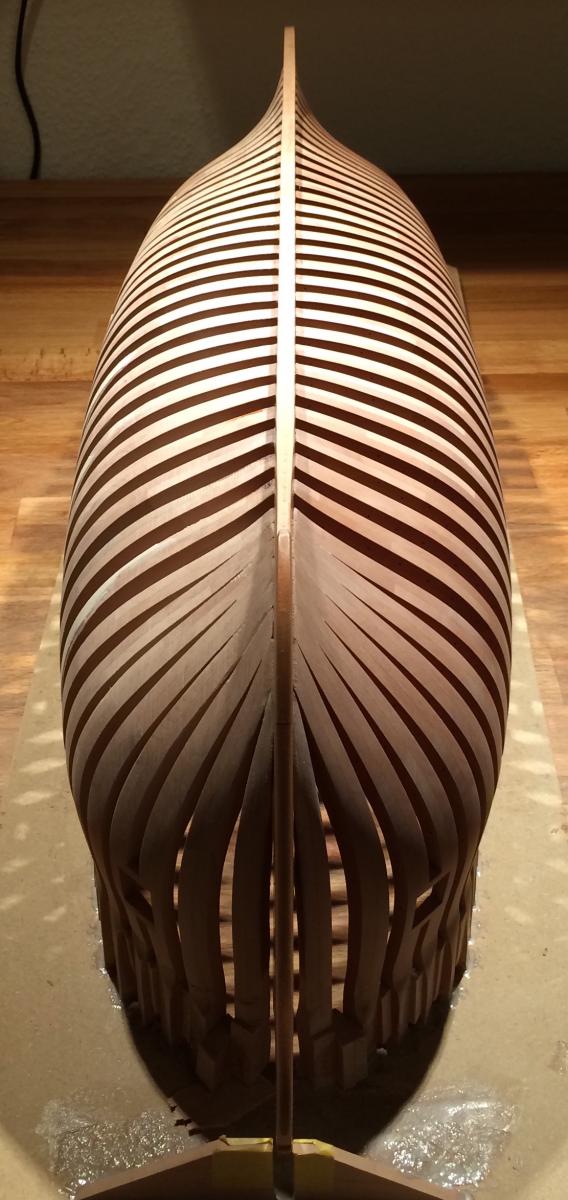
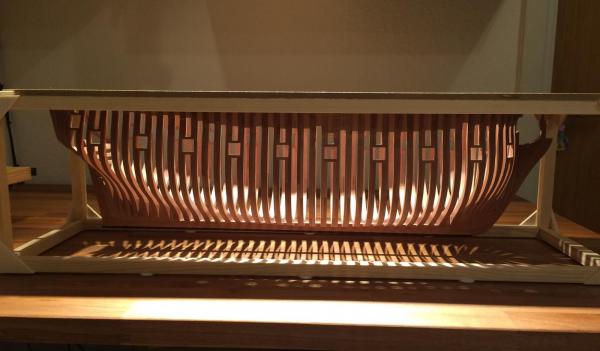
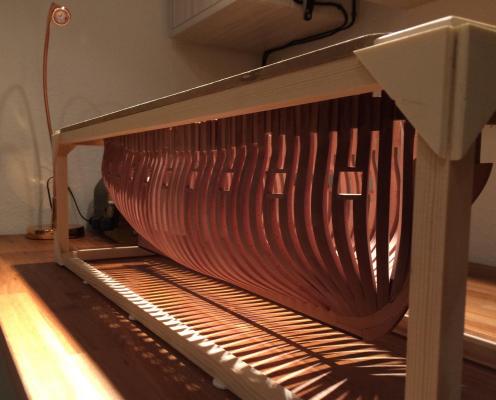
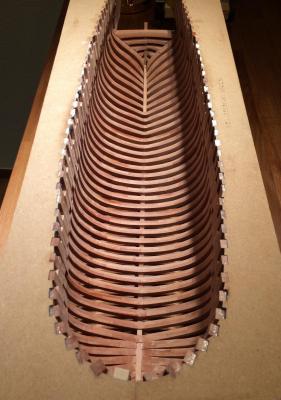
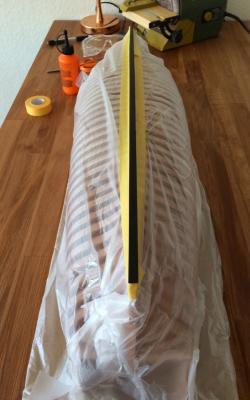
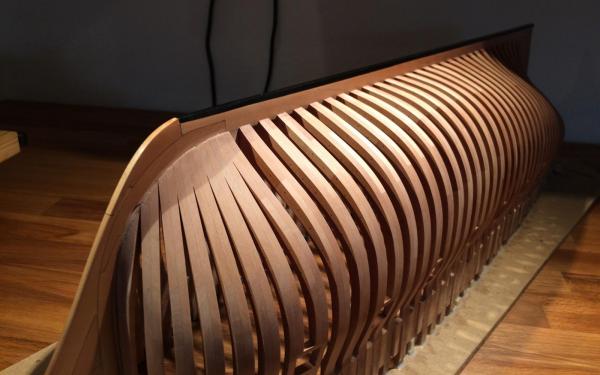
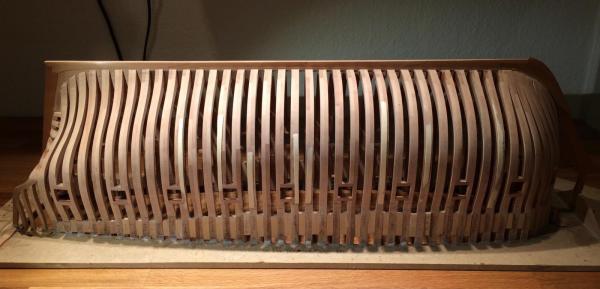
Made a support jig to install the hull in an upright position. It is a first time I see it this way, very, khm, unusual! Like it is upside down. Or, hold on, right side up? Very confusing after working on the inverted hull for little bit more than 1.5 years.. The jig is simple and surprisingly stable. I was planning to add a diagonal braces to it to increase stability, but looks like it is not necessary. Now it even looks much bigger when stored right side up Ok, so now I do not have any more excuses, time to fair the inside of the hull. See you in a few dusty weeks!

- 969 replies
-
- 23
-

-
- hahn
- oliver cromwell
- (and 1 more)
-
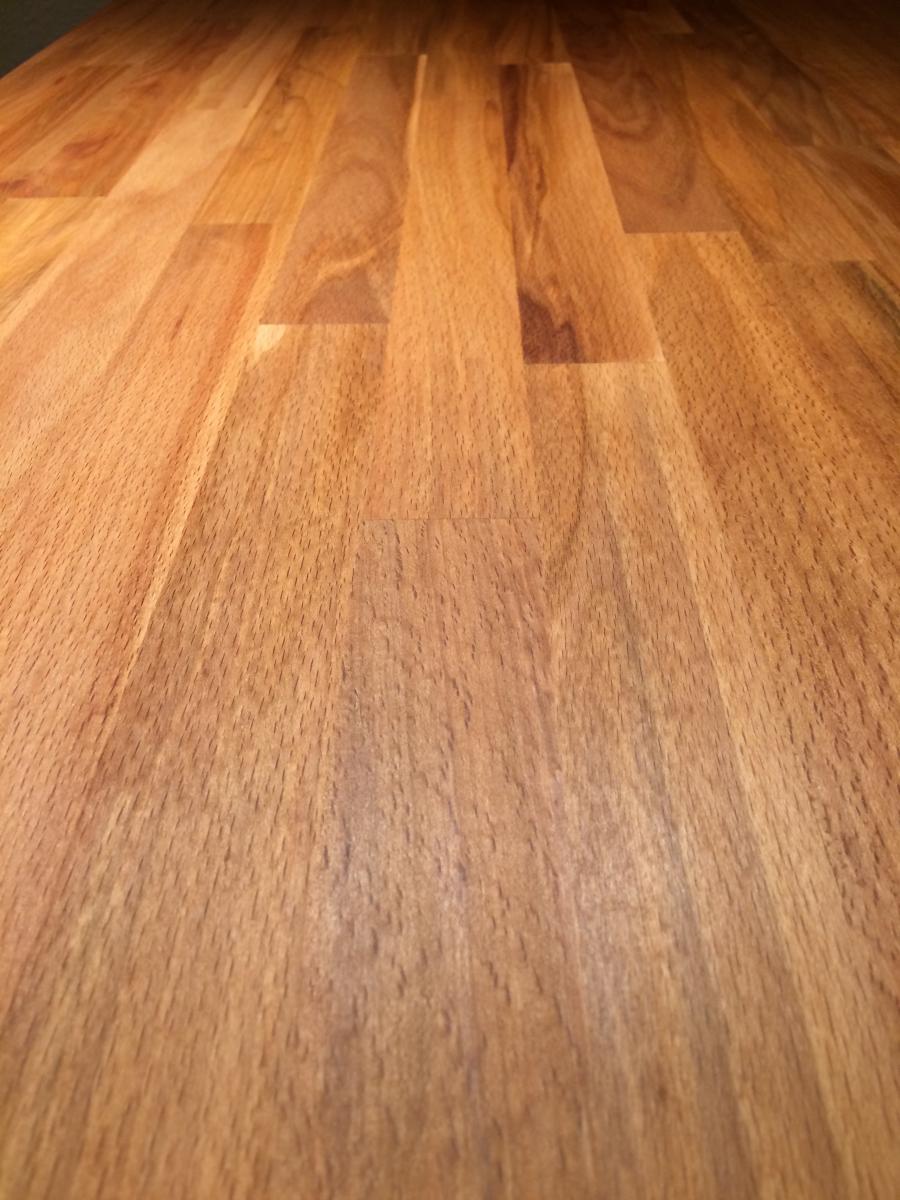
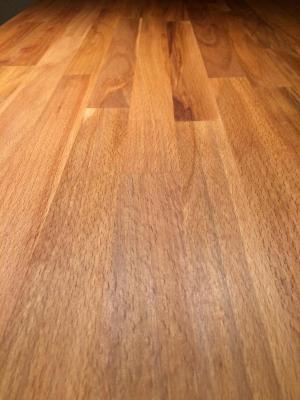
I made myself a nice table - sold beech table top, sanded to remove the old finish and applied tung oil instead. Used a microfiber cloth to rub it into the wood and evenly distribute. Few coats were applied same evening - it was a continuous process, because pieces of wood in the tabletop had different grain direction, so some were absorbing the oil pretty fast, while others did it slower. Next morning I rubbed the excess oil with a paper cloth and left it to dry for a week. 10 days passed - it is still not fully dry. It looks pretty dry, but if you touch it - you feel that the surface is oily. This is how it looks right now: The oil I have is a local brand, not something well known. Bought in a fancy boutique though, which sells only high quality stuff The can says that this is a pure oil and it dries "extremely slow" if not diluted with turpentine or some other oil: It is too late to dilute Will read the instructions next time! The same oil works fine on a model scale, but it feels different with small parts of a full size table top. What should I do? * Just wait more and it will finally dry? Should I wipe it with a paper cloth or sand it lightly, or it is better to let it untouched for a while? * Apply some wipe-on poly on top of it? I am afraid that this will cause a mix of poly with half-dry oil, which might behave unpredictably. * Apply another coat of oil? But if the current surface can't polymerize, new coat will not dry either. Would appreciate any advices!

-
I can't imagine how a long piece of wood will ever be perfectly straight. 1mm deviation sounds perfectly normal in my opinion. Wait for the humidity change, it will warp much more Are you going to screw it to the building board? If yes - might be reasonable to add another hole or two and attach it to the build board while pressing something straight against it, to ensure alignment.
-
Christian, it is only cut on the side that would be fully planked. No rabbet on the other side, for aesthetics reasons.
- 969 replies
-
- 5
-
-
- hahn
- oliver cromwell
- (and 1 more)
-
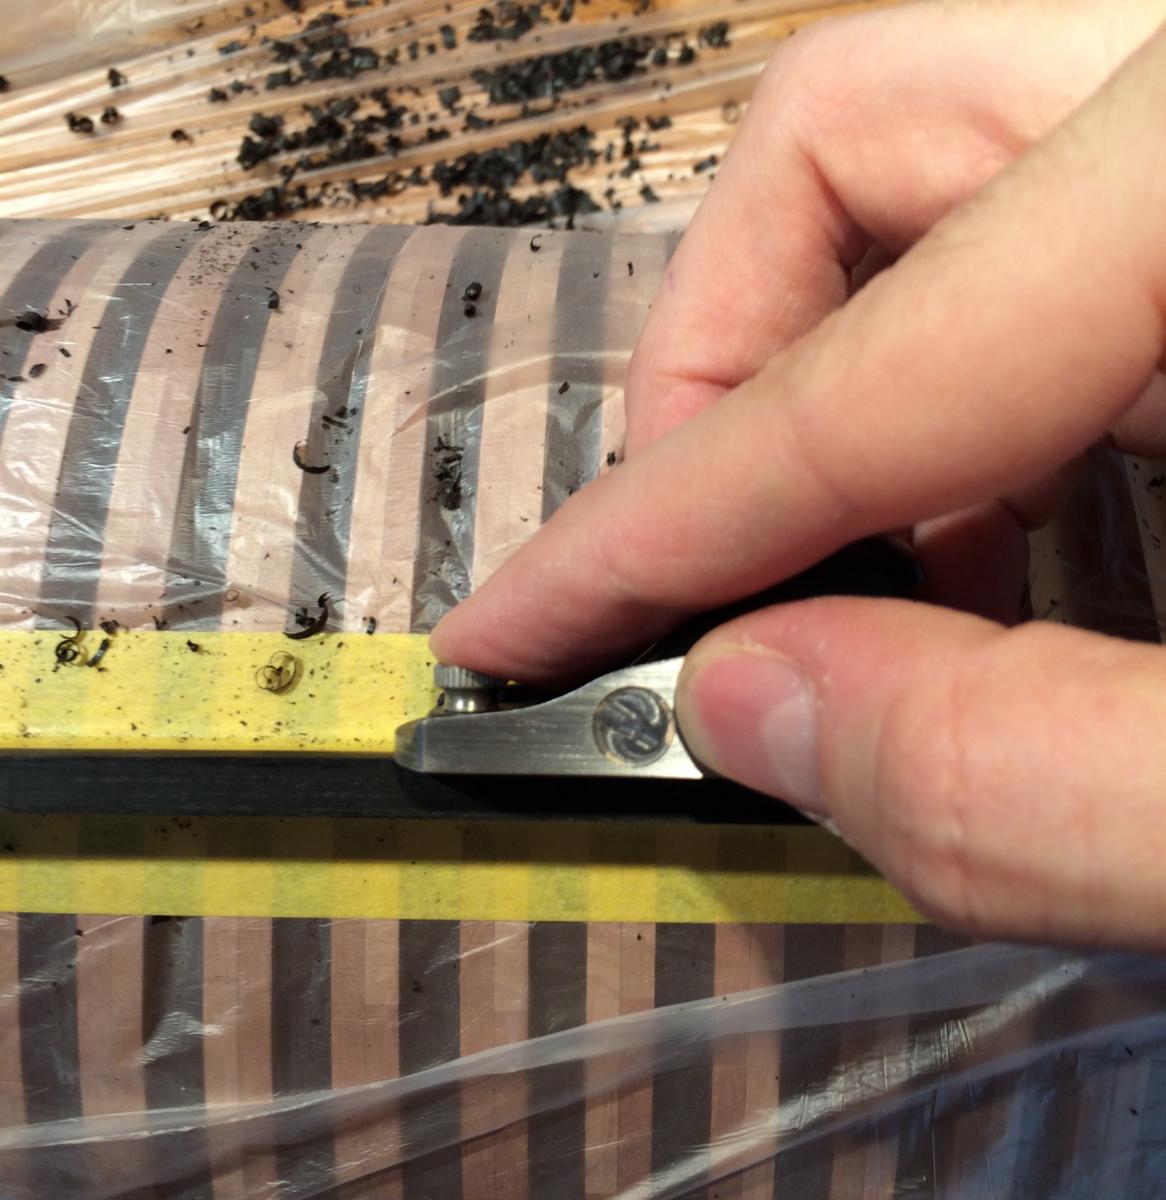
Installed the false keel. It is the first time I work with ebony, and probably the last. Working with ebony is all about cleaning, cleaning, cleaning and again cleaning. Bleh! Shaped it with the Veritas mini block plane, its blade is really hard, cuts ebony without any issues: Result:

- 969 replies
-
- 26
-
-
- hahn
- oliver cromwell
- (and 1 more)
-
Proxxon Micro Planer DH40 - owner feedback??
Mike Y replied to rtropp's topic in Modeling tools and Workshop Equipment
As far as I know - the only one (maybe excluding some chinese crap copies, was not looking on them). There are few thickness sanders of a similar size, but sander is not an option for me - too many dust. -
Thanks Erik! This time I gave up and used iPhone 5 to take photos, instead of the proper camera (Canon S120). The colours on the iphone photos are much more correct and realistic then the ones made by canon, which makes everything too warm and yellow under this light. Tried to reset the WB - ended up with colours that are too cold. Tried iPhone - hah, it just gives a right colour with no tweaks or filters or adjustments
- 969 replies
-
- 5
-
-
- hahn
- oliver cromwell
- (and 1 more)
-
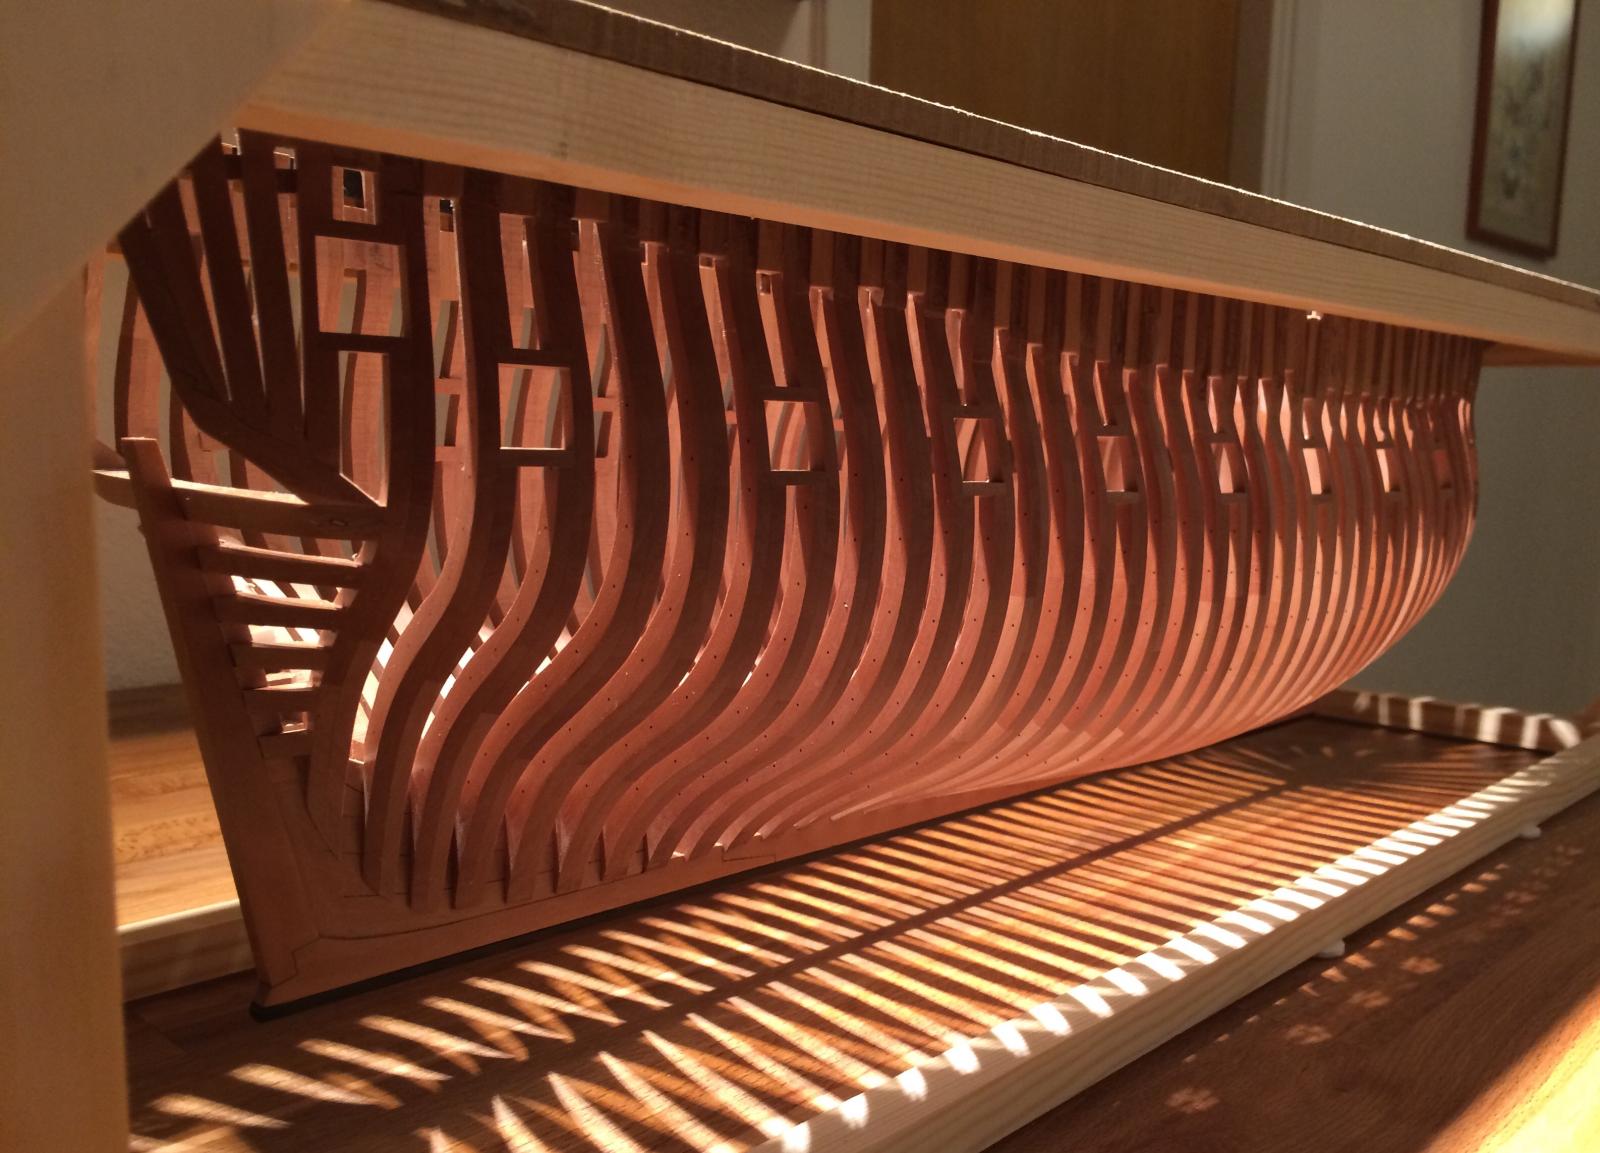
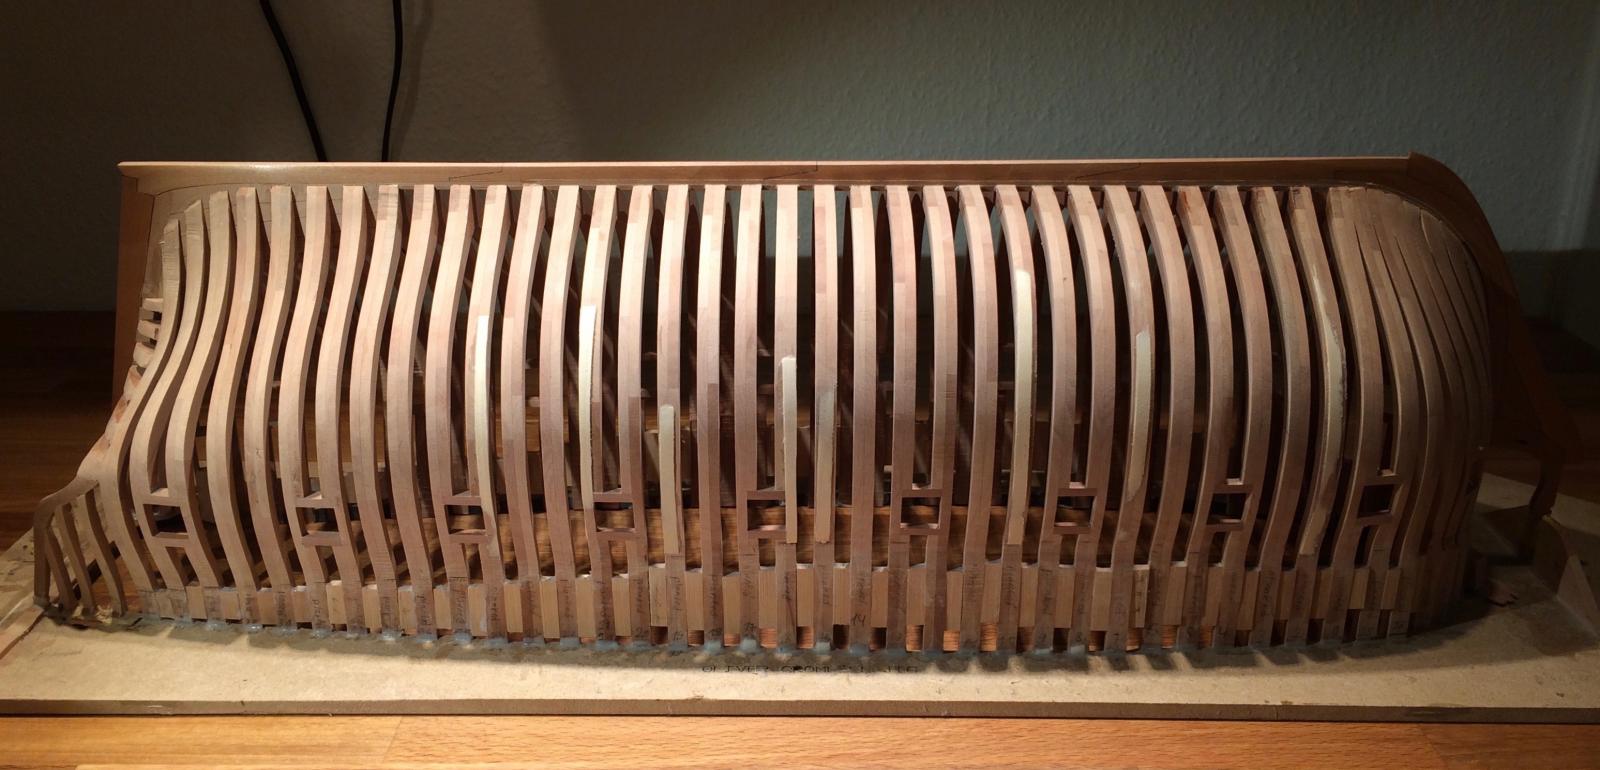
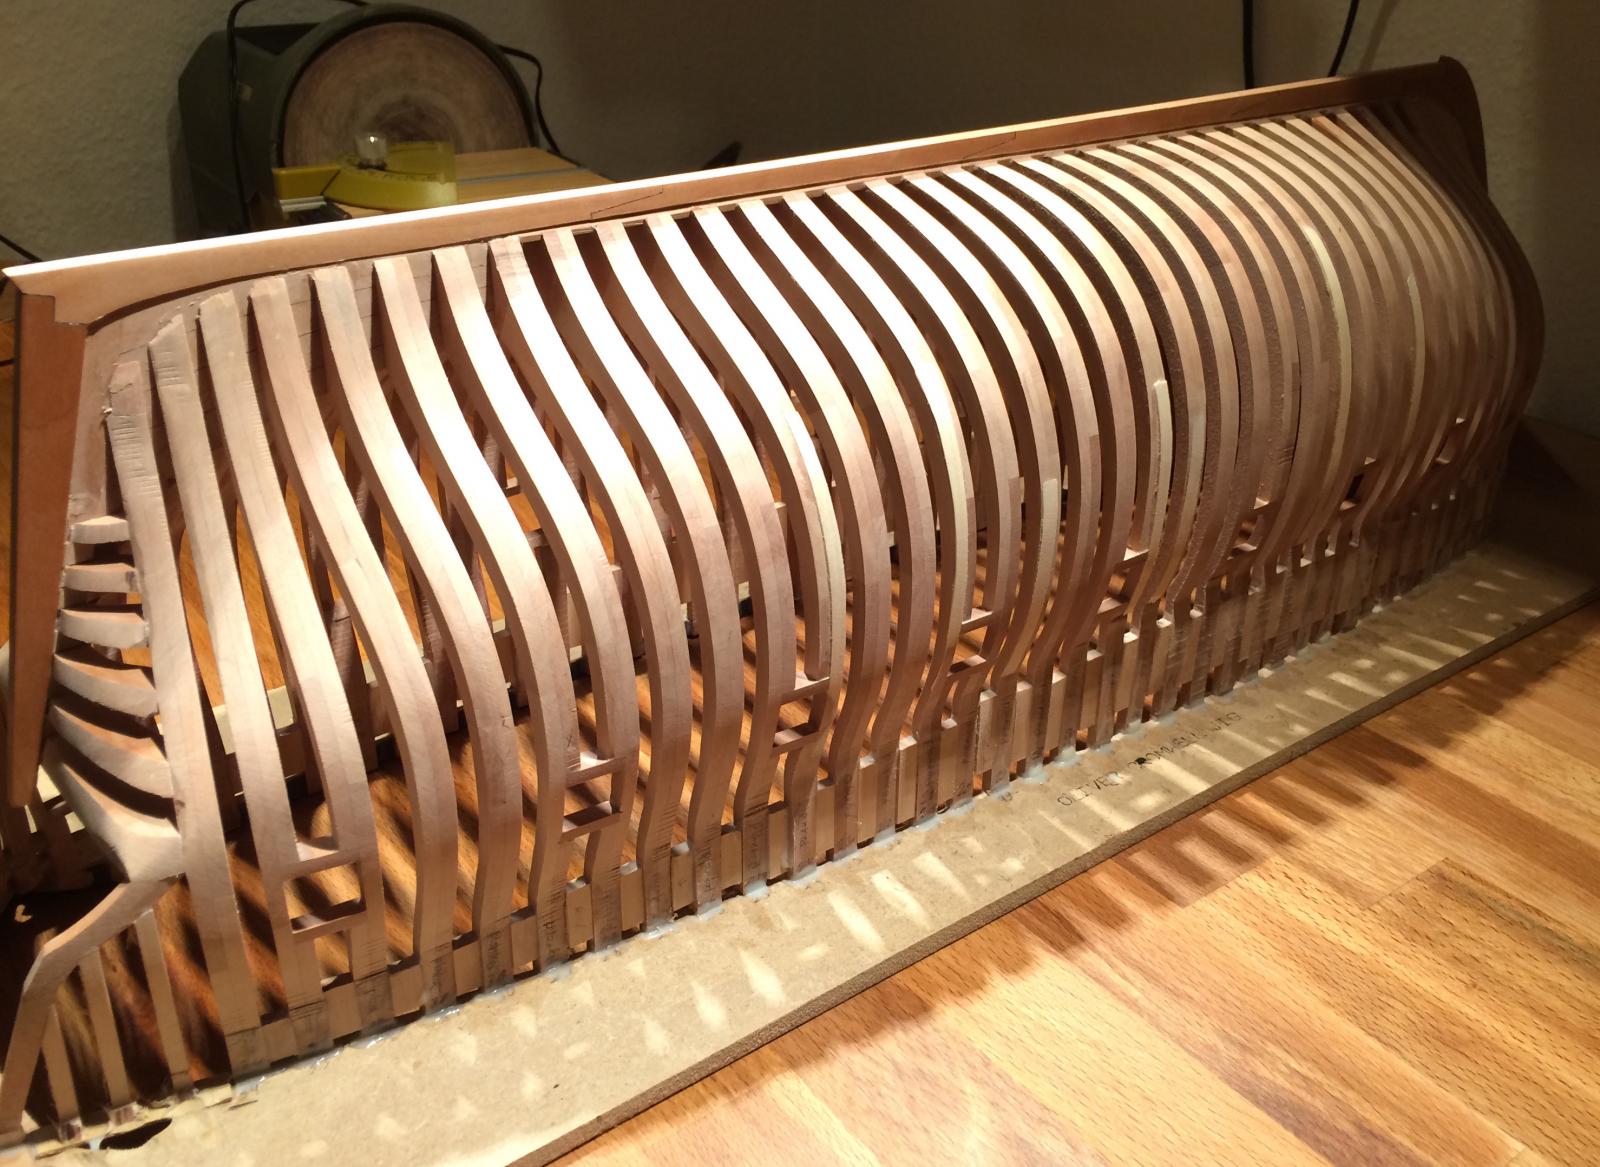
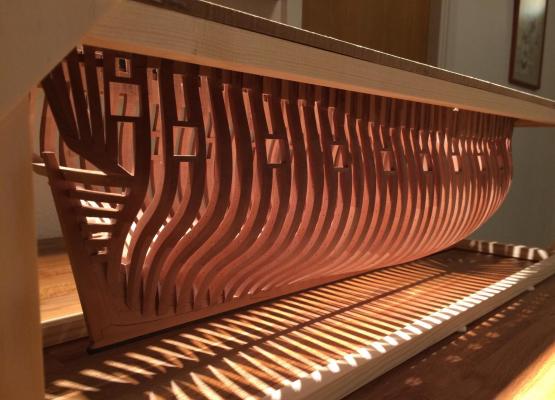
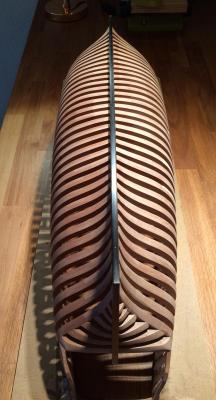
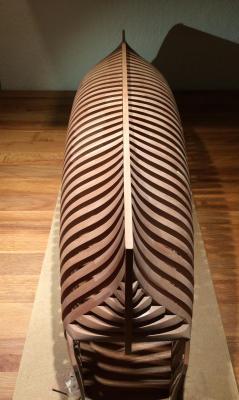
Finished fairing the exterior of the hull: No finish applied yet. First time I show the hidden side of it It is the port side, it would be fully planked and fully hidden - hence no iron bolts, very rough fairing and less attention to the frame alignment - ended up adding strips of wood to patch the low spots. Now need to make a frame to support the hull in an inverted position (keel down), to be able to comfortably work with the internals of the hull. Internal fairing would be fun!


- 969 replies
-
- 24
-
-
- hahn
- oliver cromwell
- (and 1 more)
-
Igor, all shop vacs are too loud and too big for my room... So I am using a tiny detachable vac (http://cache.air-n-water.com/images/electrolux-el1014a-6-l.jpg) I put it close to the sander, under the left bottom corner where the majority of dust goes, and that helps a lot.
- 969 replies
-
- 3
-
-
- hahn
- oliver cromwell
- (and 1 more)
-
Proxxon Micro Planer DH40 - owner feedback??
Mike Y replied to rtropp's topic in Modeling tools and Workshop Equipment
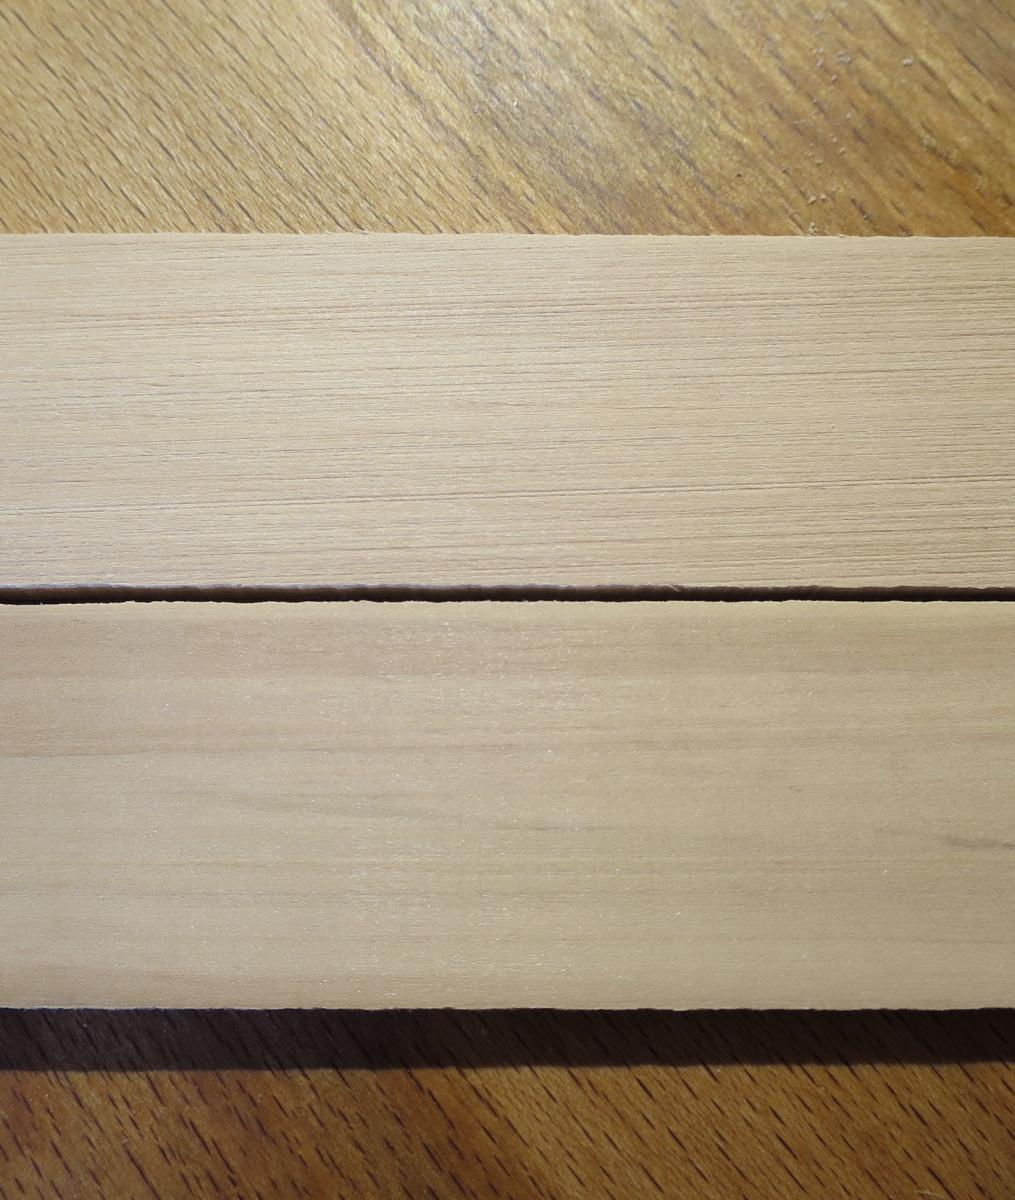
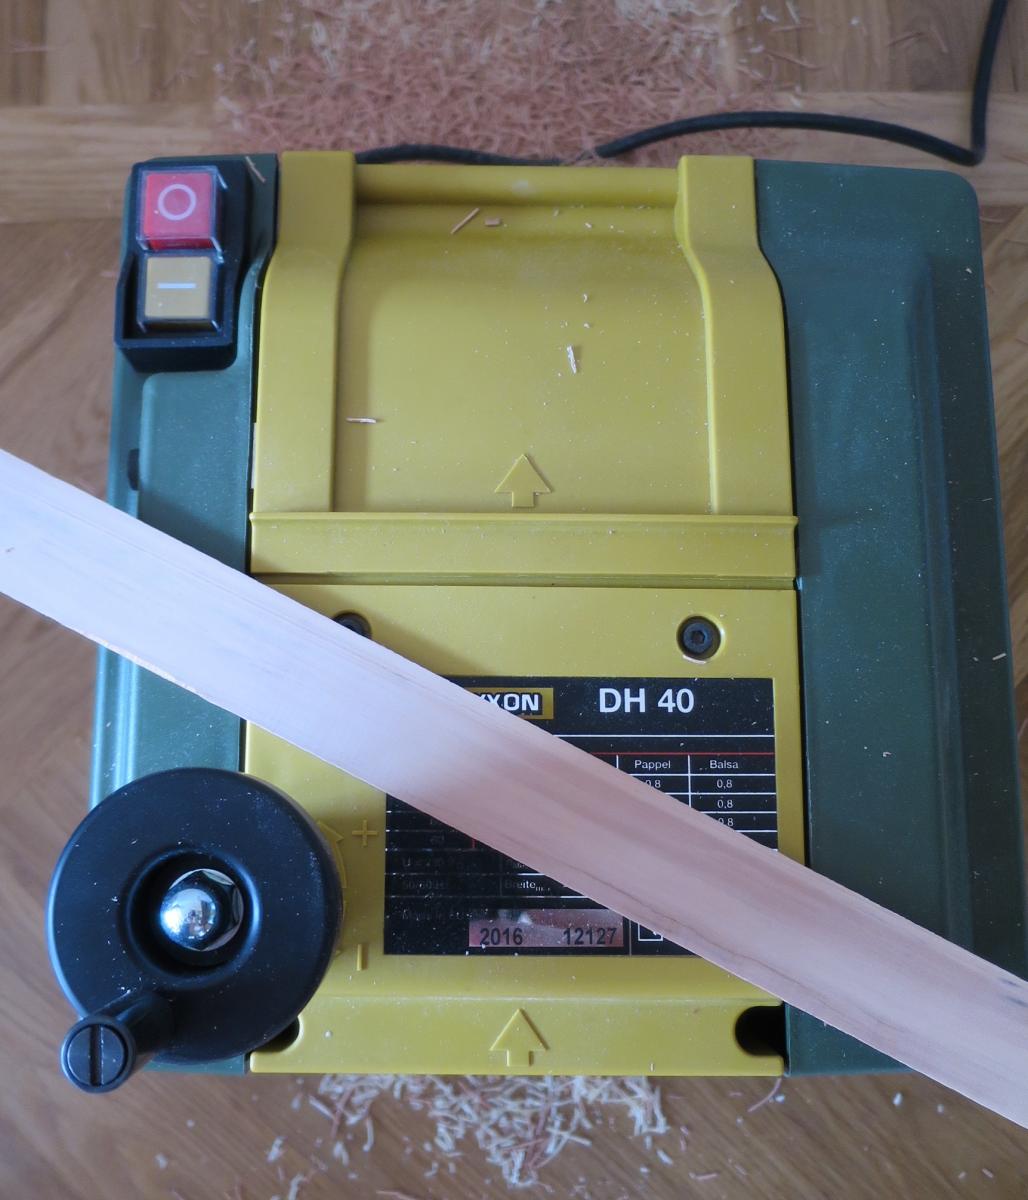
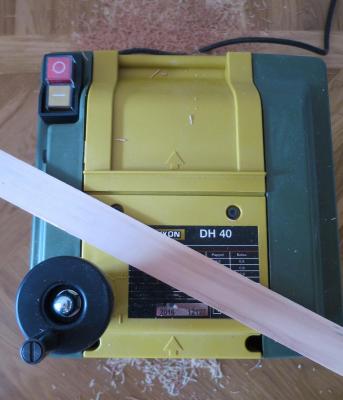
Bought the Proxxon DH40 recently. Got tired of reducing the thickness by sanding. Tried to imagine making all the deck skeleton (beams, carlings, ledges, etc) without a way to quickly get a desired thickness. Meh! The tool is ugly, but does the job. It is not quiet, but not very loud either - the sound level and type of noise is exactly like the kitchen meat grinder After purchase, make sure to carefully wipe away all the oil from the table - otherwise the wood will get really dirty. Apart from that, mine was pretty well configured on the factory. To test, I had 10kg of light pear from Lumberyard - I could not use it before, because it had a very rough finish, which is not suitable for use until you spend hours sanding it. Thanks, nope. It was collecting dust for a year, and now I can finally use it! Same piece split to two halves, original wood is on top, and the bottom one is after two passes on DH40: The result is quite smooth, so only finishing sanding (with 400-600 grit and higher) is required. It does not produce any dust (hence, no vacuum port on the tool), only wood chips: The auto feeder function works like a charm! All in all, the result is very satisfactory. And this is the only thickness planer of this size. The only downside is a price.. Damn expensive!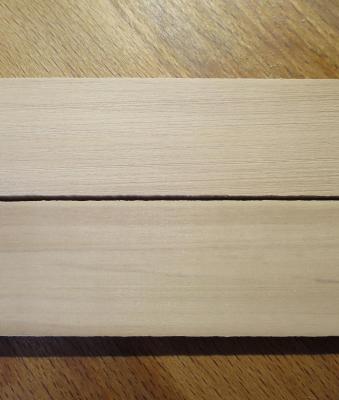
-
I am lucky, my admiral is very understanding. She does not like smelly things though, so my experiments with diluting tung oil with turpentine failed.. Also, if she complains about my "workshop" - I will complain about her knitting machine corner So no complains, perfect balance.
- 969 replies
-
- 4
-
-
- hahn
- oliver cromwell
- (and 1 more)
-
Hoorray! I saw the pictures of this model and was always wondering who built it, now I know How about a build log? It would be very interesting to follow!
-
I am vacuuming and wiping away dust after every modelling session. That is why all the drawers are closed with doors - dust will not get inside, easier to clean. Also, the main dust producer is a disc sander, and I put a small vacuum next to it when sanding, most of the sawdust go there. When doing some very dusty work, like sanding the hull - I am going to the kitchen and do it there, it is better designed for cleaning. Dust, noise and space are always a limitations if you work in the living room.. But it is definitely possible.
- 969 replies
-
- 4
-
-
- hahn
- oliver cromwell
- (and 1 more)
-
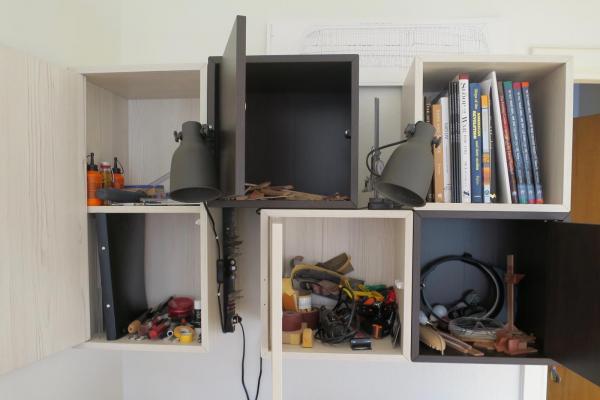
Anything with a closed rollout sections will not work - the drawers are mounted pretty high (to make room for liftong the table, 125cm in the top position), so things should be accesssible from the lower angle - shelfs are on the level of your head and sholders. I will just make an internal plywood shelfs, should be simple.
- 969 replies
-
- 3
-
-
- hahn
- oliver cromwell
- (and 1 more)
-
what is the ideal modelling table?
Mike Y replied to AON's topic in Modeling tools and Workshop Equipment
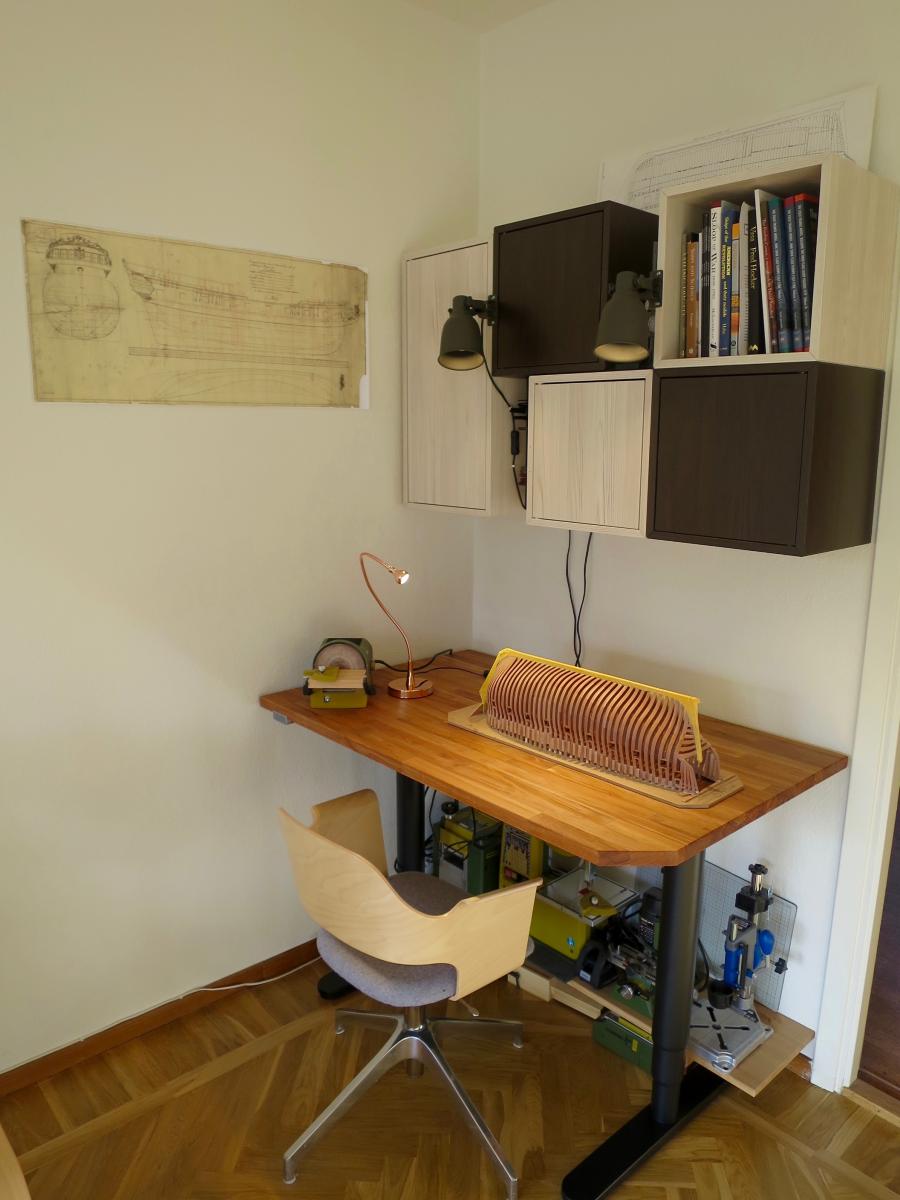
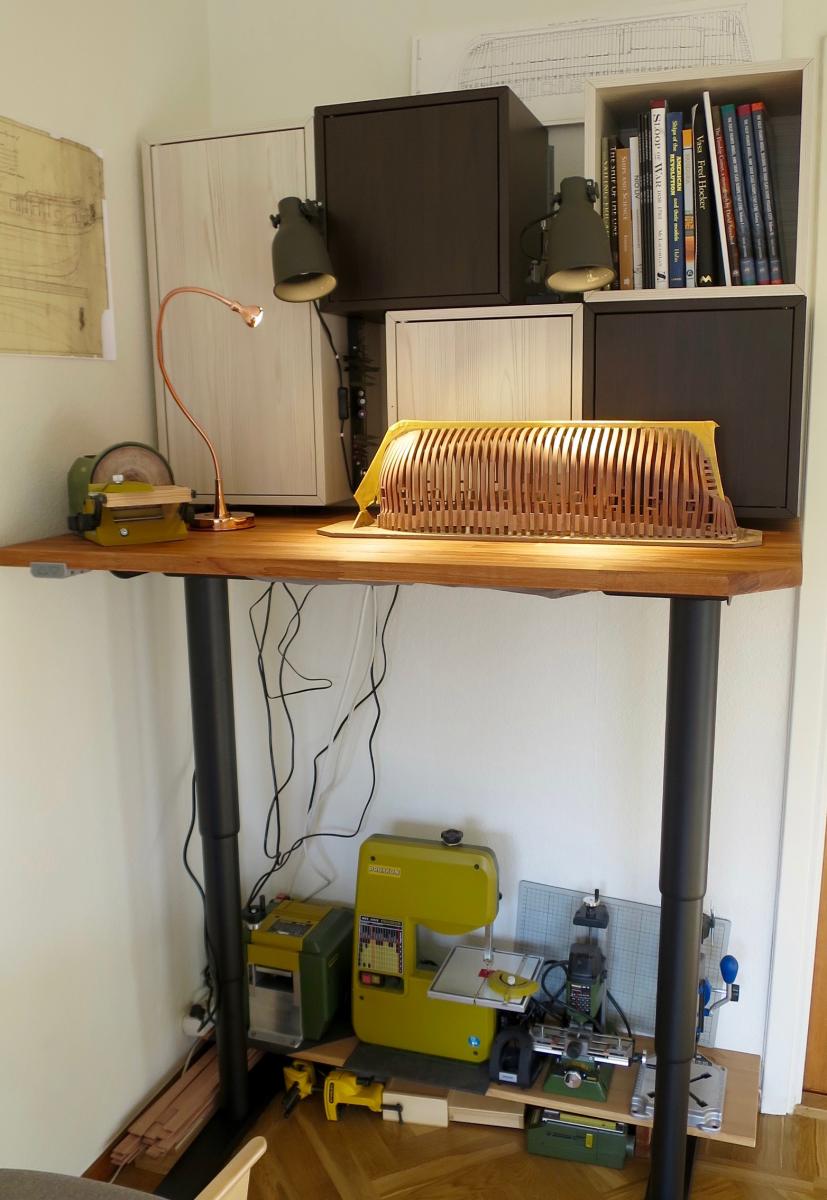
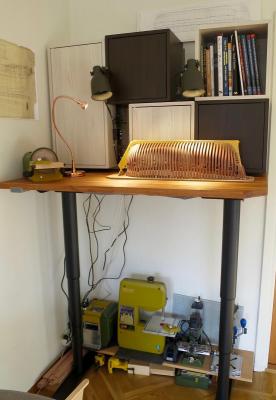
I was writing about IKEA electrical height adjusted tables here, and now I finally got it to try first hand. See the photos in "where do you do your modelling" topic: http://modelshipworld.com/index.php/topic/3869-so-where-do-you-do-yours-then-model-making-that-is/page-26#entry399112 It is the BEKANT table: http://www.ikea.com/se/sv/catalog/products/30255250/ With GERTON table top: http://www.ikea.com/se/sv/catalog/products/50106773/ It is more stable than I expected, probably a heavy table top (it is a thick solid wood) helps with that. Really great, I can recommend it. -
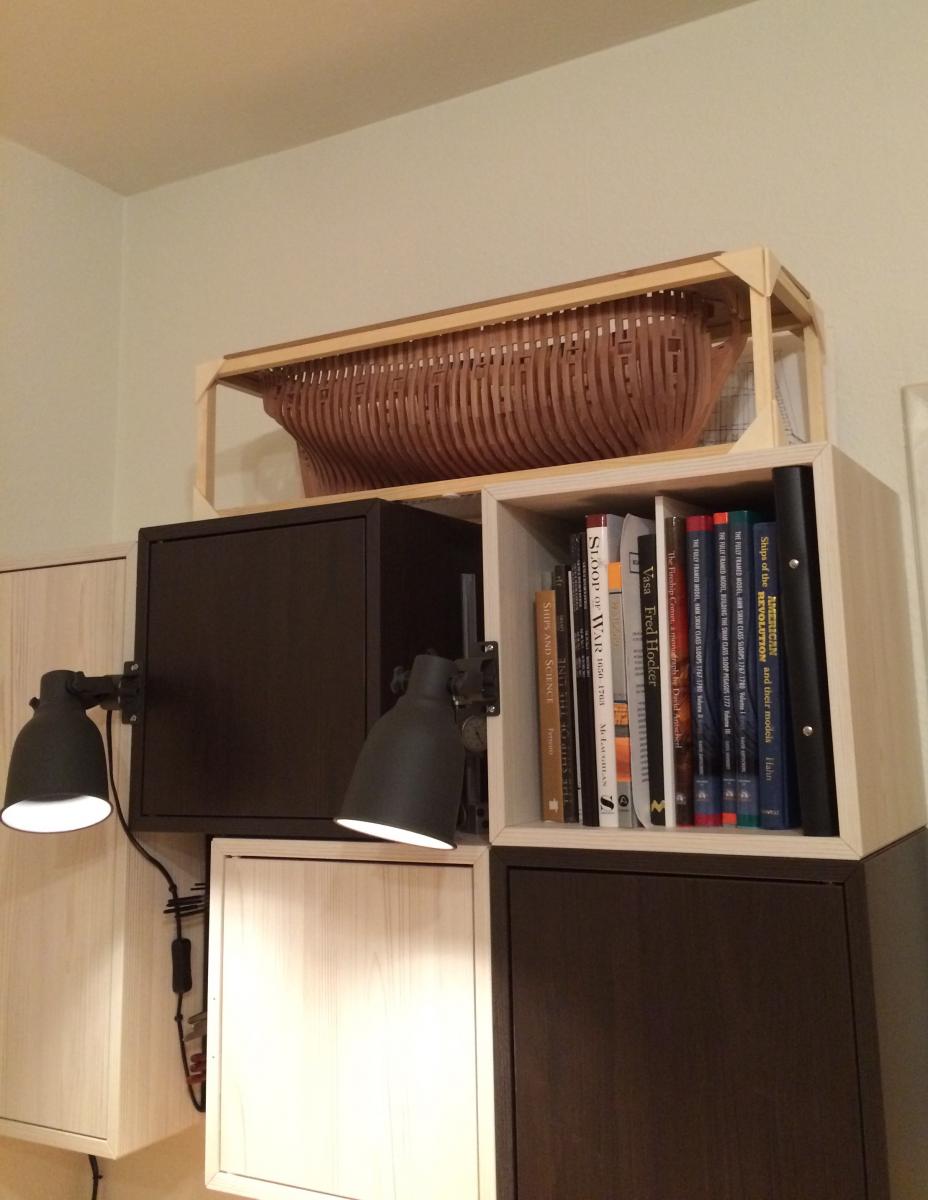
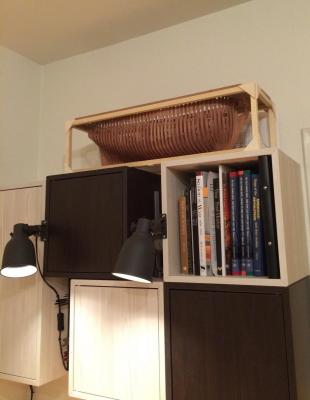
Spent few weeks working on my "living room corner workshop" Finally I have a lifting table! No more bending the neck and back when working with a small details! Hooorray! Normal position: Standing position: All power tools are stacked below the table, except the disk sander that is used too frequently. Small stuff is hidden in the drawers (need to add some internal compartments for a more efficient space use), and very frequently used tools are on a magnetic holder outside the drawers: Everything is from IKEA, of course Electrical table legs - BEKANT (I am very pleased with them, very little play, very stable, even better than my office table, which is far more expensive) Table top - GERTON. It is a solid wood beech top, which I sanded and finished with tung oil. Drawers - VALJE. They are neat like tetris bricks, could be combined in many different ways.

- 969 replies
-
- 15
-
-
- hahn
- oliver cromwell
- (and 1 more)
-
Your log is a pleasure to read, please keep it coming!
-
ancre le rochefort by cabrapente
Mike Y replied to cabrapente's topic in - Build logs for subjects built 1751 - 1800
Very tiny margin for the frame fairing, hope you will not force yourself into the corner... Watching with interest! -
This issue is a huge step forward! Lots of interesting material!
-
I really wish to become 48 times smaller for an hour to crawl inside this amazing replica. Tom is right, you are building a piece that is above the average museum quality!
-
Magnificent!
-
Work station clutter
Mike Y replied to Senior ole salt's topic in Modeling tools and Workshop Equipment
Jim, thanks for the info! Never heard about this system. Looks very interesting! Now I am seriously thinking about a lifting sit/stand table, with shelves build up from this modules -
ancre le rochefort by cabrapente
Mike Y replied to cabrapente's topic in - Build logs for subjects built 1751 - 1800
Band-sander! Brilliant idea! -
Robin, here is the NMM page with that model, maybe it will give you some additional information for your research: http://collections.rmg.co.uk/collections/objects/66277.html
- 969 replies
-
- 5
-
-
- hahn
- oliver cromwell
- (and 1 more)