HOLIDAY DONATION DRIVE - SUPPORT MSW - DO YOUR PART TO KEEP THIS GREAT FORUM GOING! (Only 13 donations so far - C'mon guys!)
×


Mike Y
-
Posts
1,550 -
Joined
-
Last visited
Content Type
Profiles
Forums
Gallery
Events
Everything posted by Mike Y
-
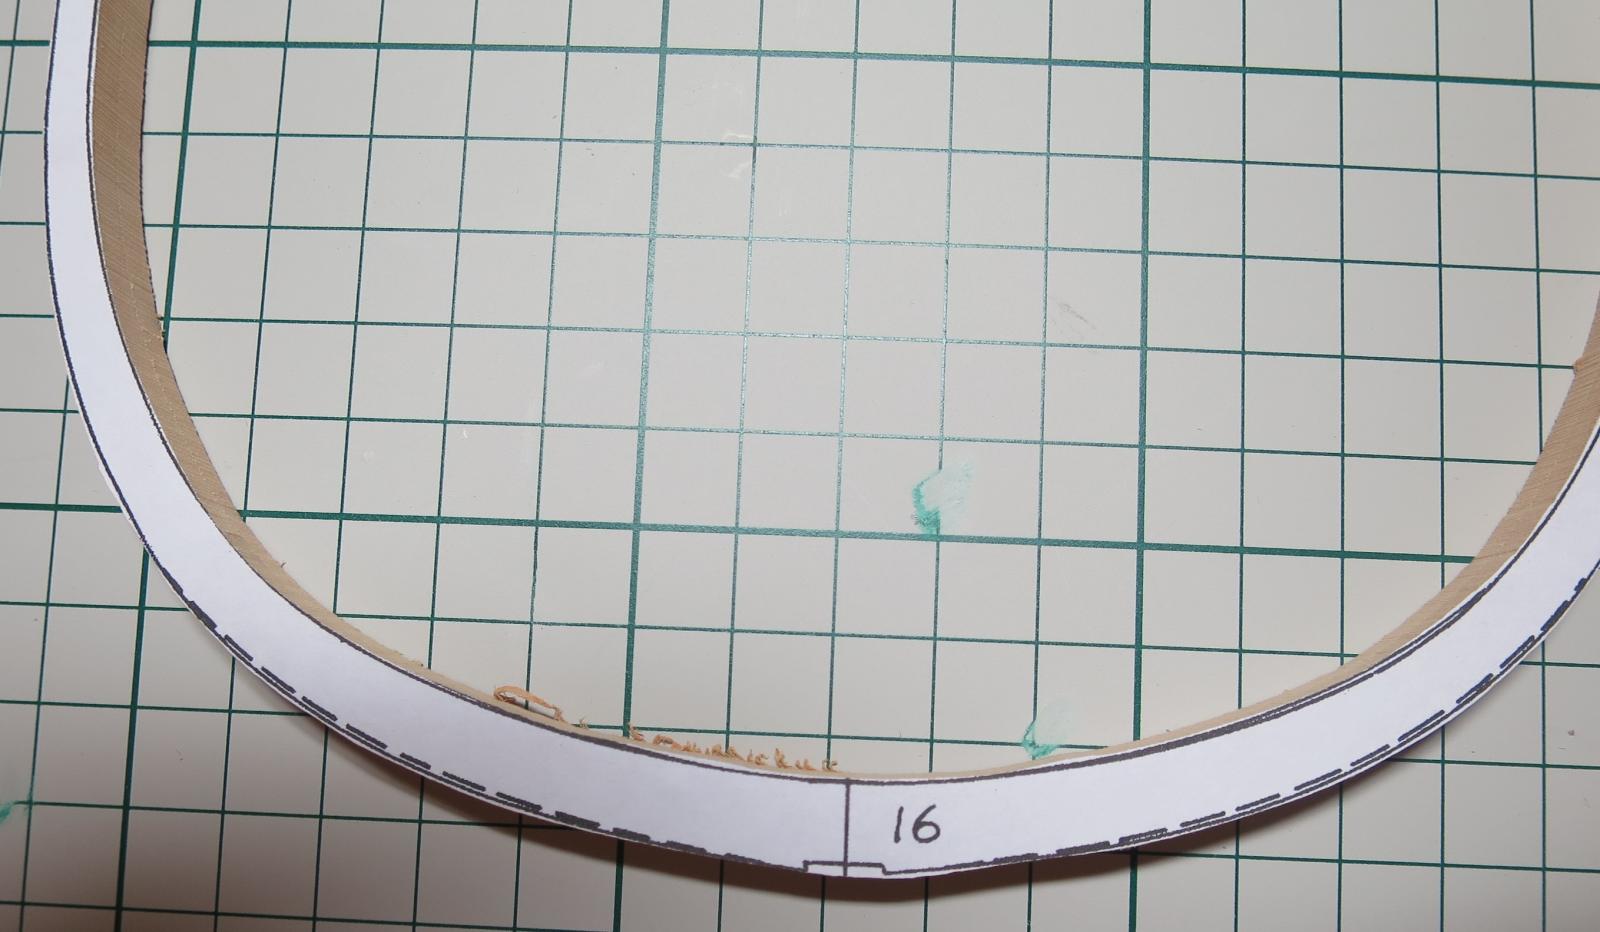
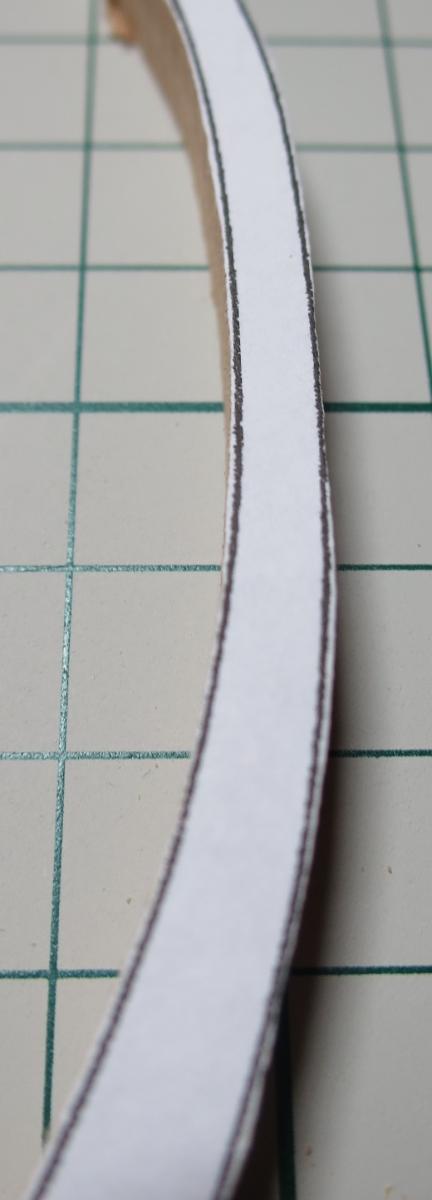
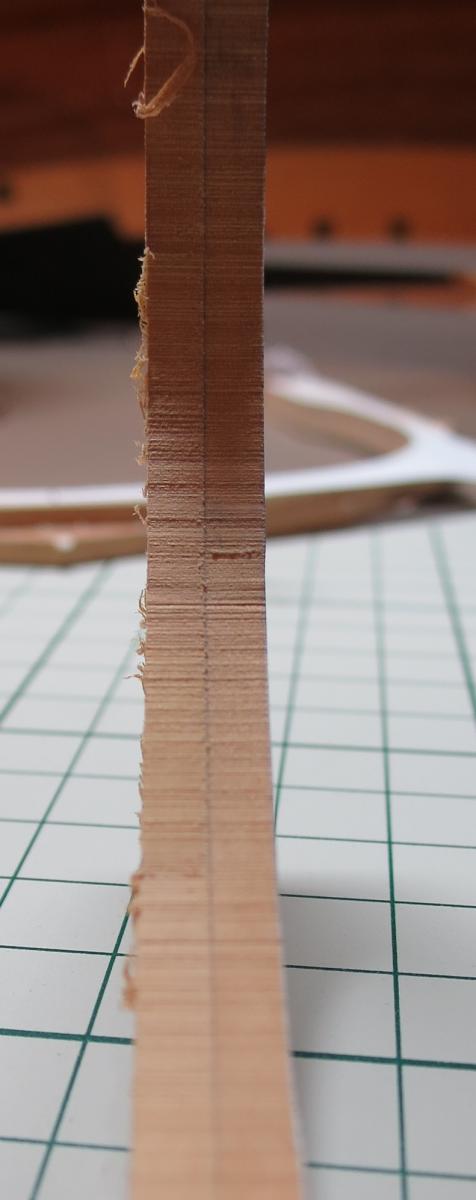
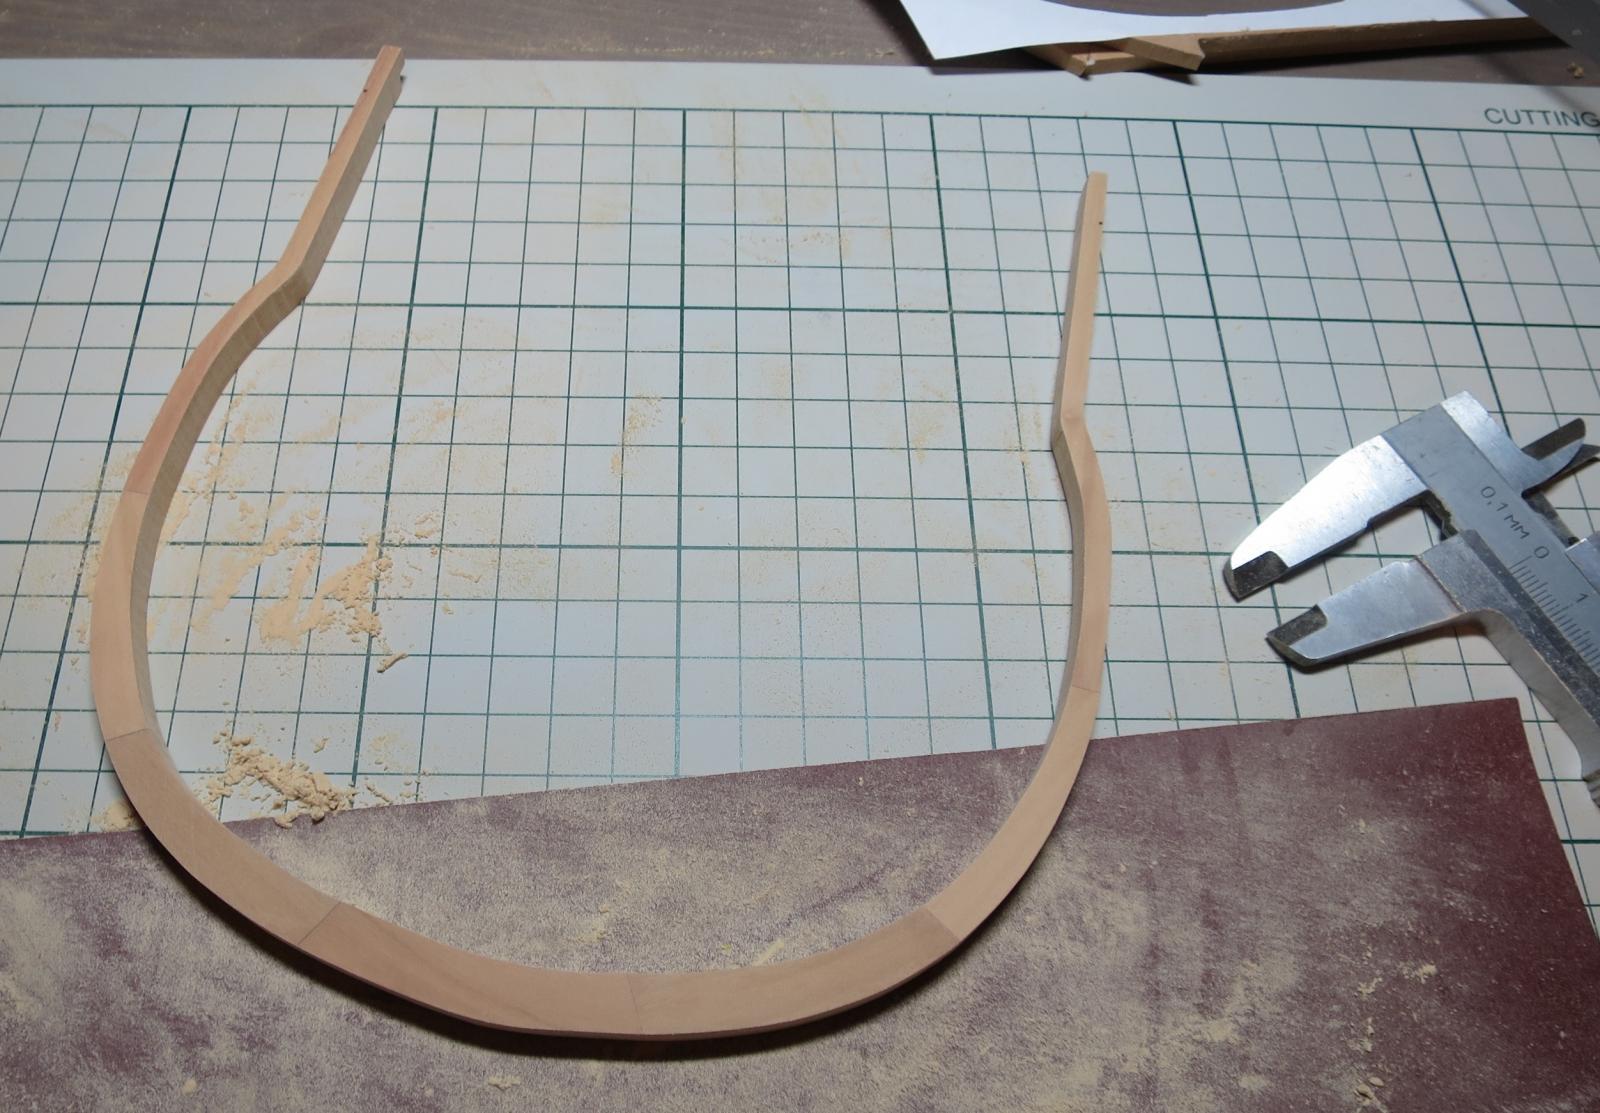
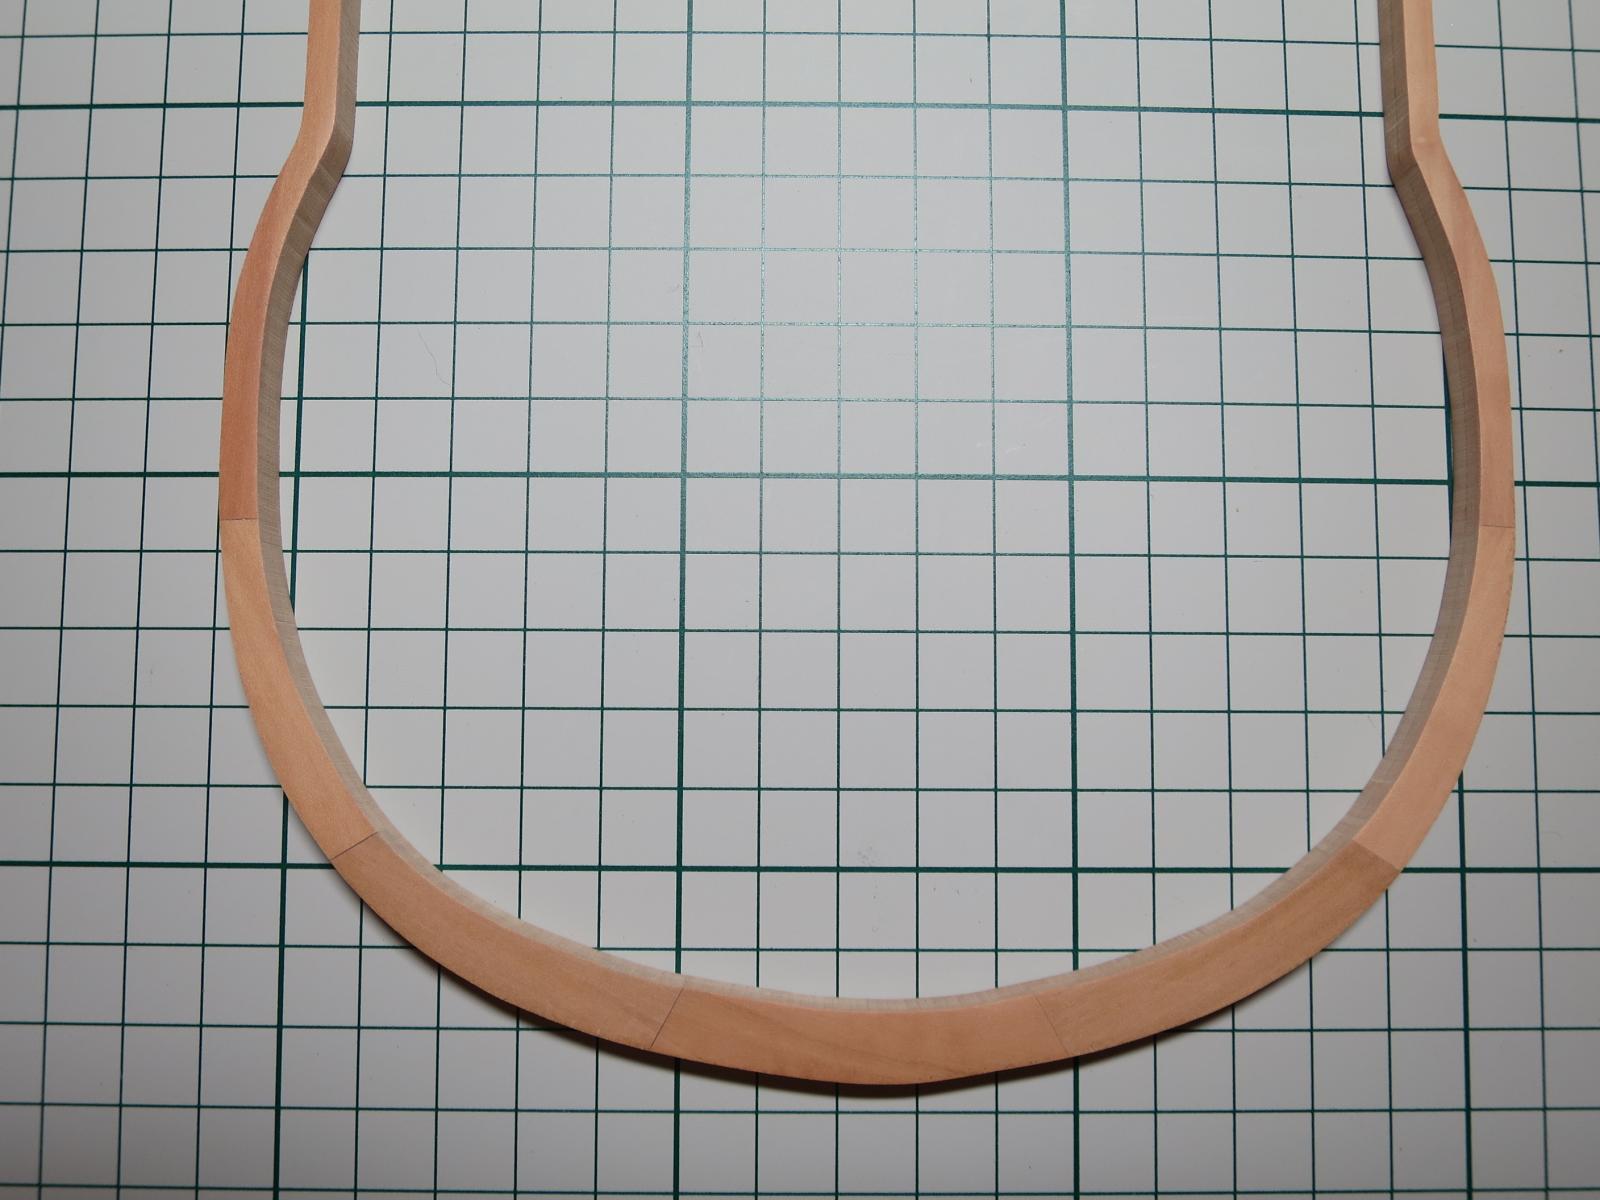
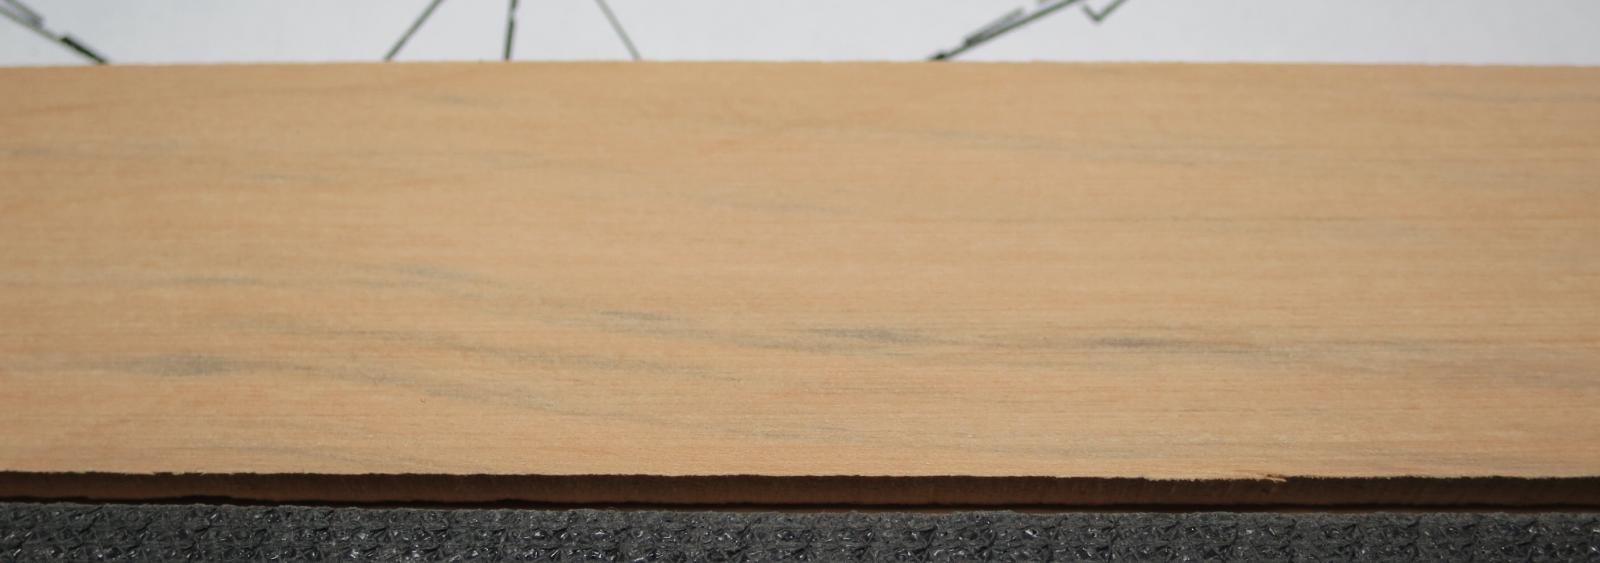
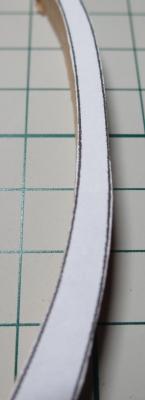
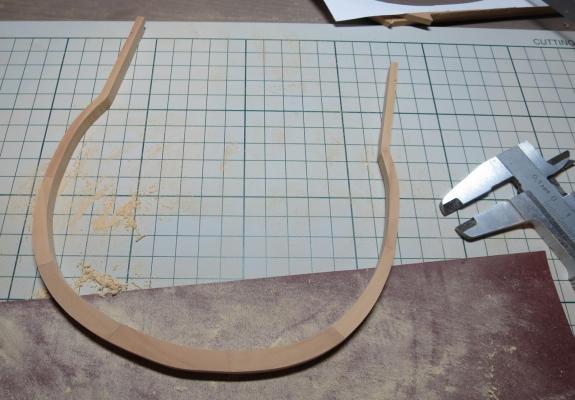
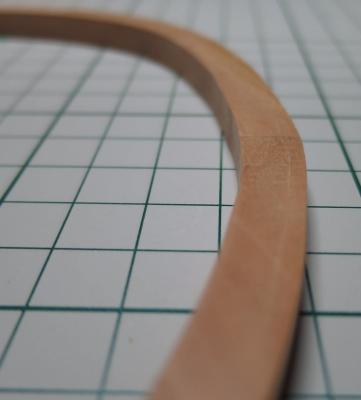
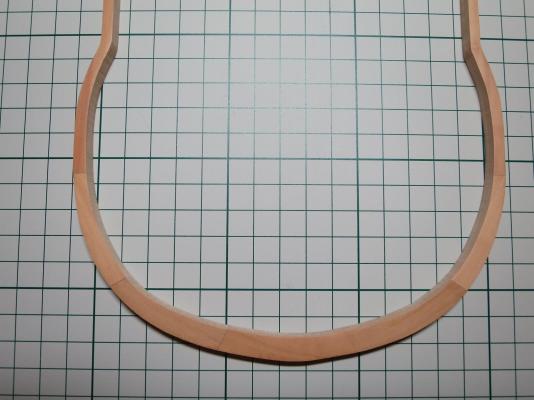
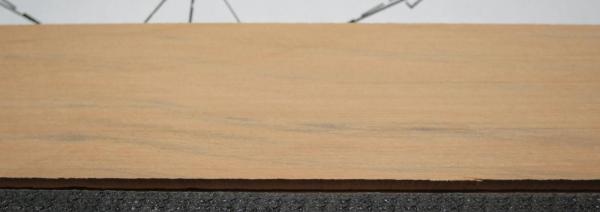
 Thanks for all the help! Applied much more glue this time, glue was pre-dried (small can left opened for 24hr). Looks much better, warping is minimal, and I used some extra clamps, stronger ones. As it turned out, the lamination was ok - no sign of gaps or warping anywhere when the frame is cut. Cut the test frame just to verify the process. It would not be installed on a model, the goal is only to practice. First question: what is the proper margin, how far should I cut from the lines? If I cut too far away - frames would be either fat, or there would be an enormous amount of sanding later on (and with too much sanding the final shape of a frame would not be close to a proper lines). If I cut too close - frames would be too small after sanding. What is the golden rule of thumb? Here is the side of a frame. Glue layer is slightly visible, but I guess that is expected? Or not? A lot of sanding and scraping to bring the frame down to desired 7.2mm thickness. Note to readers - avoid using a heavy grits, even if you need to remove a lot. Sanded with 60 grit and got some deep scratches, very hard to remove. Good that it is a test frame, would be quite sad otherwise And the end result is: When sanded with a fine grits (1200 => 2000), the colour difference between various part of the frame is striking. Not sure what to do with that.. Well, in the end it is not plastic, so it is quite expected from wood to have a different colour naturally Please post any critics, it is very important to get the technology right on a test frames. I am posting detailed process pictures hoping that somebody will spot a mistakes and share a good advice before I will produce 40 frames using a wrong technology
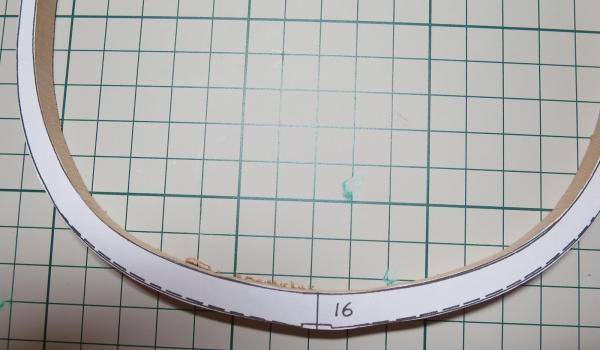
- 968 replies
-
- 8
-

-
- hahn
- oliver cromwell
- (and 1 more)
-
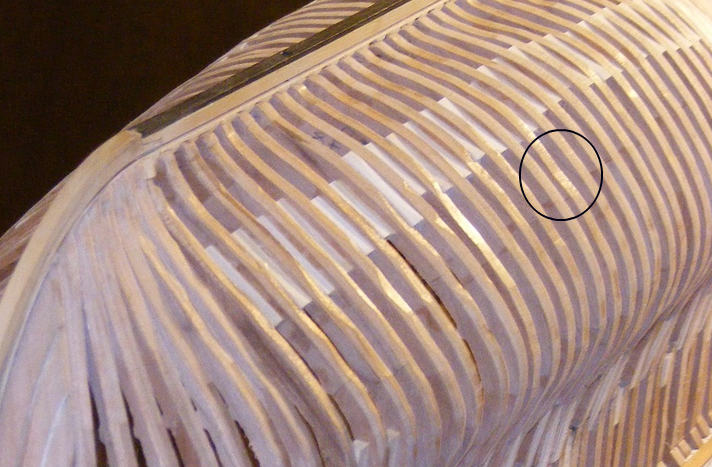
(carefully writing down the notes). Mark, thanks again for a step-by-step documentation of your build. It is very useful for a novice builders like me! However, just in case if you missed it before, is that an optical illusion or there is a small "pit" in the frame here? Or the frames would be significantly sanded anyway, so such small things should be ignored?
-
Proper light for a modelling table
Mike Y replied to Mike Y's topic in Modeling tools and Workshop Equipment
Got that "daylight" lamp from amazon, and I'm really happy with its light! Bright, right colours, no headache. -
Thanks for advices, Mark! Also will make a sanding jig to make a perfectly tight edge joint of blank pieces, without spending money on a disk sander So, here it goes - trial and experiment!
- 968 replies
-
- 1
-
-
- hahn
- oliver cromwell
- (and 1 more)
-
Thanks Peter, I will try more. Need to find a consistent process giving a perfect result, otherwise too many frames would be ruined later on Will apply more glue and closer to the edge, plus ordered extra and stronger clamps. 5mm plexiglass should hold quite a big pressure!
- 968 replies
-
- 1
-
-
- hahn
- oliver cromwell
- (and 1 more)
-
Mike, if you don't mind - could you please post a link to your Syren log to this log? Just to make sure that your followers will not miss it in a big list of other logs
-
Mark, Greg, thanks for comments! But there is one thing I do not understand. If the surface of blanks would be rough when gluing them together - that will increase the gap between the blanks, and will require to apply more glue, which will increase the wood warping. Or I simply need more clamps and higher pressure to prevent warping.. I'm already pre-drying the glue to reduce the moisture level. But if two very experienced builders recommend it - I should listen. Will sand the blanks with a low grit to get a rough surface, will see how it behaves.
- 968 replies
-
- 2
-
-
- hahn
- oliver cromwell
- (and 1 more)
-
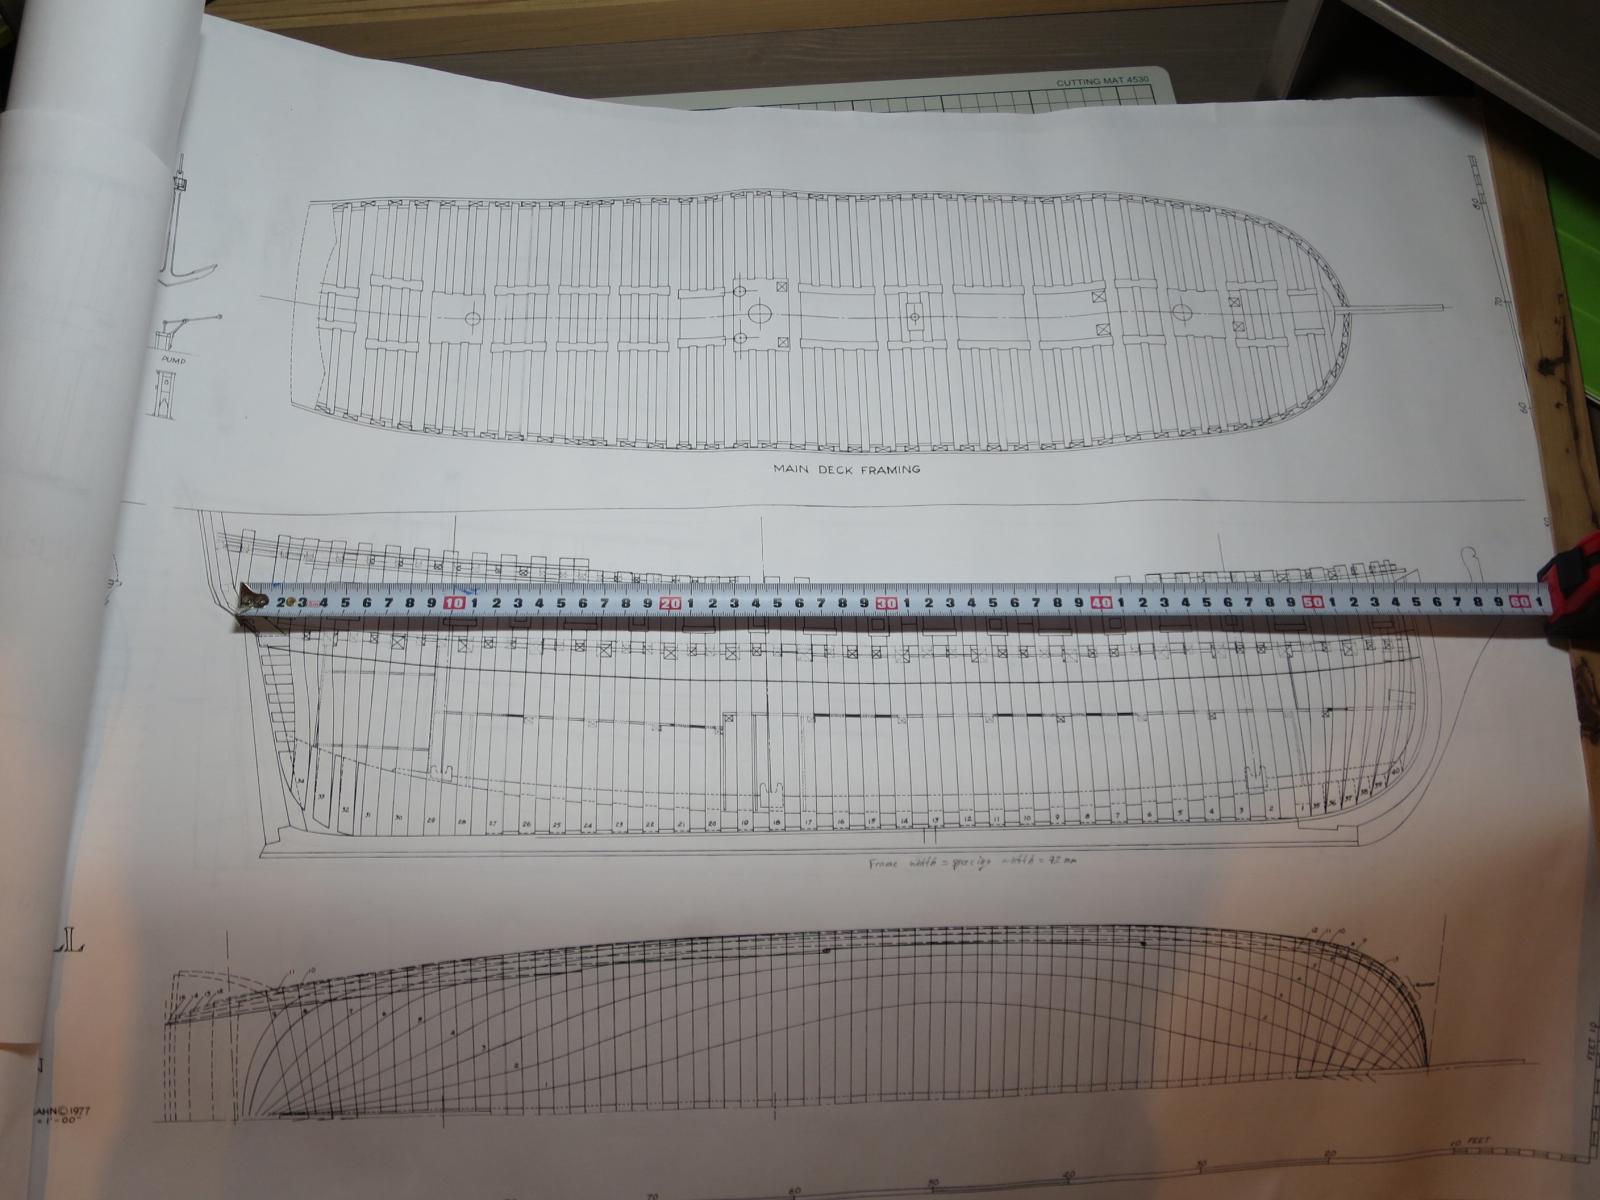
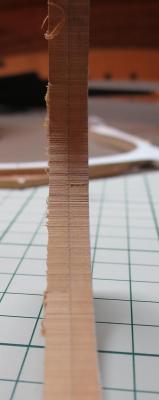
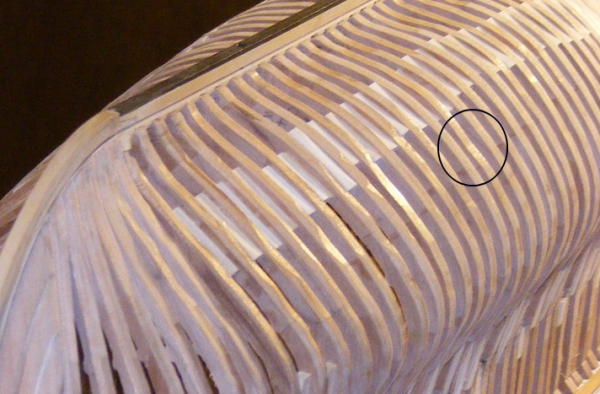
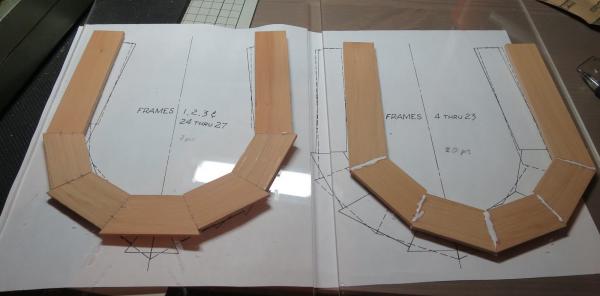
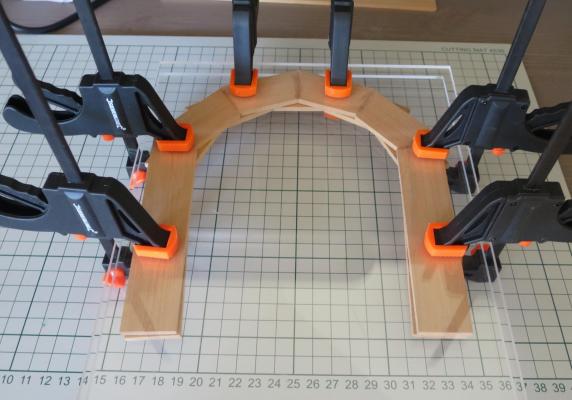
Started to make a frame blanks. Discovered that my table saw is not precise enough, but luckily frame blanks do not require a lot of precision. First - edge gluing on a flat surface, with a blueprint under the glass to make sure that everything is assembled correctly: Second - laminating. Many thanks to Mark for making a good thread where hidden traps of lamination are discussed. I used a thick plexiglass and a lot of clamps: Even with a small layer of glue, that is pre-dried, wood warped a bit: But after 10 hours it looks close to normal, no warping: But I'm worried that there is a consistent small gap between the layers: To reduce the gap, will need to apply more glue - but that will case even more warping. Or try to polish the surface of blanks even more before gluing (I sanded them with 240 and 380 grits) By the way, quality of wood for blanks is, khm, questionable. Width varies a lot (might be ok, it is just blanks, but makes it harder to cut with an accurate angle on a tablesaw). Thickness is also very random, will need a careful thickness sanding when frames would be cut. Colour of that swiss pear is also very different, from very pale to bright pink. The most strange thing is that all laser cut parts are much darker than planks for frame blanks, but they are expected to be same wood (swiss pear). Luckily, this time colour difference is actually good, I was worried that frames would be too dark. And having a darker keel and keelson might be ok. But it would be good to have a consistent colour of the wood inside one package. Plus a lot of planks have a pretty visible grey areas, around half of the planks are affected. Worried that they might be visible on a frames. Like this: I understand that it is perfectly natural for the wood, but that's the whole point of buying a milled wood for modelling - it should not have such imperfections... Or I might be just spoiled by a wood package from Hobbymill


- 968 replies
-
- 4
-
-
- hahn
- oliver cromwell
- (and 1 more)
-
Brian, it is 55cm (21.6in). Good size if you do not have a workshop. Grant, yes, I believe that mutual respect to hobbies of each other is a mandatory condition to achieve a harmony at home

- 968 replies
-
- 5
-
-
- hahn
- oliver cromwell
- (and 1 more)
-
Yes, I bought a compact vacuum cleaner to remove the sawdust quickly. Hope it will help
- 968 replies
-
- 3
-
-
- hahn
- oliver cromwell
- (and 1 more)
-
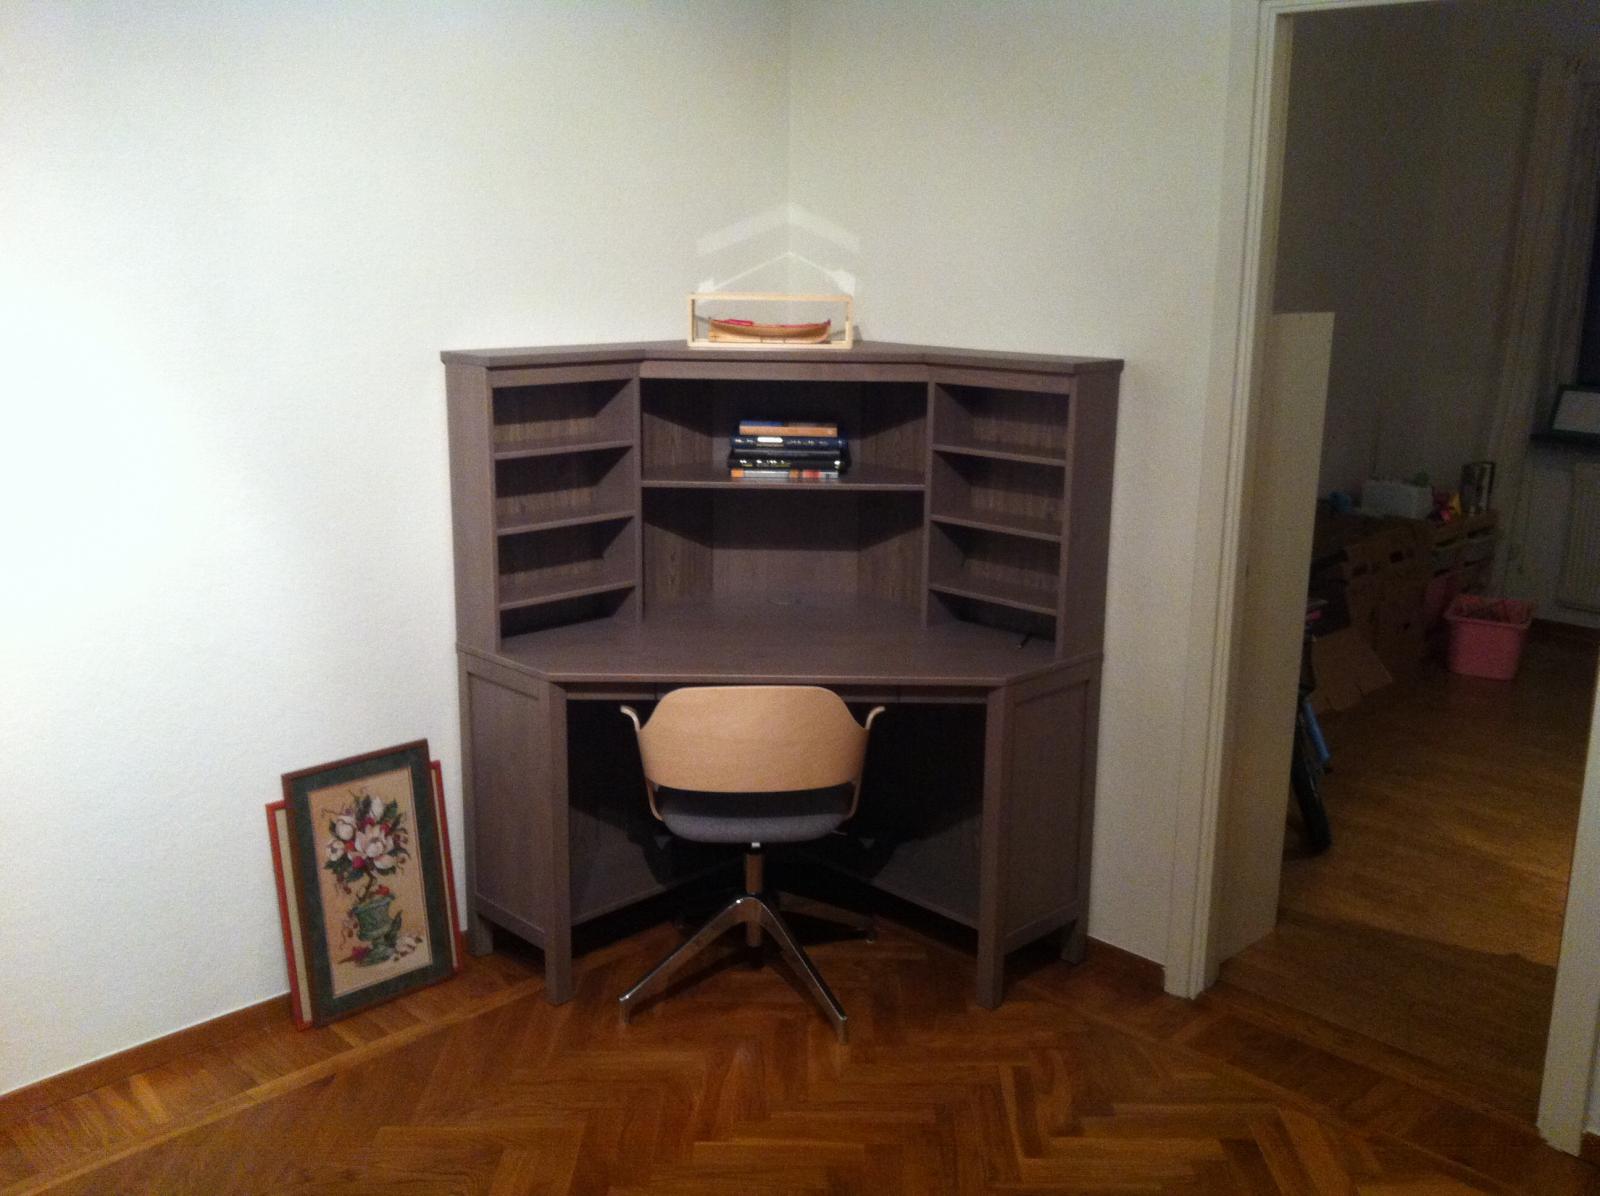
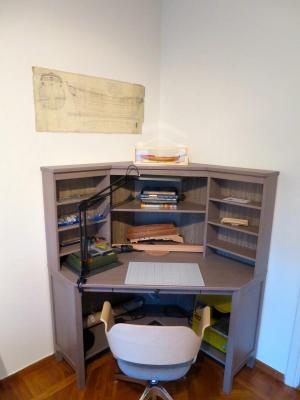
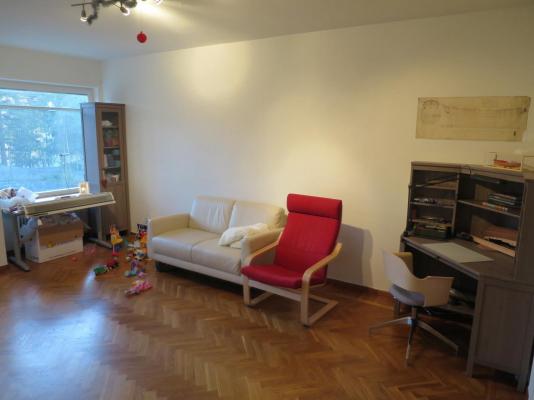
Finally finished most of the renovation works in the apartment, and here is my modelling corner! All the tools are in a large drawer, only most popular ones are stored in the table itself. The band saw is hidden under the table, it would be rarely used. The drawing is a Cromwell plan from NMM, but it is purely for decoration - Hahn plans are much more detailed. Since my wife occupied another corner for her knitting stuff, it is a time to rename the "living room" into a "hobby room". But hey, isn't hobby a big part of our life? (Yep, I know that furniture is quite not in same style, will slowly fix that over time) So now I can finally start cutting the frame blanks! Finally! Time to make a first bucket of sawdust
- 968 replies
-
- 11
-
-
- hahn
- oliver cromwell
- (and 1 more)
-
Divarty, congratulations with a decision to redo the planking, I thnk that model is perfectly suitable for it. Have you considered a boxwood package from Hobbymill? A bit more expensive, but worth every penny. Planking with boxwood is such a pleasure comparing to basswood. I planked two models - Pinnace with bass, and Longboat with box - the difference is very big, boxwood planking is easier, more stable, etc. And just a mere fact that after initial sanding basswood planks from the kit are like twice thinner than boxwood ones from hobbymill. It means a lot! You can compare the photos in my logs (see links in the signature). Longboat planked with box is not sanded yet, and already looks much better than basswood after sanding! But beware: when you will try a booxwood package for longboat, you will never go back to inferior wood, and will end up paying quite a lot for a good one!
- 55 replies
-
- 2
-
-
- 18th century longboat
- model shipways
- (and 1 more)
-
Congrats! One of the finest longboats, and a really nice and elegant stand!
-
Used Lego blocks for small models (like Pinnace and Longboat), they are amazing - square, perfectly aligned, and very flexible to adjust for different parts of the hull. For example - http://modelshipworld.com/index.php/topic/6801-18th-century-longboat-by-mike-y-model-shipways-148/page-2#entry201485
-
Thanks a lot for the review! Ordered a copy
-
Proper light for a modelling table
Mike Y replied to Mike Y's topic in Modeling tools and Workshop Equipment
Gaetan, thanks! Could you please point me to a right discussion than? I honestly searched by "light" or "lamp" keyword in that forum before creating a new topic.. -
Proper light for a modelling table
Mike Y replied to Mike Y's topic in Modeling tools and Workshop Equipment
Gaetan, pardon for an amateur questions, but I though that lux is simply a brightness. And brighter != better, it would be painful for the eyes to work under a very bright light. There should be just enough brightness Or I'm totally missing the point? Since looks like you know better, could you please share your knowledge? -
Proper light for a modelling table
Mike Y replied to Mike Y's topic in Modeling tools and Workshop Equipment
Thanks everybody for suggestions! Ordered this daylight lamp: http://www.amazon.co.uk/Daylight-Black-D33041-Energy-Saving/dp/B002XVPQP8 According to reviews, at least it's not bad People do mention that it's not flickering, no headache or eye tiredness. Will post a feedback when I receive it. -
Proper light for a modelling table
Mike Y replied to Mike Y's topic in Modeling tools and Workshop Equipment
Jud, you are right, it is a dark corner table Other setups will take too much space in a living room. And I can't afford an apartment with a dedicated hobby room. One day kid will grow up and move away... So the idea is to light that cave with a good lamp. Found some brand daylight, they say right things, but the website looks too much like a marketing blah blah. Gut feeling that they could just repackage some chinese lamps in a nice box.. Or I'm wrong? http://uk.daylightcompany.com/product/n1190/ -
Proper light for a modelling table
Mike Y replied to Mike Y's topic in Modeling tools and Workshop Equipment
Magnifier with integrated light is a different story. I will buy it separately it gives a spot light, and I am looking for a good background light, that will keep entire working area bright enough -
Proper light for a modelling table
Mike Y replied to Mike Y's topic in Modeling tools and Workshop Equipment
So conceptually I am looking for a bare lamp like this: It would be mounted on top of that table, under the place where Pinnace stands on that photo: Unfortunately most of such lamps are designed for kitchen and have a terrible light quality. And if you search for a separate light bulb to make this lamp by yourself - there are gazillion of different technologies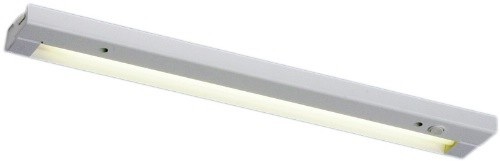

-
Making a modelling corner in a new apartment, and want to do a proper light on my modelling table. No need for a table lamp, no mounts or clamps, I will integrate the lamp into the top part of a table itself. My table is in the living room, so the room is already light. However, need a guidance in what kind of a lamps are preferred.. * No high frequency flickering like in a cheap fluorescent lamps. Lamp should not make eyes tired * Not too bright * Neutral spectrum and colour palette, when I look on a wood or paint, I want to see a real colour, without effects of the lighting Basically, it should be a pleasure for eyes and it should not skew the colours. Price range - I hope to be below $150. Would really appreciate any hints, what type of a lamp to use. I saw some professional jewellery lamps, but they are around $400, which is too expensive.
-
Ok, so I just realized that all these photos were a macro, and model is much smaller then I though! Wow!
-
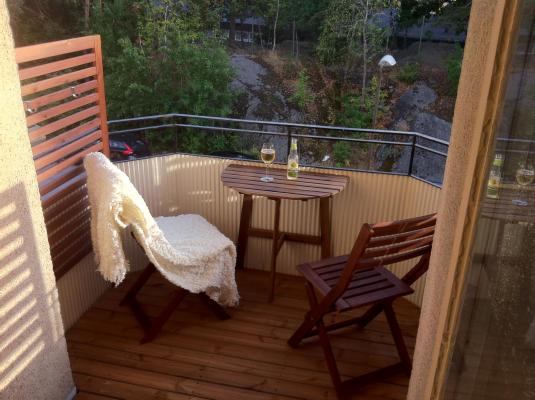
Modelling is temporarily on pause - was busy buying and moving into a new apartment. Now busy renovating it Used modelling tools to make a balcony, does it count? Next on a list - make a modelling table, so I can start my build!
- 968 replies
-
- 13
-
-
- hahn
- oliver cromwell
- (and 1 more)
-
Yes, it looks nice separately, but it definitely do not belong to the light Longboat Will think of something lighter.