HOLIDAY DONATION DRIVE - SUPPORT MSW - DO YOUR PART TO KEEP THIS GREAT FORUM GOING! (Only 13 donations so far - C'mon guys!)
×


Mike Y
-
Posts
1,550 -
Joined
-
Last visited
Content Type
Profiles
Forums
Gallery
Events
Everything posted by Mike Y
-

ancre La Belle 1684 by Nenseth - 1:36 scale
Mike Y replied to Nenseth's topic in - Build logs for subjects built 1501 - 1750
Now good luck with fitting it all together! That is tricky -
Thanks a lot! Very elegant solution, and looks more precise then a similar sanding station design.
-
No pre-order anymore. Amazon just mailed that book is not available and there is no ETA. The amazon page itself says "Out of Print--Limited Availability." http://www.amazon.com/Ship-Line-History-Models/dp/1848322143 Does anybody have any info?
-
ancre La Belle 1684 by Nenseth - 1:36 scale
Mike Y replied to Nenseth's topic in - Build logs for subjects built 1501 - 1750
That is a very fine wood you have there! Trying to find pear on Arkowood website, but can't seem to find it.. Or it is not on a website? -
Sorry to hijack into that log, but I found an interesting post. Wasa museum is building a small section of the hull, historically correct. It is under construction, and the latest info is here: http://www.vasamuseet.se/sv/Skeppet/Skeppsbloggen/Hakan-Altrock/Nyanser-av-gratt/ Looking forward to see it!
-
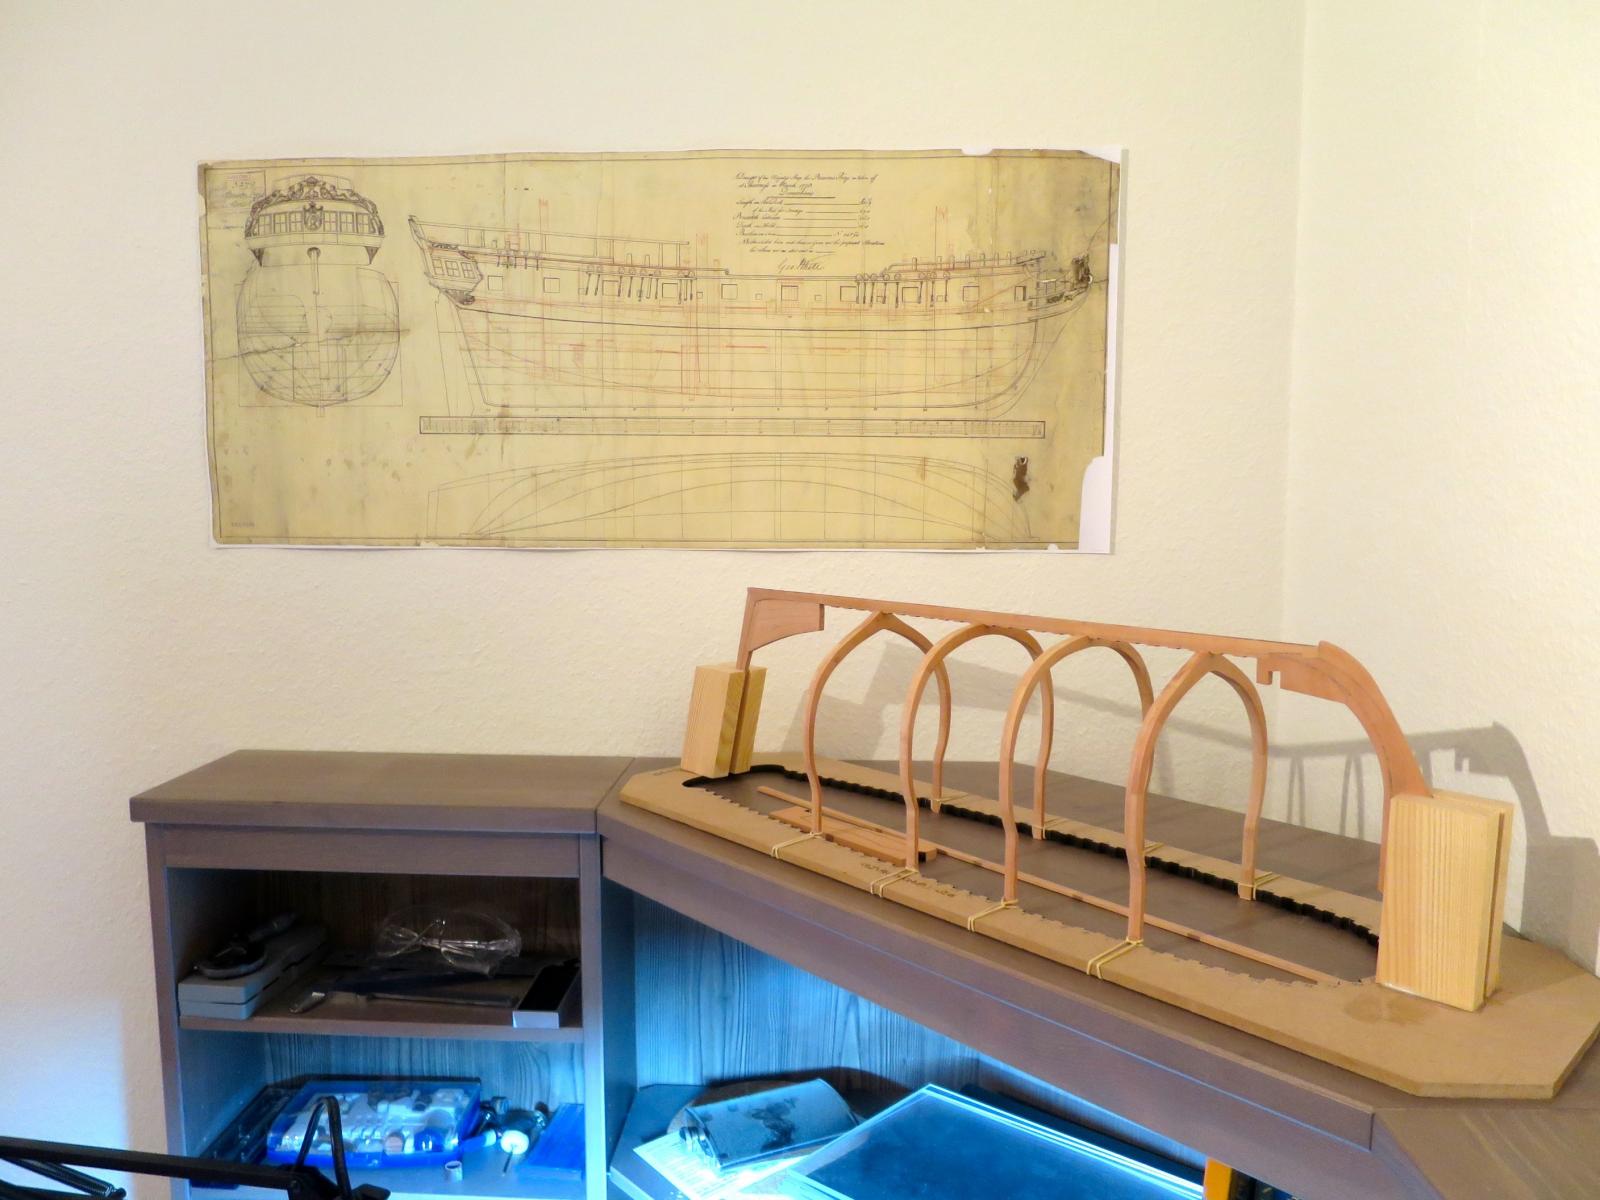
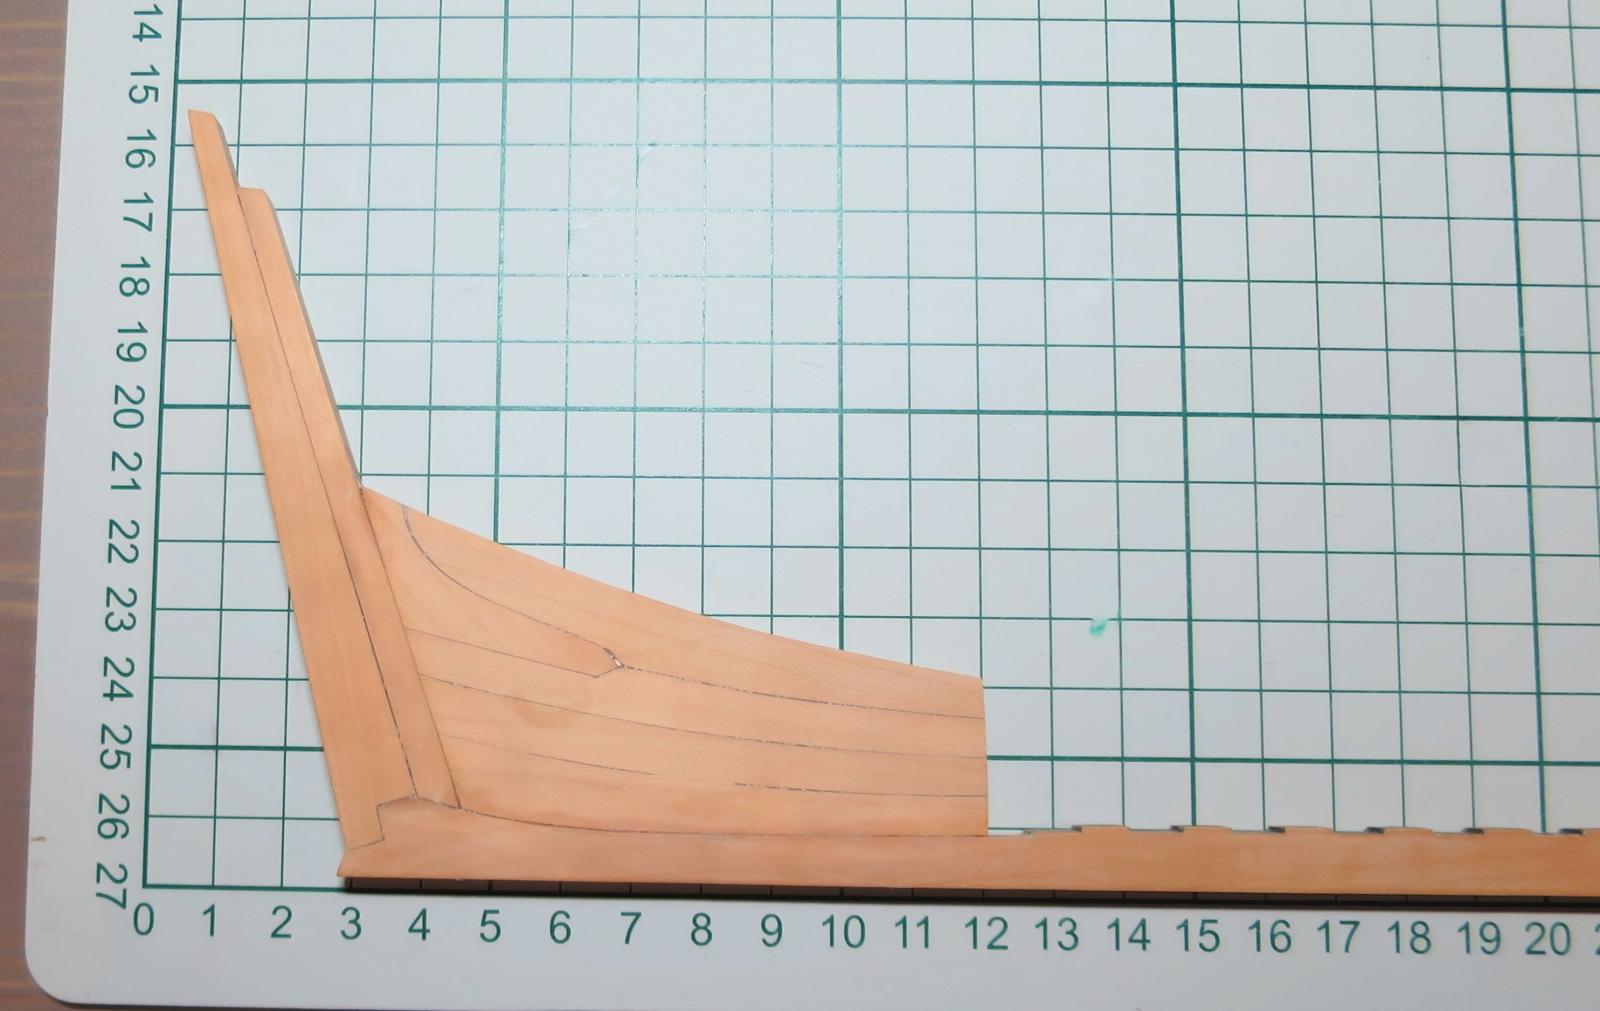
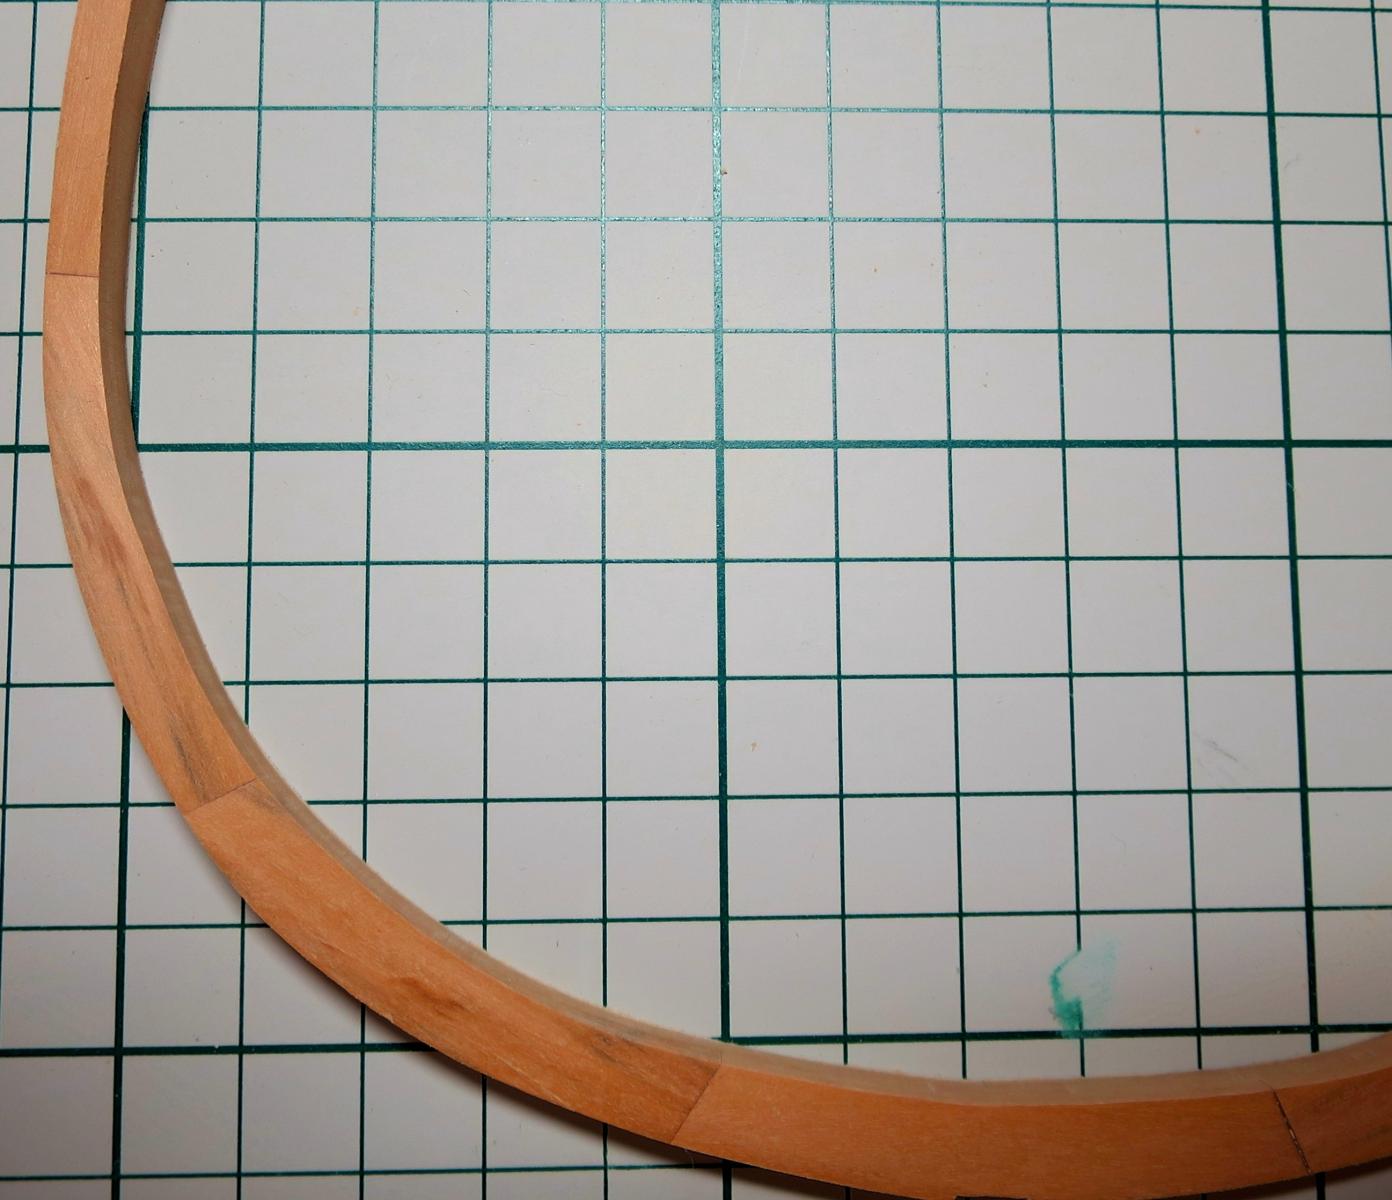
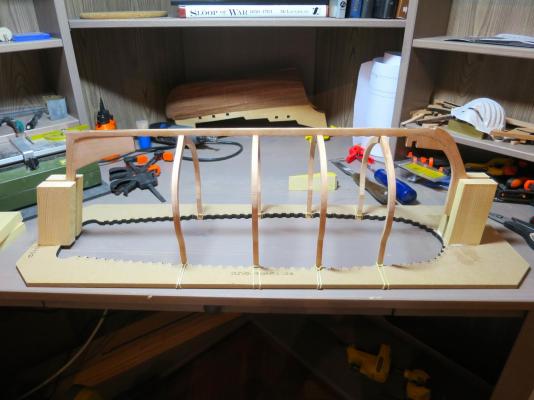
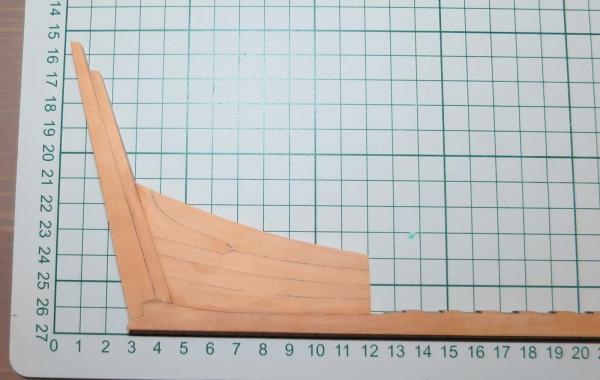
However, I decided to make rabbet much later, when all main frames would be cut. Before it, would be hard to determine the proper angle of the rabbet, how planks will go. I am not going to glue the frames before they are all cut anyway Assembled all parts on a framing jig: It nicely decorates the modeling area Now I know how to make a nice frames, keel is ready, so let's make some sawdust and produce all remaining frames! Luckily that model will have just 40 frames, due to a bigger (non-correct) spacing between them, so hope to make it in 3-4 months. Winter is coming!

- 968 replies
-
- 16
-

-
- hahn
- oliver cromwell
- (and 1 more)
-
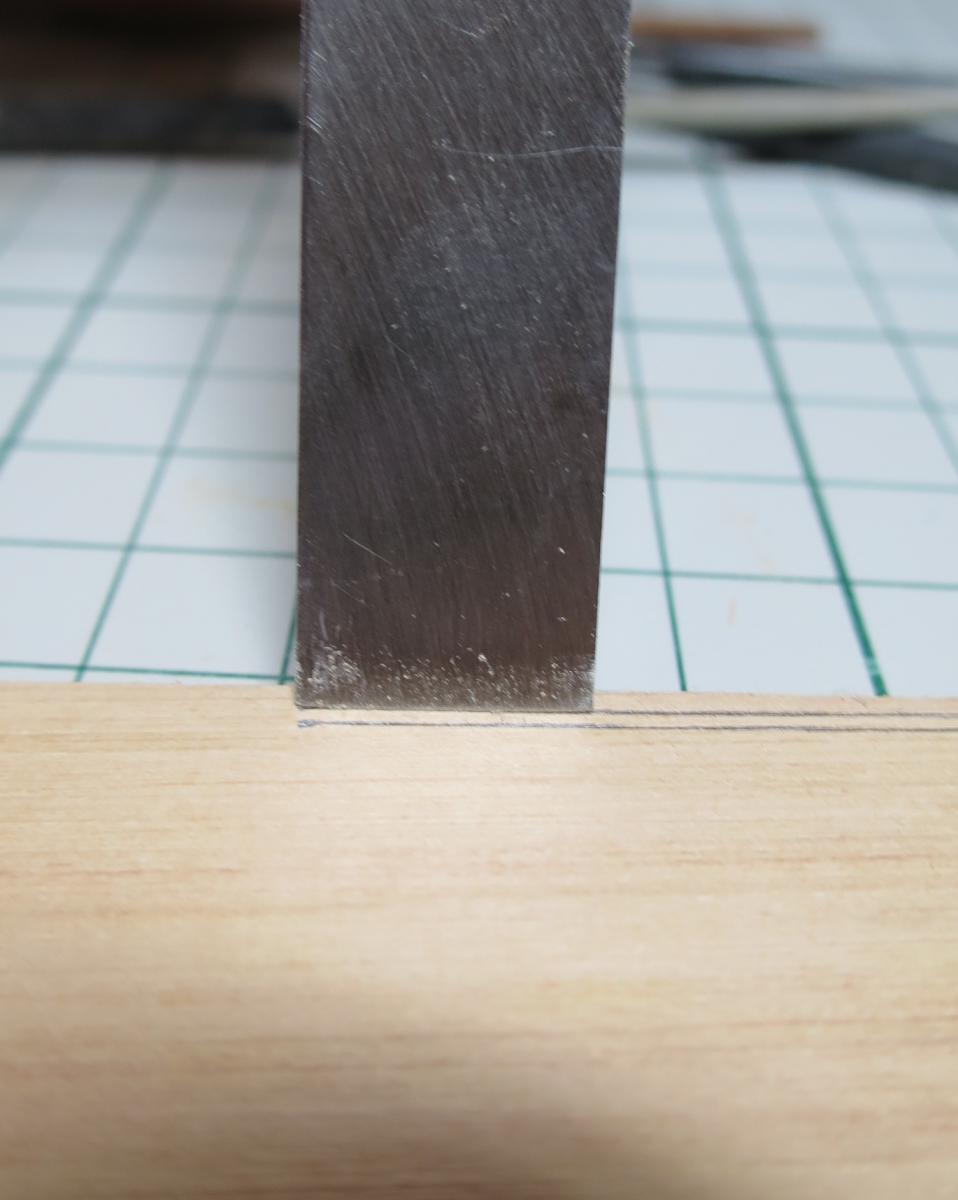
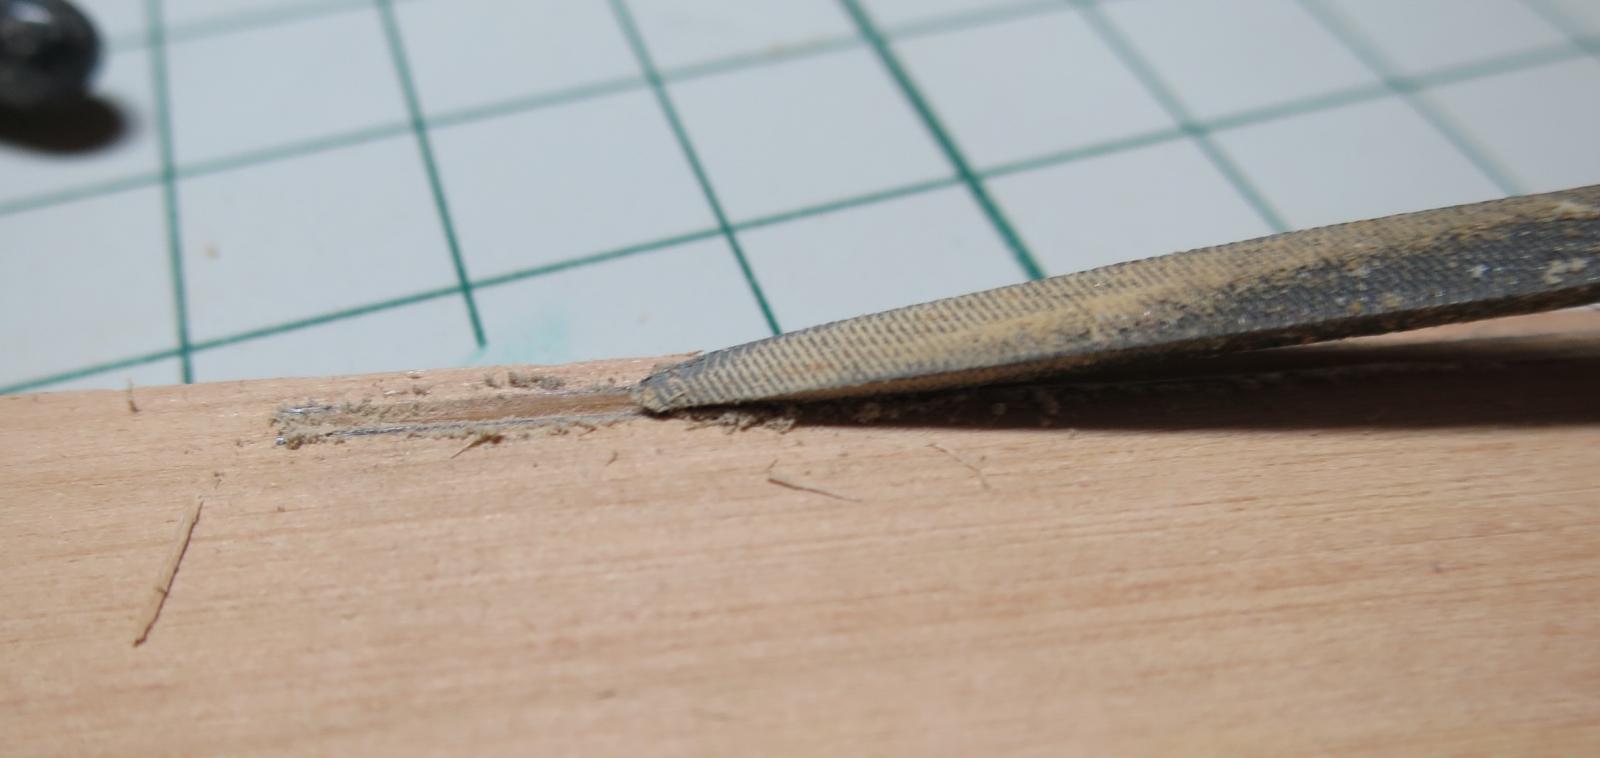
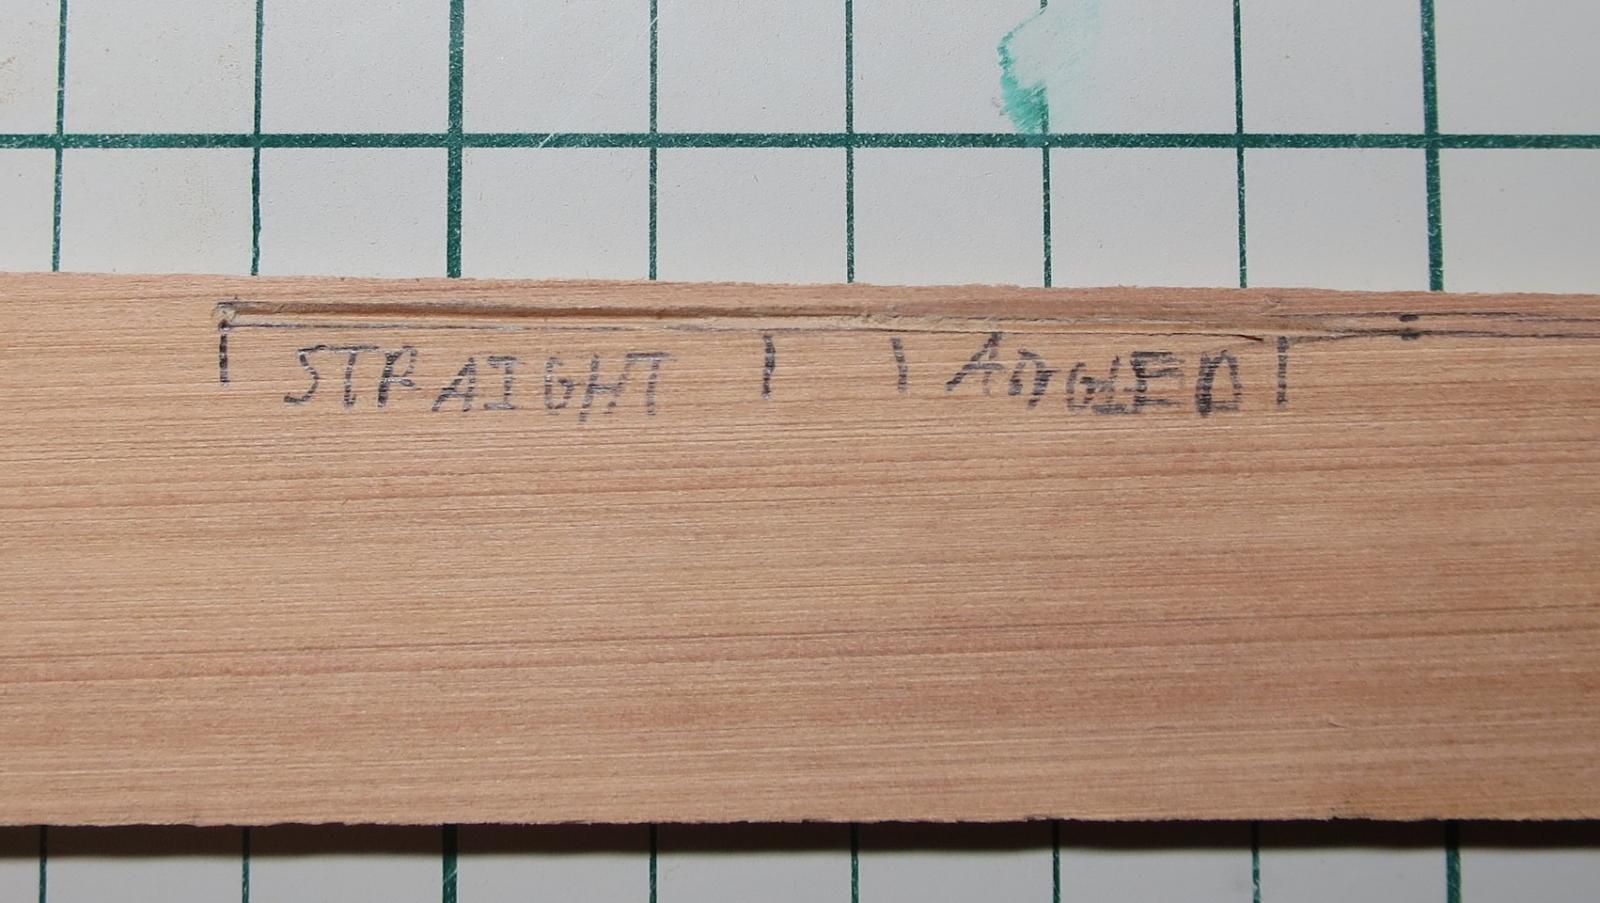
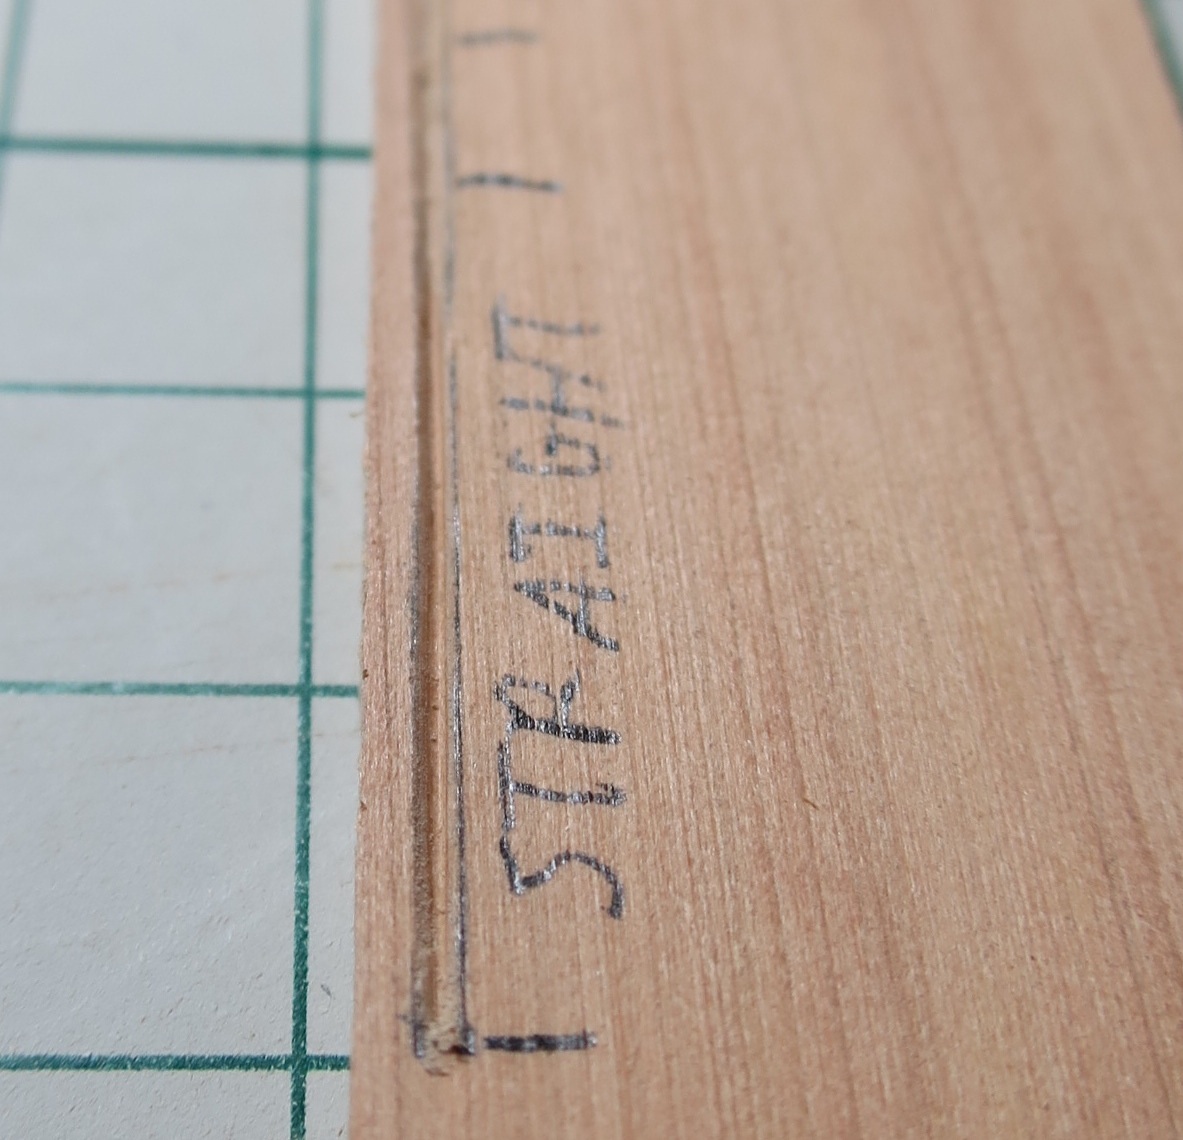
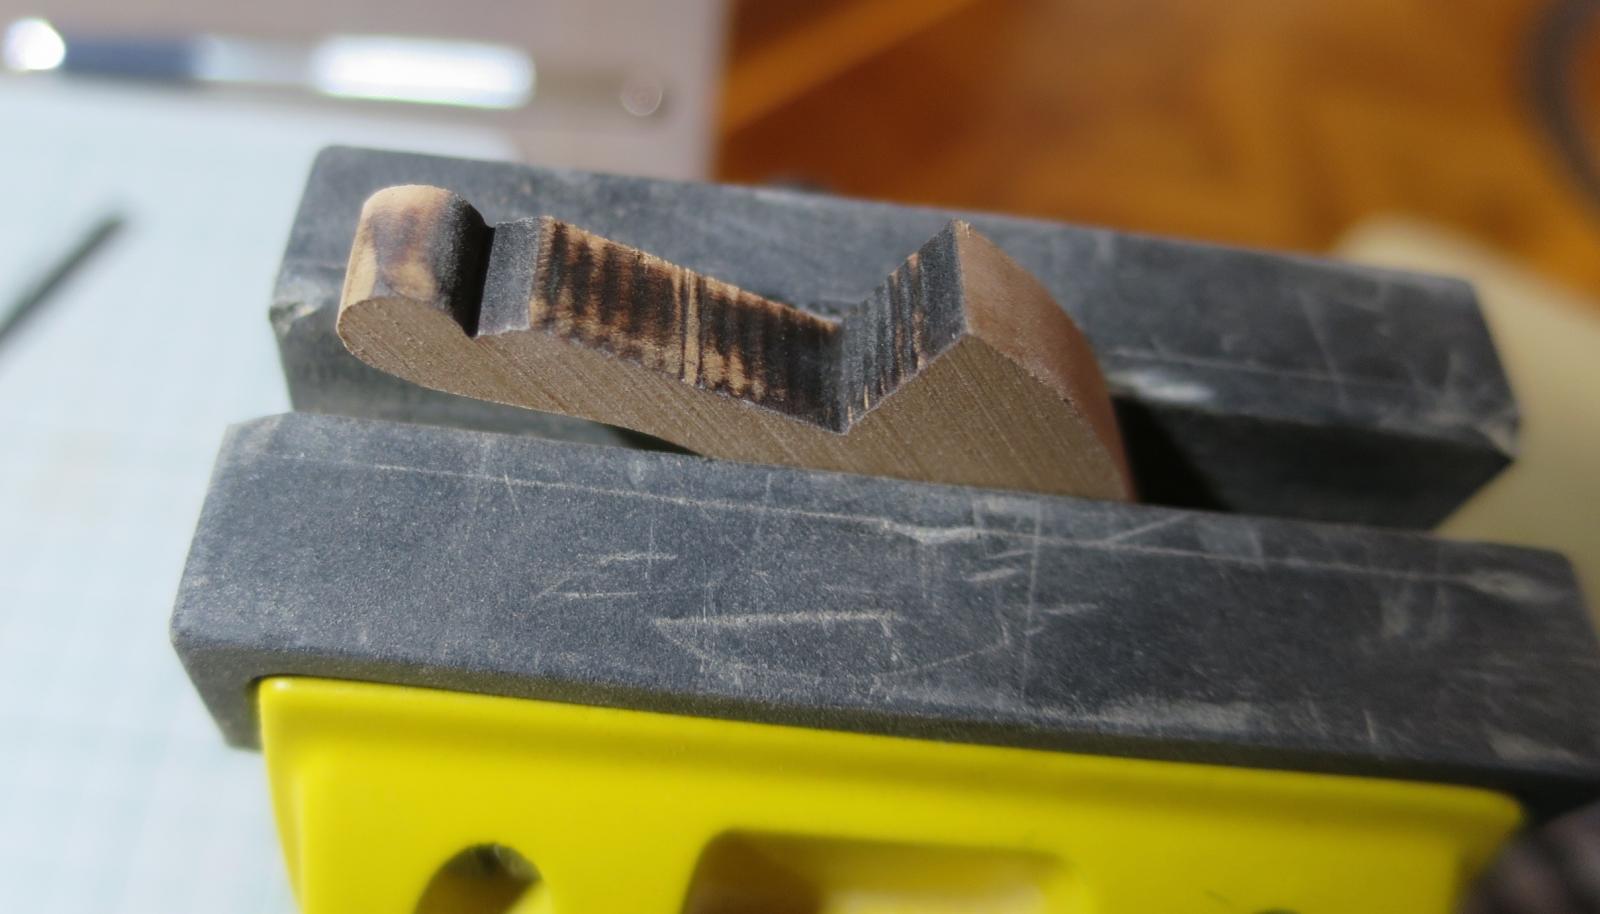
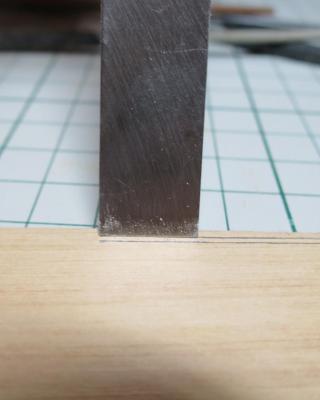
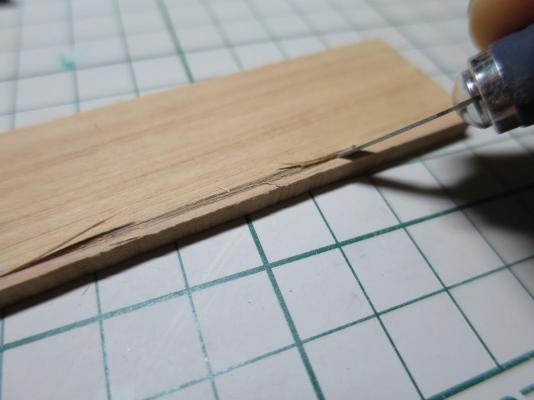
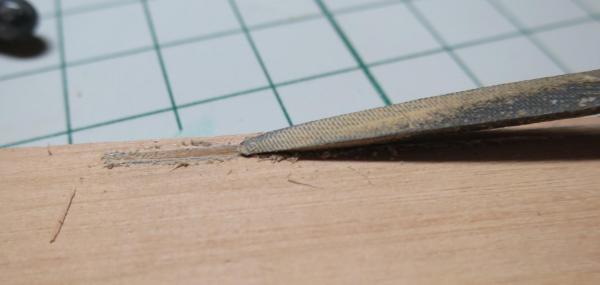
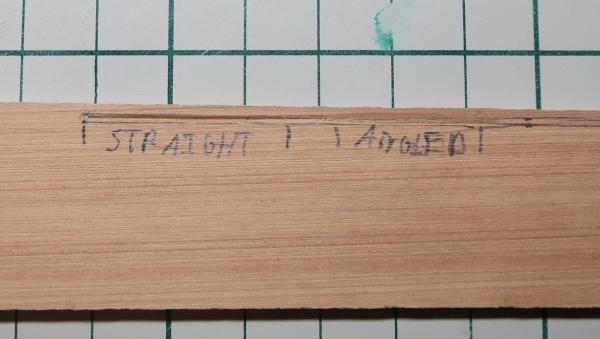
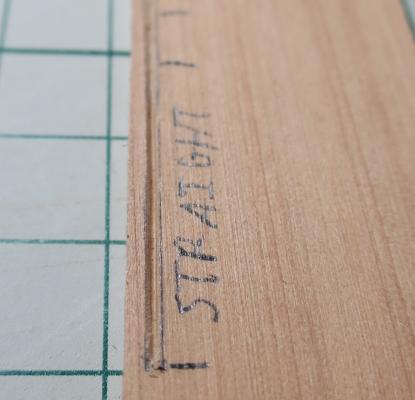
Thanks everybody for the advices, it is really much easier than I thought After a lot of experimenting with scrap wood, it turned out that scrapers will not give a straight enough line. There should be something that ignores the grains and goes straight. So I ended up with a following process, not saying it is the only correct one. Use flat chisel to set the straight line for the rabbet, making two cutoff lines. Cut away the wood between those lines with a blade: Use triangular file to shape the rabbet. Do straight passes: That triangular file was the key part, it keeps the straight line, not going sideways due to a wood grain. Also if you need to add an angle to the rabbet - just change the angle of the file:
- 968 replies
-
- 11
-
-
- hahn
- oliver cromwell
- (and 1 more)
-
If the glue is on the surface - you can try a rotary tool with nylon brush. Works surprisingly well. Do a short touches, if you press the brush to the wood for a long time - it will overheat and burn the wood. Brush like this: http://www.amazon.com/Dremel-403-Bristle-Brush/dp/B00004UDGS
-
Toni, thanks for the advice! I am probably just overthinking it Digged through various blogs here - indeed, looks like a light passes of blade, chisels and scrapers will work nicely. Just do not use power tools and do not rush it. Hope it will work out! Omega, Mark, thanks a lot!
-
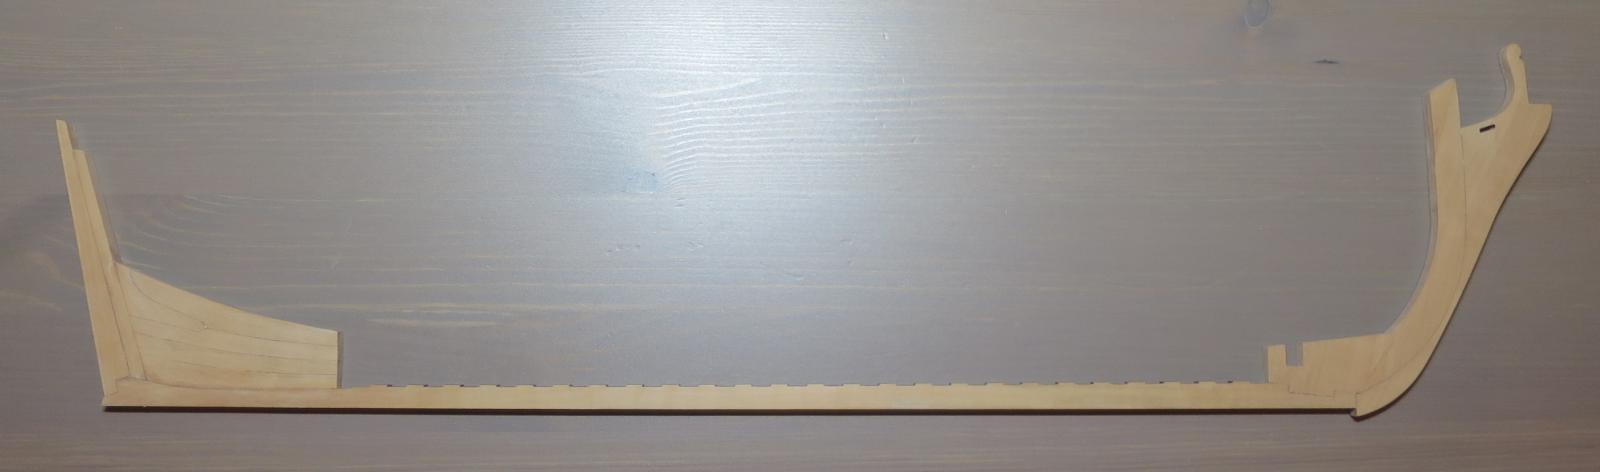
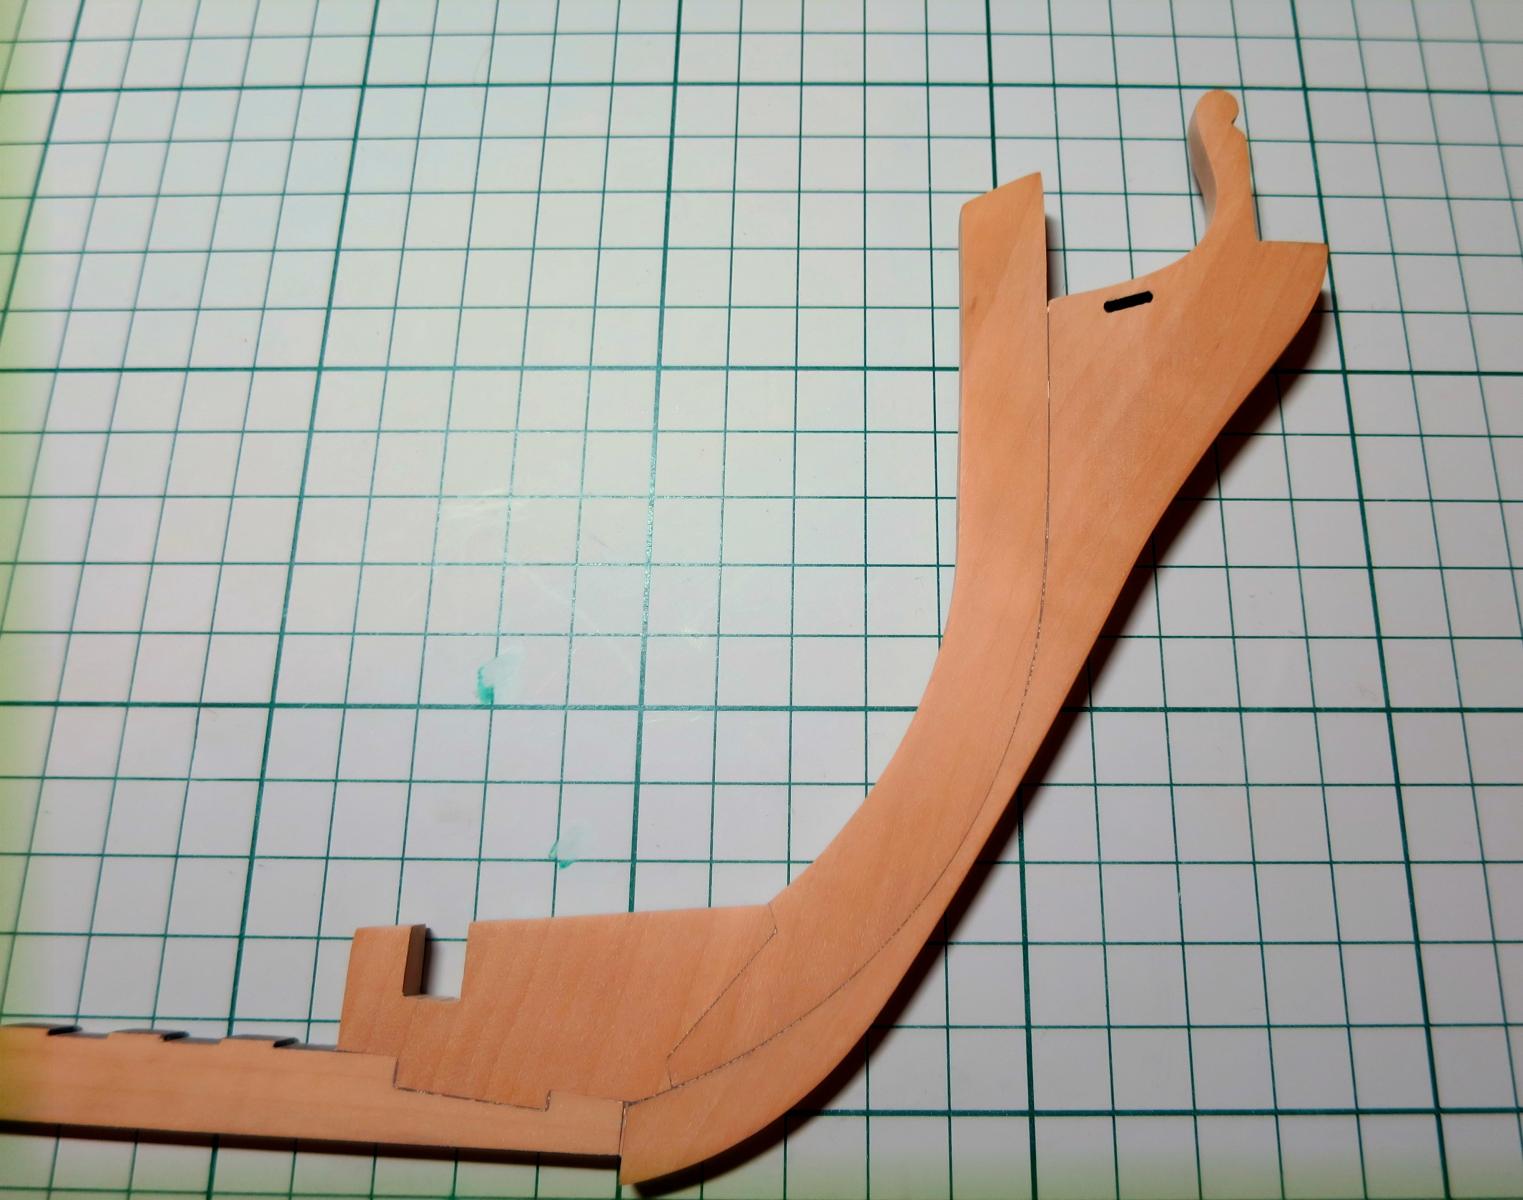
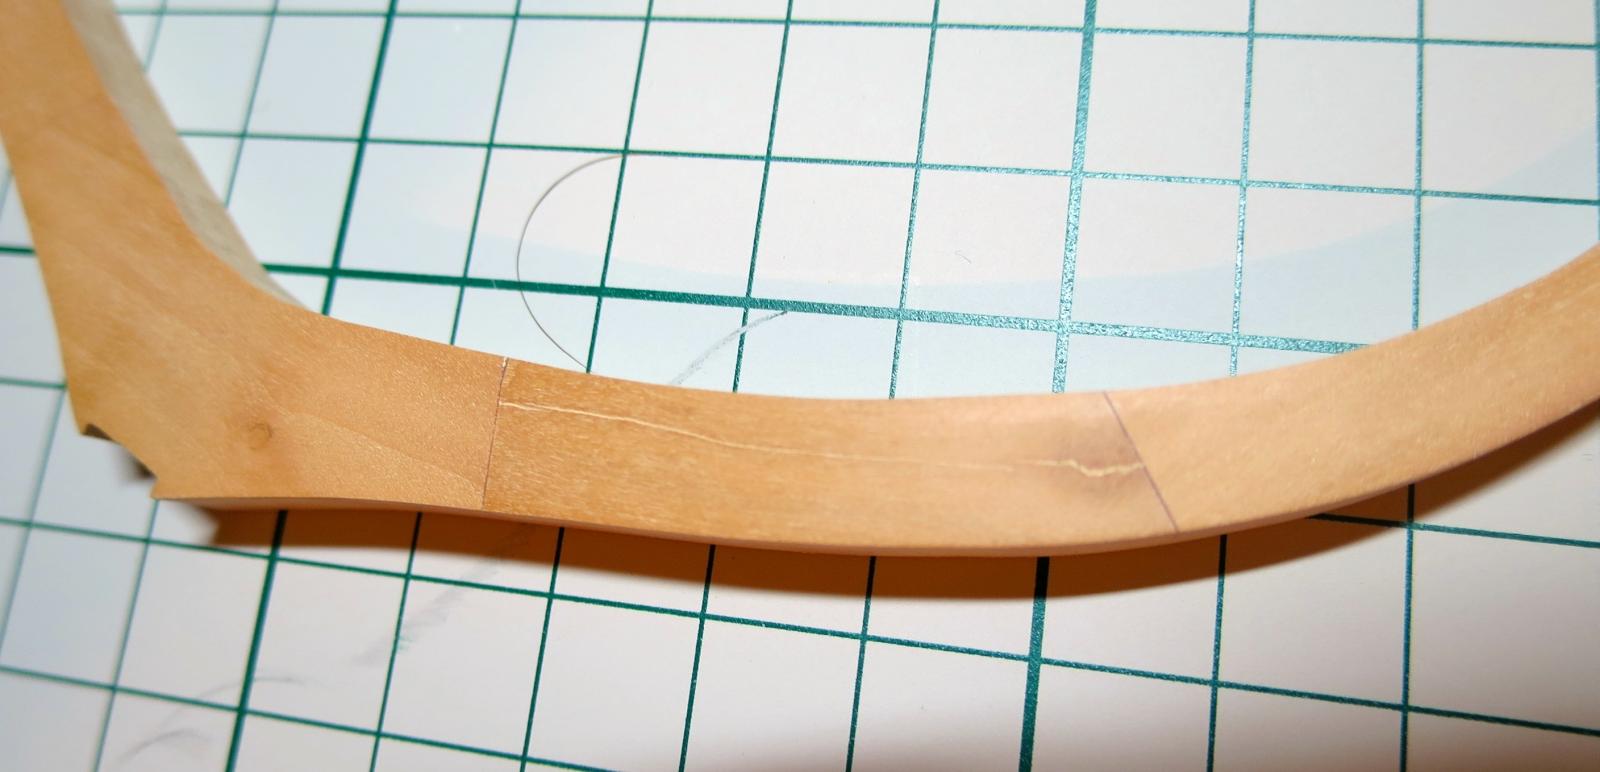
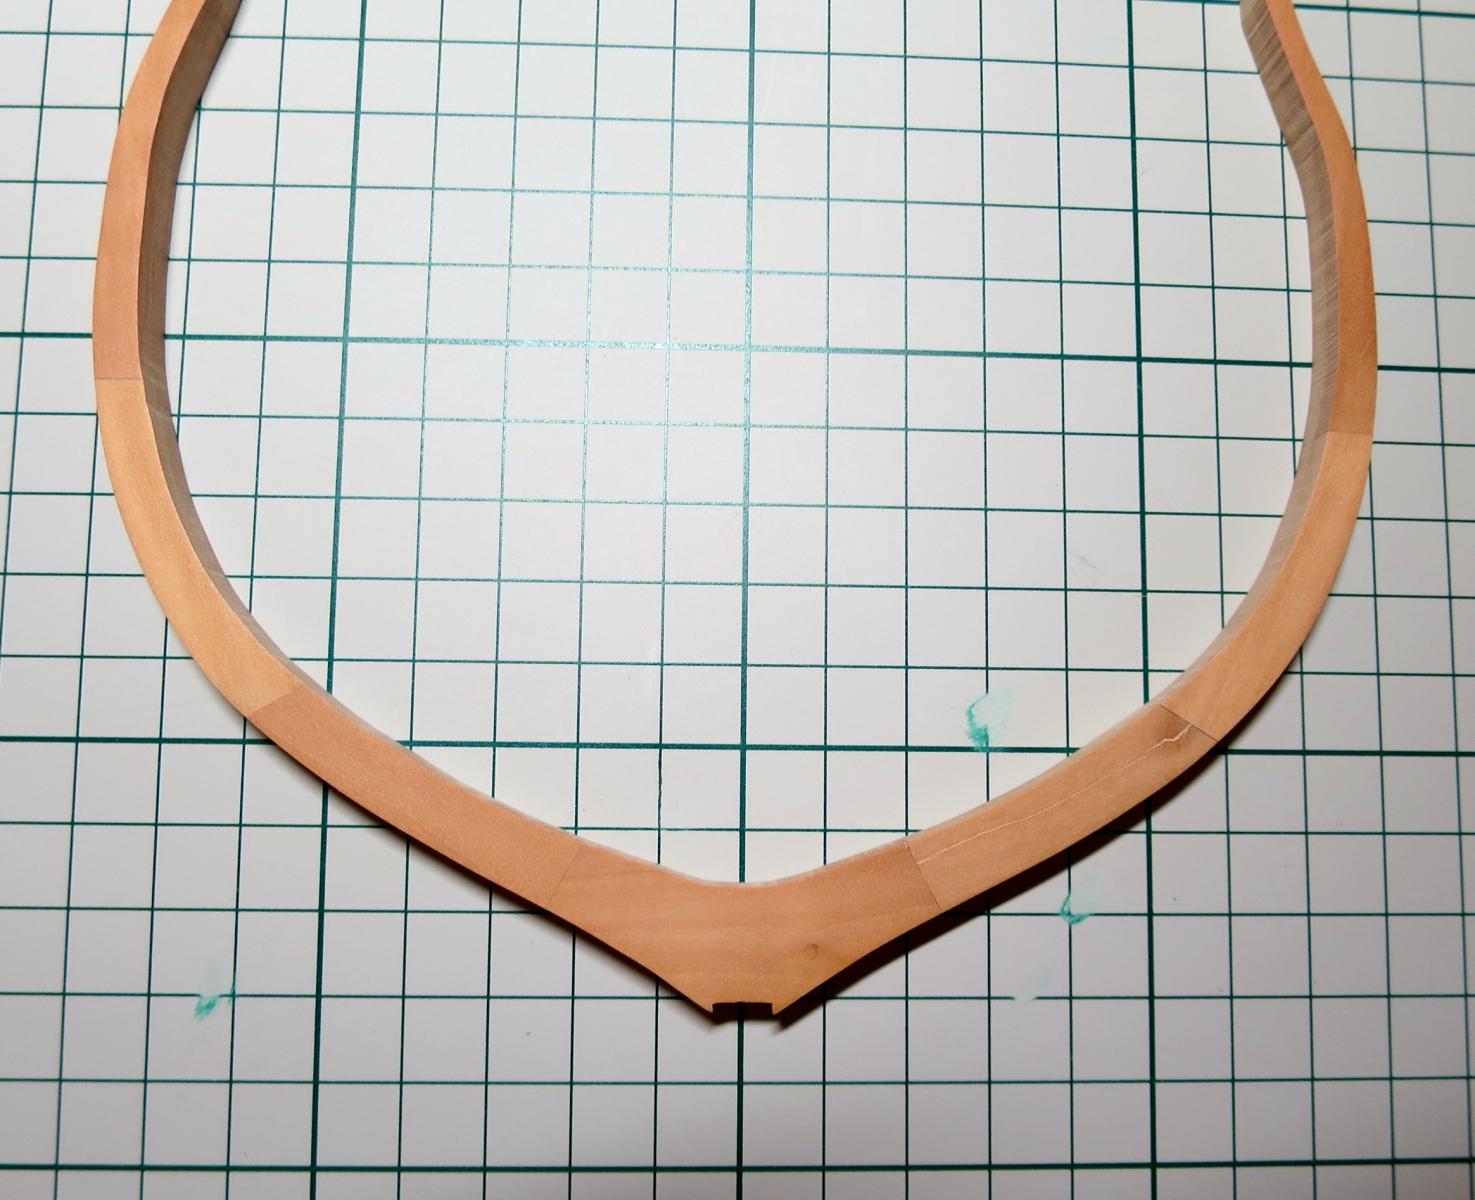
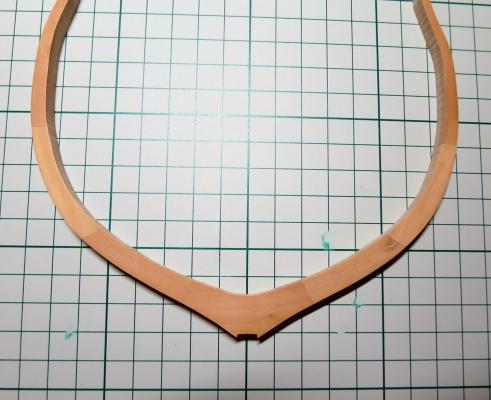
End result: Now the fun part - cutting the rabbet. I do not have any power tools to do it, so will make some hand jig and will slooooowly cut it with chisel and knife. Now when the keel is assembled, it would be a pity to ruin it by making a bad rabbet.


- 968 replies
-
- 22
-
-
- hahn
- oliver cromwell
- (and 1 more)
-
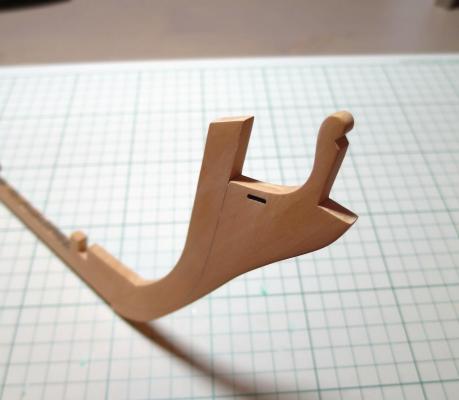
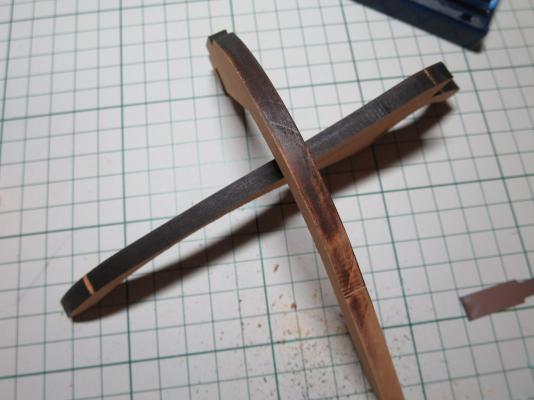
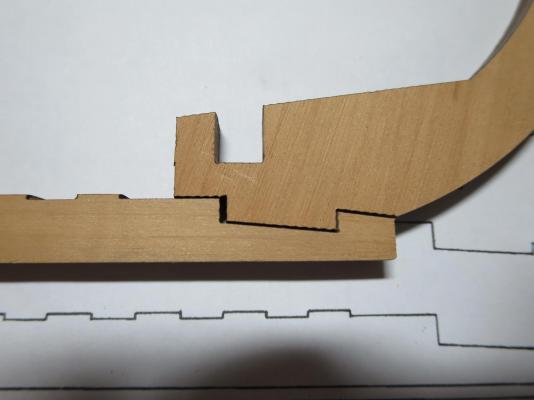
Removed the nasty laser char. In hindsight, it is good that I selected a timbering set without laser cut frames, the char removal process is messy and definitely not pleasant. In his youtube videos, Dave recommends to remove the char using the shaving blade. It works only to small extent, because char is pretty deep in the wood. Here are the laser cut pieces on a different phased of cleaning: Another issue is a bad precision of a laser at some lines, they are cut with "steps", so lots of wood should be filed away to make that surface smooth: Some joints are too wide - they fit tightly with char, but if you start to remove the char (and the "steps") - then the joint is too weak: So I cut away that joint and scratched a new one Another improvement was a deadwood - supplied laser cut deadwood was made of a single piece, which is too far from desired level of correctness. So I made a better one. But it was a hell of a job to nicely fit all the curved timbers together! It is easy to make a tight fit when parts are straight, but when they are curved - it really needs a skill. Here is how ugly it looks when just cut: Next time will try to cut smoother... It took around 4 hours of sanding and filing and sending and filing to make them fit. Resulting fitting is not great, but next time will do better:

- 968 replies
-
- 13
-
-
- hahn
- oliver cromwell
- (and 1 more)
-
Serious approach! Maybe you can try to cut a few test planks from some more standard modelling wood, to see if the problem is in the saw or in the wood? Also, what is the problem exactly? If you show some photos illustrating it - maybe there is an easy solution for the problem.
-
Wow, now it looks very accurate! Lovely!
-
Battle Station by DocBlake - FINISHED - NRG
Mike Y replied to DocBlake's topic in - Build logs for subjects built 1751 - 1800
Interesting wood selection! Bloody station -
Ben, actually just recently I was looking on a photos in your log, looking on your nice wood, thinking "yep, there is Pear and pear...."
- 968 replies
-
- 1
-
-
- hahn
- oliver cromwell
- (and 1 more)
-
Yep, saw in the Swan or Echo build logs, that Jeff's pear is quite different indeed. Darker, more cherry-ish Next frame, this time I am an idiot. Missed a tiny crack on a frame blank, after sanding it is becoming very clear: The colour variation of a brighter/darker pear might be actually good. Hard to say, need to make at least 10-15 frames and dry-fit them, to see how it really looks together. Now the plan is simple - assemble the keel, install 4 "key" frames (I selected frames 4, 10, 16, 23), make sure that everything is measured correctly - and then start a frame mass-production!

- 968 replies
-
- 8
-
-
- hahn
- oliver cromwell
- (and 1 more)
-
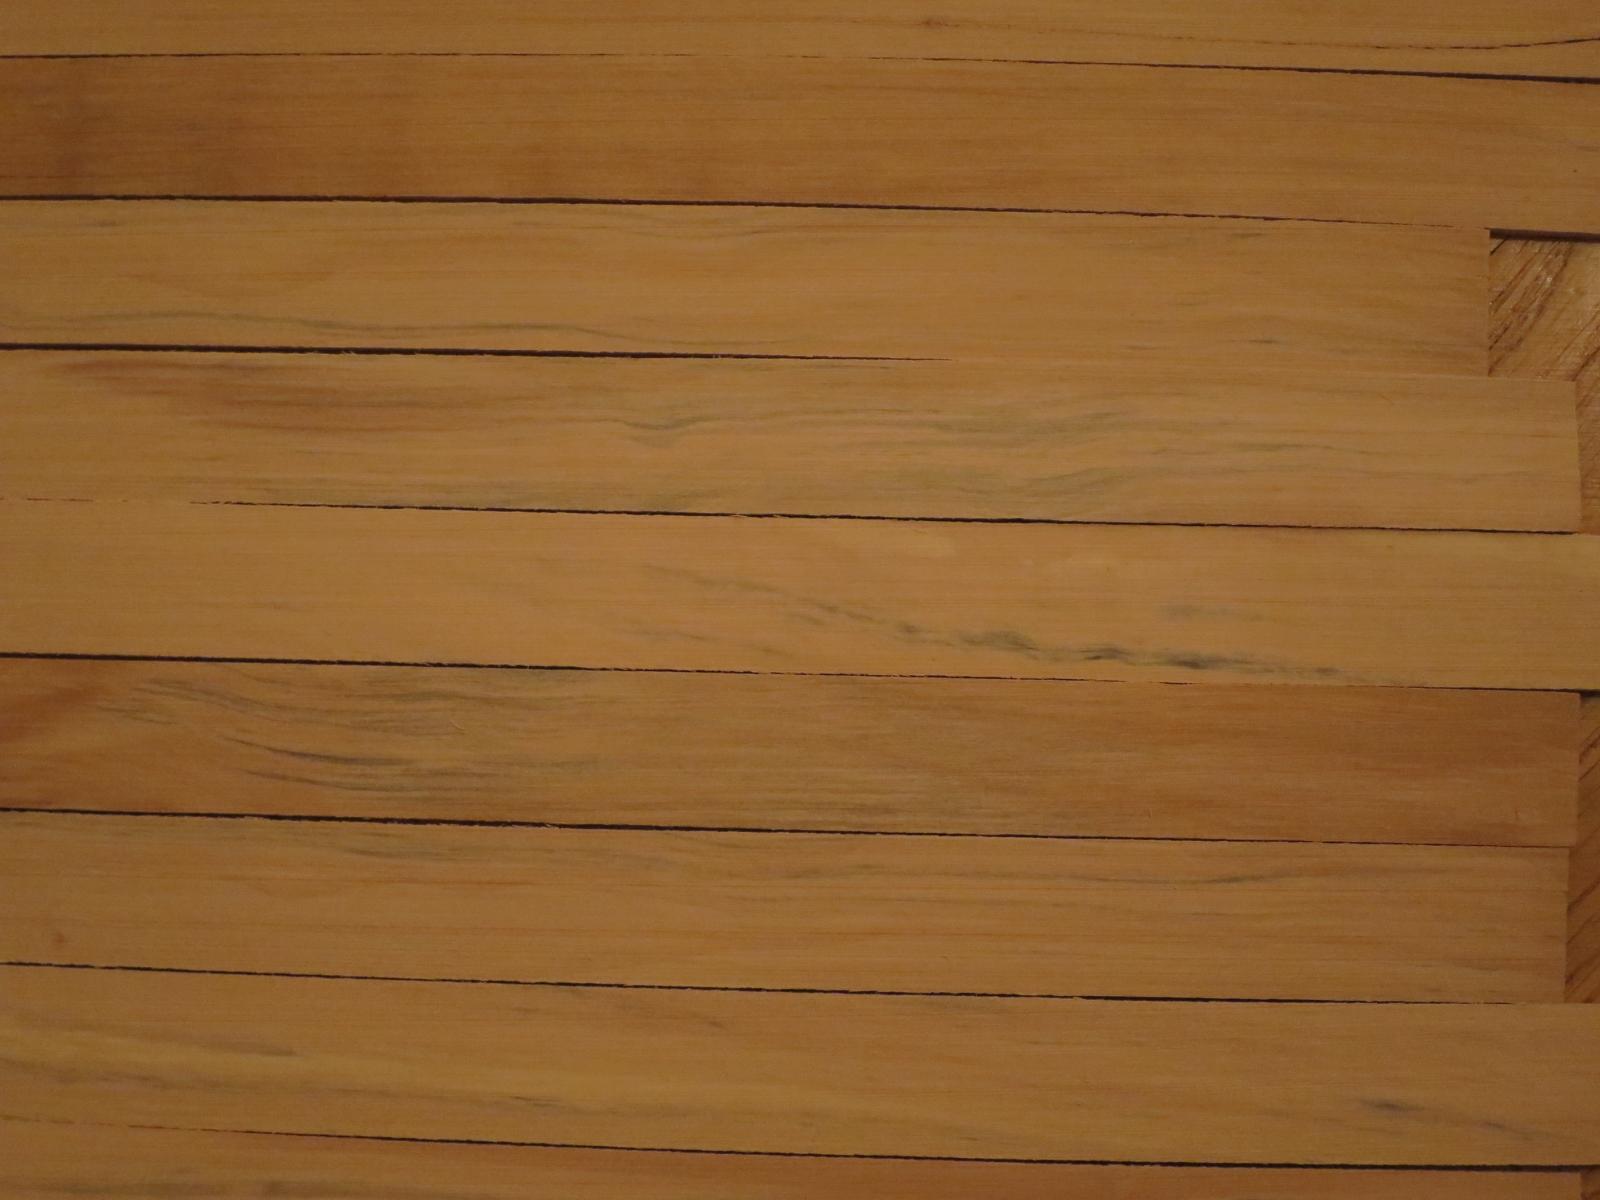
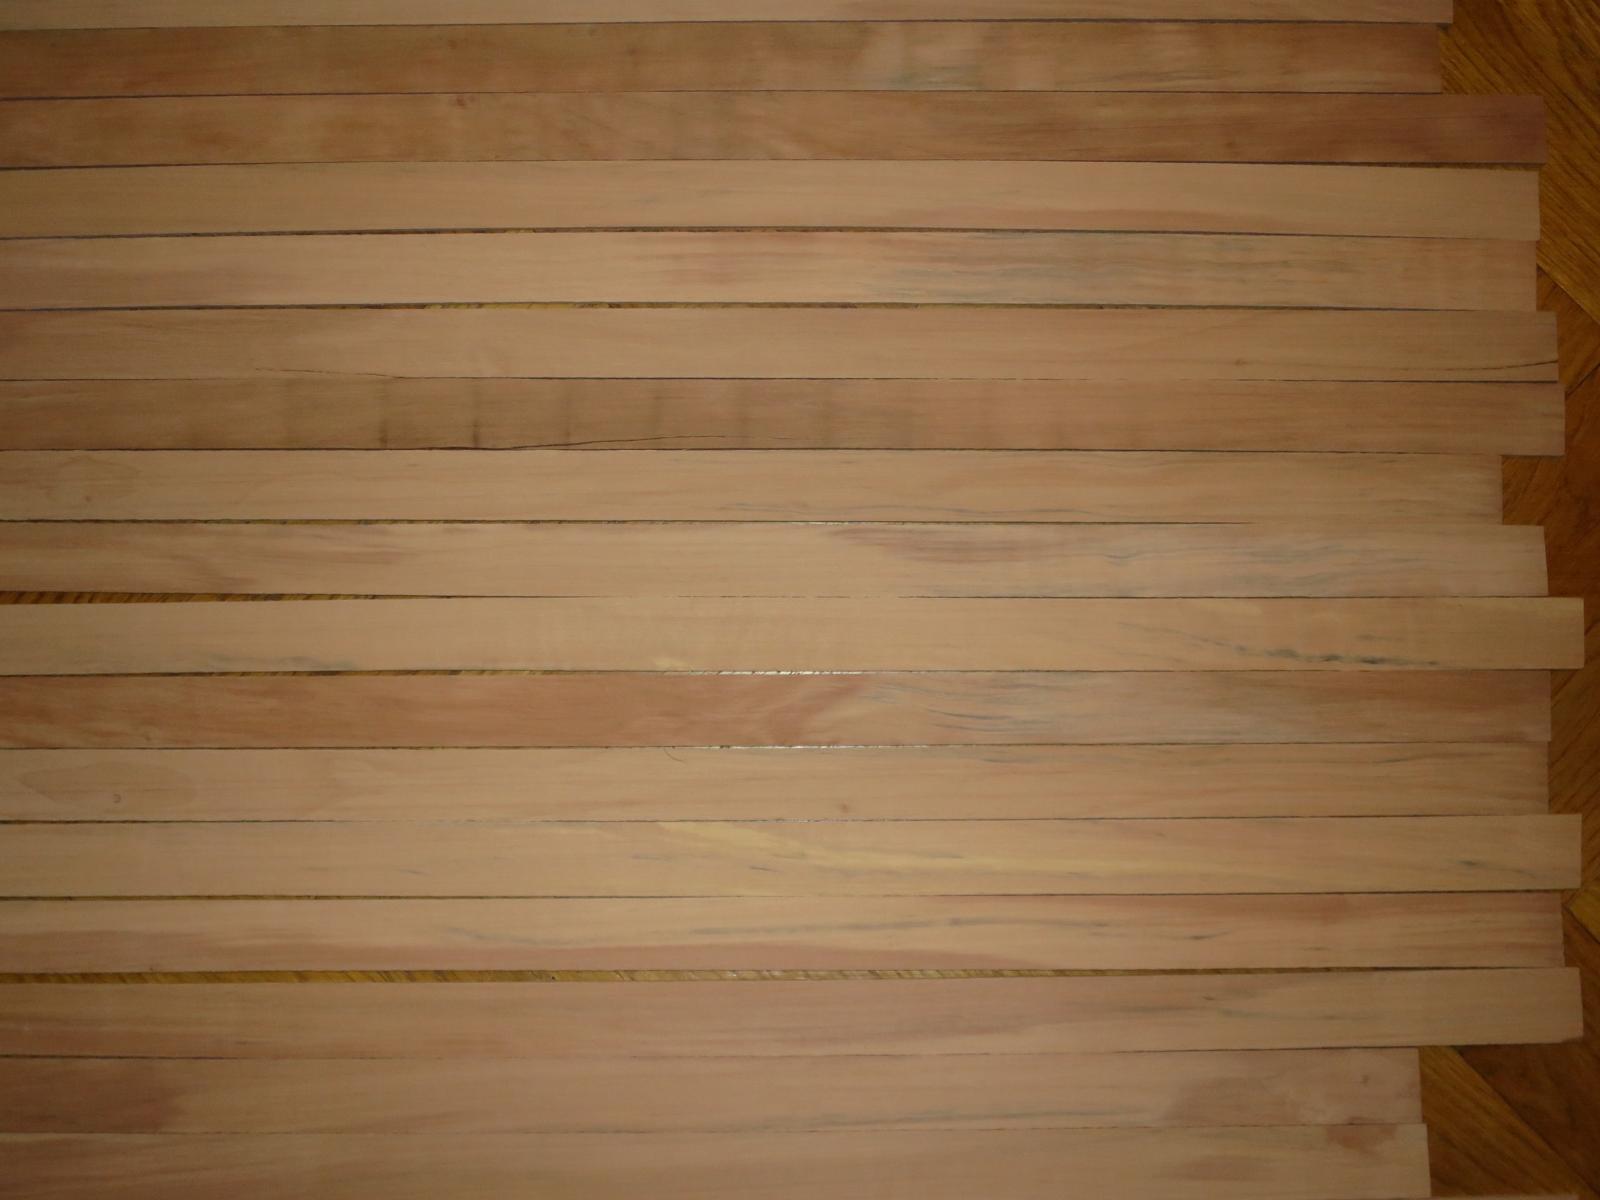
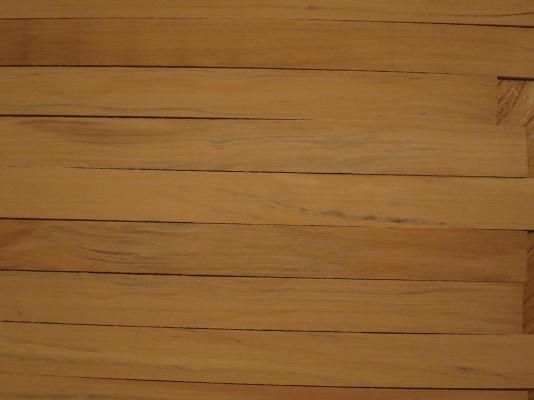
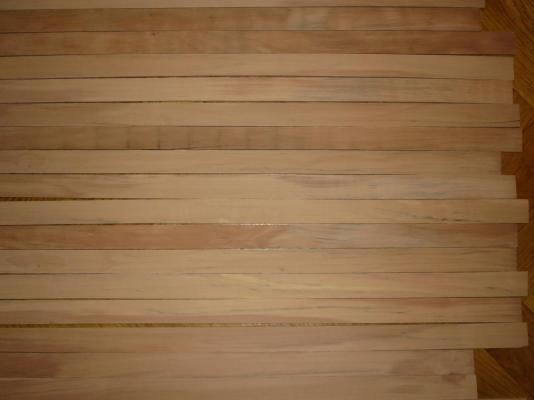
Ok, I probably was too emotional while writing previous post. Reviewed all planks today, separating them into "normal" and "trash it" piles. 31% of planks are defected (big grey areas, etc). Luckily, on most of them defect takes around half of the plank, so in total I am going to trash around 15-20% of planks. That would be probably ok, because I am hoping that there was a reserve for oopsies. Close-up of defected wood: Normal wood: Even without grey spots, note the colour deviation on a "normal" pile. it is clear that Lumberyard have a "prime" wood, that is used for laser cut parts. They are really good - quite consistent dark colour, amazing: For some reason, for frame blanks Lumberyard use second sort pear. That is fully understandable, with Hahn method most of the wood package is a wood for frame blanks, and using cheaper wood probably makes a big different cost-wise. But I would appreciate if they just offer a prime wood for frame blanks, for extra cost.. Will continue with that wood for a while. If after 10 frames it would be obvious that this wood is too bad - will recycle all frames and make a new ones with a wood from Hobbymill. I saw their swiss pear in a various build logs, and it is very consistent in colour. And I have boxwood from Hobbymill, which is the best would I ever saw. No problem with it, happy customer. P.S.: I have no intention on blaming Lumberyard, but it would be fair to post a photos of a wood that you get in a package. Sorry for rant, but it is quite disappointing to feel the second rate customer, who got the second rate wood.
- 968 replies
-
- 6
-
-
- hahn
- oliver cromwell
- (and 1 more)
-
Mark, you are right, the outside edge of a frame is more important. But on the outside it looks simply like a dirty grey stain. I understand that wood have a colour variation, and it is good. But long grey spots are not ok Alan, welcome! Happy to see you
- 968 replies
-
- 2
-
-
- hahn
- oliver cromwell
- (and 1 more)
-
ebonizing boxwood
Mike Y replied to Kurt Johnson's topic in Painting, finishing and weathering products and techniques
Brian, I am idiot, I meant ebony of course David, thanks for explanation! Will probably try it anyway, and fallback to painted boxwood if I will fail to tame that tricky wood -
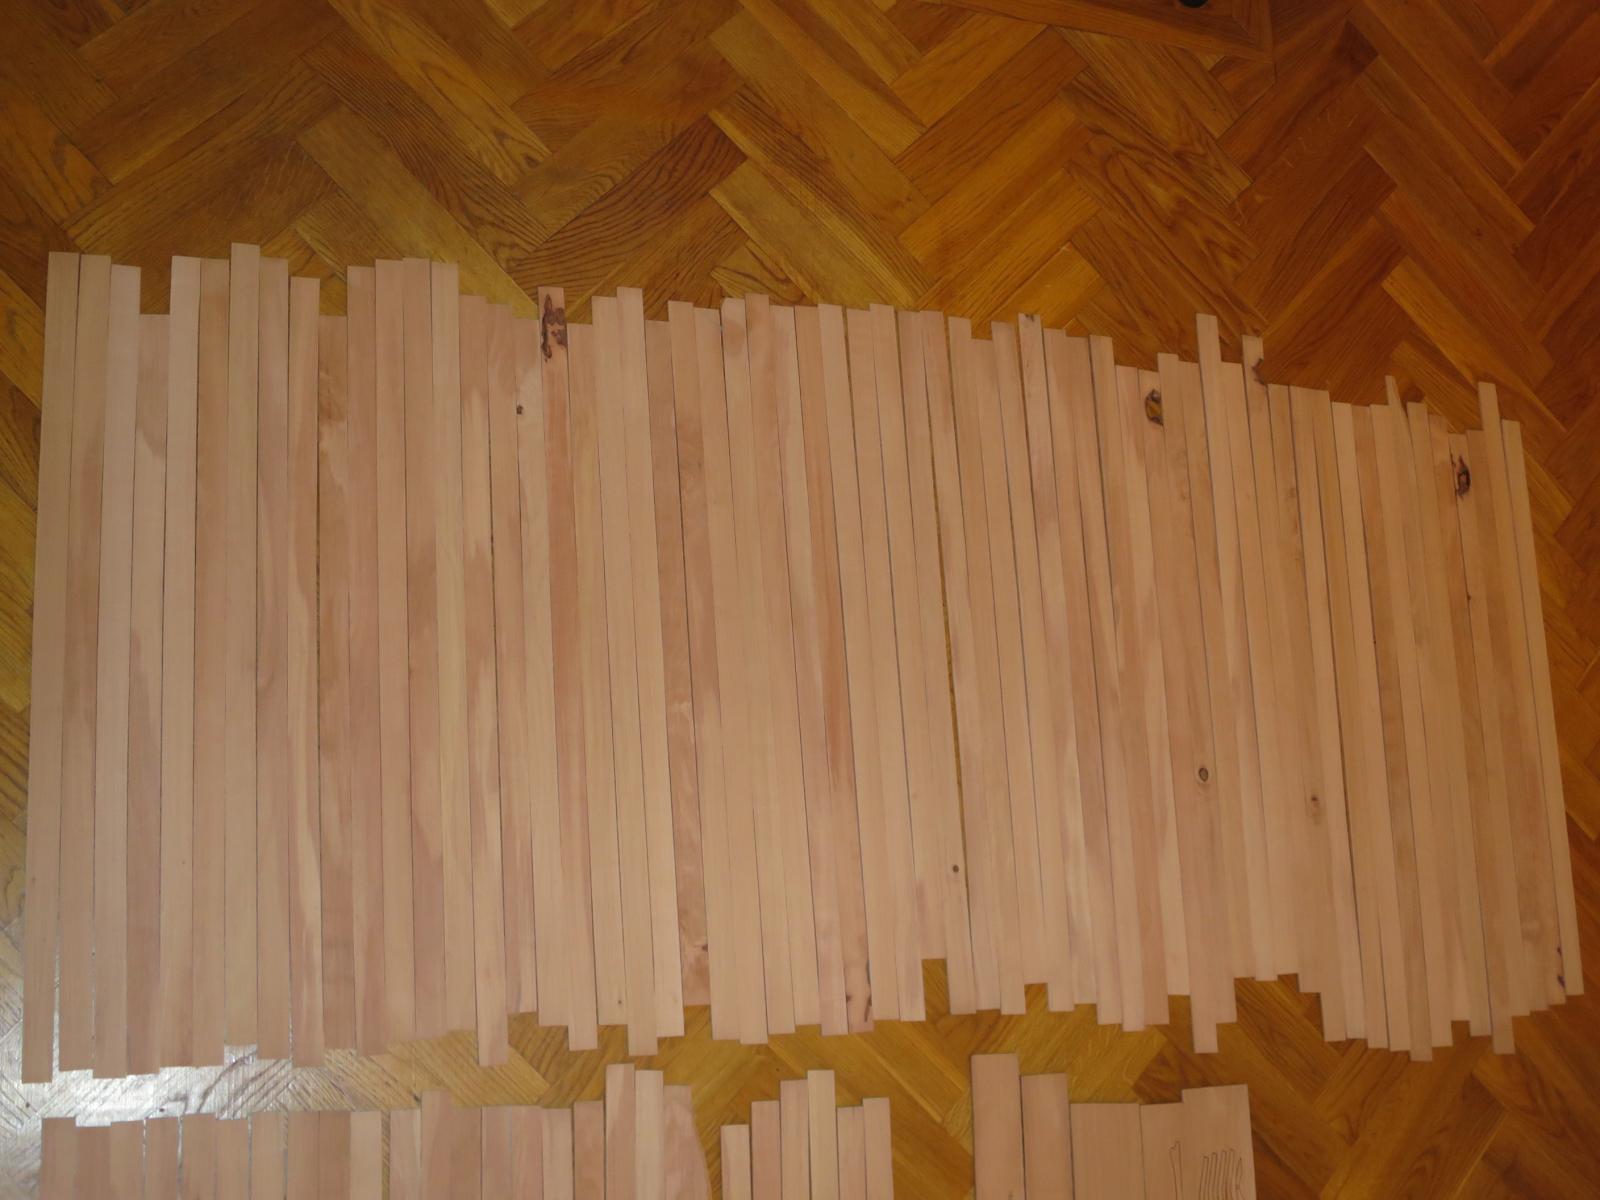
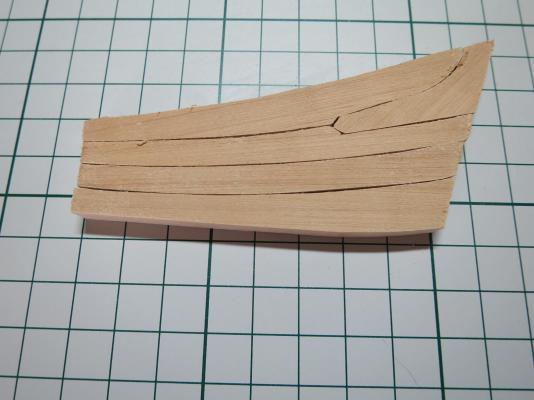
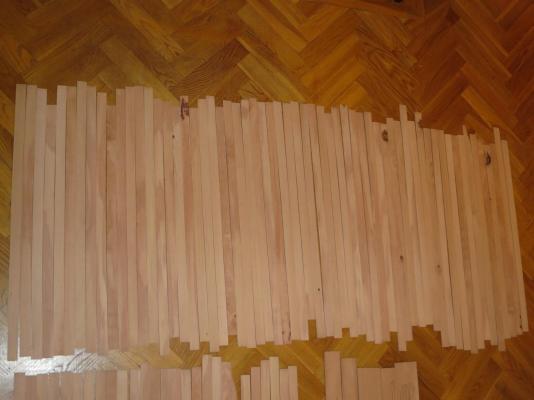
Finished 4 frame blanks and cut 4 frames in total. Last blanks were laminated using really strong clamps, that squeeze the glue under blanks like the previous clamps were not able to do. Surprisingly, I cannot find any difference in lamination quality when I look on a cut frames. Thickness and consistency of lamination looks the same. Probably I was overthinking it What turned out to be more important is an edge joint of a blank pieces - they should fit really tight, my table saw can't give such a clean cut, so on a last few blanks I used a belt sander to make sure that joints are perfectly tight. And that is visible on a frames. However, I will need to trash one frame. It is all due to the ugly grey spots on a frame blank stock. When sanded, they look even uglier. On a right side of a photo - healthy swiss pear, on a left side - smoker's pear Seriously, why are they included in the timbering package? What am I expected to do with such wood? It is not suitable for a modelling, I will just trash all the wood with that grey areas, and there are quite a lot of planks with that defect Or I am being picky? Don't think so, the defects in the wood are striking.
- 968 replies
-
- 7
-
-
- hahn
- oliver cromwell
- (and 1 more)
-
ebonizing boxwood
Mike Y replied to Kurt Johnson's topic in Painting, finishing and weathering products and techniques
Pardon for a stupid question, but what is so messy about ebony? I only saw in the logs that it is * Really hard to bend * Hard wood, hard to sand to shape * Some people have a bad allergic reaction to ebony Is that it? Or there is something else? Thinking of using ebony for false keel and wales.. -
Thanks for the information, Allan! It is a pity that there is no even brief description on seawatchbooks website. Just some "volume", whatever that means. Only the last volume is clearly described as "masting and rigging". That might actually stop people from buying a book because they are not sure what is inside.. Sorry for the rant I was going to buy only the first volume, because I was unsure if I need a second one. Now I know it, thanks to Allan, so I will buy first two volumes. Just a bit of extra information => plus one book in the customer order
-
Thanks for advice, Mark! It is something I could never guess before starting to fair the hull, it can only come with experience! Will cut "just outside the line".
- 968 replies
-
- 1
-
-
- hahn
- oliver cromwell
- (and 1 more)