augie
-
Posts
4,669 -
Joined
-
Last visited
Content Type
Profiles
Forums
Gallery
Events
Everything posted by augie
-
 It is always a pleasure to admire your work. I marvel at the crisp nature of everything you do. SPECTACULAR!
 -
Really sad to hear what life has thrown you recently. Hang in there......we're here.
-
Thanks Jax. But right now I'm more worried about the curve on the bottom of the counter where the hull plank ends fall. There is a sort of pattern on the plans that I transferred onto that section and started sanding away. I'm just bringing in the planks from the lower wales so using them for a guide at the same time. Think I have it right. I'll get a photo up once I have a few planks laid and flowing smoothly.
- 2,191 replies
-
- 2
-

-
- confederacy
- Model Shipways
- (and 1 more)
-
Wes, I've run into that sheen problem myself with 'satin' poly. One possible solution is an overcoat of clear flat lacquer. Testors makes one in their Model Master series. Of course you would need to test it over what you have first. I found it 1/2 way through my Syren build and it made a tremendous difference.
-
BEAUTIFUL! The lion sticky-outty thingy looks fine. What bothers me is that your fleet seems on course for a major disaster sailing right off the end of the table. Thank heavens Columbus disapproved the 'earth is flat' theory.
- 1,873 replies
-
- 5
-
-
- occre
- san ildefonso
- (and 1 more)
-
MARK - I'm planning on treenails (simulated) above the wales. But first I have to find the mettle to lay that first plank.
- 2,191 replies
-
- 1
-
-
- confederacy
- Model Shipways
- (and 1 more)
-
Hey John......hope there's also some rigging line left in that box !!!!
- 2,250 replies
-
- 1
-
-
- model shipways
- Charles W Morgan
- (and 1 more)
-
Thanks for all the interest and advice. This is just a great place. OK........ First checked the laser cut transom against the stern light framing. The openings look to be the right height. Chuck had a sharp eye though as the lower frames needed to be leveled just a tad. Then checked the cutout of the stern lights against the frames. Very, very close. The actual window frames fit ---- may need a last minute tweak . I'll hold on that for now but wont forget. Ben - I'm all out of film for today
- 2,191 replies
-
- 2
-
-
- confederacy
- Model Shipways
- (and 1 more)
-
Great work on those tiny bits. You're going to LOVE Syren
- 234 replies
-
- 1
-
-
- 18th century longboat
- model shipways
- (and 1 more)
-
Thanks for checking in Chris. I had checked the windows against the transom and they looked ok but I'll take another look.
- 2,191 replies
-
- 1
-
-
- confederacy
- Model Shipways
- (and 1 more)
-
GREAT SCOTT ! OK, ok. But I'll have you know that getting this angle threw my titanium back out of alignment. Strong memo to follow
- 2,191 replies
-
- 11
-
-
- confederacy
- Model Shipways
- (and 1 more)
-
Thank you for both the kind words and advise Chuck. I'll get those window sills level. And yes, I'll try and be patient on the planking as you are exactly right. She looks about as big as the floor in Madison Square Garden right now. I'm really hoping that spiling guide you were nice enough to supply gets me through the lower hull. But that's a long way off.
- 2,191 replies
-
- 1
-
-
- confederacy
- Model Shipways
- (and 1 more)
-
Aww....thanks Ron. But from the looks of your current project, Supply, you've already passed me in skill. We've both come a long way since MSW 1
- 1,668 replies
-
- 1
-
-
- syren
- model shipways
- (and 1 more)
-
Thanks everyone. SJORS - don't need a pillow. Took care of that problem 30 years ago . May need earmuffs though JAX- Stay patient. This is where I usually start screwing up. BEN- We aim to please: I'll be trimming off those port and starboard ends as soon as I figure out where the hull planking falls ---- it overlaps the ends of the counter planking.

- 2,191 replies
-
- 9
-
-
- confederacy
- Model Shipways
- (and 1 more)
-
Somebody didn't pay the bill again
-
Good job Robbyn in spite of the allergy. Give that 5 minute epoxy a try. Silver solder, like Stay brite or tix requires pretty hot temps.
- 234 replies
-
- 1
-
-
- 18th century longboat
- model shipways
- (and 1 more)
-
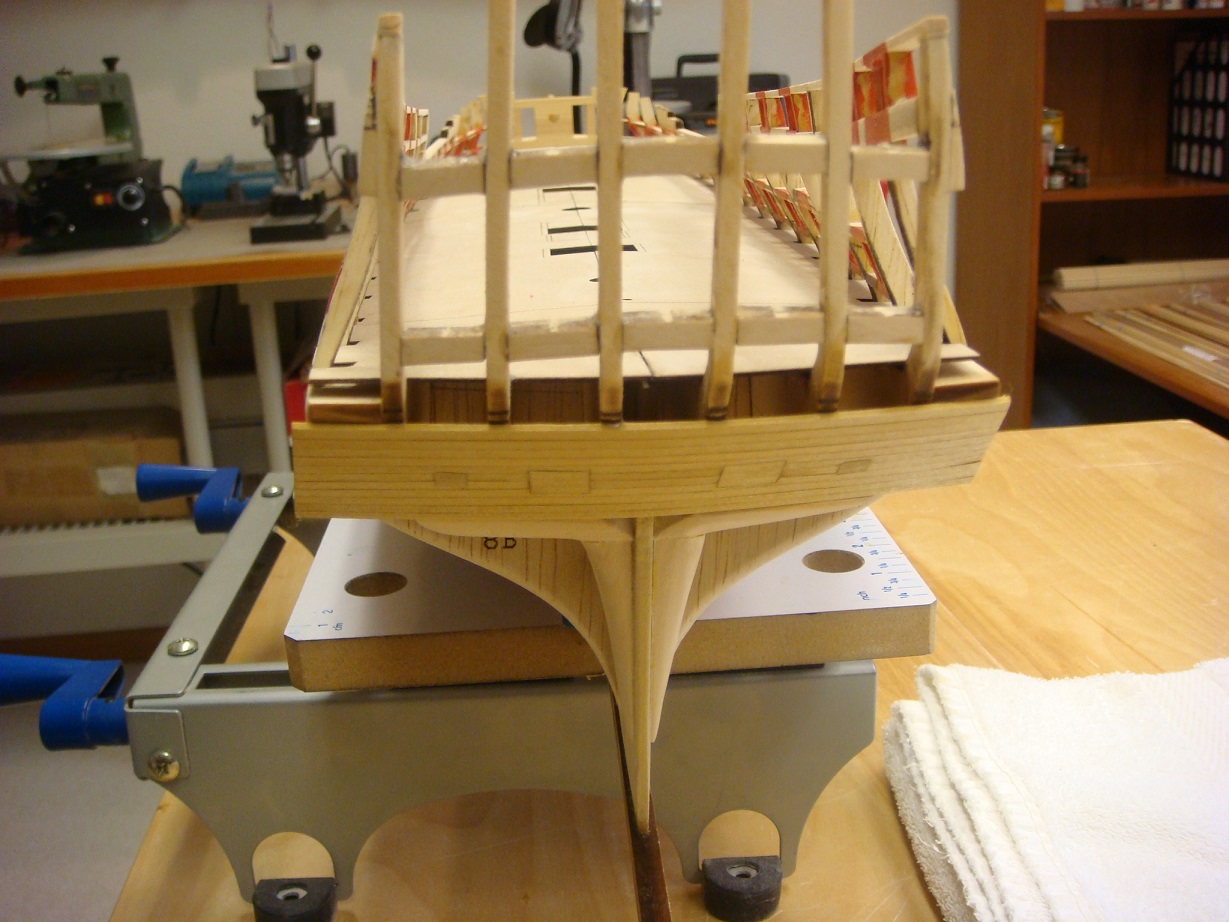
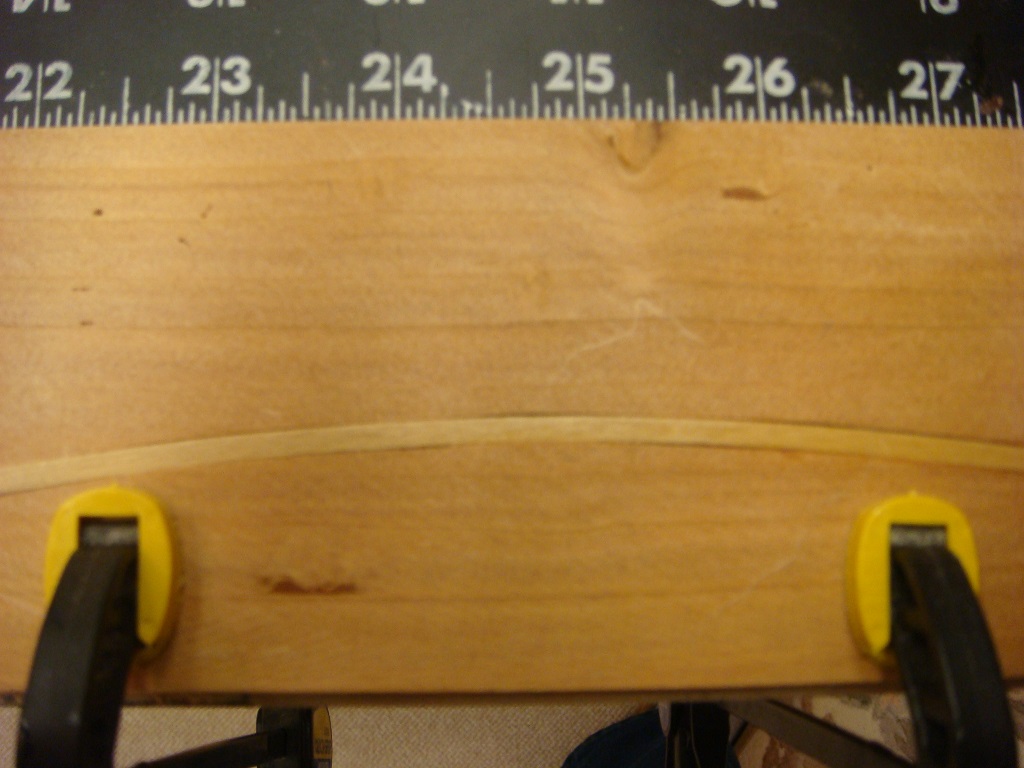
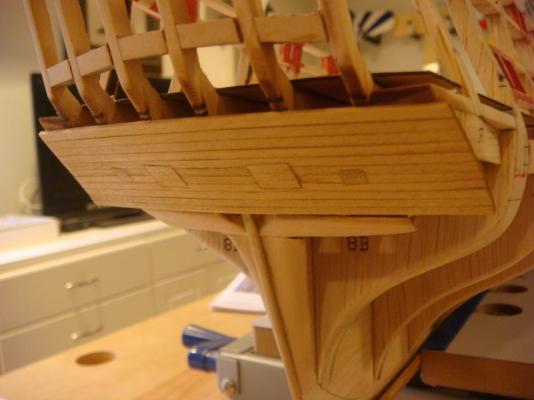
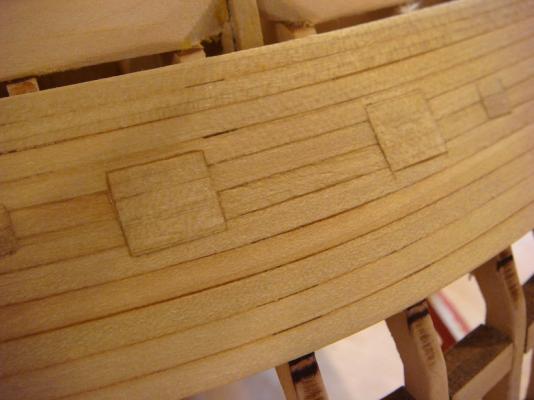
Time to get started planking. We are 150 hours into the build. The stern lower counter is a good place to begin. It has a rather significant curve throughout so I thought it would be best to edge bend the planks prior to installation. Toward that end I made a simple bending jig from a piece of 1/4" hardwood by cutting a curve to match the plans. Planks were soaked for about 15 minutes and put in the jib to dry overnight. As the planks are 1/8 x 1/16 basswood, four planks could be done at a time: Eleven planks were installed, notching those that form the outline of the 4 gun ports. These ports are two different sizes and will receive hinges and rings down the road. After planking, the counter was sanded smooth and given a coat of Minwax pre-stain then one coat of stain consisting of 30% Minwax Golden Oak diluted with 70% Minwax natural: The overall result is not bad and gets me back into planking mode. To complete the counter I need to apply some wipe on poly. I considered treenailing the counter but have decided not to do so at this point. I'll revisit that after I complete the planking of the hull above the wales. Once that's done I'll also decide on the adequacy of the color --- I want all the planking above the wales to be darker than the lower planking. Now we get to the real work. I'm glad winter is just about here.

- 2,191 replies
-
- 16
-
-
- confederacy
- Model Shipways
- (and 1 more)
-
Looks like you have it covered. Just need a 2 man crosscut saw and you're all set. You'll pick up specialty tools as you need them. Don't forget glues and lot's of sandpaper for sanding blocks/sticks. THINK SMALL !
-
Nice work. And yup, the green looks great!
-
She's filling out. That's one helluva chain there!
- 2,250 replies
-
- 1
-
-
- model shipways
- Charles W Morgan
- (and 1 more)
-
For MS kits, I think Model Expo is the way to go. Shipping rates are reasonable, and they've always given me excellent service on missing or damaged parts. Shipping is about a week from the time you order until delivery....provided the item is not back ordered. As far as wood, I've only used Jeff @ HobbyMill and I can't imagine anyone doing it better. Haven't built Pride of Baltimore but she's a beautiful schooner at a nice scale. You'll learn a lot from her.
-
Glad to see you're staying 2 steps ahead of the game Rich. Can literally save your life sometimes.
-
My Admiral just read me an article from the NY Times about a fellow from Australia who opened his closet door and was buried under an avalanche of tiny wooden blocks. Must have been a misprint.
-
I'm here Sjors. No way I was going to let you and Grant have all the fun. Looks as if we have another team on board to rival the Anja/Sjors duo The workspace looks great. I like the good lighting --- very important. And you can handle the dust with your experience! Looking forward to the build logs.
-
You're really flying on this one Bob. Looks spectacular.