


pirozzi
-
Posts
843 -
Joined
-
Last visited
Content Type
Profiles
Forums
Gallery
Events
Posts posted by pirozzi
-
-
I am very busy these days with other projects and can only put in a few hours here and there on this ship.
 I certainly can't keep up with Mark. The advantage there is that I can use his log for reference, which I do occasionally (thanks Mark).
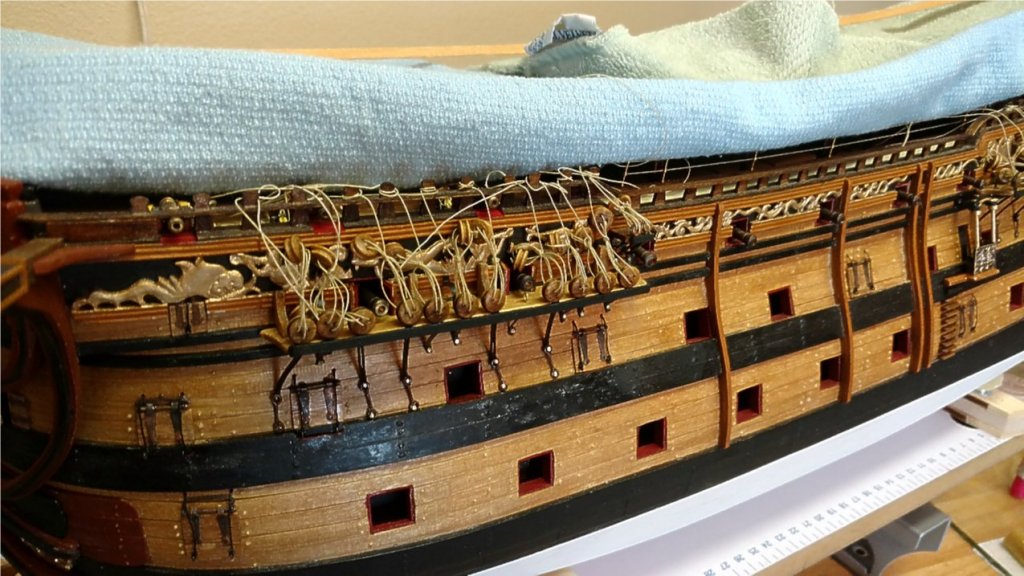
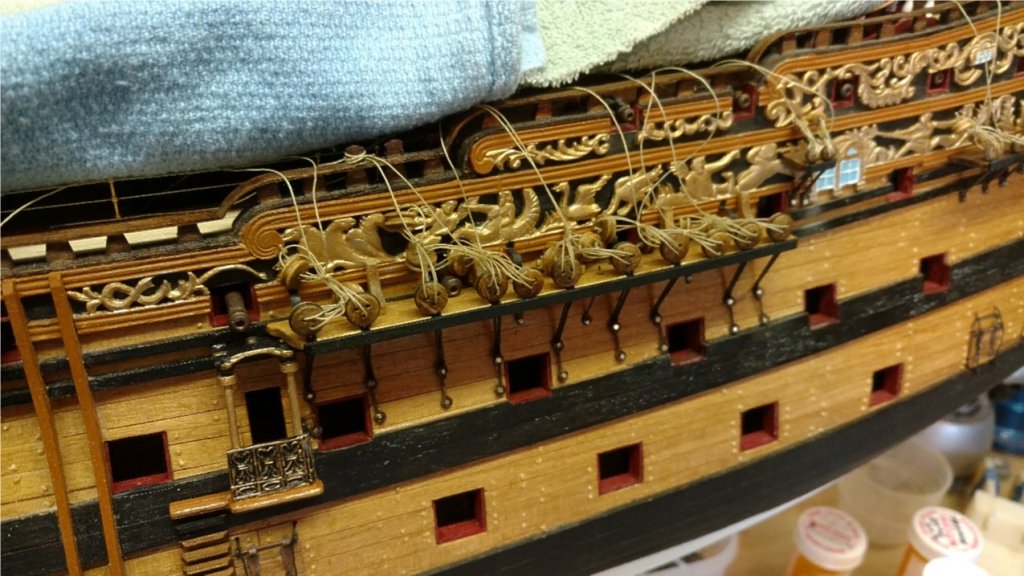
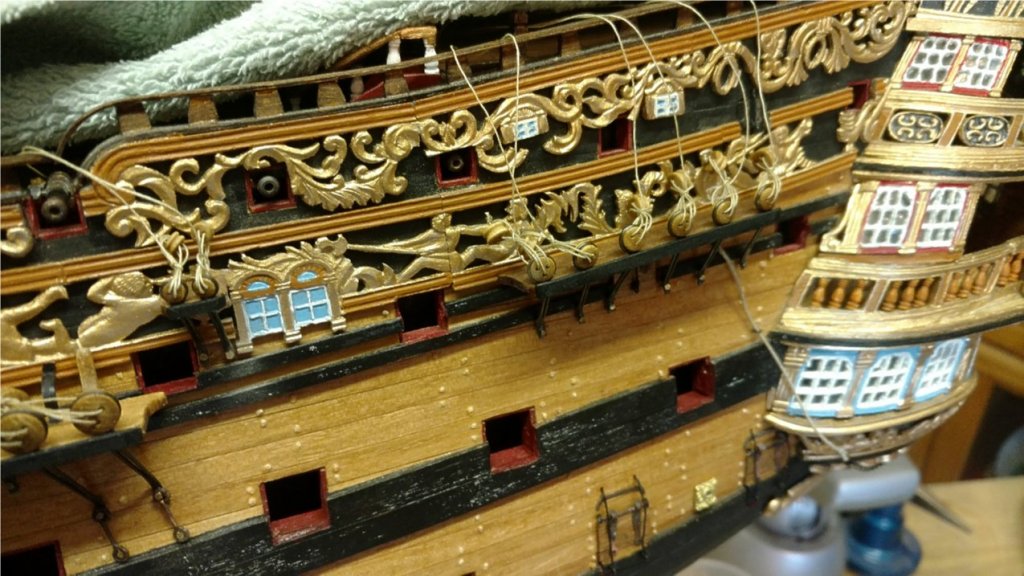
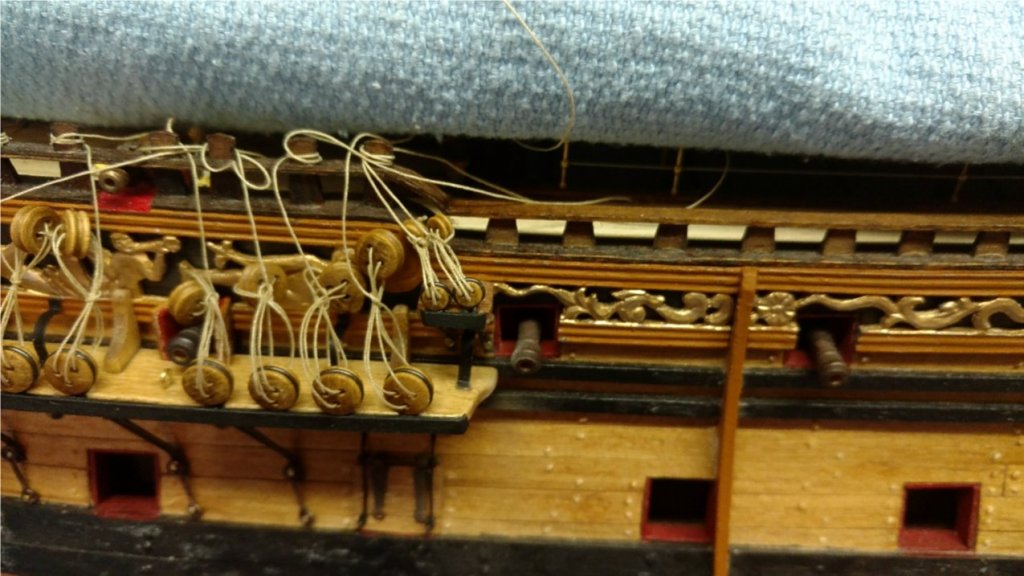
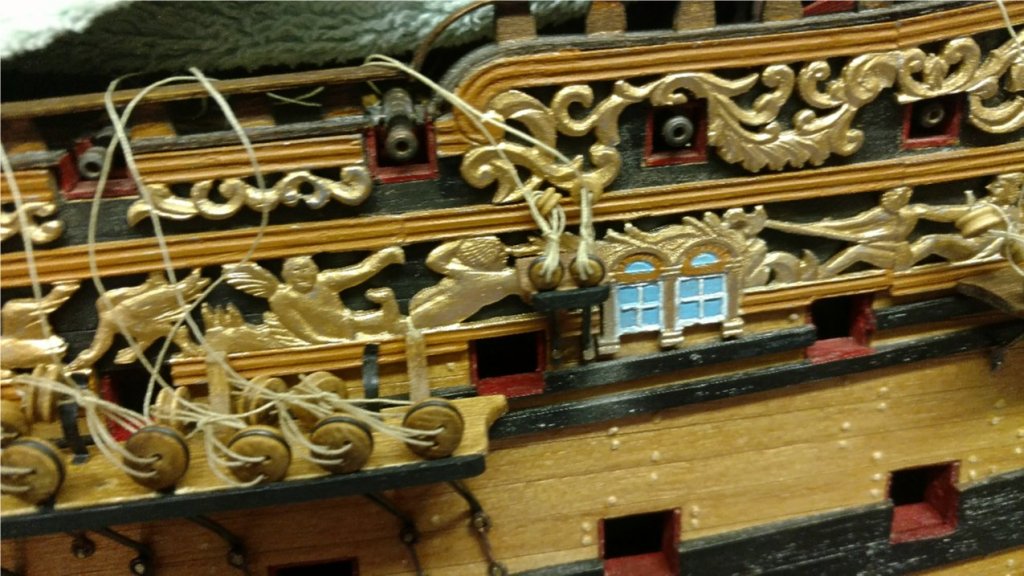
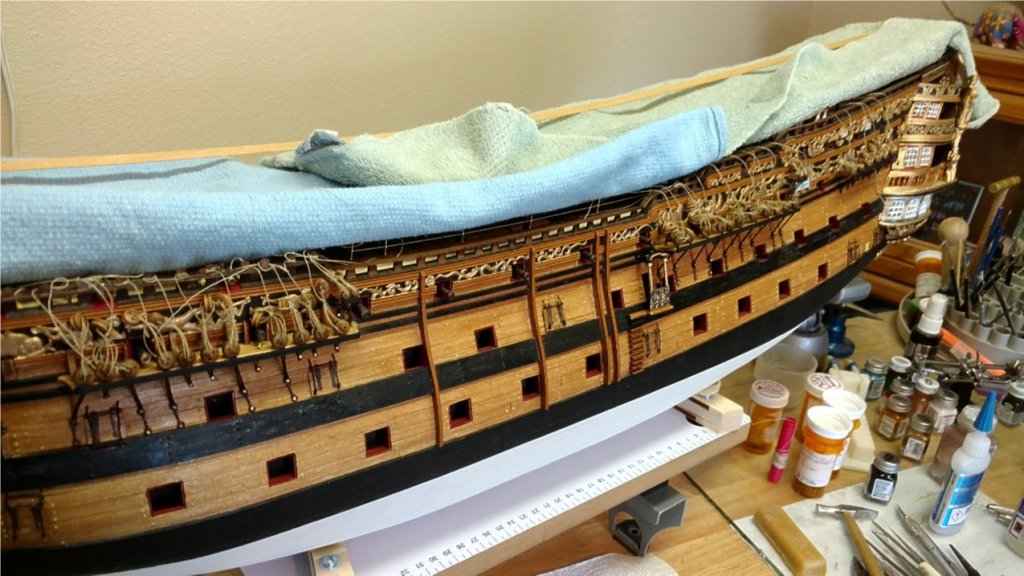
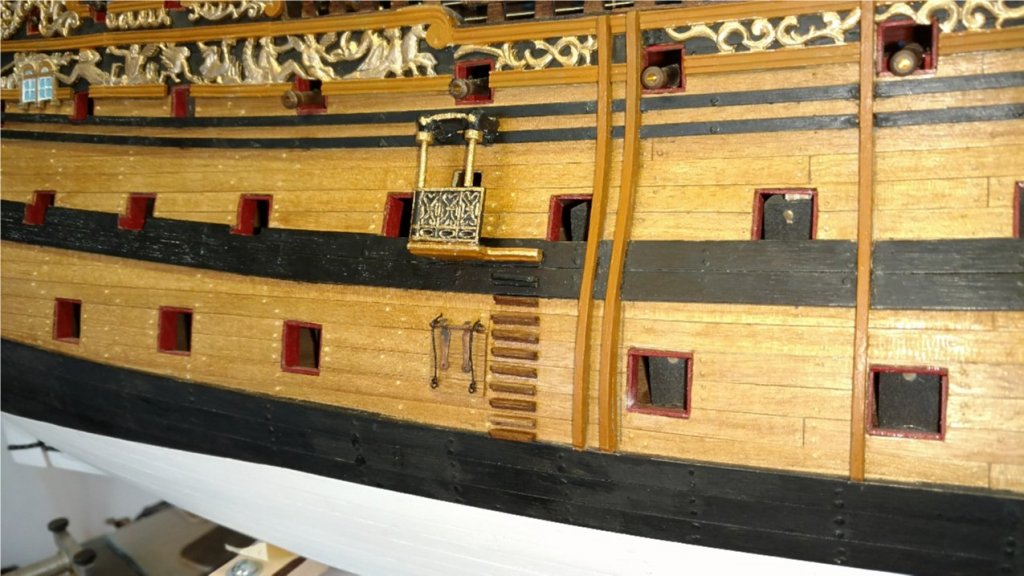
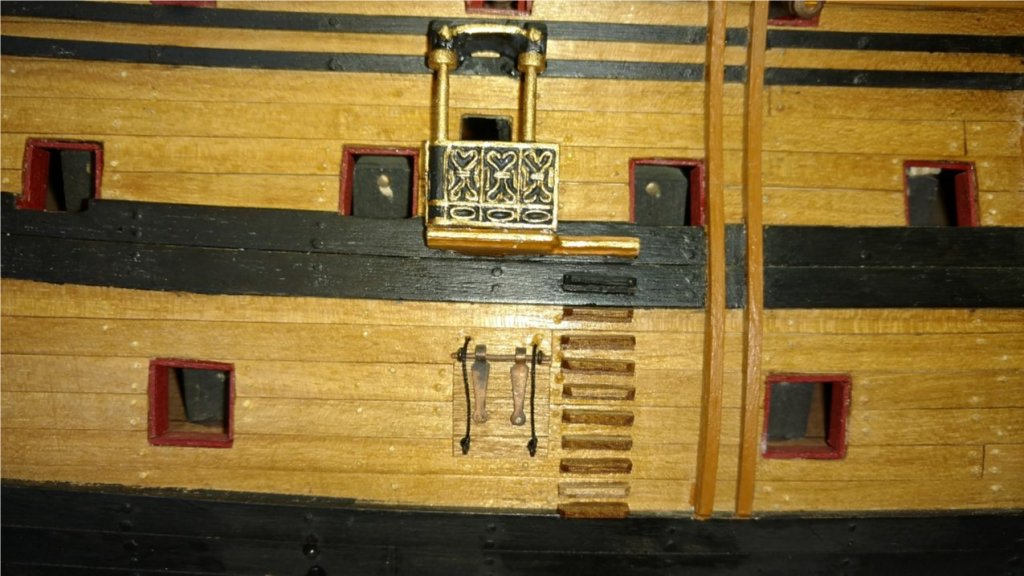
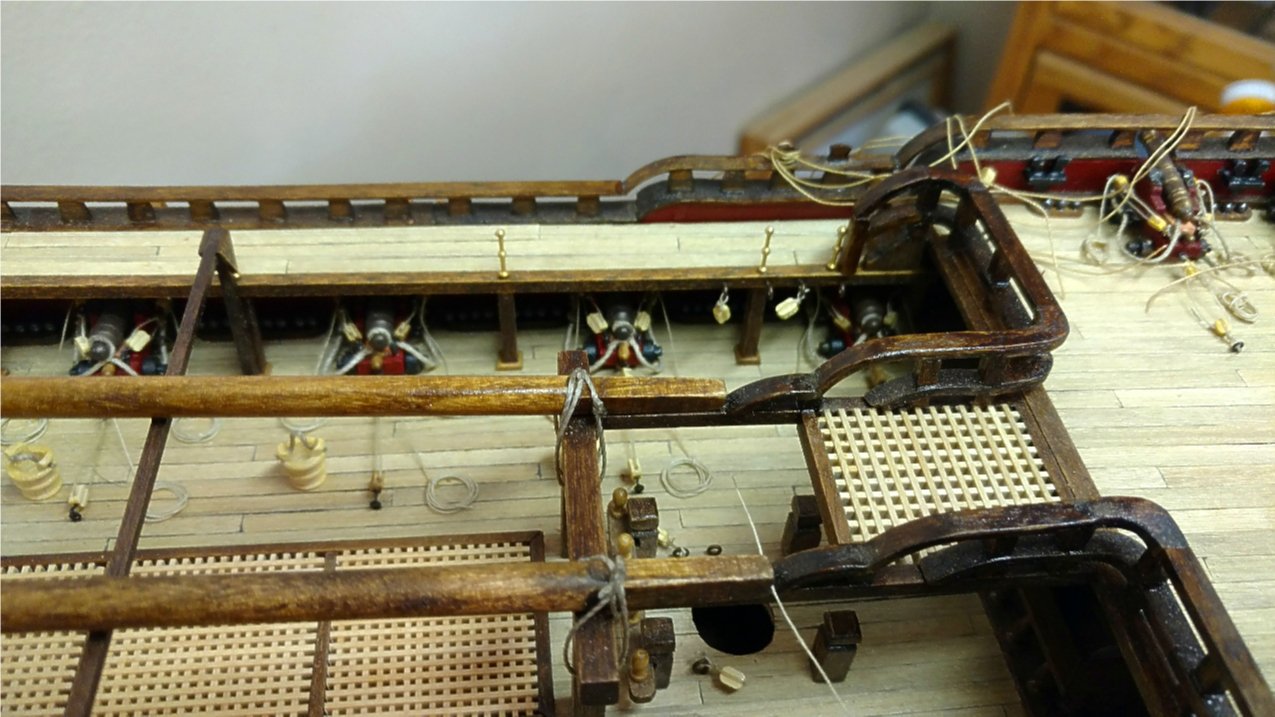
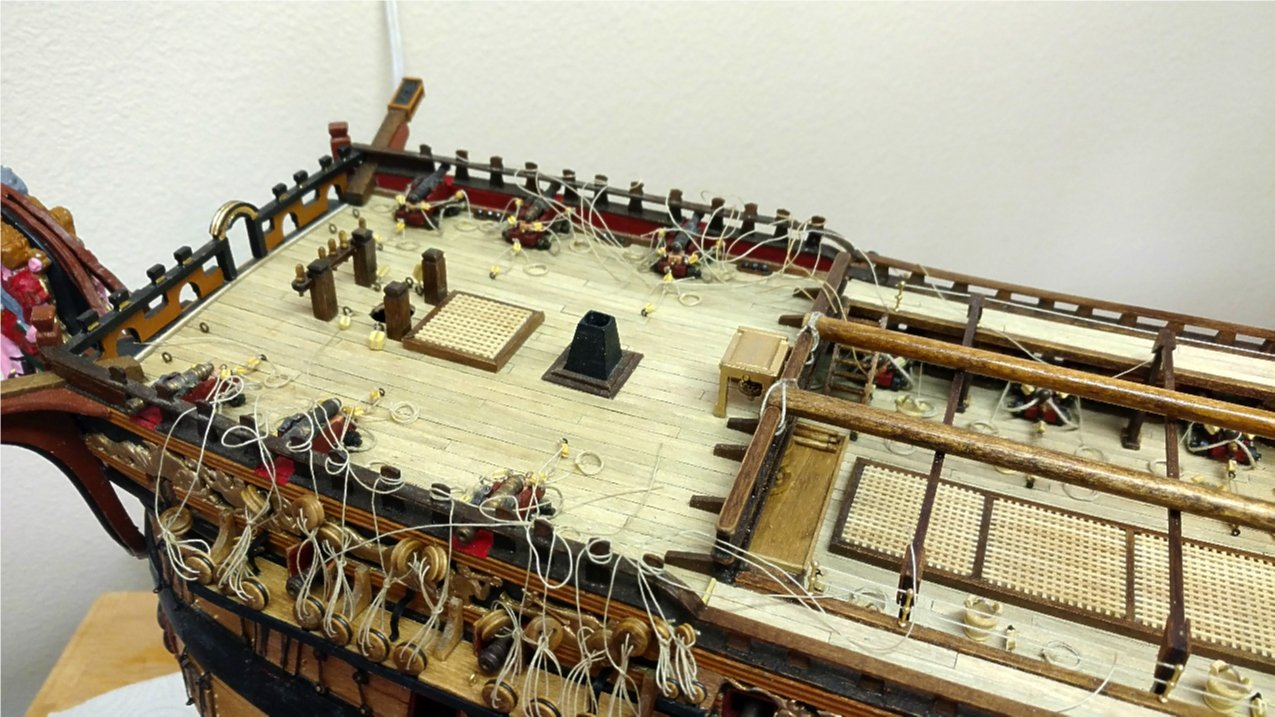
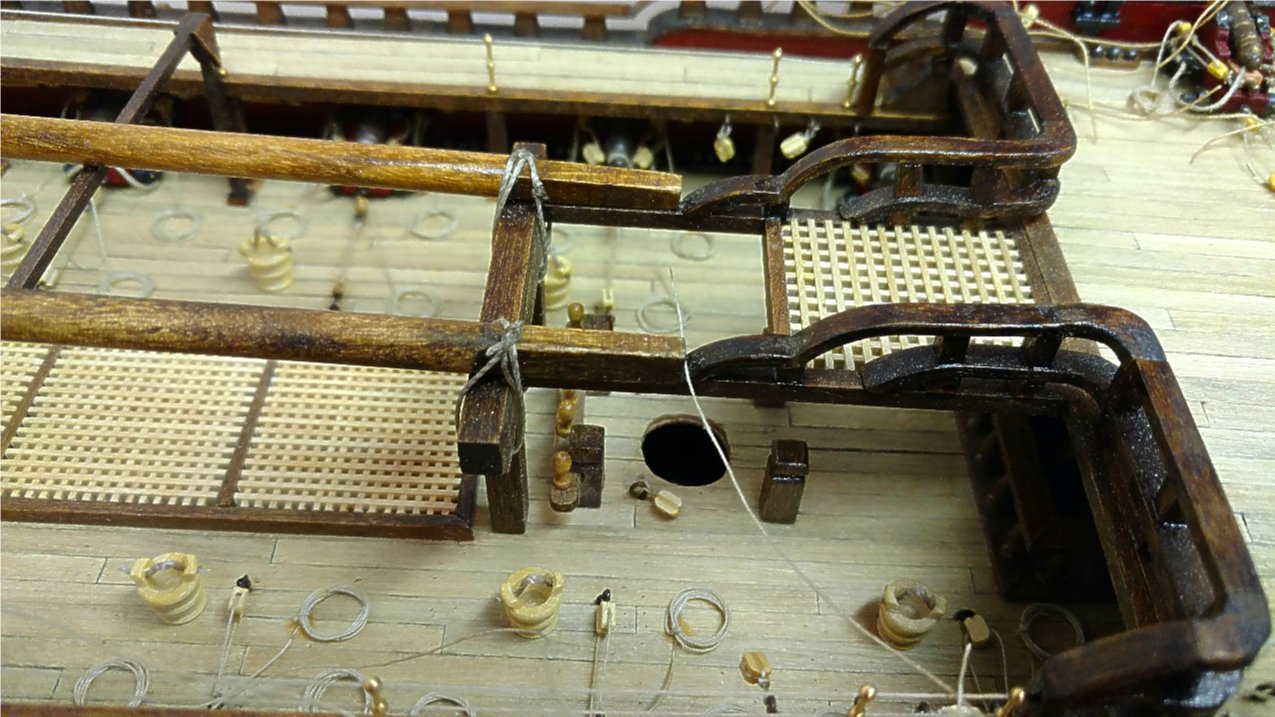
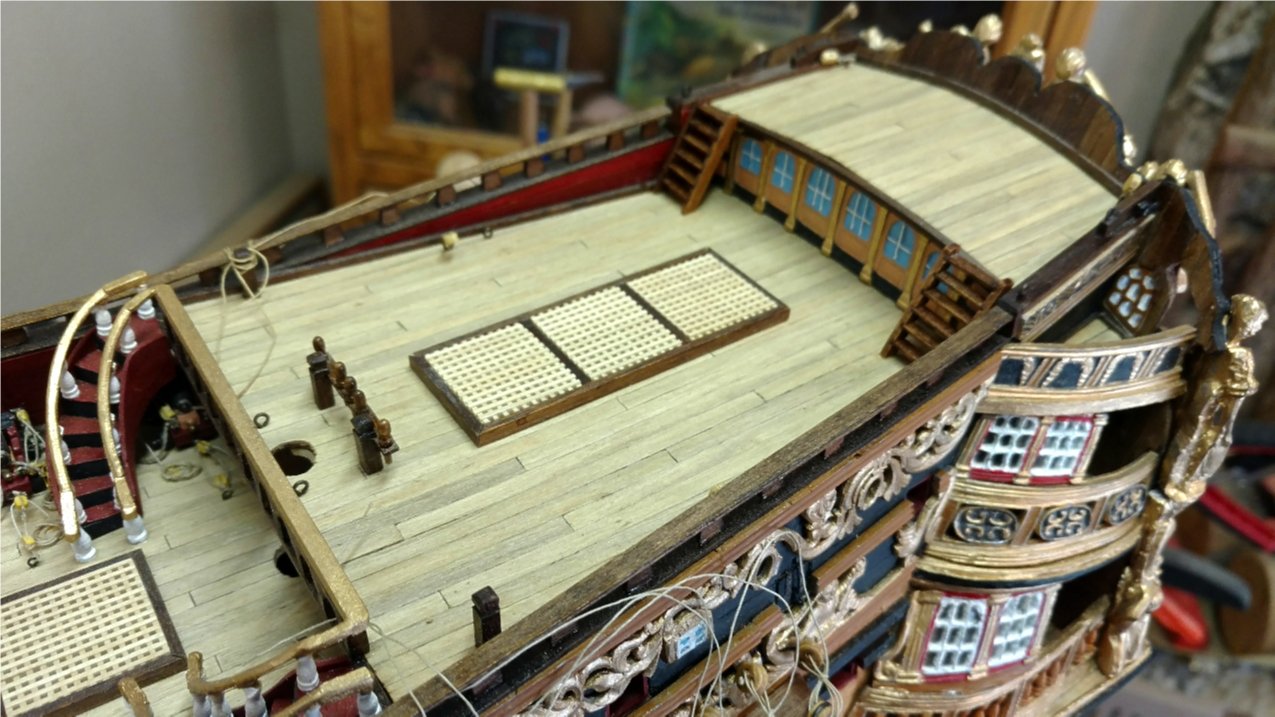
All of the chain wales and stools with pre-rigged lanyards are completed. I also placed all of the eye rings and blocks on the decks for rigging later.
On another note, I have a friend who is a seamstress, and she will created and sew the sails for me.
 One thing I am NOT is someone who can sew. The admiral does not like to either.
Next up I think is to work on the ship's longboat.
Vince P.


- ken3335, DenPink, piratepete007 and 3 others
-
 6
6
-
-
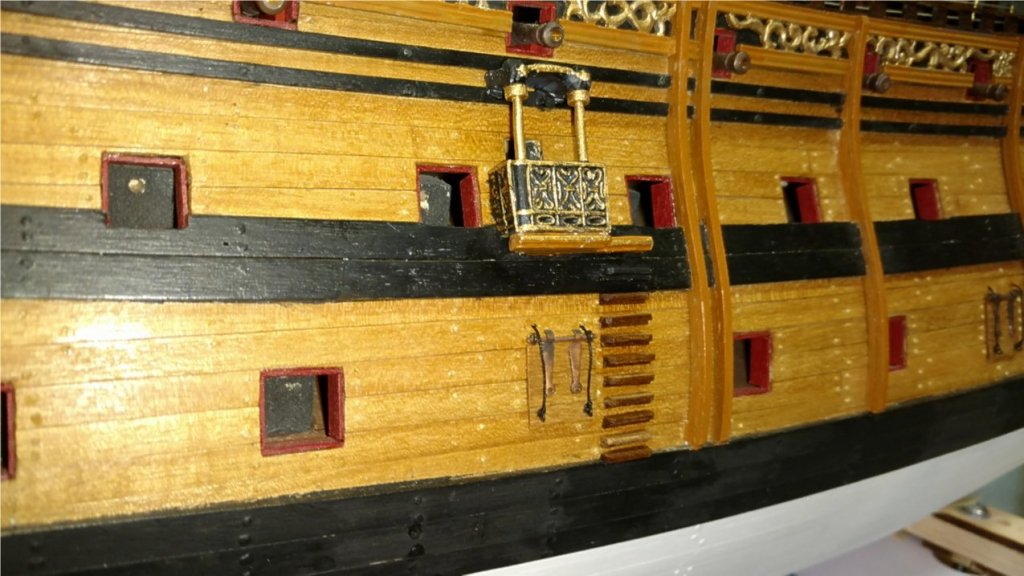
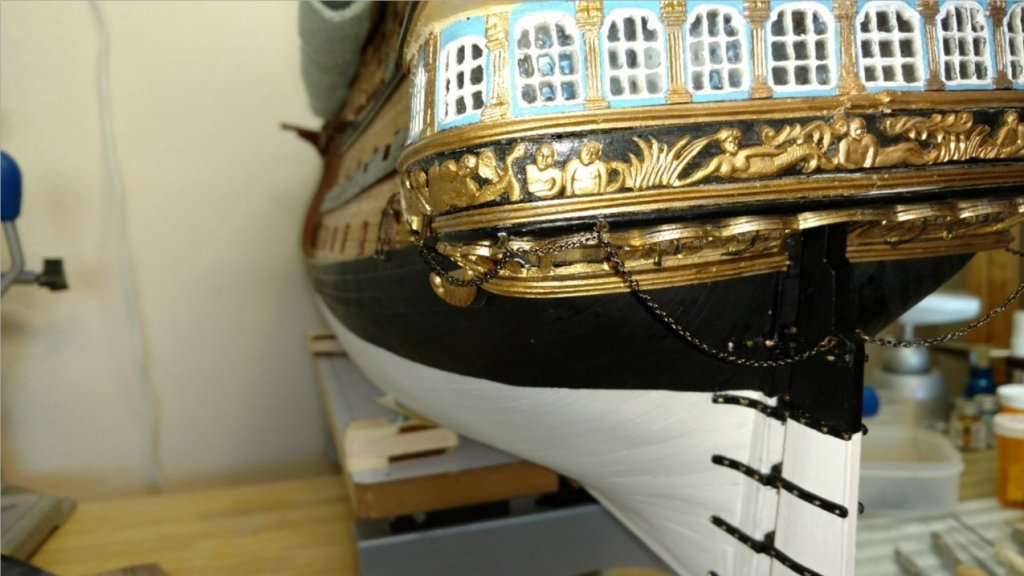
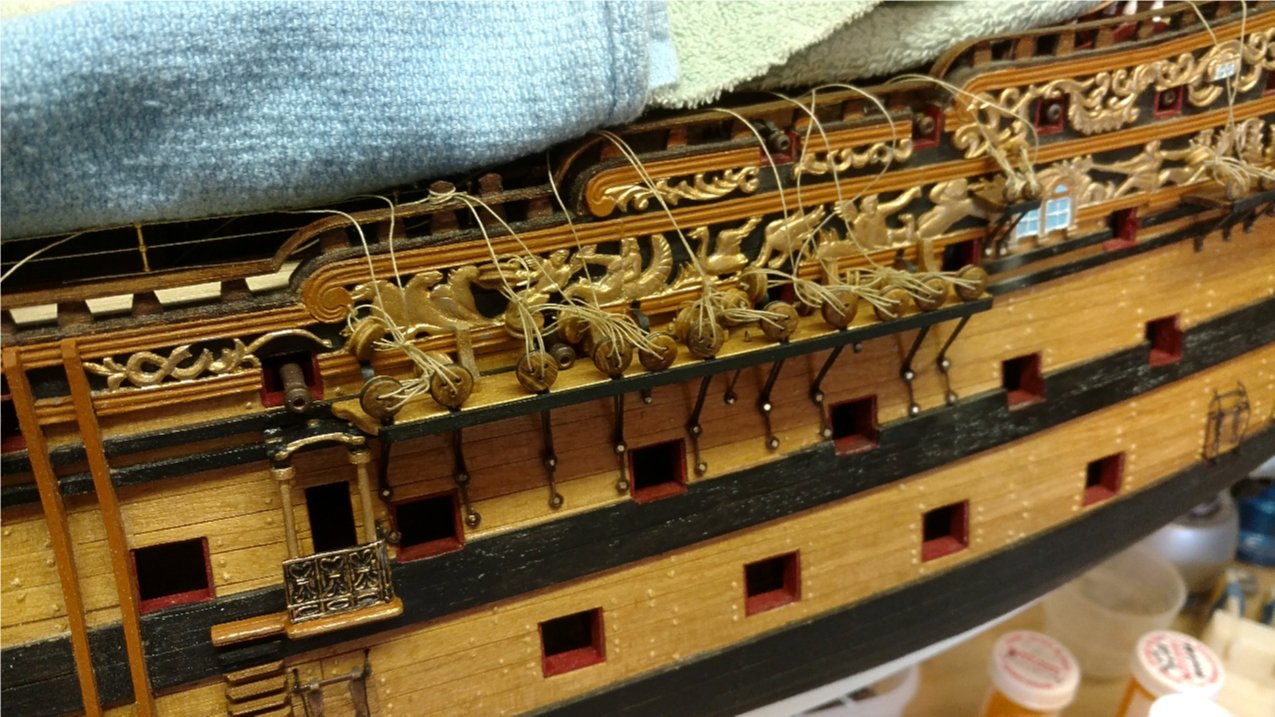
The port side chain wales, lanyards, and stools are completed. I prefer to rig the lanyards as they are placed on the wales. I find it easier this way to later on attach and rig the shrouds and back stays.
Now off to the starboard side.

Vince P.

- piratepete007, BillLib, marktiedens and 4 others
-
7
-
Hi Everyone,
Just an update on this build. Have been working on the chain wales and shroud lanyards. Since everything has to be made from scratch, it is a slow process. Will have some photos soon.
Vince P.
-
5 hours ago, ken3335 said:
Hello Everyone. Here's my progress update.
Some steps forward and quite a few back but I'm getting there.
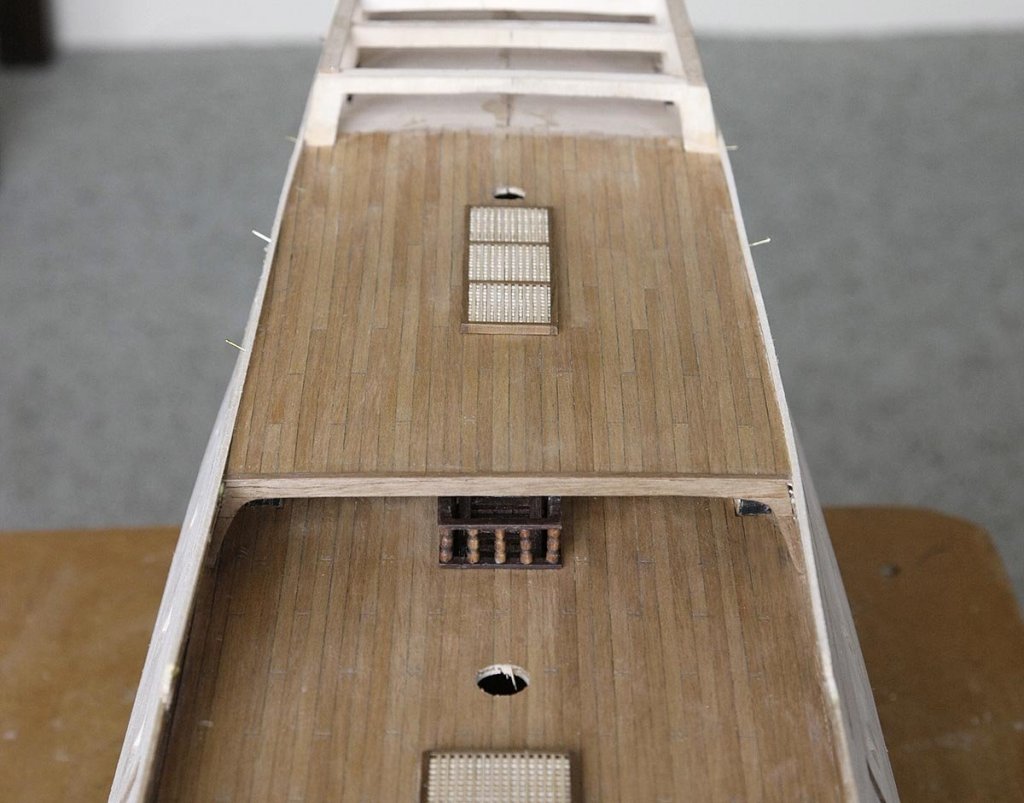
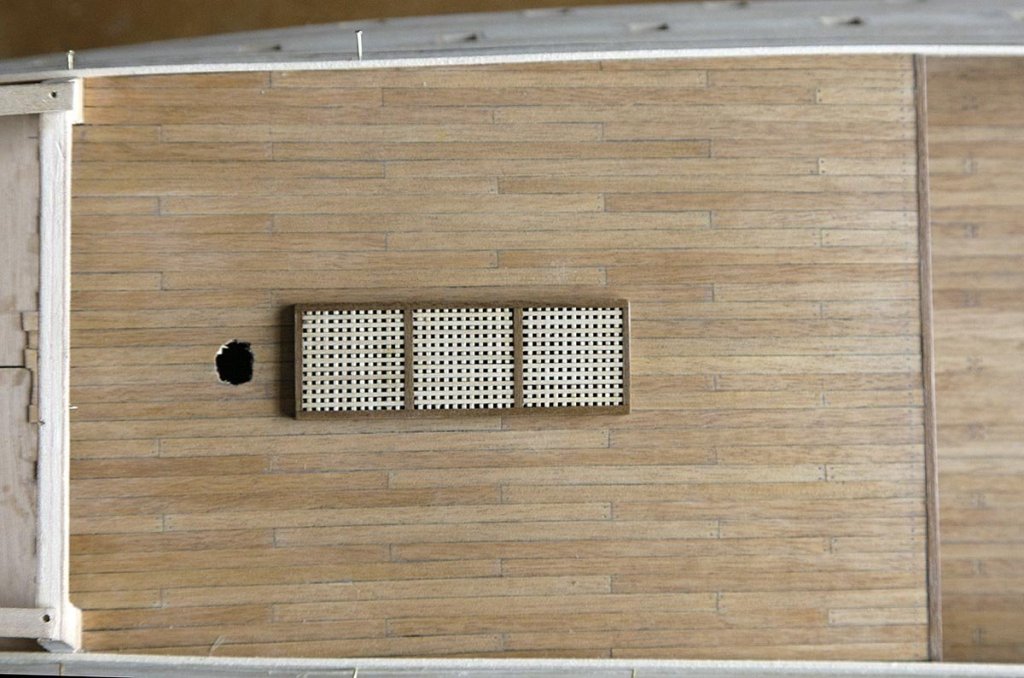
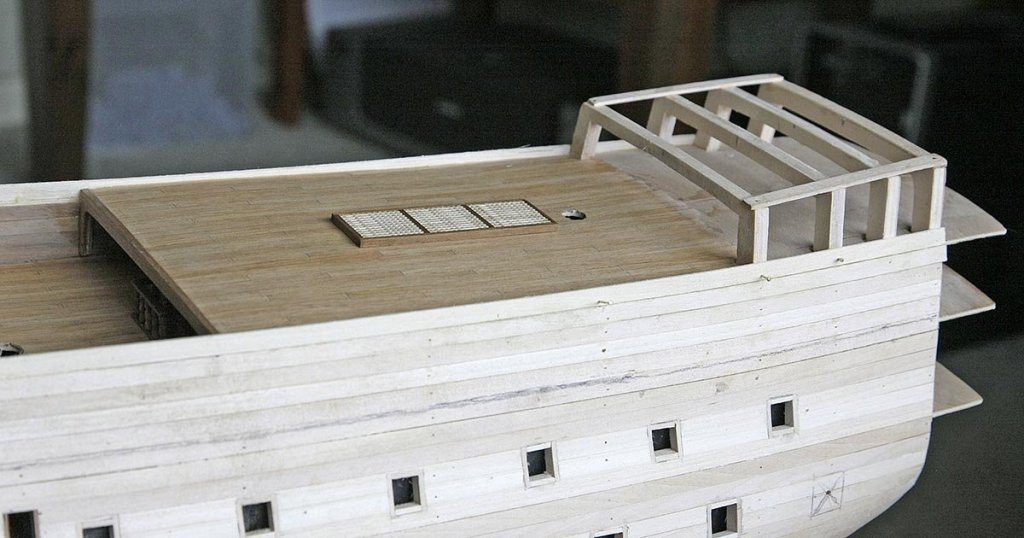
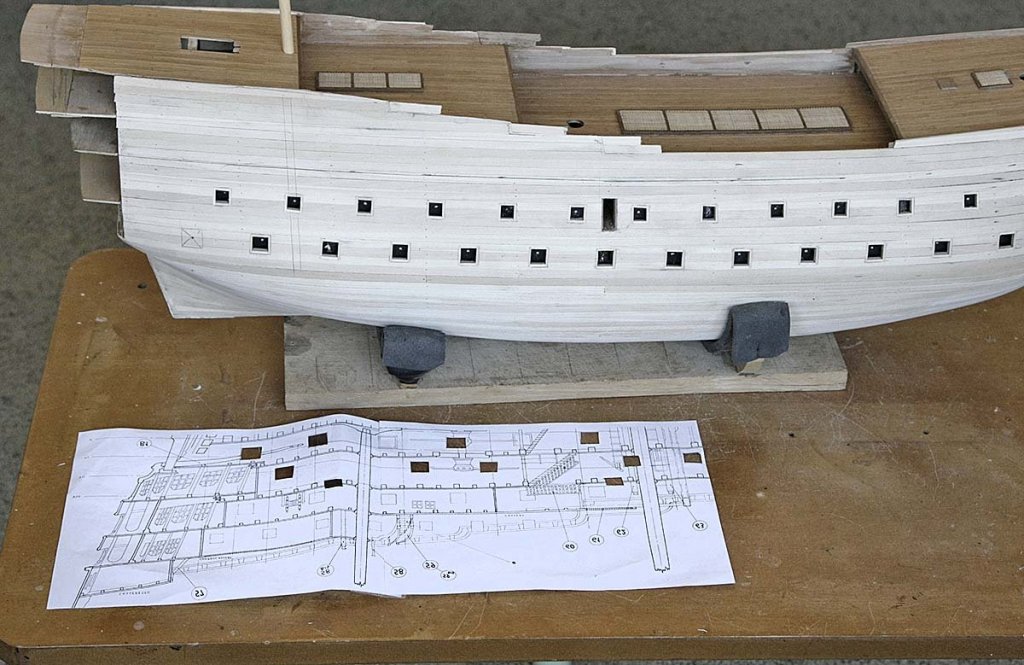
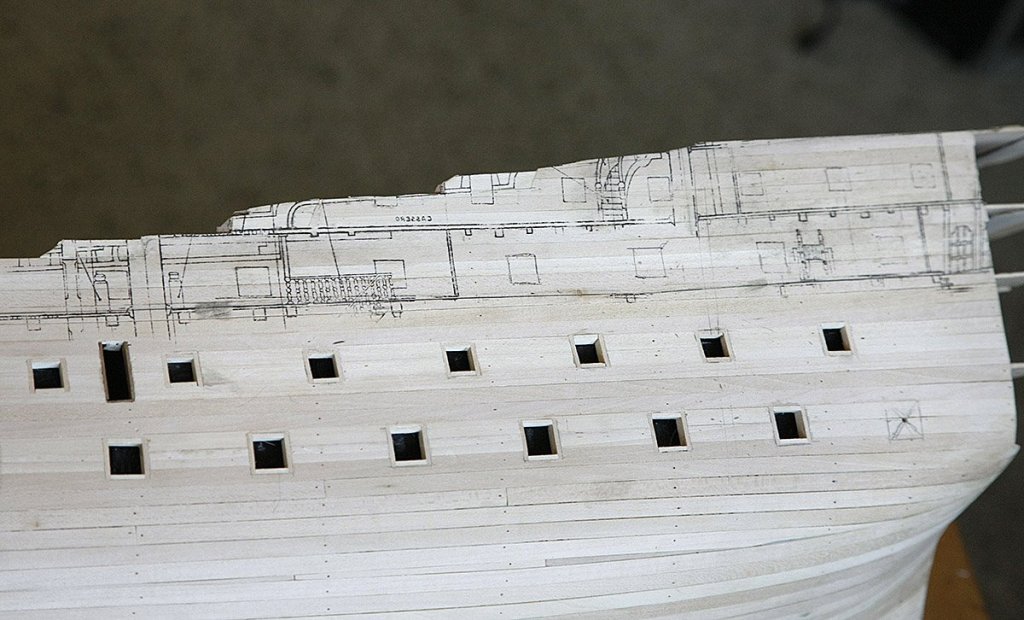
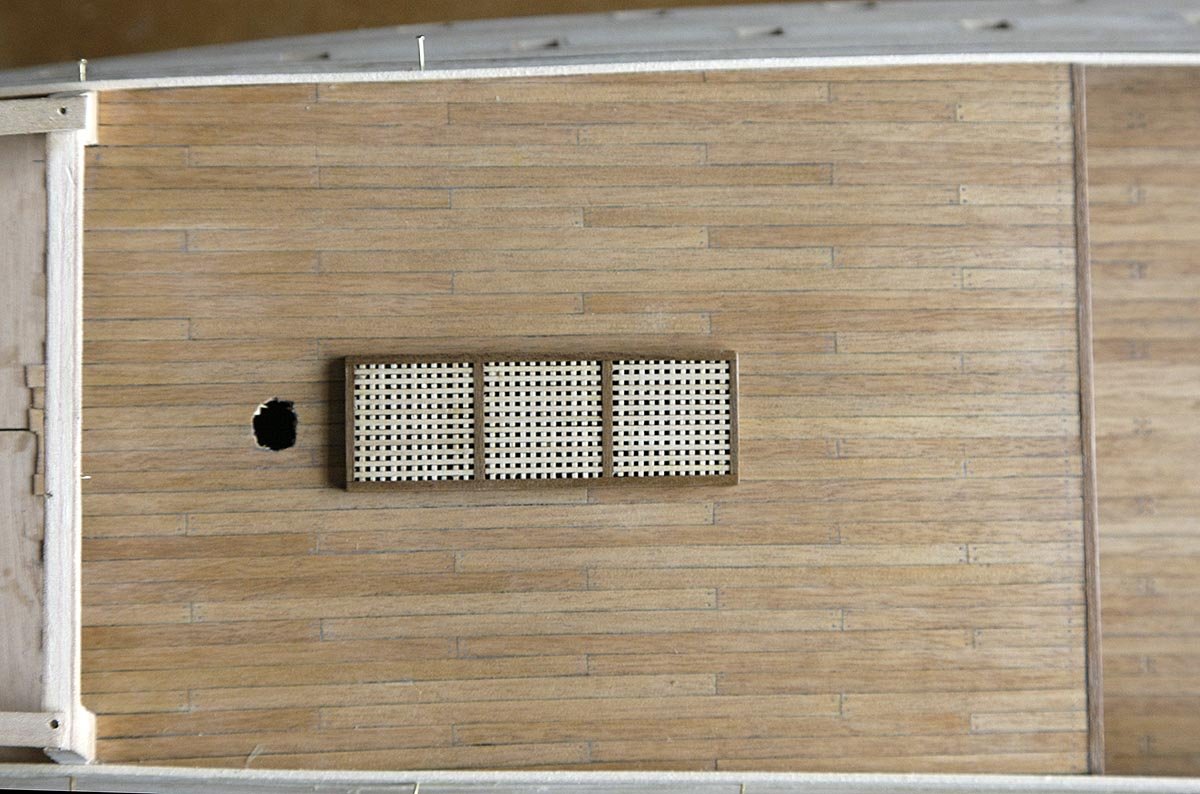
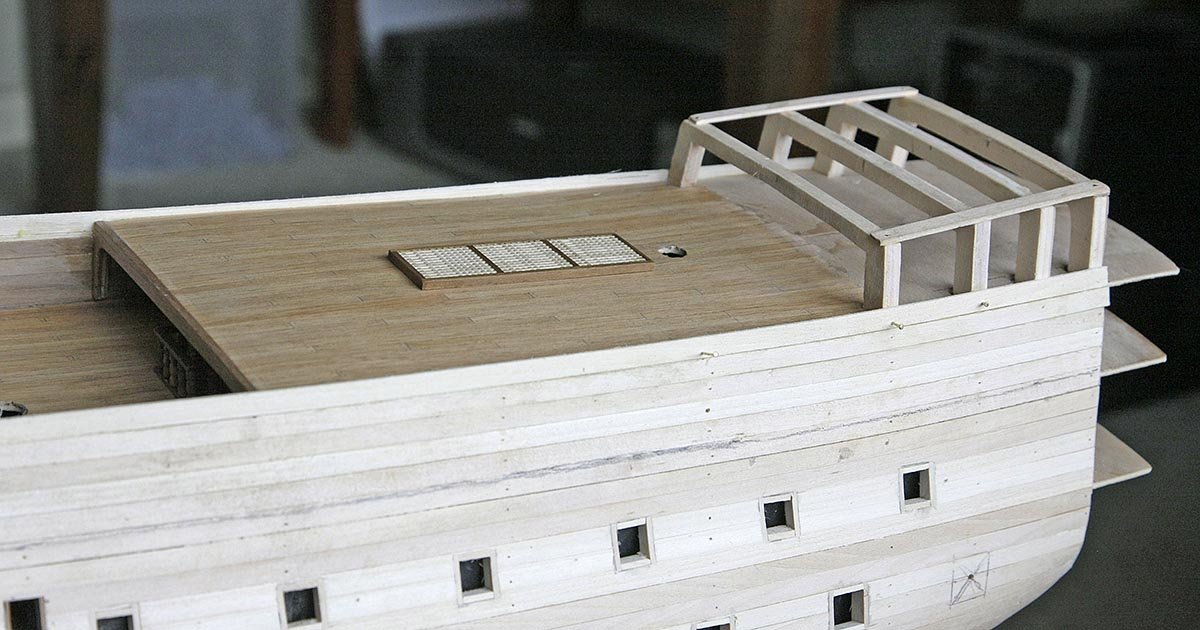
I fitted the quarter deck, planked and tree nailed it. I made up the deck beam as I had earlier and fitted that. I fitted all the dummy gun carriages and continued up with the first hull planking. I made and fitted the quarter deck gratings. I have been finding difficulties filing out all the windows so for the panels screens on the quarter deck I just painted them, they can hardly be seen so I'll accept the compromise there. After I had planked high enough I roughly shaped the profile for the top edge but having done it I found that I had taken away too much so, annoyed with myself I had to re-do a fair bit of the upper planking. I fitted the upper quarter deck, planked and nailed it. I decided to mark the gun port positions next.Up until about fifteen years ago I built and flew model aircraft and from that I learned how to transfer the image from plans onto the surface of wood so I tried that method and it worked well, see what you think. I am now ready to cut out those ports.
Ken

Hi Ken, I am curious about what method you use to transfer images from plans to wood.
Vince
- Jack12477, John Allen, WackoWolf and 1 other
-
4
-
-
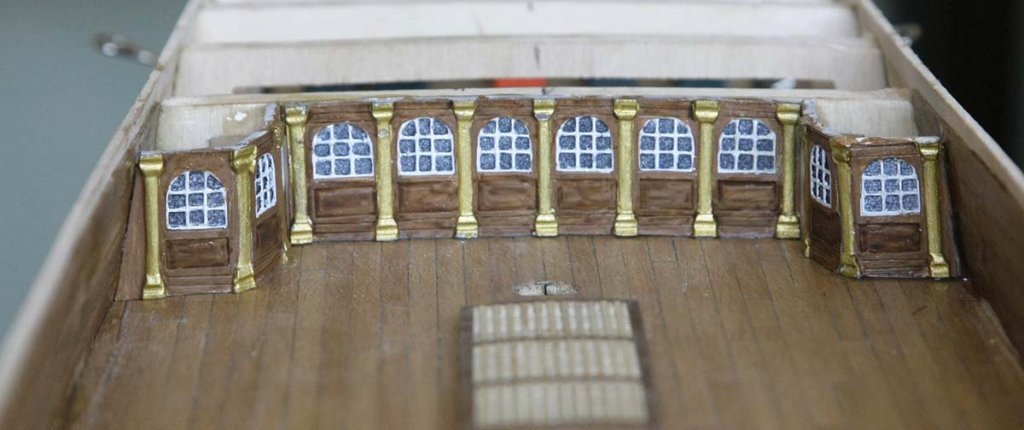
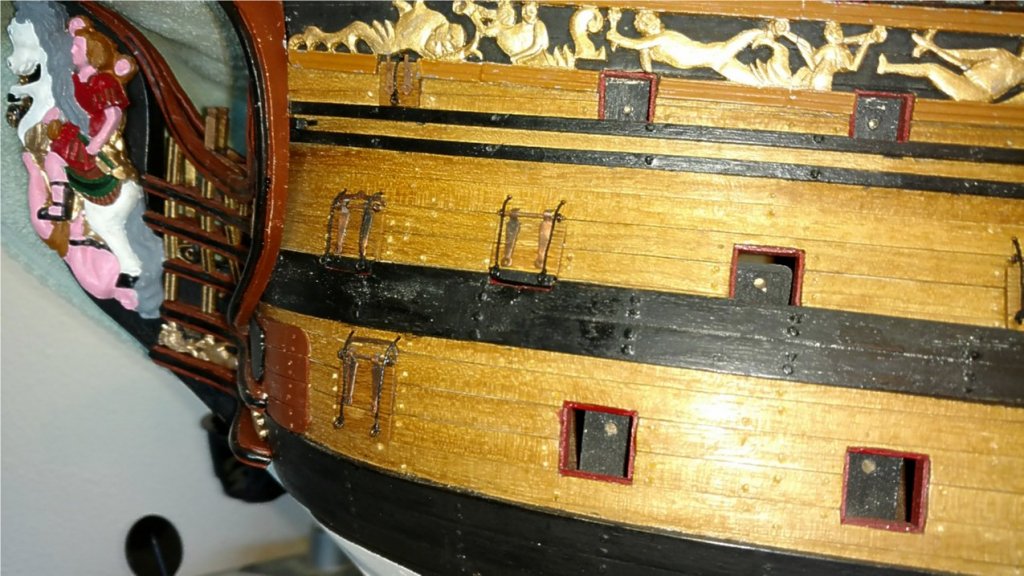
The starboard side hull entry port with planking ladder installed. The metal parts supplied in the kit were fine and just needed some cleaning up and painting. The 2 columns supporting the roof were metal wire in the kit. I used 2 small cannon wheels and toothpicks to create columns that were tapered and looked more decorative.
Next up are the chain wales.
Vince P.
-
1 hour ago, ken3335 said:
Hello Everyone, You'll be pleased to know that after that hiccup I'm back on track.
The big question, was it worth the extra work involved? The answer is an emphatic yes, worth every minute spent on doing it and I think that when you look at the pictures you'll agree with me.
I got some Tanganyika for the planking as this is what I normally get in kits and I'm familiar with it. I used an electric sander and took the planks back as much as I could with it rather than rip them off and leave a rough surface. I used a soft pencil on the edge instead of a marker pen which gave excellent results, I tree nailed in the same way using filler and finished the surface as I had done on my earlier attempt. I am so pleased, this is my best planking yet and one that I'm quite proud of, it looks even better in real life due to the matt varnish. The colour is truest on the first picture. The last picture is the before and after.
Don't you wish life itself was like this, you screw up but you can put it all behind you and start again!
Ken


Ken, that looks fabulous. Great comeback.
Vince
- ken3335, piratepete007 and WackoWolf
-
3
-
-
Hi Ken,
I see what you mean. Another thing that helps to get the bleach into the wood pores evenly is to mix your bleach at a 1 to 10 solution, bleach for just 30 minutes (time it). Rince thoroughly and then put it in an oven on white paper towels with the temperature set at the lowest setting possible ( 150 degrees or less) . The wood comes out pretty much the same shade, even in different batches. The key is the timing and drying.
Good luck,
Vince
- marktiedens and ken3335
-
2
-
Hi Ken,
While I agree that the decks could be lighter, don't get too caught up in having all of the planks the same color. On real ships the planks were often of different shades because lumber just came that way. When I planked my decks, I had all different shades because that is how the bleached wood came out. I tried to mix it up so the different shades appeared random. It came out nice and really gave the effect of a weather worn surface. As for the blackened edges, try a soft lead pencil. It looks good, is easier to apply, and won't bleed into the wood.
Vince.
- ken3335 and marktiedens
-
2
-
-
-
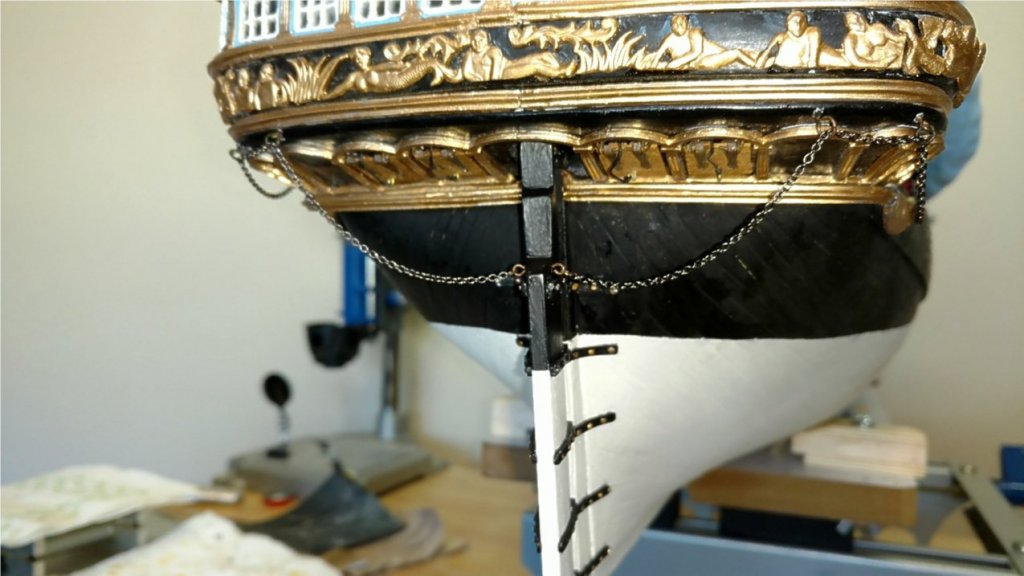
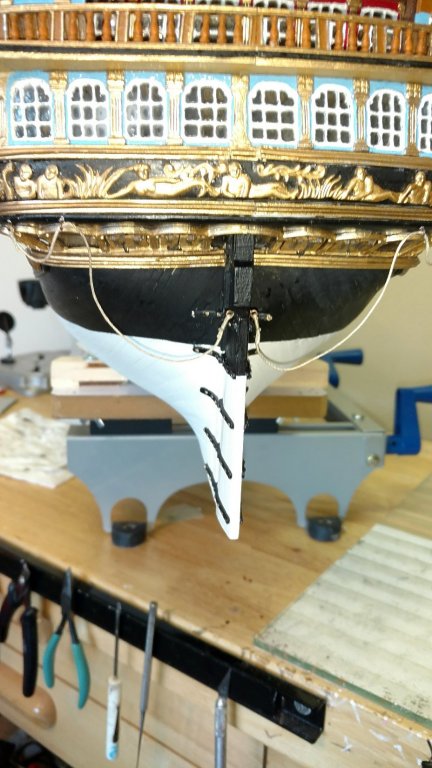
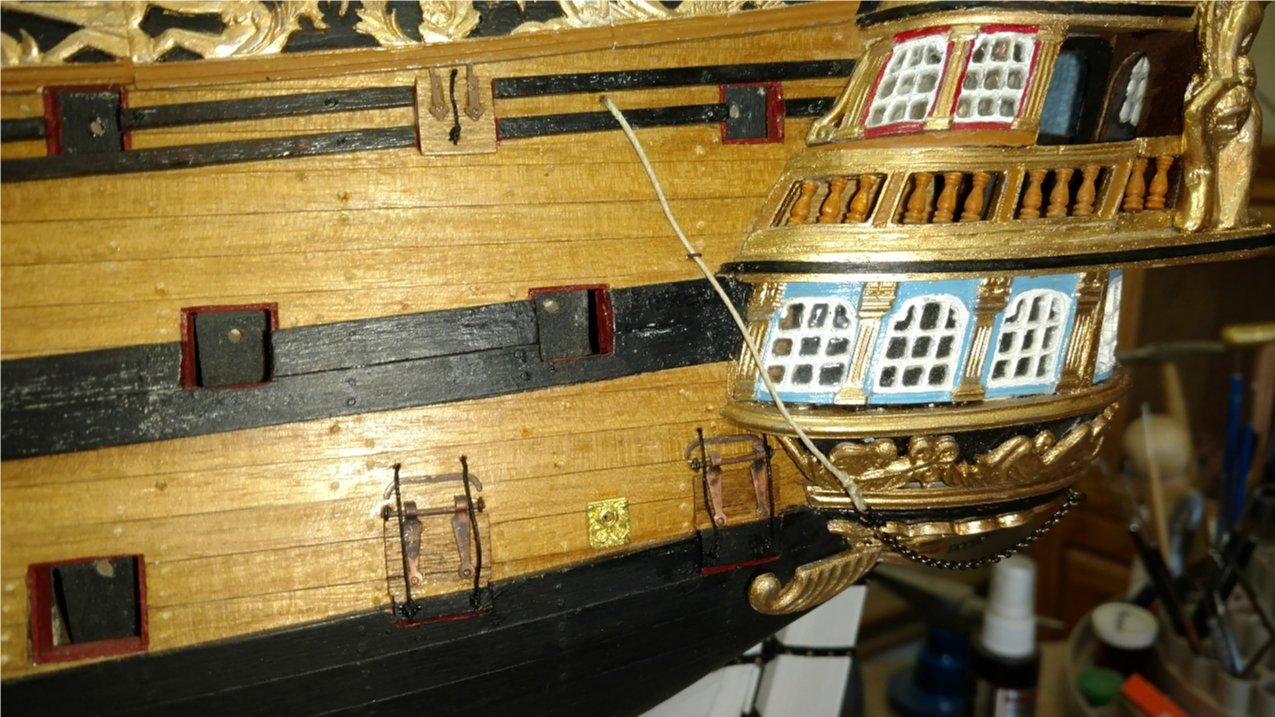
OK, I mentioned that the rudder pendants in the plans were not exactly authentic. I removed the ropes I had installed. Using actual photos of the HMS Victory in England, I determined how to rig them. The pendants are actually chains and ropes. The chains are attached to the rear edge of the rudder above the waterline with eyebolts and rings. Then up to the transom and fed through 2 more eyebolts and rings. Here the chains terminate. A heavy rope pendant is then spliced to the end of the chain with an open hook and ring and the hook is seized with rope to keep the pendant from slipping off the chain. The pendant then continues up through another eyebolt in the hull and through a hole in the hull just under and towards the rear of the mizzen channels. According to research, this arrangement would allow the rudder to be used if the tiller were damaged, and also helps to keep the rudder from being washed away should damage of the gudgeons and pintles occur.
Vince P.

- coxswain, marktiedens, gjdale and 4 others
-
7
-
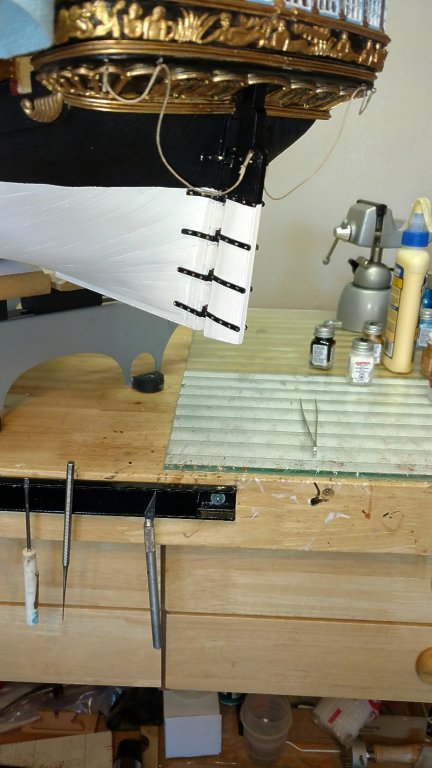
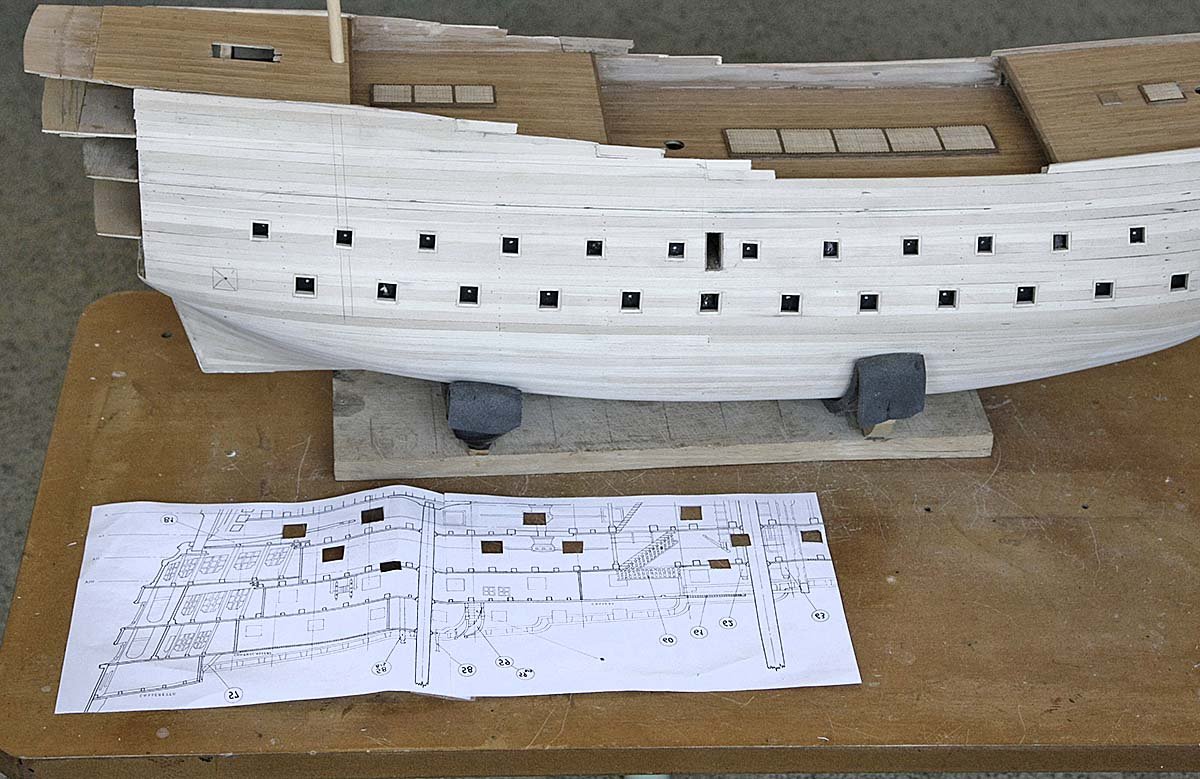
I have installed the closed gun port lids on the port side. They were created from walnut plywood and strips. The hinge plates were not the ones included in the kit. I used larger ones for the lower ports and smaller ones for the uppers. I made the hinges out of small eye bolts and brass wire. I determined that 2 pull up ropes were needed for the lower ports, since these ports were large and heavy. Single ropes are used for the uppers. When I make and install the open port lids, I will use the same configuration. Now on to the starboard side.
Vince P.


- marktiedens, Kevin and DenPink
-
3
-
-
Ok, Pirate Pete and I did some research on rudder pendants of ships of the RW period. It appears that the plans are not exactly correct, but close. I decided that I will remove the rope pendants I installed and do it the accurate way. I actually got the idea from photos of the actual HMS Victory currently moored in England. I have to order some supplies in order to complete this, so more to come as soon as they arrive.
Vince P.
-
-
Hi Steve,
I believe your problem stems from using contact cement and not getting an even layer before placing the planks. Using a PVA glue such as Tightbond is the way to go. Make sure the false deck is clean and free of dirt, splinters, and glue. Apply a few spots of PVA on each plank and spread evenly with the blade of a small screwdriver before placing on the deck. Use your finger to run across the top to press it down.
Also, make the planks longer using the model scale. About 100 to 120mm. Use the 3 plank shift pattern for the seams, as was used on real ships of the period. After completed and dried, sand lightly and apply a clear matte coating to seal it. It will be smooth as a baby's butt and look great.
Vince P.
-
-
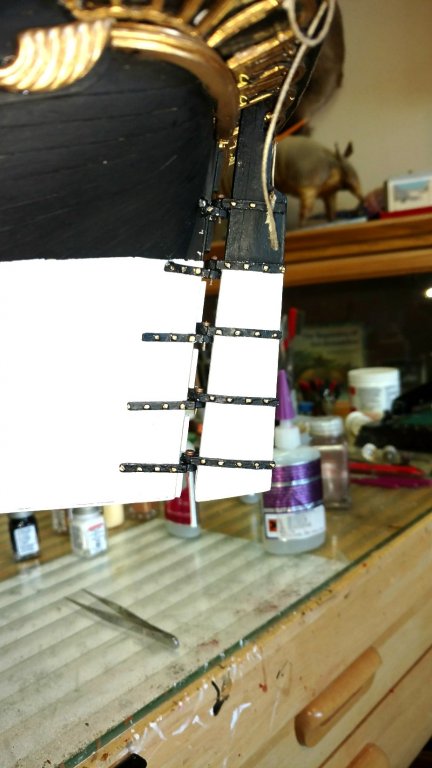
The rudder assembly has been completed and placed on the hull. Pretty straight forward, but bending the metal brackets to follow the hull was tricky. The metal is very soft and the bends needed are quite drastic. A little heating with a hair dryer and bending ever so slowly is small increments is critical to prevent breaking them.
Also, the safety lines on the rudder according to the plans are ropes and not chains. There is no chain supplied in the kit, so I just used the correct size rope (1.0mm).
Next up will be to continue with the outside hull fixtures such as gun port lids, chain wales, doorways, and ladders, etc.
Vince P.
- Kevin, ken3335, piratepete007 and 5 others
-
8
-
-
Hi Ken, welcome to the RW crew. There are several us, now including you, who are building her. You are quite right about this kit being different from others. It is a very challenging project to say the least, but you will enjoy it very much. You say you are just going to build the basic kit without adding enhancements. That is what they all say. As you go along, you will find yourself adding a little here and a little there. The kit makes you want to improve it. Looking forward to your log.
Vince P.
-


Returning to ship modelling after a number of years modelling railways
in New member Introductions
Posted
Welcome aboard mate!
Vince P.