mikec
-
Posts
334 -
Joined
-
Last visited
Content Type
Profiles
Forums
Gallery
Events
Everything posted by mikec
-
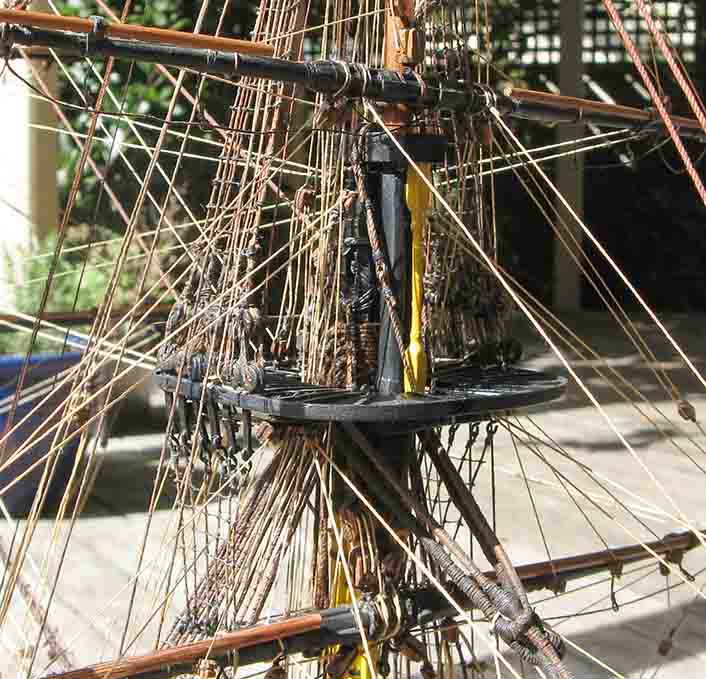
 looking fantastic Grant.Its going to get really crowded around the masts . I dont know if you are using one, but I found that by making a groove in the end of a 2 x 2mm x 30mm strip of wood you can work outside the web of lines. (see diagram me.
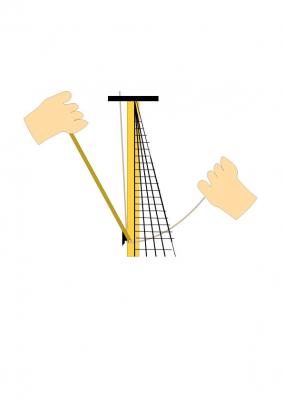
-
Victory by mikec - FINISHED - Mamoli
mikec replied to mikec's topic in - Kit build logs for subjects built from 1751 - 1800
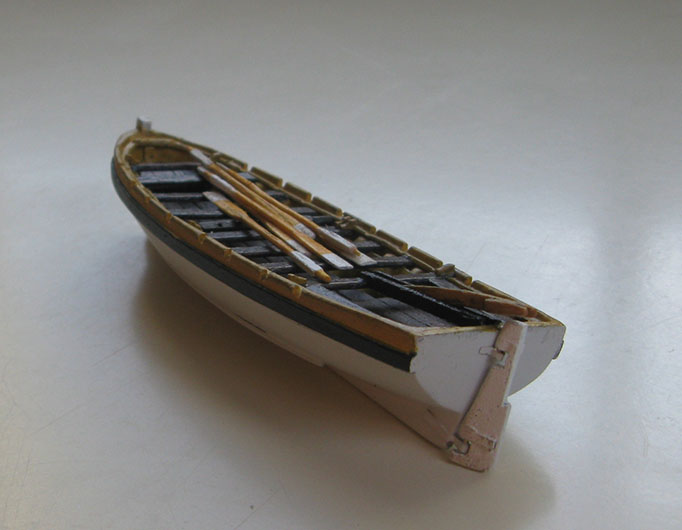
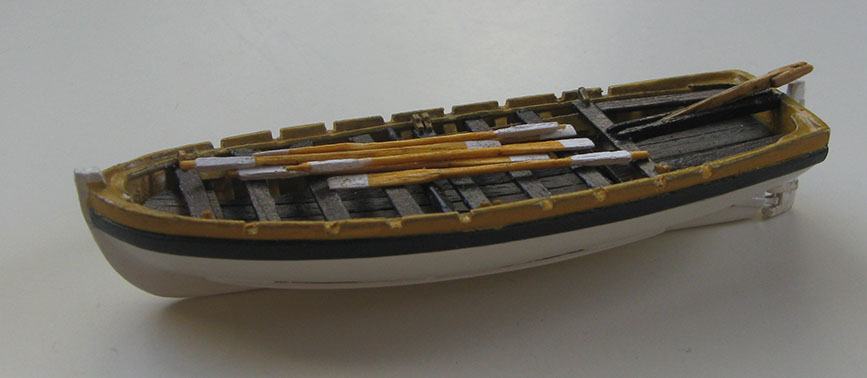
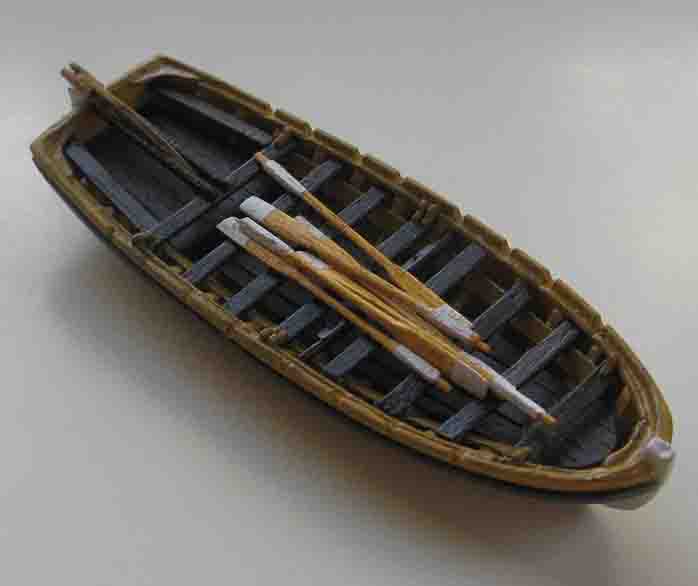
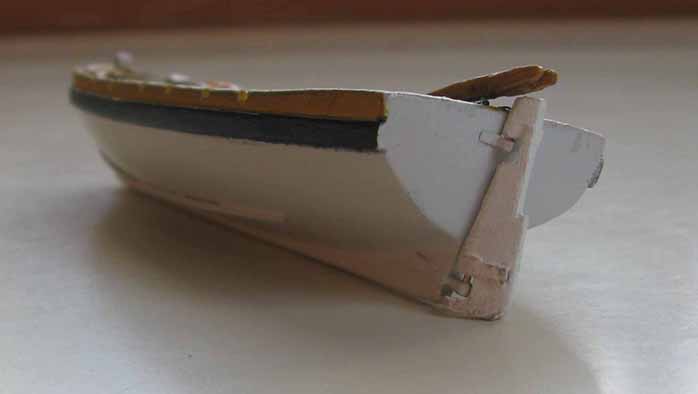
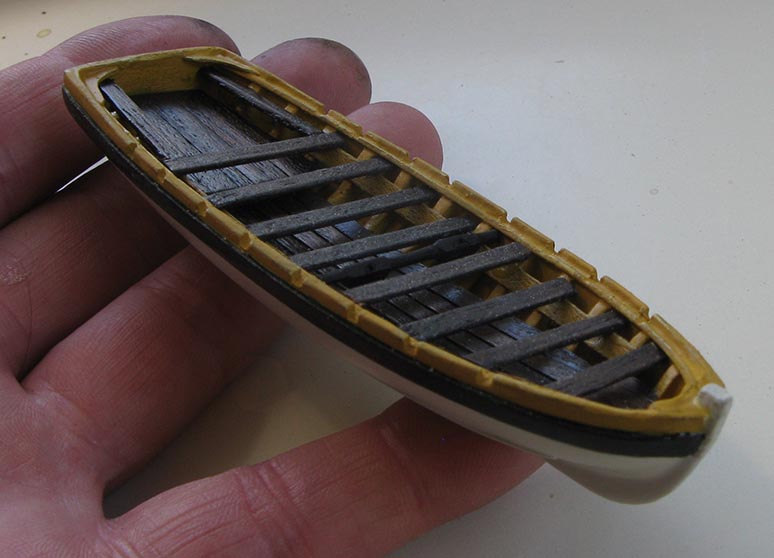
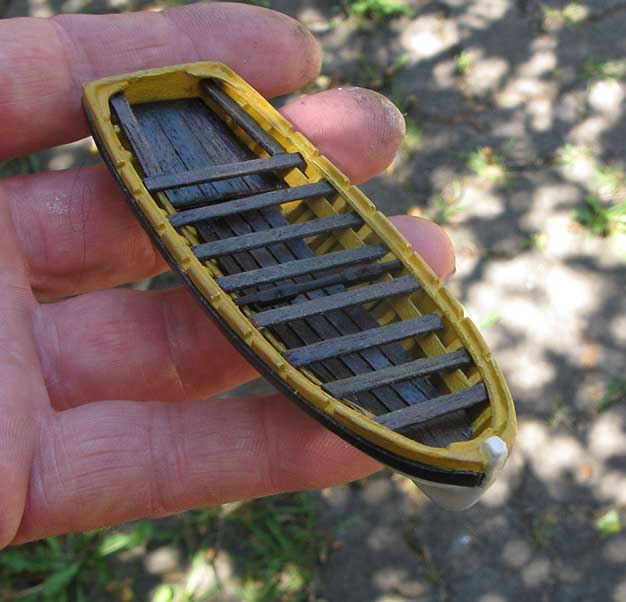
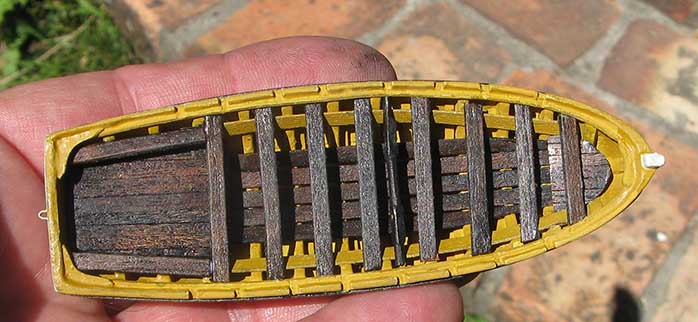
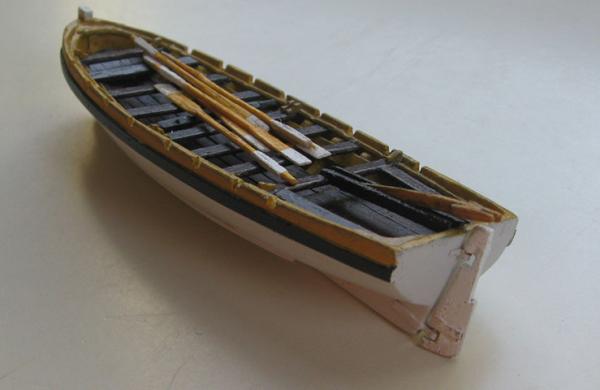
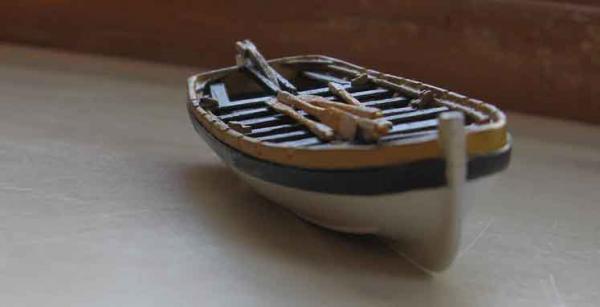
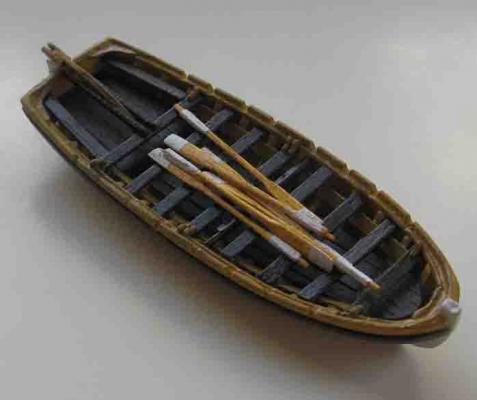
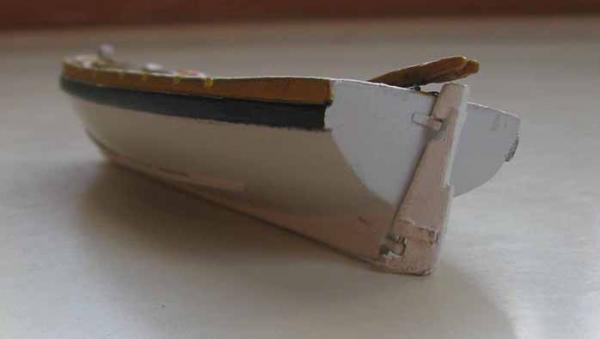
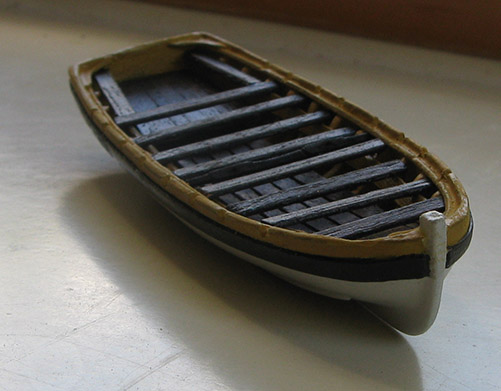
I have just about completed the launch, added the supports to the thwarts, made the rudder (this was very hard to do at this small scale- i wanted it to work (which I managed to achieve). made the oars, just a few more details and it will be finished...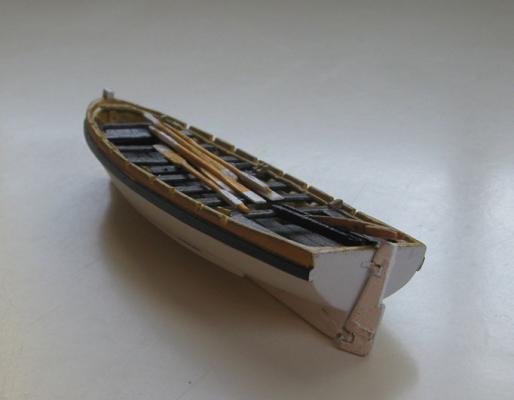

-
Victory by mikec - FINISHED - Mamoli
mikec replied to mikec's topic in - Kit build logs for subjects built from 1751 - 1800
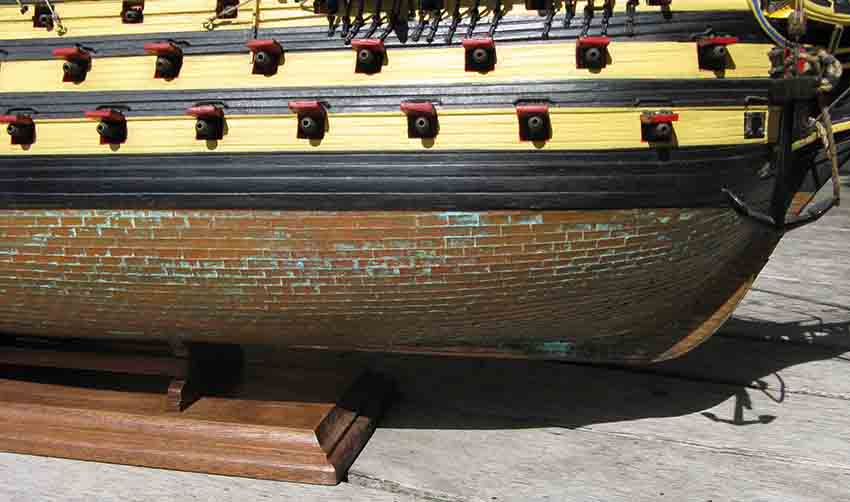
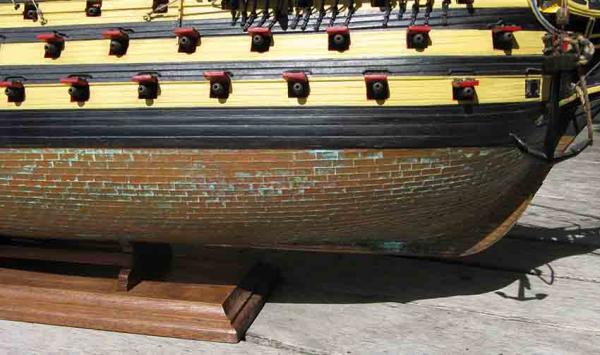
Hi Alistair, thanks for your kind comments, give me a call when you are in Devonport 021 039 6214, happy to show her to you. and my Endeavour project. The verdigris is deliberate, I obtained a special solution that a metalwork company uses to age copper for high end architectural projects that required aged copper as an effect. I have no idea what it is as they made it up for me, and was a trade secret. cheers Mike -
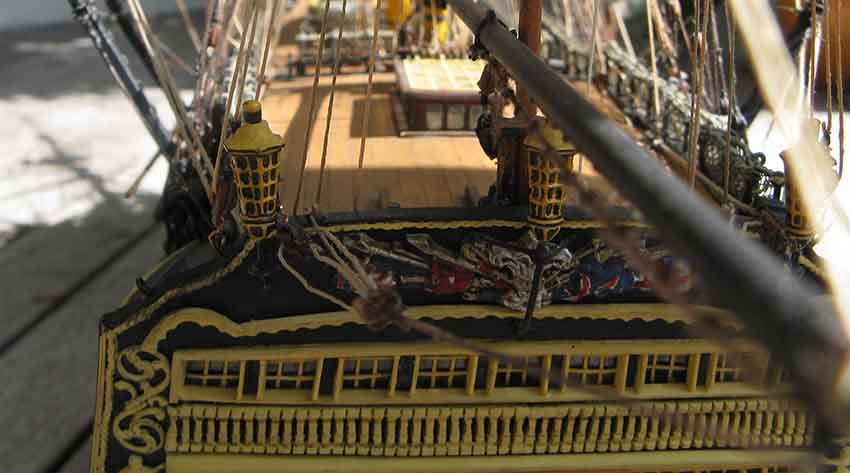
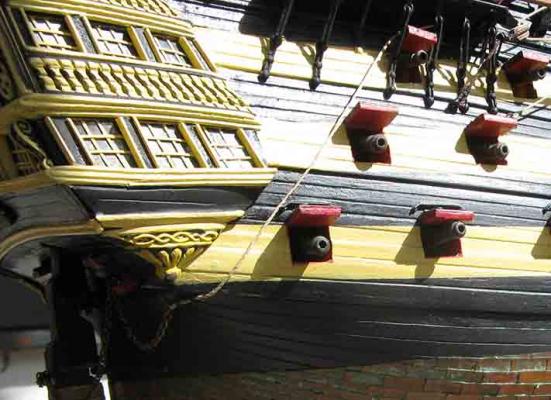
Love the lanterns. The mamoli kit ones I had to use were solid castings , and so I had to paint the windows with gloss black, to simulate them. They are very small as the mamoli kit is a lot smaller. No where near as good as yours but they are okay. Keep up the great work.

-
Victory by mikec - FINISHED - Mamoli
mikec replied to mikec's topic in - Kit build logs for subjects built from 1751 - 1800
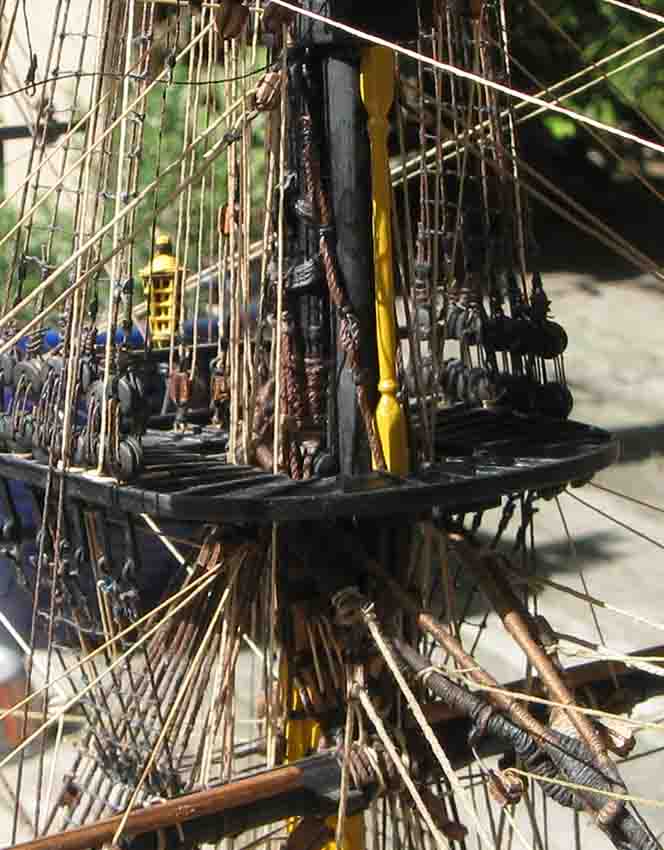
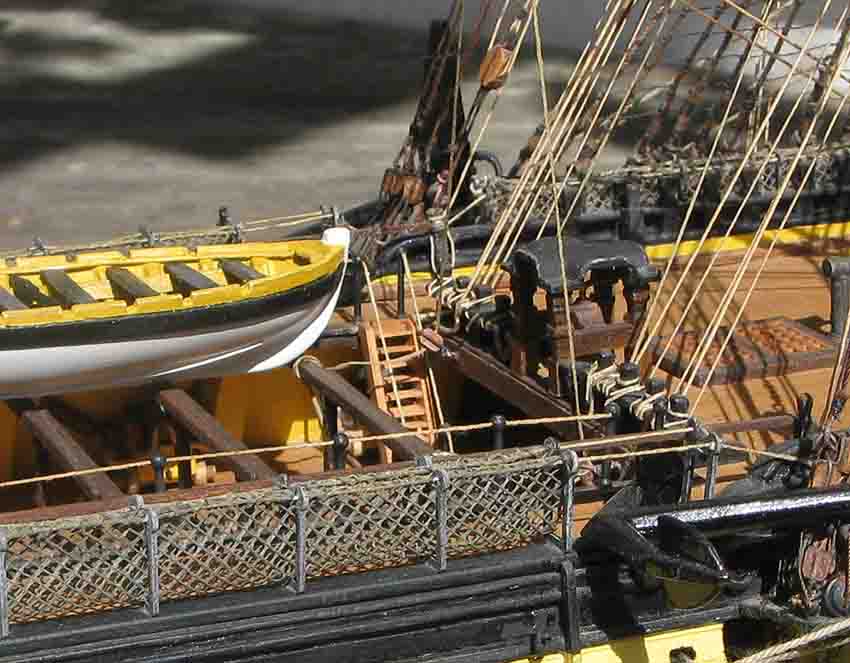
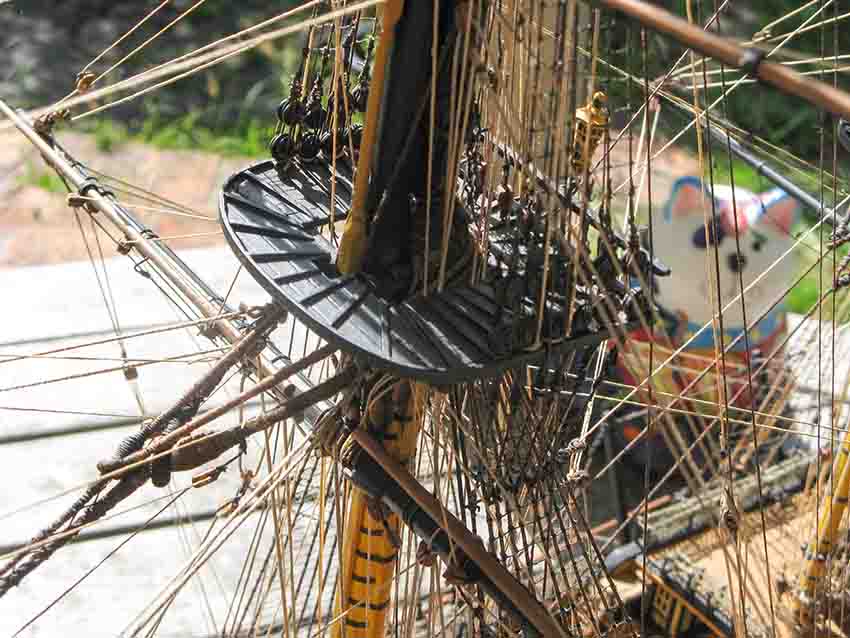
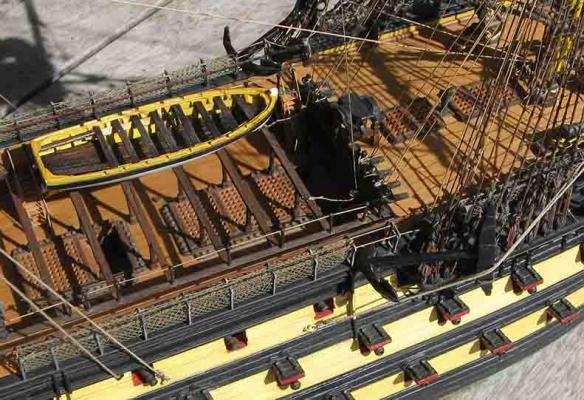
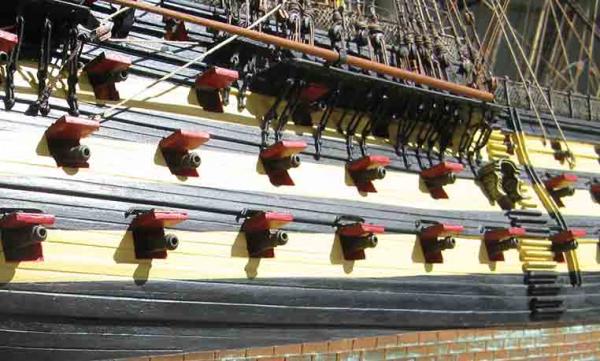
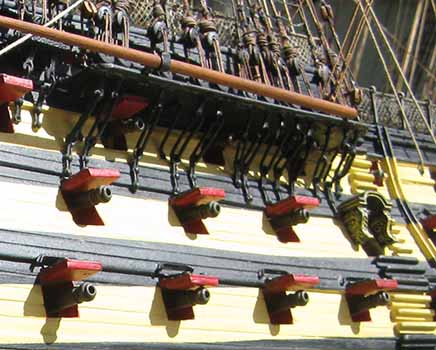
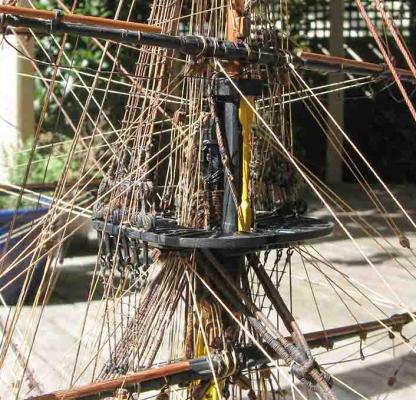
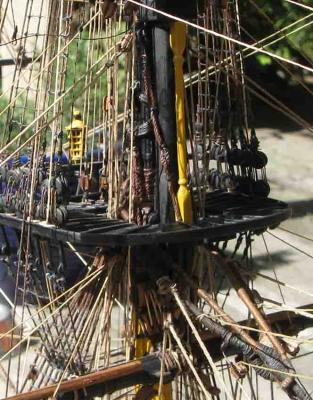
I just returned home from visiting family for a few days on waiheke Island. I managed to paint, varnish and add the mast top supports. Also the seats of ease. Now just need to add details to the launch (oars, rudder knees etc) then nearly finished. also posting some detail shots...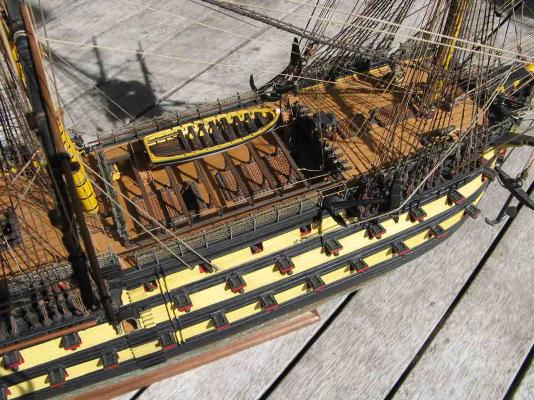


-
Fantastic model. And very unusual. What is your next project going to be?
-
Your masts look fantastic Jerry. Yes I have finished and added the davits, now working on the launch. check out my posts 8-)
-
Victory by mikec - FINISHED - Mamoli
mikec replied to mikec's topic in - Kit build logs for subjects built from 1751 - 1800
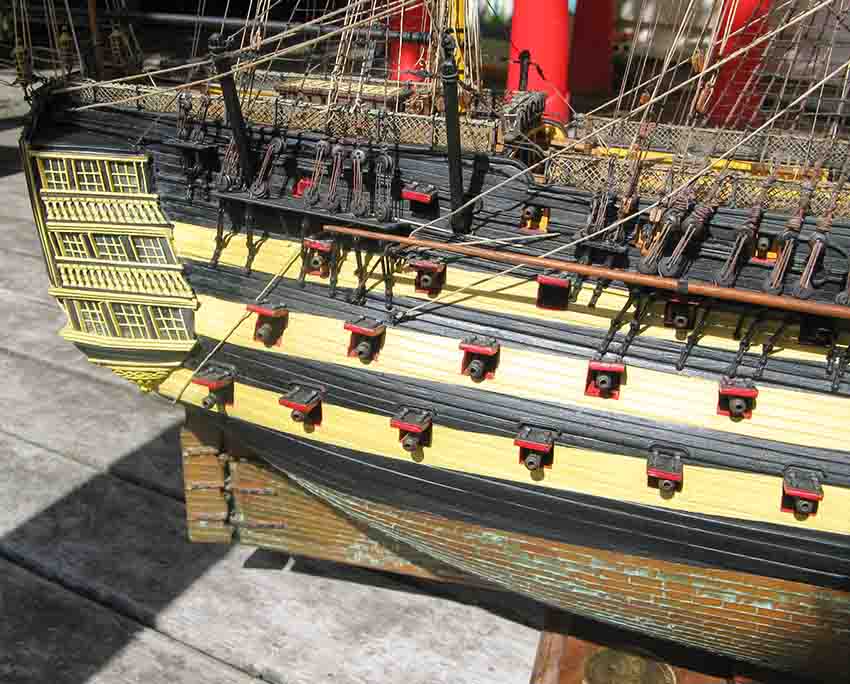
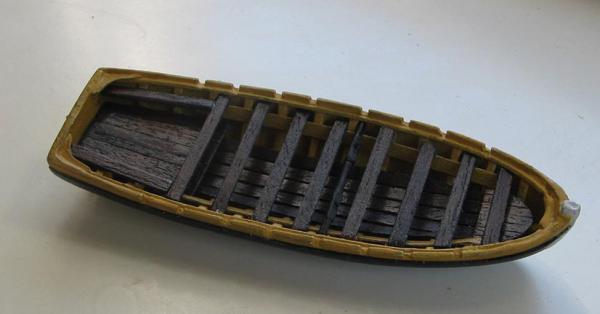
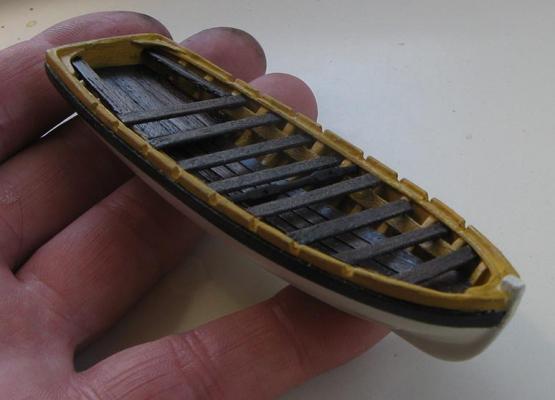
Another interesting lesson in the use of colour in scale. The lighter yellow ochre colur looks right on the victory ship sides but too light on the launch. so I re-sprayed with a darker yellow. It looks right now. I also masked and painted the wales. I made the thwarts, by laminating 0.5mm sapele strip. I used this as it has a reddish hue that when coloured with a black oak stain, it would retain a warm tinge to it. The photos haven't picked this up but in real life it worked. I am very pleased with the result of my completely scratch built launch. Now the fun bit - adding the details….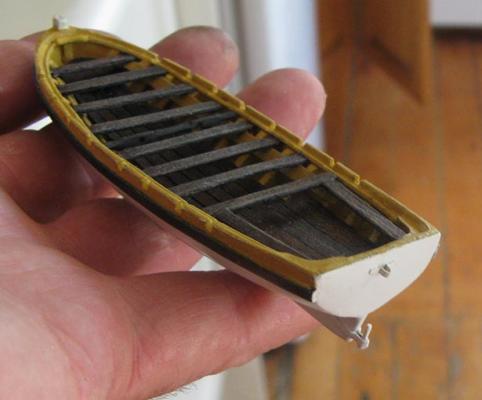

-
Victory by mikec - FINISHED - Mamoli
mikec replied to mikec's topic in - Kit build logs for subjects built from 1751 - 1800
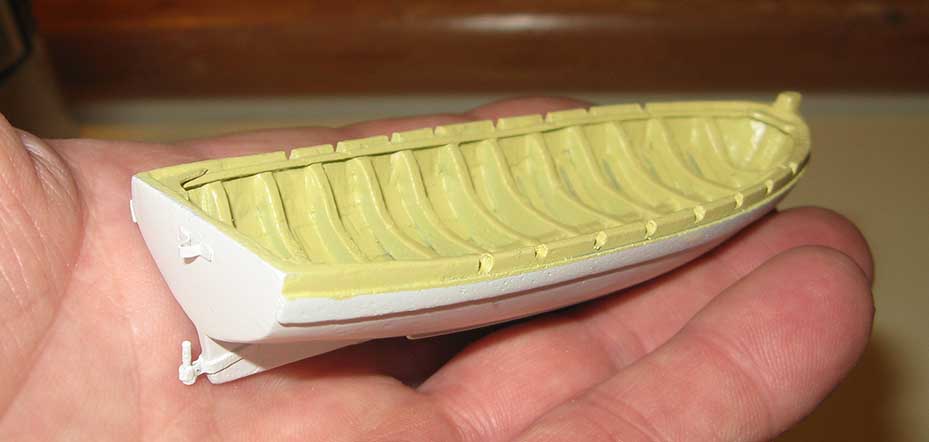
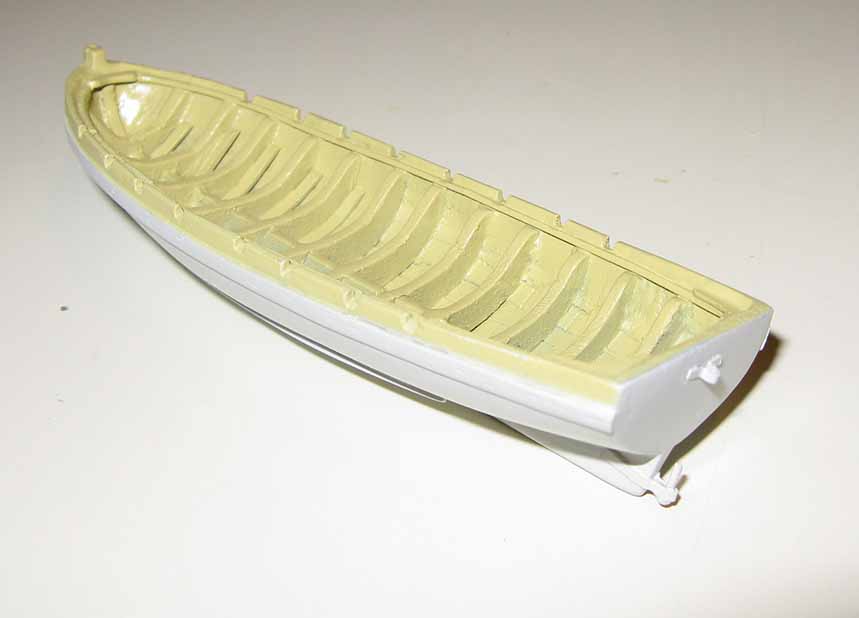
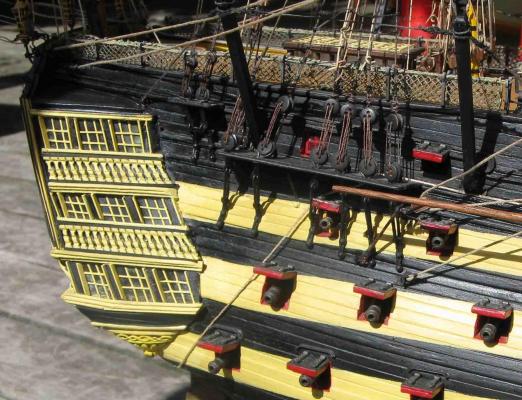
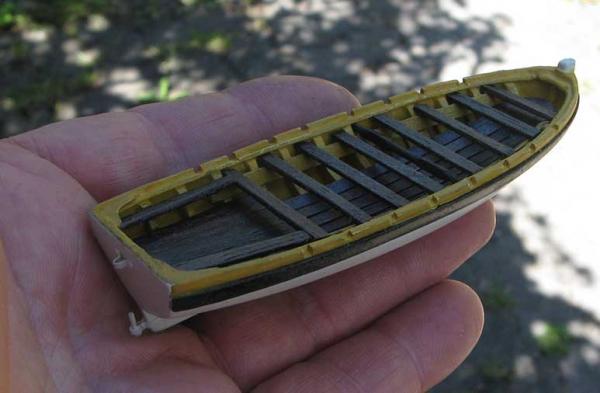
Making good progress. added the rudder gudgeons, and the rear "elbow suuports" I turned the hull upside down and sprayed with Tamiya, airforce Insignia white. As mentioned this is an off white, and at this scale I find it the perfect hue, and not too bright a contrast against the other colours. I then masked off from the wales and sprayed the inside with flat black where the frames are only, then applied the yellow ochre over the top. this gives a nice subtle shaded look that enhances the detail. I learnt this trick during my aircraft modelling years.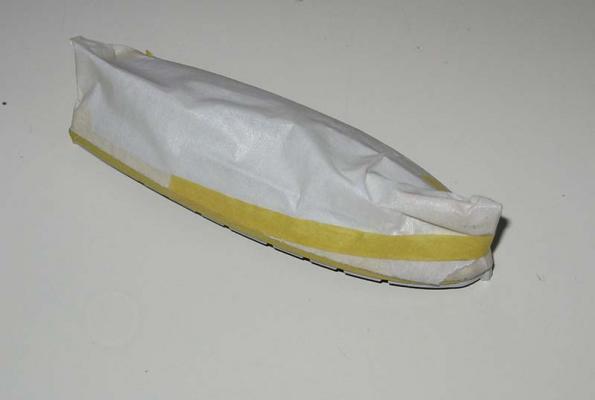


-
I dont know how or if i rigged them at all. I will have a look and post pic if I did. wshat did Longridge do?
-
HMB Endeavour by mikec - Eaglemoss
mikec replied to mikec's topic in - Kit build logs for subjects built from 1751 - 1800
Thanks for advice with the wheels. I will try and replicate as per the photo above. I am currently working on finishing off (finally) my Victory, so she can go to the Devonport Naval Museum, so Endeavour work has ground to a halt. i will be working on her in about 3 weeks though, and the break and change in project has done me the world of good, as I am itching to restart my Endeavour build. cheers Mike -
I have said it before, and i will say it again. amazing work. thanks
-
The Boarding pikes look great. I might add this detail to mine, not sure how, as the scale is a lot smaller and she is already fully rigged. i am going to have a look see now….
-
Victory by mikec - FINISHED - Mamoli
mikec replied to mikec's topic in - Kit build logs for subjects built from 1751 - 1800
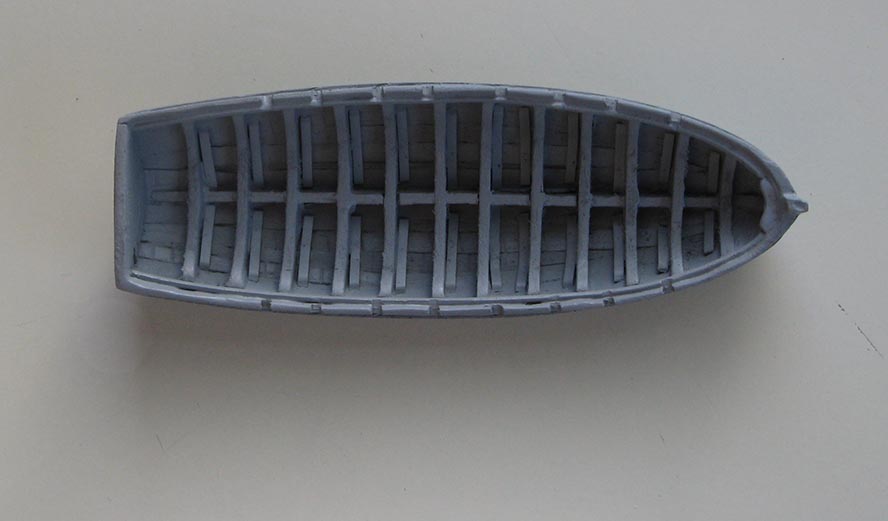
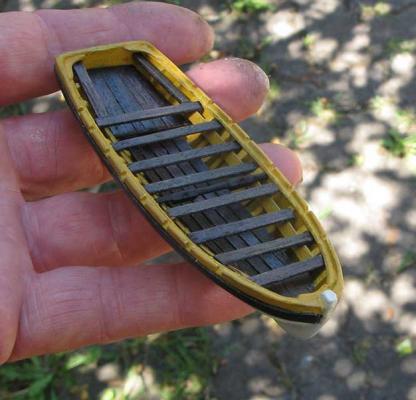
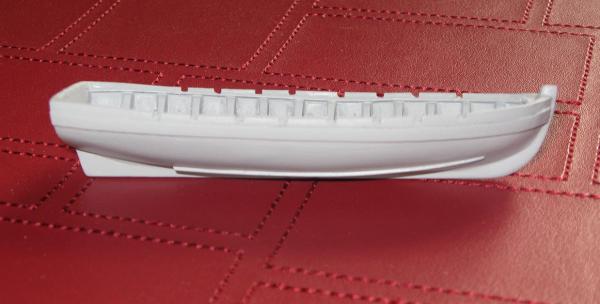
More work on the Launch. finished hull faring, added the wale planking and the "skids" that runs at the base of the hull. Working in this very small scale I use plastic strip to create the fineer details: the internal battens etc as wood is just not fine enough. I then sprayed with Tamiya undercoat ready for painting yellow ochre on the inner and satin off white on the outer. I use an off white as white is too stark a contrast against the other colours of the ship. After painting I will add all the details, thwarts etc thanks for looking, cheers Mike

-
Sorry to hear about the mishap. Though I agree you appear to have dodged a bullet - it could have been way worse
- 517 replies
-
- 1
-

-
- Endeavour
- Artesania Latina
- (and 1 more)
-
Victory by mikec - FINISHED - Mamoli
mikec replied to mikec's topic in - Kit build logs for subjects built from 1751 - 1800
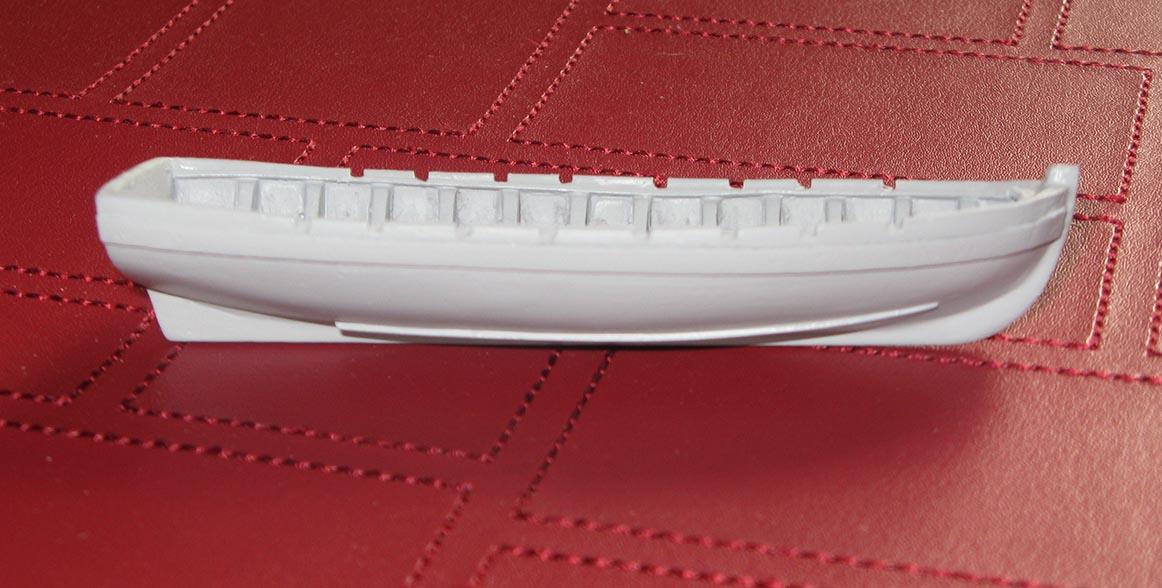
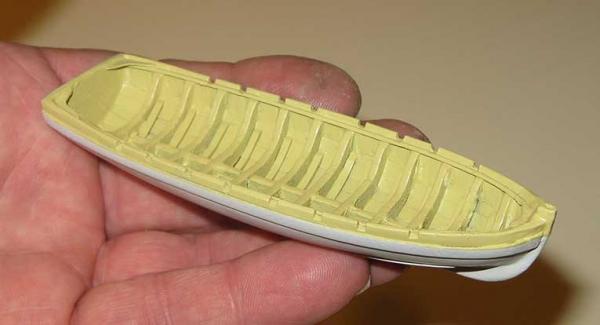
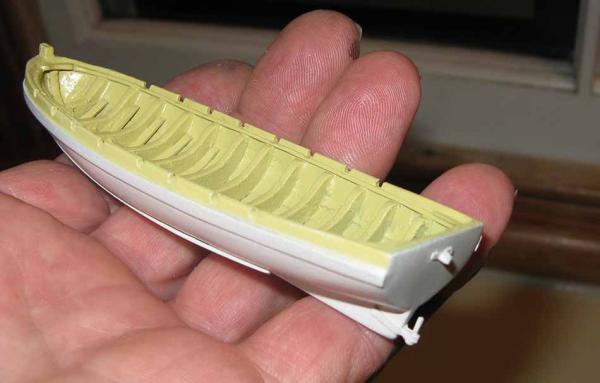
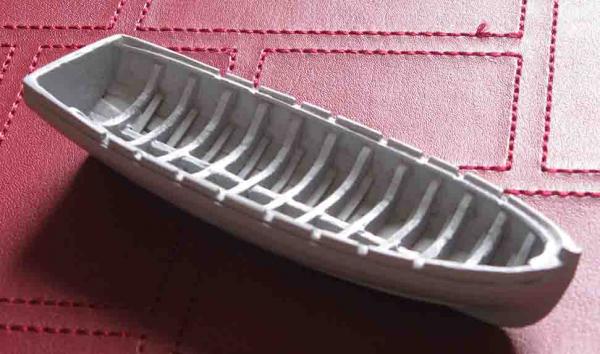
Back to small scale, i successfully removed the launch from the jig, and have now carved out the solid pieces to form the inner frames. I just need to fare them from the inside, clean up and apply filler then add the smaller half frames with plastic strip
-
Your masts look excellent, Jerry
-
Victory by mikec - FINISHED - Mamoli
mikec replied to mikec's topic in - Kit build logs for subjects built from 1751 - 1800
Guys I have been very busy this weekend. Also worked on the real boat that I race on in New Zealand (Ta Aroa) she is a 60ft sloop and was built in 1961 out of Kauri. She has an illustrious racing career having won the Auckland to Suva yacht race in race record time held for 13 years. We have discovered that she has been attacked by an old enemy that you all will be familiar with, the Toledo worm. We have cut out the affected part (you can see the wood around the rudder). it was a pleasure working at this scale from my launch LOL. We have a week to get her ready for a classic regatta race in 1 week. All hands on deck! Thought you might be interested. cheers Mike


-
Victory by mikec - FINISHED - Mamoli
mikec replied to mikec's topic in - Kit build logs for subjects built from 1751 - 1800
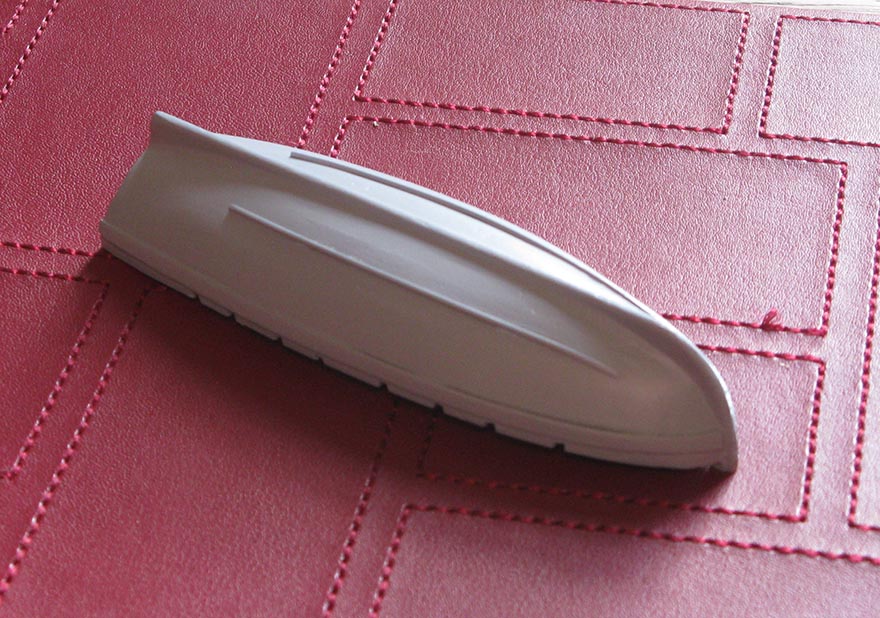
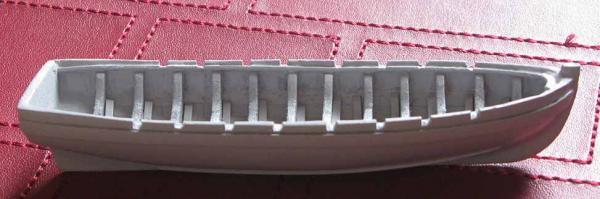
more progress. planked and fared the launch, then sprayed with undercoat ready for careful removal from jig. i am very please with the result considering the small scale. the pictures tell the story...


-
Great work Grant
-
Wow, I am impressed. Amazing work. thanks for the inspiration.
-
Looking very, very good.
-
Victory by mikec - FINISHED - Mamoli
mikec replied to mikec's topic in - Kit build logs for subjects built from 1751 - 1800
I have started building the launch. Based on what i have learned from this site, and my Endeavour. so far so good. I printed my drawings and glued to the ply, then cut out all the frames with a craft knife. i decided to keep the frames solid as at this scale they were too brittle to hollow out. I will carve the frames and thin to size once i have planked. The jig made a nice solid plateform to fare the edges of the frames. Next stage planking….


-
Victory by mikec - FINISHED - Mamoli
mikec replied to mikec's topic in - Kit build logs for subjects built from 1751 - 1800
Thanks heaps everyone. I have made the support fillers for the mast heads. i fashioned them using my dremmel drill as a lathe. They have been sprayed with undercoat ready for painting. I have also made plans and templates for a scatchbuilt launch. I drew this on my mac in Illustrator, I decided to use the same technique as i did with my Endeavour boat. (using a jig for the frames, then plank onto the frames. Believe it or not this drawing took hours to figure out. I am going to print it out and stick it to the boxwood ply and cut out the shapes by hand. Now to see if I have measured and drafted everything correctly….it should work….