mikec
-
Posts
334 -
Joined
-
Last visited
Content Type
Profiles
Forums
Gallery
Events
Everything posted by mikec
-

HMB Endeavour by mikec - Eaglemoss
mikec replied to mikec's topic in - Kit build logs for subjects built from 1751 - 1800
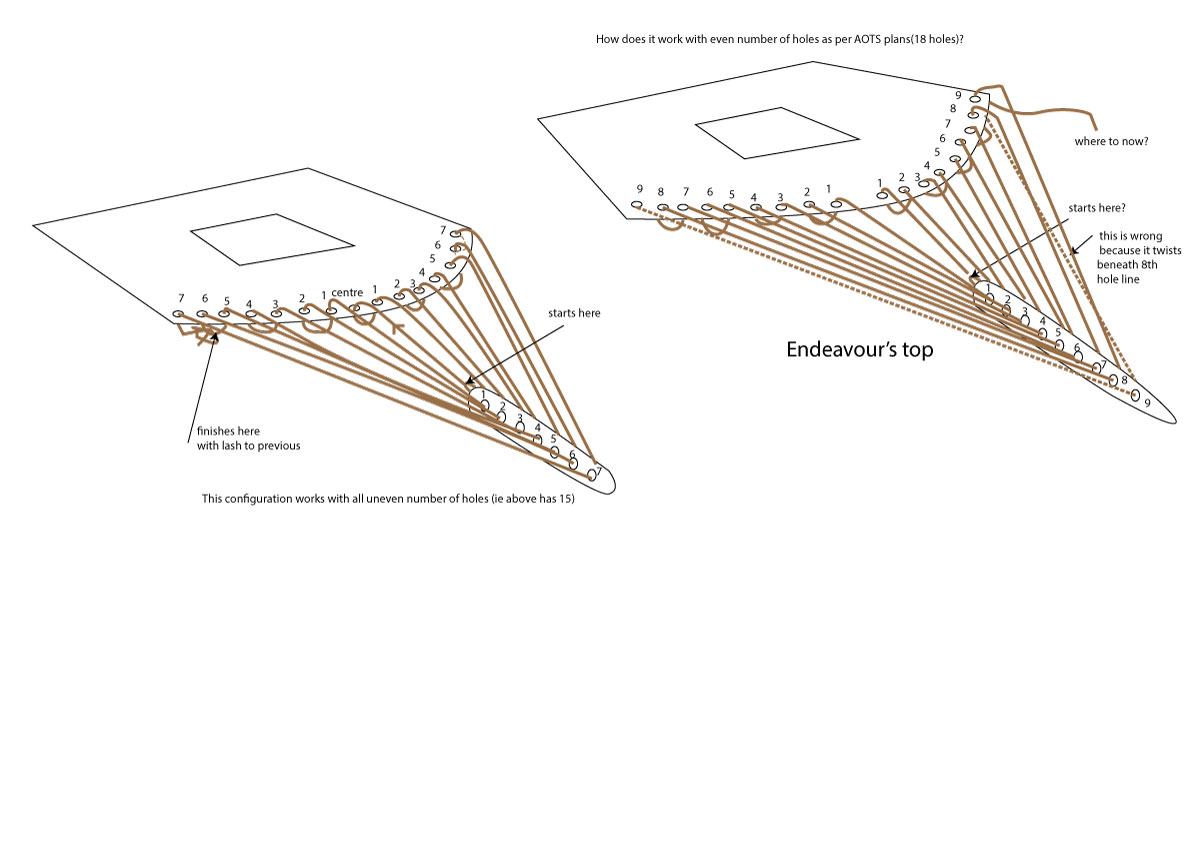
Thanks for the kind words and encouragement. I appreciate your support. I am trying to figure out the correct way to rig the crows foot. I have done some research and so far, all have a centre hole in the top and equal amount of holes port and starboard. This enables you to finish the tie in last hole and lash to the previous line beneath the top. (As per "How to rig period model ships") AOTS calls for either 14 or 18 holes so there is no center hole to start off. No matter what configuration I try, I can't make it work. Is the AOTS wrong? I am trying to follow the guide in "How to rig period ship models" which clearly shows a centre hole to start so it has a balanced finish . Help required please. I have done a rough sketch. the one on the left is has odd number (centre hole) the one on the right is Endeavours top.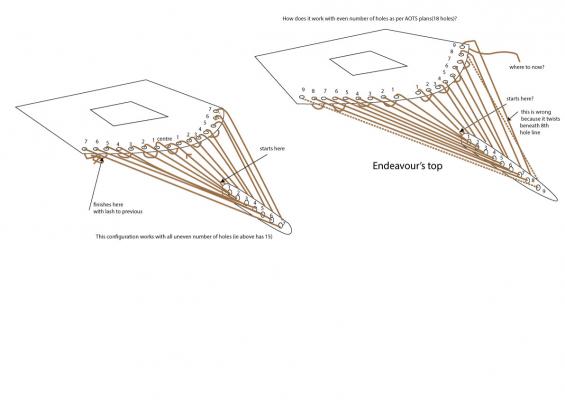
-
Hey Grant, sorry but I had to chuckle re your post about the pharmaceuticals. That tickled my fancy. Glad that you a that are okay, and not attempting to work in the shipyard while under the influence, Imagine how your build could turn out.... like some kind of abstract sculpture. Speedy recovery mate. And congratulations on the Pee
- 456 replies
-
- 2
-

-
- finished
- bomb ketch
- (and 2 more)
-
As always, great work.
-
Hi Steve, thanks for the explanation. That makes total sense. Love your build, and I will probably do the same now. cheers Mike
-
Sorry but I dont think that is right at all. The grating on top would refer to a metal grill that "protects" the glass. Remember, the purpose of this is a sky light, which is to let in as much light as possible to the cabin below. Look at the Victorys sky light.
-
Very nice start to your model. I will follow with great interest. I haven't viewed this kit before. I am guessing that it is made with exposed planking? It looks very good. Mike
-
Very nice start to your model. I will follow with great interest. I haven't viewed this kit before. I am guessing that it is made with exposed planking? It looks very good. Mike
-
HMB Endeavour by mikec - Eaglemoss
mikec replied to mikec's topic in - Kit build logs for subjects built from 1751 - 1800
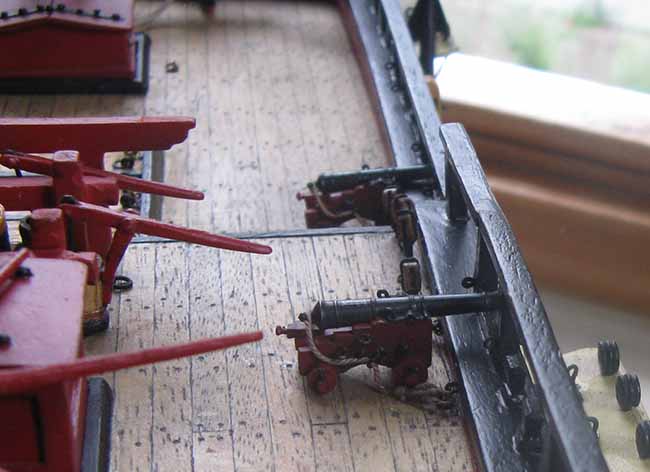
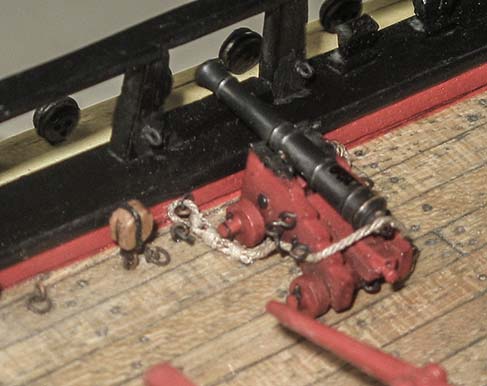
Hi, after a wee break-I have started to rig the canons. I made the "GR" cypher by photo copying onto decal paper. I then shined a small patch of the blackend brass barrel back to bare metal, so that the black decal will show. to the naked eye it now looks like the raised cypher. I also detailed the trucks using toothpick for the axle and 0.25 wire for the wheel lock pins. sorry for the poor camera photos. Now to tackle the tackles...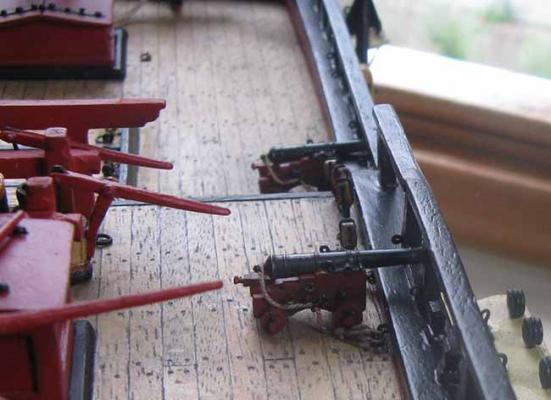

-
Nice work. I have been given this kit. I will follow your build with interest, Is anyone else building this model? and are there any historical references for this model?
- 15 replies
-
- 1
-
-
- la candelaria
- occre
- (and 1 more)
-
Looking great. Nice clean and neat work, well done.
-
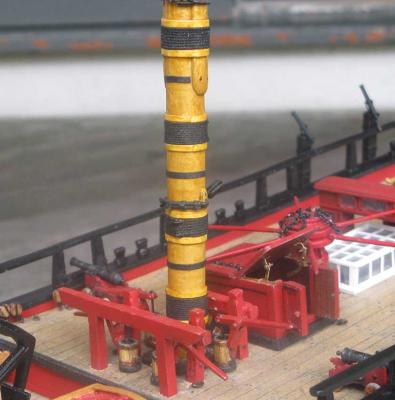
HMB Endeavour by mikec - Eaglemoss
mikec replied to mikec's topic in - Kit build logs for subjects built from 1751 - 1800
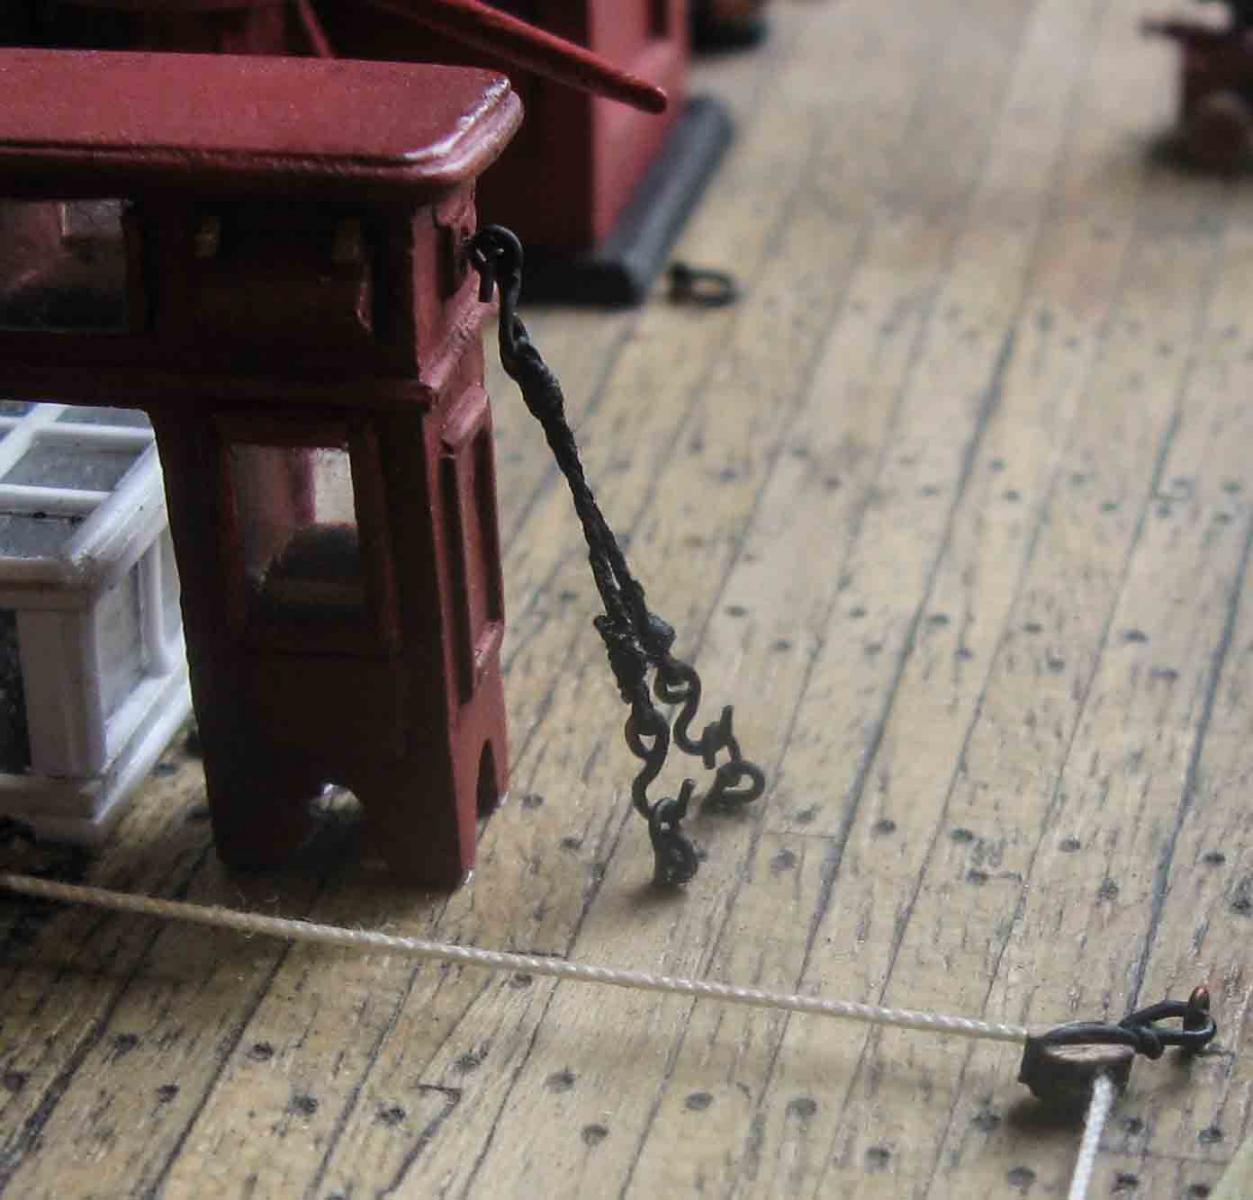
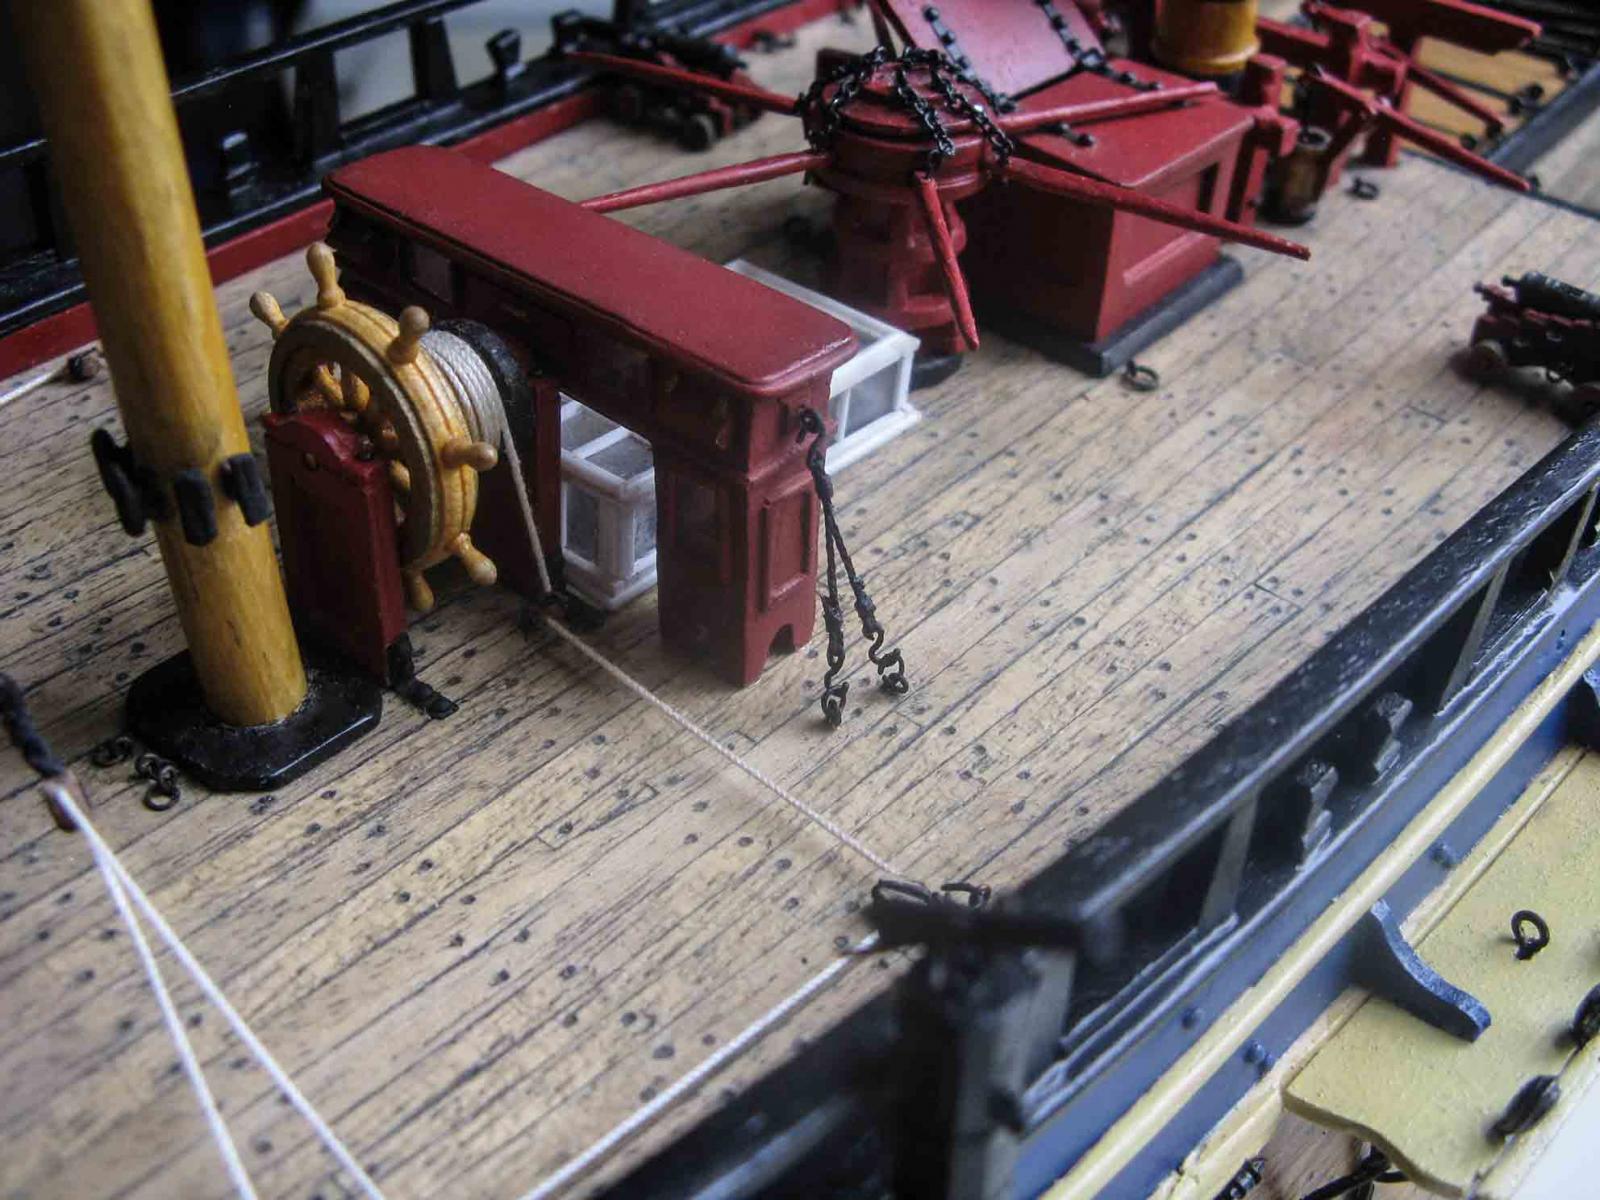
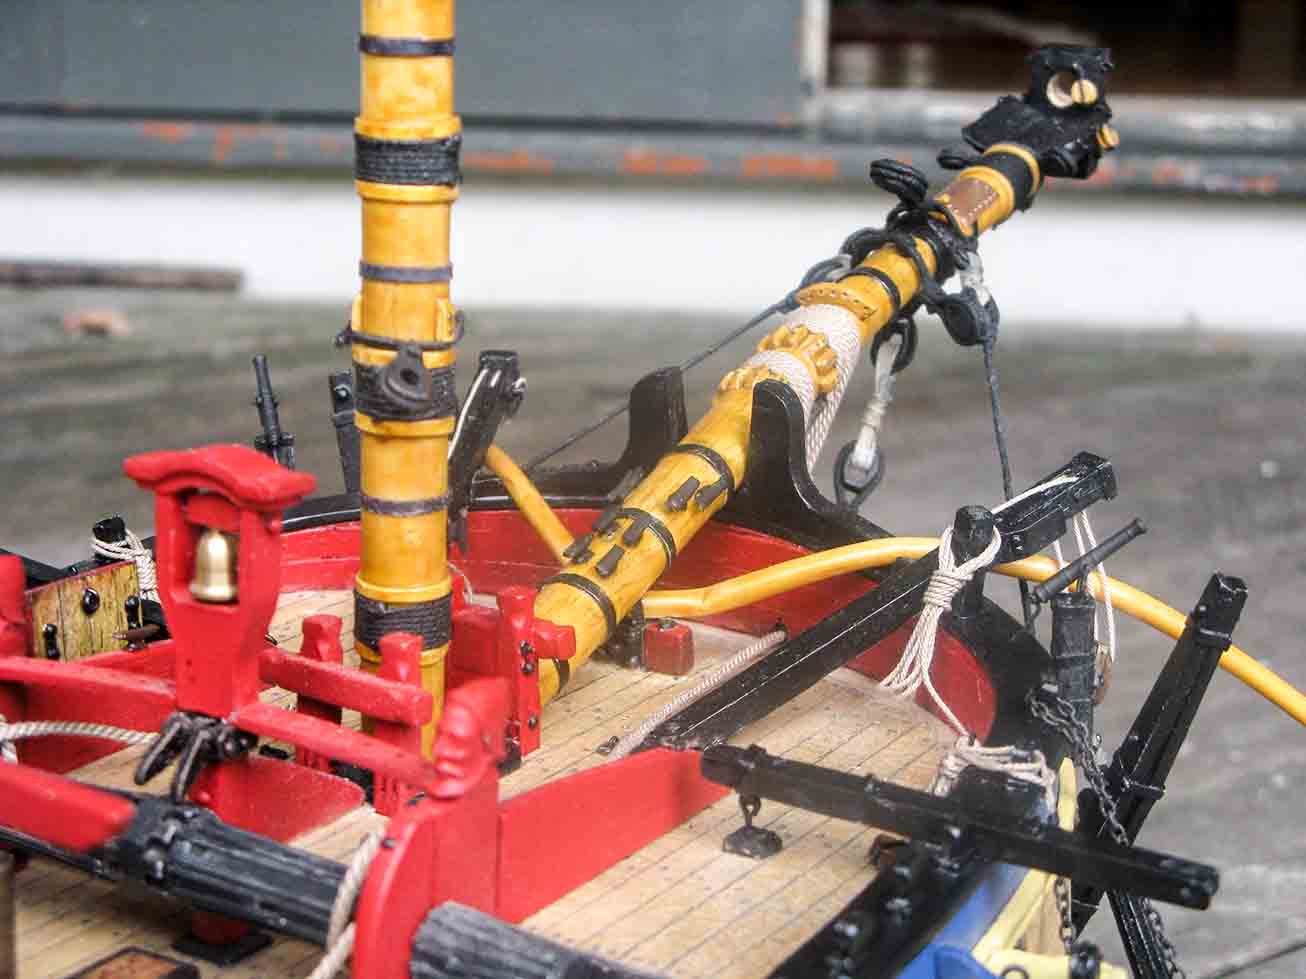
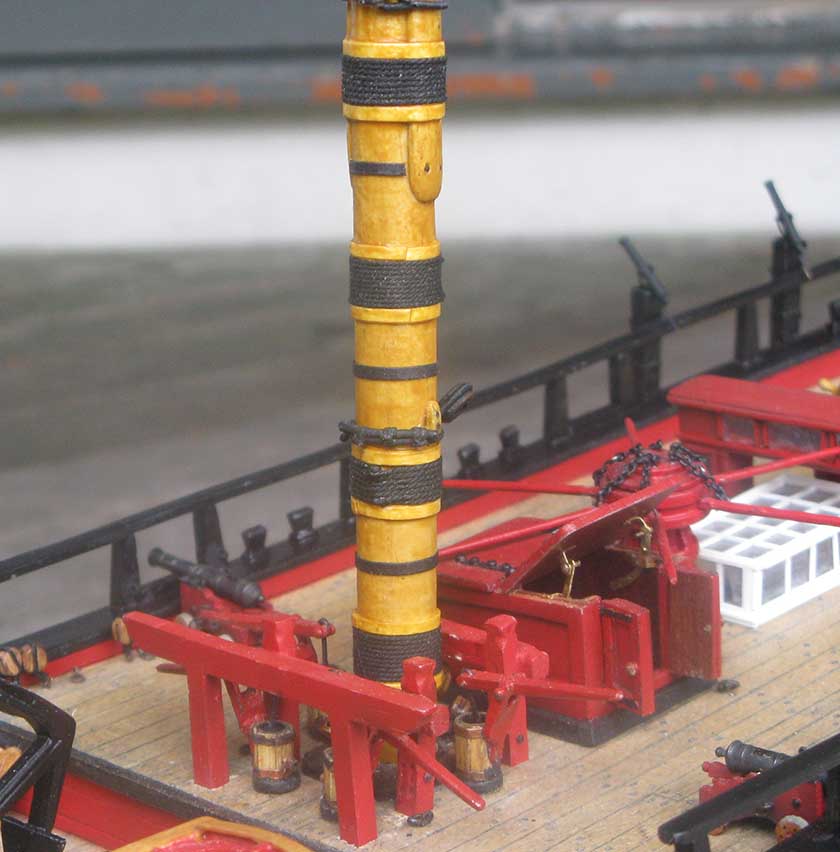
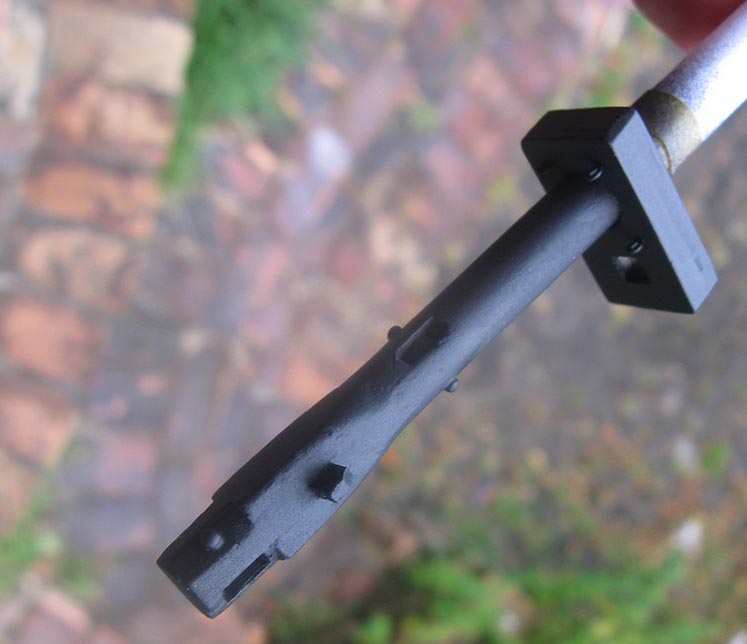
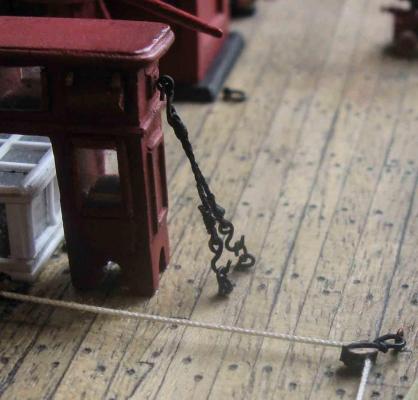
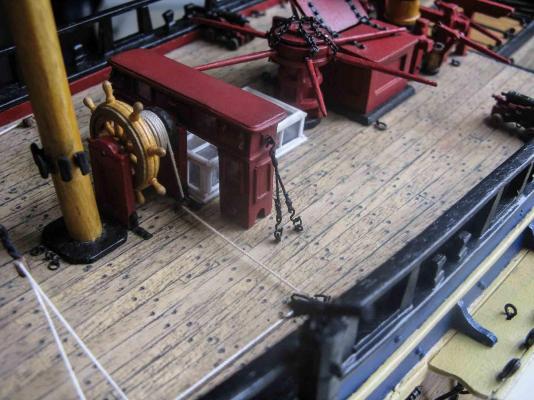
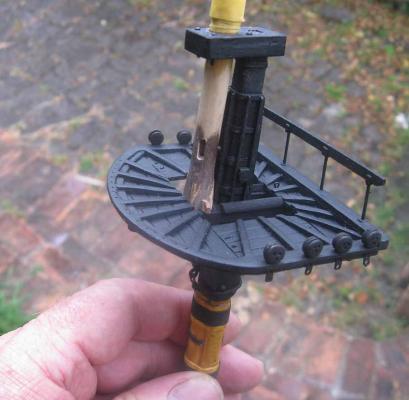
Spent more time in dockyard this weekend. Took a break from masting to attend another item I hadn't been looking forward to doing - the Binnicle lashings to the deck. I knew that at this scale they would be very tricky, and so it proved. I made the hooks from 0.5mm x 1mm copper eyebolts. And lashed to deck in situ rather than on a jigg. I kept the seizings loose, and the thread longer than it needed to be, to enable me tighten the lashing using tweezers and fingers... Tighten seizing by pulling on two seizing ends, apply spot of superglue, and trim using nail clippers. Note: I use nail clippers to do most of my trimming of rigging lines, it is a lot safer- if you slip you wont accidentally cut another rigged line. This is learnt from experience, where I indeed slipped whilst trimming a line with a scalpel, and cut through previous rigging .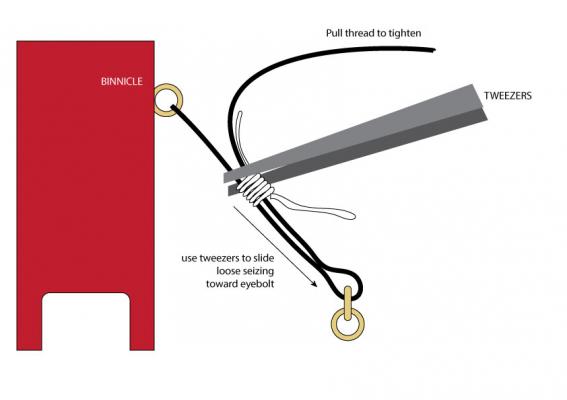
-
HMB Endeavour by mikec - Eaglemoss
mikec replied to mikec's topic in - Kit build logs for subjects built from 1751 - 1800
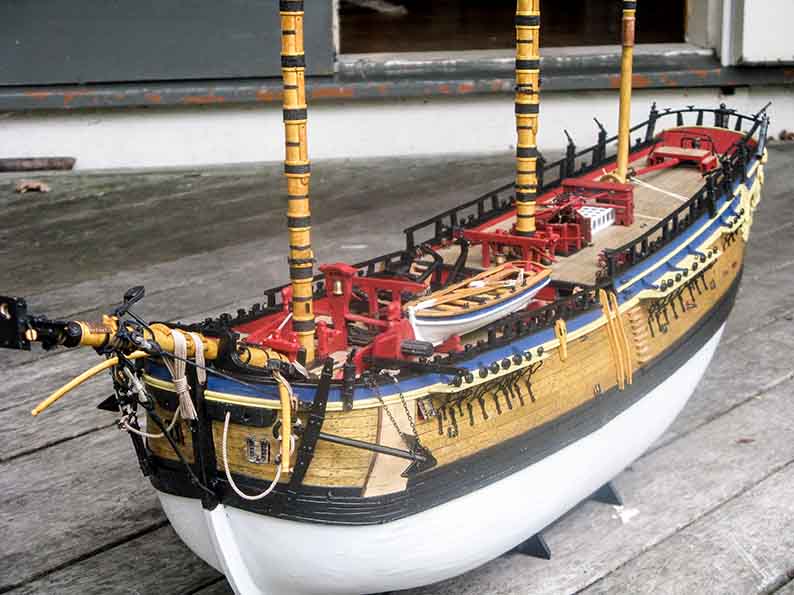
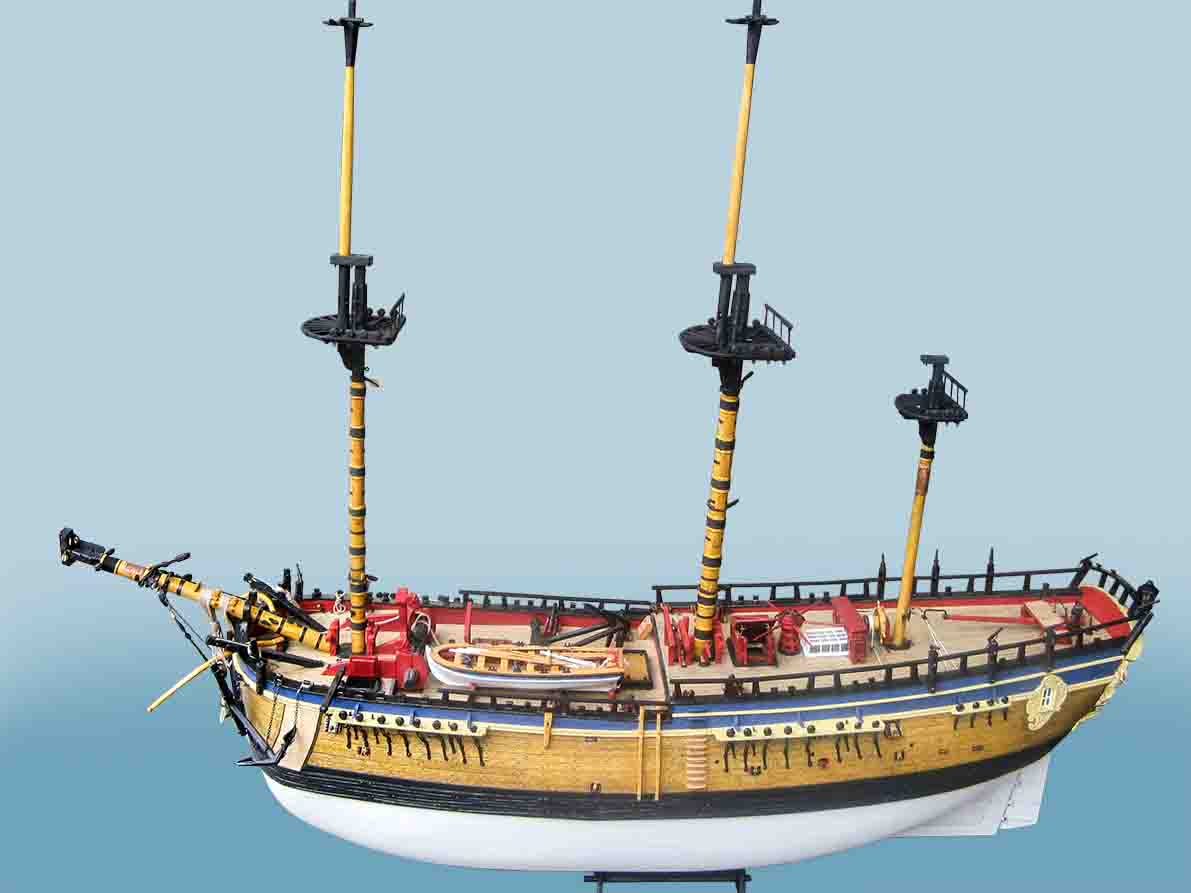
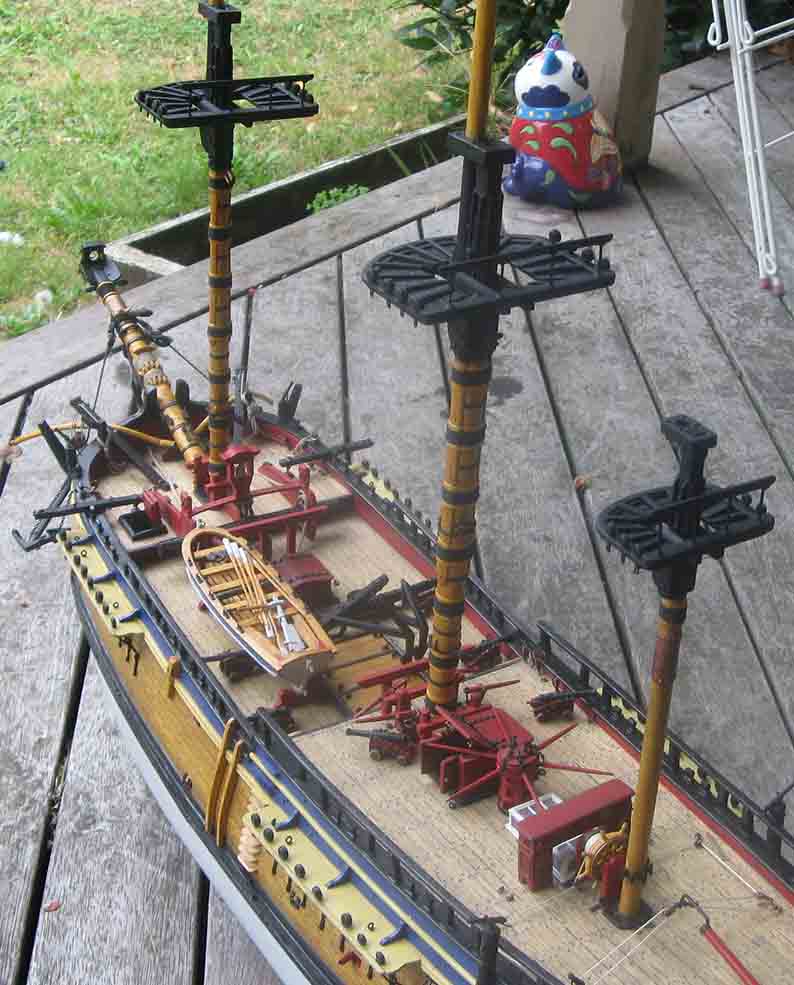
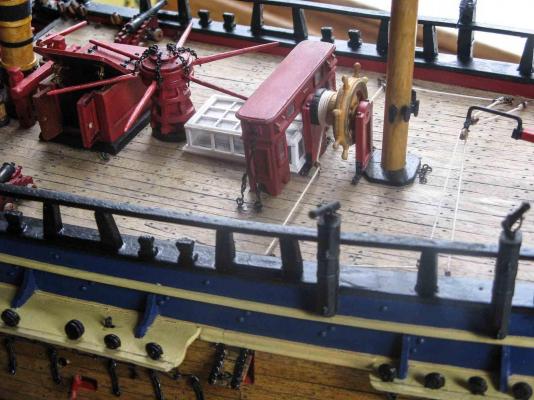
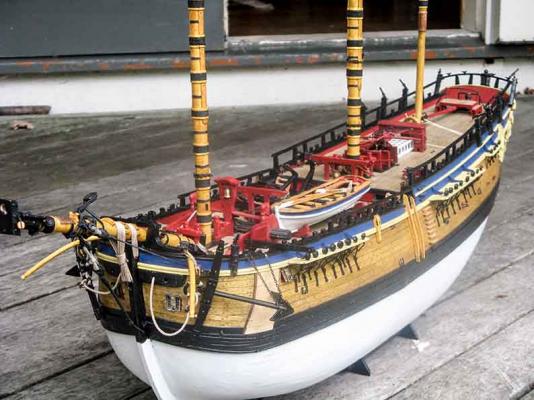
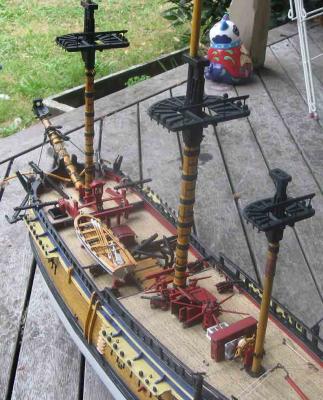
some general shops of how she looks now...
-
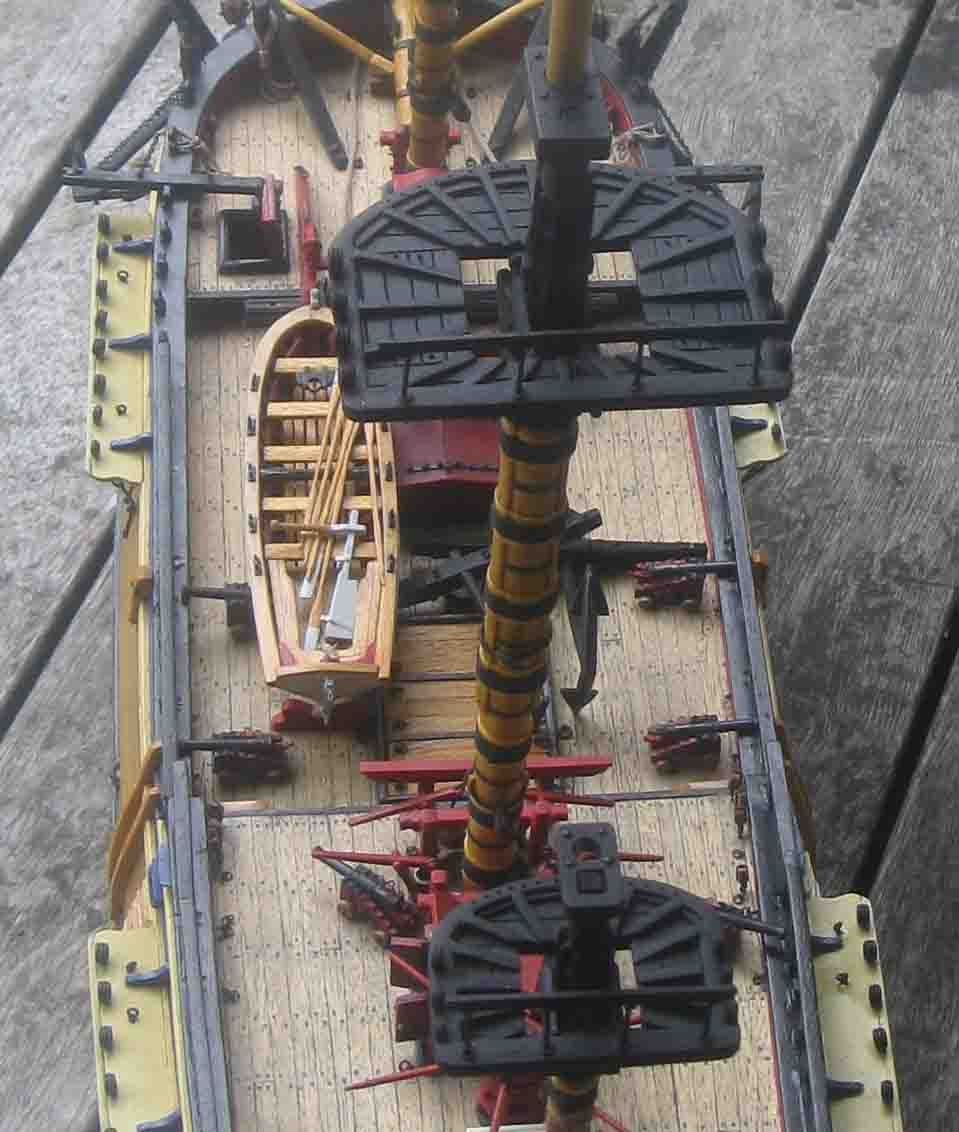
HMB Endeavour by mikec - Eaglemoss
mikec replied to mikec's topic in - Kit build logs for subjects built from 1751 - 1800
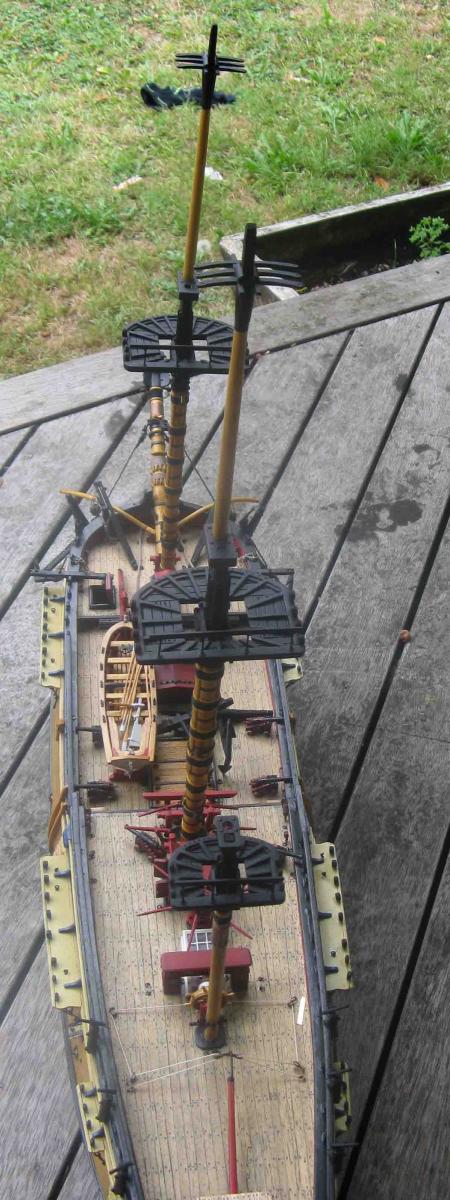
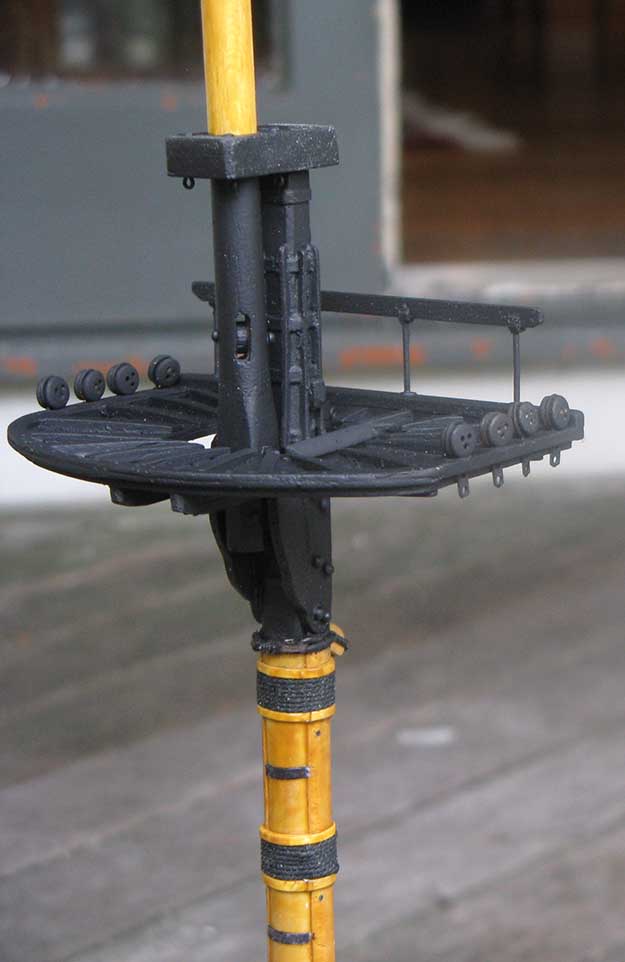
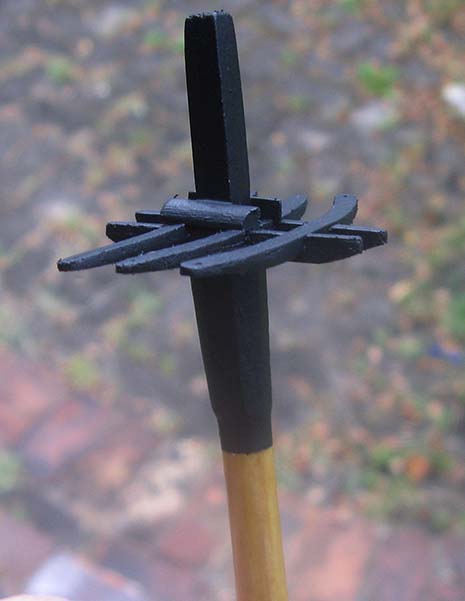
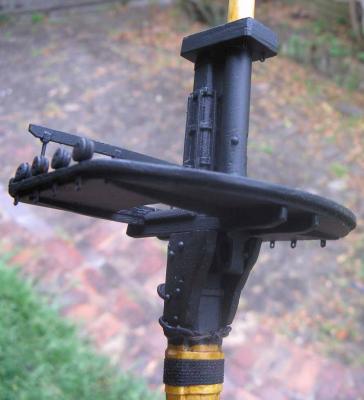
aerial shots... the closeup shot looking down on the top clearly illustrated the tops construction details. I bevelled the edges of the planks so that you can see the planking, after it hasbeen painted. I was very pleased with the result.

-
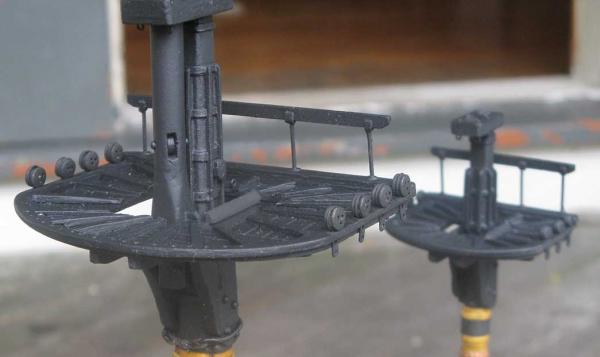
HMB Endeavour by mikec - Eaglemoss
mikec replied to mikec's topic in - Kit build logs for subjects built from 1751 - 1800
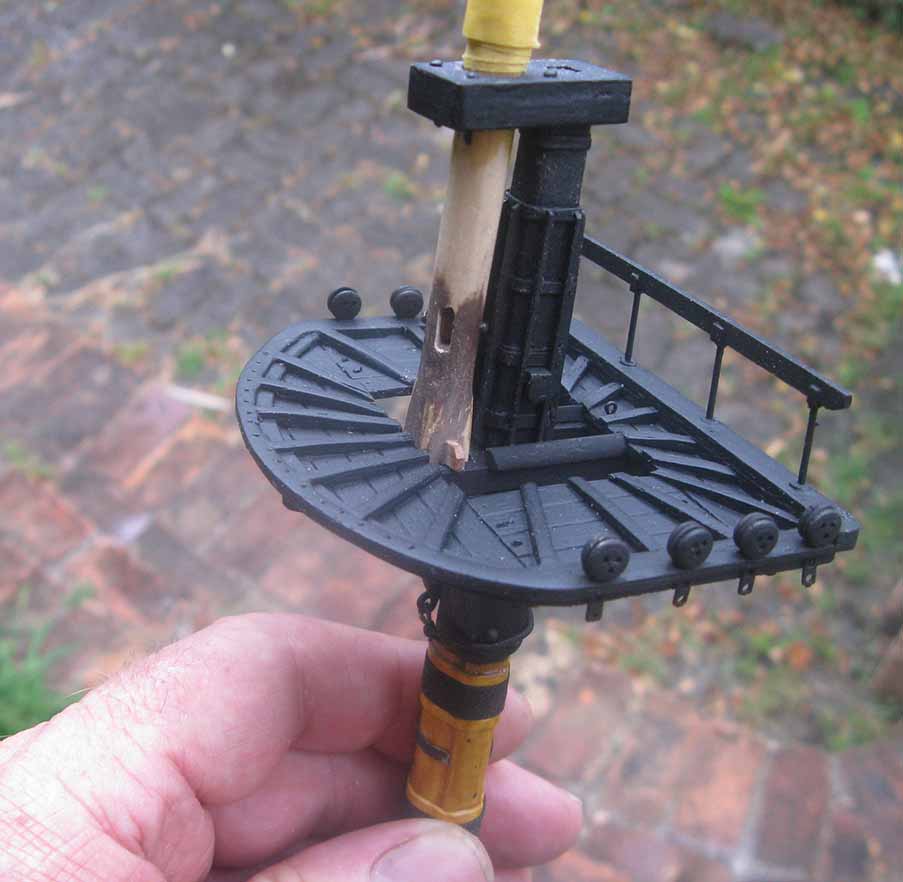
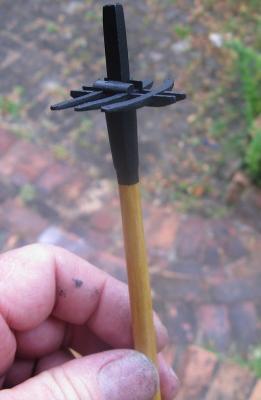
assembled tops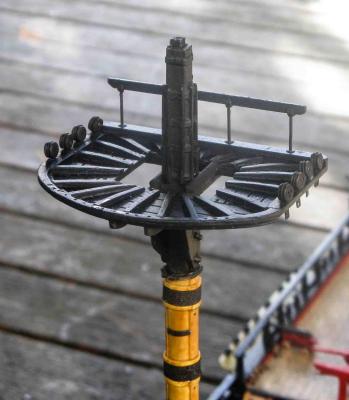

-
HMB Endeavour by mikec - Eaglemoss
mikec replied to mikec's topic in - Kit build logs for subjects built from 1751 - 1800
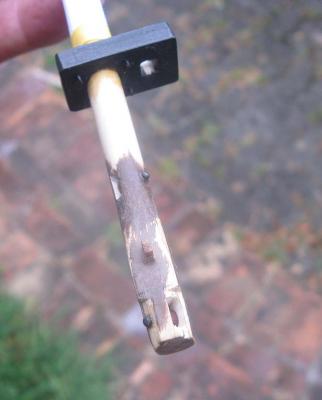
The peices were then masked and spray painted matt black

-
HMB Endeavour by mikec - Eaglemoss
mikec replied to mikec's topic in - Kit build logs for subjects built from 1751 - 1800
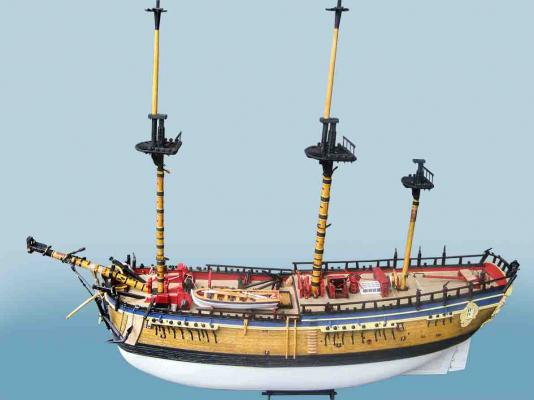
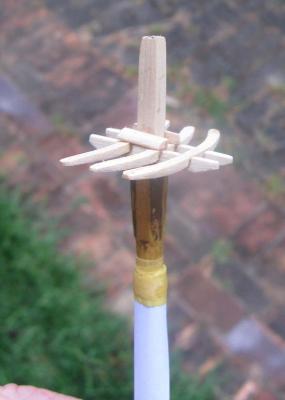
Hi everyone, I have made the topmasts and have test fit. All were shaped by hand from dowel stock. (NZ Rimu) Here are some pics...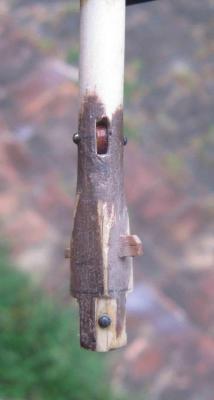
-
Yep Danny is right. It is is 8 side . Hopefully Pat has just used the wrong word ;-)
- 517 replies
-
- 1
-
-
- Endeavour
- Artesania Latina
- (and 1 more)
-
Looks fantastic Pat. Your machine is amazing. I have to do all by hand I will post pics soon
- 517 replies
-
- 1
-
-
- Endeavour
- Artesania Latina
- (and 1 more)
-
Sorry I didn't post an alert in time. I will be checking anf cross referencing even more now. Mike
-
Good work Steve, you and I are pretty much up to the same stage, I saw your warning after I noticed Pats posting. I have been cross referencing my scaled up drawings to the eaglemoss plan sheets as double-checking system, and that is how i picked the error up. Lucky for Pat it was picked up before he started making all the ratlines...
-
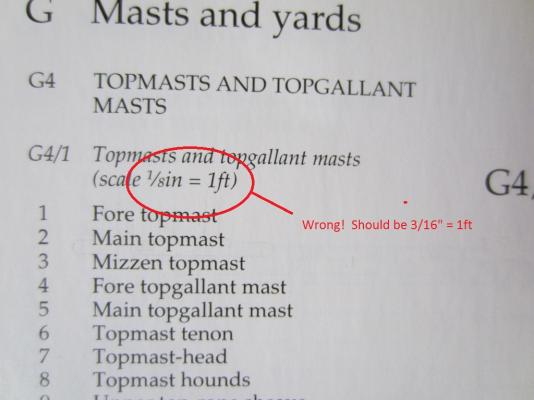
Hi Pat, I picked this up when I cross referenced to the Eaglemoss plan sheet, which although incorrect in detail-the sizes are pretty close. when I overlaid the scaled page from AOTS it was so far out I rechecked, and figured out the scaling error. Unfortunately I wasn't ready to post so couldn't warn you. It appears that Steve is slightly ahead of me and did post a warning to everybody yesterday. I spotted your pics and noticed the that the top masts looked too high.
-
Hi Pat, just checking, were you aware that the scale for the top masts is wrong in AOTS? I am asuming you are using these plans and scaled up. I don't know if its photo distortion, but it looks to me that you have indeed not picked this up. The top masts look way too long. (I am hoping it is just a bad camera angle).
-
thanks Steve, I already picked this up just yesterday, as I too have just stated the top masts.