mikec
-
Posts
334 -
Joined
-
Last visited
Content Type
Profiles
Forums
Gallery
Events
Everything posted by mikec
-
 Hi, is the mainmast and mizzen mast racked back? I am about to work on this and i think the kit has them at 90 degrees. thanks Mike
 -
Looks real. I will be following your work as a guide for me. I am just about to start the formast top
-
HMB Endeavour by mikec - Eaglemoss
mikec replied to mikec's topic in - Kit build logs for subjects built from 1751 - 1800
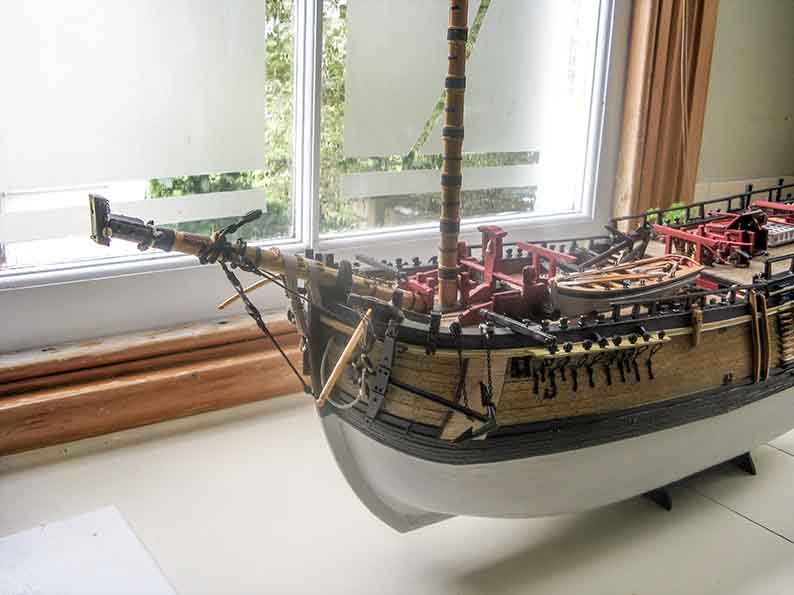
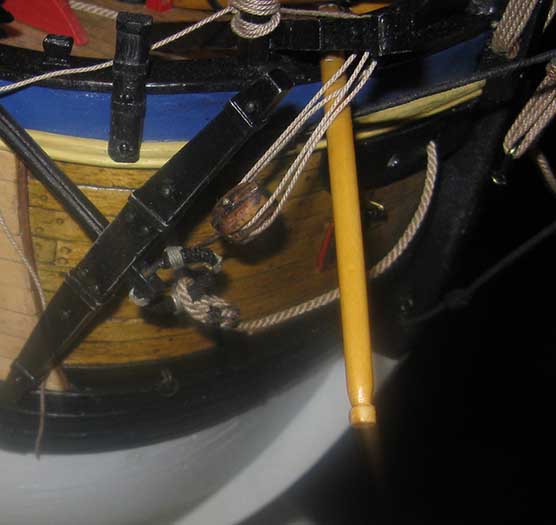
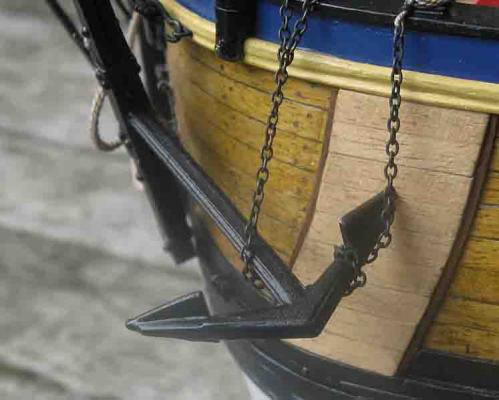
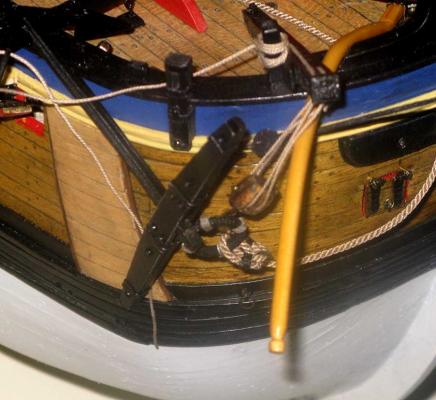
here is the shipped anchor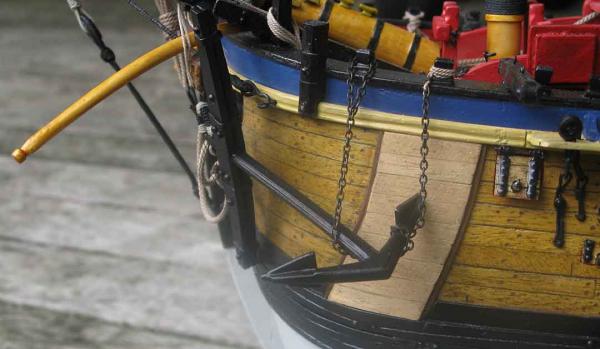


-
HMB Endeavour by mikec - Eaglemoss
mikec replied to mikec's topic in - Kit build logs for subjects built from 1751 - 1800
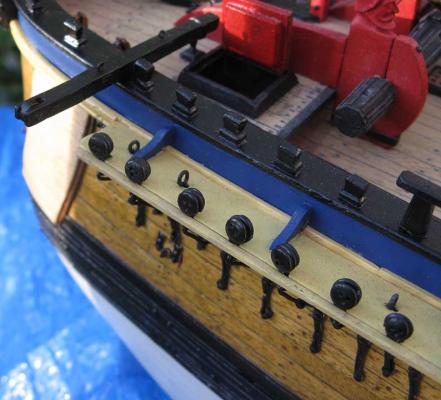
The treenails on the cheeks were made by drilling and then gluing and inserting pencil leadfrom bic refill lead pencils.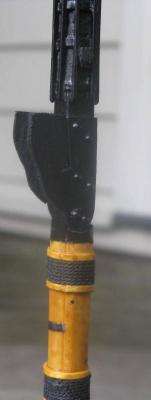

-
HMB Endeavour by mikec - Eaglemoss
mikec replied to mikec's topic in - Kit build logs for subjects built from 1751 - 1800
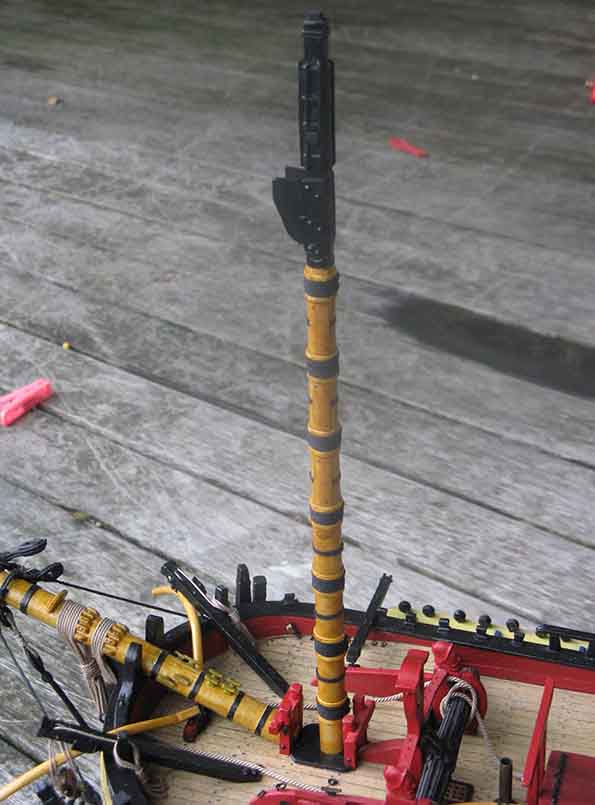
more mast pics

-
HMB Endeavour by mikec - Eaglemoss
mikec replied to mikec's topic in - Kit build logs for subjects built from 1751 - 1800
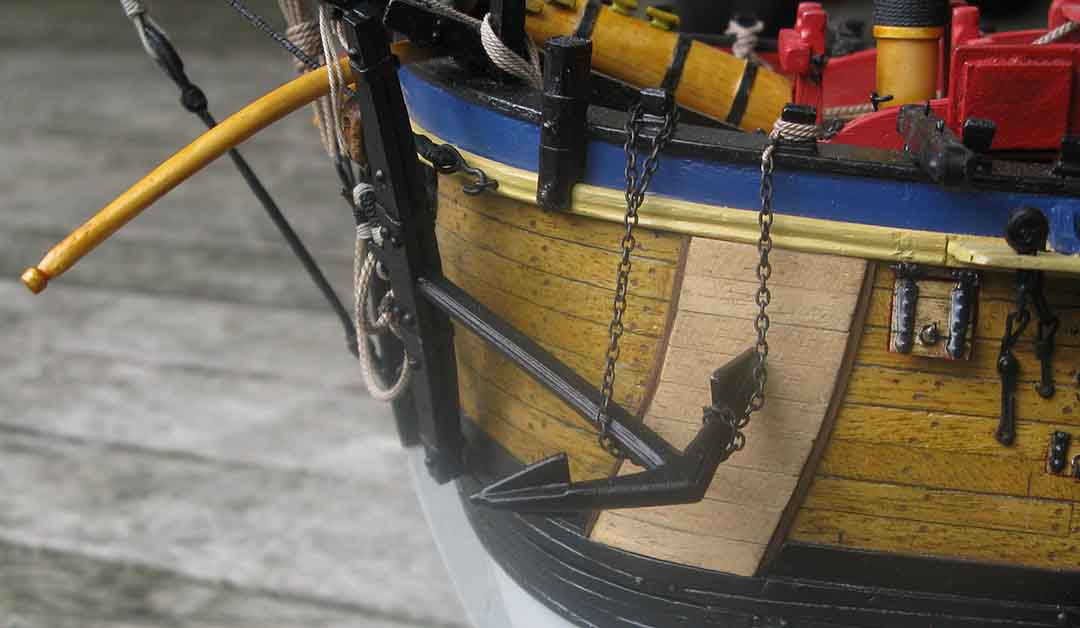
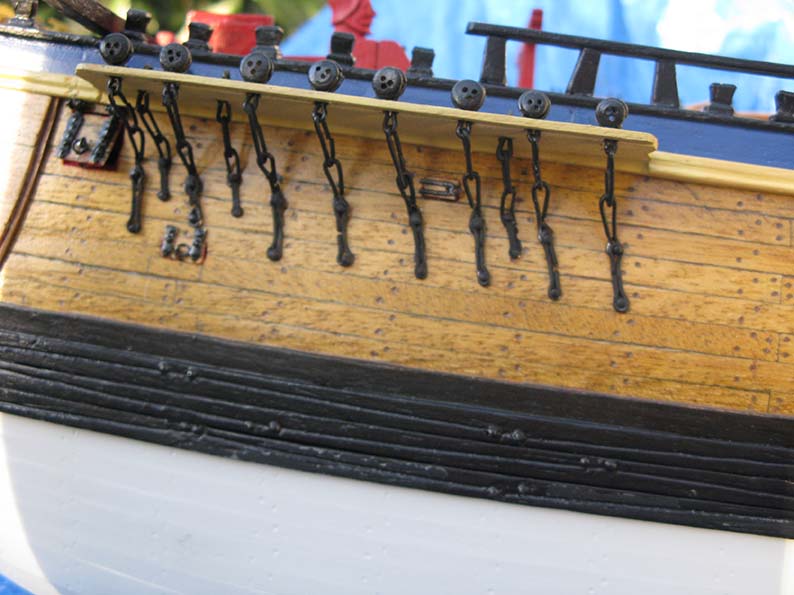
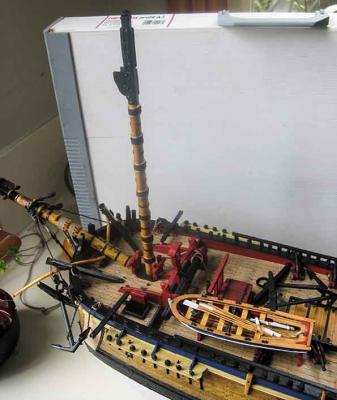
Thanks for the birthday wishes and the kind comments on my model. Sorry for the long time between posts. I have made progress: I have shipped the anchor, I am very pleased with how the anchor chain turned out. I blackened with gun black solution, it looks very real. I also made the lower foremast. I used B.E's method of manila folder card for the woolding hoops. I use a two in one Teak stain/satin varnish. this stains the card well, you cannot tell that the hoops are not wood, and i love the colour. I noticed in Longridges book, that in plan view, the bibs are splayed out and do not run parallel. I assembled the bibs in two parts and followed long ridges plan. The AOTS book does not show this, but the zig zag splt in the bibs shown the AOTS books lead me to think that the Endeavour bibs would have been splaid out as well.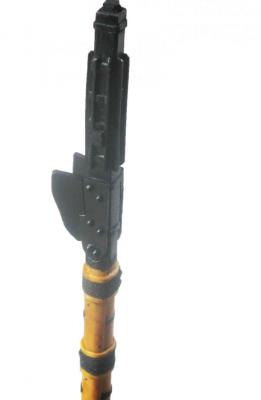

-
magnifecent work. Worthy of any museum.
-
Great work, I reckon that sketch of Parkinsons is the most compelling evidence of bumpkins.
-
She is looking absolutely magnificent. I have thoroughly enjoyed following your fantastic work.
-
Hi Grant, magnificent job. She looks absolutely amazing. I will look forward to following your next build.
-
HMB Endeavour by mikec - Eaglemoss
mikec replied to mikec's topic in - Kit build logs for subjects built from 1751 - 1800
thanks for the kind comments and birthday wishes. i will post more progress pics soon, cheers Mike -
HMB Endeavour by mikec - Eaglemoss
mikec replied to mikec's topic in - Kit build logs for subjects built from 1751 - 1800
And another...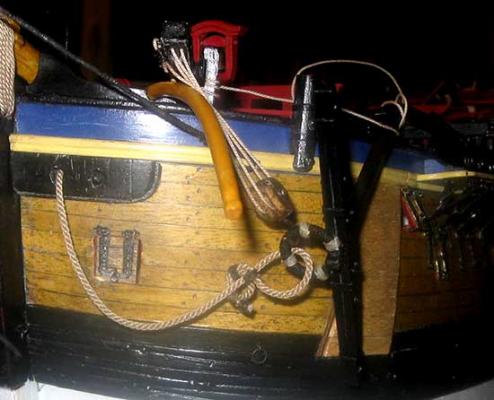
-
HMB Endeavour by mikec - Eaglemoss
mikec replied to mikec's topic in - Kit build logs for subjects built from 1751 - 1800
More progress, apologies for the quality of the photos. i will post better ones soon.
-
Fantastic work. The anchors look very very realistic.
-
You have done an incredible job. She is looking awesome. I will be using your pics as a guide when I start my rigging
-
You have done an incredible job. She is looking awesome. I will be using your pics as a guide when I start my rigging
-
HMB Endeavour by mikec - Eaglemoss
mikec replied to mikec's topic in - Kit build logs for subjects built from 1751 - 1800
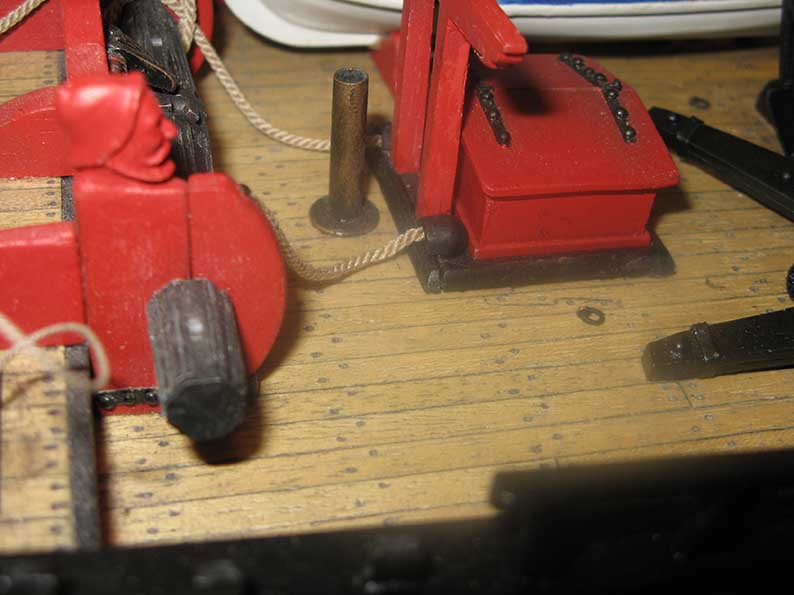
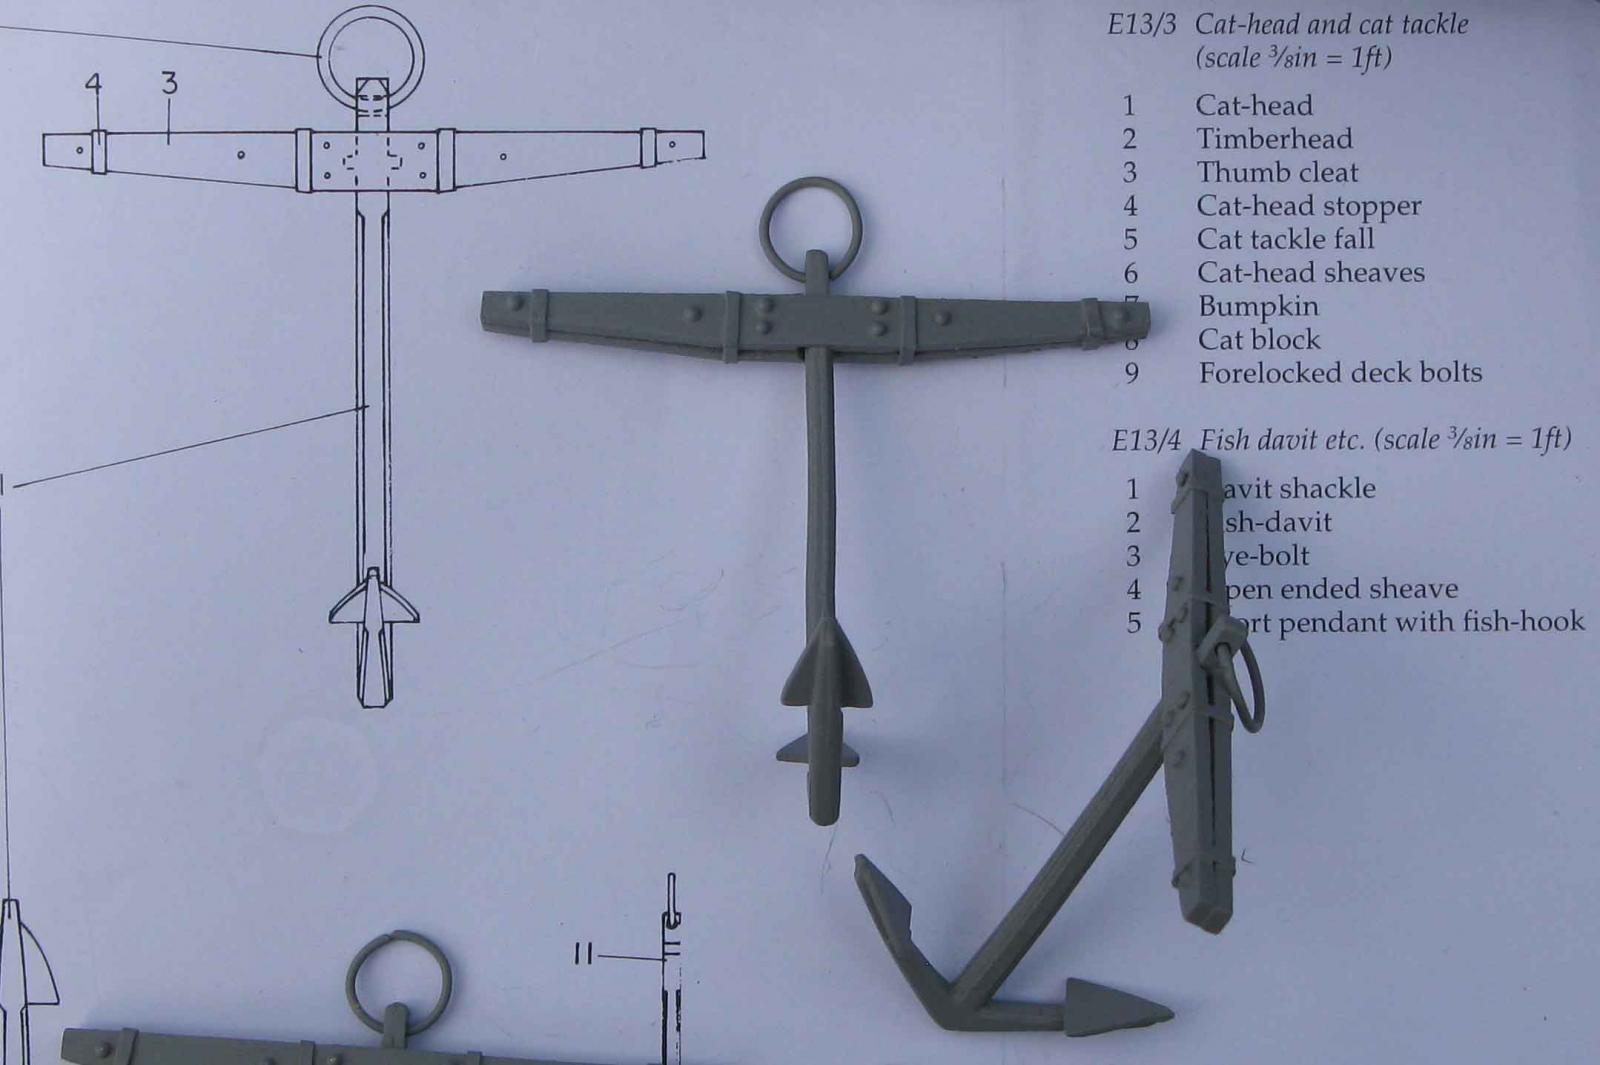
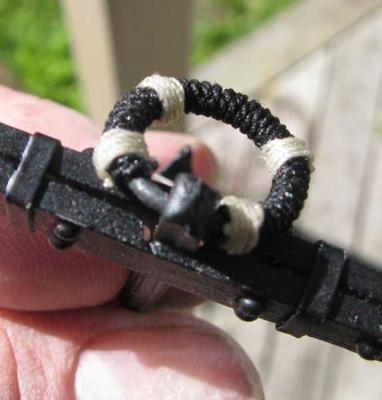
I have started scratch building the large cat blocks used to haul the anchor. Here is progress so far...
-
She looks fantastic. Can you please advise what size and make of thread you are using? or are you making your own?
-
HMB Endeavour by mikec - Eaglemoss
mikec replied to mikec's topic in - Kit build logs for subjects built from 1751 - 1800
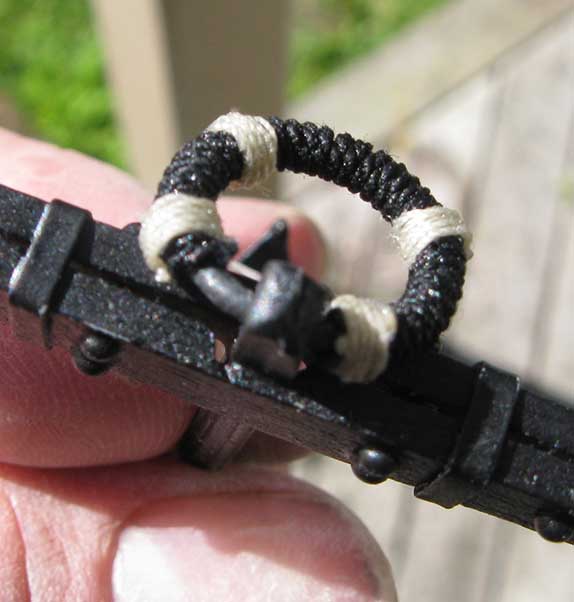
thanks Slog, I agree its a tricky little job, and took me a few practice runs to get the technique. I superglued the 1st loop around the ring. This allowed me to pull each loop tightly around the ring, pinching each loop to the ring in place as i went. i applied a spot of superglue after every 4 or 5 turns until finished. I then used fingernail clippers to cut off the ends. A coat of matt varnish then seals the whole thing and gets rid of the glossy super glue. The tan coloured binding are simply "seized" in place. cheers Mike -
Grant, your boats are incredible. I can't wait to see them in place. It will really finish off your victory beautifully. When I finish my Endeavour model, I will use your log as my guide to building the other boats. Awesome modelling skills Grant.
-
HMB Endeavour by mikec - Eaglemoss
mikec replied to mikec's topic in - Kit build logs for subjects built from 1751 - 1800
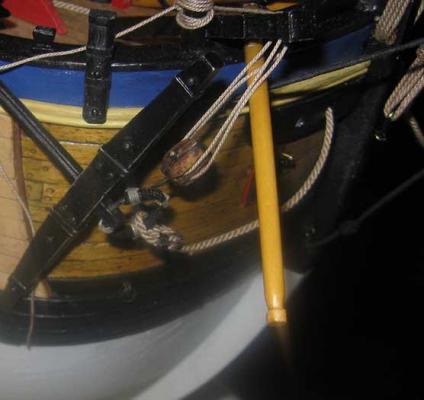
Thanks for all the encouragement guys. I spent the afternoon applying the "puddening" to the anchor rings (quite a tricky little job) and making the two large cat blocks to weigh the anchors....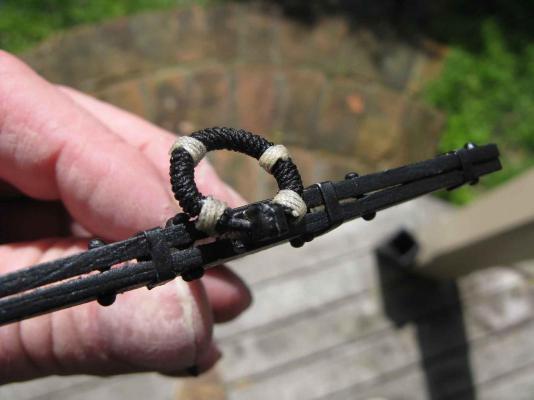

-
What an amazing model you are scratch building. I am tempted to have a go for mine...
-
HMB Endeavour by mikec - Eaglemoss
mikec replied to mikec's topic in - Kit build logs for subjects built from 1751 - 1800
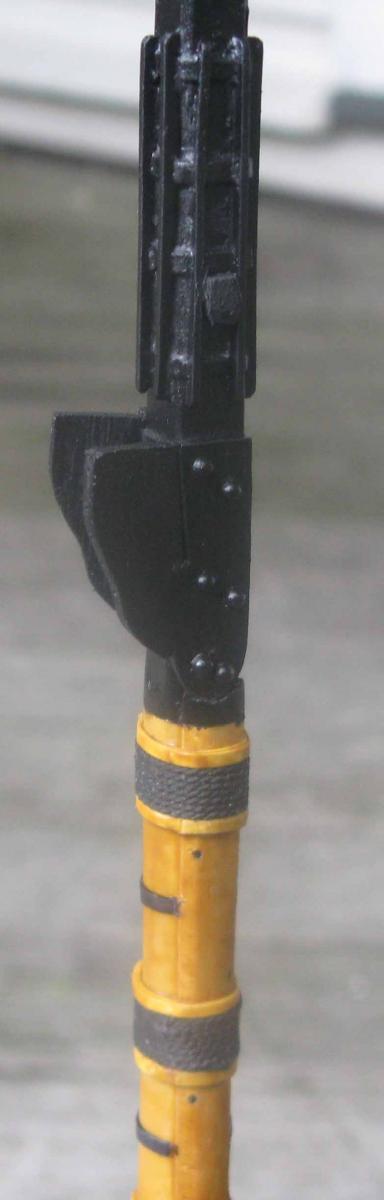
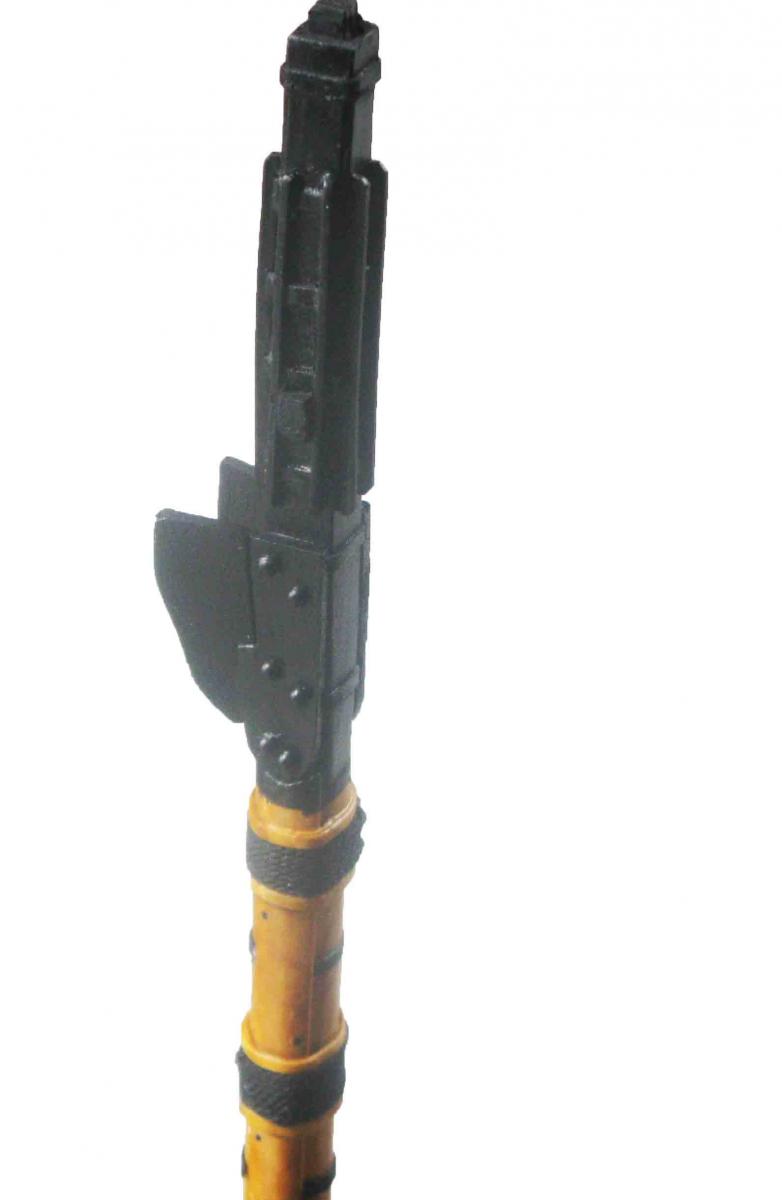
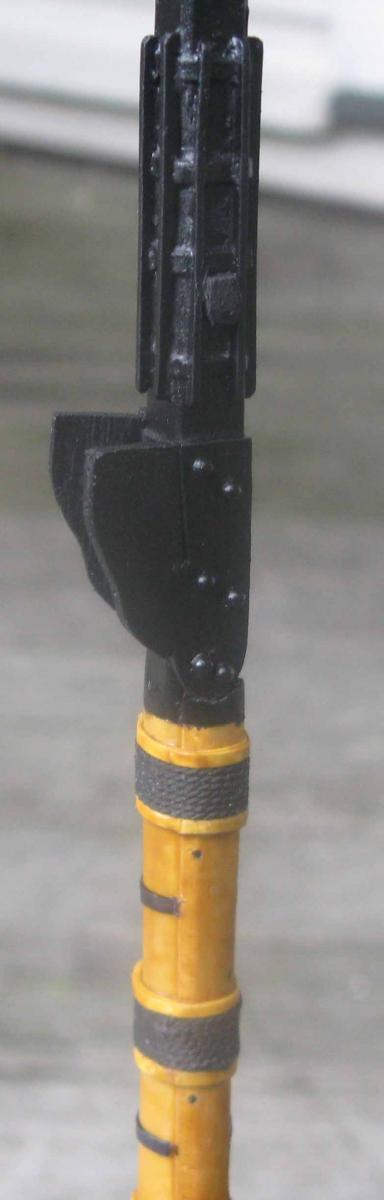
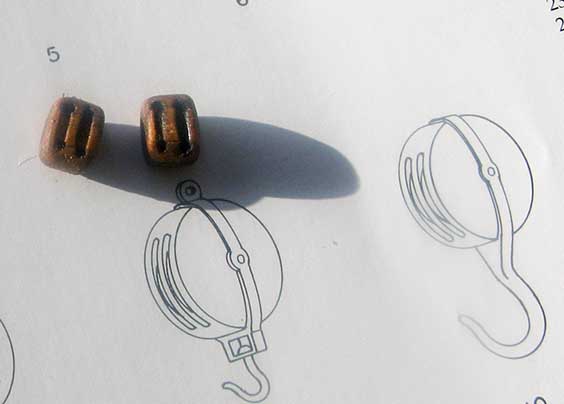
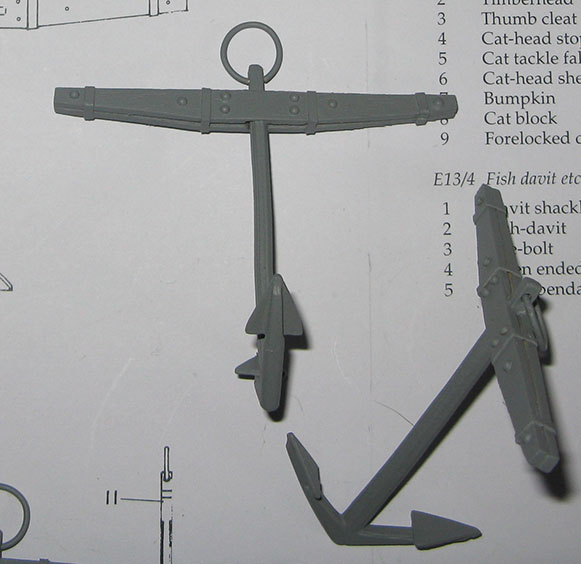
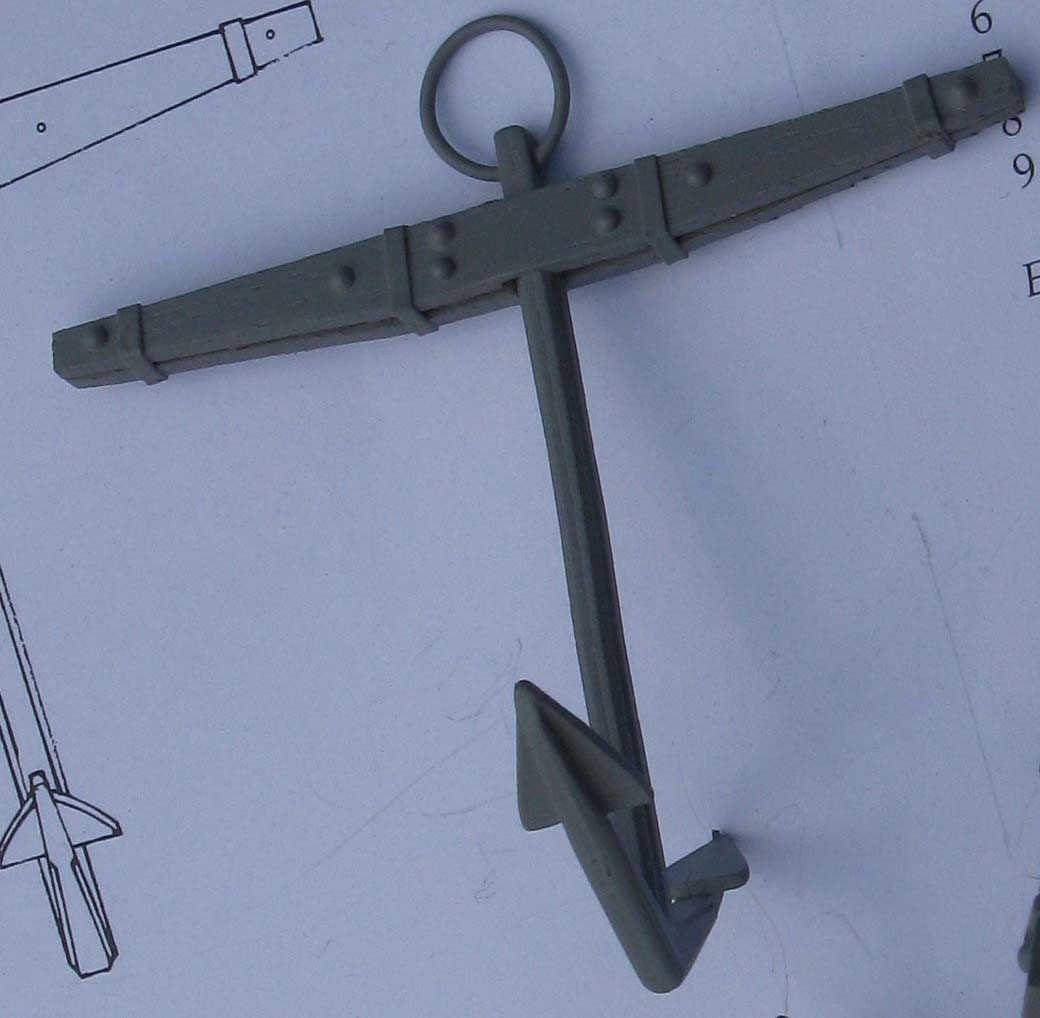
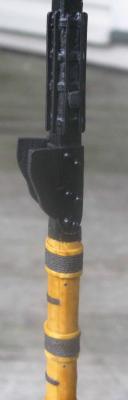
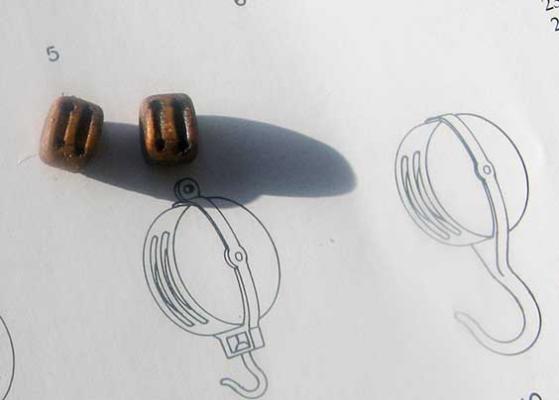
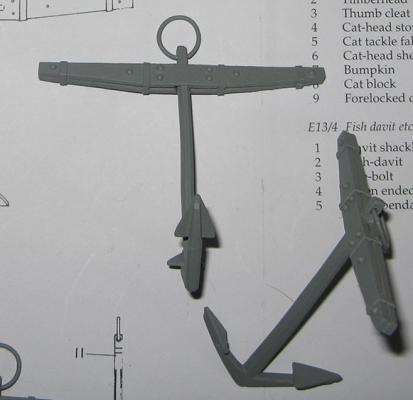
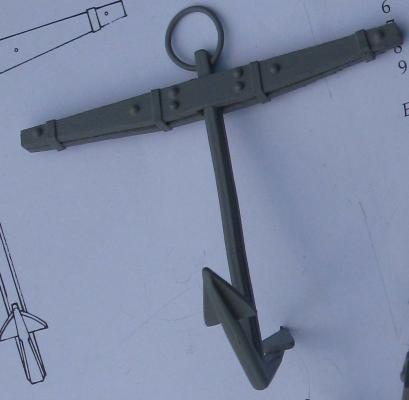
Added the "iron " bands to the anchor stock and undercoated in preparation for painting and "puddening" the anchor rings. I took the photo on my plans from AOTS...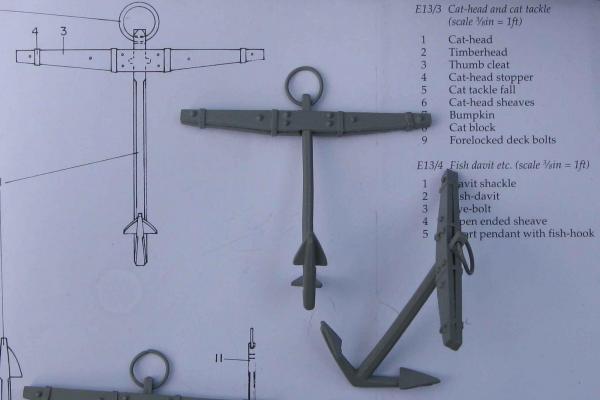

-
HMB Endeavour by mikec - Eaglemoss
mikec replied to mikec's topic in - Kit build logs for subjects built from 1751 - 1800
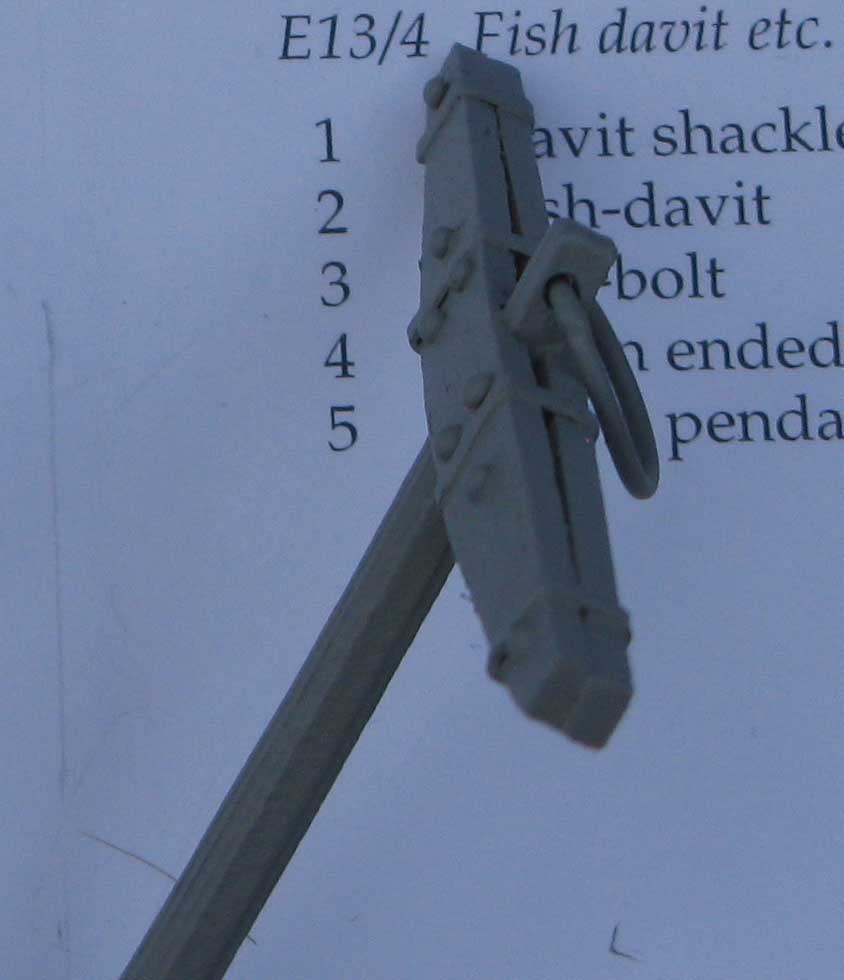
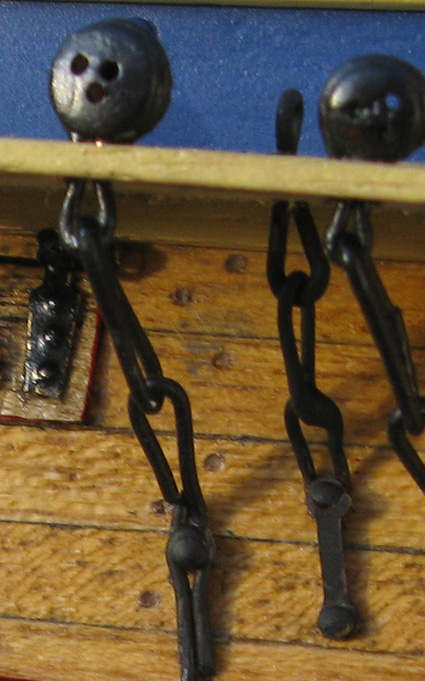
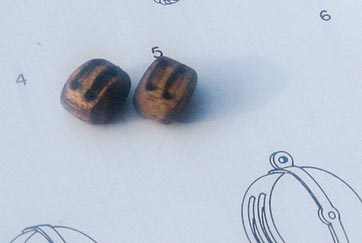
And here are the fiddly chained eyebolts...