egkb
-
Posts
1,632 -
Joined
-
Last visited
Content Type
Profiles
Forums
Gallery
Events
Everything posted by egkb
-
 Hi George .. I really like the cozy feel of the cabin, very Compact and Bijou .. Was also admiring your Chart Dividers and the Chart itself (was wondering what it would look like if you shrank an actual 'period' chart down to suit .. or am I over thinking it here.. It may not be visible at all through the grating etc.. but I did locate something suitable that you might like to try, it is attached below) Keep up the wonderful work Eamonn Edit .. this is from circa 1780's
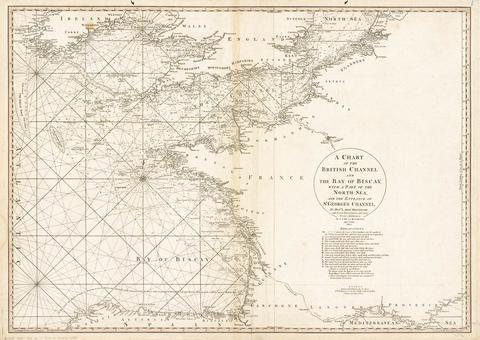
-
Wonderful to watch your progression in those photos Gregg .. Da*n they look good ! ☺️ Eamonn
-
Love where this is going Greg .. It's like Christmas and waiting for the wrapper to come off .. Eamonn
-
Wonderful Work Justin .. Inspiring Stuff ! Eamonn PS I rather like your wood choice too..
-
Hi again Peter .. You have it nailed ! Fore Staysail it is indeed. . 😃 You are also correct that there is little room to fly it in the gap 'tween Stay and Foremast, but I still would suspect it was flown there. Thanks Again Peter for the questions, they keep me on track ! It is all too easy to become 'blinkered' and miss things. Eamonn
- 1,039 replies
-
- 1
-

-
- ballahoo
- caldercraft
- (and 2 more)
-
Thanks Mike .. Deffo not the easiest thing to do LOL E
- 1,039 replies
-
- 1
-
-
- ballahoo
- caldercraft
- (and 2 more)
-
Hi Peter .. The Fore-Sail Halyard refers to the 'triangular' sail in front of the mast (similar to a Jib) not to the Fore Mast Sail (attached to the Foremast and Gaff) the Sheet in question is also for this afore-mentioned Fore Sail 😃 The Sheet's for the Mast/Gaff Attached Fore Sail go to the aft pin rail probably where the Fore Gaff Vang/Pendant are (I may move the Pendant/Vang's down one ) I was looking at this on my diagram after I posted it lol .. I hope all that makes sense .. Schooners and their Fore Sails must have been fun .. (I guess they called them different names as per Fore Sail -v- Fore Course on square rigs) Eamonn
- 1,039 replies
-
- 2
-
-
- ballahoo
- caldercraft
- (and 2 more)
-
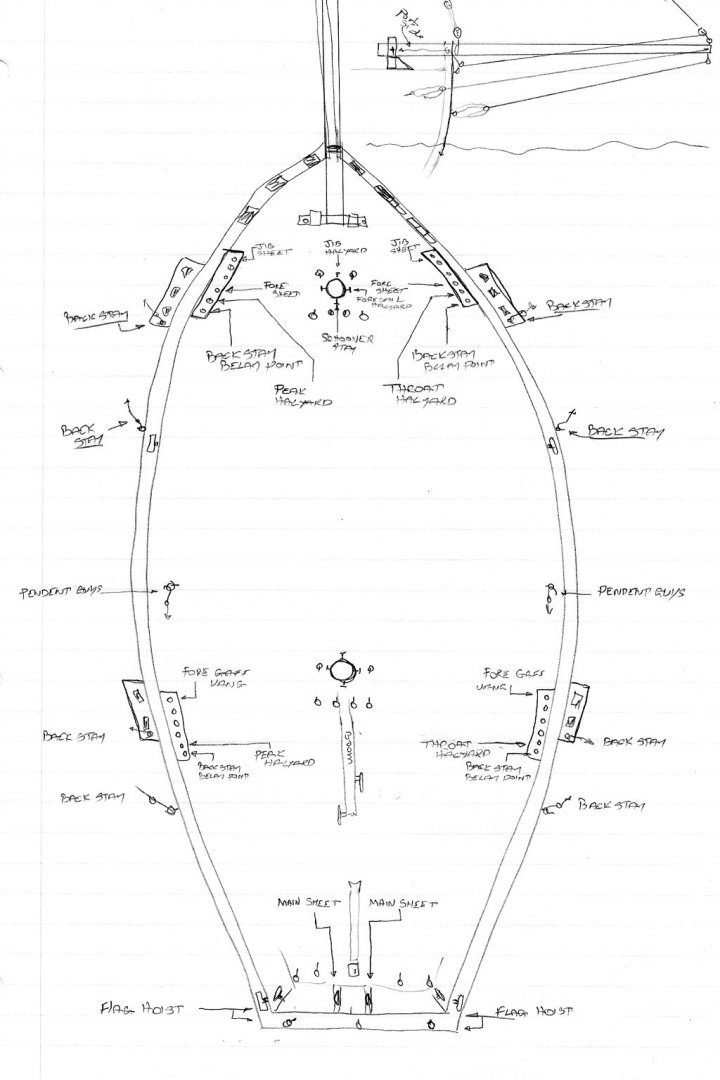
Hi Gang .. Belaying Diagram Complete ... I attach a copy for your amusement (NMM at Greenwich are welcome to archive it ..🤣🤣) It was constructed from referencing 'Topsail Schooner Sail Plans & Rigging' by Dr Pr (see post #871 at top of page) and Petersons 'Rigging Period Fore & Aft Craft' and with care I adapted both to suit Ballahoo (I allow that Ballahoo was (probably/most likely) a Topsail Schooner, but I depict her with 'struck' top-mast, but the belaying points would still be there) Next Up .. Copious Rope Coils and Follow my Belaying Pattern. As usual, if any of you see a glaring error or have any questions please do fire away! All The Very Best Eamonn
- 1,039 replies
-
- 6
-
-
- ballahoo
- caldercraft
- (and 2 more)
-
Hi George .. Thanks for posting the photo.. It is the exact look I was going for.. Was very tempted to show the 'layers' but it became all too obvious, bit like 'tree nailing' subtle is better and at 1:64 they would almost disappear or blend together at normal viewing distances anyhoo.. Love what you are doing with your own Ballier (or should I say Whitier) too BTW ! She is going to be a Star. I spent this afternoon drawing (poorly I might add) a Deck Plan (and Mast Plan) showing my available Belaying Points .. Proper Research begins tomorrow. Thanks Again For Stopping By.. Goes For All Commenters and Likes Too 😃 Eamonn
- 1,039 replies
-
- 3
-
-
- ballahoo
- caldercraft
- (and 2 more)
-
Rigging Confusions - Lifts, Halyards and More, Oh My!
egkb replied to rraisley's topic in Masting, rigging and sails
Hi There .. It can look confusing for sure .. try this book (if you haven't already) Longridge built a large model of the victory and this is the book he produced, I think many might consider it the Victory 'Bible' .. All The Best Eamonn https://www.amazon.co.uk/Anatomy-Nelsons-Ships-Nepean-Longridge/dp/1854861220/ref=sr_1_1?dchild=1&keywords=The+Anatomy+of+Nelson's+Ships&qid=1619382010&sr=8-1 -
Thanks Tony .. Tricky For Sure ! Yet rather satisfying to do.. E BTW was just over on your latest build .. 1:100 WOW .. Anchor Buoys in that scale .. Aaaaagh I cringe even thinking of it (lucky those boats don't use them .. I assume that is lol)
- 1,039 replies
-
- 1
-
-
- ballahoo
- caldercraft
- (and 2 more)
-
Hi Tony ..Another fine build of yours that I (nearly in this case) missed .. Always liked your step by steps! Eamonn
-
Nice summery Derek .. Will have to investigate these.. I have a cuticle cutter which I will liberate and attack my Ballahoo with (sudden visions of cut rigging flying everywhere, and me curled up in the corner rocking back and forth whimpering .. 😂😂) Eamonn
- 725 replies
-
- 1
-

-
- vanguard models
- speedy
- (and 1 more)
-
Hi Glenn .. Lovin' the Laser Level idea .. (Shall have to nick that, though first I'll need a laser level 😋) Your Cheery Looks A Treat Too !! Eamonn
- 778 replies
-
- 1
-
-
- cheerful
- Syren Ship Model Company
- (and 1 more)
-
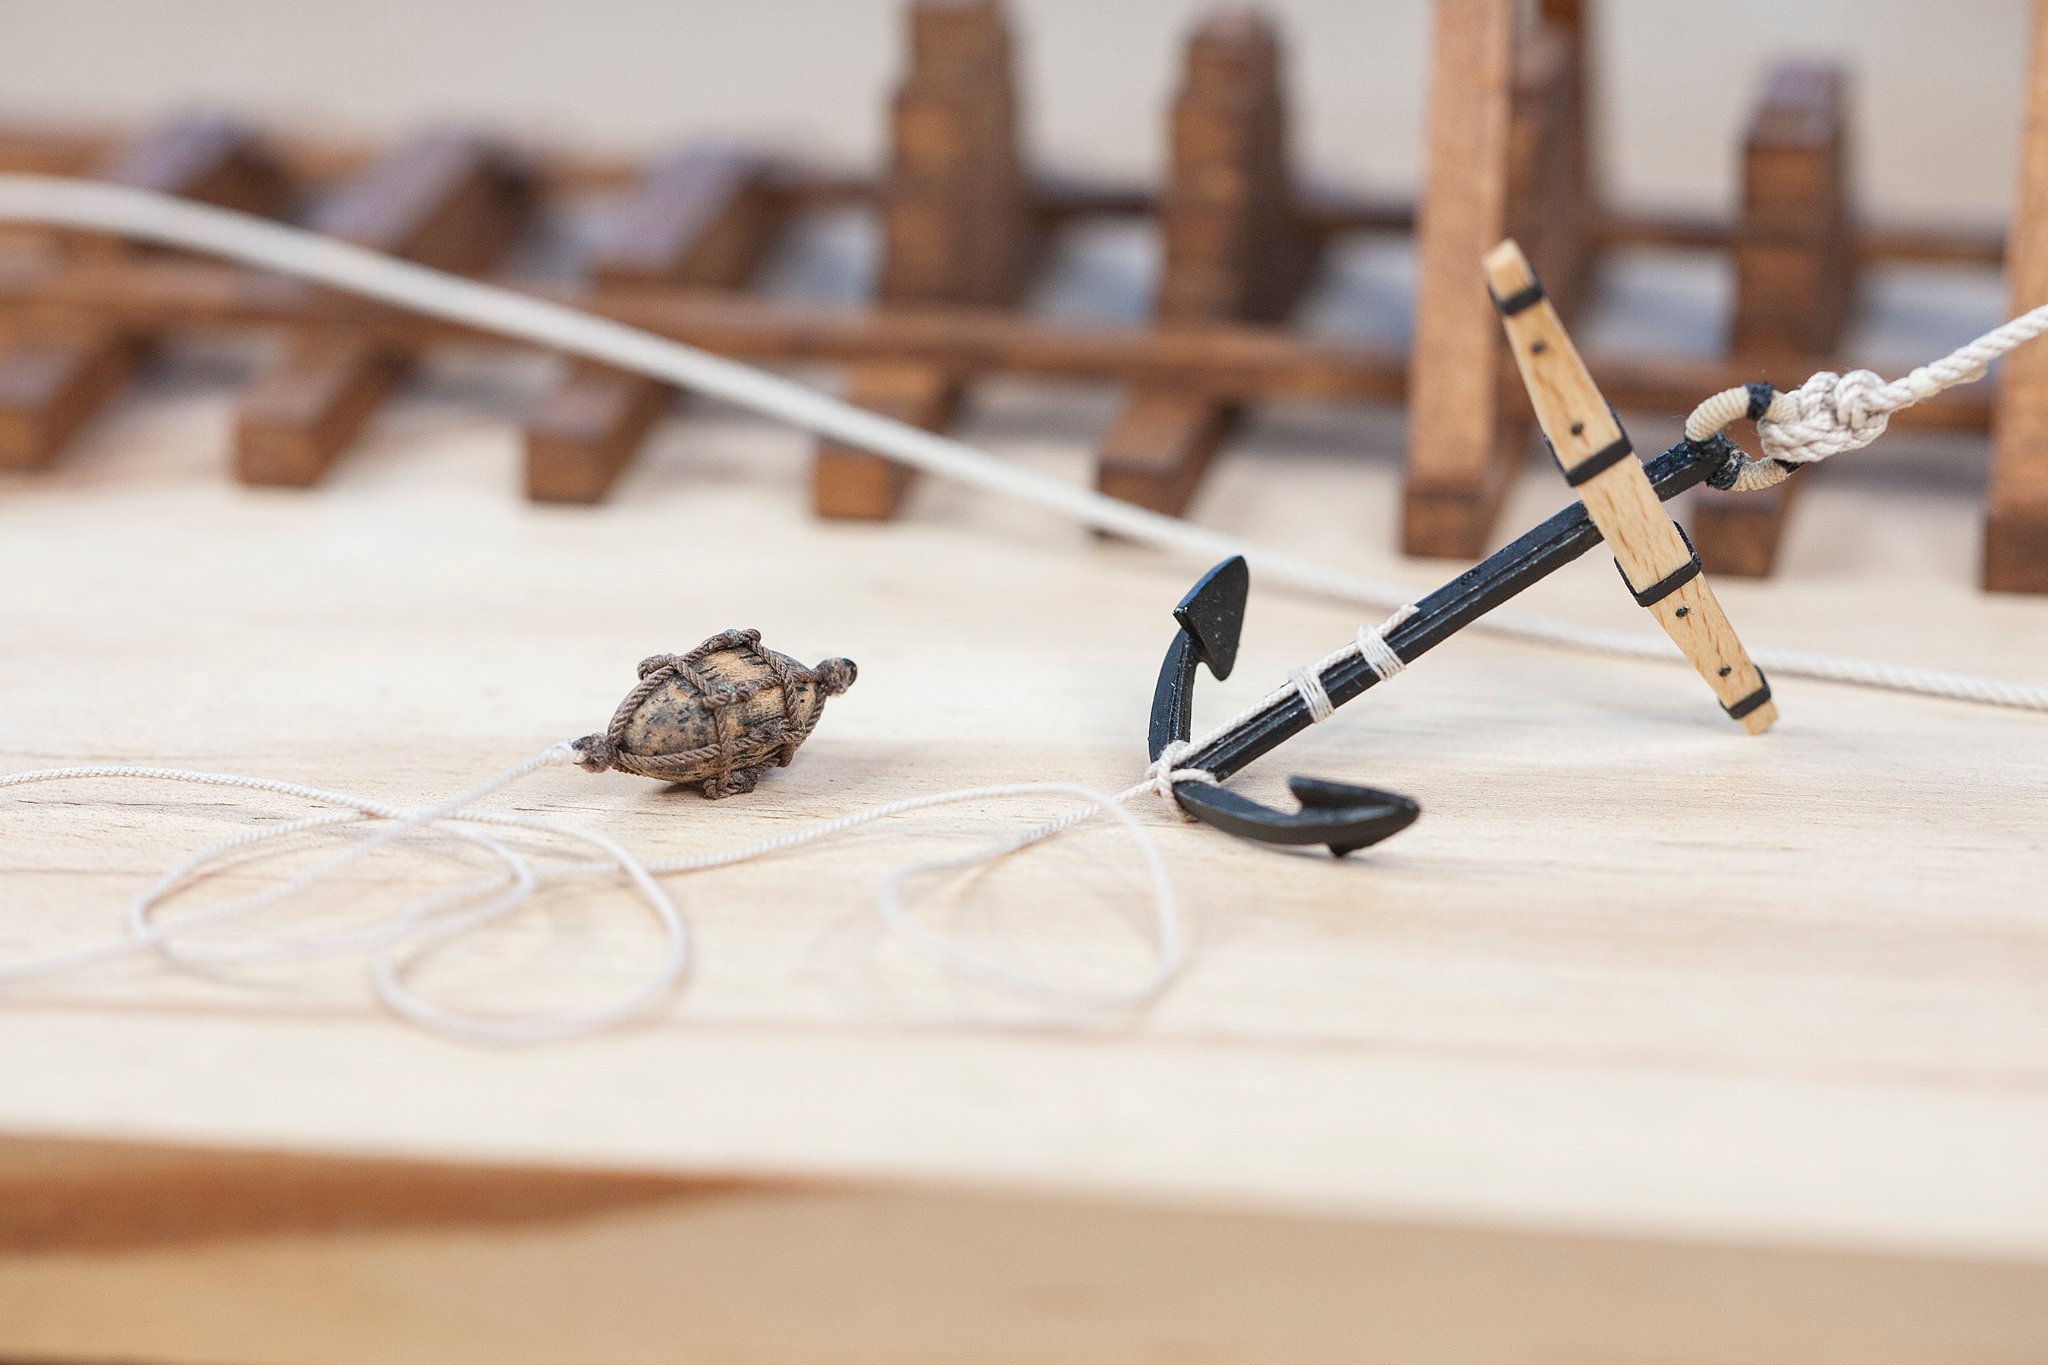
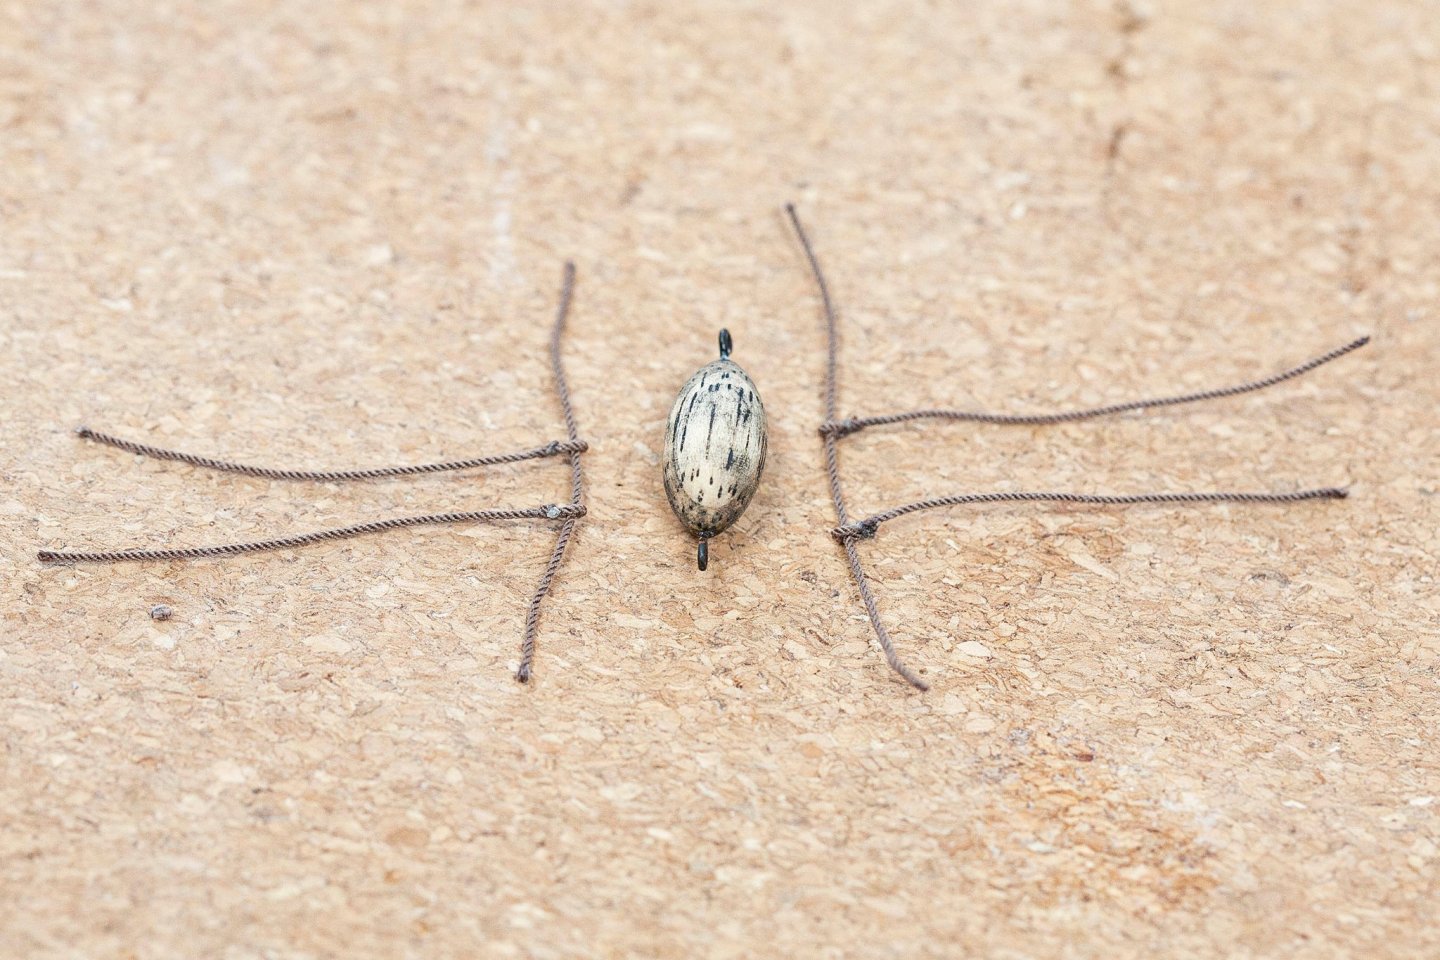
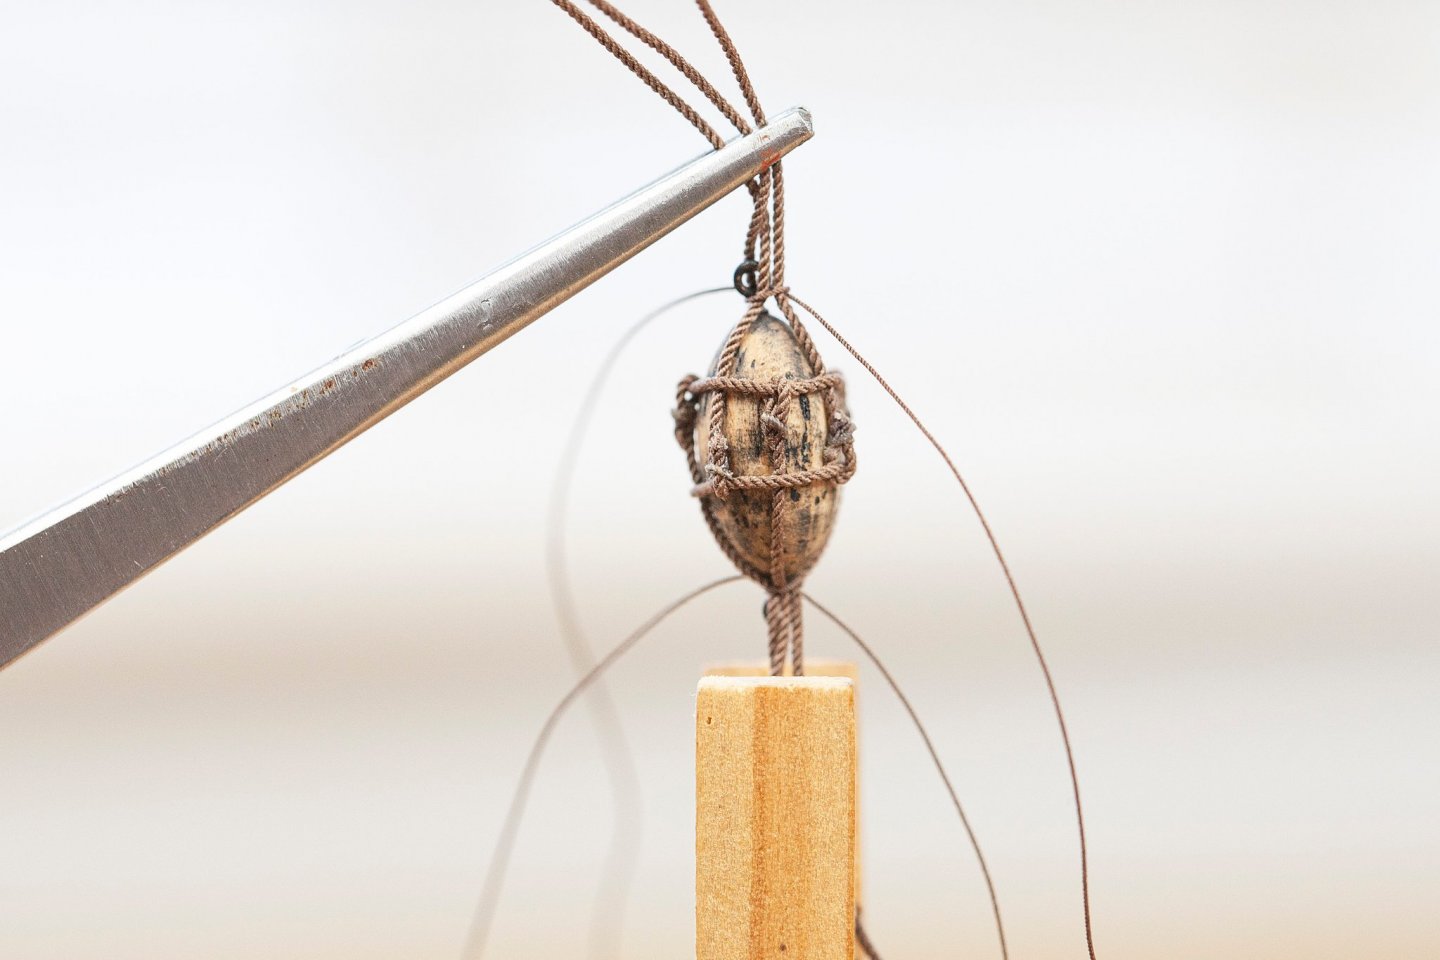
Hi Gang .. This morning I got going on the Anchor Buoy (Nun Buoy) .. I'm only doing one as I plan on leaving an Anchor with its Cable (leading onboard) on the Base Board and the Buoy will be attached to this.. if you follow 🤨 Tricky wee devils to do to say the least (kinda glad I only chose to do one lol) but once I thought the process through it got a bit easier (that and a lot of reference work here on MSW not to mention my books) The first photo shows the lead up work, please note there will be a third line, per side, attached to the pair already shown (each side of the buoy itself) I was originally only going with a pair but it didn't look/feel right ! The wooden buoy itself is a piece of scrap dowel turned on my lathe to this oval and is approx. 1.4mm in length x .75 in width .. which scales to about 3 feet in length ..Ballahoo is a smaller vessel so this is about 1/3 the size of the Anchor and would come to waist height on a person (give or take) minus the attachments of course.. I painted the buoy black then sanded it to give the somewhat grubby look (a tad like cork in fact 😉) next job is to tidy things up (get it nice and even in tension and spacing, whip the ends around the eye etc) then attach rope to it. All The Very Best, and as ever Thanks For Stopping By. Eamonn PS if ye ever have any questions please fire away..
- 1,039 replies
-
- 6
-
-
- ballahoo
- caldercraft
- (and 2 more)
-
Nuttin' wrong with that Ras, deffo Looks the Business .. E
-
Brilliant Stuff Rob .. Making Rope is deffo fun and adds a real sense of accomplishment too.. 😊 Eamonn
-
Thanks Edward & the Likes .. She is coming along now for sure.. I see Dr PR (Phil) has a nice Thread on Schooner Rigging etc., I shall be visiting there a lot over the coming weeks I think .. Here's the Link for anyone interested.. All The Very Best Folks, and Thanks again Everyone. Eamonn Eamonn
- 1,039 replies
-
- 1
-
-
- ballahoo
- caldercraft
- (and 2 more)
-
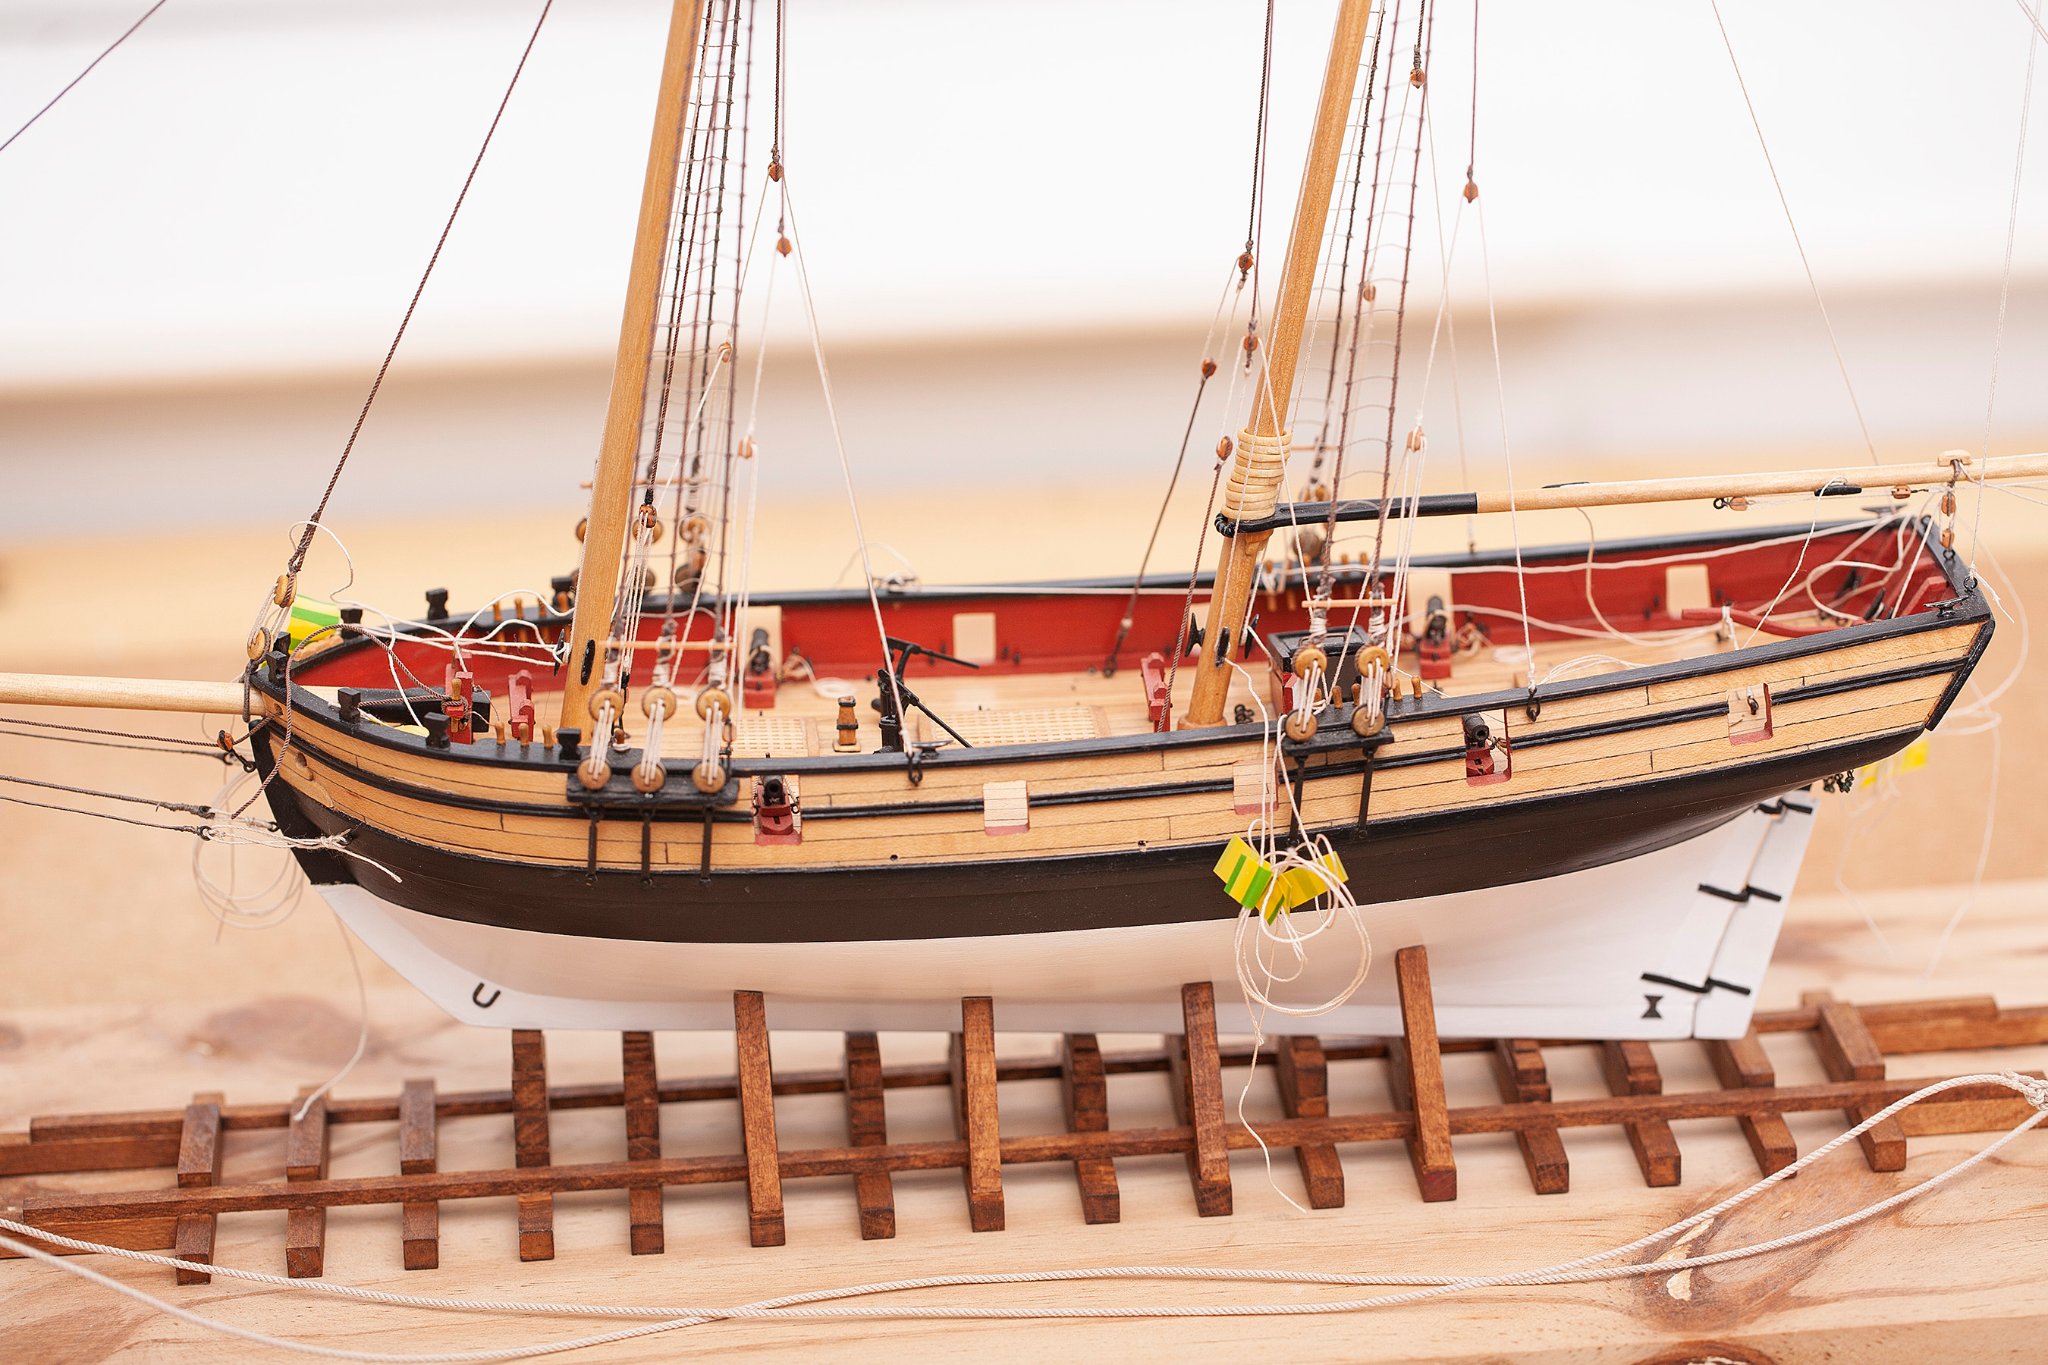
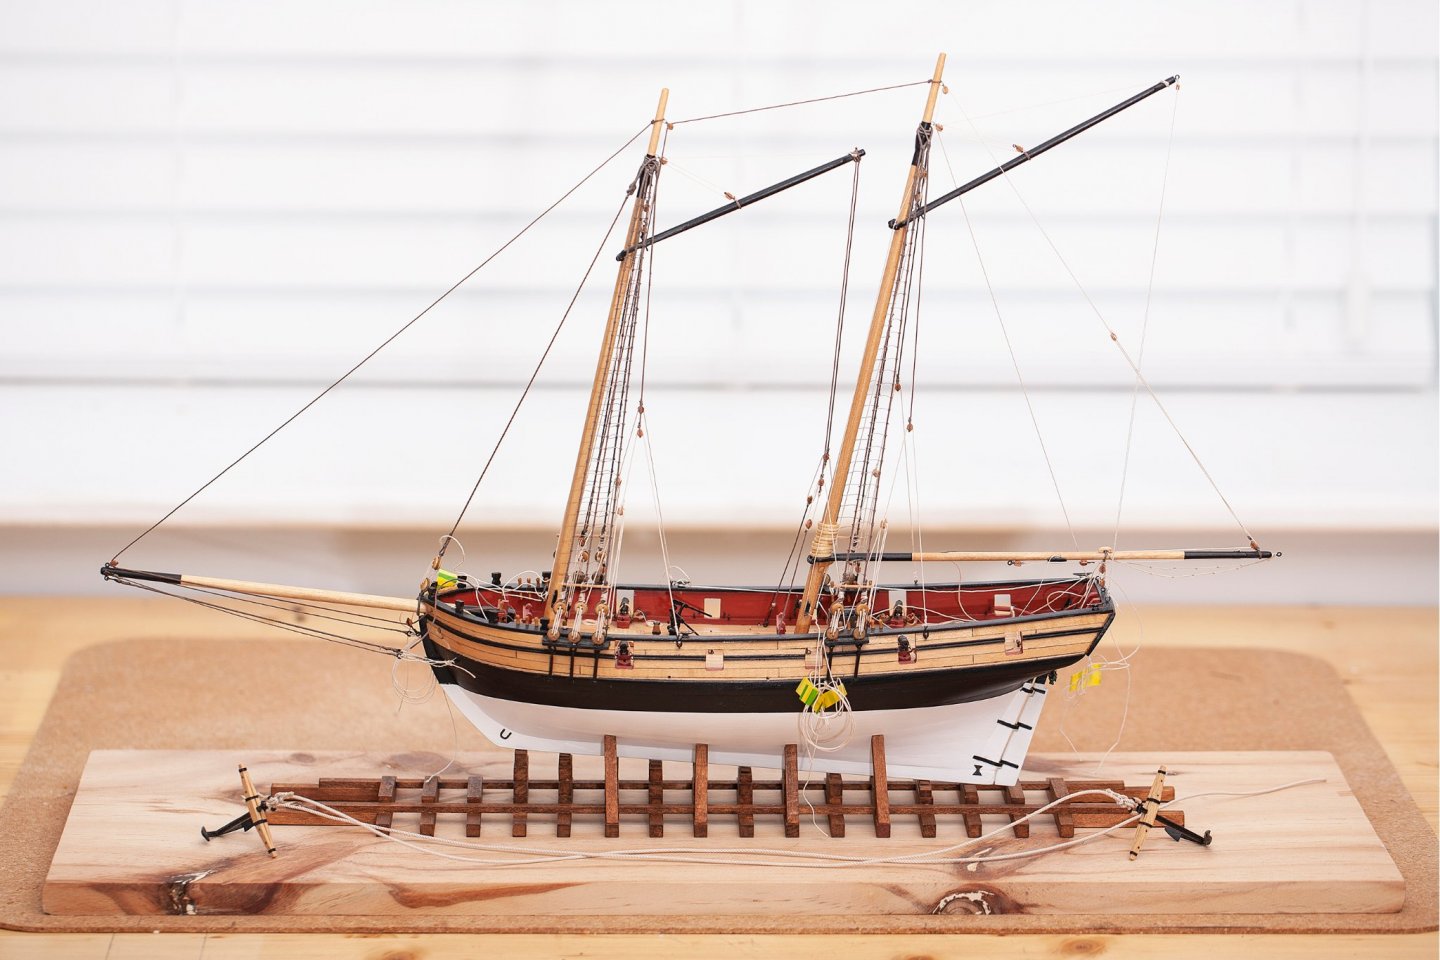
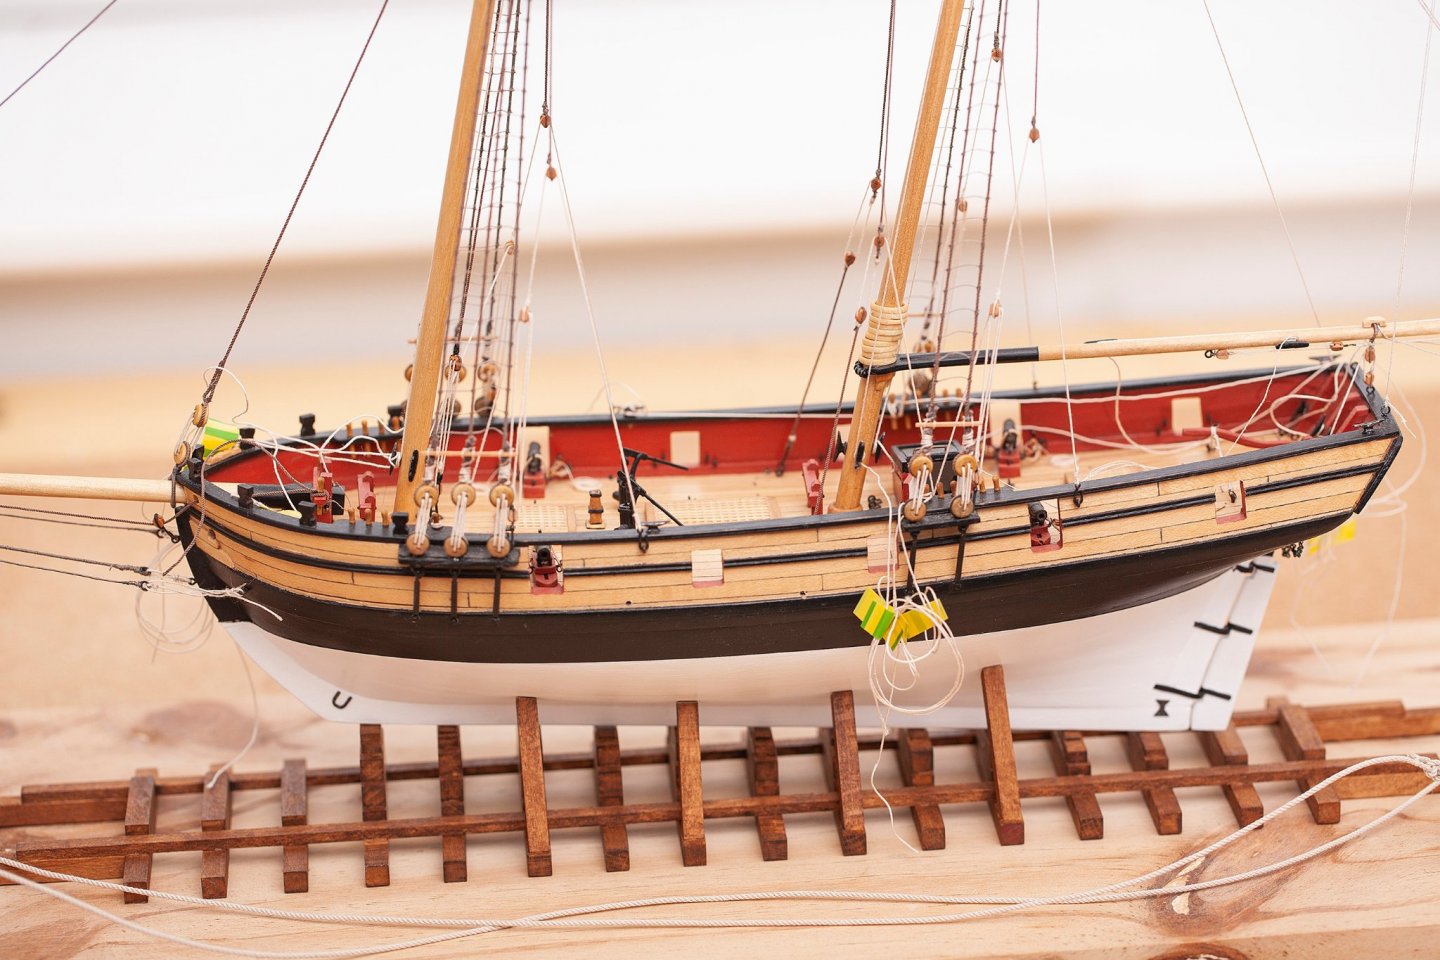
Hi Folks .. At long last I have the Ratlines finished, took a bit longer than I anticipated due to sheer Laziness 🤣 .. Am currently looking at my next steps which should involve identifying the 'proper' run of all lines/ropes etc and belaying them with some nice rope loops laid over.. Then creating 2x Anchor Buoys and securing the Anchors themselves.. Which may/will require a revisit to my Anchor Cables, as they don't seem to want to 'sit down' properly (they are way too stiff) I may have twisted them too tightly on my Rope Walk .. Photo Time ! Woo Hoo 😆 All The Very Best Folks and Thanks Again for Looking In and Commenting or Simply Liking ! Eamonn
- 1,039 replies
-
- 9
-
-
- ballahoo
- caldercraft
- (and 2 more)
-
Brilliant Rob, things just get better with each post ! Roll on the next updates. Eamonn
-
And it was all going so well .. 😆 ... One of the handiest things I made for my build was to produce a wee scale 'man', then place 'him' next to whatever I'm building to give a proper sense of scale .. I then look at him and compare it to myself.. ie .. 'That would come up to my knee, does that feel right ?' (I tend to think we sometimes make stuff on our models too 'chunky' if you follow.. and this 'Wee Man' can help to overcome it) mine is shaped from a small piece of left-over planking wood, but I'm at 1:64 scale. Loving how you made the ladder btw .. I shall have to remember that ! Eamonn
-
Hi Ras .. Now you are talking ! .. Would it be possible to squash them a bit near the tails to give that 'fishy' shape.. (even only the top visible ones in the basket or Cran)? I think that would nail it, as they say. Eamonn
-
Didn't they used to call them 'Silver Darlings' ... Looking forward to seeing them with the marker on. Eamonn