


Wintergreen
-
Posts
1,002 -
Joined
-
Last visited
Content Type
Profiles
Forums
Gallery
Events
Everything posted by Wintergreen
-
HMS Euryalus 1803 by rlb - 1:48 scale
Wintergreen replied to rlb's topic in - Build logs for subjects built 1801 - 1850
By the way Ron, did you get hold of all the plans needed? In an early post you said you were lacking vol #1 plans.- 122 replies
-
- 2
-

-
- Euryalus
- Plank-on-frame
- (and 4 more)
-
"perseverance" springs to mind 😉 It is an "ouch"-moment, but better correct the errors and do again then to leave and think "good enough". Planking is tricky, that's for sure. Keep it up!
-
Thank you @Gahm! It means a lot coming from you since I see in your look what an accurate builder you are 🙂
-
Well done! She looks splendid, unusual but splendid!
-
Looking good Dirk. Check out one of the moderators here, Chuck P on youtube: https://www.youtube.com/channel/UCPncZte1NZzmc-n7AMS7z6A He has a set of instructional videos about plank bending. Also, be careful with too much soaking since the planks change size quite a bit. Depending on species of course, but anyway. Keep it up!
- 18 replies
-
- 2
-
-

-
- marie jeanne
- Billing Boats
- (and 1 more)
-
Thanks wefalck! Then I hope you will like my next build, which is not a full rigger either 😉
-
Thank you Gentlemen for warm words! It is always a nice feeling to finish a job 🙂 Now on to next job...
-
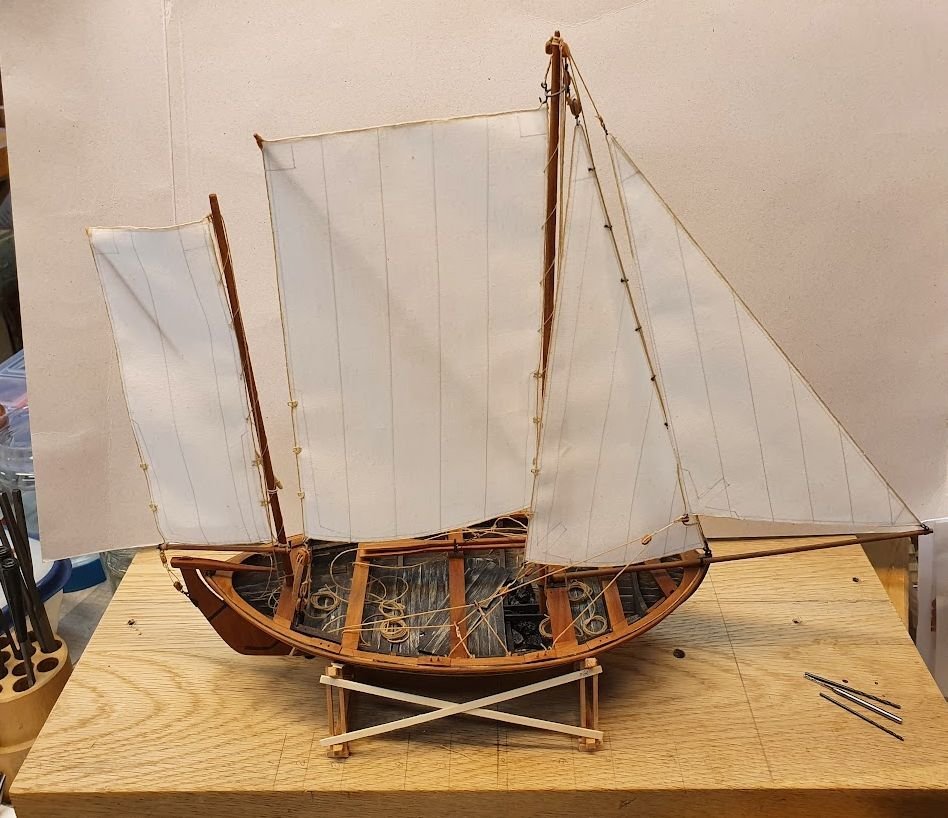
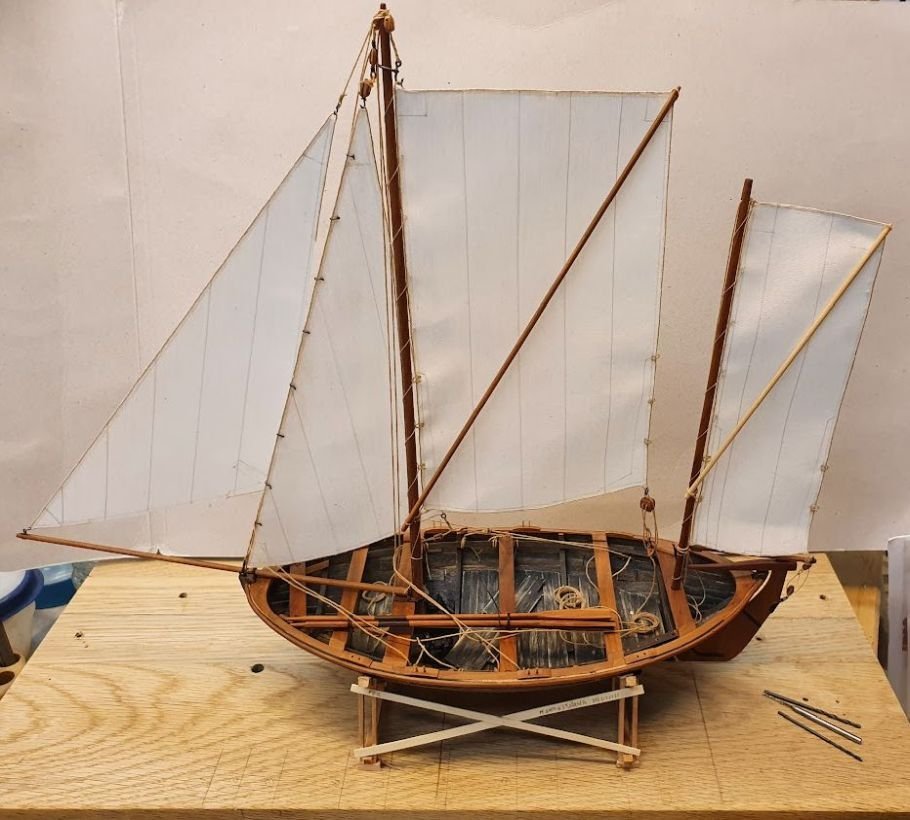
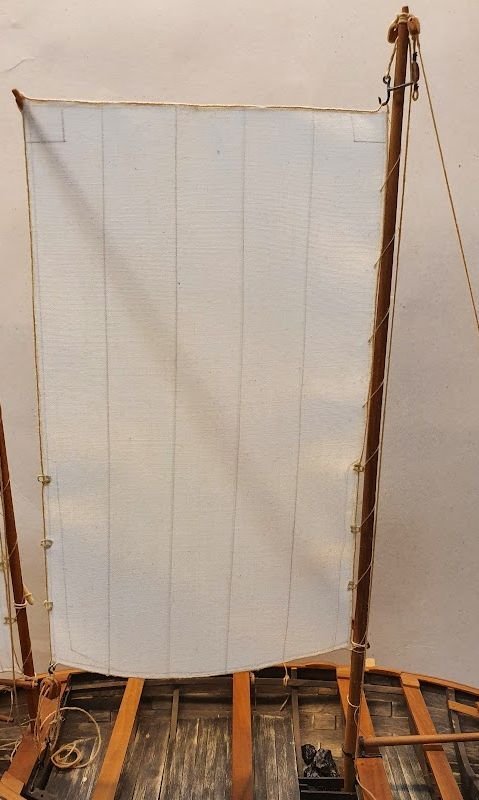
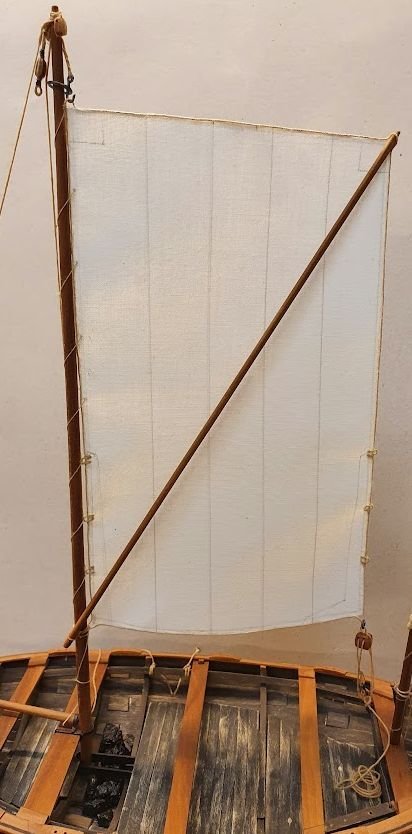
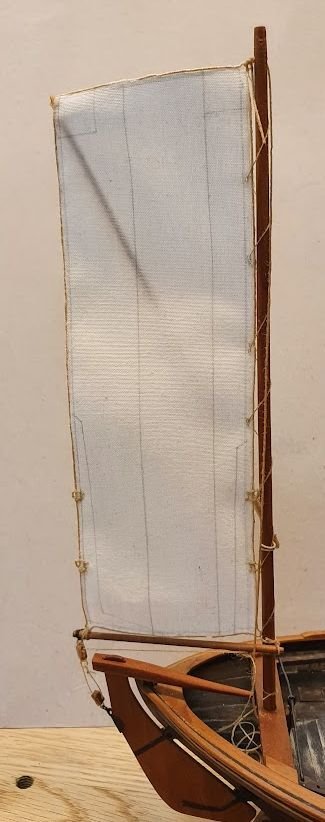
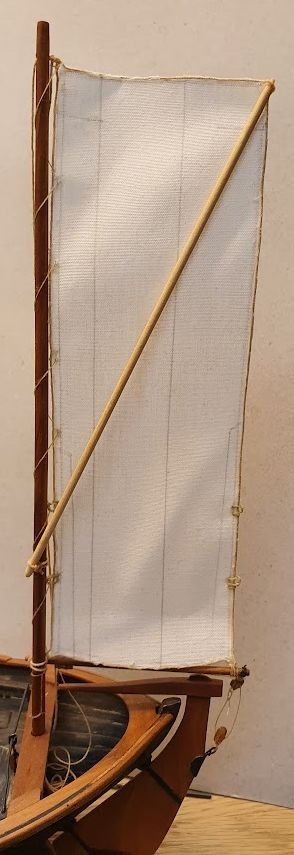
Well, what do you know... thanks to Reverend above I realized it was exactly 4 years since I started this little thing. Just had to finish it today! Here are some final shots of how the rigging turned out. More in the Gallery soon. A big thank you to all that have supported and liked my trials and tribulations along the way! First the stay sail. In reality it is a hank-on sail. But I could not be bothered to try to mimic that so I just sewed it on. A small knot on either side of the cloth, a dab of CA and snip the ends off. It is hoisted with a tackle though. The jib is set flying. The conclusion from the book is that since the jib boom is so delicate and un-stayed the jib was only flown in light to moderate winds. Hence no need for a tackle to hoist it. Both sails are belayed on pins under the main thwart. To keep the coils coiled I cheated and tied them with a little lashing. This is the third boat I finish in 12 years. A boat every 4th year, hm, with plans for future builds that might be a tad to stressed 😄 Now I need to tidy up the yard, take some nice pictures and then get on with next project. Again, thanks to all that joined for the ride!
- 240 replies
-
- 23
-
-

-
-
You're welcome @Reverend Colonel! Glad to be of help 🙂 (Gotta find that post and see what you liked now 😉)
-
Me too @BobG, me too. I would not be hesitant of getting a Byrnes table saw if it were an option. Sadly, living in Europe postage and customs take the fun out of it. The pros of these small table saws (Brynes, Proxxon, others) is that the blade is very small. Sharp yes, but still small. Set at correct height for every cut, which is were I screwed up, and you should be good to go. Also, the motors reflect the use. Remember, I put a smaller blade (165 mm instead of standard 250/254/305mm) in my 1,5hp, 400V table saw. Byrnes is powered by a 1/3hp 110V motor. The Proxxon I don't find the specs for. My point is, that even a small blade can cause kickbacks and injuries, but with care and careful set-up of each cut, the risk for serious troubles are less. Apart form wearing googles (if appropriate) wear an apron as an extra layer of protection against kickback. The pieces cut on these model makers table saw are generally small and will not cause serious damage if kick-back occurs. Wear an apron and take it slow. And Enjoy!
-
Thanks bolin! It is a nice little book. However, I recommend a bigger scale than 1:30 which I'm building in. Maybe double, like 1:15 or so.
-
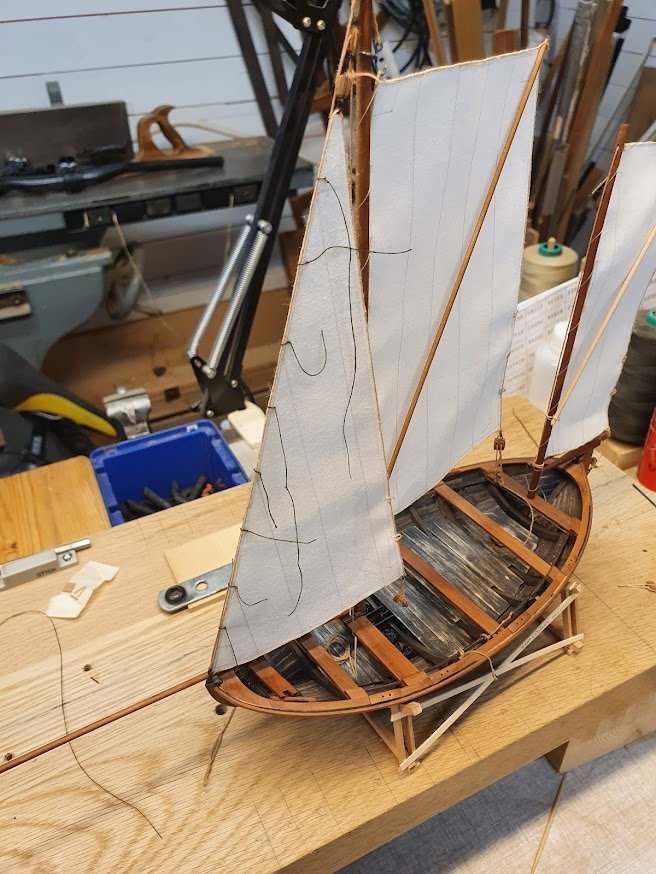
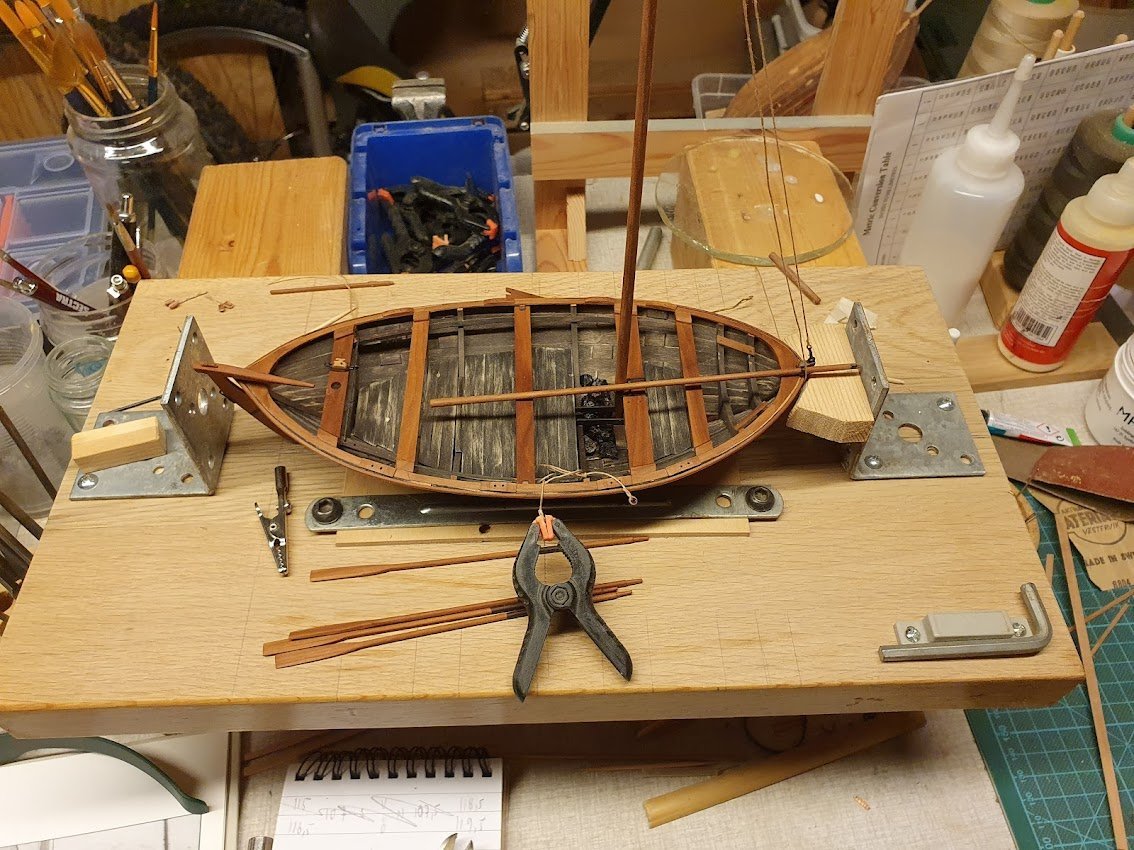
Thank you Per and a Happy New to you as well! I was hoping to have all sails set today but then some friends showed up incognito. Coffee, biscuits and some relaxed time. Well, then one of the wounds started bleeding again so I called it a day several hours prior to what I'd liked. Don't feel to well either today so it was just as well to call it quits. Anyway. When sailing you always (almost always at least) start with the aft most sail. In this case a mizzen spritsail. It took a while to figure out how the little boom and the sprit poles were attached to the mast. In the book it is described as a "hank", might be the same in English. It's an endless loop, wrapped around the mast and the boom/pole end rests in the loop. Thanks to friction (in the real case, CA-glue in model case) the hank stays where it is put on the mast. I did not fabricate an endless loop, instead tied it neatly away. Also the lashing that holds both sails to the mast is held in place thanks to friction and a timber hitch (and CA of course). Also managed to set the main sail. Both mizzen and main halyard are belayed on a pin under nearest thwart. These are bamboo trunnels I just drilled in from above. Can be seen as a dark spots. Four around the main and two around mizzen. Mizzen. And main. Main sheet is belayed on a cleat on the lower block. Mizzen is belayed on a cleat on the boom. That little cleat is secured with a bamboo nail as well. Stay sail and jib left to set, but that will be another day. Til next time, ta!
- 240 replies
-
- 12
-
-
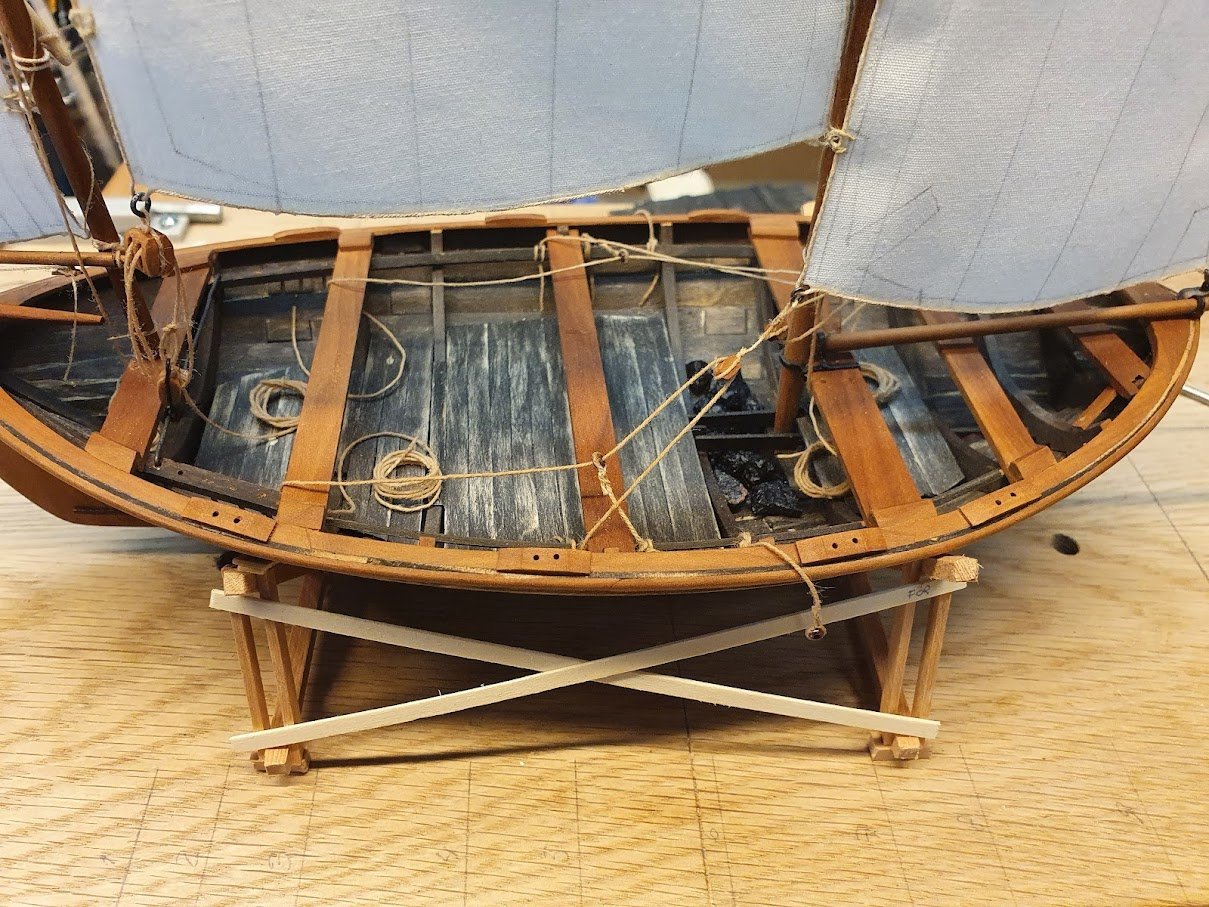
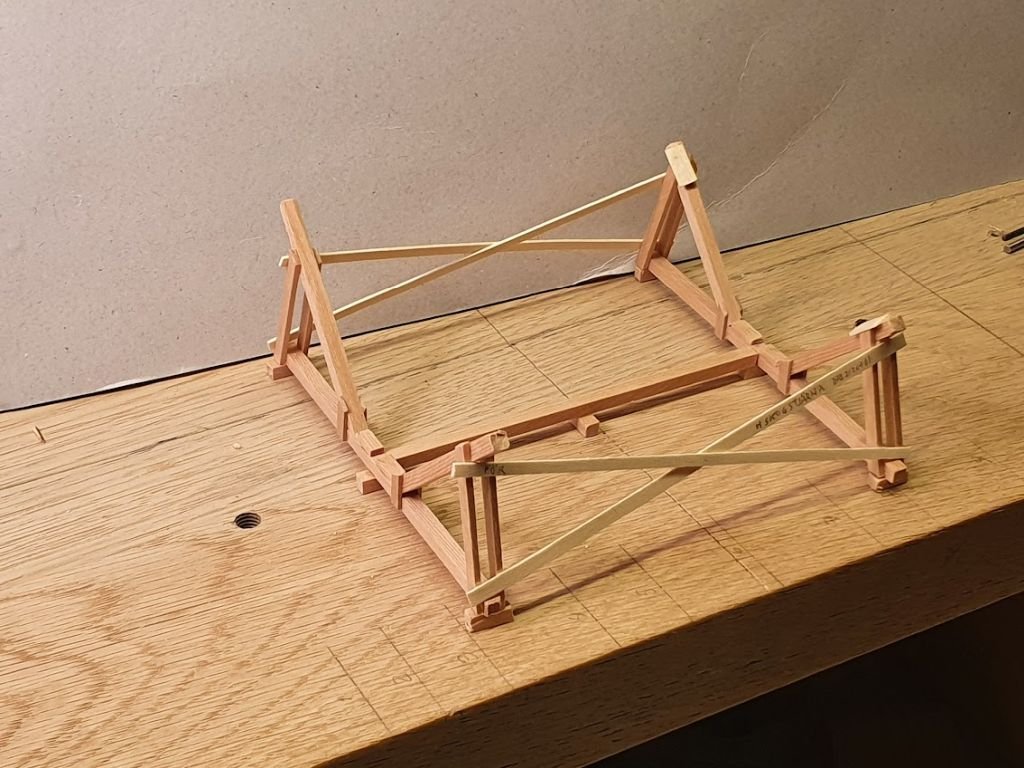
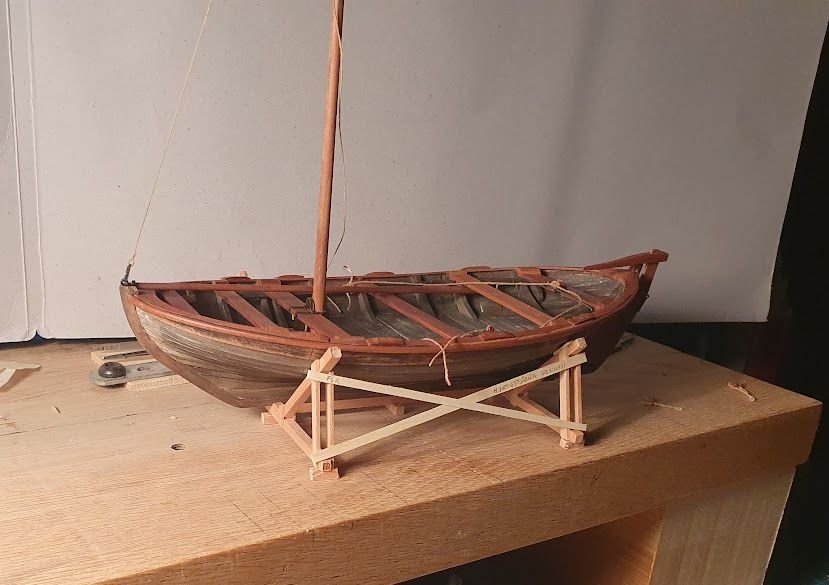
Greetings from a gloomy Sweden! Thanks for likes and comments 🙂 Started off 2022 with some minor tasks. A stand for example. The constructions stand did not allow the bowsprit to be extended and that I need for setting the jib. After some thinking I concluded that a regular cradle will do. It is a working boat, so a "working" stand will be just perfect. Wood dimensions translates to 4 by 4", 2 by 4" and 1 by 4-5". The stand is not "perfect" since these cradles were just hammered together with what was at hand. Also it is marked with owner (that's me 😉 ) and phone number (fake of course on the model). And most important "För" is Swedish for Stem or Forward. First a messy progress picture. I try to have the pictures free from debris, but it is just show and not how my shop really looks like. Without boat. And with boat. Tomorrow I can do the rigging. Probably not really accurate to have sails set while on the hard. But the owner might just check everything out on a calm, cold, sunny day in March prior to launch. Til next time, ta!

- 240 replies
-
- 10
-
-
That's an excellent tip John! As it happens I've done just that, have one "original" and then all subsequent plans are derivations from that original. The numbering is clever also. Will adopt that. Thanks!
-
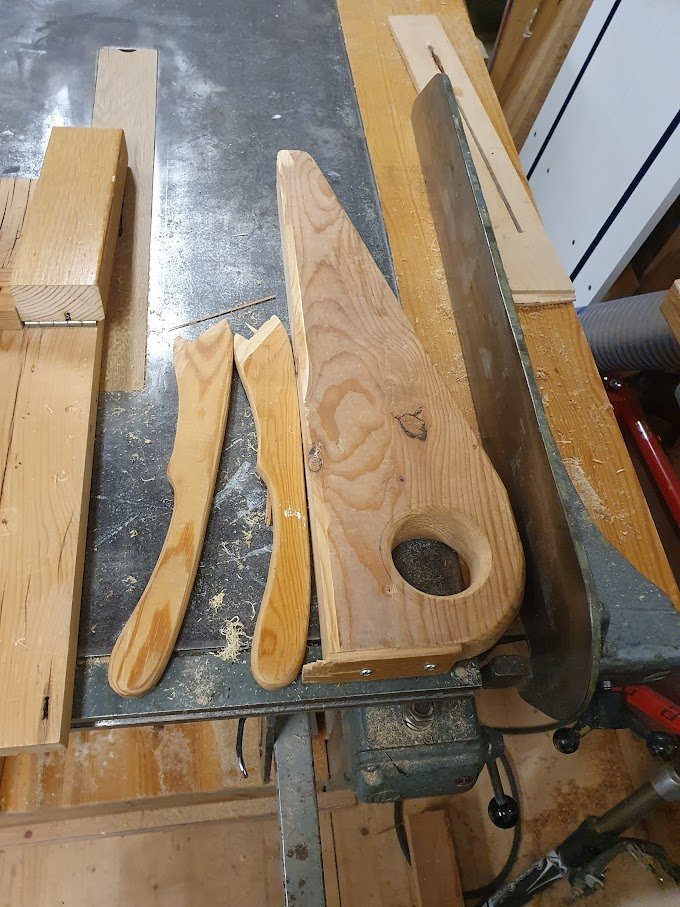
@wefalck Indeed I am. But I thanks for the search anyway 🙂 But I need to make some fore small stock also.
-
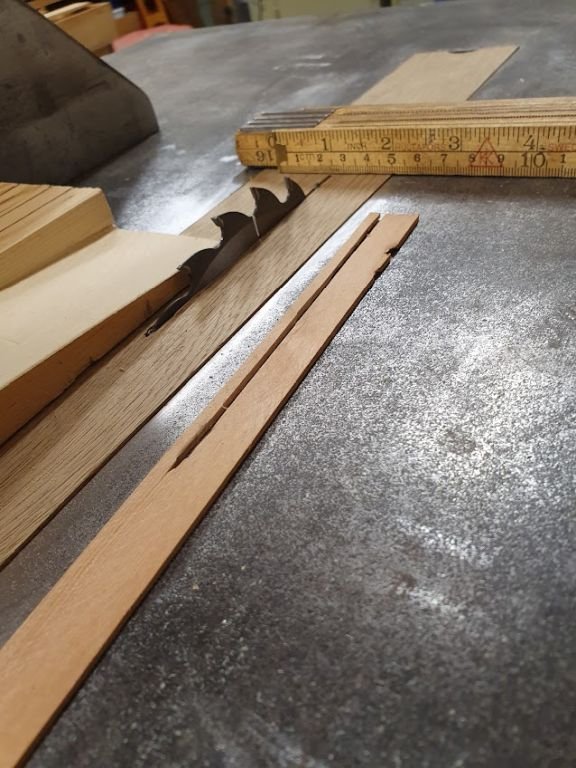
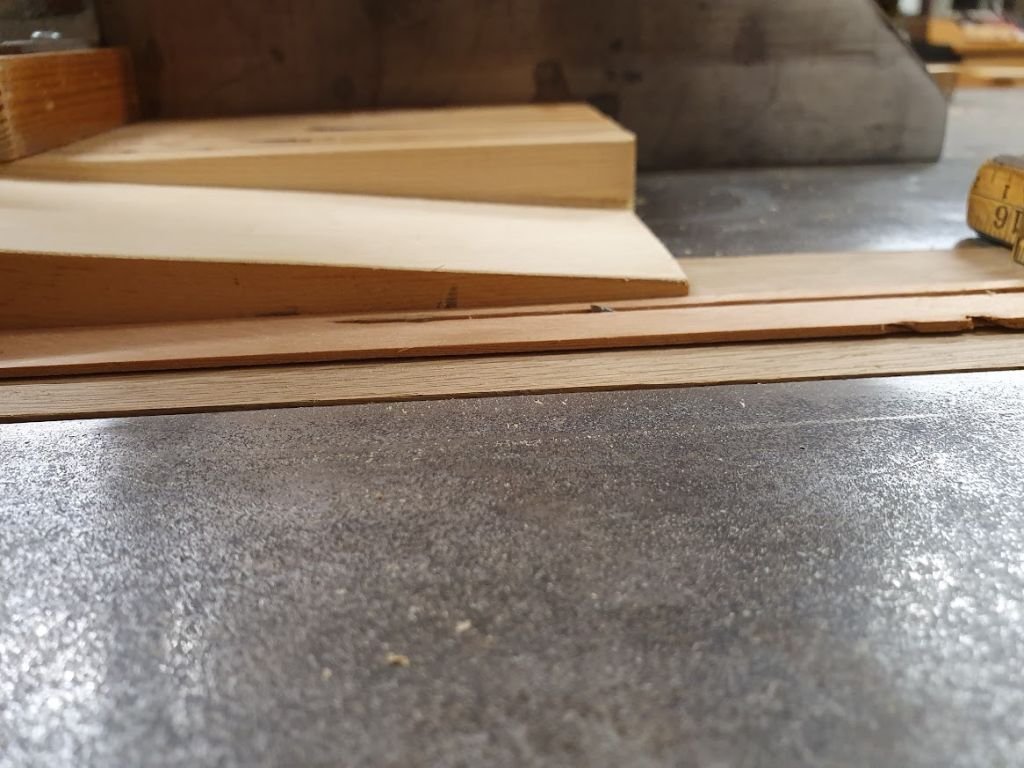
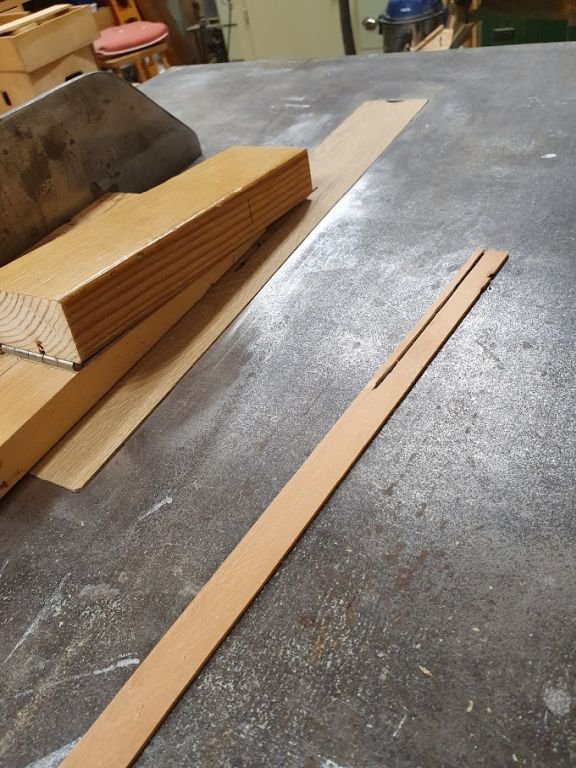
Back up on the horse as they say. Now a couple of days later I went out to the shop again. The injured fingers doesn't ache all the time and yes, I have been shaken of the incident. Creative thinking applied. It happened once. It might happen again. The human race is slow to learn from history... the glove is nailed to the wall adjacent the saw. A blade guard...hm... pictures below. The fences on my crude table saw are quite high, therefore I use a board clamped to the fence for smaller jobs. Figured out the the guard had to be attached to the board. The setup only applies for small jobs, still need to figure out one for the 10" blade as well. Later though. It also needed to be retractable in some sense, for setting the blade and such. (gah, typing one-handed is slow) It can probably be refined. Anyway, I fired up the saw and finished the cuts that I started previously. Yes, having the fingers wrapped in band-aids does impede agility and it felt awkard and I was not at all feeling confident. All due to the accident. But I got it done and it worked quite okay. This high was the blade set at the accident. Should have been this high. And the blade guard (or fingerguard might be more appropriate). It is attached with a hinge at this end and folds up to 90 degrees. The saw only does 90 degree cuts, no tilting. No riving knife either. But dust extraction I've built. Now back to building 🙂
-
"Everything is possible. The impossible just takes a bit longer" 😉 With a small sharp chisel I think you will find a way. Keep it up!
- 18 replies
-
- 3
-
-
- marie jeanne
- Billing Boats
- (and 1 more)
-
Coming along nicely! What Brian said above and the run of the planks look superb as well. Happy to hear that you are getting out of sick department 🙂 Keep it up!
-
Clever to use adjustable feet and a laser level to get square and fair. About the dotted lines you were asking about. I think they are the so called bearding line and rabbet. See this thread for a picture a couple posts down: Good luck!
- 18 replies
-
- 3
-
-
-
- marie jeanne
- Billing Boats
- (and 1 more)
-
Per, yes have this log as well. 🙂 The early plan was to make sawdust this fall. That didn't happen for a number reasons. My plan B is to actually start it this year. That might still happen, even if I'm forced to a short brake and some days out of the shed now. Can't do much building with one hand... I have the injured hand stuck in a sock to prevent me from doing anything I shouldn't do. I wish you a Happy, Prosperous New Year as well!
-
Thanks for the replies and well wishes! My point of posting this screw-up of mine was to remind anyone that reads it just how easy and terribly quick things can go wrong. I kick myself for letting it happen, but as you say I was lucky, indeed. Today my daughter which is a full blown nurse will stop by and switch the bandages that are more like band-aids really. And I also got the antibiotics to prevent infection.
-
Well, on and off. Amazingly enough it snowed the night before Xmas eve, so we had a white Christmas! Imagine that 🙂 Enough to cover the ground. Moore will come tomorrow night, but then, as per usual, it will thaw away in time forl new years. 😛
-
Another wee update. First, thank you for the interest shown in my humble try of scratch building a tiny vessel! The plan for today was rigging and possibly making the stand. Fate thought otherwise. See under tools and workshops discussion. Anyway, I started to tie down the stropped fairleds. Actually came off to a good start. Las thing yesterday was to put in the ballast stones. Progress will very slow for a day or two until my fingers stop hurting at least. Take care, and Be Safe! Til next time - Ta!
-
And by the way, I'm left handed, so I can still brush me teeth. 😄
