


Wintergreen
-
Posts
1,002 -
Joined
-
Last visited
Content Type
Profiles
Forums
Gallery
Events
Everything posted by Wintergreen
-
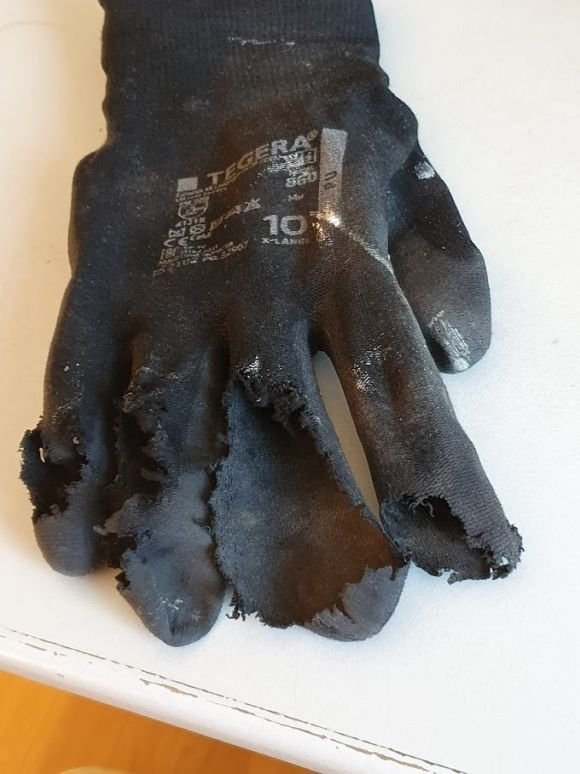
I post here since it regards our tools. How many times have you read the instructions about safety first? Plenty? Yeah, me too. But still... I will only post a picture of my glove and not of the wound the tablesaw inflicted on my fingers and then a short discussion of what happened and ho to prevent it from ever happen again. So, take a moment to examine this picture. Let your mind wander off to worst case scenario and then read on below. That was ugly, yes? However I can comfort you in that I still have five functional fingers on my hand. The wounds are only shallow however the fingernail on my index finger got slitted lengthwise and will probably fall off in a week or two. Thumb and pinky are unharmed. Okey, what happened? I usually work with gloves on. Partly because my shop is below room temp and partly becasue I've believed that they give some sort of safety when it comes to power tools. Now I know that that is not true. Today I bought and mounted a new blade to my tablesaw. A tablesaw that takes up tp 12"/300mm blades. This new blade was small att 165mm with a kerf of 1,5mm. Happily trying it out I made two or three more or less serious errors. 1. Slitting a piece of fine grained pine down to 1,5x3,5 I had the blade unecessarily high. I didn't lower it between cuts. 2. I did not use my pushing sticks, which btw always lay beside the saw. 3. I had gloves on. 4. And finally, I got carried away and forgot about safety first. What happened was that as I was cutting the wood from 20x30mm downto 1,5x3mm the far end of the stock started to catch the blade. Reaching beyond the blade to hold down the end s**t happend. Even though my fingers were away from the blade the blade caught the fabric of the glove's index finger. Rest is history so to speak. Right, so what to do in order to keep skin and nails intact in the future? Well, had I lowered the blade it wouldn't have caught the glove and even if it did catch the glove, I would probably get away with only real scare and a "C**P, that was close! In using push sticks I would have been safe no matter how high the blade was set. And with bare hands I doubt that the blade hade caught my entire hand, which is what happend now. Instead the blade would probably only scoure the finger. Or maybe not. I have no intention of trying this out. What about my wellbeing? Yes, we drove down to local healthcare (only 2 mins away) and had the wounds taken care of by a nurse after a GP dr had had a look. I did also receive a prescription of antibiotics cure, one week long. I addition to that regular pain killers will be on the menu for a couple of days. And really, I'm fine. Yes it hurts but I kind of earned that. My sending off words to you all are Have fun, but BE SAFE!
- 48 replies
-
- 18
-

-

-

-

-
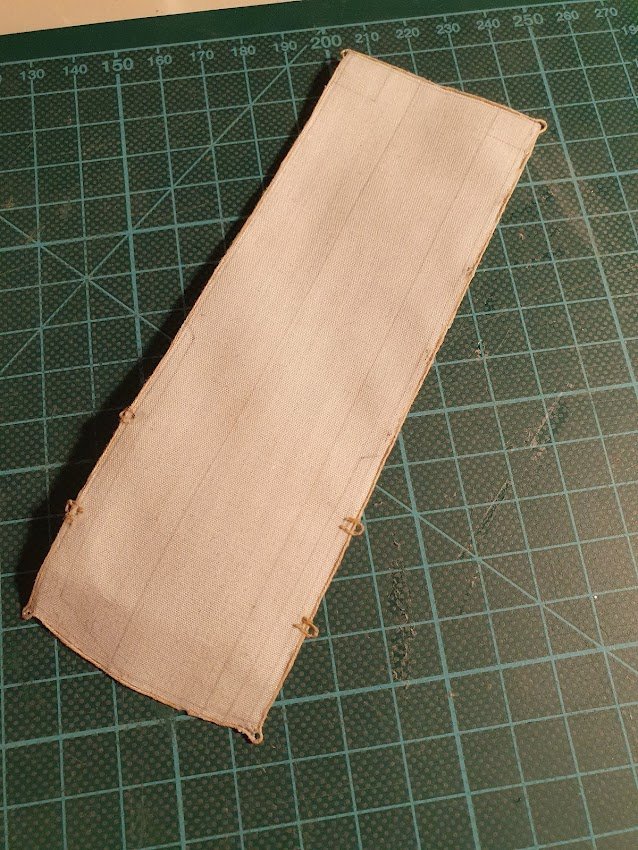
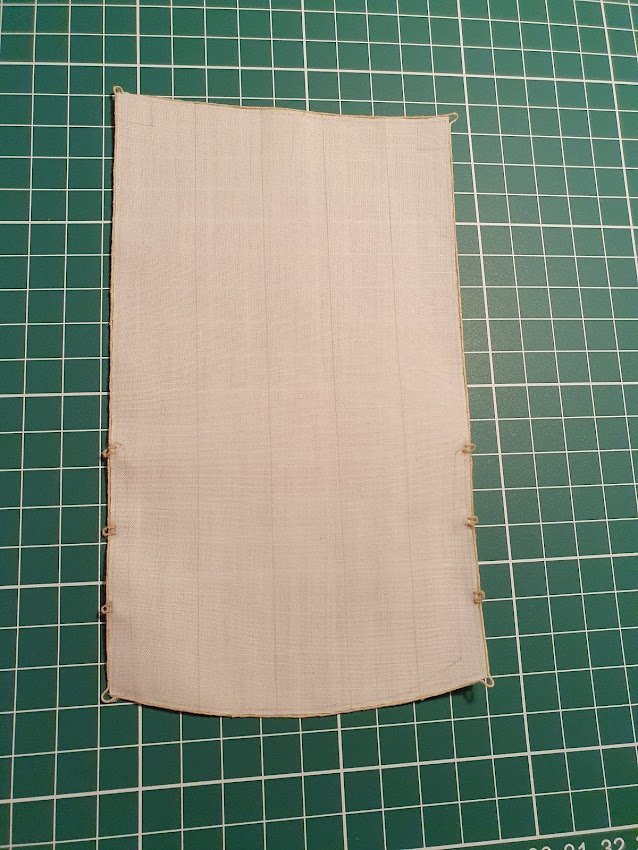
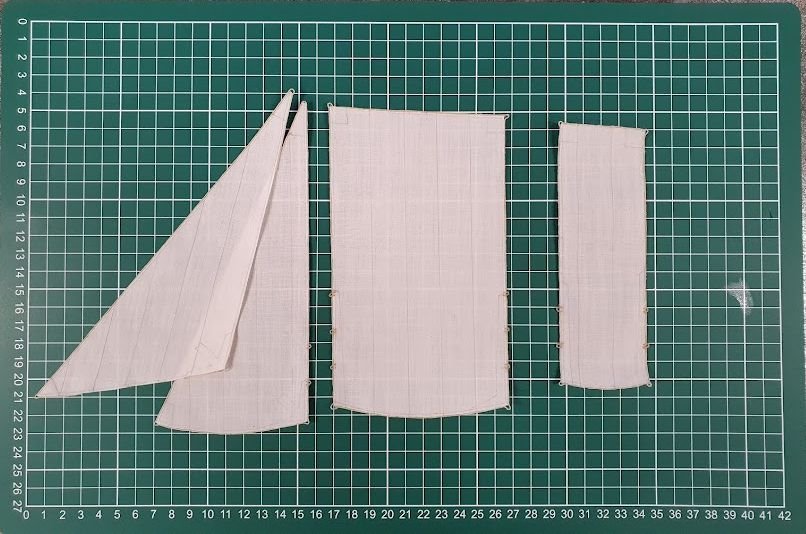
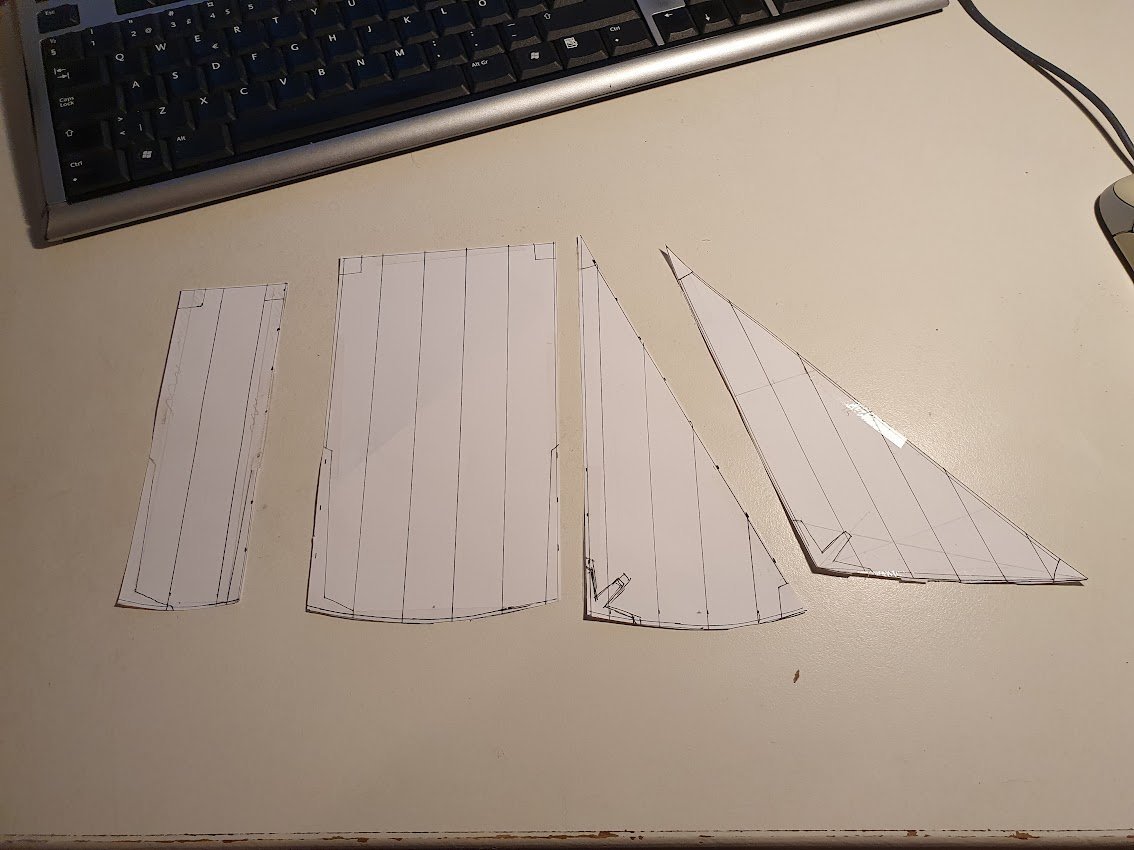
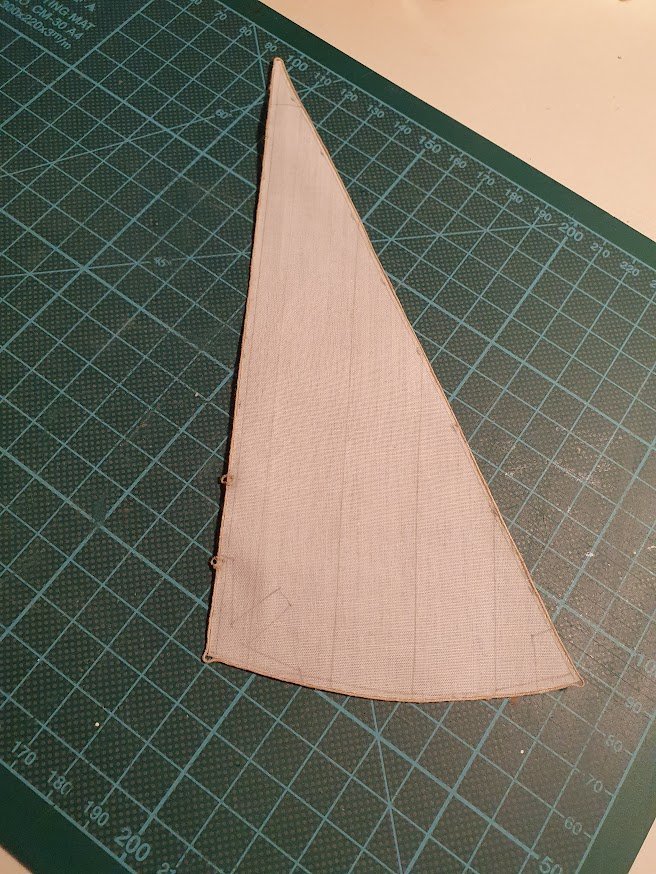
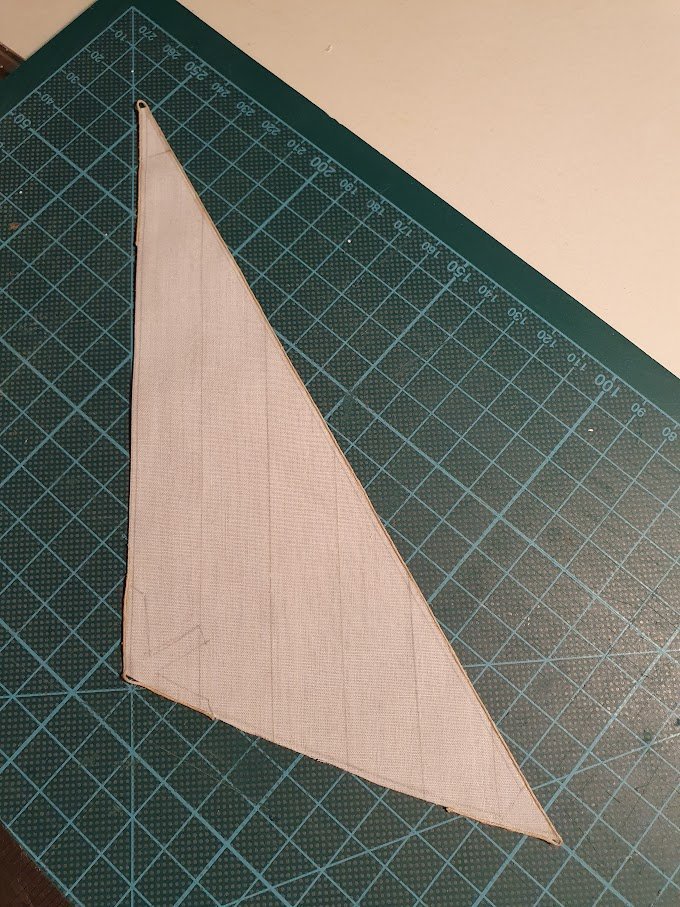
Hi there! Today is all about sails. I have no progress shot and thus only describe in words how I fabricated them. Sail cloth is some thin fabric that I have used for my previous Regina build as well. First, templates were cut out from regular 80 gm paper. Like in the below picture. These were taped to the cutting mat and then the fabric taped on top. All lines where drawn with a regular pencil (H). Along the edge, diluted white glue was applied with a narrow brush. Let dry. After they were cut out the finicky business set off - gluing the bolt rope. I used a glue for fabics which worked really well. A first try with needle and thread was abandoned due to scale issues. Alas, even the first sail was scrapped due various issues (mizzen that was). After bolt rope, reefing cringles were added. Theese took a couple of tries to get descent... The are sewn with a regular cotton sewing thread and then secured with white glue. Now, some pictures. The complete set (bar the topsail which I have omitted) And to round it off an image to get into the right mode for finishing this build off... Til next time, ta!

-
Every little success counts! You're doing a fine job with the old lady 🙂 Keep it up!
-
The left (2nd) splize is definitely okay! I can do them in real worlds size and if mine would turn out that neat I'd be very satisfied. Hats off to you Siggi!
-
Those are some excellent looking blocks! No, I don't have preconceoptions about people. Your talent speaks otherwise. By hard solder I meant silver solder and by soft solder, which I get is what you use is the type with a soldering iron and tin. Thank you for showing your nice work!
- 153 replies
-
- 2
-
-
- Ancre
- Bruno Orsel
- (and 2 more)
-
ancre Belle Poule 1765 by j.guydal
Wintergreen replied to j.guydal's topic in - Build logs for subjects built 1751 - 1800
Salute! Impressive work on this lovely Belle Poule 🙂 What type of wood do you use? -
Space for a ropewalk you say? Yes, the thought has crossed my mind. Maybe up the road. Off course I submit to that generous offer, how wouldn't want a Xmas gift?
-
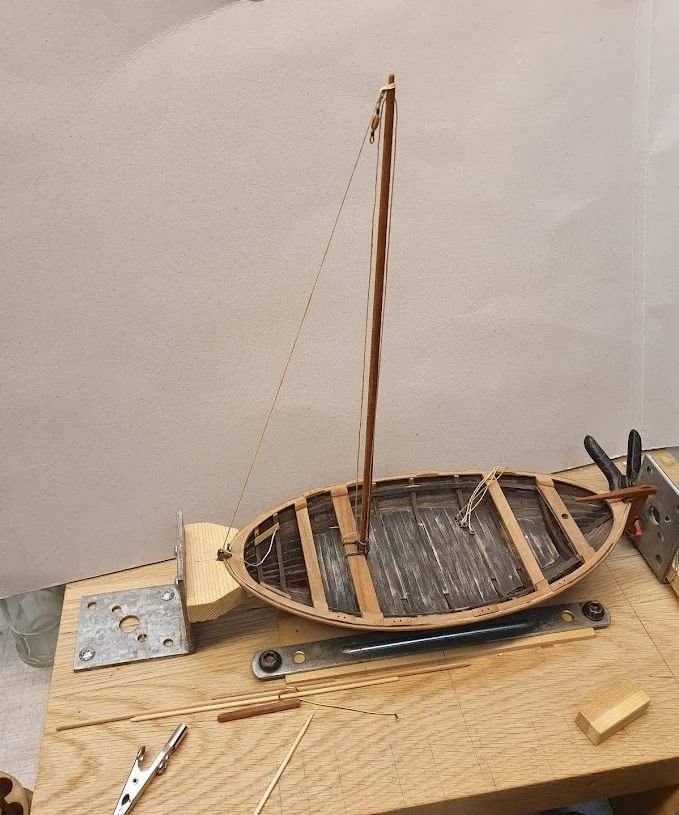
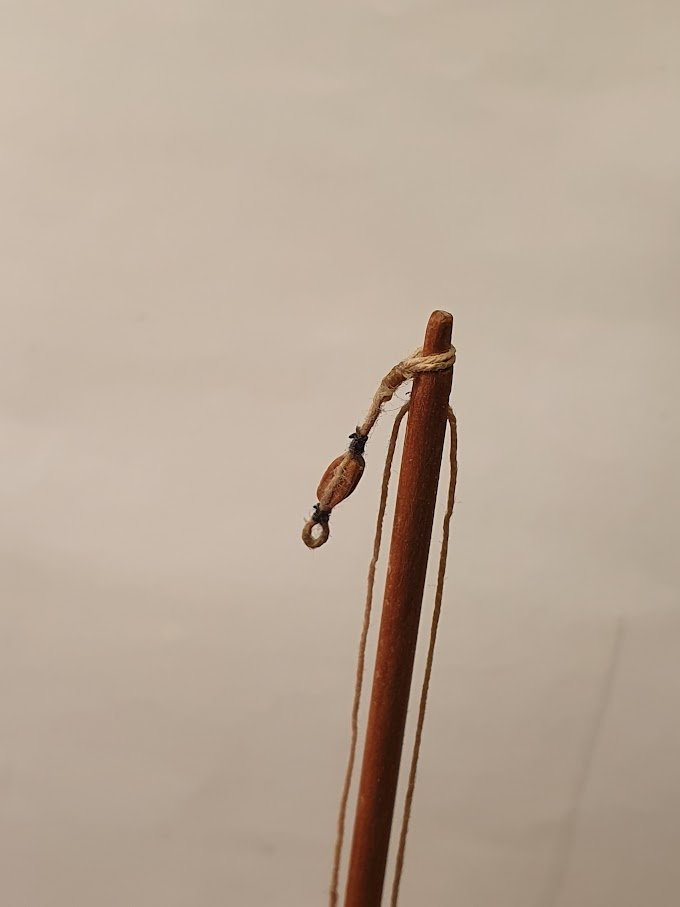
Thanks for likes and comments! Plodding along with rigging here. To keep me from going nuts this winter with chemo and all that, I bought a small addition to my workshop... a 5kW 3phase heater. Yum. No more problems with low outside temperatures. The stropped block at the top is for the staysail hailyard. It is about 5mm long and need to practise shaping the blocks more round/oval instead of stretched/oval. Well, practise makes perfect in the end. The seizings are plain sewing thread. Cotton I think. A drop of CA glue on and they will not part. White glue for the hops and eye. The forestay in the second picture is not permanently fastened. It probably should be seized with a shackle to the ring but I think I'll just tie it off. Till next time, ta!
- 240 replies
-
- 10
-
-
Variable speed dremels
Wintergreen replied to Laggard's topic in Modeling tools and Workshop Equipment
Proxxon rotary tools usually have a somewhat lower RPM ratio than Dremel. Proxxon 5000-20000 while Dremel 10000-30000. If it is the problem of making an entry in to the wood at several thousands of RPM, something I struggle with as well, use an fine awl to break the surface so to speak. Then the drillbit will find its way in to the wood. Another thing, that Jaager above mentions is the power or torque these multitools provide in the lower range RPM is not very good. I tend to stay around the 10-15k mark when drilling. -
Nice work! About soldering, do you use silver solder (hard soldering) och soft soldering? Keep it up!
- 153 replies
-
- 1
-
-
- Ancre
- Bruno Orsel
- (and 2 more)
-
@Roger Pellett indeed it is not abandoned, just slow. Thank you for your concerns and tip regarding lines plan. However, I'm more of a make it up as you go type of guy. With a reasonable planning ahead of course. Since this vessel stems from working boats and is in some sense already a bastard I'm not too concerned about to the mm accuratess. Bastard? Yes, Atlanticas lines were taken of her sister ship, Gratitude. Only that Gratitude is a fair bit smaller, so they just blew the lines up a bit to suit their needs. I have EdT:s first Naiad book where he delves into the intricacies of drafting as well, using all kinds of measuring, angles, offsets and whatnot. To be fair, it is a bit over my ambition for Atlantica. But again, thank you for taking the time to explain a different approach. It is always welcome with different thoughts. Cheers!
-
Hello Seglaren! I would suggest that you actually buy and build one of the kits out there depicting these kind of vessels. One is Billing Boats FD 10 Yawl at scale 1:50. It gives a reasonable sized boat. A couple of others are the new, and higher quality kits from Vanguard Models, Erycina a ketch and Nisha a cutter (single mast). Both at scale 1:64 which produces smaller boats, fewer details and easier to place on you favourite shelf. Don't bite off more than you can chew and give it a go!
-
Aha! Planning ahead I understand. Well done, and an impressive set of thunder there!
-
Ahh, those painted frieses... Well, I have a question Siggi. What about armament? It looks like you are only planning for guns on weather/2nd deck? I mean, first gundeck is a bit hard to do any work on now, right? About lightning, I remember that Gaetan B had some posts about lightning a good while ago. He compared flourescent lights with led and halogen if I remember correctly. Pros and cons and did reasoning around them. Keep it up!
-
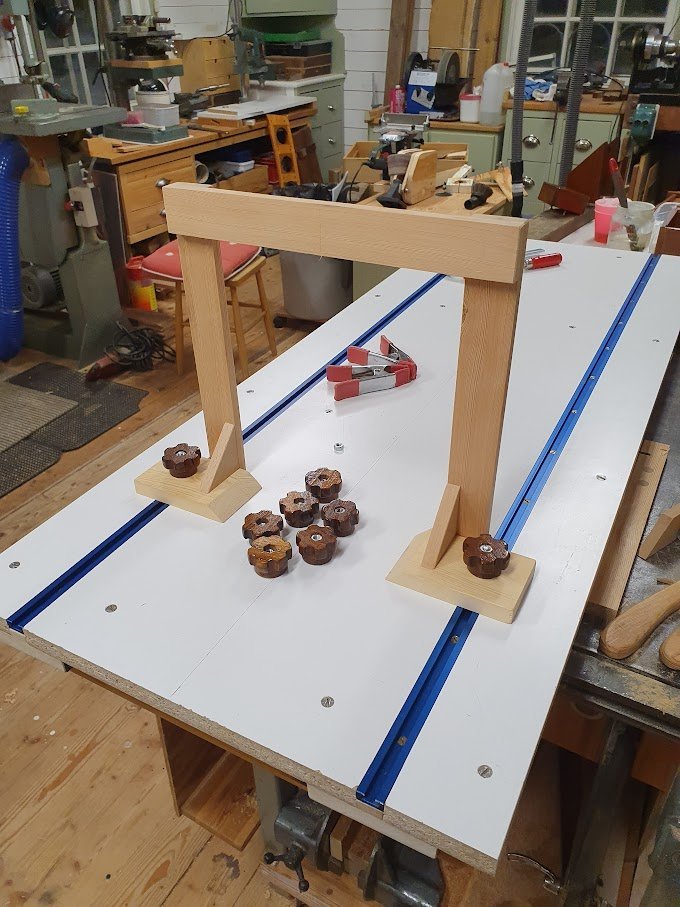
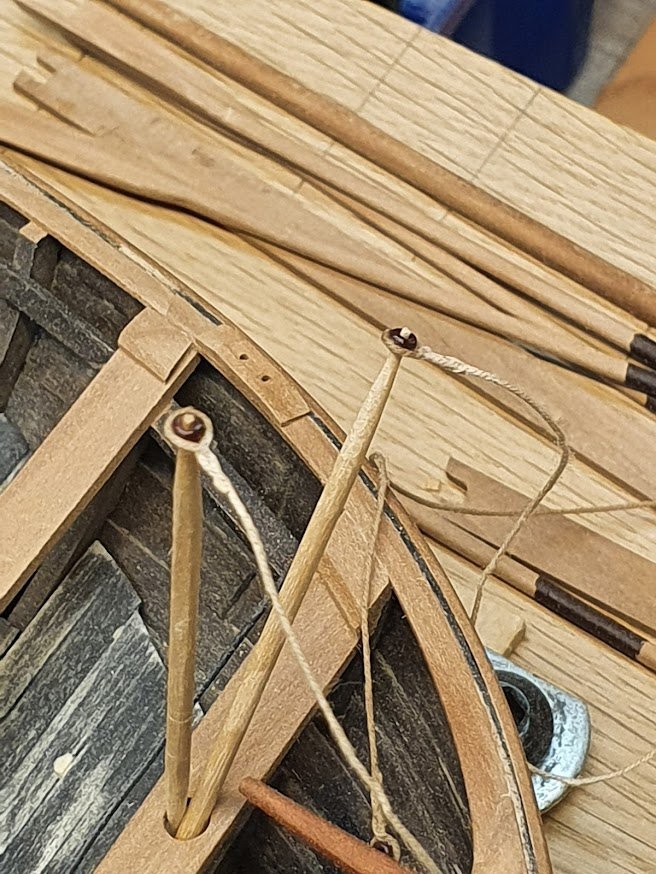
So, plodding along slowly. Guys, thanks for likes and comments 🙂 As I've mentioned before the heating system in my shop doesn't really cope with temperatures below -10 C. Right now, we're at -16 C. say no more. Anyway, short sessions it is. Sheet for the head sails are led aft through some pendants that are fastened in the stringer on the side. After some thinking I came up with the idea of using small beads and CA-glue the line around the. A fake splize and some white glue to finish them off. Third picture is to keep me focused on moving forward. The sliding gantry, as Ed calls it is done and the knurly knobs as well. Yes, I could have just ordered a bunch from Amazon or wherever, but where would the fun be in that? Thought it was mahogany but it turned (😄) out to be teak.

-
That sounds reasonable wefalck. Countersunk and plugged, off course for a varnished surface.
- 153 replies
-
- 3
-
-
- Ancre
- Bruno Orsel
- (and 2 more)
-
What Patrick said above. I notice that you haven't treenailed the coverboards and assume that that is intentional. Is it to keep details to an accurate but not overwhelming experience? I mean, treenailing the coverboards will detract interest from the nice deck. As it is now, both the coverboard and the deck stands out on its own. Keep it up!
- 153 replies
-
- 4
-
-
- Ancre
- Bruno Orsel
- (and 2 more)
-
Wow, what a lovely build! And the detailing is quite extrordinary I must say. Years ago I saw HMS Mars from Caldercraft and really liked the hull shape. This Swallow is very similar in both shape and size I think (RW dimensions). Thanks for sharing 🙂
-
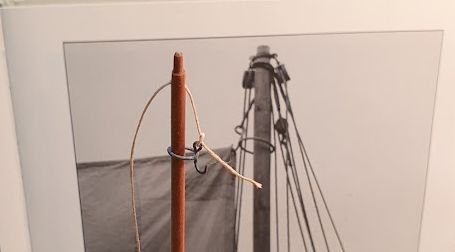
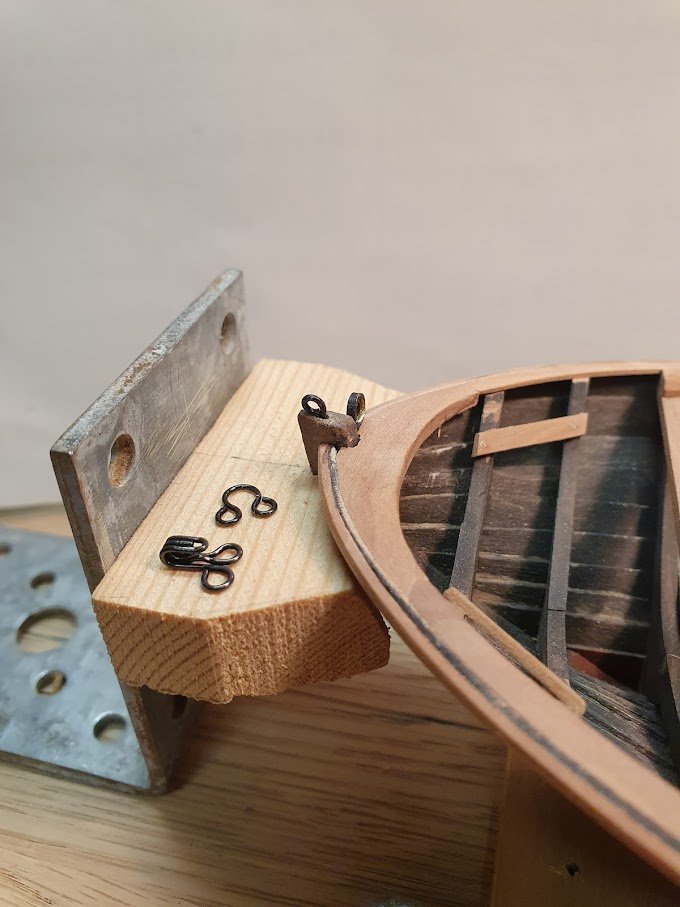
Thanks for all the likes! They keep me going 🙂 @G.L. a sincere Thank You! for your boost. I'm glad you won the battle! My radiation is done and next appointment is already next week. But I don't know about clean workshop... my shop is fairly clean in the open areas. But the corners and behind stuff is another matter altogether. Over to the wee update. But I thought that a tiny update is still an update, right? The dark art of soldering... after a couple of tries it came out rather decent. It is of brass wire and painted to simulate galvanization. Don't mind the rigging thread. My block of wax is elsewhere and I just wanted to see the hook and ring in position. The real deal in the background. Second picture. Another miniature update. A ring in the stem head for the forestay. Laying beside is the stock material, bought at any sewing chandlery. I have no idea what they'r called in english though. That'll be all for now. 🙂
-
@Nirvana/Per, Not even in IKEA? Or maybe you're not anyway near an IKEA right? I feel your pain. 😞 @gsdpic/Gary, Yes, I have bigger plans. Just wait and see 😉 @vaddoc Thank you. Yeah the machinery are full size. In the trusty bench circular saw currently sits a 305mm dia saw blade. The green planner takes 400mm wide material. I'm a lucky guy 😄 However, the full size stuff I'm building is like furniture, boat fittings and stuff. No 1:1 boats. (I have one already 😉). About the model shipway. Agreed, it appears a wee bit big and the reason is twofold. One, the T-tracks came in 48" length and I didn't want to cut them. Two, even if my future plans only include hulls of up to 800mm in length, you never know, do you? I do have the two volumes of Euryalus which is a 1:48 build, rendering a hull of close to a meter if I recall correctly. Initially I thought about to scale it down to 1:64 (easy enough conversion in 1:64 being 75% of 1:48). Time will tell...
-
Every time I visit this build, I find myself admiring the painted friezes. They.Are.Just.Amazing!
-
Good to see you back at the work bench GL! I like the way you pre-attach stuff together and then "just" glue them into place. Smartly done 🙂
- 153 replies
-
- 3
-
-
- Ancre
- Bruno Orsel
- (and 2 more)
-
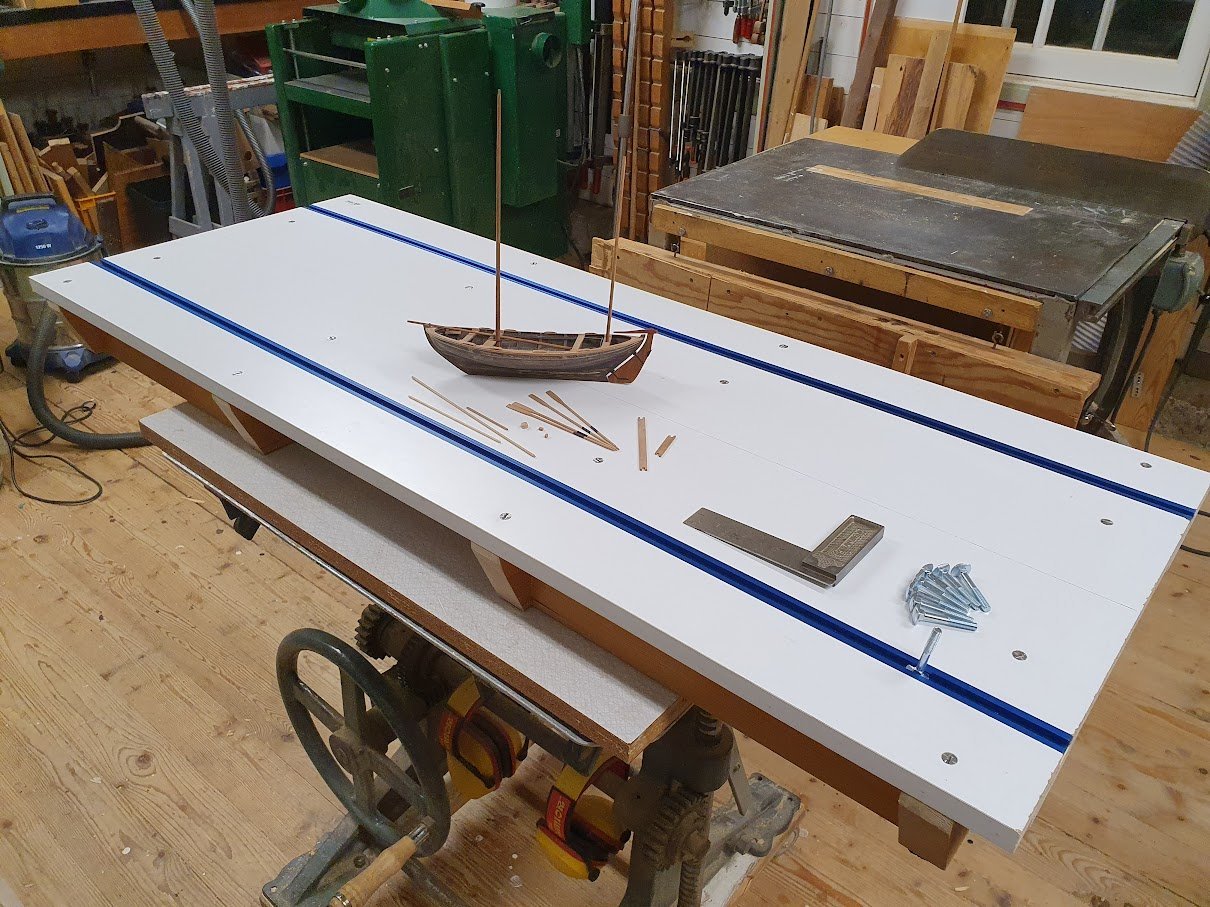
Vaddoc, druxey, thank you for the well wishes. In hindsight, ten years from now, this period will be just a memory, quickly gone by. At the moment though, it takes a great deal of effort to be creative. Not so much for physical reasons, more the mind games and ghosts. For the moment I'm getting my head around the very few lines that is the rigging. It's like a dozen blocks all in all 😛 Also took some time off to build the model shipway for future builds as per EdT:s drawings. Measurements are 48"x19" or 122x48cm whichever system you prefer. The T-headed bolts are plain good quality carriage bolts that got their heads filed down. Worked like a charm. Just need a matching number of friction knobs, the gantry, some klamps and whatnot and I'm ready to go... On the supporting rails I put some anti-skid which in combination with the constructions heavy weight makes it very stationary 😉 That's all for now. Bring out the gingerbreads and glüh wine - Advent is coming 😉
- 240 replies
-
- 11
-
