HOLIDAY DONATION DRIVE - SUPPORT MSW - DO YOUR PART TO KEEP THIS GREAT FORUM GOING! (Only 13 donations so far - C'mon guys!)
×


keelhauled
-
Posts
788 -
Joined
-
Last visited
Content Type
Profiles
Forums
Gallery
Events
Everything posted by keelhauled
-
 Nenad, I think you should try sculpting. Nothing to loose and based on what I've seen of your build you'll do an awesome job, better than my attempt! As far as the detail, you're correct that the more detail you put into the model, the more opportunities you see to create more detail. I think that it's hard to find the balance. I've considered redoing several areas, but I don't want to end up rebuilding two thirds of the ship. I'd rather move on to another ship and use what I've learned. Bob, thanks for the feedback! I used Elmer's stain-able wood filler. The pre-carved surface is fairly rough and gritty, but underneath it will be smooth. I didn't do anything to the jewelers screwdriver. Looking back, I should have sharpened them. Also when I looked back at the bow, I noticed that I was able to make more detailed work in the fine scrolls with a thinner layer. I didn't notice this until I had already hardened the stern, so I couldn't go back. However, if you make it too thin It may crack or break. Grant, thanks again for the encouragement. And yes, I am glad that I went down this path. Costarn, I'm not familiar with that kit. However, I don't think that it matter's who manufactured the kit. Bob, Nenad, Grant, and myself have built most of our ships from scratch, tossing aside the kit provided materials as we've become more sure of our building skills. You should look at Grant's build. He even made the blocks! The next kit parts that I'm throwing away and rebuilding are the ships wheel and windlass.
 -
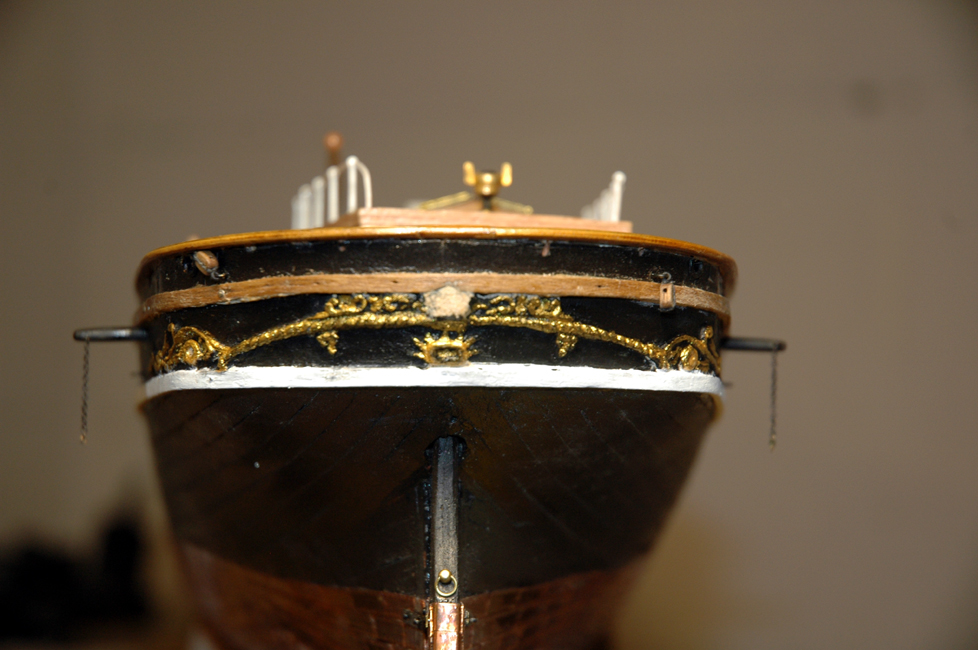
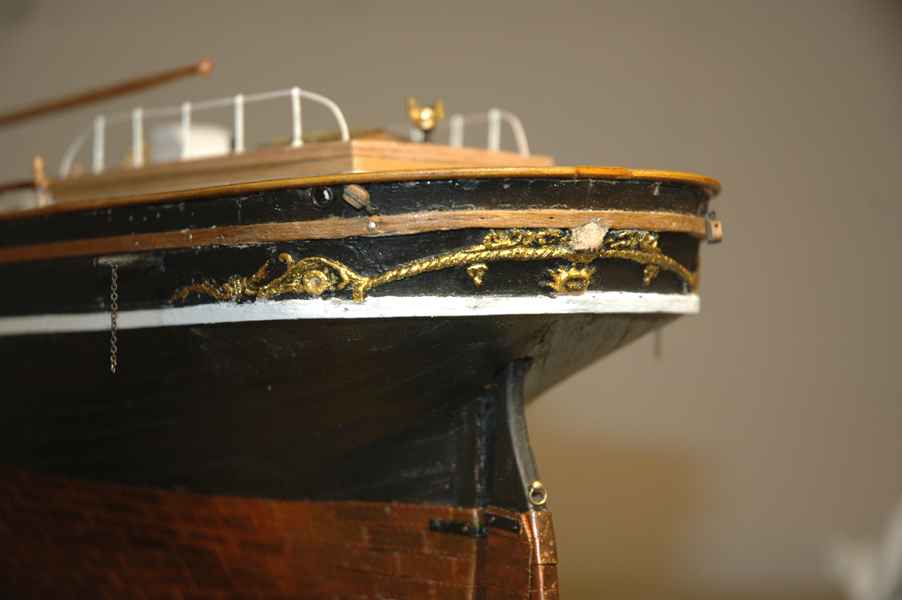
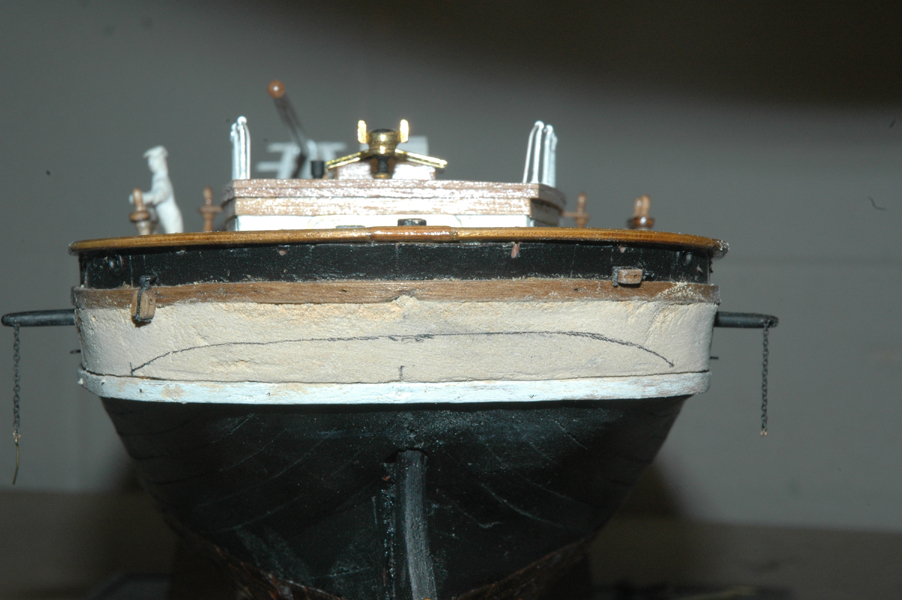
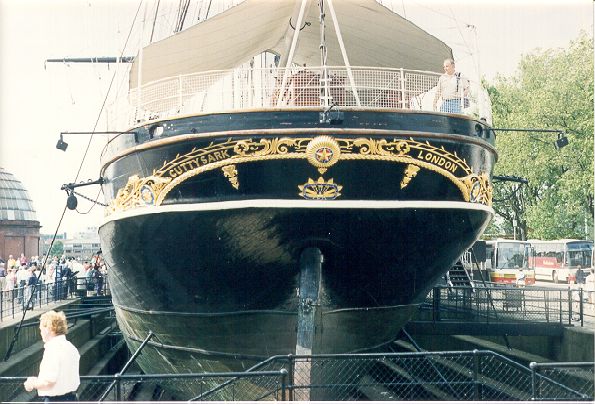
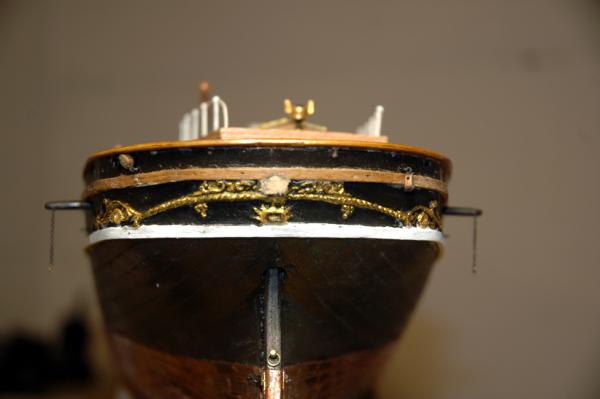
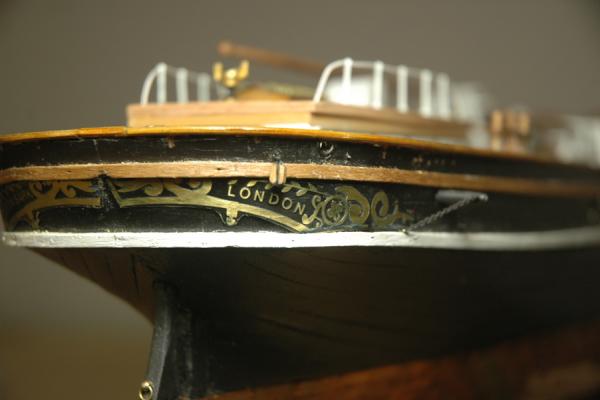
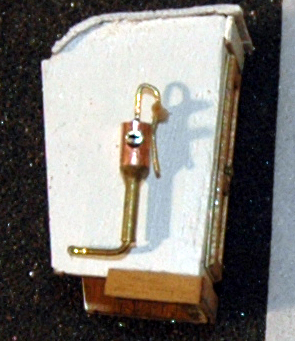
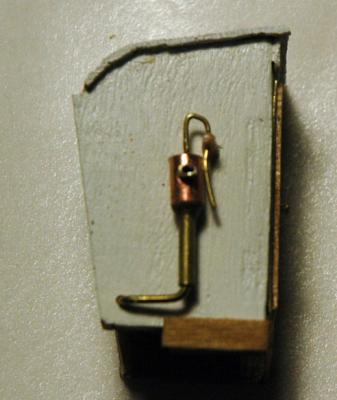
Thanks Brian!!! Here's a couple of photos of it with a coat of paint. Still needs some clean up and the robin's egg blue of the band and inside of the circular trim. Also not sure what to do with the Star of India ornament. I tried Sculpy with no success. I also have to add the name and town. I saved them from the stern brass that i tore off. thanks Marc

- 525 replies
-
- 7
-

-
- cutty sark
- mantua
- (and 2 more)
-
Cutty Sark by NenadM
keelhauled replied to NenadM's topic in - Build logs for subjects built 1851 - 1900
Looking good!!! It's amazing how many ring bolts there are. It reminds me that I need to go back and take a look at my hull. I think that i have them all, but your post makes me think I might have missed some around the bow. Hopefully the strike will end soon and in a positive way. Take care, marc -
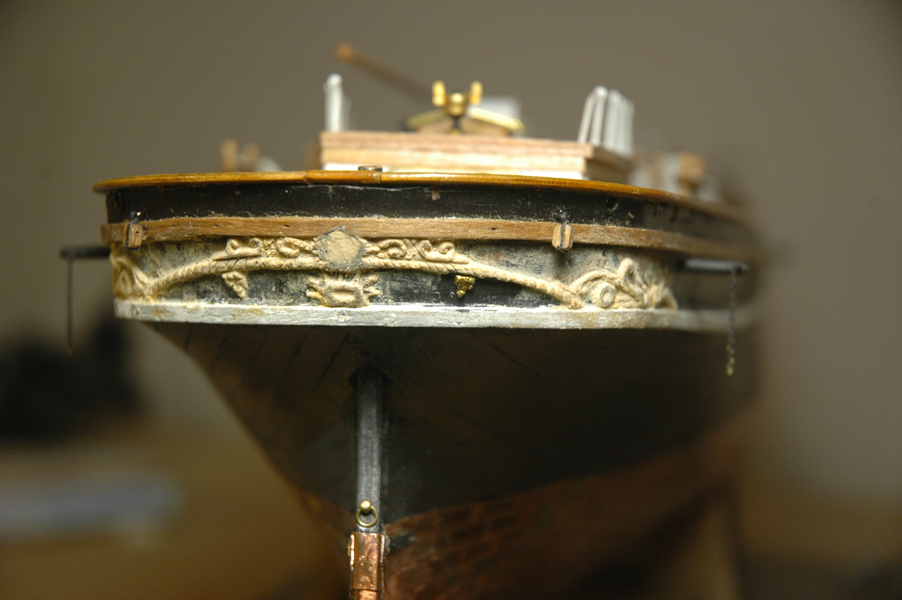
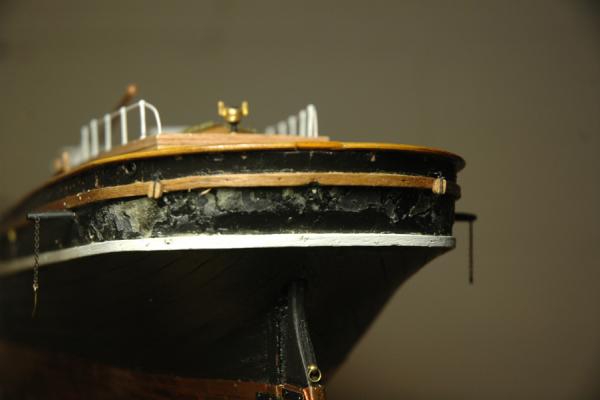
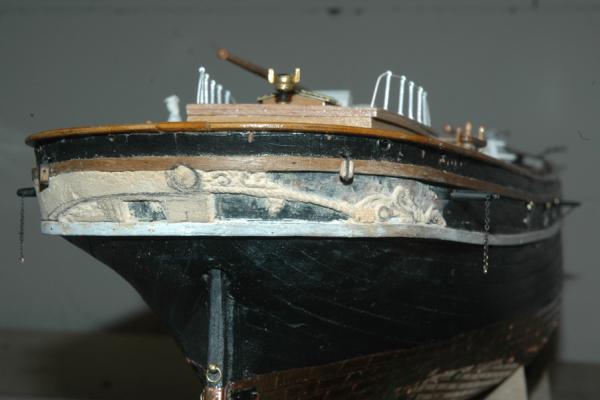
So here is my work on the stern The original stern with the kit ornamentation. I removed the brass ornamentation that came with the kit. I then had to scrape and sand the stern removing the superglue I then coated the stern with wood filler and left 24 hrs. I then started carving the ornamentation with jewelers screw drivers. I've been meaning to by micro chisels, but I can't seem to fork out the $60 to $100 for them. Here I'm almost finihed. By the way I did some hardening test. The wood glue needs some strength added. I tried coating with elmers and superglue. The Elmer's wood glue hardened the surface, but you could still go back and carve into it. The super glue seemed to penetrate deeper and made the wood filler hard as a rock. You can't go back and change it without breaking it.. I think both slightly softened the detail - The Elmer's more than the CA.


- 525 replies
-
- 5
-
-
- cutty sark
- mantua
- (and 2 more)
-
Cutty Sark by Keith B
keelhauled replied to Keith B's topic in - Build logs for subjects built 1851 - 1900
Looking good!! I'm glad your enjoying your build. That's what hobbies are all about! -
thanks Grant and Nenad. Both of you guys made major changes and rework on your builds. Mine is truly nothing compared to what you did. But it always is a moment of pause when you know that you are going to destroy what exists and there is no going back. But so far I've always been happier with the replacement than the original. Nenad, I haven't decided how I'm going to sculpt or carve the decoration. I think that I'd rather carve the parts. I feel like I have more control. There is a shop that has carving wood nearby. I've also carved from a mixture of resin and wood filler that worked well. That's how I did the bow. Trouble is I can't remember what resin I used. The resin made the wood filler like concrete after I was done carving. I might also use sculpy. I saw someone on this site using it for a figure head. I tried it for making figures and wasn't impressed, but I was told that there are different versions of the product depending upon the size and detail that you want to work with. I'm definitely going to do some tests off the ship. I hope to work on it this weekend!! Marc
- 525 replies
-
- 1
-
-
- cutty sark
- mantua
- (and 2 more)
-
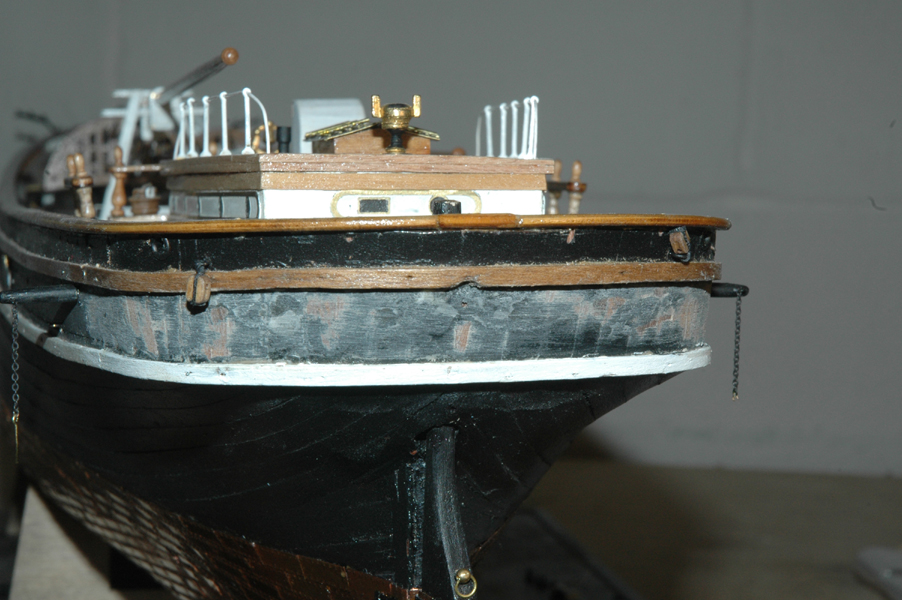
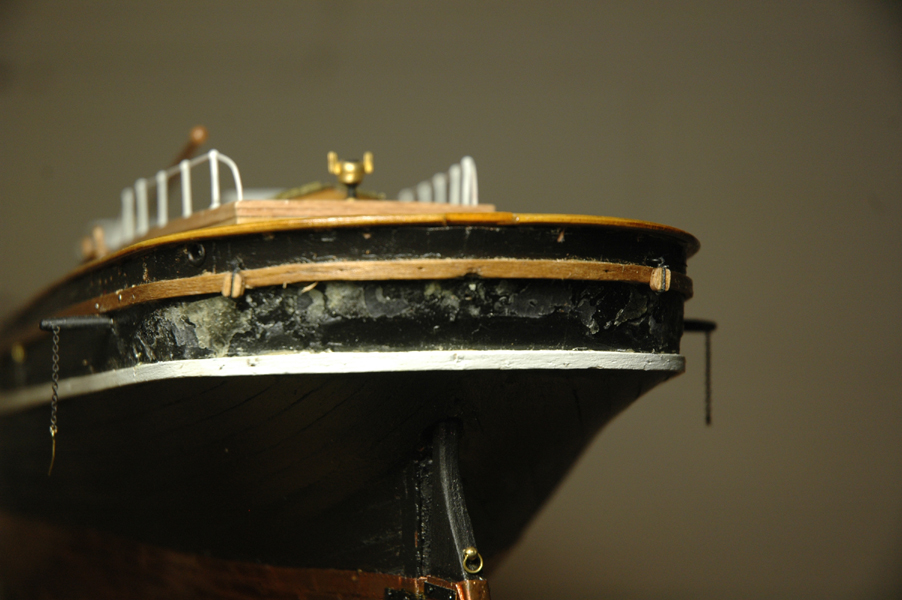
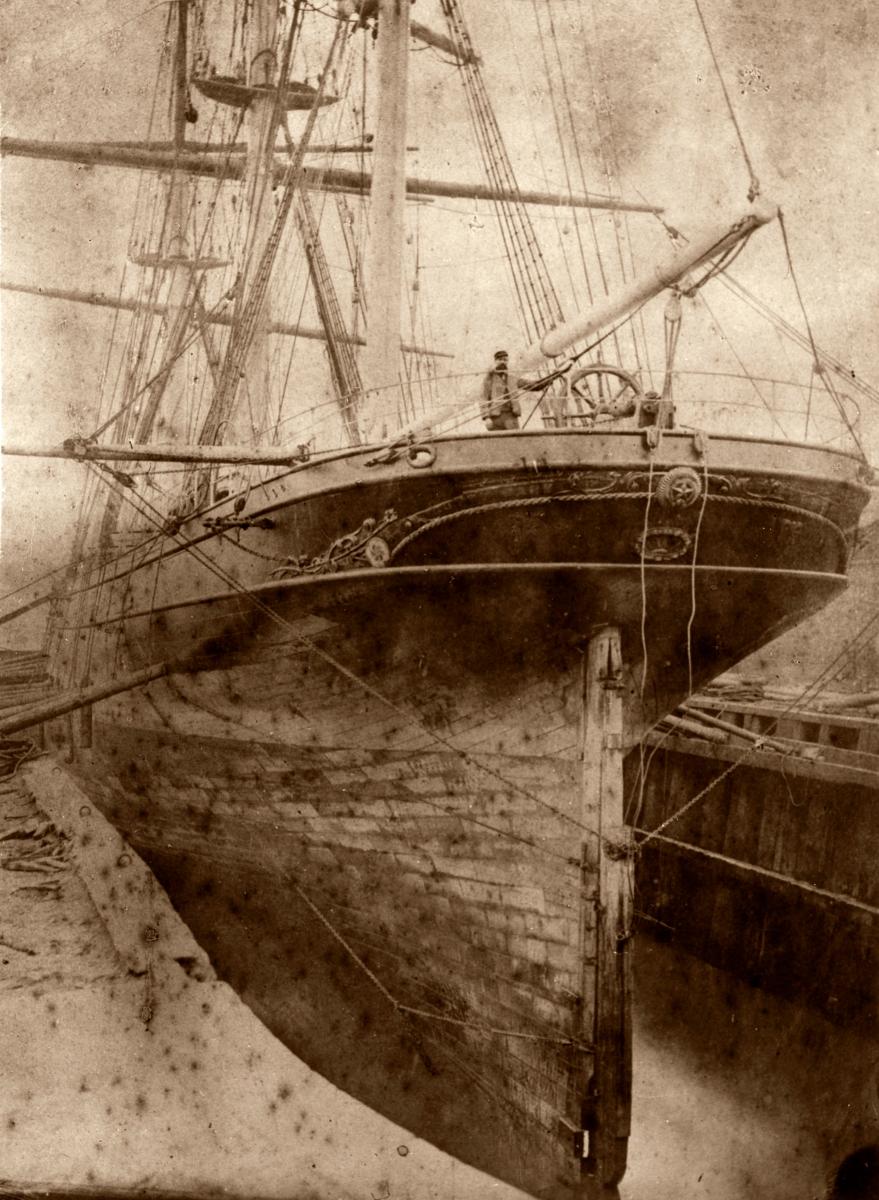
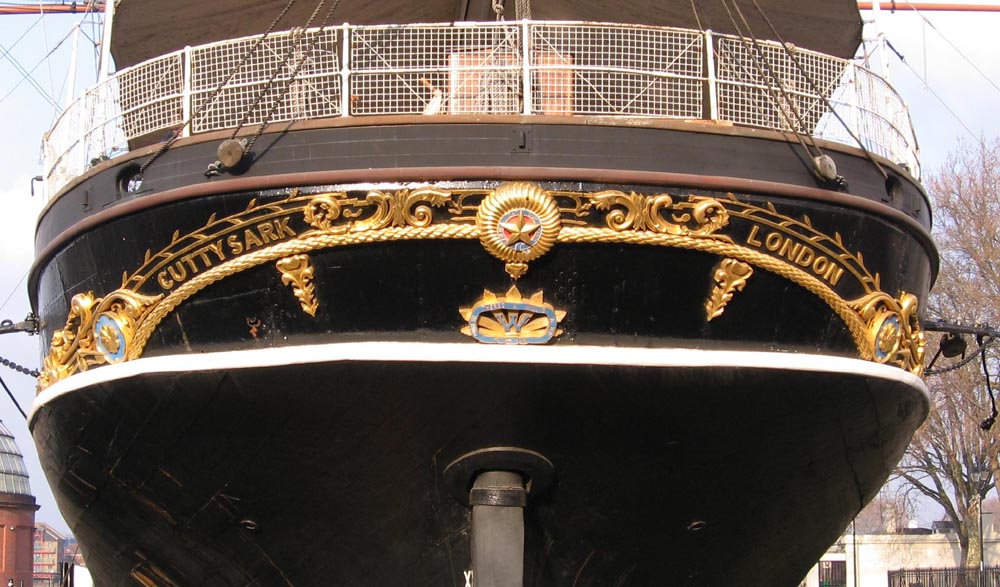
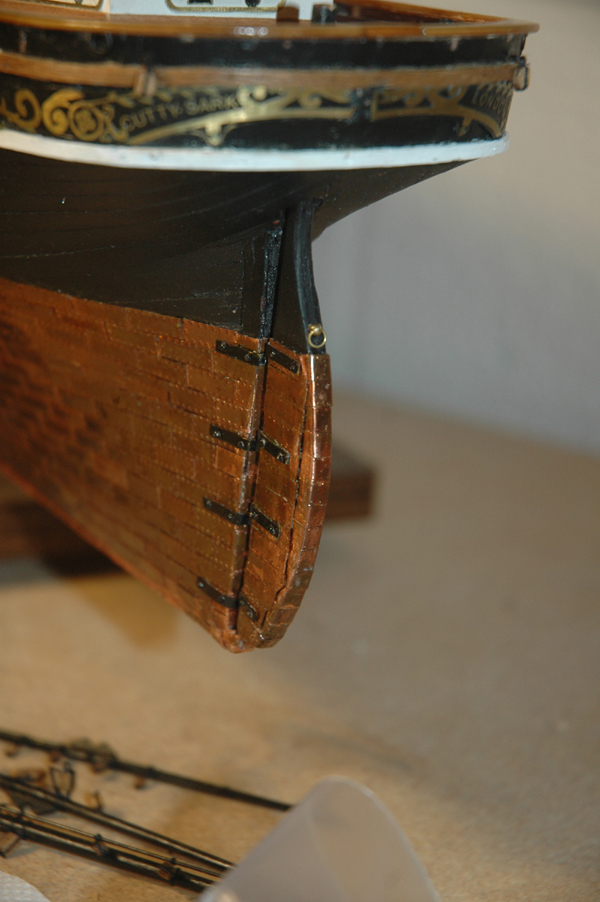
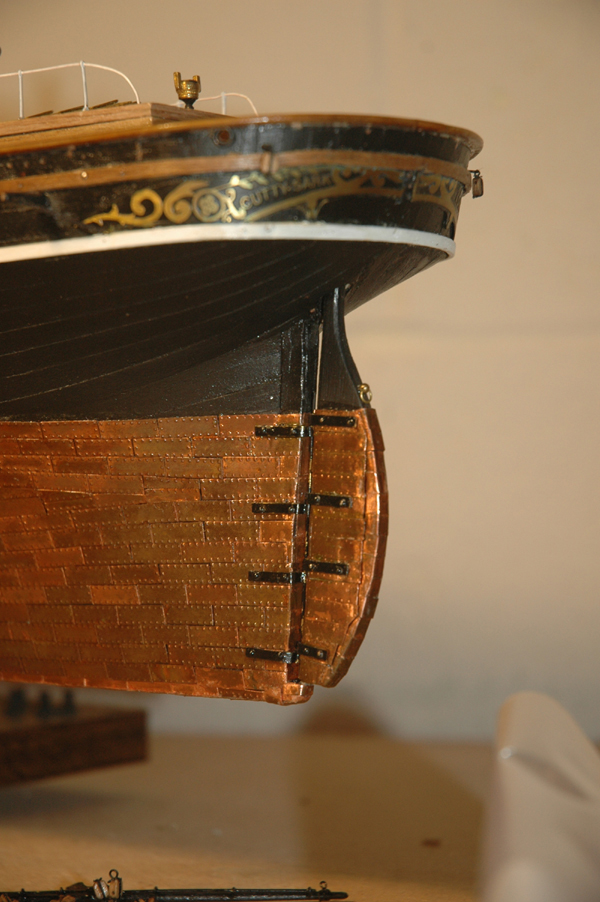
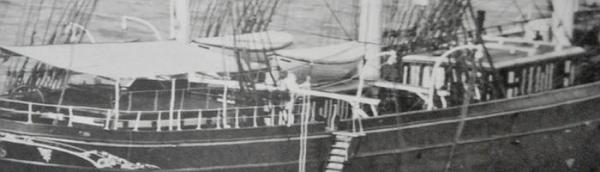
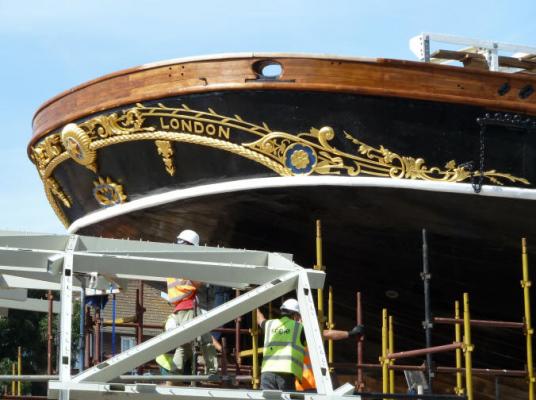
In the spirit of Grant Dale and his courage to tear off the stern decoration of his Victory, I decided to tear off the stern decoration of my Cutty. Although my work is much, much, much less then his was. I simply removed the stern decoration. I was never truly happy with it and since I carved the bow decoration I thought that the brass decoration on the stern looked mismatched. So tonight, I took a micro chisel and pried the decoration loose. The mess of hard CA was more of an issue to remove. I tried wire wheels, but they didn't help. I tried to chisel the stuff off, but it wasn't very clean or effective. I ended up using drywall sandpaper in the end. This paper actually worked really well. In the process of removing the boomkin chain, I broke a few links, so I'll have to make that repair. No big deal. I'll post some photos tomorrow. The next question is which version of the stern decoration to use. Campbells, the latest restoration, the 1872 photo? cutty in Austrailia? The restored Cutty? I'm thinking that the 1872 is probably most reflects the original carving. It is also less complicated than the latest restoration. to be quite honest, I doubt that my skill will resolve the level of detail that it would matter any way. I imagine that it will be a crude approximation at best.


- 525 replies
-
- 1
-
-
- cutty sark
- mantua
- (and 2 more)
-
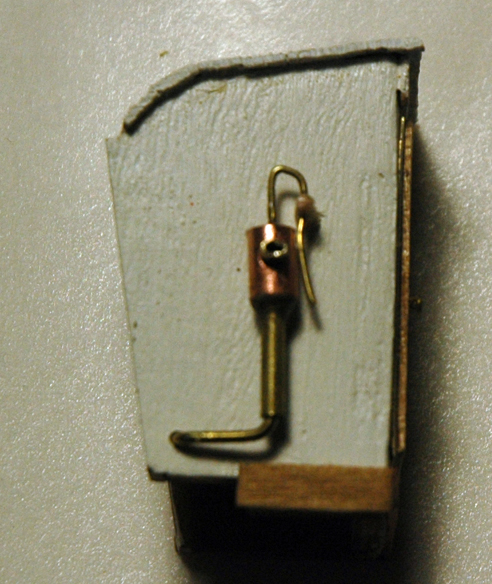
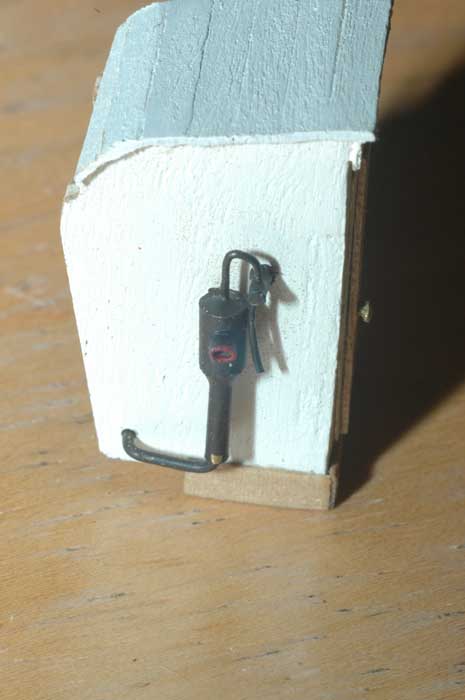
Thanks Bob, The pump was made from different diameters of bass and copper tubing. The handle was brass wire. I cut the pieces to length and soldered and then painted in enamel. It's not exact, but I think that it is much better than what the kit offered.

- 525 replies
-
- 3
-
-
- cutty sark
- mantua
- (and 2 more)
-
Nice work Bob! Glad your feeling better and back to building! Nenad, your recipe sounds good. I think that I'll give it a try. Marc
-
Thanks Nenad!!
-
Cutty Sark by NenadM
keelhauled replied to NenadM's topic in - Build logs for subjects built 1851 - 1900
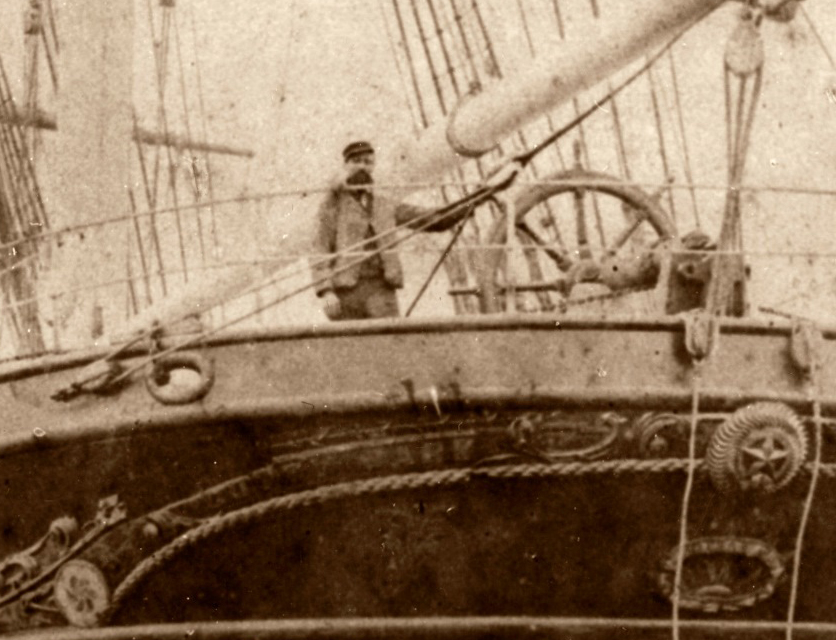
I think Mark is correct that the rings are for emergency steering. That is also what the ring on the rudder is for. Found a photo using the three brackets to hold lights Marc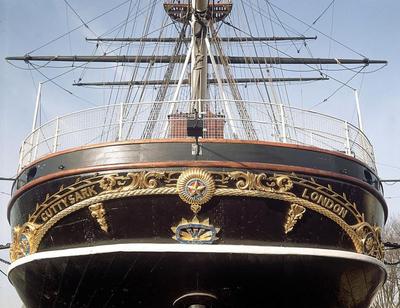
- 4,152 replies
-
- 1
-
-
- cutty sark
- tehnodidakta
- (and 1 more)
-
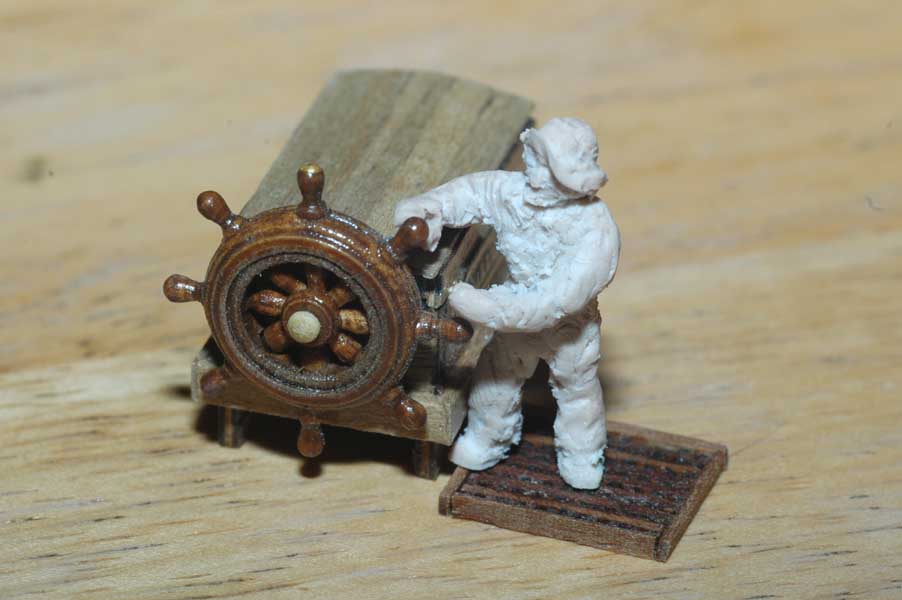
Hi JP, Thanks for the comments. the wheel did come with the kit. Not too happy with it. Not sure what I'll end up doing with replacing it. I'm open to suggestions. If anyone has tutorials on building a wheel let me know. I couldn't find one on the site. I'm sure it is here in a build somewhere. Thanks Marc
-
Cutty Sark by NenadM
keelhauled replied to NenadM's topic in - Build logs for subjects built 1851 - 1900
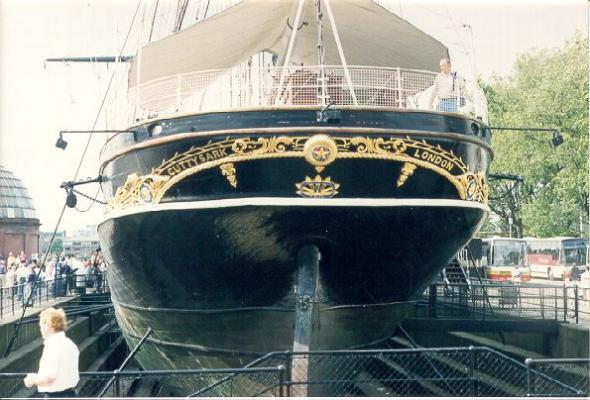
Hi Nenad, Concerning the mystery fitting on the stern. To me it does look like a fitting for a flag, however, I couldn't find any photos old or new with a flag in that position. I have a book that has a photo of the cutty in dry dock in 1872 with her jury-rigged rudder. It doens't look like she has that fitting. However, it wasn't the greatest photo. Maybe someone else has a better version it is: Greenwich Maritime Museum Negative 7795. I did find it being in place before the restoration. The full photo shows that ship below the waterline with the old dry dock. You do have an eye for detail! I never noticed it before, it wasn't on the photos that I took when I was there in 1990 and 2003. I'll keep looking Marc
- 4,152 replies
-
- 2
-
-
- cutty sark
- tehnodidakta
- (and 1 more)
-
Thanks Luca! I'm planning on setting about half of her sails and no stunsuls. I previously rigged my Constitution with all of the sails set (including stunsuls) and it ended up being too many lines and sails covered up most of the yard and mast work. I think that having her only set with the lower top sails, fore course, lower stay sails, and most of the rest furled will give her a nice shape while not hiding all of the beauty of the rigging and masts. Thanks Marc
-
Cutty Sark by Keith B
keelhauled replied to Keith B's topic in - Build logs for subjects built 1851 - 1900
Very nice work, indeed! I also don't think that I will ever glue thousands of tiles onto a hull again after seeing your work with the tape! Thanks!! -
An unbelievable build! The photos outside are stunning. I wish that I could build so well. Marc
- 1,319 replies
-
- 1
-
-
- caldercraft
- Victory
- (and 1 more)
-
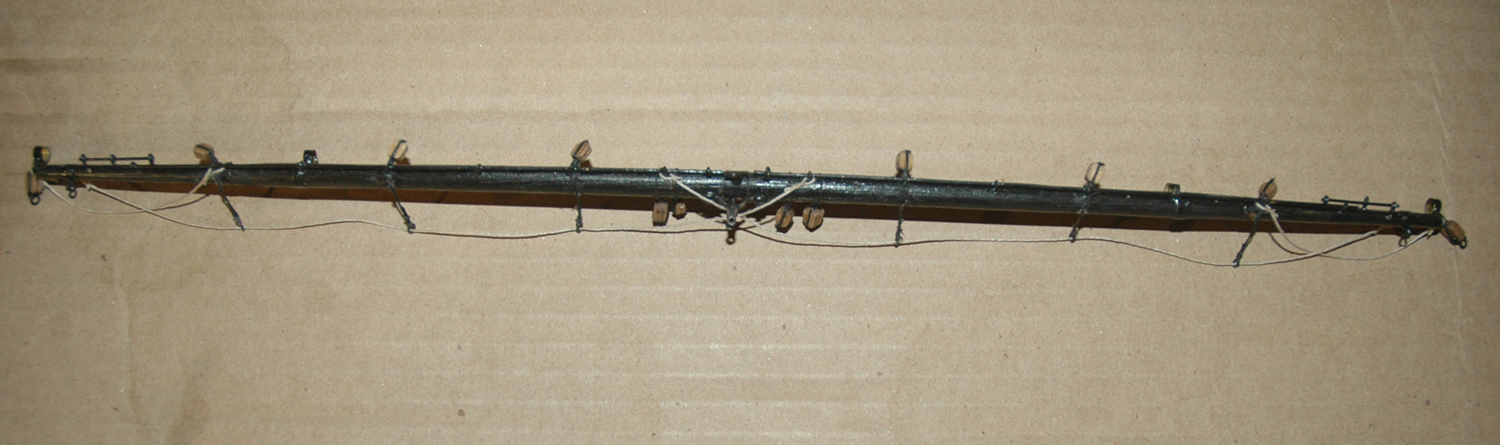
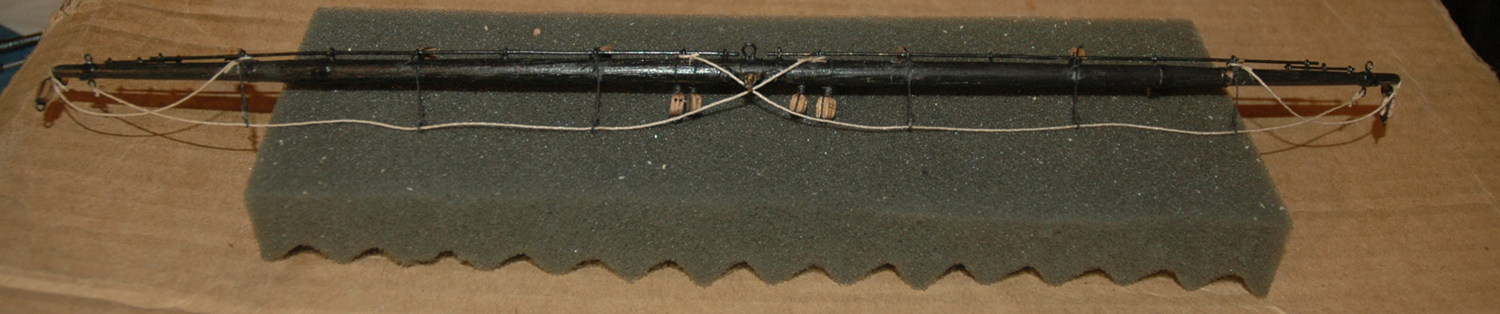
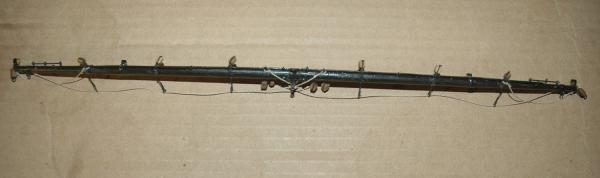
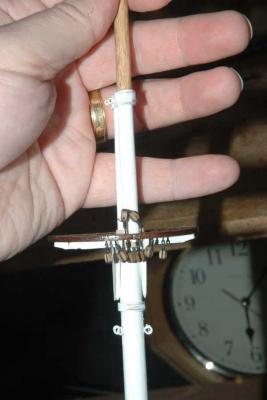
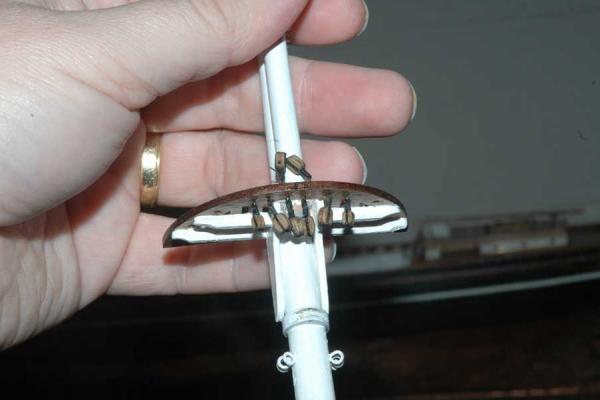
As promised photos of the foot ropes and stirrups. Here are photos of the main course and lower top sail yards Main course main lower top yard I glued the stirrups with Elmer's white glue and attached weights to the stirrup loops so that they hung correctly. I waxed and glued the foot ropes. The wax did a good job helping the ropes to hang correctly. I then applied Elmer's white glue to where the ropes met the stirrups to lock the ropes into place with the stirrups. I used Elmer's white glue on all of my blocks as well. It holds them all well while allowing the lines to be still soft and pliable, unlike the CA / superglue that makes the lines stiff and changes the color.


- 525 replies
-
- 7
-
-
- cutty sark
- mantua
- (and 2 more)
-
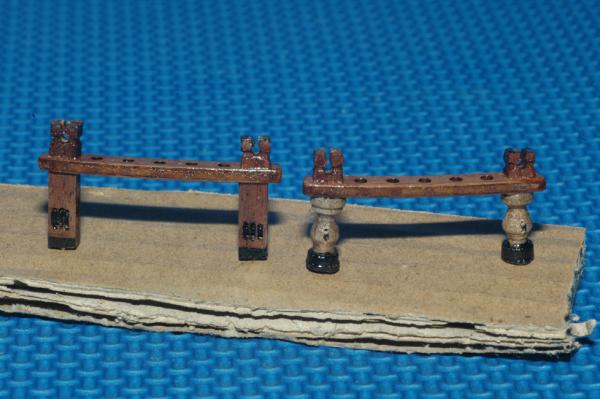
Thanks Popeye and Bob! I've been working on the main fife rails. I turned the legs, carved the tops, and drilled and carved the seave pullies. I need to finish staining the lower part of the curved legs I also worked on the mizzen fife rails. These just had to be turned. I'm doing all of the shapes by hand and eye. I need to learn how to make a form to ensure that they are all exactly alike. This was the hobby lathe attachment for a micro mark rotary tool. It's not too bad. I had to make a longer bed for it to do the masts. Bob and Nenad, I'm sorry that I missed your rudder builds. So I felt that I needed to include photos of mine. Nenad, I feel embarrassed that i forgot the gasket. The sea is going to poor into my stern


- 525 replies
-
- 8
-
-
- cutty sark
- mantua
- (and 2 more)
-
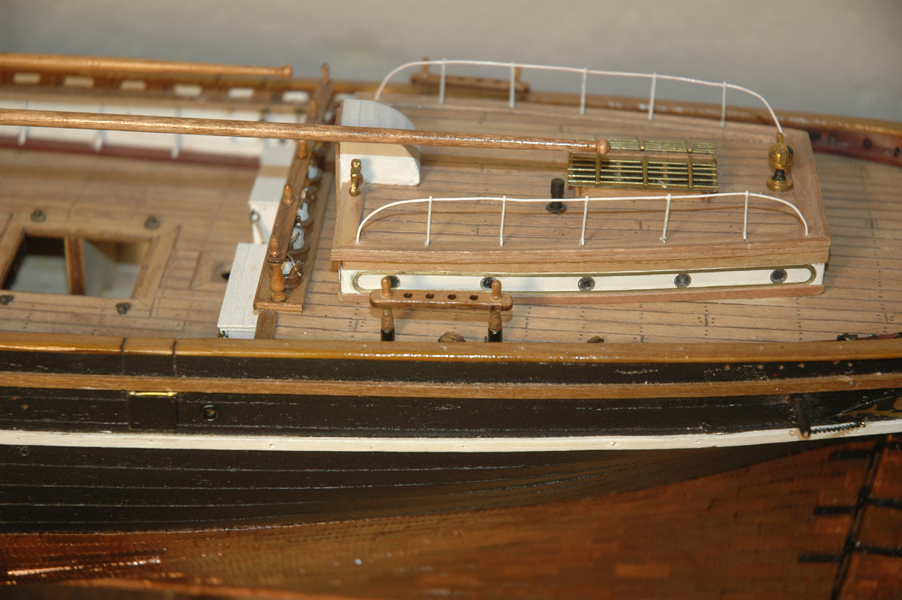
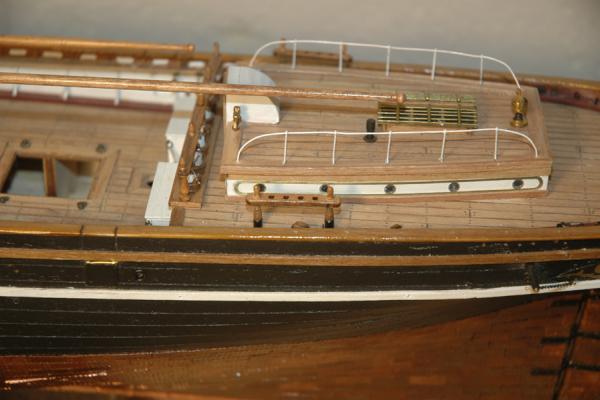
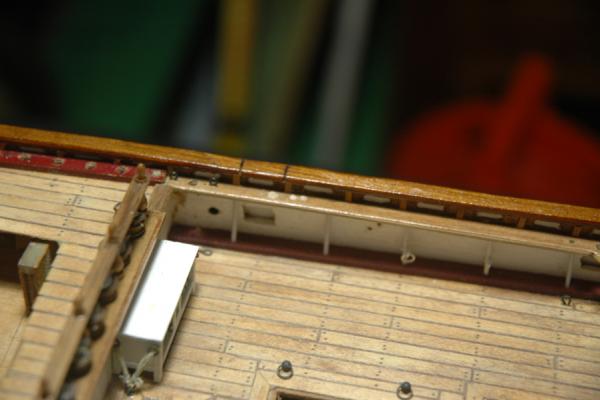
One more photo.. I decided to add the removable bulwark on each side for the ladder access. Pulled out the very fine saw and went to work on the bulwark and then reinstalled. You can also see where I had to plug the rail from incorrectly locating the davit. I'll have to re-drill the holes. Such is life. One step forward.. two back
- 525 replies
-
- 3
-
-
- cutty sark
- mantua
- (and 2 more)
-
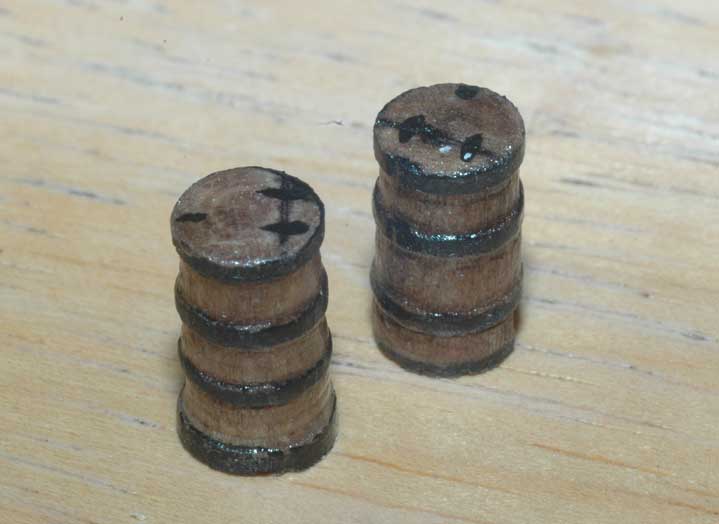
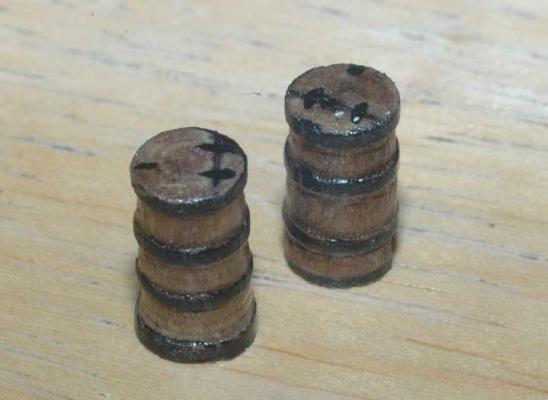
Nenad, Here are some photos . I mounted the pump onto the WC I also tried creating a crew member. He didn't come out as nice as I would hope, but it's a start. Before I started traveling I was working on getting the blocks onto the masts. What a pain! The tiny mizzen blocks at 1mm tried my patience. I'll get the camera out and shoot the foot ropes on the yards. Also before all the traveling I made casks before putting my hobby lathe away to make more room to work Thanks Marc


- 525 replies
-
- 6
-
-
- cutty sark
- mantua
- (and 2 more)
-
Bob, hope you feel better!! Marc
-
Cutty Sark by NenadM
keelhauled replied to NenadM's topic in - Build logs for subjects built 1851 - 1900
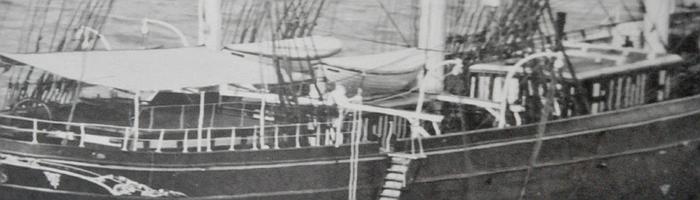
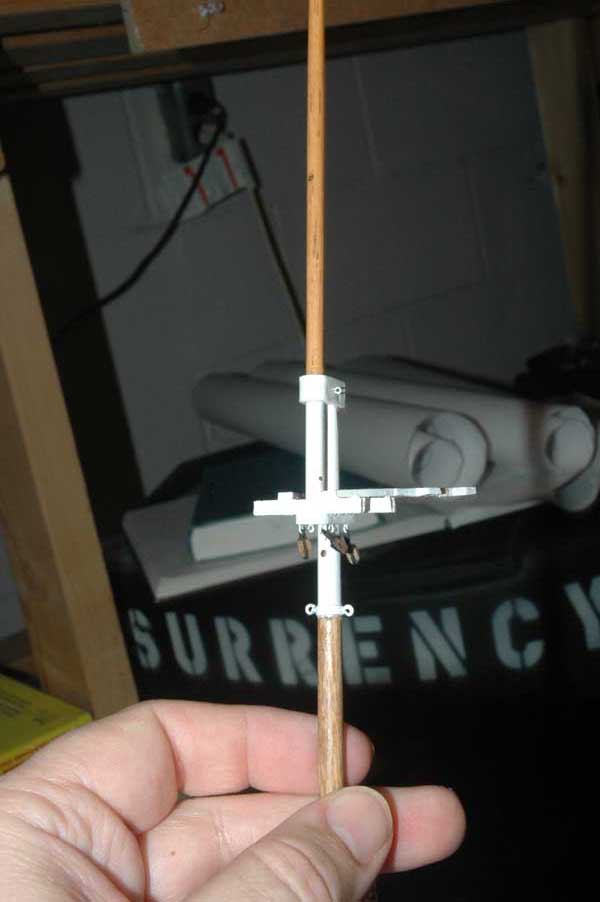
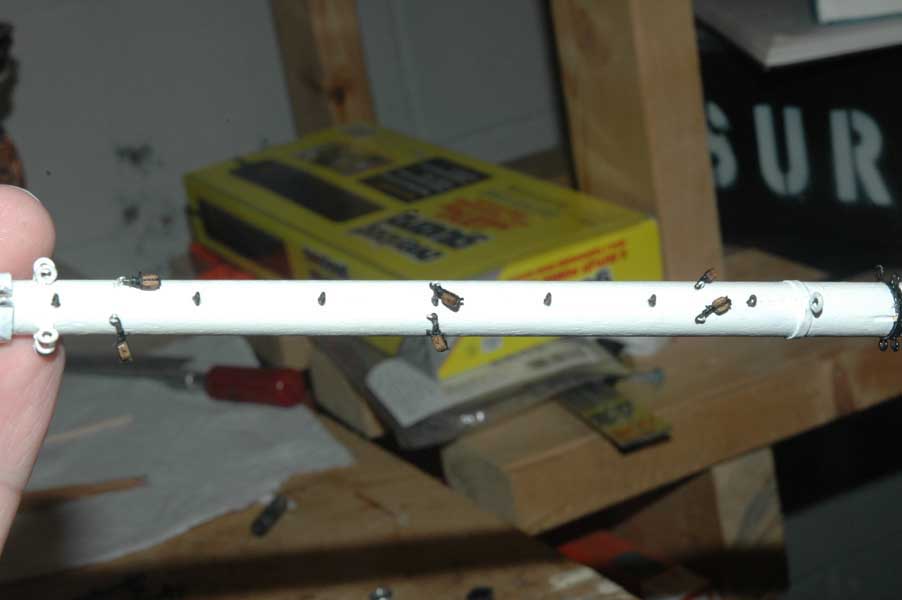
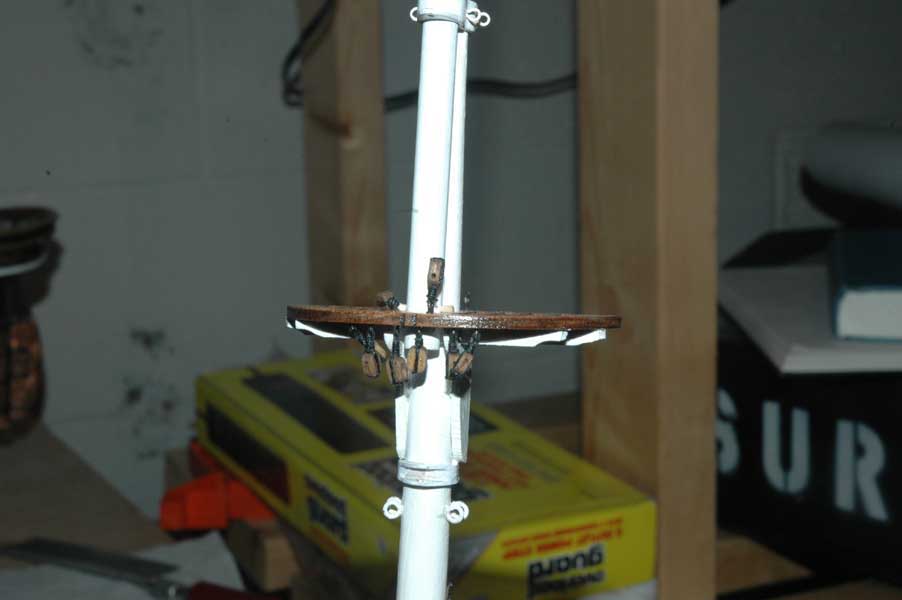
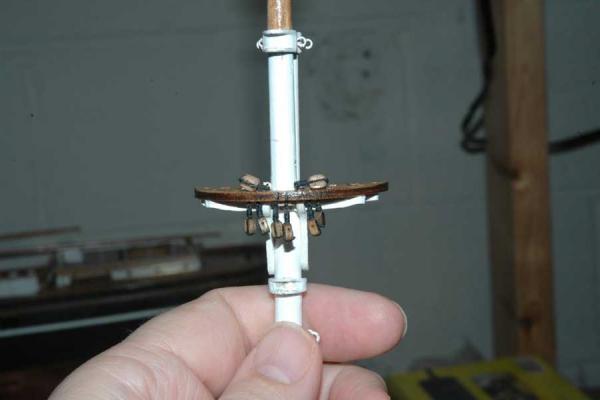
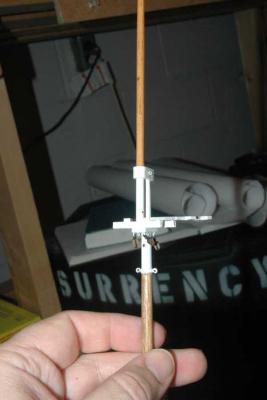
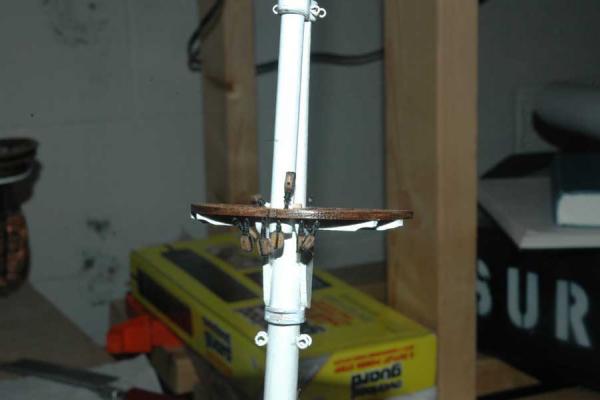
Nenad, I found the whole anchoring process fascinating and spent a lot of time researching and speaking to people about it. Especially how the anchor is let out or dropped while the chain is wrapped around the windlass. After discussions with a captain that used a similar windlass on his boat, I went home and made a mock up to prove the operation to my self. It worked exactly as he explained. I try to spend time on a sailing tall ship every vacation I can, even if it's just for a short cruise. I always learn so much watching sailors actually working a tall ship. I used to have questions about the Cutty and her anchor stowed inboard. For example in old photos of the Cutty with the anchor stowed inboard, I always wondered how the anchor stock ended up under the deck rail with the chain still attached. I was on a tall-ship cruise and was telling a sailor about the question. He took me forward and showed me that the rail on his tall ship is removable. They lift the rail out of the sockets to bring the anchor in-board and then put the rail back after the anchor is secured. Simple solution. I then found a photo of the Cutty being towed and the rail had been removed just as the sailor had explained. At sea, the anchors would be stowed inboard and the chains unshackled and stored in the chain locker. I'm not doing this because I think it would look unfinished. So I think that I'm going to have one anchor catted with the fluke secured and the other anchor in the process of being taken inboard with the fish tackle and anchor davit raising the anchor onto focsle. Happy to pass on any of the knowledge I have in this area. Marc- 4,152 replies
-
- 2
-
-
- cutty sark
- tehnodidakta
- (and 1 more)
-
Finally back in the shop tonight!! Working on making stirrups and foot ropes for the yards. Two yards done. I'll post them this weekend. Marc
-
Hi The ports are called clearing ports. they allow the water to flow out when the ship is in heavy weather and the water is crashing over the bulwarks onto the deck. Nice build Marc
-
Cutty Sark by Keith B
keelhauled replied to Keith B's topic in - Build logs for subjects built 1851 - 1900
Keith, your making the rest of us look bad with the speed that your are building. Of course I'm building so slow that I'm almost going backwards... stupid job and travel for work. Build is looking good! Marc