keelhauled
-
Posts
788 -
Joined
-
Last visited
Content Type
Profiles
Forums
Gallery
Events
Everything posted by keelhauled
-
 Here are some photos of the masts. I started putting in the eyes under the trees and the tops based on Campbell's plans.

- 525 replies
-
- 7
-

-
- cutty sark
- mantua
- (and 2 more)
-
Cutty is looking good!
-
Cutty Sark by NenadM
keelhauled replied to NenadM's topic in - Build logs for subjects built 1851 - 1900
Finally getting a chance to pop in and say hi! I like 3 and 4. 3 is what 4 would look like when it gets wet. I can't believe the difference in color of a teak deck when it gets wet. It goes from that grey to a deep brown. Amazing. Great Job! -
Bob, you might want to use epoxy to affix the hinges instead of CA. I haven't been too impressed gluing metal to metal with CA. But maybe I just have bad luck or I'm too rough. Don't forget to score the surfaces! Makes a huge difference. Take care, Marc
-
Cutty Sark by NenadM
keelhauled replied to NenadM's topic in - Build logs for subjects built 1851 - 1900
I wonder how many trees we've sanded away!? It is amazing what corrections sanding will accomplish. Nenad, I don't see anything noticeable concerning the deck warping. I wouldn't worry about it. Once you get the mizzen masts, yards, braces, chicken coops, and the rigging lines all over the place you won't notice any slight warp. I'd be dazzled by all of the detail that you've put into the bulwarks to notice any issues. Marc -
Hi Nenad, I've painted all of the yards and have most of the blocks attached to the foremast yards. I'll snap some photos and upload. It's been too cold to work during the past few weeks. I should take your example and move the yard to winter quarters. I just don't know where I have any extra room. I've been working some on a small tray. Marc
- 525 replies
-
- 1
-
-
- cutty sark
- mantua
- (and 2 more)
-
Cutty Sark by NenadM
keelhauled replied to NenadM's topic in - Build logs for subjects built 1851 - 1900
Nenad, Beautiful work!!! She's coming along well. It's been too cold in my ship yard to do any real work on mine. Also been tied up trying to get another job. Interviews - applications, etc. Keep up the wonderful work!! Marc -
Cutty Sark by NenadM
keelhauled replied to NenadM's topic in - Build logs for subjects built 1851 - 1900
Looks great! The stem has good shape And as you said the Spice must Flow! I use that at work all of the time! -
Cutty Sark by NenadM
keelhauled replied to NenadM's topic in - Build logs for subjects built 1851 - 1900
Great work!! I'm with you on two steps forward one back. To correct a mistake or not? Such questions drive me crazy. But I wouldn't have it any other way. The research is part of the fun. Keep up the great build. Also thanks for the photos of the day out. The view from the tower is amazing. Also the photos of the bad weather sailing are great! Marc- 4,152 replies
-
- 2
-
-
- cutty sark
- tehnodidakta
- (and 1 more)
-
Cutty Sark by NenadM
keelhauled replied to NenadM's topic in - Build logs for subjects built 1851 - 1900
Nenad, I agree with Popeye, when you get the pin rails, deck houses, and rope coils in place the difference in heights of the bulwarks won't be noticeable. Small mistake. The details that you are putting into the freeing ports on the outside will definitely be noticeable and appreciated. take care, Marc- 4,152 replies
-
- 1
-
-
- cutty sark
- tehnodidakta
- (and 1 more)
-
Cutty Sark by NenadM
keelhauled replied to NenadM's topic in - Build logs for subjects built 1851 - 1900
Merry Christmas and Happy New Year! The freeing ports look great!! You are making the rest of us look bad! Marc -
Cutty Sark by NenadM
keelhauled replied to NenadM's topic in - Build logs for subjects built 1851 - 1900
No, our ships are never good enough for us! But that is the fun of the journey. We find out that we did it better than we thought could. But were not satisfied, we have to make it better. The feeing ports look great. Marc- 4,152 replies
-
- 2
-
-
- cutty sark
- tehnodidakta
- (and 1 more)
-
Cutty Sark by NenadM
keelhauled replied to NenadM's topic in - Build logs for subjects built 1851 - 1900
I hear you Rob, I'm not brave enough to steam planks in the Admiral's kitchen - especially since we just remodeled it. I think that if I tried, she would make sure that I lived up to my name "keelhauled"! I steam in the garage. Nenad, the ship is looking great. I think that you should definitely include the needle in the compass! Marc- 4,152 replies
-
- 1
-
-
- cutty sark
- tehnodidakta
- (and 1 more)
-
Nenad, I am sorry that we share mishaps! Let me know how the mixer holds up with the mortar! Thanks Rob. Sailor of many numbers, I didn't give him an ear full. I didn't want to make him feel bad for something he didn't do with any malice. It's amazing how many spars this ship has. I know it's not anymore than any other clipper, but it seems like they never stop! I'm almost done with the main mast yards and stunsul booms. Marc
- 525 replies
-
- 1
-
-
- cutty sark
- mantua
- (and 2 more)
-
Outstanding work! although I've only built one ship before, I'm planning on rigging the current build the same way you are doing it. My first ship, the Constitution, I rigged all of the standing rigging bottom up and bowsprit aft. Then the sails and running rigging. I had a heck of a time trying to rig the running rigging with all of the shrouds and ratlines in the way. Belaying was a real pain. I think that your approach makes a lot of sense, and I'm going to use your method. Thanks for sharing!!
-
Really nice work. I really like the details that you added to the boats. Nice creative approach to building them.
-
Cutty Sark by NenadM
keelhauled replied to NenadM's topic in - Build logs for subjects built 1851 - 1900
Are the Winstons part of the "toys" you picked up? The anvil and vice look great and what a deal! It looks like a very peaceful shop. I also have photos up. Like you, I hate having the laptop near the saw/wood dust. -
Good lord Popeye! You are a building machine!!! Do you sleep? Thanks for the entertainment! Marc
-
So my yards were lying on my workbench all lined up with normal building scrap around them. A friend of mine was over and asked if he could borrow one of my small pliers. I handed him three different ones that might fit the bill. He selected one and tossed the other two back onto the bench. ON TOP OF MY YARDS!!!! Luckily God was looking out for me and no damage. Lesson Learned. NEVER let anyone into my work area (other than the Admiral). I should have known better. dozens and dozens of hours that could have gone down the drain. Makes me mad.
-
Cutty Sark by NenadM
keelhauled replied to NenadM's topic in - Build logs for subjects built 1851 - 1900
Nenad, I was looking at your post from the beginning of the month about the bow. I see what you are talking about with the knights heads stepping back from where the planks end. I've included three photos of my model one is with the bulkheads. The arrow pointing to a notch on the stem shows where the knights heads will attach, the rabbit is in pencil below. The other photo shows the second planking. The third shows it with the scroll work Hope this helps. Marc


-
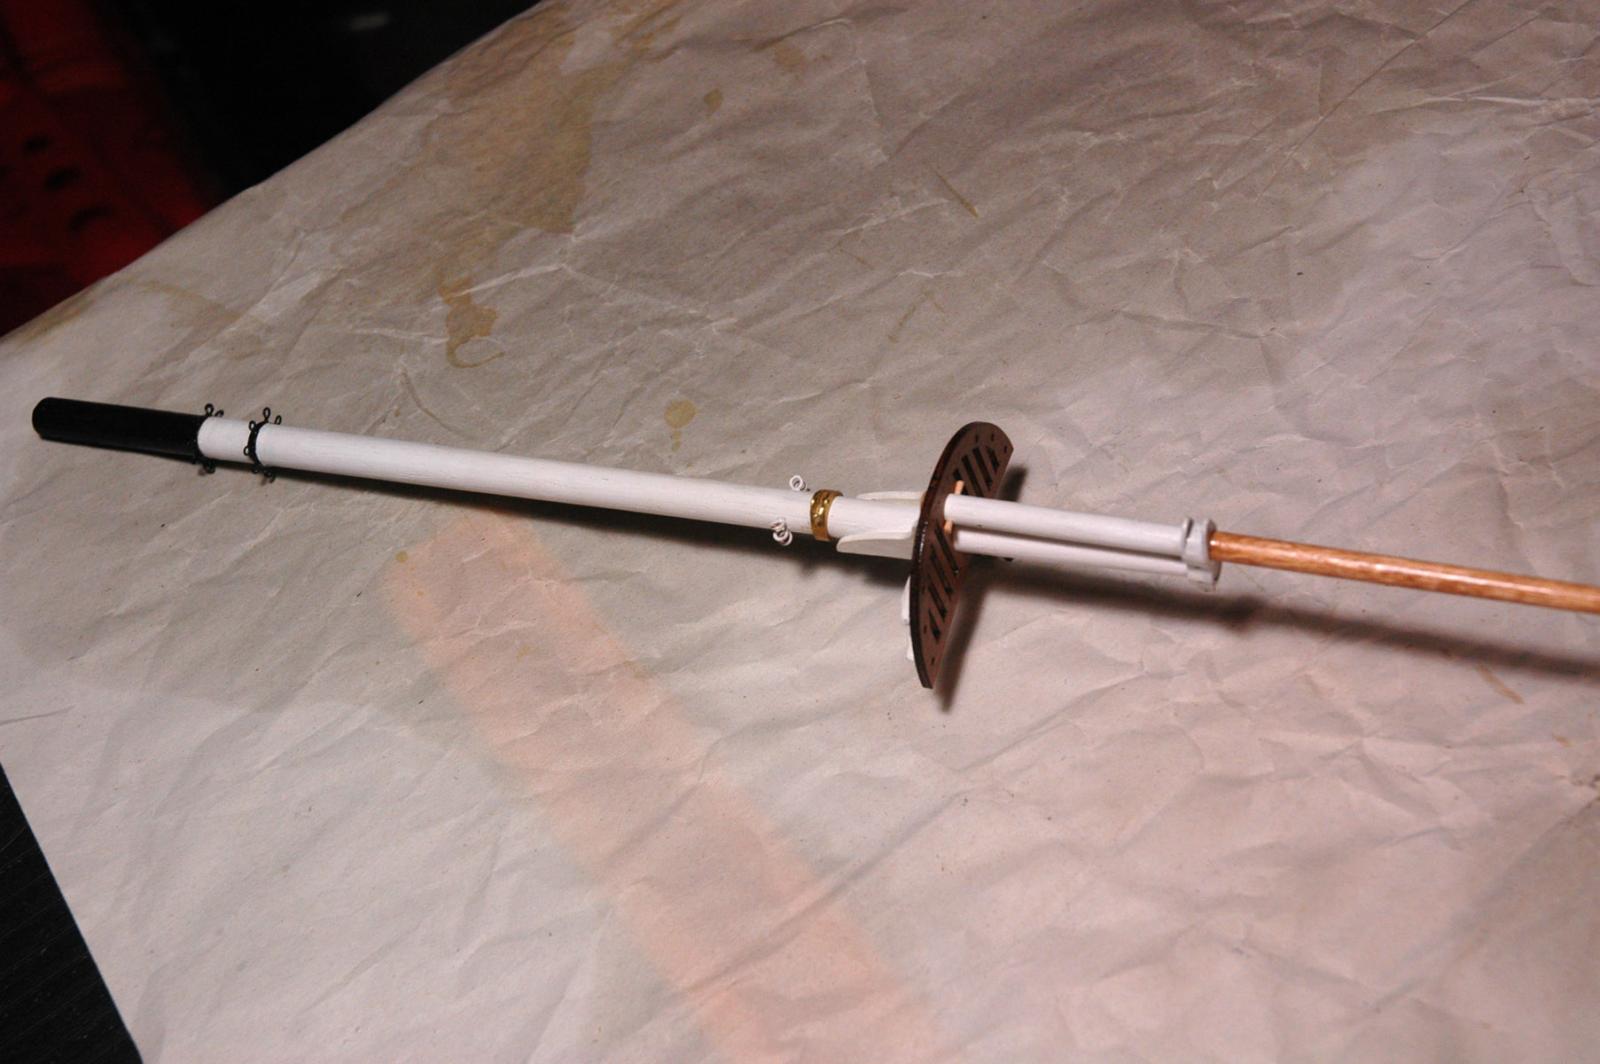
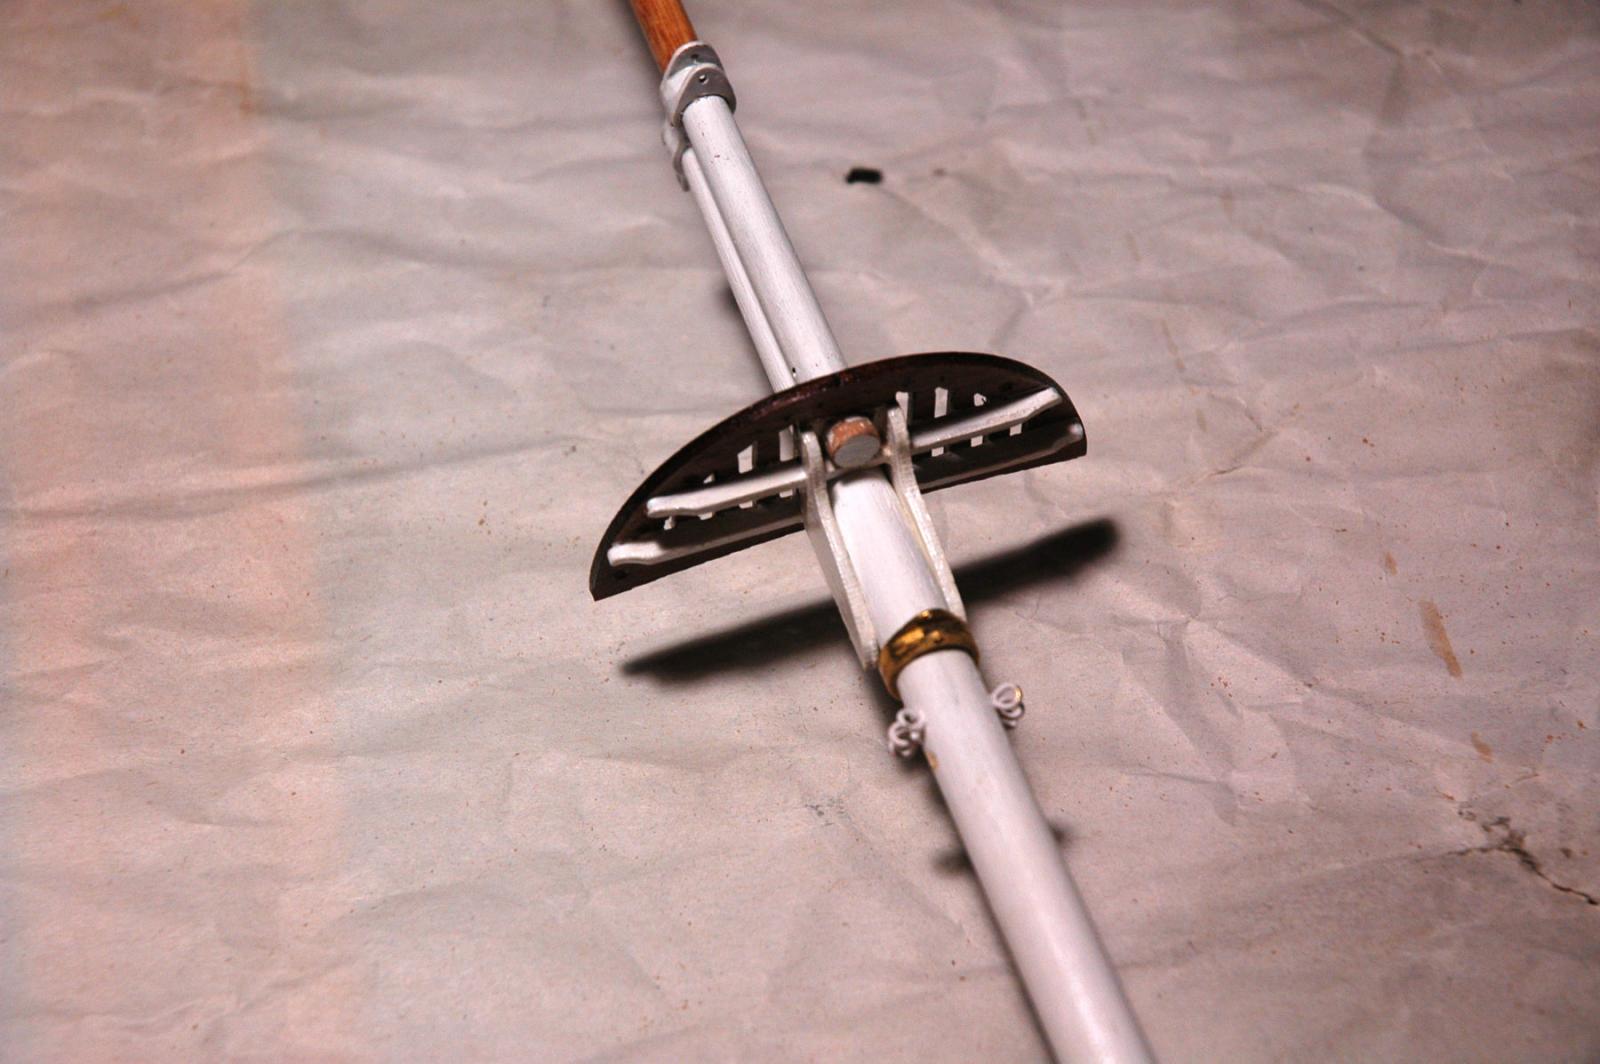
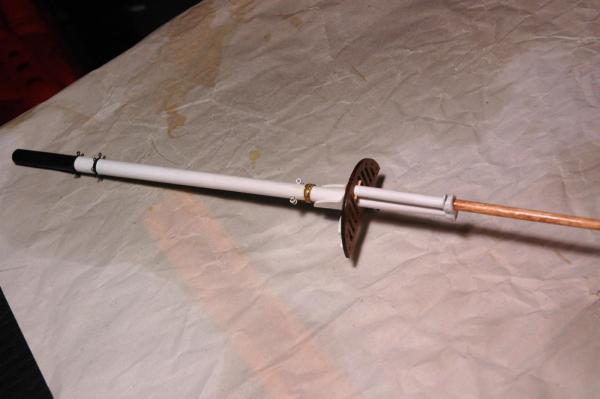
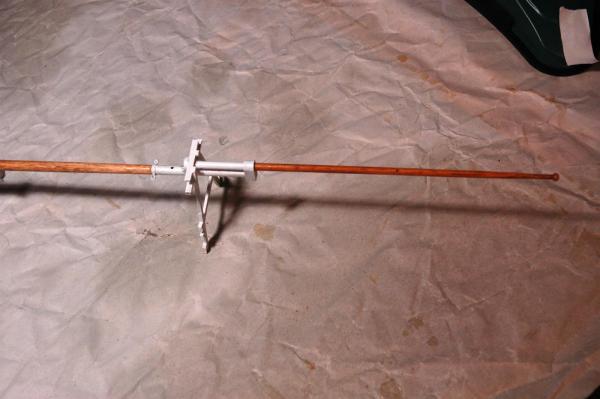
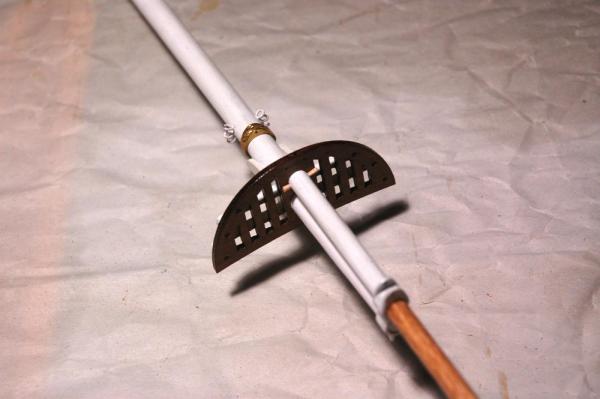
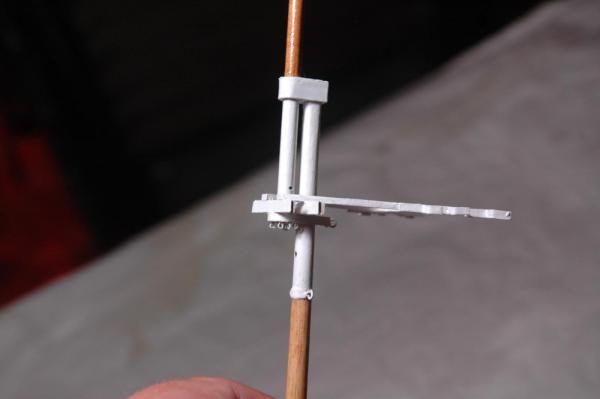
Here are the fore mast yards. They aren't complete yet - still need the footropes, blocks, painting. They took much longer than I expected. Everything always seems to take much longer than I expect. I also wonder if making the bands was worth the effort since everything will be painted in black and I'll be attaching sails. For some reason the "add to post" isn't working for the photos, so they will just show up at the bottom. I dryfitted the yards to the fore mast and left them overnight. The next day they were on the bench. The yards had separated from the trusses. The trusses had been attached to the yards with Cyano-Acrylate. So I drilled holes through the trusses and into the yards and attached the trusses to the yards with epoxy and brass nails. There shouldn't be any separation issues now. The poor close up photos are just illustrating the truss attachments with the nails. sorry for the quality. Marc


- 525 replies
-
- 1
-
-
- cutty sark
- mantua
- (and 2 more)
-
Amazing work! I'm just blown away. Just following the build I have a much better idea of how the ship is actually laid out. much better than just looking at the book Thank you for posting your work! Marc
-
Awesome work Grant! It appears to me that Longridge made a drawing of your yard build, rather than the other way around. I enjoy watching your build and learn so much. Thanks for sharing!! Marc
-
Cutty Sark by NenadM
keelhauled replied to NenadM's topic in - Build logs for subjects built 1851 - 1900
Nenad, You can drive yourself crazy trying to determine exactly what the Cutty was at a specific time. I've spent tons of hours - way more than building the ship looking at photos, plans, descriptions, etc. Remember to have fun! Your work is looking great!- 4,152 replies
-
- 1
-
-
- cutty sark
- tehnodidakta
- (and 1 more)