HOLIDAY DONATION DRIVE - SUPPORT MSW - DO YOUR PART TO KEEP THIS GREAT FORUM GOING! (Only 72 donations so far out of 49,000 members - Can we at least get 100? C'mon guys!)
×


keelhauled
-
Posts
788 -
Joined
-
Last visited
Content Type
Profiles
Forums
Gallery
Events
Everything posted by keelhauled
-

Cutty Sark by NenadM
keelhauled replied to NenadM's topic in - Build logs for subjects built 1851 - 1900
Looking good! I've been on travel, so I'm catching up. You have a steady hand to paint those numbers on the stem! Hoping to get to work on the Cutty this weekend. I spent about 20 hours drawing the belaying pin plan for the ship using multiple sources. How is work going? Everything back to normal?- 4,152 replies
-
- 1
-

-
- cutty sark
- tehnodidakta
- (and 1 more)
-
thanks Popeye! Hope to post some soon. I've been on travel and now have to catch up around the house. Marc
- 525 replies
-
- 2
-
-
- cutty sark
- mantua
- (and 2 more)
-
HMS Victory by EdT - FINISHED - 1:96 - POB
keelhauled replied to EdT's topic in - Build logs for subjects built 1751 - 1800
Thank you for taking the time to post your build. I found it very informative and inspirational. Very beautiful model!! Thanks Marc -
really like the build. Neat idea and beautiful execution!
-
Thanks Popeye, I agree Nenad, poetry. Just did a "dry" fit of fore stays to check staysail scale and placement. Showed me that I hadn't finished putting in all the hardware. So I'm busy doing that stuff. Also realized I hadn't stepped in the taper of the mast at the hounds! So how do I fix this? I think that I'll use a file and cut in a grove for the fore stay to seat into and hopefully everything else will seat on top of the lines the same as if there was an actual stepped hound. HOW could I have missed this??? thanks Marc
- 525 replies
-
- 2
-
-
- cutty sark
- mantua
- (and 2 more)
-
Cutty Sark by NenadM
keelhauled replied to NenadM's topic in - Build logs for subjects built 1851 - 1900
looking good! Experimentation is the key!- 4,152 replies
-
- 2
-
-
- cutty sark
- tehnodidakta
- (and 1 more)
-
Thanks for the update. Looking forward to your return to the Victory when you are done with your other models
- 1,319 replies
-
- 1
-
-
- caldercraft
- Victory
- (and 1 more)
-
Bob, Really sorry to hear about your situation! I'm sure that you will be better off. I wish all the best for you! Marc
-
Thanks Popeye and Nenad. Bob what's your two cents? Nenad thanks for the photos. The steps are much narrower than the kit version. Looks like I'll be going back and rebuilding the steps if include them. Any guesses on the width? Maybe 3.5 to 4 planks - anyone know the width of the actual planking? Thanks marc
- 525 replies
-
- 2
-
-
- cutty sark
- mantua
- (and 2 more)
-
I agree! I don't post much on your build because I can't find the words to express my amazement and I would just be repeatedly saying the same thing over and over. By the way, a 56 inch long hull is nothing less than awesome! I keep looking at the entire build over and over to see what I missed the previous times through the photos! Thank you so much for giving us the privilege of seeing you work! Marc
-
So I have a question. I'm planning on having the Cutty under way with sails. I've read that the fore castle steps were removed once the Cutty was under way and you can see the hook and eye attachment of the steps currently. When I was visiting the Cutty years ago, I asked a docent about the pin rail that is in Campbell's plan for where the stairs are. He said that the pin rail was removed for safety, they didn't want visitors stepping over it to get onto the deck and that although the rail would have held crewman fine anywhere on the ship, they weren't' designed to have thousands of visitors a year stepping on it. Originally the steps hooked onto the pin rails when in port and the belaying pins would be removed since there were no sheets to belay which would have blocked access using the steps. However, I don't think that I've ever seen a model of the Cutty under sail where the steps were removed. Should I keep them or remove them. I think that if I have the jibs belayed, it will block the steps on one side. Comments??
- 525 replies
-
- 1
-
-
- cutty sark
- mantua
- (and 2 more)
-
Just beautiful work! Love the figure head and the windlass. Just great work!
-
Wow! What Beautiful work. Gun port cuts are amazing. Thanks for sharing your build with us! I'm really enjoying it. Marc
- 456 replies
-
- 1
-
-
- finished
- bomb ketch
- (and 2 more)
-
Brian, Thanks for the kind words. You should go for the wheel! This is my first wooden ship model and any model since I was a teen. You just have to go for it. But I know what you mean about mean about adding new things and never finishing. I've rebuilt from scratch stuff that I've already completed from the kit. But if I didn't go back and change some stuff, I'd probably regret it. I try to limit what I do, but where do you draw the line? Nenad, I thought we were skipping down the devil's road together, with Bob of course! Grant, Thanks for the feedback! I really appreciate it. By the way I'm really enjoying your new build. It looks fantastic. Marc
- 525 replies
-
- 2
-
-
- cutty sark
- mantua
- (and 2 more)
-
Thank George, It really means a lot to me. It took me three weekends to make. Partly becuse I kept having to make replacement parts because I would either break them or drop and loose them. Don't know what was wrong with my butter fingers! Marc
- 525 replies
-
- 1
-
-
- cutty sark
- mantua
- (and 2 more)
-
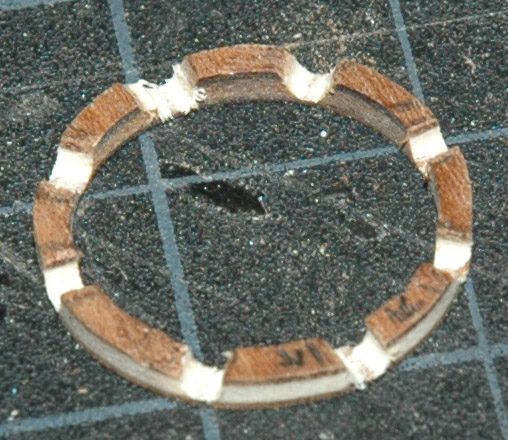
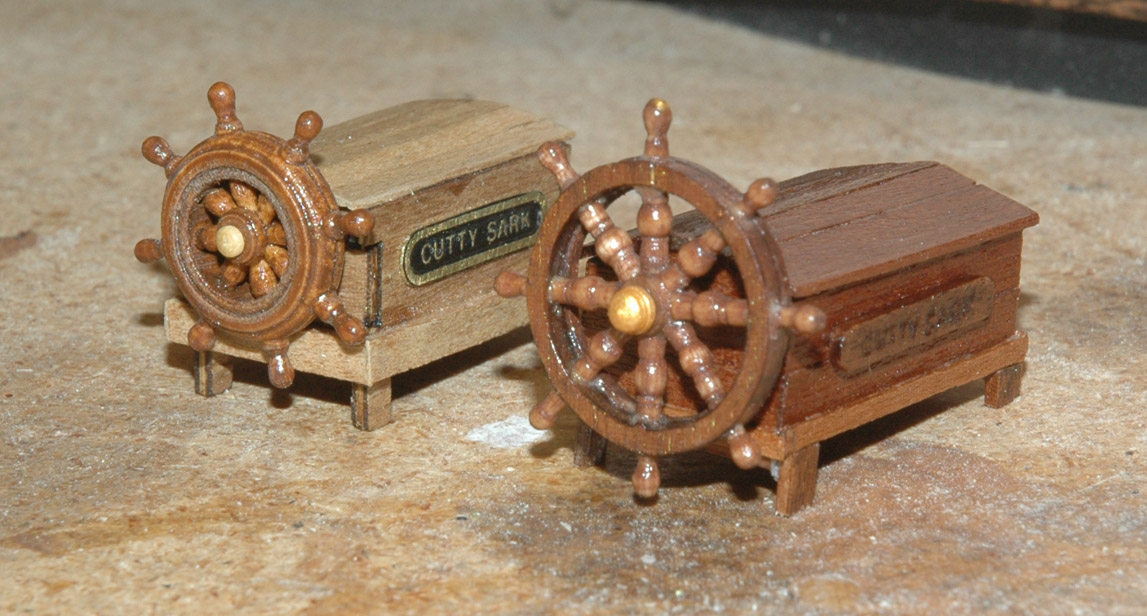
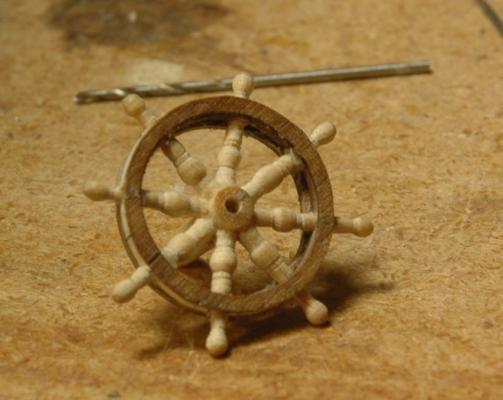
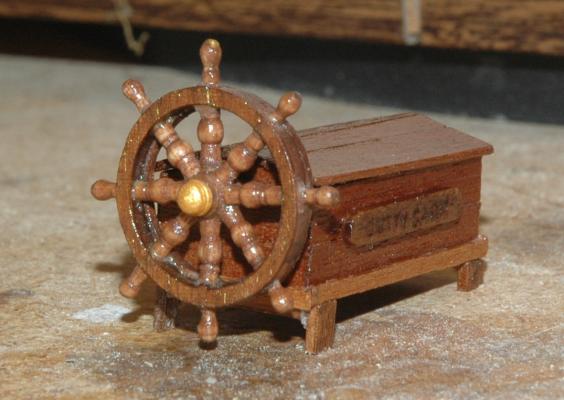
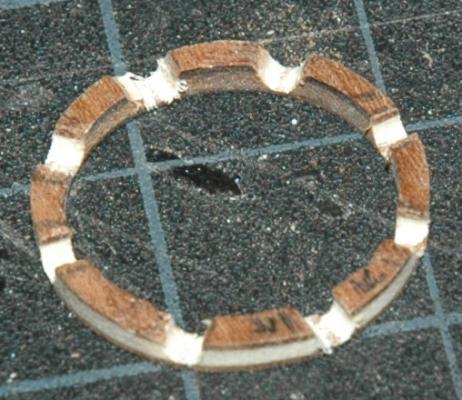
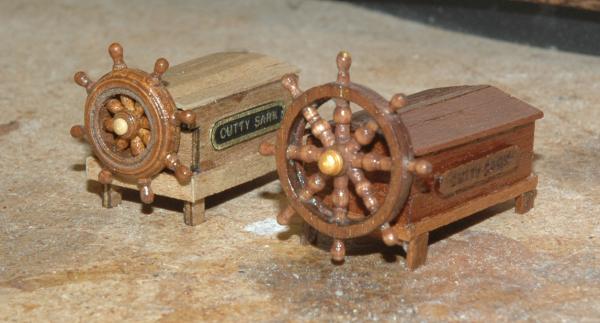
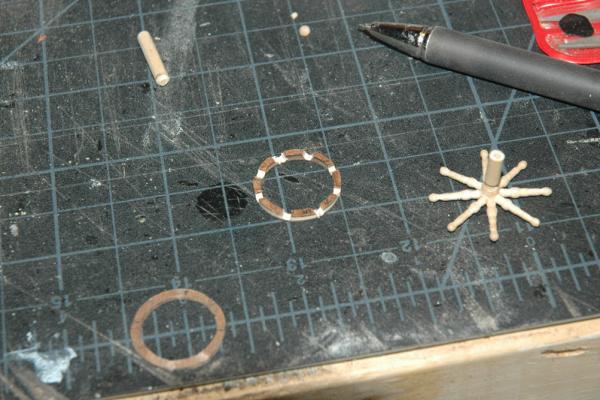
Now I had to make the rim. I tried making it as you would a real wheel. However, I found that I didn't have a way of accurately making the angles.. So I made the rim out of two parts. I made two hoops, one from walnut plywood and one from thin walnut sheet. I placed the spoke and hub assembly on the plywood hoop (from the back) and marked the position of the spokes. I then used a rotary tool to remove wood until the spokes where embedded into the rim. I glued the spoke assembly into place and then glued the wood hoop onto the back. The wheel parts Here is the completed wheel Here is the my wheel with a new steering box Here is the kit supplied wheel next to my scratch build wheel with is actually at the correct scale.
- 525 replies
-
- 11
-
-
- cutty sark
- mantua
- (and 2 more)
-
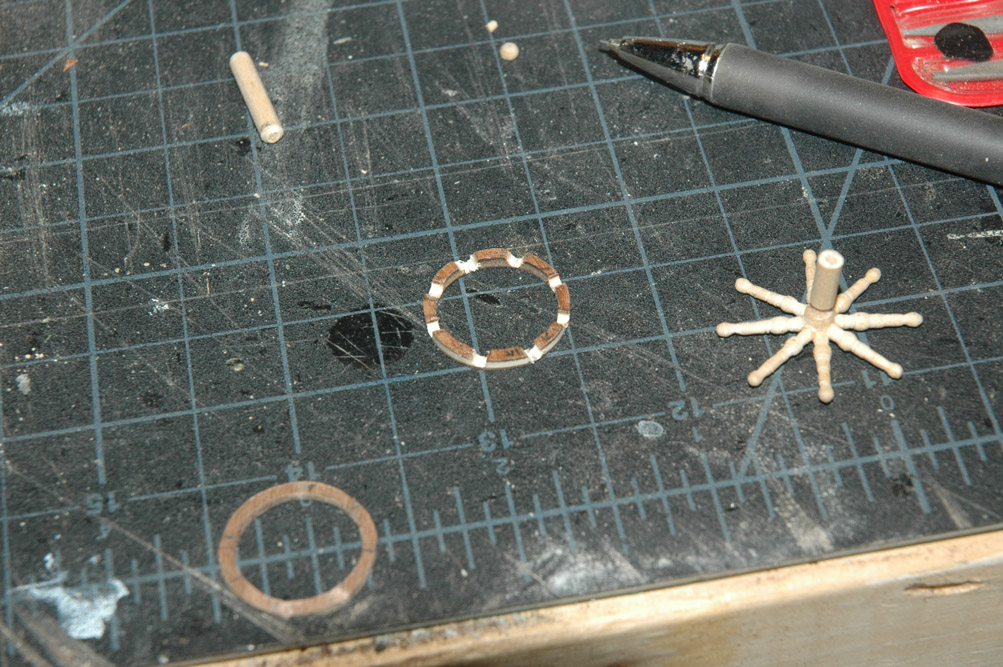
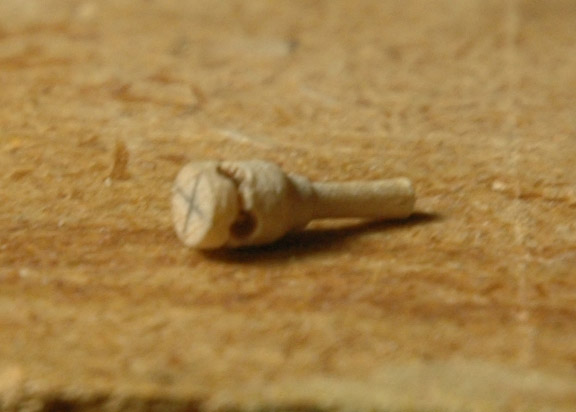
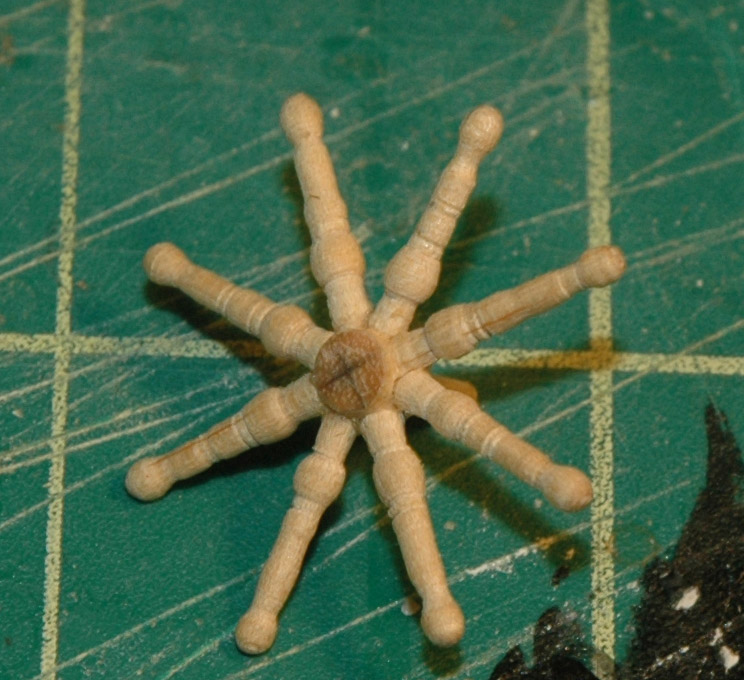
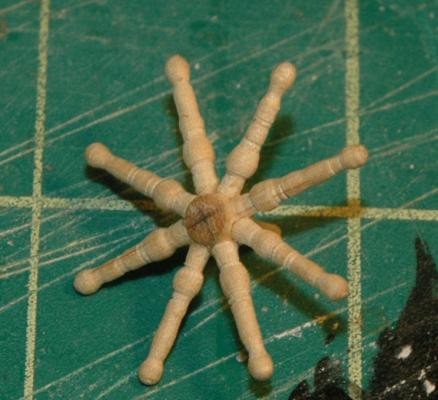
So I sectioned off the hub into eight with a pencil and by sight. I drilled 8 holes and the hub feel apart. Oh well, such is life. I went back to square one for the hub, turned another hub and this time only drilled 4 holes 90 degrees apart. I then glued 4 spokes into place and let it dry overnight. I then drilled the other 4 holes and glued spokes into the holes.


- 525 replies
-
- 5
-
-
- cutty sark
- mantua
- (and 2 more)
-
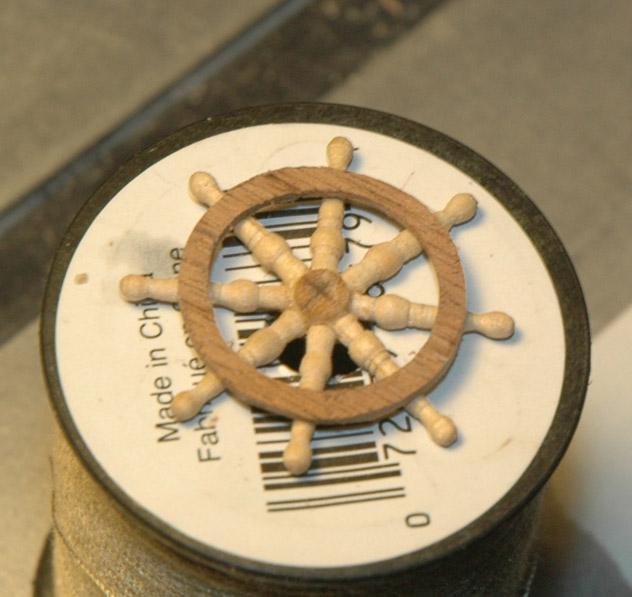
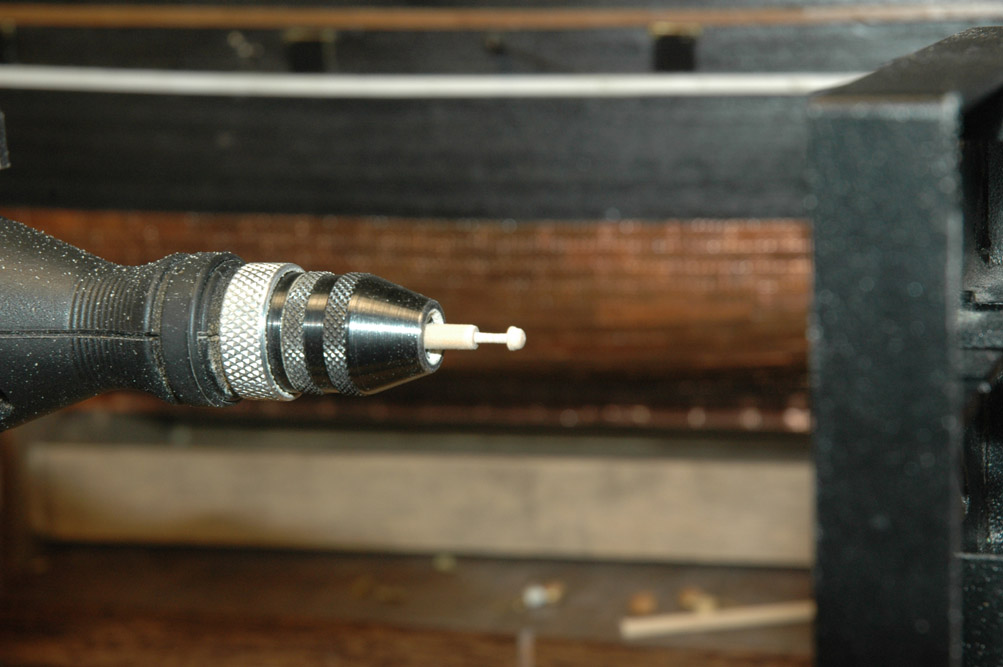
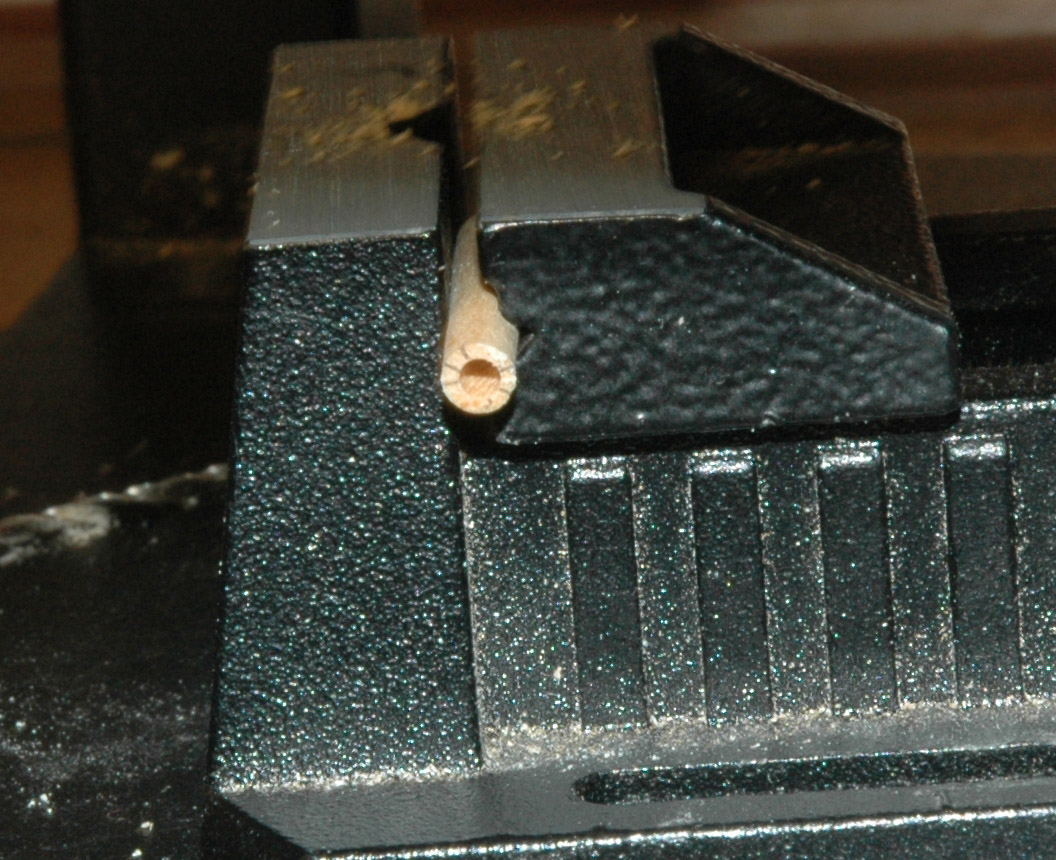
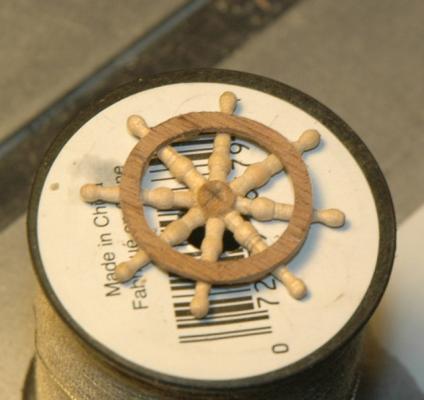
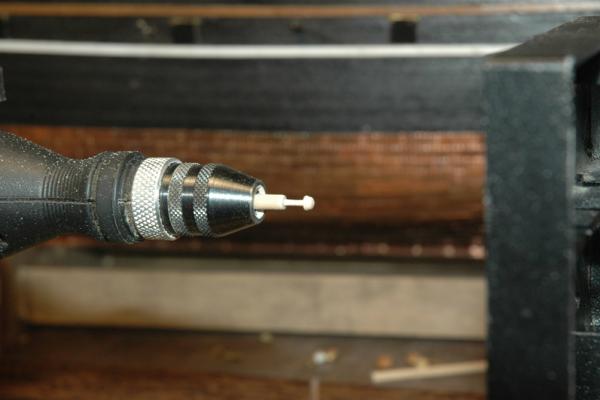
Well I finished my new ships wheel. A few posts back I talked about turning the spokes on my rotary tool. After turning the spokes, I turned the hub on the rotary tool drill press using it as a lathe. My next step was to drill the holes in the hub for the spokes to seat into. I found that I couldn't put the tapered portion (the axle?) of the hub into the drill press, it was too small. So I made a holder for the hub, by taking a dowel, drilling a hole in the center smaller than the hub axle, then increased the diameter with a file, until the axle fit into the dowel was tight, but not in danger of breaking the axle when inserting or removing the hub. I made the copper cover for the the wheel making it out of wood and creating a peg so that it is easy to align and glue into the hub.

- 525 replies
-
- 5
-
-
- cutty sark
- mantua
- (and 2 more)
-
Cutty Sark by NenadM
keelhauled replied to NenadM's topic in - Build logs for subjects built 1851 - 1900
Nenad, Your skills are great and getting better every day as is your ship model! Thank you for sharing your approach, thoughts and experiences with us! Take care of your health. Without it you have nothing. Marc- 4,152 replies
-
- 5
-
-
- cutty sark
- tehnodidakta
- (and 1 more)
-
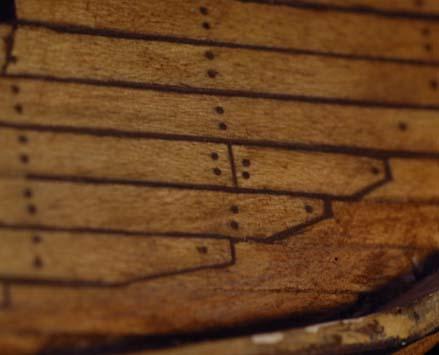
Hi Jim, If you are planning on putting recessed water ways or especially jogging it will make the work much much easier. With jogging you have the ability to place the end planks in place at the bow or stern, jog the deck planking and lay over the margin plank (end planks that are at an angle to the run of the deck planks), trace in pencil the edge of the jogged deck planks on the the margin plank and then remove the margin plank, cut out the overlap at the pencil line and have a perfect fit. Then you can put the jogged planks in place as well as the margin plank and then trim the outside edge of the margin plank to the shape of the waterway or deck. Look up jogging the deck planking and you'll see what I'm trying to explain. this is jogging the planks into a margin plank If you have the bulwarks in place, It makes the whole process very tedious and you will have a much harder time trying to get the fit right. Also if you cut out a space for one plank to large in the margin plank it is ruined. I ruined several margin planks and ended up using each subsequent one as a pattern for the jogged planks that were good, but the time wasted was huge. If you won't be jogging planks then it doesn't really matter that much. Jogged planks are a nice detail though. Hope it helped Marc
- 525 replies
-
- 3
-
-
- cutty sark
- mantua
- (and 2 more)
-
Hi Jim First, If I were to do it again, I'd plank the deck first and dry fit sections of recessed waterways before planking the bulwarks As to planking the bulkhead extensions for the bulwarks - I actually wrapped the tape around the extension. The tape needs to go all the way to the deck line. The trick is to prevent the extensions from becoming glued to the planking. If the extension becomes glued to the planking I'm not sure you could ever separate them. I used artist tape. It comes off easily, but most importantly, wood glue doesn't stick to it well. Put tape on the outside of the bulkhead extensions for the bulwarks. plank the bulwarks using nails. Be very, very, careful nailing the extensions, they break easily. I placed glue into the seams between the planking and wiped it clean. After drying for a few days remove the nails. The planks are strong enough that after they dry from steaming they will hold their shape. The nails just hold them in place while they are drying. With the glue in the seams, the are very solid. Use the artist tape and run it along the waterways and planking near the bulwarks to protect the deck. Thus why I use artist tape because it won't pull on the wood deck planking,( However, you need to test this to make sure that your tape won't harm the deck!!) Use a rotary tool with a cut off disk or more preferably a small Japanese dowel saw, cut the extensions. I guess you could use a shap chisel to cut through the extensions like the instructions say. However, you do it, be careful not to cut through to the hull bulwark planks. My extensions didn't stick at all to the bulwark planking because of the artist tape. Good luck! Marc
- 525 replies
-
- 1
-
-
- cutty sark
- mantua
- (and 2 more)
-
Cutty Sark by NenadM
keelhauled replied to NenadM's topic in - Build logs for subjects built 1851 - 1900
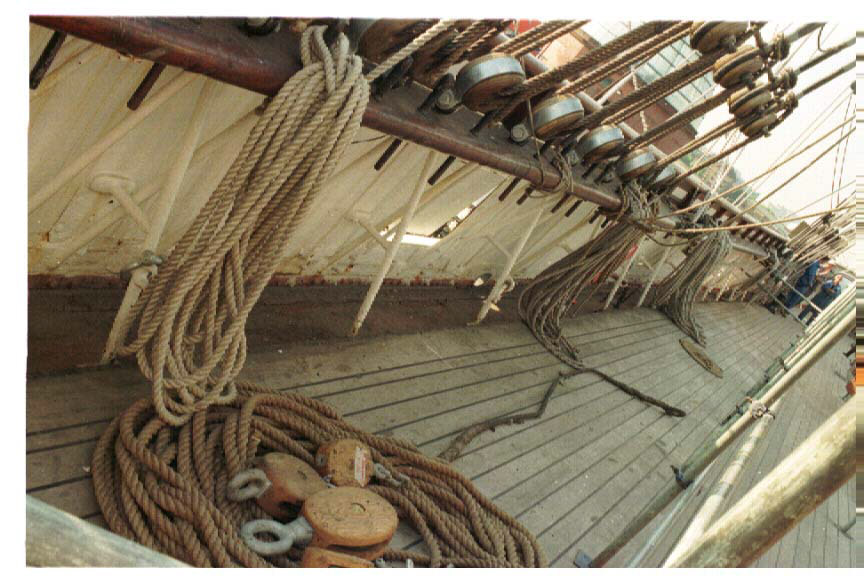
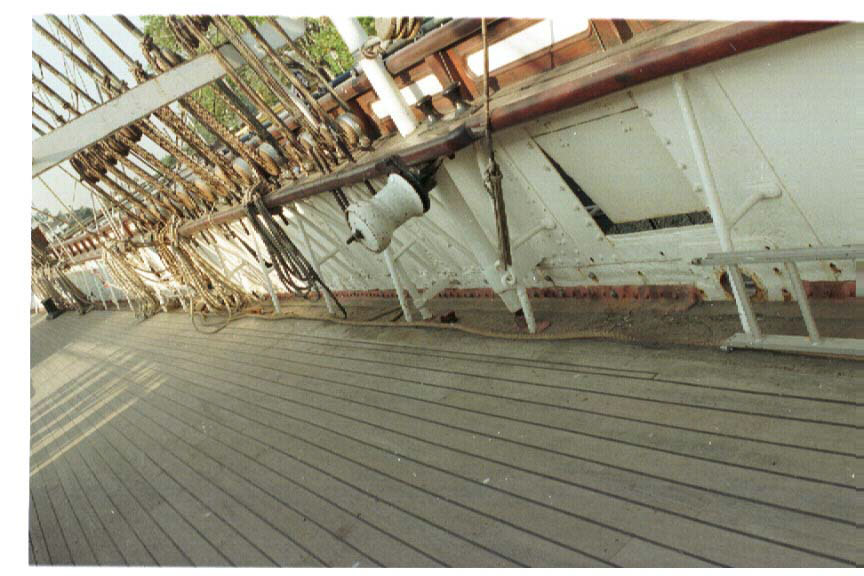
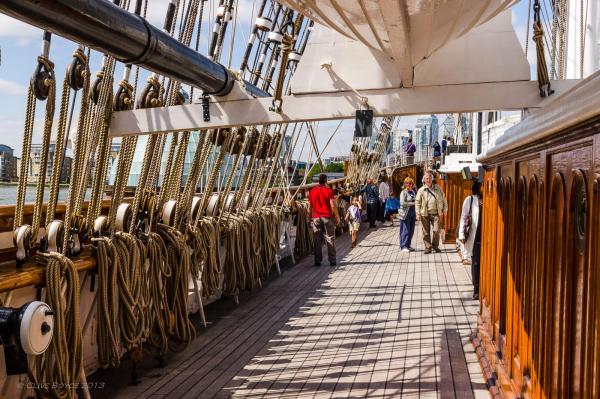
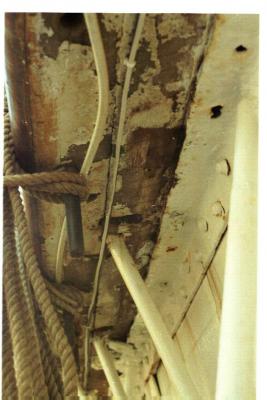
Beautiful work. Looking great. Hope some of these photos might help Marc These are from below the rail. They show the belaying pins and deadeye stays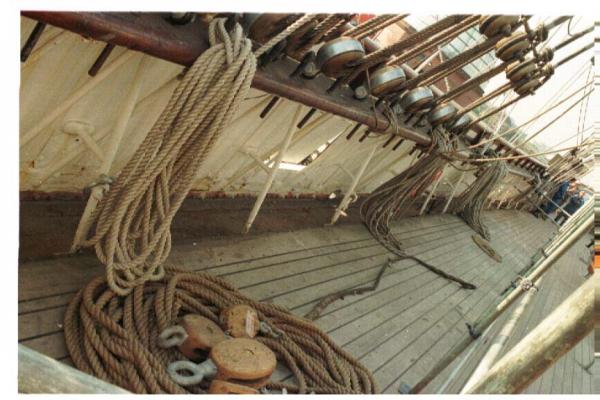


- 4,152 replies
-
- 4
-
-
- cutty sark
- tehnodidakta
- (and 1 more)
-
Cutty Sark by NenadM
keelhauled replied to NenadM's topic in - Build logs for subjects built 1851 - 1900
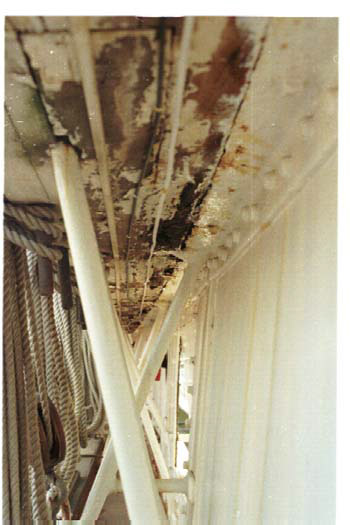
Nenad, Any detail I can help out with or maybe have a photo you need? Like you I have quite a few photos saved. Also, very nice work on the rails! I ran into the same problem about support and used the same solution. I applied a great deal of force and no movement. Your rail should be just as secure. I really like the eye bolt plates. Also very nice drilling work for the pins and deadeyes! Marc- 4,152 replies
-
- 2
-
-
- cutty sark
- tehnodidakta
- (and 1 more)
-
Cutty Sark by NenadM
keelhauled replied to NenadM's topic in - Build logs for subjects built 1851 - 1900
Very nice work! rails are looking great!- 4,152 replies
-
- 1
-
-
- cutty sark
- tehnodidakta
- (and 1 more)