keelhauled
-
Posts
788 -
Joined
-
Last visited
Content Type
Profiles
Forums
Gallery
Events
Everything posted by keelhauled
-
 Welcome aboard! I'm looking forward to your build! Marc
 -
Grant, Congratulations on a beautiful ship!!! Truly inspiring! I remember when you decided to completely redo the stern. I was captivated at your determination for detail. Thanks for allowing us to share the journey and thank you for sharing your knowledge! Take care, Marc
-
Hi Bob, Don't know if your hinges are already glued, but you might want to bend them back the other way toward the rudder and then intall. I see that they are bowed out away from the rudder. I don't know how thick your hinges are, but I had trouble with mine (which were also curved out) wanting to pull away and had gaps between the hinge and the rudder even when nailed. I ended up removing them and bending them so that they bent toward the rudder and had to be wedged on. They ended up staying in place with no issues. I added epoxy as I slid them into place. I then nailed into place. by the way spent the evening catching up on Nenad's and your builds. Nice work! Take care, marc
-
Cutty Sark by NenadM
keelhauled replied to NenadM's topic in - Build logs for subjects built 1851 - 1900
Hi Nenad, Spent quite a bit of my Friday night catching up on your build. Thanks for sharing!!! So many impressive accomplishments. By the way, Your billboard looks good. You might be right about the thickness, but I wouldn't take too much off. The ones that I've seen on actual ships are typically a sheet of steel over wood. I was just on a tall ship this week for a 3 hour visit. They were replacing the wood cap above the billboard because the anchor had chewed up the cap from being stowed at sea. The billboard was dented up pretty good. typically the flukes come in contact with the billboards. I got to talk with a crewman about catting and stowing the anchor. I've been thinking of showing the Cutty as she is pulling the anchor inboard. Take care Marc -
Cutty Sark by NenadM
keelhauled replied to NenadM's topic in - Build logs for subjects built 1851 - 1900
Very nice portholes! Very creative solution to the problem. I wouldn't worry too much about the color. The first time I visited the Cutty they were painted black. I can't tell from the old photos if they were polished brass back during her wool years. I guess that they are back to polishing the brass from your photos. awesome work!! -
Cutty Sark by NenadM
keelhauled replied to NenadM's topic in - Build logs for subjects built 1851 - 1900
101 pages of posts!! My I have been away a long time. But you also build like a madman. I'm glad to see that you placed the ring around the top of the rudder. I was worried about the sea water getting in to hull when the ship gets pooped at sea! Nice detail! Look forward to checking out your progress over the past 6 months when I get home from my continued travels next week. -
Hi Nenad!!! I feel off the face of the earth, or so it seems to everyone that I know. Back in March I changed jobs. The new job has involved a great deal of travel. Since May I've been on traveling almost continuously (all over the US and overseas) with only being home one day a weekend (if I'm home during the weekend). Since I'm out of the office so much I've been working late the one week a month that I'm home. So all my Saturdays have been doing all of the work around the house that should have been done during the week and packing for the next trip. I also seem to be too tired to build if I do find a moment. I think that my body is trying to stabilize from the different in time zones. However, great news is that my travel should decrease after next week. The job was supposed to have some travel, but not like it has been. So, I'm hoping to get into the shop next weekend for the first time since May or June!! I can't wait to read through your posts since last May! You're probably done at the rate you build! Look forward to getting to see your build on a regular basis. Take care, Marc
- 525 replies
-
- 1
-

-
- cutty sark
- mantua
- (and 2 more)
-
The Ship is looking great! Your attention to detail is awesome. I also liked the pig for the pen! One day (soon) I hope to get back to my build. Take care Marc
-
Johnroy, The easiest way to plank the deck is to run the planking continuously under the deck houses. I didn't do this because I wanted the 45 degree miters that were on the deck around the deck houses when I photographed the Cutty back in 1991. You can buy extra planking from various suppliers including Model Expo. There are several good suppliers listed on this site under that section. Good luck! Marc
-
Cutty Sark by NenadM
keelhauled replied to NenadM's topic in - Build logs for subjects built 1851 - 1900
She's looking good! I could see myself walking that deck, soaking up the sunshine and breathing in the salt air! The color looks great. I also like that it's not all uniform. I went for the same look. I think it looks more natural. Looks like Cutty teak to me!- 4,152 replies
-
- 2
-
-
- cutty sark
- tehnodidakta
- (and 1 more)
-
Hi John. My plans only have English (along with French, Portuguese, German, Italian, etc). in the legends. Everything else is just numbers. I do have instructions (2-3 pages) that are in English. They are about useless, but if you'd like to have them I'm happy to scan and send them to you. What I would suggest is looking at the info on this sight. There are great tutorials on here. Chuck has amazing pointers. Also Hubert Sicard is a great teacher and has a great sight at www.shipmodeling.ca. We'll worth the membership. I'll help you any way that I can. Have patience with me. I'm only able to check the site once a week, typically. Just one word of caution. Take your time with aligning the bulwarks and the keel. If it isn't right, you can't go back and fix it later. Everything else you can rip back off and do it again until it's correct. You can even correct the edge of a bulkhead, but not it's alignment. Laying the bulwarks and keel is one shot. Check it over and over again, Then go away and come back check it again and then glue. Don't rush the 1st step. I only glued one bulkhead a day. Made sure that it was dead on. Might be overboard, probably is. But since you'll spend years building this, a few weeks isn't so long to the backbone straight. Marc
- 525 replies
-
- 1
-
-
- cutty sark
- mantua
- (and 2 more)
-
Cutty Sark by NenadM
keelhauled replied to NenadM's topic in - Build logs for subjects built 1851 - 1900
The fo'cle is looking great! The molding really sets off the deck. Bindy is correct. We have to stay in touch with you continuously to keep up with your progress!- 4,152 replies
-
- 1
-
-
- cutty sark
- tehnodidakta
- (and 1 more)
-
I finished putting blocks on the Main mast. I'll post photos this weekend!
-
Hi John, Welcome. to answer your questions: I would recommend cutting your bulkheads out using a coping saw. Use a block but with a "v" for the saw to move around under the plywood it to help support it as you cut. Take your time. If you break it you can always transfer the lines from the plans to a new sheet of plywood and try it again. The copper sheets. The blue you see is called the resist. Here was how it was made. A photo-sensitive coating was applied to the surface of the copper. when light hits that resist it hardens into a polymer and turns blue. So a photographic negative is placed over the unexposed resist coating. A bright light is directed at the negative, passes through the clear parts and into the resist. The resist develops after a few minutes and becomes fixed (the polymer harden). The copper sheet is then washed with water, which removes the unexposed resist and the hardened exposed resist remains - now blue. Acid is then placed onto the surface, the resist protects the copper, while the exposed areas are eaten away by the acid. Once the desired depth is etched the copper plate is washed with water. The result is what you have in your kit. Here is what you get to do: remove the parts using metal shears. straighten out the parts (wooden roller pin works well). file the edges. Paint the entire part black. Put very fine sand paper onto a wooden block and sand the top surface (which is blue underneath). The paint will be removed from the surface relief and will be shiny copper on a black background. Good luck. If you need any help just ask me, Nenad, and Bob Marc
- 525 replies
-
- 1
-
-
- cutty sark
- mantua
- (and 2 more)
-
Every time I look at your model I'm speechless. Just Amazing! I don't know what else to say.
-
Very beautiful work! The sails look wonderful! I really like the look of some sails set, with others furled. Looks more like an actual ship than a model.
-
HMS Bounty by UdoK
keelhauled replied to UdoK's topic in - Build logs for subjects built 1751 - 1800
Beautiful work! I look forward to the build! -
I learn so much from you! What a great solution!
-
Cutty Sark by NenadM
keelhauled replied to NenadM's topic in - Build logs for subjects built 1851 - 1900
Deck is looking good!! -
Thanks for the advice Nenad. I'll make sure that I'm at full concentration. Some coffee, but not too much coffee! Don't want nervous hands! Good point Lou! Although Maybe the model can live without so much drama. Especially in the area of the bowsprit and figurehead area I still have quite a ways to go before rigging! Still plenty of blocks to tie to yards! Still have to make the sails and bend them to the arms. Soo much work. Good thing that I find this enjoyable!
- 525 replies
-
- 2
-
-
- cutty sark
- mantua
- (and 2 more)
-
Thanks everyone. Grant, if I break a mast I'm coming to you for help!! I was dry fitting the masts (to admire my work) and had the ship on a turn table. Forgot about the lamp extended on an arm that I was using to light the deck. Spun the ship around and struck the lamp with the fore mast. Luckily no damage, but my heart missed a beat or two. I immediately un-stepped the mast and put them away. I think that I'll have to change my lighting to make sure that there are no obstructions when I finally permanently step the mast. It will be some time though. I still have a ton of work with the sails and then the upper shrouds and ratlines. Lou, I do have Longridge's book. It's probably a good time to re-read that section. Thanks for the reminder! Planning on getting back to work this weekend!
- 525 replies
-
- 1
-
-
- cutty sark
- mantua
- (and 2 more)
-
Bob, the photo of your deck and pinrails looks great! Really nice work. I also like your waterways. I wished that I had done mine that way. I used those eyelets for the same details! I think that they are great. They also make great portholes. I found them in the scrapbooking supplies, lots of different sizes and in black.
-
Cutty Sark by NenadM
keelhauled replied to NenadM's topic in - Build logs for subjects built 1851 - 1900
So much variation and ways to simulate the caulking and the deck planks. I think it provides an opportunity to be an artist and be creative!- 4,152 replies
-
- 2
-
-
- cutty sark
- tehnodidakta
- (and 1 more)
-
Thanks for the kind words guys! Nenad, I do worry about the strength of the Masts. The part that I worry about the most is the holes that I had to drill through them for the yard lifts. I keep reminding myself that they are stronger than the plastic masts that I used on the Revell constitution and that came out fine.
- 525 replies
-
- 1
-
-
- cutty sark
- mantua
- (and 2 more)
-
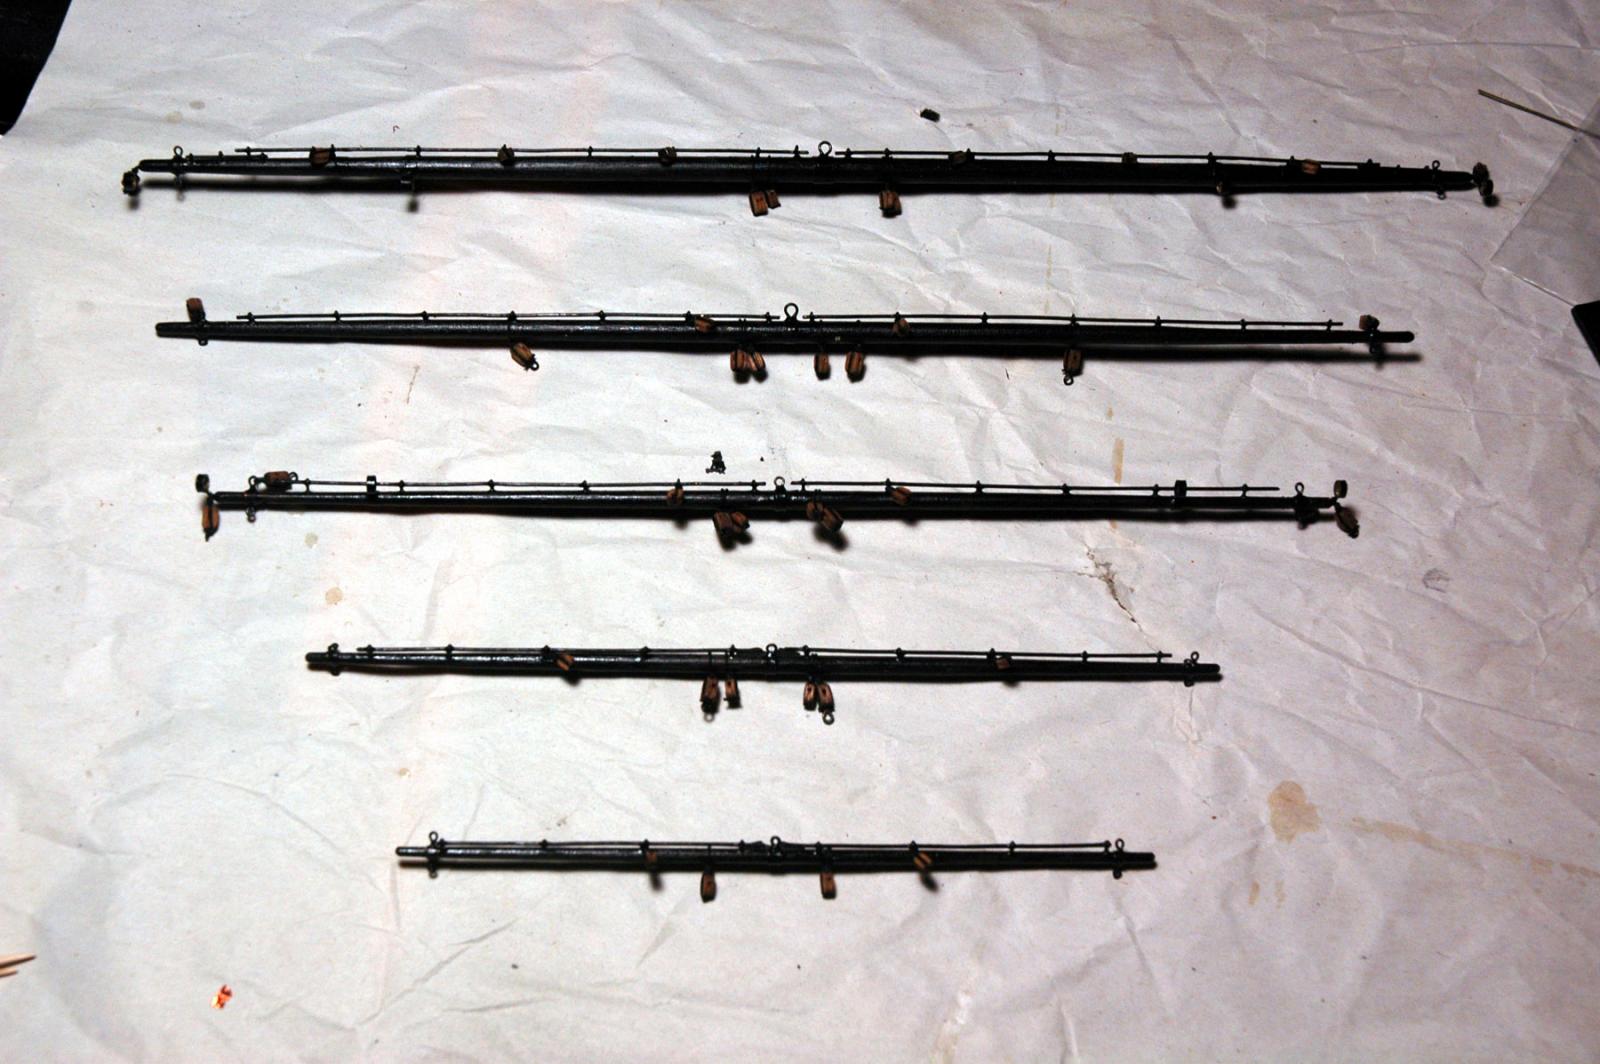
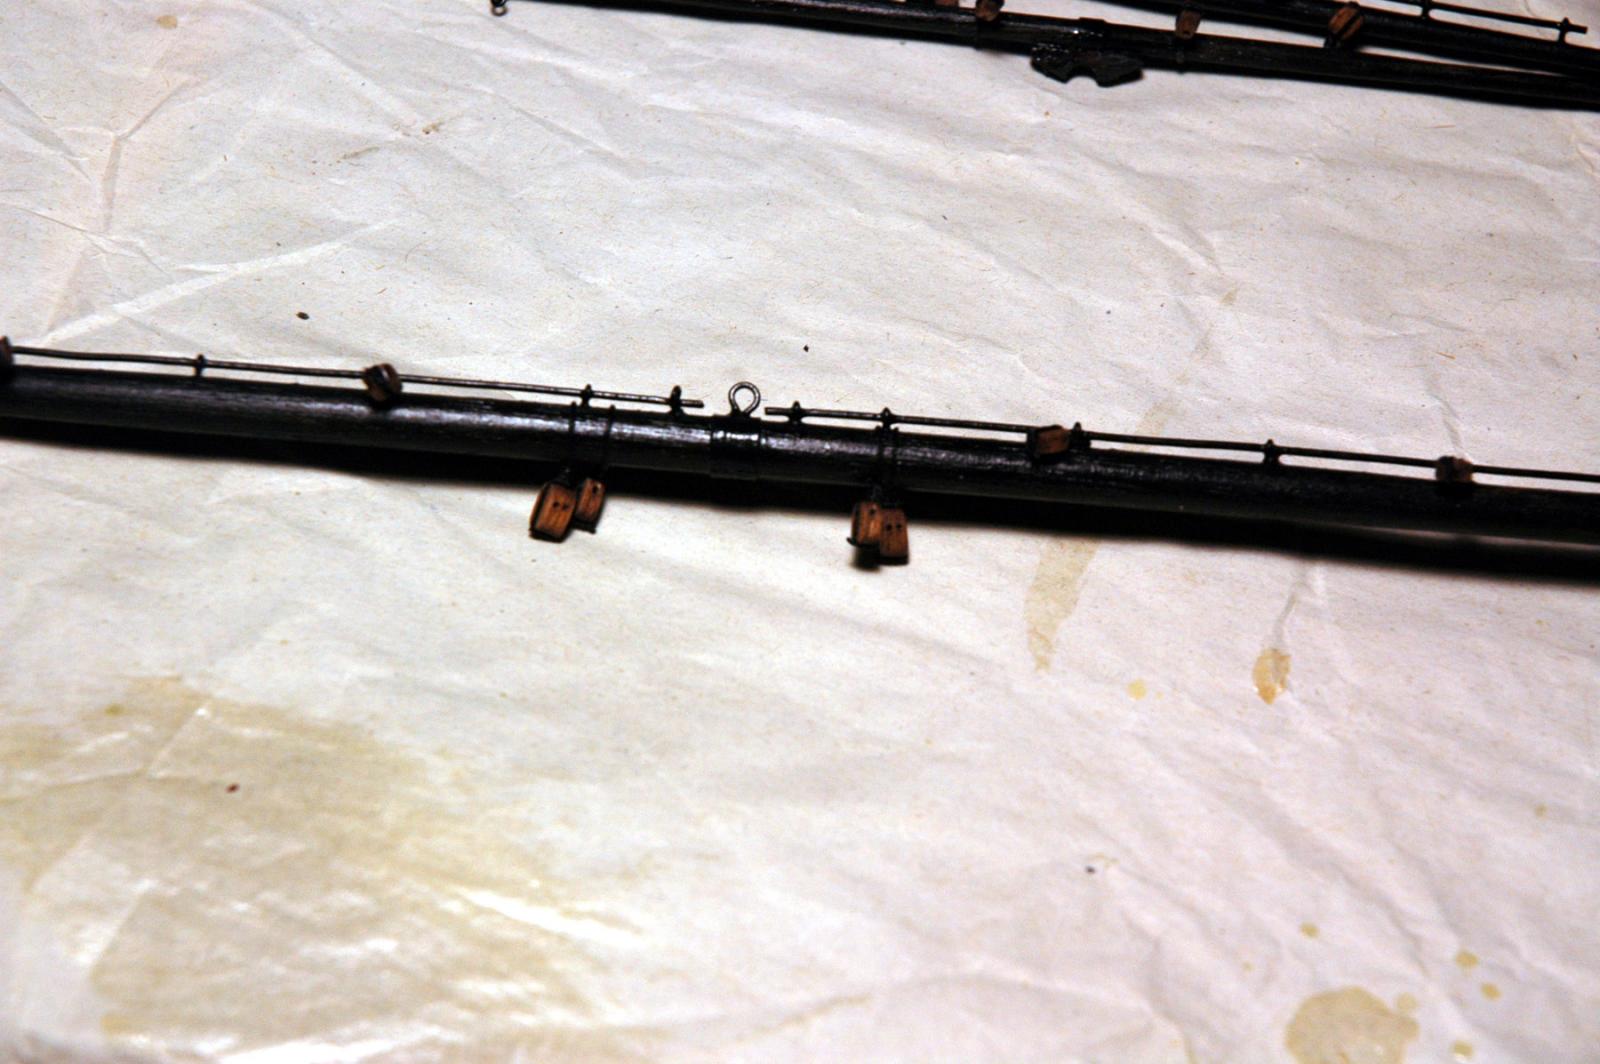
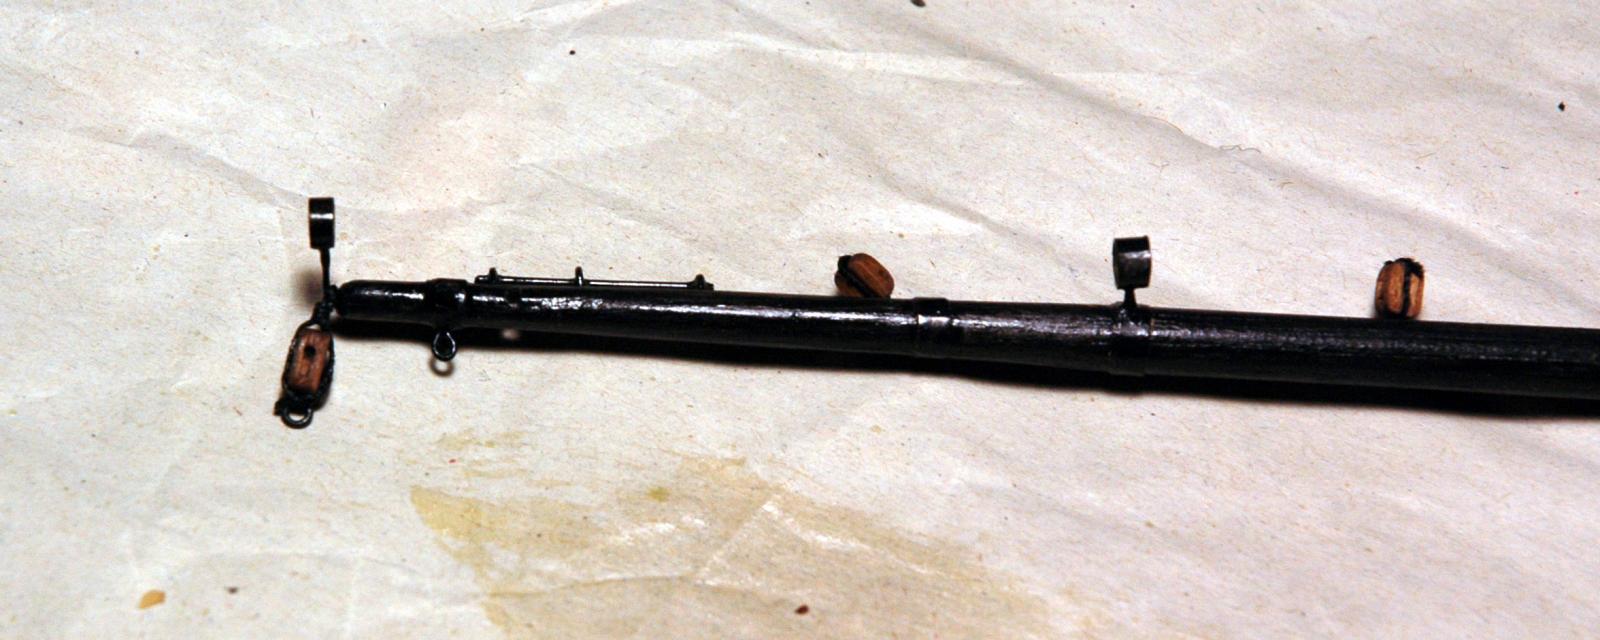
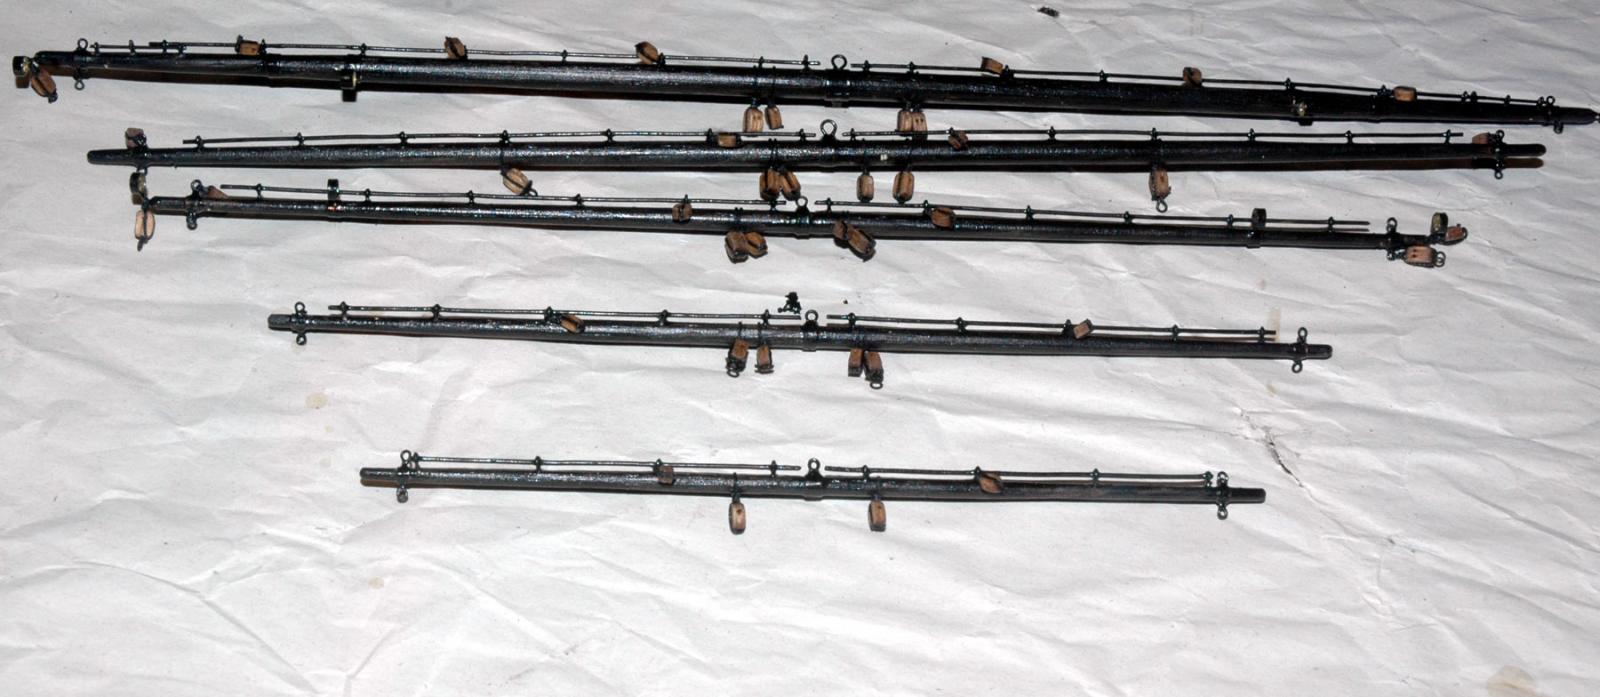
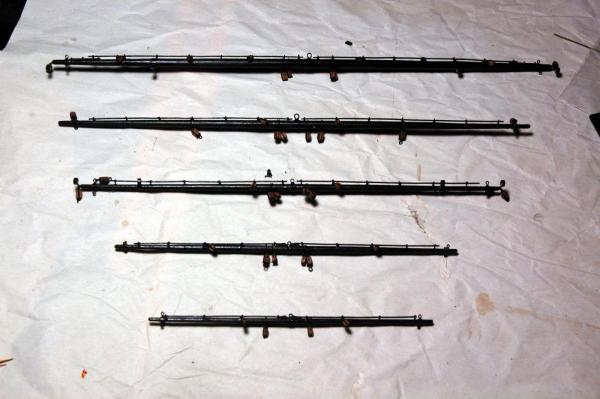
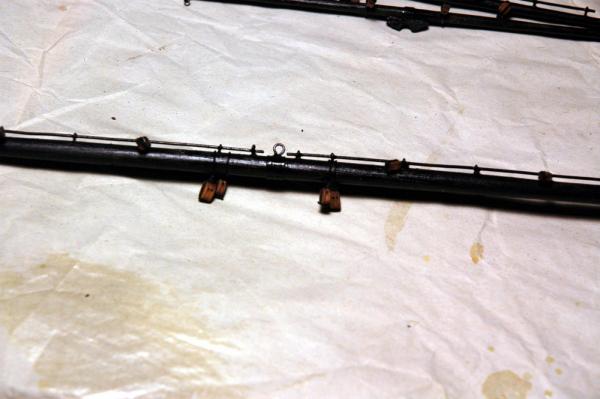
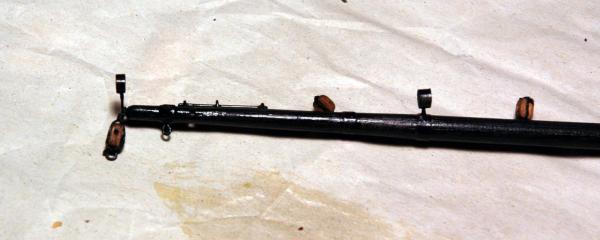
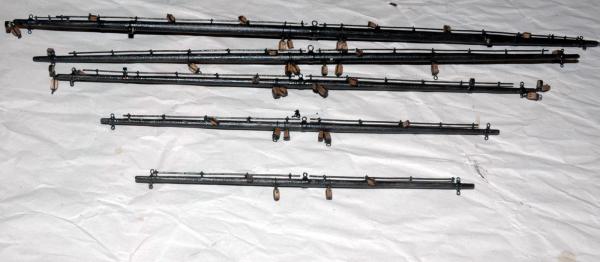
Sorry for the delay. I was tied up trying to find a new job. Also it has been too cold to build! Here are some photos of the yards for the foremast. They didn't turn out too well. I'll try getting some better shots. The yards are painted and I have the blocks attached per Campbell. Cheers, marc
- 525 replies
-
- 8
-
-
- cutty sark
- mantua
- (and 2 more)