


popeye the sailor
-
Posts
15,981 -
Joined
-
Last visited
Content Type
Profiles
Forums
Gallery
Events
Posts posted by popeye the sailor
-
-
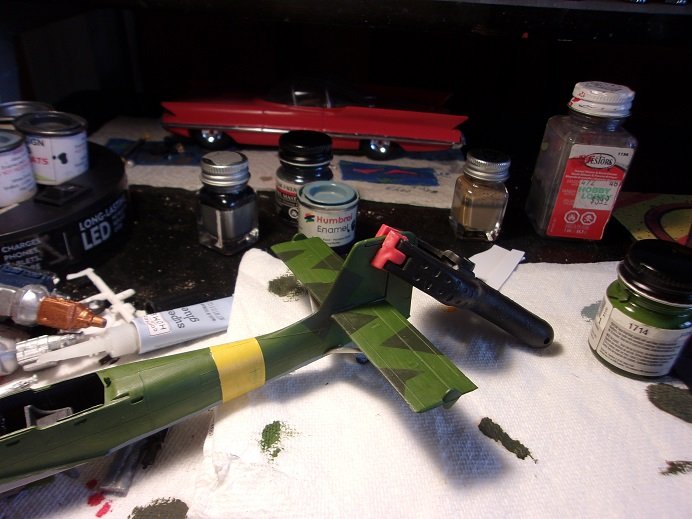
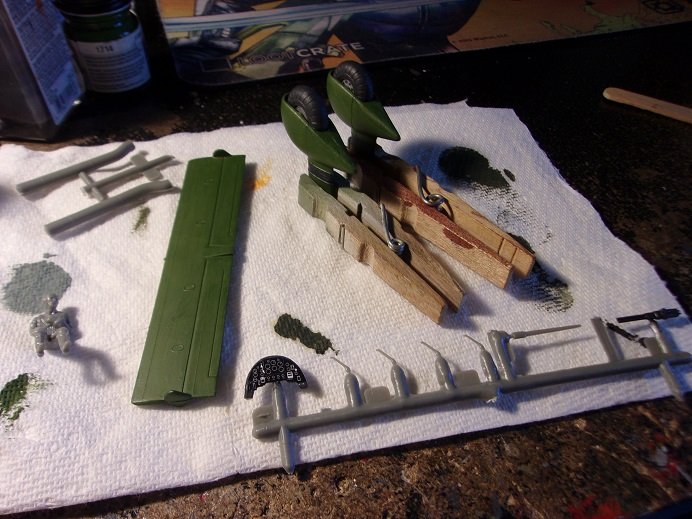
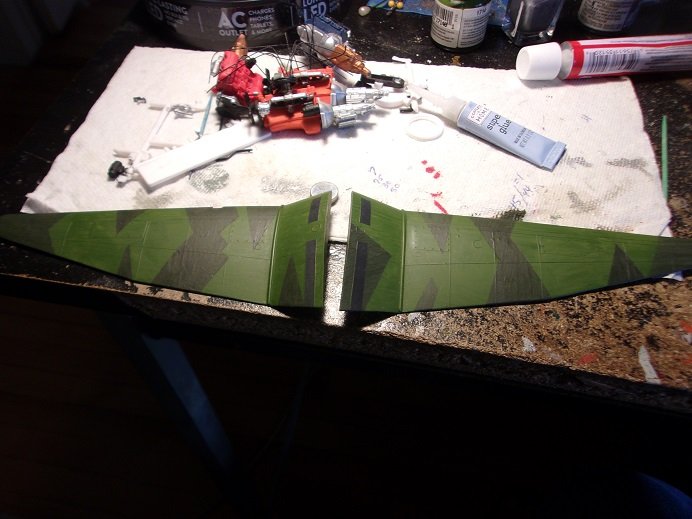
the camo is to lap onto the stabilizers, so this update starts here. the stabilizer struts have the same part number in the kit, but there is a difference, so they really should have their own. there is a left and right here...test fit to be sure your putting them on the correct side.
I had to do some trimming to get the rudder to fit correctly later on. once the struts were in place, the camo work started on the fuselage.

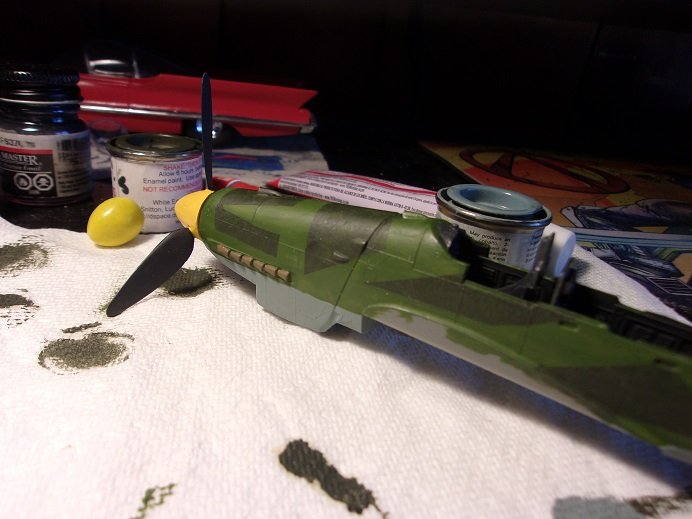
the Stuka in later variants never lost those diamond shaped tips on the stabilizer {s}. early in the development, the V 1 had twin rudders. when the V 2 was introduced, it too had the twin rudders, but in the first round of testing, it spun out of control and killed the pilot. from the V 2 on, a single rudder fin was used. it is a bit curious why the stubs were left in the design, possibly to add more stability. I would say.........that in regards to the human anatomy, they are nothing more than the Appendix, in comparison.
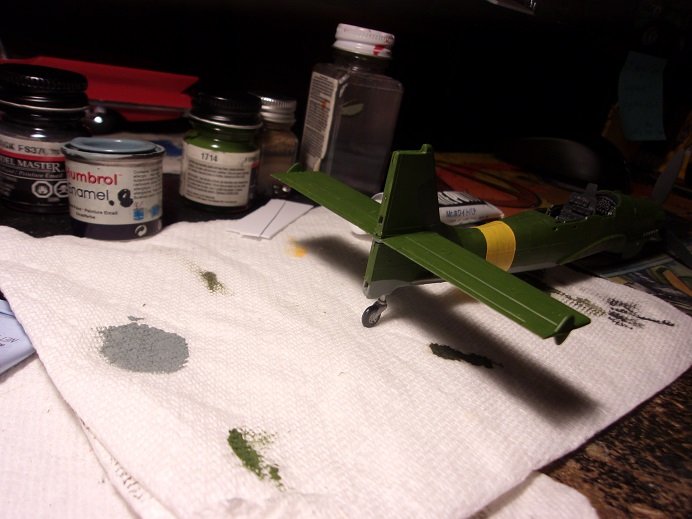
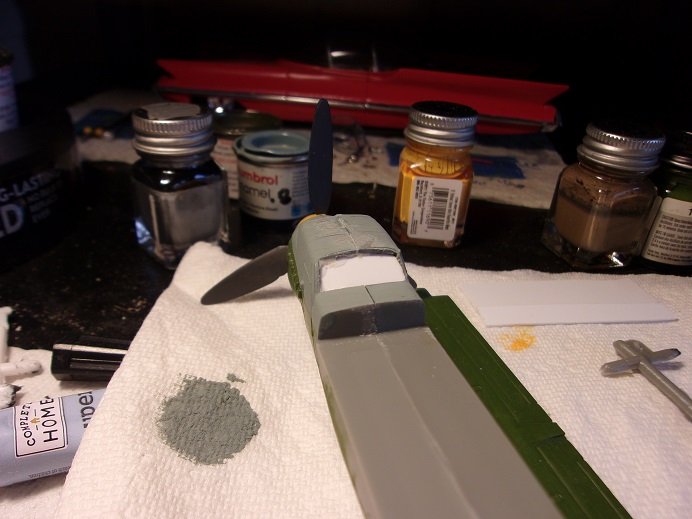
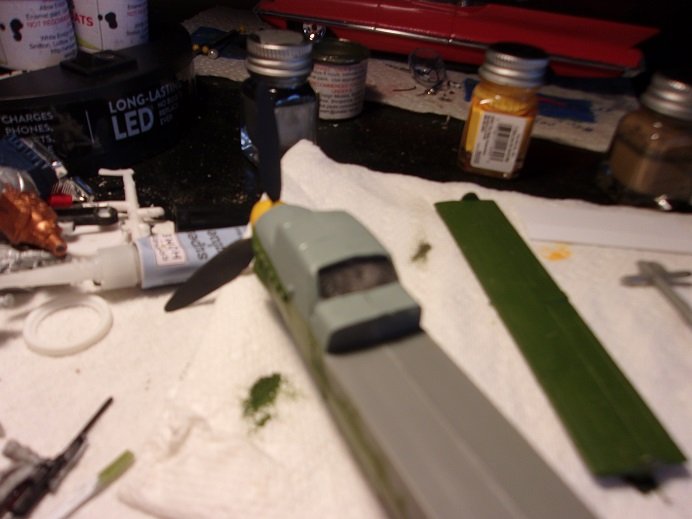
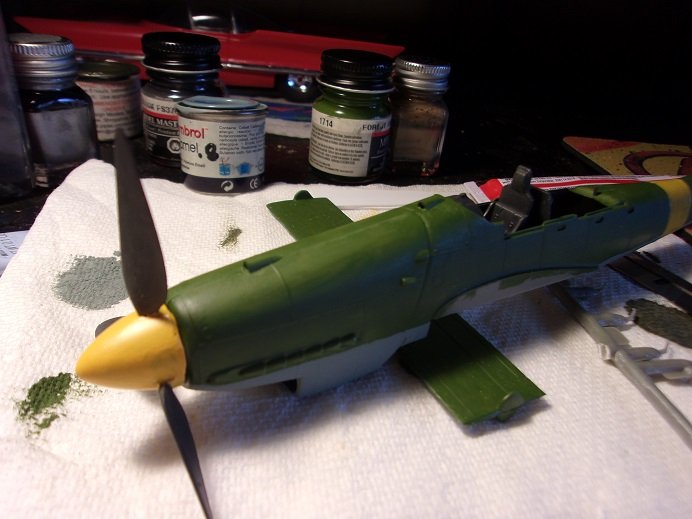
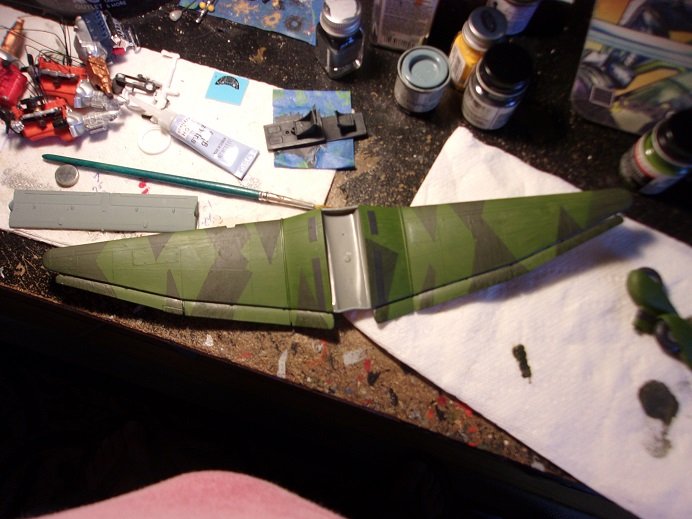
the camo continued towards the nose........

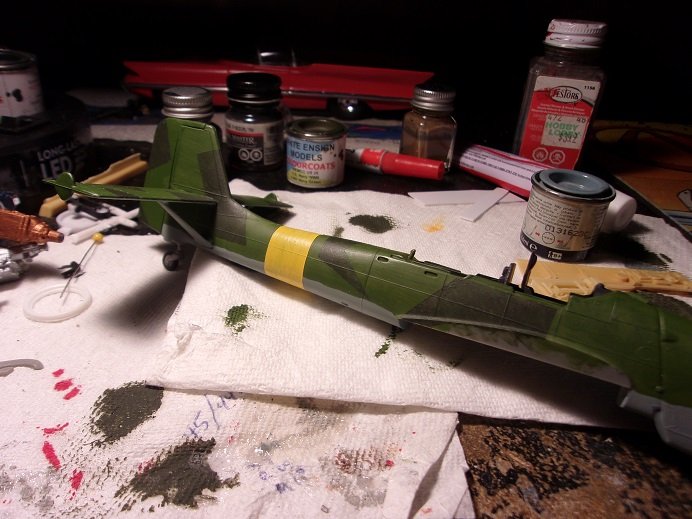
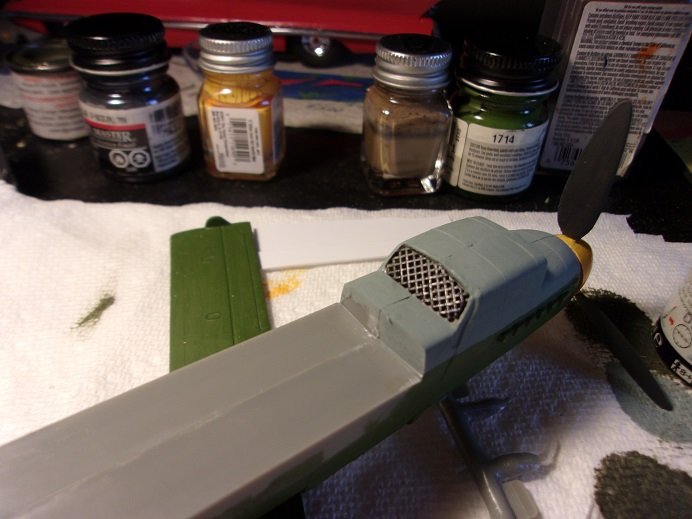
finally, the entire fuselage was covered.
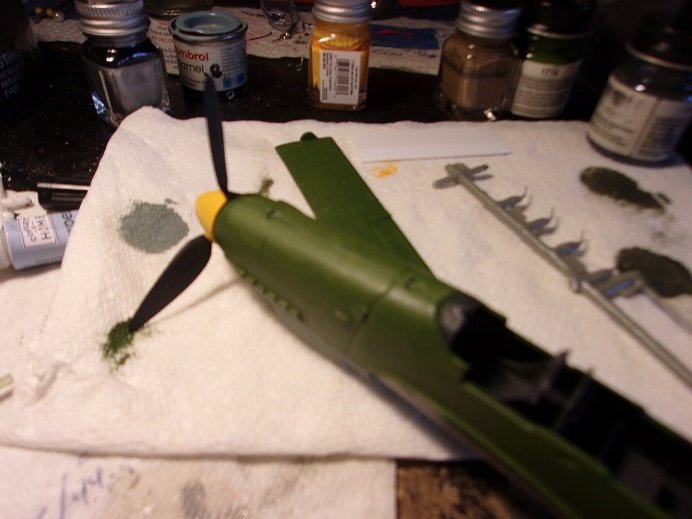
the exhaust was also painted..........time to give 'er her wings!
a bit dark, I know.............I like this effort better than the 1:72
")
- Edwardkenway, hof00, mtaylor and 7 others
-
 10
10
-
...or you might lose most of it by reactivating the decal adhesive. would decal set help? beautiful job on the paint.........awesome model
")
- mtaylor, Canute, Old Collingwood and 1 other
-
4
-
getting closer to another update....made some progress on my little side task. I read another article that outlines in more detail, how the Stuka came to be.
it gives a good deal of info on it's development....it conflicts the installation of the wing gun........and it expands the use of the stuka upon entry into WWII. one of the target changes made around this time was on shipping. two later variants not really mentioned to any degree was the JU87C {and one I never heard of}, the JU87R. these planes were built for carrier use........really interesting. I haven't seen any model kits on the odd variants........the Special Hobby kit was a unique find.
-
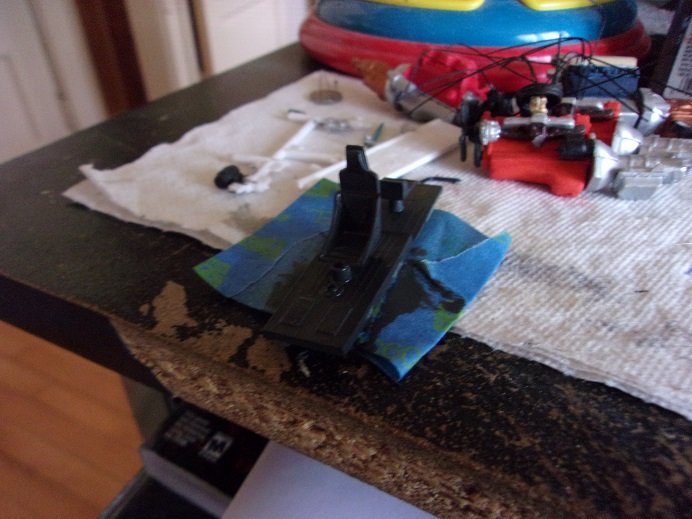
I'm in the process right now, of assembling and painting the tail section. it's a bit boring watching paint dry, so I thought I'd amuse myself........or abuse myself {whatever the case may be}. I keep thinking about the resin tires for the JU87A........can it be done
 so that's what I'm doing while I wait. all I can say, is that the plastic seems too thick for this type of stuff. the tire detail has been cut off.........no turning back now!
- Egilman, Edwardkenway, mtaylor and 4 others
-
7
-
I won't cry foul if you got help
 .....I wish I did sometimes! looking really nice.....great start! so glad to see your back.
- Bill Morrison, Mr Whippy and kiwiron
-
3
-
thanx OC and Jav.......
if you read the articles, these planes were primarily used during the Spanish and Russian conflicts.........and also the stint in Africa. they did well in the beginning of WWII, but they lost out towards the end. fitted with the Jummo engine, they were just not as fast as American fighters, and their arch enemy..........the Spitfire. I'm sure the numbers are short of the exact amount built.........Ju87 D's - 3,800 Ju87G 1 {and possibly the G 2 variant} 5,800, which suggests that this plane was one that was built in large quantity. their only task was to deliver bombs..........their defense was a radio /gunner in the beginning........a 50 cal in the left wing further on, and then the nose cannon after that {possibly the G-2}.
- Canute, Old Collingwood, mtaylor and 4 others
-
7
-
following along Chris..........another of your great projects
- lmagna, Edwardkenway, Egilman and 6 others
-
9
-
no......it's a glider
- lmagna, Old Collingwood, Danstream and 5 others
-
 8
8
-
-
very nice looking tank! I've had that happen to me a few time....it's why I don't do a finish coat. great paint work.........nicely done!
- Canute, Old Collingwood, mtaylor and 2 others
-
5
-
moving right along........very nice detail
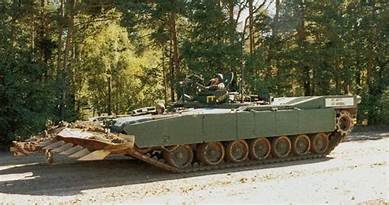
I wonder if that brace in the front is the attachment point for a mine sweeper. I saw a kit on old model kits the other day that had such an attachment on the tank
- Edwardkenway, Egilman, lmagna and 4 others
-
7
-
I mentioned shortcomings..........in comparison to the Special Hobby kit, I saw three. there may be others, but I'm sure that they are cosmetic and likely something I'm willing to live with. the first thing I noticed, is that there is a partition between the pilot and gunner, and the radio equipment is visible on the gunner side. there is a cut away toward the base, but I went with a full length partition that narrows at the top. I gotta say.....I did a great job with hugging the inner cockpit walls.
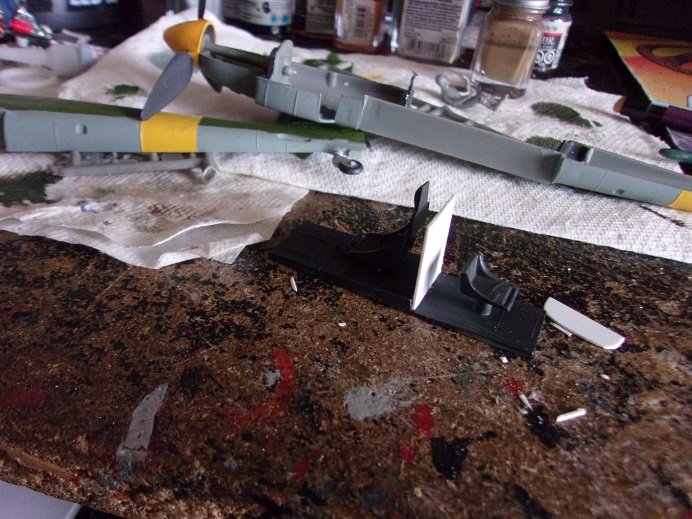
the raw blank was whittled down to the shape I wanted, and then I went into my spare parts box. parts for the equipment was cobbled out and added to the partition.
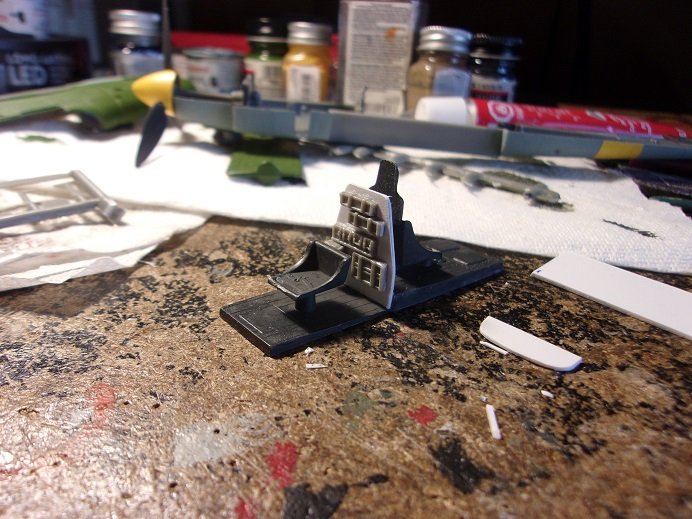
once painted, they look more the part.......even more so once the fuselage halves were cemented together.
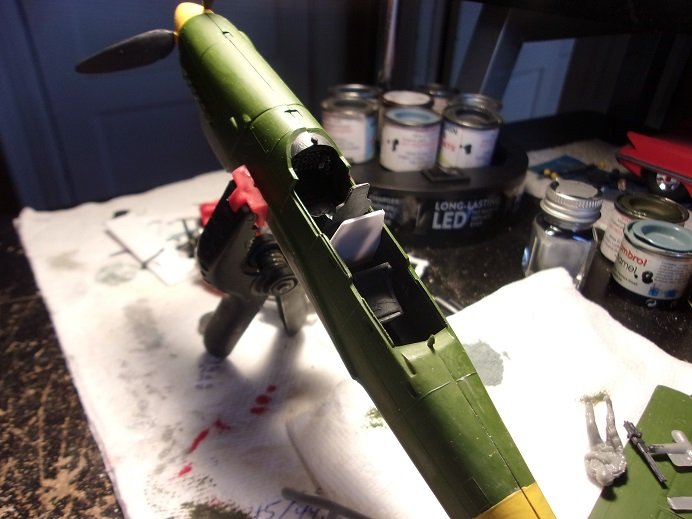
the missing intake screen was my next concern. the two locator pin holes were trimmed out, and a blank was glued in place before the halves were joined.
I was just going to leave it as it is, but going through the spare parts, I found something for it. the blank was cleaned up and painted.
the screen part was cut to shape and glued in place....I'm glad I recessed the blank.
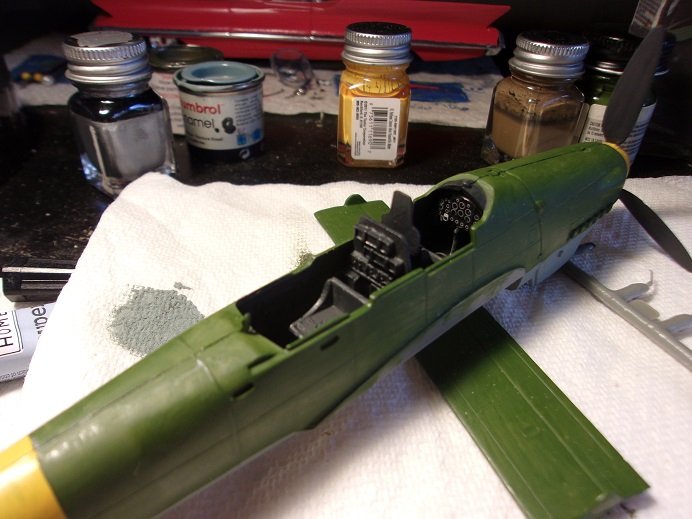
I wished it was PE........but beggars can't be choosers. the third short coming can be seen in prior pictures..........the two demarcations on the top of the cowl, that suggests vents.
sorry for the blur........a clearer view can be seen in the cockpit picture. as luck would have it.......I found something in the spare parts that could be used. it took a bit of trimming, since they are small vents, but I managed to cobble something together.
I hope to add more to the model......usually I revel in getting it built
- Canute, GrandpaPhil, Egilman and 7 others
-
10
-
thanks Mike
I found that removing the molded detail helped out a lot. I didn't center it quite right, but in the cockpit it looks good. with the glass in place, it will never be seen.
oh.....I like that Ken.........I'll keep it in mind
back in my youth, I built the 1:32 'snake' Stuka..........it used to be quite common, but has become a bit rare to see. one day while I was out, my siblings took it outside and destroyed it on me..........I found it smashed into a stump in the corral for the horses. I didn't do a lot of paint on it.......I wasn't much of a painter, not that I am now .....but I think I could do much more than join plastic together.........and it's a huge plane, for 1:32.
I'm actually kind of surprised with this kit.........so far, I've fixed three shortcomings with it. check out this update
-
thanks Ken.......I received the Special Hobby kit, and it opened up the wider implications. I haven't seen anything to suggest that it was an either/or. I did find an interesting article on the Stuka development
Tools of War: The Stuka — The Military Historian
this article shows from the JU 87A up to the G variants. the role of the dive bomber dates all the way back to the later part of the 1920's, when all it amounted to, was the pilot tossing grenade size bombs out of the cockpit as he flew over. as thought, this wasn't always right on target, and plans were in the works to make the practice more precise. here is another article that is pretty interesting:
the Special Hobby kit shed light on the early variant, and is more of a multimedia kit...very different from what I've built in the past. I will post this one separately because of this.......I think you will agree. the looks is what drew me to the model.
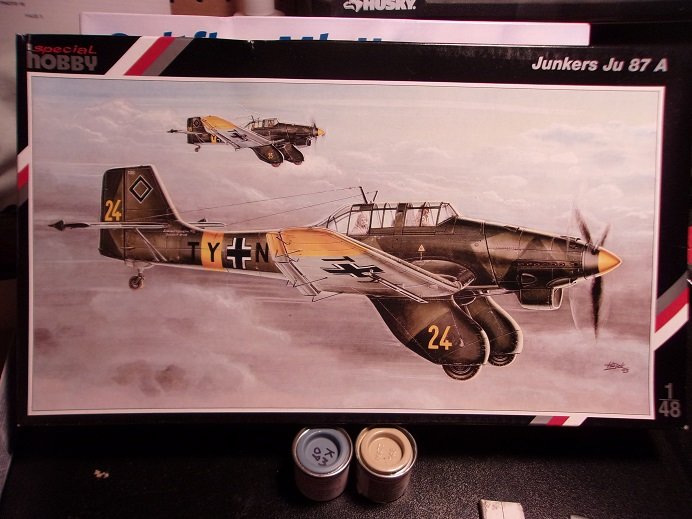
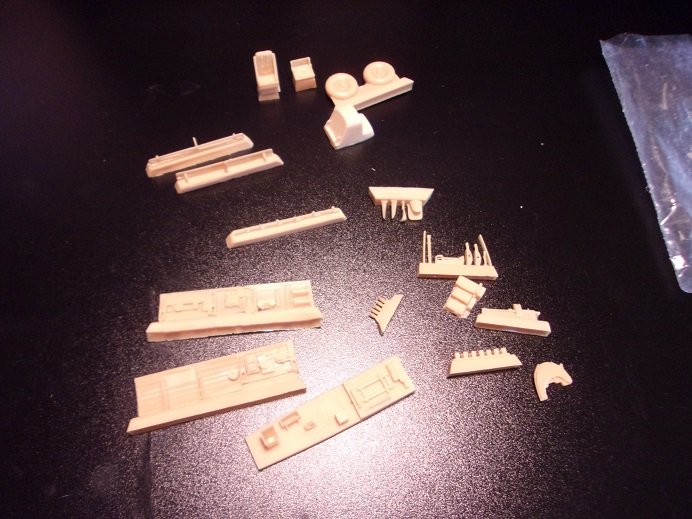
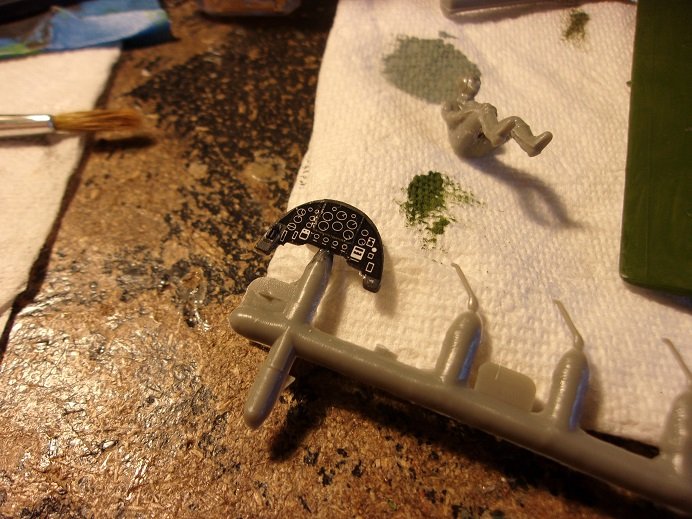
anyone who has built of of their models knows that they are a Czech Republic company. this kit also includes resin parts....the complete cockpit and accessories. the first thing I noticed with the kit, are the landing gear 'boots'.........the tires are molded in them...not something I expected.
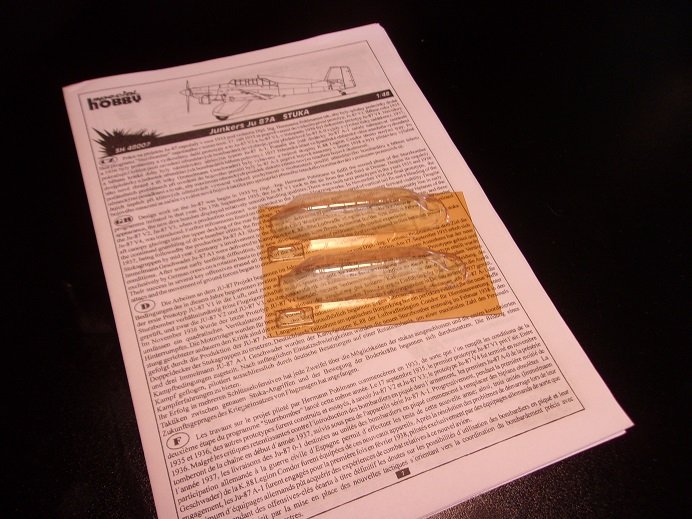
the canopy is a rather stiff cello, and not the usual clear plastic. they include two of them, so it's an assumption that the mistake ratio is pretty high for them to do that. I'm not sure if it is supposed to be 'yellowed', but ist is to some degree.
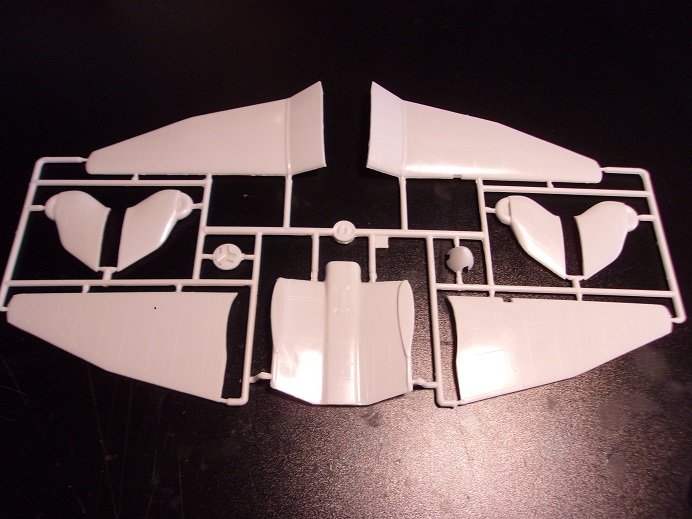
there are plenty of small parts.......the dive flaps are assembled separately {that will be fun}.
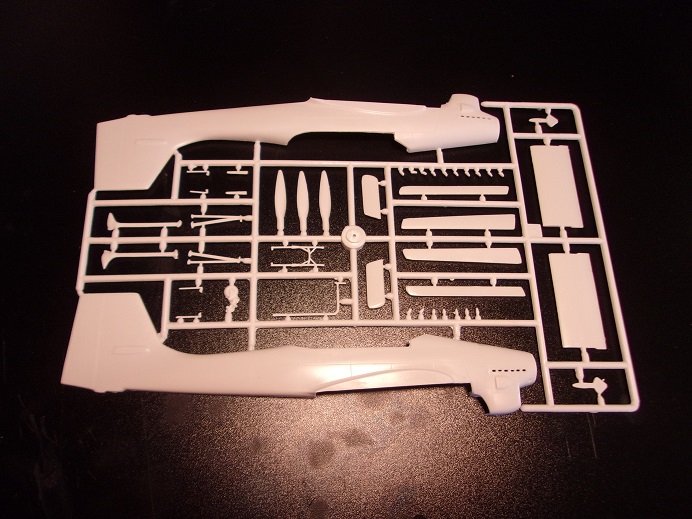
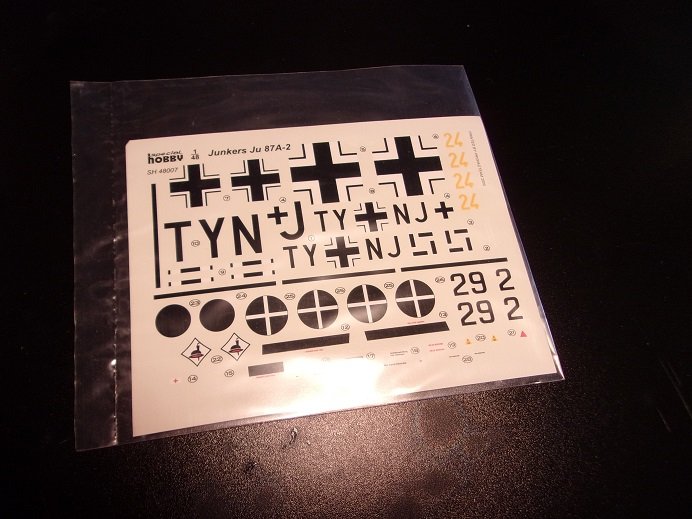
the decal sheet is colorful.........kidding
has markings for German or Spanish
....and the resin parts..........the boots can be modified to house the resin tires. I haven't looked at this with any depth, but so far, I didn't see any locators or marks to give direction for fit. as a matter of fact, there are few pins or locator tabs on any of the parts, so dry fit is a must
should be an interesting kit when I get to it
-
nice to see that the engine tests are going along splendidly
.........looks super! the mods on the fuselage is looking really good too. I'm in awe at those who can do it without much fuss.
great progress .......keep up the good work! glad your feeling better!
- Edwardkenway, Old Collingwood, Egilman and 2 others
-
4
-
 1
1
-
great job Kevin..........always wanted to see one of these painted
doesn't take away from it at all! you can cut some sides for the trailer and give it some graphics........really neat stuff!
-
I have an update on the G 1....... the landing gear 'boots' have ben assembled, along with more paint. the instrument panel is shown as well with the decal applied.
the molded detail was trimmed off the panel before the decal was added, which made it much easier to apply. the instructions tell you to simply cut the panel out of the decal sheet and glue in place over it, but I thought that was a silly thing to do. the area under the fuselage, between the wings appears like an indented 'well' and could possess the detail for a bomb rack, but no parts for the bomb rack is included in the kit....too bad
 I also noticed that there is a screen for the front of the fuselage intake, but nothing is supplied for the back of it. two pin locators are there to suggest that there is a part, not not the case.
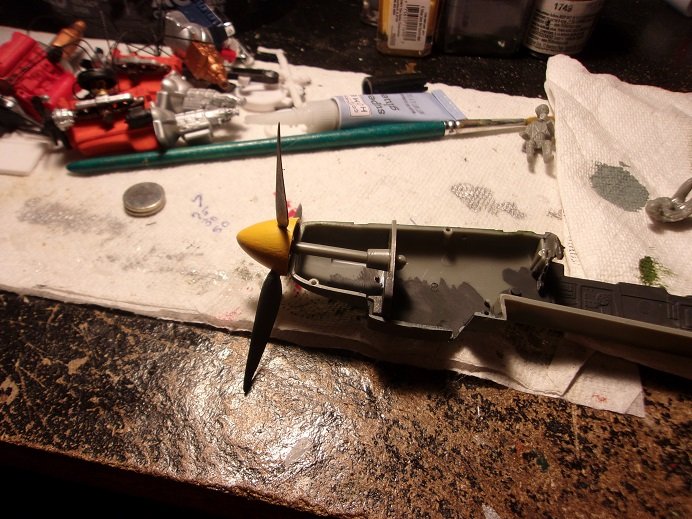
this can be seen in the picture above..........the prop is in place, and it does spin. the tires turn in the 'boots' as well, even though I view things like this as redundant........a nice touch, but whose gonna sit around and spin the things?
I'm looking into these two things.......the bomb rack and the screen.........I'll certainly let ya know if I come up with anything. with the completion of the landing gear and the cannons, I added them to the underside of the wings. with the wings in place {dry fit} the indented belly can be seen.
more soon
- Edwardkenway, mtaylor, Canute and 3 others
-
6
-
that's a big girl! love the large scale aircraft.........they take up a lot of room, but there's a lot more to them
- Canute, lmagna, Old Collingwood and 3 others
-
6
-
you've made some very good progress on the Hellcat Chris! looks fantastic!
- Dave_E, thibaultron, Canute and 5 others
-
8
-
really nice looking tank
there are a lot of different 'motorized' kits out there......some have the gearbox and the motor, and some just has the gearbox. on the one I did, the gearbox was plastic and didn't hold up very well, and neither did the remote. great paint job!
-
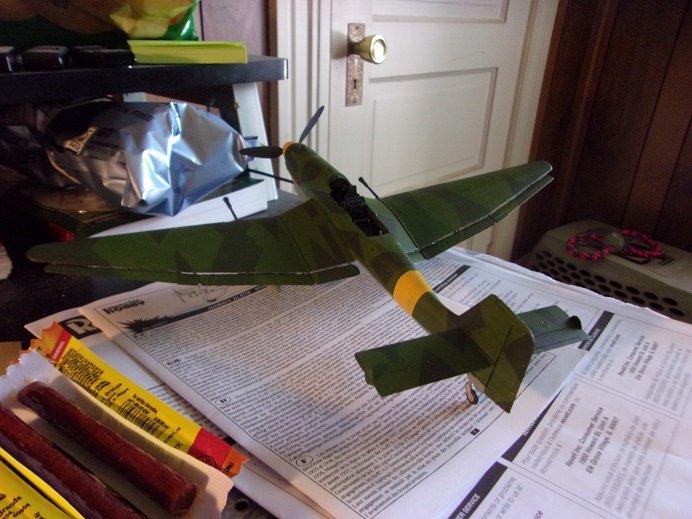
wartime here on the fourth of July..........a huge upheaval for Gibbs
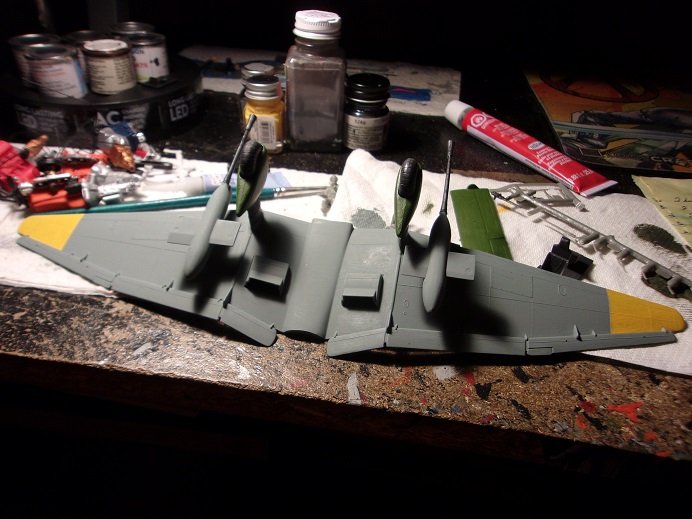
poor guy was under our bed most of the time........some folks not realizing that evening hours is the best time to view fireworks. the camo work on the upper part of the wings was under way......I stayed with the jagged camo design.
once the upper surfaces of the dive flaps were painted, the wings were assembled
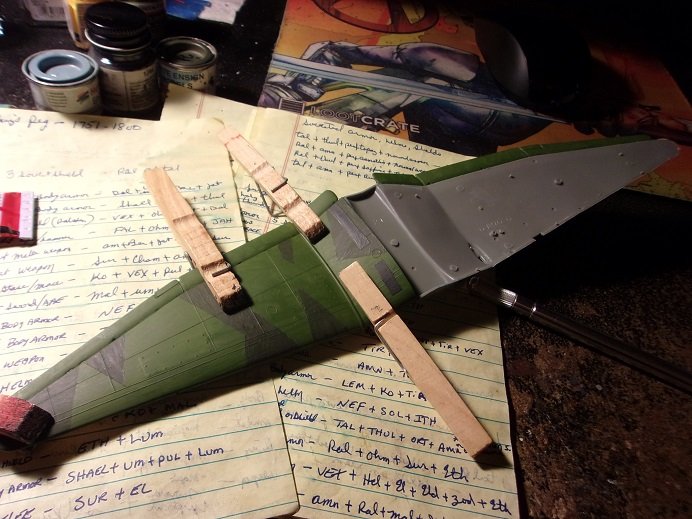
the stabilizers and fuselage were being painted as well. added here is the yellow stripe..........I also painted the spinner yellow too
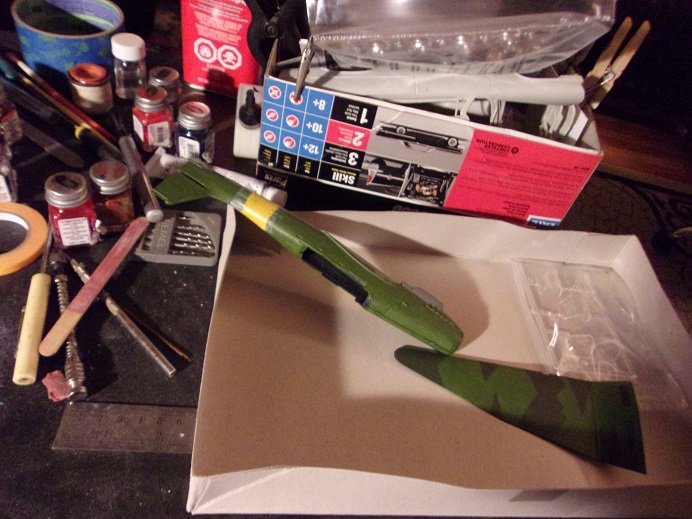
that's the Chrysler 300 in the box.........doing some maniacal things to it
I should do a log on it...perhaps later on when I have more to show the wing work continues......
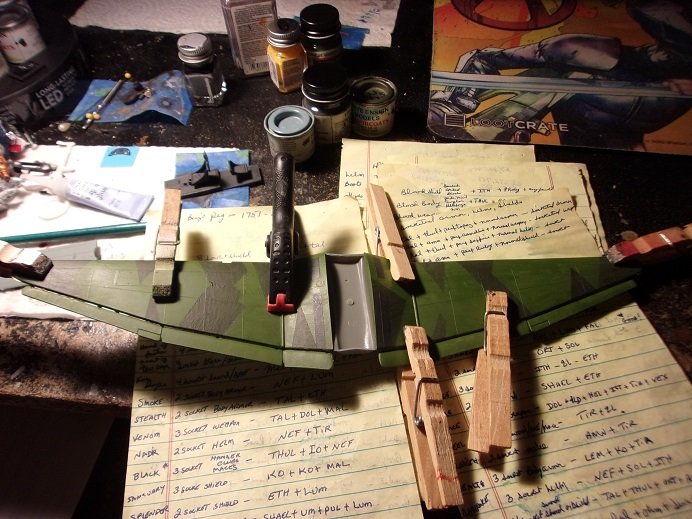
once dry, I spilled the camo on the flaps
this is where I am at the moment
- mtaylor, Egilman, king derelict and 5 others
-
8
-
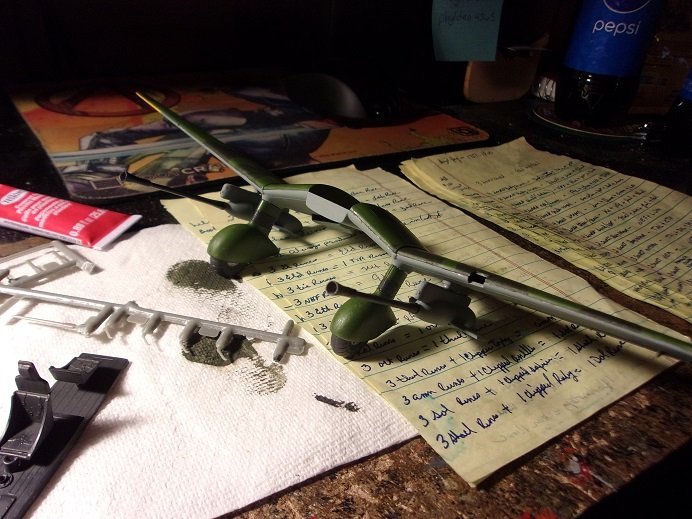
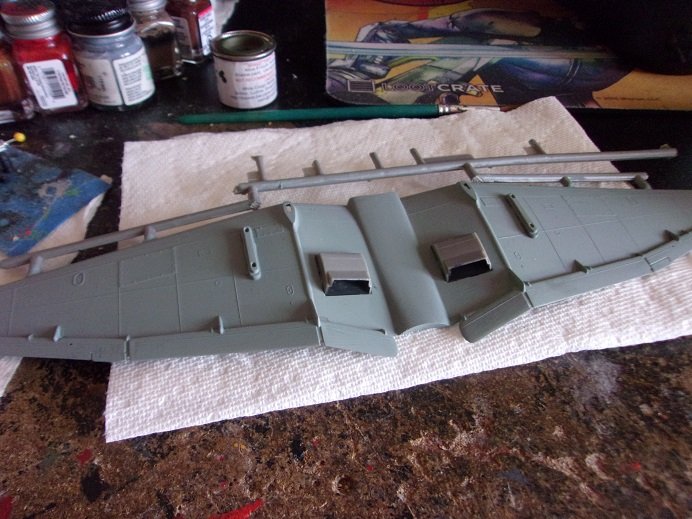
the assembly isn't much different than the Fujimi kit.......I went with a forest green and a navy green for the darker camo color. I stuck with the basic light blue for the underbelly. the underside of the wings was painted and the areas for the intakes were painted flat black.
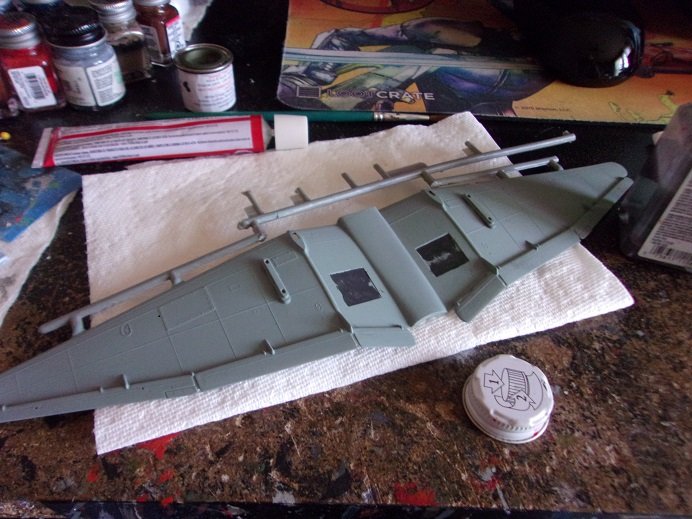
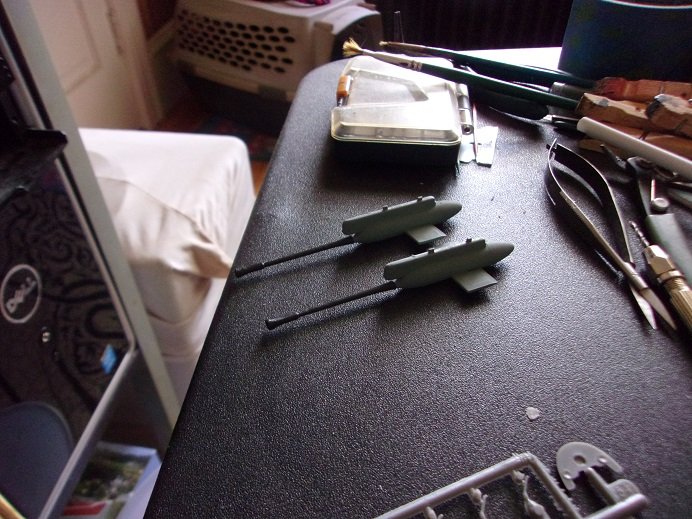
the gun pod brackets were added as well.
the gun pods were cleaned up some more and then painted later on..
the cockpit was partially assembled and painted
- lmagna, Canute, Edwardkenway and 2 others
-
5
-
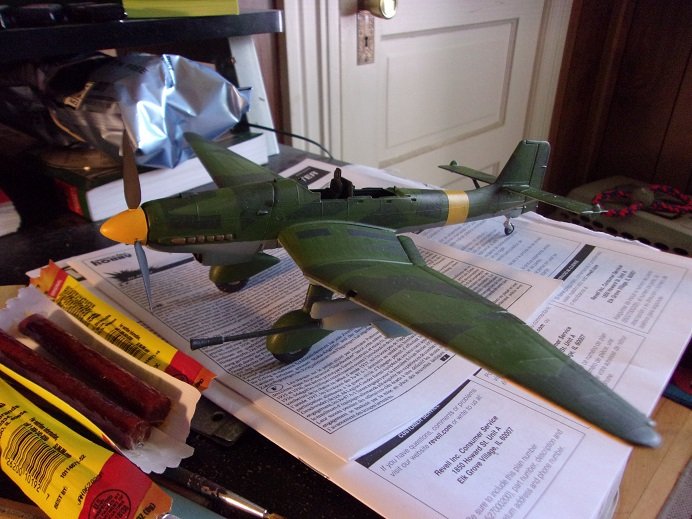
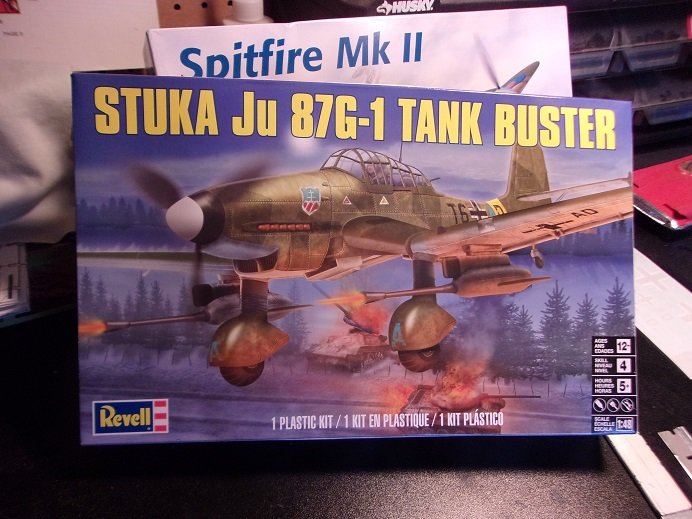
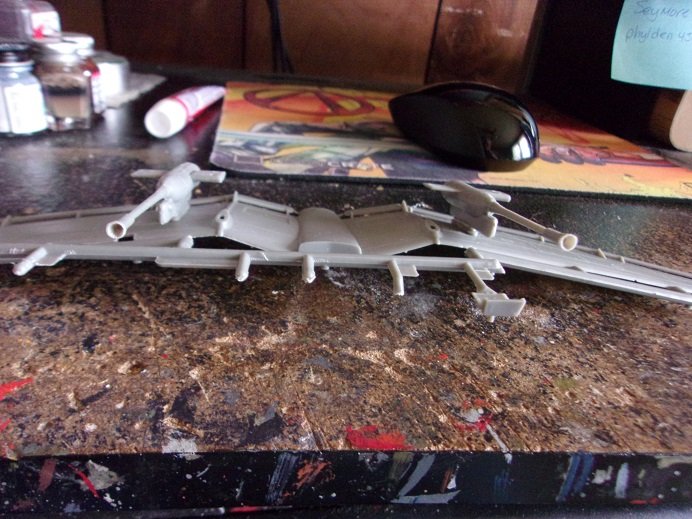
I opened this one back up.........my chance at a larger scale has occurred. a couple of weeks ago, we were at Hobby Lobby, taking advantage of a sale on model kits {I just can't resist a bargain}. I picked up two 1:48 Revell kits, one being a Stuka JU 87G-1 Tank Buster. the Fujimi kit at 1:72 scale was a huge pass around kit for a few companies......this one I feel was no different. the molds for this kit were tooled in 1963, but this is not an original kit. it was produced for Revell in 2018, but the model itself was made in China
there is some added detail with the larger scale, but not as much as I would have liked to see. one of the idioes with the kit was with the cannons.......the barrels weren't hollowed out. it wasn't too hard to open them up.
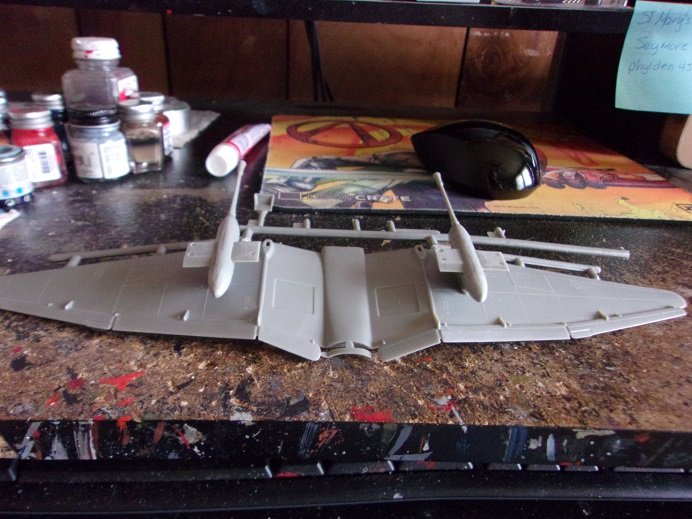
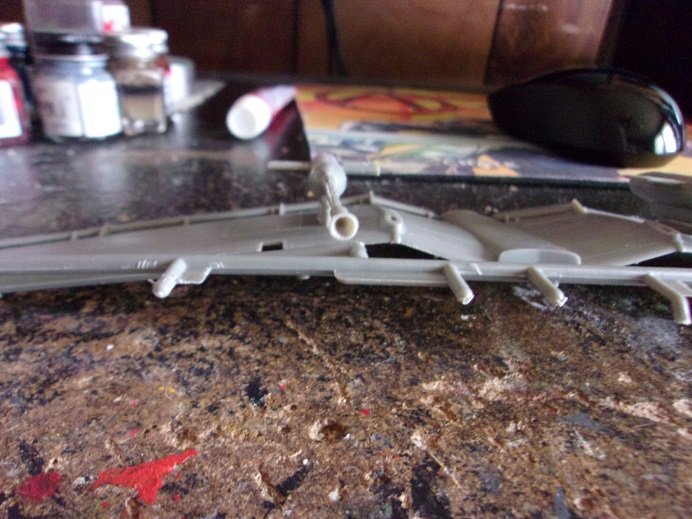
I made sure to go far enough down the throat to make it look hollow
the kit also comes with the exhaust pipes that would be seen on Stukas during the African tour.......they would need a bit of modification to make them look the real deal. I don't plan to use them. the other model I mentioned is a Spitfire MKII
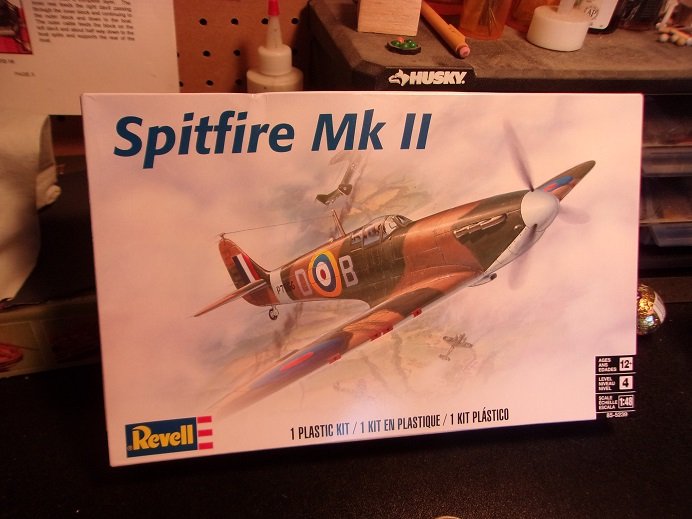
it looks a nice kit, but there is some work to do on it. on the underside of the wings, the openings for bomb racks and fuel tanks are exposed. they would need to be filled in. on most models I've dealt with, these slots and openings would need to be drilled out or cut with an x actor.......I had to drill the holes for the gun pod brackets on the Stuka. I haven't seen anything else on that one yet, but I'm sure I will when I get into it more
I have another kit on it's way to me......a kit produced by Special Hobby, a company I haven't modeled yet.......a Junkers JU 87A, a variant I haven't seen in kit form....same scale , 1:48.
bear with me...........the 1:32 kit is coming................the 'Snake' if I'm lucky
- Old Collingwood, Canute, mtaylor and 1 other
-
4
-
Junkers Ju 87G-2 Stuka 'Kanonenvogel' by popeye the sailor - Fujimi - 1:72 scale
in Non-ship/categorised builds
Posted
I thought that as well, considering that it is in relation to the elevators. my next phase will be to do the masking on the canopy.....currently trimming off the injection pin marks so it will fit right. it's been very hot up here in the Northeast.........my work week couldn't end quick enough..........I REALLY didn't want to be there. there is no break from this heat till this coming Monday. to add to the misery, I've got some gastro issues going on...definitely something I ate Sunday our family had a get together........out oldest sister came up from Florida {this is our second}. yesterday, my younger sister {#6.......there are eight in our family} informs us that her husband has Covid {I sat next to him}. I haven't been feeling ill, other than the abdominal cramps I've been experiencing, but I did a home test and it came up negative. with a sudden rush of visits to the porcelain god last night, I think I'm over the hill with the gastro issues........I'll bet it was the HOT Sausage. but I don't want to get too analytical....I just want to put it behind me............cheeky
 ")
I got a bit further with the JU87A....is there a difference between Polyuretan {quote from the instructions} and resin? I took a break from the landing gear boots / tire fitting and began looking at these parts. even the wings look challenging, being made up of five pieces. I assembled them, careful to position then to the correct dihedral....the instructions have diagrams showing it, which is really nice. without locator pins or tabs though, there is some major guesswork on where stuff goes. the resin is interesting though.......I have never dealt with it at this scale. the entire cockpit is resin....the rest are just odds and ends. due to the enlarged radiator, it is a V2 variant......not too many pictures of them online.......the G variant seems the star in that respect. I should start a log on it, since I've got a few sessions worth of pictures. I'm having to go about this one a bit differently as well.