
HOLIDAY DONATION DRIVE - SUPPORT MSW - DO YOUR PART TO KEEP THIS GREAT FORUM GOING! (Only 75 donations so far out of 49,000 members - C'mon guys!)
×


popeye the sailor
-
Posts
16,007 -
Joined
-
Last visited
Content Type
Profiles
Forums
Gallery
Events
Everything posted by popeye the sailor
-
 oh Roger.........what are you saying!!! are you saying that molded deck detail is out of scale! ROLF!
- 48 replies
-
- 8
-

-

-
- New Jersey
- Tamiya
- (and 1 more)
-
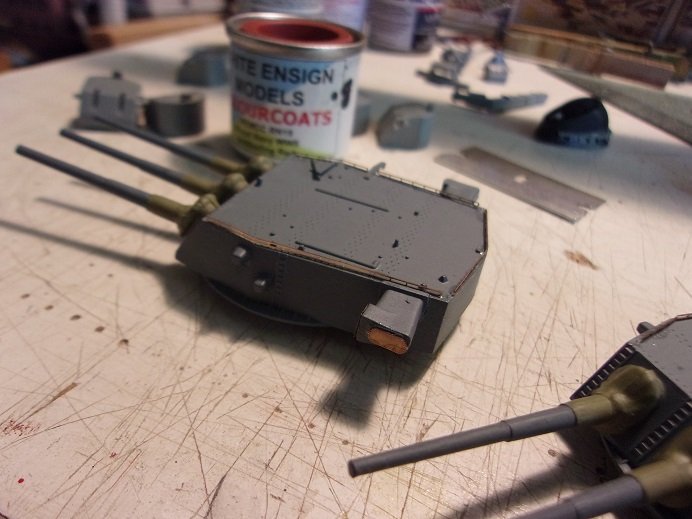
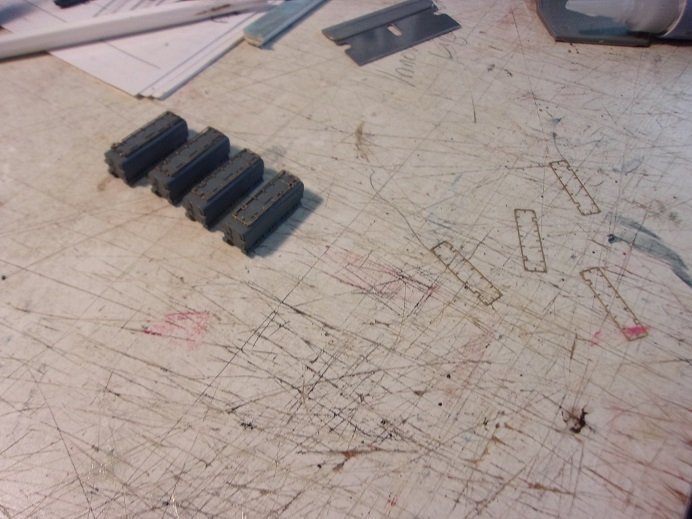
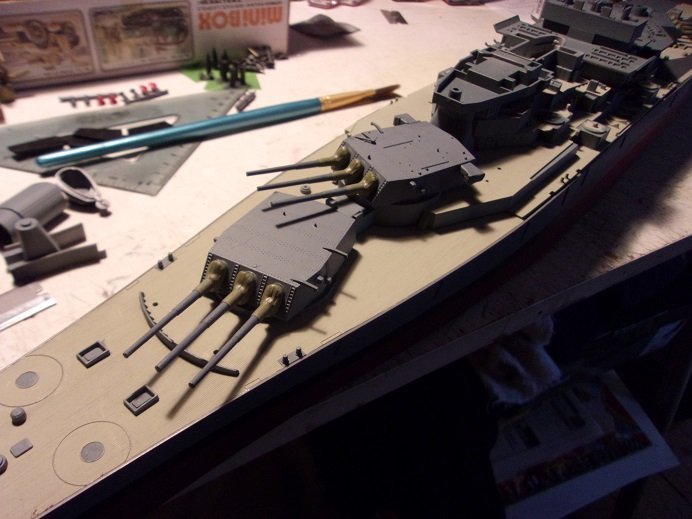
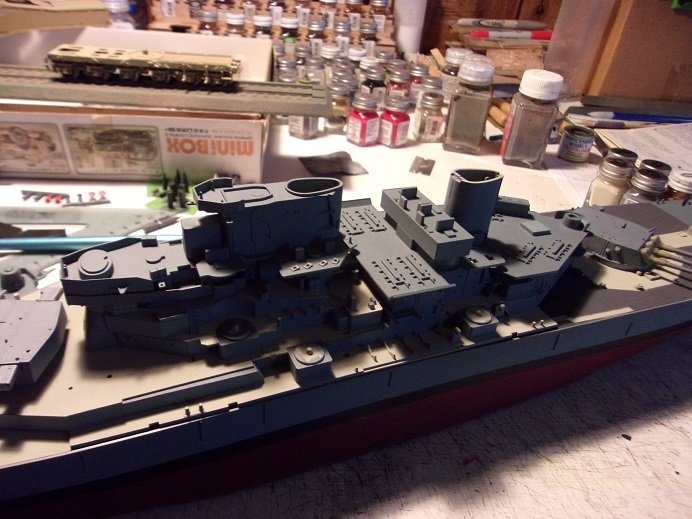
yea.......that's what I thought too I'm still trying to nail down the exact color used, but it's looking more like repaint at this point in time. not only that, I've been wrestling with car issues of late........be nice to devote a little time to the model. today I was left on the side of the road waiting for a tow.......the A/C clutch pulley seized and ate the belt. I was on my way to my brother's shop. he has a scanner that can shed more light on my EVAP issue, which was an issue since I bought it. can't wait to see what happens next while I'm here though........I can post the pictures that I've been sitting on since the beginning of June. as I mentioned earlier.....I redid the big guns, after adding the PE I thought would add more to them. there are two casements that on both sides of the main superstructure.......figured I'd add them. I also added the first bit of railing detail, which went rather well. of course it makes it imperative that I find the correct deck paint I went out and bought a different type of CA......something a little bit thicker. I've yet to try it out. the Admiral and I went to Hobby Lobby.......I got some supplies and couldn't pass up the sale on kits. I got two 1:48 scale aircraft kits @ $11.99 each {40% off}. I also made an effort towards a better stand for the model........all I need now are the pedestals! stained and lacquered, it should look OK.........better than that plastic abomination the kit supplies I touched up the big guns again......... I started to add PE to the Tomahawk missile launchers........a bit clumsy, but they worked out reasonably well. I almost lost one of these bits.......wicked hard to find on wood floors. I still have ladders to add to them and then they will get touched up again. I added range finder pedestals on an upper deck and added a bit more railing to another deck placement......I think for the Phalanx guns. so this brings us up to date......love to have done more. I really need to get the hull touched and painted, so I can continue getting it suited for the new stand........but I suppose I can do that now and touch it up later. I'm holding off on paint, since the admiral is using the spare room for her puzzles...don't want to choke her up 😷 more soon!

- 48 replies
-
- 11
-
-
- New Jersey
- Tamiya
- (and 1 more)
-
superb job on her Jav........folks don't do enough eastern front aircraft. love the paint!
-
sure......I could go out and see if there's a deck set for this model, but likely I would still have to dismantle it. I wouldn't be overly concerned if the color was a little bit off...it's not like I'm looking to put it in a museum. I made a few advances on the model........I should be posting the pictures soon.
- 48 replies
-
- 7
-
-
- New Jersey
- Tamiya
- (and 1 more)
-
the guns have been redone again.........added the little railings and the range finder parts. I confirmed that I found the correct antifoul red used on the bottom, but I've hit snags in other places. the deck tan used on the decks has been elusive, and further hindered by ghosting from the colored plastic. even if I found the correct paint, it would show like a sore thumb when touch ups are done. I'm not looking forward to it, but I may have to try and break down the built up super structure. I'll only run into the same problem over and over again. it's an odd start, but it's doable
- 48 replies
-
- 5
-
-
- New Jersey
- Tamiya
- (and 1 more)
-
thank you good sir I'd love to get another........call it something else or try to get a better body paint job { I only gave it one coat}, but the budget director is a hard sell I did locate another kit......still in the bags...perhaps for the future
-
at the base of the section you have in the putty..........I noticed in the picture before that one, there is a round section of the complete bridge {that this section sits on}, that has what looks like windows as well. curious you didn't open them up. it would be too risky now.
- 203 replies
-
- 1
-
-
- Roma
- Micromaster
- (and 4 more)
-
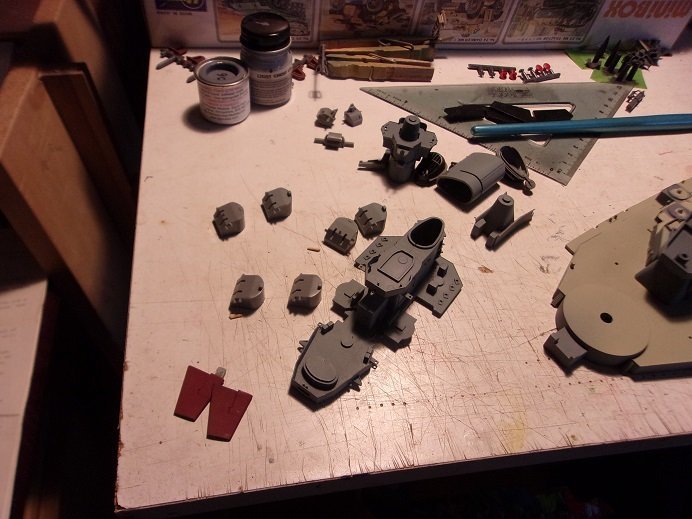
yea.........Tamiya did a great job denoting what paint and where. would have made it easier if the gent wrote down what he used. I do, but resorted to leaving the paints with the model. this led to the problem of having multiple bottles of open paint, so I got away from that practice. yes again, that the use of PE and aftermarket is a personal taste, depending on what one would like to see in their models. my original thoughts........now coupled with the idea of adding PE, has put me in a sort of 'groundhog day' which is sending me back to the beginning again. so far, I've refurbished the main guns, only to go back to them again. the ladders are quite visible, so I will leave them...........I started to add the railing bits to the roof of the #1 gun, fumbling and dropping the first piece a number of times. getting use to PE will be fun
- 48 replies
-
- 6
-
-
- New Jersey
- Tamiya
- (and 1 more)
-
your usual fine job with the PE Greg! are those windows in the base?
- 203 replies
-
- 3
-
-
- Roma
- Micromaster
- (and 4 more)
-
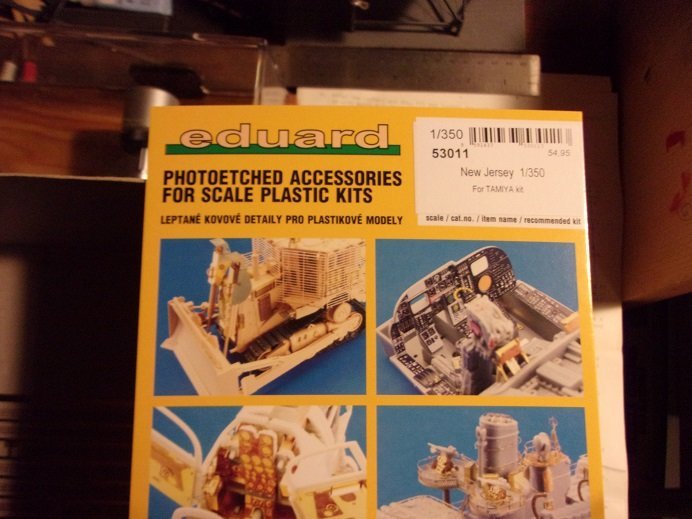
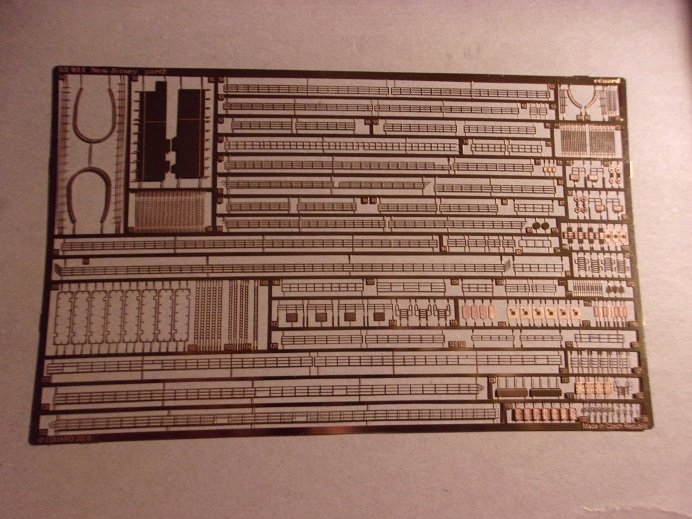
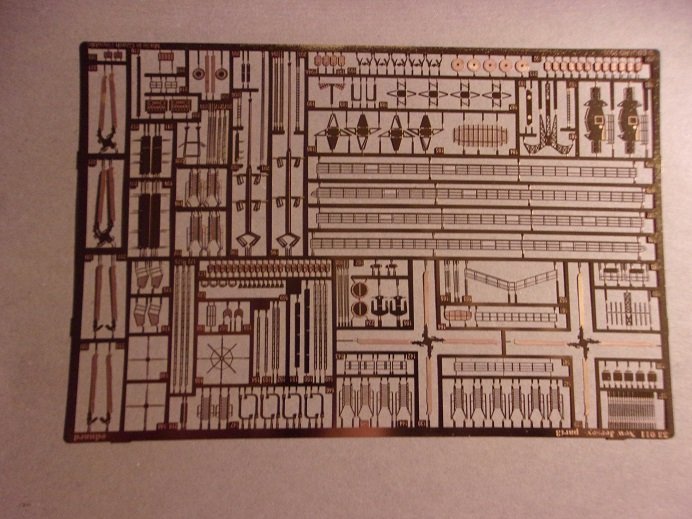
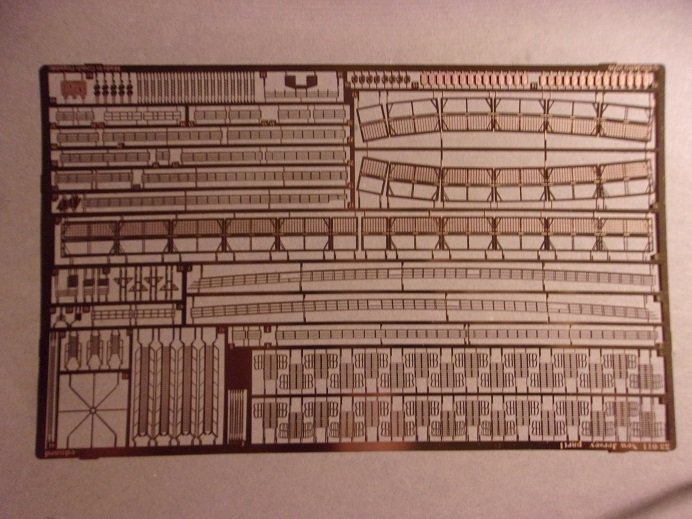
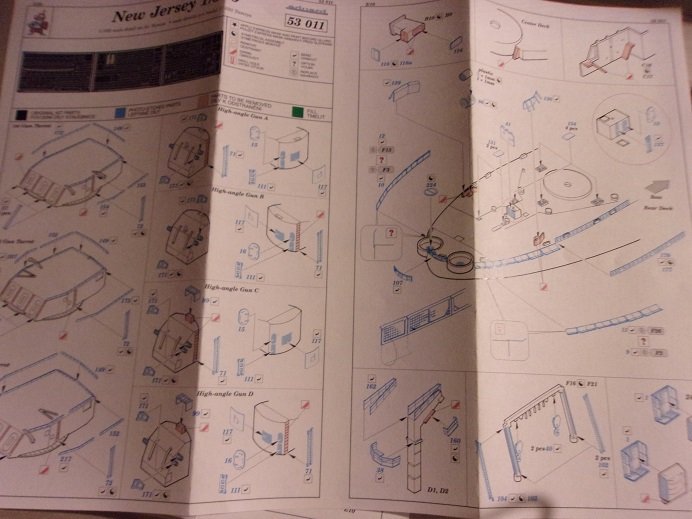
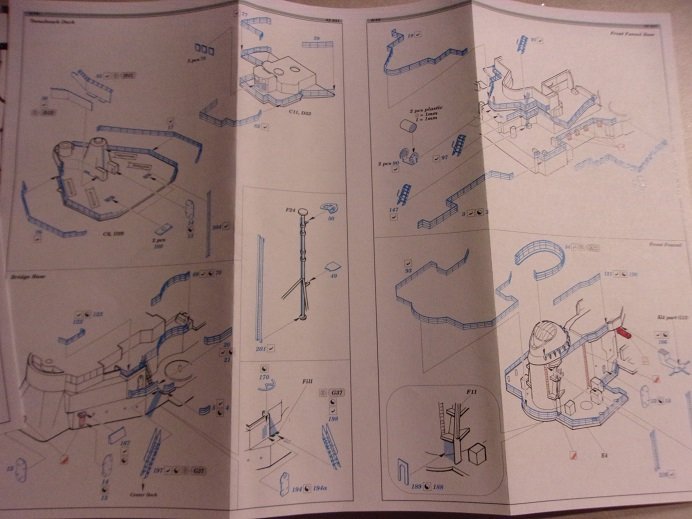
hello gents........the mailman smiled today........I was due to get it on Thursday. Mega Hobby hasn't let me down yet I'll get into it in a moment........but first... it will OC........but due to the pre assembly, I may have to pick and choose what I put into her. I still don't want to mar the work done already. in fact, I am a bit surprised that this gent didn't order it. while that statement may be true Egilman, what makes it so is how much {and how fast} the use of PE has grown. still, there are some kits, that without it, might look a little bland.......this is one of those kits. the big thing is the missing detail......the most obvious is the railings. the only ones in the kit are the collapsible ones at the stern. I thought it would look strange not having railings, let alone weird as for resin, or aftermarket parts, the kit doesn't really need them.........there is enough detail that it can hold it's own when finished. but for reasons that a lot of other folks cite for using it, is that it will give the model more detail. you can go either way though....by using PE, it negates the use of aftermarket parts..........and just as much the other way around, except that you'll need to get some railing PE. I know Lou........I don't want to go all hot 'n heavy either......I don't have a lot of experience with PE. I got a chance to delve into the history of the New Jersey.......and it's pretty interesting. at first, I couldn't put my finger on the timeline for the model, other than the dating for the kit being 1984. when she was first launched in 1943, she had quite a compliment of weaponry 20 Quad Bofors 40mm 49 Oerlikon 20mm were on the main deck and lower upper decks 10 twin 5 inch secondary gun turrets {totaling 20 guns} as time went on and her needs changed, some or all the placements were removed, to make way for the missile age. I found this article which will better explain it all, there are some pictures in it that I don't think I can print. Full History - Battleship New Jersey when you get to the war with Japan..........WOW! even in the condition that this kit is in.........it is worth every penny spent the kit depicts the timeline in the '80's.....she was decommissioned for the final time in 1991. the PE I got is from Eduard's three sheets of some really detailed stuff .....and the instructions.......head scratch'in good time! there's a lot more............ there is some that I probably won't be able to add, but what I can add will really add to the model. I did most of my chores today.......mowing and did my own decommission to my car, the Toyota, due to go to the scrap on Friday. I'll see what I can get done tomorrow
- 48 replies
-
- 7
-
-
- New Jersey
- Tamiya
- (and 1 more)
-
it's about to get more OC. I was browsing through the site that Lou linked me. it appears that they favor British and German ships, than US ships......... very nice stuff though I got an e-mail from Mega Hobby yesterday, so I took a browse though there. I saw a PE detail set for this kit! interesting because I have noticed that there are no railings at all in the kit. I ordered it........in my experience with them, I will likely see it within the week. it's a good thing I haven't assembled too much yet. I'll work on cleaning up the hull until it arrives I guess I'm jumping into a deeper rabbit hole than I thought
- 48 replies
-
- 5
-
-
- New Jersey
- Tamiya
- (and 1 more)
-
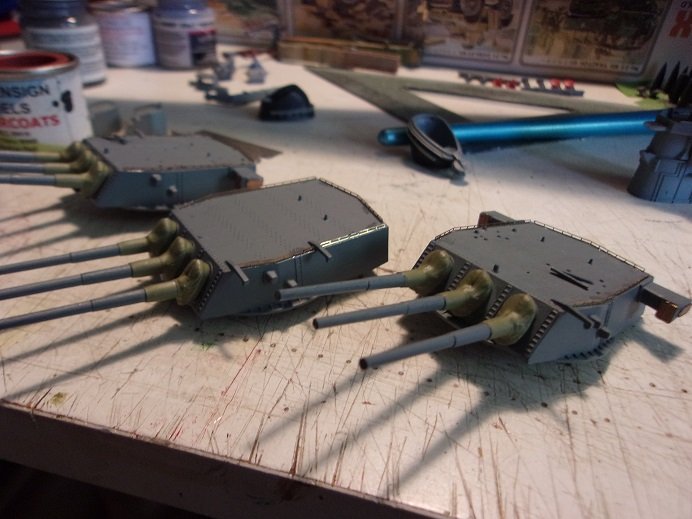
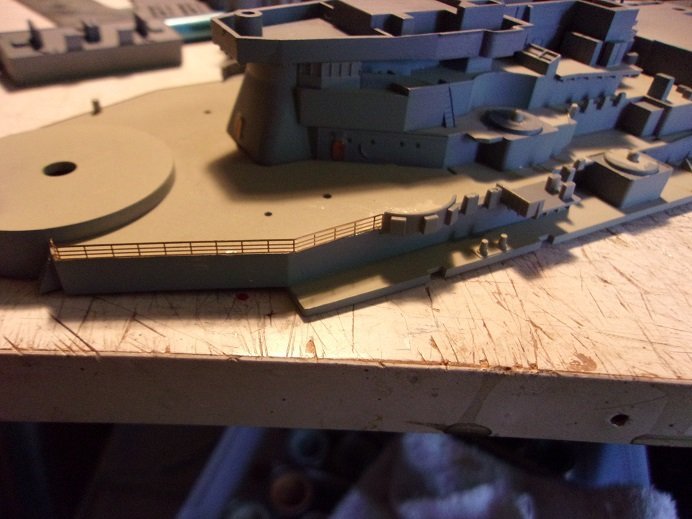
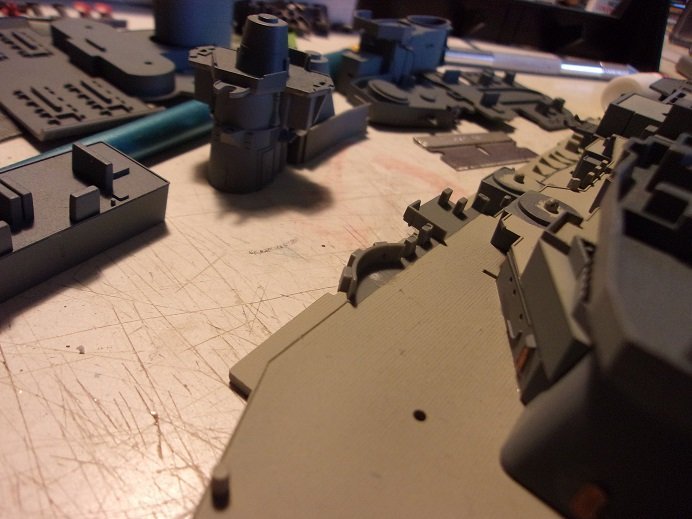
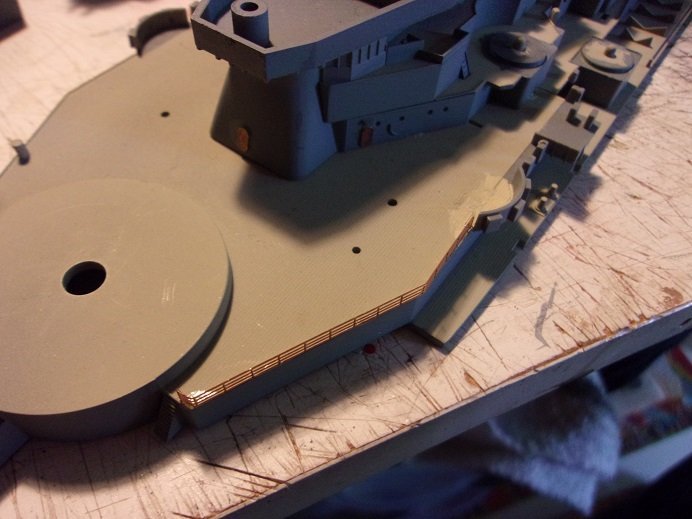
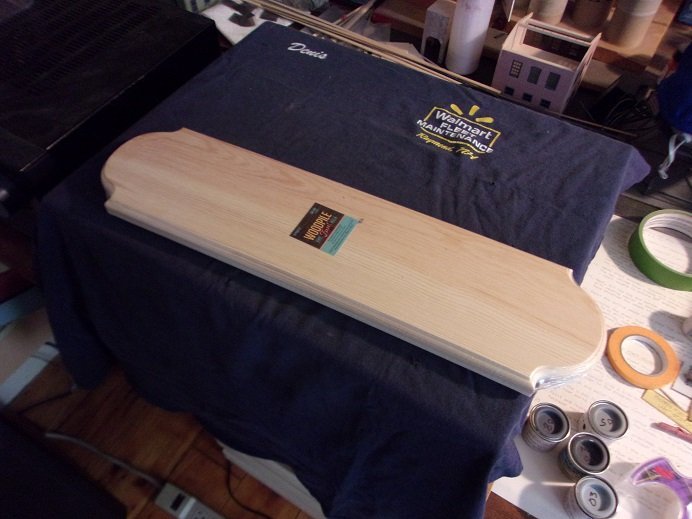
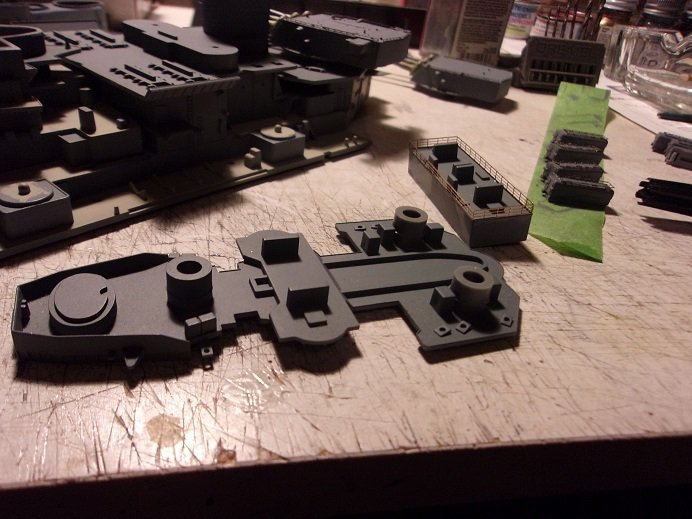
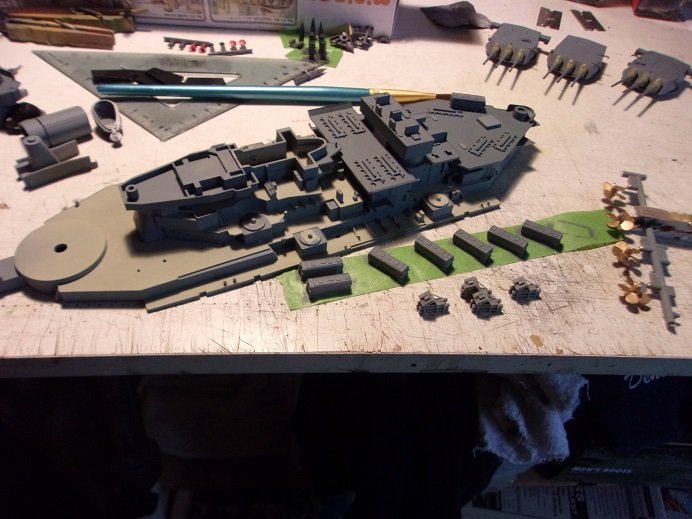
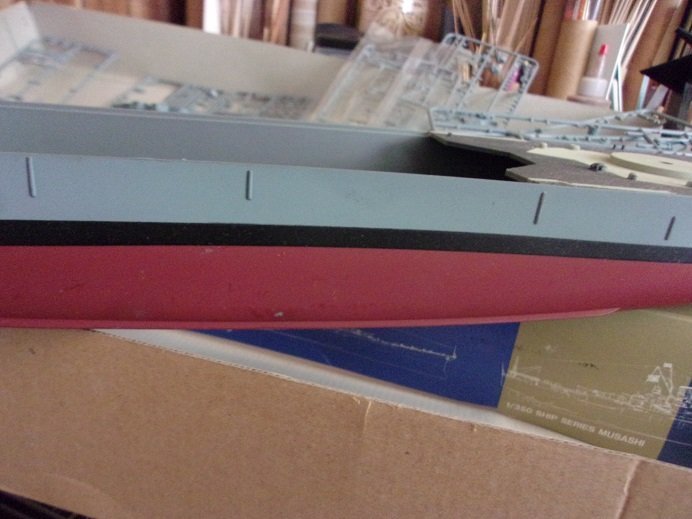
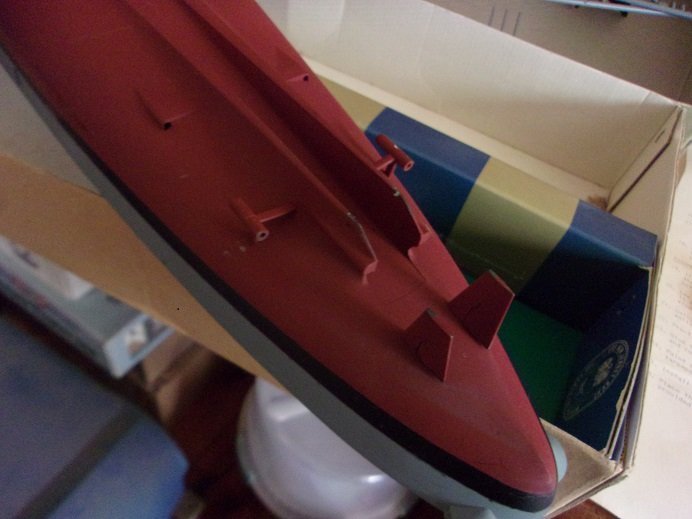
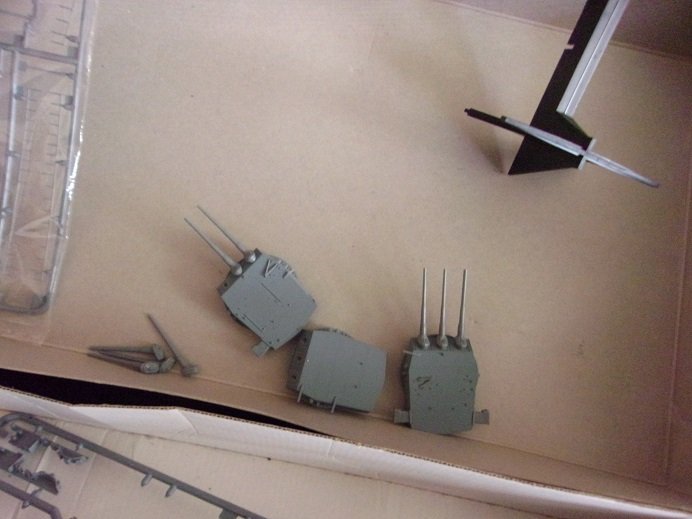
thanks to the moderator who updated the title.......I was unaware of all the changes. I'll keep it in mind....thanks for all you folks do it wasn't hard to remove the gun barrels from the turrets...all but one. rather than risk damage, I painted it on the turret....not too big a deal. one of the range finder nodes was missing on one of the turrets...luckily there are a couple extras. going out on a limb, I used a testor's color that looked very close to the original color. but when I was finished touching them up, I saw that the difference could be seen, so I painted them all over completely. the Tomahawk missile launchers were already assembled, so I painted them. dry fitted is the deck plat form for the rest of the Tomahawk launchers and the Harpoon launchers. the step structure for the Vulcan/phalanx launchers is also seen here. I painted the screws...I was going to paint them Brass, but stuck with the instructions and painted them gold. the decking I'm pretty sure was painted in Teak........the instructions suggest deck tan. this is to get a sense of the direction that was being taken with the model, and the relationship of all the loose parts. as this progresses, I'm seeing a lot of the parts that are still missing, and locating them on the sprues. the funnels are partially assembled..........still more to go with them. this structure here will go on the forward section... also seen here are the 5 inch gun turrets.......these have also been assembled, but not painted. they have specific locations, so I need to figure out which goes where and label them for future reference. good that the guns haven't been added yet. I did a little clean up at the bow....the anchor chain is molded detail. I have quite a bit of chain, but might not be correct for the model. I am thinking of removing it though. then I wanted to see the built up model more of the forward structure dry fitted, as well as the aft funnel...I didn't go any further. I can see the direction he was taking, and to me, it looks really good when one can see through the shadows, it is realized even more. I've done a few touch ups...the rest can be done as accents. adding in what is missing will further enhance it. the bollards need to be painted.......add them to the list. curious about the two placement circles towards the bow and the stern tubs........wish there was something to add, but it wouldn't fit the model. more to come

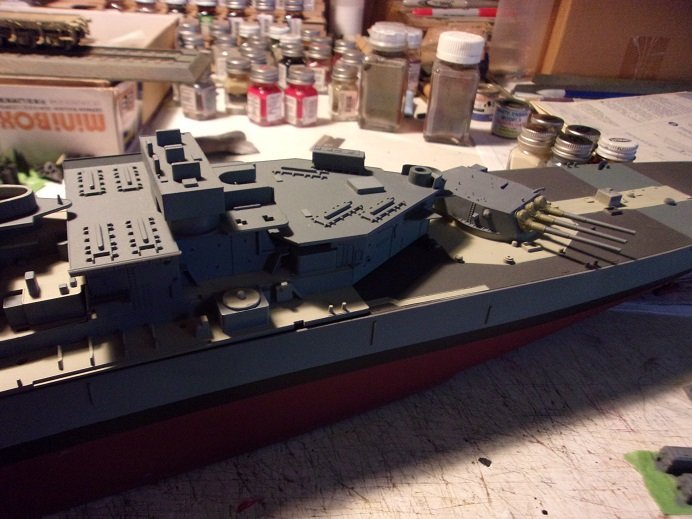

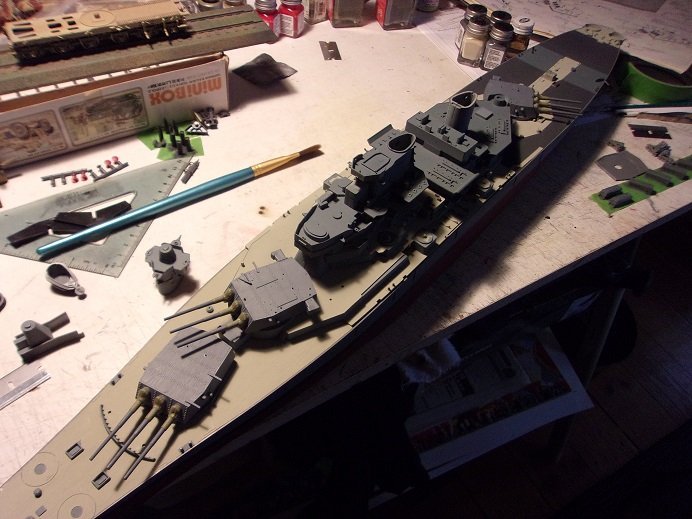
- 48 replies
-
- 13
-
-
- New Jersey
- Tamiya
- (and 1 more)
-
thanks Lou for shedding a bit more light on the kit. I guess we have an unknown sailor on our hands. I still want to try and leave the work he did on it and preserve it....a monument to another modeler who didn't have the time to finish his ultimate model.......something I think we all strive to accomplish. I have the utmost respect for this.....to any modeler. it is their license..........their course of direction. it is our job to encourage....not discourage, no matter which way the model goes.........their triumph to sit proudly on their mantle, or go down in flames and end up in the circular file. the hope is that they learn from it and continue, and we should do our best to perpetuate the craft. I am glad to have has some {small} hand in seeing Augie's Confederacy come to fruition.........and now I have an opportunity..........*crack*..............oh sh__ .....the soapbox broke* well......while it may not be as good as some of the more accomplished steel navy modelers here........I will do my best! I like what he did....I never pictured the deck {s} bordered off in color like this........never did one like this either. finding the antifoul paint last nigh is pretty big.....I had better get a move on and source some pedestals for it.....and the wood base. your trying to get me killed aren't you?!?!?!........the admiral saw me browsing {of course I looked as soon as I saw it }. I bookmarked it..........if I can get something by.....we'll see. I left the ship as I left it last night {you'll see with the update I have for you all}.......and asked her to envision upgrades..........yea, that went over like flatulence in the clergy....but I'll keep trying. it may also be a good thing for the Hasegawa Missouri or the Nichimo Shokaku that I have stashed away. thanks for the link ..........and yes, the instructions were in the kit........it is complete. does strike me odd {a little} that there are some extra parts........so far they pertain to a fourth turret....there may be more. makes one wonder if one of these sprues {molds} was used for other large scale kits. you'll like the kit Egilman........it's a nicely detailed kit. PE wise........the model could benefit with doors and small stuff, but overall, out of the box, it's going to look really nice welcome Jack.........good to have you look'in in enjoy! Hi Mike.....I had just gotten Christine out of my system........although I have another '58 Plymouth Fury to do a custom job out of...that can wait I wanted to get back to ships....lou's comment kinda helped me along. I've promised him long enough enjoy! are you still holding off on your find? welcome Matt welcome Jim I'll keep your kind offer in mind! I have bookmarked sites for research........if you have pictures or take some, by all means post them..........we'd all love to see them thank you! welcome Ken........good to have you look'in in I have a small chest freezer........it's big enough for the hull I started to break the super structure down, but basically to do some of the missing detail paint....window glass, etc. I figured I could get it done without damaging anything, so I stopped. it's an option to keep in mind on with the update
- 48 replies
-
- 4
-
-
- New Jersey
- Tamiya
- (and 1 more)
-
good to see you OC..........still gotta finish catching up on you hood meant to ask.........whatever happened to waiting on building it? you jumped in with both feet! I know........I know........you needed something to straighten your eyes, painting those figures........... believe it or not........I think this is my first Tamiya model. gotta remember..........I'm old school. my only stray from the US based companies was Heller. even back then, I never did any mixing.....not unless I was looking for some off the wall color. as a matter of fact.........a little while ago, I was rummaging through one of the White Ensign bins { I have two of those three drawer plastic thingies}, when I believe I found the paint he used for the anti foul paint he used on the bottom. "RN 19 Royal Navy WWII Antifouling Red" perhaps the hull color is in this bin too you wouldn't believe the colors I have...I must have at least 10 shades of gray {I'm still look'in for the other 40 }
- 48 replies
-
- 5
-
-
- New Jersey
- Tamiya
- (and 1 more)
-
hello Todd.......welcome aboard. I've ben living in another part of the forum........I just got back! this is going to be an out of the box build..........PE would be nice, but I don't think the admiral would approve it. from what I've seen so far, there are some parts that should have already been added to what's been done. I hope there isn't too much of it, cuz he did a lot of jumping around. depending on the model, I tend to do it too, so I shouldn't be too surprised. the model is nicely detailed......so far, the only nuance is drilling the holes for the inboard screws { an aide for centering later on}. enjoy welcome Egilman......is your Missouri by Tamiya? I have the Hasegawa 1:450 Missouri {talk about a kit that could use PE }. I bought the wood decks for it.......something I've never done before. I'm sure the popcorn machine will be rolling in pretty soon.........just what I need.........butterfingers enjoy my friend!
- 48 replies
-
- 5
-
-
- New Jersey
- Tamiya
- (and 1 more)
-
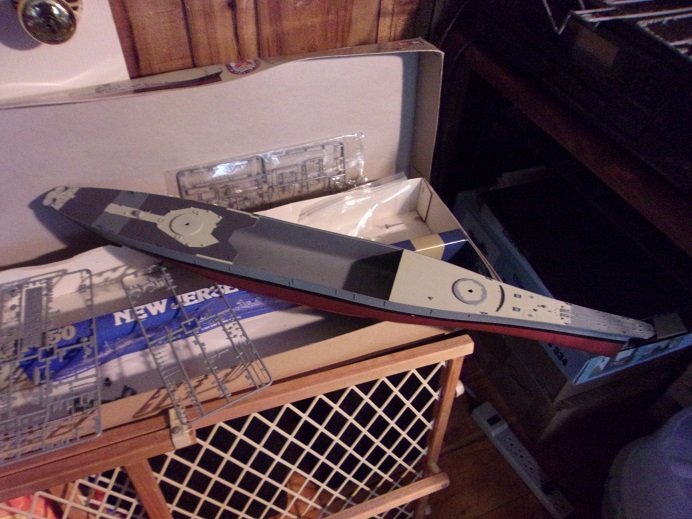
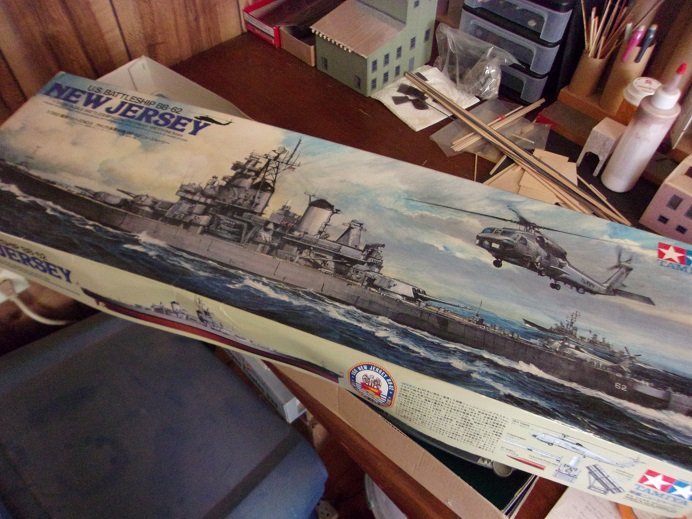
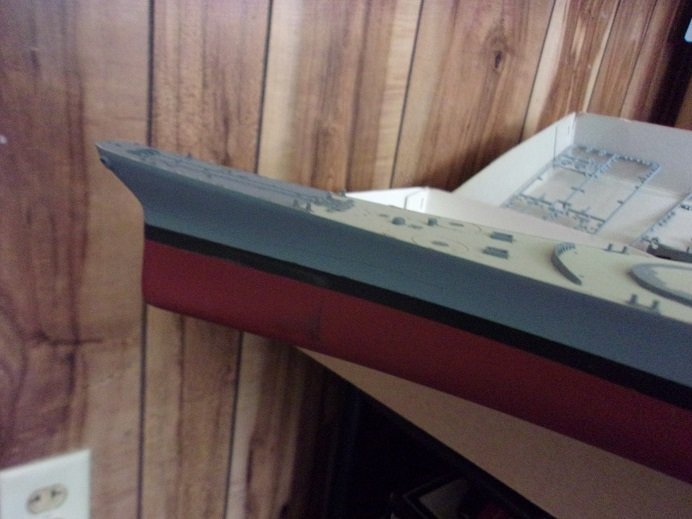
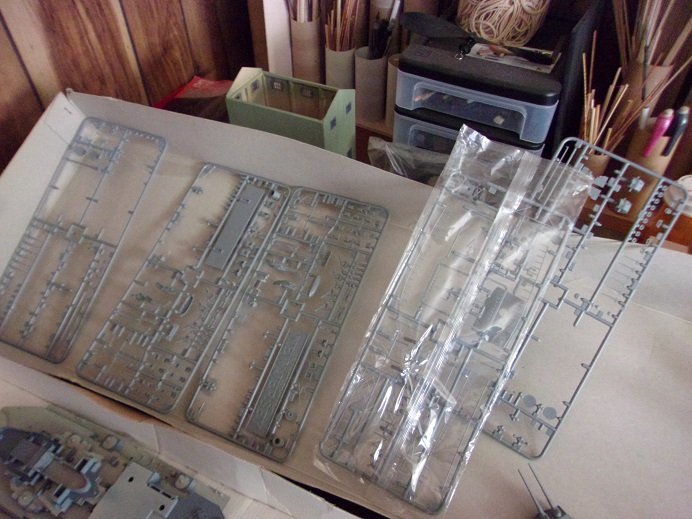
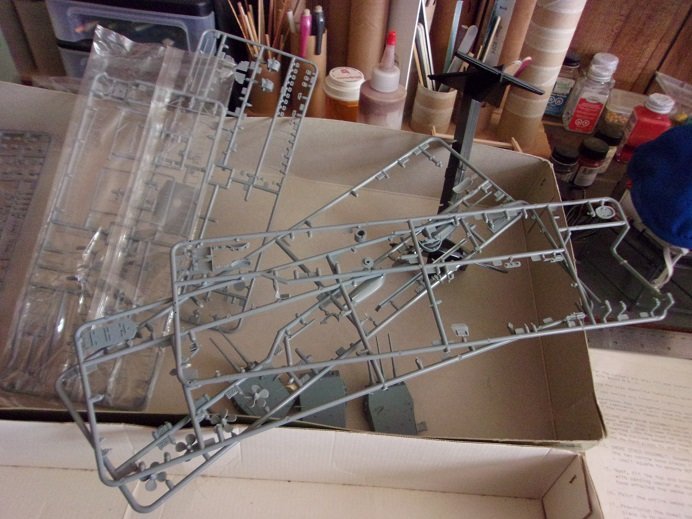
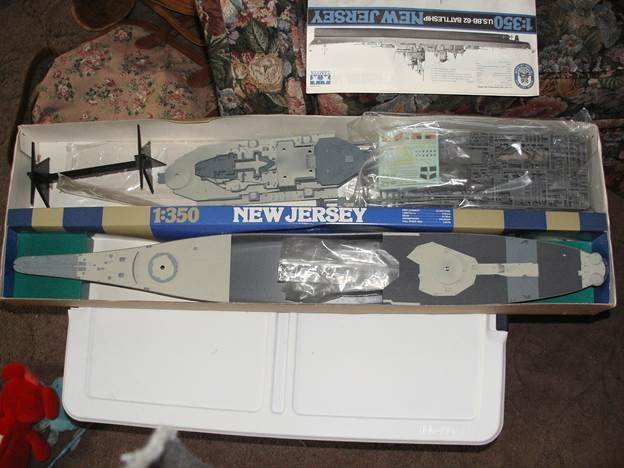
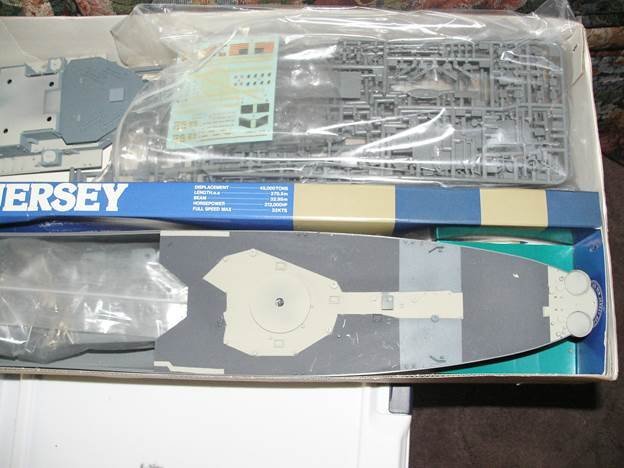
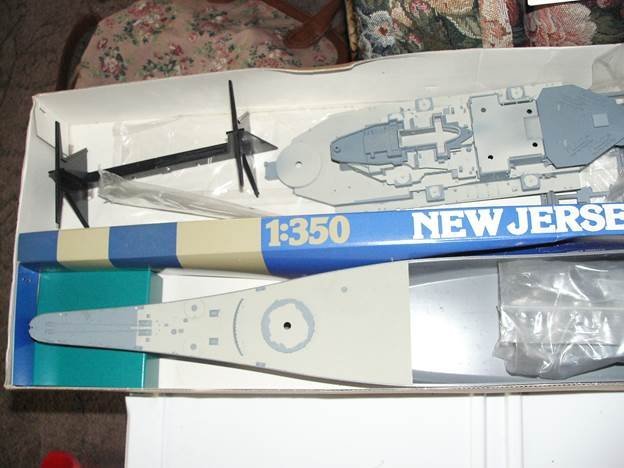
the Battle ship U.S.S. New Jersey {BB 62} was the second of four IOWA class Dreadnaughts, launched in Dec 1942, built during WWII. she served through the entire war with the Japanese.......may of 1943 through to the end of the conflict. at the end of every conflict, she would be decommissioned.......only to be recommissioned for the next one. she served in the Korean war and Viet Nam, and was later commissioned to aide in the Lebanon conflict. in the 40 years, she is the only BB class vessel to have participated in four major conflicts. though her looks might not appear to have changed much in these 40 years {per the instruction sheet}, there were many modifications done on the vessel, in preparation for each of her missions. as outfitted in the kit, she has the following: 3 triple 16 inch guns {turrets} 6 twin 5 inch gun {turrets} 8 Quad Tomahawk missile launchers 4 quad Harpoon missile launchers 4 Vulcan/Phalanx 20 mm guns 3 Sikorsky SH-60B Sea Hawk Helicopters {the kit only supplies two}.............oh, I get it..........the third one is flying around in the picture { I see that now} this kit was produced in 1984, so most of the information in the instructions is likely old news..........I did bookmark some sites for further research. the box is in pretty decent shape.........but the hull sustained some rub marks and etch scratches. most didn't take the paint off, but some touch ups and buffing will be in order if I intend to save the paint job. I removed the rudders in order to drill holes for the inboard screws. the screws have holes, so I will fit them with a pin to center them in place. some parts were painted on the sprues, but there are a lot of loose pieces. I would guess that he was doing some dry fitting. this might not be a big deal, but it makes me think that he wasn't working according to the instructions...........these parts span over 4 or 5 pages. some are not painted at all....some of these parts are sub assemblies that consist of 2 or 3 pieces. the 16 inch gun turrets are partially assembled........and partially painted. I will take them apart and do more paint work to them. as can be seen......I don't care for the stand. I may source some pedestals and go that route. it will be hard since he cemented in the bow and stern deck sections. I'll look into it icky Mae bottom left there........you see the superstructure has some assembly. I did attempt to remove parts, but I stopped in fear that I might damage something. it has been assembled fairly well.......once I dial in the paints used, I can touch up tell tale places. there is some slight ghosting in places, so it is a safe bet that he used the White Ensign paints. I've used them for a few projects and that is one thing I observed with them. they are already fairly thin, so thinning them down further will need to be experimented with. I also saw that Tamiya instructs you to mix a lot of the colors used, so they are not 'out of the tin' colors. I'm not into doing that all that much, so I will need to match the colors as close as I can, and mix where I need to. a few more sprues of parts and Bob's your uncle..........that's the kit. there are some decals that should already have been put in place on the superstructure that I need to catch up on as well. I tinkered with it a little the other day, but a got more done today.........I'll have that update for you soon
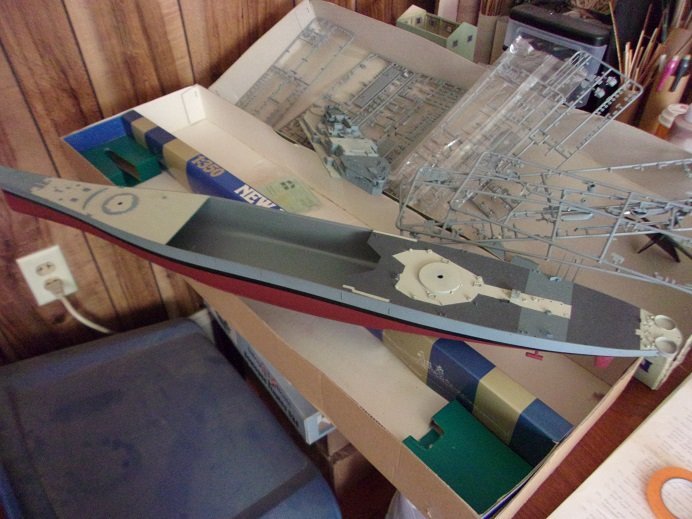
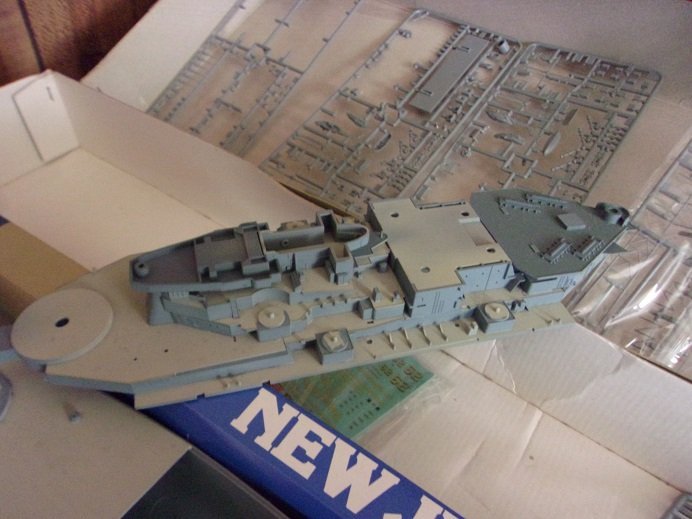
- 48 replies
-
- 15
-
-
- New Jersey
- Tamiya
- (and 1 more)
-
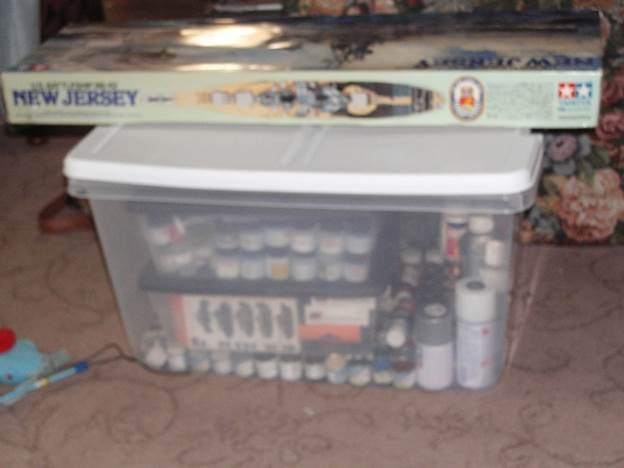
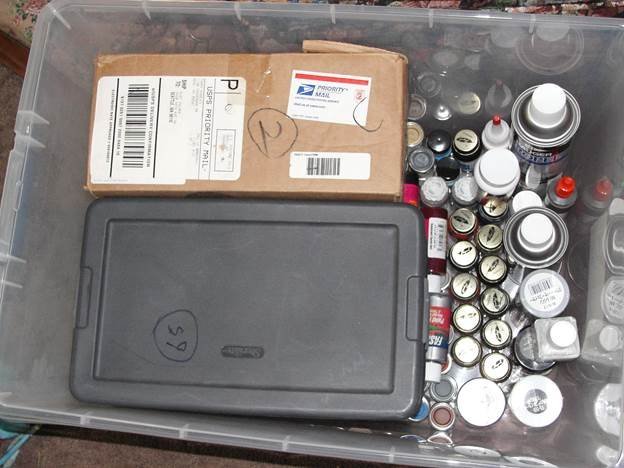
this ought to bring a smile to your face Lou I was indecisive as to what to amuse myself with next.........could have been any one of the many active projects I have ongoing, but a recent exchange caused me to bring this out of the closet. I guess it's been over a year since Lou sent me this kit.........a kit that had been started by another gentleman, whose passing was how Lou came in possession of it. he also got/bought a rather vast array of different paints in many forms.......bottles, tins and sprays. it's been so long ago, that I can't recall what the deal was, but I got a good portion of these paints. Japanese, German, Royal Navy, French, UN....you name it.......I got a sampling of each nation. there were plenty of Testors paints too.......some quite old {I think he told me some were from his inventory}. I'm sure Lou can add to this. the fellow did a lot of prepainting and some assembly on the kit. I don't believe I got the fellow's name.......I don't recall it if Lou told me...I hope I'm not being rude after seeing what he painted, I did say that in light of how well he did, I wouldn't change any of it...>I didn't take into account that I would have to match up the paints before proceeding. I did do a light inventory to make sure all the parts were here..........and by my guess, it is complete. this will be the largest plastic ship I will have done to date. so now, the model is out of the box and I am evaluating where he left off, and what the best starting point is on it. since I received the paints, they are separated and I have been sourcing color charts for White Ensign and Humbrol........I already have one for Testors, and recently found a good one for Humbrol. White Ensign is a tough nut.......can't seem to find one........even if I did, it likely would be many charts to cover all the nations. so here we go.........down another rabbit hole

- 48 replies
-
- 14
-
-
- New Jersey
- Tamiya
- (and 1 more)
-
aircraft carriers are always fun to do.........depending on the kit, you can get a little of everything wonderful start!
-
MAN!...........I've seen a battle ship with guns............but I've never seen guns with a battleship! there are more guns on this one Greg, than any ship you've done so far. very interesting looking too!
- 203 replies
-
- 6
-
-
- Roma
- Micromaster
- (and 4 more)
-
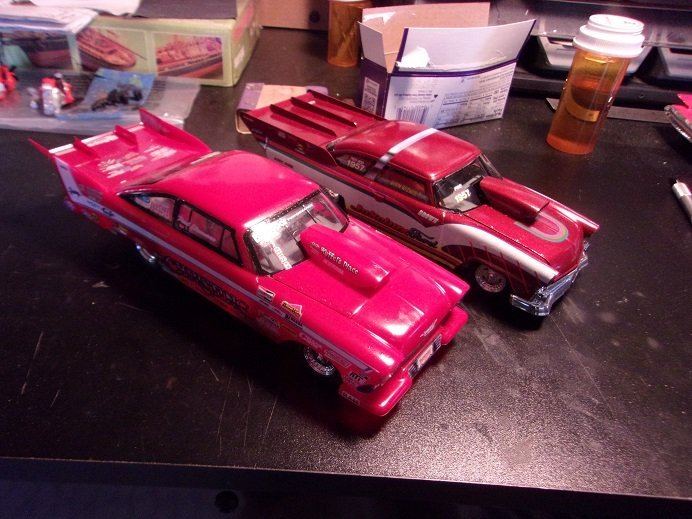
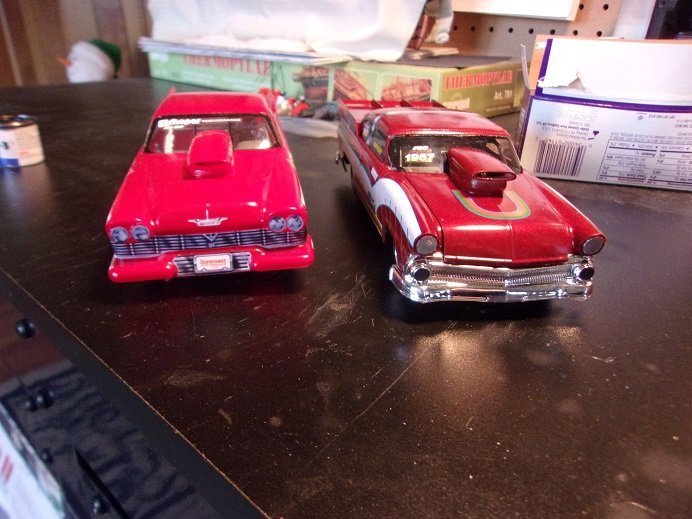
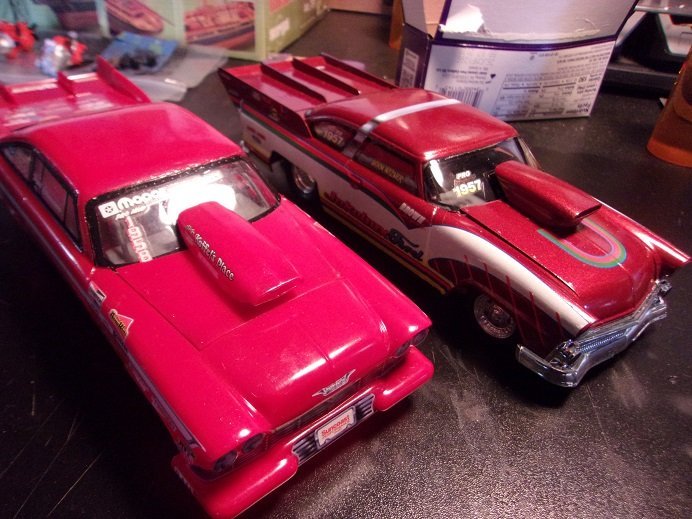
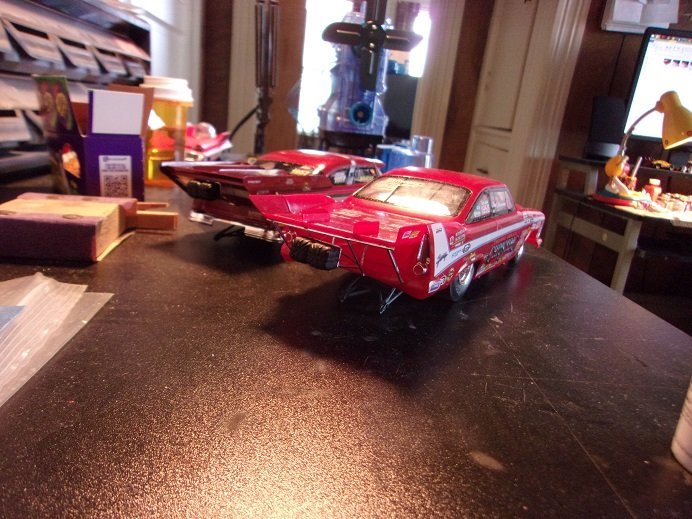
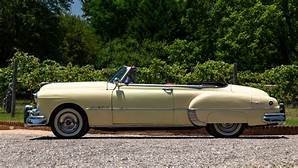
I took some pictures of a project that had been started by another gentleman.....he passed away and the project was given to me. it's been a bit busy 'round here........that and I was undecided on what to bring out next. these pictures were stuck in the camera.......though I'd pass them along. they are of the Jukebox Ford and Christine together. for the month of June, the calendar sports a 1949 Pontiac Chieftain convertible .....not in this color, but this is what it looks like. the hard top can be purchased with or without the roof visor. could be a contender for a pro mod look........but it doesn't look too bad as a custom job either. I'd have done a metalflake job on her.........but to each their own I've yet to see if there's a kit on it
-
superb look'in bomber Jav.....great paint!
-
hello Bob.......fine looking ship your building nice to see that there are a few 1:96 fans out there...I have long enjoyed this series of ship models. when I built my second Cutty model, I ran into the same problem with the decals.......they were old and micro cracked. I ordered another set from Revell, along with a request for another set of sails.....got only a couple of the sail sheets {they were done in beige, rather than the white vacu-plastic}, but I got another decal sheet. sad to find that they were just as old as the ones I had! I tried to source out for a set from places that did custom decals, but all I got was excuses and the run around. after a bit more searching, I stumbled onto the Testor's "decal it" program. you can make your own decals using your printer. getting into it though, I found that that there were limitations to what the program can do, and that it wasn't possible. even trying to do them in "paint shop" was a bust.......mainly showing the limits of an ink jet printer....the inability to print white, and metallic. it does work well for other applications though, so I found that it wasn't a total waste of money. one thing I gleaned from your log though, are the complaints concerning the inaccuracies with the kit. folks should keep in mind that back in the day {the kit was produced back in the mid 50's}, that they were considered cutting edge for ship models.........highly detailed with the information available at the time. Revell over the years has gone though a lot of changes.......last I checked, it acquired the name Hobico, and the only inkling of the name Revell is Revell Germany. I've yet to see any updated retooling of this kit, with so many older kits popping out of the wood work on E Bay {and other site like 'em}. I've heard that R.G. is reproducing and expanding the 1:96 line....the Connie kit being the only one that was still being produced through the years. I have never used metal on these kits...nor have I ever put brass rods in the masts...haven't felt the need to. the one thing that urked me, was the segmented decks and trying to hide the joints. one thing I tried, which I need to get back to, was I made wooden decks for my second U.S.S. United States. it was a tedious task, but the results came out really good. I did have to do a second set though, because I took too long getting back to the model and the decks warped. I took precautions with this set and hopefully, it won't happen when I get back to it I have another Constitution kit....it will be my second as well. there should be a log for my second Cutty in the archives.......along with the one for the United States. some of the inaccuracies are actually design modifications for ease of assembly.......the dead eye racks are the most obvious. if they were to be located on the pin rails {the way they should be}, it would be almost impossible to tie off the rigging to the belaying pins. so they moved them onto the cap rails to make it easier. as with any model........there are ways to enhance them to add realism...you've done well with the rabbit holes you've gone down
-
so glad to see you are well and safe my friend! such stunning progress you've made on your model, under such circumstances...... your model is truly amazing!
-
one thing you didn't mention Craig, is that the washes you used on the plane mottled the flat finish a bit more, killing more of the flat sheen. that made it look even better.....more life like great job on the plane!
