HOLIDAY DONATION DRIVE - SUPPORT MSW - DO YOUR PART TO KEEP THIS GREAT FORUM GOING! (Only 20 donations so far - C'mon guys!)
×


popeye the sailor
-
Posts
16,007 -
Joined
-
Last visited
Content Type
Profiles
Forums
Gallery
Events
Everything posted by popeye the sailor
-
 I have it book marked already I also have listings of B 17 bomber groups, and that number comes up no where. I knew a few had the chin gun.......likely testing it before the G's came out. I did find a group with similar markings....'V' stripe on the wing......but little else matched. there are options for a different variant, perhaps the kit has the option to cross over to a G. I haven't seen anything about it.......then again, it's hard to turn pages with a tube of glue and an x actor in one's hands
 -
brave man
-
you tried.......can't do better than that
-
Grumman A-6 Intruder by Papa - Fujimi - PLASTIC
popeye the sailor replied to Papa's topic in Non-ship/categorised builds
sorry to hear it -
superb progress Greg........the island, rafts, and guns look so good so much PE..........you must have the hands of a doctor!
-
you've got an old kit........are the parts laser cut? I've built one older kit of the Nordkap.......I've started on a second, a bit older kit, that I'm going to build the Progress...it's another Nordkap kit. the bulkheads have the same marks as yours does........I believe these parts are pre cut.......they are fastening holes from a jig. the newer laser cut kit of the Mary Ann is a very nice kit to work with........the Cux 87 is basically the same hull design, just outfitted differently. I've built both models, as well as a few other Billing's kits......I've enjoyed all of 'em if you want to make it easy on yourself, looking around on E-Bay or the like sometimes has these particular kits, either missing the fittings kit, or partial in some way. you can get them on the cheap. if you don't have the fittings kit for her, Billing Boats have released the kits for them. Billing Boats Official Website 2012 Billing Boats USA
-
I don't either.....only in the summer when I can use the garage. my spray booth is a large plastic storage bin......I open a window for ventilation. I can't right now because the weather has gone to the dogs....it's in the teens to zero right now. we got more snow coming Saturday or Sunday. where do you get Floquil?.......haven't seen that brand for a while either.
-
really nice
-
not to worry Lou ...it is the thought. good you brought it up though.........not all B 17F's had the chin guns. you stirred enough curiosity in me to look at the Wulfe Hound, to see if she had it...she doesn't! it's an F kit anyway.........I should have known better. there is the hole for it on the one you sent me, but looking through the instructions, there is a 'plug' for it.
-
not totally correct on the primer use Mark........if you go with thin coats and use an air brush, you should be able to use primers with no trouble. the bad thing about primers and hand brushing, is depending how long a drying time one gave the primer coat, brushing over it can cause the primer to become solvent again and blend with the paint. understandable why he would say that........in any case, subtle detail can get lost just by using paint in the first place. paints with high pigment counts will cover better as a thin coat.........this is not specified on any labels, but it does depend on how much it is thinned down. you've probably heard canvas painters referring to their paints as 'pigments'. that is what they are using........color pigments thinned down with small amounts of mineral spirits, oils, or water. I know a fella a while back that was using Jo Santos artist paint on models......I thought he was nutz! it does work, but I can't attest if the paint cracks or chips over time........no suspension in it really to bond to plastic. I've never used acrylics, but from what I've seen here on the site, they are just as good as enamels. glad to see you've laid down some paint
-
now to get it down to scale. what are the measurements of the front apron {between the glass?}
-
you mean....like this??
-
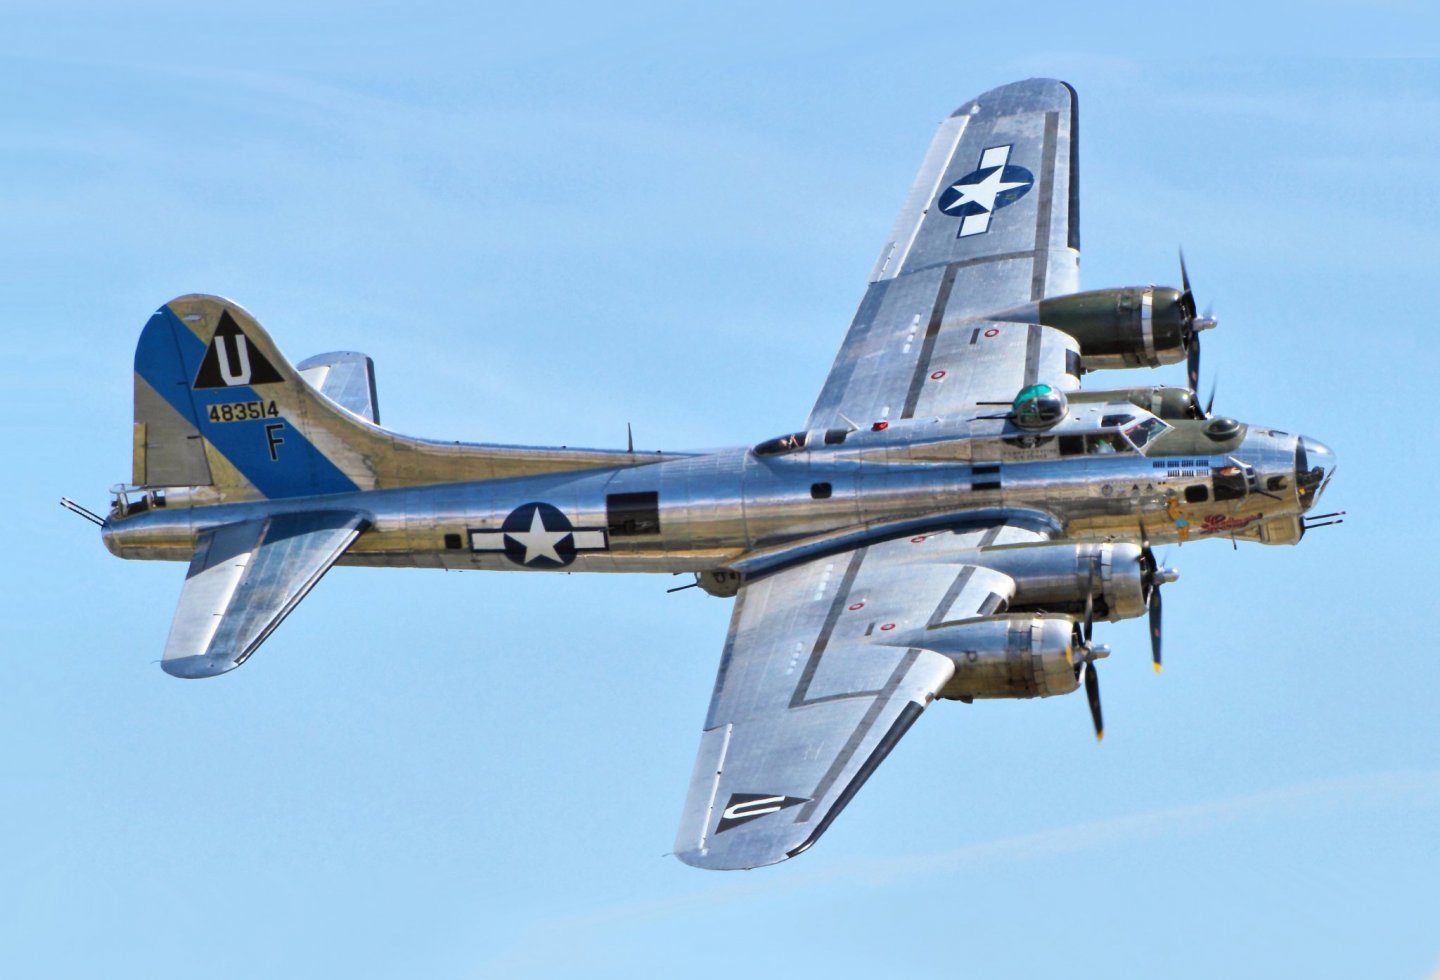
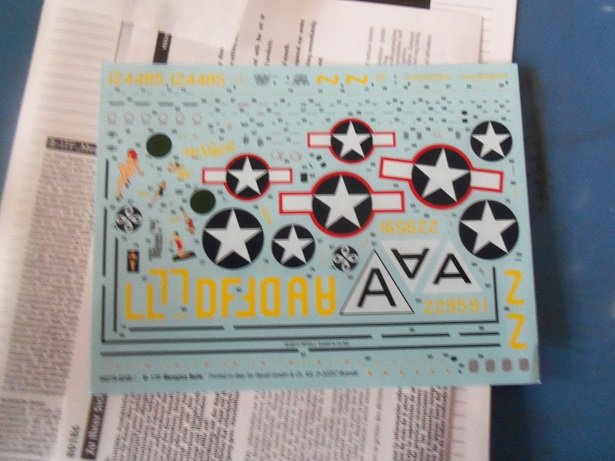
reality sets in..........I just saw that the Sentimental Journey was a B 17G I really was starting to warm up to her too.................. you are correct there Lou........not too many f's that were in their natural skin..........99% were olive green. the natural aluminum finish was reserved for the G variant. the F's had the chin turret....as you see in this picture, it went through some changes as well. the first picture you sent Lou is not an actual plane........can't find that number anywhere. I try to avoid paintings........too much room for error. you would not believe how many sites I've book marked related to the B 17....good way to know that a certain marking is real. Lou was suggesting that I go with the RAF OC.....I think that one is an earlier model 299, since it is void the ball turret underneath. yea..........I guess the Memphis Belle has it. I've also ordered the 1990 film...there are also a trove of documentaries on the M.B. and B 17's in general. so.....that's that........I won't even need to alter the title.
-
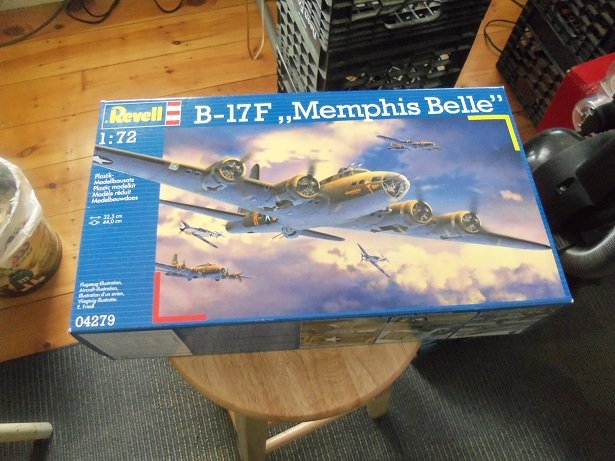
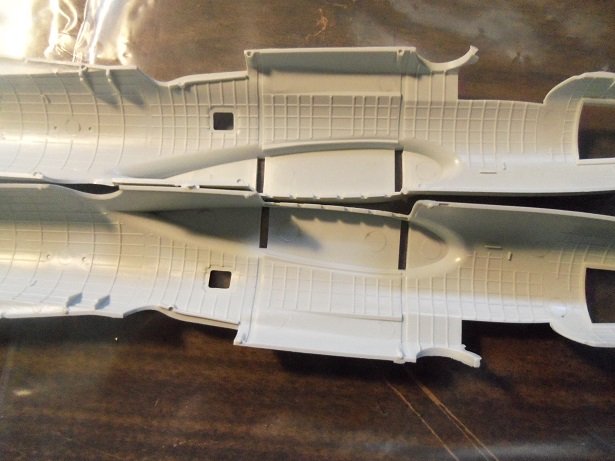
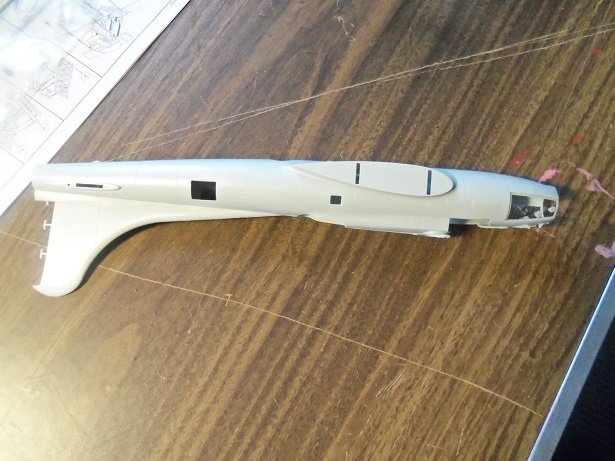
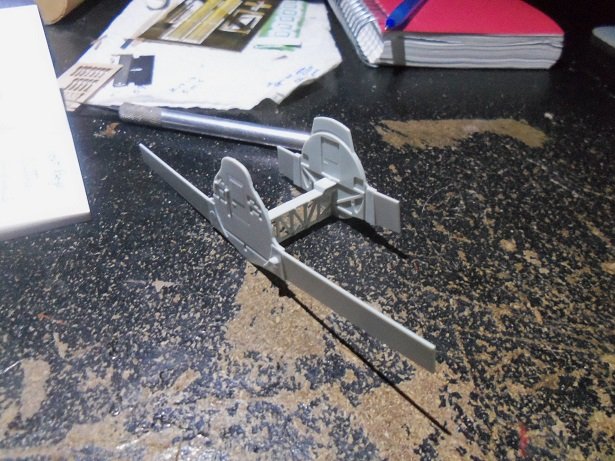
I wasn't kidding when I told ya Lou..........for a 1:72 kit.......this is amazing. it's a far cry from 1989. I even measured the fuselages just to be sure. the date stamp is located inside one of the rudder 'fins' of the fuselage...Revell Germany 2010. I made a mistake on the one for the Wulfe Hound....the box says Germany, but the date stamp is located inside the upper starboard wing half......says 1989 Revell USA. it is interesting to note that a second set of molds were made for this model.....likely that Revell Germany found that the US molds were outdated or worn. I'm not sure yet OC........the Nine and the Wulfe Hound are olive drab........it would be neat to break up the manotany with an aluminum paint scheme. the Sentimental Journey has some drab areas and a blue stripe on the rudder fin. not sure, but I think the Shamrock Special was olive drab. another contender is called Sweet and Lovely......she's olive drab, but has some red and white stripes around the waist gunner's windows. of course, we all know that the Memphis belle was olive drab. it's still up for grabs
-
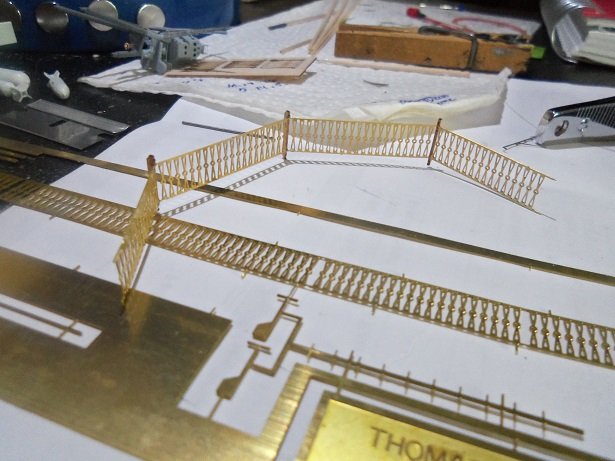
thanks Lou and Jack........I got the second section in place. just need to touch it up and paint the end post. should have more to show tomorrow thanks also to those who looked in!
-
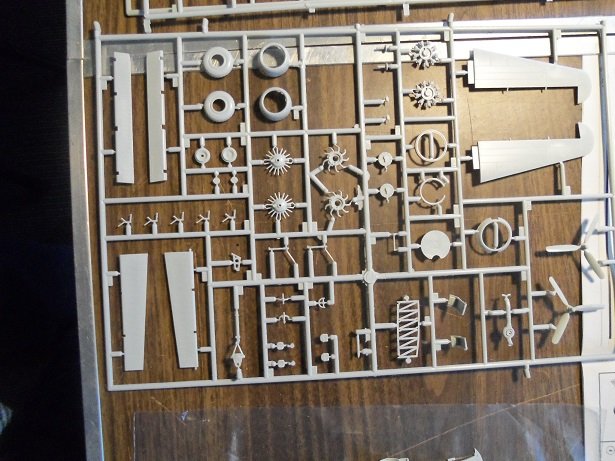
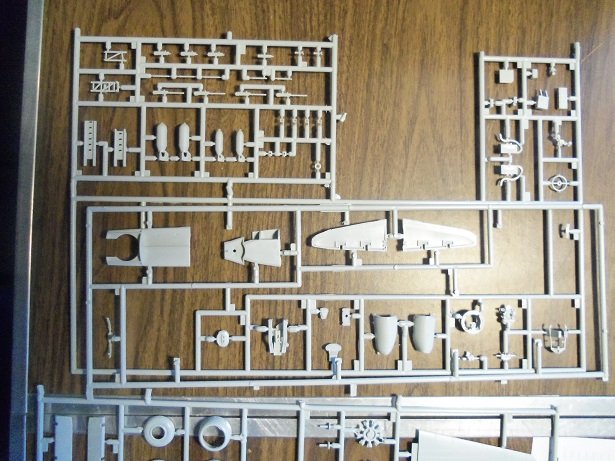
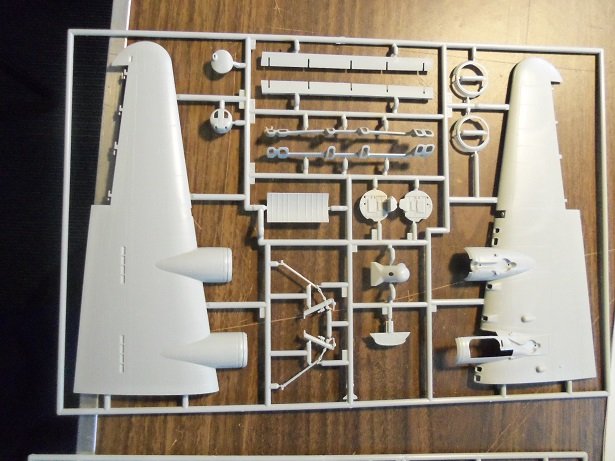
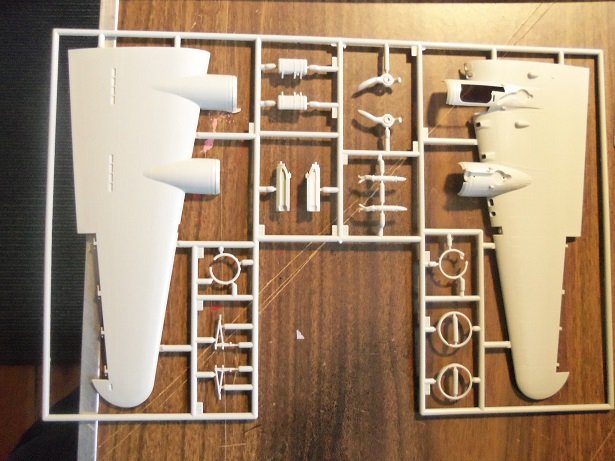
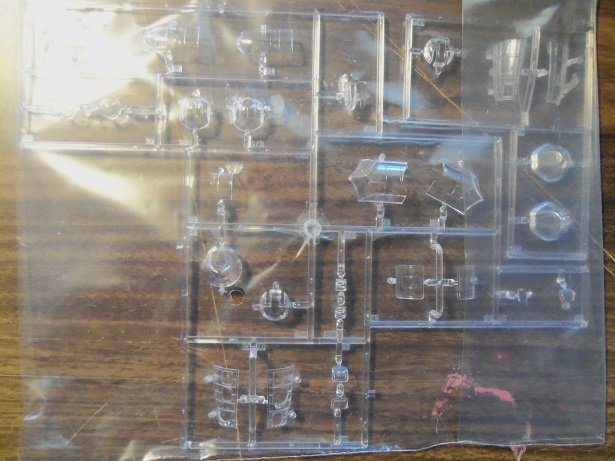
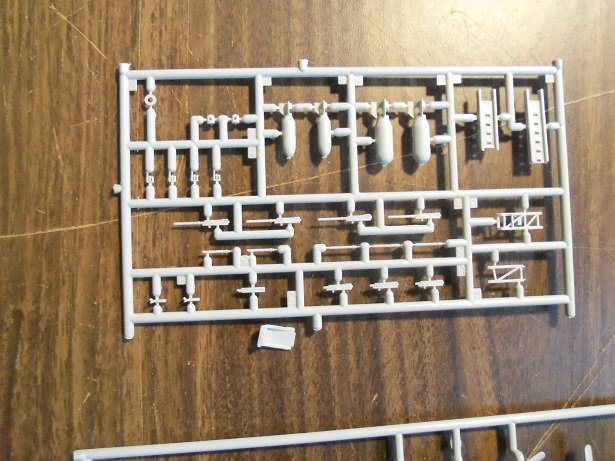
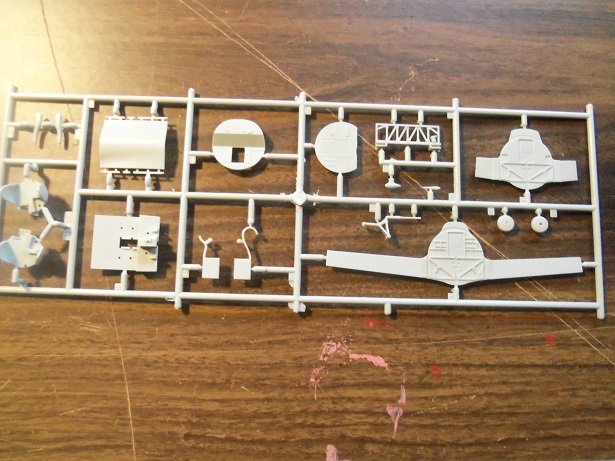
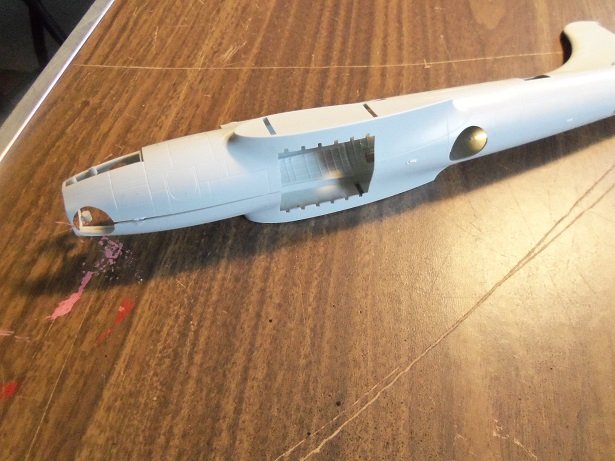
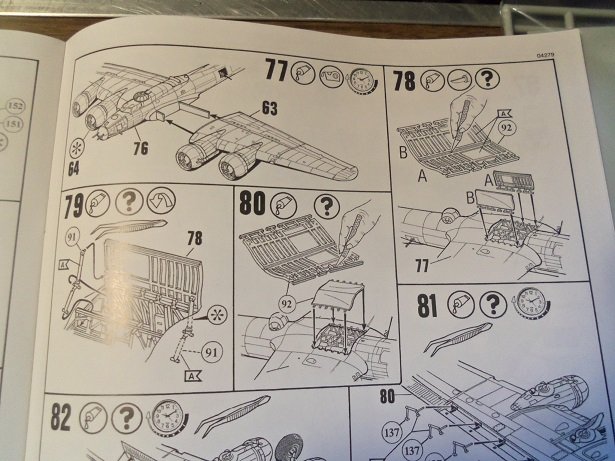
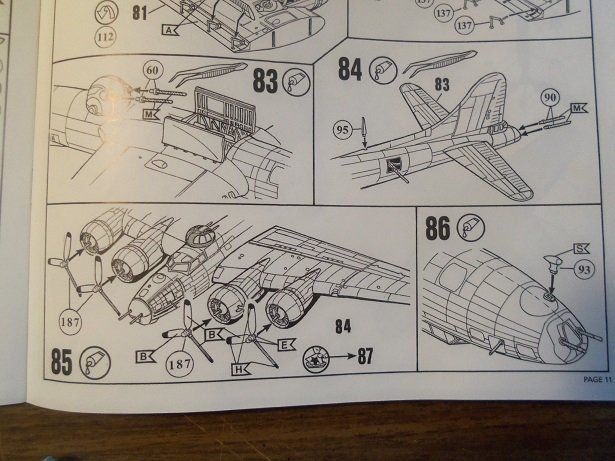
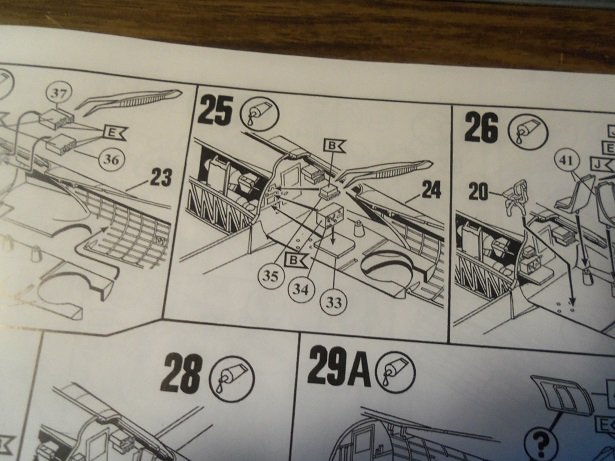
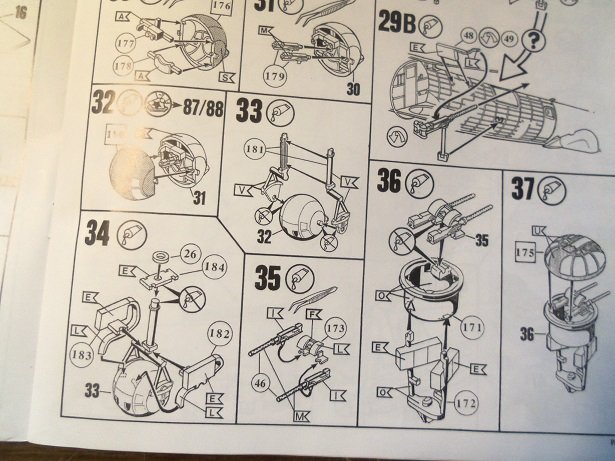
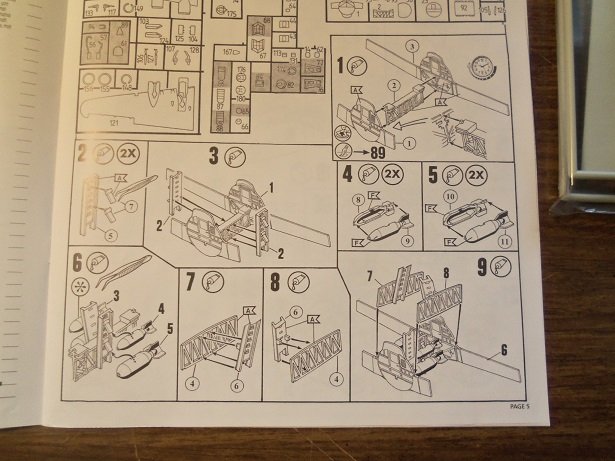
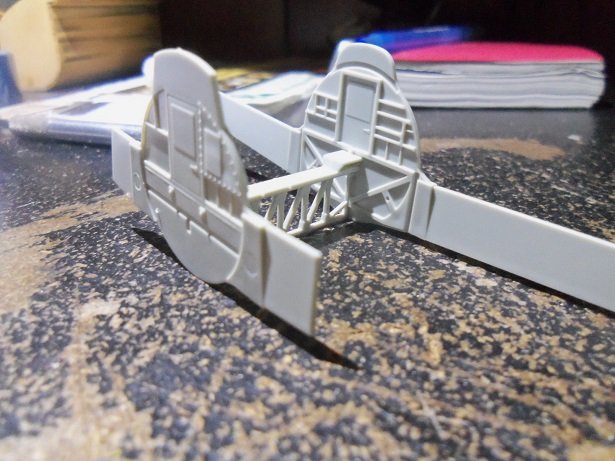
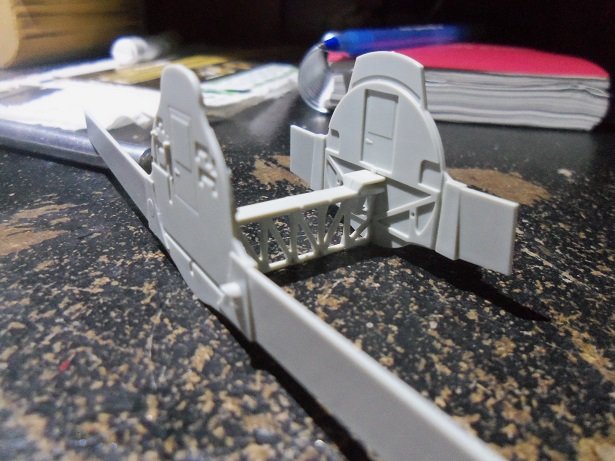
the case in point......... for as long as I can recall, I have complained about molded detail in model kits. I fell victim to quite a few times.........see a kit that looks really cool, only to find a few parts in the box, with whatever existential detail molded to the parts........some poorly at that. true........as time went on, the kits became more sophisticated to the taste of the builder. car.......and aircraft kits got the biggest boon I think......engines, chassis, and suspensions were molded less and increased the parts count of the model...........engines, ailerons/flaps, and cockpit detail respectively {let's not forget the planes} when I purchased the Lindberg B 17 kit......I have to be honest........I thought it was more of the same. even the decal led to be desired....but hey! tweak the subject, and look what happened........I'm a happy camper with how it came out the subject is huge.......enter the world of the B 17, and you see more candy than at Willy Wonka's! B 25's and B 24's are no exception { can you tell I like bombers}. during the project of the Nine o Nine, I stumbled on pictures of the Wulfe Hound..........the more I looked into the idea of the captured aircraft......the more I wanted to build it. I put in my Christmas wish list, and in it was an 'already started' kit of a B 17.......not much of an investment for the joy it will bring { my list was all at the same place }. Lou.........you have a big heart........but you out did yourself. one look at the kit you sent me, and there was no way I was going to blow it on a whim. this kit is way to special....it totally blew my mind, as well as my thoughts of what I would expect in a kit. the kit I got for Christmas will more than suffice, for what will be the Wulfe Hound. the kit you sent me deserves to be special, and I do hope I can pull off a very attractive piece of Air Force hardware. both of these kits that I speak of were produced by Revell Germany......the one for the Wulf Hound was produced in 1989. the one that Lou sent me was produced in 2010.....and for a model kit that is 1:72 scale, the details in it, is extraordinary. pardon if I seem startled by all the bells and whistles, but I'm not accustomed in seeing kits like this. for what the 1989 kit has in it, it only has 82 parts {it was a sealed kit BTW}. the 2010 kit more than doubles it, with a parts count of 235 pieces. the instructions is not a folded up 'road map'.......but a booklet! there are eight sprue sheets housing the parts.......there are a few extra parts for different variants. I used to like that with car models.......I bought the three in ones exclusively just for that reason. the decal sheet has all the decals for the Memphis Belle and another named plane called the Shamrock Special. sorry for the blur...... detailed engines, cockpit, ball turrets, and more! ...and the main event... the interior detail is amazing....little flash, but I can deal with that......trust me the fuselage together as a dry fit, shows the emphasis of the nose and tail.......there is another variant for the tail, as well as the cockpit housing. it has a sophisticated design for the wing roots, and yes.......the ball turrets are not built up, as in the 1989 kit. thumbing through the instruction booklet, one can see how much R&D was put into this kit. if anyone is looking for a good replica model for a B 17, this is the kit to get. another feature of this kit is the intake inlets located on the underside of each wing.........they are not 'dummied'. the bomb bay doors can be done open or closed........they will be open in this project. which brings us to the bomb bay itself........there is one being the first page, this is where the fun starts. step #1 is done.........I also assembled the bombs, but failed to get a picture. no worries, you'll get to see them later this kind of came off as a review........guilty as charged. it's nice to be able to show a good example of how the kit {in general} has evolved. some manufacturers {mostly overseas} have been producing complex kits all along, while some still chose to simplify their kits with the molded detail. it's a toss up as to whether their goal was to cut cost in R&D, or to satisfy mass appeal. I think that with the emergence of PE and resin, it's spurring the evolution of the model kit, as we once knew it. I haven't seen too many 1:72 scale this complex.......usually larger kits were more involved....1:28 was my go to for planes. for the time being, I will leave it as the Memphis Belle, but after receiving the decals for the Wulfe Hound, I now can go for three different planes........the Memphis Belle, the Shamrock Special, and the Sentimental Journey. once I can decide on which way to go, I will change the title accordingly

-
we're com'in in too fast Capt............trim the pitch or we'll shatter the rotors!
-
white decal paper is one of my cheats. when I did the decals for the Andrea Gail, I changes the background to Emerald Green....that allowed the name and stern placard to be printed. don't know what happened to the numbering.......I think my black was running low. as long as you can stay with the color spectrum and can match the paint your using, the cheat works great. using odd colors is a lot harder, unless you know the pigment measurements. another problem is putting the decal on a darker surface........all colors are made up of at least three common colors {can be any three colors}. in school, you must have learned about two color mixes....blue and yellow make green.....etc. the transparency occurs when the decal containing like colors is place on a surface, the surface color possessing one or more of the same color combos. the decal disappears I think I have it right........hope I'm making sense. it all boils down to the DPI level and the fact that printers can't print white. there are printers that can........but I can't afford one
-
whole heartedly agree........I have always thought, believed, complained, kicked a can, that there are too much detail lost by molded plastic parts. I have the perfect case in point.........and as I recall, you had another project where you cut back on the PE use, due to the part being better than adding the PE. this kit is really nice.........for the scale, it ought to be personally, I'd do the seat belts rather than add the figures. logic being, that if the figures are use, the model should be in a flying pose, on a stand.......gear up. parked, one looks in the canopy and sees the seat belts {dunno.......I'm just nostalgic that way } but your the commandant.......I know you'll do this one the justice it deserves!
-
I'll give it a shot if you'd like........send me what you want. as for lettering, they do sell sheets of letter/number decals like I purchased for the Nine.........in a number of scales. as Alan mentioned, decals can be made with any photo shop program, but is not set up for the size of decal paper. you have to figure out where to position the decal paper. I have the Testor's 'decal it' program by sure thing.....it's formatted already. after printing, decal bonder must be sprayed over the image to seal the ink......else will be destroyed when placed in water. it's not a perfect program.......it seems to have a transparency issue, but I don't use it a lot, so nailing down a solution is an ongoing process. I tried to find out if there was an update for the program........and I bought what they offered, but all it was was an extension of the decal options and choices. it is nice, because I can import images into it and manipulate them to my liking. it expands the subject matter......a big plus for me.
-
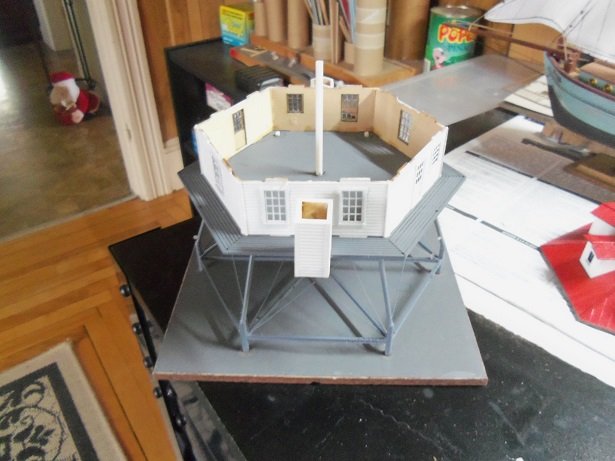
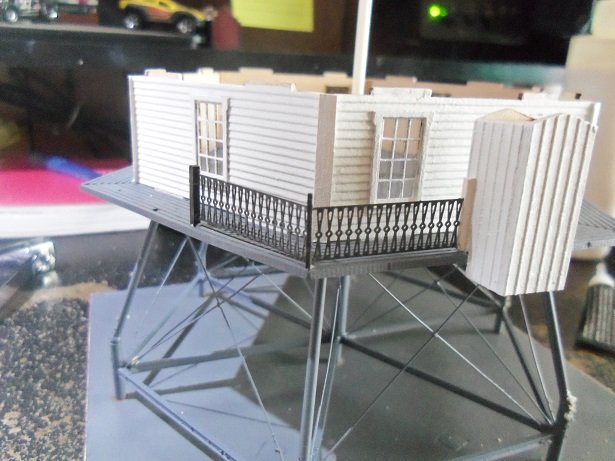
we've been wanting to trek up the coast line.......always seems to fizzle out when we get to Hampton. I recall an invitation I got back when I was doing the Gundalow. time being what they were, I never made it out there. been kinda bee-bopp'in around the projects today........spent some time with the light house. I had the railing PE sitting on my desk, along with the posts....tiny little wooden things. now that the walls are cemented in place on the lower platform, I felt it was time to get them in place, before I lose them or something. starting with the shortest segment, to the right of the boat launch, the end post was created and the post {only one} was added to the railing. once it was assembled, it was off to the paint booth to paint it black. the second segment is a few sections longer...added three posts to it, and it too was taken to the paint booth and painted black. the first segment was dry by now and could be cemented into place. the second segment will need the left side end post. the third segment was made ready.......it needs five posts. once these are painted and ready........I can put them in place. got to run to the store..........Pffffffff!
-
that's quite a bit of detail..........do you think it needs PE? ICM does models to this degree..... gonna be some super camo. front row!
-
prolonging the war wasn't a good idea either. they had my vote on Nixon's impeachment, even though I couldn't vote. you may have to improvise on the decals. try Tom's, Eduard's, Scale Hobbist ..........there are many out there.
-
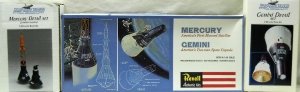
time will be a factor as well.........are you going to suspend it by two or three attachment points? looks awesome! from my constant browsing on the old model kits site, I've noticed an increase of missile and rocket models. they just received one of the older Mercury kits it even comes with the Mercury and Gemini detail sets
-
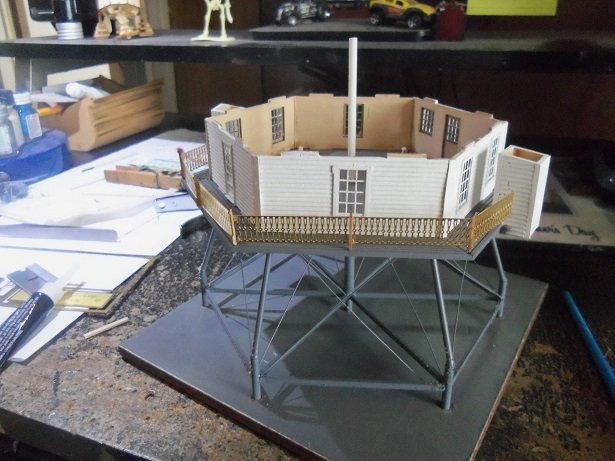
time to start back on the light house. I was going to put the two sections together for a shot, but found that I didn't cement the walls to the upper part. kind of a good thing, 'cuz the tabs weren't going into the bottom holes very well. so I cemented the walls in place on the bottom section. I'm still planning to trim down the center tube.......this way, all of the electrical parts can be inside the house {not sure where they are per the instructions}. I bought a couple of red markers Jack.......I think this will remedy the dilemma of the tinted windows.