
MORE HANDBOOKS ARE ON THEIR WAY! We will let you know when they get here.
×


popeye the sailor
-
Posts
16,007 -
Joined
-
Last visited
Content Type
Profiles
Forums
Gallery
Events
Everything posted by popeye the sailor
-

1/72 ADGZ M35 funkwagen armoured car. FINISHED
popeye the sailor replied to Baker's topic in Non-ship/categorised builds
really nice job on this one...at first it appeared to have some fit problems. but you made it work........great weathering! -
look'in better and better Danny
-
look'in good
-
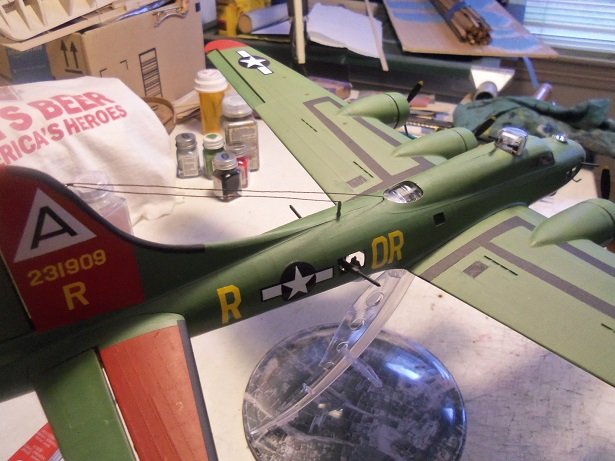
thanks for the kind comment, but some of my touch ups came out with very slight hue differences. odd since I used the paint I had mixed. I did most of it with an airbrush, and touch ups were done with a fine tip brush. the walkways on the wings was a total mask job.........it wasn't till I removed the tape, that I noticed the unevenness of the walkways. I could have fixed them, but I decided to wait till the plane was done. as I hoped, it's hardly noticeable. I usually don't try replica projects..I never seem to get as close as I would like. the only other one that I had a good time with was the Andrea Gail. the only time I have luck with masking, is with the airbrush.
-
I do apologize Ron.......I thought I had spelt it the way you did always nice to meet folks who hail from these parts. I myself tried to migrate to Florida, but my heart brought me back here...funny story about the day I came 'home'. ....and yes, I would imagine that any military hardware.......plane, tank, or the like, had any creature comforts built in . yes I did........it give a lot of options of what the interior can look like. one could go with an aluminum overlaid with a wash of green, and give a good rendition...I also noticed that certain aspects was indeed green. for the floor 'runway'......one could also add a tint of flat black, to show the foot traffic and slid ammo boxes. thanks again for posting them
-
your not too late ragrove........the interior is interesting. nice to know that not all are painted in that green cromate. as I read somewhere, this was the case........part reason was that they didn't want to waste the paint. I think a lot of it depended on the squadron and where they were stationed. some even polished the darn things on the subject of captured planes.........when off on a bombing mission, the enemy in a commandeered aircraft, would try and join the formation. this was to spy and see what they were up to. the formation was instructed to warn off the tag-a-long aircraft. if that failed...then he was fired upon. I would expect nothing less
-
I sent some pictures over to the foundation: Hi Denis - Excellent rendition. Well done. We miss Nine 0 Nine Hunter Chaney Director of Marketing Collings Foundation 978-562-9182 From: denis wenzel <seymoregutz@comcast.net> Sent: Friday, November 29, 2019 9:11 AM To: Hunter Chaney <hchaney@collingsfoundation.org> Subject: Nine O Nine good morning, My name is Denis Wenzel, and I am a modeler. I was starting to build a B 17G when I hear about the Nine O Nine crashing at Bradley. At the time, I was undecided what nose art to go by, the kit was showing a terrible rendition of a fully marked B 17. I was going to depict the Thunderbirds, but quickly changed my mind when I heard the news. the loss of a historic plane and life was very sad to hear. I always loved these planes....but I won't lie.....Biplanes are my first love {but bombers are a very close second}. I did this plane to show my respect and I hope that I've depicted her as close to her likeness. you folks would be the best ones to decide. here are some pictures of the model...I used the Lindberg 'nose art' kit in 1:64 scale...I wish I had used the Revell kit....much better detail. I hope those injured have recovered well, and coping with the loss, a bit easier. yours truly, Denis >Popeye<
-
thank you Gary.......I'll be focusing more on this project since the B 17 is finished glad you liked the other builds........the train was new territory.
-
nice treatment on the seat! very nice bike..........well done!
-
very nicely done..........on both fronts.
-
very true so many thing I want to do........so little time to do it in. today I finally cut out the bulkheads I spoke of.......I got tired of seeing that sheet with the tracings taped to it, hanging around the spare room. I may post it.......but I fear that I've cluttered these hallowed halls enough with my nonsense. concentrate on the projects at hand........and not the ones in my mind
-
to think....if you don't set your sights that high........you'll never be inspired to get to that level. I myself have few fancy tools......but my creativity is never in short supply it appears that yours isn't either
-
that's a sweet looking model.........I hope you will post it
-
glad to hear you had a great day
-
thanks OC and Mark......I have accumulated so many book marks for B 17 sites........I'll be more than ready for the next one
-
Thanksgiving meal was fantastic.......the spread was laid out over at my son Brandon's house. spent time with the grand kids........a passion of mine now I feel like a beached whale......and if I set down anywhere...I definitely will not be getting back up thanks for the kind comments...I'm glad you like how it came out as much as I do thanks Jack....glad you enjoyed the build thanks Martyn does yours have a name? perhaps you could do a log {condensed is fine}........if your doing it for a museum, it's gotta be really good! love to see it thanks Lou........shucks, I'm not that good not sure if I will do the B 25, or the Memphis Belle / Shamrock Special.......if I do, it will be like an expanded version...the kit is that good I still want to do the Wulfe Hound, but I have a kit in my Christmas wish list that will suit it OK. you know........all this runn'in 'round for paint......when I have all that White Ensign paint .........I think I even have that German color thanks Kevin......I though they were centered, but I had problems with this. being late with these decals and the props being assembled in the nacelles, they were very loose and floppy. it was hard to get them in the right spot, so where the first one laid, the rest followed. from now on, I will apply them before the props are installed.....scout's honor! ⚜️
-
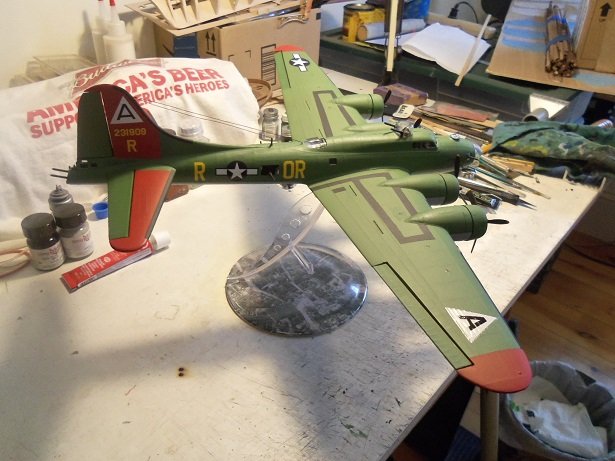
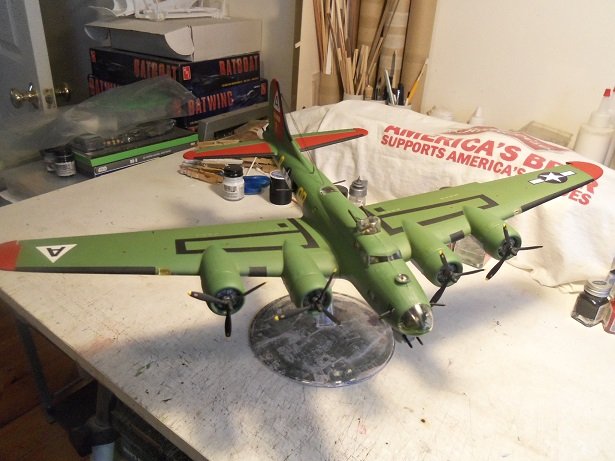
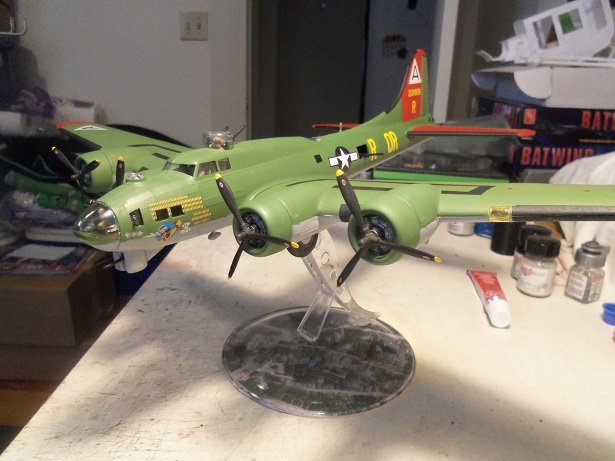
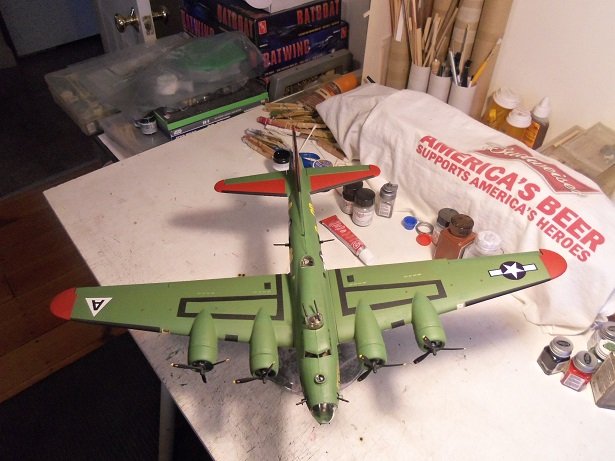
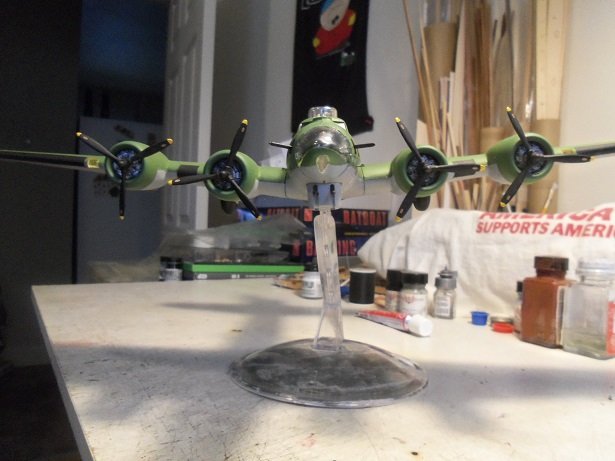
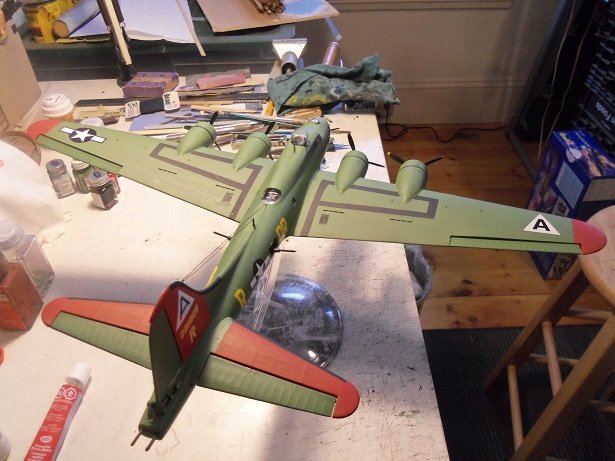
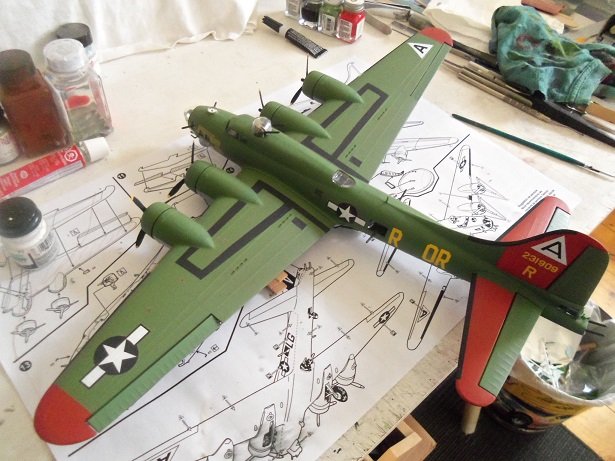
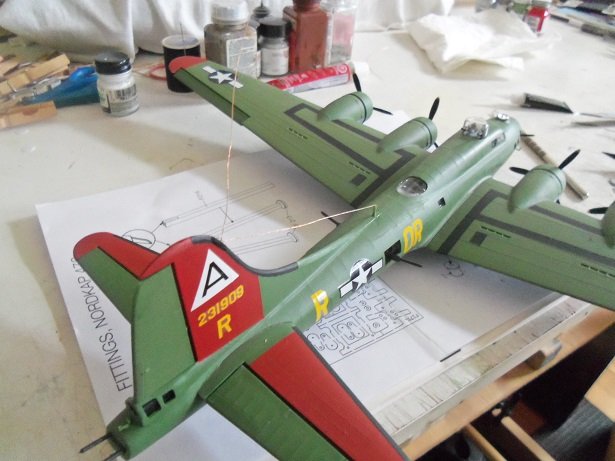
after a bit of fidgeting and taking Gibbs out......the Nine O Nine is finished! she's mounted on the stand in all her glory the admiral passed by the door and saw it....asked if the stand was a tool that I've been using. she was kinda surprised I think, when I told her that it came in the kit. next thing I know.......she's got her phone and taking pictures of it I forgot to show you how the two underbelly patches came out.......they hardly can be seen ...and there we have it. it came out well for a spur of the moment build. it was a fun build. I hope you enjoyed look'in in on her progress........I enjoyed the company
- 153 replies
-
- 14
-

-
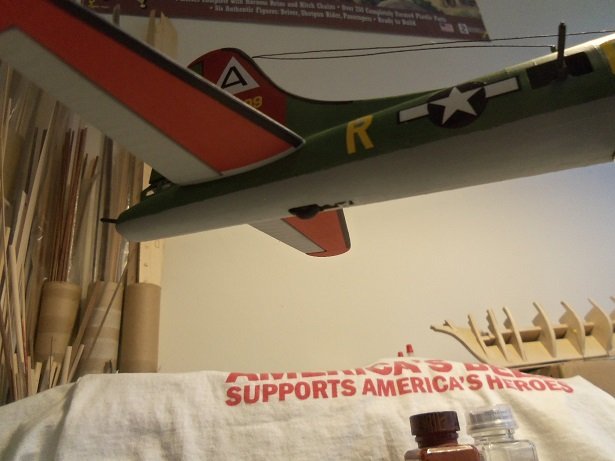
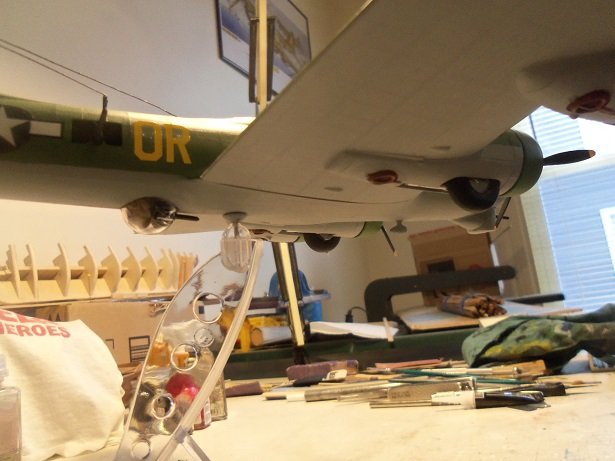
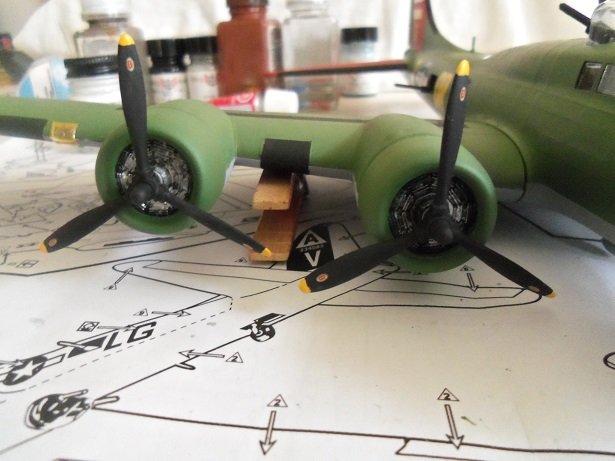
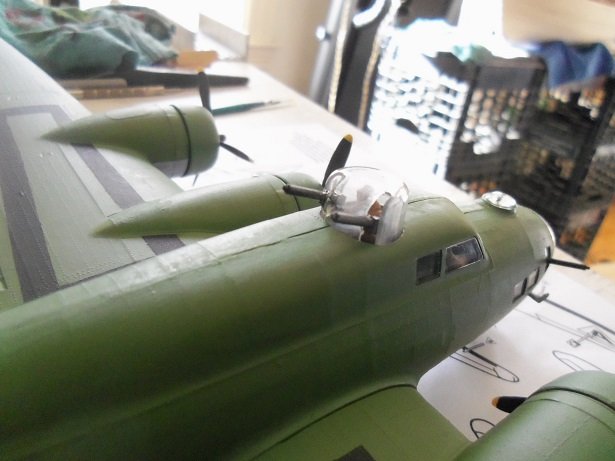
so now it's the addition of the few parts that are left, and repair my top turret gunner. working at the tail, the guns were added, along with what looks like a gun sight. best guess...... the decal work was done on the props........and the wings are finally cemented in place. I had to go get a cold water hose for the kitchen sink, so it was a all good.......gave it time to dry. an 'awwwwww....nutz' moment came when went to finish the top turret gunner. not sure if I used regular cement or CA, but it frosted a small area of the turret glass. I guess if one is just glancing over the model, it might not bee seen.......but a detailed inspection will definitely pick it up. oh....well <shrug> I did touch up under the nose 'chin'.......now I feel happy a small touch up is still needed the waste guns are in place........I should have cut down the gun butts, 'cuz I think they stick out too much. didn't do it though........failed to see the specs on gun barrel length this morning....................................................................................................................................................................................................................* the start of the finish.......

-
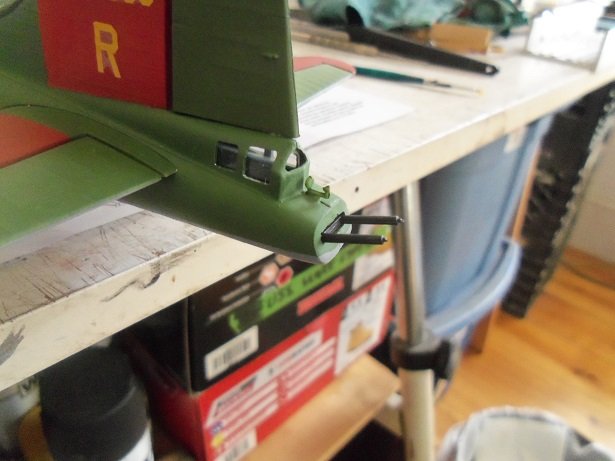
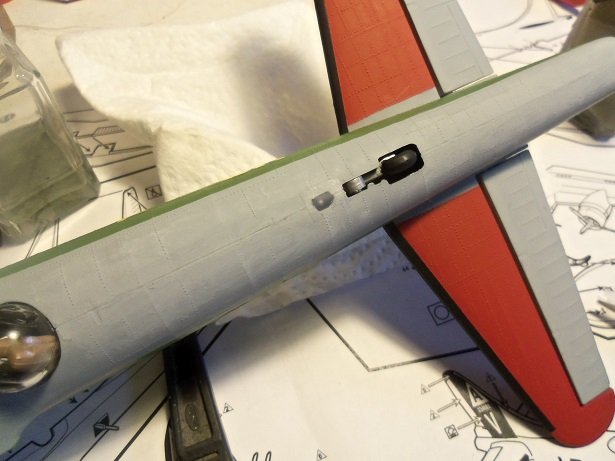
I forgot I took these pictures.........found them in the camera the underside of the fuselage has these two holes.......one of them isn't even shown in the instructions. back at the tail at the tail gear, there is a hole that allows the tab for the gear to be seen. I suppose it's a way to pop the tail gear back out, in the event that your showing it with the gear up. Since I won't be removing it from the stand, I want to get rid of it. I remembered an old trick I used to use. I take scotch tape {frosted or clear}, cut a piece that will cover, and lay it over the imperfection. for a model like this, it's great.........it ends up looking like an access panel I've covered the hole up here........it will later be painted. where the stand button is located, there is a hole that is not in the instructions. I filled it over with glue with the hopes that it would do the job, but it dried as a dimple. I will cover it over as well. try not to put pressure on the hole itself, or you'll get an impression.........I take an x-actor and rub around the hole and the edges, in order to get good contact and get rid of air bubbles under the tape.

-
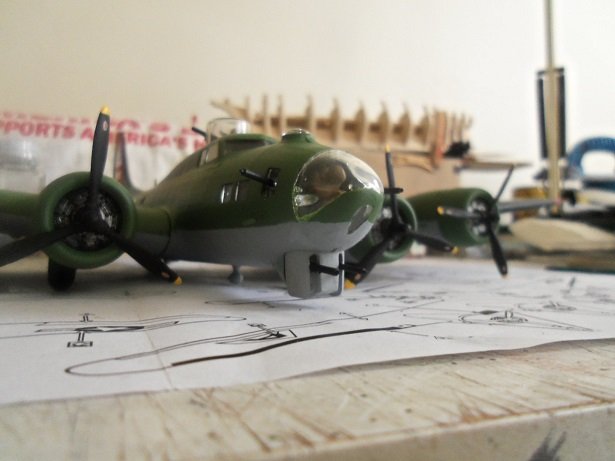
thanks gents I got more done yesterday.....the finish line is very close. the kit does have it's problems....no bomb bay detail, shape and detail of the upper and lower turrets, along with a few other minor inaccuracies, but overall....the kit works. it does the job and is a great kit to practice your skills on. there is not a lot of extra detail to worry about losing, but it can be added if one desires. the one big downer is the scale......it makes it almost impossible to get after market parts. I have a Revell 1:72 B 17 and I did some comparisons with this kit........it's night and day! the one thing though, I wish Revell would have added, was a stand. I had such fun with the stand.......what kicked off this build. they are simple to make.....I may try and do it when I start either this B 17, or the B 25 {which is 1:48 } more on her today........before I get stuffed!
-
look'in sweet!
-
to know if you've added too much is a two sided question..........do you feel that your desire is satisfied, or is there any more room on the deck? she's look'in really sweet!