
HOLIDAY DONATION DRIVE - SUPPORT MSW - DO YOUR PART TO KEEP THIS GREAT FORUM GOING! (Only 13 donations so far - C'mon guys!)
×


popeye the sailor
-
Posts
16,007 -
Joined
-
Last visited
Content Type
Profiles
Forums
Gallery
Events
Everything posted by popeye the sailor
-
 yea.......that would be hard to do with the set up supplied in the kit Jack. if that was the case, it would have two sets of wires for output. I do have a red LED....I could substitute ? .....then I looked at your reference.......... I have the Wiki bookmarked............never noticed that! the beacon dome is sealed........don't know what I could do about it now...........unless I painted three of the panes red. thanks for the head's up.
 -
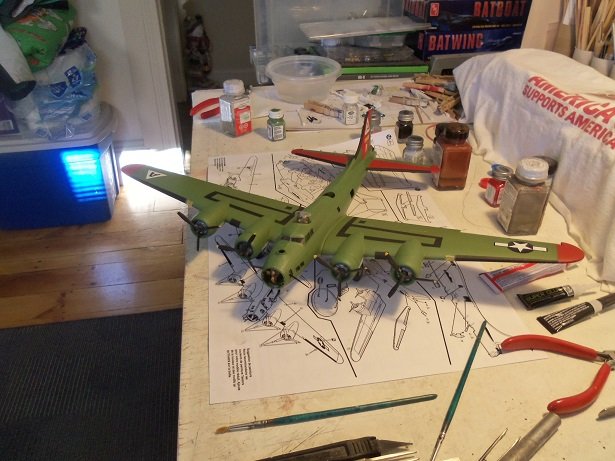
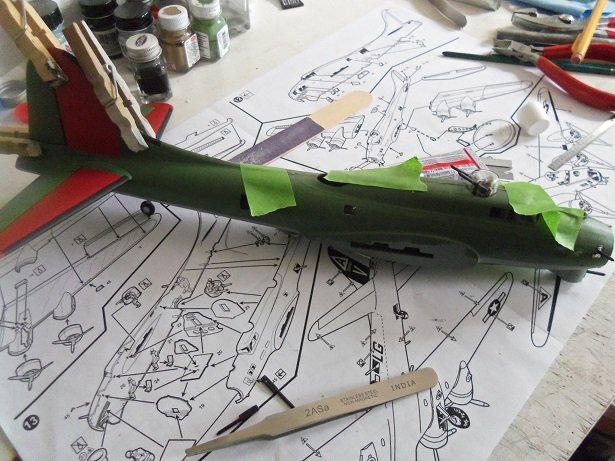
I haven't added any other decals so far........my typing went to the dogs today.....correcting as I go along. I did add a couple more parts.......still have to finish the gunner repair. curious.....I put the wings on......I hesitate gluing them on because I think it will be easier adding the smaller decals with the wings off. ,,,better than juggling the whole plane...it is a large model I also fitted it on the stand........I was impressed with how it looks, but I took it off and will save it till the final reveal. I don't think I've ever been this attentive creating a replica of this subject........most of the time, I simply took the kit's 'word' for it that this was what it looked like. at first, the walkways I painted on looked a bit off......I should have redone them. but as I hoped, seeing the assembled plane, they don't look bad at all again.......I didn't think to measure the wing span......I believe I did it earlier in the log though. I had to close the blinds for these........the sun is a rare thing these days..........been cold and gloomy with frequent rain. we've even seen squalls of snow. glad I removed the walkway over the nacelles...looks more like the real plane. I've done most of the fuselage mating touch ups...the topside is done. the bulkheads are a big problem here.....even though I shaped and sanded the edges of them, they still posed a problem when the halves went together. I even removed all the guide tabs on the bulkheads, so they wouldn't be there to create the gap problems I had.......I had 'em anyway. the Lindberg kit may not be a first choice, but it does make into a pretty neat model. I was looking at box art the other day........I saw kits {judging from the box art} that I would never buy, because they looked like toys! Monogram has a series of models that sports the model as the art.......some look really toy-like. well, the admiral wants to do the errands early.........silver lining, since it might give me the afternoon to get something done. in the grand scheme of things, there isn't much left to do.

- 153 replies
-
- 16
-

-
good to have a few more look'in in...welcome I sprayed the pile yesterday with gray primer.........this morning, I touched it up, but I didn't shake the can. I wanted to give it a two tone gray contrast. I think the play sand will do the trick.......not too fine or chunky........appreciate the offer I'm still going to look at the smashed rock idea, as well as adding a little of the scenery stuff. I should have it in the base soon then I can wire it up! thanks for all the fine comments and likes!
-
look'in awesome.........keep going! how is the 'tubing' behaving? sometimes flaring it to attach to the pins is a pain
-
checking in on your progress Mark. plywood thickness is a peeve of mine. I've seen so many kits where the bulkheads and keel spine is way too thick for the model.........the Sergal Thermopylae is a prime example. the scale doesn't match the thickness and one comes out with a very bulky frame. I would have suggested the approach you did here........thinner plywood and cap the keel spine with wider strip stock........this creates it's own rabbits for planking but thinner plywood does create another problem....what you've done here. filling in between the bulkheads is a good idea......you won't end up with a wonky looking hull after planking. at least you won't have to work around leveling and straight edge apparatus as you plank { it would look like the hull is in traction}. if I wasn't such a stubborn 'ole bugger, I'd be clamoring for a laser cutter for Christmas!!! stellar job thus far
-
catching up on your progress Nils....and what a lot of progress you've made! the deck sheer really looks great........the coamings work quite well! she's shaping up to be another of your stellar achievements........you've done a fantastic job so far I agree with you on the portholes.......they are awesome
-
hello Jim.......coming in today, I saw that you were finished! I had to take a lookie....... fabulous ship you have there!......and wow....what a coaster ride for the ending. so easy to break something....some really good repairs........I've not seen the mizzen braces run like that before. I've always known them to rig to the main mast. is this the class of ship? in any case.......in which it is now in great job and congratz for completing a very beautiful model
-
looks really good!
-
no....pictures I have show just the insignia. I did a bit more to her today....I was a putz yesterday not related to the B 17.......I did a search on the Ruptured duck. it was an early B 25B, and one of the planes that made up the Dolittle raid. Accurate Miniatures produced a 1:48 scale model of a B 25B, but a review of the kit {it reads like a build log} I found, states that it has some inaccuracies. I've seen three variations of the nose art.....hard to say which one is the correct one. I found a list of the planes in Wiki. Doolittle Raid - Wikipedia as I was writing this, the mail came..........I have the decals finally! after a month and a half, the saga is over I hope they don't ask me to do a review
-
might be Roger.........but I don't have a set up like that. I do have some play sand though...something like that perhaps?
-
sounds like they supplied the wrong size brass
-
oHHHHHHHHHH! you know........I was thinking of looking for small rocks outside....smack 'em with a hammer, and glue some around the pilings. them add a little of that scenery that I used for the General. do you think that will work? I could smatter them with some green too.
-
great looking plane
-
I run into things like that with decals........the Nine o Nine build is a good example. the supplied decal sheet is less than adequate and doesn't point to any definite subject......it's missing half of the markings anyway. after market has saved me in that respect. granted, the decal sheet didn't include the Nine o Nine nose art, but one couldn't detail a model even with the existing nose art. for detail, I've had kits that are really good.......some not so good. disappointing when you buy something that looks really cool, turns out to be a dud. I've always heard that Trumpeter was a good brand......but I've also heard that they have a degree of inaccuracies with some of their kits. the book might not have been a bad idea..........research is key
-
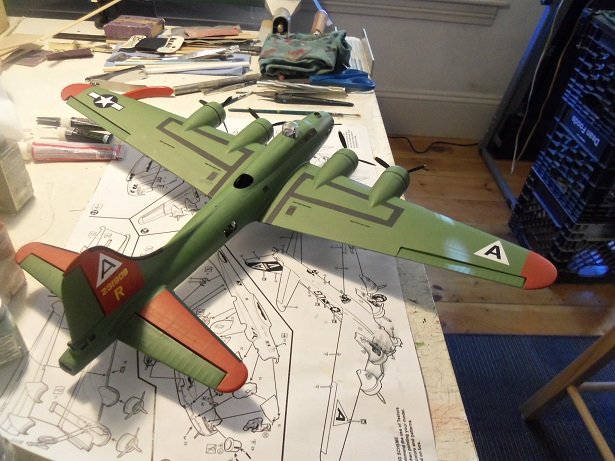
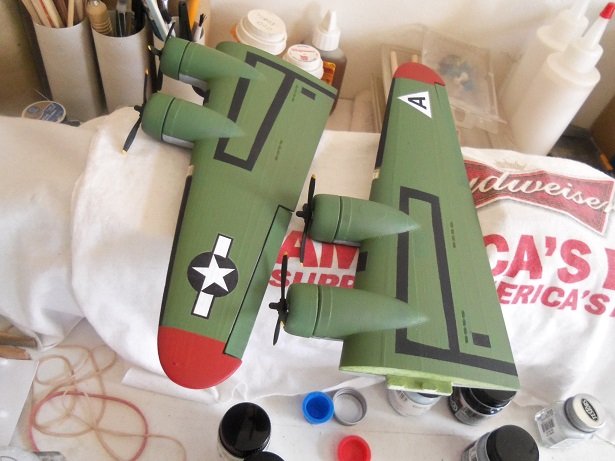
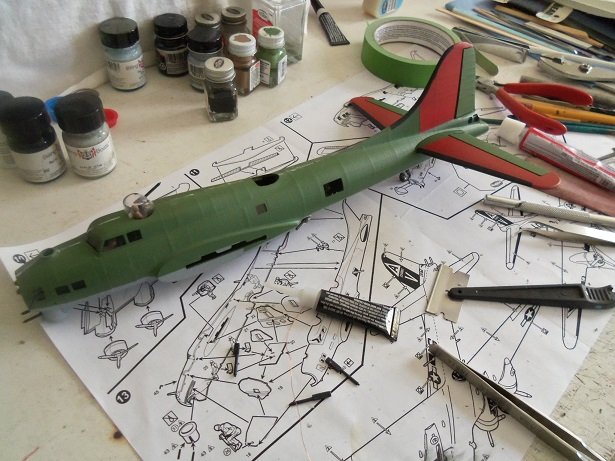
I'll check those links out....thanks gents surprised that I've not heard of that place CW.......god knows how much decal searching I've done. though my past 'weekend' was kind of a wash.....things kept me hopping, I did get a little bit more done on the Nine. I cut out the decals I'm going to use from the supplied sheet, and the one I got from Mega Hobby. for the wings, I'm using the 1:64 insignias and 'A' marking for the top surface of the starboard wing. though not shown, the insignia is on the bottom surface of the starboard wing.........looking at the pictures, there is no 'A' on the underside. for the rudder......these are the 1:72 decals. there really isn't that much of a size difference, as can be seen I should have shot a picture of the whole plane.........I thought I was going to get back to it, but got carried off on another errand {can't wait for the Christmas hub-bub to kick in} I started to clean up the fuselage.....the underbelly will need a little extra attention. I got a surprise in the mail recently........a Revell 1:72 'Memphis Belle' looking over the kit, it is clearly too good for the 'Wulfe Hound. rest assured that a kit has been scoped out to build it. this one will do well as the 'Belle', or the 'Shamrock Special' I can't thank you enough 'masked stranger'

-
very nice work on the tender.......the whole model looks awesome! the camo really came out great
-
I built one cycle model in my day........1:9 is an odd scale. still gonna built into a large bike superb start as usual!
-
amazing work Michael.........you never cease to amaze
-
ballasts? what do they look like?
-
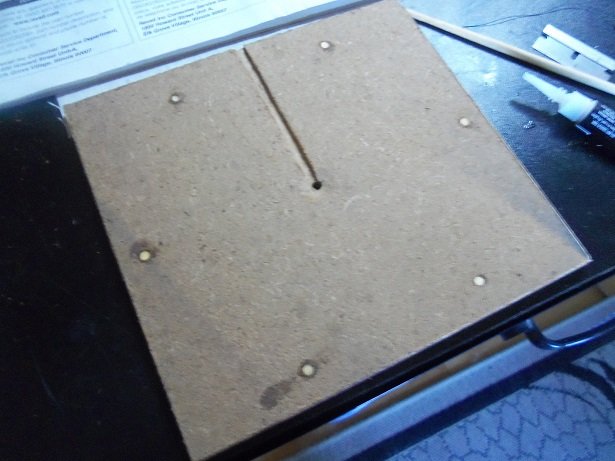
the task is complete........I've done a few checks to insure that all of the cables are cemented. I've found only one that is being stubborn. I was going through some of cast off pieces, which I keep in little bins. these pieces are the cut outs for windows, doors, circular and square bits, that are usually punched out and tossed. I have found many uses for these bits in the past, and now I need to come up with six that will fit into the screw pile holes in the base. I need to shallow these holes, so reinstalling it back on the base, is not a problem. not finding what I needed in the bins, the though turned towards looking for what I could use instead. I was going to cut some dowel........but then I came up with alternative idea. long ago, I received some parts for a Billing model....the Danmark. I have the center spine, the long panels for the bulwarks and upper section of the hull, and a few other bits. I also have a copy of the instructions on CD, sent to me since I was helping at the time, a modeler who was building the model. that has long passed........but I hung onto the parts, intending on replicating the hull, and outfit it for another subject. the panels have portholes.......they are not punched out yet punching out six of them, they will be perfect......they are about 1/8th thick........the base is about 1/4 inches thick. I've drilled out the holes in the base to accept them and will make it easier for the screw pile to set back in the holes too. I was going to paint the pile flat black.........but thinking of how hard it would be to mask the underside of the structure, I'm leaning on simply painting it flat gray. should look OK.
-
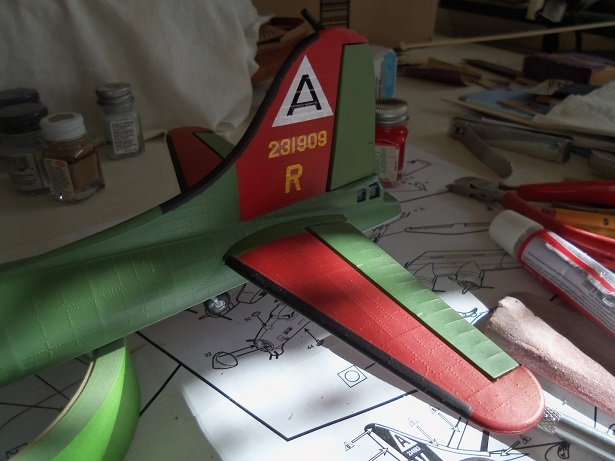
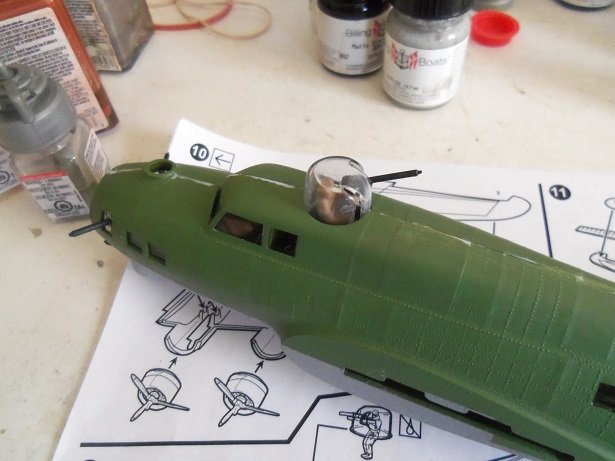
I wish it was that easy......the bomb bay doors are molded to the fuselage........would have to cut them out not only that, there would be the floor closing the bay off.....he would be trapped. I warned him of court martial, but he simply replied 'melt me!' . there is a silver lining to this story however........he is finally back at his post I used really thin wire, turning the fuselage upside down and rattling the gun into view, it was hooked and pulled over to the slot. from there, tweezers were used to get him back into position. I used Ca to cement him in place......I hope it won't mar the clear turret. in the initial efforts to free the free fallen gunner, the other gun came loose.......I'll have to put it back in place after I know the gunner is firmly back in place. gluing the halves together...........and after the gunner is back in place....... .....I almost forgot........ I've about hit the end of my patients concerning the order of those other decals. as the admiral and I discussed......I would rather see this order go to it's full fruition, as I think cancelling the order might be a ordeal getting my money back into my account. I was ready to order from Mega Hobby, but I was told to hold off until I've dealt with the order already in progress. I sent them an email yesterday, asking if there was any additional problems and that this order is over a month old. when will it be sent to me. the reply I got is that it was mailed yesterday......wow! as can be seen, I still have some touching up to do, so I have time to wait.
- 153 replies
-
- 10
-
-
Winnebago project by philo426
popeye the sailor replied to Lucius Molchany's topic in Non-ship/categorised builds
the sheet metal used for model railroading might be better........I have some of the corrugated stuff. it's like tin foil and shapes very easy. you could look into the doll house modeling too. looking great so far. -
........and I'm sure that the decal sheet is just as 'crisp' I have a B 25 as well.......haven't decided on the name yet.
-
oh bother! I have an MIA to report! the fuselage is now glued together.....not as pain free, as I would have liked. I'm sure some have scratched their heads, wonder why I chose to build her this way......1/2 at a time. I've hardly built my planes the way I've seen some do........assemble and paint the interior, assemble the fuselage and wings together, and then paint the exterior. I'm terrible at plugging up all the open areas to do it that way........I always suffer some degree of over spray. bu no matter how I assembled the fuselage.......it wouldn't have saved me. the top gunner came loose in the turret, and before I could save him, fell into the plane I tried to coax him out through one of the other openings, but he's trapped inside the bulkheads, and can't escape. my only option to save him, will be to try and snag the gun that he's attached to, and pull it back out through the gun slot. my luck.......I just checked the crew roster........and the gunner's last name is Houdini