


AndyG
-
Posts
35 -
Joined
-
Last visited
Content Type
Profiles
Forums
Gallery
Events
Posts posted by AndyG
-
-
-
This is really lovely! And she'll come even more alive as you start fitting her out, internally.
Andy
- G.L., FriedClams and mtaylor
-
 3
3
-
A 1/8th scale clinker dinghy! Perfect size, wonderful subject. Is there something in the air? 😀
Andy, a big fan of Oughtred's boats
-
And ... She made it ok!

The new owner is a gentleman in his 90s, who 'always wanted' a model of Swallow having read the books pretty much when they first came out. He loves it: I'm so pleased!
- Colin B, thibaultron, Siggi52 and 9 others
-
12
-
And now the sad news!
After blocks and ropework were added, I boxed up Swallow (with a mountain of bubblewrap) and posted her to her new owner this morning. According to the tracking app, she's currently halfway to her new home in Suffolk. I have to say I'm surprised how much I miss her! ...I may have to make one for myself in the future, if only to fill the dinghy-shaped hole in my shed.
") I'll fish for a final photo once she arrives and is assembled.
I'll fish for a final photo once she arrives and is assembled.
But before another dinghy ... a bigger boat.
Andy
-
Next up? Nancy Blackett/Goblin to the same scale - radio, 15kg. Oh yeah!
- thibaultron, mtaylor and druxey
-
3
-
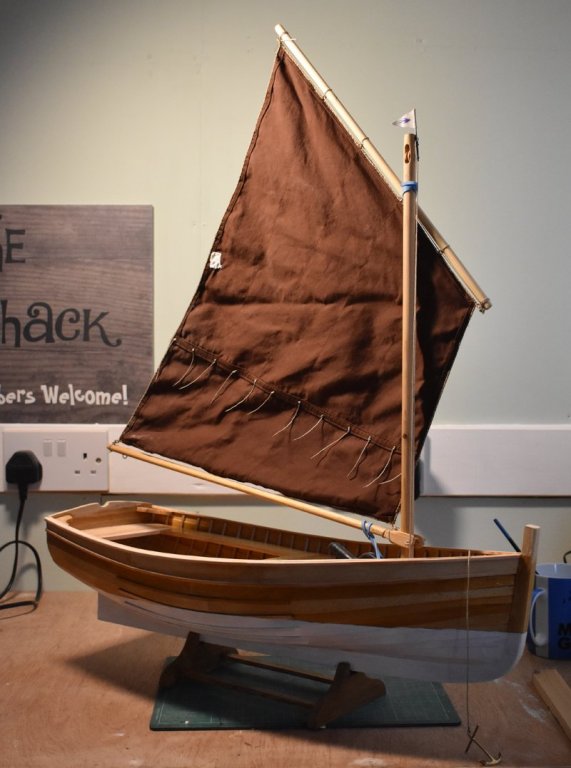
Nearly there. Got a decal to add and some final ropework before she's complete!
- GrandpaPhil, yvesvidal, G.L. and 8 others
-
11
-
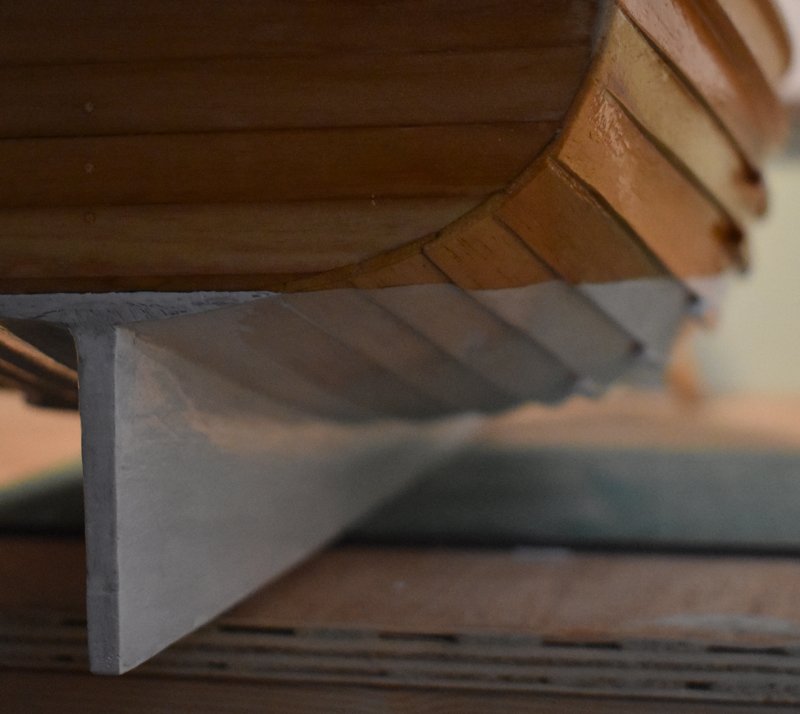
Pigs!
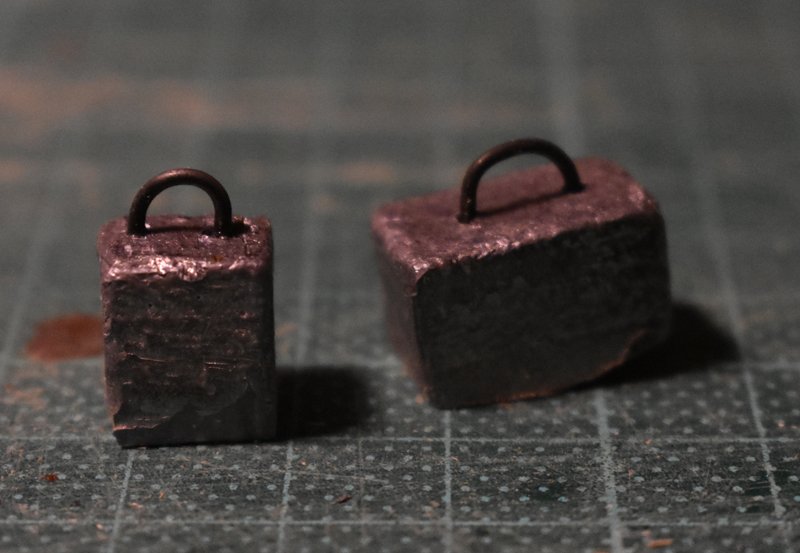
Cast in lead, today. Internal varnishing done.
And keel/stem built up. Nearly there!
-
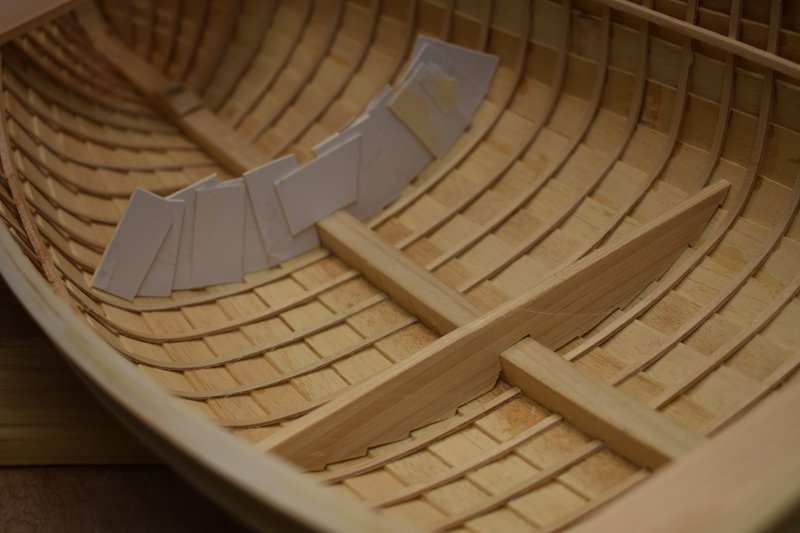
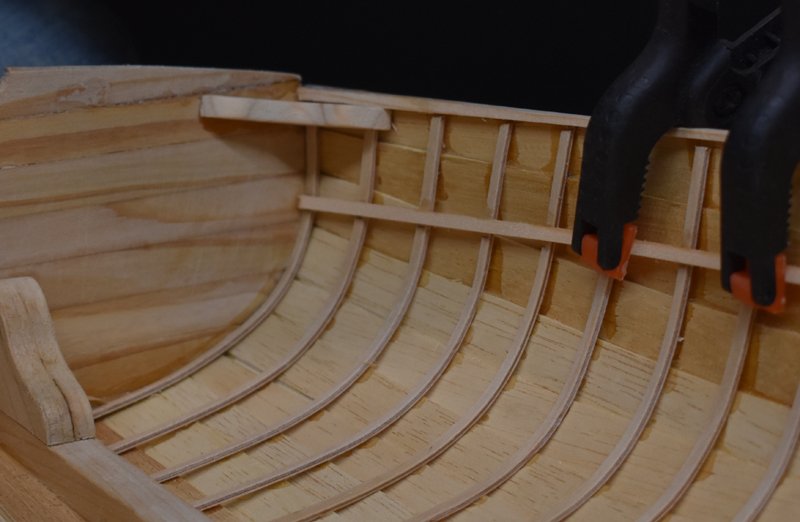
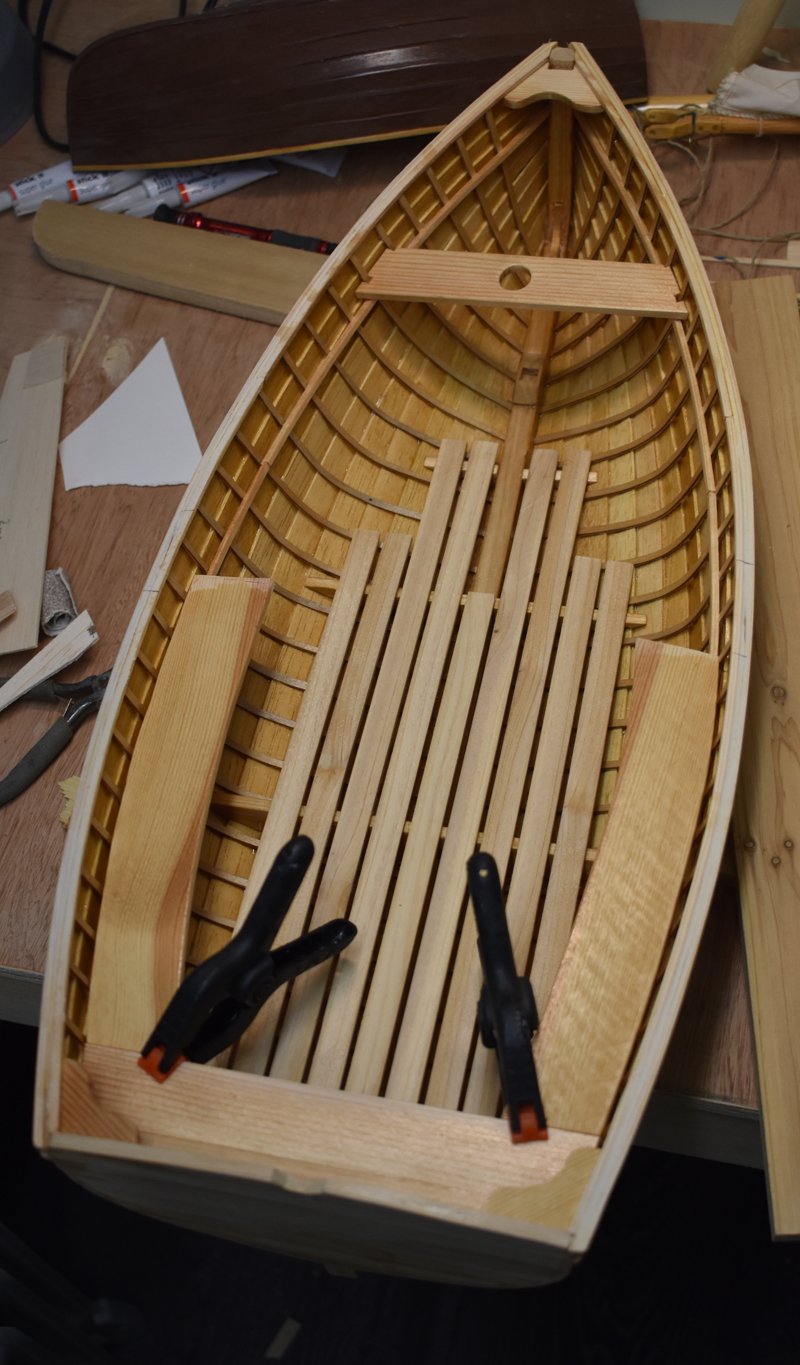
Calculating the floors' angles from scrap cardboard and superglue.
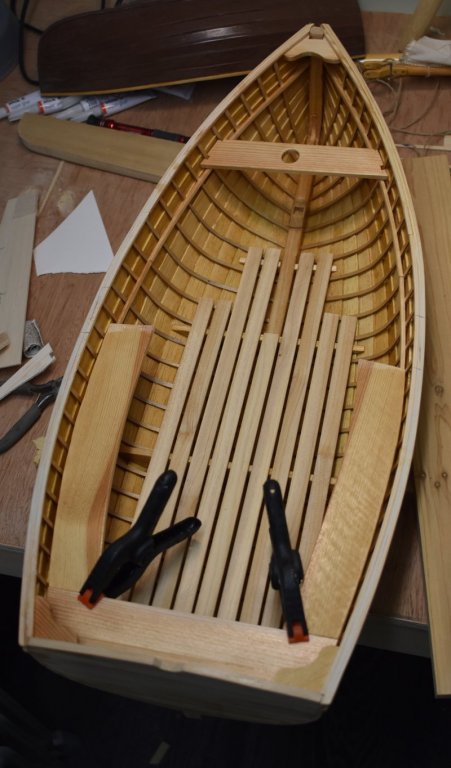
...and fitting the bottom boards.
- mtaylor, michael mott, Tigersteve and 9 others
-
12
-
-
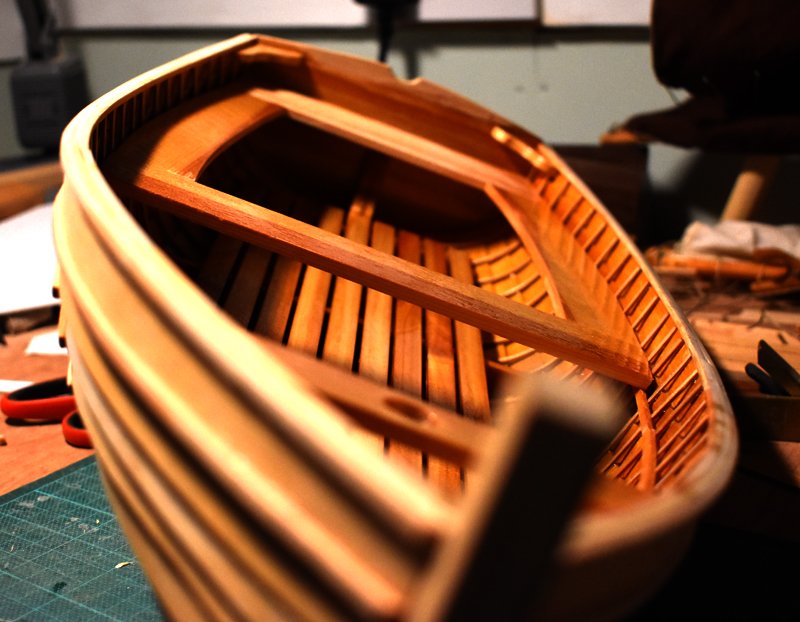
Thanks Jim. What's really amazing me is:
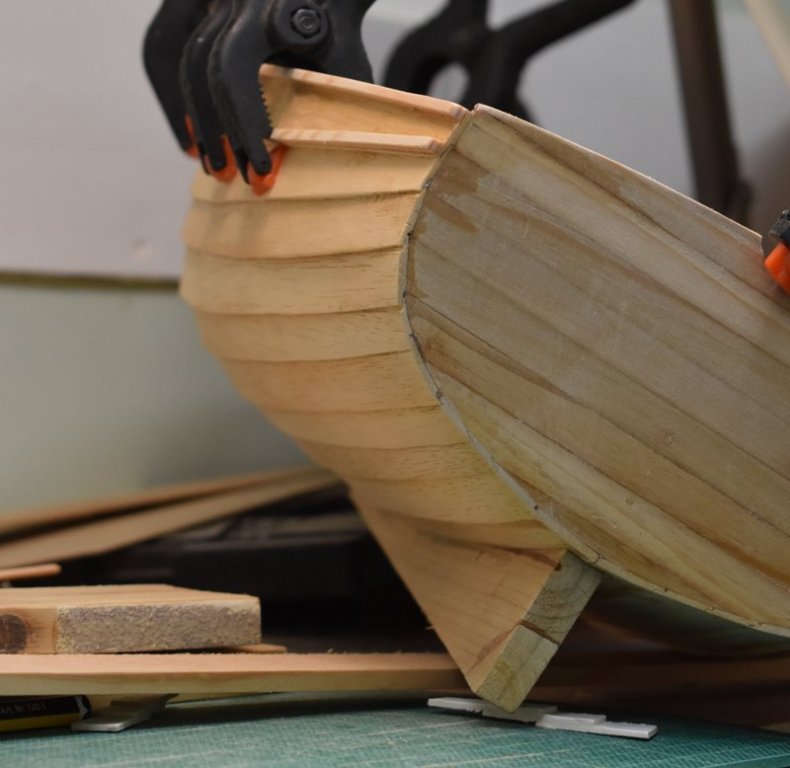
1/ How wobbly/warpy she was when planked up.
2/ How much better she was framed up.
3/ How solid she is with gunwales on.
4/ Thwarts to go ... She won't move at all.
- thibaultron, mtaylor, michael mott and 2 others
-
5
-
-
-
The drawing is a scaled-up version of the Atkin clinker/lapstrake dinghy, modded by myself to resemble 'my best guess' of the literary original. There's a little evidence of Ransome's original Swallow online, which I've drawn from, too.
- mtaylor and thibaultron
-
2
-
Thank you for the positive vibes!
The pine comes from old bits of furniture, ripped and planed to the right dimensions. The limewood? An old Ikea venetian blind, part-destroyed by the kitten.
"I'll have that!" The ribs are pine ply strips (well spotted!), from a sheet I bought. 1mm thick, I think - I'd have to measure it.
More to follow!
- mtaylor and thibaultron
-
2
-
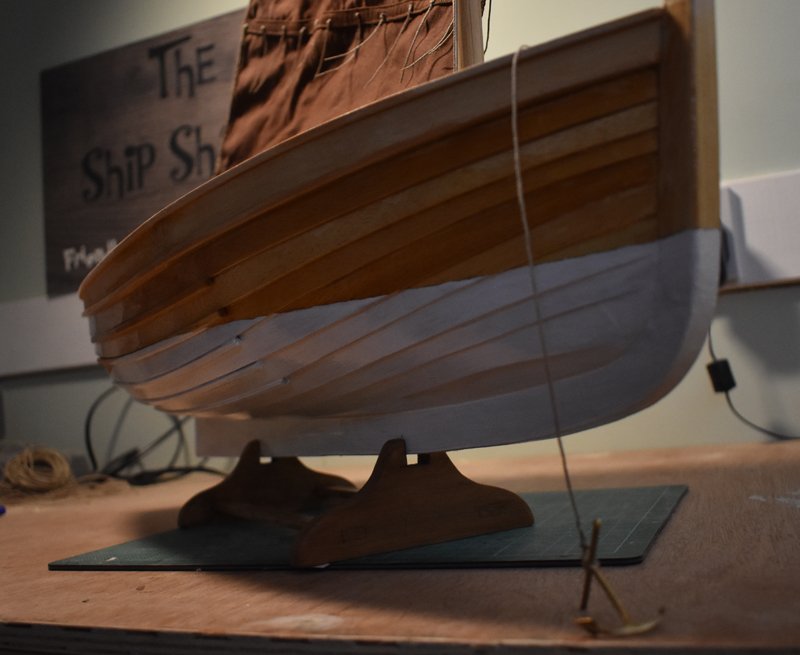
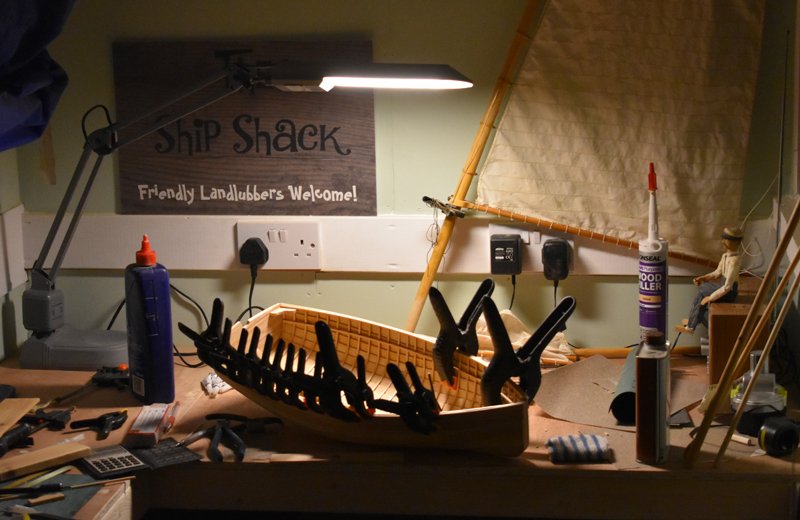
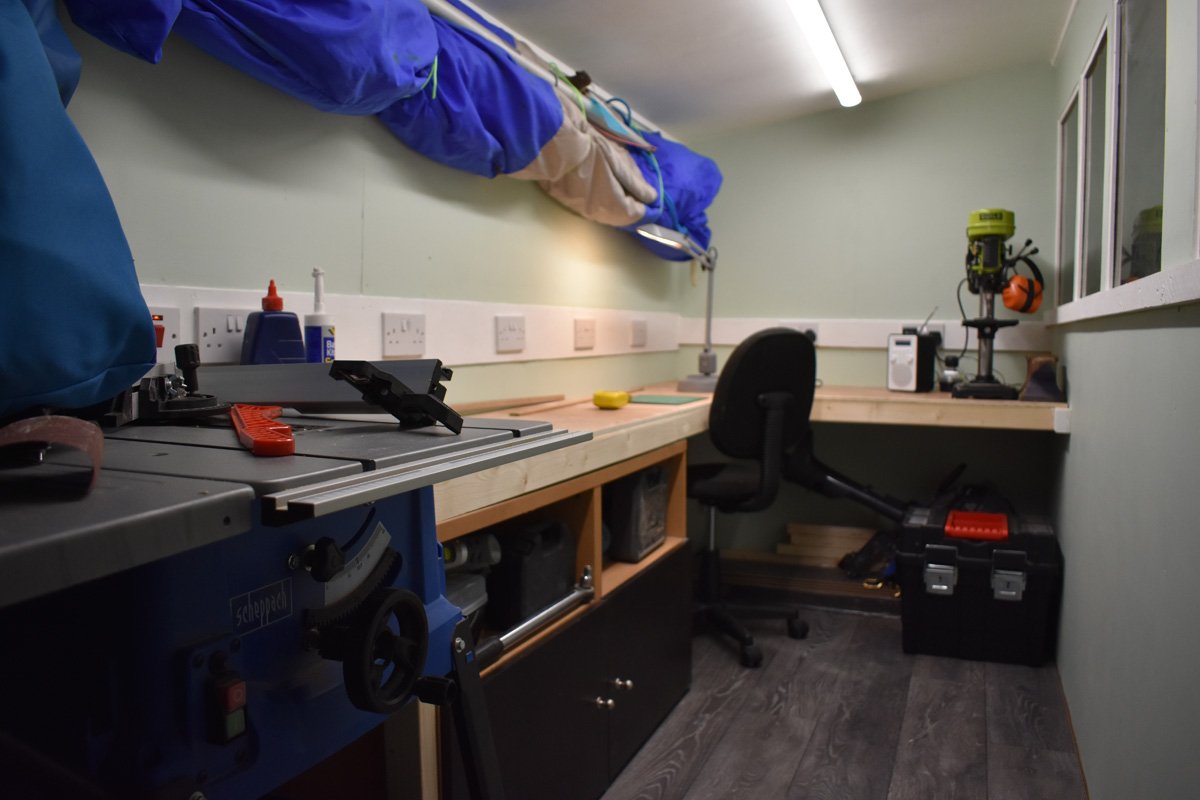
I've tried building boats in the house, but I don't have the room, and the models (and I) just get in the way. So, late last summer, I turned this fairly fresh patch of concrete:
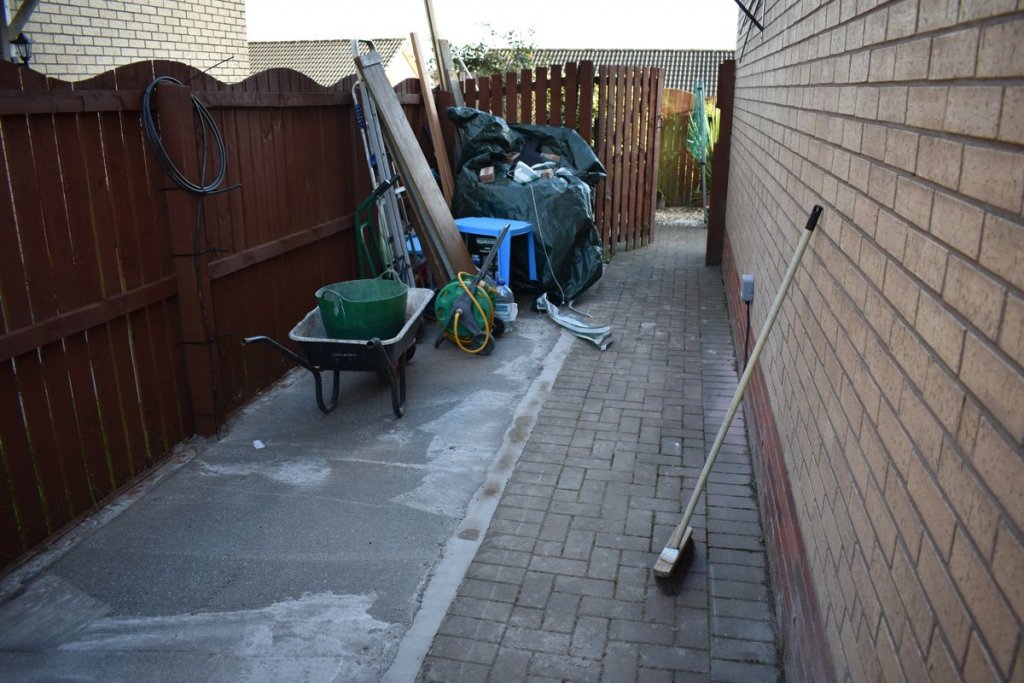
Into this:

...which is becoming an absolute joy. A bit narrow (5') but long enough (14') for anything. LED lighting, tonnes of sockets, a radio: I'm good to go! And, with a love of the works of Arthur Ransome, and a commission for a dinghy, I started using my workshop just before Christmas:
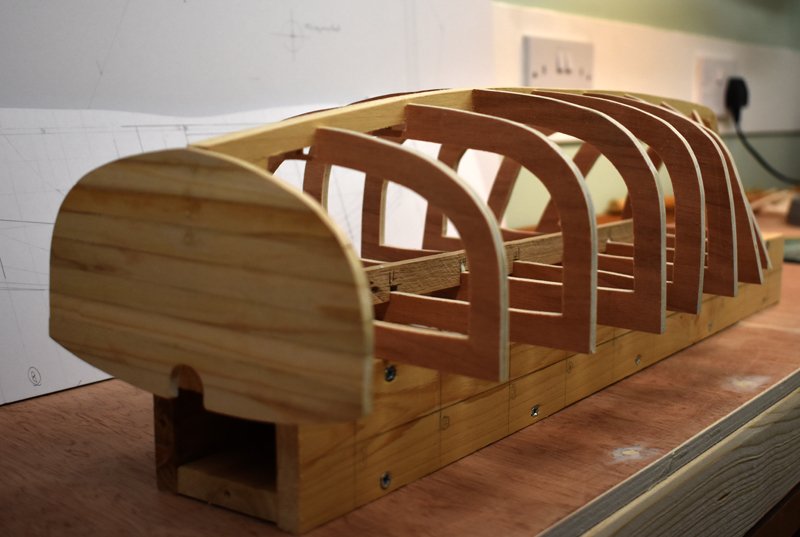
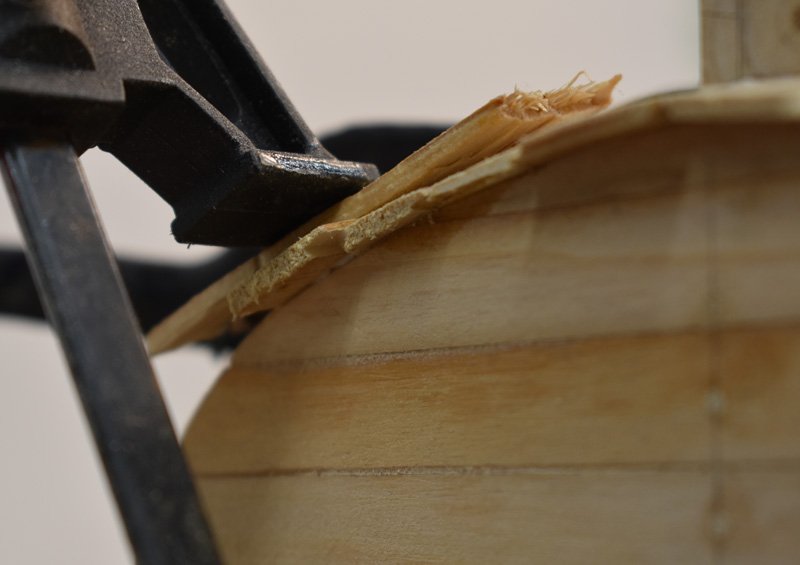
This is the start of a one-eighth scale lugsail dinghy, clinker built, sitting on its molds. Pine and lime wood throughout.
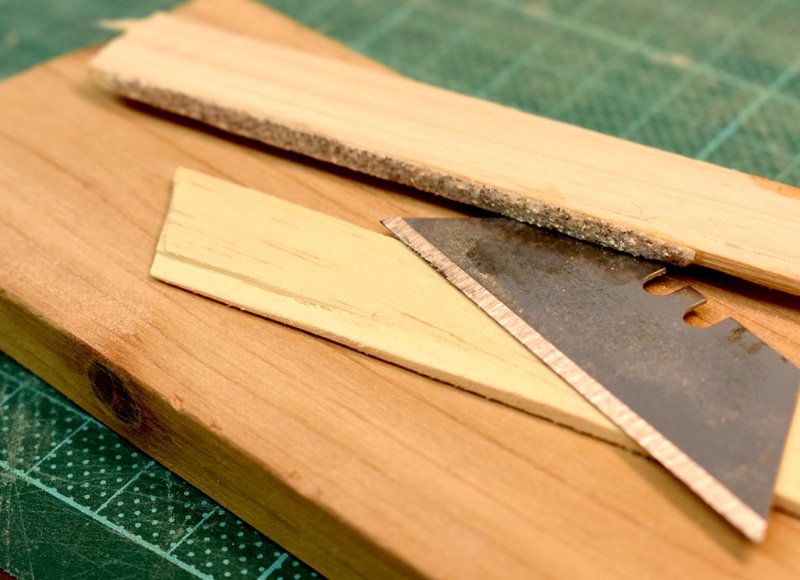
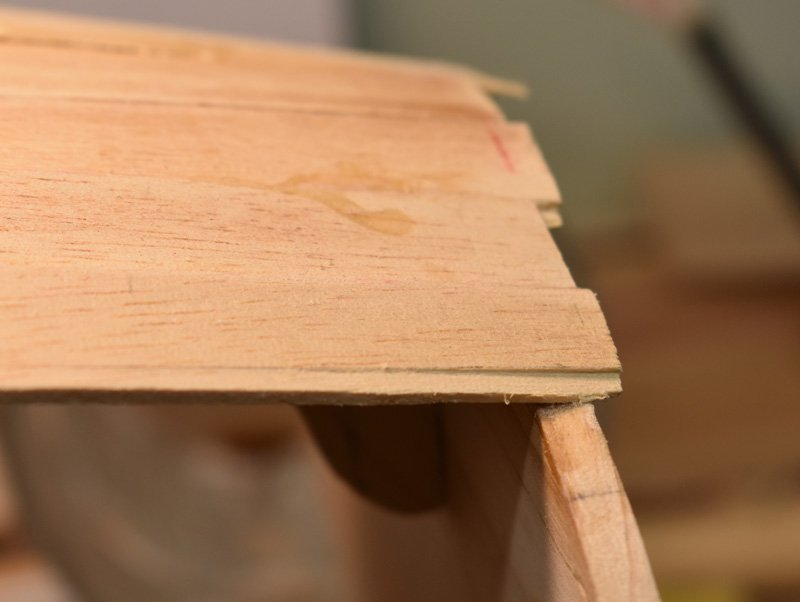
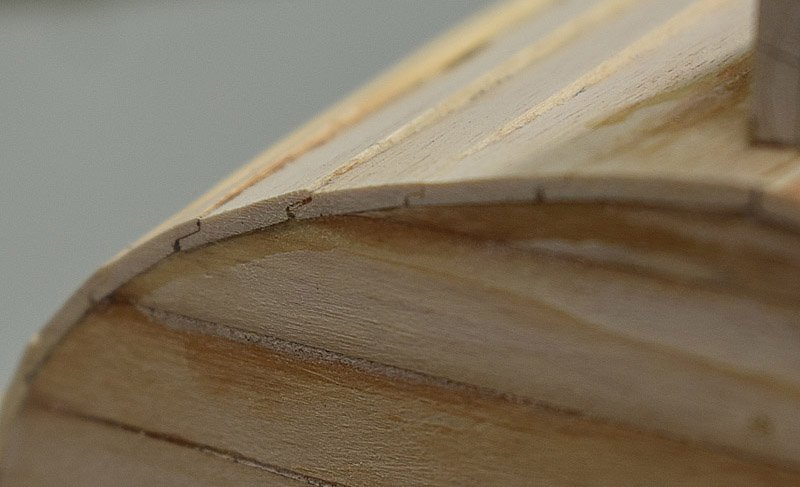
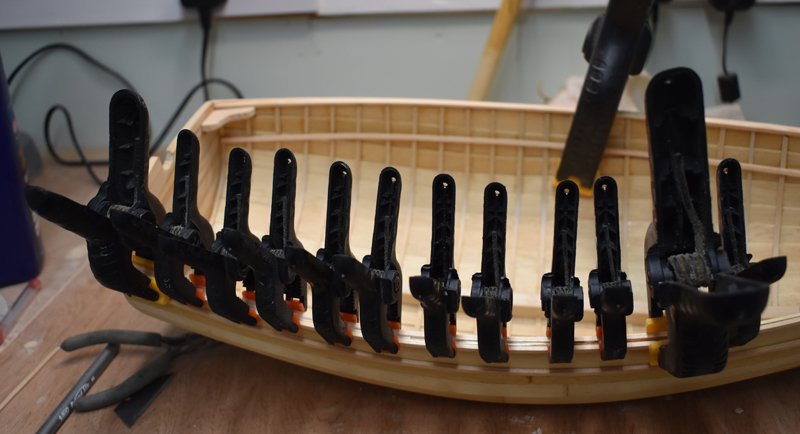
Lands cut on the planks using the specialist tools (!), and geralding commences...
I am in clamp heaven!
One-eighth scale is a great size. RW techniques (well, were it a modern epoxy-glued dinghy!) in miniature.
Storming along, now Winter's almost over and I have double-digit Celsius again!
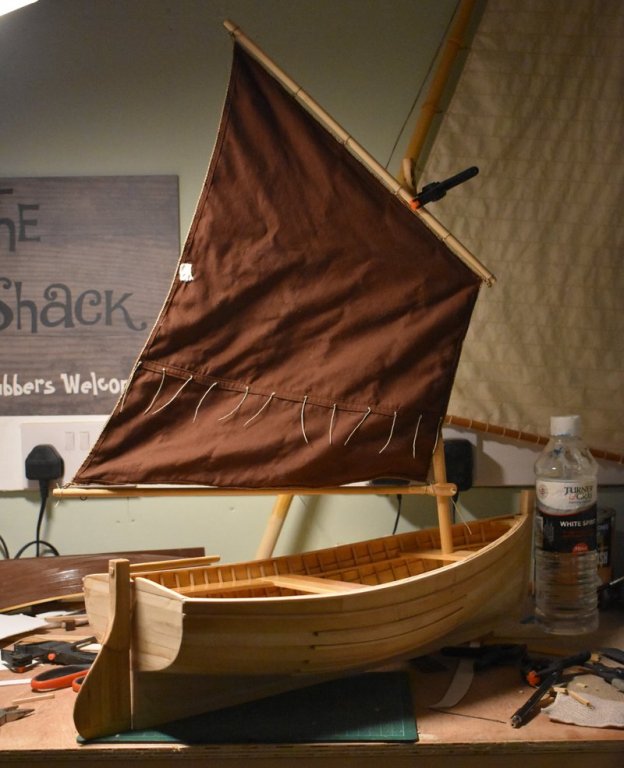
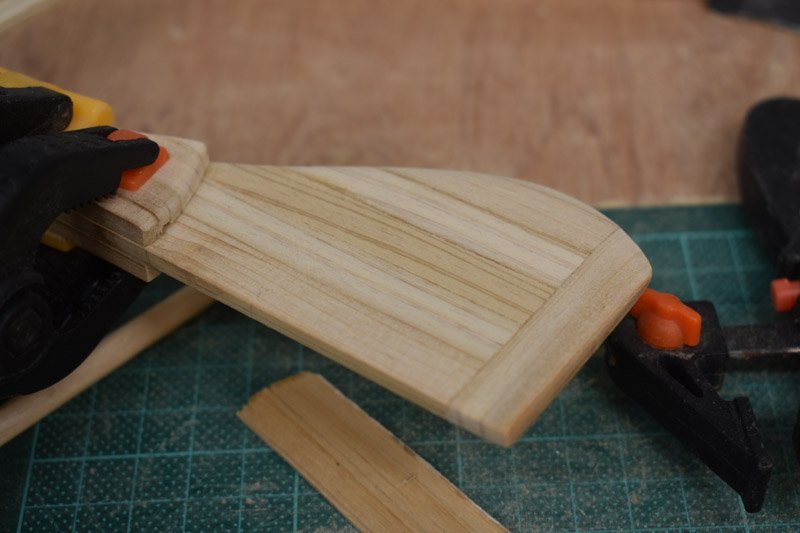
Lots of work to do, internally - and breaking work on the hull (glue-drying time) to complete some of the other bits and bobs. Rudder...
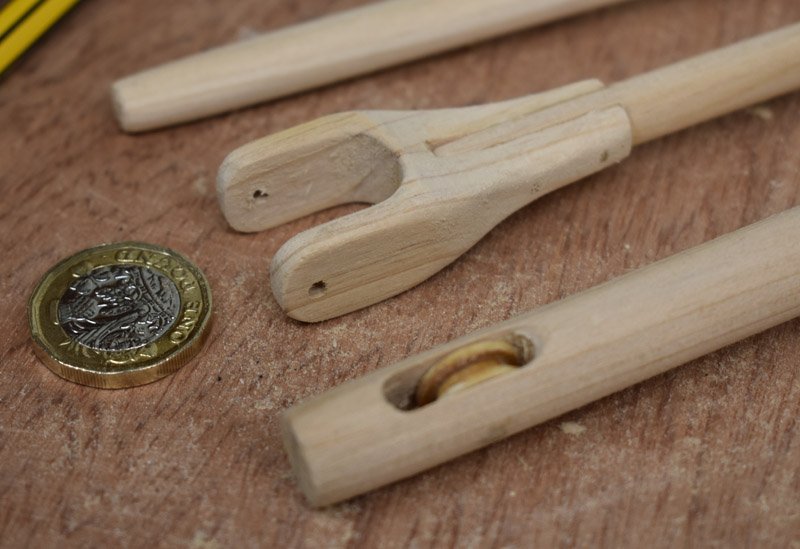
... yard, boom and mast ...
...More to come!
- mcpwilk, michael mott, KeithAug and 15 others
-
18
-
My advice would be:
- Start with square section stock. (Four-sided.)
- Taper this as required using a plane/sand paper.
- Make a spar gauge of a suitable size for the spar.
- In use, the gauge marks lines on the square stock, enabling you to...
- ...Accurately plane/sand to eight-sided.
- Take off the ridges to aim for sixteen-sided.
- Hand sand to finish.
Perfectly round spars, tapered as you want them, every time!
Andy
-
-
The whisstock.com pages lead me to this layout of the gaff-rigged 5-tonner. (It's a .pdf - you might need to be registered with the site to view it.)
That shows the mast held in a tabernacle on the roof of the coach house - this is handy for lowering the mast when required. Under the mast there's a vertical support for the tabernacle down to the keel. No doubt there's an athwartship beam for the roof at that point, and the support butts against the lower side of this beam. This support is seen also functioning as the bottom-right corner of the 'head' and the port side of the frame of the door into the forward berth.
Andy
- Mark Pearse, Omega1234 and mtaylor
-
3
-
-
5 hours ago, vaddoc said:
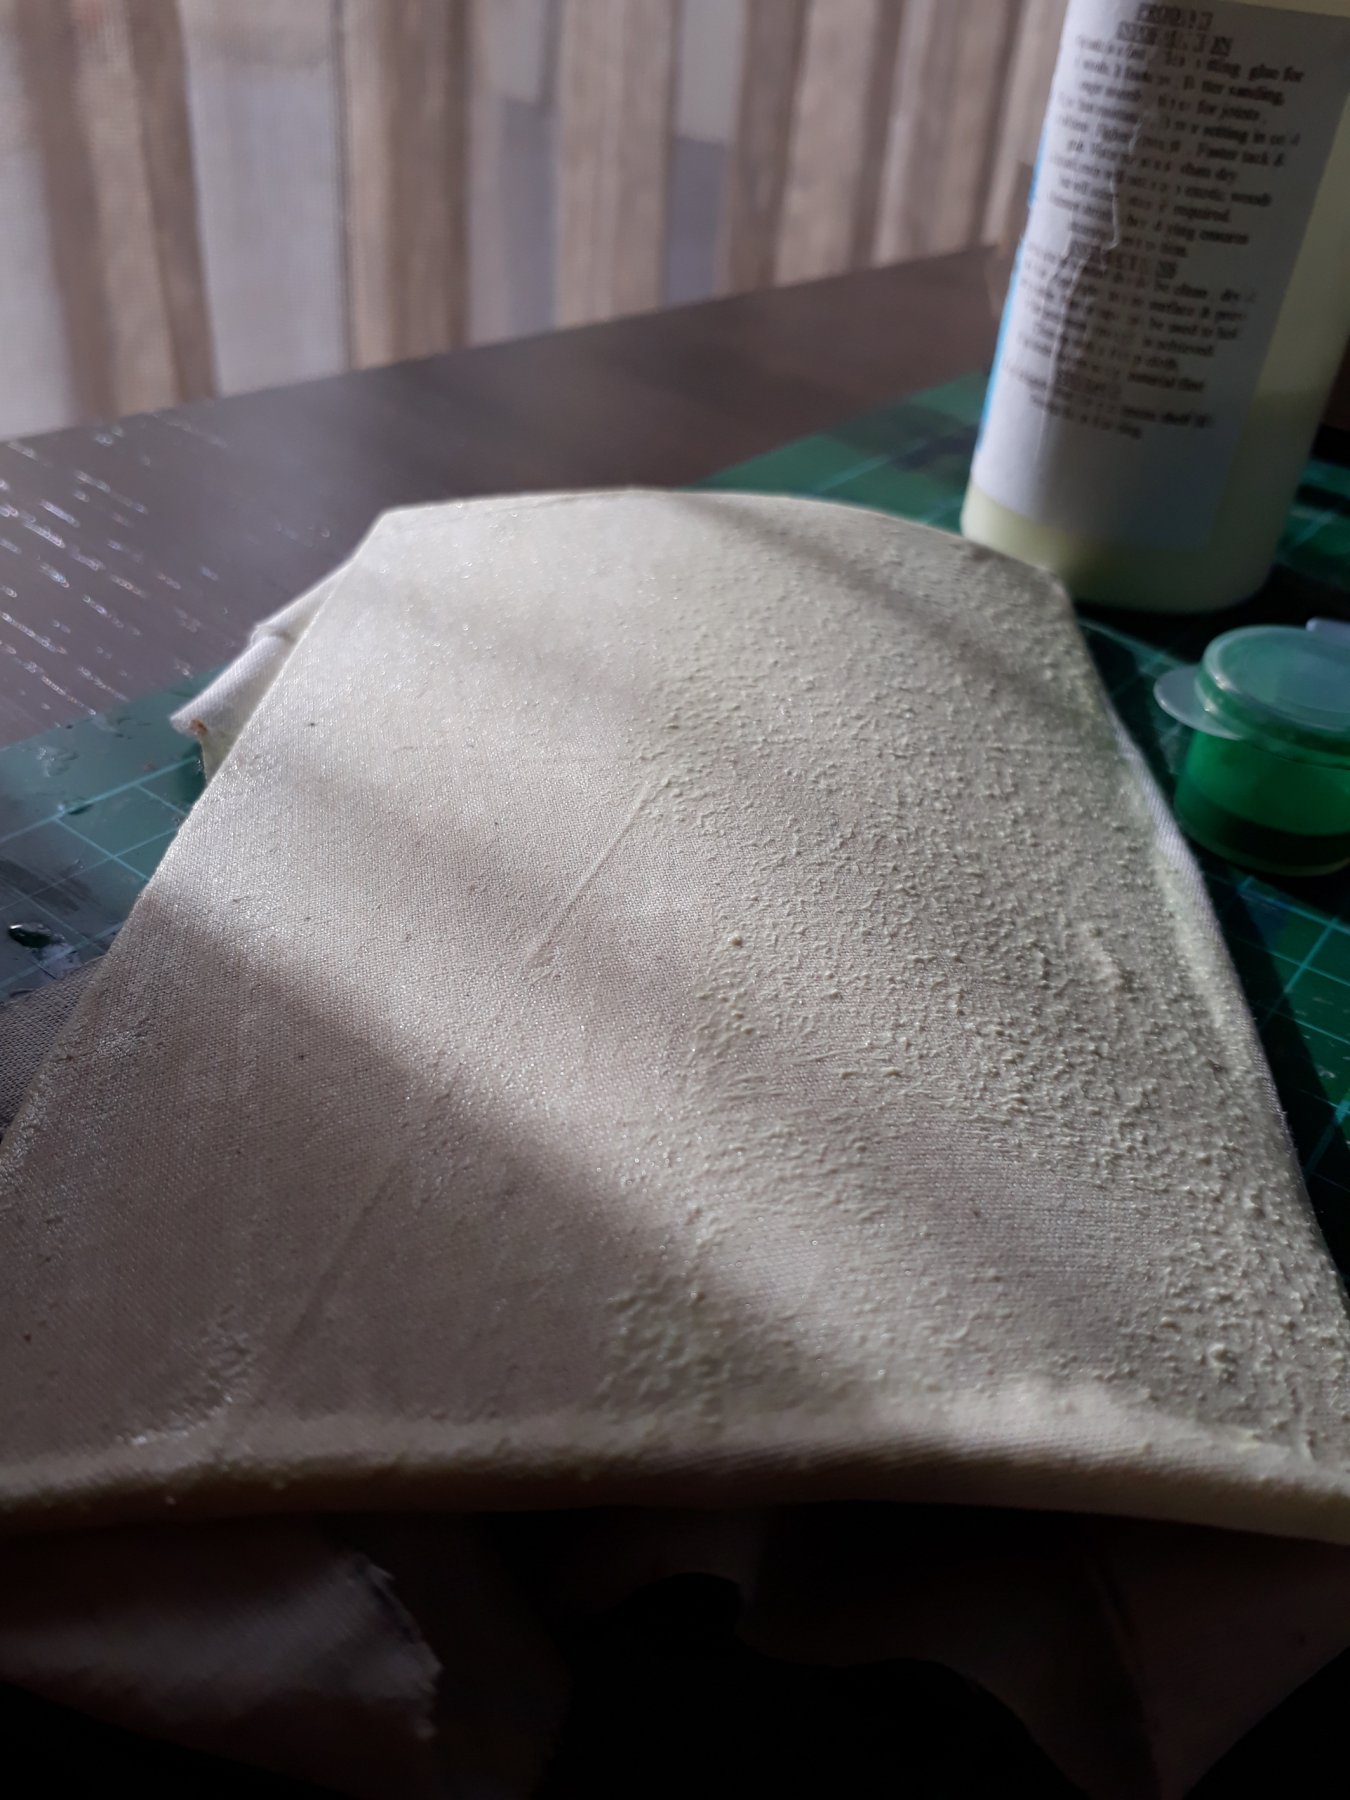
I saturated the fabric once more with PVA, but not as diluted as before. This time however, I squeezed the excess off from half the surface. This half came out smoother.
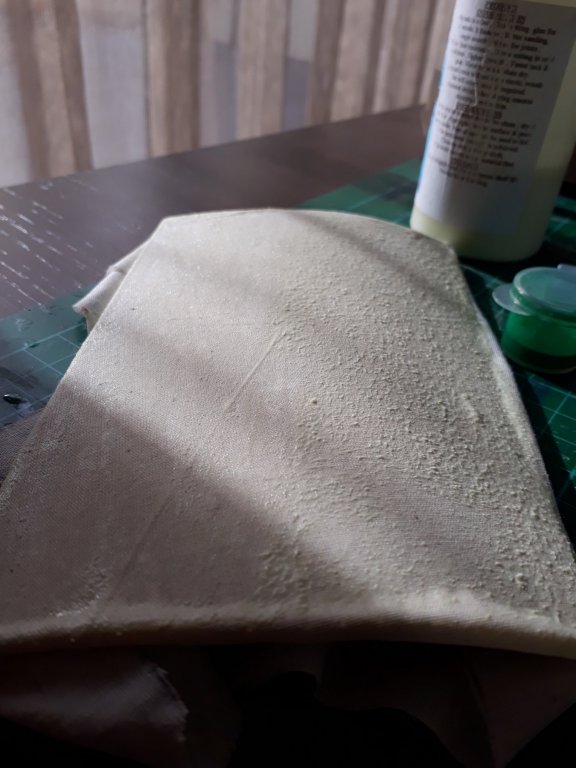
The right side is very blobby - left side seems ok. Left side might be better stretched a bit while drying and rolled out while wet on the surface. It certainly takes a few coats to build up paint on the dried cotton surface once glued. I hit it on coat 4 or 5 of acrylic on cotton: thought I'd never get there, but then - all of a sudden! - it does.
Andy
-
-
Vaddoc ... a couple of thoughts from my 1/8th scale experiences:
First of all, I loved it. After too much time in the worlds of 1/72nd and 1/96th, it's heading towards 'real', and many of the modelling tricks you need to employ on smaller scales can be dispensed with. Plus, there's a physical 'presence' and 'mass' to fittings and structures which is great for my fat fingers, and the final result is just that bit more 'believable' to the eye.
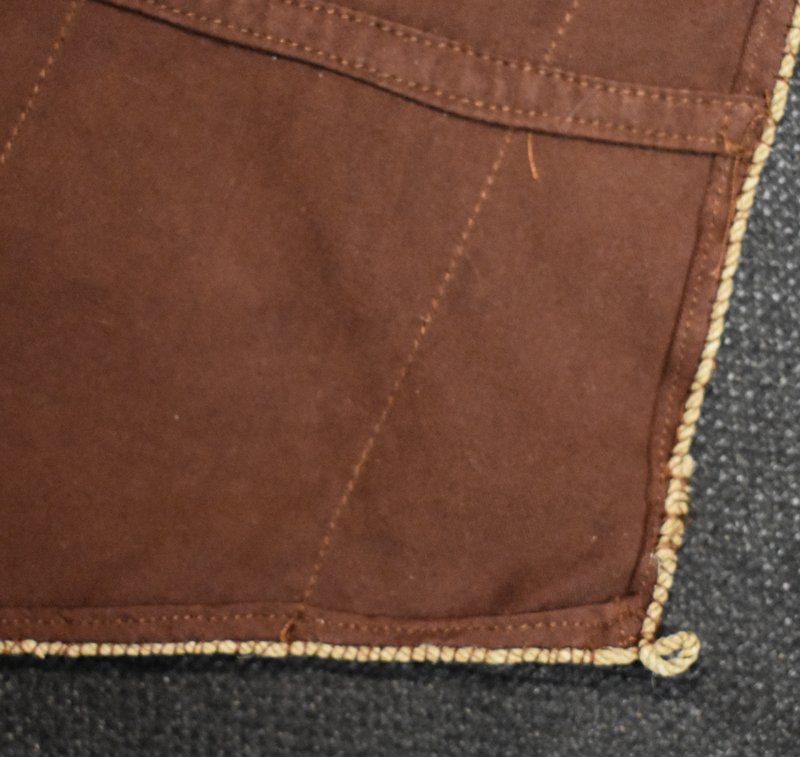
Canvas - I mentioned 'high thread count' cotton material. I was aiming for the same sort of number of threads-per-scale-inch as real canvas has, and found a 300 tpi cotton pillowcase on offer which (pretty much) matches heavy duty full-scale canvas in this regard. It looks 'appropriate' on the model, so I can't fault it. It was first well-washed and then, once dry, glued on with PVA (rolling the fabric on with a roller, pinning it where needed in order to stretch it) and allowed to fully set for a day or so. Later, I painted it over with thinned PVA to help set and part-fill the weave. This provided the basis for later painting in acrylics. The subsequent wood/cotton laminate (and it is that - extremely bonded) is great for drilling and cutting, where needed - but do use a sharp scalpel.
I suspect your original boat would have had canvas added to its decks after hatches and lights (and so on) were integrated to the wooden deck. For a model, it's much easier to do this beforehand - add the 'canvas', then build the structure. It might be a cheat, but it makes for neater edges.
Finally: don't dismiss hand painting as a finish. Once again, 1/8th scale is working for us. The original was certainly hand-brushed - so some minor brush marks would be more than expected on the final surface. I hand-painted with standard modelling acrylic paints throughout my build of Racundra. The finish is not, by any means, Photoshop Perfect, but does look like the finish you'd get on a handcrafted wooden boat of the 20th century.
...Which, of course, is the point.
Andy
-


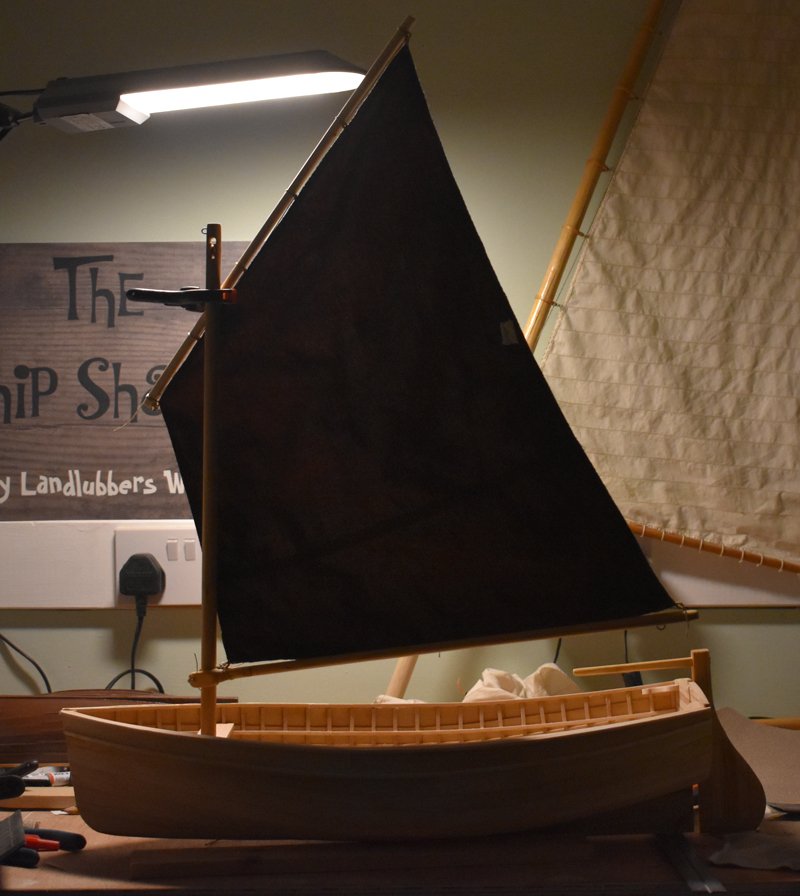

 I'm getting there. End in sight. Thwarts, bilge boards, rowlocks, bit of metal and ropework. A tonne of varnishing. But I can see the end.

Swallow by AndyG - FINISHED - 1/8th scale - 1930s lugsail dinghy - small
in - Kit build logs for subjects built from 1901 - Present Day
Posted
Hi Phil! You have a private message!
Andy