


glbarlow
-
Posts
4,126 -
Joined
-
Last visited
Content Type
Profiles
Forums
Gallery
Events
Everything posted by glbarlow
-
 I really hate that I’m now going to have to buy a lathe.... Beautiful, next level work as usual...and excellent tutorial to add to bookmarked pages.
- 725 replies
-
- 1
-

-
- vanguard models
- speedy
- (and 1 more)
-
Byrne's saw accessories question..
glbarlow replied to CPDDET's topic in Modeling tools and Workshop Equipment
This is all it takes to prevent kickbacks in my experience, that and a side block to keep it tight to the side and a push stick to move it past the blade. -
How is your Speedy coming along?
-
Ingenious! If I may ask, how do you keep the moulding strip from sliding in the grove as it’s being milled
- 589 replies
-
- 2
-
-
- le gros ventre
- cargo
- (and 1 more)
-
This where good design and gentle hands come into play. It took me forever to get this part right on Vanguard. It’s looking great, very neatly done!
-
Being a good modeler is knowing and being willing to take apart a mistake and do it over. Based on that axiom I’m a really good modeler Being a great modeler is not making the mistake in the first place. I am not great 🤣😂
- 221 replies
-
- 2
-
-
- queen anne barge
- Syren Ship Model Company
- (and 1 more)
-
Excellent! I’m certain you’ll enjoy the build. Be sure to let us know when you have log started.
-
I think you have a problem 😂🤣
-
Nothing wrong with yours. I’d recommend getting the fashion pieces right and trimmed to the bottom of the wales. Seems like you have plenty of wood to do a little more sanding. Aside from that it looks great. Your square tuck is very well done. I know how hard that is.
- 778 replies
-
- 1
-
-
- cheerful
- Syren Ship Model Company
- (and 1 more)
-
If you need to edge glue planks it’s because they weren’t properly shaped. Edge gluing is a lot more likely to cause staining than it is to retain planks. Hold them up tight to the one above when gluing and slightly bevel the top back edge. If tapered and bent to shape that’s all you need.
-
crisp and clean workmanship, nice!
-
I’m enjoying watching you build this monster. I just shake my head at the size of this thing. So already the extra work you did on the orlop is lost forever other than a tiny glimpse down a hatch. Definitely for the detail enthusiast, but so beautiful design.
-
😂🤣I hate it when I have to let any of the Manor staff go...😂🤣
-
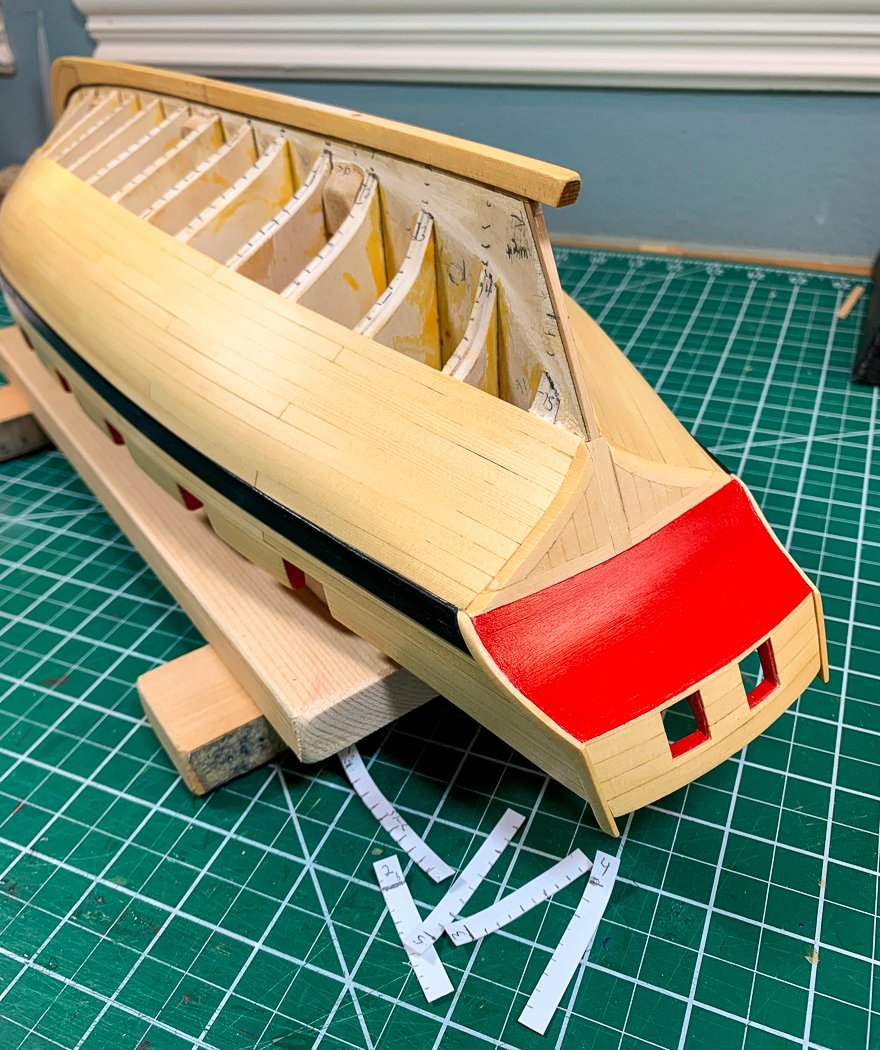
I've started lining the lower planking belt. It is a chore but so worth the effort once the planking starts. I also use the plans to add a vertical hashmark where the plank joints are so I remember to cut the planks the proper lengths. Really though I just wanted to share a photo of my ***RED*** counter. For Cheerful I wanted to go RED or go home, I think I'm successful. I've never used anything but Admiralty Paints Red Ochre, this Golden Medium Cadium Red makes a statement. 😄 Of course I've already painted the gun ports a long while ago, but the counter really pops against the gold of the Alaskan Cedar. (five thin coats in case you're wondering).
- 778 replies
-
- 18
-
-
- cheerful
- Syren Ship Model Company
- (and 1 more)
-
Dang it, I may have to buy another tool.
-
The better way - you'll not like it later if you don't. I expect the same encouragement when I'm faltering on rigging Flirt 🙂
-
Haven't really used them yet, no rigging or small hands work with where I am on Cheerful. It does look very solid and better than the little extra hands thing I've used for years.
-
I went for the 4 hands version, I’ve never needed more than 3 plus I thought the 6x9 inch base would fit better on mu bench. I was hesitant until Derek assured me of the strength of the magnets to the base. i need to stop reading these forums, I learn about too many great tools that I can’t resist. Amazon just makes it all too easy.
- 725 replies
-
- 3
-
-
- vanguard models
- speedy
- (and 1 more)
-
I only have the two, guess I better get busy ordering stuff. Texans are very competitive 😁
-
Great and creative display for your excellent barge. If this is your first model, we’ll all look forward to more great build logs!
- 103 replies
-
- 1
-
-
- queen anne barge
- Syren Ship Model Company
- (and 1 more)
-
My mistake, it was the USS Kidd in Baton Rouge. There were 4-5 destroyers named Bainbridge including the first one in 1903 and a current Arleigh Burke class but apparently not in the movie Greyhound.
-
I watched it on my 85 inch TV using Amazon Fire Stick and the Apple TV app. Apple TV is not limited to a computer.
-
I read the book after seeing the movie, I found it tedious. The movie is 98 minutes of action, the book dwelled on and on and on about inner thoughts. I'm generally a fan of the book over the movie and of Forrester's books - not this time.
-
Not the best example but as a photographer I know that photos used for trailer or magazine covers are often reversed just to accommodate the text placement - someone should have noticed the reversed letters on the helmet, that could have been easily reversed back.