Adrieke
-
Posts
1,625 -
Joined
-
Last visited
Content Type
Profiles
Forums
Gallery
Events
Everything posted by Adrieke
-
 nice John now you cna relax a bit when yo are building her
 -
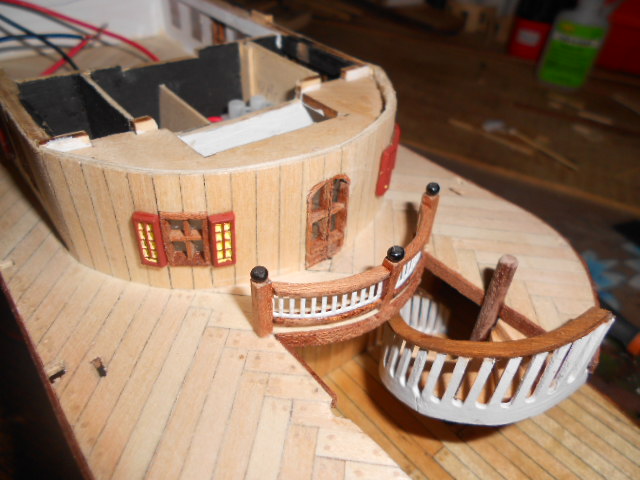
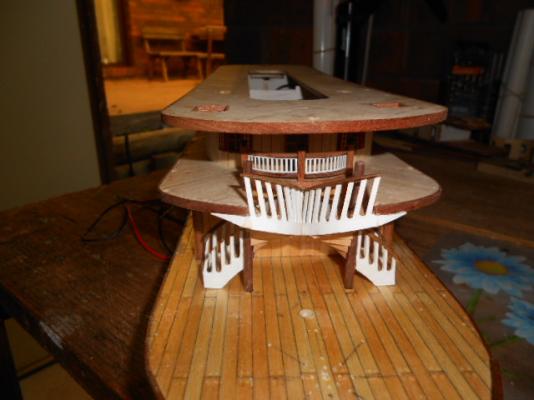
@ wim thanks yes the stiras and the railings do make this model a beauty @ John almost finished now they are both in as you can see in the picture (forgot the short handrail on one but that seasily fixed) @ robbyn. i am pleased with the result not prefect but its the best i can do @ carl thanks and i understand my friend be well @ tophog thanks @ Jim thanks . i mentioned it before : its been fun doing it together with John and certainly for me it has been motivating especialy for these stairs and here the result ok i am of now for a picnic lunch with the family
- 1,038 replies
-
- 1
-

-
- King of the Mississippi
- Artesania Latina
- (and 1 more)
-
yup it felt good to be doign somethign again on her Pat hello captain slog . i have actualy not worked much on her for the last month as all my buidling time is taken up by the kom. and the paper model is just for those times i cant get to my workshop
-
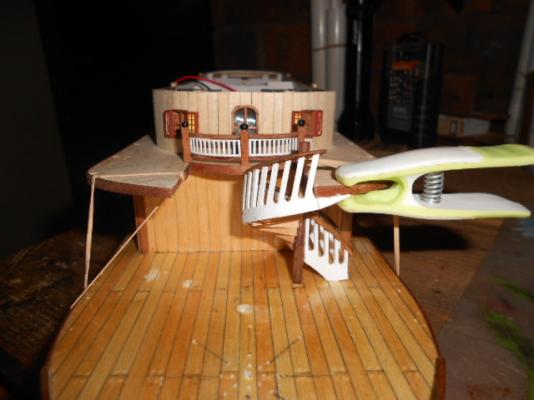
first stairs are in. will need a bit of retouch at the top ( if you look good you ll see the paint cracked) and after the glue has dried. when i tried squeezing th esecond one ofcourse one of the steps cam eloose (sigh) so waiting for that to set before i try again

-
thanks John yes the railings are the part that makes this ship looks good thanks for looking in Anja building her together with John makes it so much more enjoyable my father is doing ok . he is back home since last week. due to him being a diabetic wounds dont heal quickly so he still needs months and months of daily treatment. i am still hoping to visit him later on this year.
- 1,038 replies
-
- 1
-
-
- King of the Mississippi
- Artesania Latina
- (and 1 more)
-
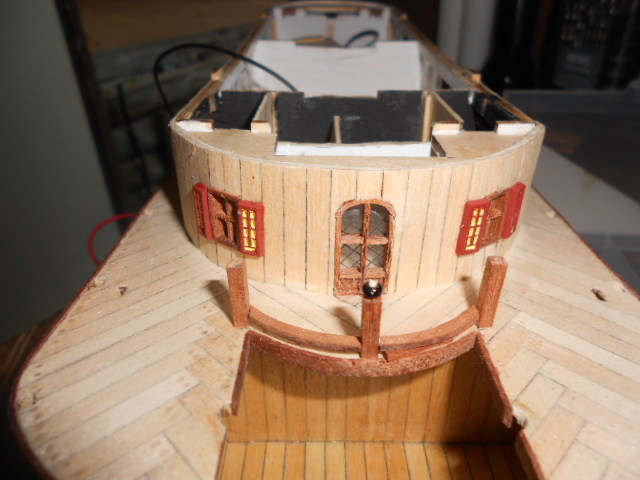
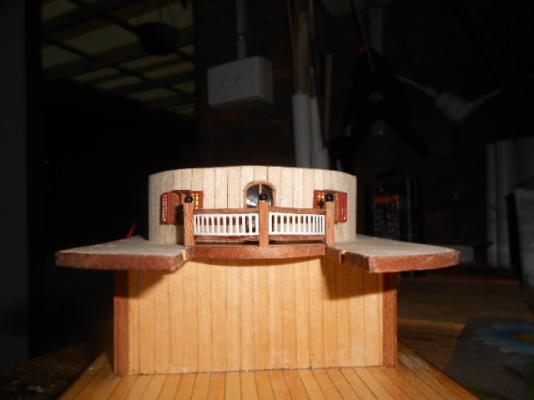
while i am finishing of the two curved stairs i worked on the railings on the second deck i used wooden dowels (toothpicks) to fastne the poles and the little round bead at the top ( just needs a lick of black paint to cover up) and all finished . next wil be to install the stairs . wil lbe a tedious job as there is not much if any room between them.
-
after you have done your ratlines Sjors
- 1,038 replies
-
- 3
-
-
- King of the Mississippi
- Artesania Latina
- (and 1 more)
-
very nice work
-
i used it mostly on my Virginia and it was ok but sometimes you need to put so much force on it that when it finaly goes in you dent the plank i wont be using nails for planking anymore too much as when sanding the hill they really get in the way and with the AL ones they are not really brass. for the ornamental nails on the kom i used but jsut to make the nail bite into the wood then used a hammer also Milo this question belongs in the modelling tools and workshop equipment
-
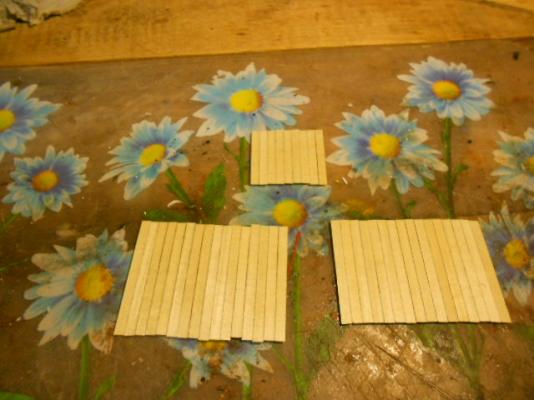
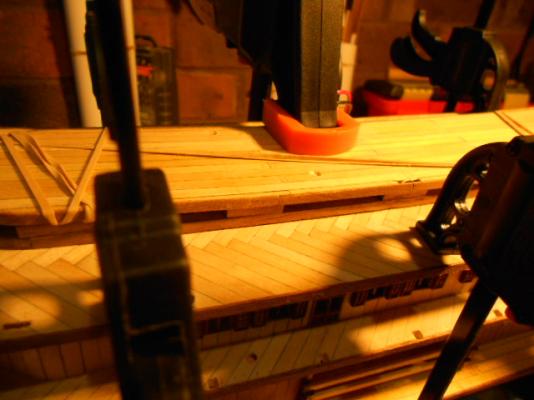
well its not much but i planked the 3 bits of lower eck that are hardly going to be seen
-
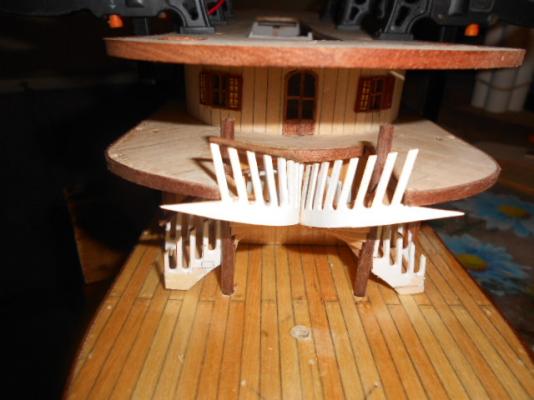
ok i think its going to work . the little adjustment makes it that the stairs are now straight. only problem now is that i need to put a fair bit of strenth on them to get them to tocuh the deck. i am thinking of drilling 2 holes and some dowels to make it hold better. fingers crossed it will work
-
mast is looking very good robbyn you do need to do count and those bulkheads easily slide out of their board so the best place to hold them is in the flase keel.
- 773 replies
-
- 1
-
-
- san francisco ii
- artesania latina
- (and 1 more)
-
very clever. i have a set but the cover is hard to open so they are all mixed up now i need to check each time to find the one i need
-
hi Matthew thanks for looking in . not much progress on her as all my time is spend on the kom. i ll probably finish of the fairing of th ebulkheads when i am at the finishing stage (lots of railings to add) of the kom
-
thanks Brian John not quiet yet but atleast i have a plan of attack now thanks for the comments Sjors now stop pushing me to start on the Gorch Fock so i can finish this one yup Wim i guess model buildiong does test the resilience of the builder . reminds me of the saying : failure doenst lie in being knocked down but in not getting up again. thanks Jim yes robbyn the last 2 weeks i think i put atleast 2 hours a day in her and stil i havent finished enough so i cna glue that 3rd deck on. thanks for the comments . i am jeaulous of John though his looks so neat and tidy i ll promise to bite my tongue instead
-
i didnt notice the reveresed deadeye. but was wonderign just as Wim if the rigging above the deadeyes should be in black string unless you intend to color it after ? good start on it though
-
very nice job indeed and an ingenious way to do it
-
well i am going further ... with my translations i am usualy very early at work (to avoid the trafic) so i have a bit of time then and during lunchbreak . that is if i dont get caught up in reading on here
-
John she looks amazing
-
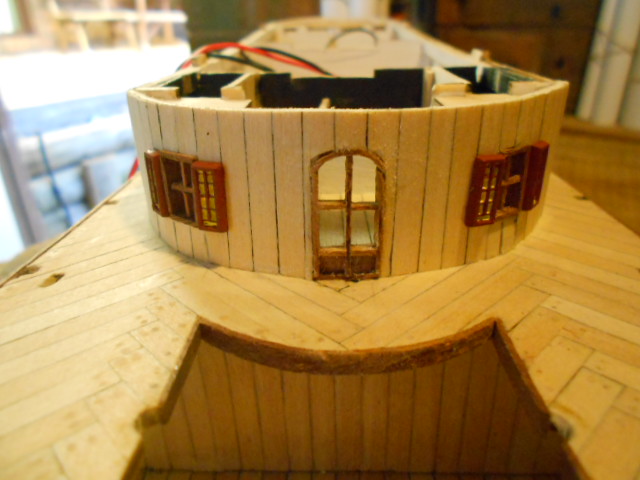
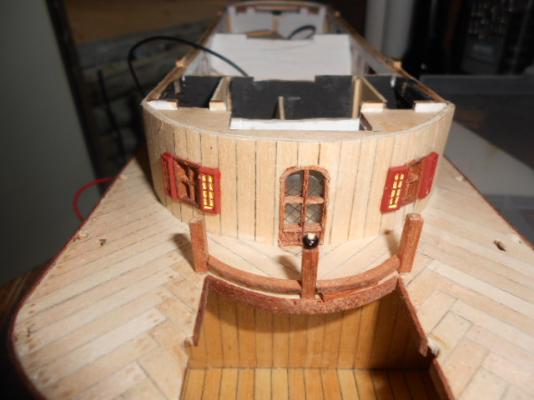
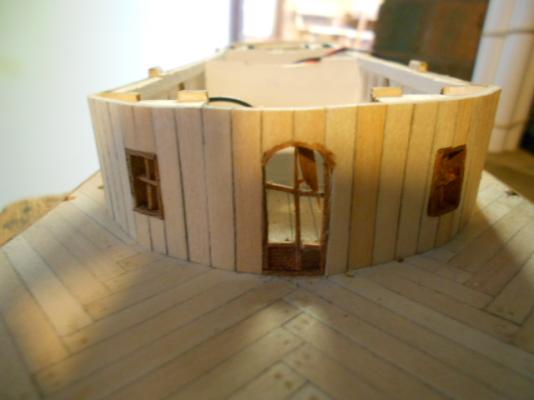
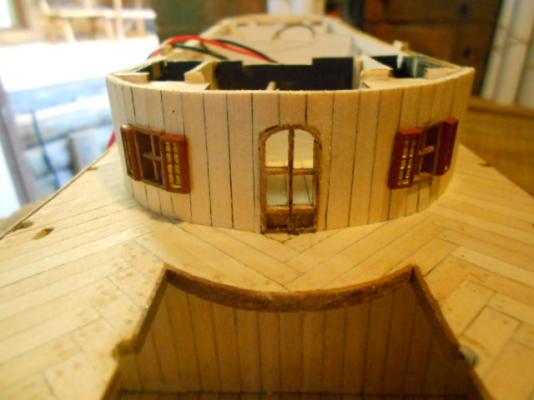
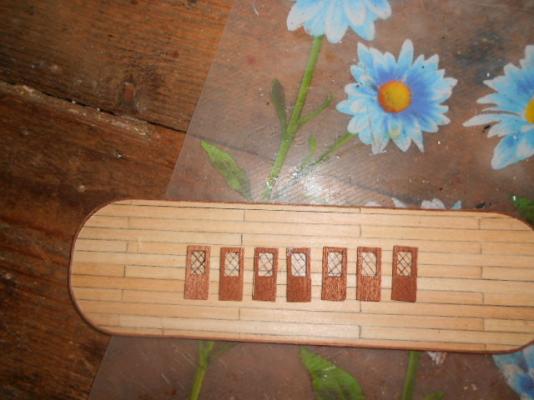
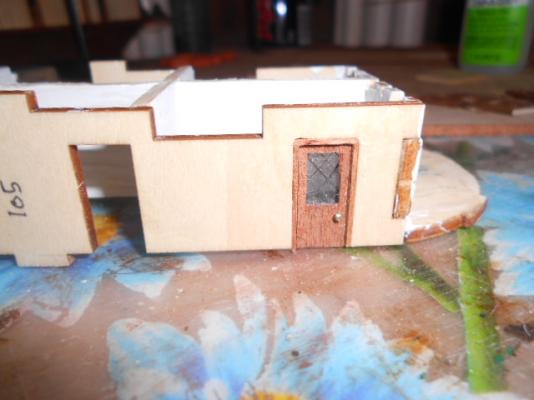
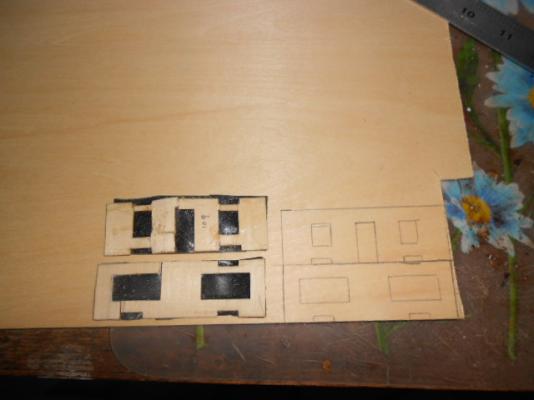
making the last door and putting a tiny bit too much pressure on it when fitting the last piece no darling i didnt swear i was just calling out the name of my next ship to build ("the gorch FOCK") cutting of the top of the broken middle bit and placing a small bit on top worked though so what sleft is fitting the last 4 doors with windows (checkign to see if i have enough) thats why i am working on the doors for the next deck (allso 2 big windows and 4 smaller ones) one finished door fitted in .the instructions and pictures show no frames for these so i added them as i stil have plenty of the 1x3 strips left i also recreated the curved walls for the 3rd deck stateroom. as you can see the orginals are on the top hold together with tape. before i decided to add the lights i had already glued them on coverd the holes and removing them was impossible especialy since they where already broken when curving them. of course i made the newbie mistake that it doestn matter which way you put them on. wrong the pieces are almost not bendable . wetting them and using the soldering iron has left them pretyt much as i wanted them but there are some cracks . i wil try them on and see if it works if not i ll have to redo them i also tackled the stairs . the right one can now be corrected fitted in place. the left one fits but the bottom of the stairs are not completly straight. comparing them with thr others i loosened the top outside and reglued (bit of a gap with the sairs but wil be impossible to see once fitted in). praying it will work also clamping down the ventilation part after wetting to get it to the correct curve. remember this part wil not be glued on so it needs to have the correct bend . this will also mean the bottom of the 3rd deck stateroom wil have gaps which i need to fill and then plank over. seemed to have done much and not gotten much further. and still so much to do . there is the 2 back smoke stacks that acording to AL dont go anywhere. so i need to make an assembly to bend them into the engine room
- 1,038 replies
-
- 1
-
-
- King of the Mississippi
- Artesania Latina
- (and 1 more)
-
well i want to keep those that are following this topic entertained until i start on her
-
only 2 keith i am finishing off the 2 nd deck on my kom and on eof the mian parts is fitting the curved stairs which are giving me a headache. so last night i was not in the mood to do anything on her and to pass the time i just fitted t h e bulkheads and some decks. i noticed there was an unevenes between the 3 parts of the deck not sure if t hat is because the bulkheads where loose. by doing the translation (28/216 now) i also looked at some of the things i will do different. there is a lot of painting on this ship which i am not good at so i need to find a way to get the waterline (from green to white) perfect. btw sonce the whole hull wil be painted i dont understand why they made this a double planking kit
-
haha thats the glue on the endeavour all the parts are back in the box on the shelf i can restrain myself for now. too much to do on the other builds
-
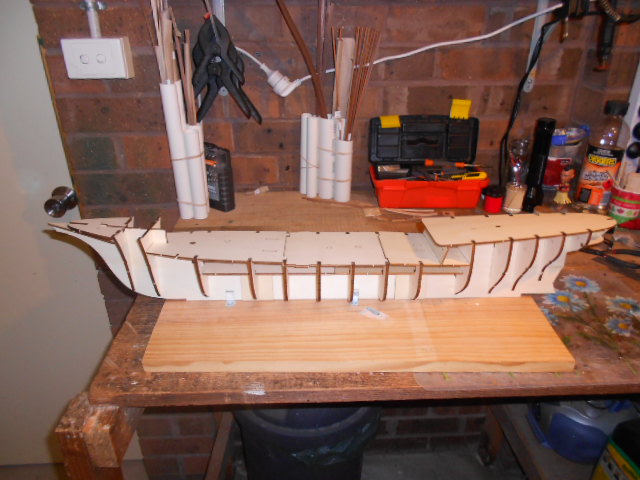
nope still no news on the parts. wil email them again tomorrow to get an idea i dry assembled bulkheads and some of the decks. as you can see she is to large for the board i made for the endeavour and here to compare with the endeavour which is scale 1:60