No Idea
-
Posts
1,036 -
Joined
-
Last visited
Content Type
Profiles
Forums
Gallery
Events
Everything posted by No Idea
-
 Thanks for the replies - In Le Rochefort the hearth is simply a brick lined wooden box with a metal lattice. The whole thing simply sits on a sheet of metal to protect the deck and was the most basic of cookers. I am also guessing that due to the heat the bricks were placed with no mortar of any kind?
 -
Hi All Does anyone know what colour bricks would have been used in a ships hearth? For some reason I can't help but think that they would have been made from grey clay. I see many ships with red bricks in the hearth so I could be completely wrong. Your thoughts would be appreciated Mark
-
What a beautiful build - As Dave E said this is top shelf work!
- 137 replies
-
- 1
-

-
- winchelsea
- Syren Ship Model Company
- (and 1 more)
-
There's some very good advice you've been given there already 👍 Looking at your pictures I would say that you are pretty much there but as has been said use a plank to check. What I would say though is that if you do go too far all is not lost at all. Simply glue some thin strips of wood onto the bulkheads to build them back up and start to shape them again. Although some builders may see this as fail it's not - we all make mistakes it's just part of building model ships. Once the planking is on the fix will never been seen but a badly shaped hull always will be if the error is not corrected. Good luck with your build as it looks very good so far
-
Hi All I just wanted to share my experience with Wolfcraft regarding their small one handed clamps. The one's I am talking about are in the link below https://www.amazon.co.uk/Wolfcraft-3455100-miniature-one-hand-clamps/dp/B0001P19KY/ref=asc_df_B0001P19KY/?tag=googshopuk-21&linkCode=df0&hvadid=222086461140&hvpos=&hvnetw=g&hvrand=2479218987862035583&hvpone=&hvptwo=&hvqmt=&hvdev=c&hvdvcmdl=&hvlocint=&hvlocphy=1006884&hvtargid=pla-421121069499&mcid=20d8ad9ddff138ff8bf636d6cd9c8a34&th=1 I have had mine for quite a few years now and I have used and abused them to the point where the jaw pads are pretty much worn out now. They are in fact extremely good clamps as I have had other makes but these have lasted the longest. So with worn out pads I contacted Wolfcraft in Germany to see if they supplied replacement parts. To my amazement they contacted me the very next day asking me how many pads I required. I explained that I have 10 of these clamps and as such need 20 new pads. Not a problem they said - send us your address and we will post them to you for FREE!!!! What can I say - If you want good clamps with good customer service I cannot recommend these one's enough. Well that's my experience anyway Cheers Mark
- 1 reply
-
- 8
-
-

-
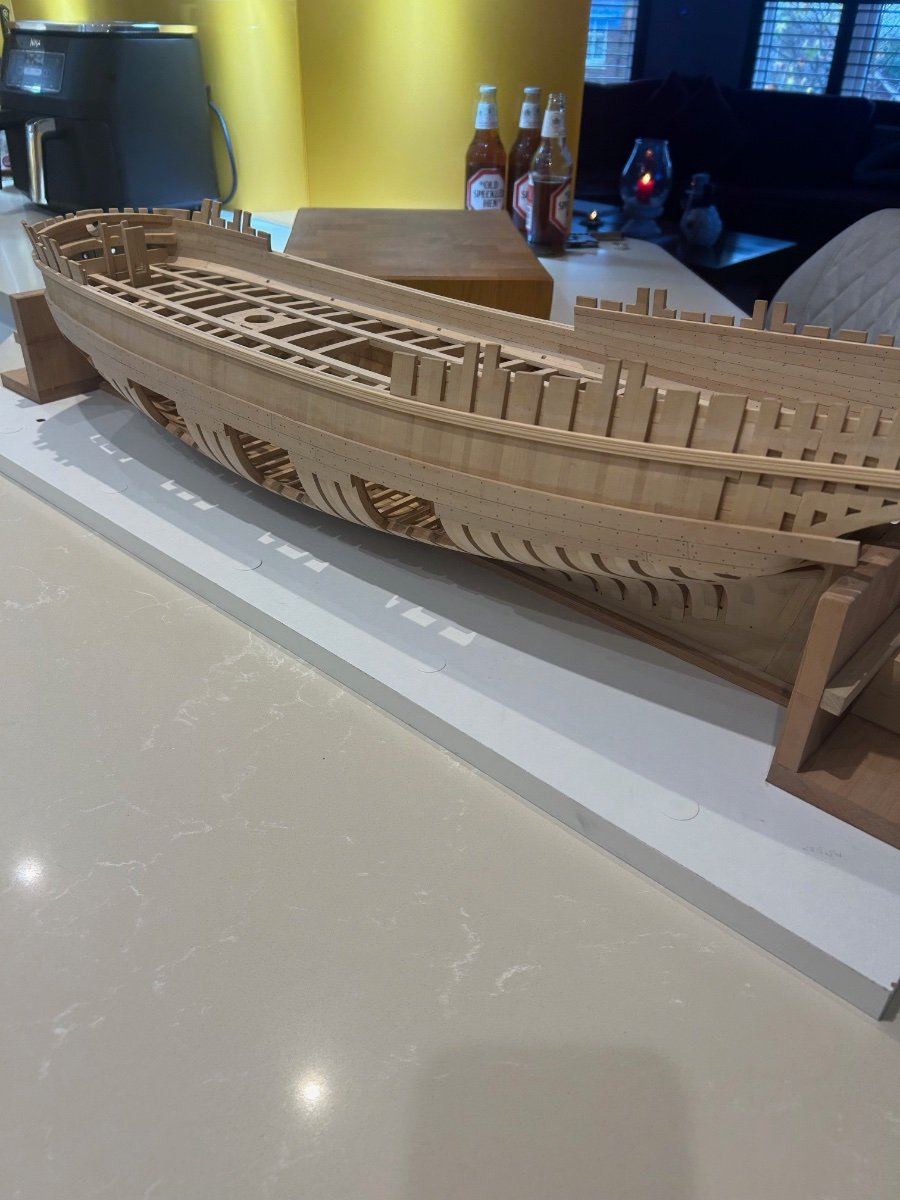
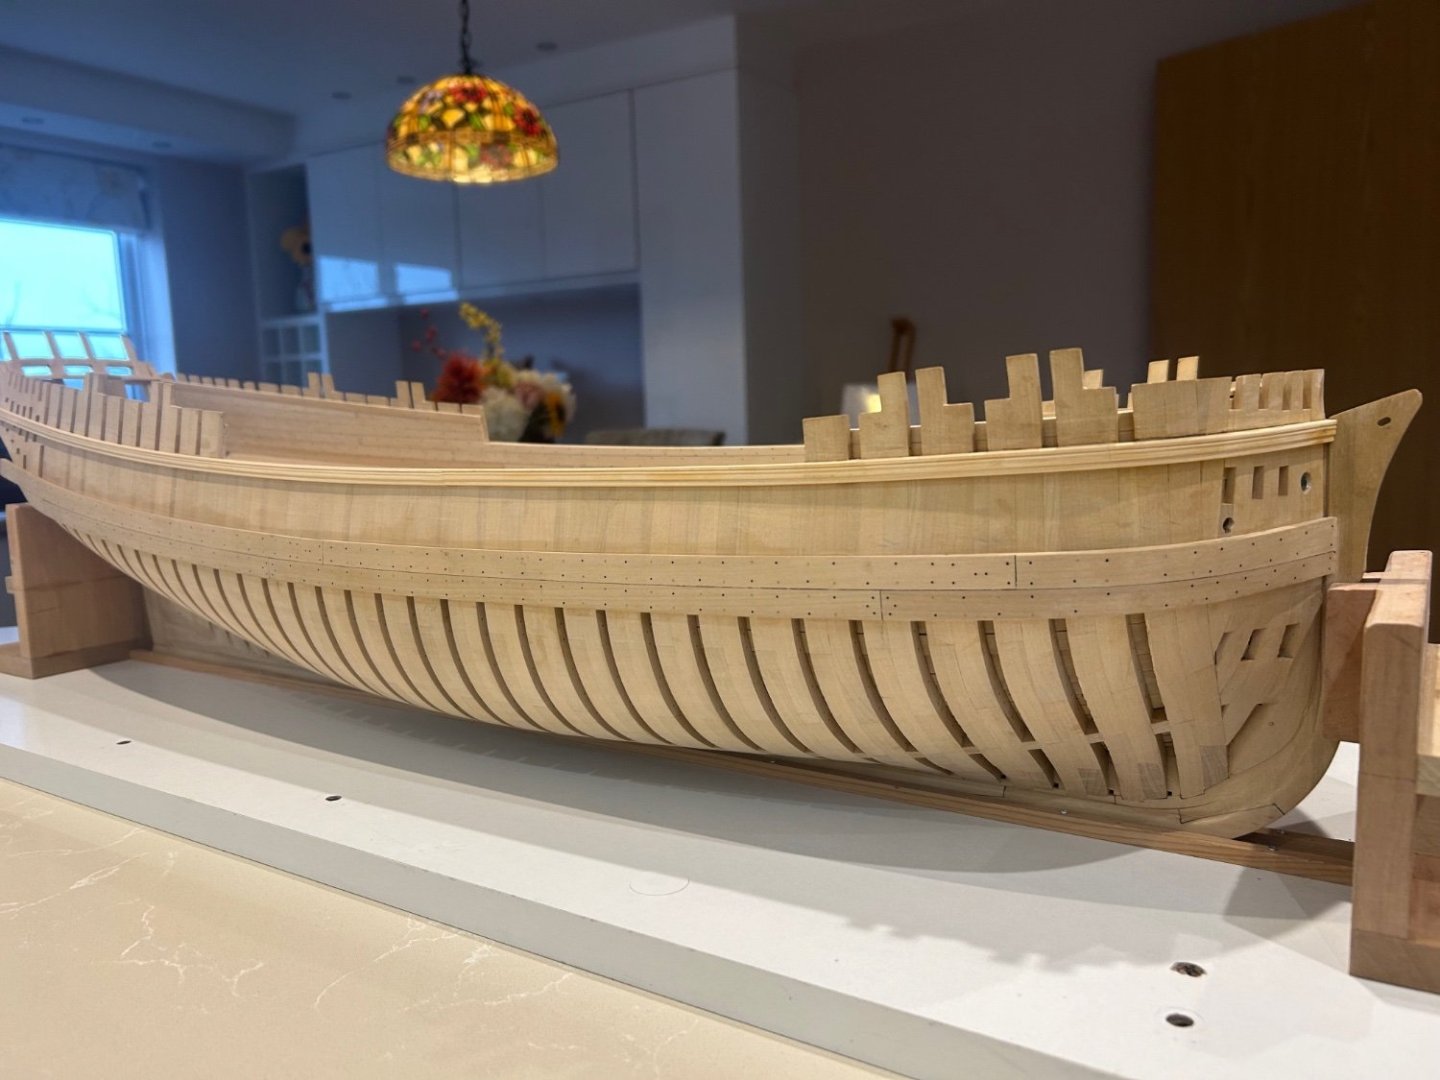
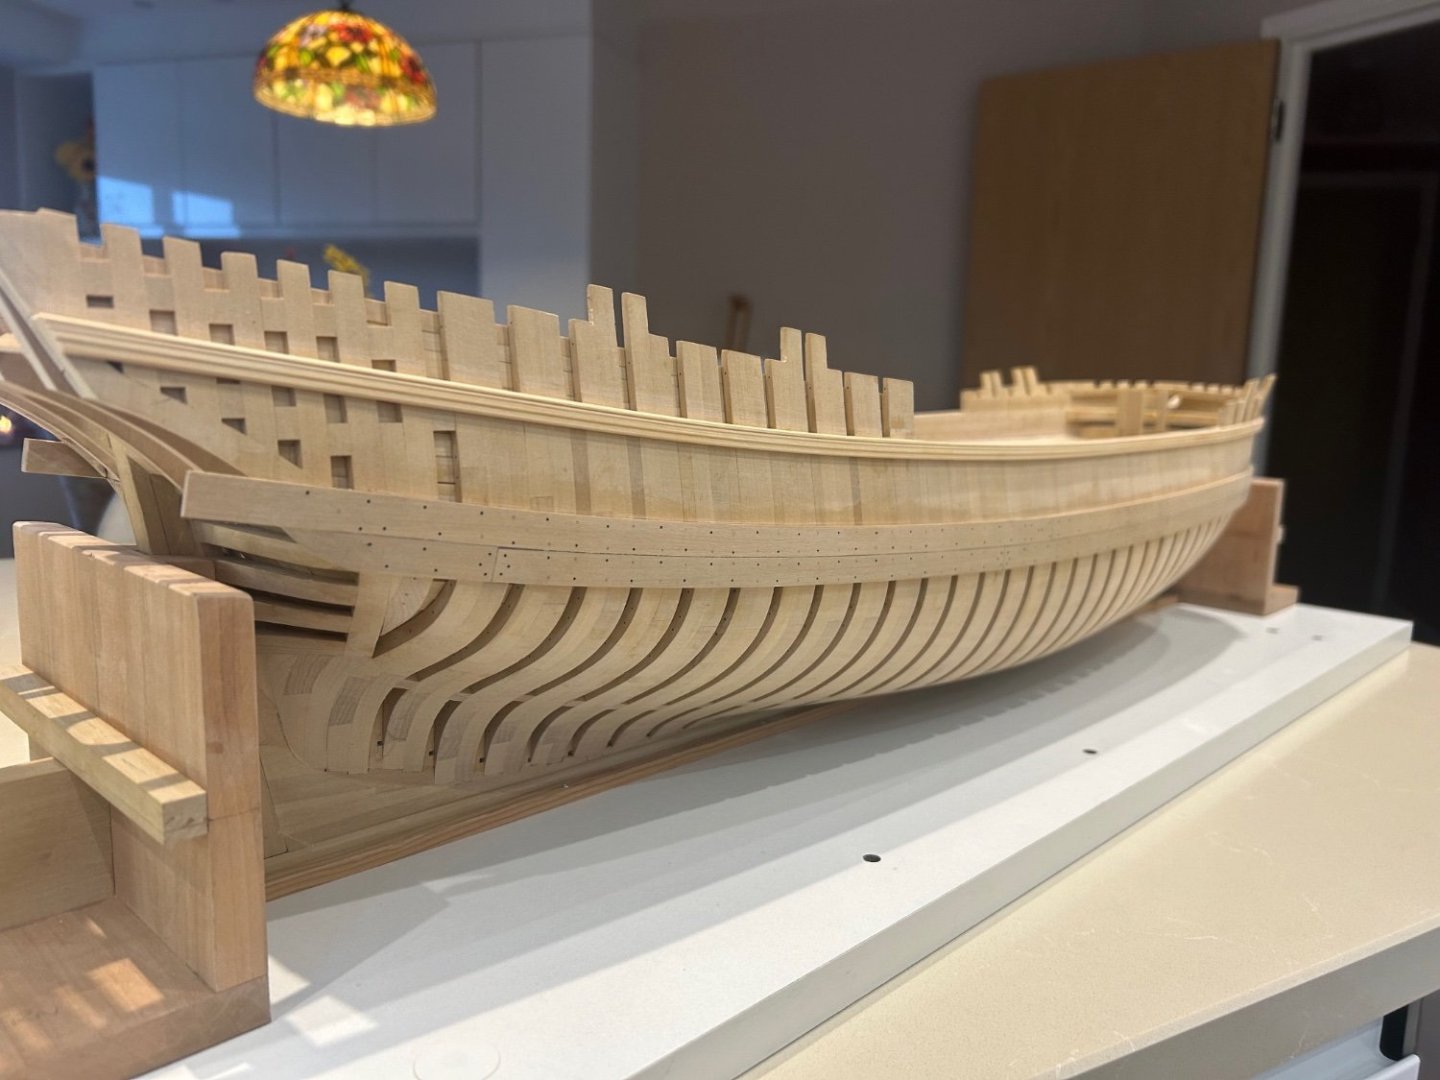
Another update I bottled it and decided not to put scarf joints into the moulded rail so I'm using simple butt joints instead. I wanted the rail to look as best it could with all of the details lining up. So I marked out the position both sides - I like to use automotive lining tape to see the run and I leave it on until the glue has dried. I then bent and glued the rails on which needed quite a lot of heat to get a tight fit around the bow. I have got a very tiny crack in it on the starboard side but I think it will be ok. I really wanted to get a good joint into the rabit with this plank - I think it came out ok So next I am going to make and fit the planking in between the whale and moulded rail. Mark
.thumb.jpeg.d91840fc4e06f250928a52b33042e52d.jpeg)
.thumb.jpeg.e6abd646b2465abbd86c052e867cf32d.jpeg)


-
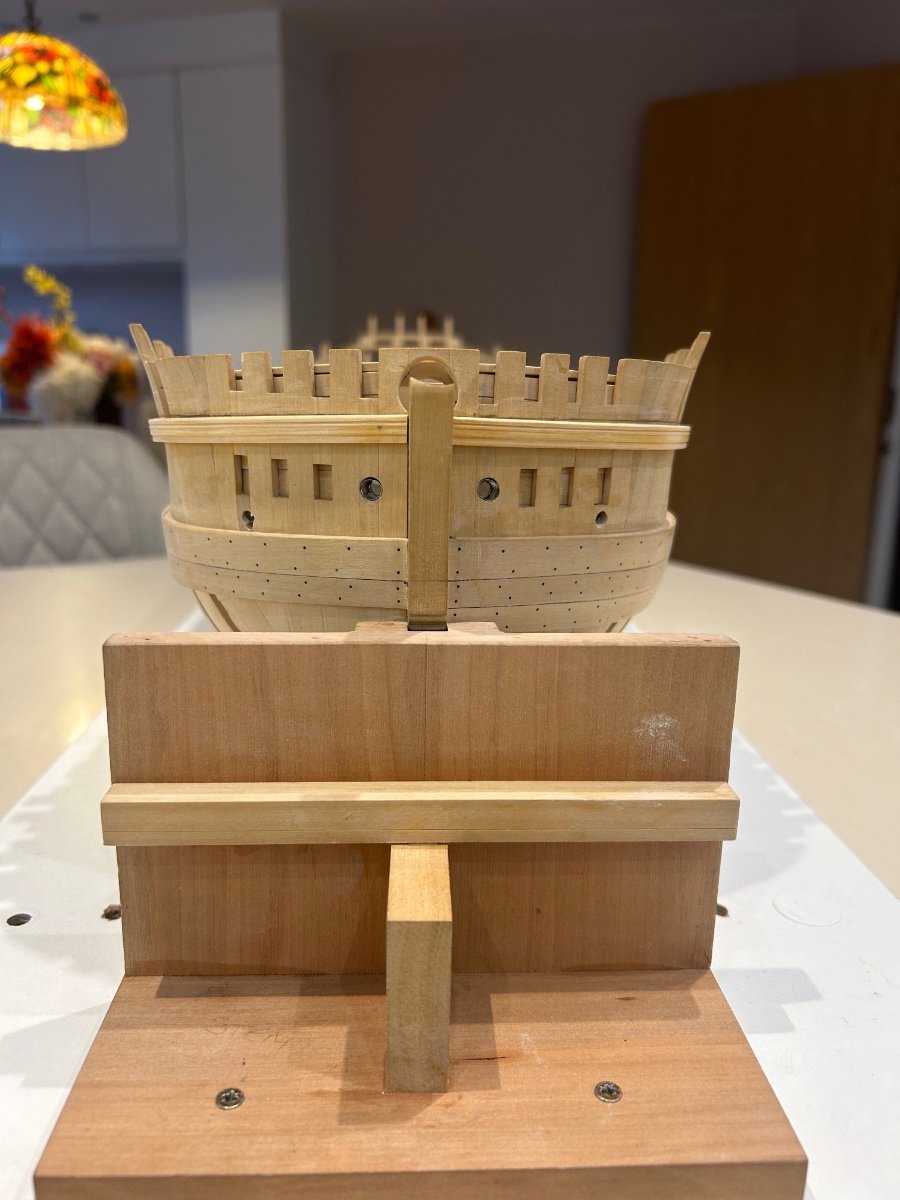
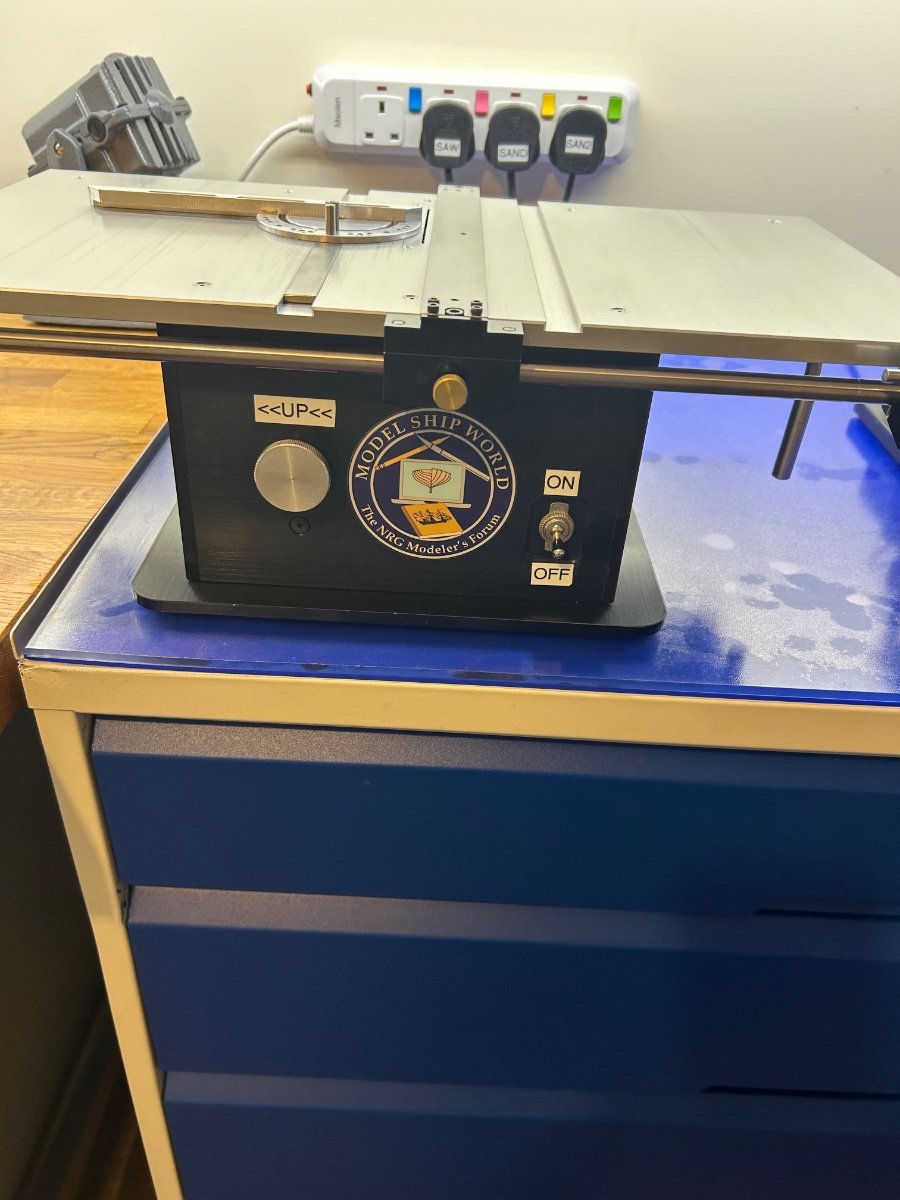
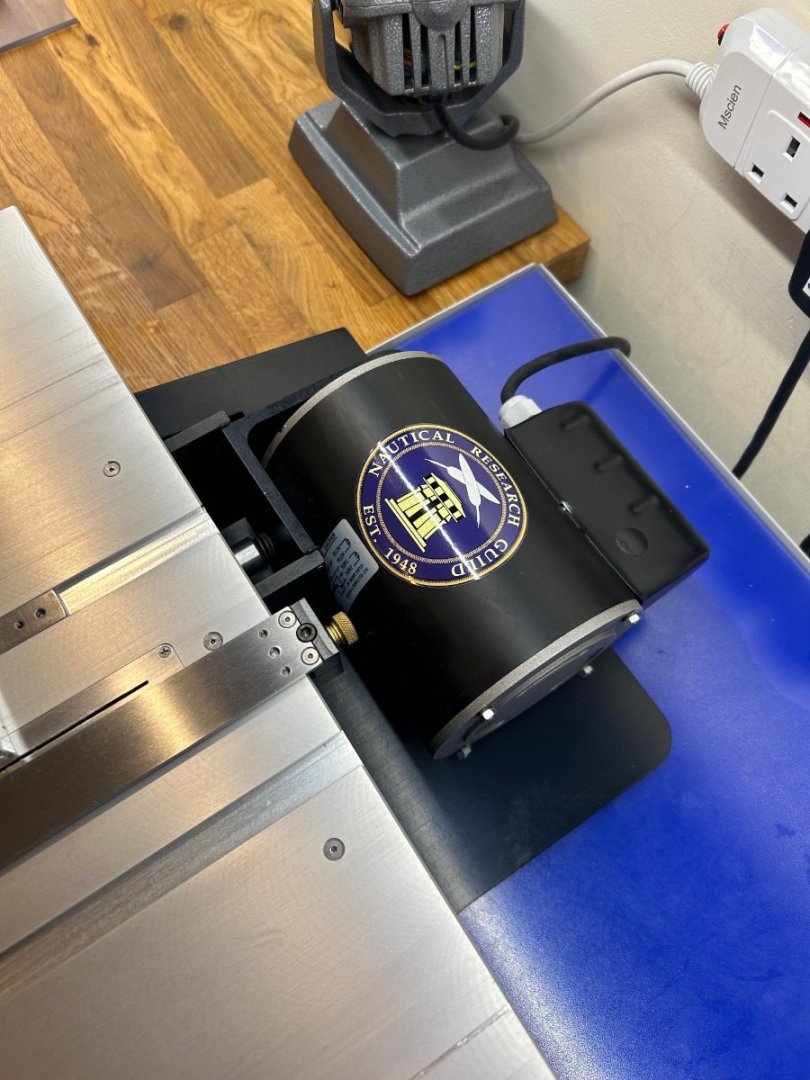
So where do you place your much valued NRG stickers??? Mine - well it's on my best machine. I couldn't think of a better place - so where is yours? Oh and so that MSW doesn't feel left out here's your's
-
Marc your attention to the historical details of your ship are mind blowing for me. Very impressive work indeed!
- 2,623 replies
-
- 3
-

-
-
- heller
- soleil royal
- (and 9 more)
-
What an incredible project - I have an infinity with this ship as I grew up in South London where she is dry docked. Back in the 70's when we were kids no one - and I mean no one was interested in her. We used to skateboard around her and get free tours as it was so quiet in that area of Greenwich. Just next to her was the Gypsy Moth which was hardy looked after. Now however she is a major tourist attraction as she should be...........I consider myself very lucky to have been around at that time. Good luck with your project and I will certainly be following along.
-
Welcome to MSW Dan
-
Axminster 300 mm disc sander unboxing
No Idea replied to vaddoc's topic in Modeling tools and Workshop Equipment
I second what Morgan has said as Axminster products are very good. Go in any Axminster shop and you will meet sales people that know exactly what they are selling and are honest about the tools capability too. -
This is such a beautiful model and you are doing such justice to it. Everything about this ship is outstanding from the just incredible design to the flawless wood that is supplied. I'm in for the rest of this build - fantastic!
-
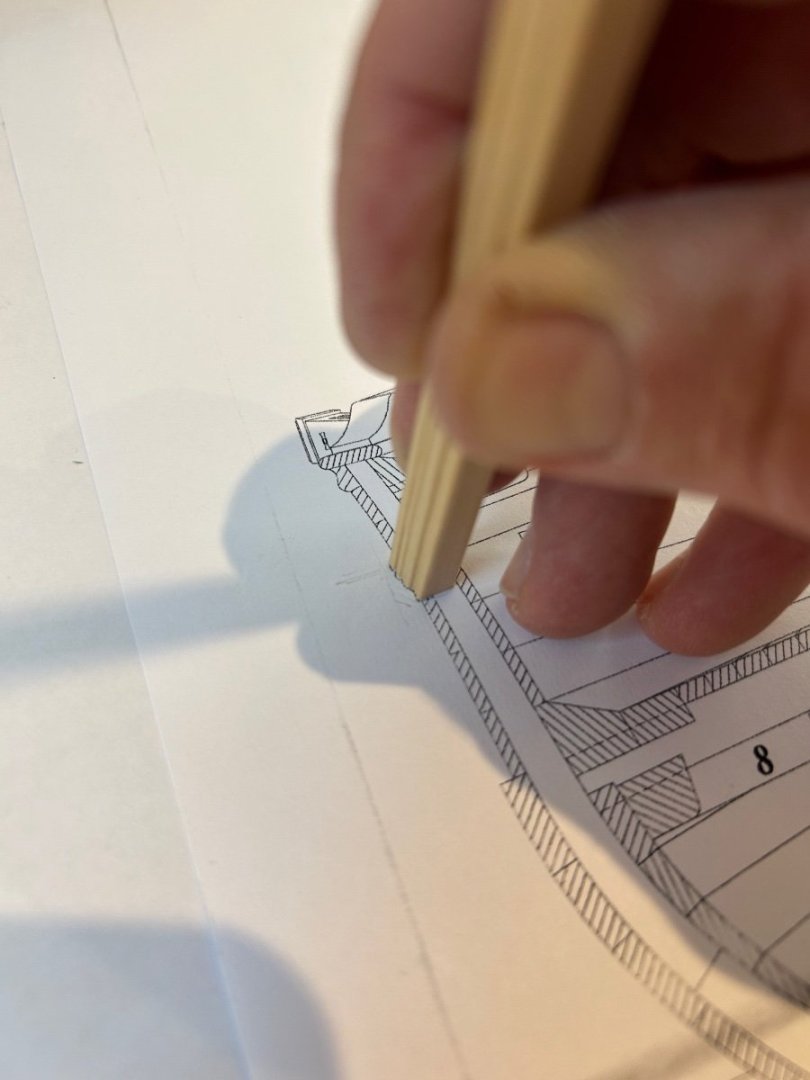
Hi Dave this idea works extremely well as you can simply make a drawing and then use the indexes on the axis to cut it pretty much exactly. It's not my idea have a look at Kevin Kennys HMS Thorn thread and he's done a great video of his process. Your idea of using a vertical mill is exactly the same and will definitely work. Thanks for the comment about how they turned out - I'm pretty chuffed to be honest. I've marked out the line on the hull for fitting but the problem of how to join the planks still remains.
-
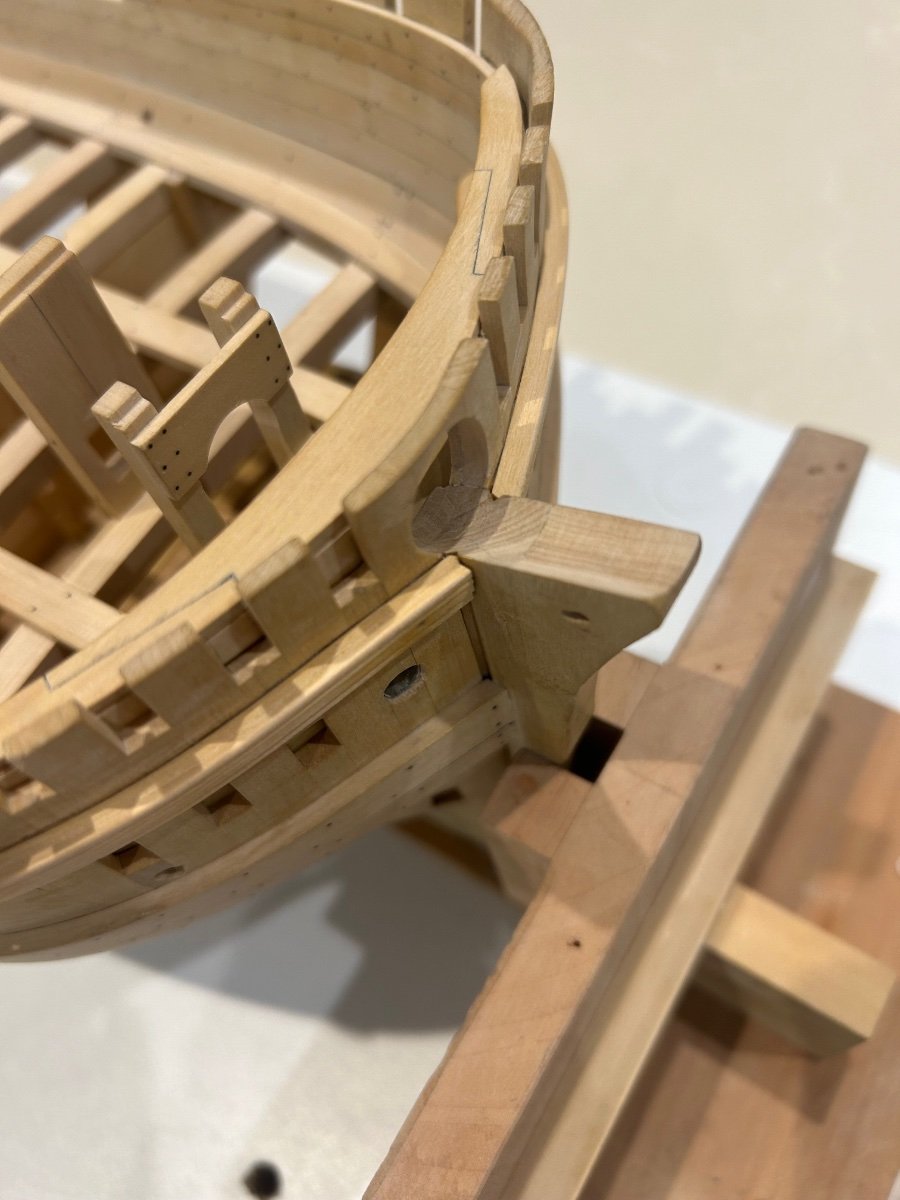
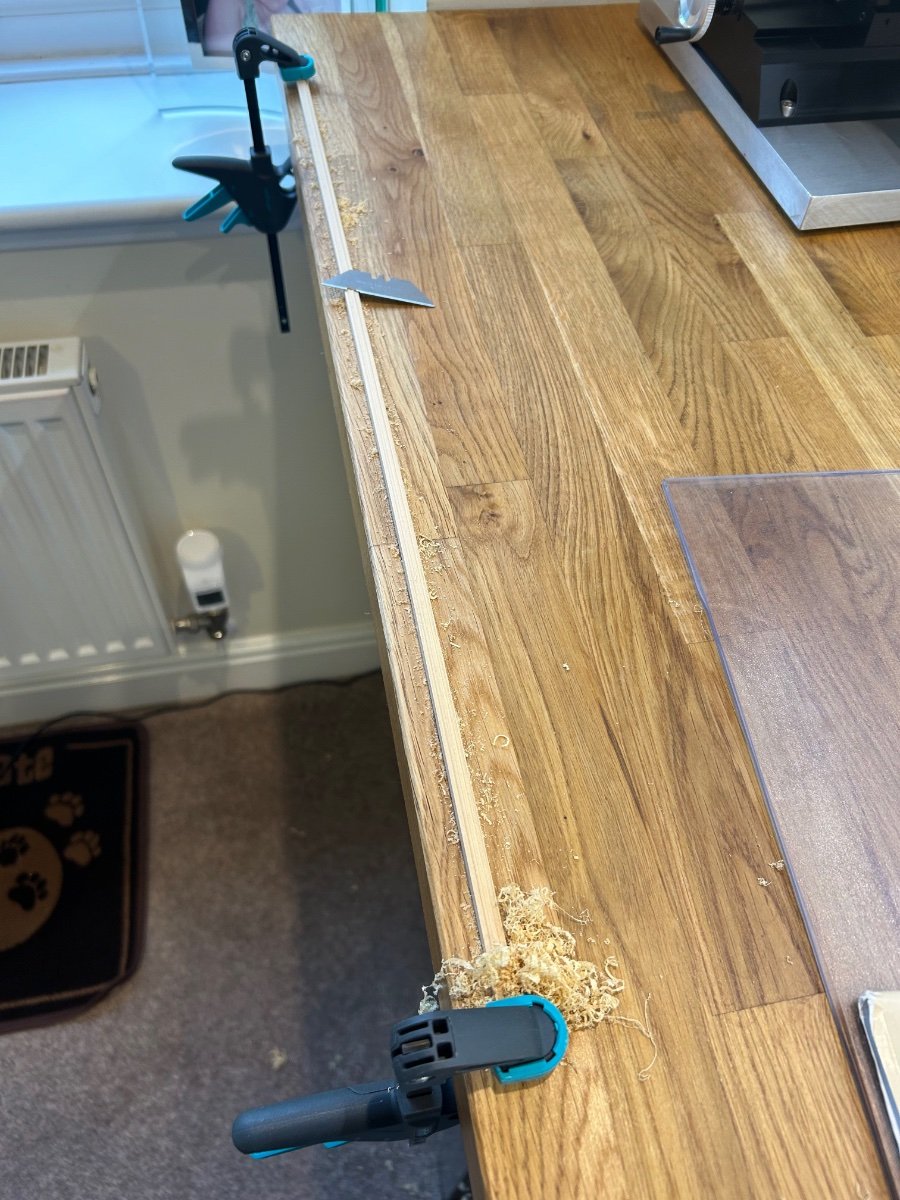
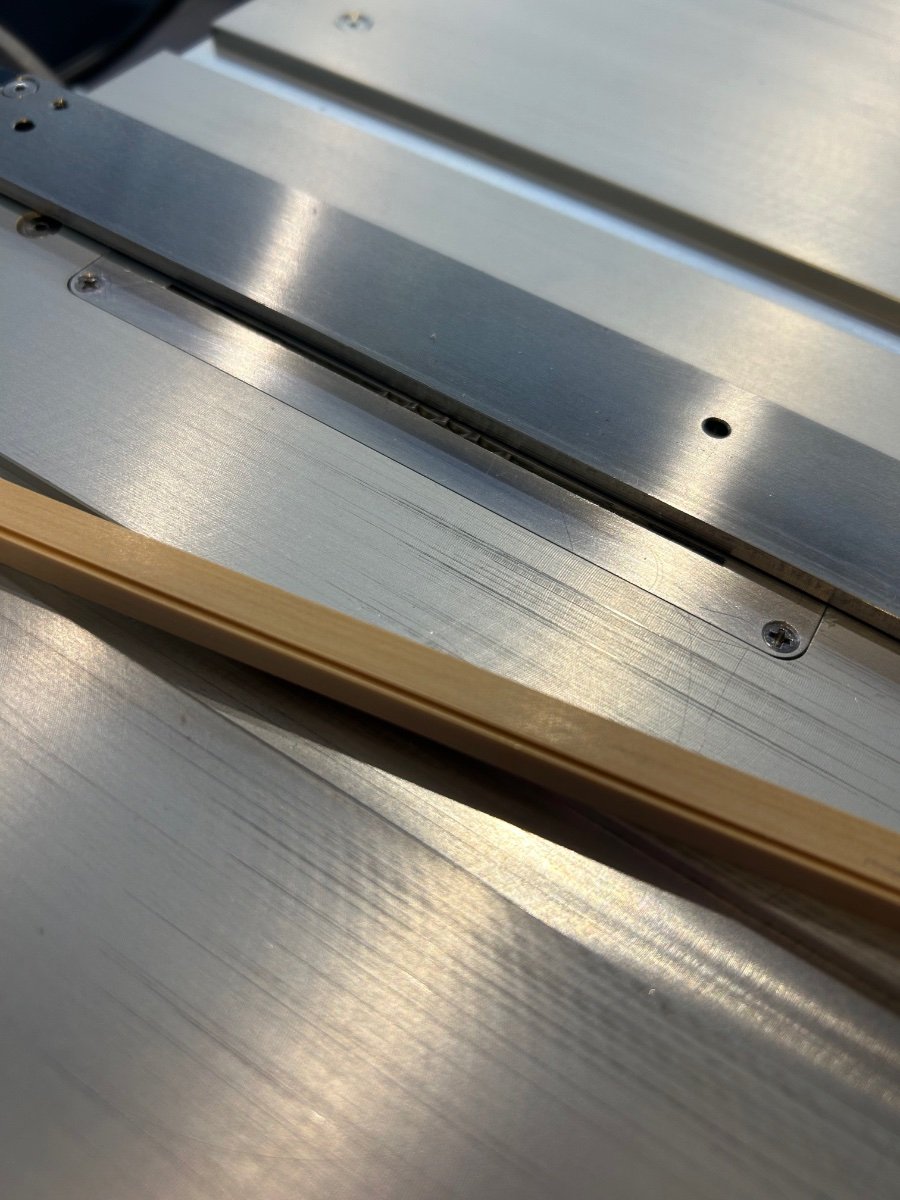
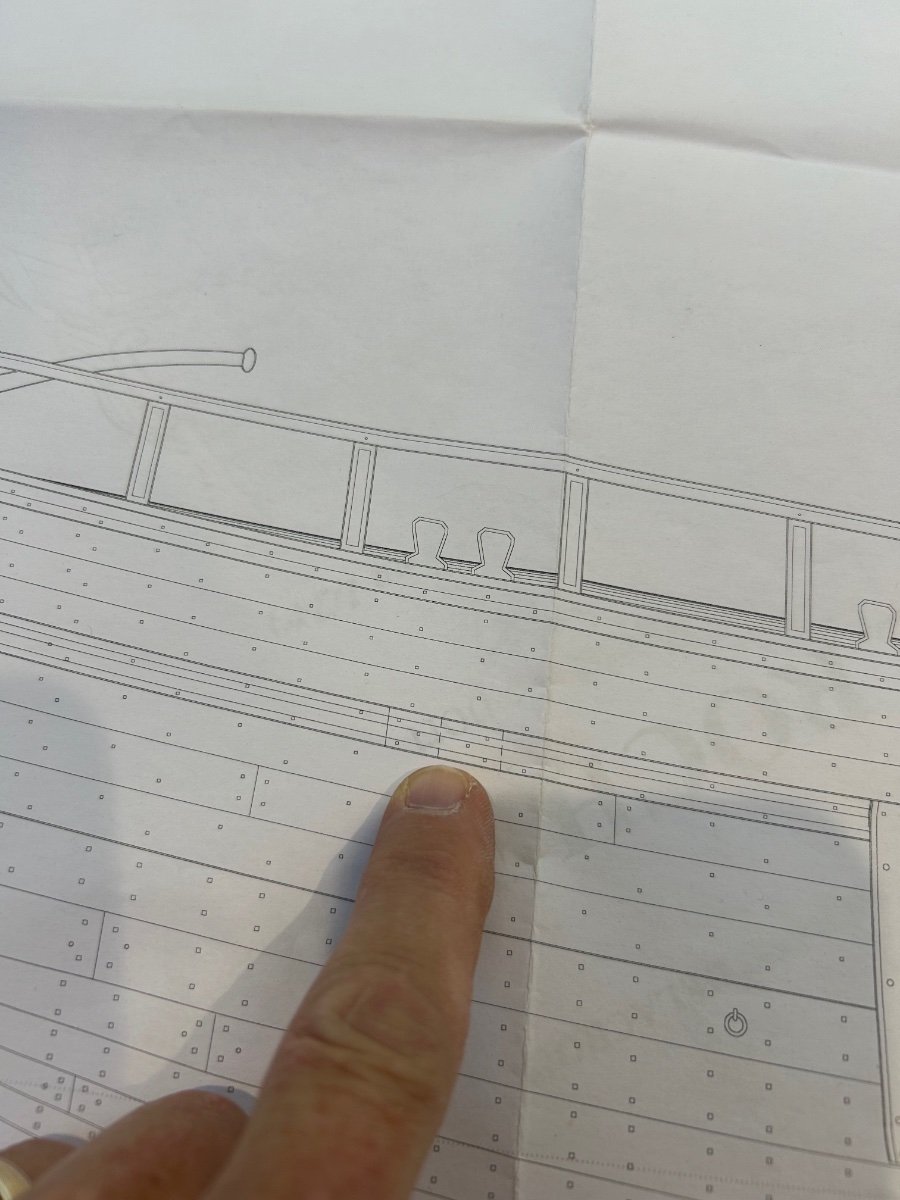
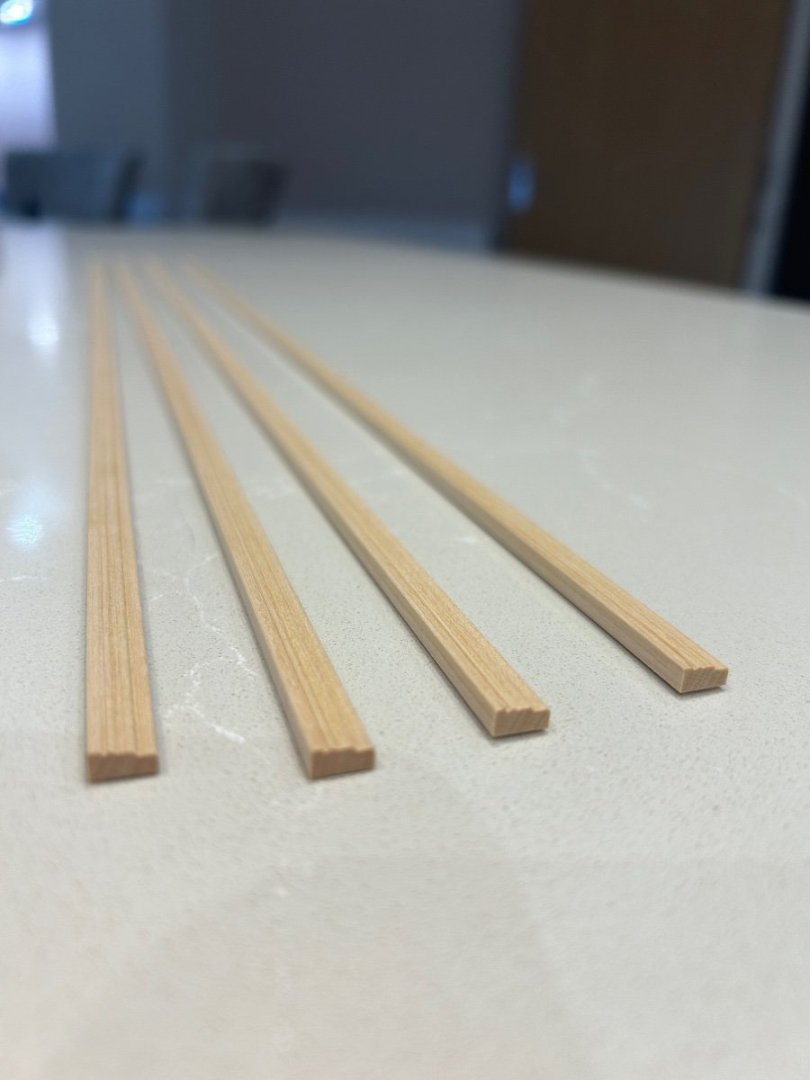
Hi All Ok I've made progress on the moulded planks so I can share that but I also need some advice moving forward. Firstly I made the scraper in exactly the same fashion that Kevin Kenny made his - Kevin your a genius working out using the mill to make these it made the job quite simple. Having said that it took me 4 attempts to get it right. To help with the removal of the wood I used the table saw to cut away the deepest part of the shape to be scraped. I don't know how everyone else uses a scraper? I found the easiest way was to clamp it down and then just go for it. It was a far more simple process than I thought it would be. You know when you are at the right depth because the scrape actually feels different - it feels smooth is the best way that I can describe it. Check against the drawing for accuracy. And now I've got enough pieces to complete the job. It took a morning to complete and it's a very relaxing process to carry out. After making the shape I just had to put them back onto the table saw to cut them to the correct thickness. So now I would like some advice from my fellow builders. The drawings show that each strake is made up of 4 individual planks which are joined with a scarf joint (see below). Now I've become quite good at scarf joints - however I think this may be a little too difficult to pull off as accurately as I would like. Firstly the piece is not rectangular which means that the scarf would have to be angled width ways across the top section but parallel across the bottom. Secondly that is a hell of a lot of detail to line up and look seamless. My feelings are that I should put practicality first here and make a simple butt joint and then nail it so it looks like a scarf joint. Am I bailing out here? Should I give it a go? Let me know as I'm currently unsure of which way to go. Cheers Mark


-
That looks absolutely stunning - wow!!
-
Wow that is lovely work 👍
-
Hi Huw - I sent you a message a couple of weeks ago but not heard anything back?
-
Me too what a great jig you made - Lovely work!
-
Hi Tony thanks for your nice comments. I’m sure that you will be back on your ship in no time. I’ve changed tack now as I was going to make the forward deck. I soon realised that if I put the deck beams in it will make clamping the outer planking very difficult. So I’m currently trying to make the moulded planks which is something completely new for me. I’ve never scraped a shape into wood before or made a decent scraper so that’s what I’m experimenting with. I’ll get something up as soon as I make something that resembles a half decent mould.
-
Just been catching up on your build - You have made such a beautiful clean build - fantastic
-
ensor when I was driving through Europe one of my regular stops was between Ypres and Wormhout in France. It was a routier call Hoffland which was owned by a guy call Michael. I have great memories of this place and although it is not a pub - the bar was always open and usually open late too. I think it was in Steenvoorde but my memory fails me sometimes now.
-
Lovely job on the dog’s legs Oliver
-
Hi Luc and welcome to MSW - I think your workshop looks great and good luck with your build
.jpeg.63e137f257c6e9328ade4fcfe9387f67.jpeg)
.jpeg.d3ce48a499aed294c2172941664c7c93.jpeg)