


muzzleloader
-
Posts
127 -
Joined
-
Last visited
Content Type
Profiles
Forums
Gallery
Events
Posts posted by muzzleloader
-
-
Port side cabin interiors. I don't know if the are really correct but the are as close as I can guess from the plans. All the interior structures are made from
1/16 basswood sheet. It's what the local hobby shop has available.


Thanks for watching
Mark
- prutser, mtaylor and GrandpaPhil
-
 3
3
-
It's been a long time since my last post and not a lot has been done. Actually all I've gotten done was the starboard side front and install the port side. I was diagnosed with diabetes in November and have been dealing with that and finally have it under control with minimal meds and hopefully none in the future.
First knee and interior wall installed.
Starboard side cabin outside wall.

Port side cabin and one starboard interior wall installed.
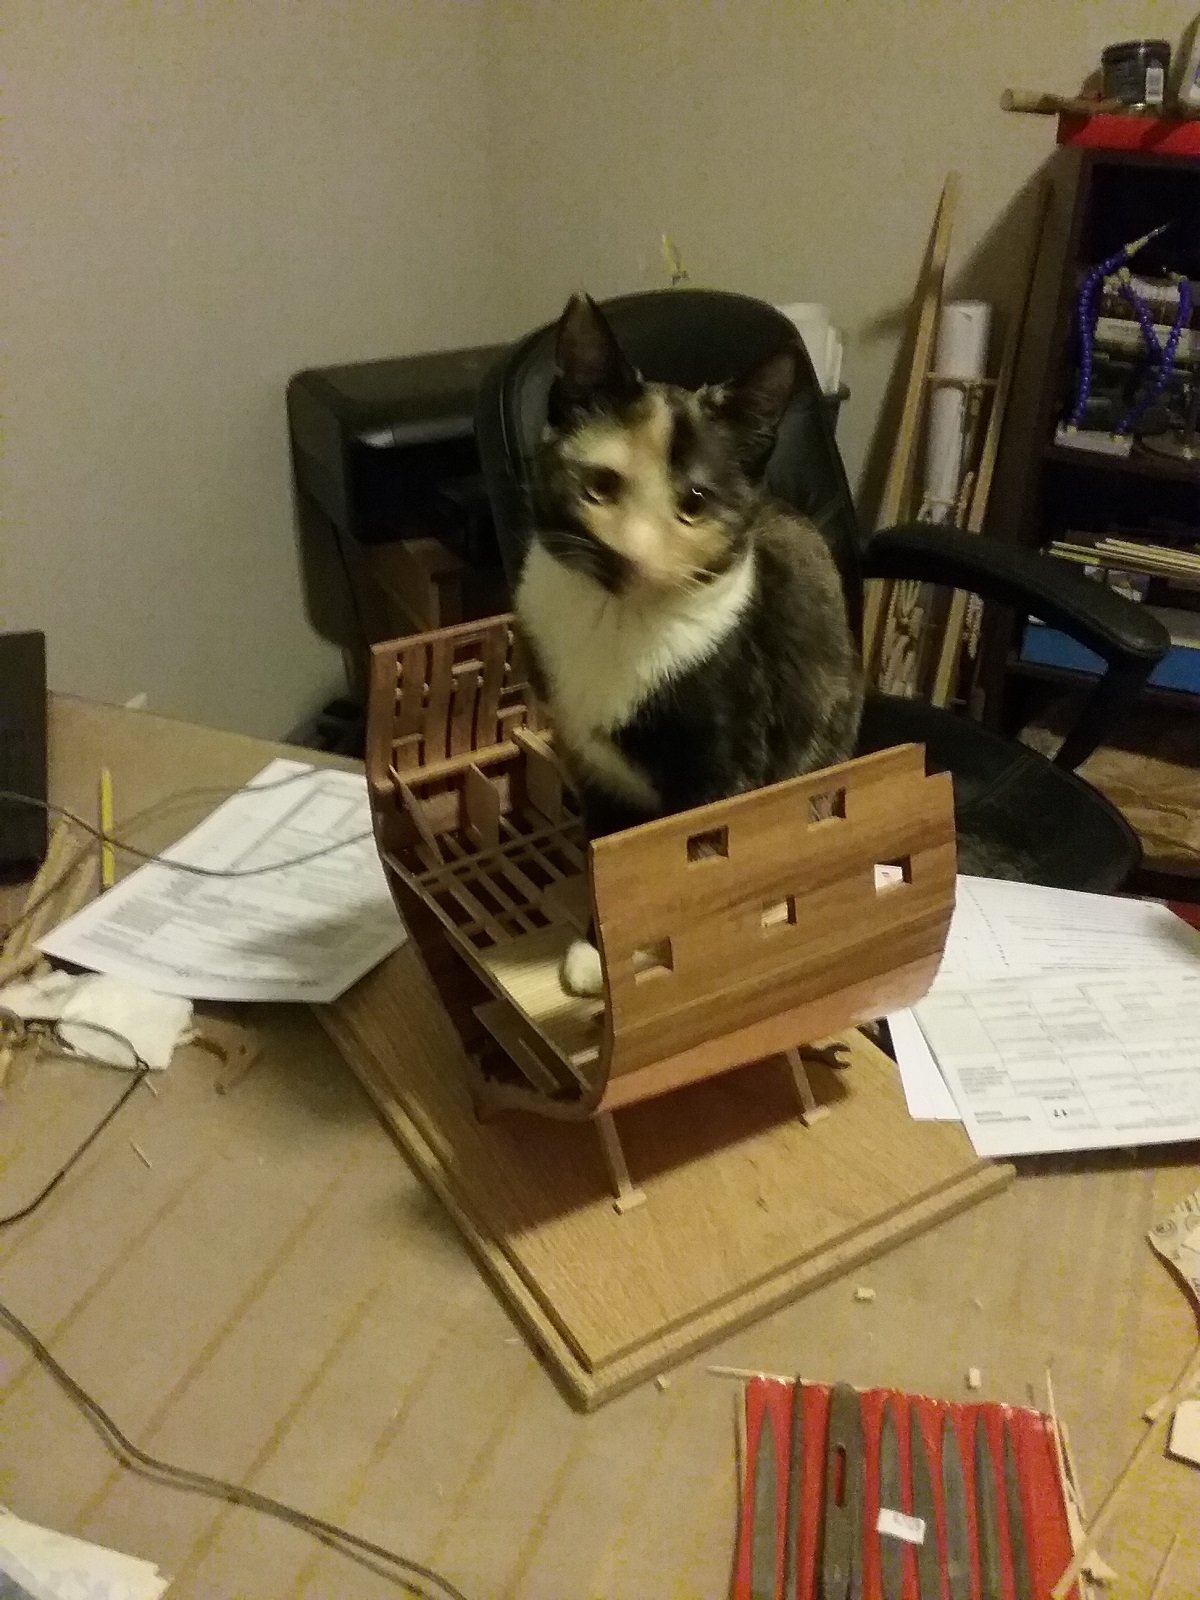
Of course while doing this work I had a lot a supervision from the newest member of the family (don't you just hate having someone look over your shoulder
while your working).

She was later found doing a close up inspection and assured me that the ship was free of rodents.

Now that life is a little more settled work can continue at a more even pace.
thanks for watching
Mark
-
I have not been totally idle. I have finished the port side cabins. These will be under the deck so there is no interior construction. It is made of basswood and the doors and mouldings are bamboo pulled thru a draw plate and then scraped one side flat. The door frames are size 53 and the other parts are drawn down to size 40 on a Jim draw plate. The hinges are thread dipped in a gold acrylic paint, the latches are foil from a wine bottle.
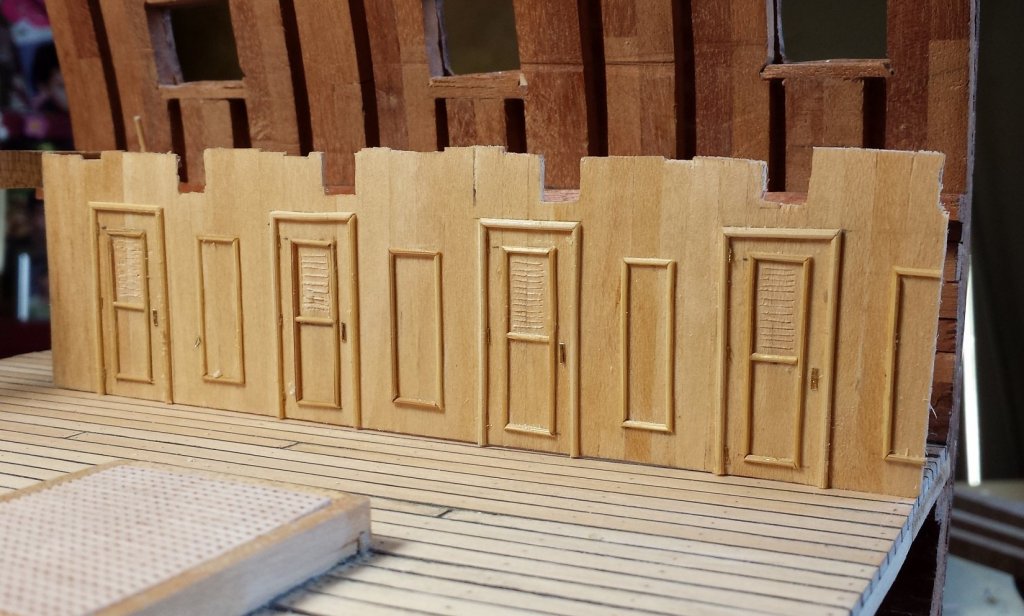
Progress is slow (life keeps getting in the way) but it's getting there.
Thanks for watching
Mark
- kees de mol, CiscoH, yvesvidal and 1 other
-
4
-
Christian thanks.
I have finally gotten some work done.
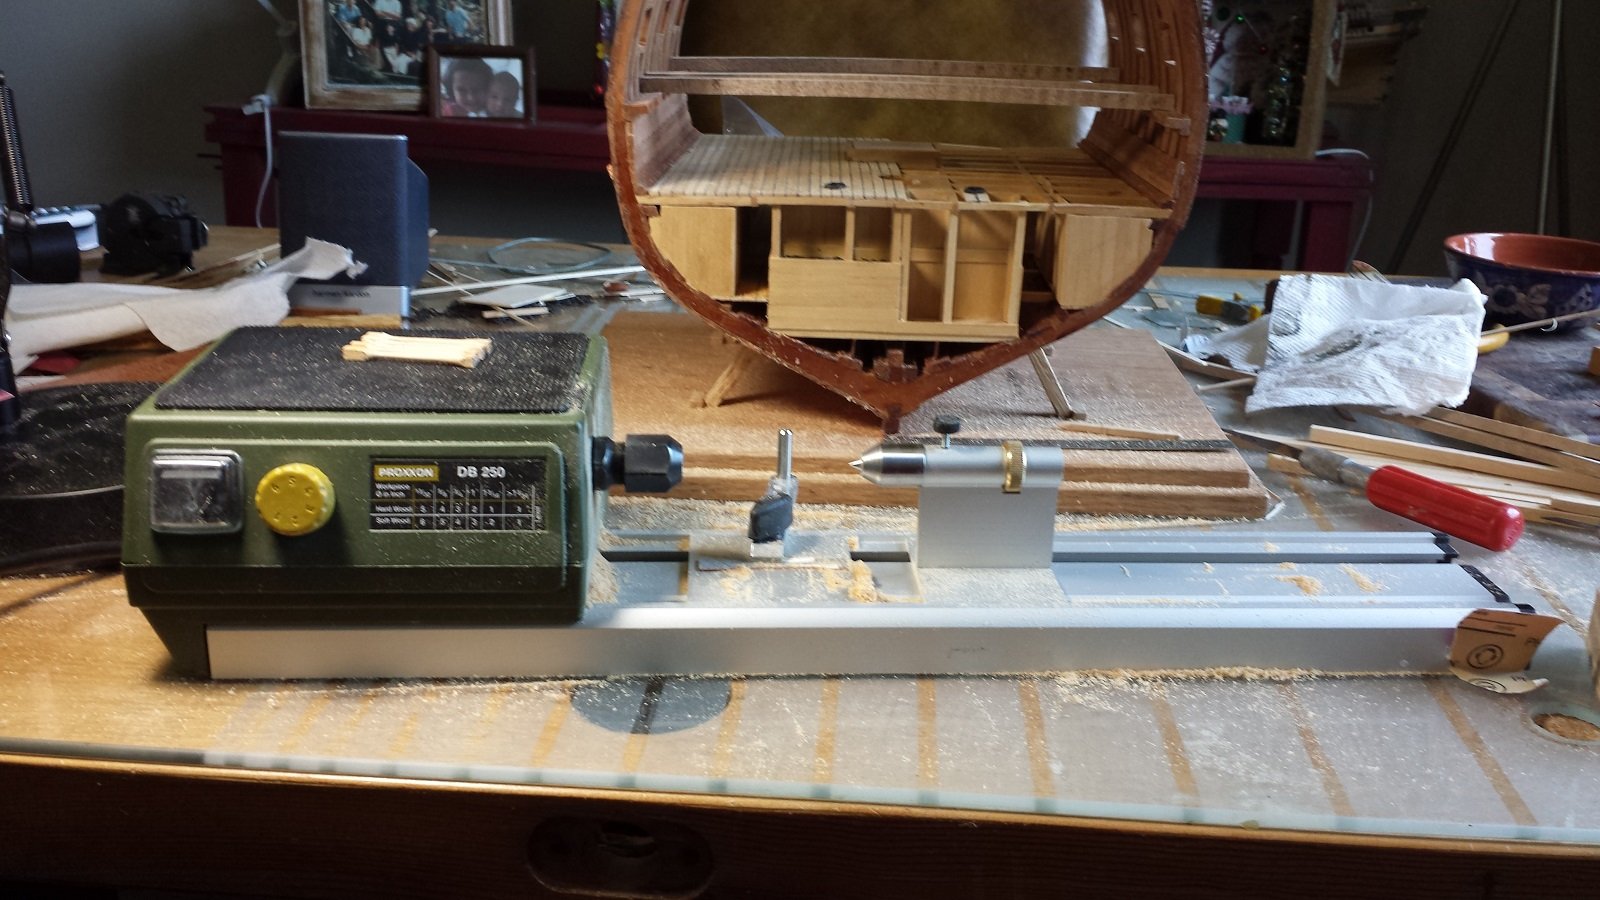
I got a new toy for my birthday thanks to she who must be obeyed and http://www.proxxontoolsdiscount.com/ I ordered it on the 17th and it arrived on the 19th. Very fast.

As you can see I have been trying it out. You can see I've also started the gun deck beams.
The first things I made on the lathe were supports for the deck beams. I tried them freehand first. No good. I needed some kind of guide. I can't find a ready made one
so I had to make something. It turned out to be very simple to make but will take some practice to make anything complicated.
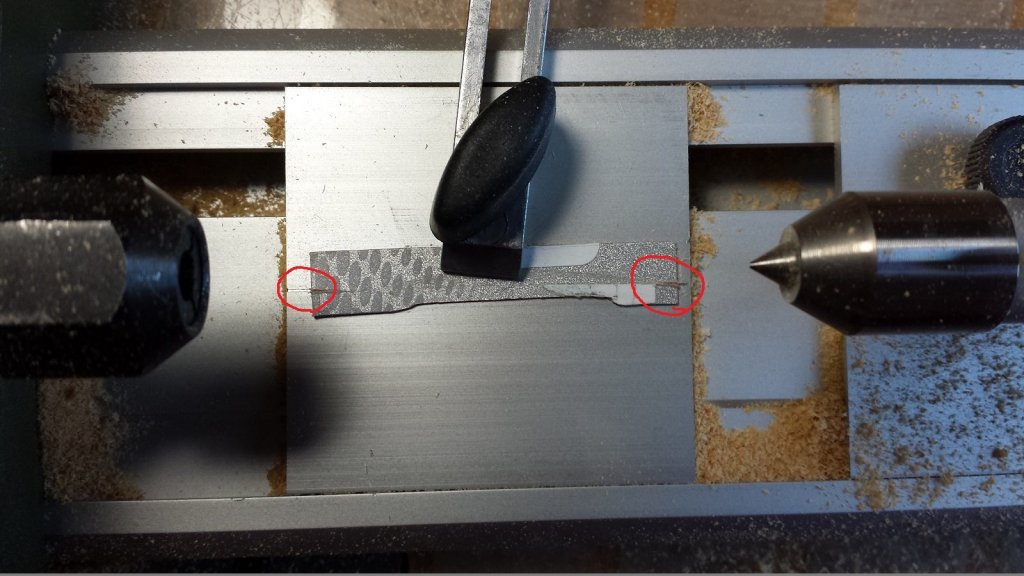
This is the guide for the shape I need. It is cut from a piece of plastic (an old credit card). The center of the rest holder has line scratched in at the center line. The pattern
is aligned with these lines.

My tool holder. Very simple, the chisel is made from an allen wench and the guide is a paper clip. A stiffer piece of wire would have been better but this is what I had
on hand.
These are the first pieces of the lathe using the duplicator. Not bad but I will get better. I found I had to work slowly or the chisel would grab the wood and go under the work. Also
it is very easy to bend the work piece which throws off the alignment. They still need some cleaning up but they are MUCH better than the freehand attempts.
As always thanks for watching.
Mark
-
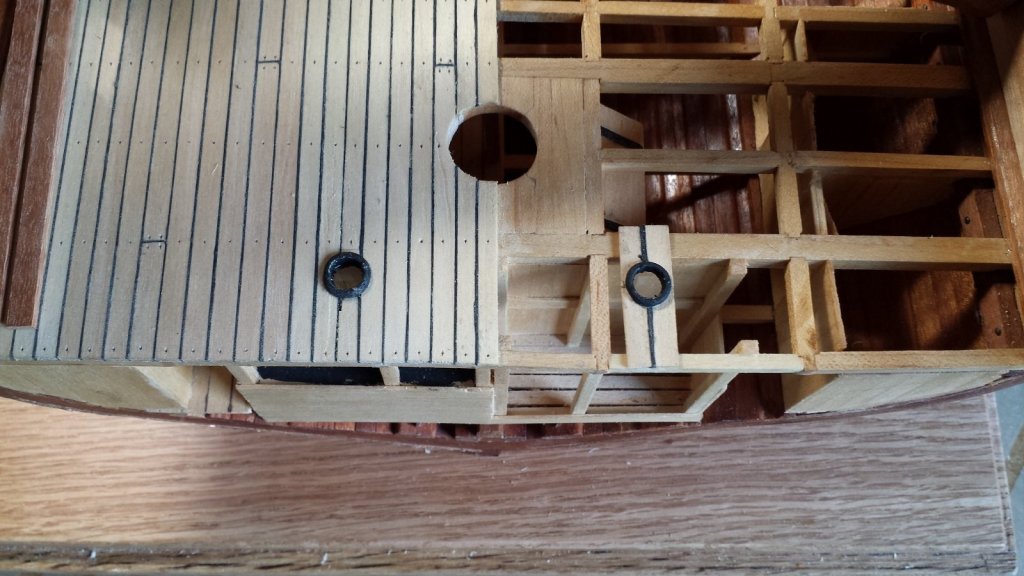
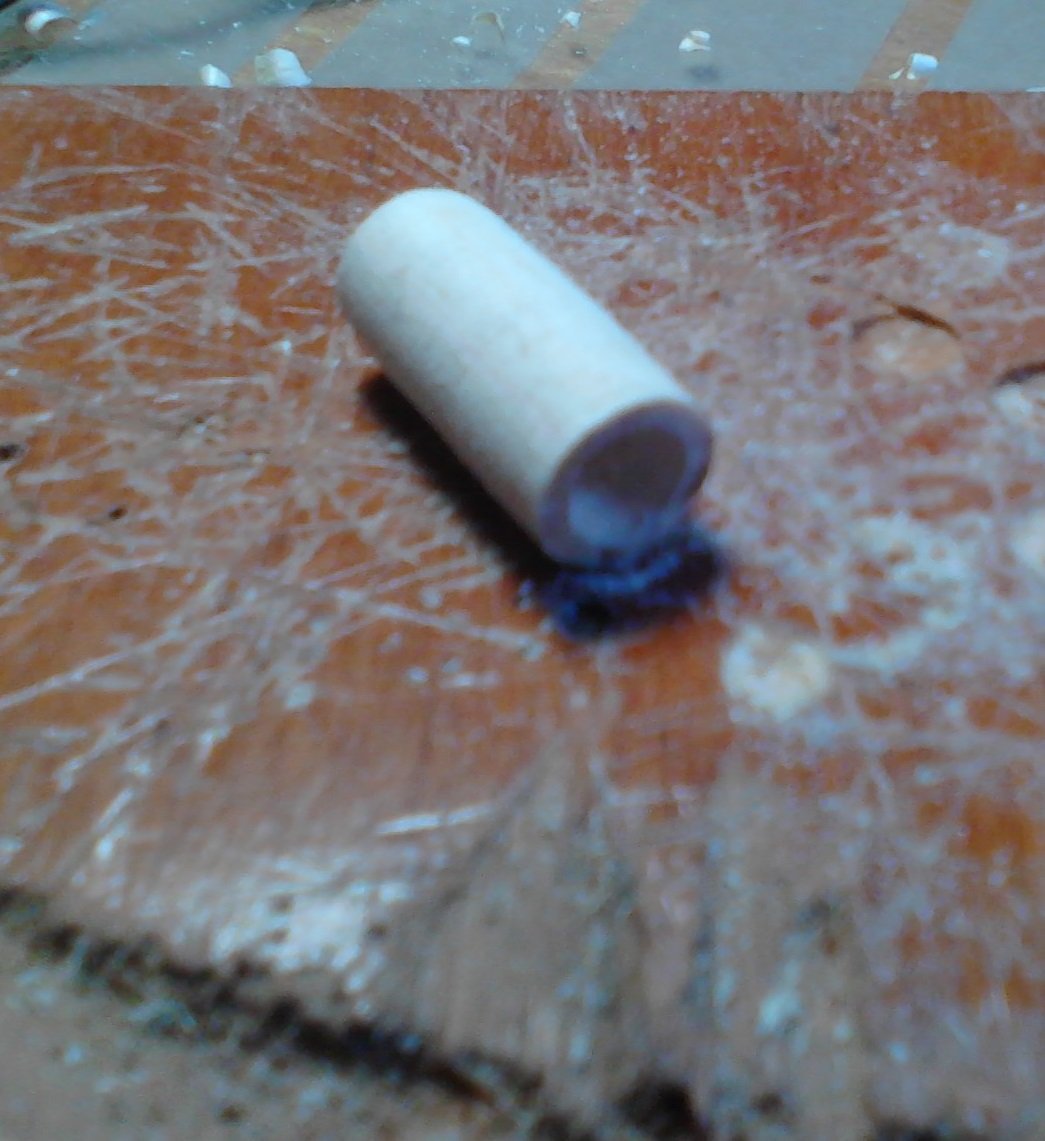
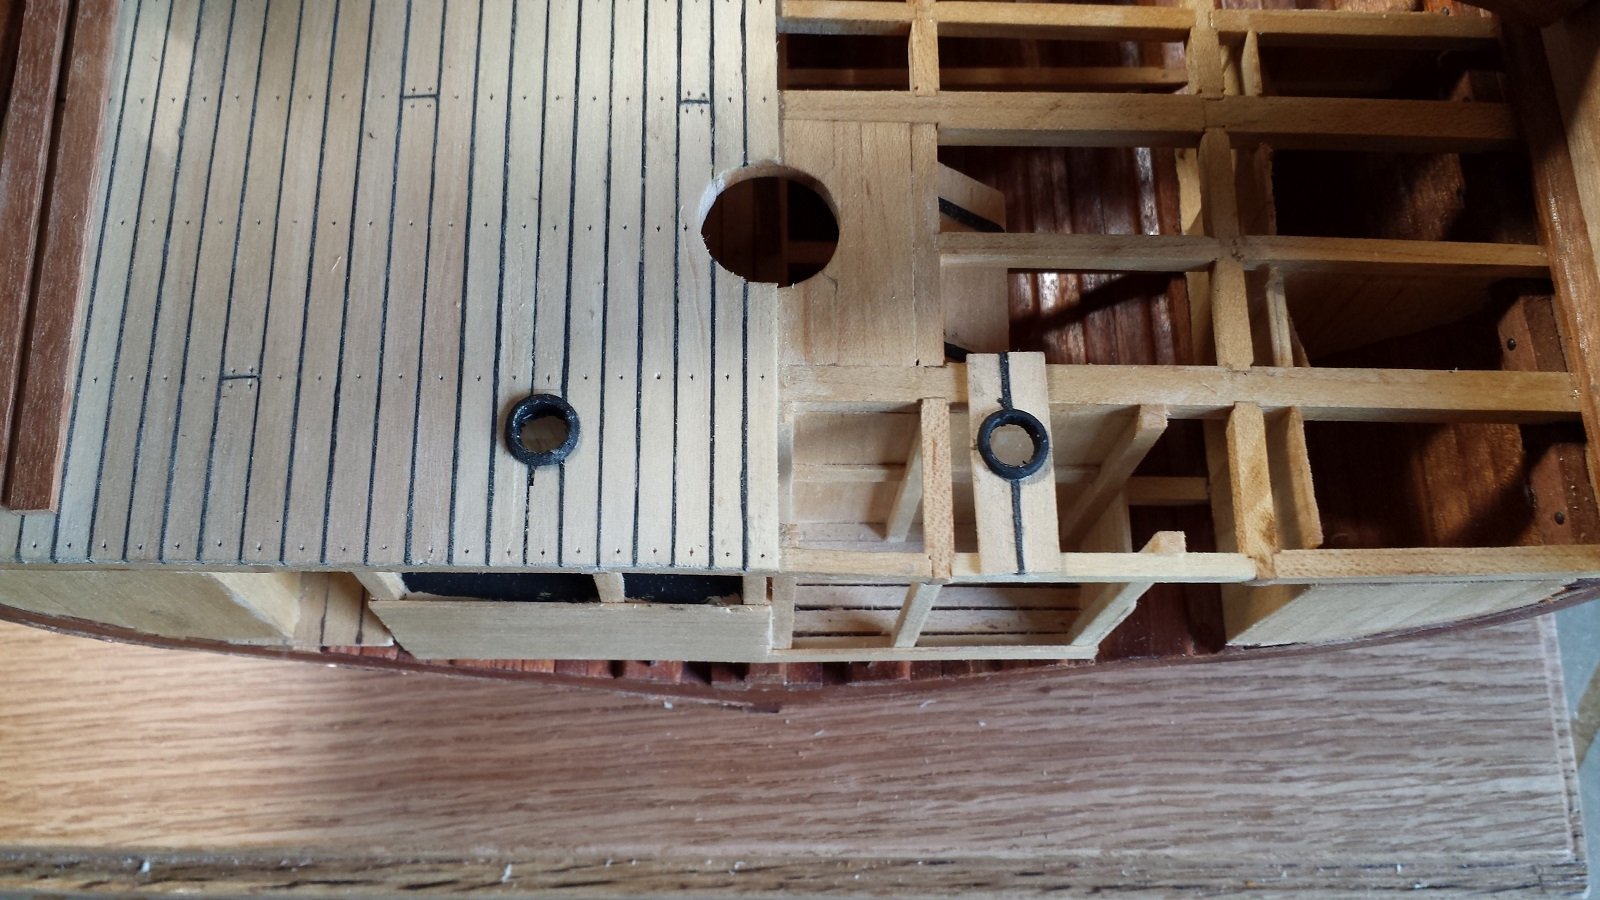
Next the liners for the hole in the deck the anchor chain passes through. I started with a hard wood dowel and drilled a 1/4" hole through it. Then it was cut into four pieces and each piece finished with an exacto and files.

She who must be obeyed was not at home so I had to use my phone for these two pictures. These are about as good as it will do close up.
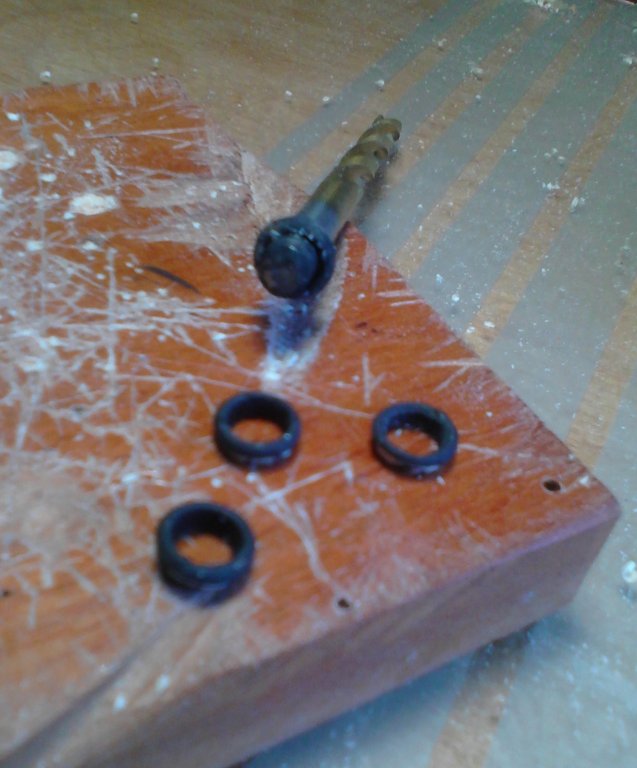
A little flat black paint and two boards and the first two they are installed.
It's been awhile since my last update, life keeps getting in the way.
Thanks for watching
Mark
- mtaylor, Beef Wellington, yvesvidal and 1 other
-
4
-
-
The ladder is assembled. Just cut the sides to size and glued the steps to it. They were marked to get the spacing even. I have never been able to make good ladders and this proves it.
Well when it's in the guts of the ship it will not be so visible. The next one will be better.

And installed.
That's it for today. Thanks for watching.
Mark
- AnobiumPunctatum, CiscoH, mtaylor and 1 other
-
4
-
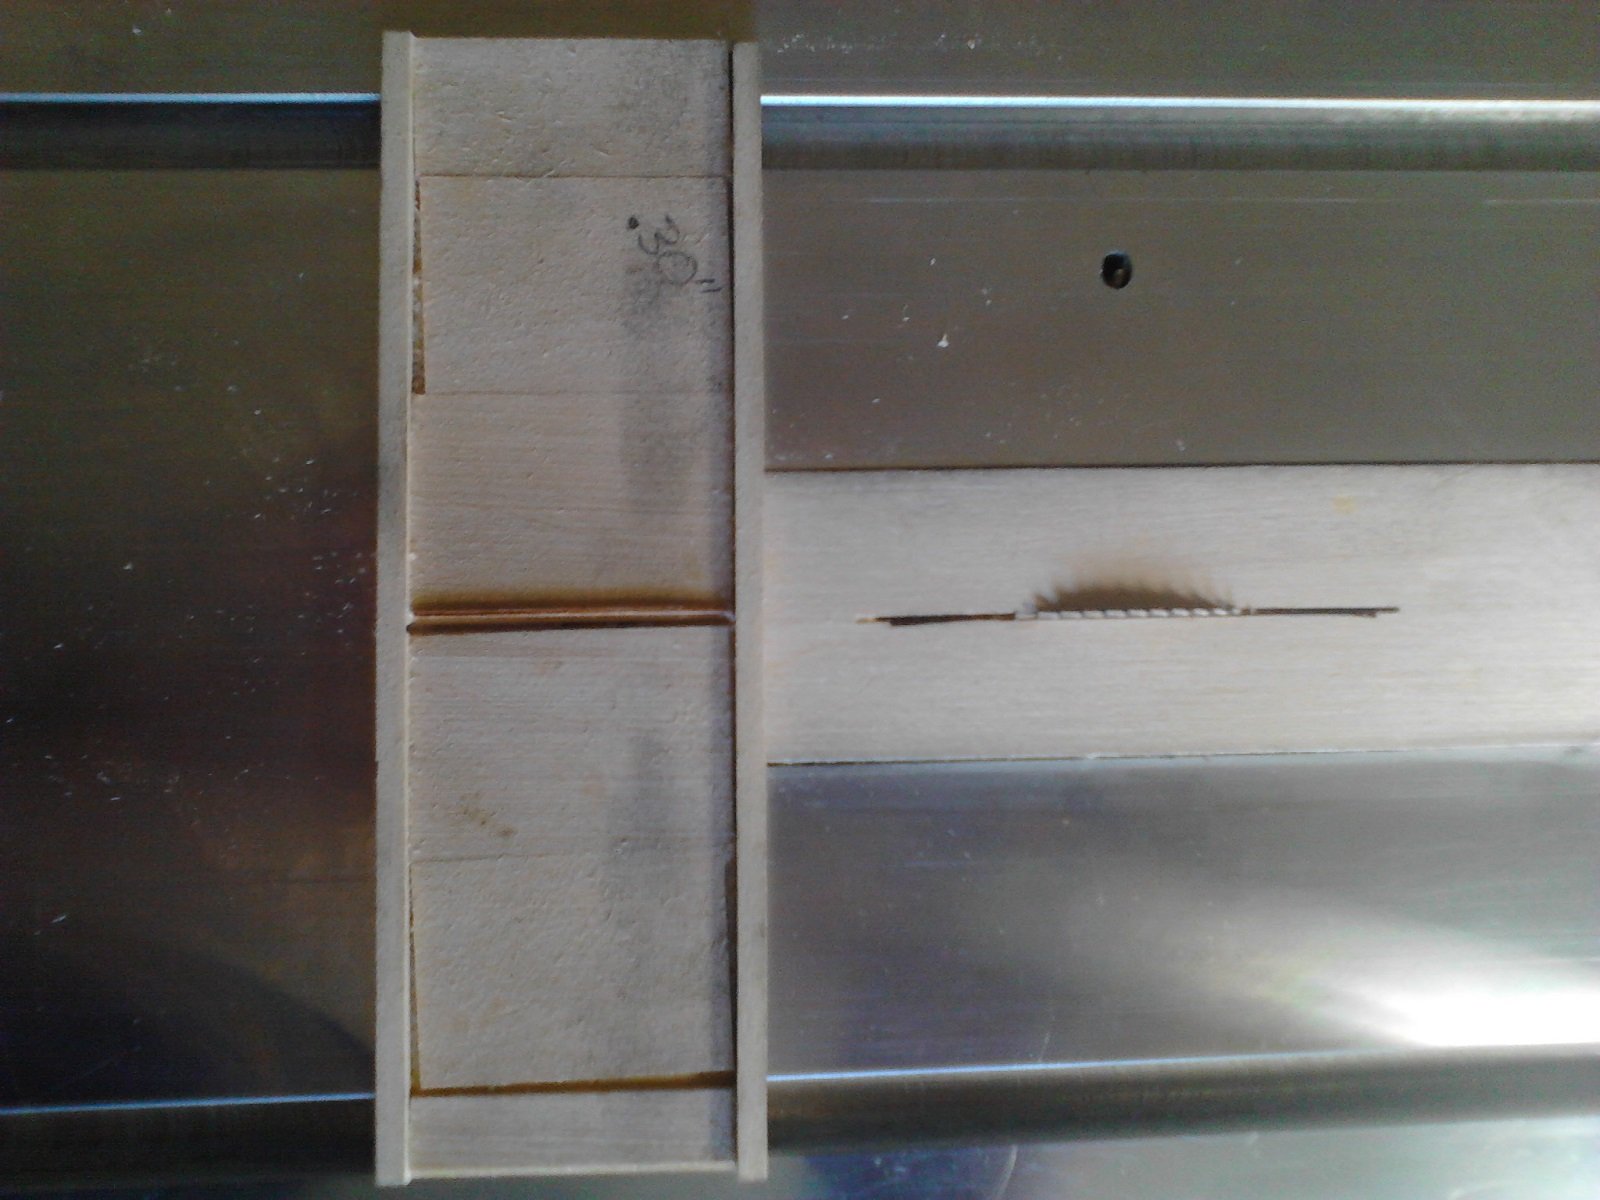
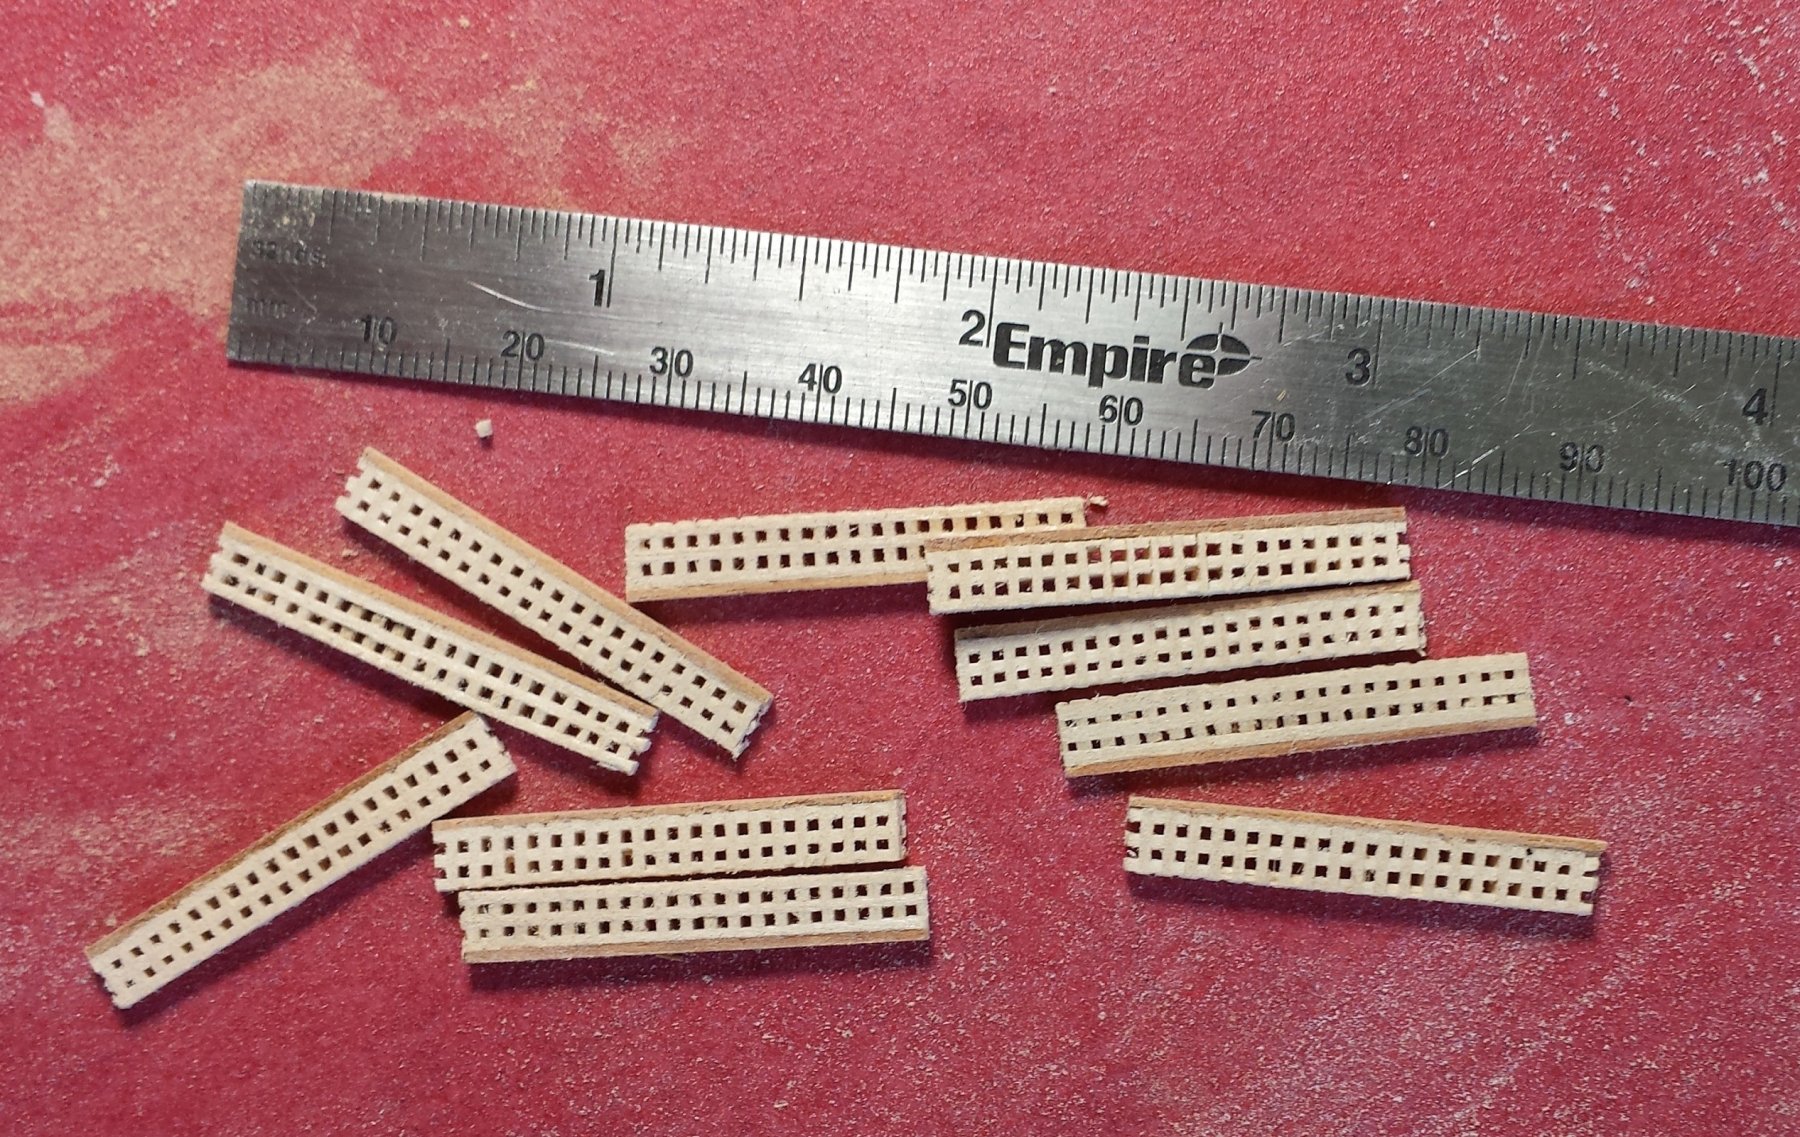
The treads on the ladders are made of grating so I started out with a jig.
This is the second try. The first one only went in one guide slot. This one is much better although it is fiddly to use. If the guides are too snug it is very hard to push. So there is a compromise between accuracy and usability. The blade is .030" thick so the grating holes are about .030". There is a little wobble factor. It's hard to see in the picture but there is gap between the blade slot and the guide.
Started by running a 2" wide piece. One cut at a time. I found I had to hold the wood down on the jig or I didn't get the depth consistent. Next cut the main piece into manageable lengths. With each strip only .030 wide keeping them consistent took patience. I also found if the grooved side is down there are fewer teeth (?) broken when cutting.
I am using basswood because that is all the local hobby lobby carries. A better wood would have made it a lot easier.

The treads assembled and given a coat of dilute glue. I found once put together and glued the basswood did alright. The glue also cut down the fuzz. A trim added to the front and final sanding and they are ready to go..... If you don't look too close.

Now to search the forum for ways to build ladders.
Thanks for watching.
Mark
-
-
-
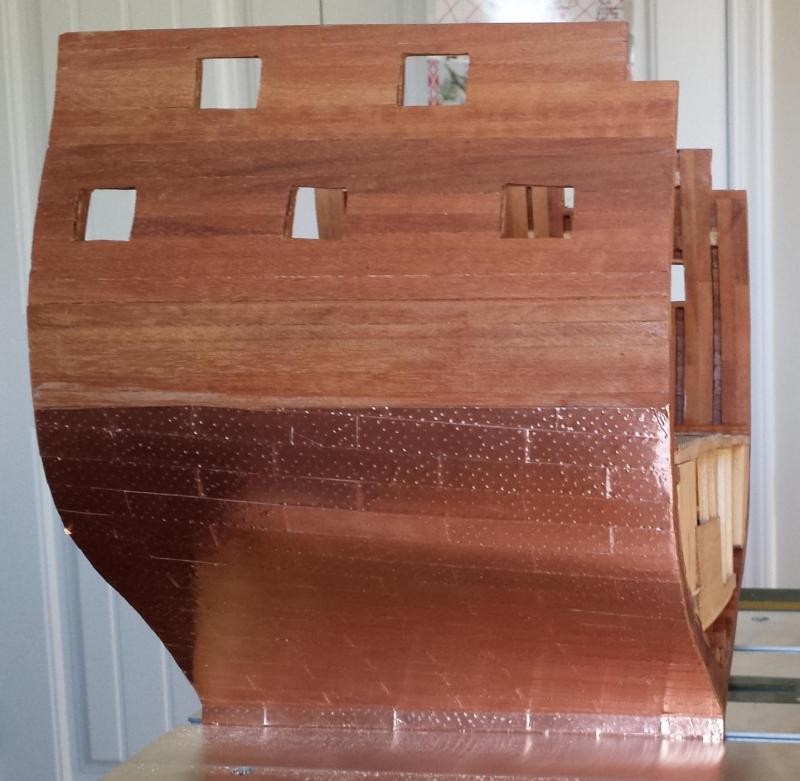
The deck is repaired, trimmed, given a coat of sanding sealer. sanded and scraped. Channels also installed.
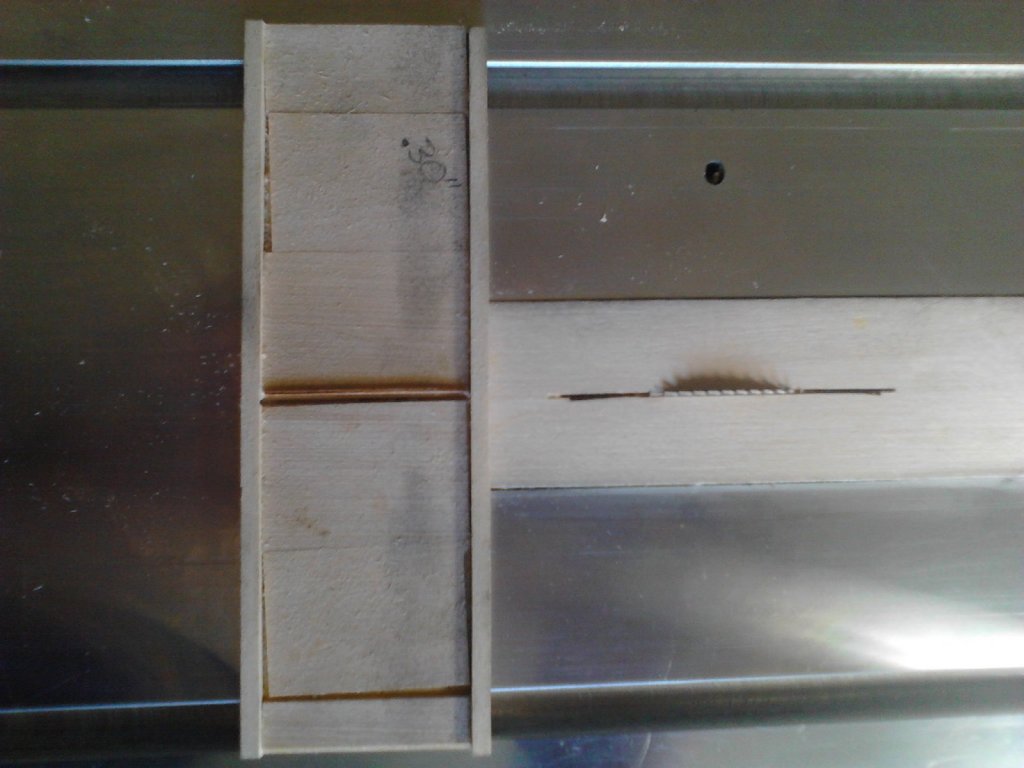
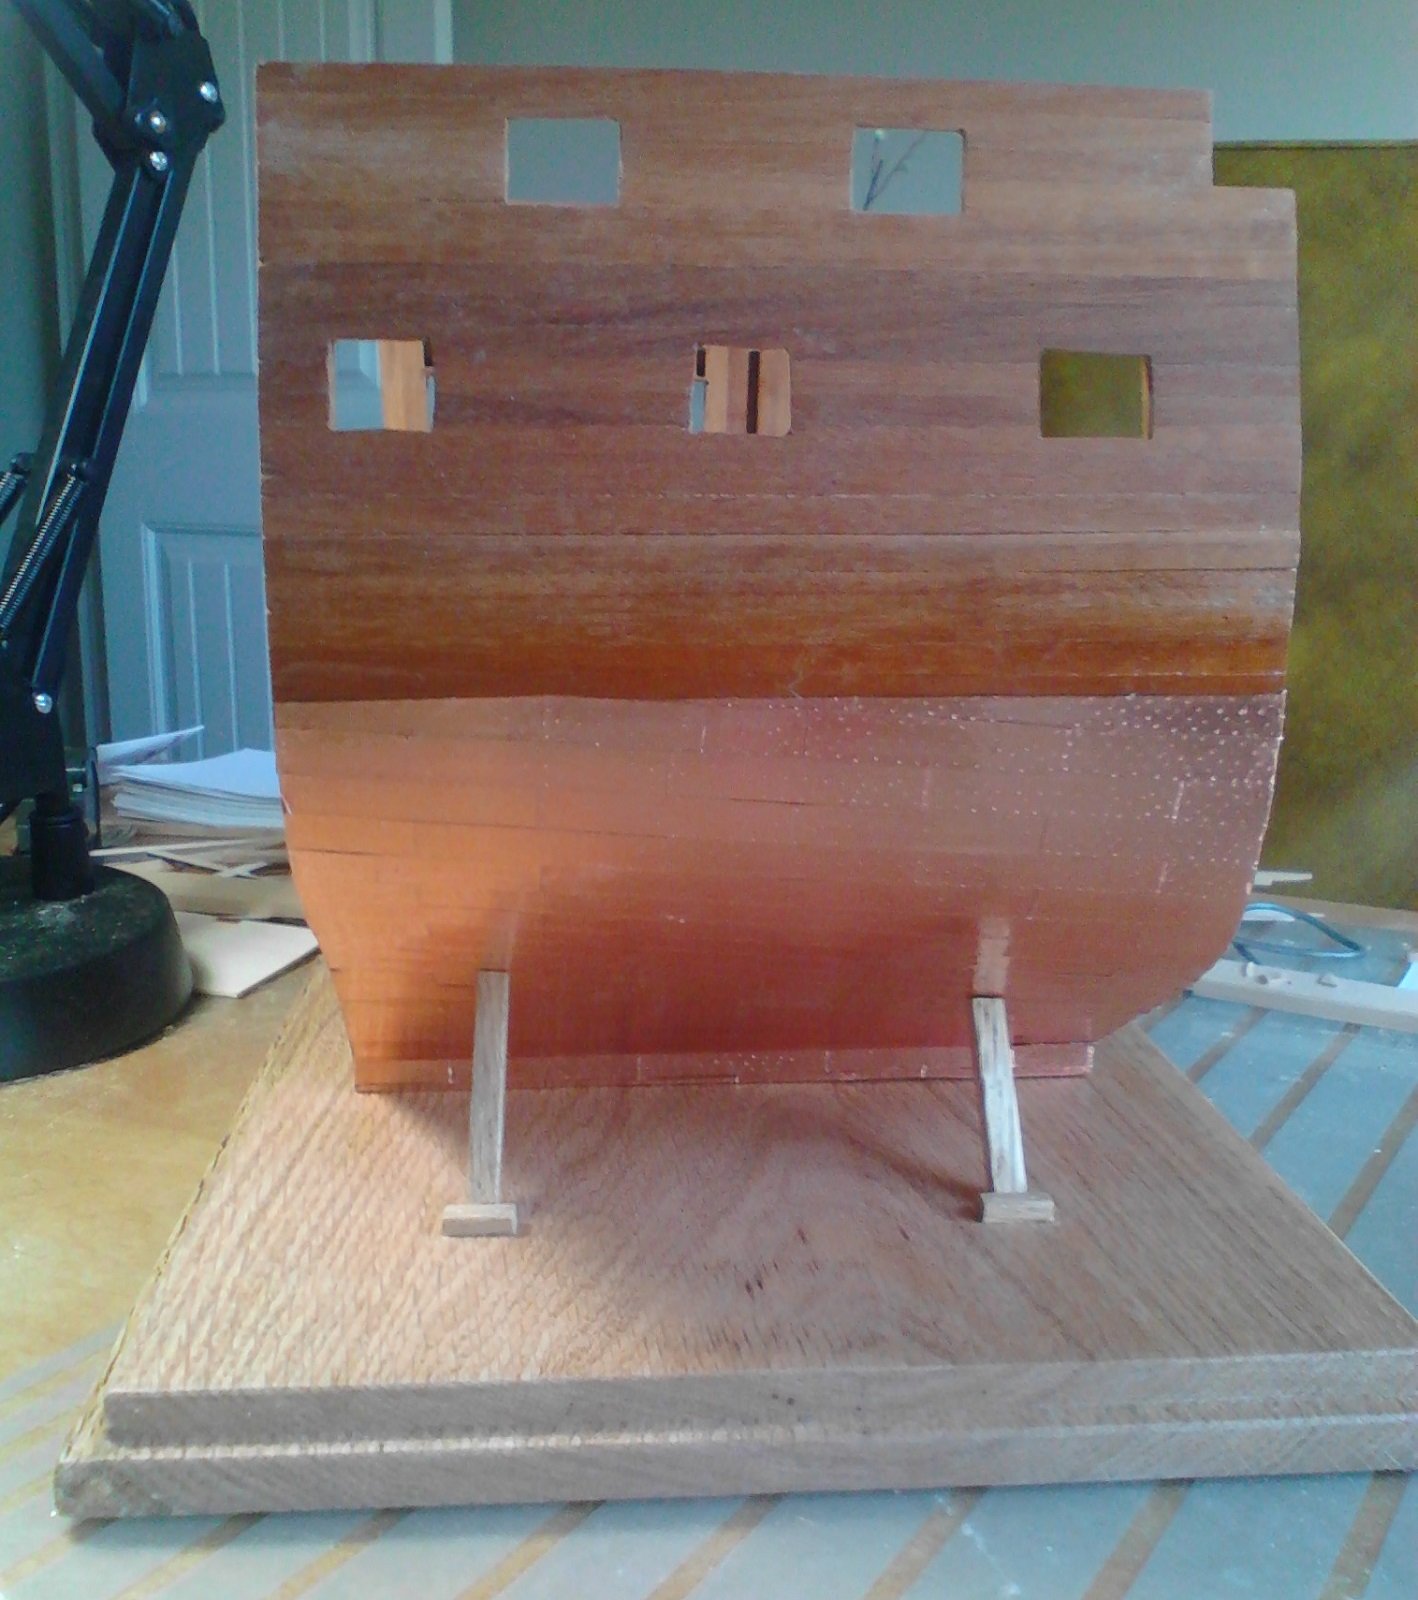
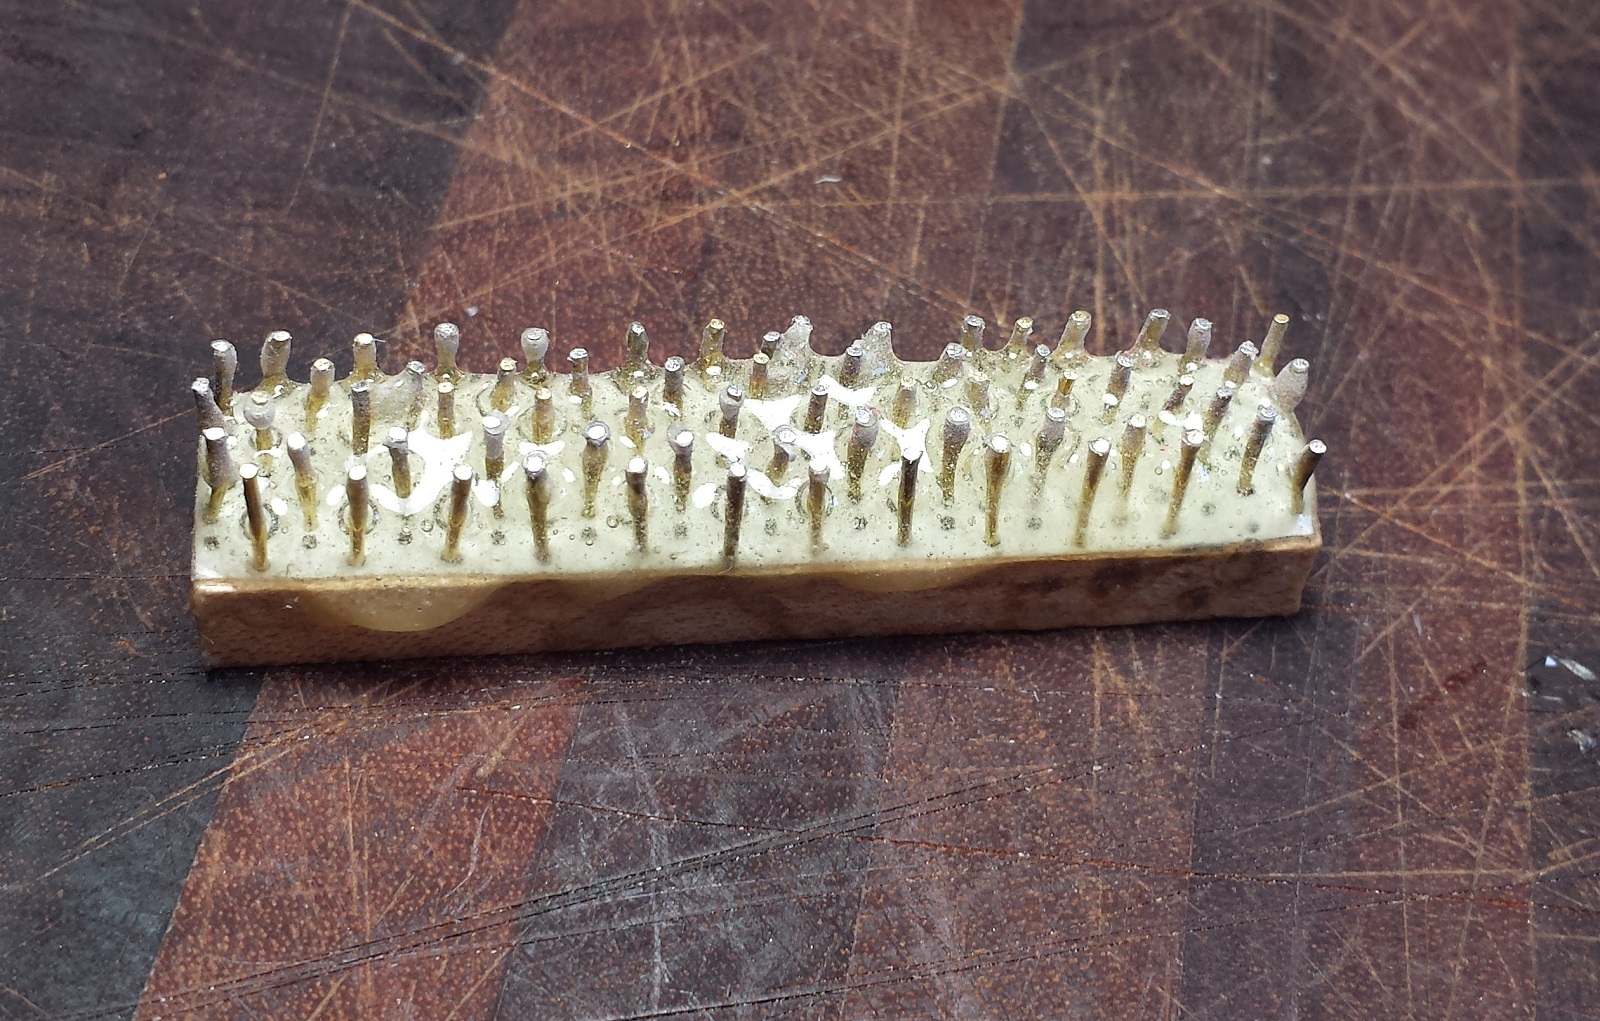
Next I decided to finish the bottom. Started with a punch to dimple the sheets to simulate nails (kinda).
I drew the nail pattern in Autocad and printed a couple of copies. The plates amidship are .5x2.5 meters that comes to 138 nails. Not gonna happen.
The punch is made with a piece of scrap cut to size, patten glued on and pins nailed in. This would have worked better with a good drill press and then putting the pins in pointy side up. Next time. If I have a small drill press.
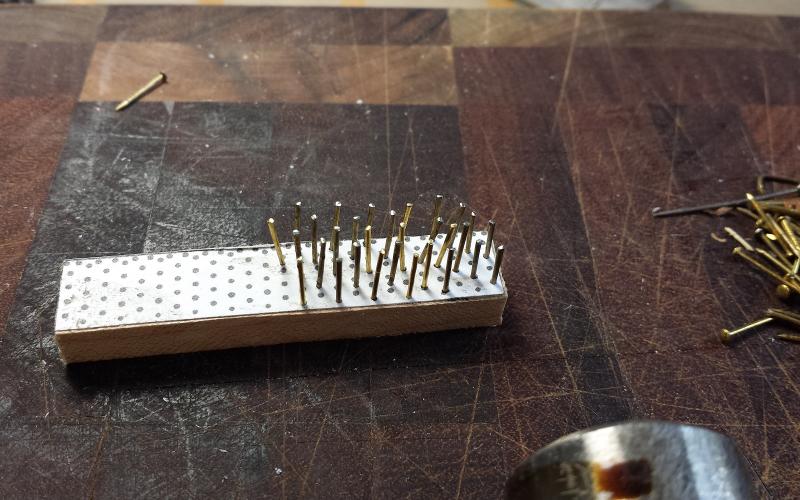
The pins where then straightened and set in with epoxy and filed even.

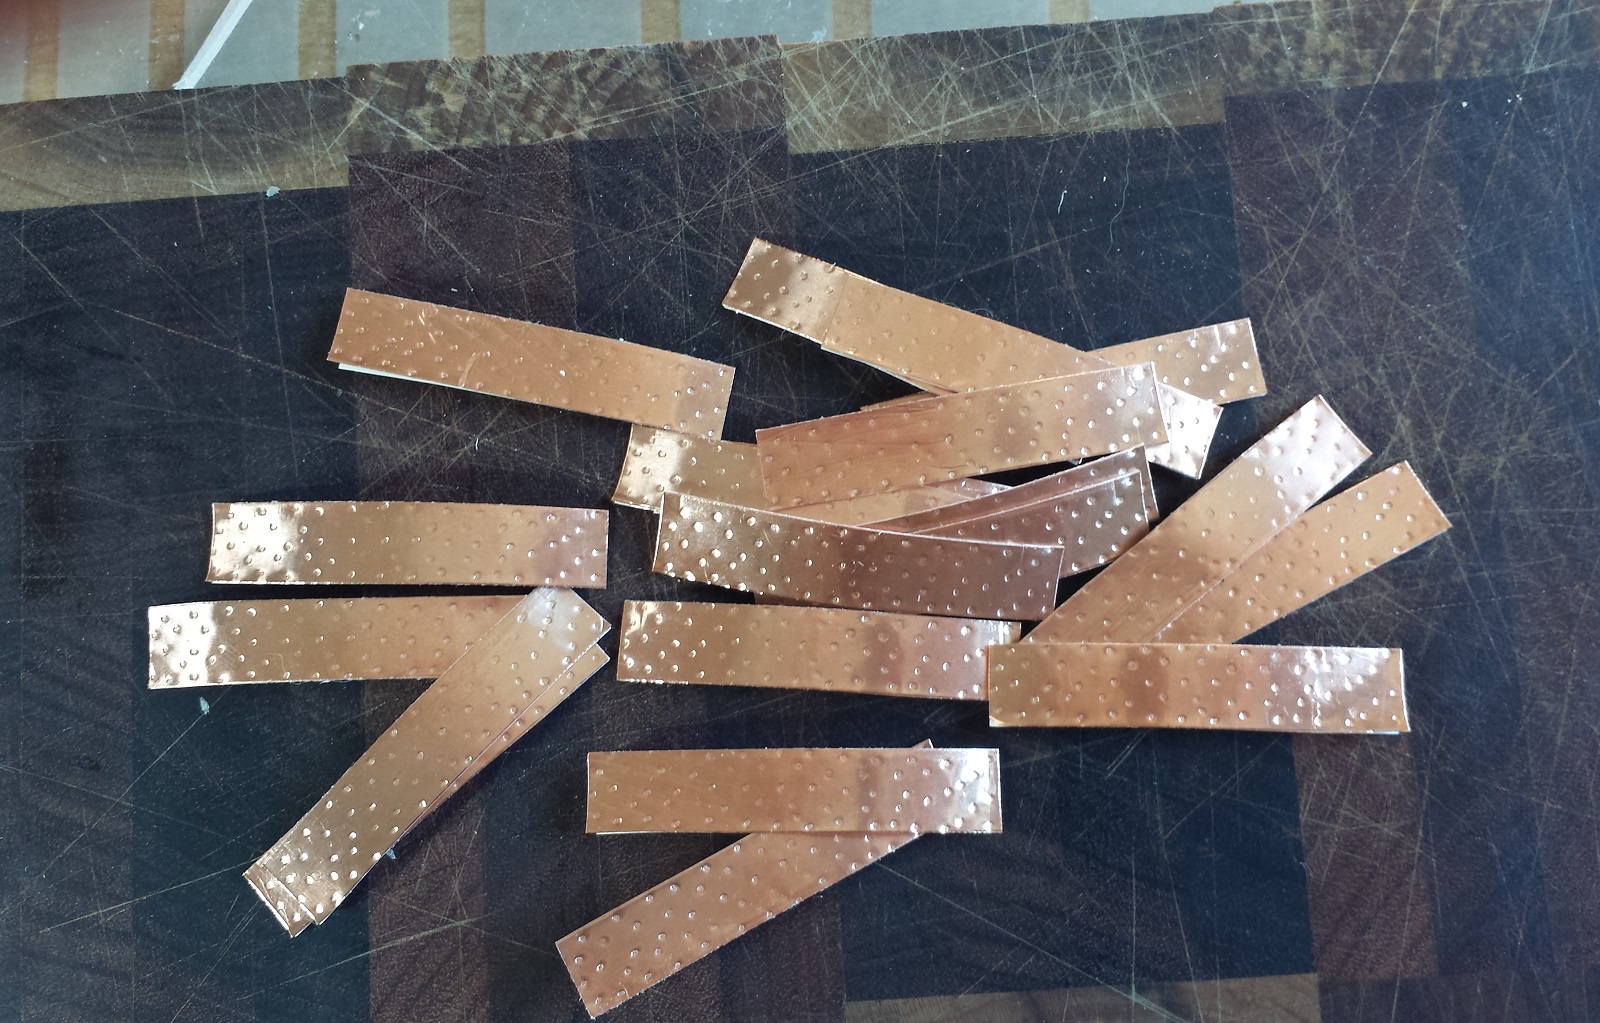
The sheathing was made from copper tape cut to size and then stamped.

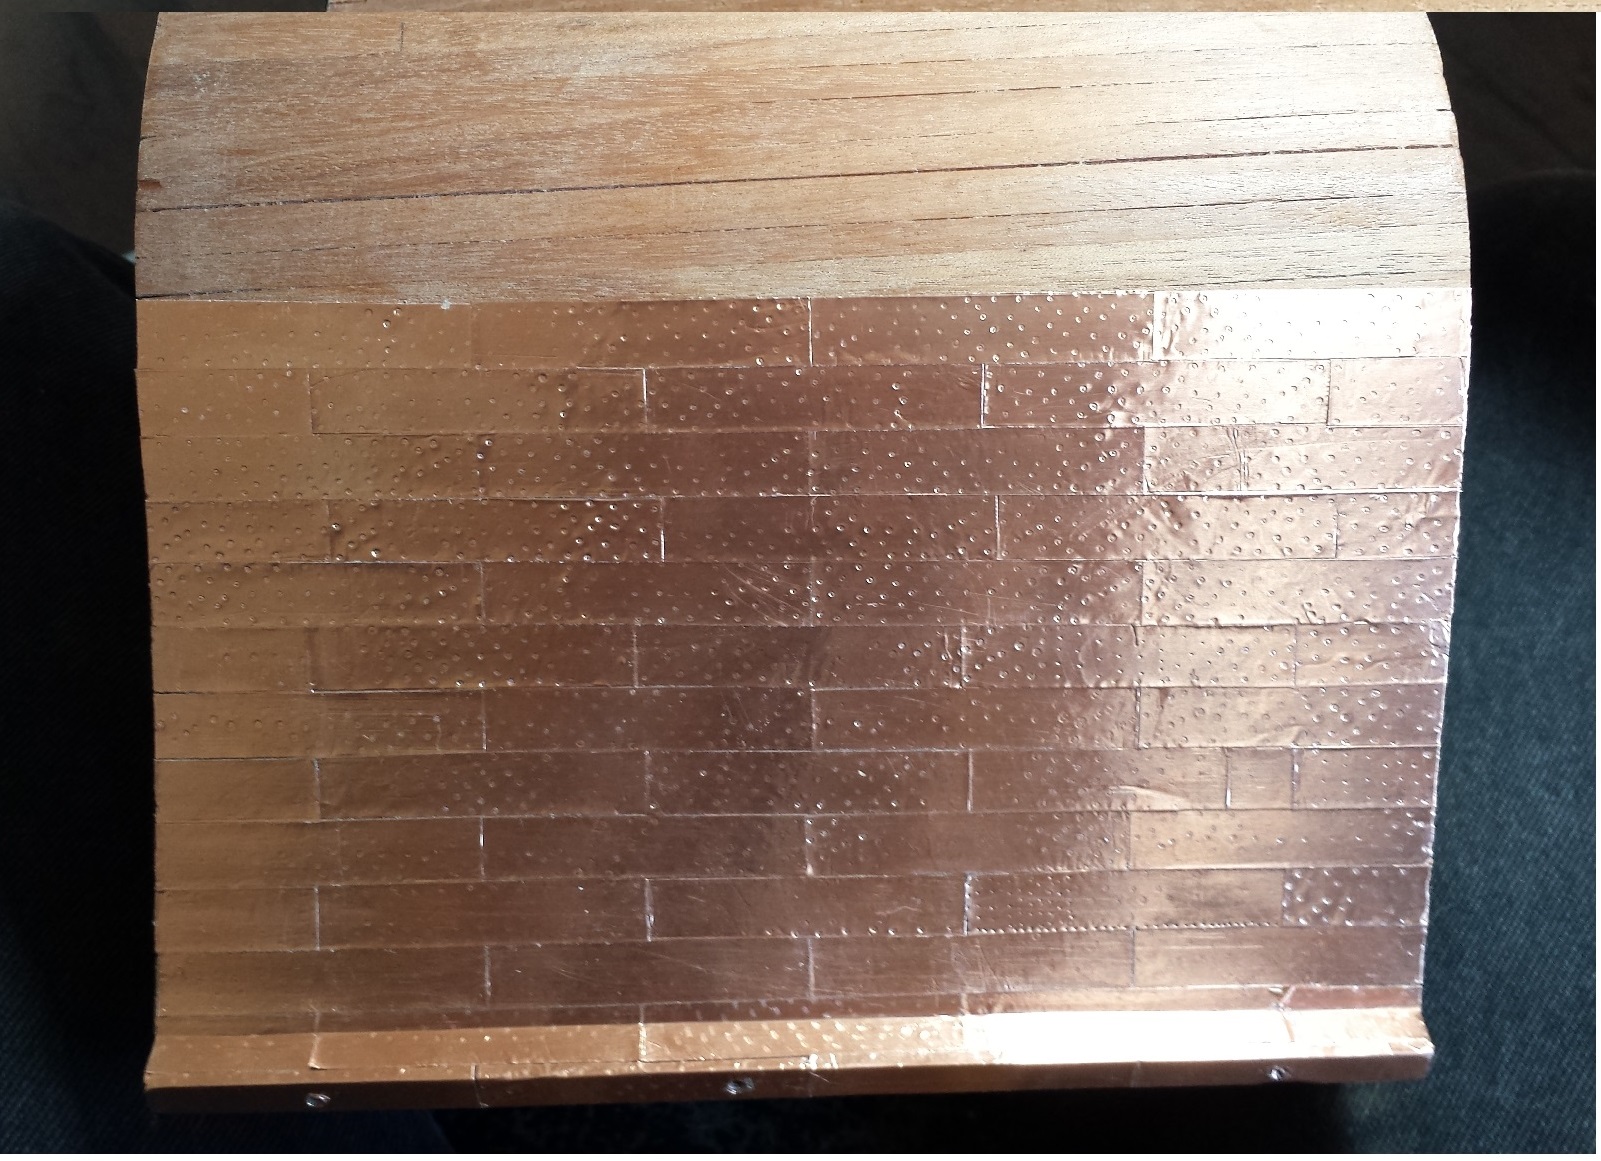
Started from the keel and worked my way up. I found the tape ease to put on and keep even but it is delicate so care is needed. If to much presser is used the dimples disappear to little and the tape doesn't stick.
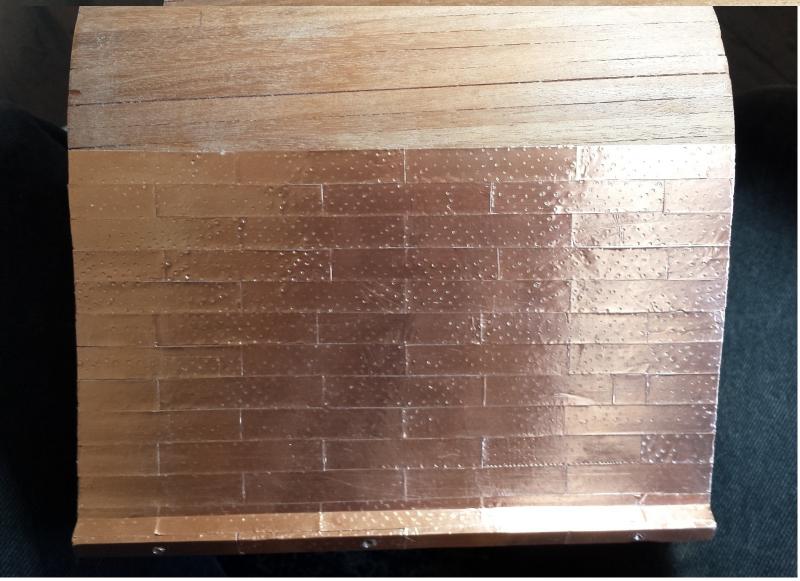
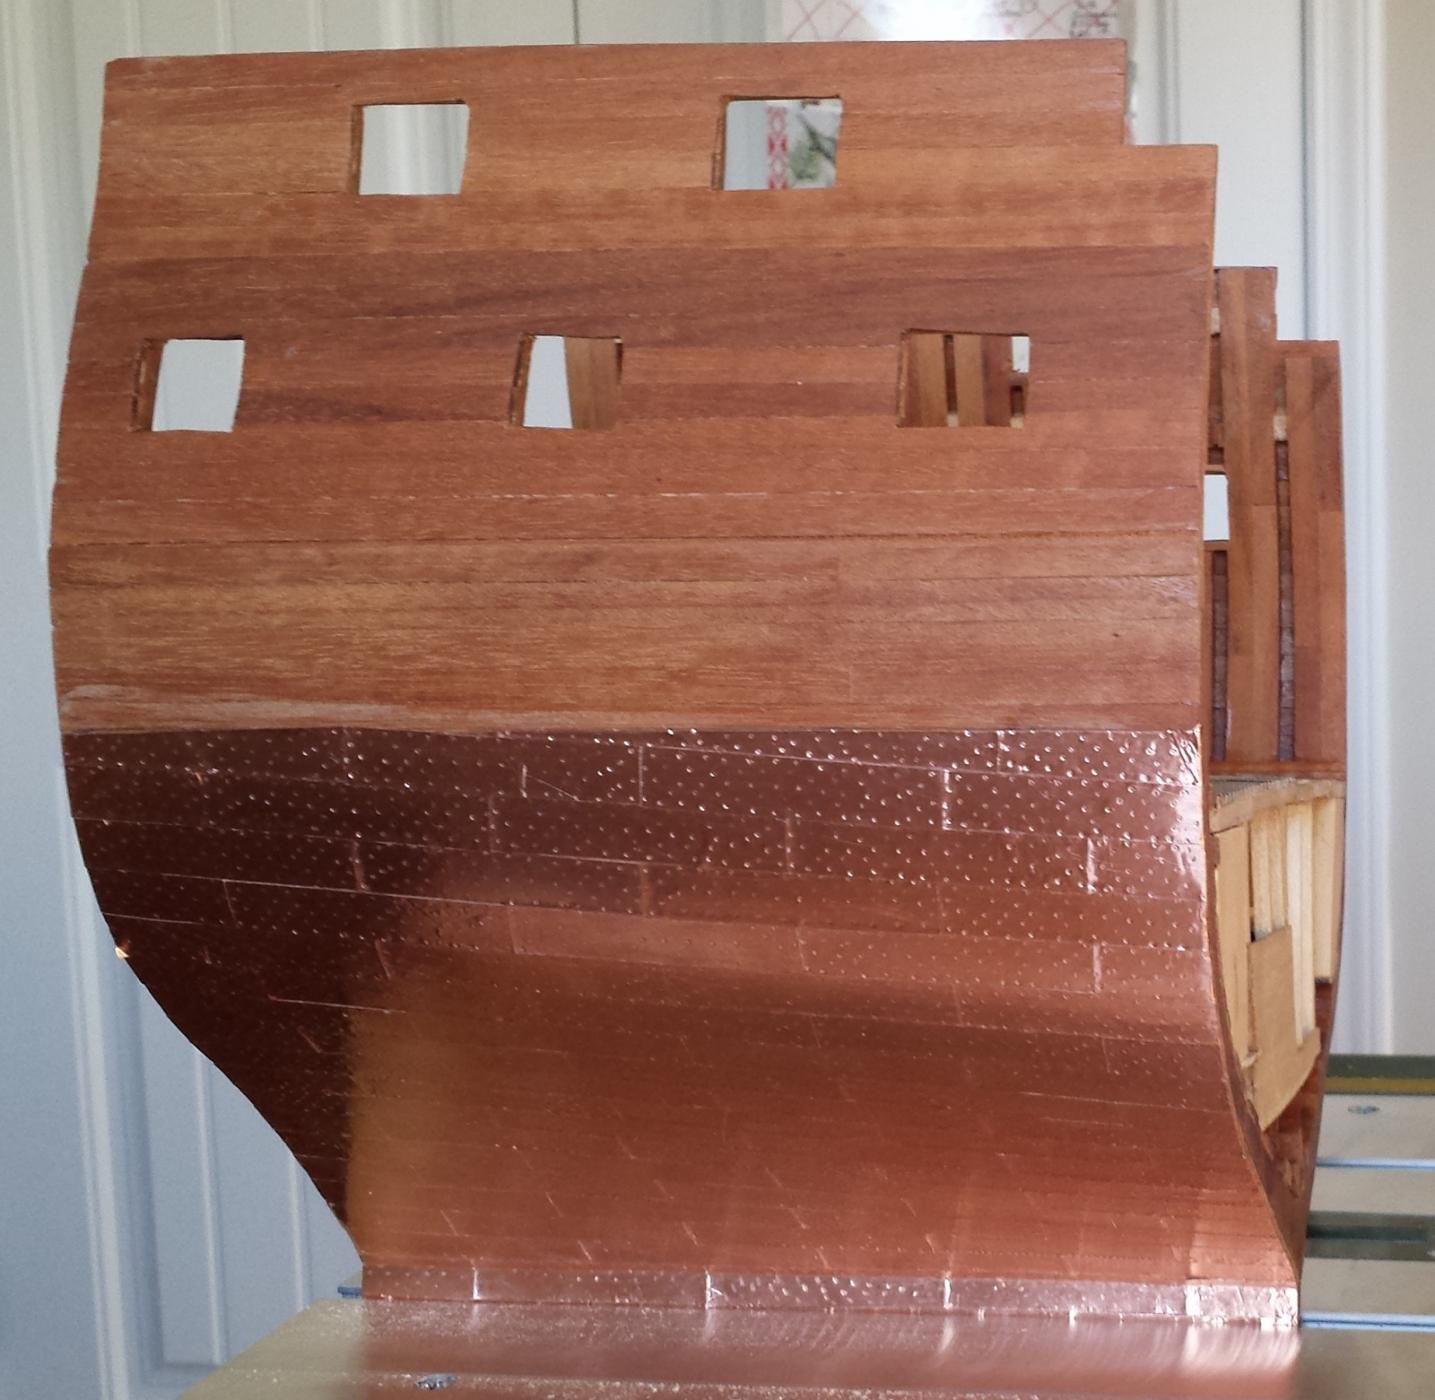
Finished. Some final smoothing and a coat of something to keep it safe.
On to the next project. Most likely a base and some kind of cradle.
Mark
- archjofo, albert, AnobiumPunctatum and 3 others
-
6
-
Some old muzzleloading firearms were stained with a mixture of nitric acid and iron. I have used it and it gives a very nice color. It affects different hardness of wood differently so the grain really stands out. One caveat it MUST be neutralized with something like a baking soda slurry or the stain will continue to darken. Also nitric acid is dangerous when the iron is put in it gets hot. I have one pistol I made about 25 years ago and there is no deterioration of the wood although it has darkened over the years. I guess I didn't let the baking soda sit long enough.
Mark
-
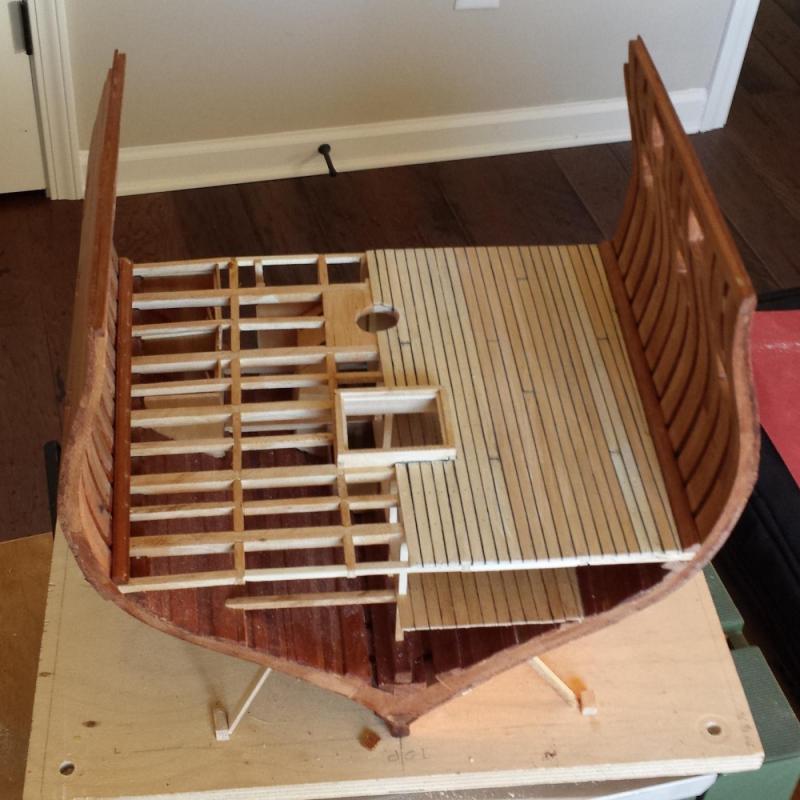
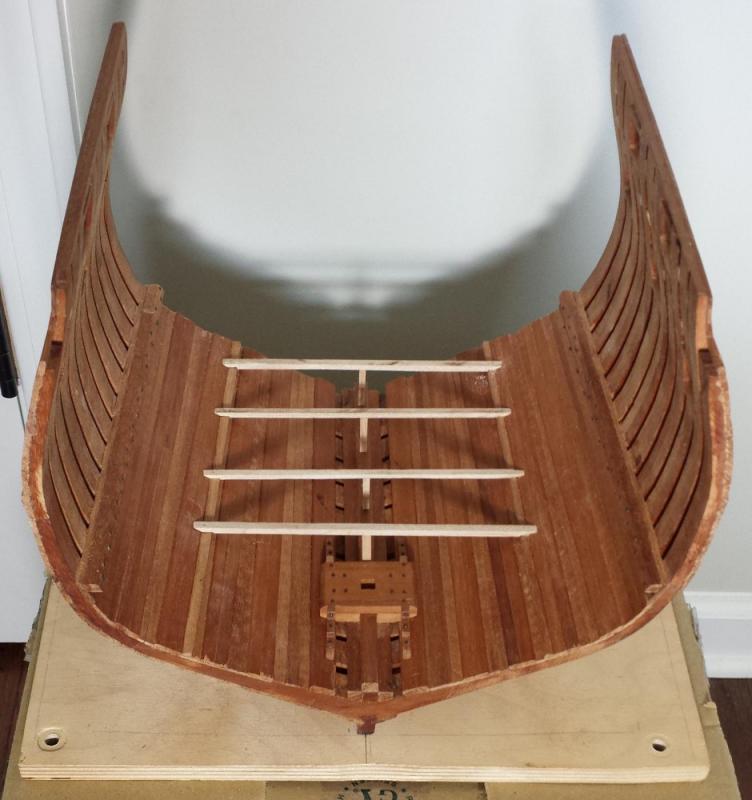
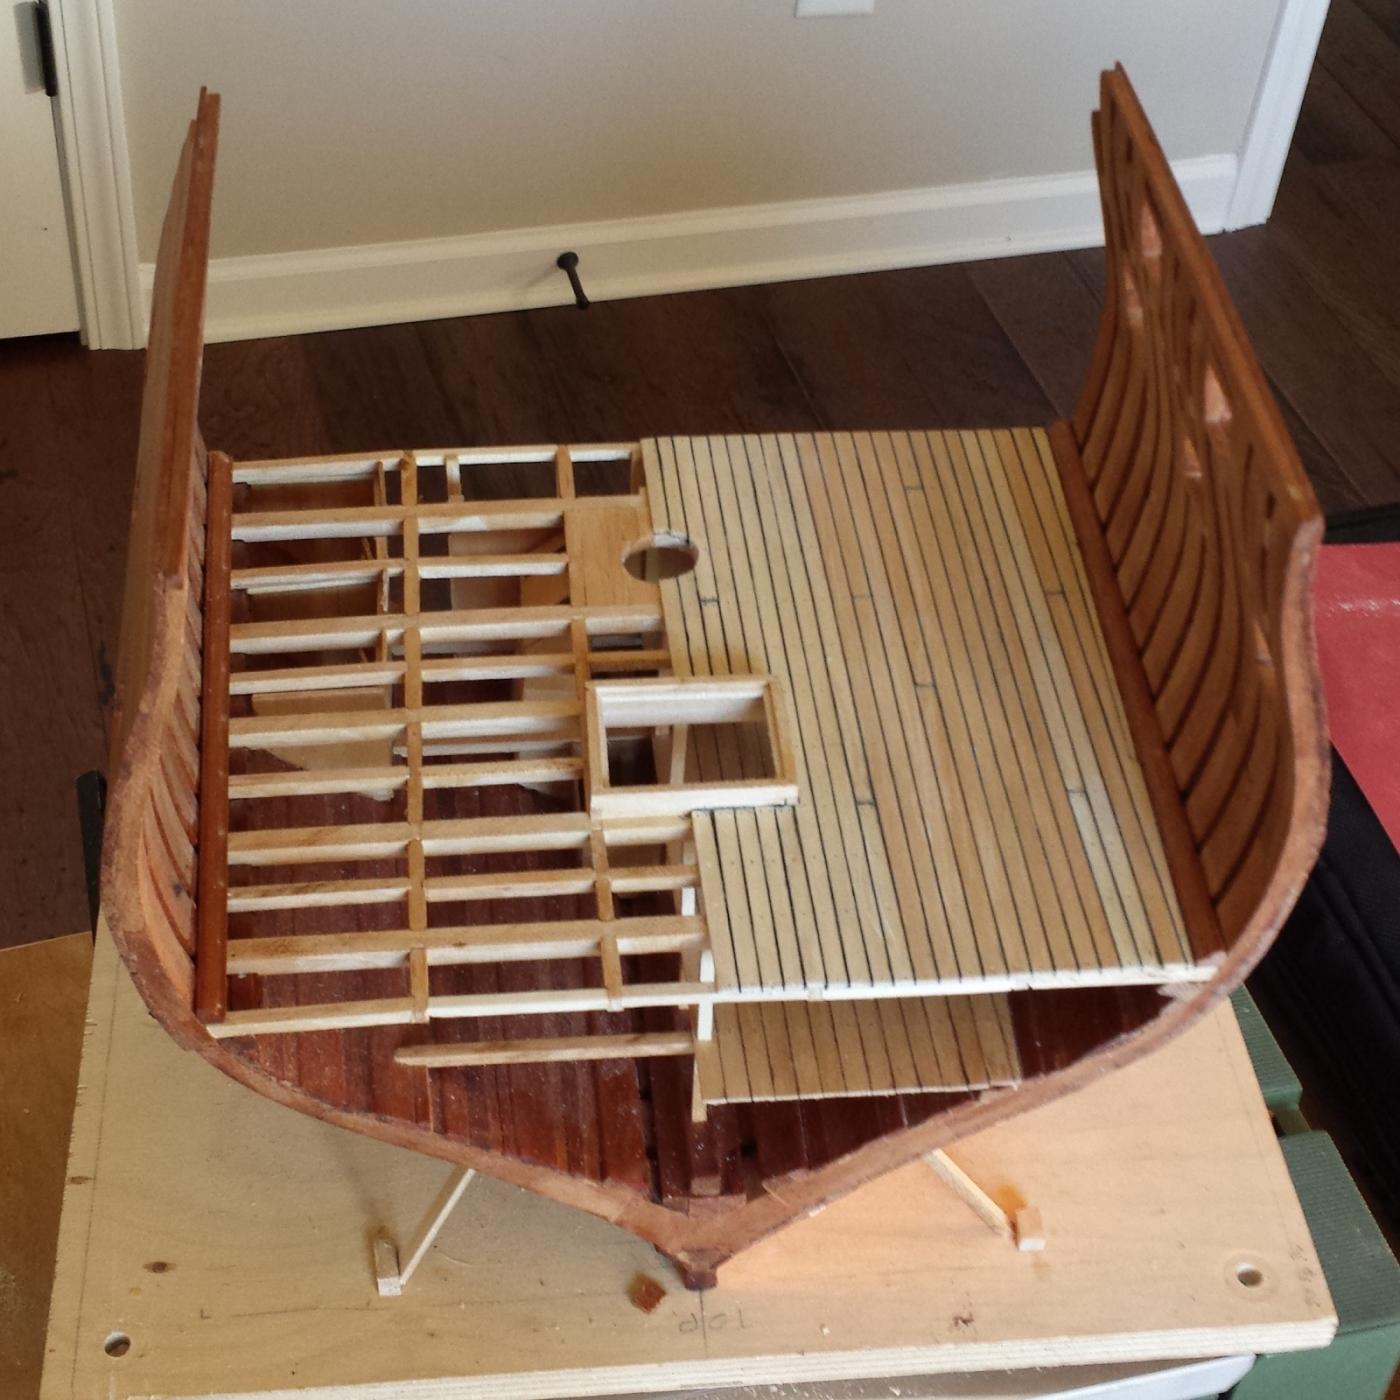
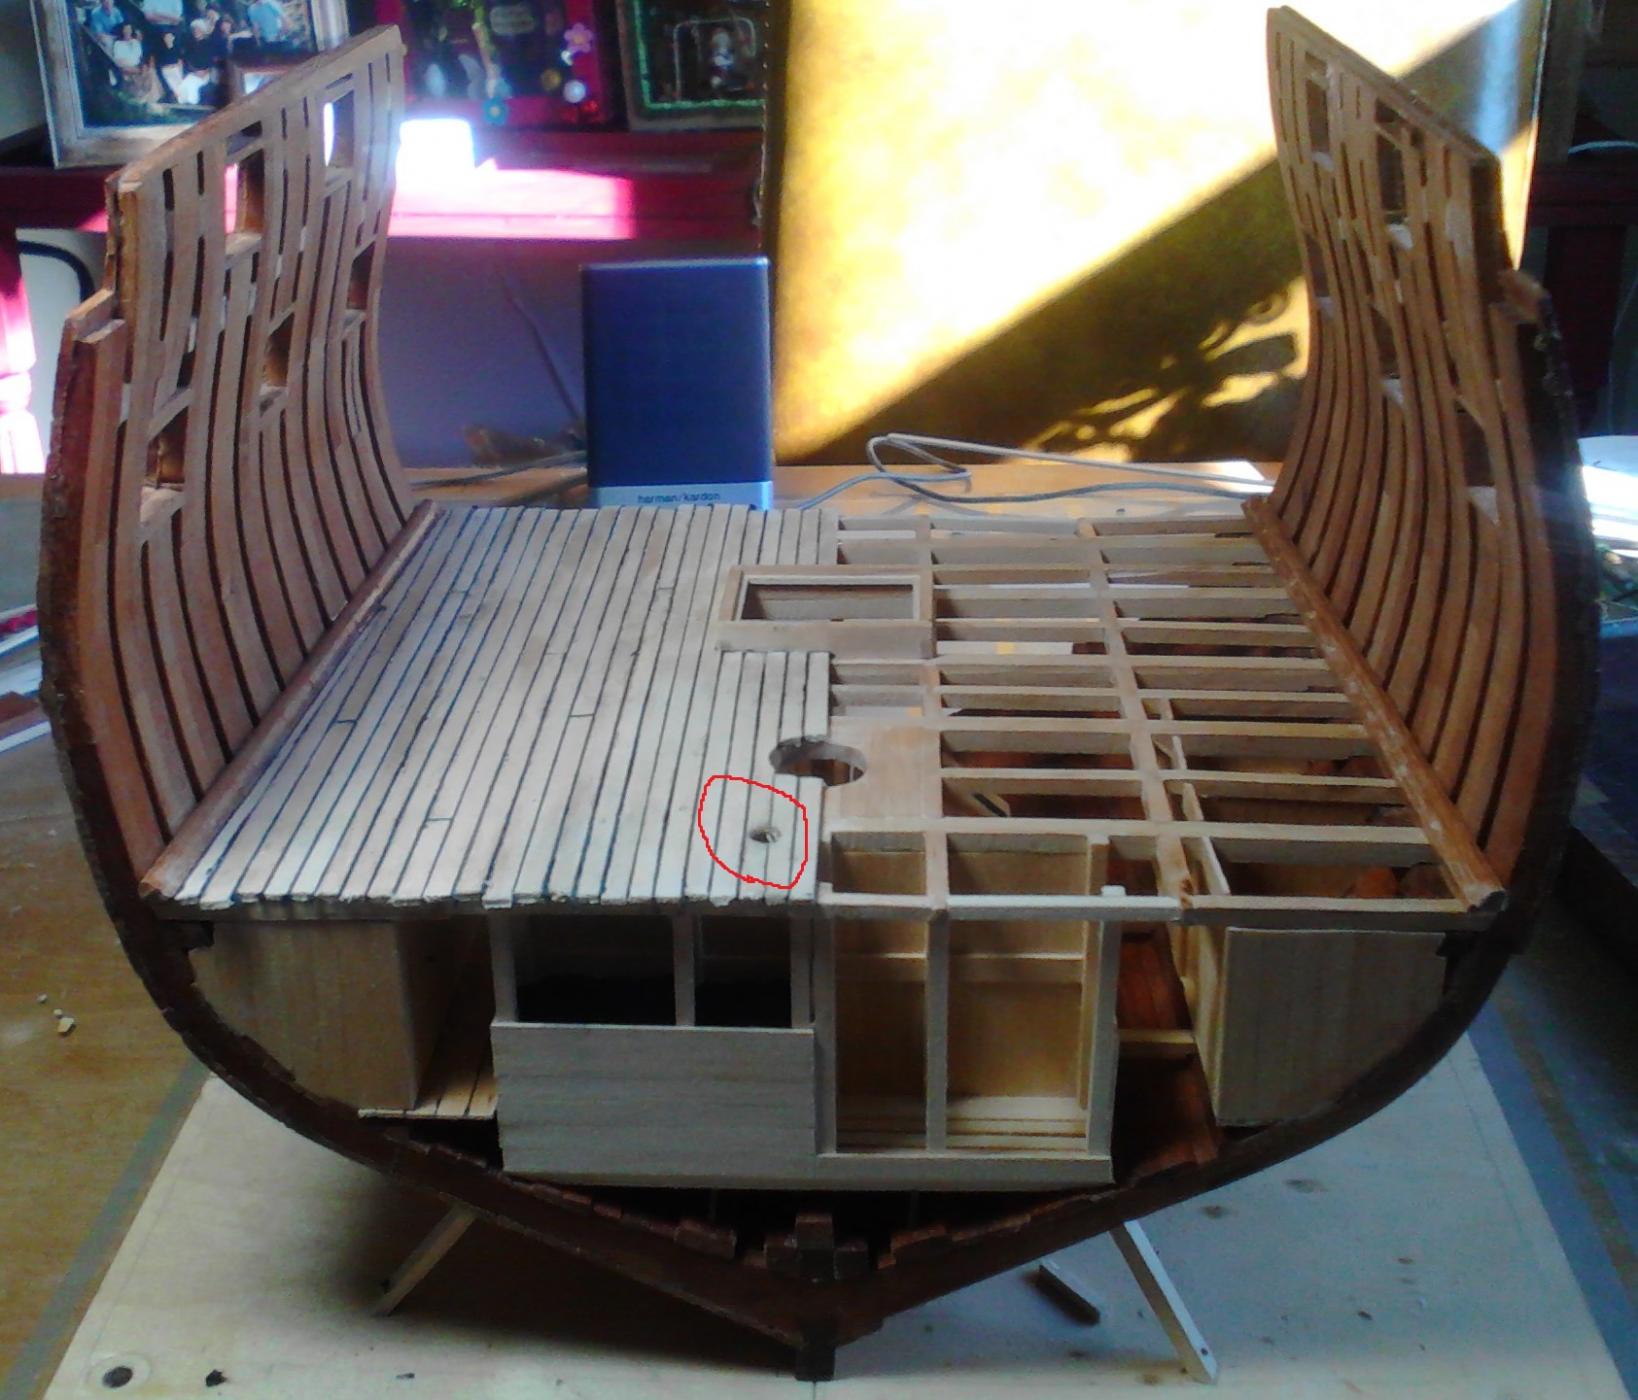
Not much work done over the holidays. Actually all of it done yesterday and today. Installed the planking.

The red circle is around the hole that the anchor chain goes through. Its in the wrong place. Easy to fix though. Just pull up those three planks and replace them.

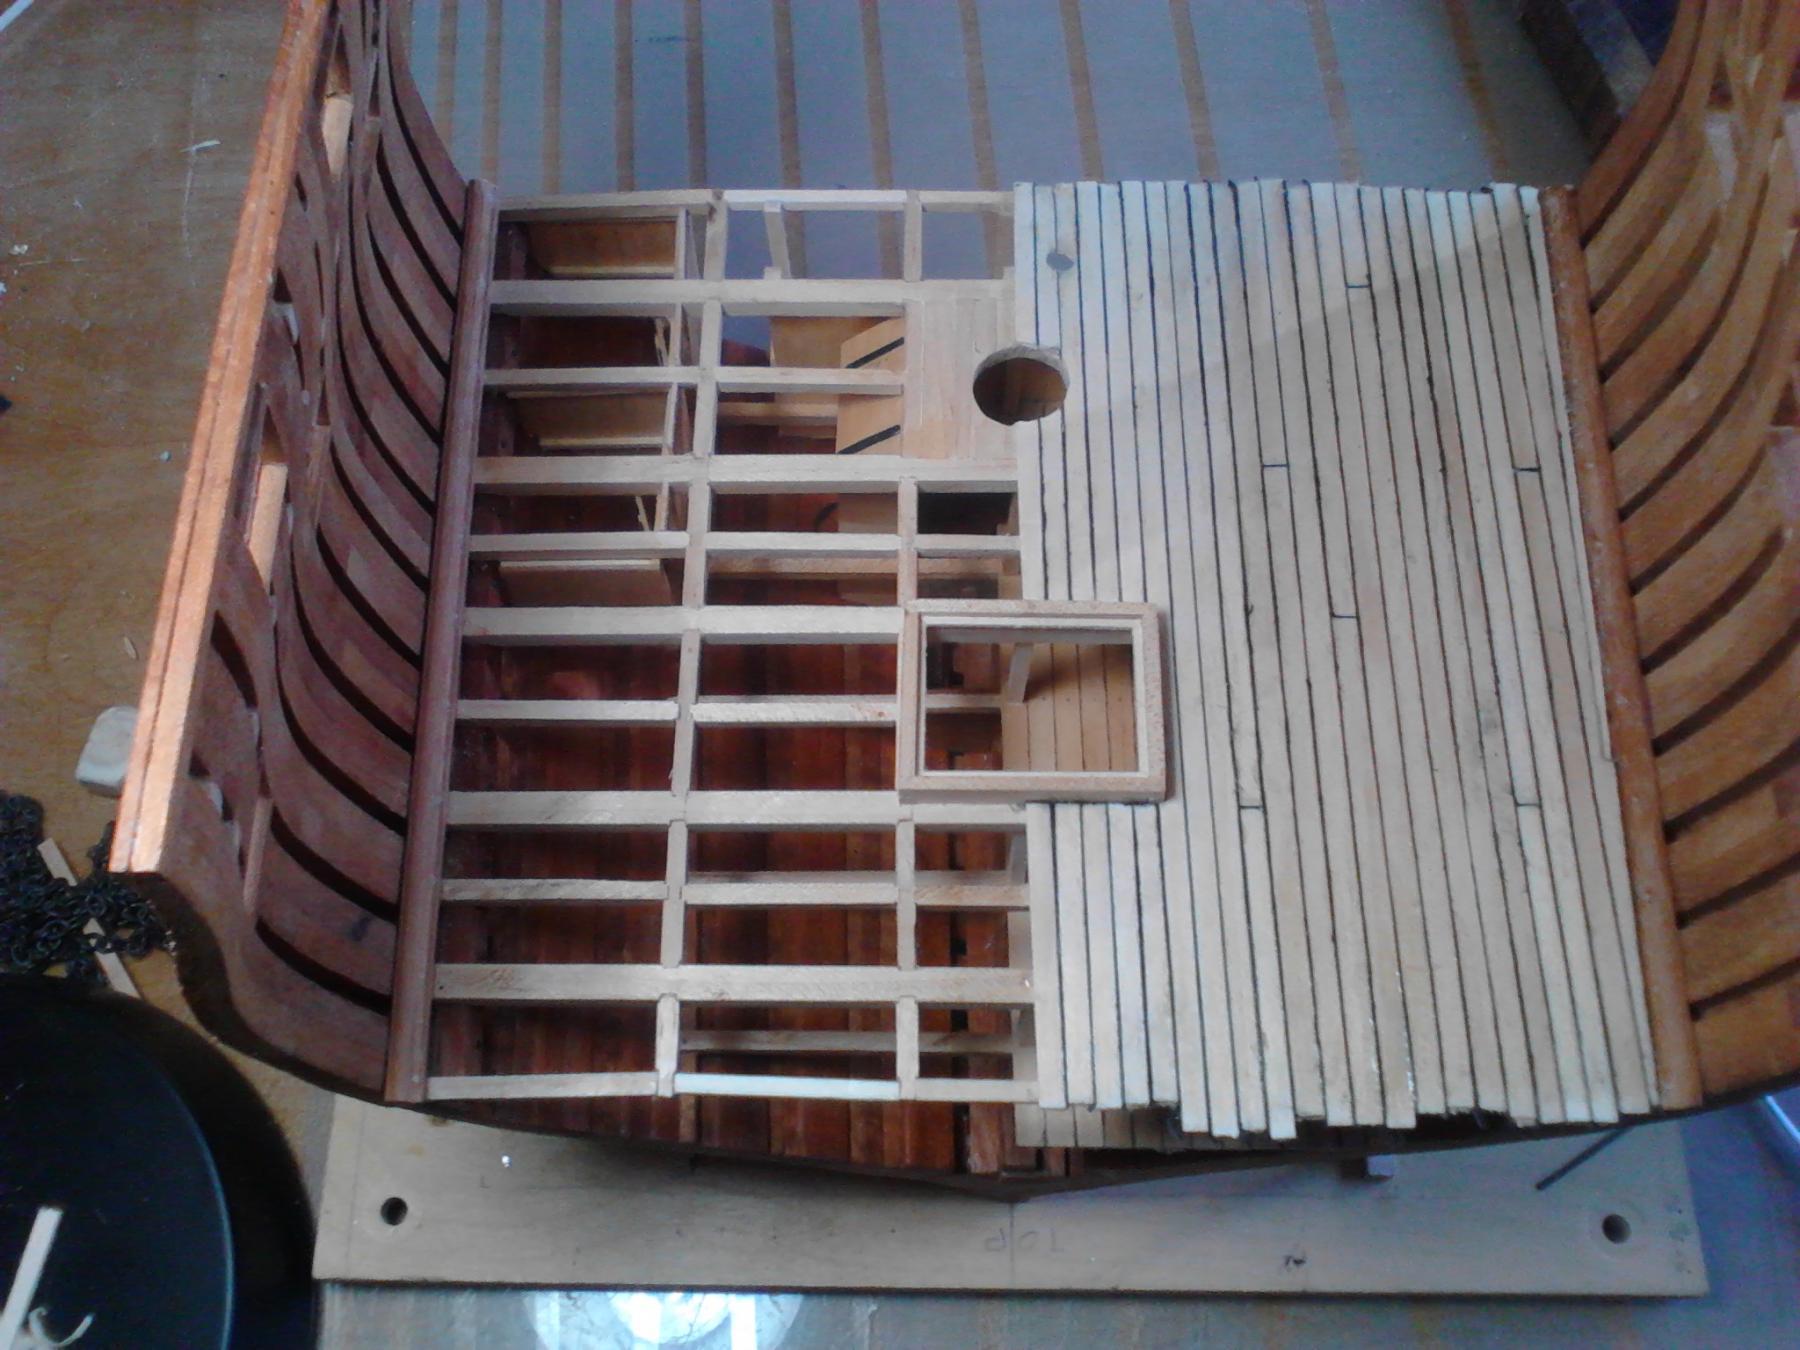
Top view. The joints are random. On the real ship there is to pattern to the planking that I could make out. In portchieboy's
Victory photo gallery there seem to be rules for the planking (no joints next to each other) put no hard and fast pattern.
More later thanks for watching
Mark
-
I use a wine bottle to soak the wood (empty it first, the white is ok but the red stains the wood) there is always one around and they are long enough to do long pieces. Then heat with a plank bender, the kind that in on the end of a soldering iron. Depending on the wood as little as ten minutes soaking does the job.
Mark
- Canute, mtaylor, thibaultron and 1 other
-
4
-
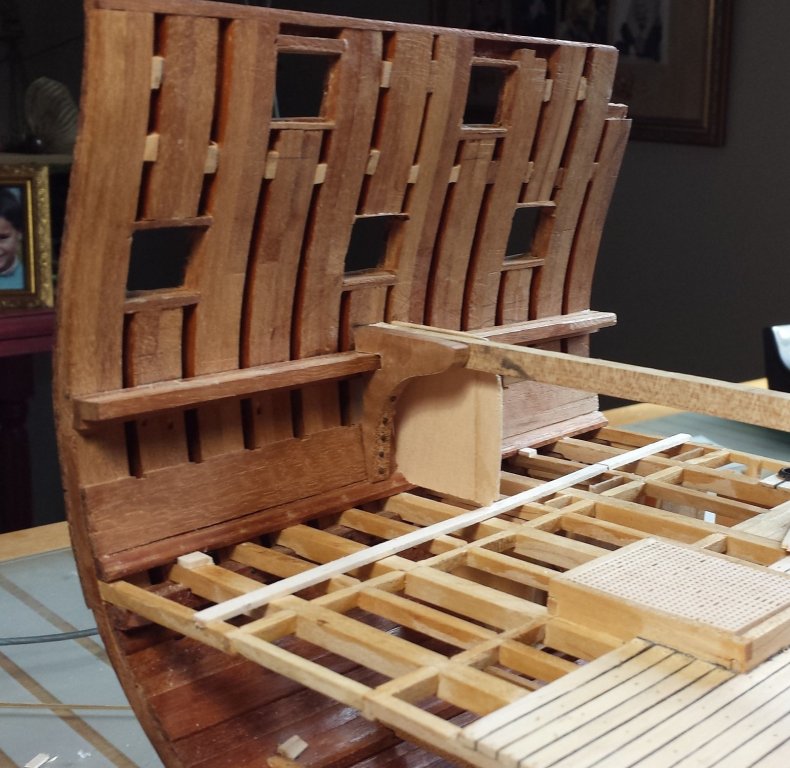
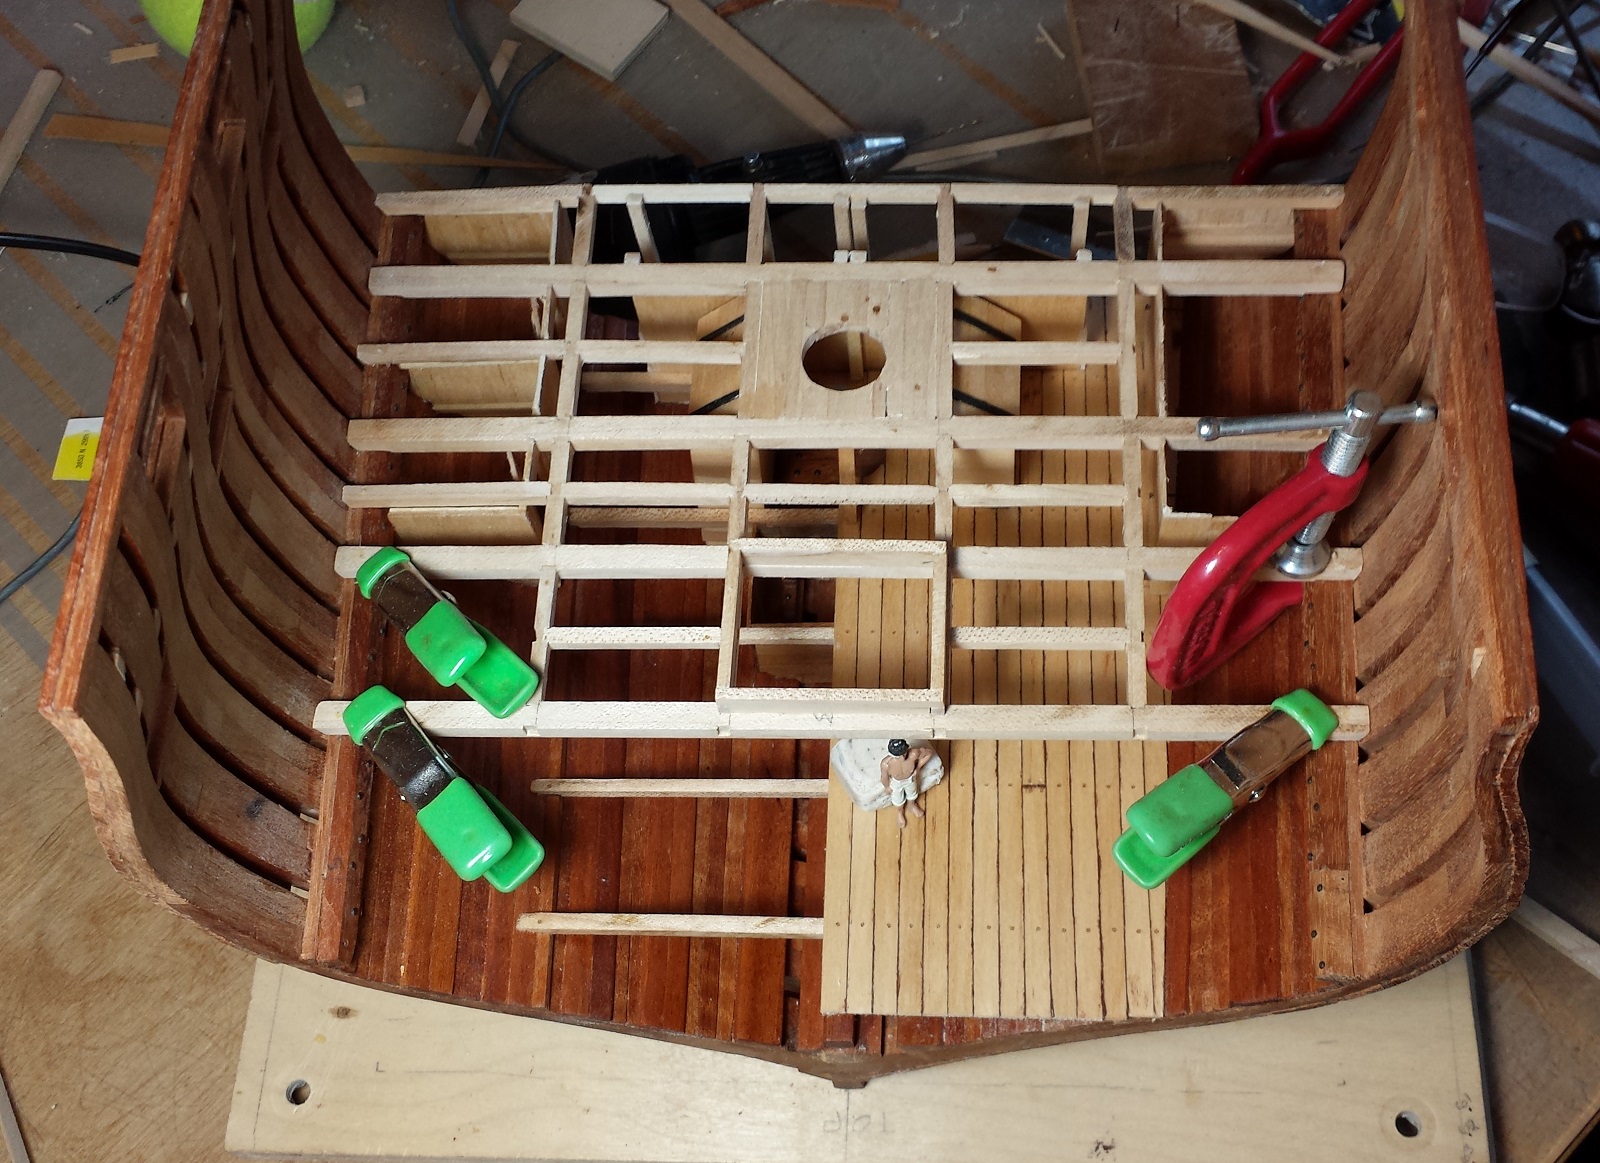
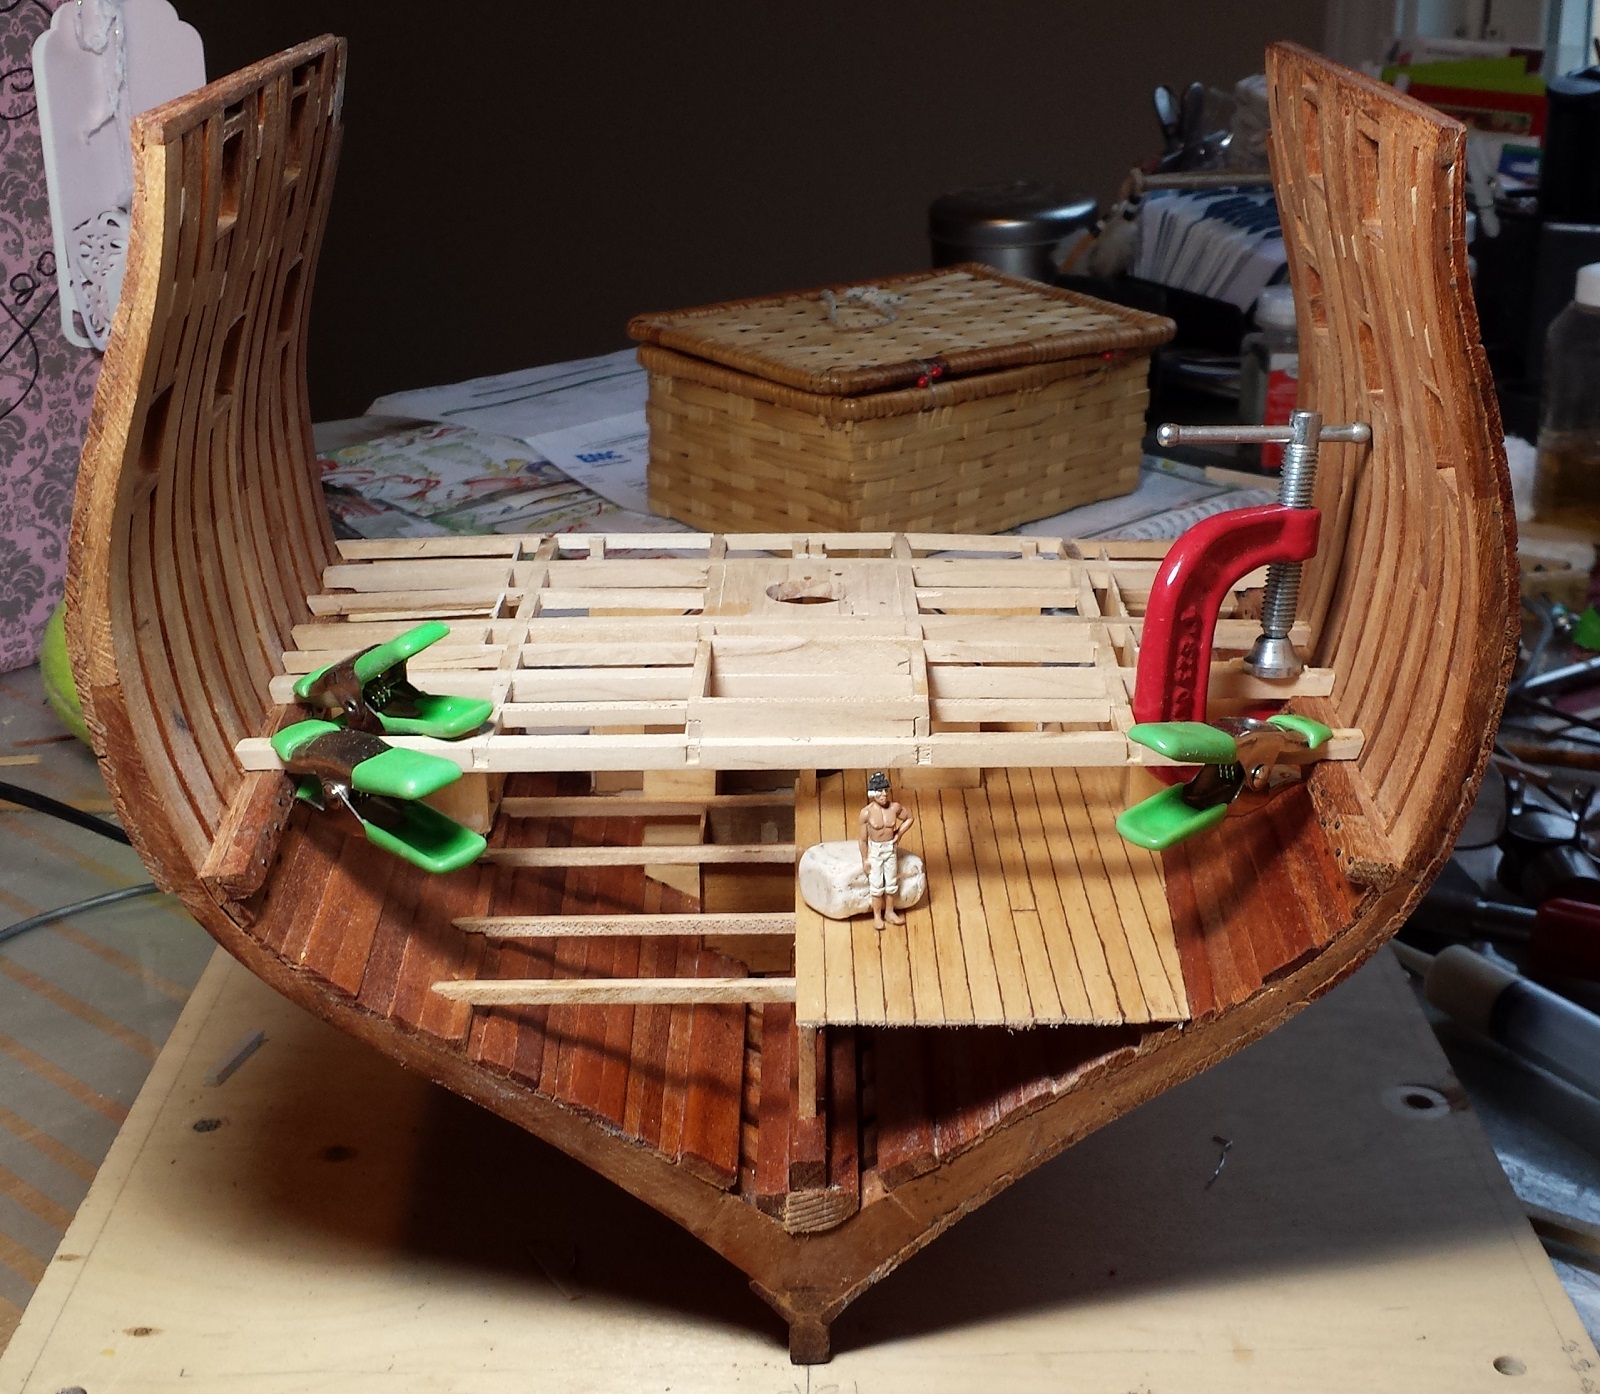
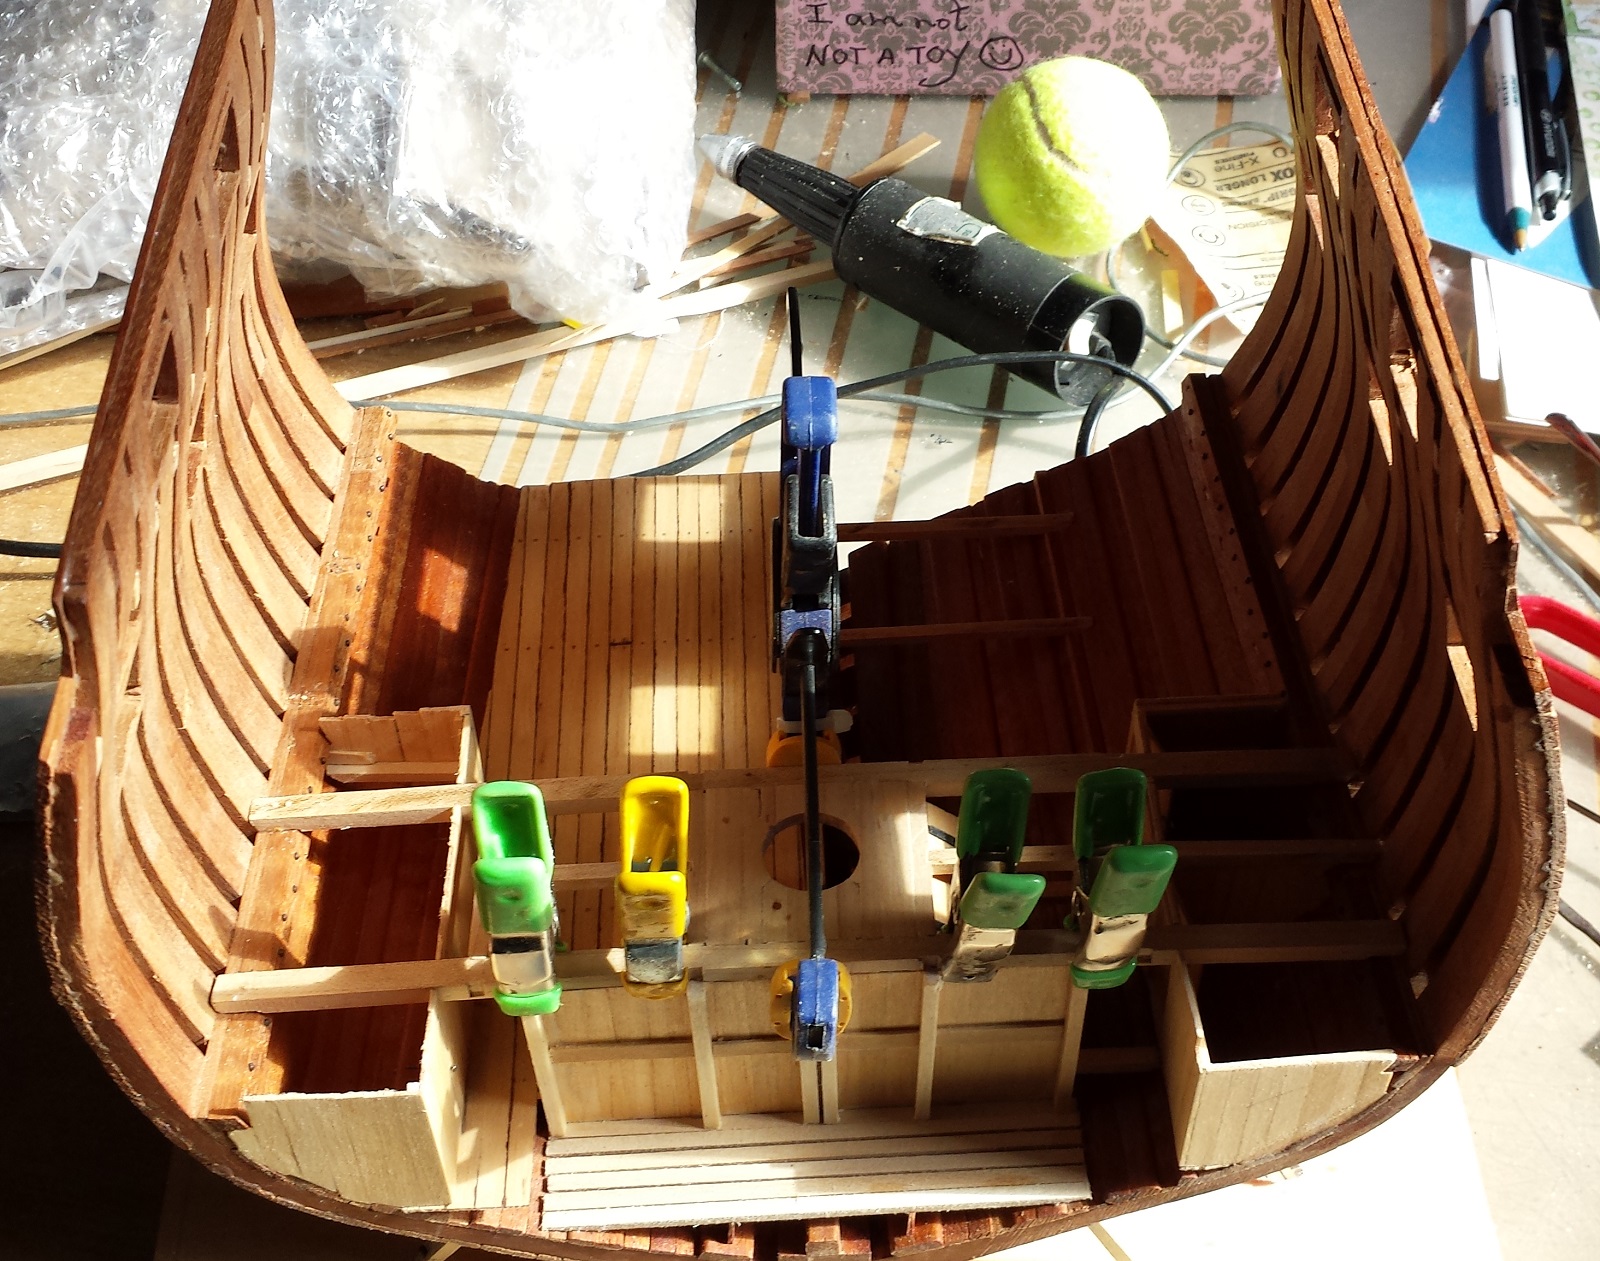
Weekend update. The chain is on backorder but work must go on. Continued work on the installation of the deck beams.


The little sailor can't stand of his own, must have had a hard night.
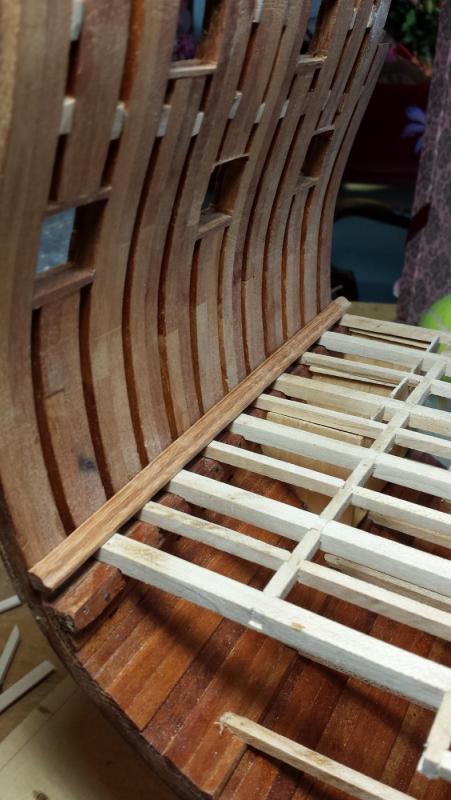
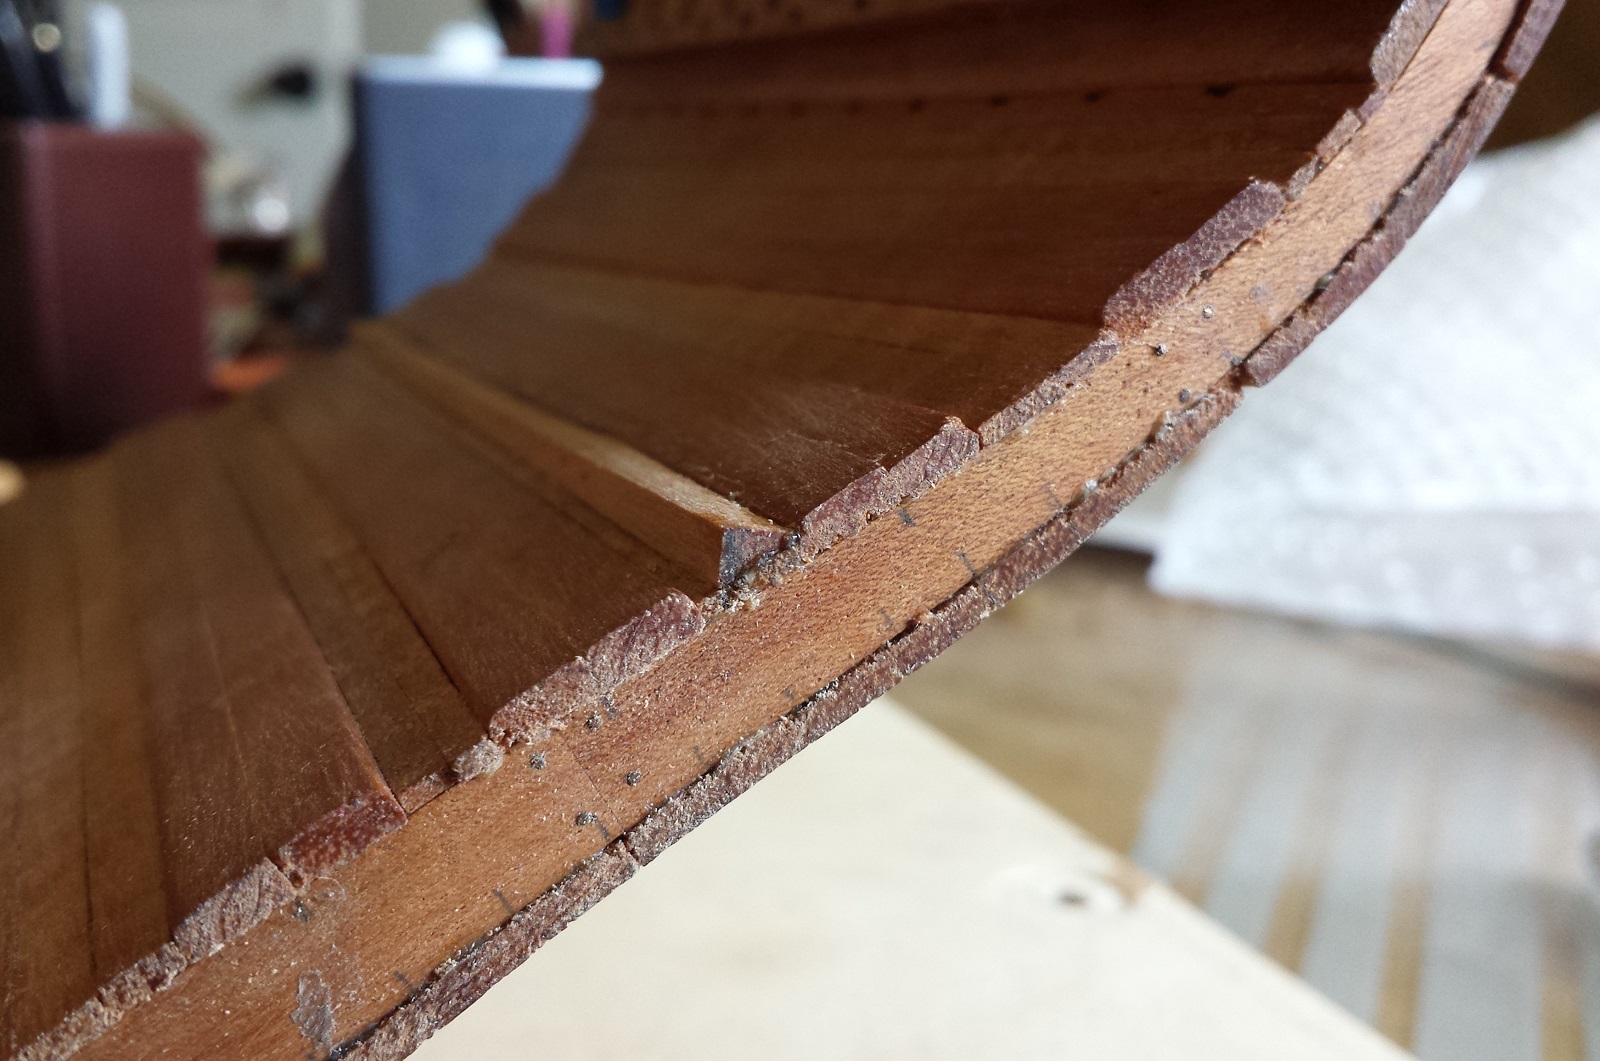
The channels where shaped with a scaper cut into a utility knife blade. This is the first time i've used a scraper to shape parts so it took a couple of hours, the Brazilian cherry is hard and did not shape easily. They are just dry fitted for now.
The beams are almost finished and planking is started. The end beams will go in with the planking to help support them. The chalking is 100 lbs black paper. I tried using thread but these planks are 1/16 thick so it did not work.
The chain lockers. The one on the left has a false floor to reduce the amount of chain needed. I will probably leave the other open.
Thanks for watching and for the likes.
Mark
-
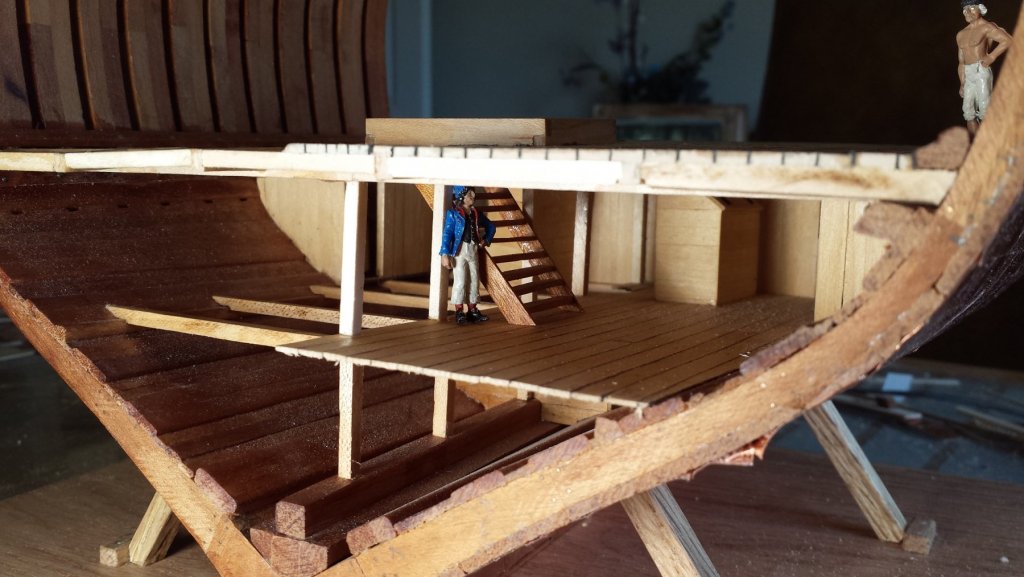
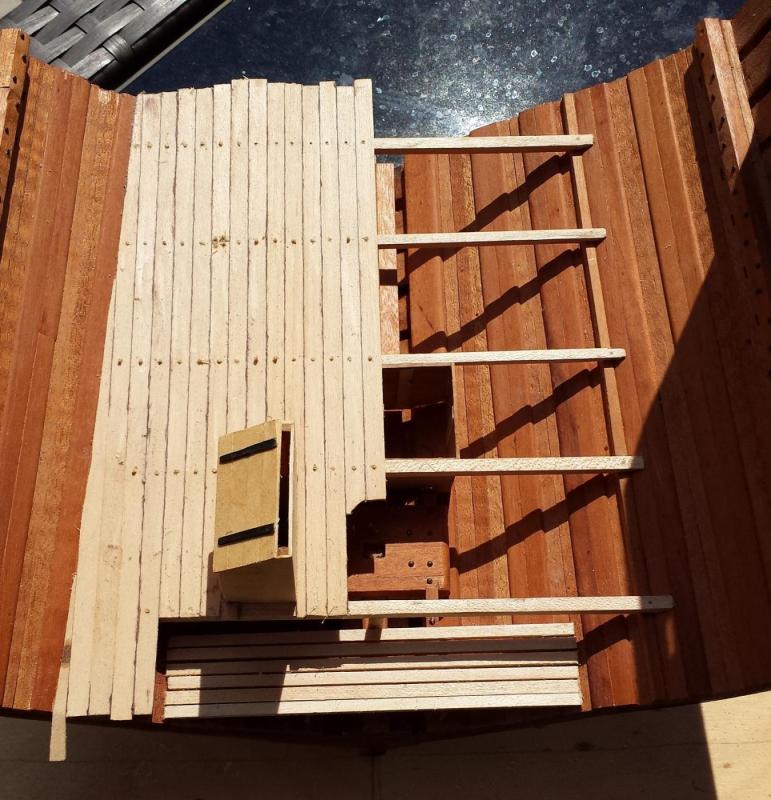
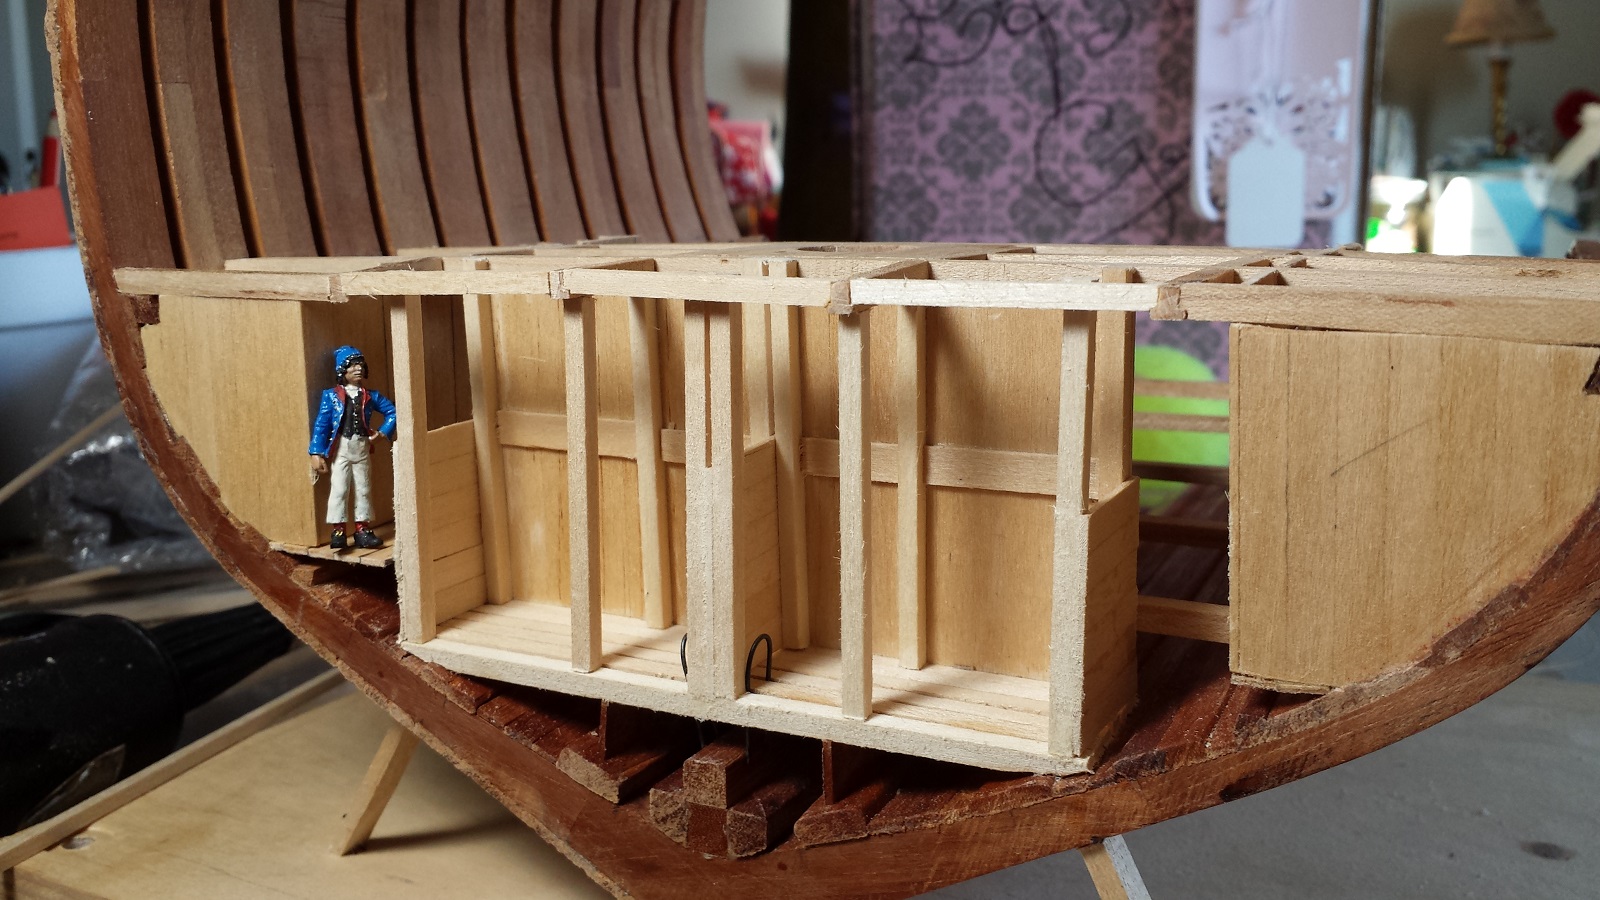
The first section deck beams installed. I found it easier to install them a piece at a time so that the stuff under them can be fitted. I then started on the anchor chain locker (paiol da amarra). The little guy came from Cornwall Models they are from Amati. They are the only place I could find that had 1:50 scale sailors. They are the 35mm size. It makes them about 5'6" or 1.75m. This ship has a LOT of head room.
The first section of deck beams.

The aft wall of the chain locker being installed.

The locker almost done. I will wait until I get the chain before finishing the forward wall.
All done until the chain gets here.
Thanks for watching.
Mark
- Mike Y, yvesvidal, AnobiumPunctatum and 3 others
-
6
-
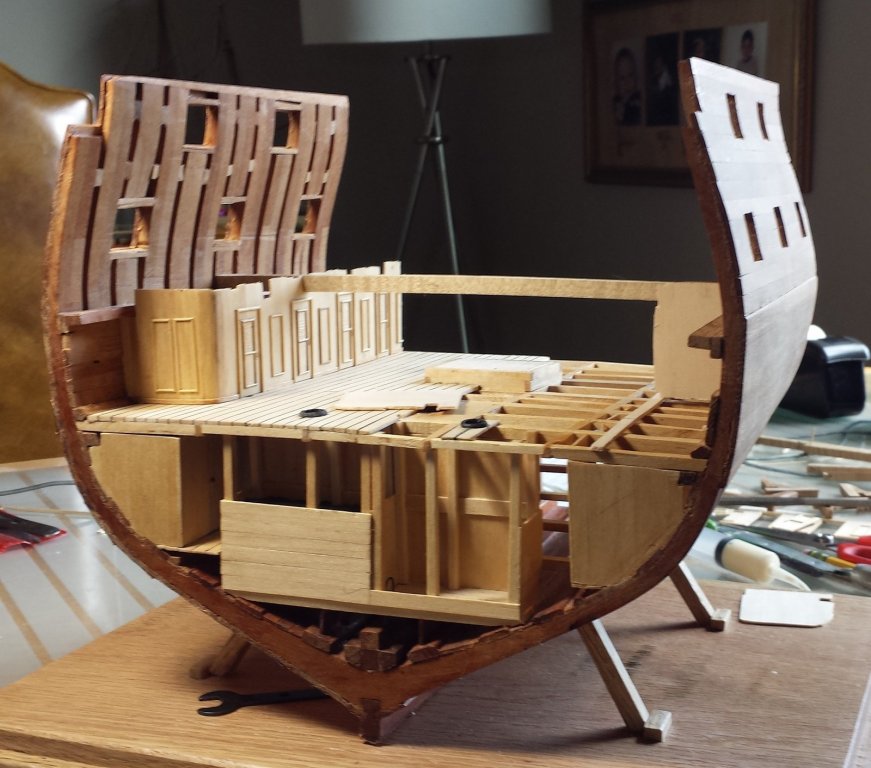
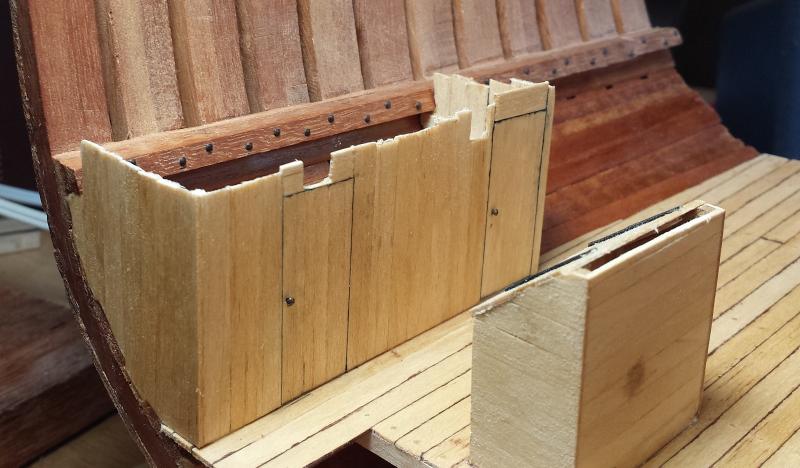
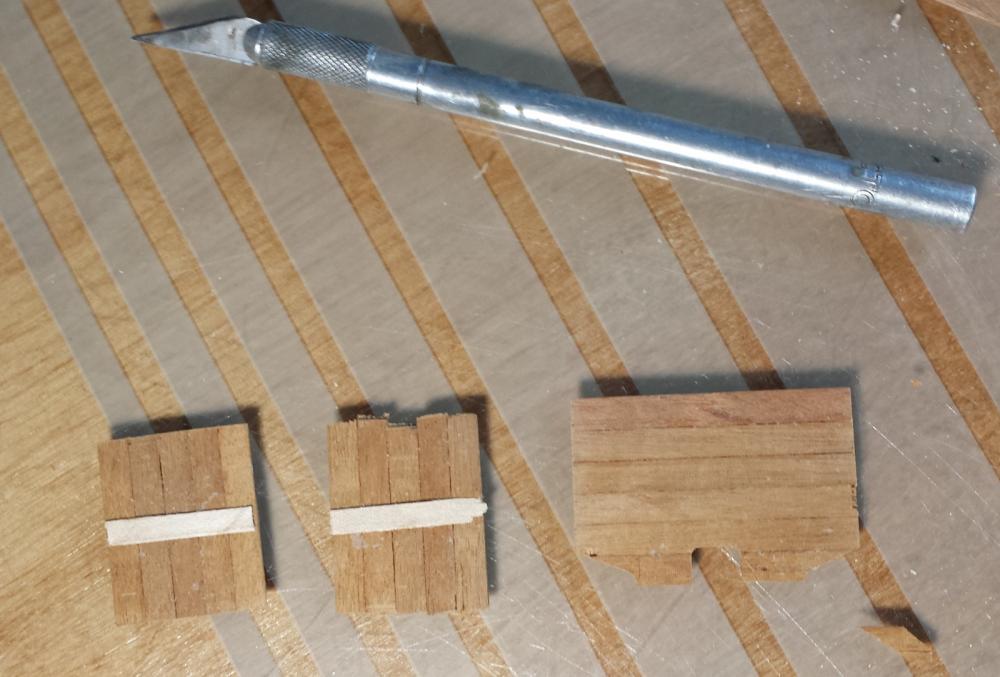
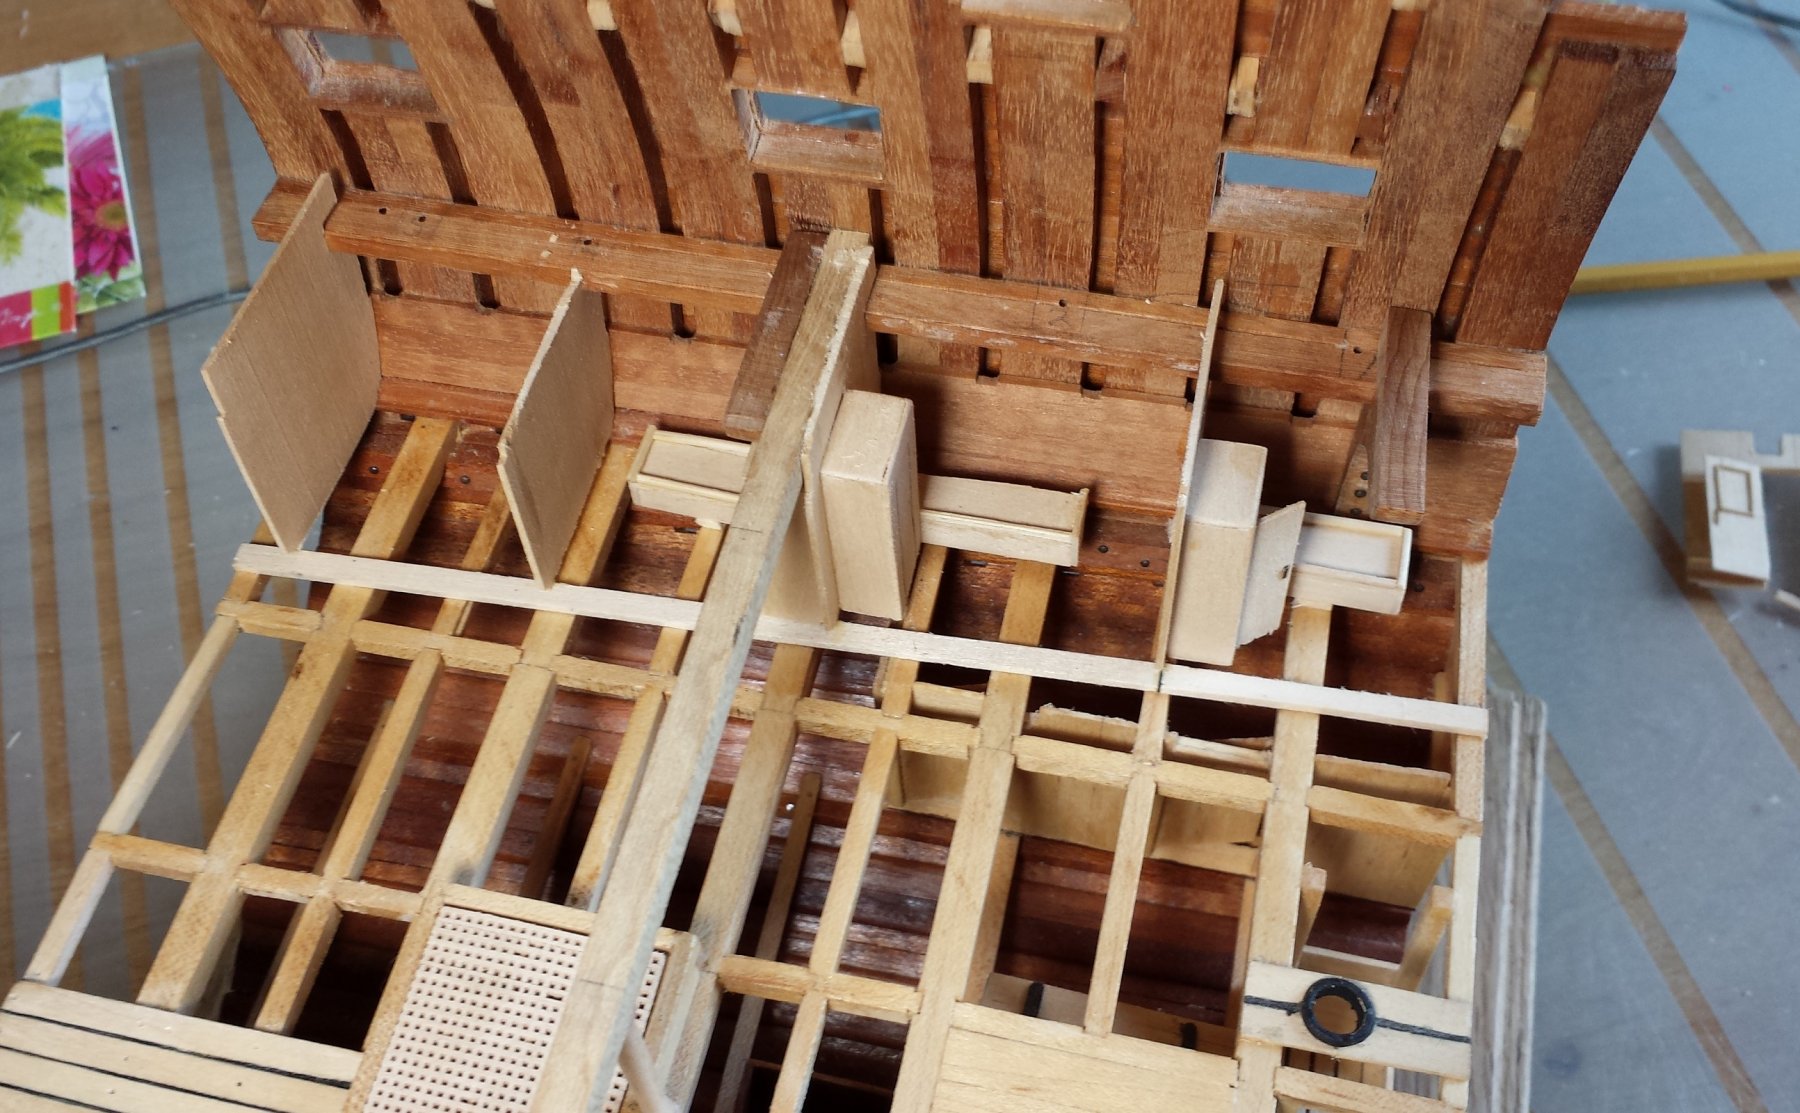
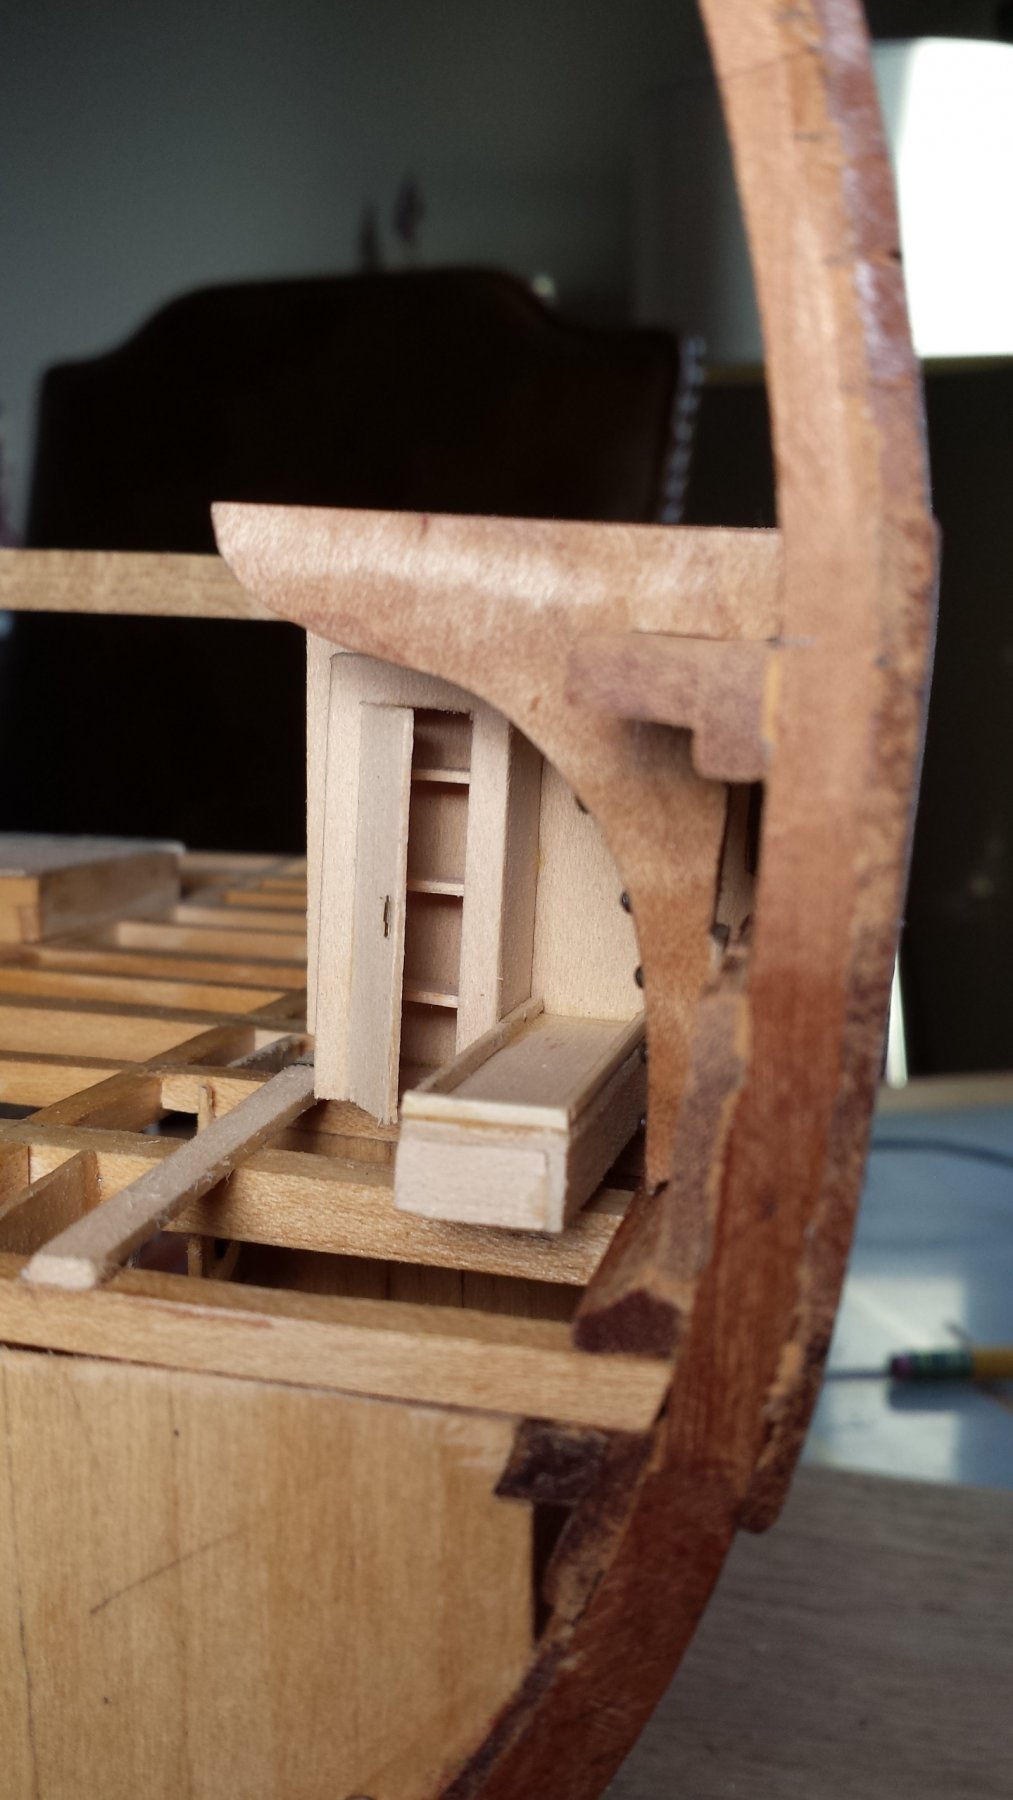
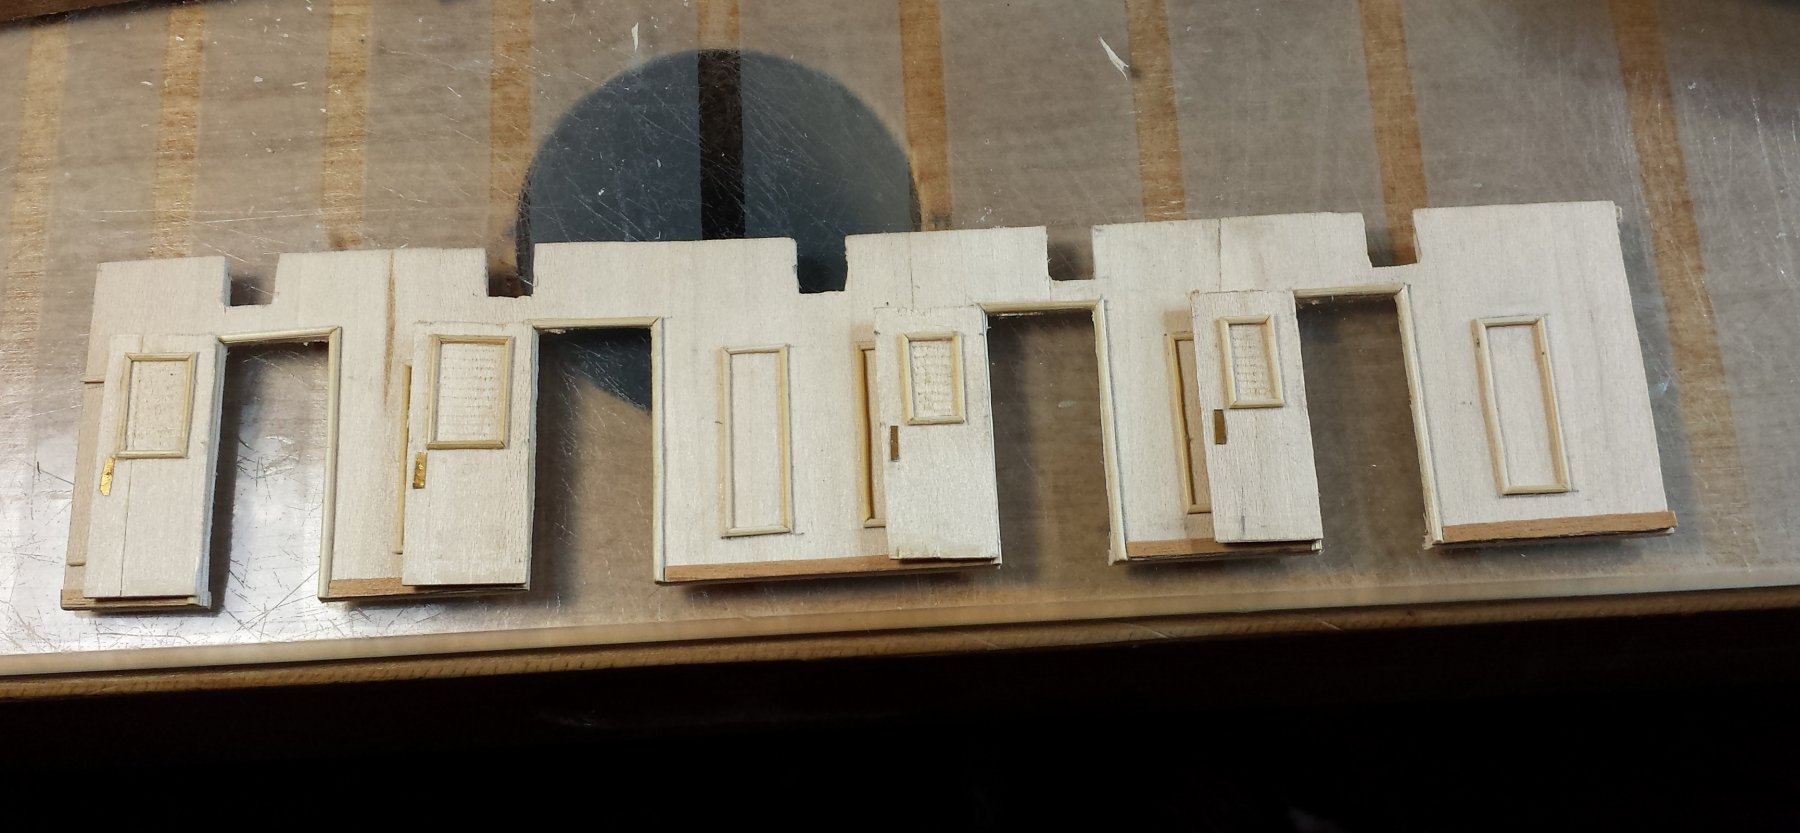
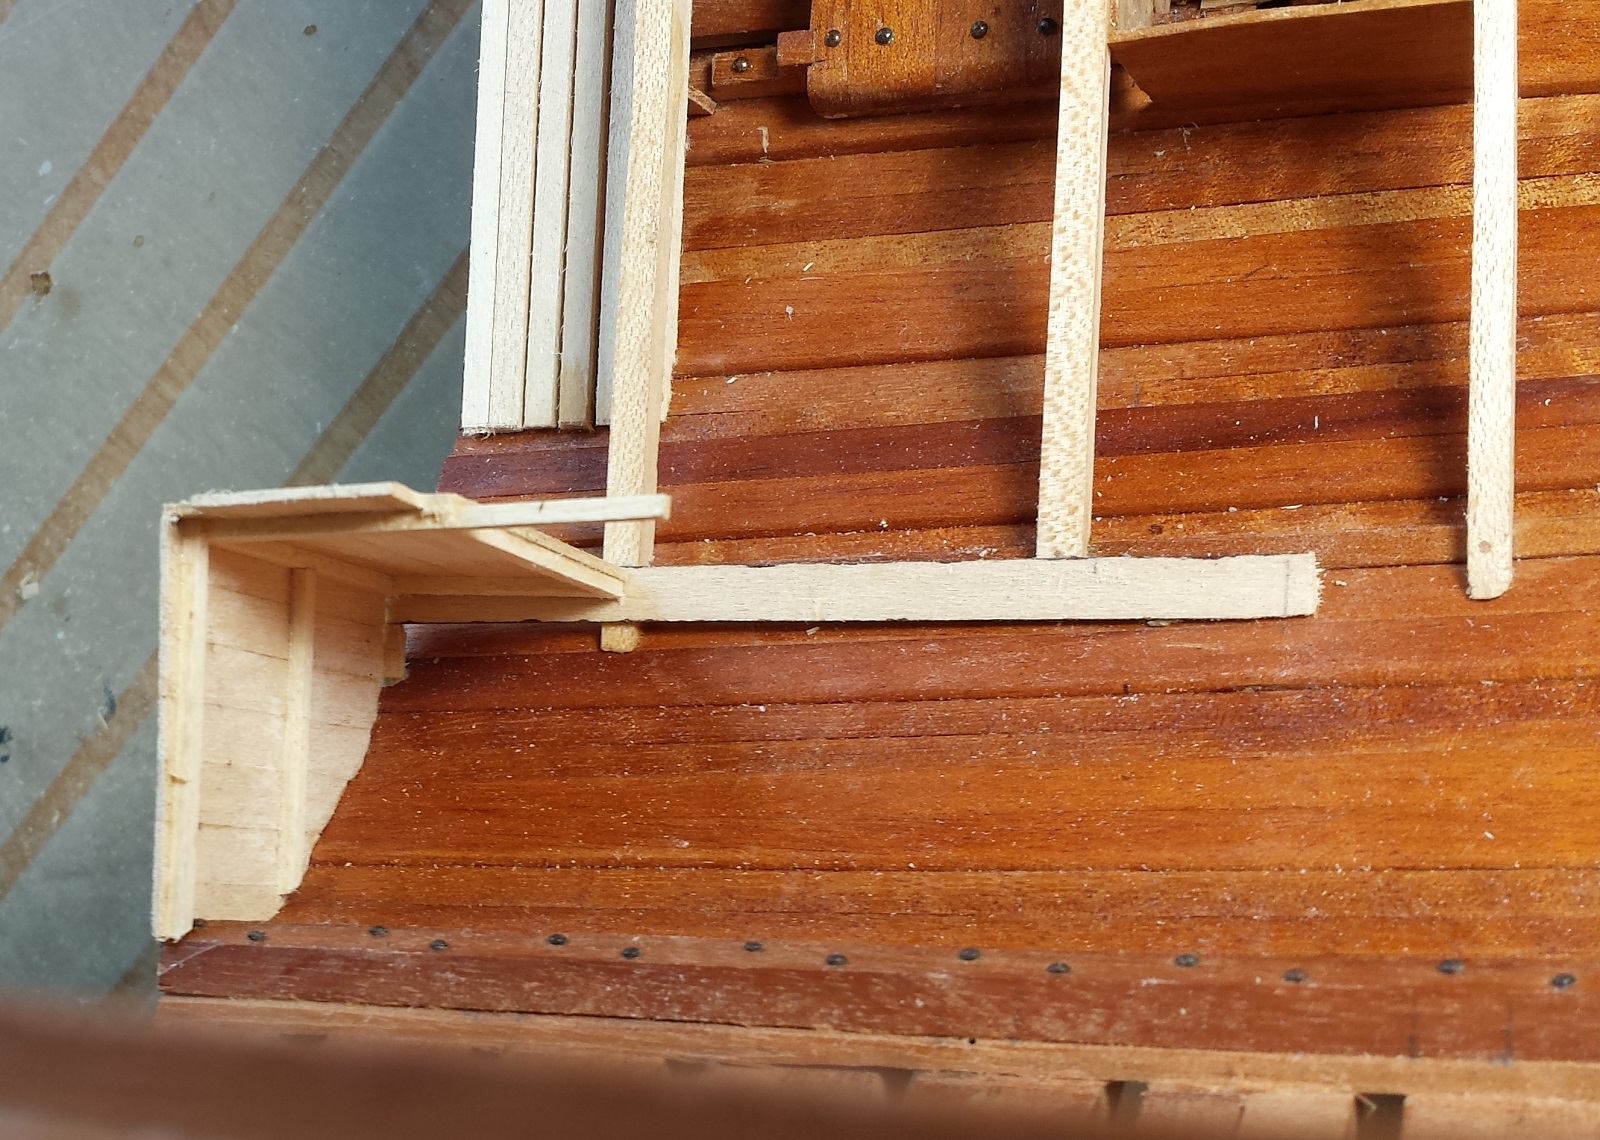
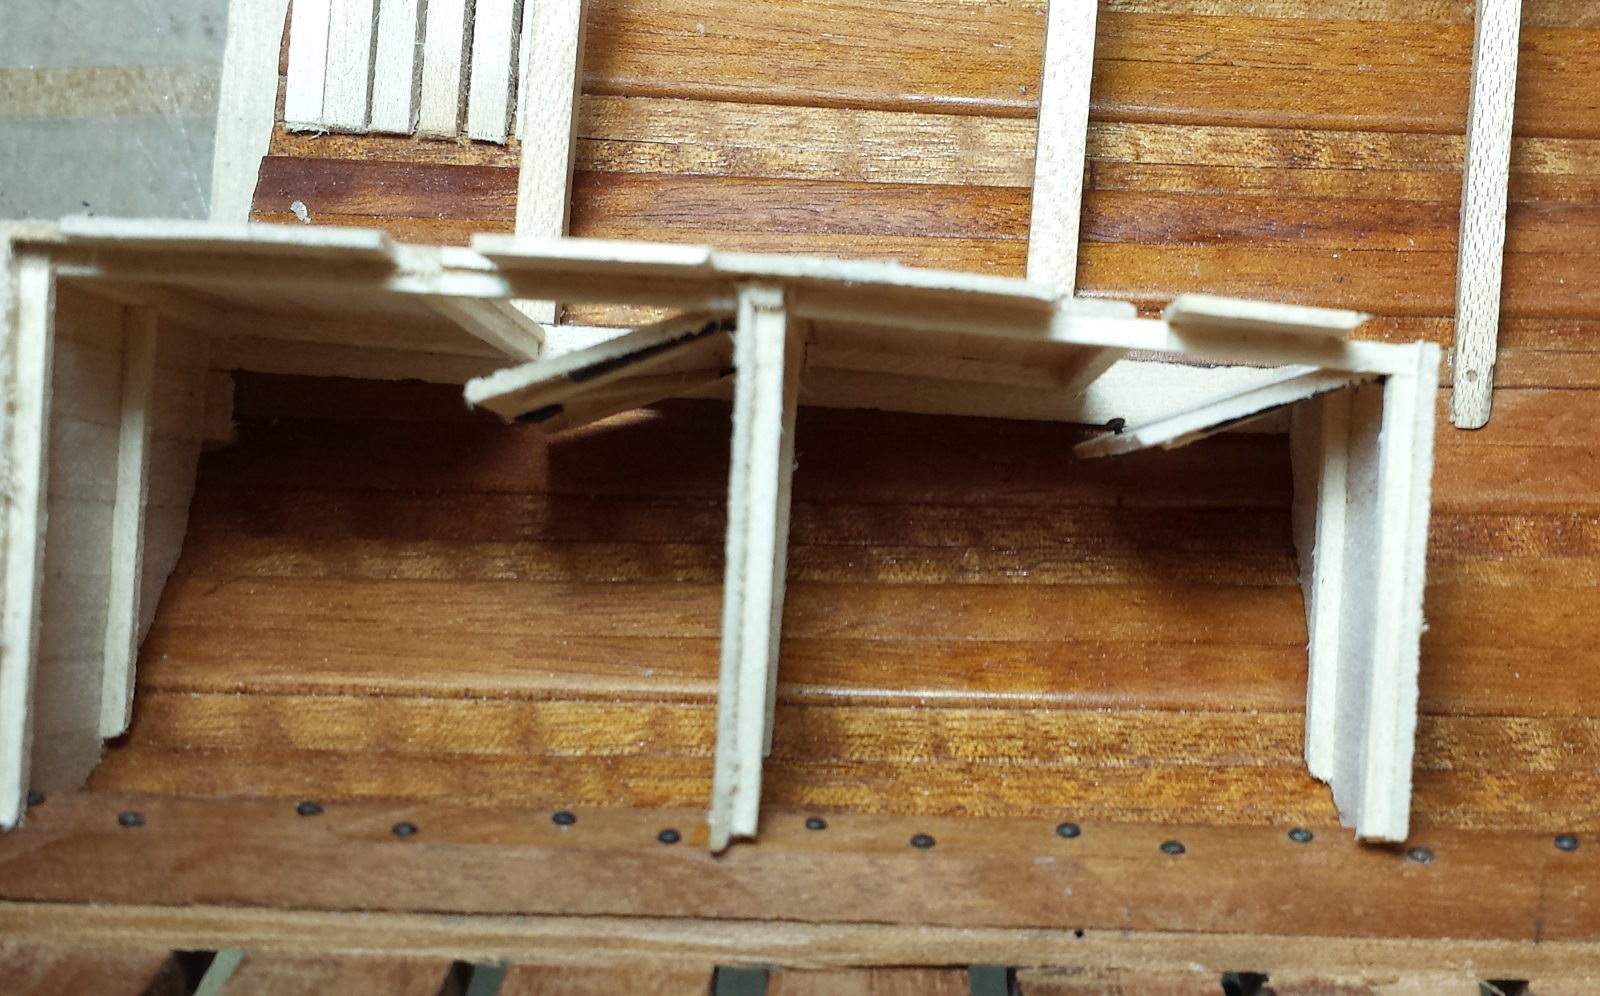
The port side storage compartments were done this weekend. Officers forward and captains aft. There will be no decking above these so they took a lot longer to do.
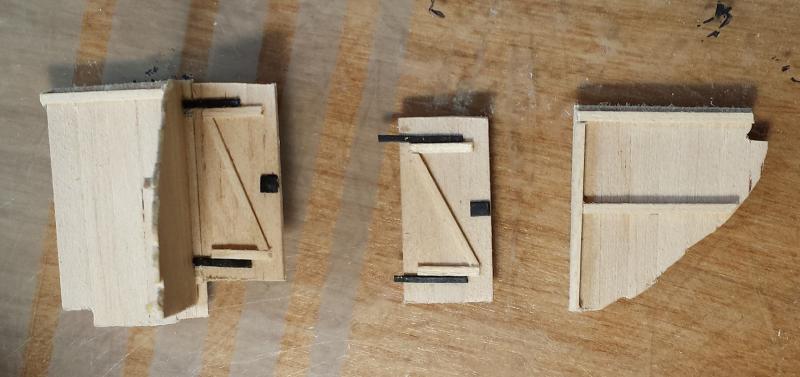
Some of the pieces for the walls and doors.

The forward wall installed. One floor plank installed so the walls have something to sit on and a way to align them.
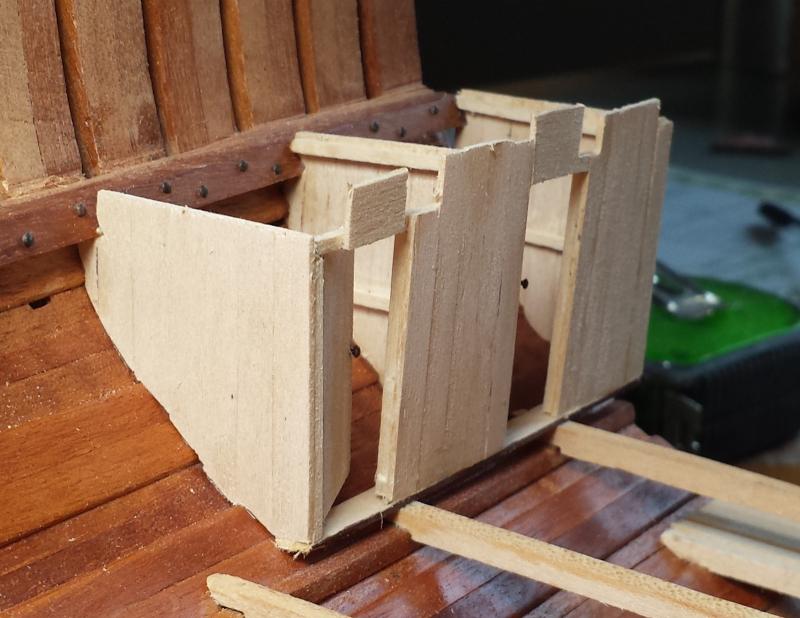

Everything installed. All they need is oil finish and cleaning up. When the deck beams are fitted there will be more tweaking them where the beams go over the compartment walls.
- mtaylor, Beef Wellington, Tadeusz43 and 1 other
-
4
-
Now for up to date information.
The next project is the right side store rooms. The commisioners stores forward and the groceries (literal translation) aft.

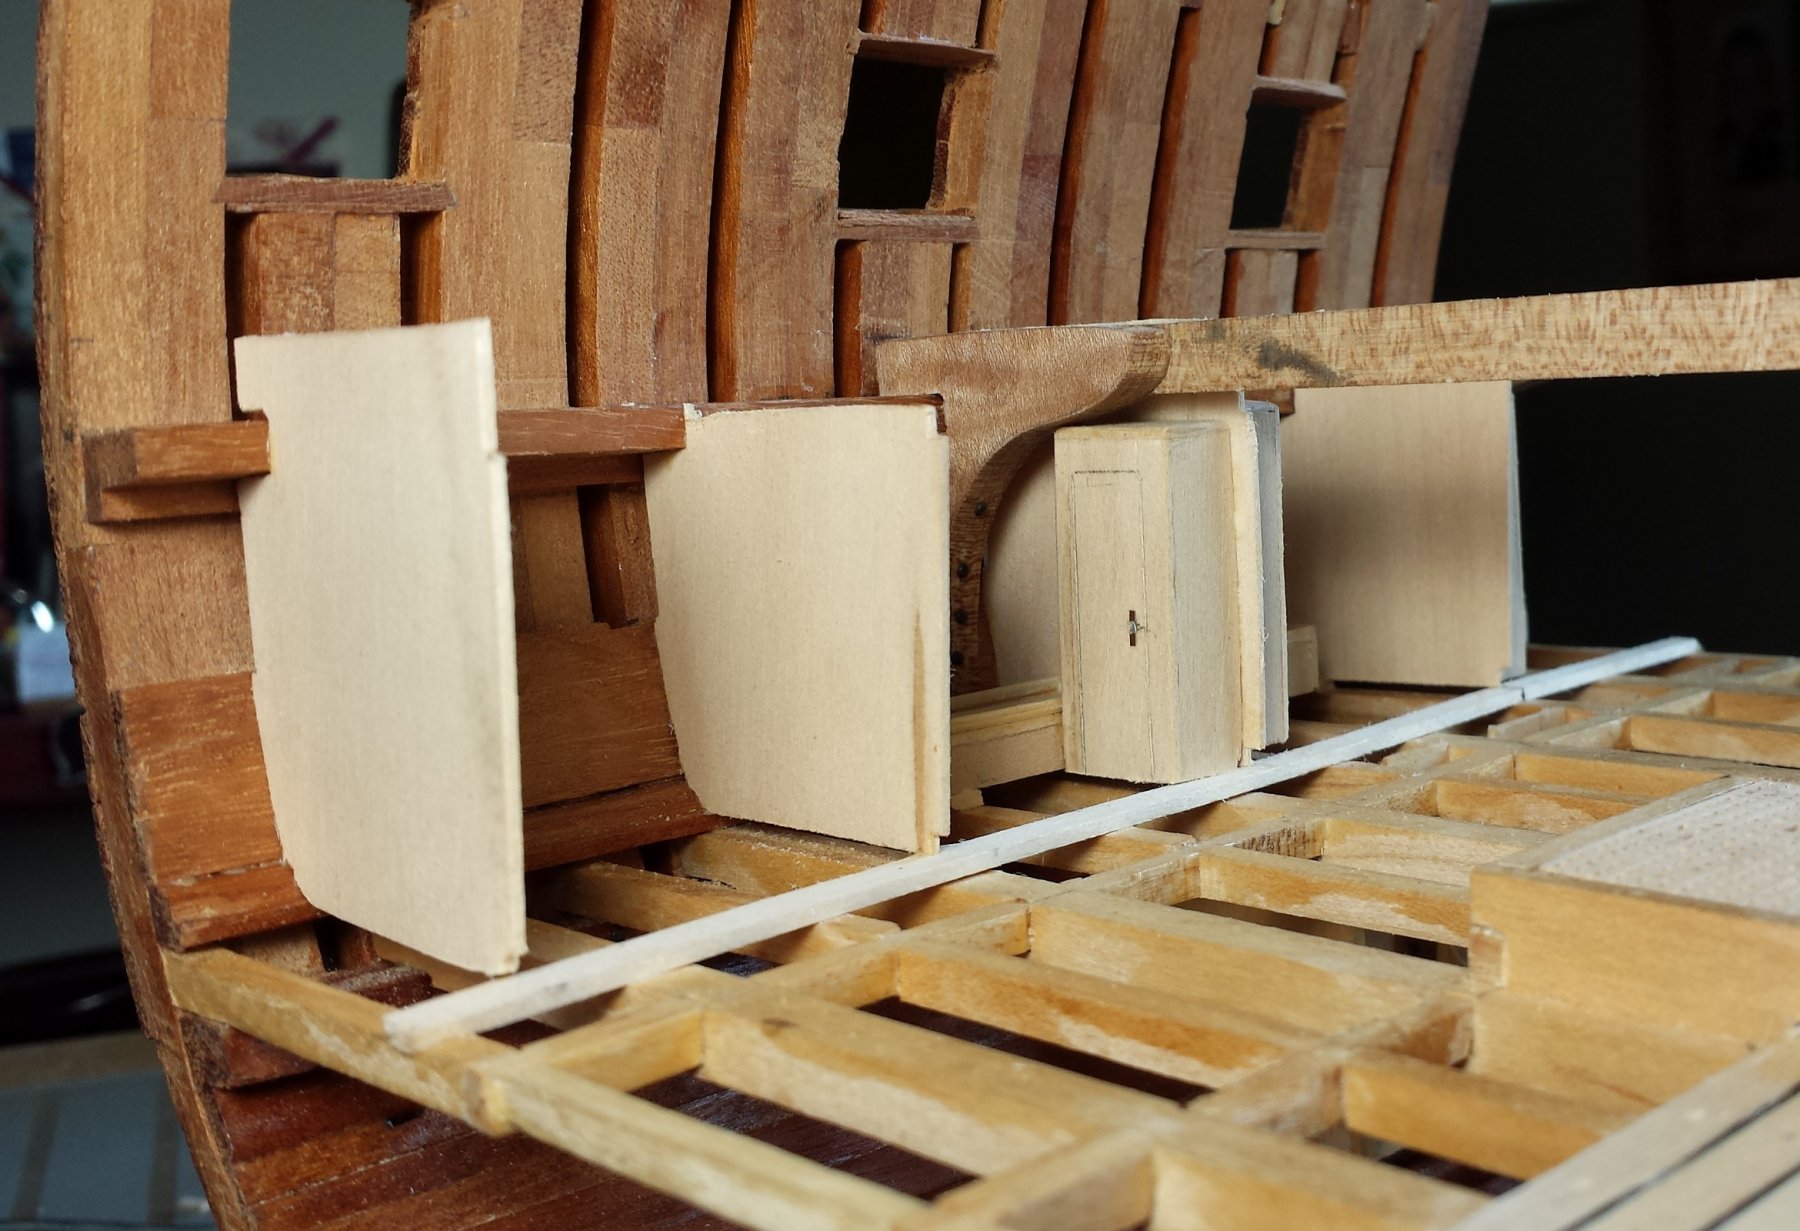
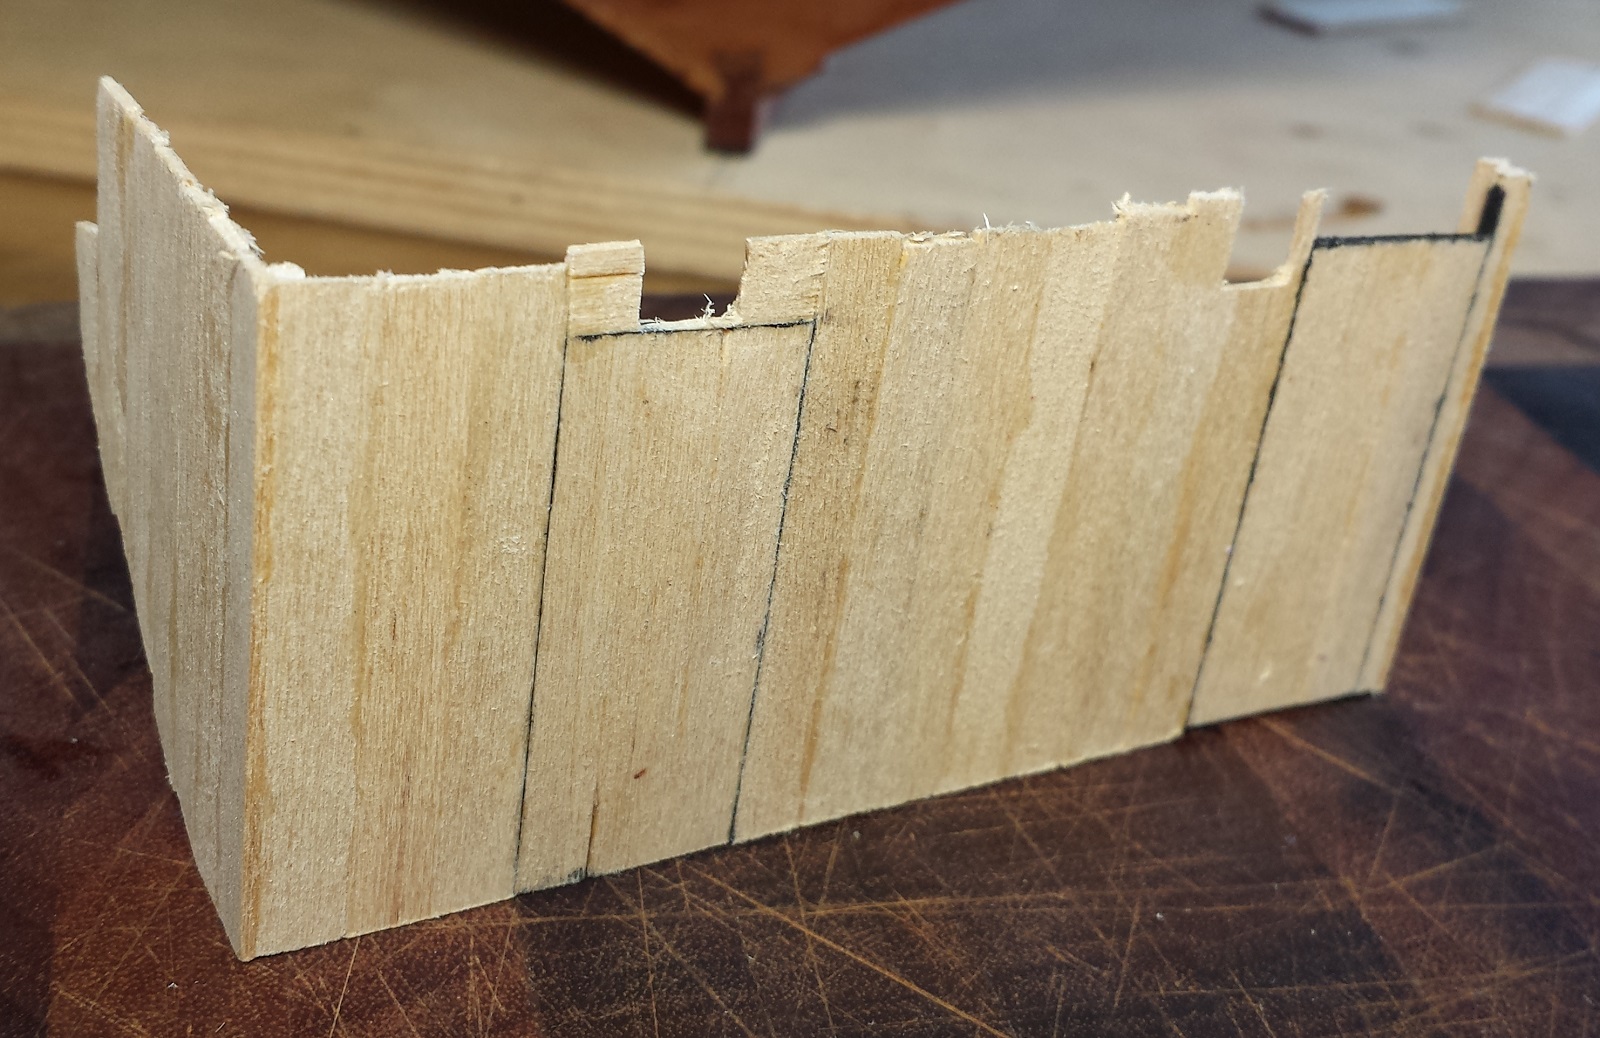
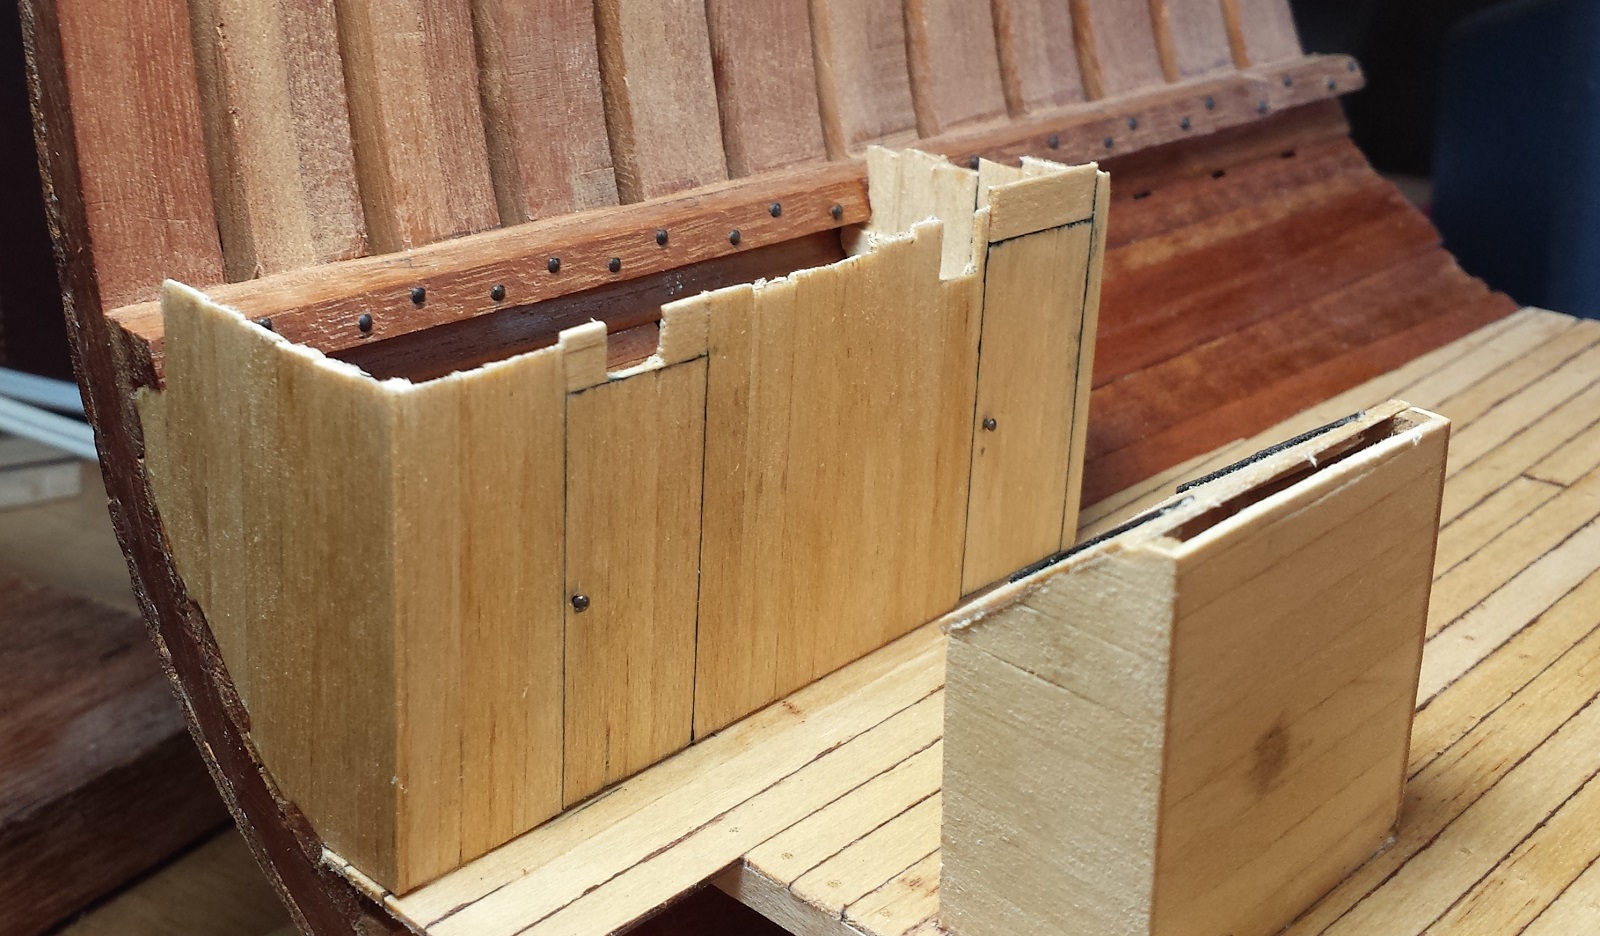
The outside of the storage compartments.
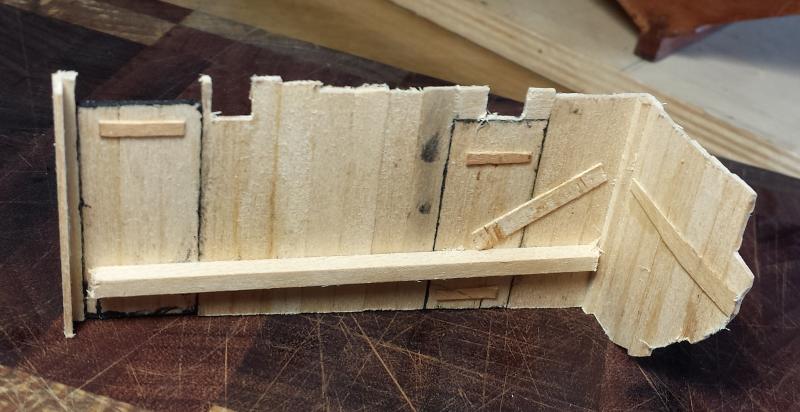
The inside of the compartments. The large square piece is needed to stiffen the side. That long a piece warped .
The door knobs are nails. The doors open inward so no hinges on the outside.

These compartments will be decked over so all that nasty work will not be seen.
The finish is sanding sealer and an oil finish.
That's it for now.
Mark
-
The shot lockers are finished. I decided to have both of them closed because I could not find the correct size shot (no. 5) to simulate 32# shot. The floor of the chain locker was next. Then the right shot locker and orlop deck planks.
That's it for last week.
Mark
-
Now it's time to do the shot lockers. I have learned from doing the well. These are being built and then will be installed. Did the right side first, it is closed so no interior details.

The shop wells are basswood and the hinges are card stock. Then they get an oil finish.
The right side dry fitted.
Thanks for watching.
Mark
-
-
-
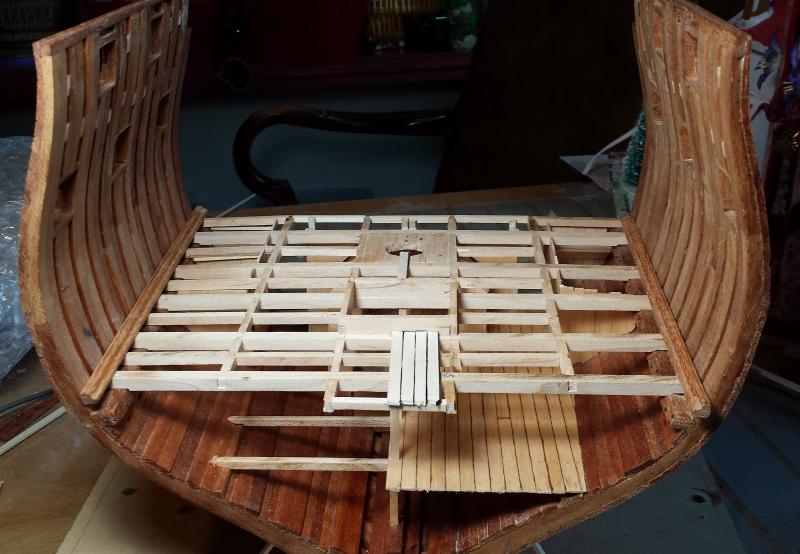
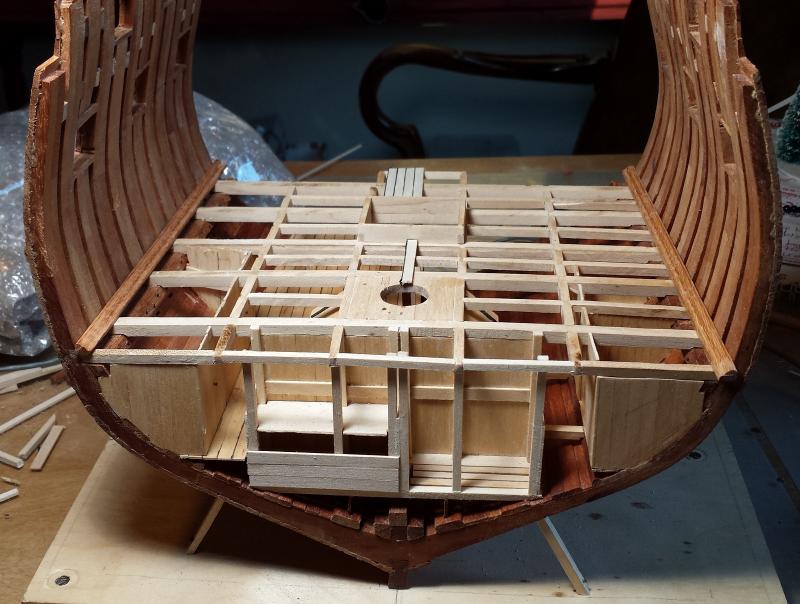
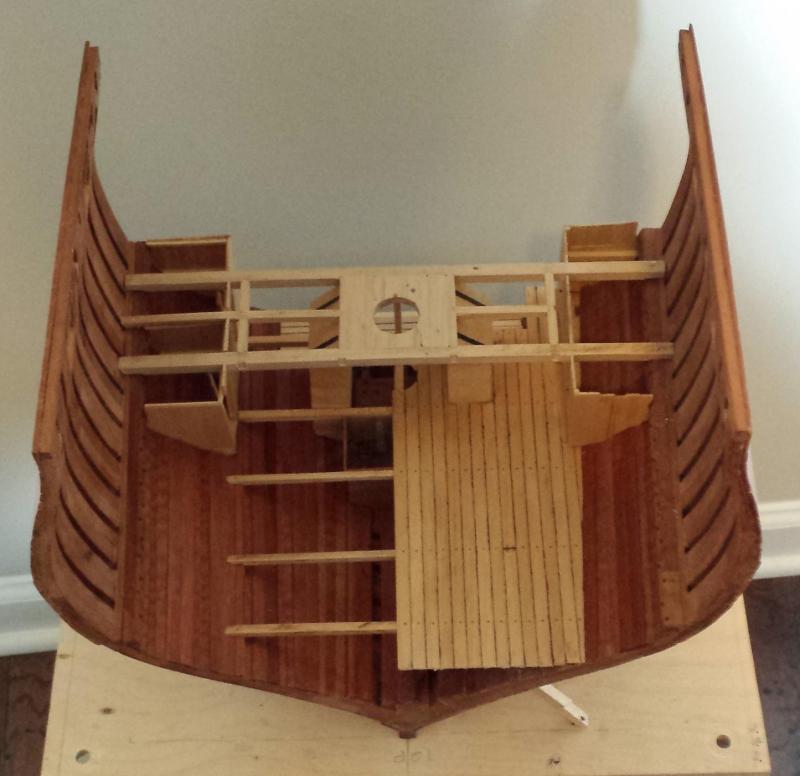
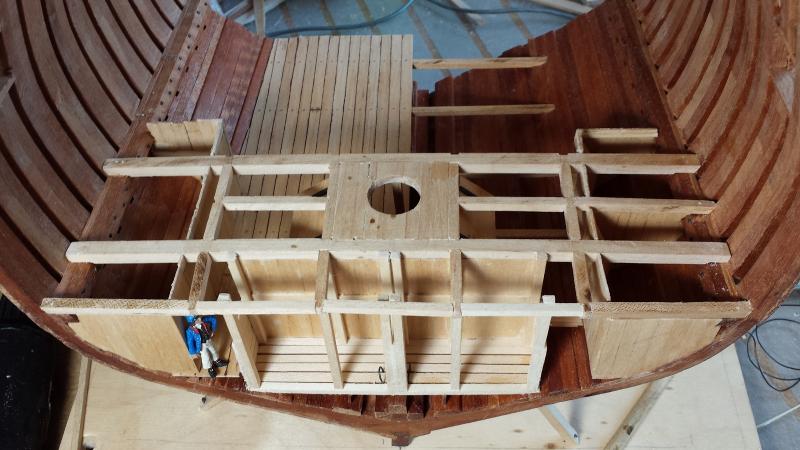
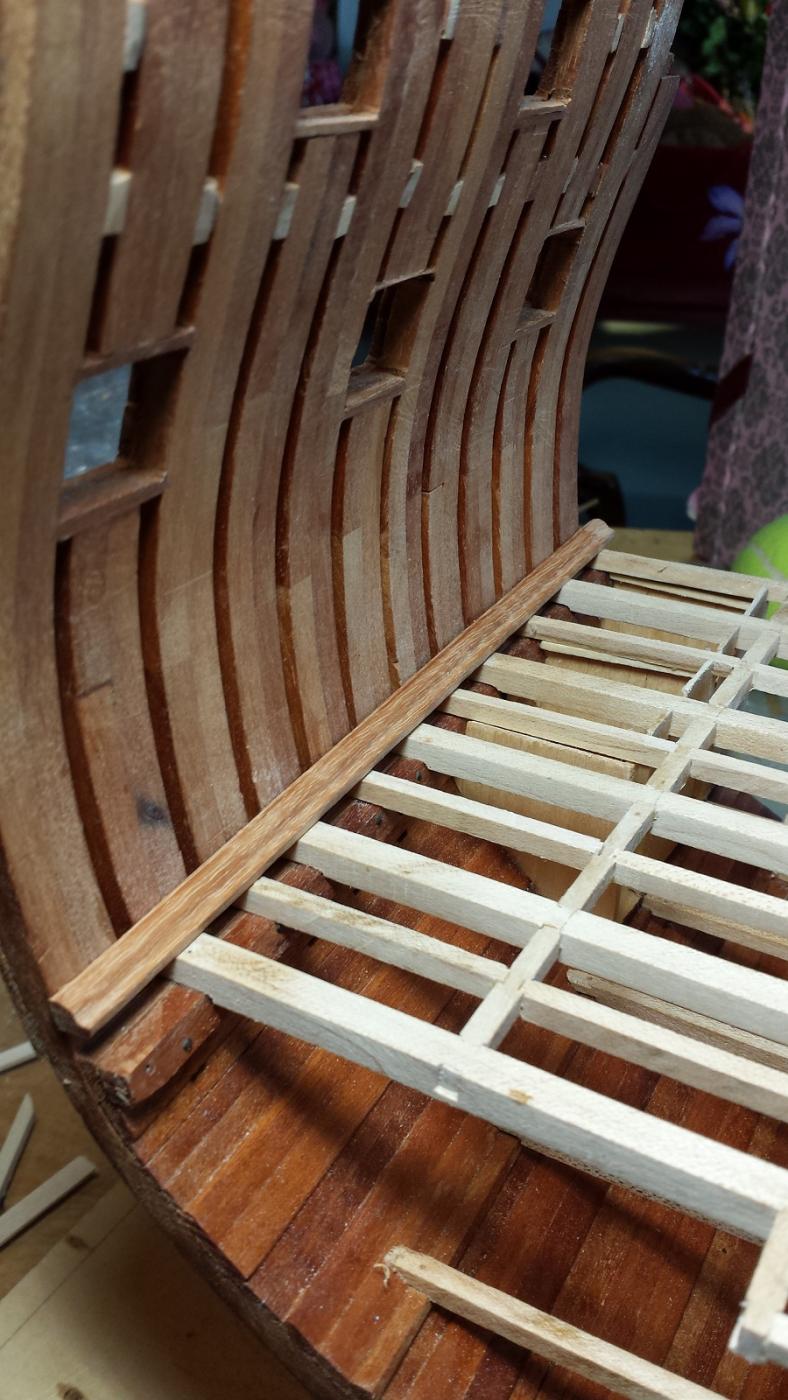
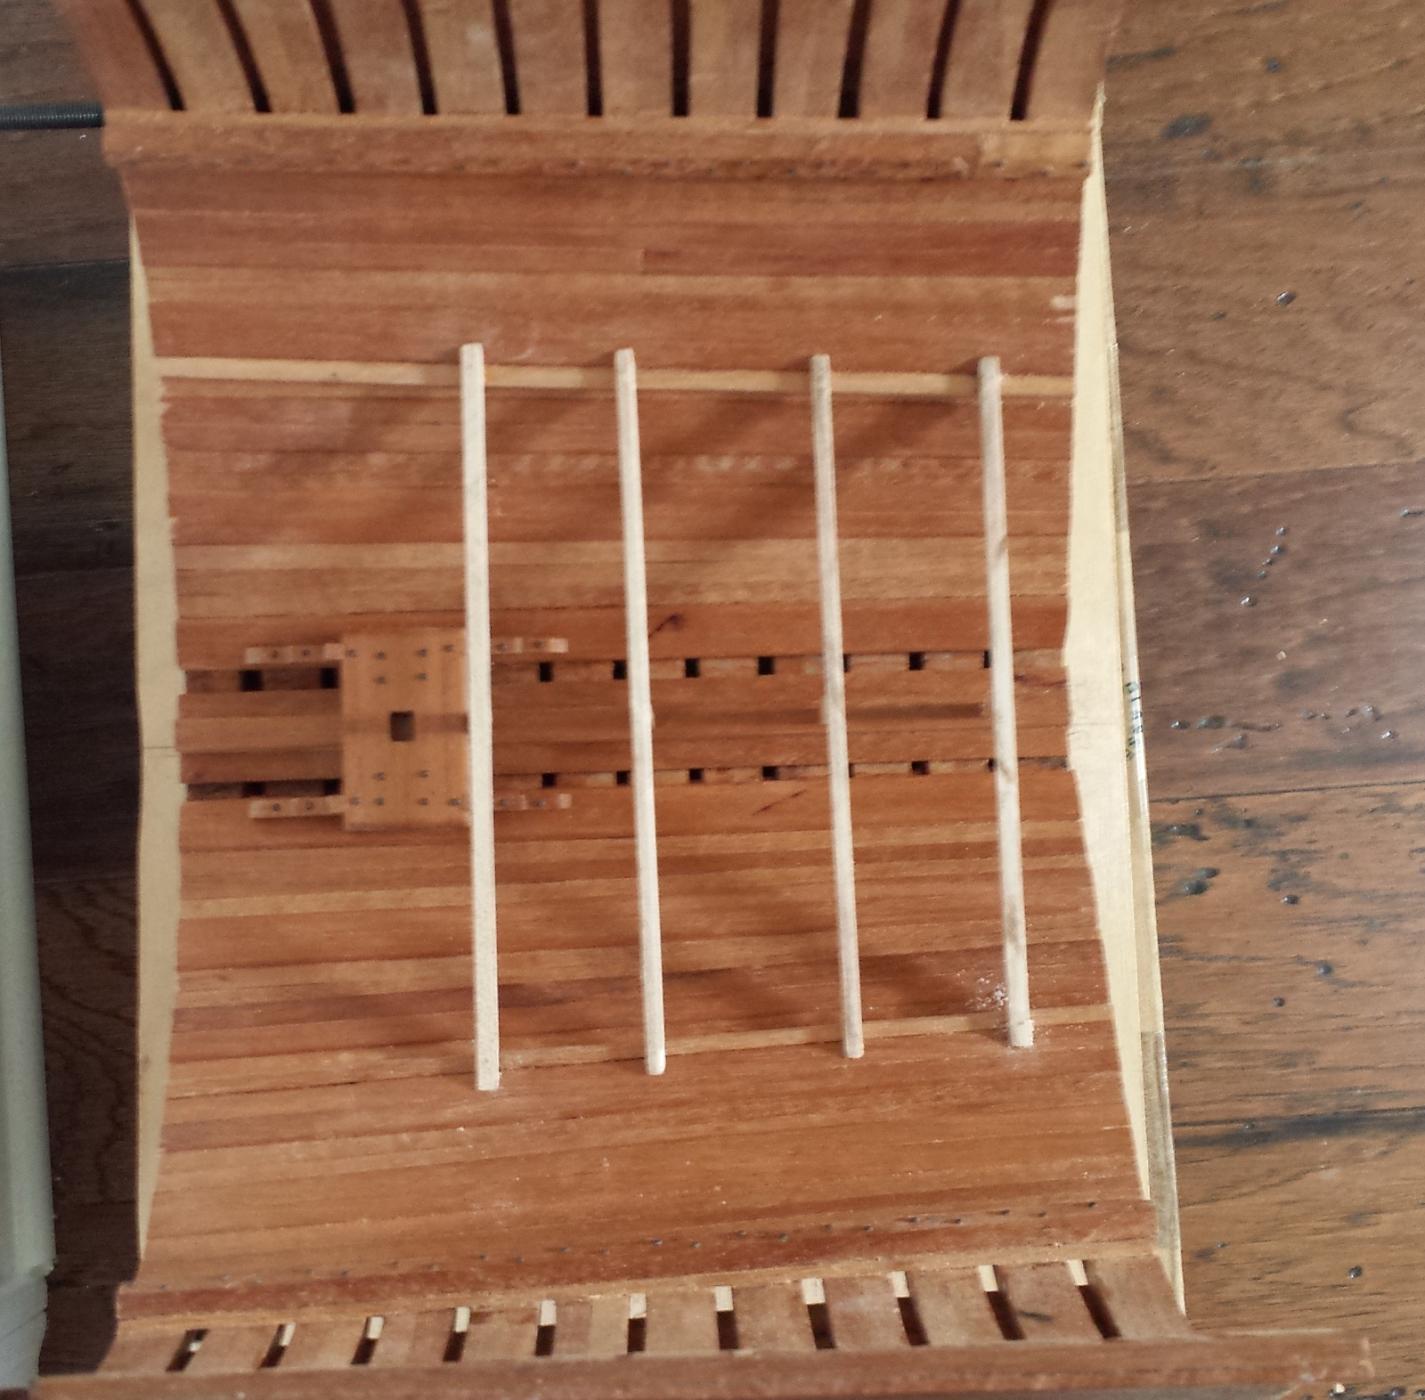
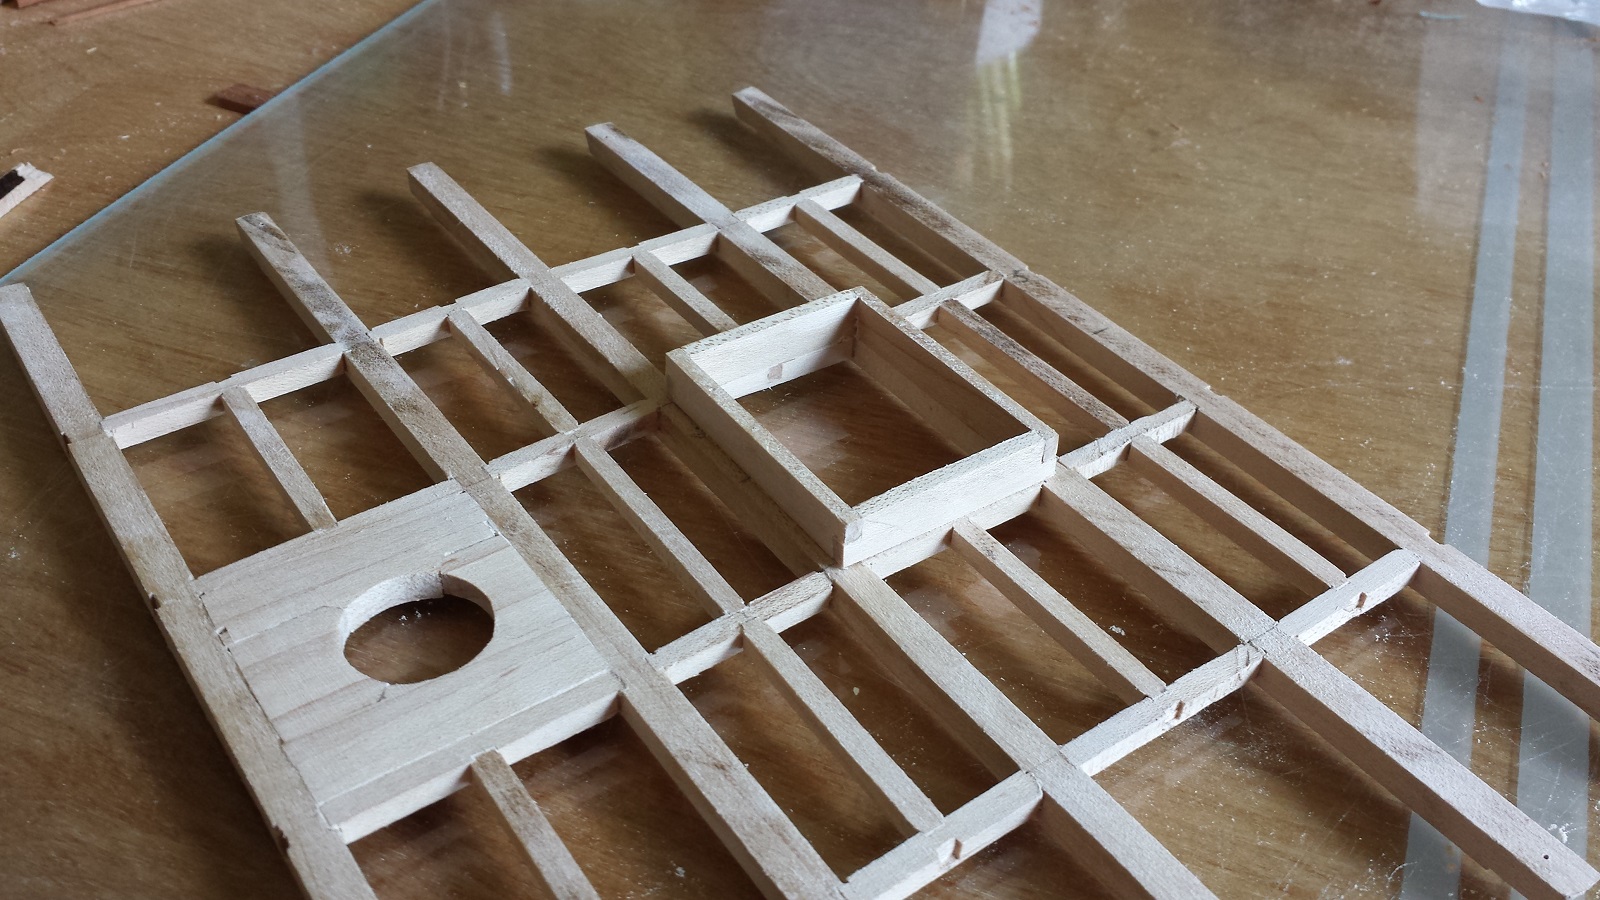
Orlop deck beams next. These are cut from maple and have no camber. The center post is the same size as the beams. Four of five installed.

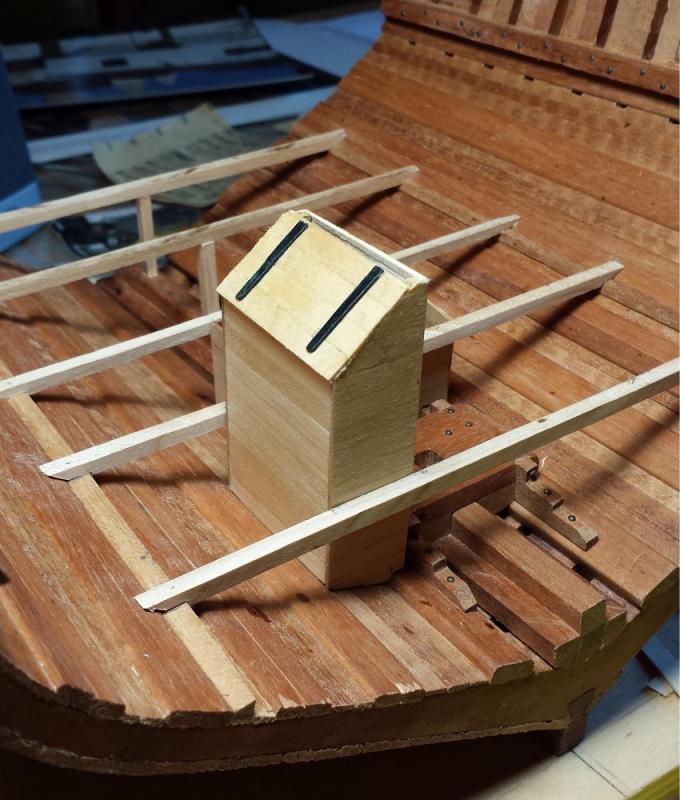
Before all the beams are installed I need to build the cistern. At least that's what it's called in Portuguese. It is the well where the elm tree pumps go. I assume it's there to keep big things from getting to the pumps and clogging them.
Starting the walls of the well. The light colored pieces are for support and will be on the inside of the well our of sight.
A good weekends work.
Thanks for watching
Mark
-
Six pieces of wood installed this weekend!! First the the coming (is that spelled right). I made them by cutting a piece of scrap the size of the opening them built the coming around it before installing.

Next the orlop deck hangers. Just two pieces of triangular wood. But the angle is slightly different along their length.


Orlop deck beams next.
Thanks for watching
Mark


Dom Fernando II e Gloria by muzzleloader - 1:50 - cross-section
in - Build logs for subjects built 1801 - 1850
Posted
Has it really been 5 years since I posted to this log??? Anyway here goes.
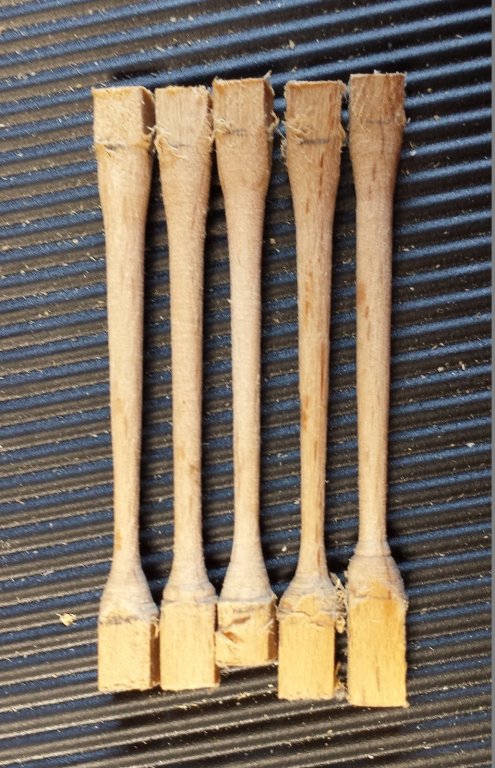
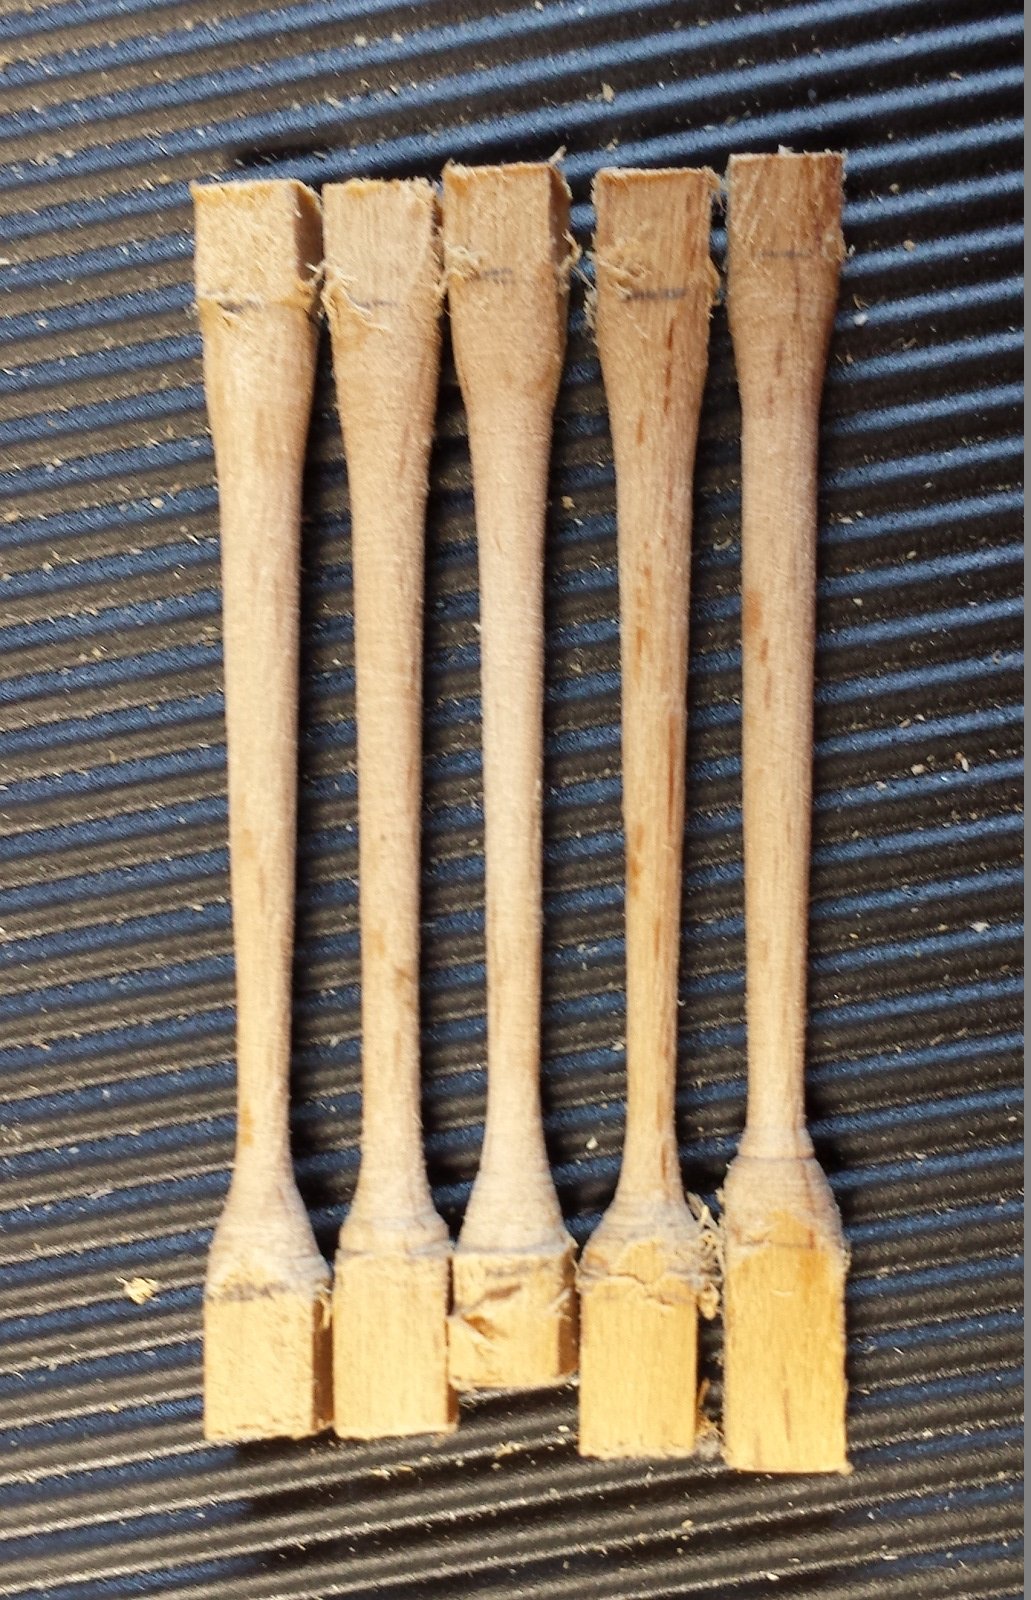
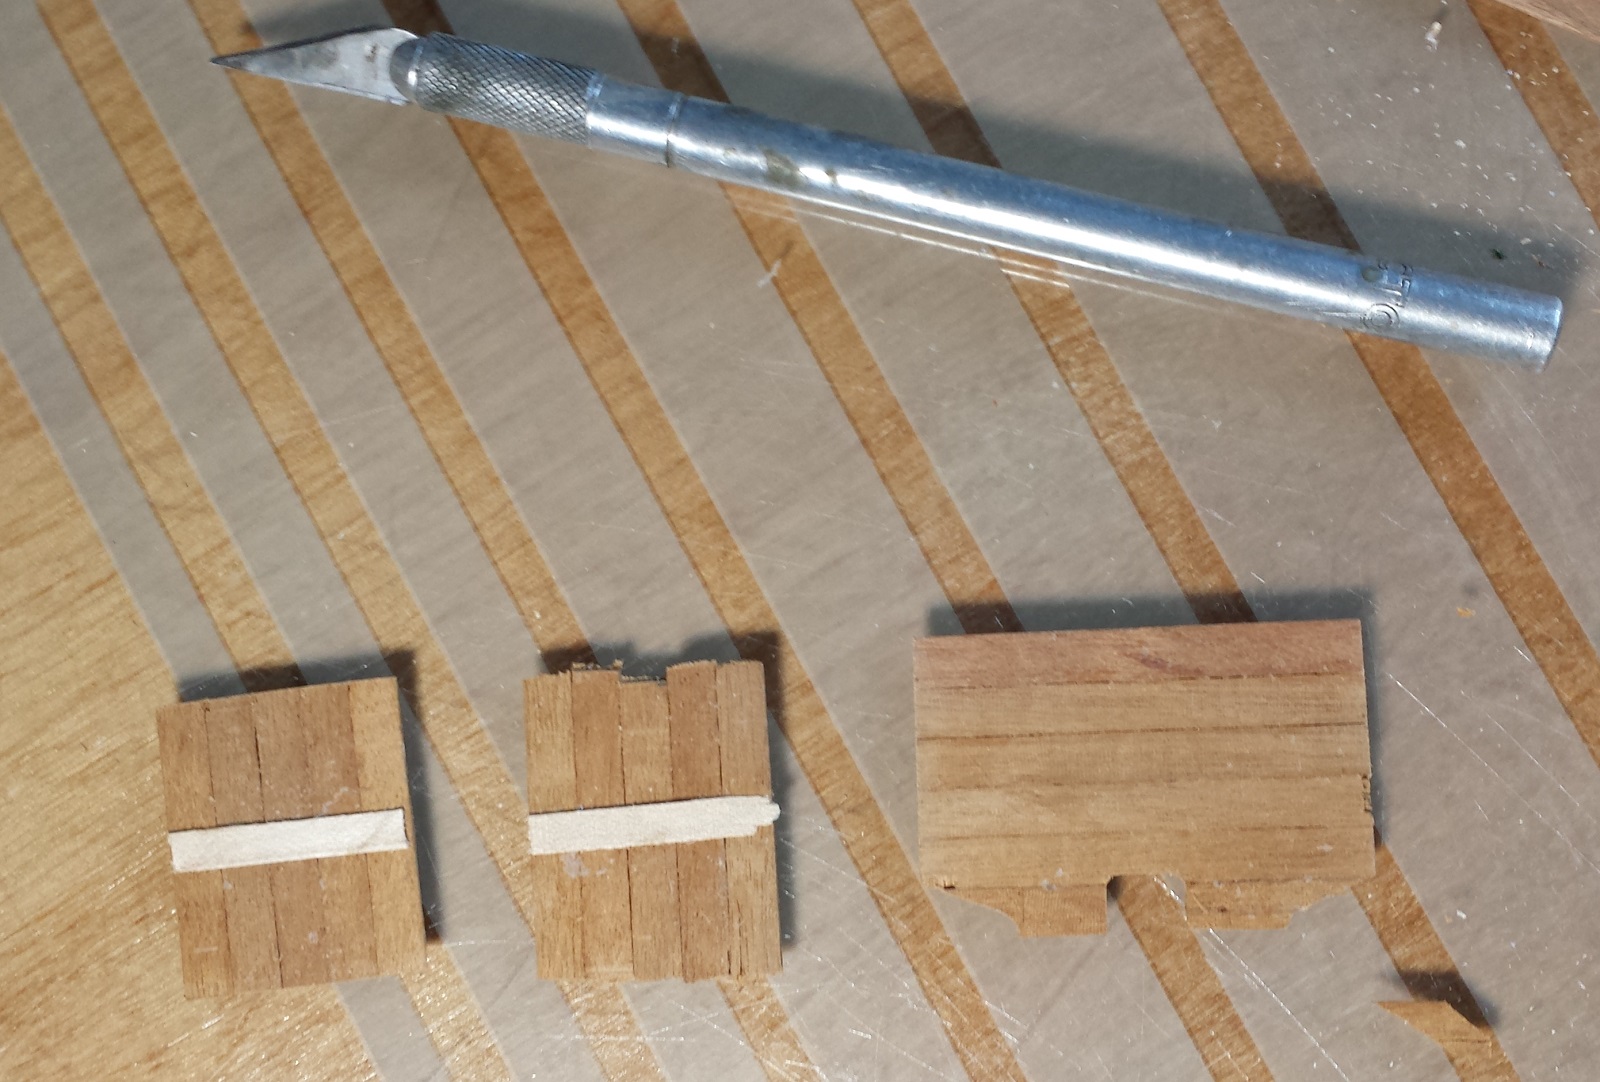
I started building the guns. I needed some wood that was close grained. I tried a couple and settled an dogwood.
These are two of the MANY blanks I cut.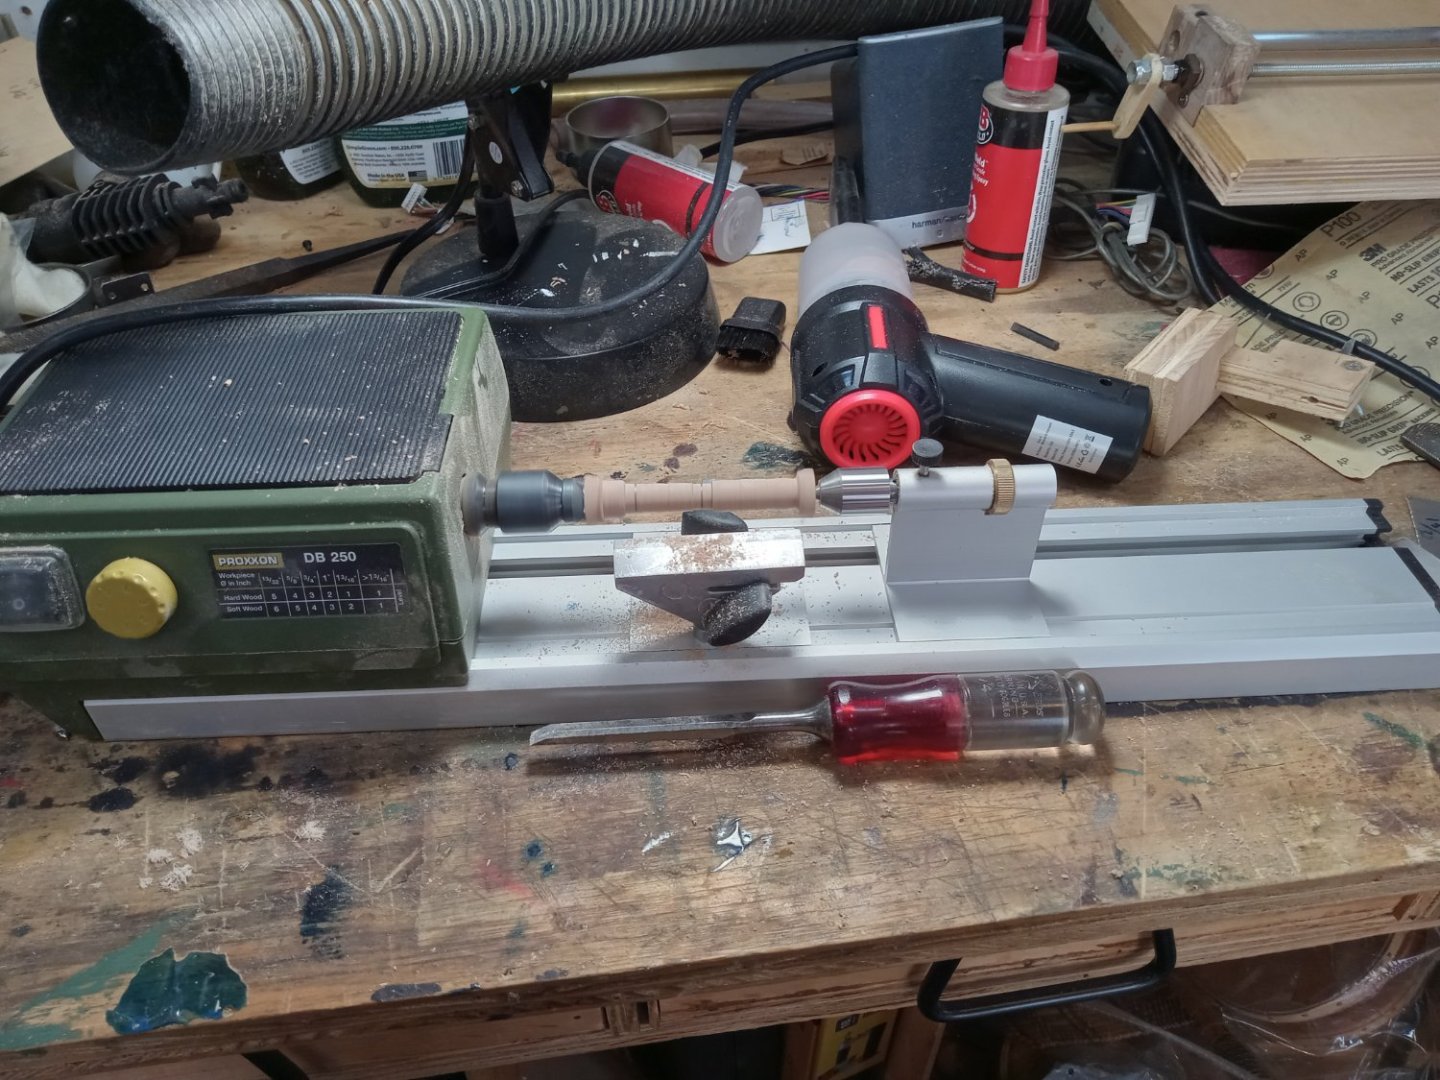
One of the cannon in progress. The chisel was used for removing large amounts of wood. I made a smaller one from an allen wrench for the fine work and finished with
jewelers files.
Ten good barrels. And a pile of firewood.