HOLIDAY DONATION DRIVE - SUPPORT MSW - DO YOUR PART TO KEEP THIS GREAT FORUM GOING! (Only 20 donations so far - C'mon guys!)
×


channell
-
Posts
234 -
Joined
-
Last visited
Content Type
Profiles
Forums
Gallery
Events
Everything posted by channell
-
 Good to be back and building again! The Pontos advanced set also includes stanchions... Just the thought of 'em induces terror and panic in me though! Call me a wimp but I'll probably just stick with the regular (Pontos) railings on this build. Bismarck's rails had an extra bracing pole every other stanchion; I was thinking I could cut those off the individual stanchions and add them to the PE rails for effect; it's on my list of things to experiment with anyway.
 -
Thanks Kevin... trying to put my all into this one and I appreciate the encouragement! Scaledecks advertises the deck as being specifically intended to fit the Trumpy kit so I'm thinking either they just messed up or the decks are really prone to shrinkage. I live in a dry area with very little humidity so it happens... but if the deck shrank, it did so perfectly even and with no warping. Oh well, at least it's still usable!
-
Hey all, made some more progress... I ran into a bunch of issues with the Scaledecks wooden deck; turns out it doesn't fit particularly well. First off, I noticed the width between the deck and the hull edges was gonna be very off; I thought I might have sanded the sides of the hull too much but now I wonder if the deck itself wasn't the problem. Both the bow and stern decks didn't fit properly either; the cutouts in the wood deck didn't quite match the corresponding moldings on the plastic deck. This pic shows how far off all the stern cutouts are; turret Dora and the molded deck fittings closest to it it fit OK but the further aft you go, the worse the discrepancy got... I have 3 unused decks for this kit but I really wanted to get the look of individual planks that the Scaledecks offering provided, even though it was by far the worst fitting of my options. Anyway, I decided it would be best to jump ahead and get the deck installed before painting the hull so I could try to even out the edges of the hull and integrate the wooden deck better. First I painted the barbettes, stairways ect in the final upper hull colors (Model Master Acryl Lichtgrau with Vallejo grey-black "baseboards"). I airbrushed the grey-black bases first, then masked them off and painted the light grey. Then I went to work getting the deck down... I had to patch the front of the deck in a couple of places and extend the "metal" of the prow to get everything looking good... Unlike other wooden decks I've used, this one leaves it up to the builder to integrate the separate pieces together... On the stern where fit was the worst I had two choices; split the deck into multiple pieces and assemble it piecemeal or shave it flat and rebuild the deck fittings... I chose the latter: Somehow it all came together and other than a fairly lousy fit on the barbettes of the aft most secondary guns it turned out all right. I think I might add some kind of "molding" around the barbettes to cover the gaps for that issue. And for fun, here's the newly "decked out" hull next to Bissy #1; there is a BIG difference between this PITA of a deck and your standard "stick on" wood deck in my opinion, worth the effort though I think it should have fit better for what it costs. Buyer beware. From here I can seal the deck, even out the "gutters" around the perimeter of the main deck and then mask it all off easily before painting the hull. Until next time!
- 265 replies
-
- 14
-

-
Yeah, I saw that one way back when... pretty impressive work. It's definitely the "Big Bissy" build to beat on the interwebs. I'm still putting through endless prep work on my build... cleanup on the propshafts and bow, from this: ... to this: And more hack-n-slash on the superstructure in preparation for PE: Lots of work that isn't immediately obvious (or quite finished) but it's still necessary in my opinion to get a really great build. Even though I keep building 'em, I've been a somewhat vocal critic of Trumpeter 1/200 kits as they come "out of the box"... they are basically like Trumpy's 1/350 kits blown up to 1/200 so they tend to take any small accuracy issues and multiply 'em. LOTS of details that are OK to be missing in smaller scale end up being glaring omissions in a larger scales too, such as the center anchor hawsepipe (completely omitted on the standard kit). This means lots of extra work and additions if you want to end up with anything better than a bathtub toy. Still, I think it's fun to rework these monsters into something really cool... don't know for sure if I've just been sucking up too much sanding dust but I feel like the shape of my modified hull helps my version of the kit take a large step away from "toy" and towards realism, which makes all the work worth it.
- 265 replies
-
- 11
-
-
Good to hear from you Kevin! I saw your finished Bismarck... she turned out amazing! Gonna finish one this time, I swear...
-
Made more progress this weekend... My hull "remodel" took way more work than I thought it would... looking forward to getting the hull painted up and diving into the more fun stuff to do above the waterline.
- 265 replies
-
- 11
-
-
The underwater volcano didn't erupt and the back section sheared off as the Bismarck sank. When it got to the bottom, the ship hit the slopes of an underwater volcano like a ton of bricks and caused an underwater avalanche, then ended up digging a huge trench through the mud before coming to a rest well down the slope. Not as fun I guess... but it's interesting that Bismarck ended up on the bottom more or less in one piece. All the other sunken WW2 battleships in deep water seem to be just heaps of unidentifiable wreckage. I suppose it's because they imploded as they sank but Bismarck was reportedly scuttled by her crew at the end to stop the Brit bombardment in the last battle. Would love to see a well done Bissy wreck though... that would be a cool project!
-
... Like I said earlier, I'm going for broke on aftermarket add-ons: Got the complete Pontos advanced set, a KA MK 1 set, all the resin Veteran models DKM sets and a bunch of other random bits + whatever I need/want to salvage from build #1 to work with. I'm especially excited about the scaledecks wood deck: The individual planks are printed onto the wood rather than burnt on with a laser, giving a far more convincing result than before (KA deck left, Pontos deck middle and Scaledecks right) In between bouts of sanding the hull I've also been preparing the first tier of the superstructure for photo-etch heaven... or hell, depending on your standing with the stuff! I did a couple of PE vents just to make sure I could do them... fiddly stuff but they are gonna look great in the end. Finally, did some work on the propshafts/rudders: And some "eye candy" with the messed up superstructure of build #1 to give me hope for the future: More to come...
- 265 replies
-
- 13
-
-
My first job has been to improve the shape of the kit hull to make it look closer to the real thing while still allowing myself some artistic license and not getting too bogged down in making it 100% exact. In the end, aside from simply chasing accuracy in scale I guess it's really all about making the model more "mine" instead of the work of some nameless grunts and a huge injection molding machine. Here's a smattering of Bismarck hulls to illustrate: Top is a 1/100 fiberglass Bismarck hull, middle is my original hull and bottom is the hull I'm gonna use to finish this build. I used the plans of the 1/100 version scaled down as a guide to get a fair approximation of the hull shape and built up/shaved down the hull from stem to stern to match the plan profile using reverse cross-sections as a guide. I also replaced the bow portholes by drilling fresh circles in styrene sheet and inletting them into the hull: I did this because the kit portholes are warped due to the curvature of the hull and the realities of molding the hull in 1 large piece. I was able to drill and grind the stern portholes from behind to get the same effect: I also re-profiled the stern itself as the kit interpretation is too sharp and narrow.
-
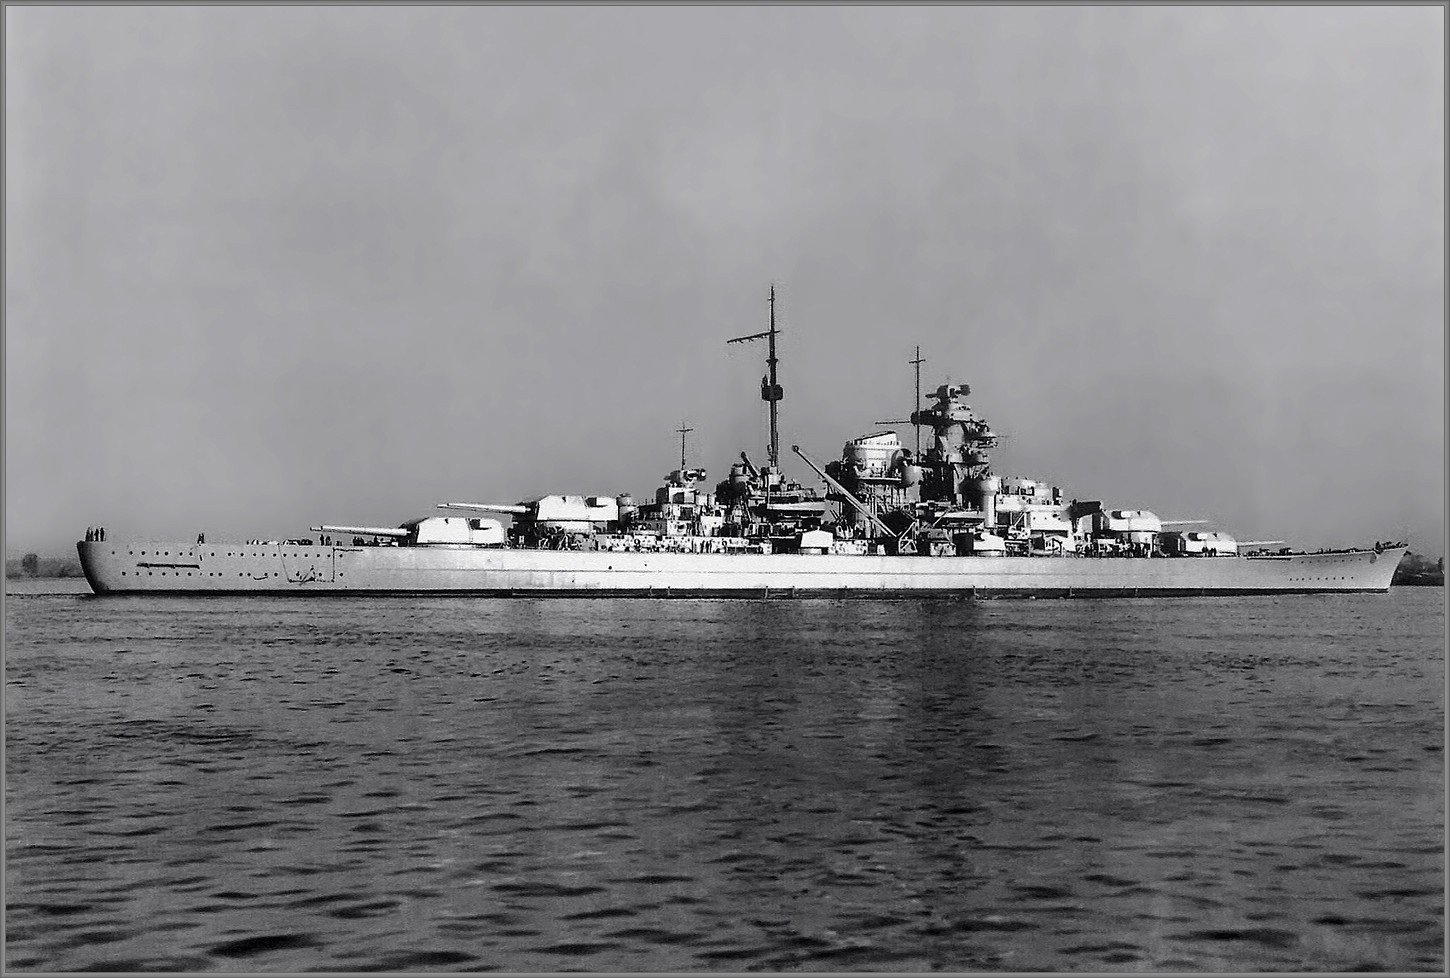
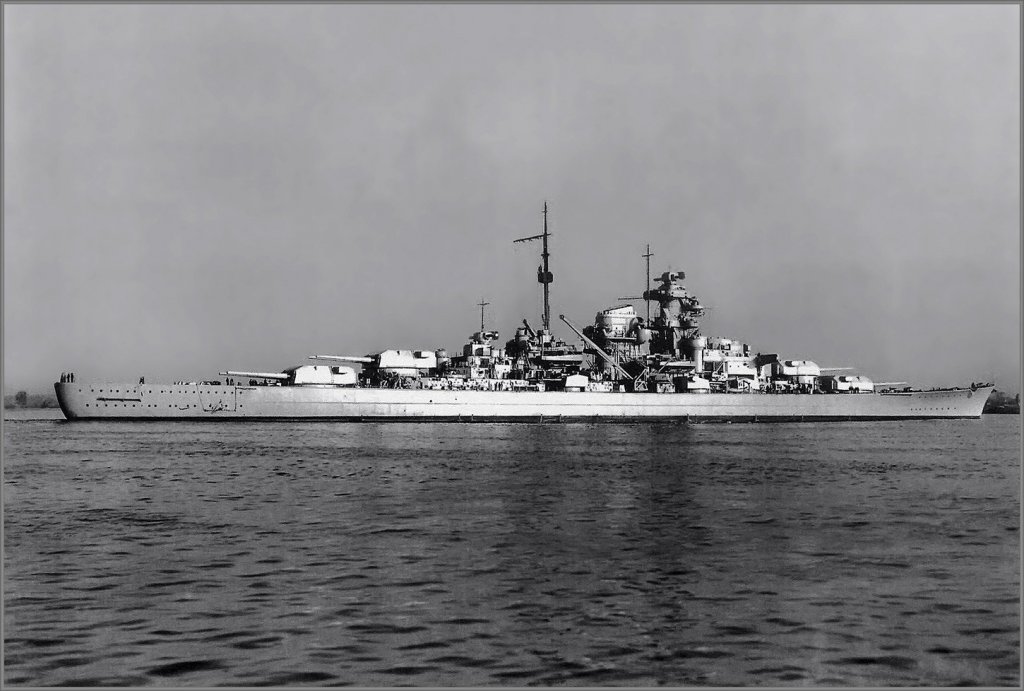
I'm bringing this project back from the dead if that's OK with y'all. I'm also doing a log on another site but I thought I'd share my misadventures here too for those who are interested. 😁 I've been through a rocky past few years when it comes to scale modeling... I've started several ambitious builds but only finished one (a 1/200 HMS Nelson) and ran into enough frustration/burnout that I ended up boxing up my modeling stuff and walking away for quite some time because of it. (edit) Here's a couple of pics of my Nelson, just for fun... Anyway, the world spins in circles and me along with it... The bug has bitten again and I've come back refreshed and renewed with an urge to succeed where I failed in the past... and I'm restarting where it pretty much all began for me: superdetailing the Trumpeter 1/200 Bismarck. The original subject of this thread is pretty much trashed... I accidentally dropped it in an icy self-storage parking lot during a move about 5 years back and it's been sitting in a box getting even more broken and loosing parts ever since. Luckily for me, I'm a big spender and bought 2 of these kits back then... the aftermarket has since put out a metric crapton of add-ons for this kit which I've collected a lot of over the years too. Here's the main plan... I'm still aiming to do Bismarck as she appeared late in 1940 with an emphasis on doing a clean and extremely detailed build. There were quite a few minor improvements/ completion of elements of the ship and paint scheme changes made to the Bismarck between the fall/winter of 1940 and Operation Rheinübung the following spring and I'll point them out as a go along. I'm expecting a long-term project of a year or so... we'll see how it goes.
-
Veteran models does incredible resin stuff, they are "top tier" for sure. Keep up the good work SMB, started my Bismarck the other day and your thread is inspirational!
-
Awesome work! I have the urge to do another big build this winter; Bismarck with all the aftermarket goodies is lurking in my stash and is one of the candidates. Looking through this thread makes it even more tempting.
-
Just went through the thread for the first time... just WOW! Inspirational stuff, and making Jason's everywhere look good!
-
I'm assuming this would be your first foray into superdetailing sets for big kits? if so, man are you picking a scary ambitious place to start! Anyway, here's how I approach these things: 1st, build assemblies in manageable sections... clean up superstructure parts, scrape off detail/parts that are getting replaced with PE and assemble/erase seams. Next prime and install PE that can't be cleanly added after painting (for example, guns, floater net baskets, railings and tiny deck details are best assembled/painted separately and added last), then paint with final color. After that, install decks (they go on just like stickers, you just have to be careful to align them properly as you only get 1 shot at it) and then add the little stuff. Then move on to the next section and repeat the process again. My Iowa (the log Kevin mentioned) is in limbo but I'm currently working on a 1/200 Nelson + Pontos over on Model Warships which will give you a good idea of what you'd be getting yourself into: http://www.shipmodels.info/mws_forum/viewtopic.php?f=59&t=160389 In my opinion the Pontos stuff is definitely worth it as it REALLY takes the kit to a whole new level of awesomeness. Be forewarned though... the 1/200 Iowa/Missouri is not for the faint of heart as-is and the Pontos stuff will easily double the length and intensity of your build. Pontos is also known for having difficult to interpret instructions that are riddled with errors... it won't be a "paint by numbers" project and will require plenty of research, planning and forethought to pull off well. The total amount of work will run into the hundreds of hours and it will be a LONG term project, so plan on that too.
-
Decided to build the USS Constitution 1/96 Scale Model
channell replied to kmgreene's topic in Plastic model kits
Here's some info on the wooden deck: http://www.shipmodels.info/mws_forum/viewtopic.php?f=16&t=152919 I cannot find the PE I mentioned back then, it was a cottage company but I can't remember which and I don't know if it's still available. Plenty of the HMS Victory PE could be adapted for use though, as mentioned. -
Good to see your Bismarck back Kevin! I will probably go back to mine after I finish the Nelson.
-
Minicraft 1:350 Plastic, Centennial Titanic kit.
channell replied to S.Coleman's topic in Plastic model kits
I built one as a teenager in the 90's... my impression even then was that it was a fairly crappy kit (bulkheads too thick, tons of fit issues, poorly molded/ detailed by today's standards). But if you want a 1/350 Titanic, that's the only game in town and it CAN be built up into something specatular with aftermarket goodies and plenty of hard work. -
Tamiya primer is the best rattlecan primer for models but it's also overpriced. I use it (as well as primer applied from an airbrush) on smaller detail areas. You can use regular primer, just get sandable filling primer. There is a type sold at walmart that says it's for plastic and it seems to work great.
-
I use Squadron putty and Bondo all purpose filler (basically auto body putty).
-
I've got both; the Pontos kit is more complete (especially with the "advanced detail set") and has a better wooden deck. Still, the KA set is not bad at all.
-
Great work so far, Hank! Nothing wrong with going slow, especially when it produces good results.
-
Keep up the good work, Hank! Cheers from both forums!
-
Great work so far!