CaptainSteve
-
Posts
1,858 -
Joined
-
Last visited
Content Type
Profiles
Forums
Gallery
Events
Everything posted by CaptainSteve
-
 Thanks, Guys. Nay, Matt. Me rigging is tied and glued most securely. There'll be no foot-loose sails upon this 'ere boat, I can assure ye !!
- 625 replies
-
- 3
-

-
- bounty launch
- model shipways
- (and 1 more)
-
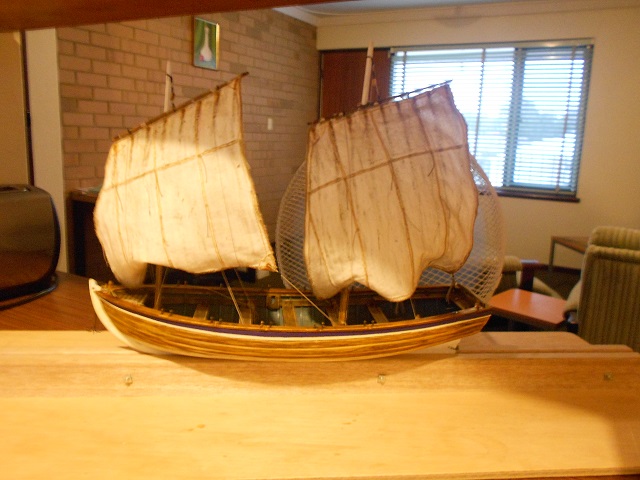
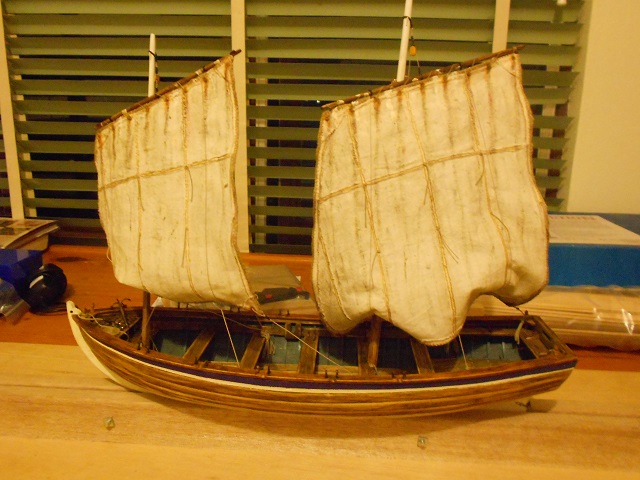
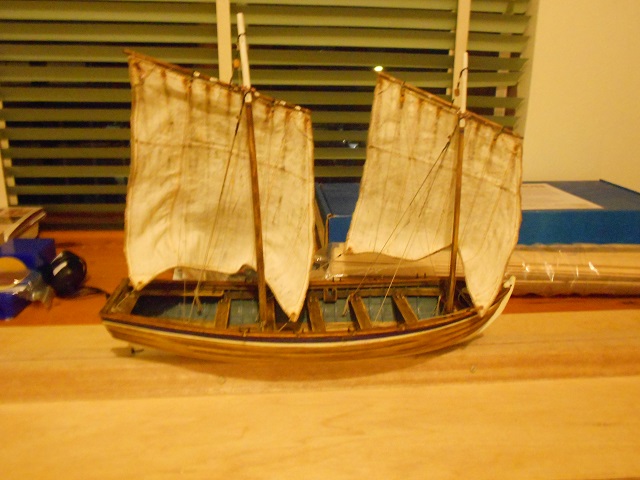
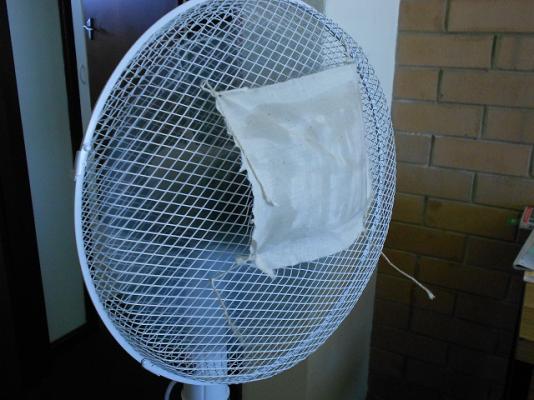
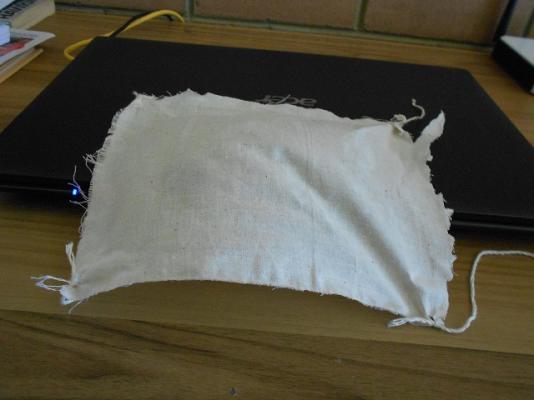
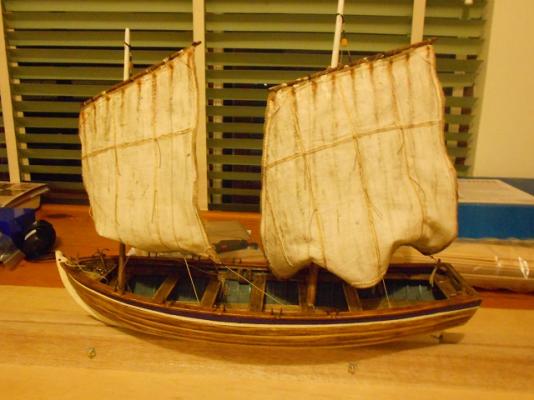
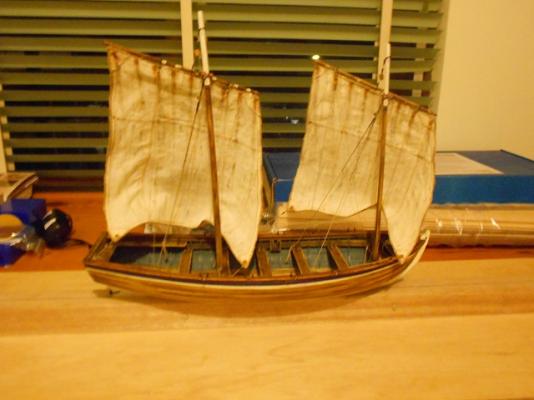
And so, wi’ his sails now lashed using Chuck’s ropes, and the newly installed rigging works, it doest thus becometh necessary to re-apply some o’ the bird poopin’s. “I shall also be a-touchin’-up me parrels with a little dry-brushin’,” he were to mention, “They just be too shiny fer me liking.” Now, so very, very close to bein’ done wi’ his Launch, CaptainSteve didst haveth this to say … “But a-forehand, there be the matter o’ a little surprise I didst promise ye”, he were to mention. For Our Hero were to be lookin’ at his boat just the other day, and were to be somewhat displeased wi’ the fall o’ the sail cloth. “Thusly, I didst settle upon-eth an idea,” he stated, somewhat ominously. “This ‘ere test upon a spare piece o’ raw sail-cloth may giveth you some idea o’ what I be thinkin’.” "I were to liberally paint some Fray-Check onto the test-piece, and thereupon didst tie-eth it to me pedestal fan," he said. Thence, Our Hero did turn the fan on, and head out the door to his local for a pint and a counter lunch. Upon his return, the test-piece were to be lookin' like this ... For, verily, Our Hero hath decided that he doth prefer the look o’ billowing sails … “And, so,” he were to close, “here be me boat as she doth stand currently.”

- 625 replies
-
- 19
-
-
- bounty launch
- model shipways
- (and 1 more)
-
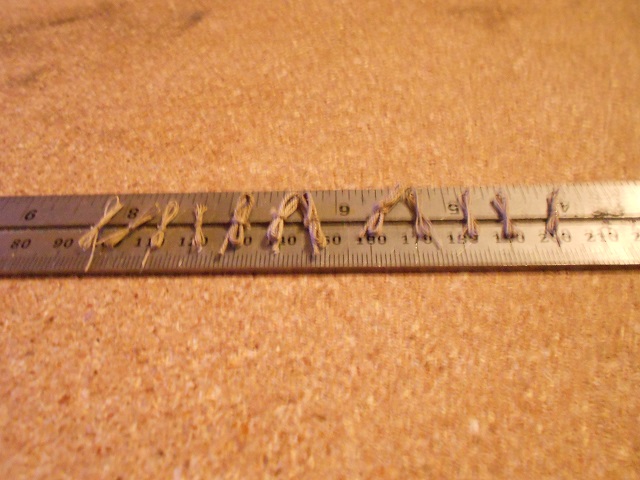
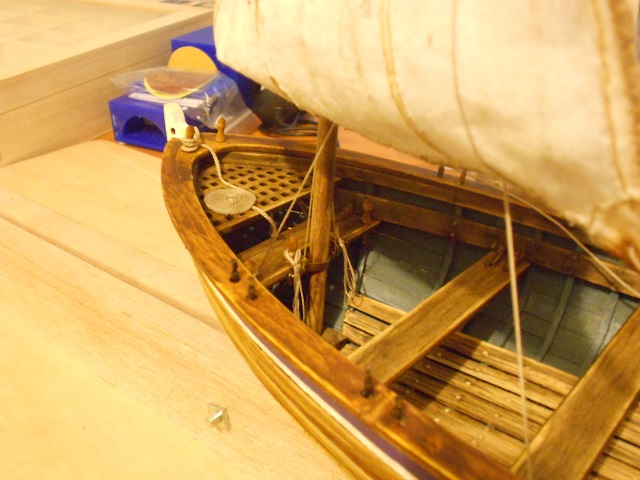
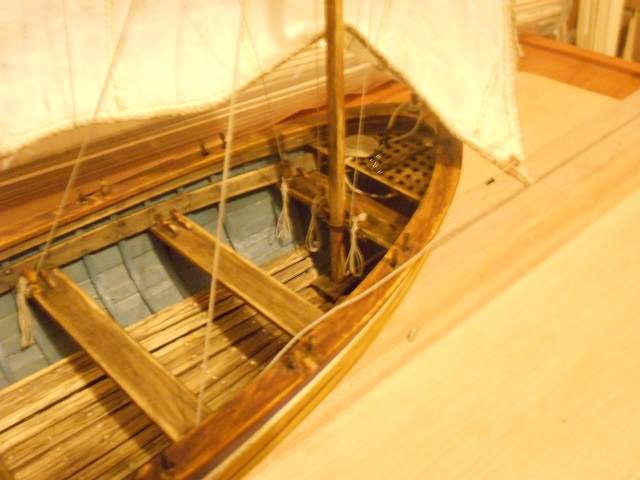
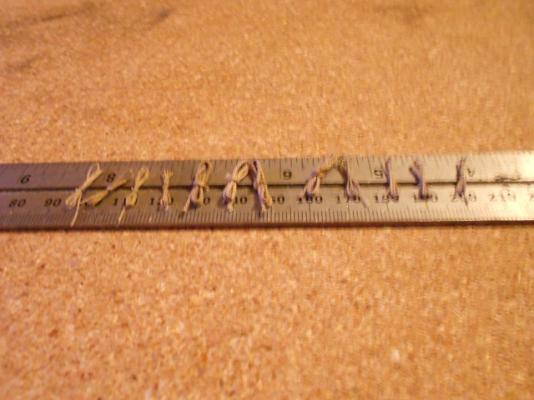
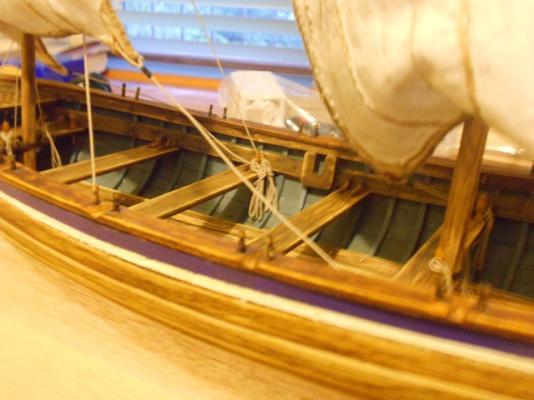
Well, as mentioned, Our Hero didst most verily experience-eth a “light-bulb moment” upon reading Mark’s message … “Ne’er in a million years,” he were to mumble ‘neath his breath, “wouldst I a-thought o’ doublin’-up me ropes to the belaying pins.” Wi’ new-fired vigour, and armed with the new information, Our Hero didst attack-eth his rigging a-new. “I didst only have to be moving four o’ me ropes from their original positions …” But, a-fore commencing, CaptainSteve didst make-eth up a batch of rope loops to hang from his belaying pins. “I be not sitting in me boat and tying these up,” he explained. “So instead, I didst form a jig in order that they be a-lookin’ tidy an’ uniform in they appearance.” In truth, these not be the actual rope loops that Our Hero were to finally use. “These be the first batch,” he didst go on. “I be a-binning them, as they were to prove too small in stature.” Verily, a loop length o’ 3cm didst prove-eth to be most pleasing. After a-fixin’ his ropes, thence cutting them out, re-doing and re-fittin’ them, CaptainSteve didst take a few close-ups. “These be for the Horde,” he spouted. “For I doth know-eth that you lot doest thrive upon pictures.” Finally !!! A photo where ye can be seeing me oar-grooves !! Oh yeah, I forgotteth to mention that I didst add-eth me anchor ...


- 625 replies
-
- 14
-
-
- bounty launch
- model shipways
- (and 1 more)
-
Err, No. Not that kind of surprise, Harv' .... keep readin'.
- 625 replies
-
- 2
-
-
- bounty launch
- model shipways
- (and 1 more)
-
Nice job on your cleats. It would be a good idea to add a pin to the bottom. That way, they will be more secure when holding rigging lines to your deck - less chance of being pulled loose later on.
- 708 replies
-
- 1
-
-
- victory
- constructo
- (and 1 more)
-
Lookin' real good, O Squirrelly One. But, err, what's up with the white plank running lengthwise beneath the cut-out panel ??
-
"Arr. Thanks, Matt," CaptainSteve yawned, a-fore stumblin' back to bed at 1:45am on a work night. "Cleats be somethin' else lacking from this kit. An' something else which I may have added, given actual sailing knowledge." He didst go on, "But, never fear. Wi' the information afforded me from the Sailing Ones, the job hath just, this very moment, been completed." Sorry, but Our Hero be yet to take any photographs ... "These be a-coming o'er the next few days," CaptainSteve didst conclude. "But first, there be a surprise ..."
- 625 replies
-
- 3
-
-
- bounty launch
- model shipways
- (and 1 more)
-
Mark and Harvey !! CaptainSteve be extremely grateful to the pair o' ye, at this moment ... Verily, this were to be a "light-bulb moment" fer Our Hero !! "You, Sir !!" CaptainSteve didst stand and point towards the cheap-seats. "Hereby and forthwith, you may feel-eth most free to be impertinent any time you do-eth bloody well wish !!" Thanks, Harv'. Mayest I assume that it be preferable to have a lighter (thinner) line above a thicker one (a back-stay, mayhaps), rather than 'tother way 'round ??
- 625 replies
-
- 2
-
-
- bounty launch
- model shipways
- (and 1 more)
-
I'd vote Image 3. I'm fairly sure that is how I made mine look. By the way, your comment from above ... ... reminded me of exactly how I made those gun-doors. As mentioned above, I took two strips of the planking wood and edge-glued these together. Then, a strip of the framing wood was edge-glued to each side of the two planks, making four strips glued side-by-side (dark-light-light-dark). I believe, to make enough doors, I had to make up three sets of these edge-glued planks. By the way, clamps were definitely used (I should've said that earlier). Once the glue had completely set, the strips were cut into square "tiles". More strips of the framing wood was then cut into tiny pieces just slightly longer than the width of a "tile". These were then individually glued to each side of some 90+ tiles. After the glue had dried, the edges were sanded back, to give a gun-door.
- 708 replies
-
- 1
-
-
- victory
- constructo
- (and 1 more)
-
Oh !!! Didn't know that one !!! Thanks, Mark. Well, that little tidbit of information will certainly make things a lot easier.
- 625 replies
-
- 3
-
-
- bounty launch
- model shipways
- (and 1 more)
-
As that model is docked at one of my younger brother's homes, I only have the photos which are in the MSW Gallery. There's a link in my signature below. The best two pictures of the gun-doors are the 1st one and the ninth.
- 708 replies
-
- 2
-
-
- victory
- constructo
- (and 1 more)
-
Reading about your gun-doors reminded me of the two weeks+ fun I had scratch-building my own doors from wood, as I, also, did not like the metal doors supplied by Constructo. From memory, I took strips of planking and edged-glued them together. Once dried, I cut the doors to size and then added frames around the outside to each. It did annoy me at the time that I didn't have any straps on them, but they still looked better than the kit-supplied ones. Now, however, should you wish, Paul, that particular problem may not be an issue for you. Check here to see what I mean.
-
Cutty Sark by NenadM
CaptainSteve replied to NenadM's topic in - Build logs for subjects built 1851 - 1900
Great job, Nenad. She is looking very impressive !!- 4,152 replies
-
- 3
-
-
- cutty sark
- tehnodidakta
- (and 1 more)
-
Tom !! On behalf of myself and all future Connie builders who are (and will) follow your build, I thank you for your candour. I assure you that I am taking every point you mention into consideration before commencing my own build in earnest.
- 1,354 replies
-
- 1
-
-
- constitution
- model shipways
- (and 1 more)
-
Nope. Matt, as per the plans, there be one pin either side of each mast (4 pins). I have used these for the lift-lines, and one of (the most-forward on each sail) the bunt-lines.
- 625 replies
-
- 3
-
-
- bounty launch
- model shipways
- (and 1 more)
-
Thanks heaps, Boyd ... CaptainAndrew and I do go back a long, long ways. However, I shall just say-eth that I cannot recount many of our adventures together, fer this be a family-orientated forum.
- 625 replies
-
- 4
-
-
- bounty launch
- model shipways
- (and 1 more)
-
Arrr ... Our Hero didst spend-eth the better part o’ this Friday evenin’ contemplating not his navel, but his naval-rigging … “I hath taken onboard the advice a-coming to me from the Sailing Ones (Thanks again, Guys),” CaptainSteve didst state most sincerely. “To have-eth all lines fer a sail tied-eth off to the one side,” he began to ramble, “wouldst be-eth most goodly and may well help the crew aboard avoid boom-related headaches.” Indeed-eth, as CaptainSteve were to discover, it be-eth most possible that Our Hero could swap-eth the pin used to tie-off the foresail clew-line with the pin used to tie-off the mainsail tack-line. “However,” he doth counter, “this doest create a new problem wi’ me bunt-lines. Where are they to be a-going ??” Thusly, he doth have a question .... “Be it feasible, given the application o’ some Isopropyl,” CaptainSteve were to posit, “that the mast backstays wouldst be tied-off not to belaying-pins, but instead-eth to the risers ??” This wouldst give-eth Our Hero the necessary extra belayin’ points fer ‘is ropes …. "I be a-figurin'," he didst propose, "to untie, and if necessary, unglue, me ropes on the morrow ... or, mayhaps, the day after the morrow.”
- 625 replies
-
- 3
-
-
- bounty launch
- model shipways
- (and 1 more)
-
Thanks, Igor. I'm planning on looking at my rig set-up this weekend.
- 625 replies
-
- 4
-
-
- bounty launch
- model shipways
- (and 1 more)
-
Thanks heaps to everyone (especially Crackers, CapnHarv, Matt) for all the advice regarding my rigging. Essentially, general opinion seems to be to rig the sails to one side so they don't cause head-aches (literally) for the crew. As such, I'll be untying a few lines this evening and seeing if I can come up with a better arrangement, however, this will greatly depend upon the belaying-pin set-up. Stay-tuned !! PS: Crackers. Originally, I was all in favour of modelling a Capt Bligh from SuperSculpey (have you seen Keith W's mini-tutorial here ??). Latest reports are, however, that the friend to whom this build be a-going will make a Bligh himself.
- 625 replies
-
- 2
-
-
- bounty launch
- model shipways
- (and 1 more)
-
Nice work on the stern galleries there, Foultide.
-
Arr ... Verily, I have read that same number o' builds, my ownself !! The secret with using chemical-blackening agents seems to be in the preparation of the surface before blackening. Essentially, all oils, dirt, dust, grease and grime needs to be removed a-forehand. Also, it can help to scratch-up highly polished surfaces e'er so slightly.
-
Great idea, Mark. But would starch hold long-term ?? What about a diluted PVA mix ?? What ratio do you suggest ??
- 625 replies
-
- 3
-
-
- bounty launch
- model shipways
- (and 1 more)
-
You seem to be doing a fine job so far, Boyd. As to blackening metals, I do prefer the look of chemically-coloured over painted. There are a number of products available ... as well as a number of threads on the topic here on MSW. So far, my favourite is Casey's Brass Black.
-
Although I went all-brass on previous builds, I admit I'm now a convert to the blackened brass look ... so, the one on the right for me.