WBlakeny
-
Posts
252 -
Joined
-
Last visited
Content Type
Profiles
Forums
Gallery
Events
Everything posted by WBlakeny
-
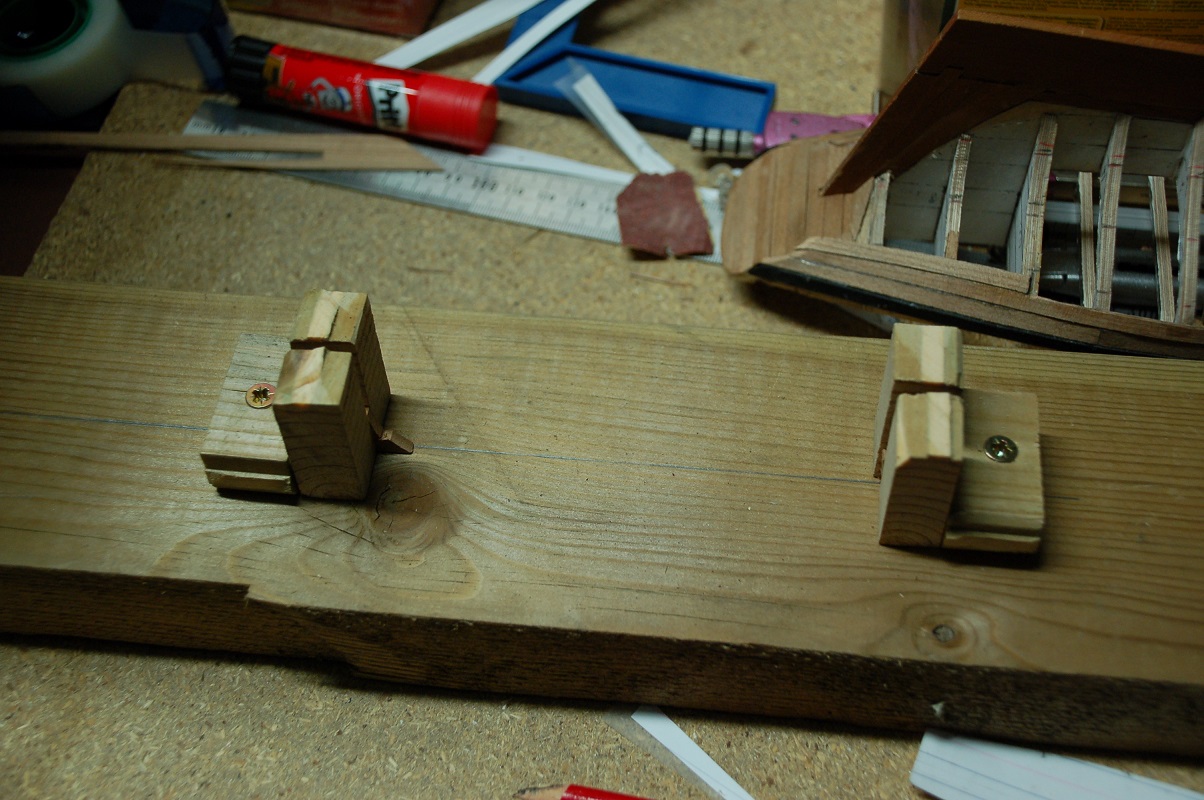
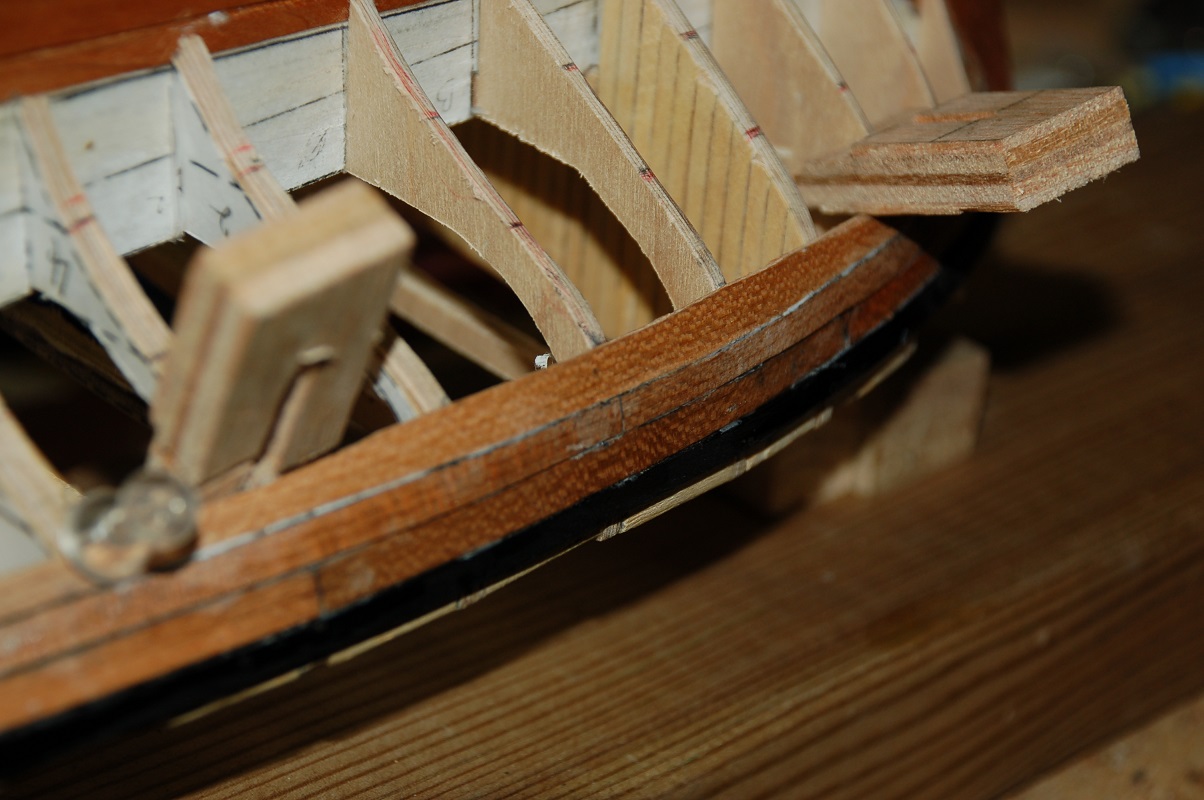
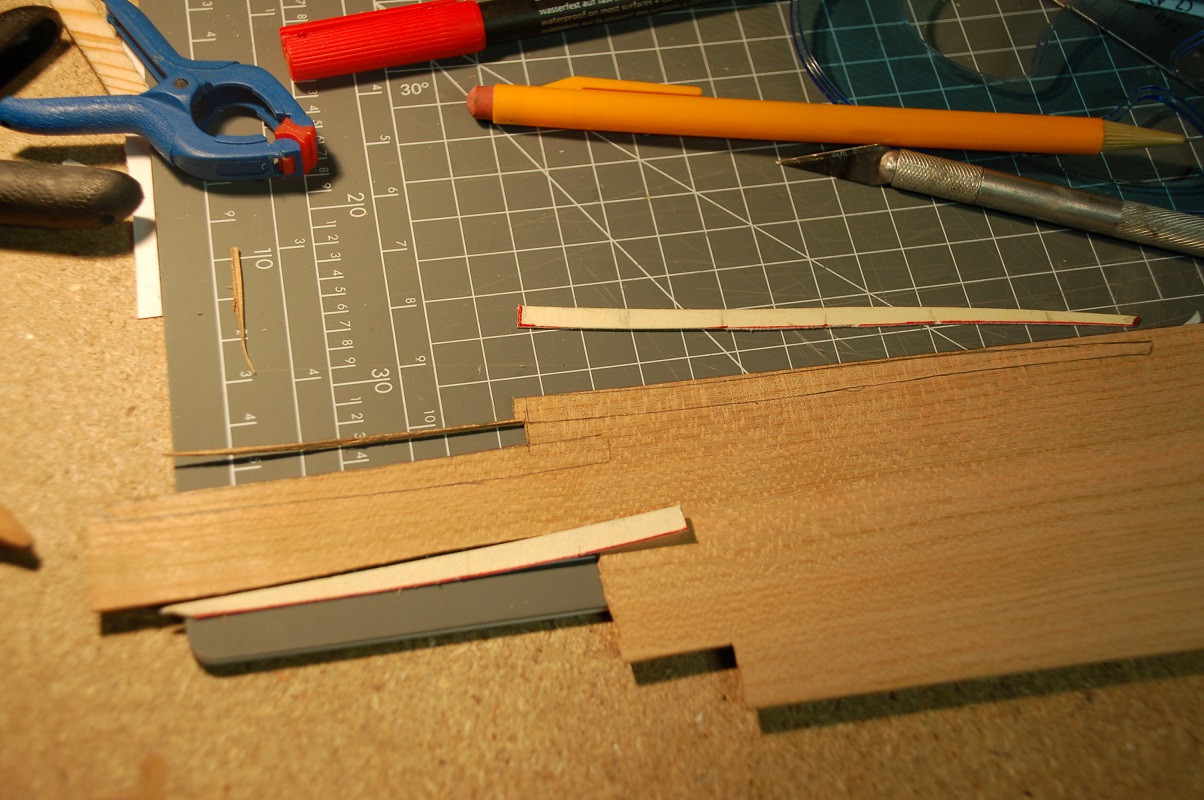
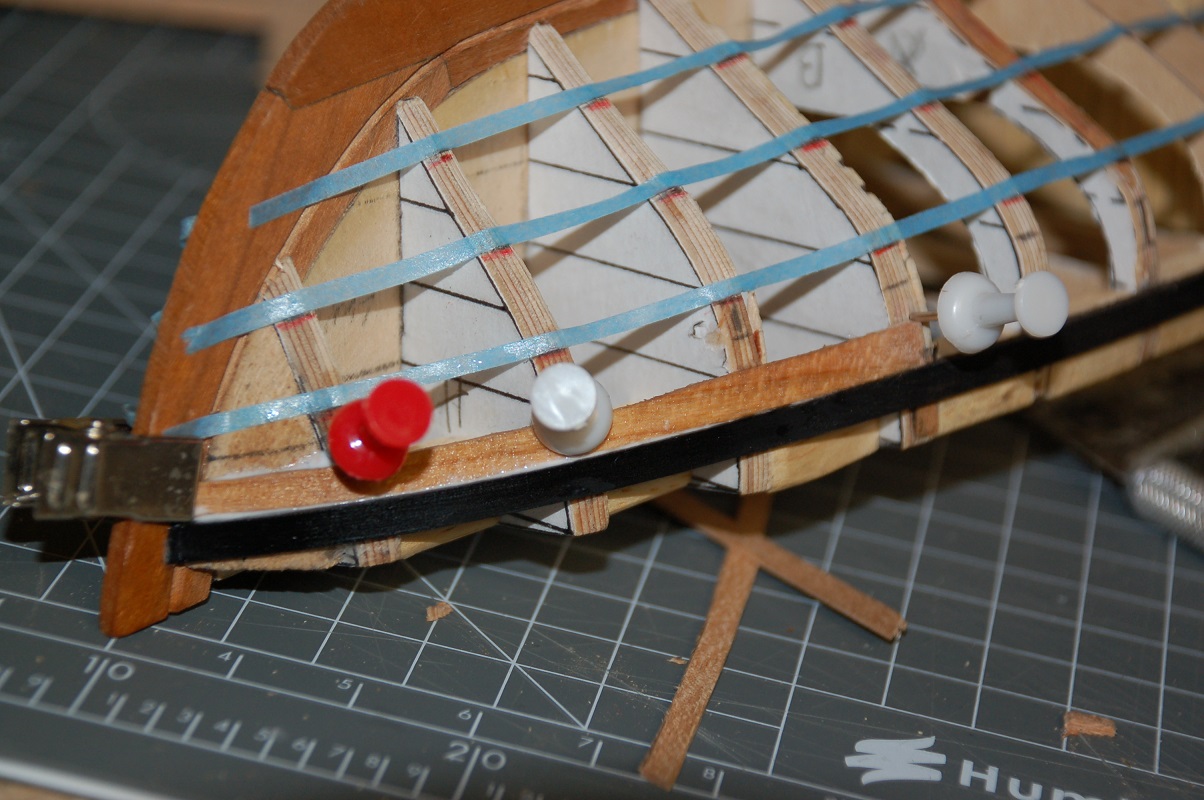
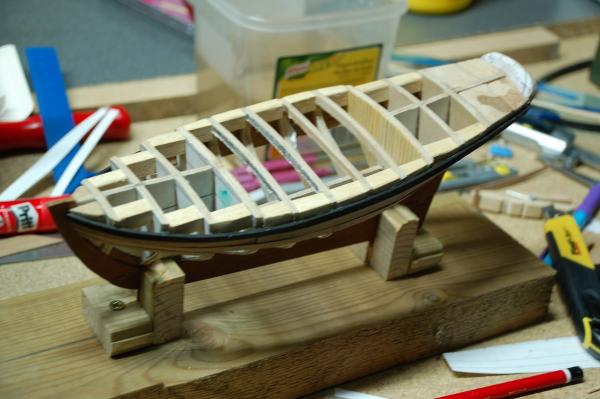
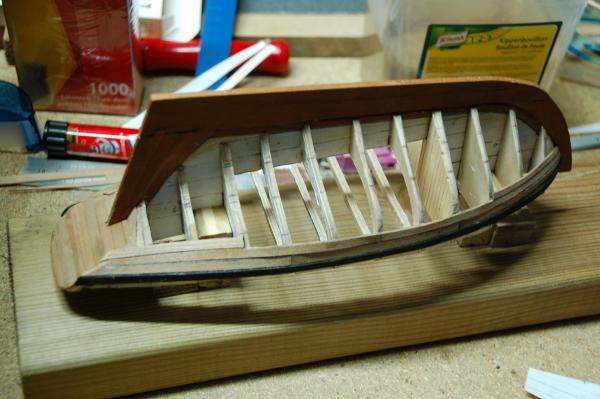
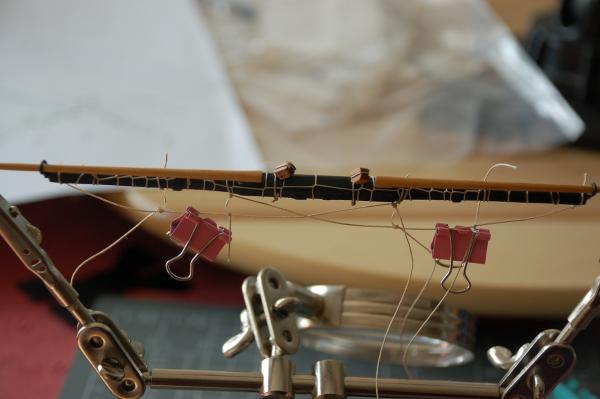
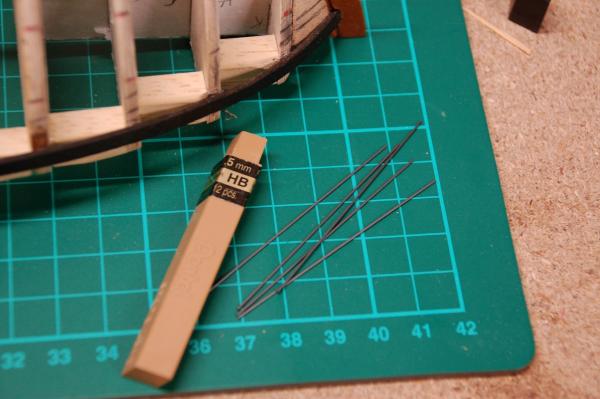
 Back to the Corsair! I'm sorry for having been away so long. I got frustrated with the planking and decided it was better to lay her aside for a while. Since last time I've continued the planking, though very slow. It's what got me discouraged. When drawing the form, my planks tend to get very wavy. Is this normal? Cutting out a wavy plank is'nt easy. It's always a lot of trial and error and results often in discarding the formed plank. One cause was not having a stable building board for her. It's a lesson I learned now and will not make again in the future! So, one building board coming up, although a very (very very) simple one. I used an old piece of wood, a leftover from making my carport. To make the supports i glued a piece of cherry of the wood i used for making the keel. The support blocks were carefully sawn in a way they fitted between the frames, so i can mount her upside down. Which is more easy for her planking. At this stage i'm inserting the last plank of the first belt on both sides. That plank didn't want to lay flat against her prior plank, but tended to creep upwards. In order to let her remain in place i glued some wooden strips on the back. I then slided them over the prior plank and as such the new plank stayed nicely flat against the prior one. I'm glad, the first belt is planked.
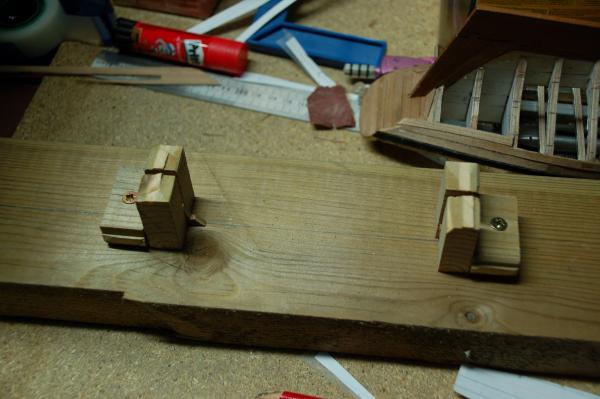

- 144 replies
-
- 6
-

-
- corsair
- bermuda boat
- (and 1 more)
-
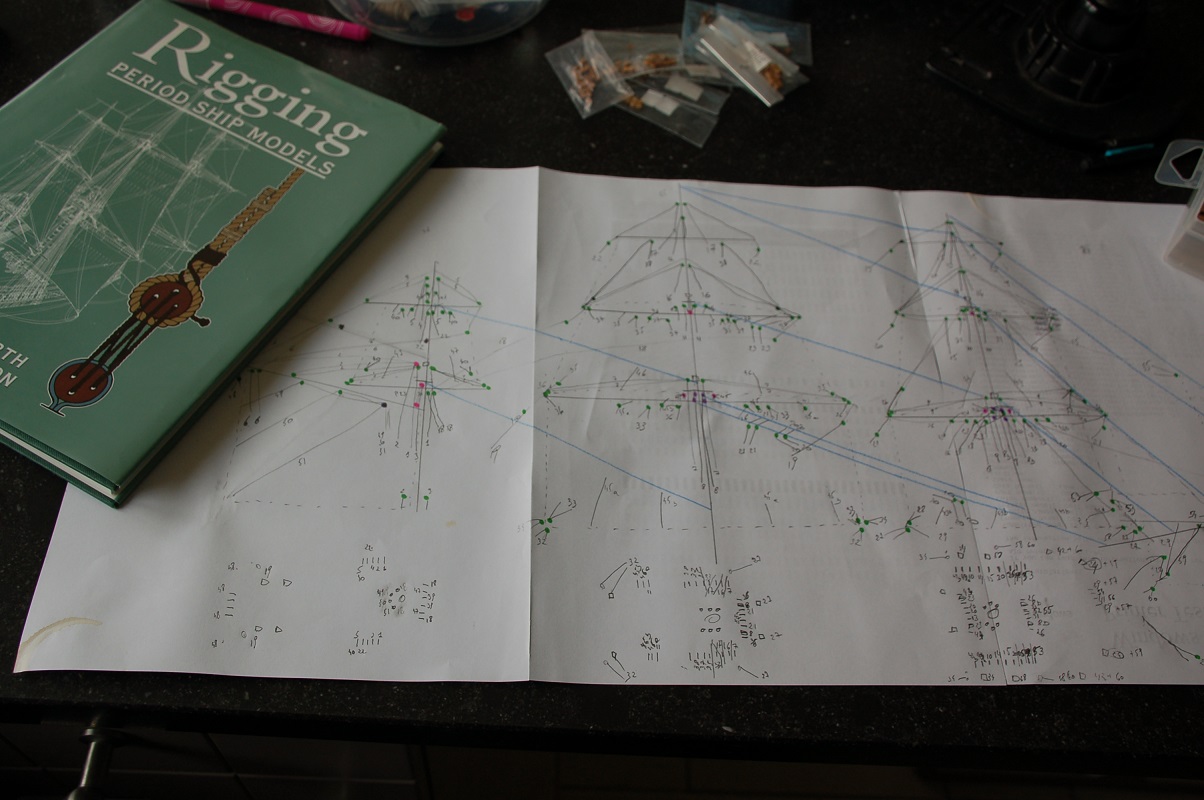
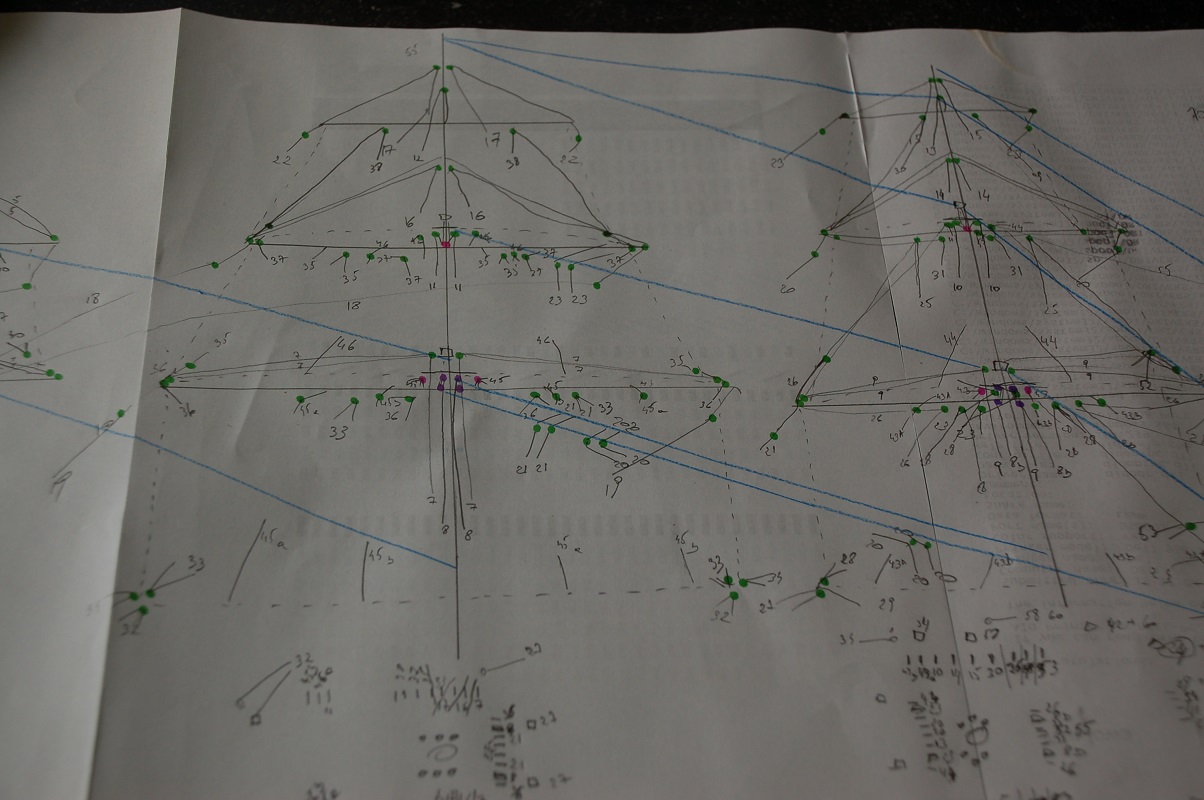
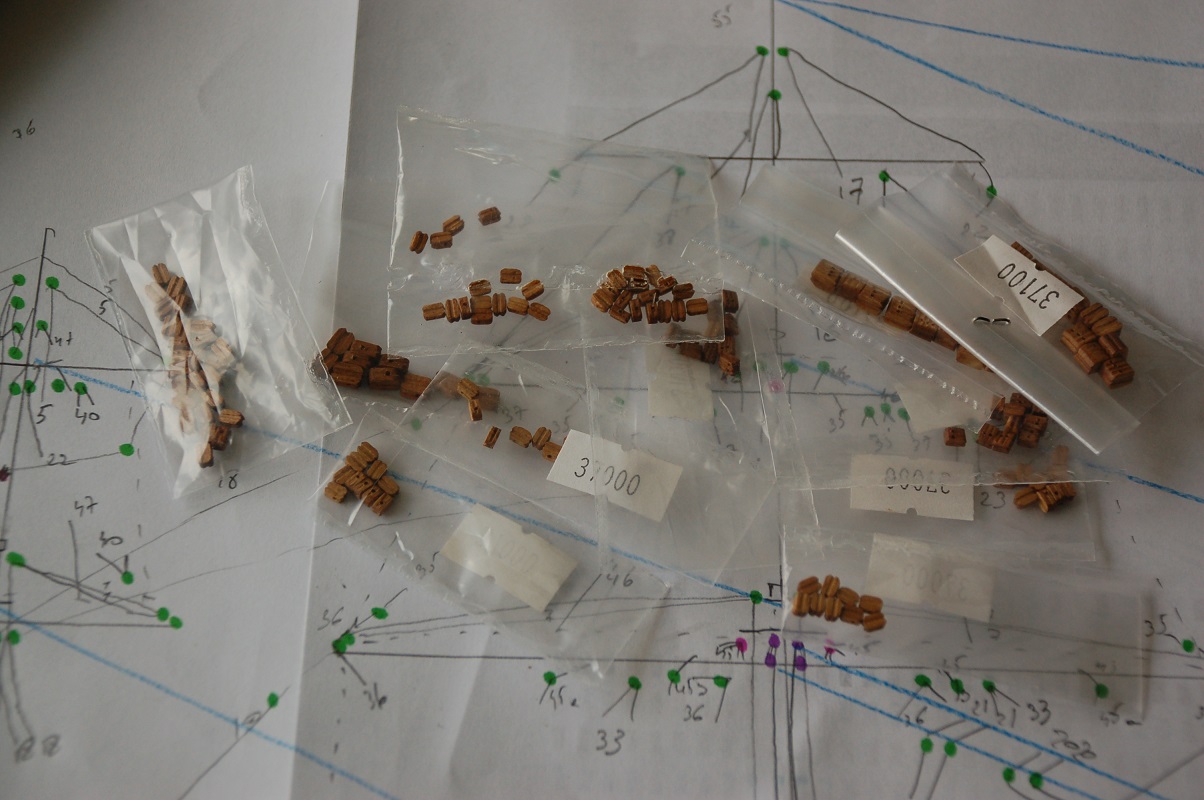
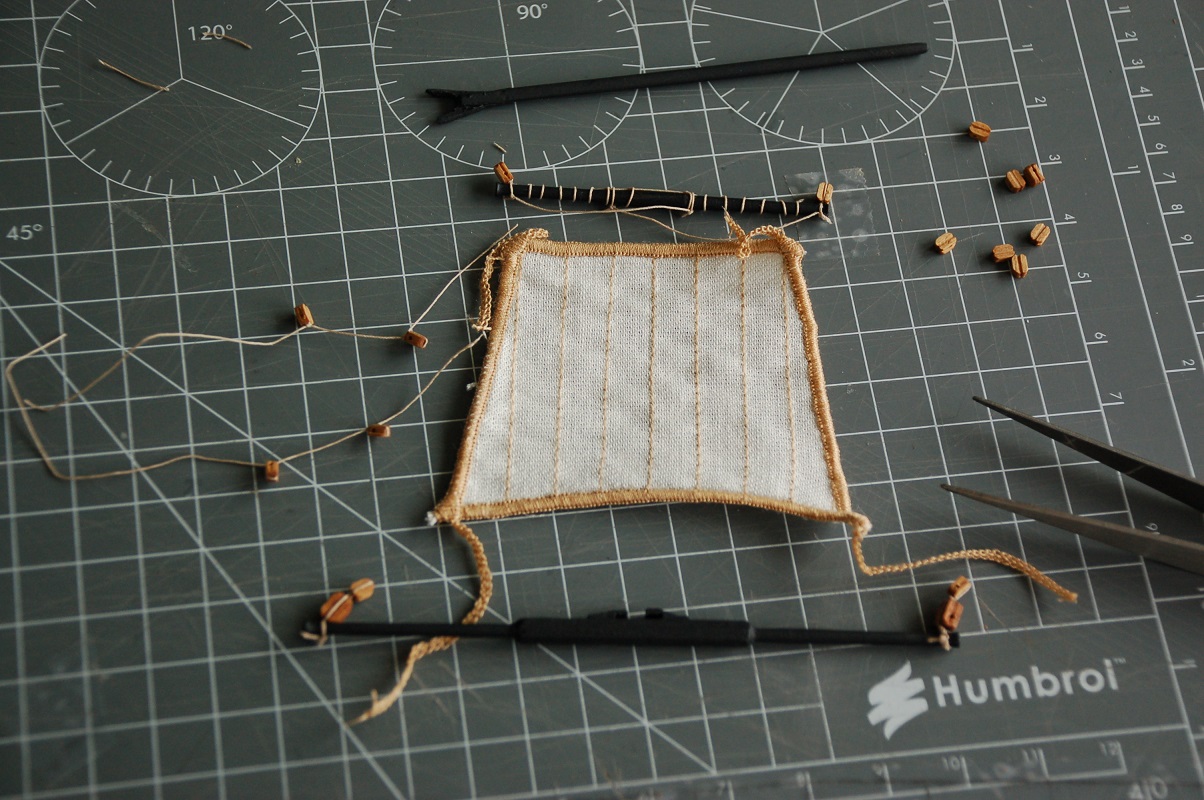
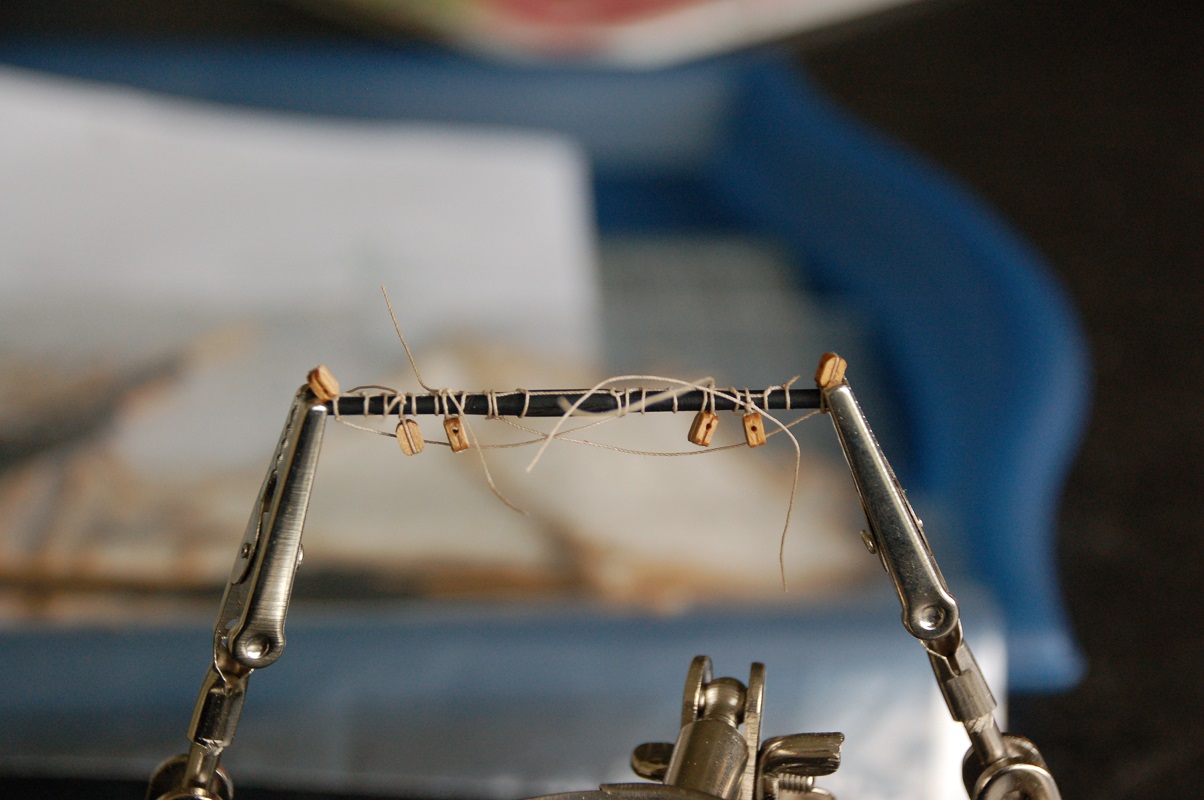
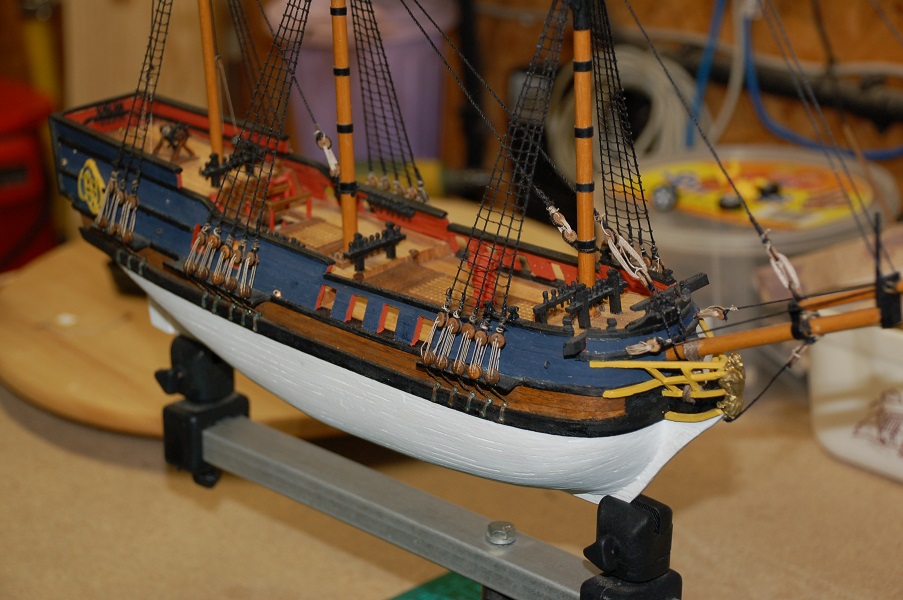
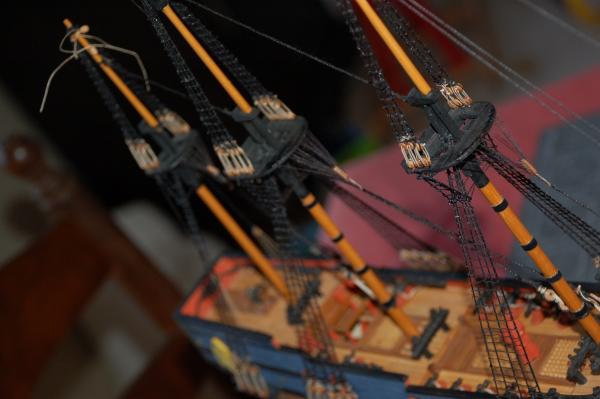
I want to put sails on the model, so i bought the sails together with the kit, so many years ago. The plans of the kit do not include the sail rigging plan. So I've made a rigging plan based upon the book of Lennarth Peterson. A good thing i decided to add many belaying pins! It'll be somewhat simplified though, i do not intend to rig every buntline and will be omitting the reef tackles and bowlines of the sails. Even though i've bought some extra blocks together with the sails, i'll definatly have too few according to the rigging plan. I'll order some more from arkowood. I needed to buy some extra wood for the planking of my Corsair anyway. Then i started the rigging of the yardarms with those of the mizzen mast. I simulate the the rope bands of the sail by first going round the yardarm. The sail itself will then later be tied to the yardarm with 4 knots. Before the sail goes on, i make sure i prepare all the blocks needed on that yardarm. For preparing the yard arms and making the footropes and such, the aid of a third hand is very useful!!


-
Congratulations! What a beauty she has become. Seeing those close ups from the deck is like standing on one in real life. Superbly done!
-
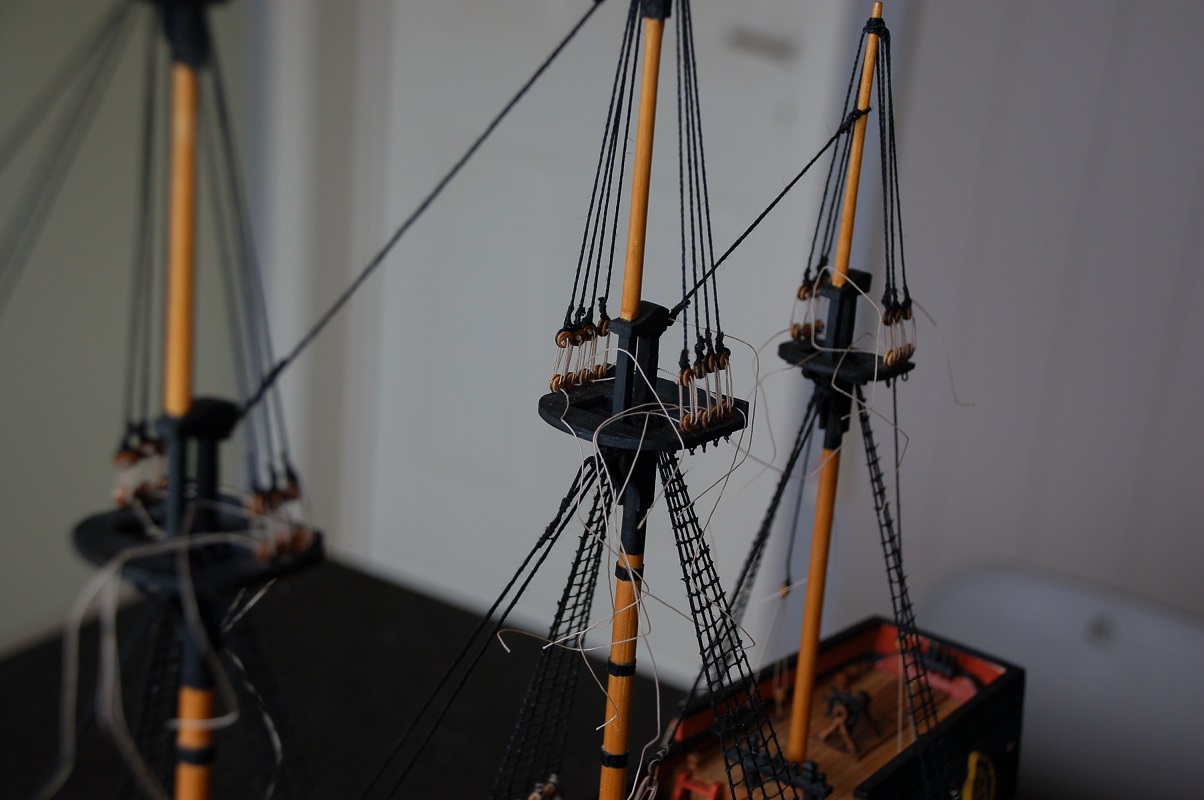
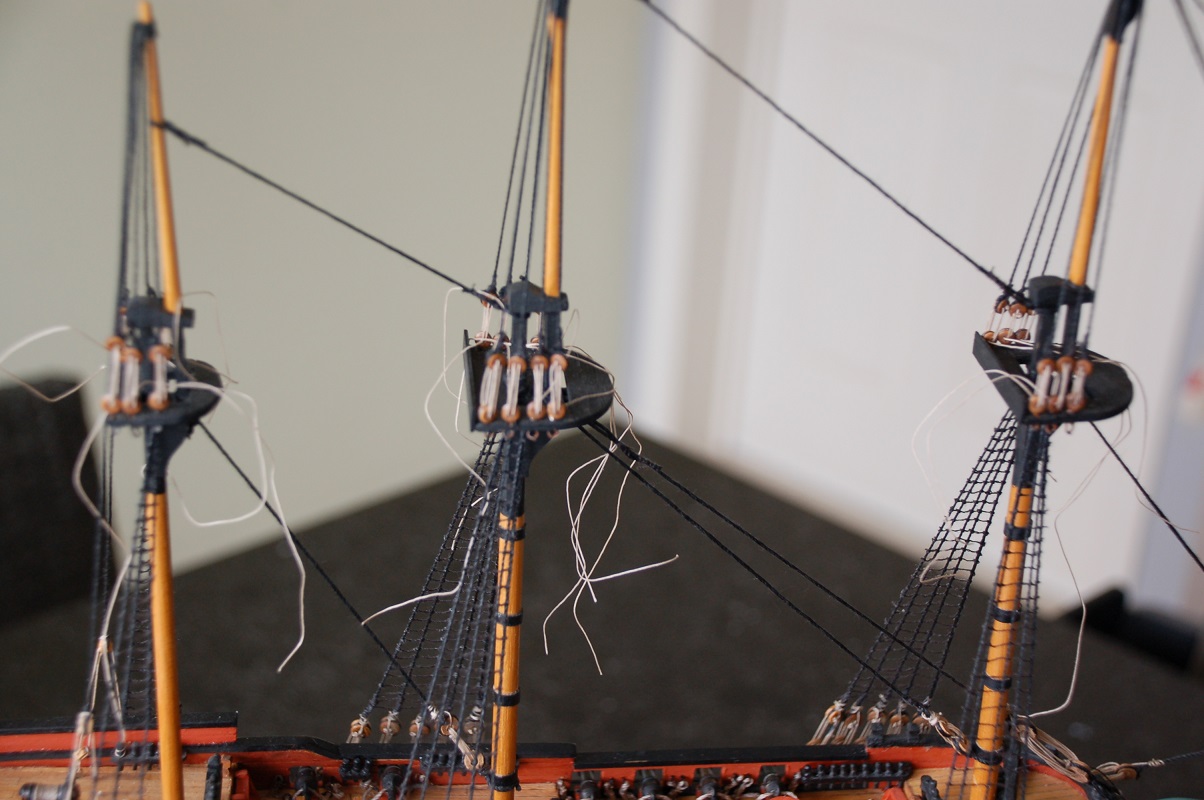
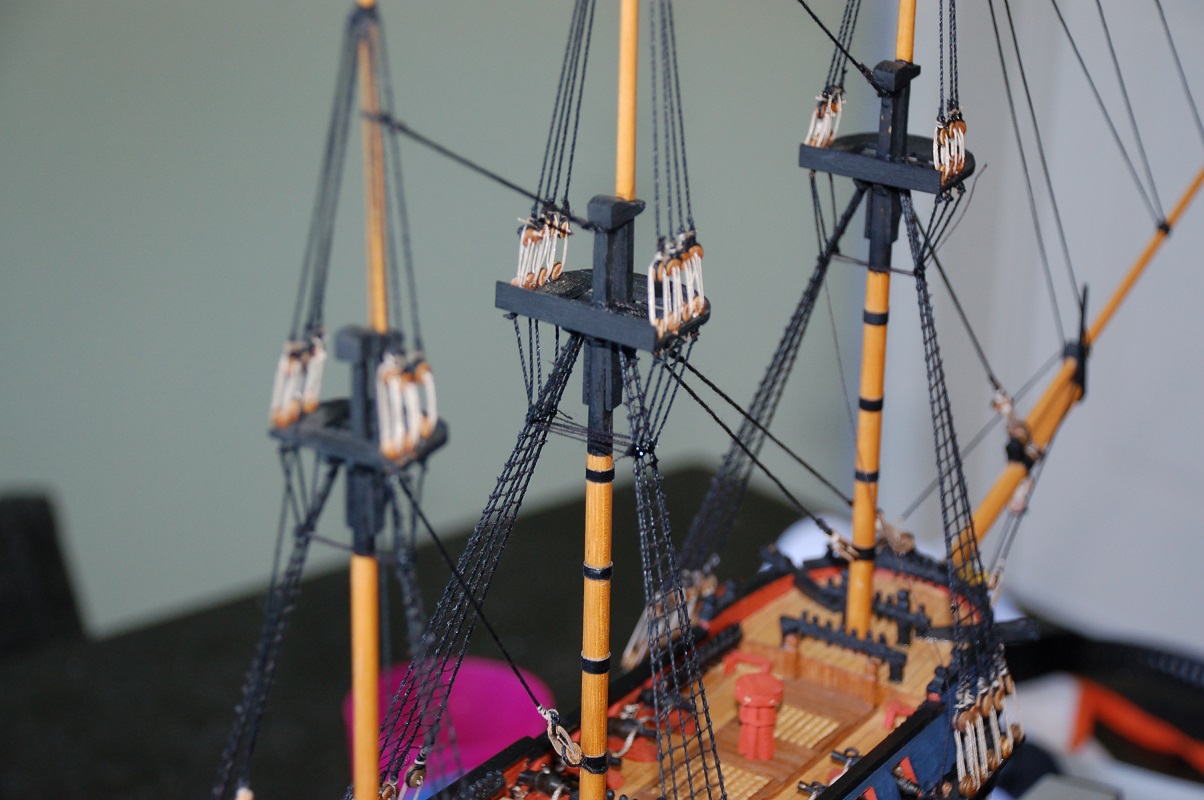
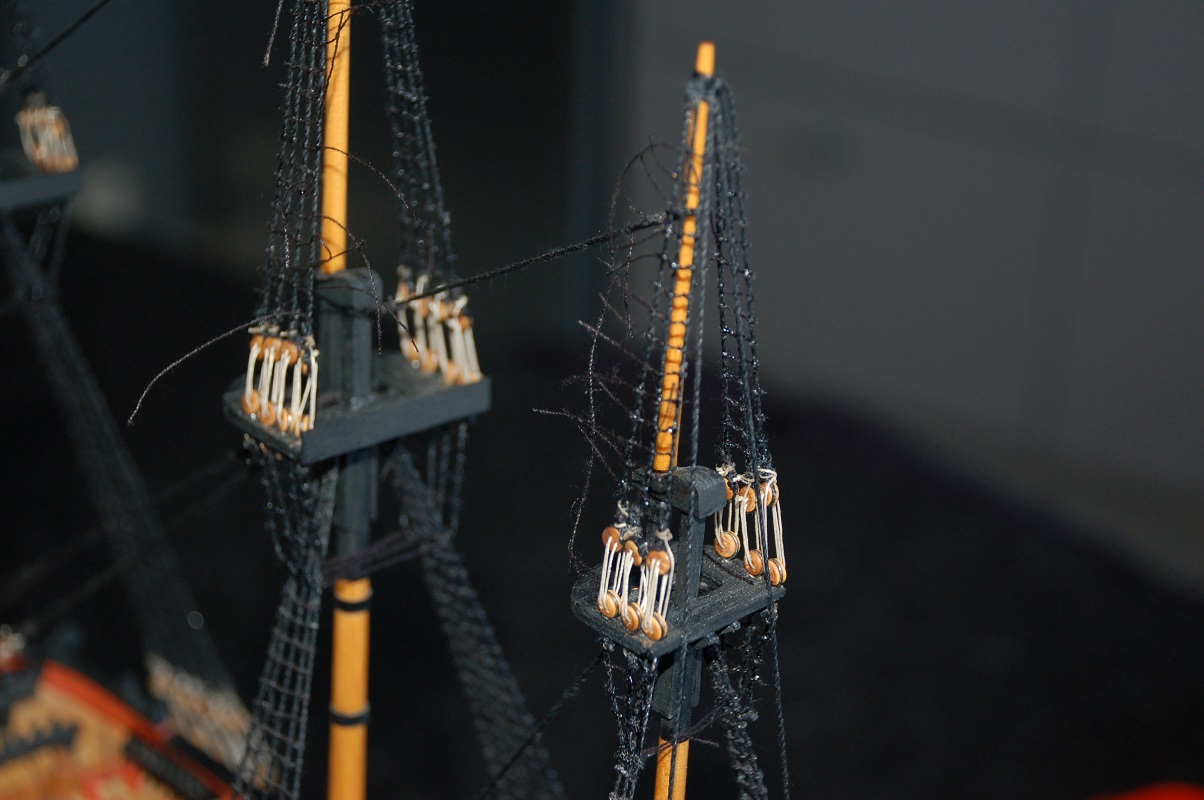
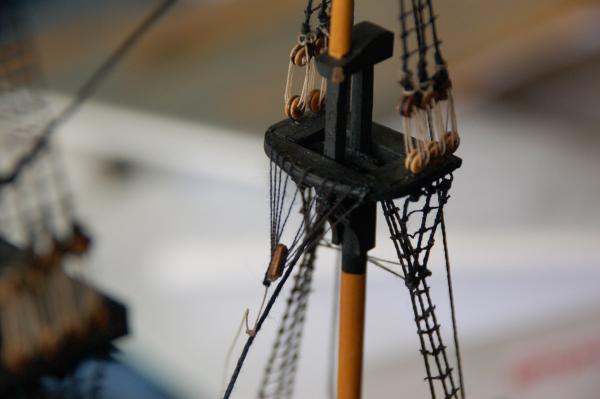
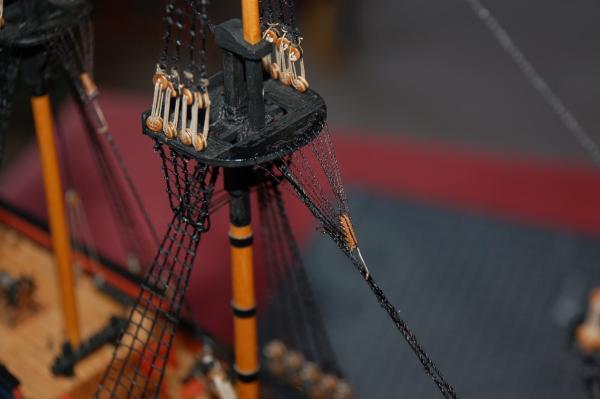
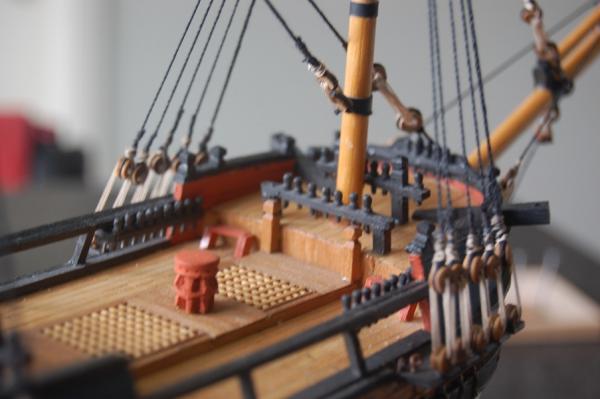
Using a small scrap piece of cherry, i've made the euphroe blocks for the crow's feet on the tops. The crow's feet at the mizzen top. The crow's feet at the main top. All the crow's feet done.
-
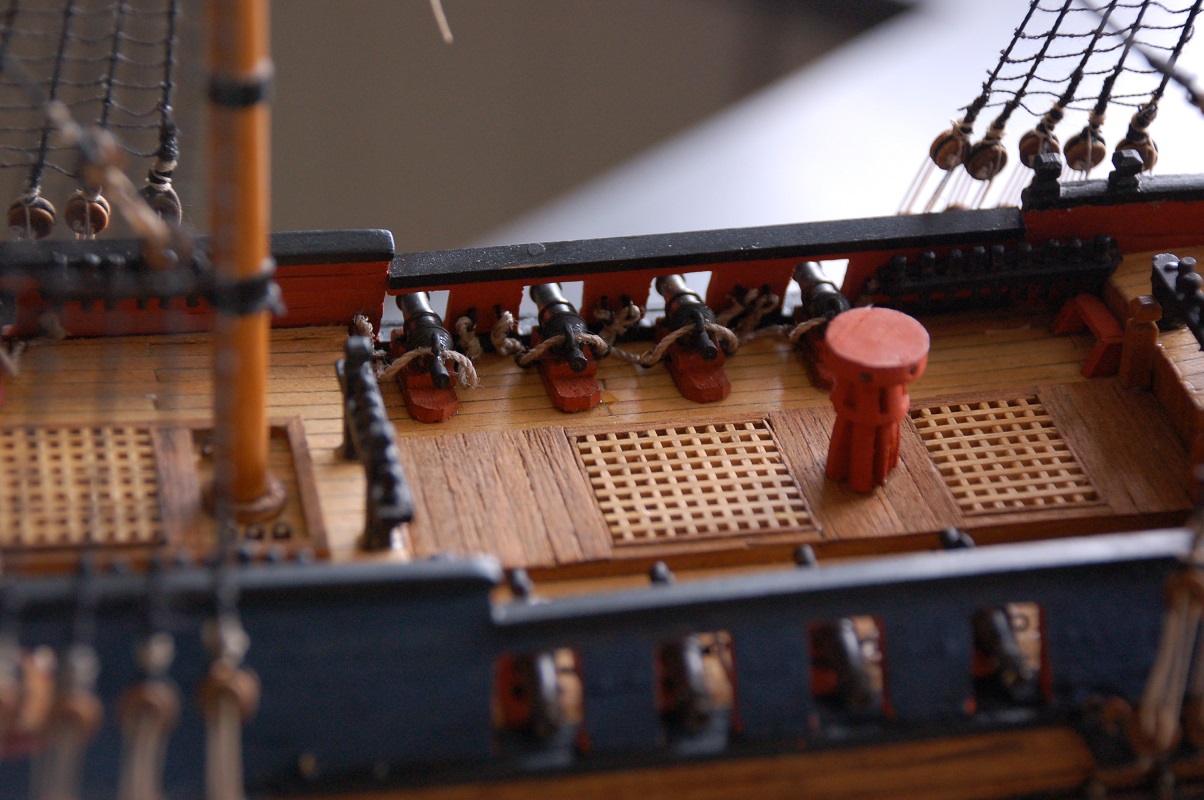
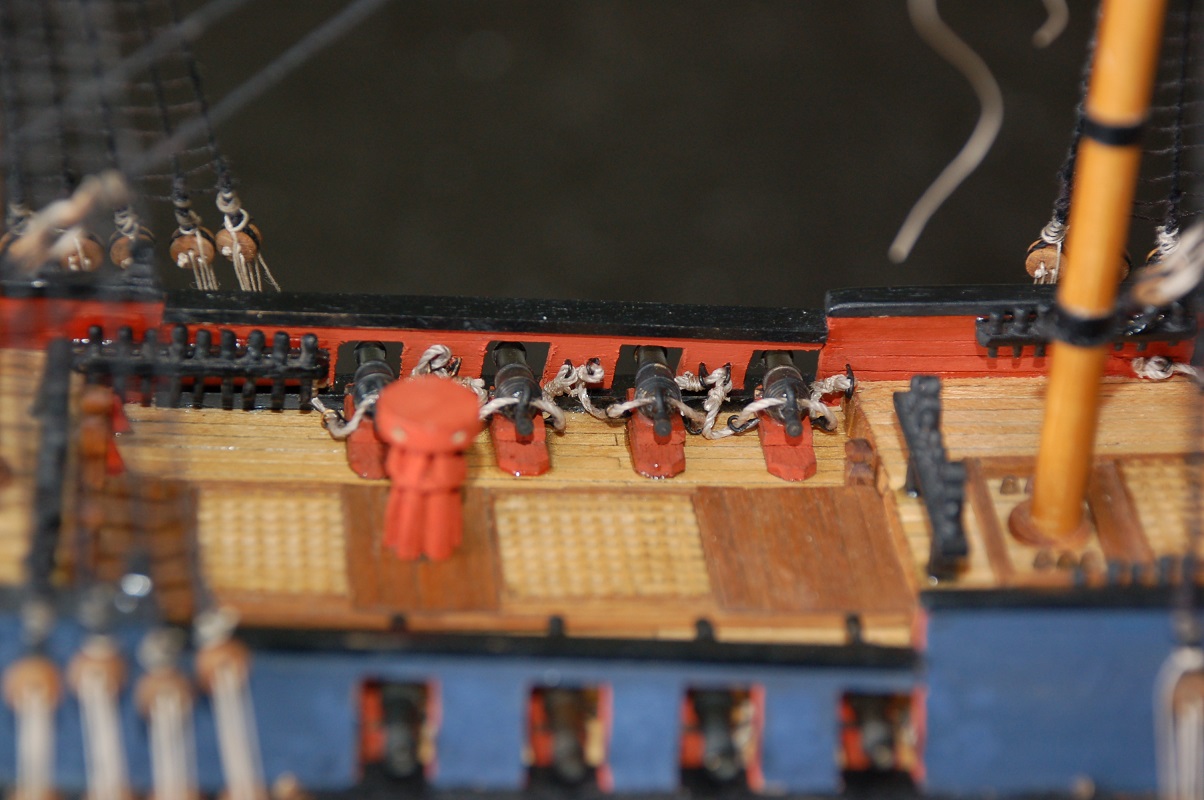
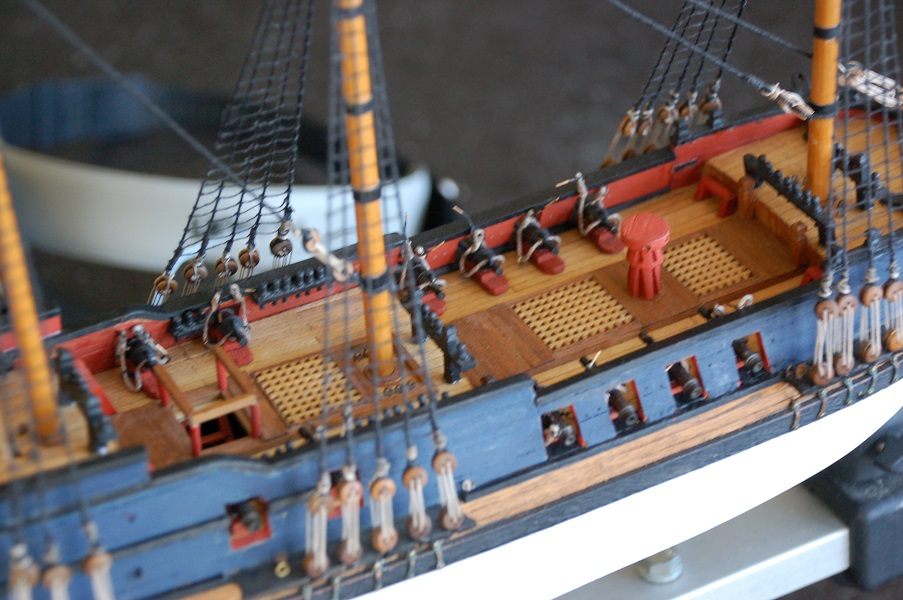
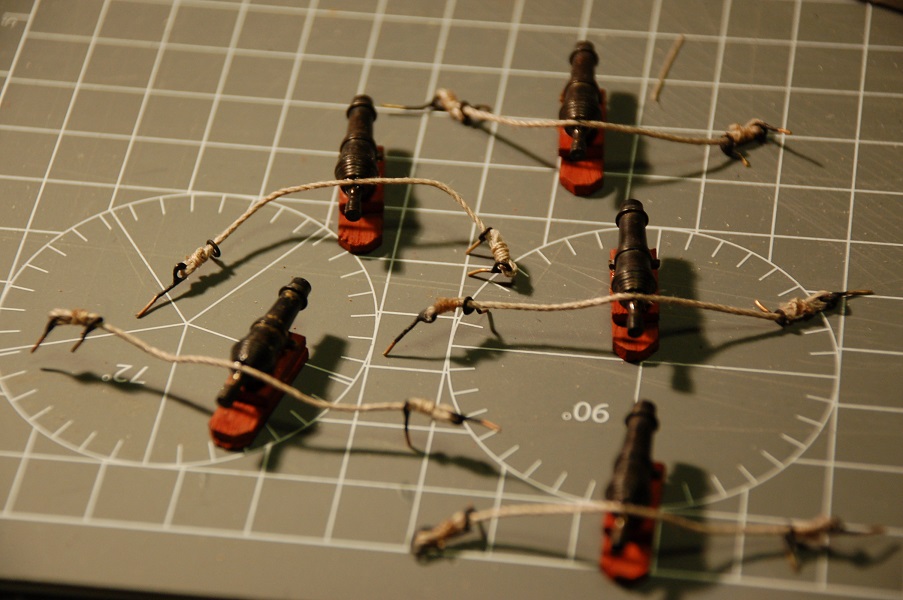
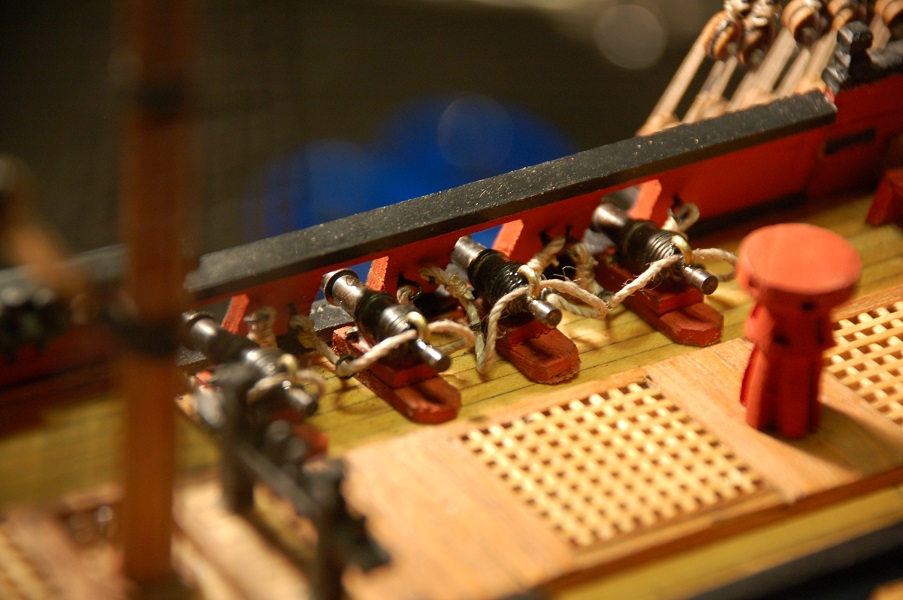
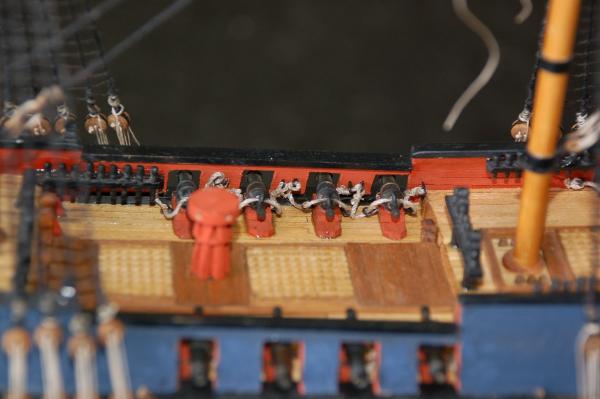
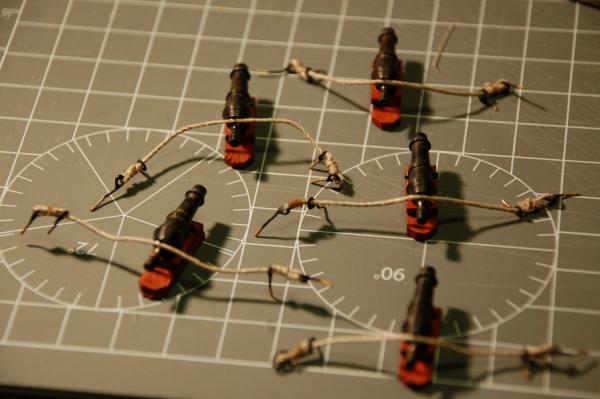
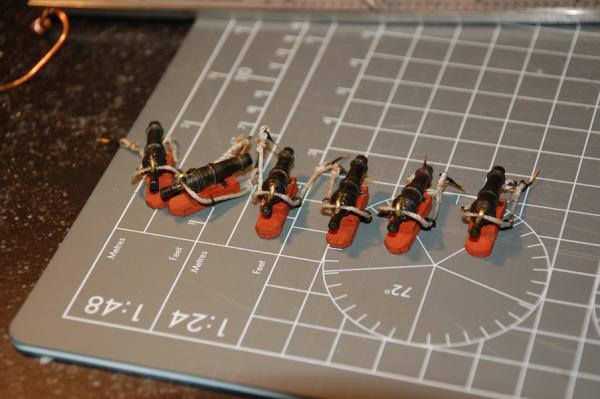
Long time since i've posted something. I've finished the guns and glued the breeching ropes in place.

-
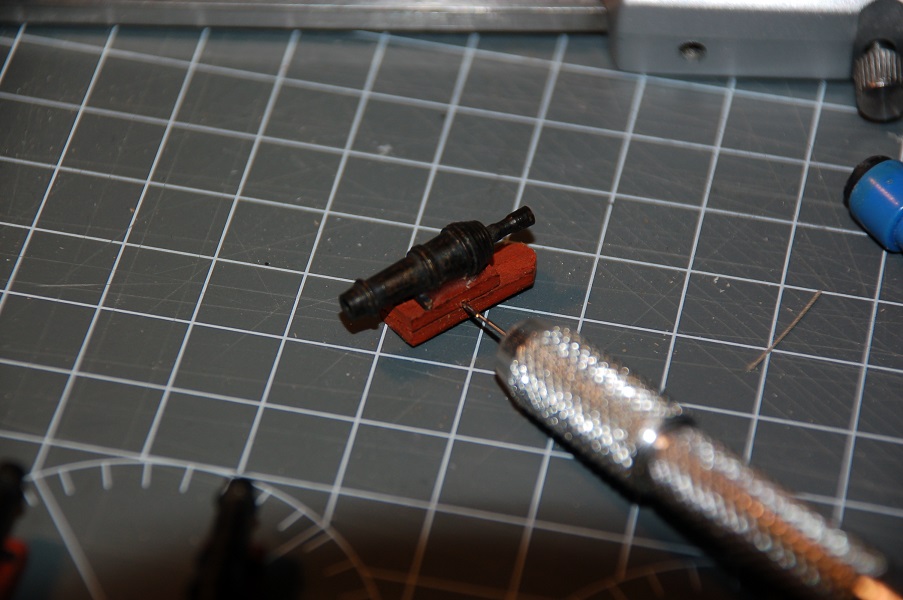
Continued on the guns. All the guns are ready, the breeching bolts painted black. Using epoxy i glued them in place, the breeching ropes will be put in their place once the glue has dried. I was afraid they'd push the gun out of place while the glue is drying.


-
What a beautiful planking job Giampiero! What are you using to simulate the caulking between the planks? Oh, and a happy birthday of course !
-
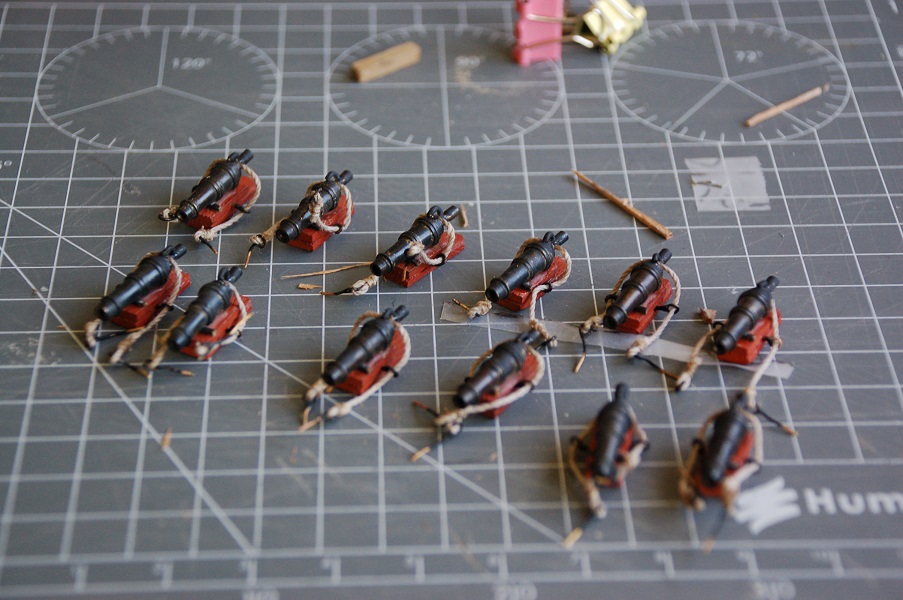
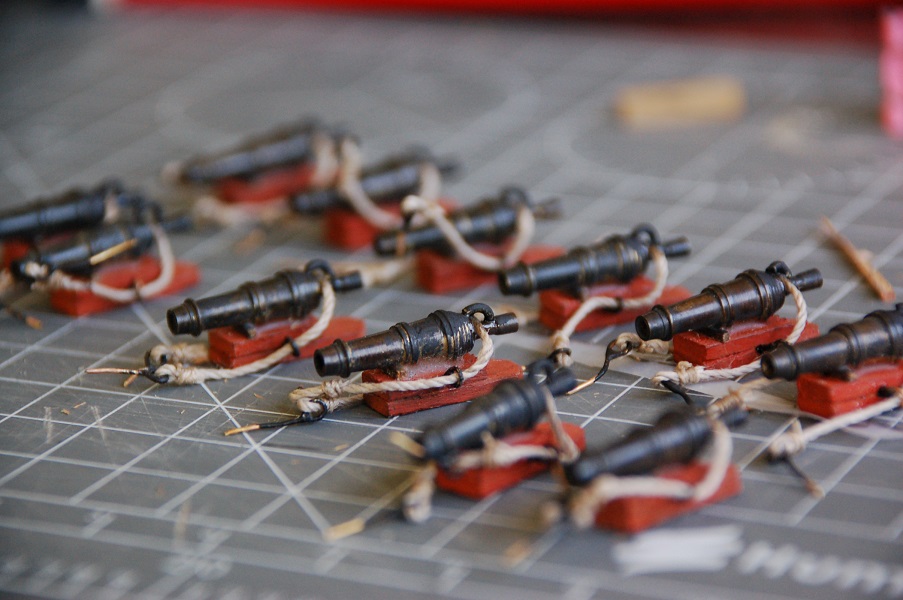
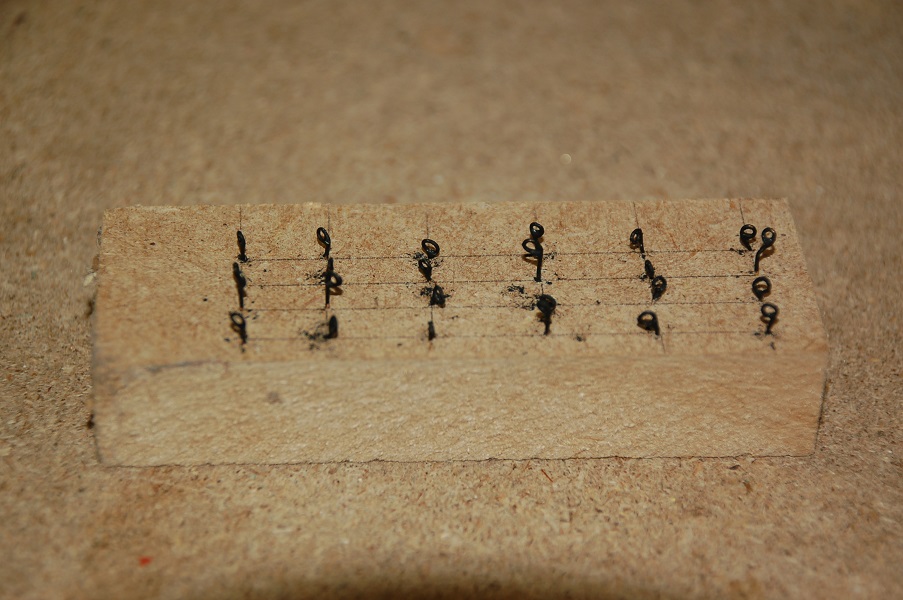
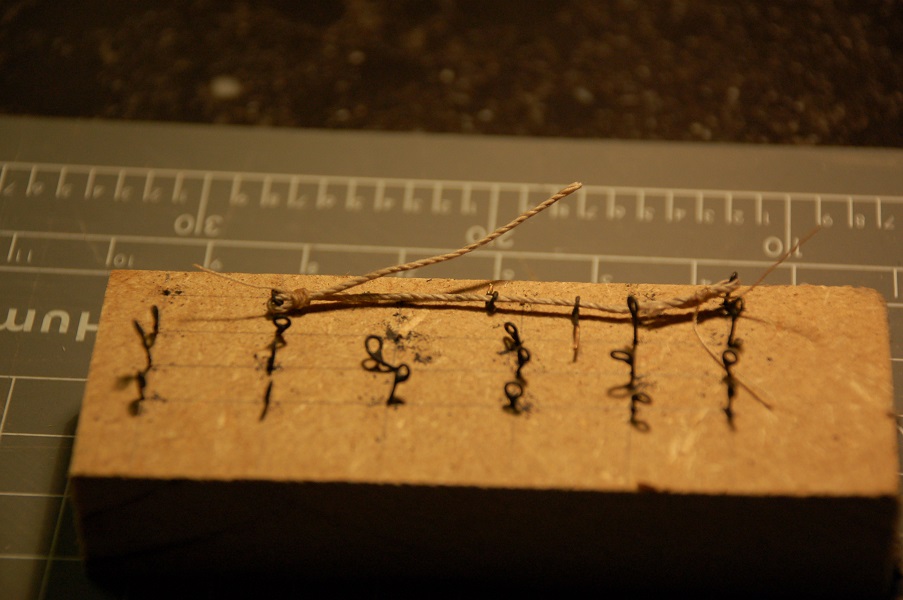
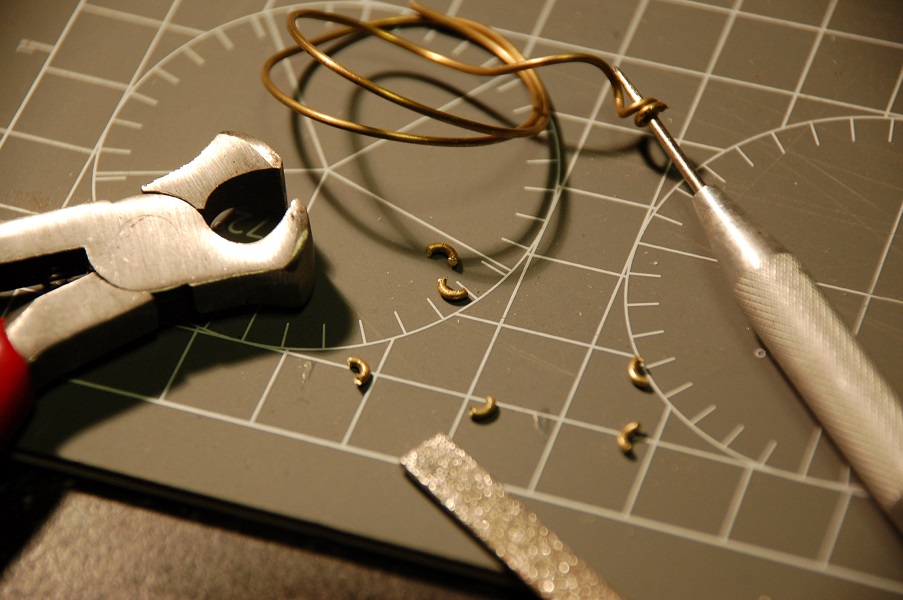
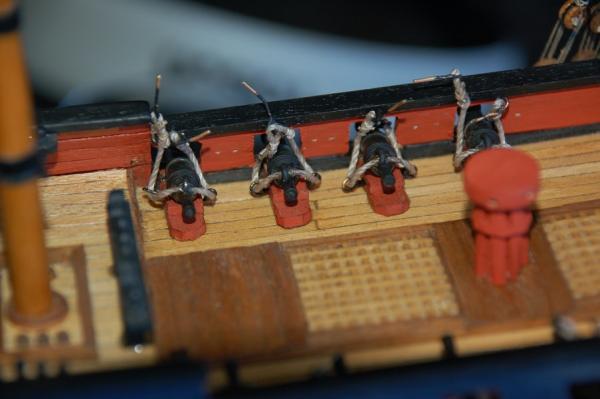
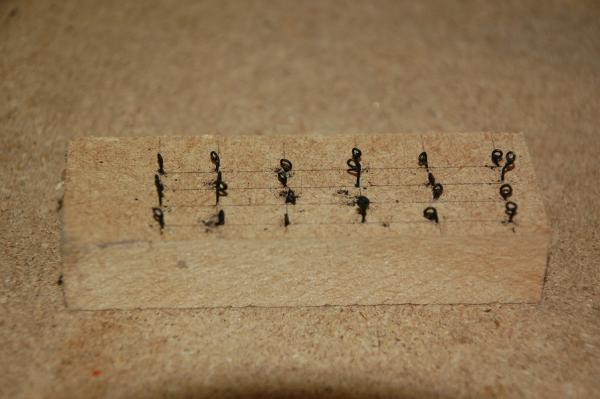
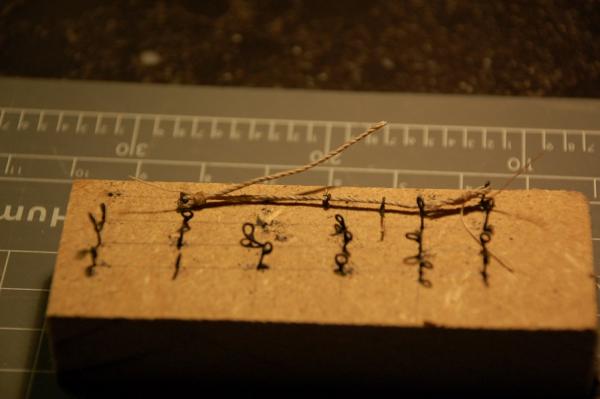
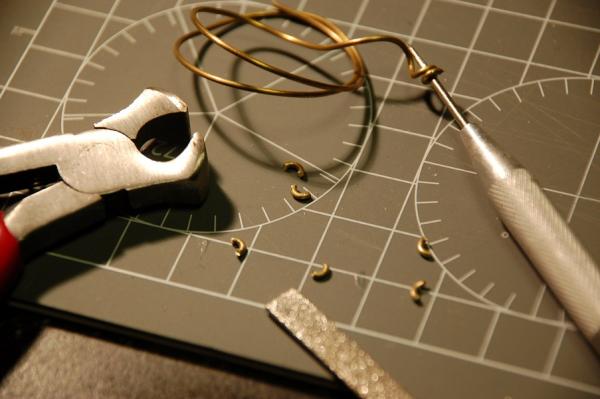
Started on rigging the guns. I first created some eyelets from brass wire wich i soldered afterwards. Then put them all in a mdf block and painted them black. I then created the breeching ropes on that same block and drilled the carriages for the eyelets on each side of the carriage. Afterwards i glued with CA the breeching ropes on the guns. To make the breech bolts, i turned the wire round a smile diameter. Then i cutted some parts of it. With CA i glued the breech bolts on the guns. The result, there not fixed permanently yet. I still have to paint the breech bolts black.


-
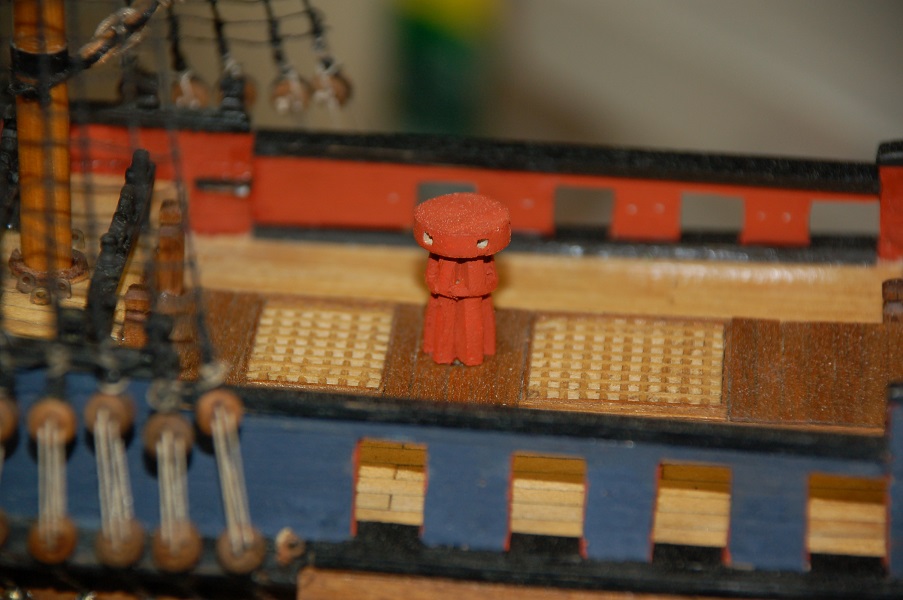
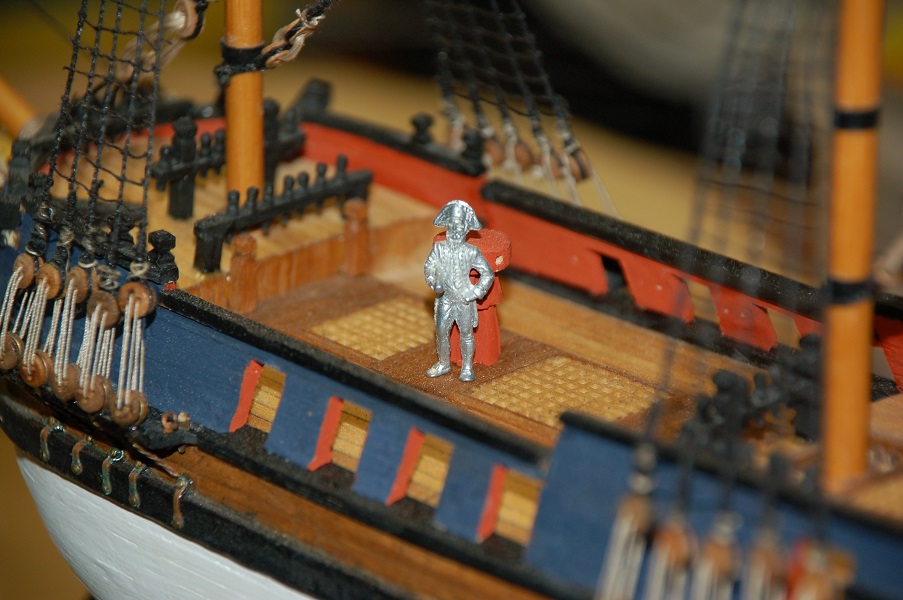
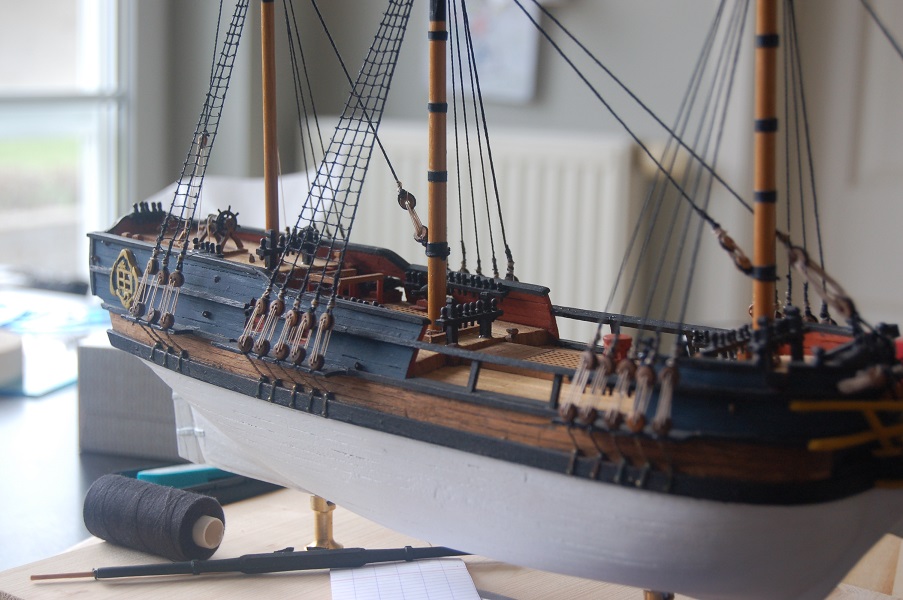
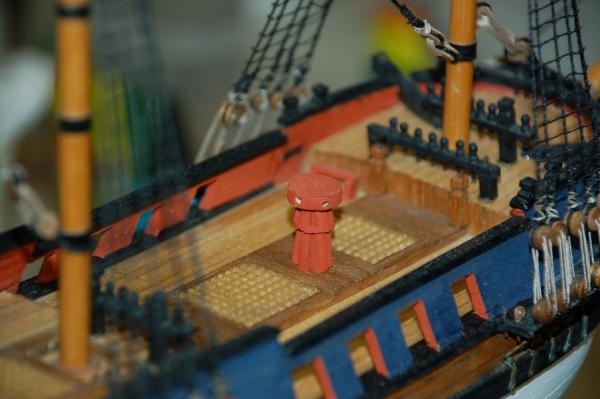
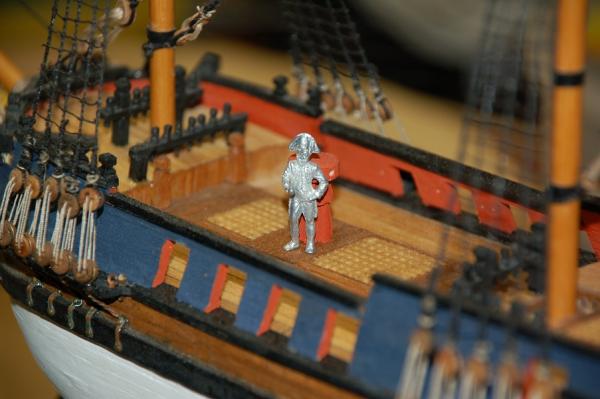
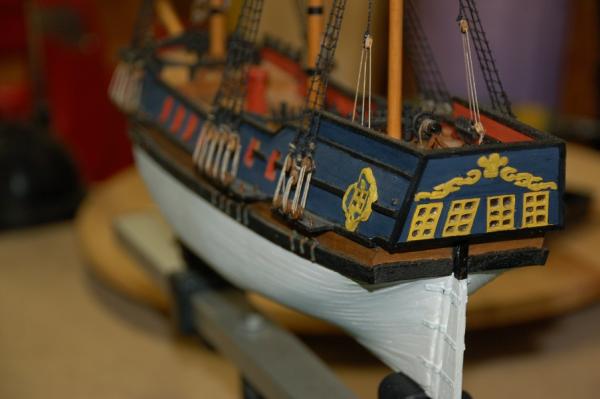
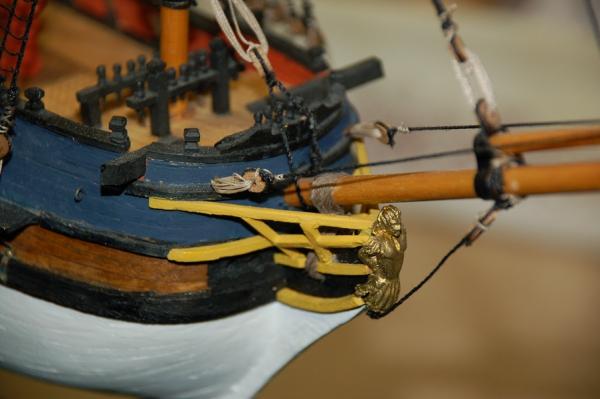
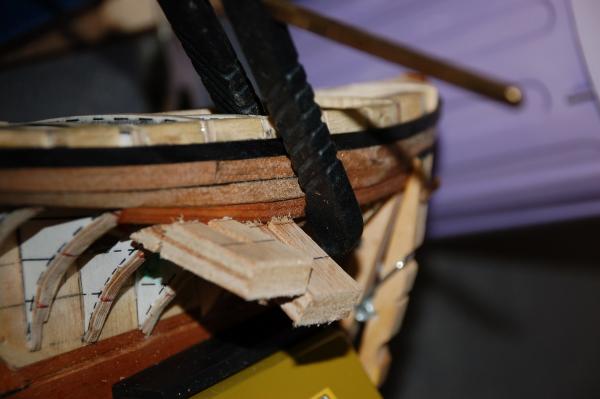
Now that i've decided to continue the model, i rebuild the bulwarks. (Why didn't I do that before the shrouds!) It's not perfect but at least i'll be able to add the carronades to the model. The capstan i made was in too small a scale. So i remade one, with the help of the articles in the download section. Which are really excellent ! The captain is inspecting the new capstan. I wasn't quite happy with the result of the stern, so off it went. I completely remade it, also because I've made the bulwarks a bit higher on the quarterdeck. I made some new windows and tried some minimal carving. I made some new windows and tried some minimal carving. The picture revealed that one carving is a bit lower then the other above the stern window. I'll have to correct that. Next step will be rigging the guns, although minimal, probably only the breeching ropes. And probably painting the figurehead. (What was i thinking 10 years ago?)


-
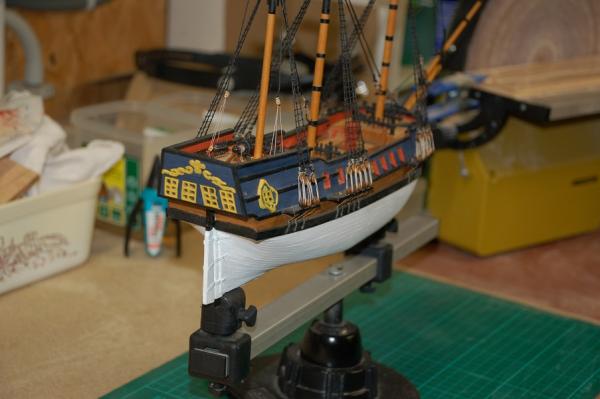
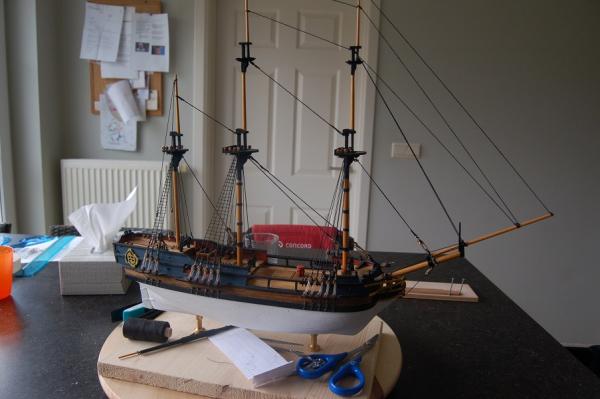
Hi all I hope you don't mind i start a build log of a model in which I've already progressed a lot. This was/is my second build in ship modelling. I started this build about 10 years ago, but due to different reasons my model shipbuilding got a long break. She started to collect a lot of dust until about a year ago, i restarted my shipbuilding with my other model, the corsair. But now I've put that one on hold, because i really think i should finish this model first. In the beginning, while planking the hull i had a little accident and broke off the bulwarks on the middle deck. Hence why she has a railing on the middle deck in stead of bulwarks with guns. I also discarded the brass fittings because they were a bit too much too my liking. I decided back then to try some scratch building on the stern. Same goes for the capstan provided with the kit. This is where she was about a year ago. The bow The capstan


-
Hi Duff No, the plans were not separate. They're in the book itself. (the foldable pages, the book cover and the body sections on one of the first pages in the book.)
-
I've received this book as a Christmas gift. It truly is amazing. It contains a wealth of information about that ship, along with beautiful plans in scale 1/72. This book is a "must have" in every enthousiast library.
-
Very nice, a great start on your "La Belle Poule". This ship is my ultimate goal, but i want to practice my skills first on smaller builds. I'll be following your build.
-
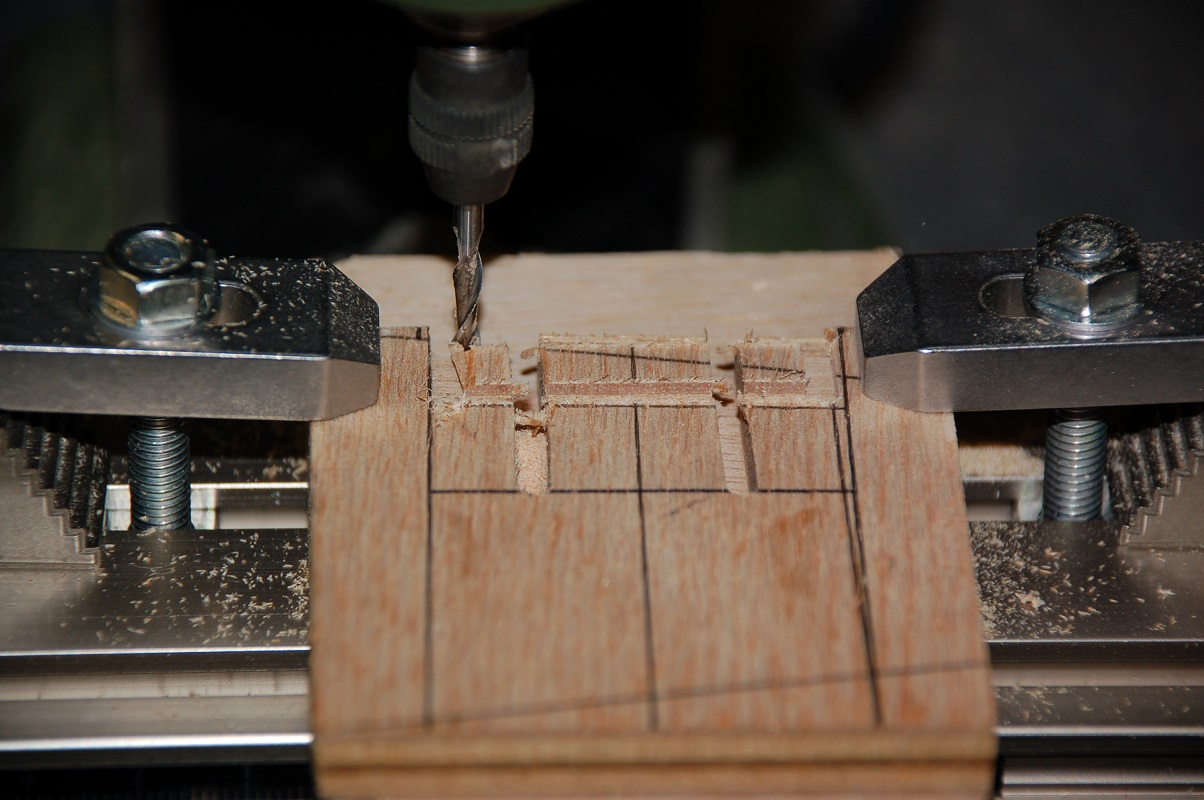
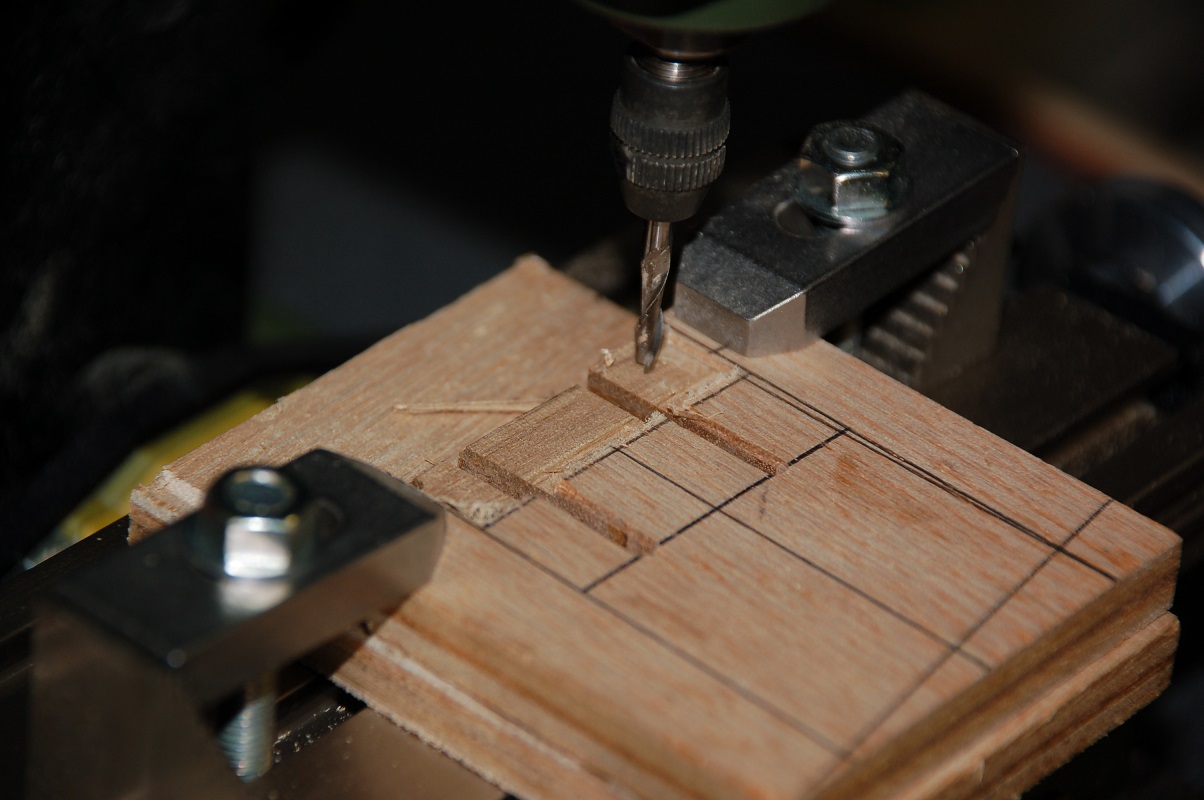
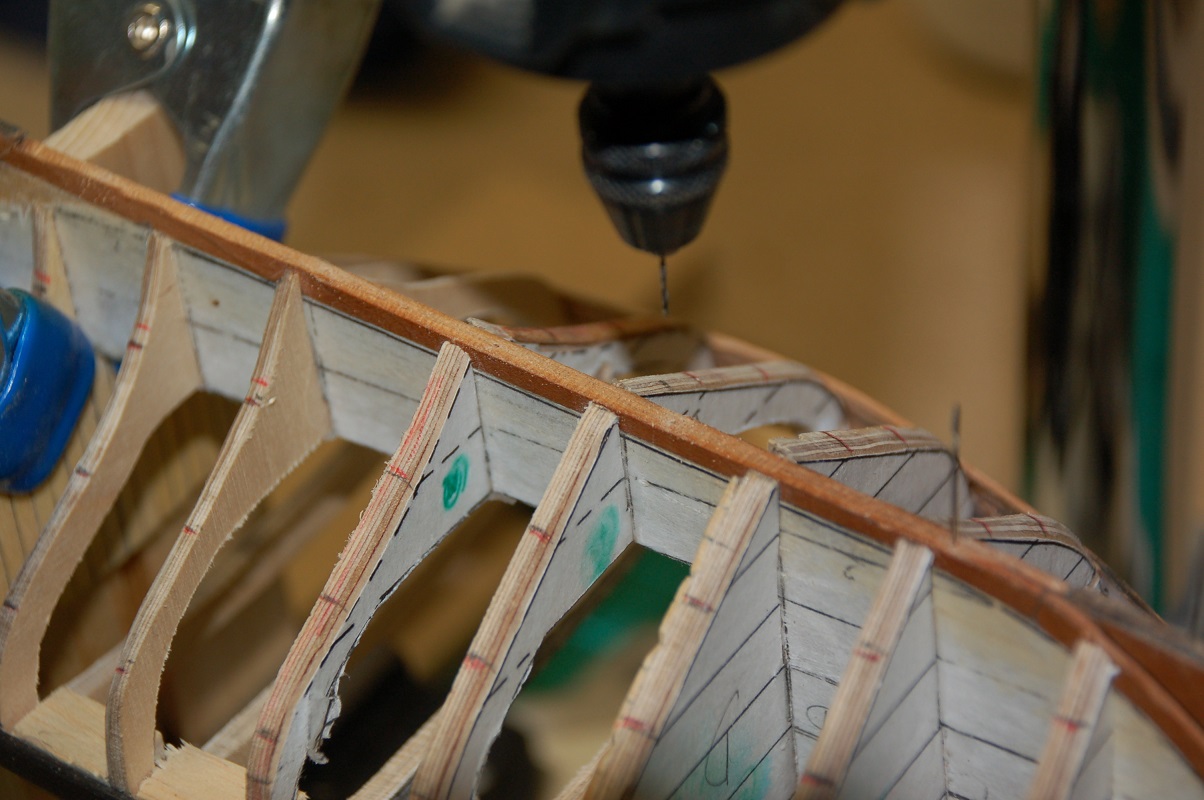
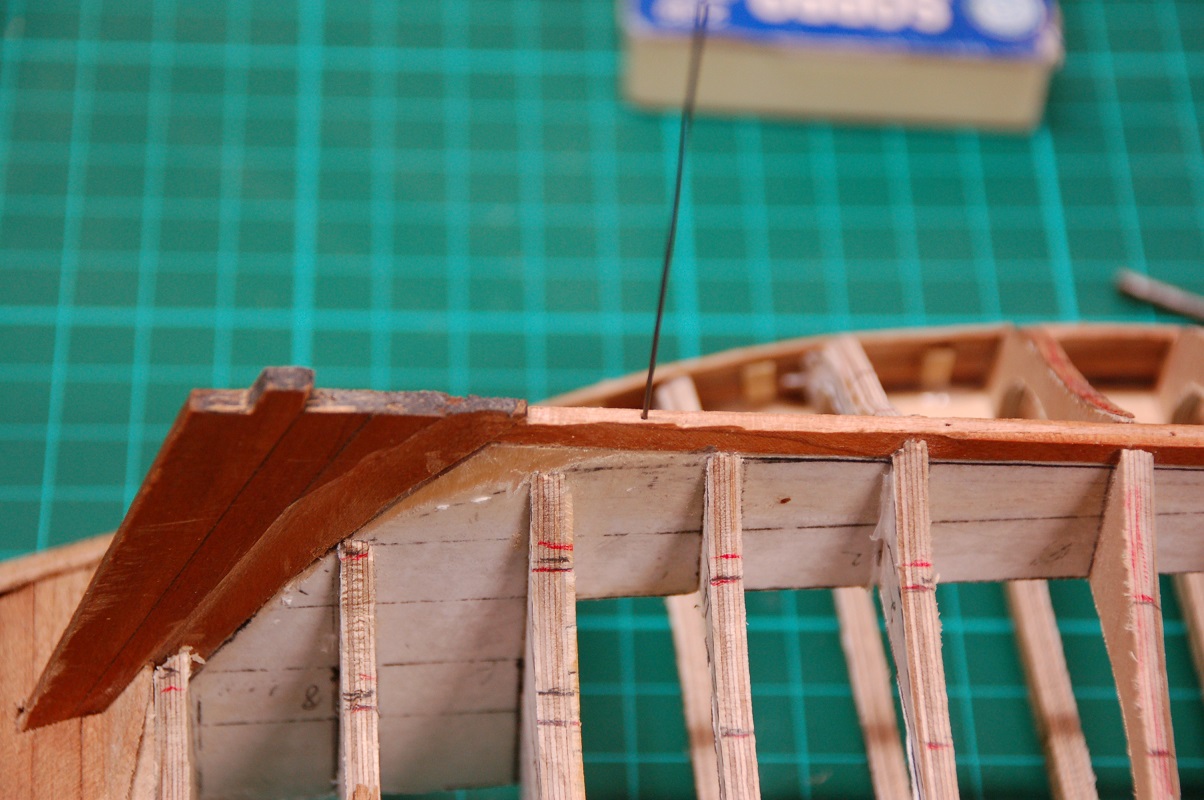
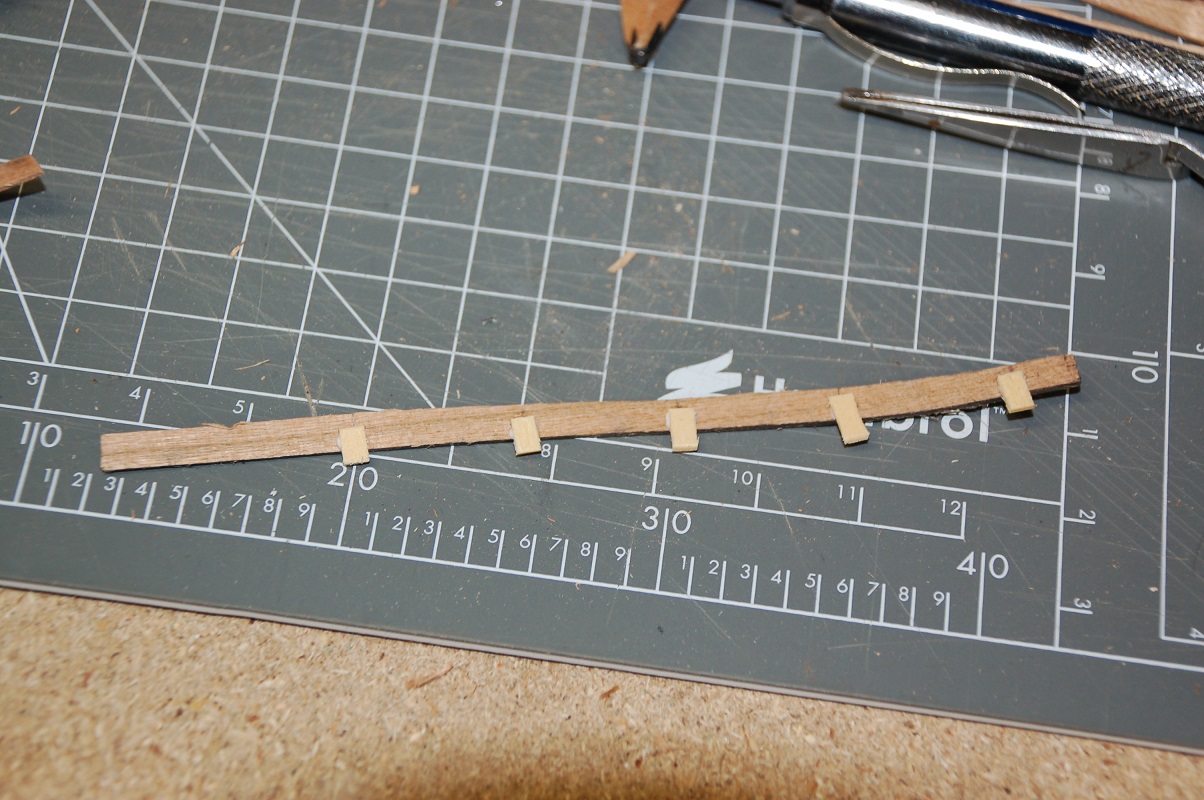
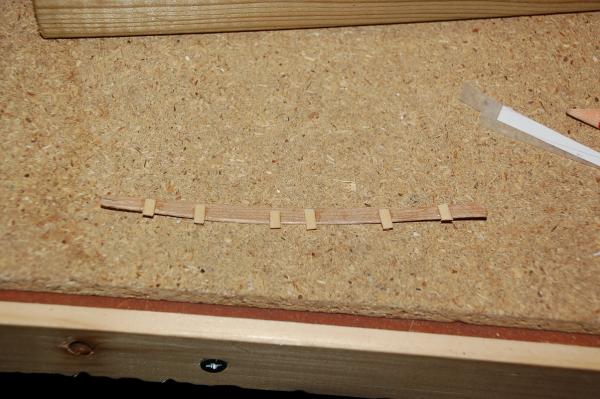
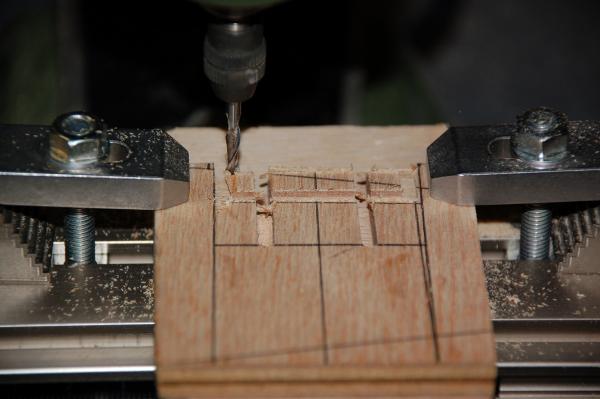
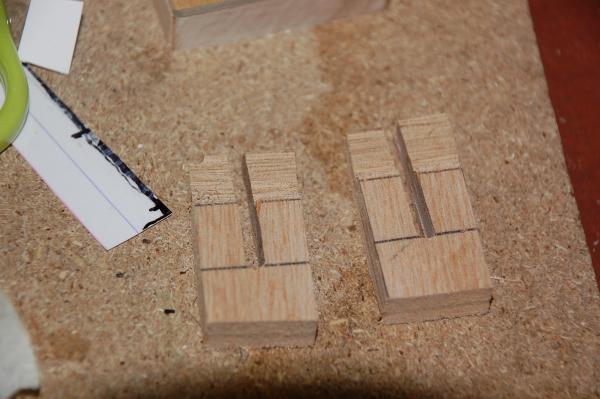
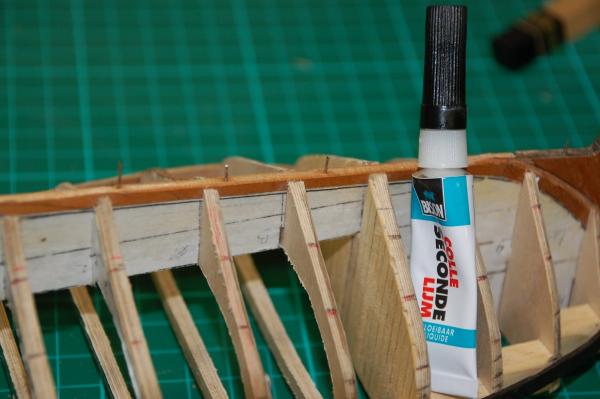
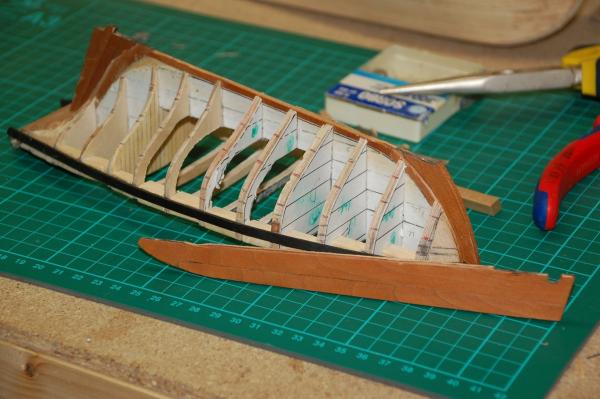
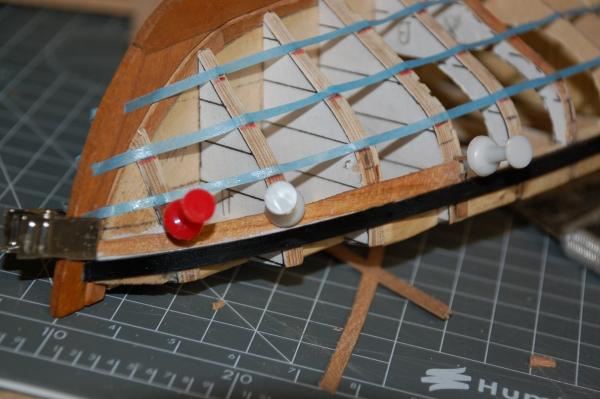
After the keel story i'm not so fond of using pins to hold my planking anymore. So i'll be following Clay's instructions and make some friction clamps. You can see them already in action in my previous post. It's only purpose is to slide it over the bulkheads in order to hold the plank in its place. I prepared a scrap piece of plywood for two such clamps, as a test. The bulkheads are 3.15 mm, so i milled a slot of 3 mm. Then i milled a recess in the front part of the clamps. Using the scroll saw i separated the two clamps Testing the clamp, it works like a charm, but i'm thinking it needs a bigger recess.

- 144 replies
-
- 3
-
-
- corsair
- bermuda boat
- (and 1 more)
-
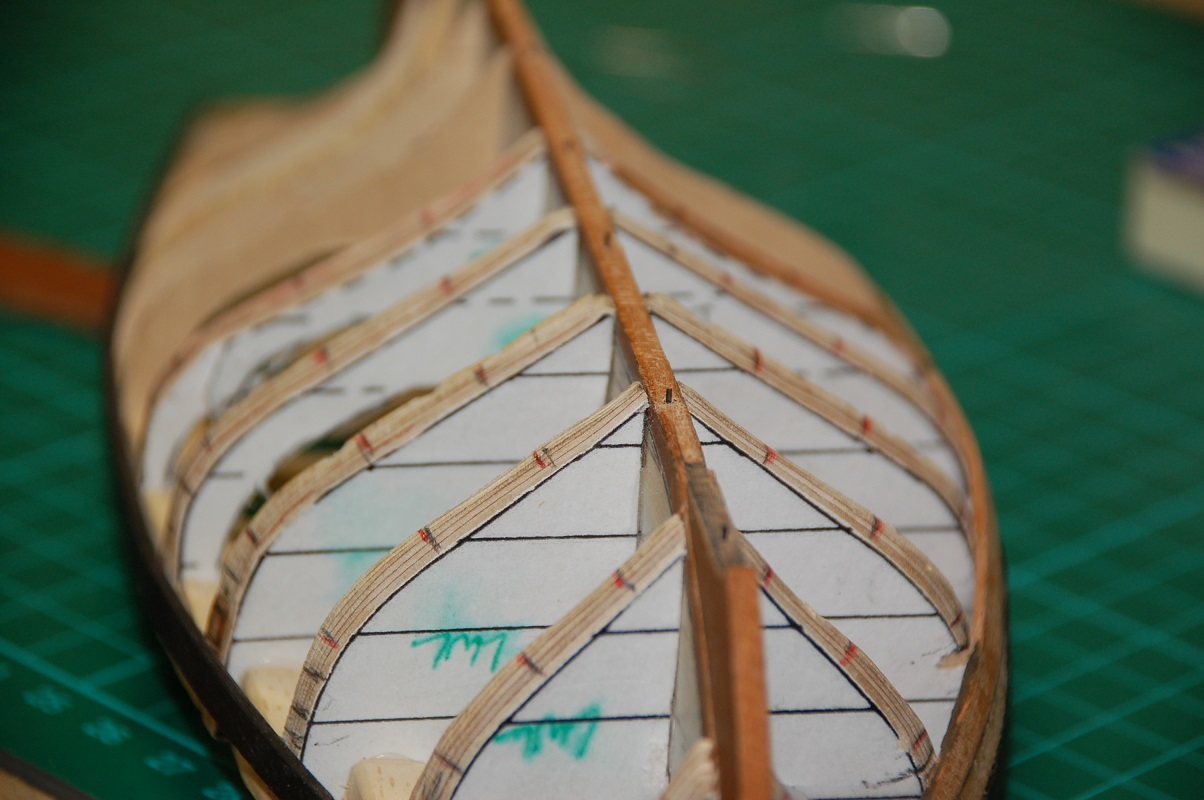
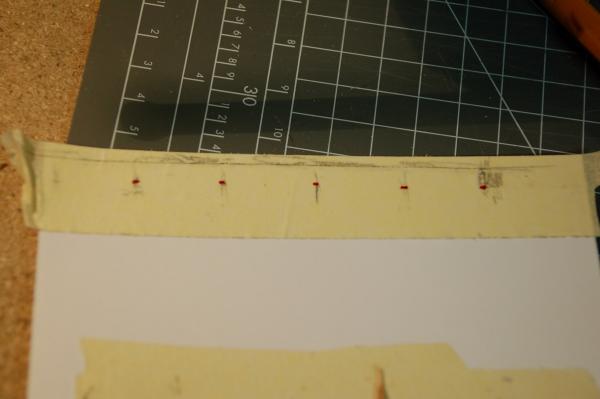
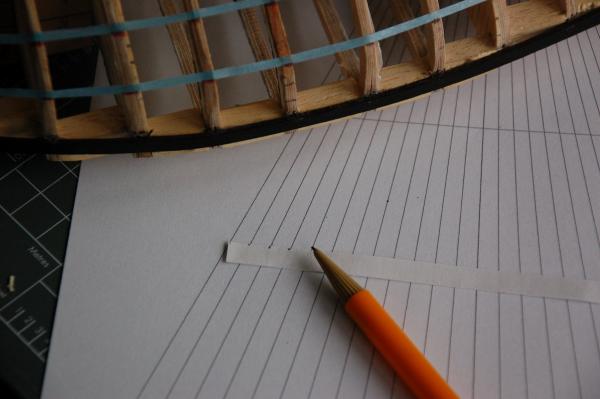
Last night, I found a good tape to work with for the spilling, scotch Magic tape . Then with a pencil i gently mark the edge of the prior planking run. The result is a plank on which i only had to do some minor tweaking for the perfect fit. The result underneath, while letting it dry on the hull after soaking. I'm so happy, I got a plank right from the first time! Hopefully it wasn't just beginners luck.
- 144 replies
-
- 3
-
-
- corsair
- bermuda boat
- (and 1 more)
-
Thank you all for the likes and nice comments. To be honest, the first days after it, i was planning to stop my Corsair. I was already studying the plans of la Jacynthe. But then after the cooldown, i was thinking how i could solve this problem. I'm now really glad i did.
-
HMS Alert 1777 by Jaekon Lee - 1/64
WBlakeny replied to Jaekon Lee's topic in - Build logs for subjects built 1751 - 1800
The result is beautiful. You're off to a great start of the Alert. -
HMS Victory by willz
WBlakeny replied to willz's topic in - Build logs for subjects built 1751 - 1800
I like your idea of fun! What a nice little trick. -
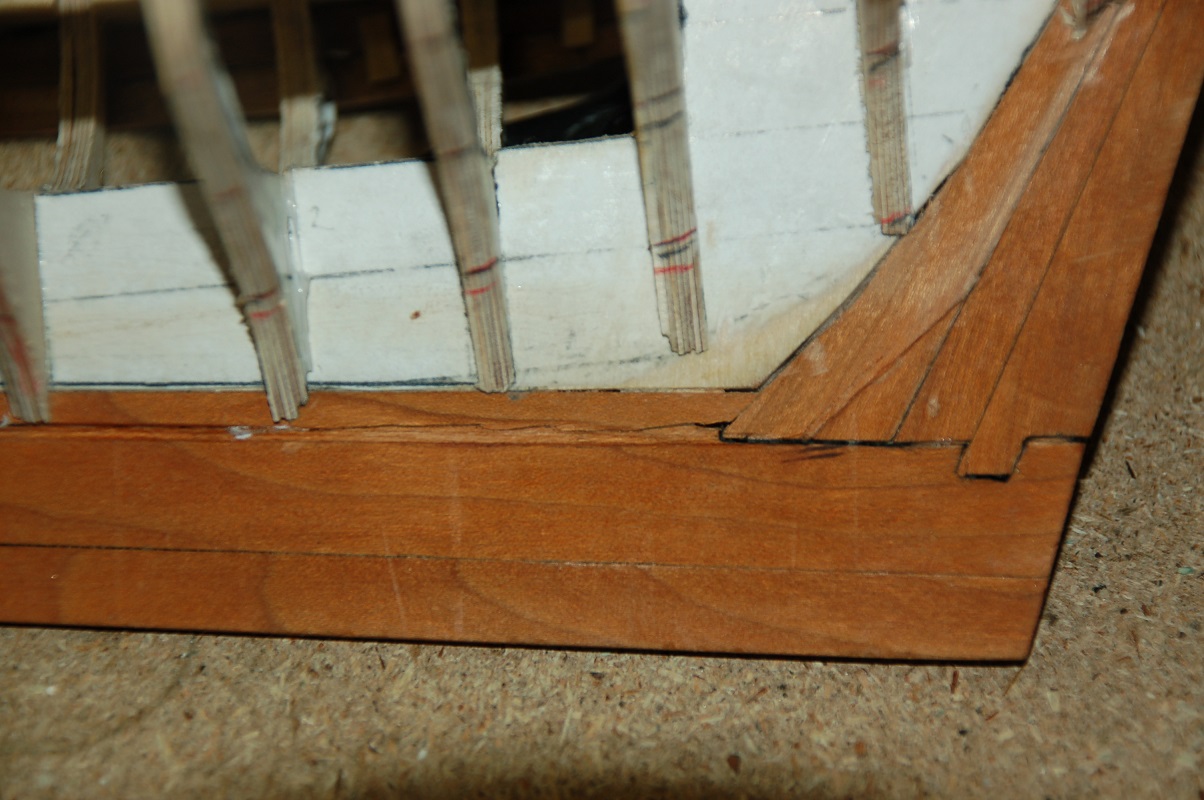
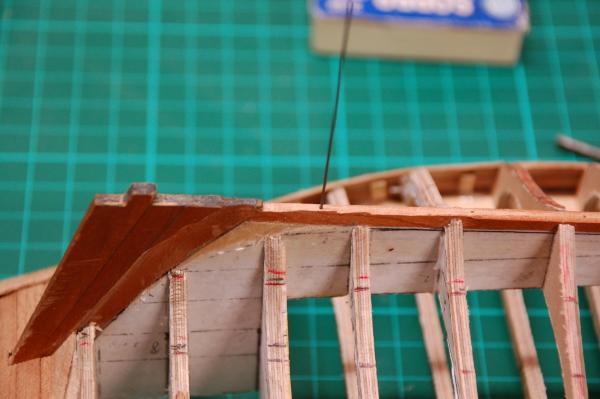
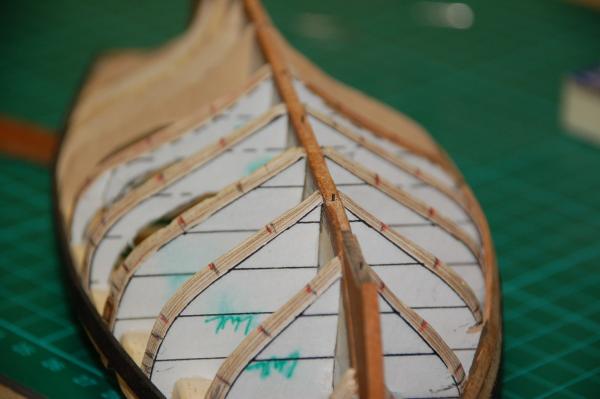
With all that corrected, we're back in business for the planking job. Last night i glued another plank in its place. The last plank of the first belt. It sure is very time consuming, but i like to do it.

- 144 replies
-
- 6
-
-
- corsair
- bermuda boat
- (and 1 more)
-
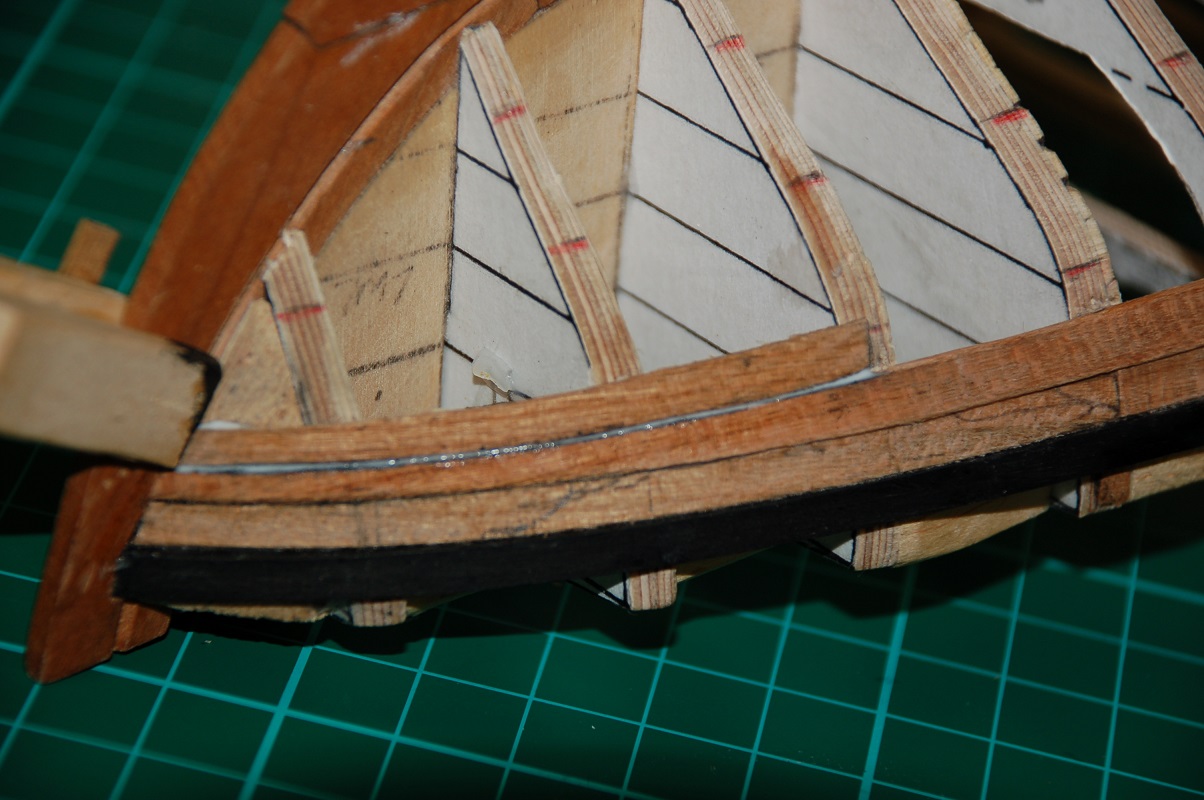
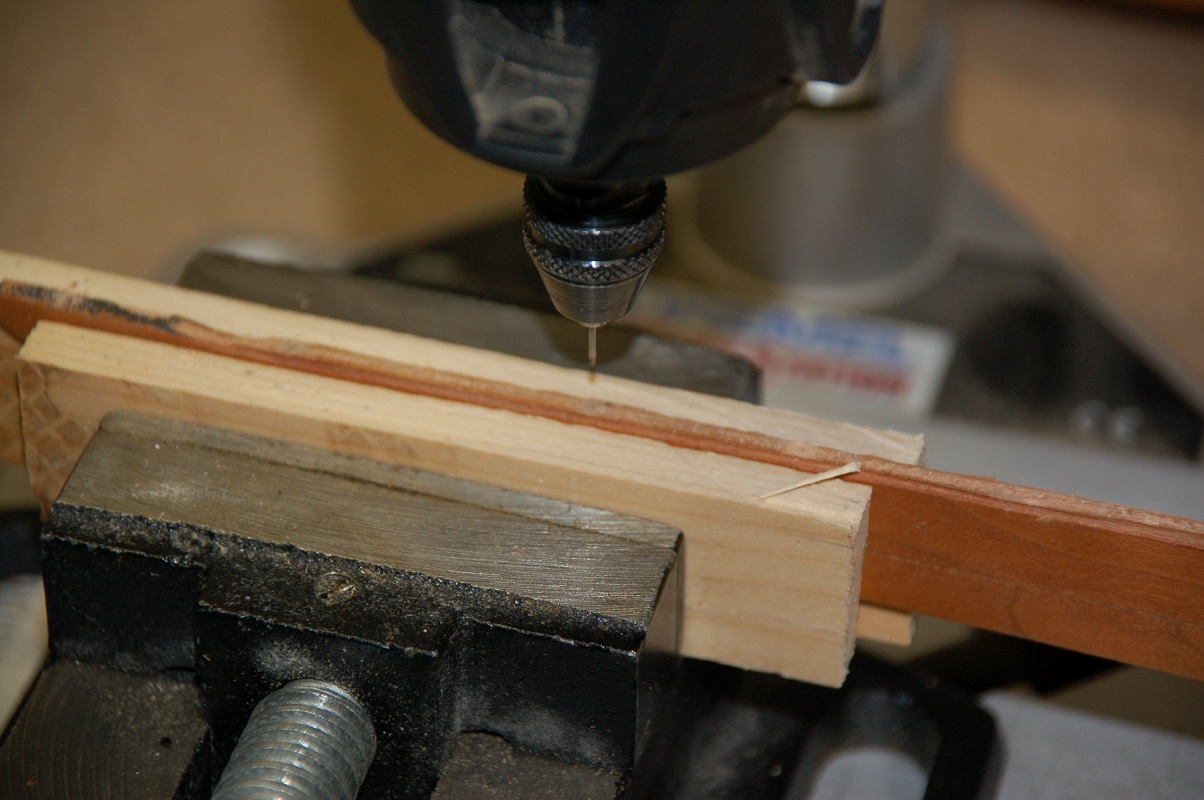
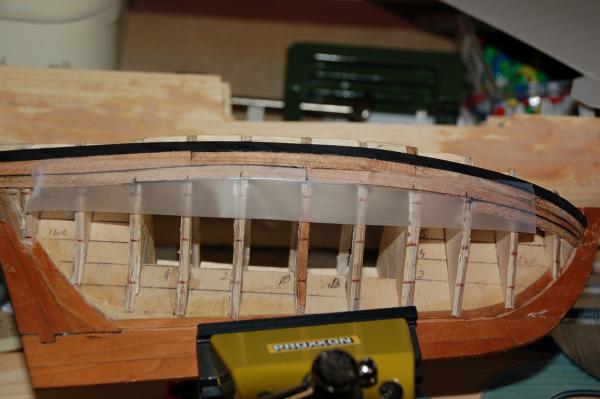
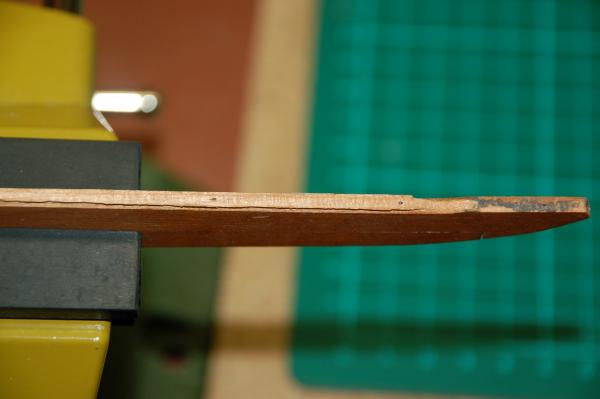
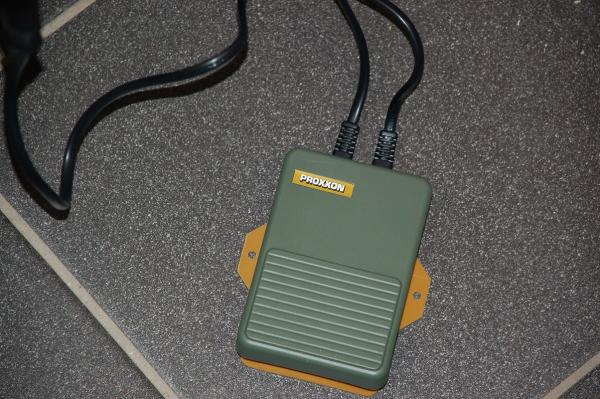
True, it's not the end of the world (or at least for my little corsair). I was lucky that it snapped off cleanly. Now, i didn't want to simply glue it back in place, i wanted something stronger. The keel being only 3mm, i thought about using pins to dowel it. First i drilled the hull at several places. Then dry fitted some pins from which i cut off the heads. To locate the places to drill on the keel, i used 0,5 mmm (which is the same the diameter as the pins) lead pencil for a refillable lead pencil. They were cut rather short to the hull. After that i pressed the keel back to its place and the pencil did its job, marking the places to drill. Next thing, drilling the wholes in the keel. Some months ago i bought something very usefull for a task like this. A footswitch, first time i tried it and i immediately wondered why i never thought of this before. So handy... Glueing the pins in place with CA. And then glueing the keel with some woodglue, using the clothing pins to make sure the keel is right aligned to the hull. The result, all firmly back in its place. The only scar to see is right above the rabbet. And since this will be covered by the planking, i was very lucky.


- 144 replies
-
- 4
-
-
- corsair
- bermuda boat
- (and 1 more)
-
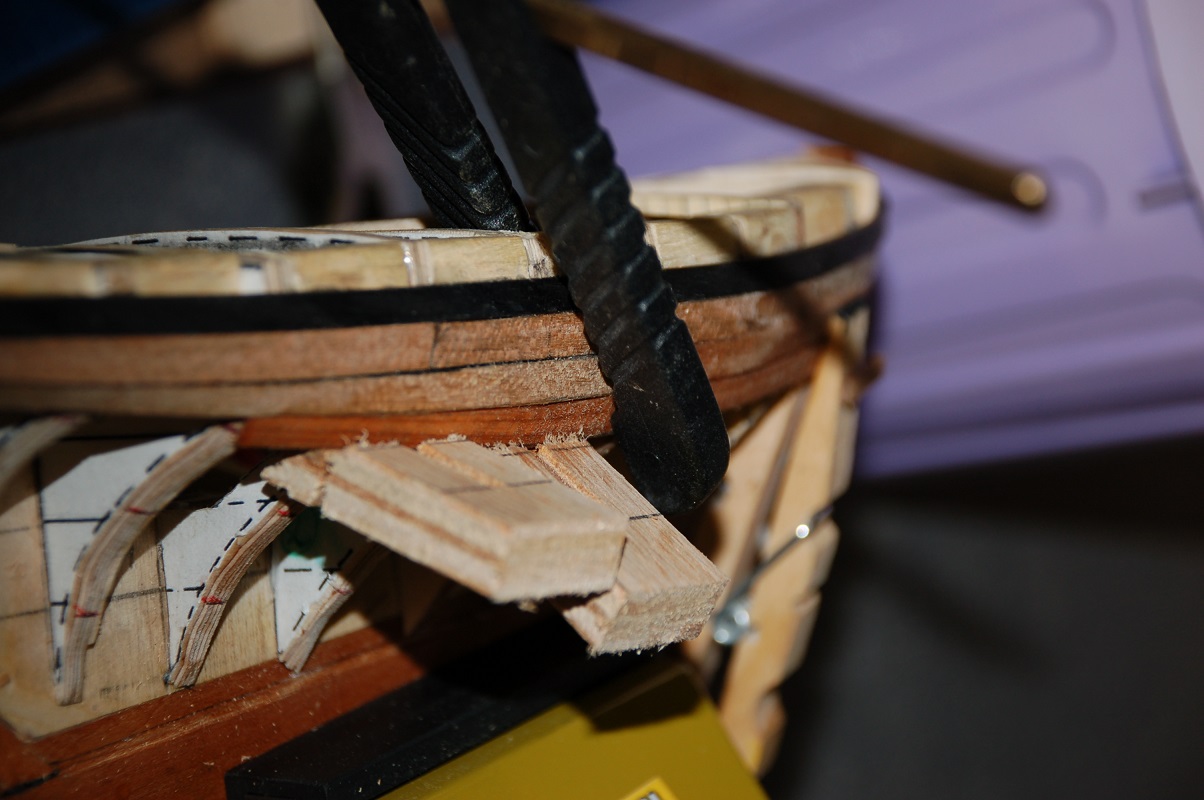
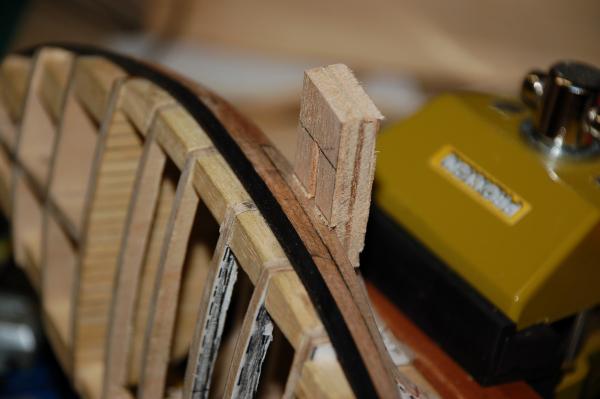
Disaster! While pushing in a pin to hold a plank in place, i used to much force on the keel. It snapped off all along te rabet and the joints. I must take a mental note to always dowel the keel on future builds. I gently putted the model aside, and didn't look at it for more then a week or so.
- 144 replies
-
- 4
-
-
- corsair
- bermuda boat
- (and 1 more)
-
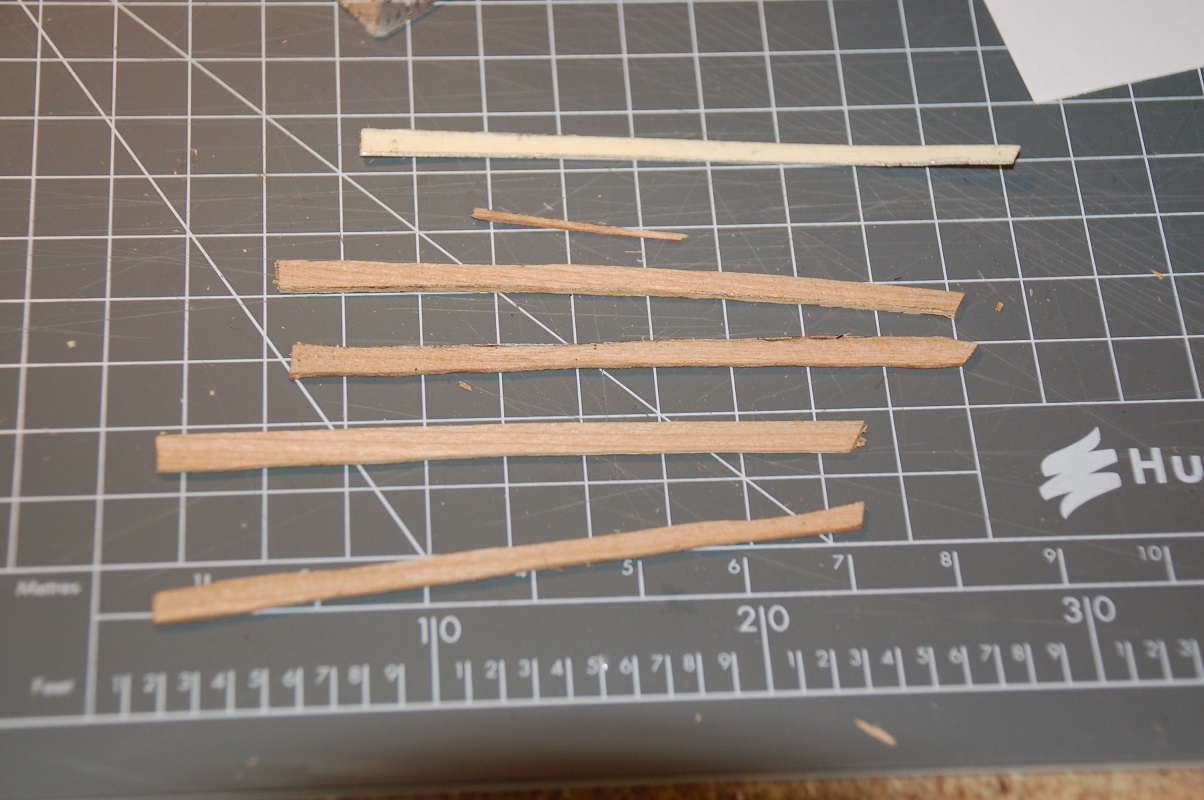
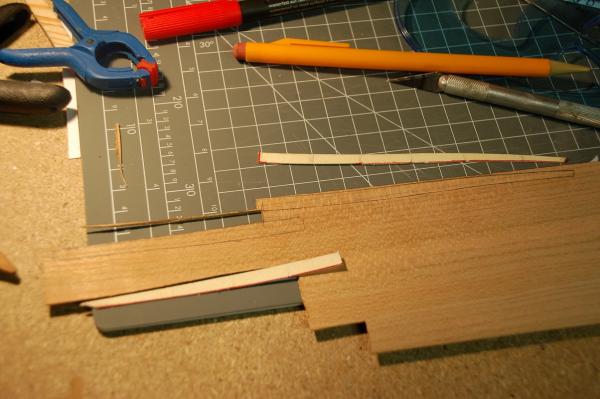
I cutted the card template of the plank and traced them on a piece of cherry. Then i cutted the plank. After several tries, i found out, that the best way to obtain a proper plank is to score it first using a scriber. Using the frech curves i traced the lines with a scriber. Then i gently cutted with a sharp knife in several passes the plank. For some planks, where the curvature of the hull allowed it, i use some scrap wood to reinforce the planking. I glue some scrap wood on the back of the plank. For some planks, especially a the bow, i soak them and let them dry to obtain the right bending. Then glue the plank in place. It took several tries to obtain a plank to my liking.


- 144 replies
-
- 1
-
-
- corsair
- bermuda boat
- (and 1 more)
-
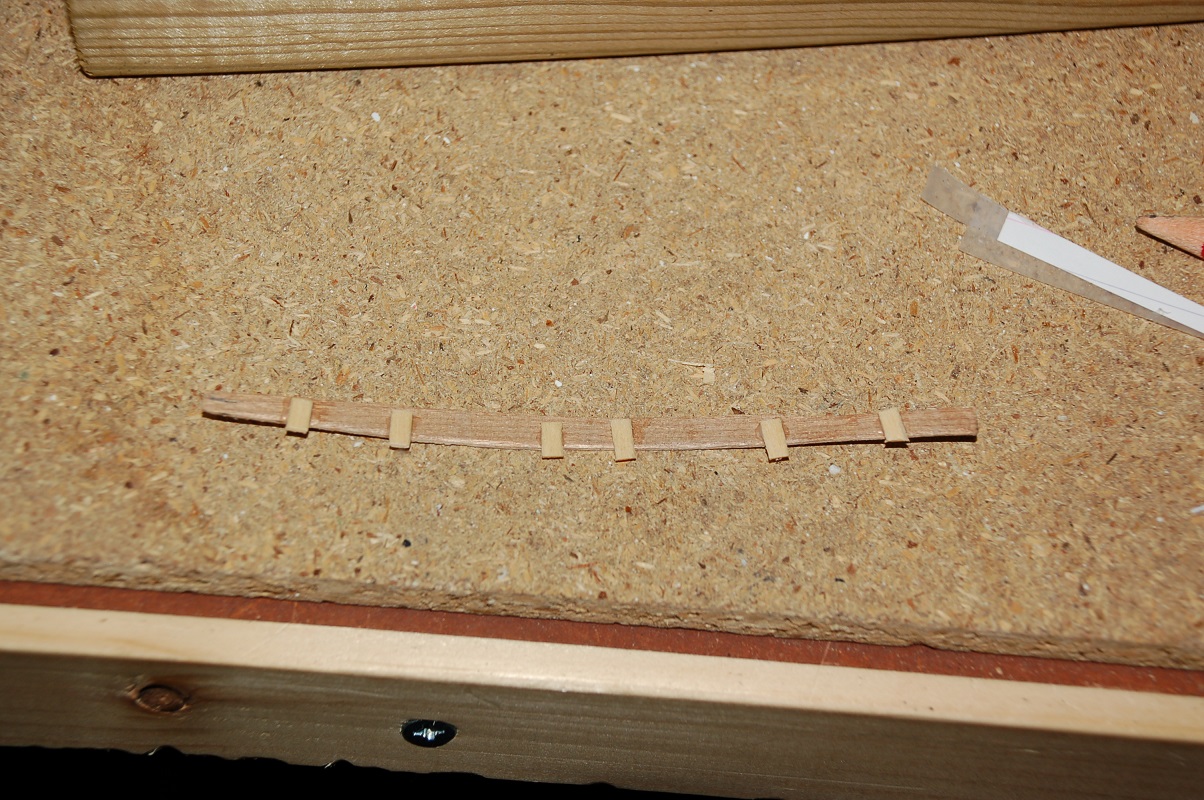
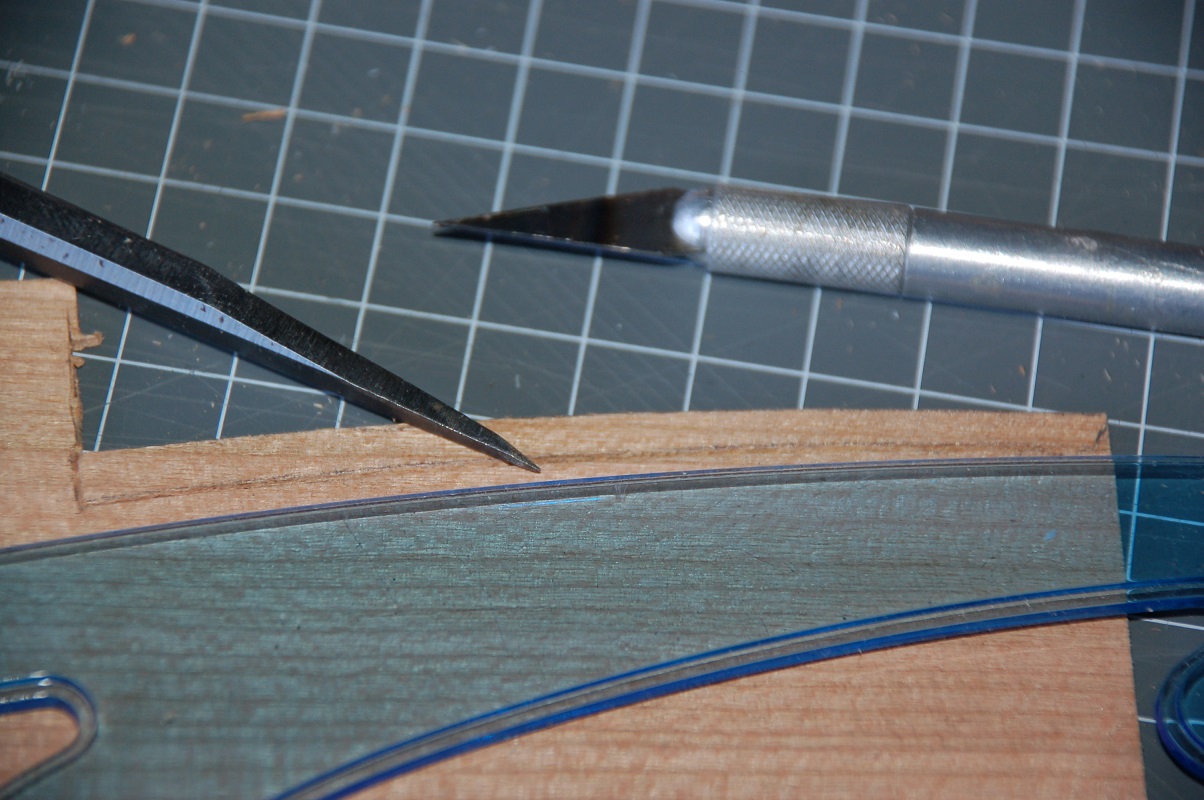
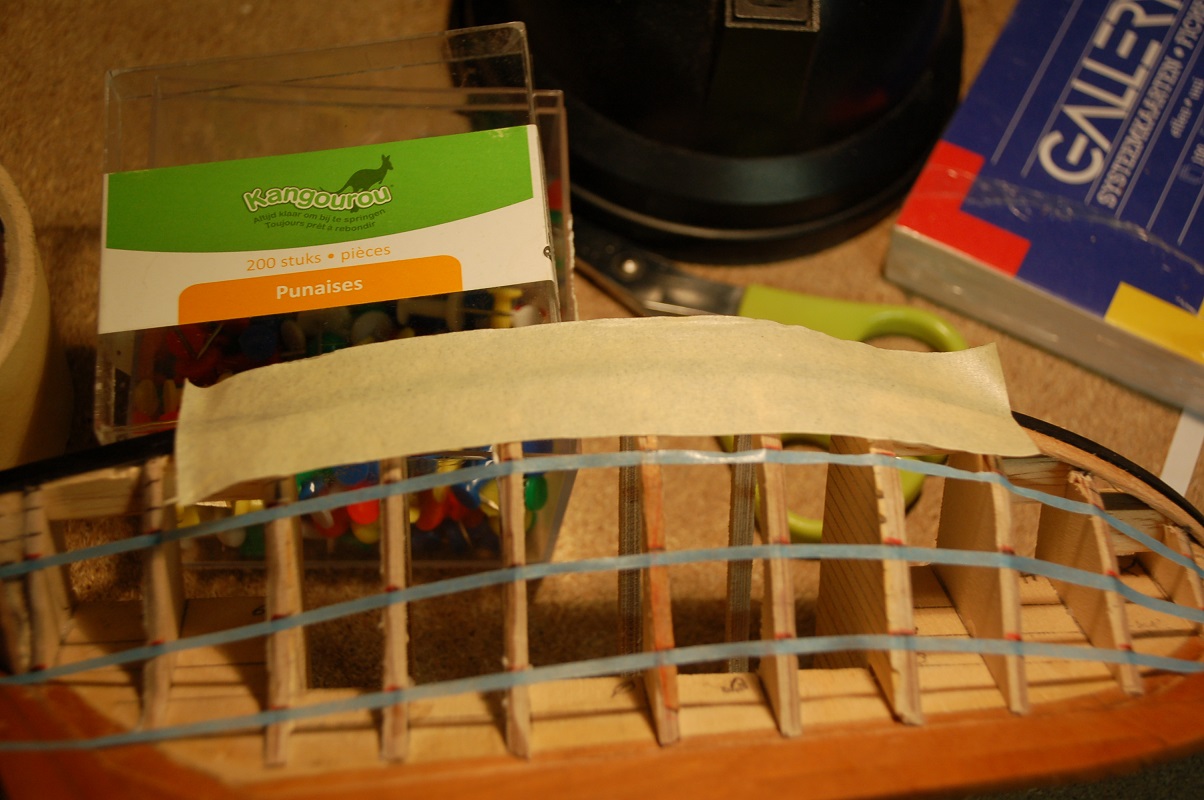
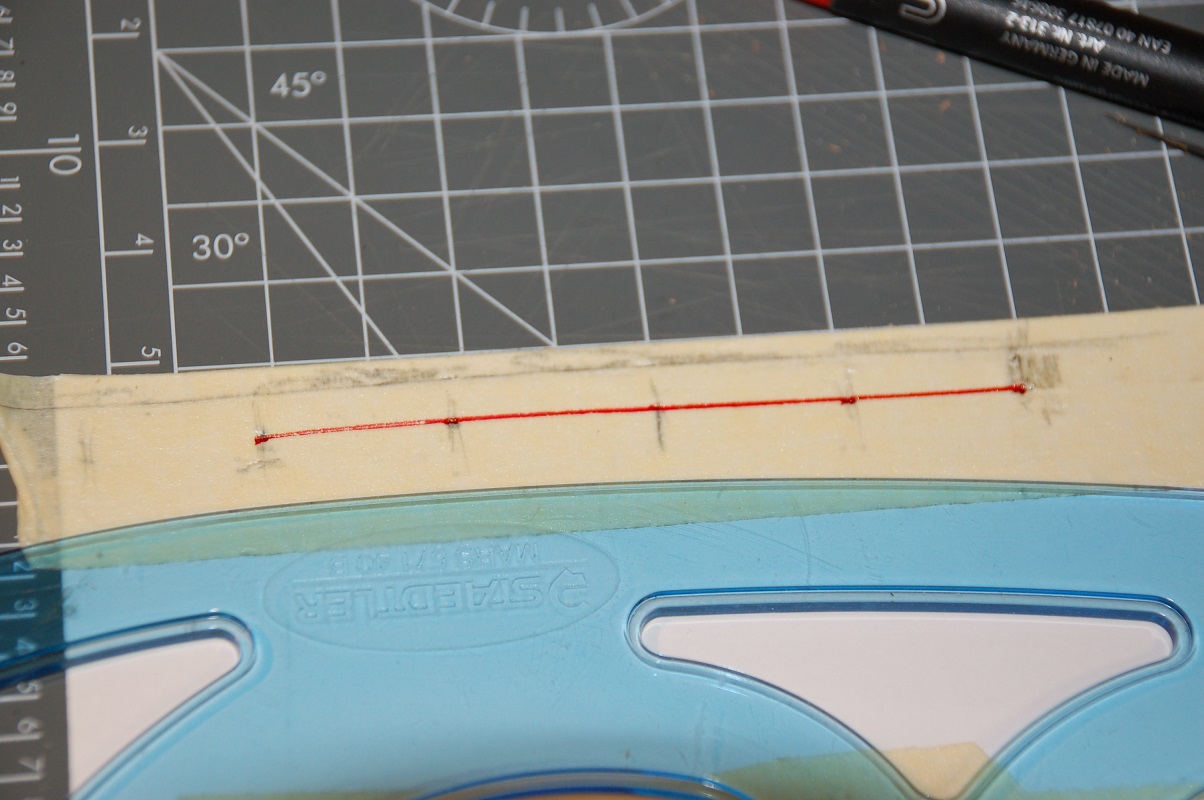
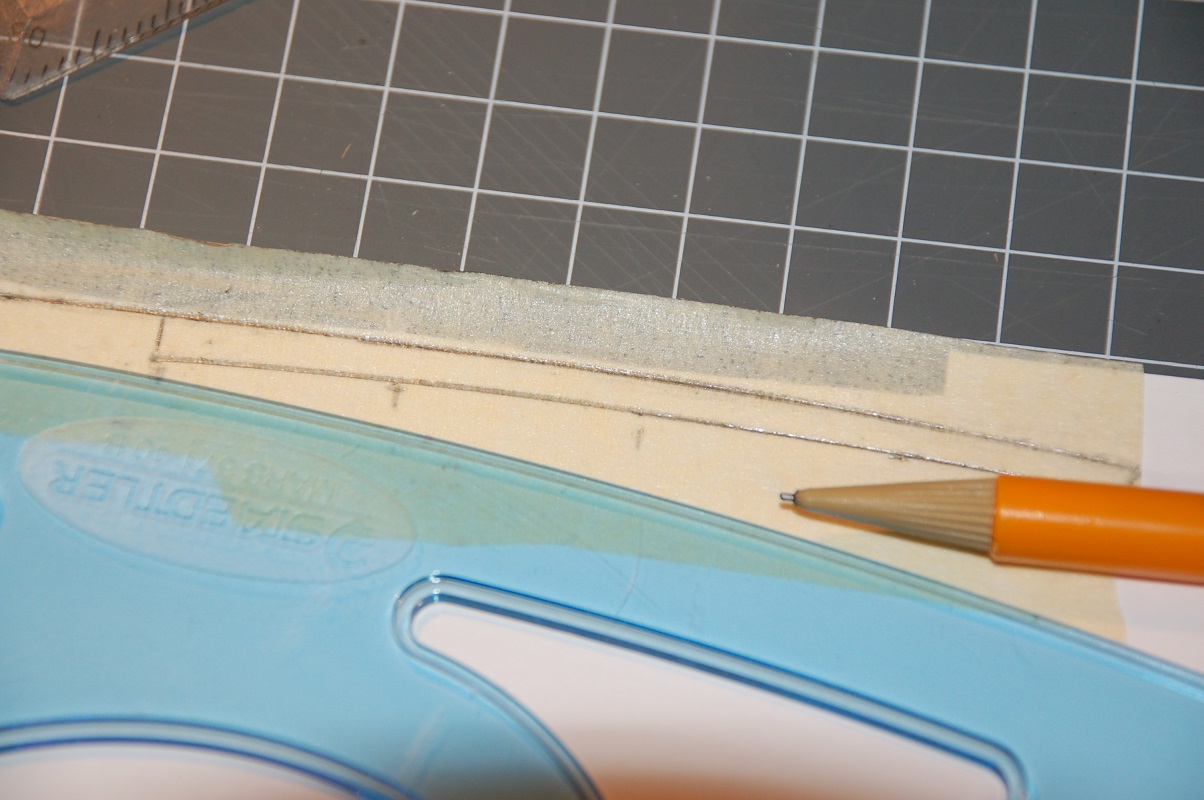
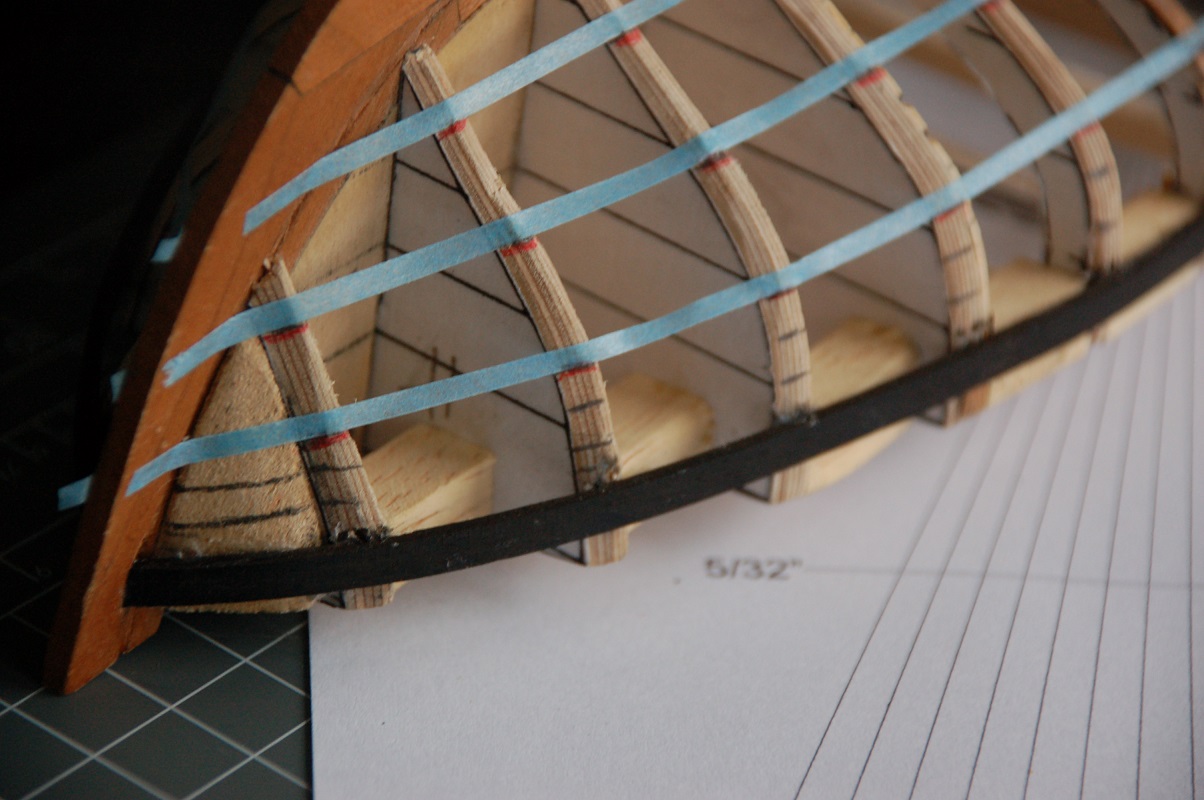
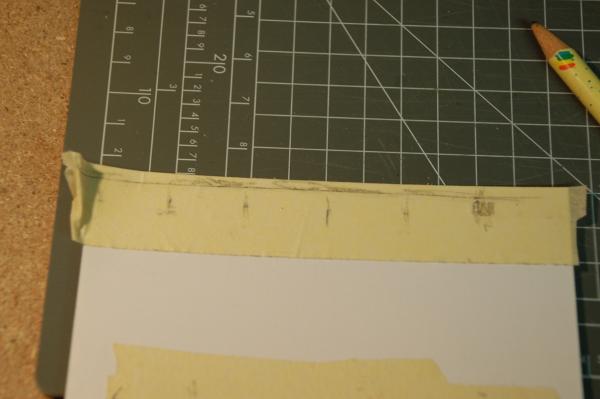
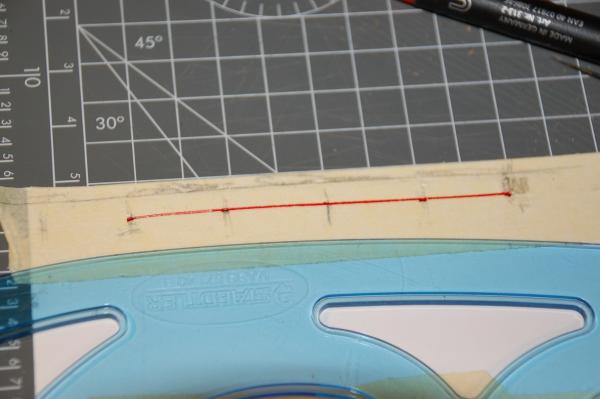
I used a wide masking tape to do the spilling. I first used a transparent 3M tape, but it didn't allow me to use a pencil to mark on it. I need to look further for other tapes. The masking tape isn't ideal for this. I followed the curve of the previous plank with a pencil and marked the positions of the bulkheads. Afterwards i removed the tape and transfered it to a piece of card. Then i transfered the width of the plank, on each bulkhead, to each mark on the tape/card. Using a french curve, or a flexi-curve i connected the dots, obtaining the form of the plank.


- 144 replies
-
- 2
-
-
- corsair
- bermuda boat
- (and 1 more)
-
Using a piece of paper i marked the width of a strake on the bulkhead. Then with the paper i slide it over the planking fan, until i have my three planks with the space of the bulkhead belt. Then transfer those marks to the bulkhead, and this i did for all the bulkheads of that belt.

- 144 replies
-
- 2
-
-
- corsair
- bermuda boat
- (and 1 more)