WBlakeny
-
Posts
252 -
Joined
-
Last visited
Content Type
Profiles
Forums
Gallery
Events
Everything posted by WBlakeny
-
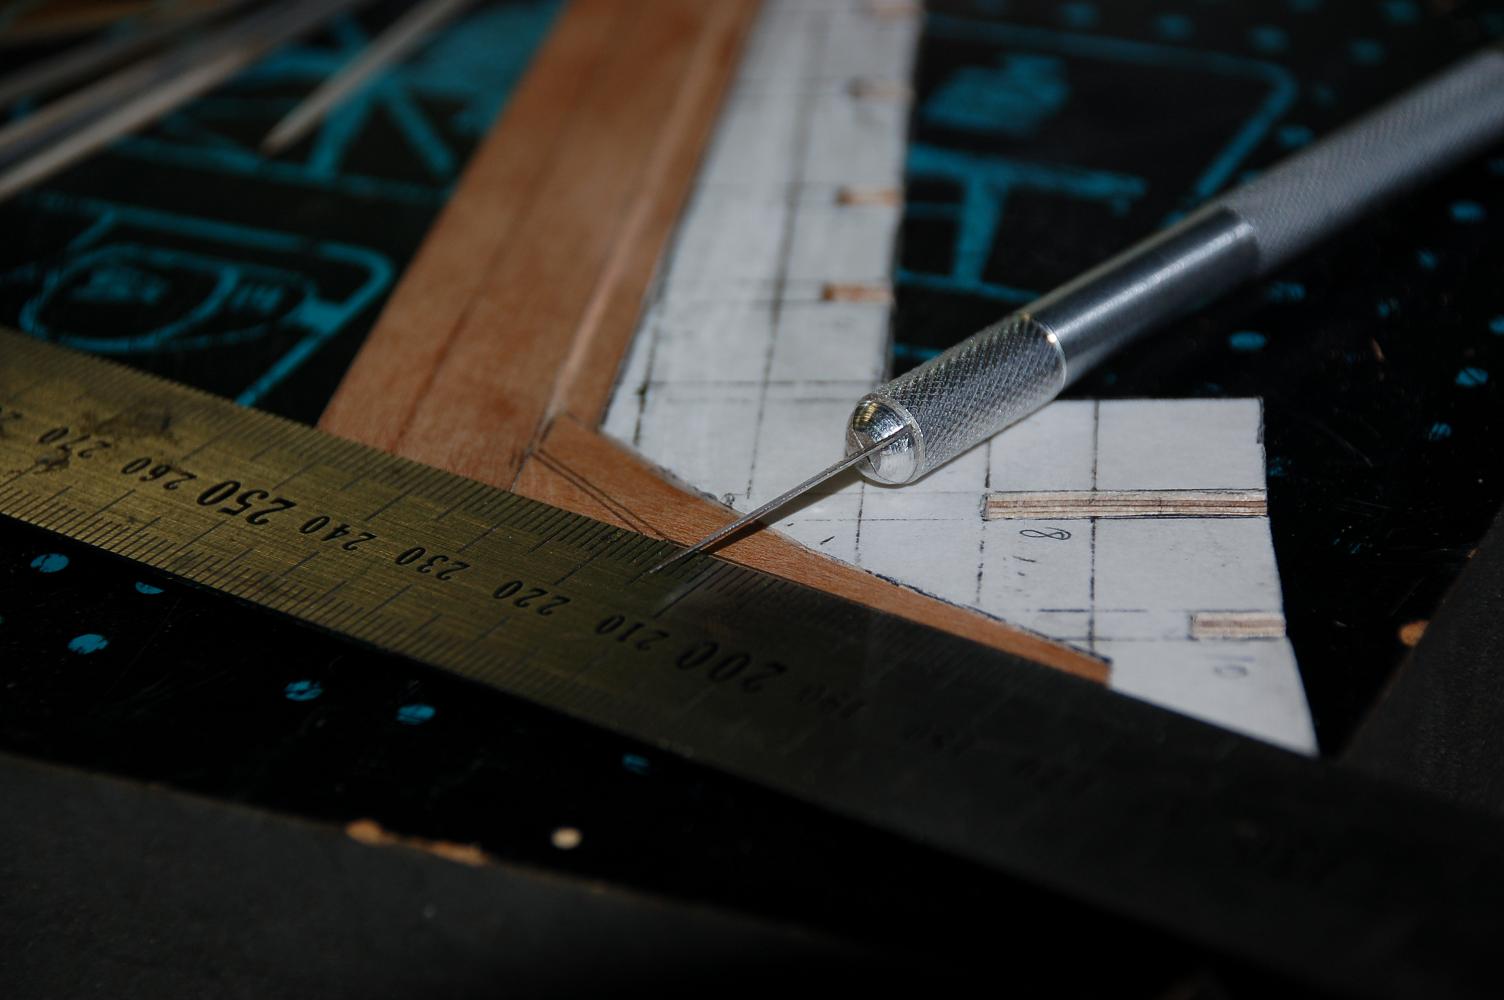
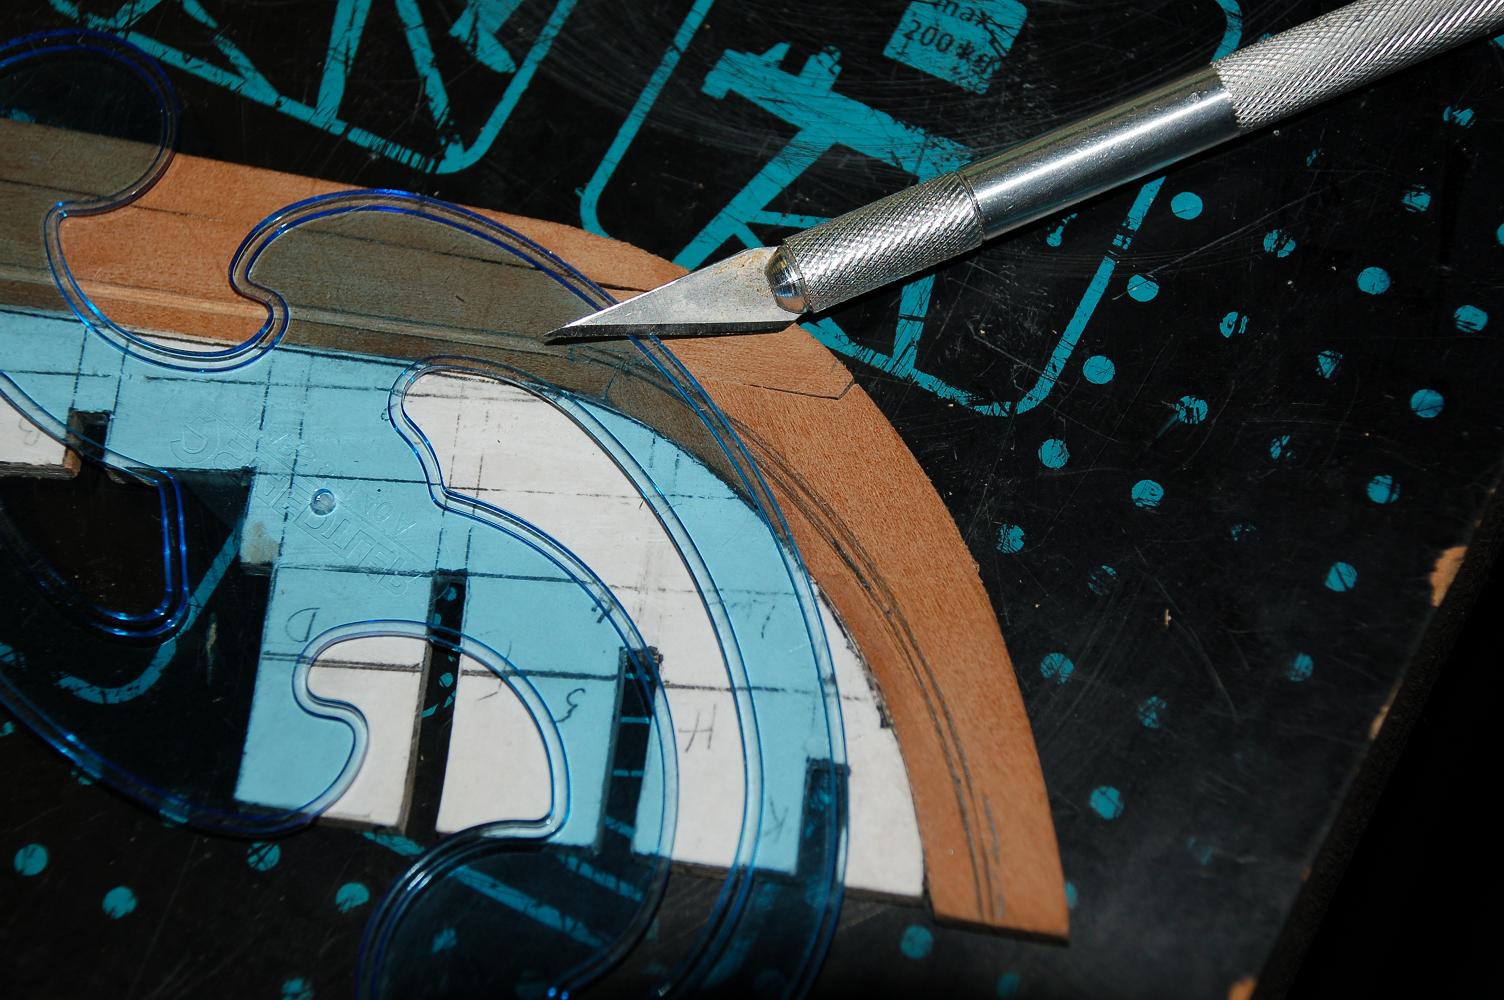
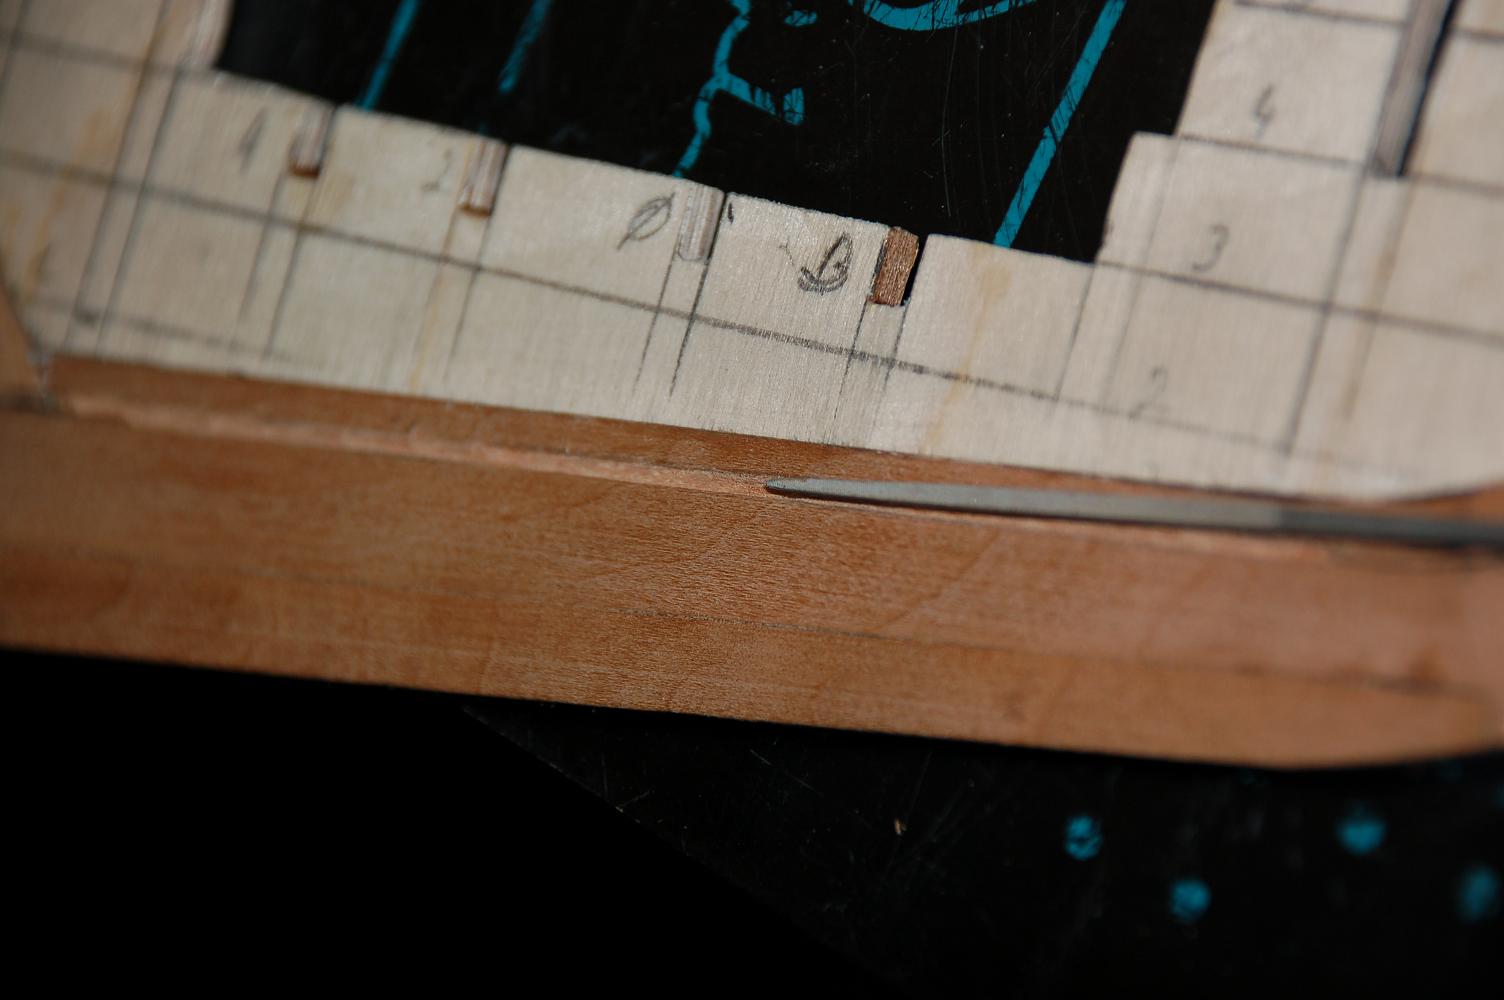
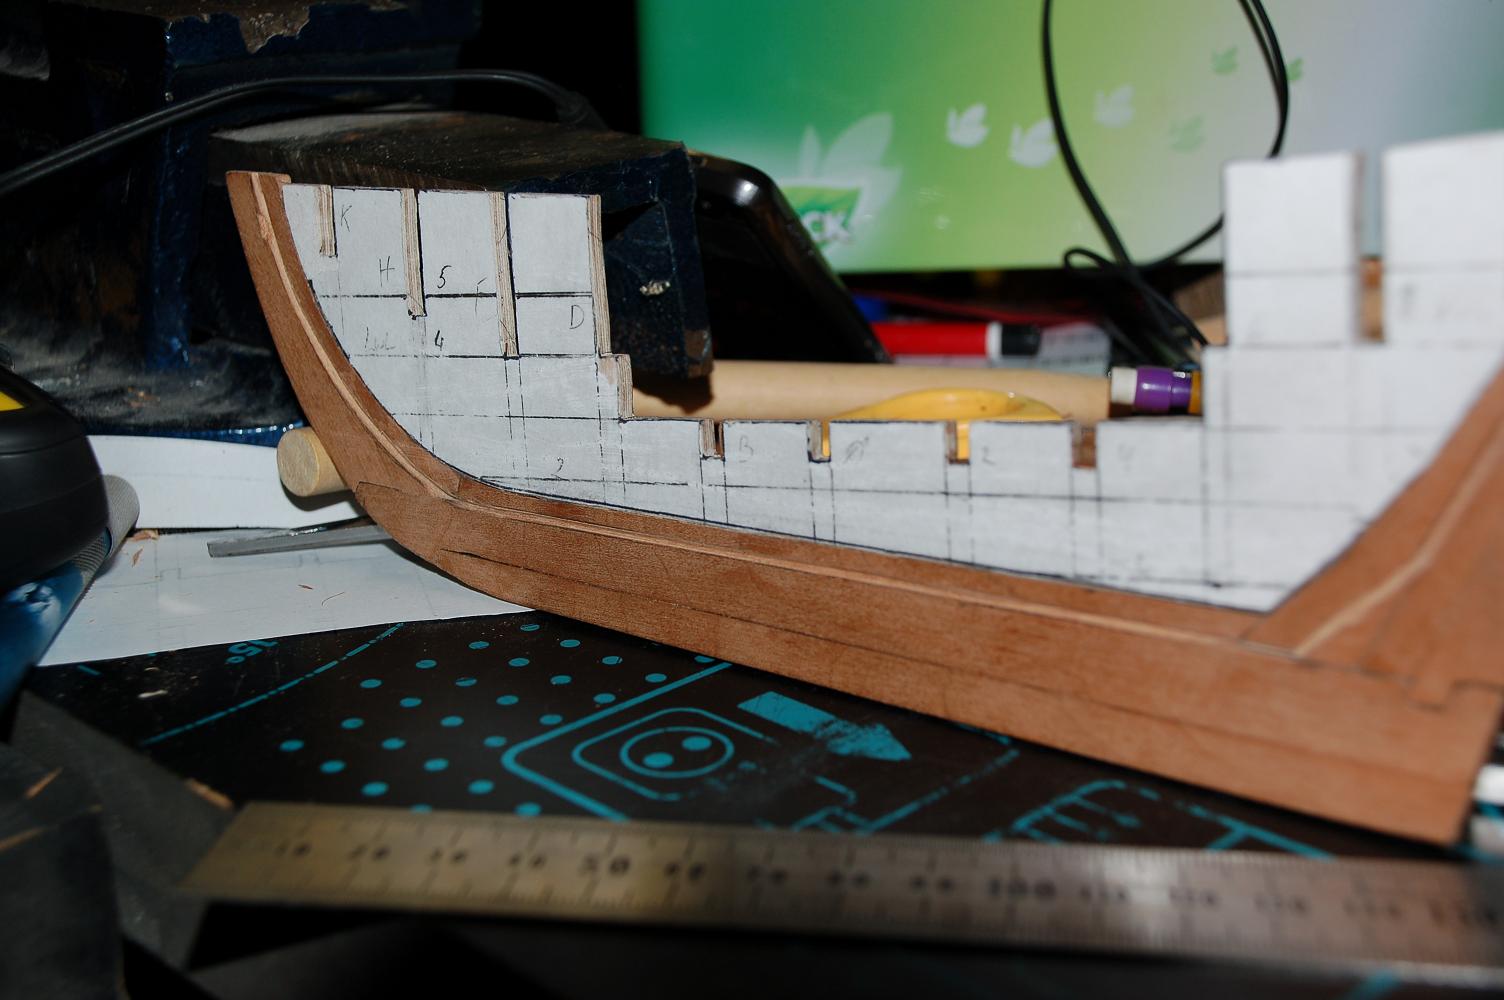
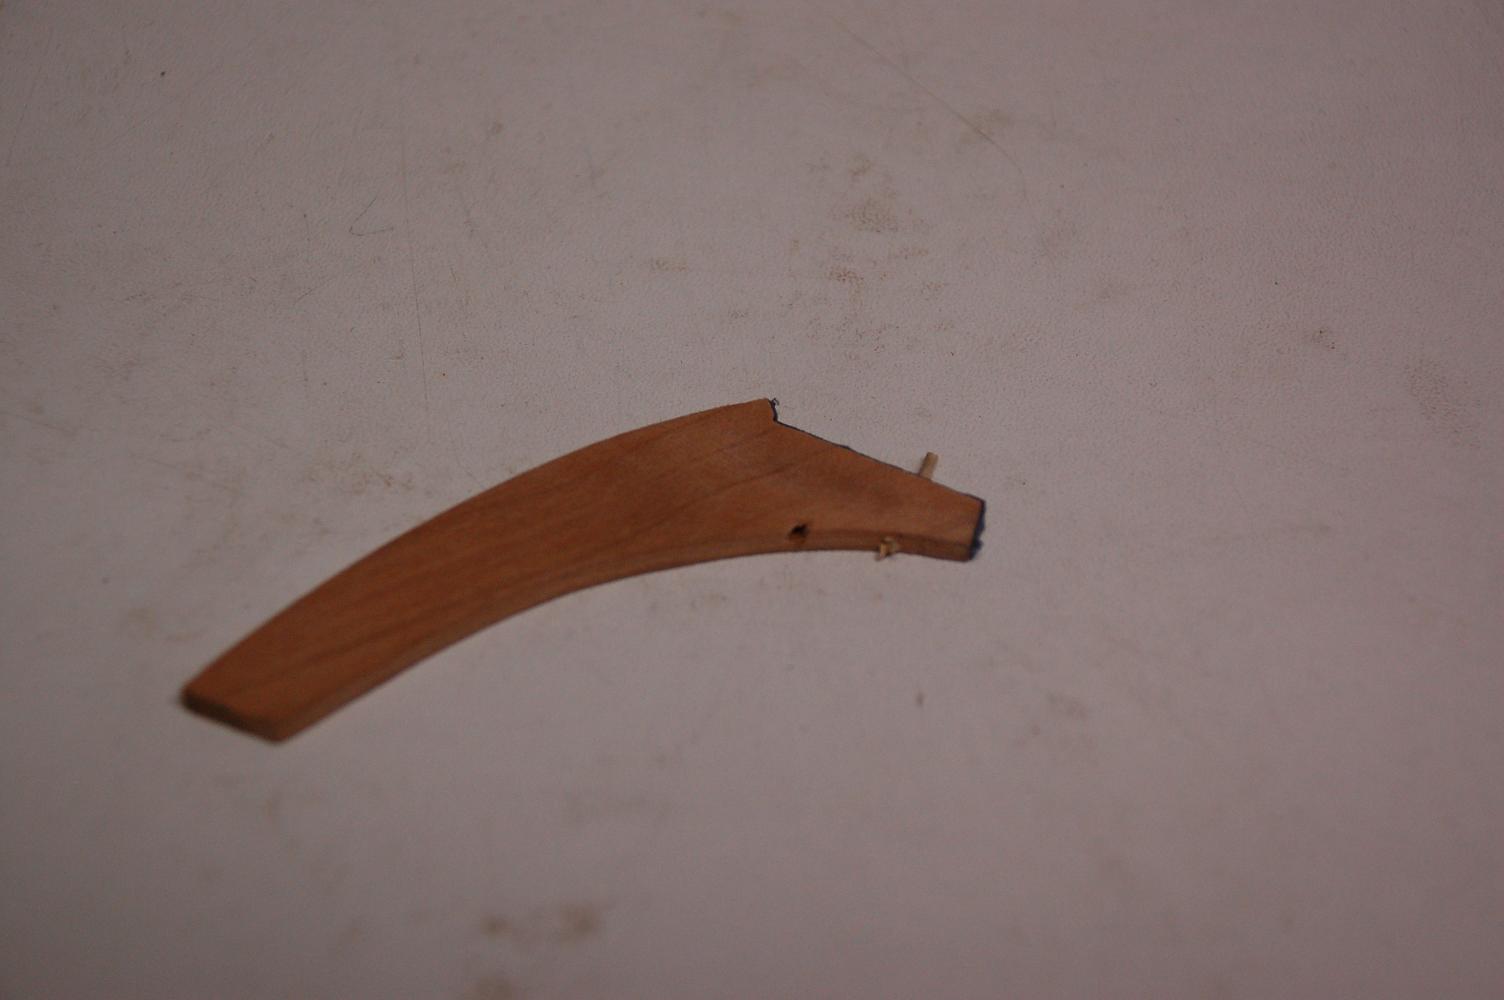
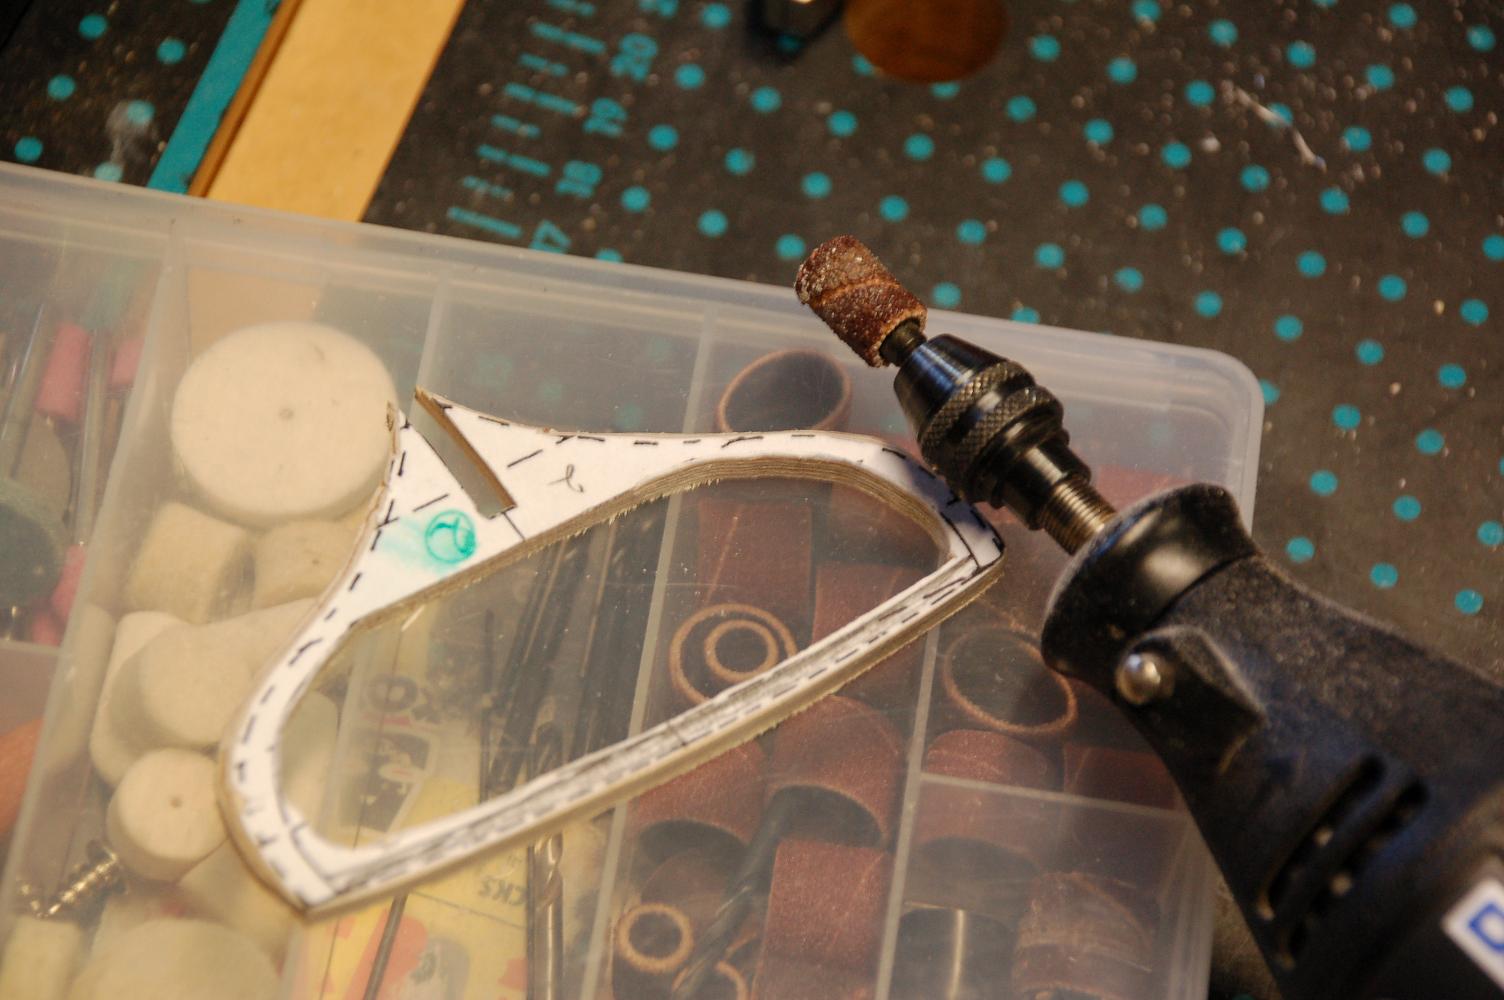
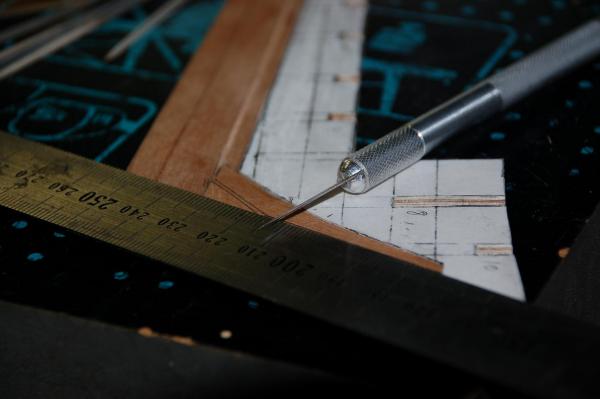
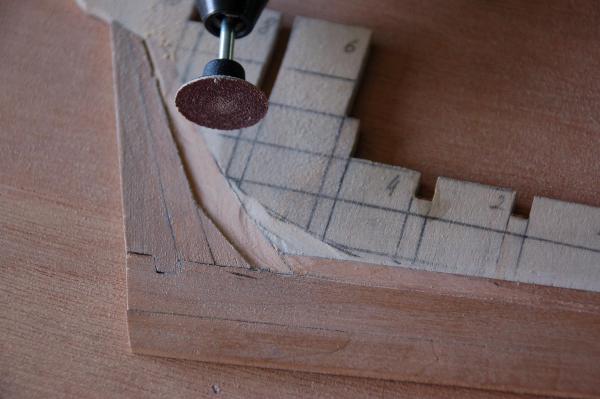
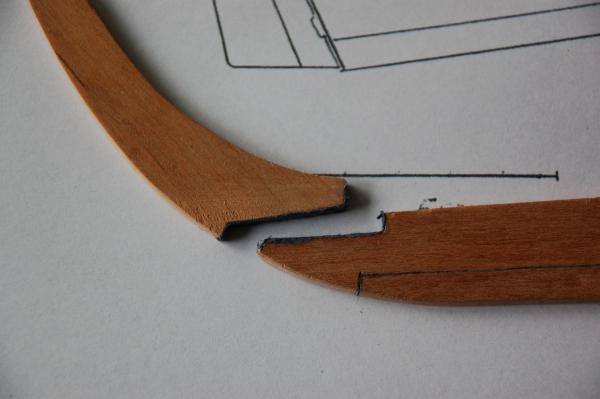
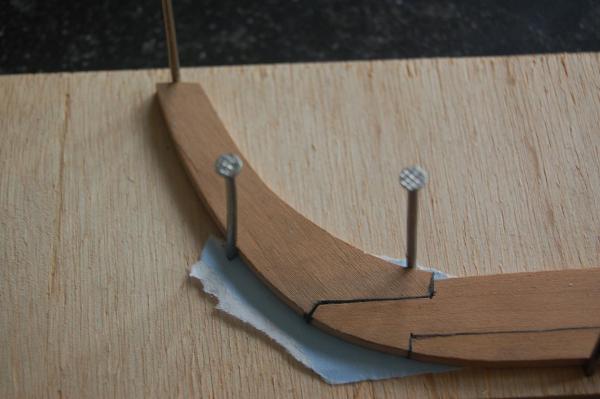
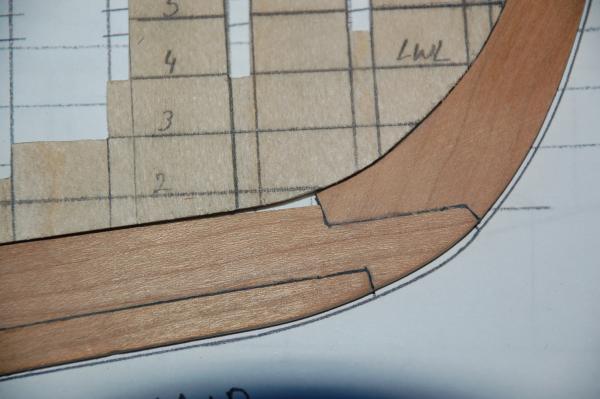
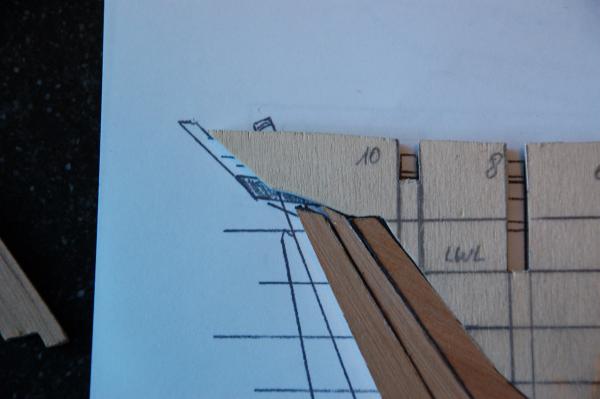
 Time time to get serious again, and return to my little boat. And thanks a lot Ray, cutting the rabbet like your method worked like a charm! First i cutted al along the bearding and rabbet line with a sharp X-acto blade. While using the steel ruler as a safeguard for not damaging the keel. At the stem, i used the french curves as a safeguard. Then i used a small chisel to cut out the wood between the two lines. And afterwards i used a small file to deepen the rabbet, very slowly. I did this for the two sides, and i am quite pleased with the result. Finally i have to remove the excess of wood at the stern, to do this i used my proxxon with a disc sander. Slowly and very carefully i removed the wood between the bearding line and the rabbet.
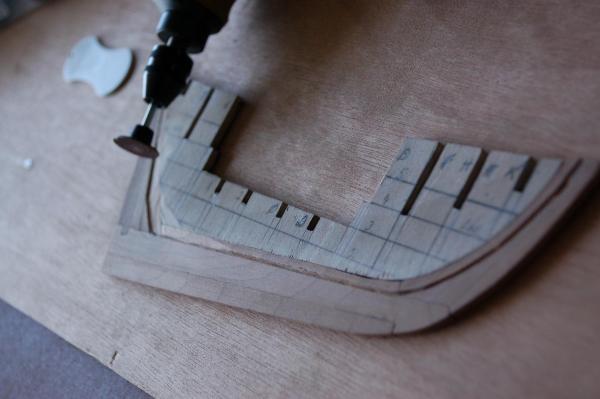


- 144 replies
-
- 6
-

-
- corsair
- bermuda boat
- (and 1 more)
-
Words of wisdom
-
Thank you Robert and welcome!
-
Wow, Karl, very nice. Like said before, it's very interesting and inspiring to see the guns once in and then out ready to be fired. Bravo
- 662 replies
-
- 1
-
-
- bonhomme richard
- frigate
- (and 1 more)
-
Nice work Ray, love your mast and top, looking clean and sharp.
-
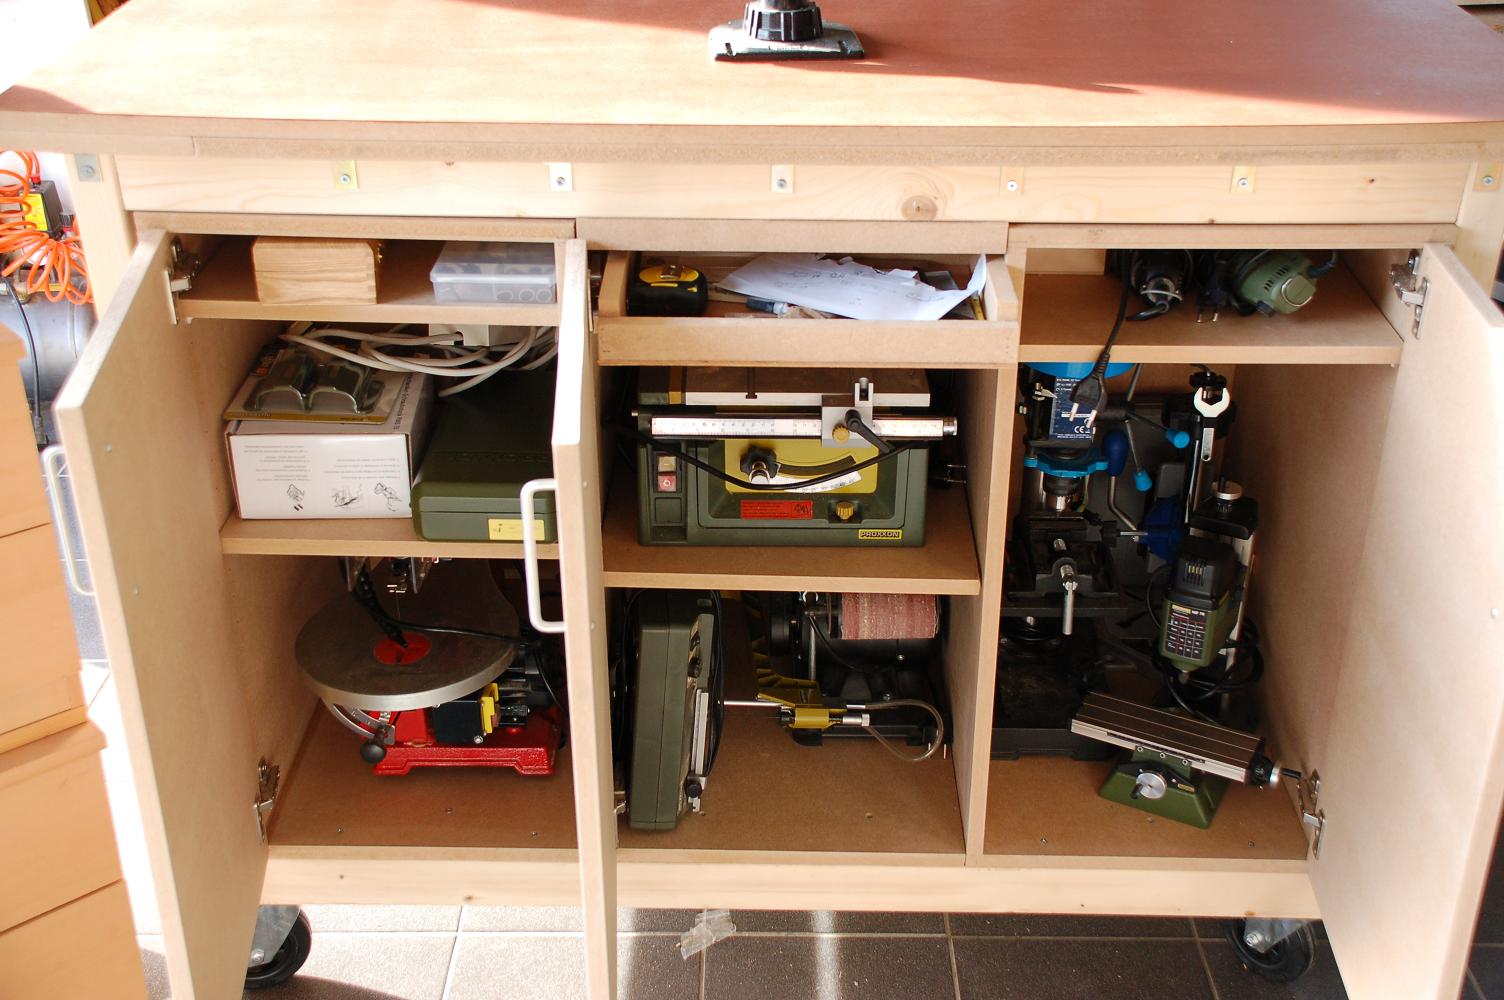
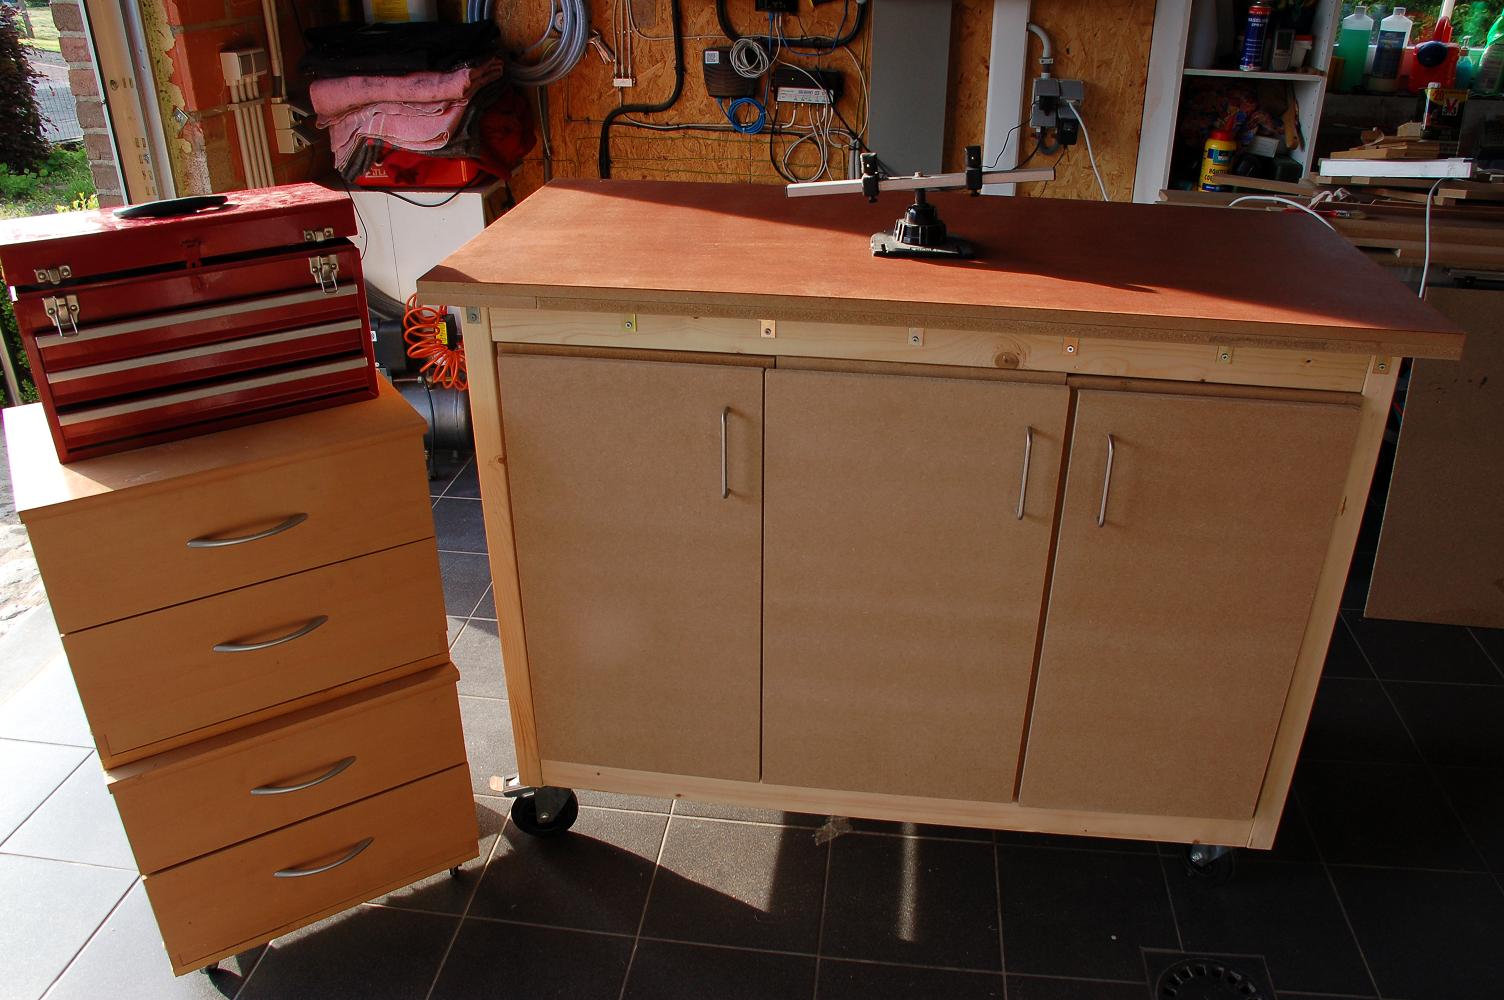
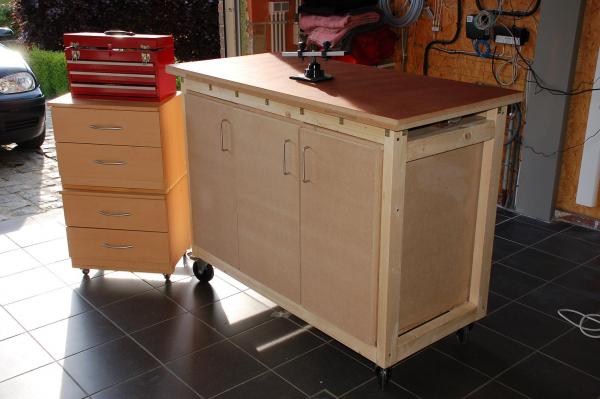
Hi all Things have been a bit slow around here. I had serious storage problems in my garage, so i decided it was time to do something about it. I wanted to be able to store all my tools for shipmodeling, and still have a nice workbench to operate them on. So i've decided to create my own "mobile" workshop. It's very flexible now and i can move it outside for the "dirty" sawing work. That keeps the admiral very happy! The inside looks like this : I still have to make trays for the spaces in the upper corners, to store the small stuff in, like the one i made in the middle. On the side, there'll be a larger tray over the whole length of the workbench in which i'll be able to store some wood in.


- 144 replies
-
- 9
-
-
- corsair
- bermuda boat
- (and 1 more)
-
Alright, thanks, i'll give it a try on a scrap piece of wood first. Chris
-
Hello Ziled No i didn't start cutting the rabbet yet. I marked it on the keel, but i was a bit hesitant to start cutting it. I think i'll start like you say by cutting it with the x-acto blade. For the triangular file, is it a curved one? If i use a straight file, wouldn't I leave marks on the keel outside the rabbet? Chris
-
Beautiful!!
-
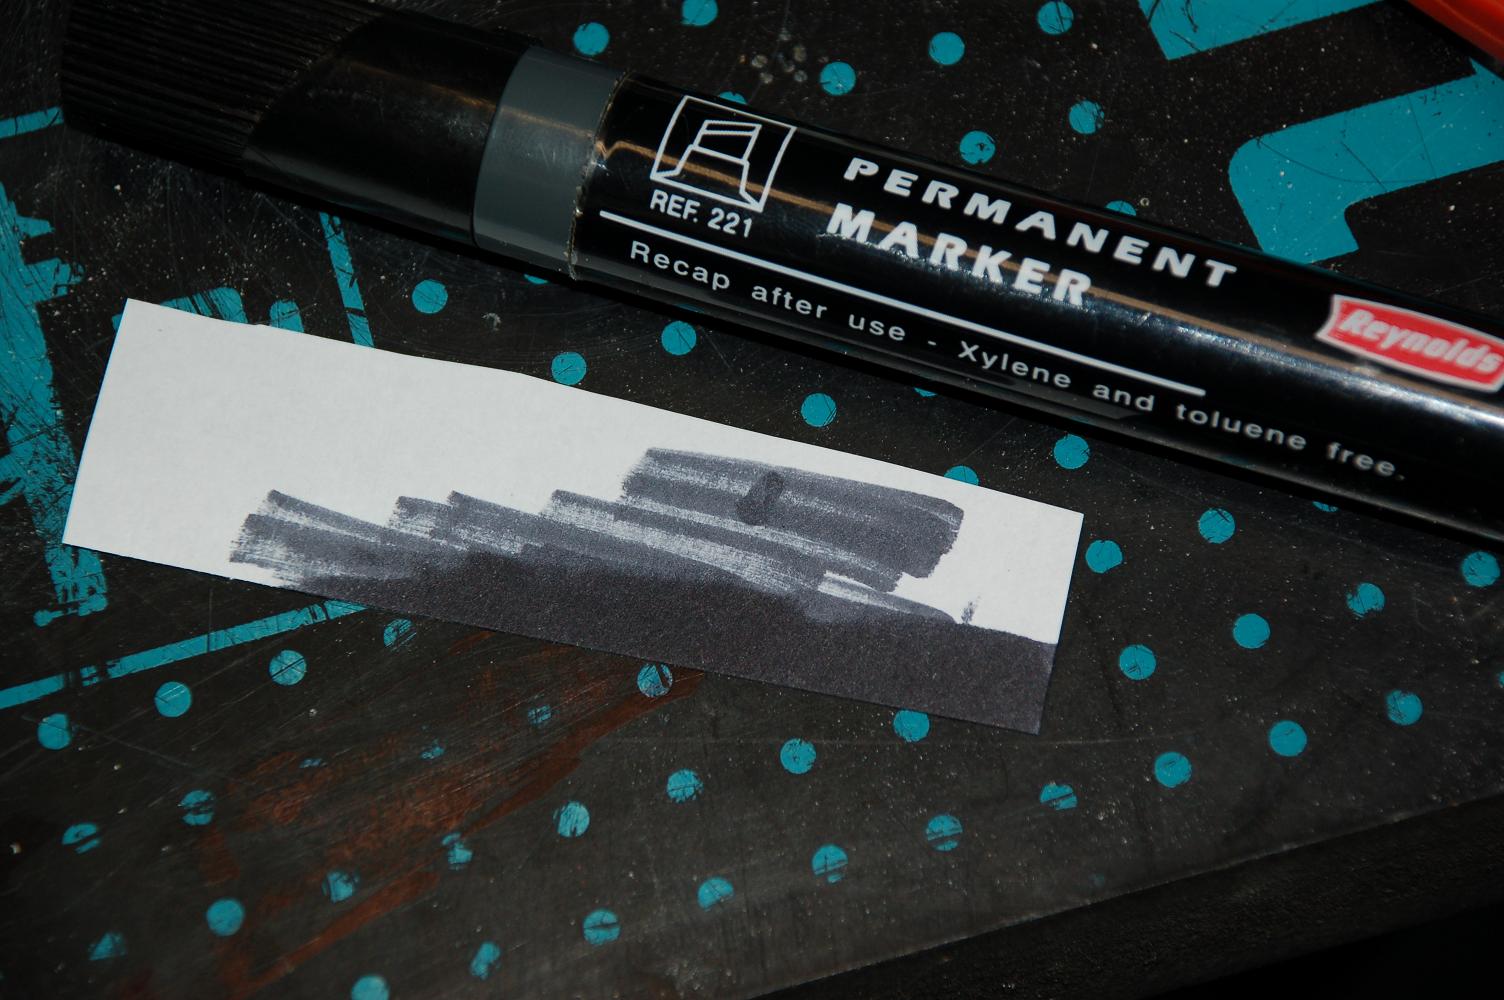
Oh, tissuepaper, of course. I'll have to remember that. And punch the paper, why didn't i think of that. I tried coloring the glue with chinese ink but it had a real strange effect on the glue. The glue became much more solid.
-
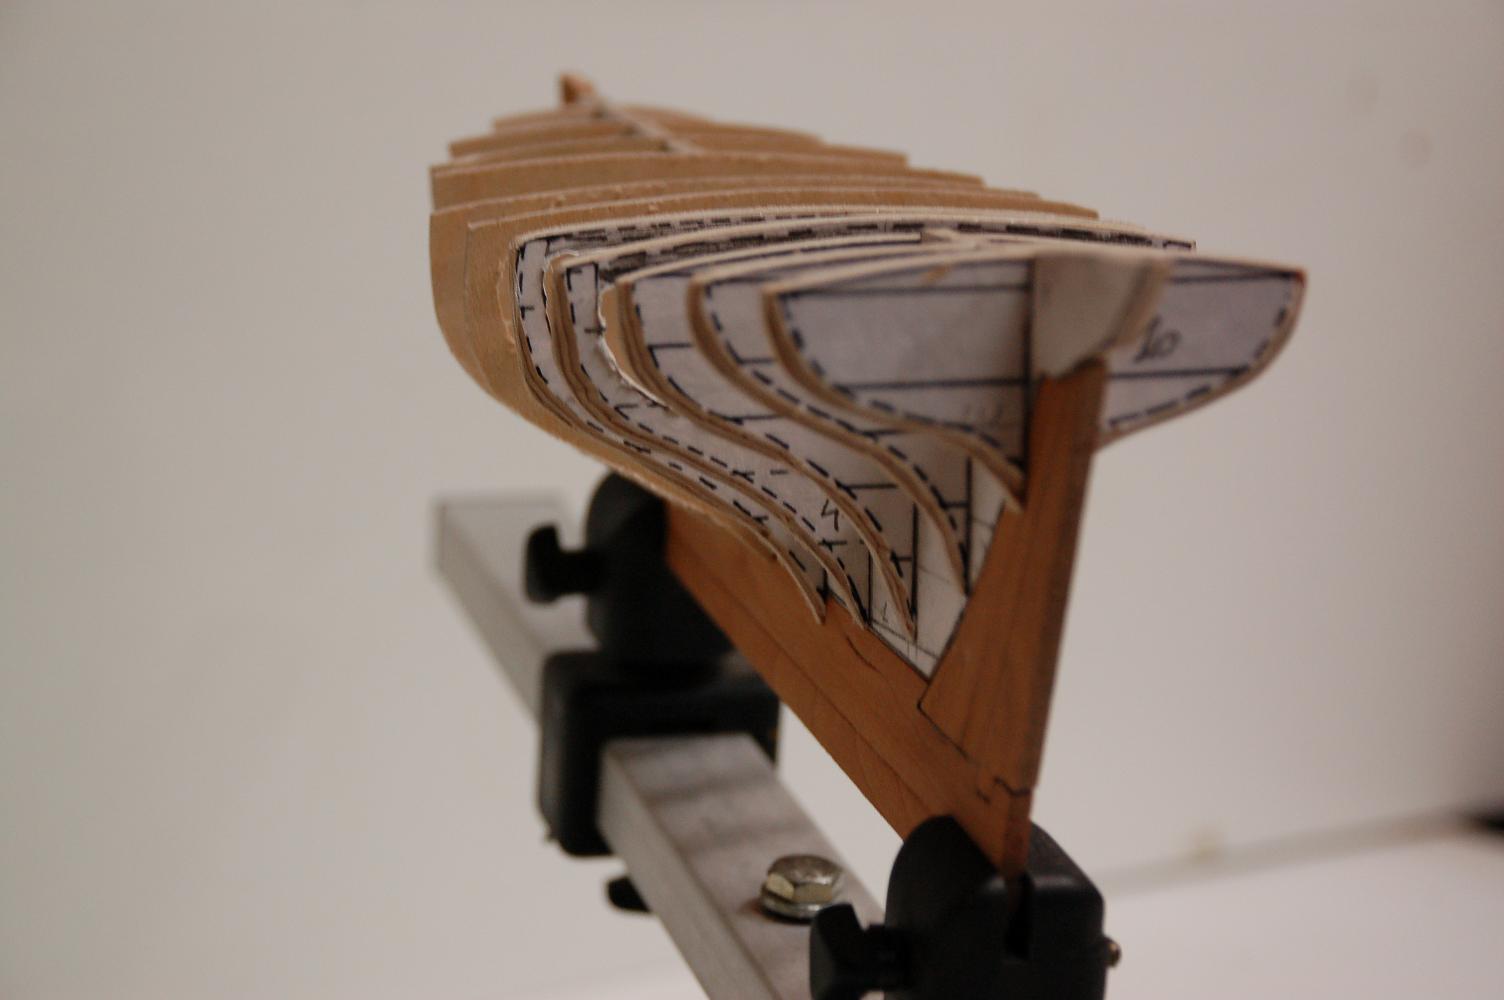
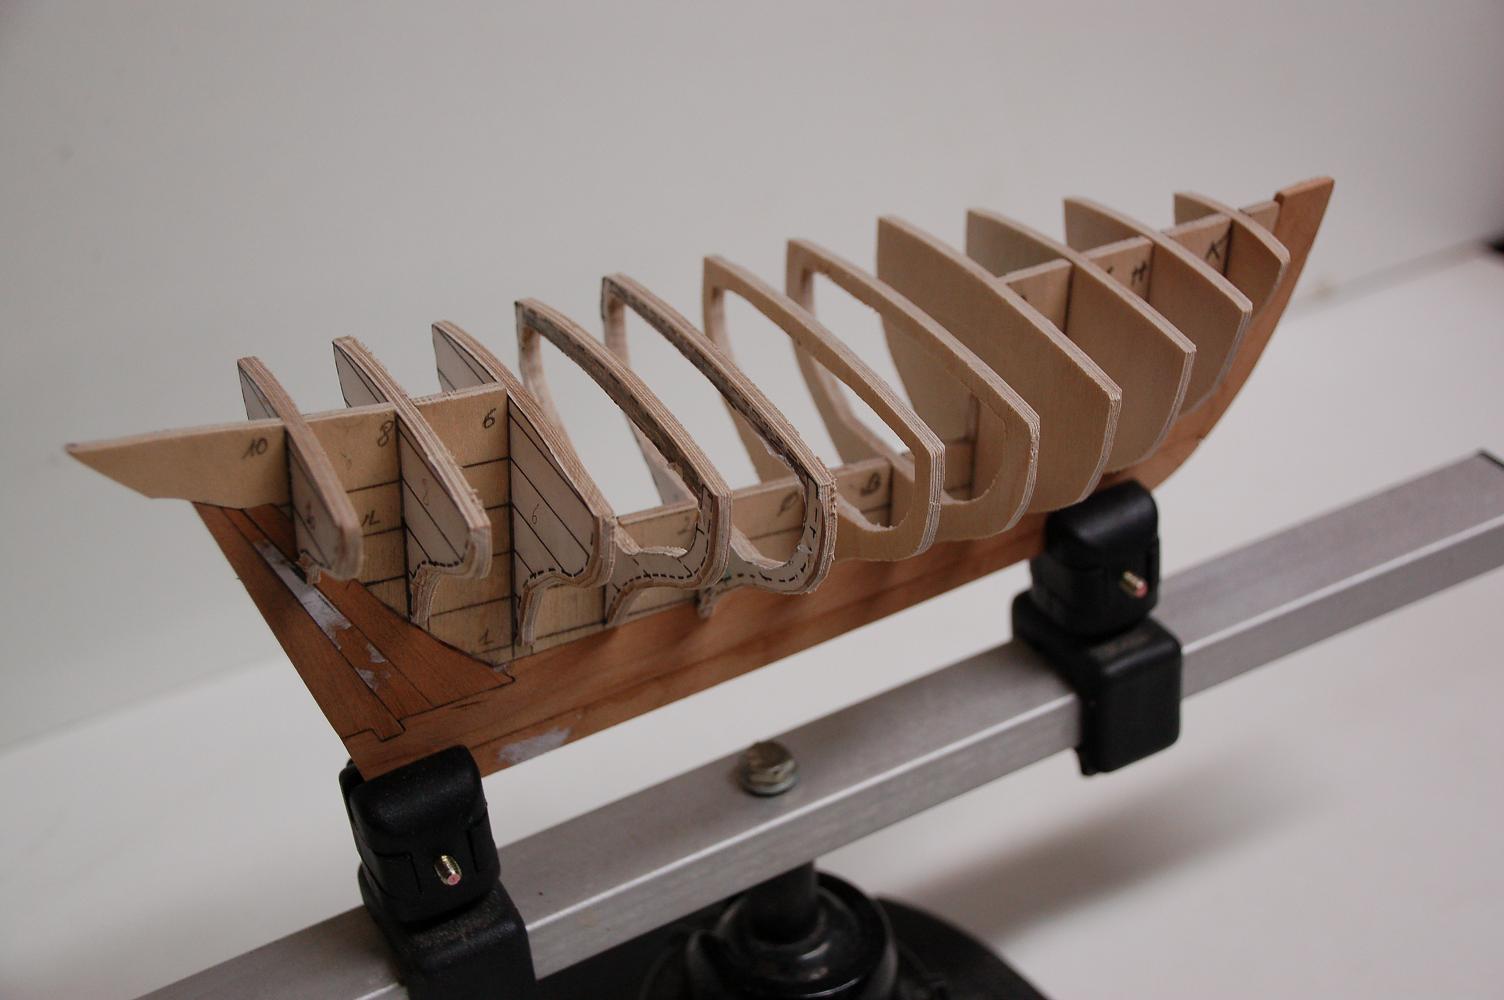
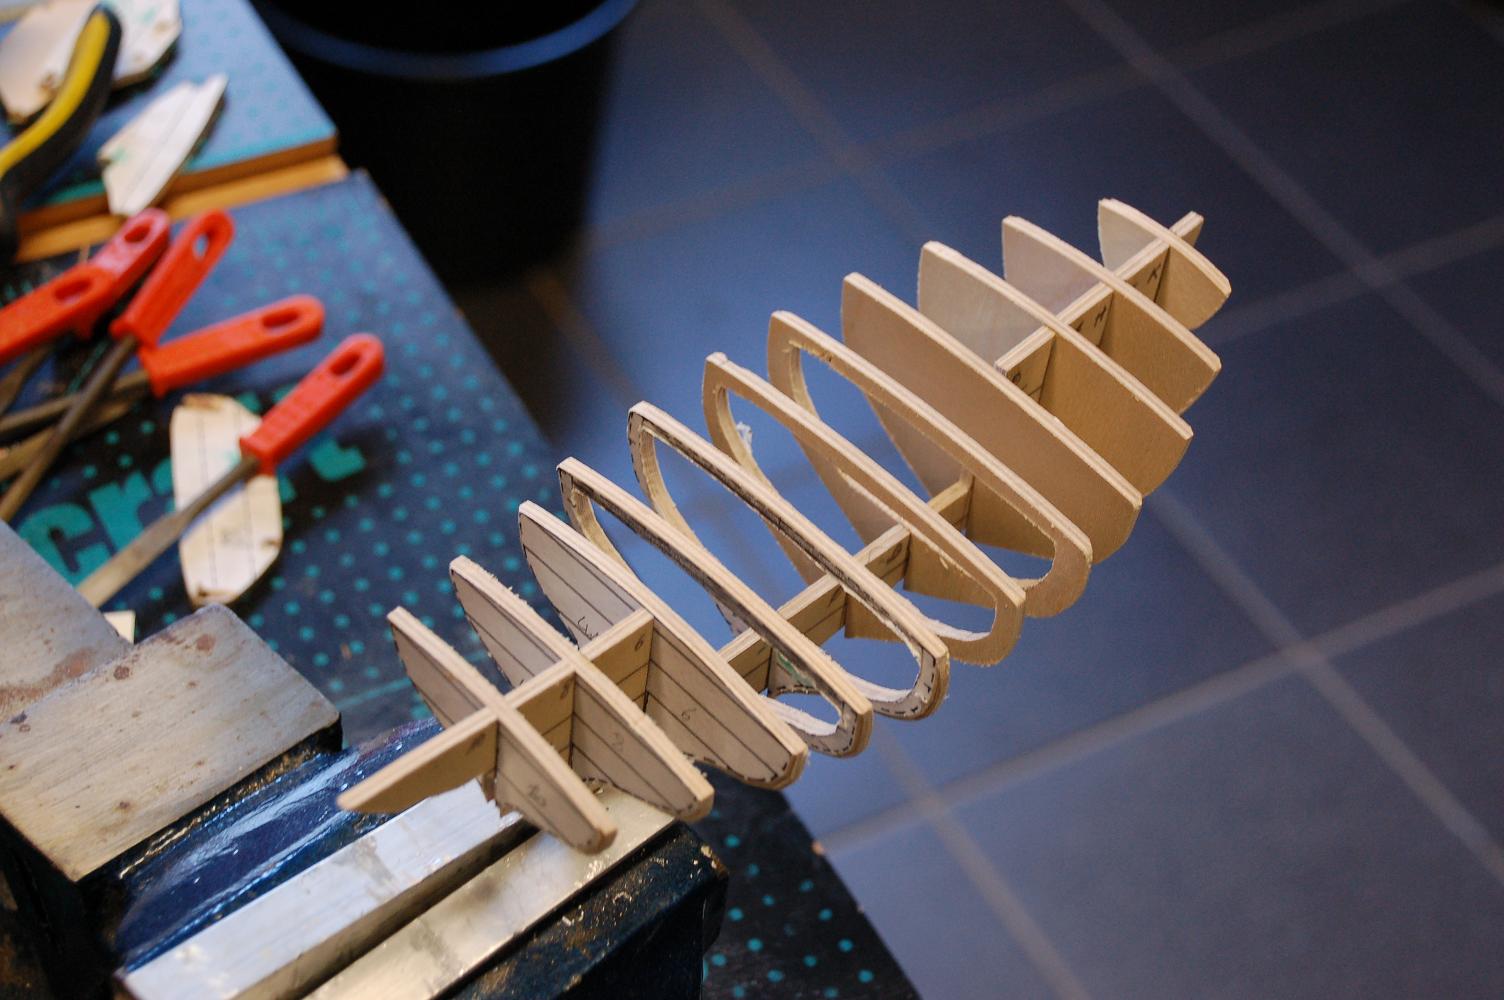
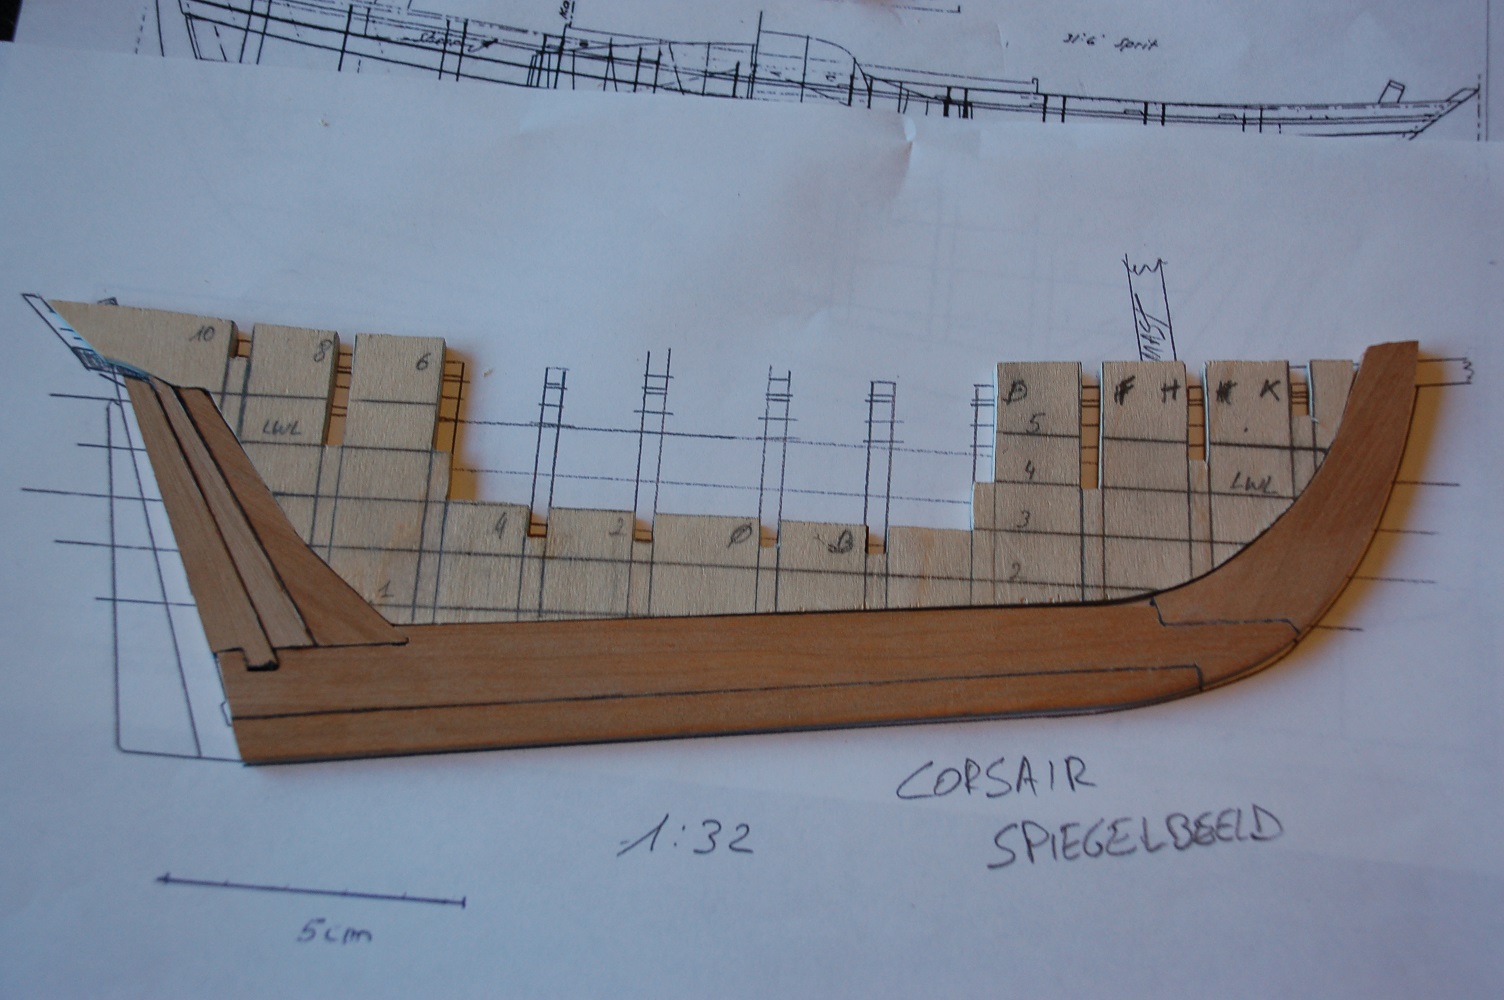
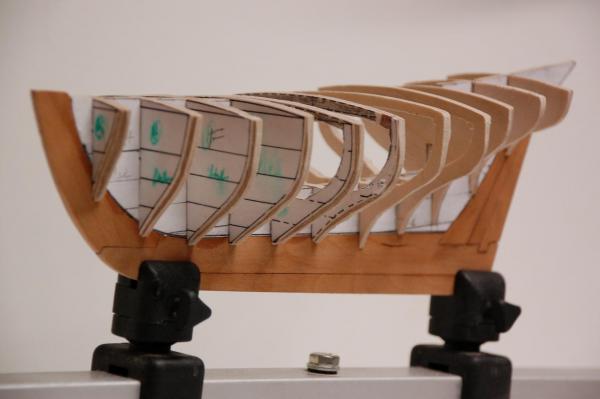
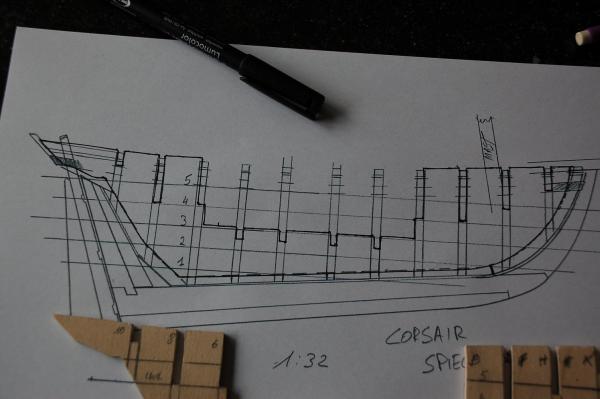
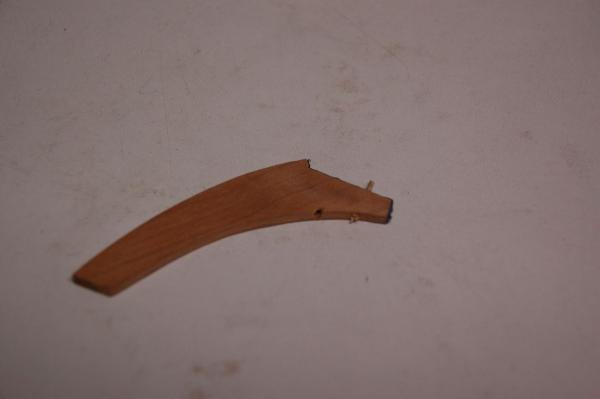
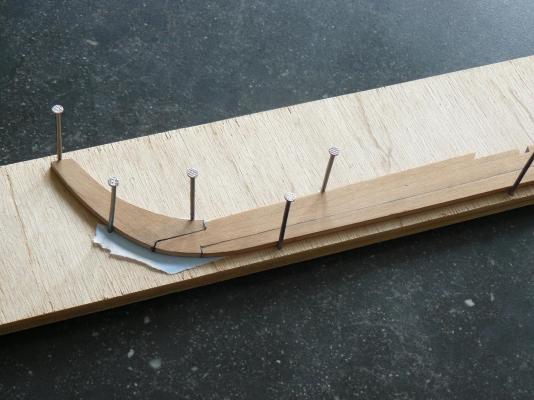
I've finished the keel and glued the false keel to it. I'm quite happy with the result. There are no longer gaps between the keel and the false keel. The pencil caulking leaves a fine line between the parts. Just enough to accentuate the different parts. I still have to do some sanding on the keel and to clean up the last paper on it. But here is the result with the bulkheads dry fitted. Next thing to do, cutting the rabbet. The thing i fear the most, i've never cut one before when i was building from kits. I think i'll practise on som scrap wood first.

- 144 replies
-
- 11
-
-
- corsair
- bermuda boat
- (and 1 more)
-
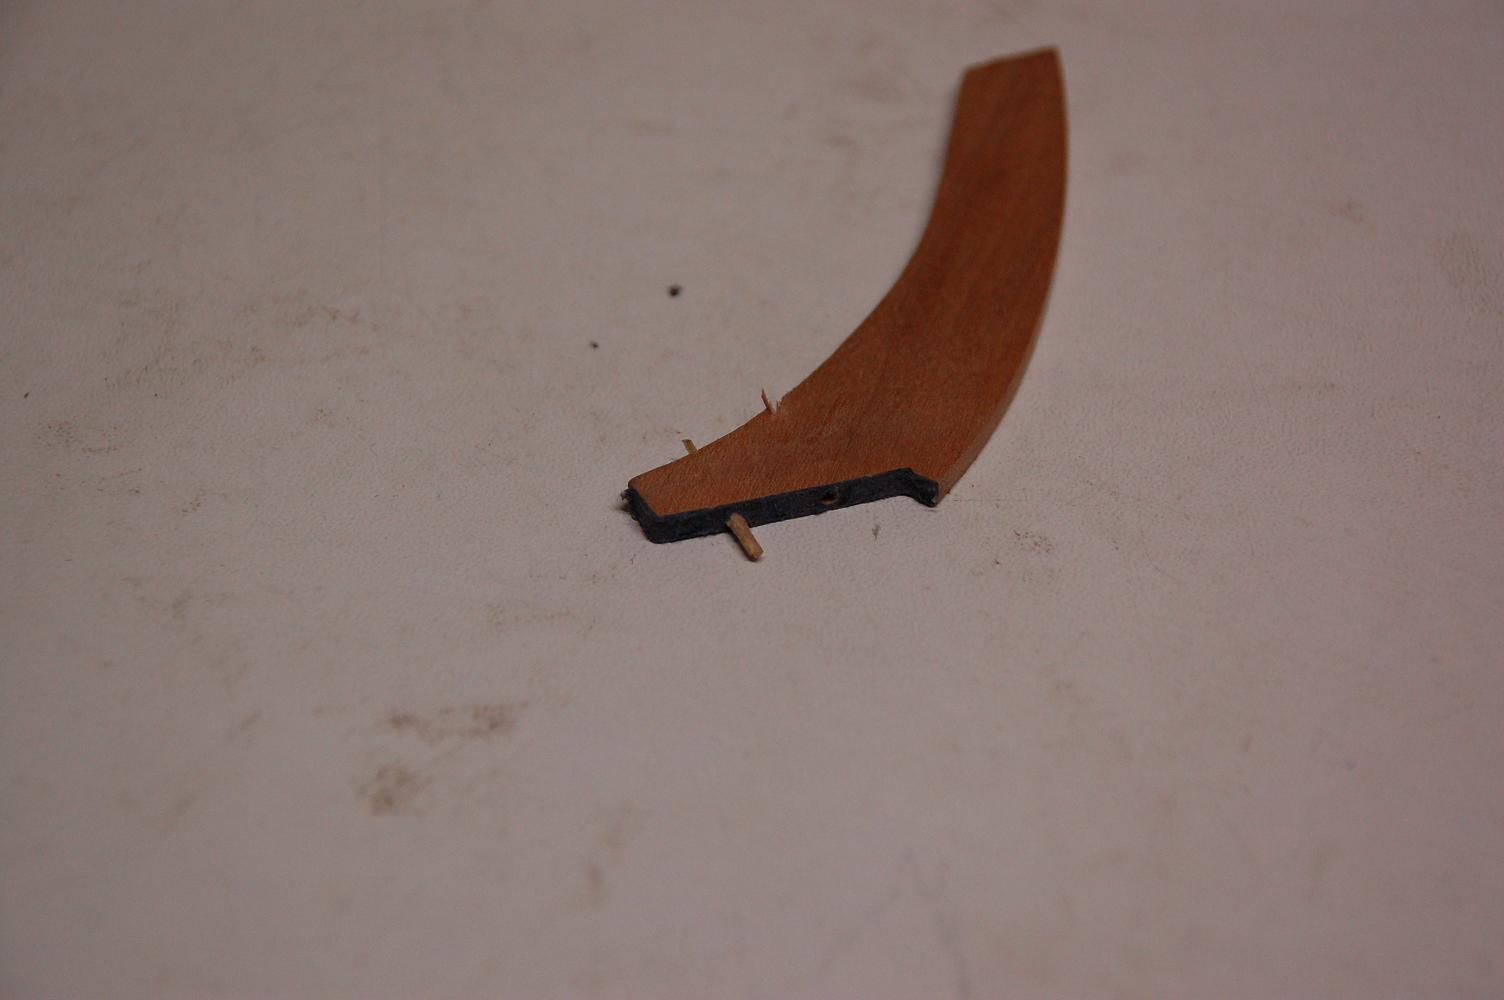
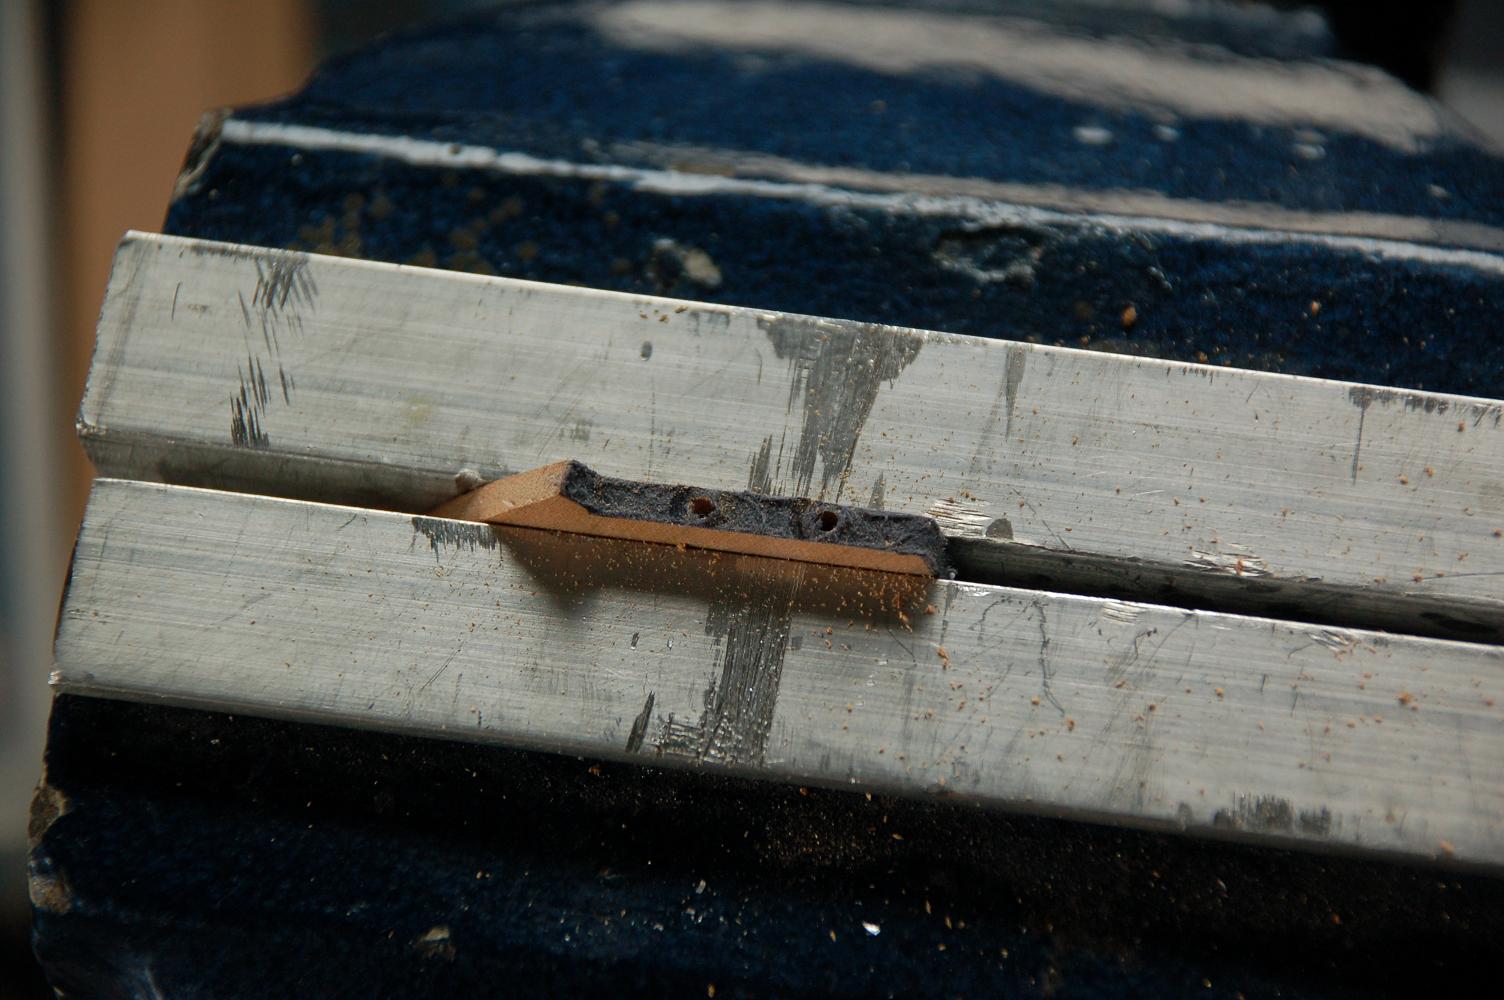
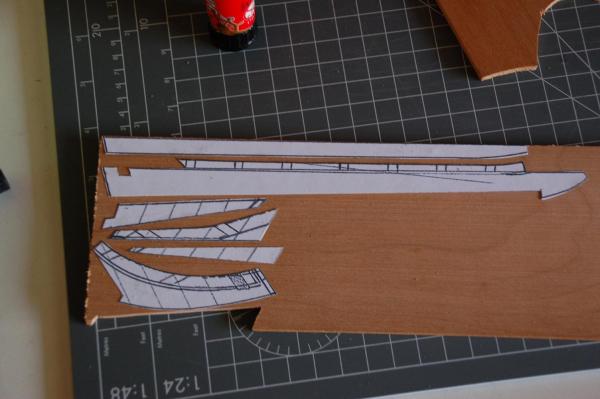
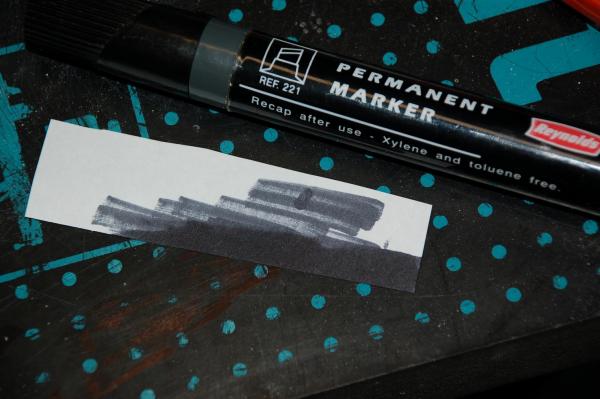
My keel broke off!! Apparently the black paper i used is too thick, the bond between the two parts with the paper is not strong enough, because the glue can't penetrate the paper. In the DVD "Model ship building secrets", dr Mike said that black paper is good quality paper. And that white paper should be used because it is of inferior quality. So I tried with some white paper which i colored black with a marker, but it wasn't much good either. I then tried drilling some wholes in the keel to reinforce it with a dowel, but i should have used a drill press to drill the wholes. Big mistake! One of the wholes came out sidewards, and where visible from the side. So for the third time, back to the saw. (Now i know why scratch building takes so long ) I first traced the false keel to the plans to have the exact outline of the keel pieces. I wanted to make sure, i've no more gaps. Then it was back to sawing and sanding the keel pieces with finally glueing them. I used an old mirror as surface upon i glued the pieces to each other. As such i was certain the surface was perfectly flat. This time i didn't use black paper but i just used a pencil on the parts.


- 144 replies
-
- 5
-
-
- corsair
- bermuda boat
- (and 1 more)
-
Batavia by *Hans* - FINISHED
WBlakeny replied to *Hans*'s topic in - Build logs for subjects built 1501 - 1750
Ooh, can't wait to see that movie... looks promising. -
Superb cannons! And what an equipment you have, hats off!
-
i'm speechless, so beautiful. Very nice!!
-
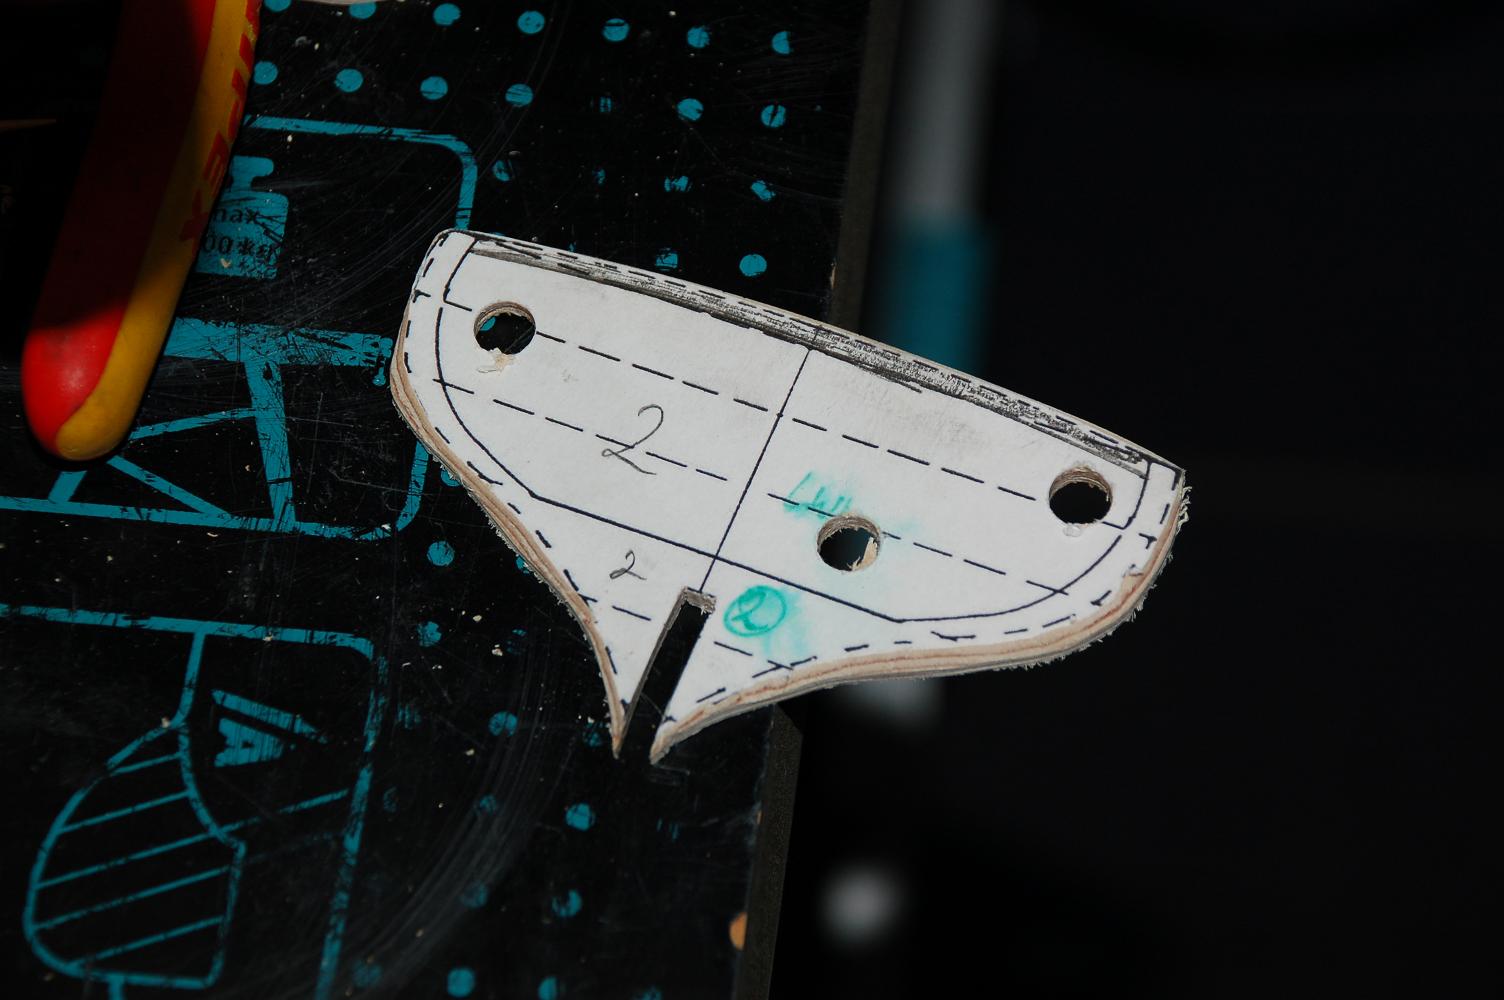
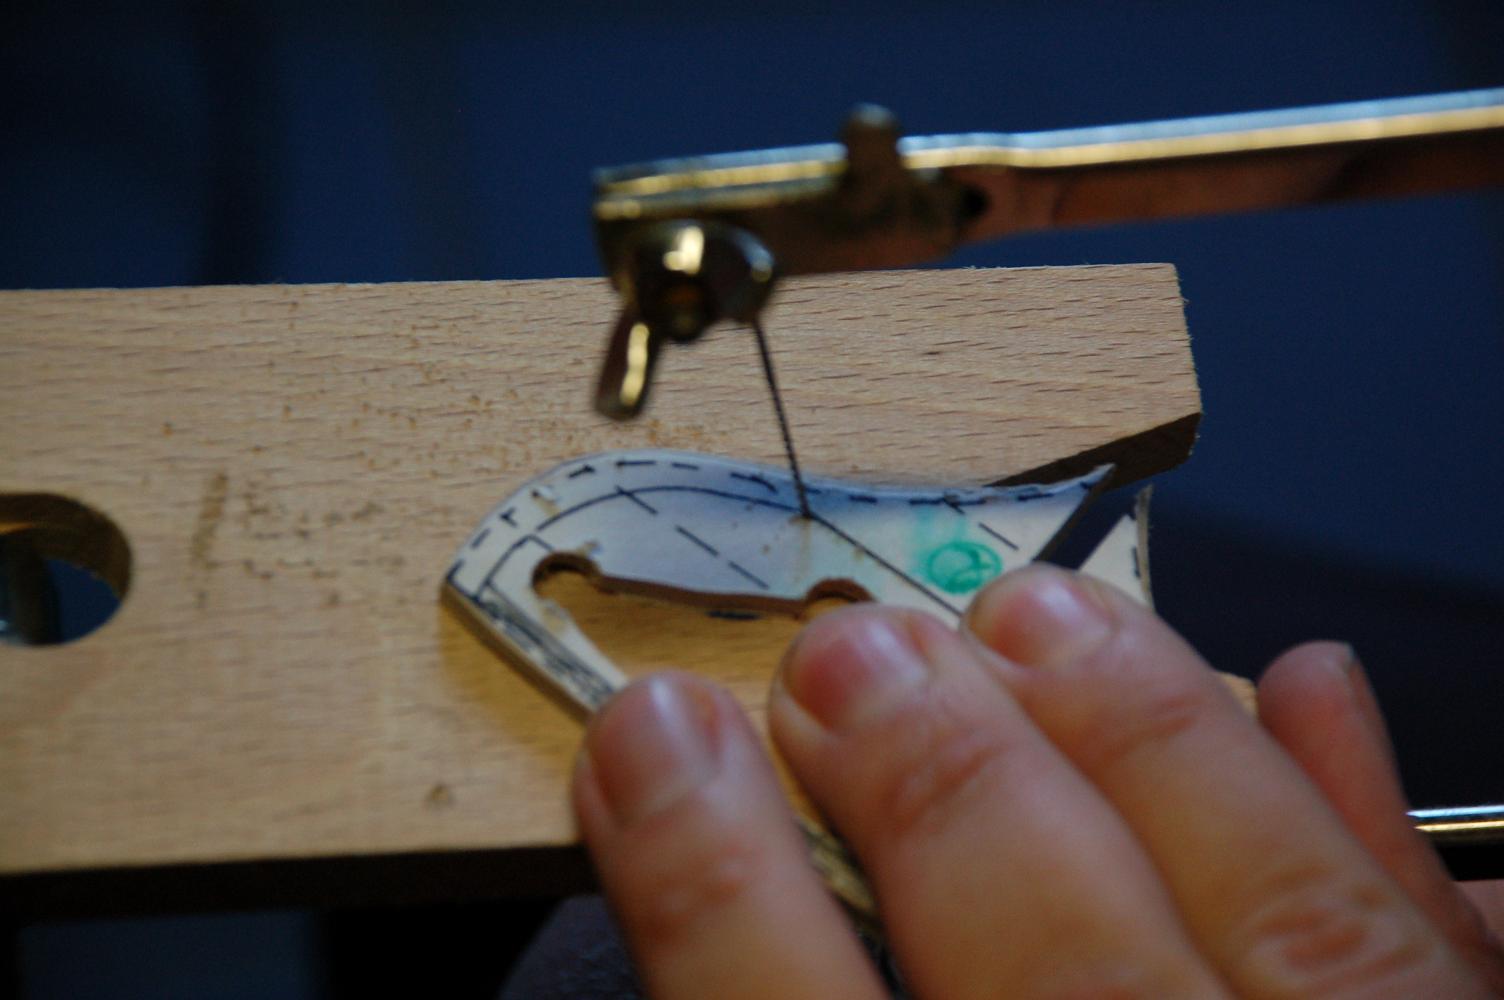
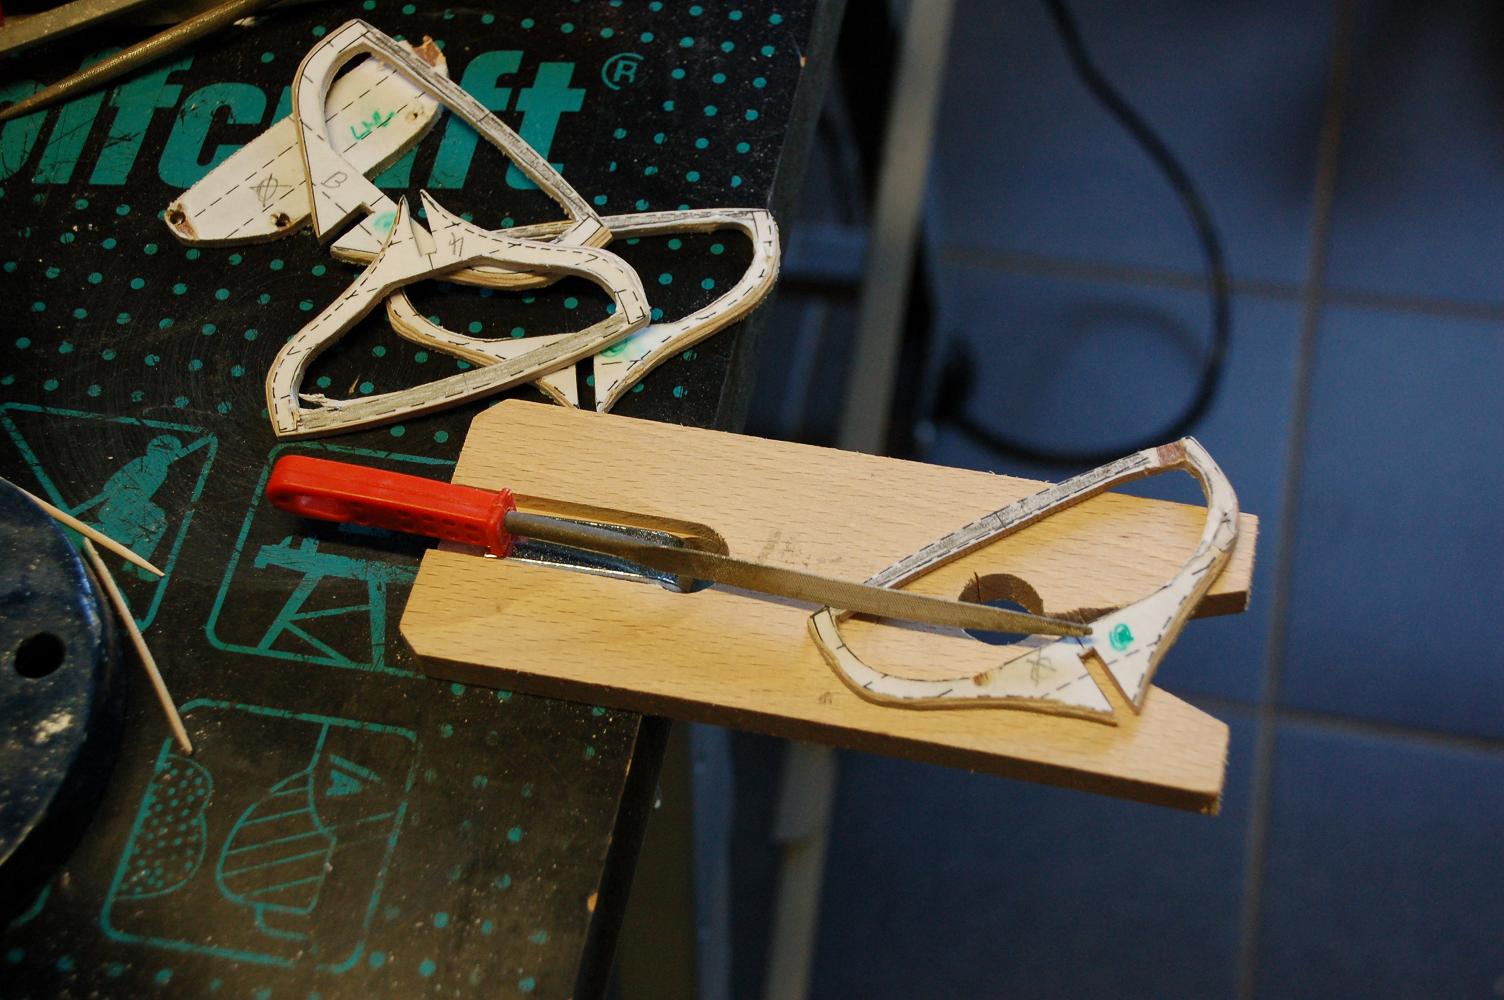
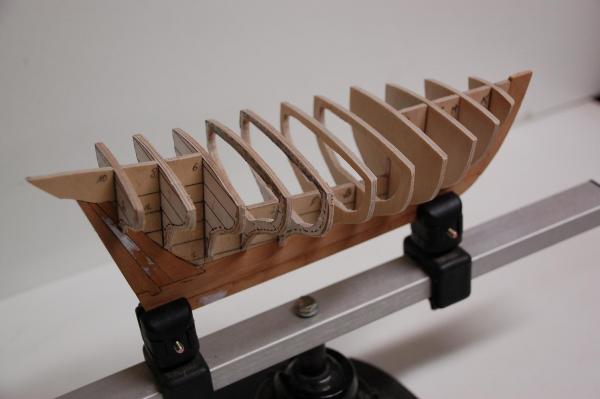
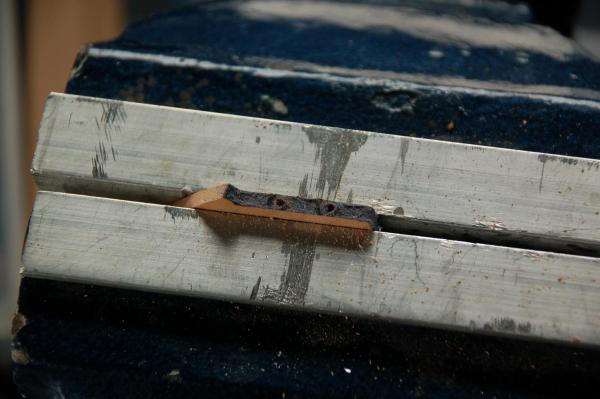
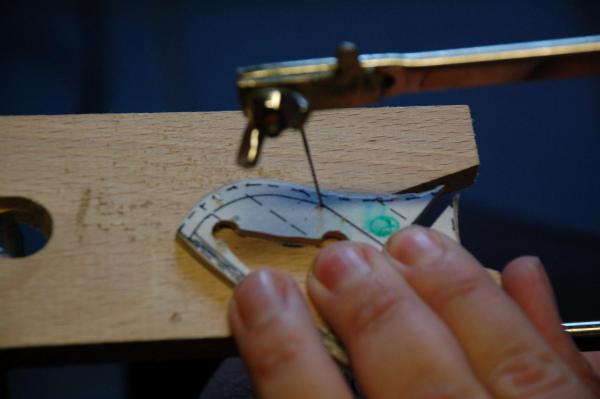
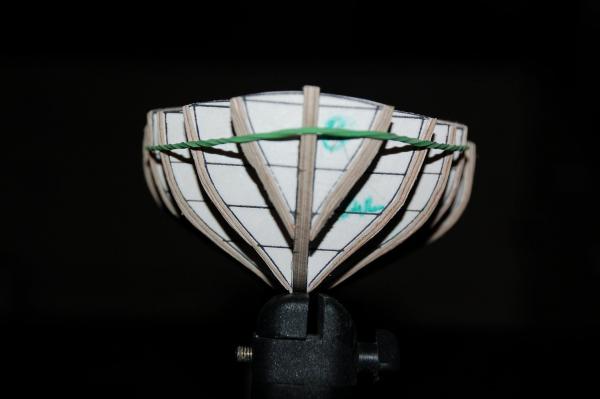
Working on the midships bulkheads, those need to be hollowed out to form the inner cabin. I first drilled some wholes in the bulkheads. Those wholes permitted me to insert the saw of the scroll saw. I then sawed along the line of the cabin floor and the lines for the thickness of the frame. Leaving an upper beam for strength, it'll come off afterwards, when the planking will be done. Afterwards i used the drum sander of my Dremel to roughly sand the inner contour of the cabin. And finishing off with the file. Dry fitted the finished midship bulkheads.


- 144 replies
-
- 13
-
-
- corsair
- bermuda boat
- (and 1 more)
-
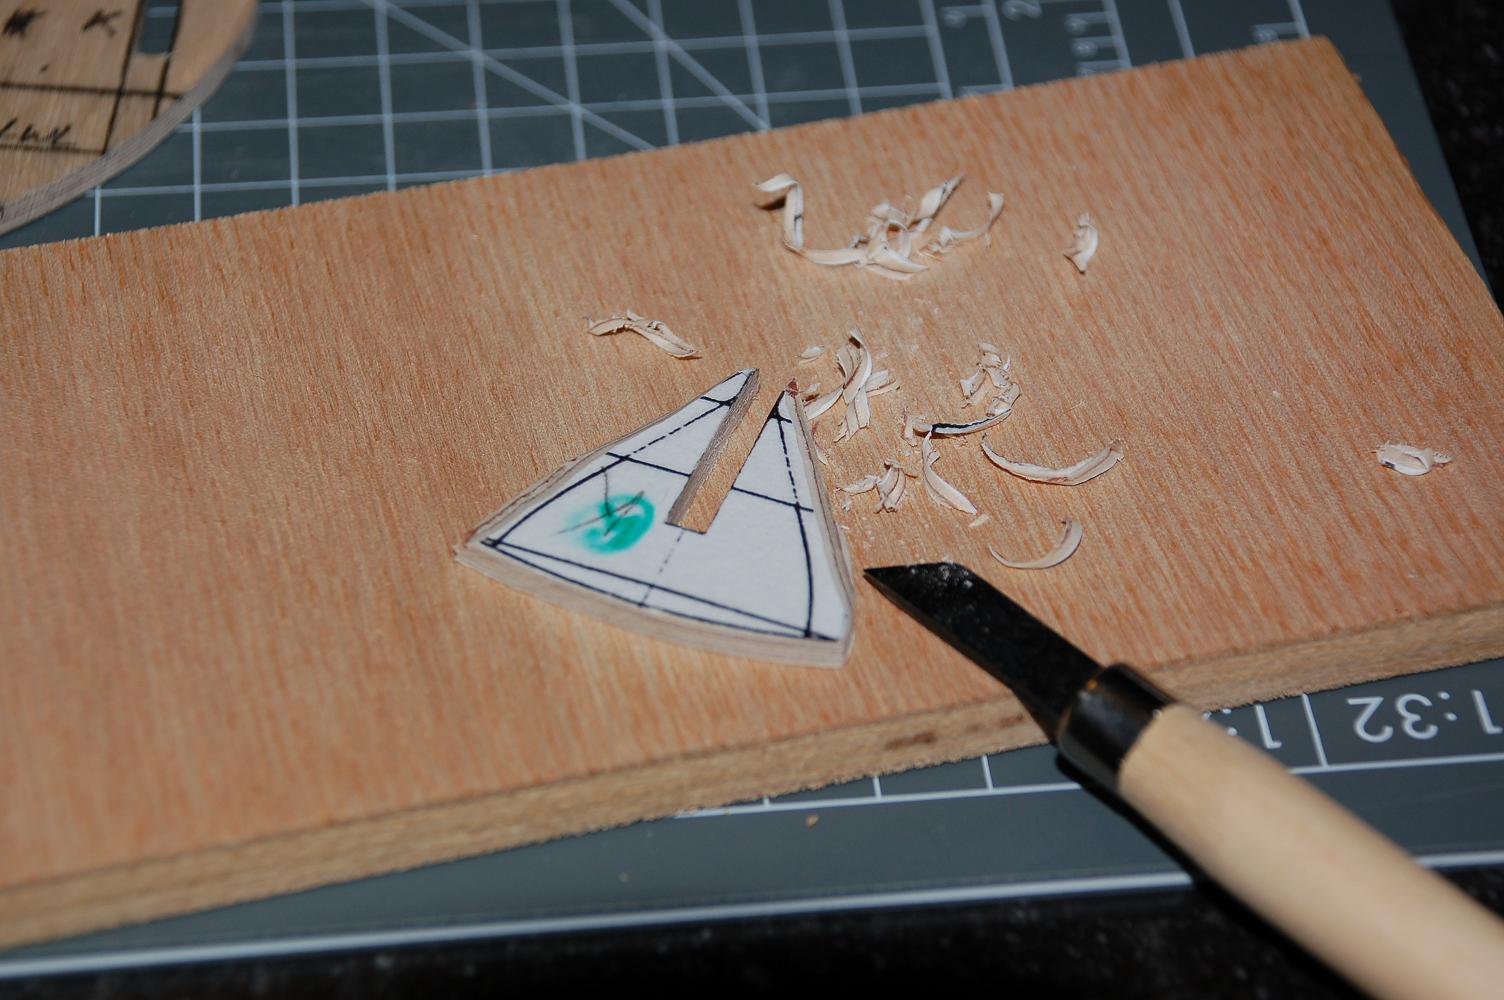
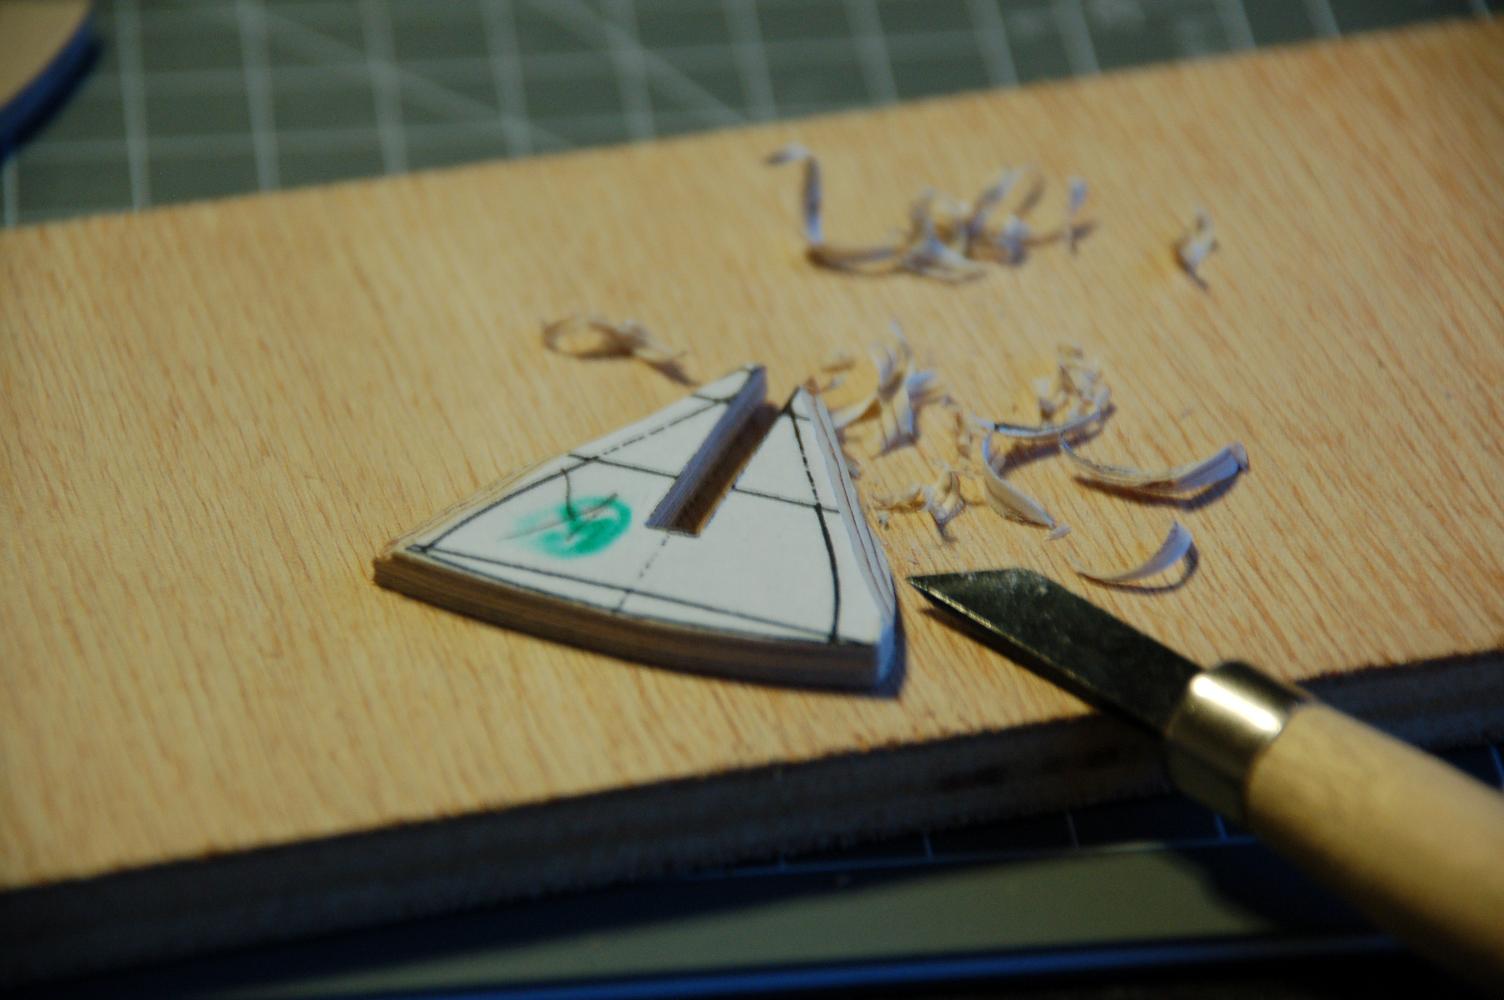
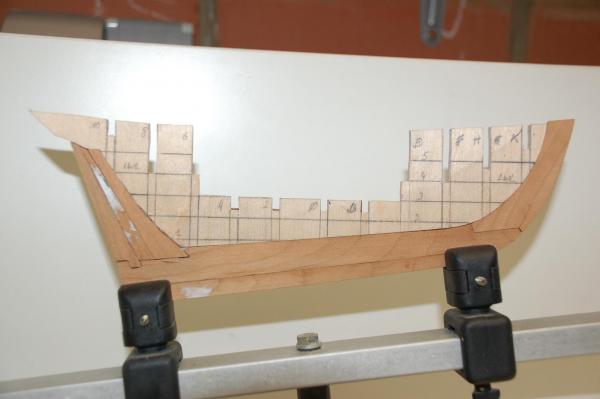
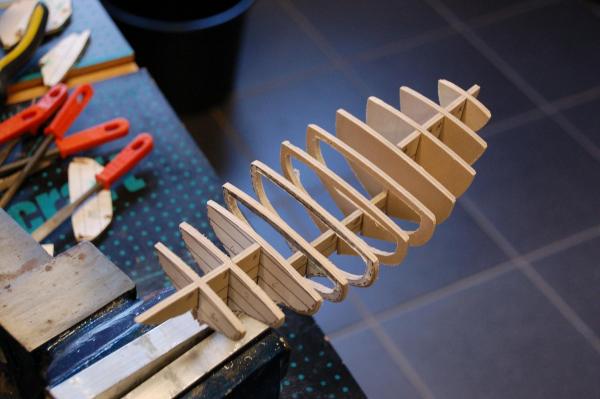
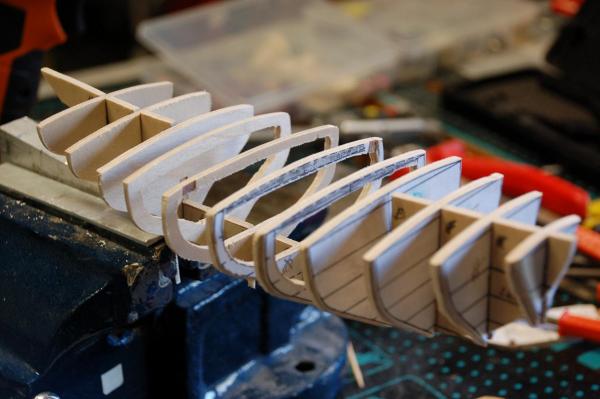
Starting to fair up the bulkheads. With a sharp mini chisel i followed the inner line on the bulkheads to fair up. I only take off a little with the chisel, prefering to do the final fair up when the bulkheads are glued on the keel and i can check the flow with a plank. A view from the stem with the bulkheads with the result of the preliminary fairing.


- 144 replies
-
- 6
-
-
- corsair
- bermuda boat
- (and 1 more)
-
Congratulations for your medal. Those canons are outstanding! It must be a joy to walk around in that hall with all those beautiful models around. I could walk there for hours just watching all those ships. I hope it all ends well in your country, stay safe.
-
Thanks Pierre. If you can build such nice models like your Agamemnon, you definatly can build a nice scratch model And for tools, i've a thing for tools. I like powertools, but hey, i'm a guy, perhaps that's normal I bought my 16" scroll saw when it was on sale in the Makro, and my sander in the Gamma when there was a 30% reduction. That sander is really good, only thing is the table at the disc is not that stable, i always have to re-check it for the right angle. I'll have to fabricate myself something someday, for use with the disc. And for the scroll saw, the whole where the saw goes into the top is a way too big, for sawing small pieces. But that's because the the top can be tilted to saw at an angle.
-
HMS AGAMEMNON by PMG - Caldercraft
WBlakeny replied to PMG's topic in - Kit build logs for subjects built from 1751 - 1800
Hi Pierre, just found out about your build log. It's a very pleasant read and she's coming along very nicely. I'm still afraid of starting on those big ships, i've still much to learn. I'll follow along. -
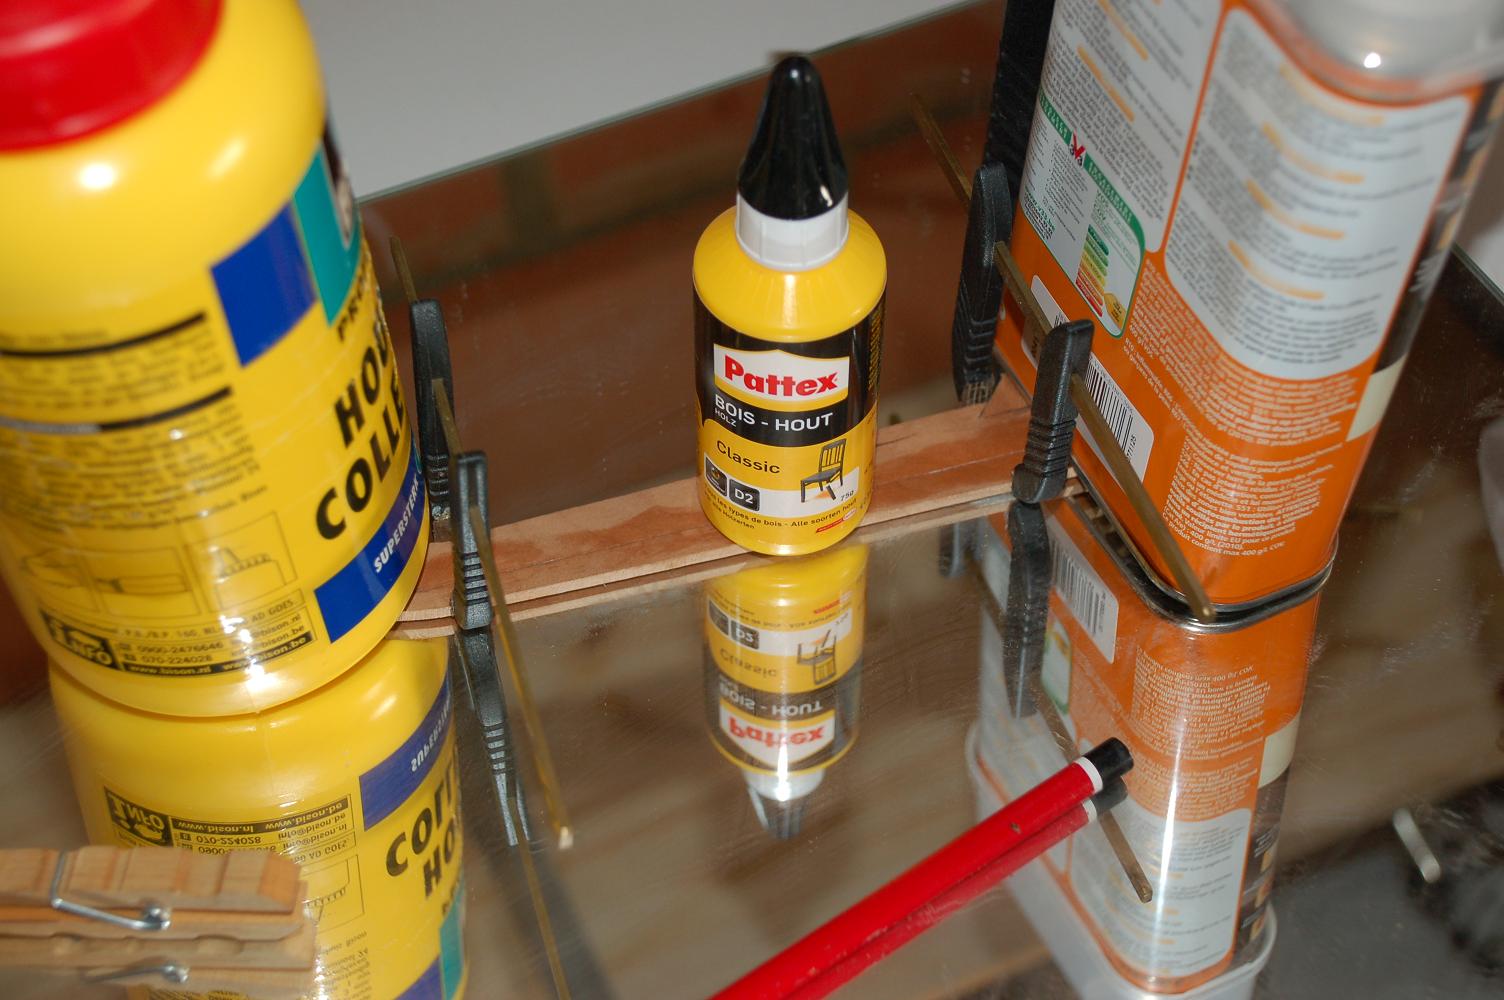
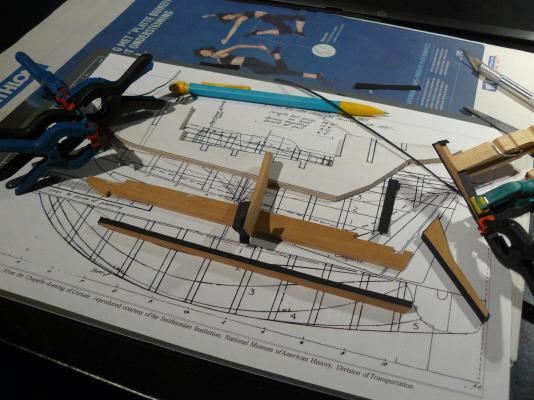
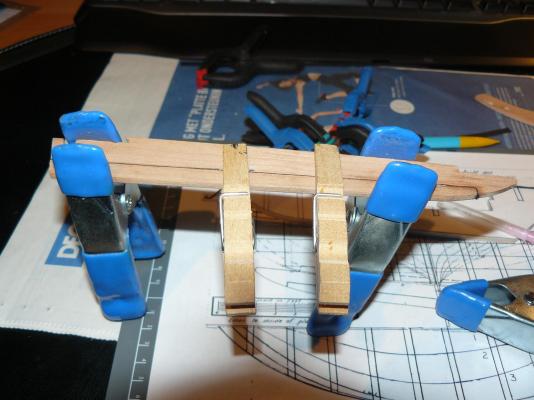
Hi Don and welcome to my build log. I continued my work on the keel. I first glued some black paper on the keel. Afterwards I glued the different pieces to each other. I just did the stem, as I’ve noticed the pieces at the stern were not long enough. There’s a gap between them and the profile former. Back to the saw to fabricate new pieces. There's also a small gap at the sterm but since that part will dissapear when the planking will be done, i'll just glue a small filler piece between them. For the curved piece of the keel, I made a simple jig to keep enough pressure on the parts till the glue dries and to make sure, the pieces are flat to each other. An overview of the whole keel and the profile former with the stern pieces and profile former not yet glued to each other. Now I was wondering if have not made a mistake here. I used black paper to simulate the caulking, but are those pieces really supposed to have caulking between them?

- 144 replies
-
- 11
-
-
- corsair
- bermuda boat
- (and 1 more)
-
Ulises, that's a really big ship! You're off with a great start. I'll be following this one, she's gonna be a beautiful ship.
- 786 replies
-
- 1
-
-
- Royal Louis
- Finished
- (and 1 more)