JesseLee
-
Posts
1,694 -
Joined
-
Last visited
Content Type
Profiles
Forums
Gallery
Events
Everything posted by JesseLee
-
 Does the ship bottom sit on the clay or the bottle? Always wondered how the glue holds the ship down.
 -
Lol, Keith you crack me up!
-
Thanks for the input everyone. Doing more discussing than building but like we all keep saying here on MSW, that's how we learn. Still feeling bad, using this time to research some more & decide what I will do next when I can jump back on it. Been searching online today about this - here is what I found on a British website. In the early days the hull below the waterline was usually painted with wood-coal tar that looked dark brown to almost black. From the 16th century on it became common to mix sulfur to aid in worm protection which gave it a yellowish-grey color or to paint with an off white lead paint. Sometimes an extra layer of protection of wooden sheathing of elm or fir was added below the waterline. (I have never heard of this) Early 16th century the Portuguese & Spanish started adding lead sheathing. Copper began being used in the mid 18th century. I also remembered in the movies the Black Pearl was solid black below & above the waterline & it looked fine to me.
-
From previous discussions on this ship it seems that she most likely wasn't coppered since she was used only in northern colder waters. Interesting suggestion on the different shades of black. I read that they would maybe tar the bottom. Wonder what it would look like to make the bottom a tarred black color & above the waterline mix the blue in with the black or would it not be different enough?
-
Wonder what color should be painted below the waterline?
-
Interesting. My kit shows no paint scheme at all, just natural wood. I would like to make mine historically correct. Wondering now if I should go back & paint the hull now. Don't know the paint scheme of the figurehead either & was planning on painting it white. What do you guys think? guillemot, I see you painted your hull black. Those reddish sails in that old model look cool to me.
-
Sailor, I can find very little info & no pictures at all. Someone explained to me on the page before this one that many records were lost to the bombing & fires of WWII. I am going by what pics & instructions (which isn't much) that came in my kit.
- 607 replies
-
- 1
-

-
- scottish maid
- artesania latina
- (and 1 more)
-
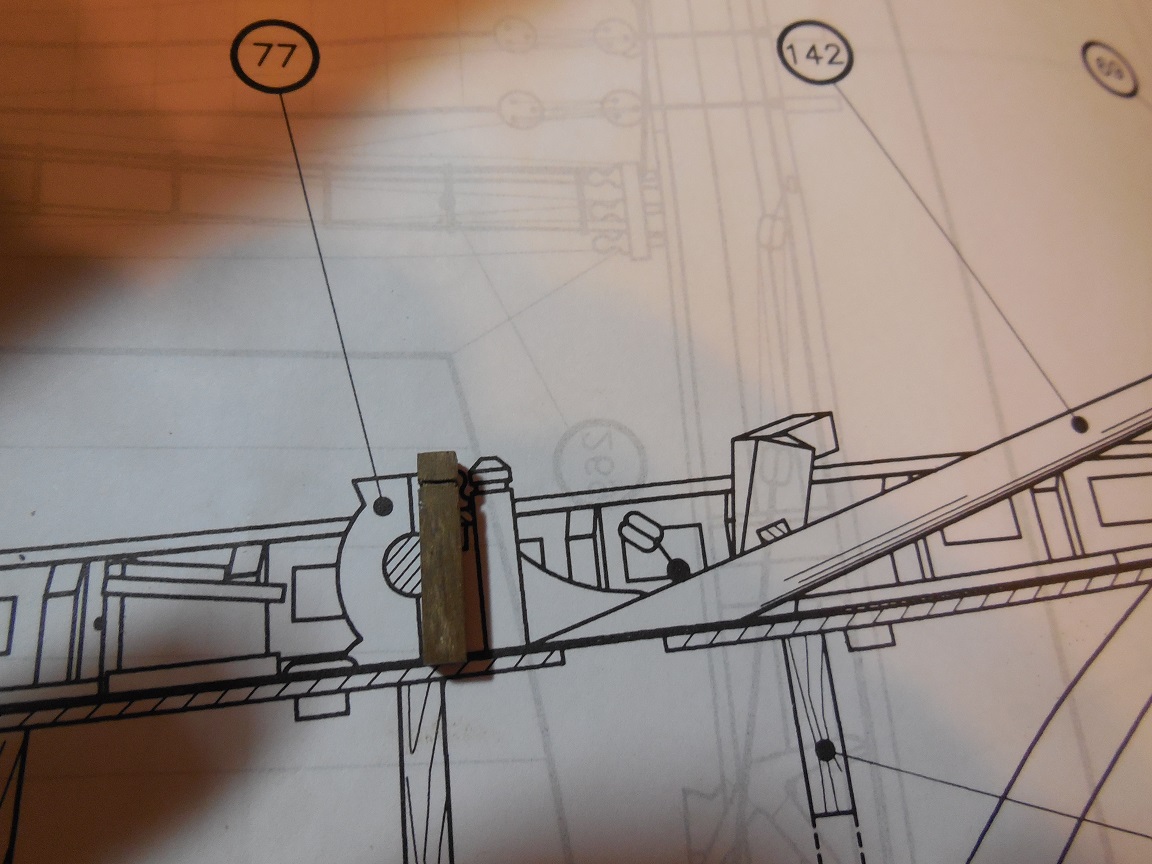
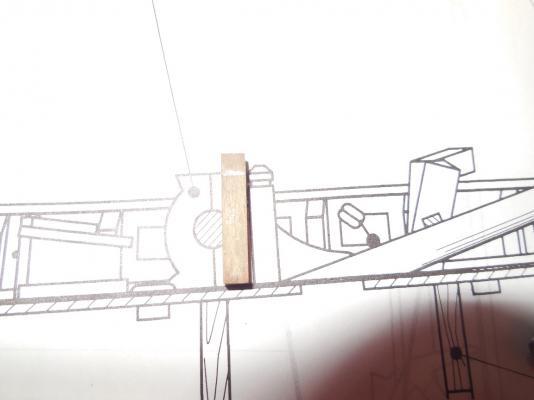
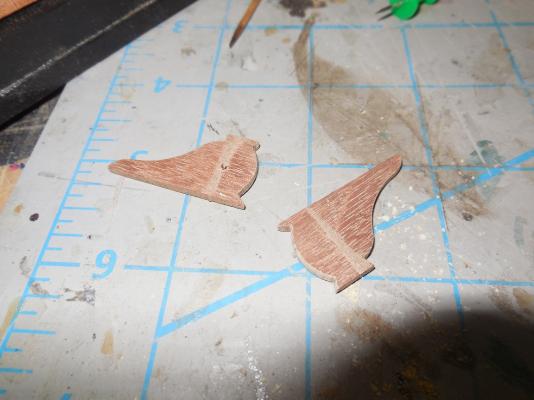
Next the stanchion. Cut to correct size & used mini saw & files to get the cuts & angles as shown on plans.


- 607 replies
-
- 4
-
-
- scottish maid
- artesania latina
- (and 1 more)
-
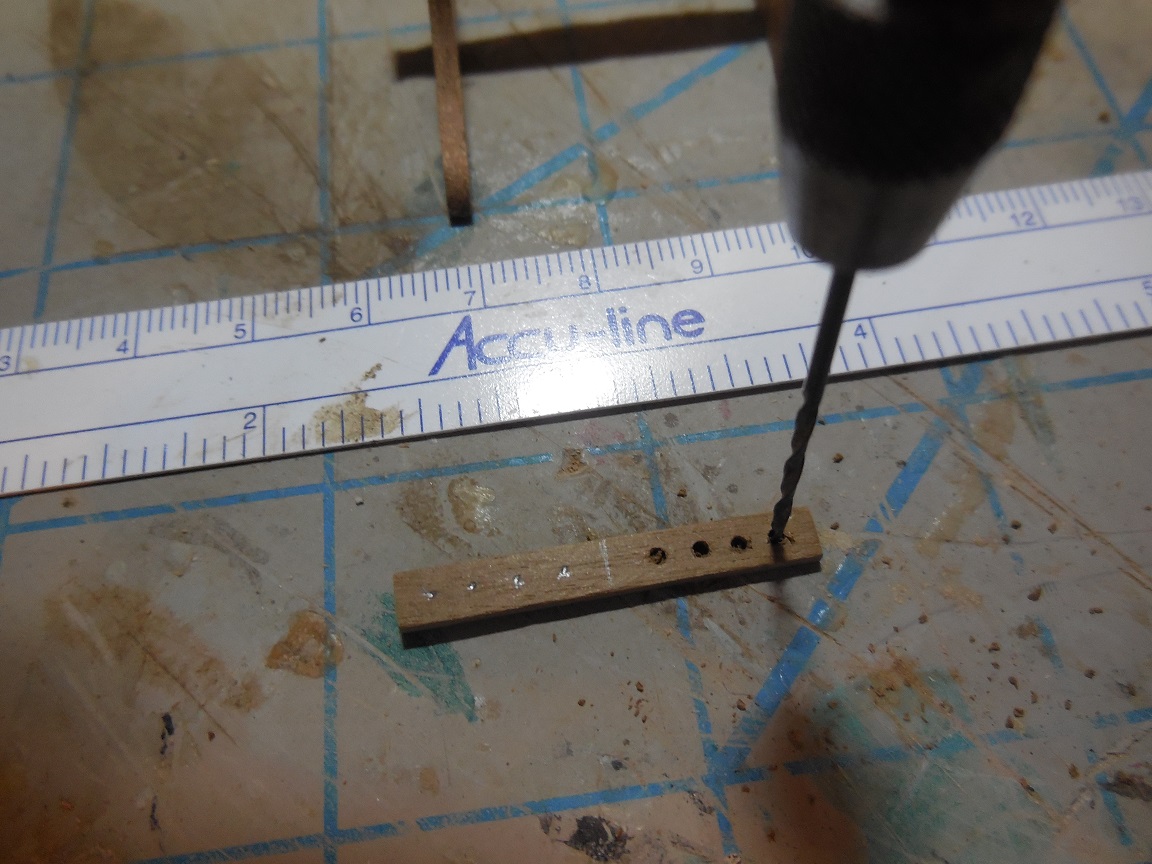
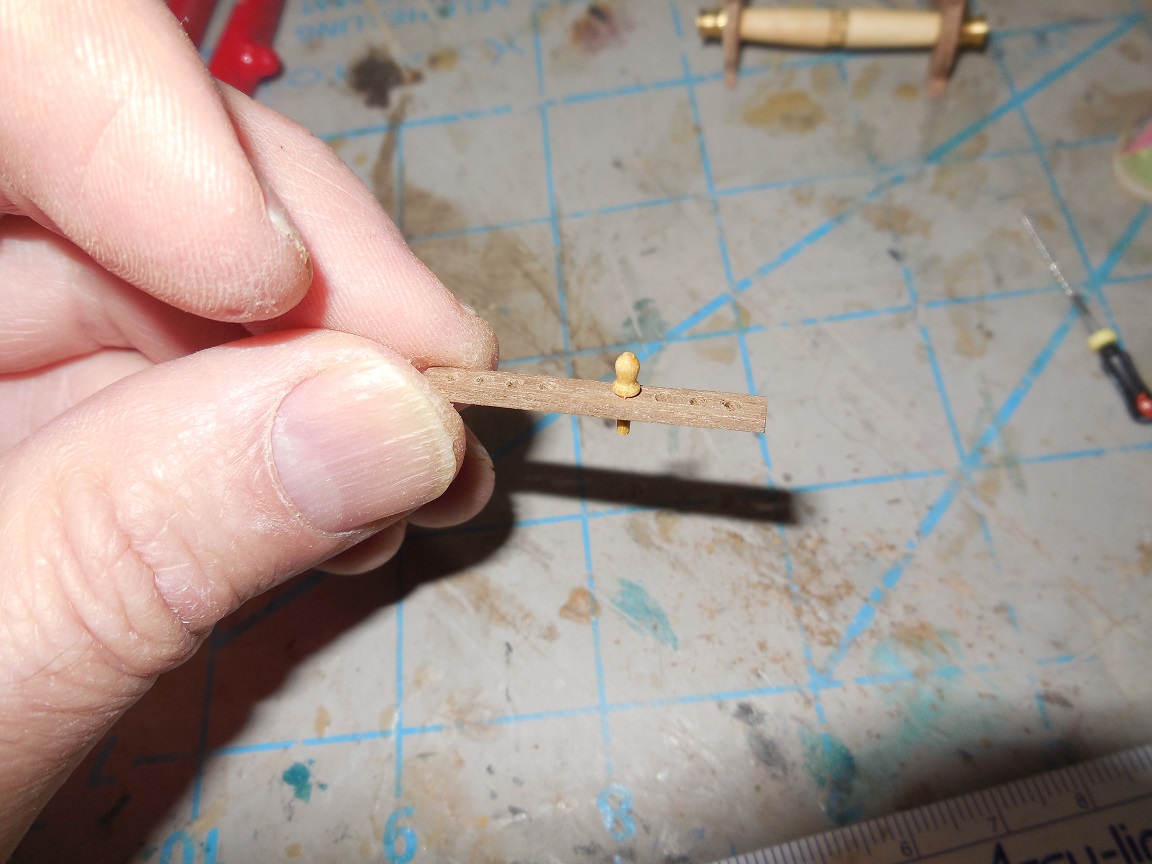
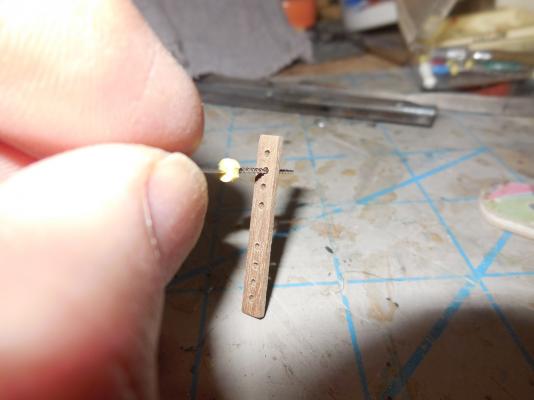
Spacing & marking where the belaying pin holes go in the pin rack. Once drilled got them to just the right size with these handy little twist reamers I got years ago & glued the pin rack on.


- 607 replies
-
- 2
-
-
- scottish maid
- artesania latina
- (and 1 more)
-
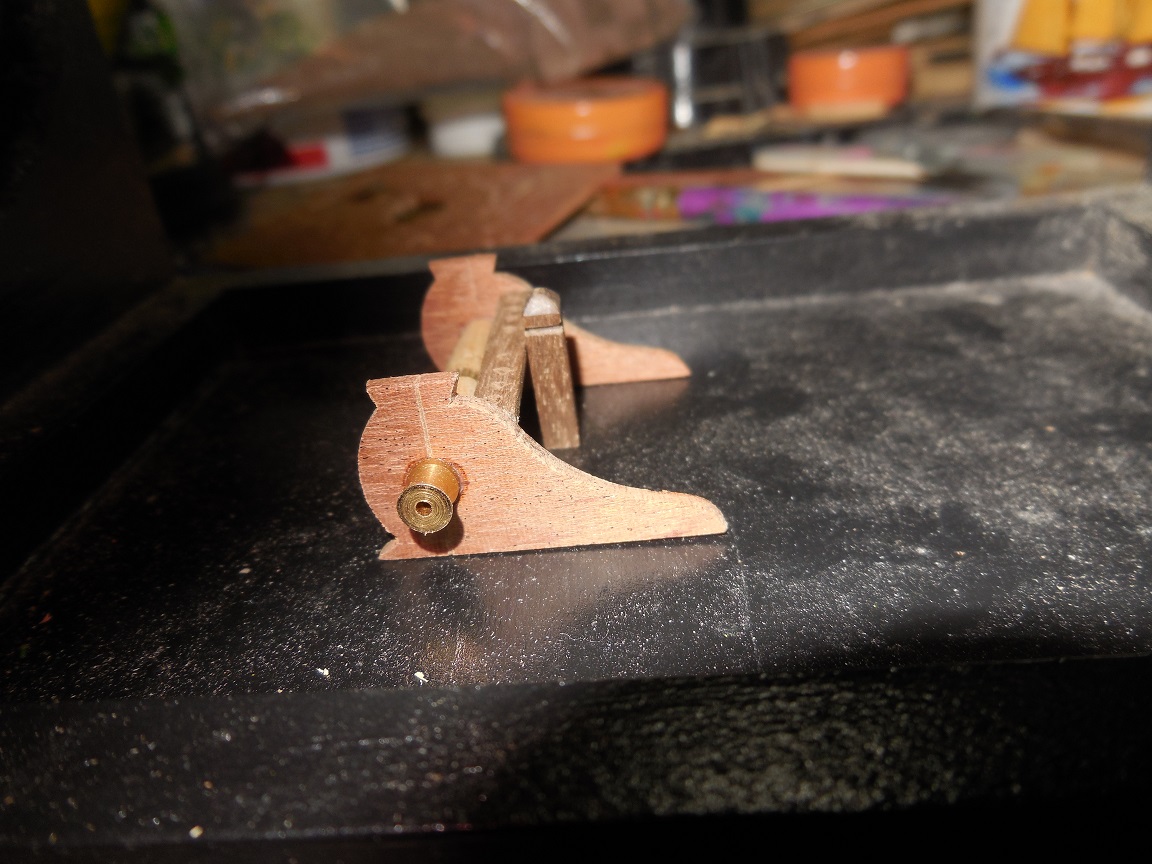
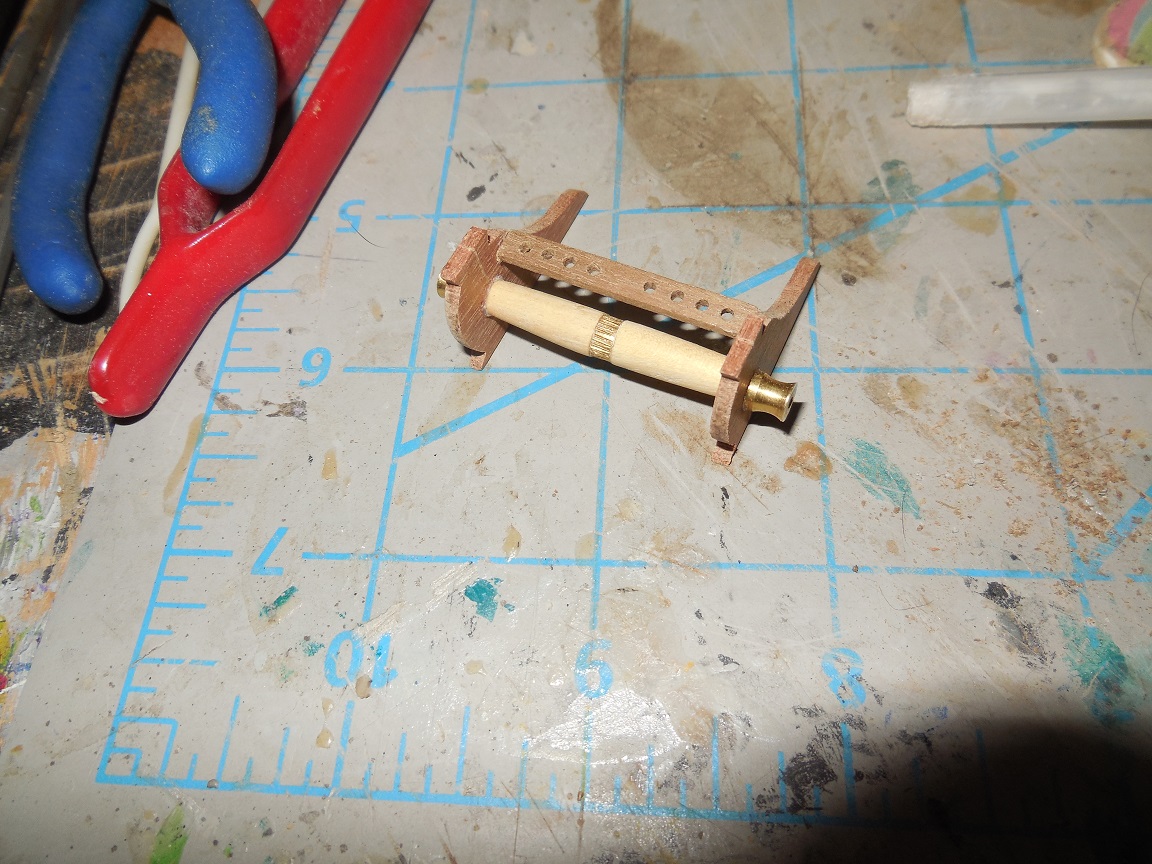
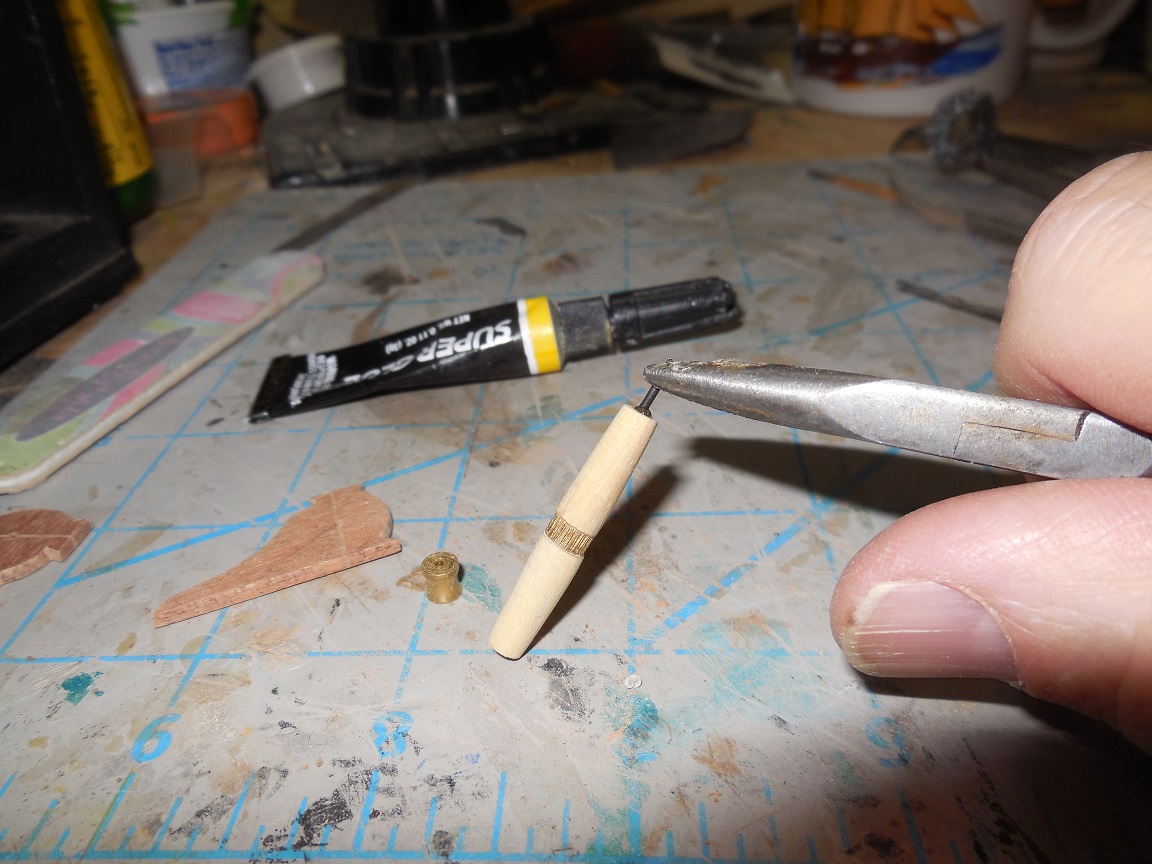
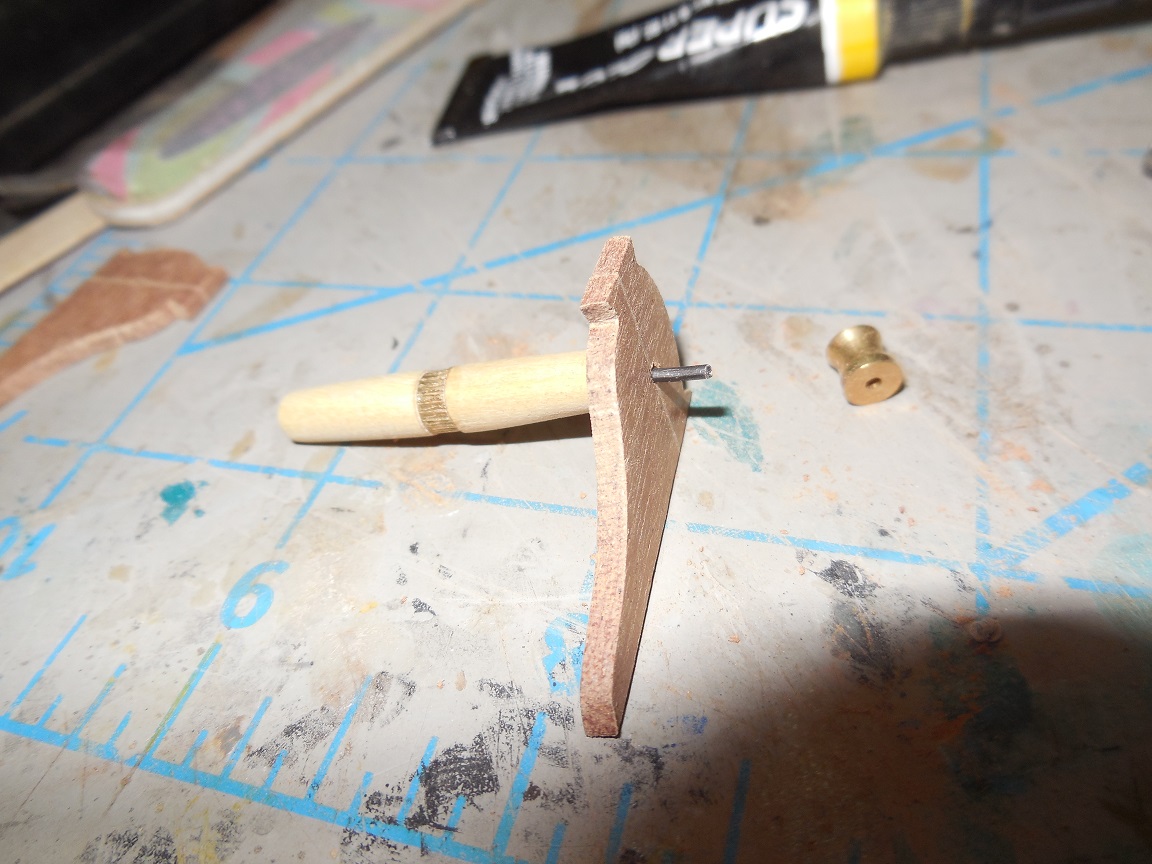
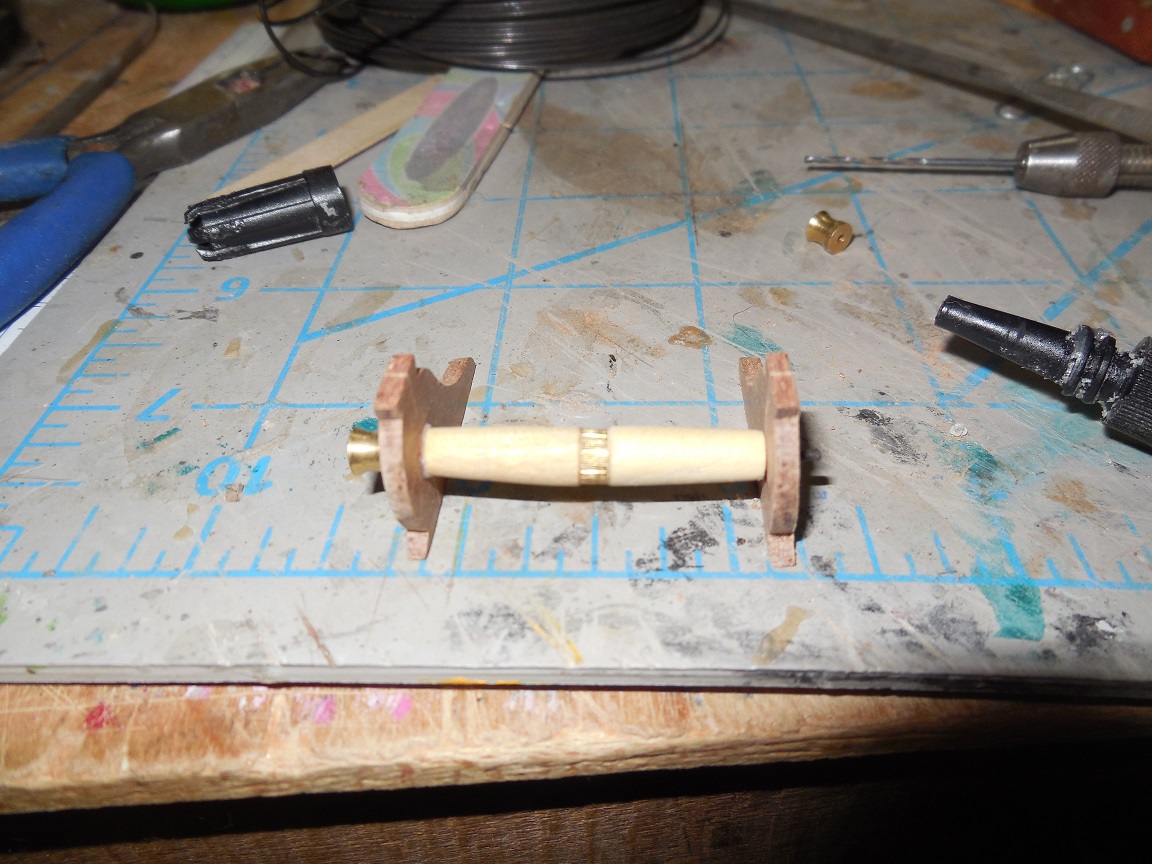
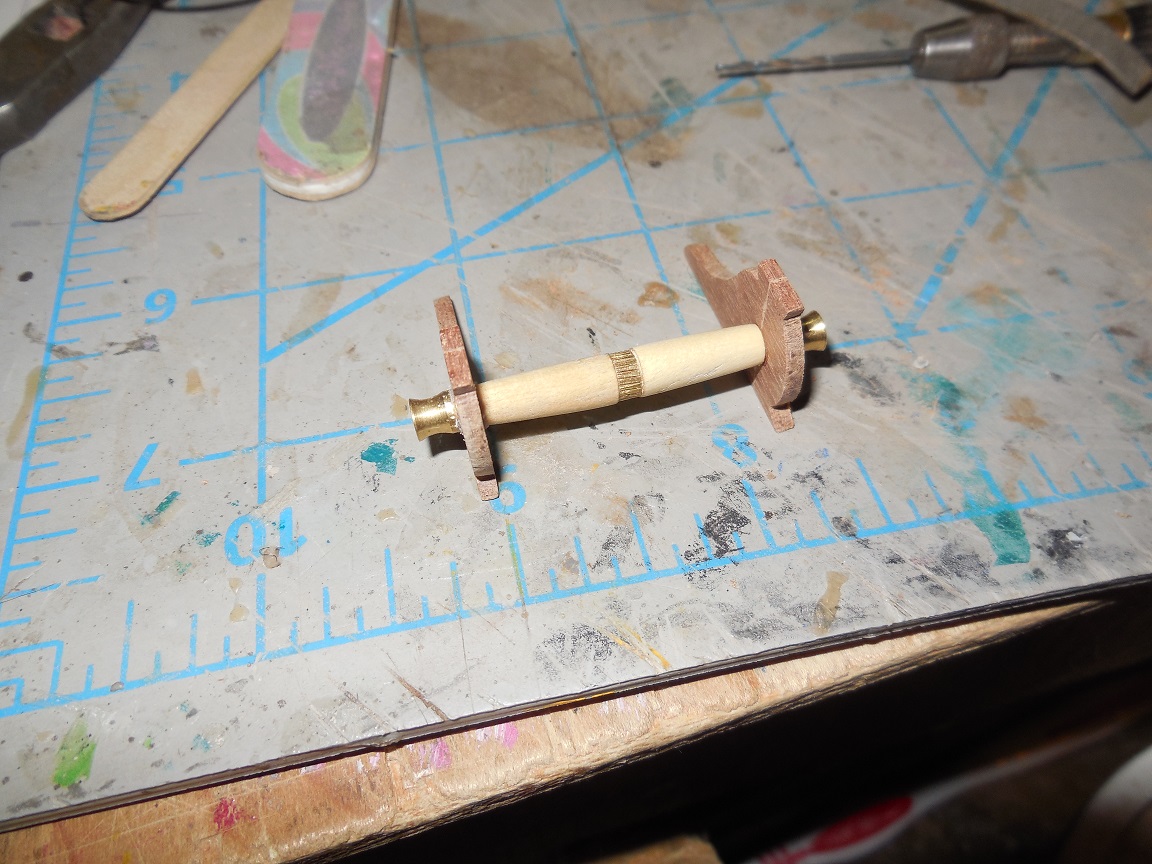
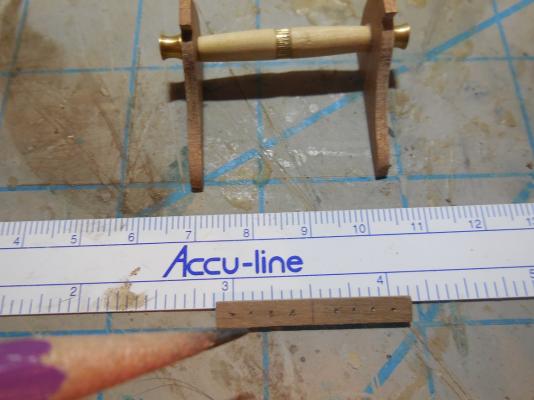
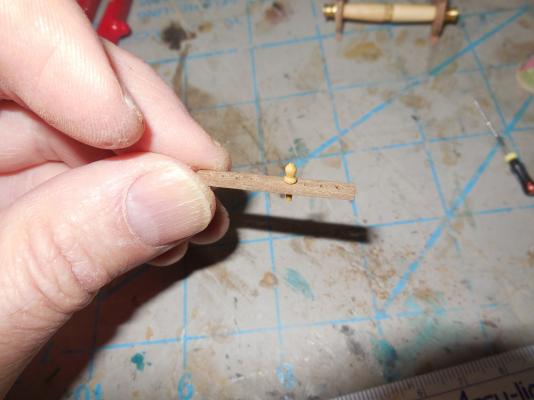
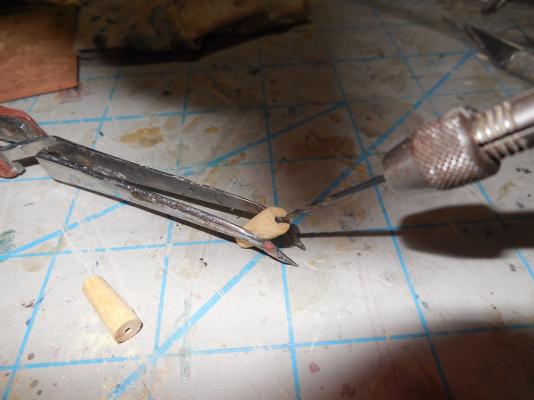
Drilled holes in lathe ends & sides to hold everything together strongly & for the drum on the side.


- 607 replies
-
- 3
-
-
- scottish maid
- artesania latina
- (and 1 more)
-
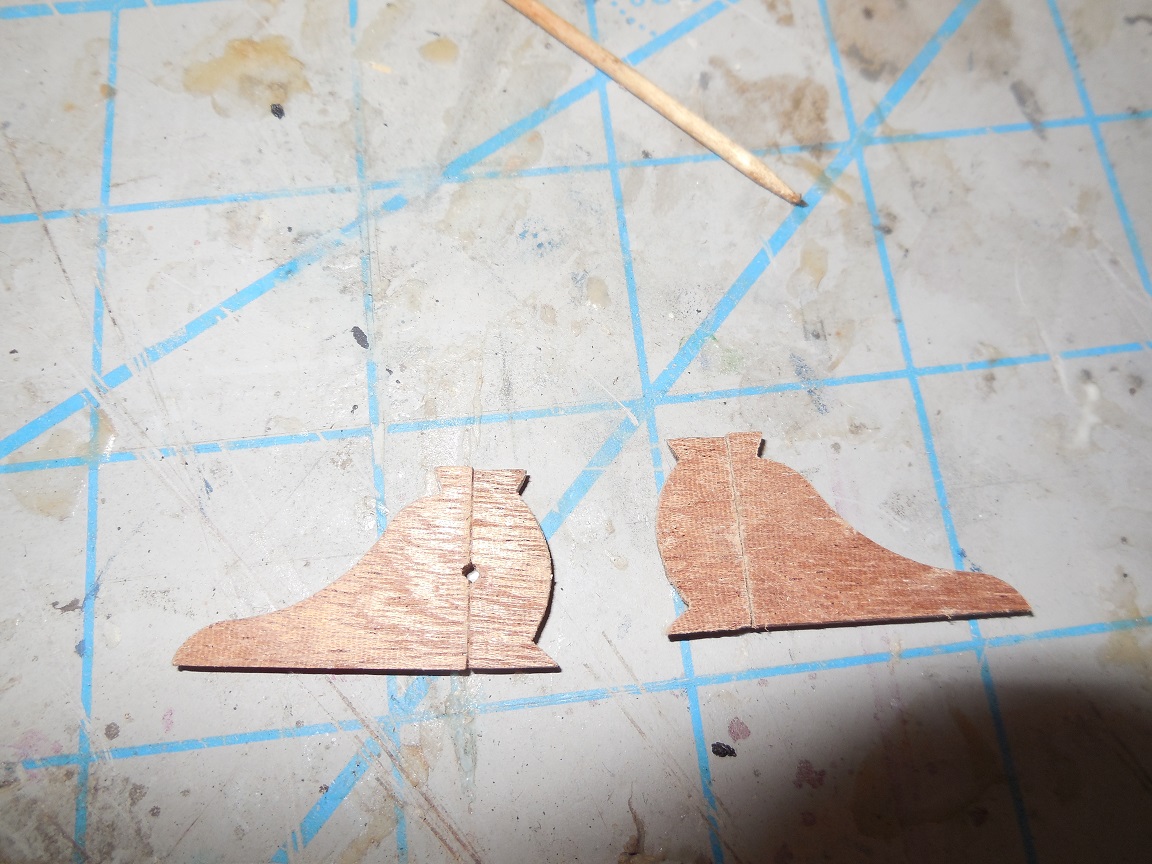
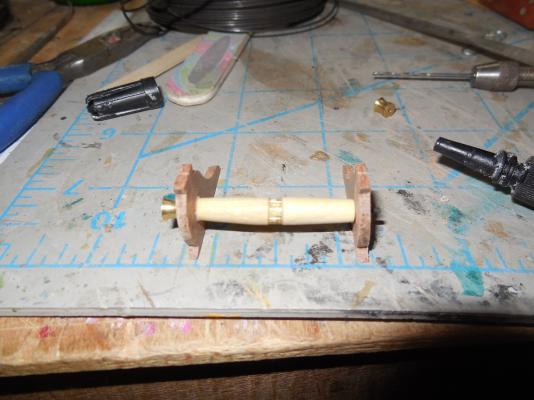
Glued sides together. I wonder why these were not made in one piece instead of two. Shows an ugly glue line. I tried to hide as best I could with sawdust in the glued line.

- 607 replies
-
- 1
-
-
- scottish maid
- artesania latina
- (and 1 more)
-
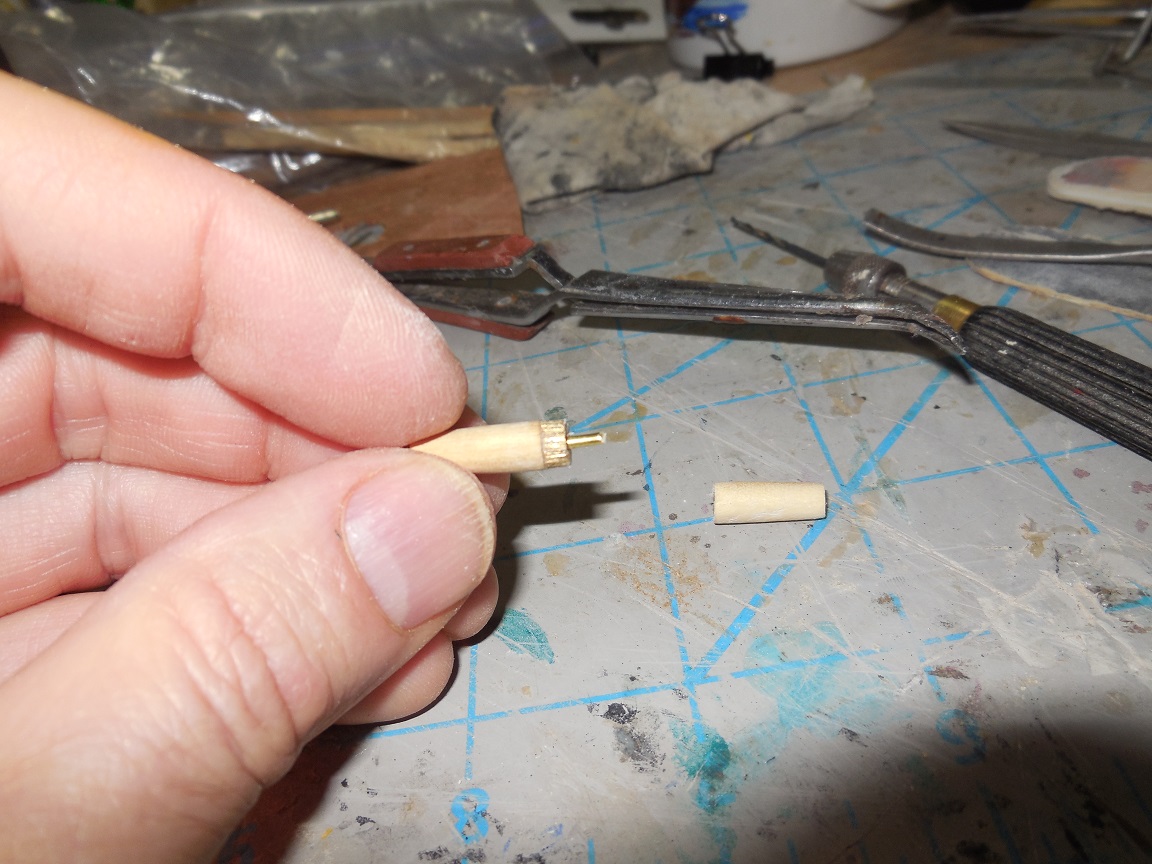
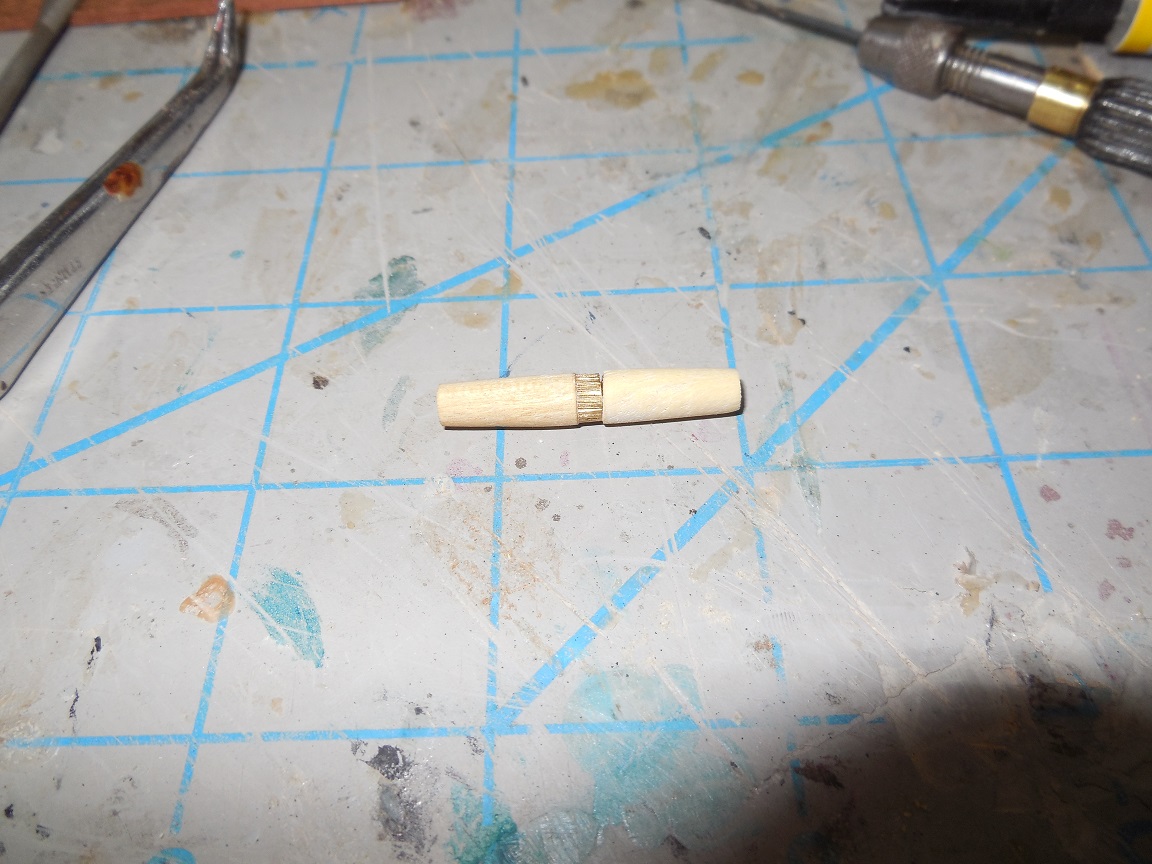
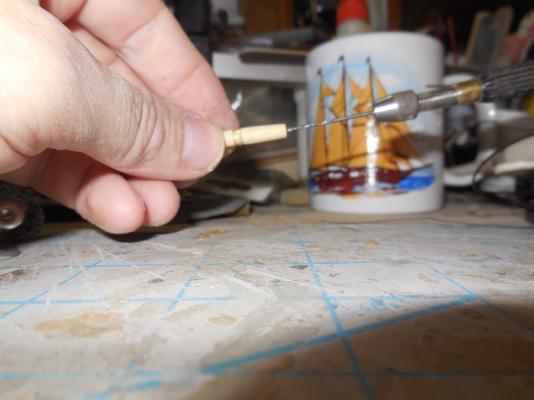
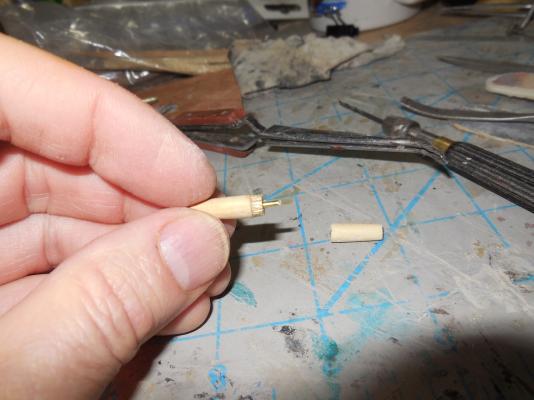
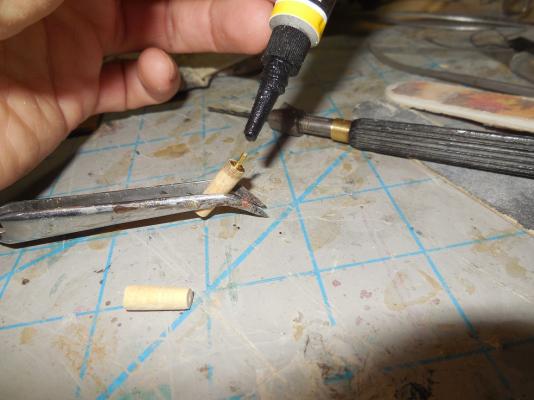
Started with sanding & shaping the lathes. Decided to put a wire through the middle to hold the cogged wheel, found it holds together better & stronger than just gluing them together- plus it keeps it all lined up better.
- 607 replies
-
- 1
-
-
- scottish maid
- artesania latina
- (and 1 more)
-
Lyme has been kicking my butt the last few weeks. Here is an attempt at artistic humor to show/tell how this disease makes me feel: it attacks every part of my body, feel adrift, alone in rough seas, every day is a constant battle & feel like I'm near death every day. Oh well, enough of that. I have been trying to work on preparing ahead of time other parts of the build in the small amounts of time I have been able to do any work. I find I enjoy assembling these smaller parts of the build just as much as I do the more major parts of it. So first as soon as I load up the pics will be assembling the windlass......
- 607 replies
-
- 2
-
-
- scottish maid
- artesania latina
- (and 1 more)
-
What did you draw the lines on the sails with?
-
Stained it first. The pic doesn't show it but it turned out with dark & light areas that didn't look right so I lightly dry brushed some brown paint on it that was as close to the stain color as I had. The paint covered enough to make it evenly colored all over & the stain showed through just enough to keep the wooden look. I'm not sure this would work on a larger hull but on one this small it turned out better than I thought it would.

- 607 replies
-
- 4
-
-
- scottish maid
- artesania latina
- (and 1 more)
-
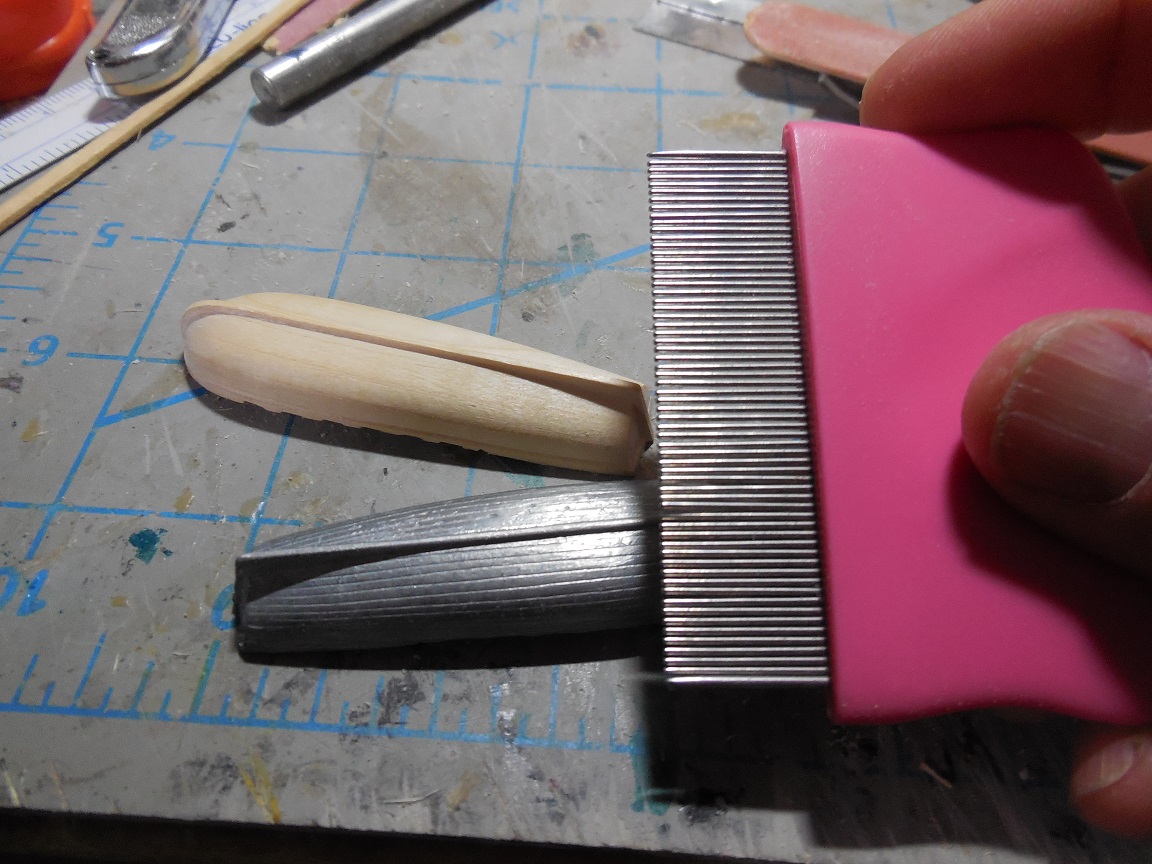
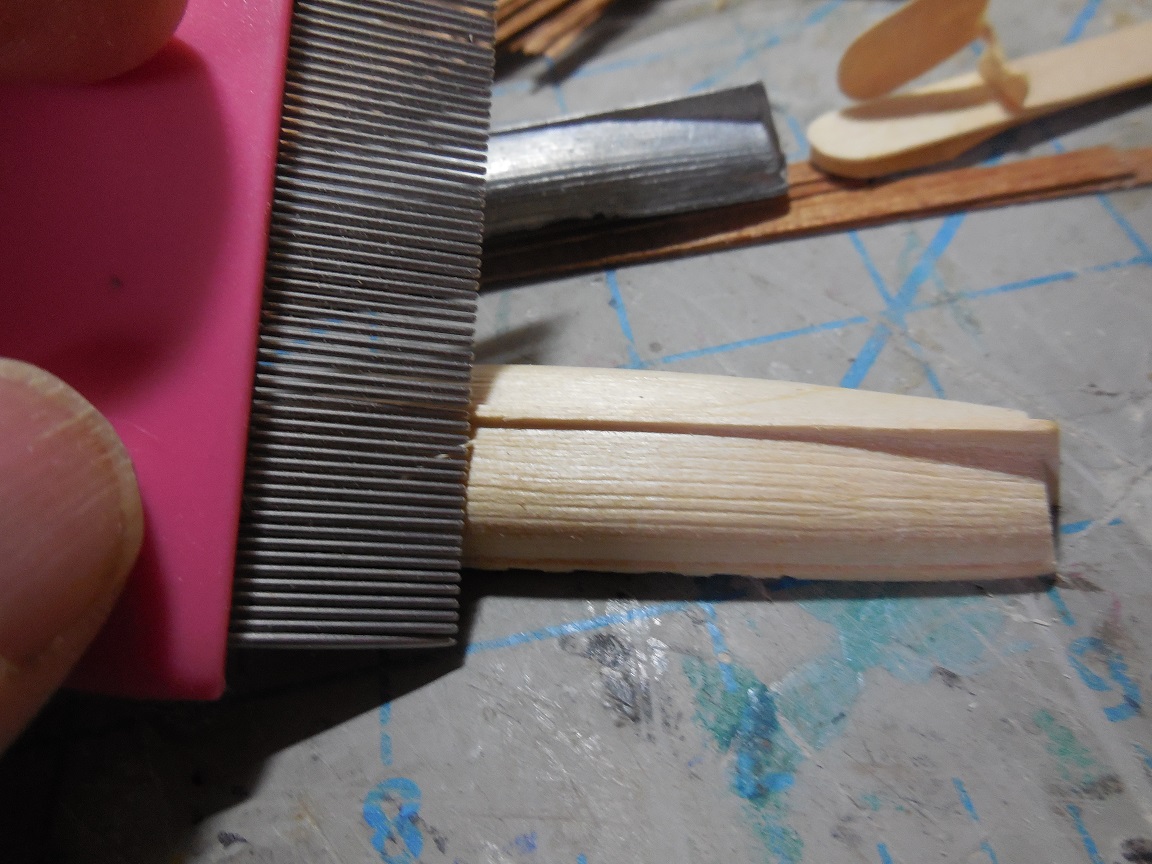
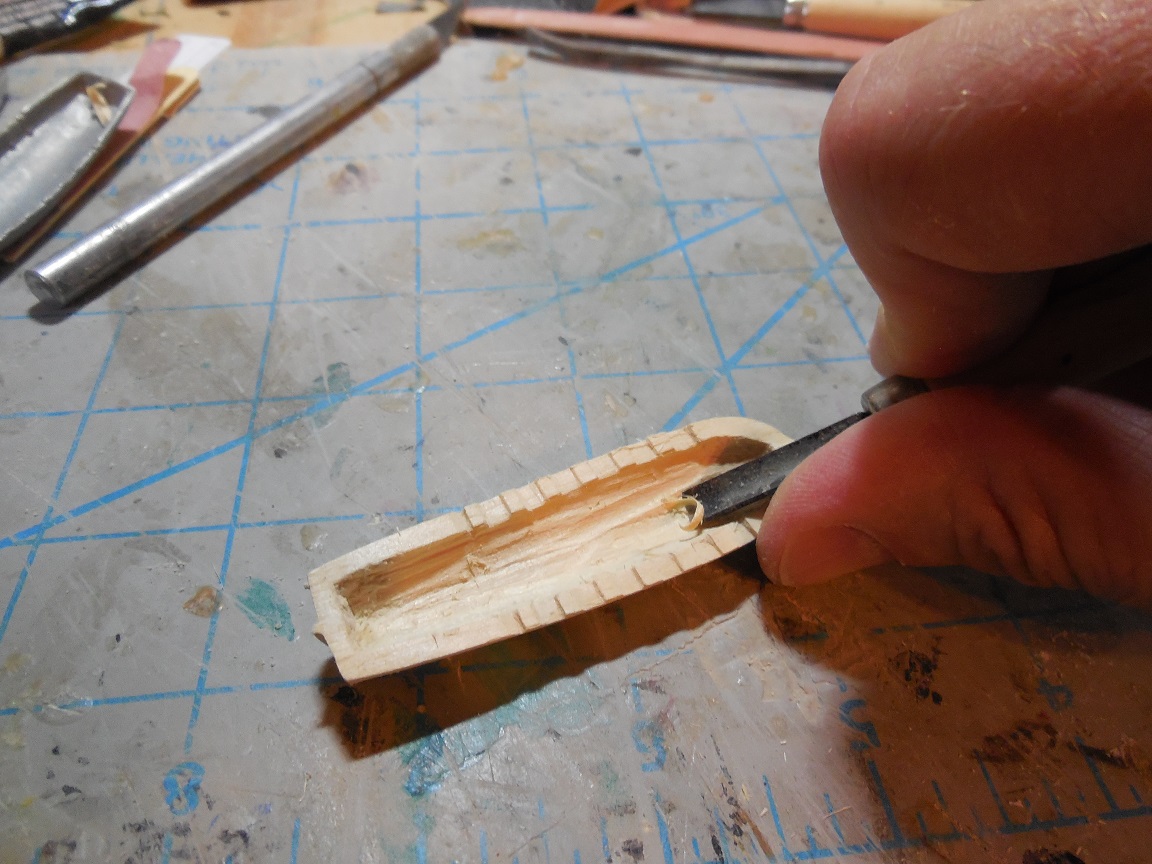
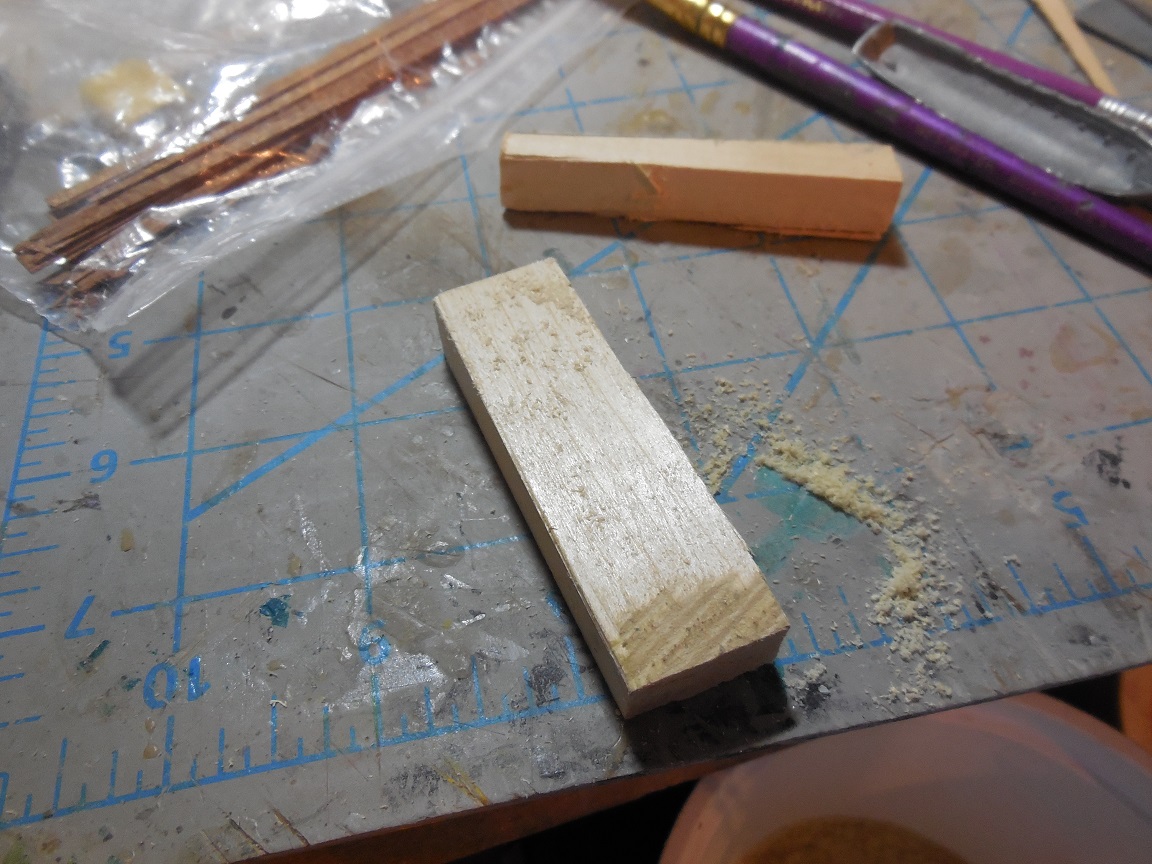
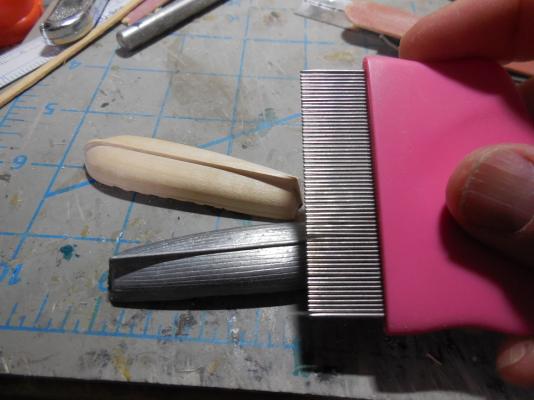
I didn't want spend the time it would take to plank it it so I had this idea of how I could get the planking lines on the hull. This is a flea comb for dogs. The metal prongs are the same space apart as the plank lines on the metal boat. Practicing on scrap showed that pressing down & dragging it along the length of the hull made lines that looked like planking lines. It wasn't as easy as I thought it would be. The pic shows the first try. After a few attempts It turned out pretty good.

- 607 replies
-
- 5
-
-
- scottish maid
- artesania latina
- (and 1 more)
-
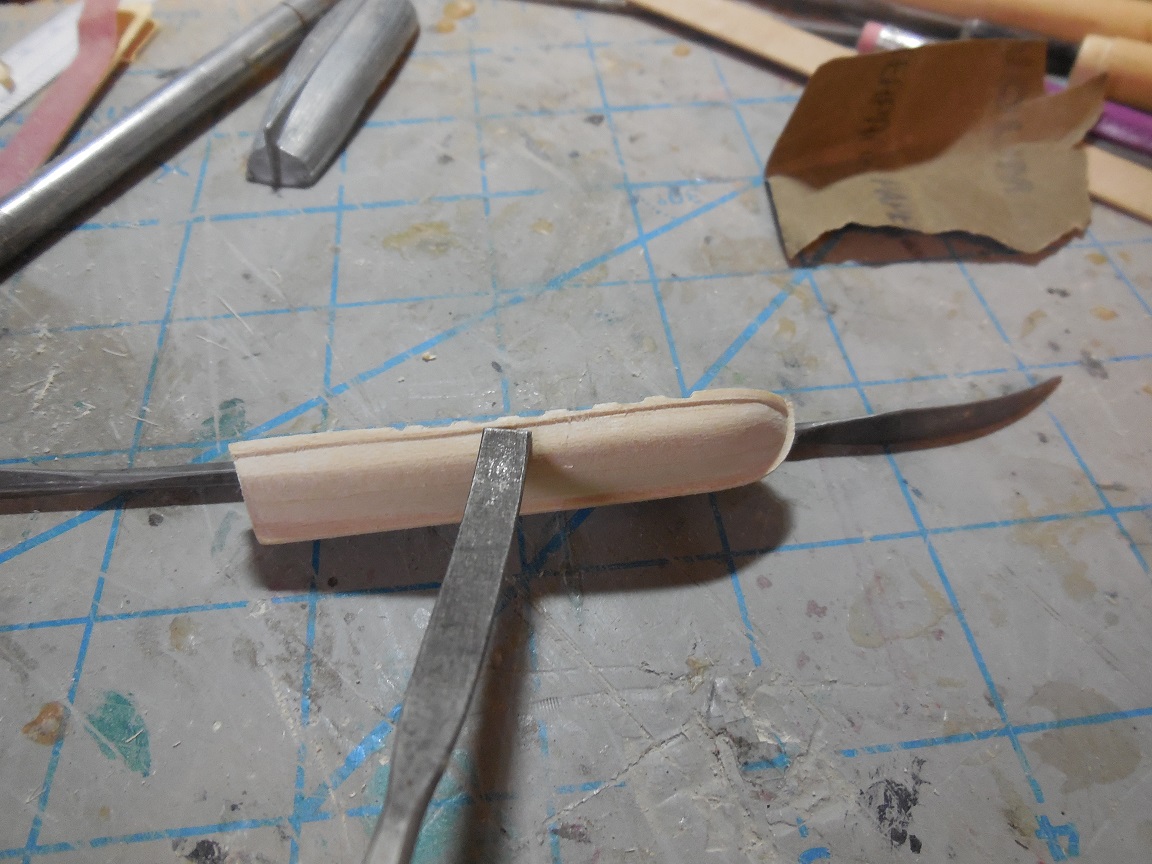
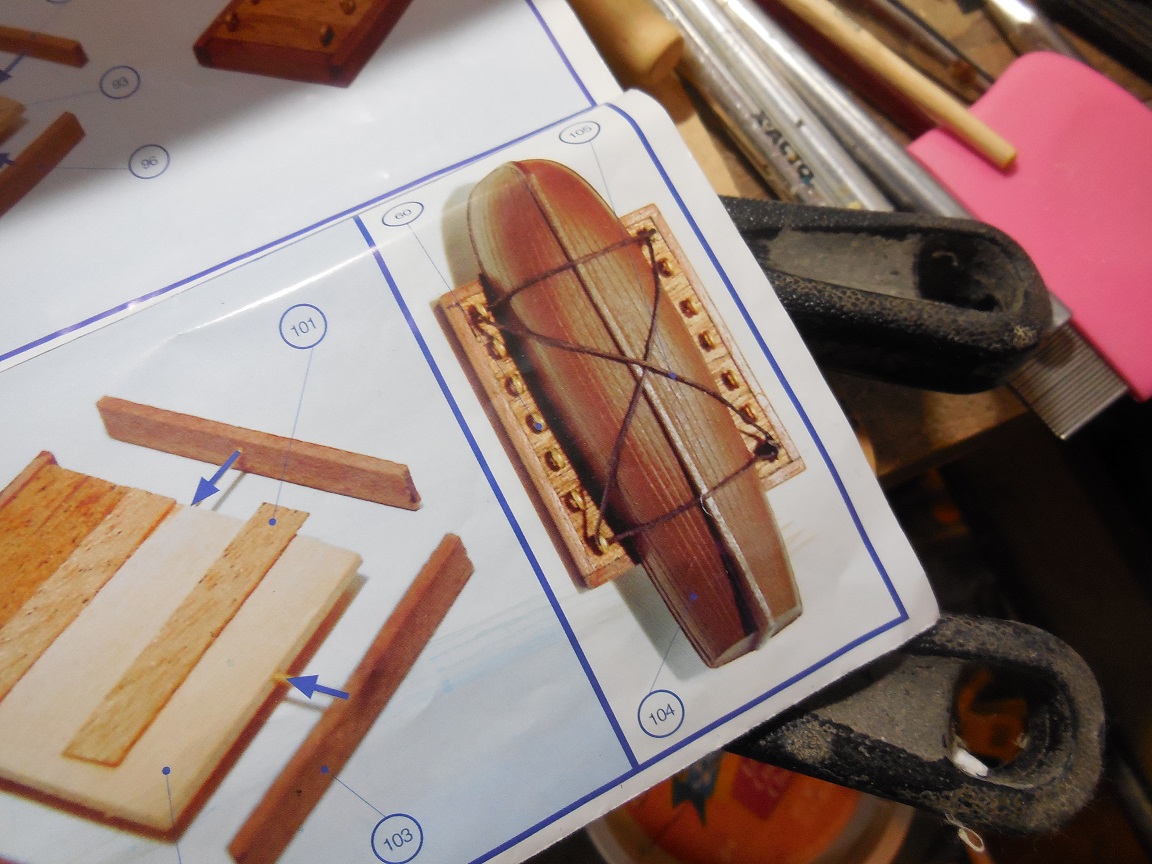
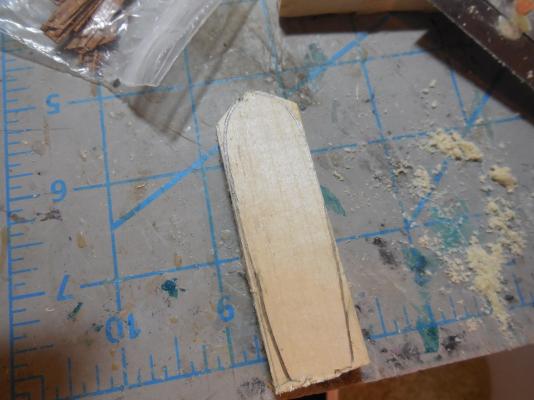
After a lot of thought I decided to continue on with my original plan to just make the lifeboat outside & not the inside & tie it down upside down like the plans show......for now. Later on one day if I have no other builds going on & want something to work on I can come back to it & make a more detailed one. Here are pics of the continued progress on the lifeboat.


- 607 replies
-
- 4
-
-
- scottish maid
- artesania latina
- (and 1 more)
-
I have found her called a Clipper-Schooner on the web. Cant find any photos except for the later re-done version & pics of models. I cant even find a pic of the figurehead anywhere
-
Keith, I have often wondered myself about the lifeboats being upright on deck. Did they have to dump them out every time it rained or were they really stored upside down? Upside down makes more sense to me. Maybe it is a modeling thing to have them upright & show more detail?
- 607 replies
-
- 1
-
-
- scottish maid
- artesania latina
- (and 1 more)
-
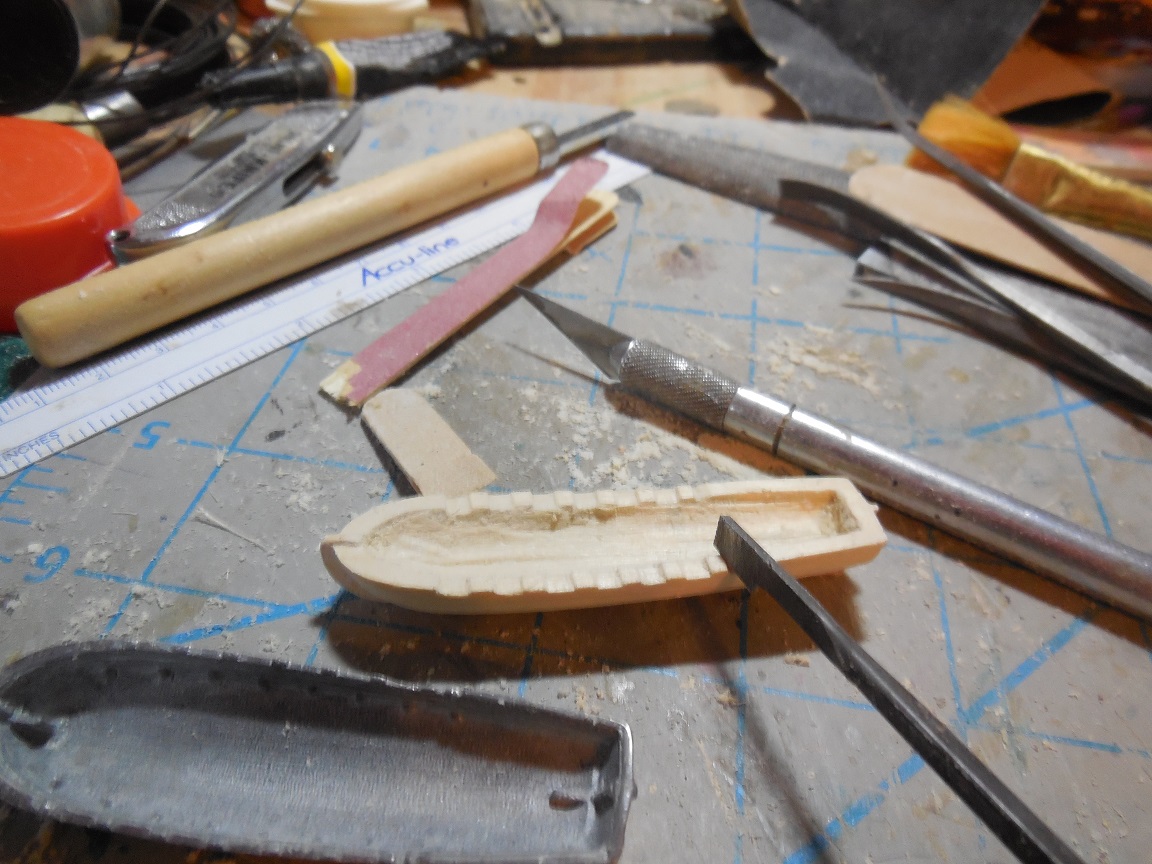
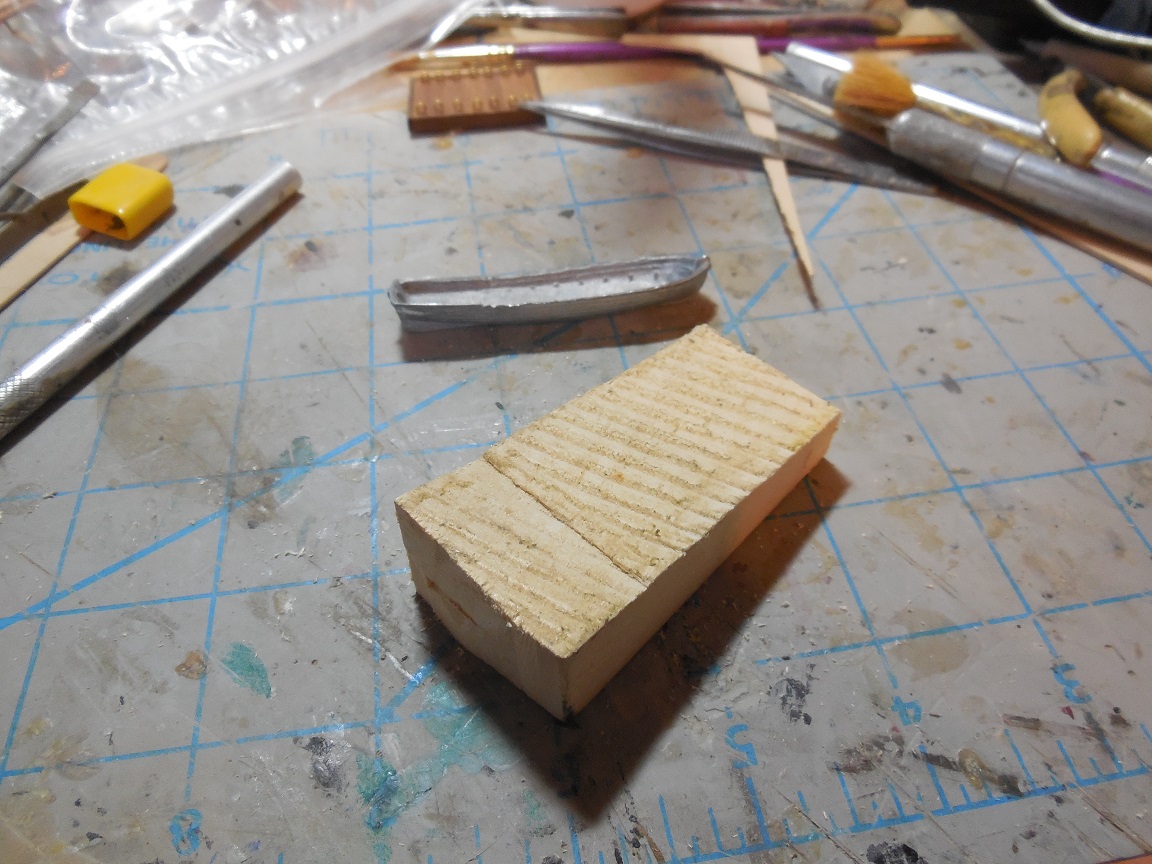
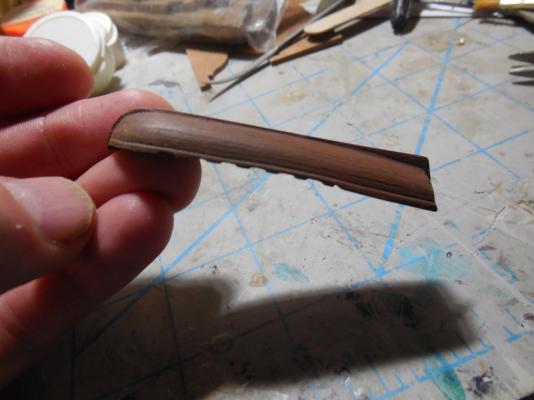
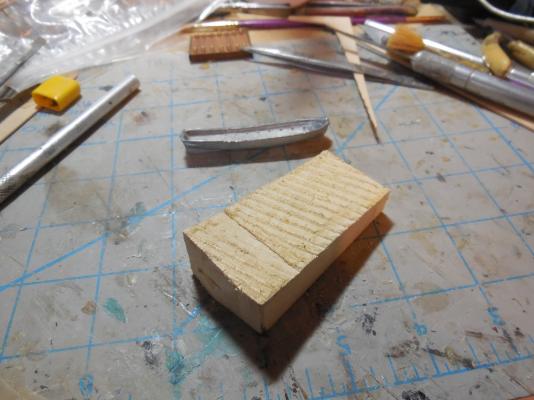
Since all that came with the kit was a cast metal boat with no detail on the inside I don't know how this lifeboat looked on the inside. Not sure which way I'll go with it at this point.
-
The plans have this lifeboat tied down upside down so whatever hollowing out I do will just be to lighten the weight some. Since the inside of the boat will not be seen I wont worry about that much. Been racking my brain as to what to do about planking. Got an idea to make planking lines since it is so small. If my idea works, upcoming pics will show what I have in mind.
-
Things have been slow lately. Not got much done but I do have one pic showing the lifeboat progress.

- 607 replies
-
- 6
-
-
- scottish maid
- artesania latina
- (and 1 more)
-
I agree, BEAUTIFUL finish!
-
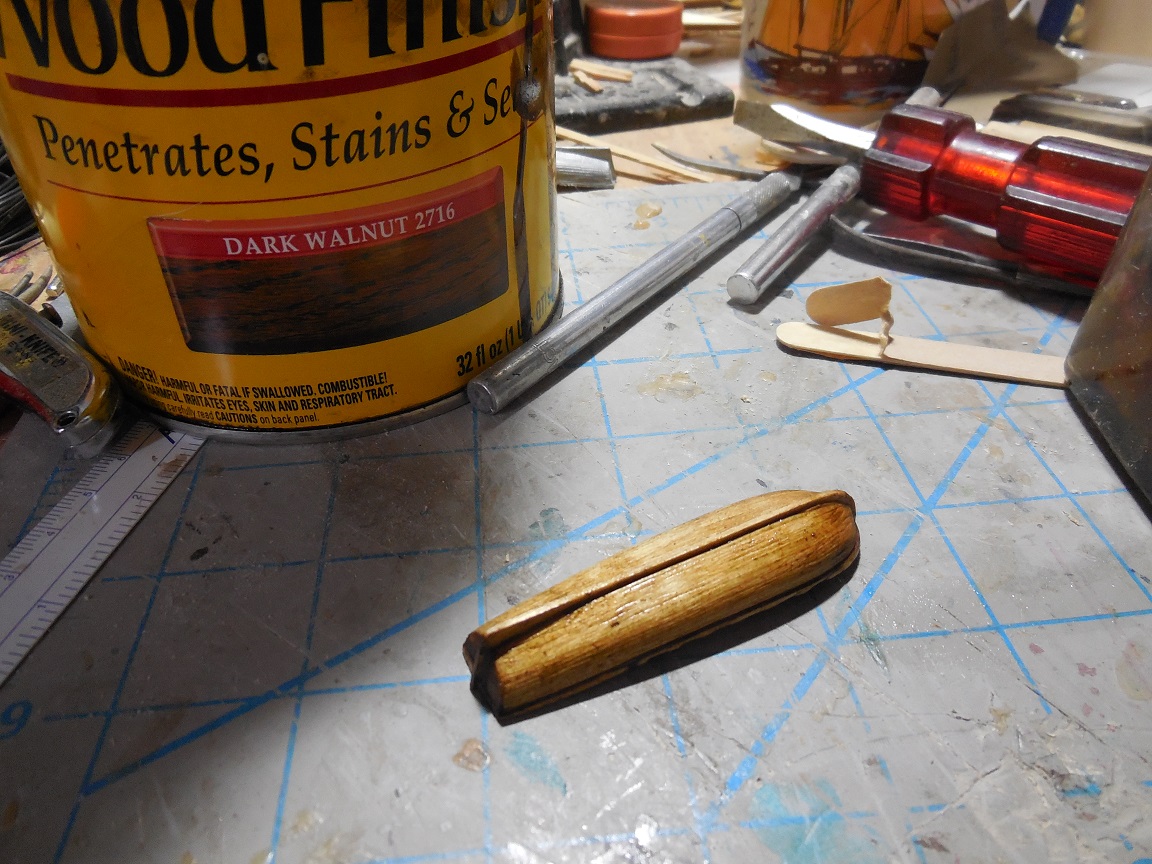
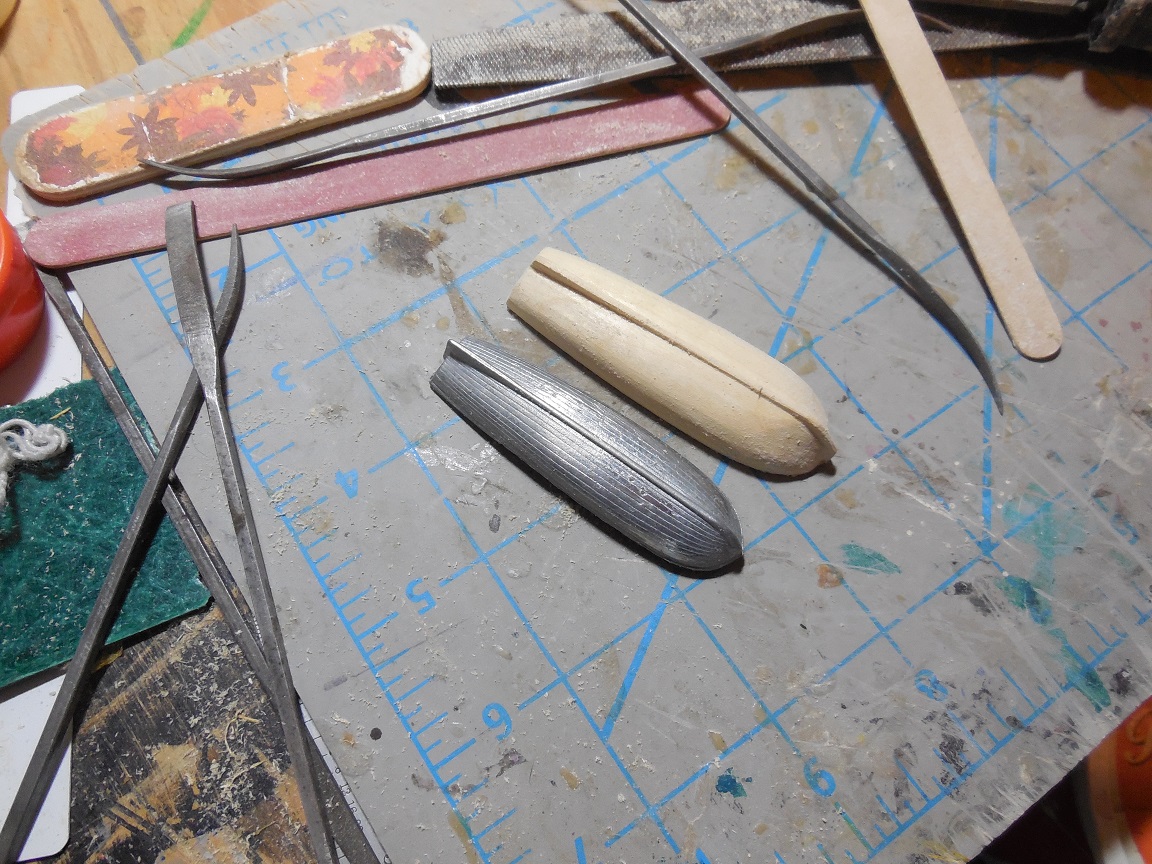
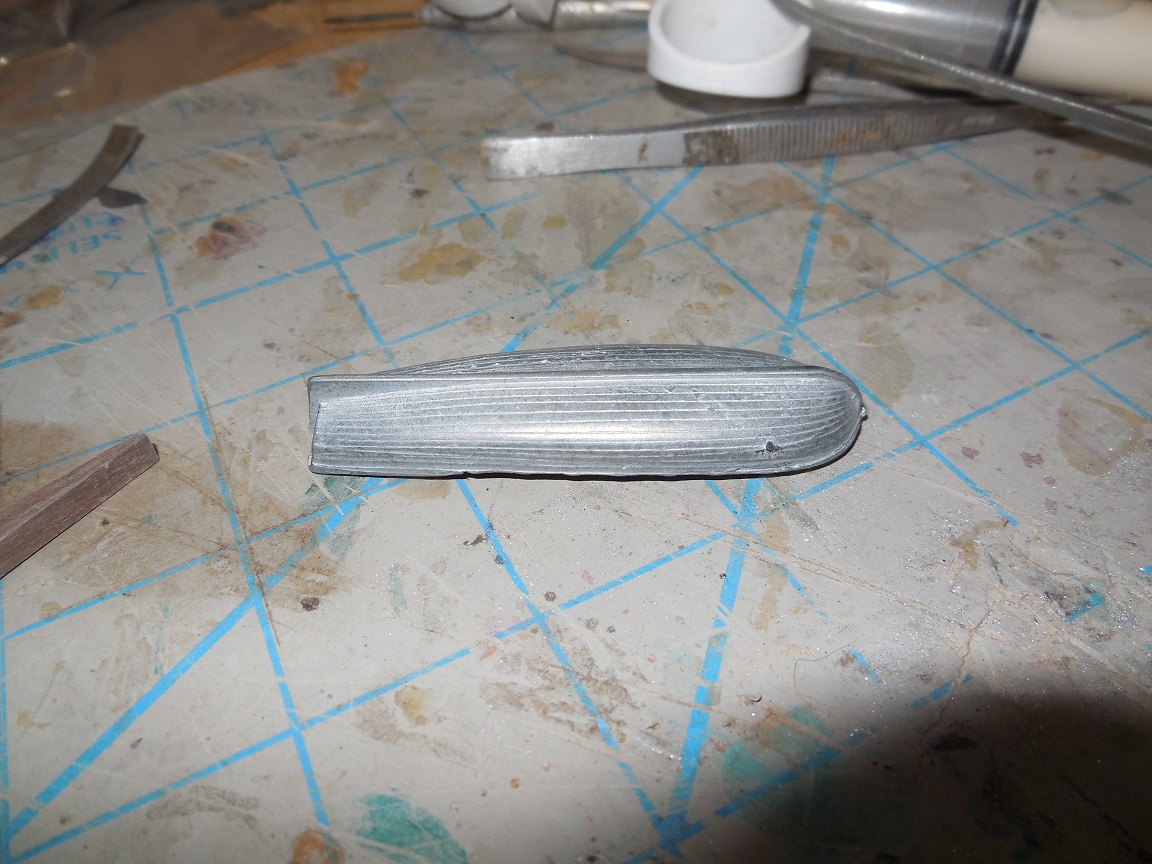
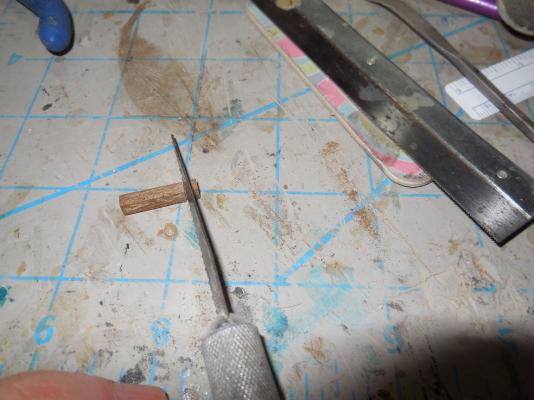
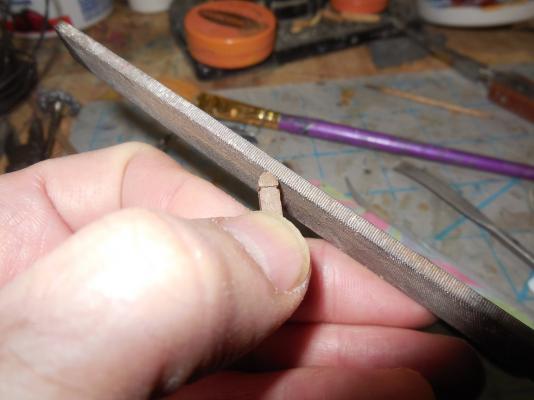
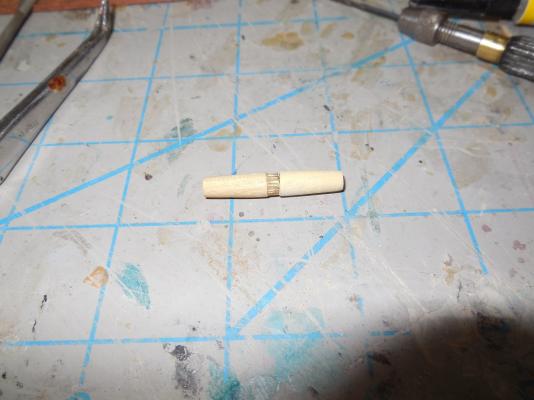
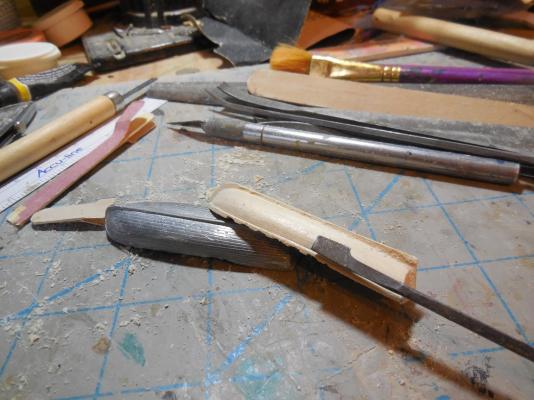
Kit came with a pewter(?) cast lifeboat. Lot of imperfections & is heavy. Think I can do better. Began cutting block out to make a wooden replacement lifeboat.


- 607 replies
-
- 4
-
-
- scottish maid
- artesania latina
- (and 1 more)
-
Prayers for you & your family! I admire your determination on this build. I love brigs. I always have thought they were one of the most beautiful of ships.