JesseLee
-
Posts
1,694 -
Joined
-
Last visited
Content Type
Profiles
Forums
Gallery
Events
Everything posted by JesseLee
-
 Thanks Alistair ! Got most of the assembly done today. The bottom flat plates are too long so tomorrow I will be cutting them shorter & re-drilling the bottom holes.
 -
Frank, it does frustrate me. Between nerve damage from Lyme & carpal tunnel it is very difficult & slow. Good thing the log doesn't show me having my Tasmanian devil fits!
- 607 replies
-
- 2
-

-
- scottish maid
- artesania latina
- (and 1 more)
-
Yes, I'm a little better since yesterday. The little stuff is very difficult but I like the challenge (most of the time). That's why I love MSW so much. I wish I'd had this years ago. I love learning & sharing ideas with other builders. I was dragged kicking & screaming into this modern age of personal computers & such. I'm glad I gave in now. It's great to be able to interact with others around the country & the world compared to trying to figure it out myself with only the help of a book or two.
- 607 replies
-
- 6
-
-
- scottish maid
- artesania latina
- (and 1 more)
-
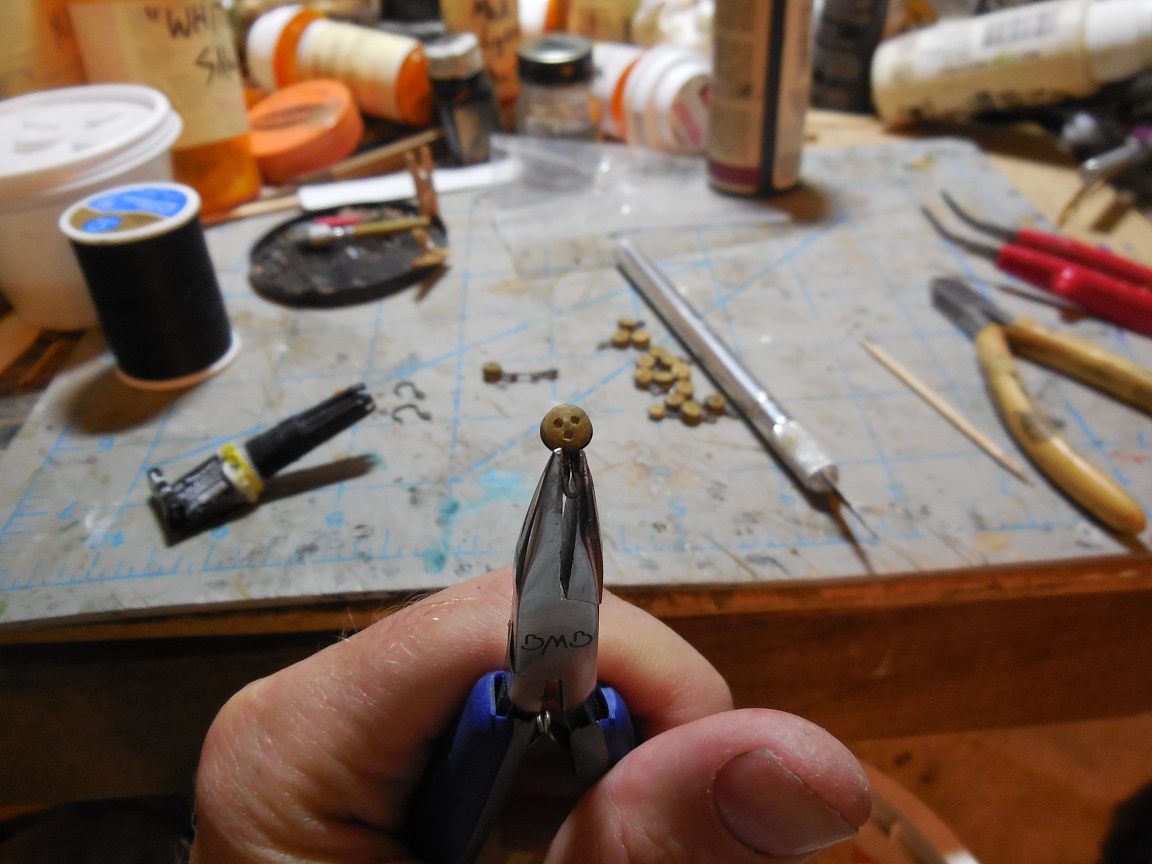
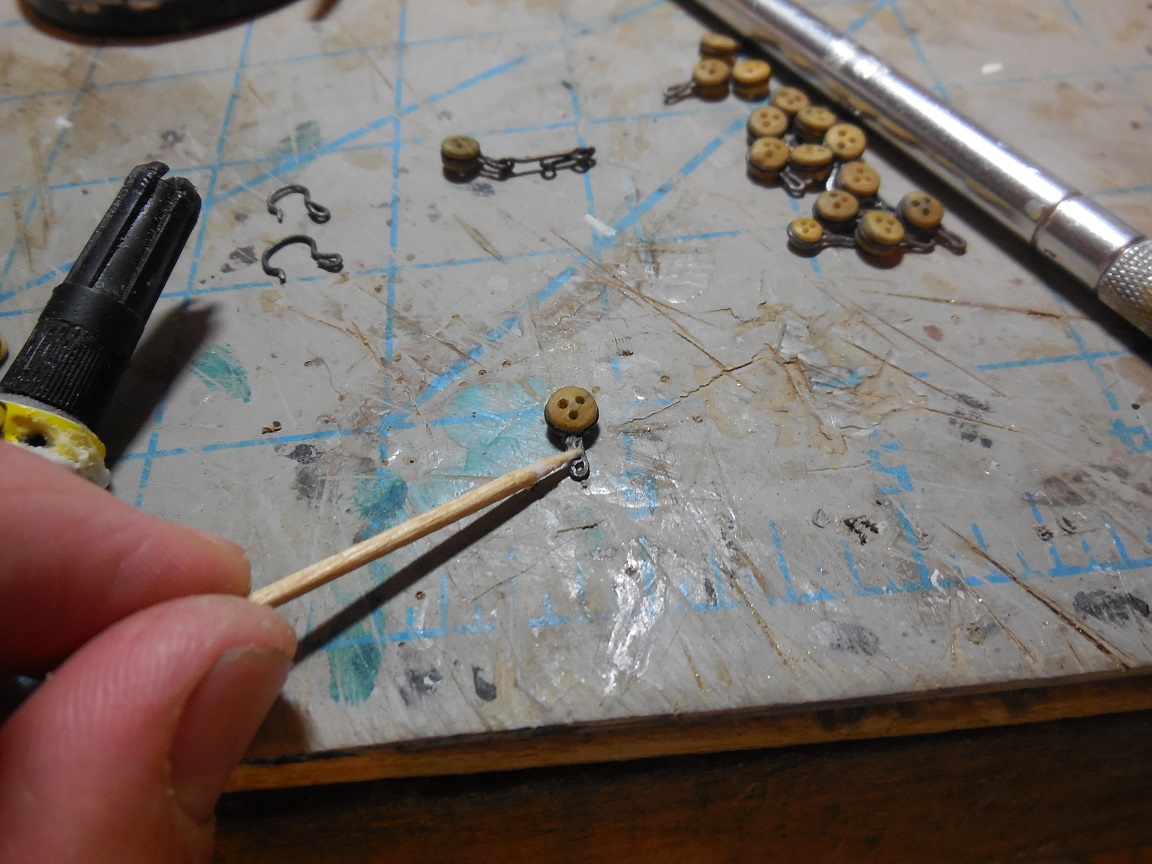
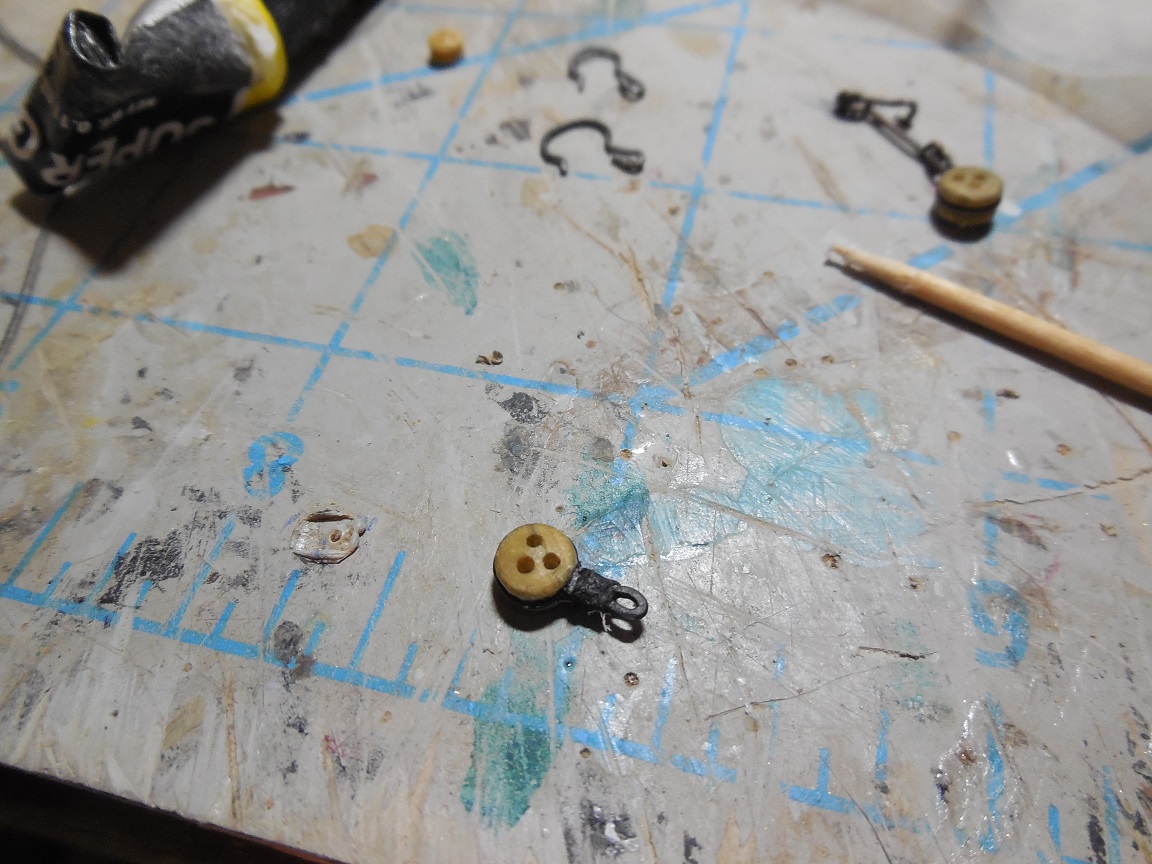
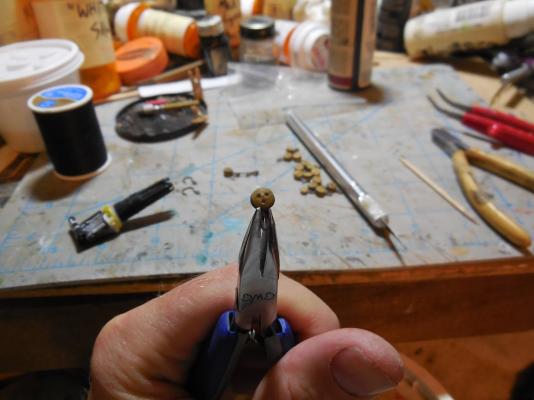
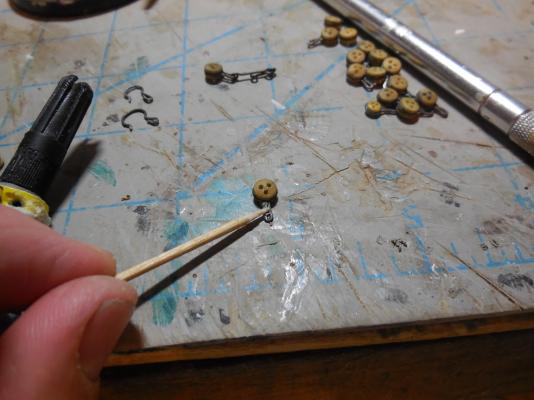
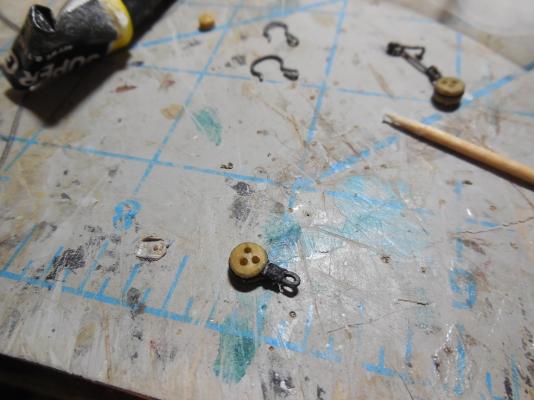
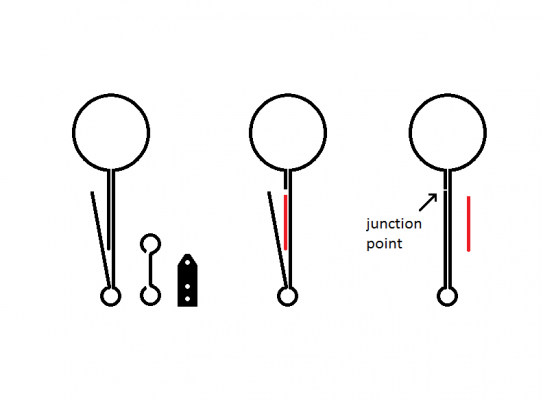
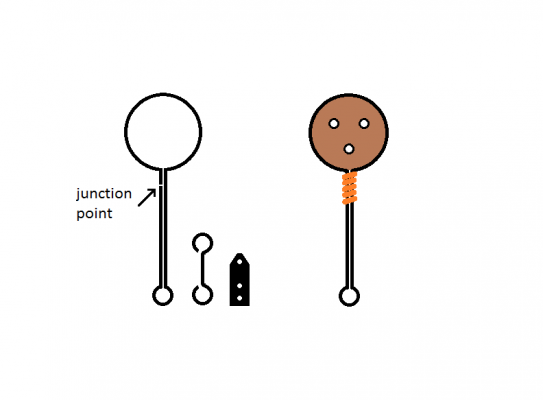
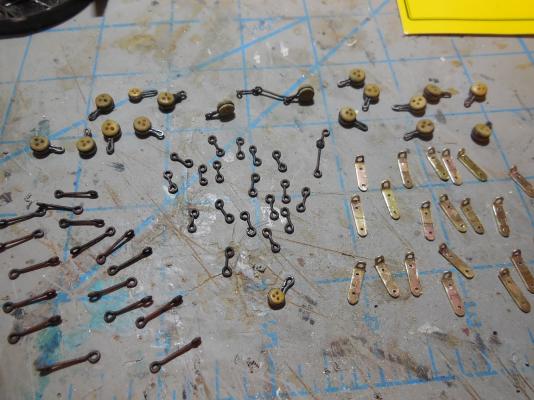
The only thing I'm doing different is the first piece around the deadeye I am making shorter & adding an extra link in the assembly. I formed the first wire around the deadeye. After I'm sure it is shaped as best as I can get it I take the deadeye back out, apply CA glue, put it back together & crimp it with pliers to dry tight. I glue the junction point with CA glue & seize the area with some thin black thread. I glue the thread, touch up with some black paint. This actually holds very well & does not pull apart. After I finish this first step I will begin to put the other links together.

- 607 replies
-
- 10
-
-
- scottish maid
- artesania latina
- (and 1 more)
-
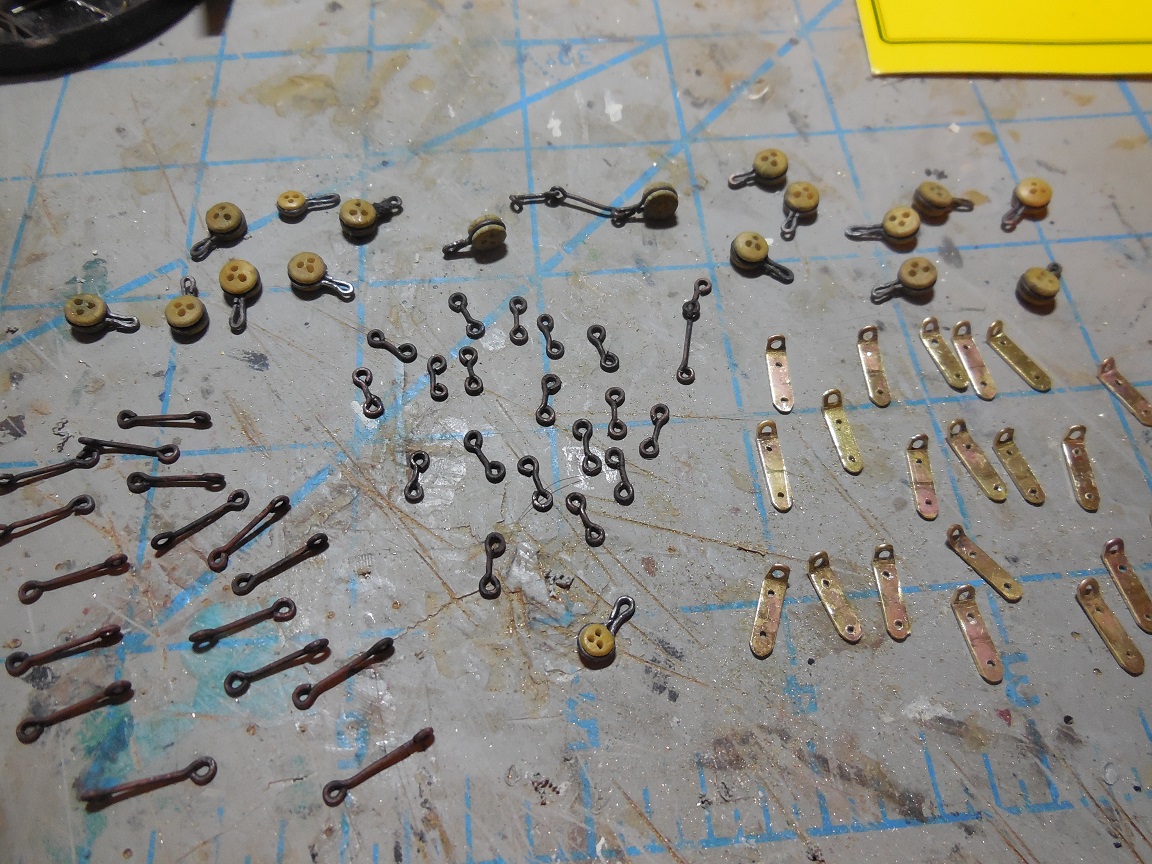
I don't have soldering supplies so I wasn't sure how I was going to go about doing the chain plate assembly. Saw in Keith's log about a log of Ferit KUTLU's Berlin build. I looked it up & liked his ideas on how to do this without soldering. The pics below are from his log that I will use to make mine.
- 607 replies
-
- 10
-
-
- scottish maid
- artesania latina
- (and 1 more)
-
Just ran across this log. Good work. Enjoying following the rigging work.
-
Just ran across this log. Very nice. The deck detail looks so good! Oh, & Happy birthday!
-
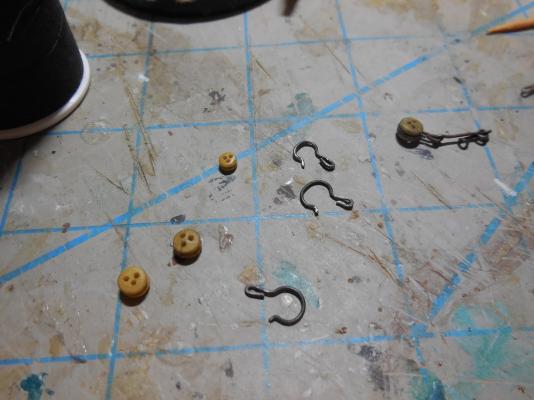
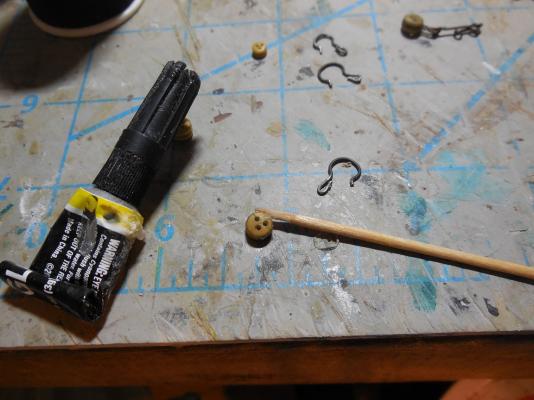
Began making deadeye strops & chain plate parts out of wire & brass plates.
- 607 replies
-
- 7
-
-
- scottish maid
- artesania latina
- (and 1 more)
-
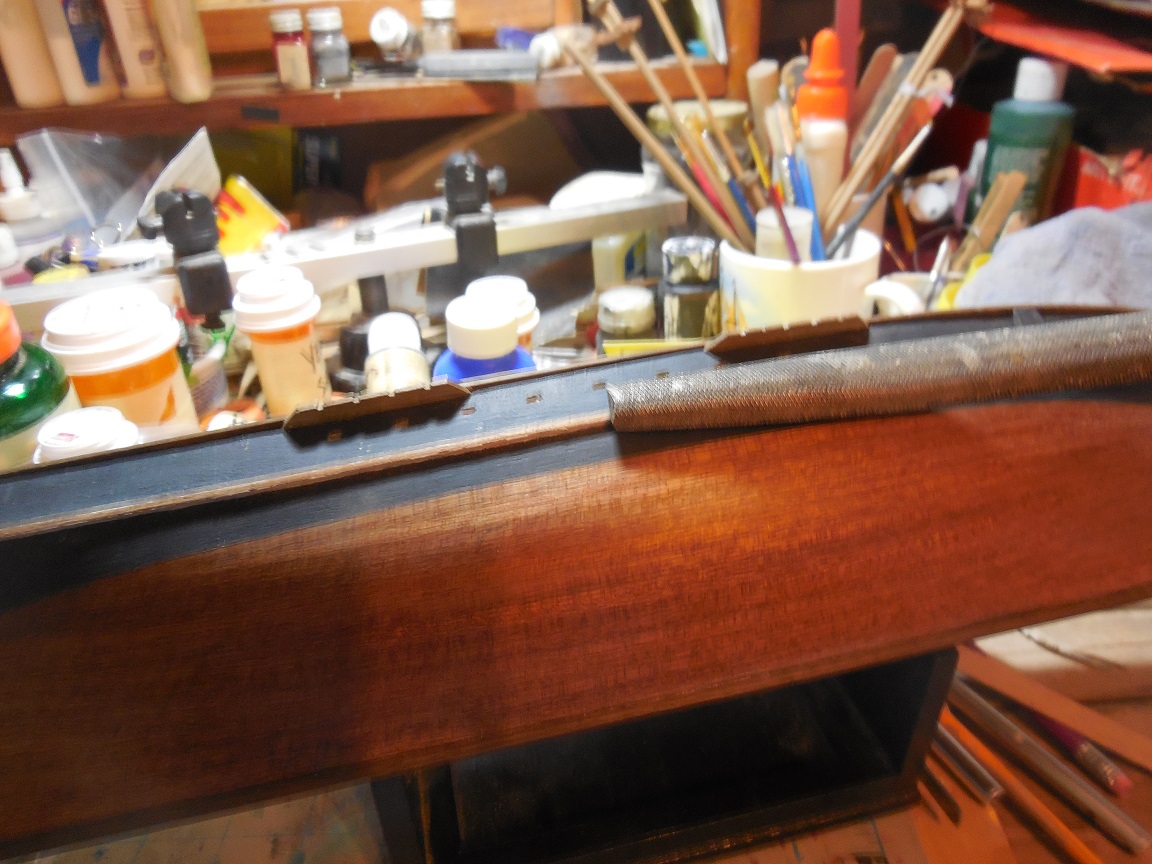
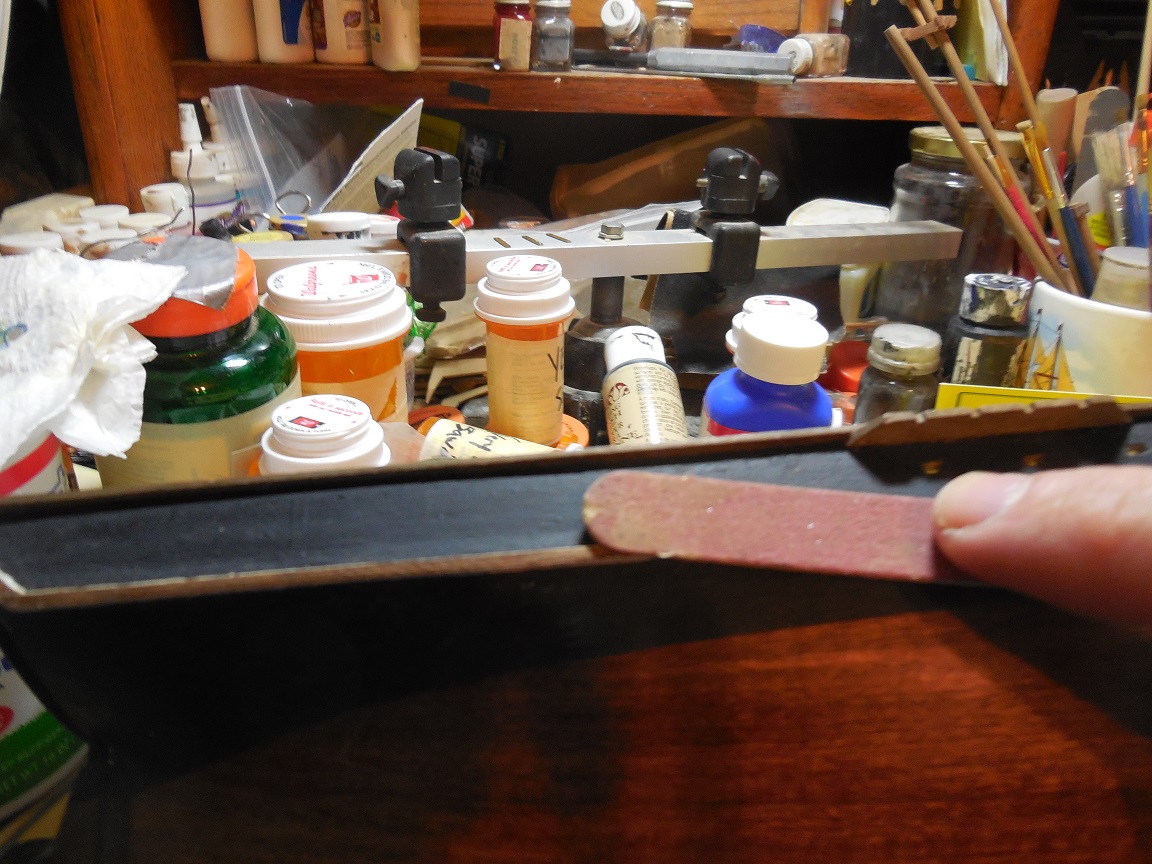
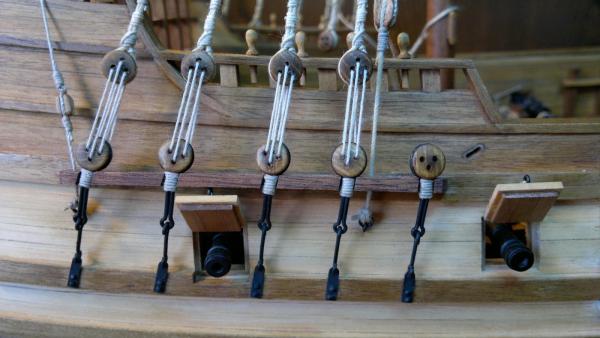
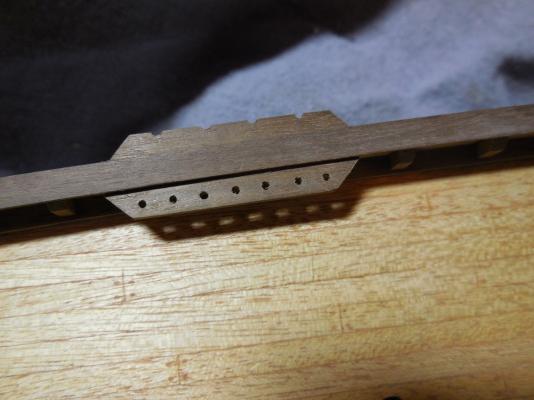
After deciding I would attach the chain plates below the rubbing strake I realized they were too thick & stuck out too far. The chain plate assembly wouldn't clear them without having to bend around them. I filed & sanded them down to half the thickness they were. Now the chain plate assembly will pass over them without having to bend around them.


- 607 replies
-
- 8
-
-
- scottish maid
- artesania latina
- (and 1 more)
-
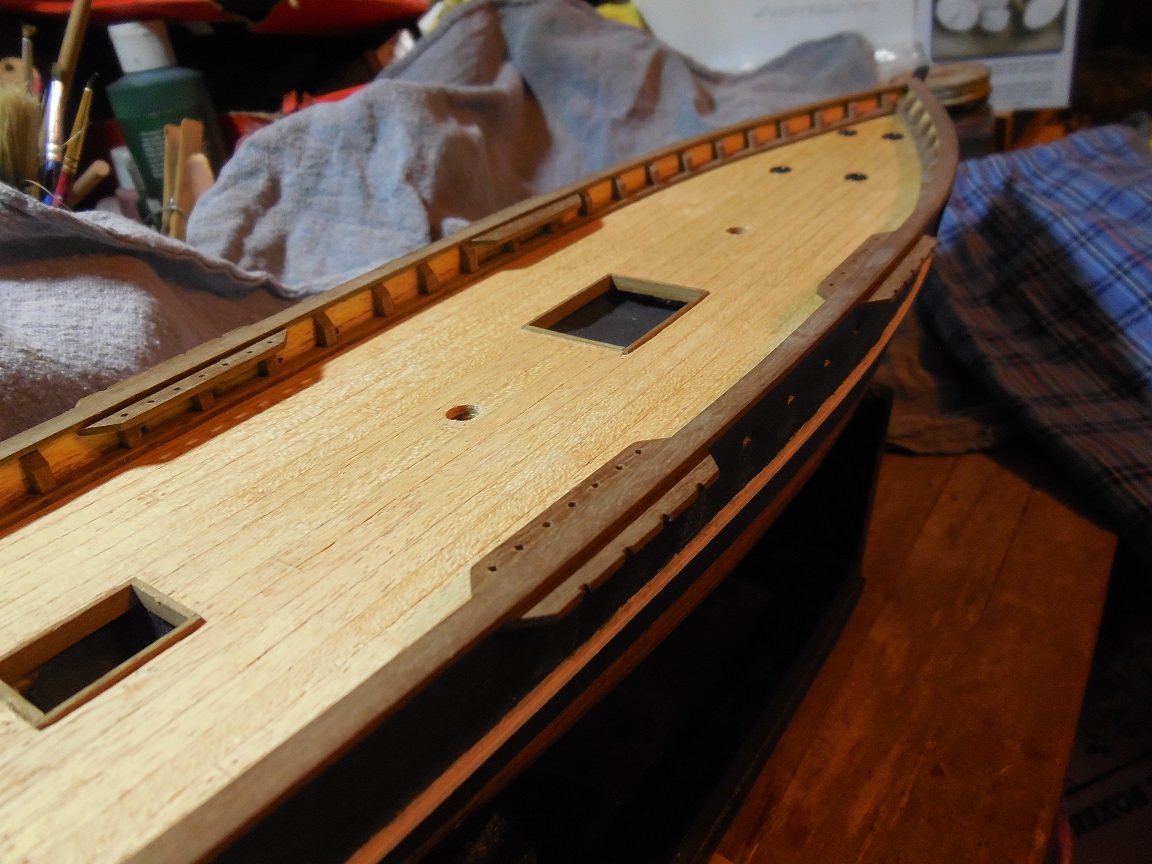
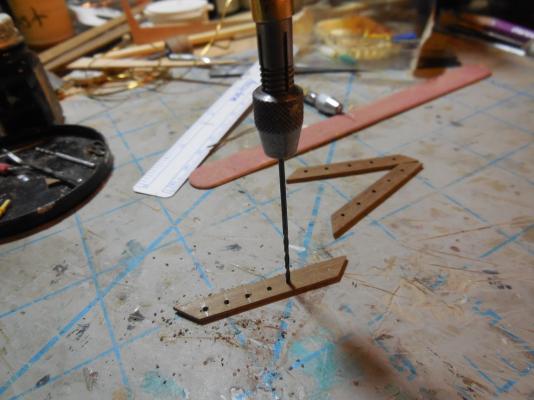
Drilled holes in pin racks. Glued them on along with channels.

- 607 replies
-
- 9
-
-
- scottish maid
- artesania latina
- (and 1 more)
-
Thanks Matti, it doesn't compare at all to your building skills!
-
So does the model made by her first captain. I guess this finally answers my question. Now to get to work on them.......
-
This drawing shows them going below so I guess that's what I'll do
-
Thank you John! I searched the web for 2 weeks & couldn't find a picture at all.
-
That was my thought. I would defeat the purpose of the rubbing strake which acts as "bumper". You wouldn't want any important rigging on the outside of this to get damaged. The rubbing strake for this ship is not very thick or wide- not much room for passing under it. I've got to figure out how I am going to do this..... Seems there are 3 options..... (1) have the bars coming down from the channels to contact the deck right above the rubbing strake & stop there (2) have it contact the deck a little higher up(making for shorter pieces) & have a very short flat piece that joins that lays flat on the hull & stopping at the strake, or... (3) same as #2 but have the flat piece pass under the rubbing strake so it can be longer or quit worrying over this so much & have them pass over & below the strake. I have seen pictures of it done this way on the web- it still doesn't make any sense to me
-
My main question is does the bottom plate sit above the rubbing strip? The pic above shows the top of the plate on the rubbing strip & the bottom of the plate leaned down at an angle to the hull with space between them. I though this plate was always flat against the side. If so it would have to stop above the rubbing strip. I guess it could pass below it but that would defeat the purpose of the rubbing strip as kind of bumper. I wouldn't think you would have important rigging across an area that could be rubbed against.
-
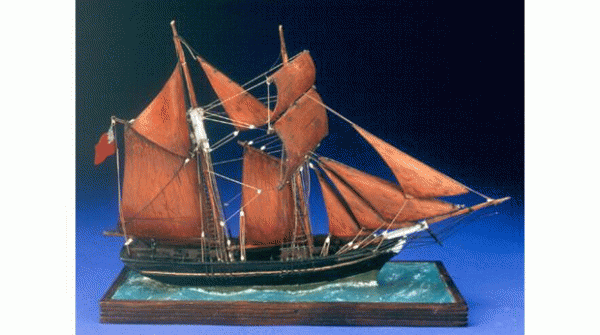
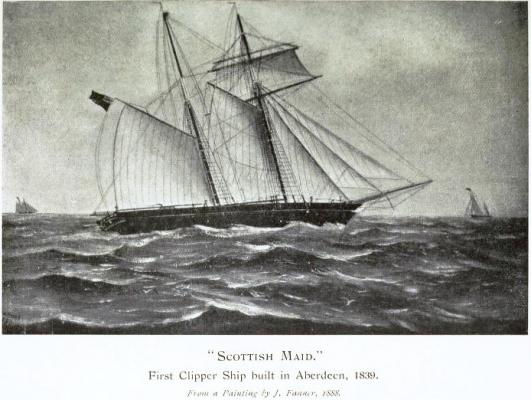
Scottish Maid, Great Britain, 1839
-
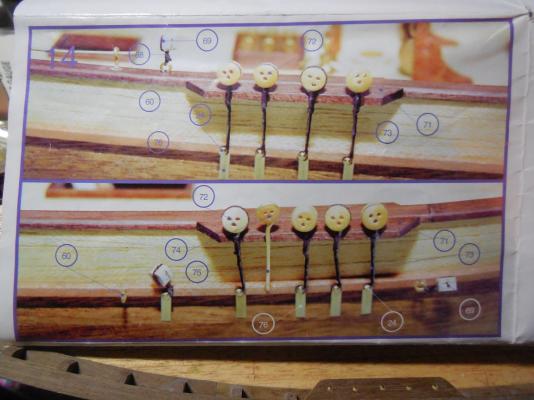
Are chain plates supposed to go above or stop at the rubbing strake/strip? My kit shows them crossing below the rubbing strip which makes them not flat against the hull. Doesn't look right to me.
-
The more I look back over this log the more I love this! The paint color looks great & the water damaged looking planks makes this look like the real thing. I really like the distressed method you used. Hope you don't mind if I use this method in a future build! Great thinking & great skills!
- 625 replies
-
- 3
-
-
- bounty launch
- model shipways
- (and 1 more)
-
I agree. I like it when someone takes the time to think about how you would have seen things in reality instead of a picture perfect pose. Kind of like seeing someone buried in a suit & tie & you never saw them wear clothes like that. It's sort of a false representation. Love the work you are doing!
-
I don't think the joggled planking looks odd- I think it looks good!
- 569 replies
-
- 1
-
-
- shenandoah
- corel
- (and 1 more)
-
Think I've got something figured out. Will have to have some practice trail runs to see if I can pull it off or not.
- 607 replies
-
- 2
-
-
- scottish maid
- artesania latina
- (and 1 more)
-
I am currently building the Scottish Maid from AL. The kit was given to me so reasons for this manufacturer doesn't apply here. Since I have it though I find the lack of detailed instructions frustrating. A lot of the wood is cheap quality & many details are not correct. I do agree with Vivian they would be great kits for bashing if you can get them at a good price. I wouldn't recommend AL to an inexperienced modeler but if you have some experience you know how to deal with these things & even though they can sometimes be frustrating it can also be fun, it brings your creativity out. So I don't think very highly of this manufacturer but I sure do appreciate the gift of this kit. Haven't had a new kit in years & its way better than nothing!
-
Got a question about chain plates on my Scottish Maid build. The picture below is what the instruction page from my kit shows to do them. Doesn't look good to me. I am already planning to use wire instead of thread for the strops but weren't those 2 pieces linked together back then? Also the chain plate in the pic is not flat against the side- it's leaning up against the the rubbing strake. Is this right? Doesn't look right to me. I will shape them a little better & have a brass nail on the top & bottom like it should be.