.jpg.f26acc9a74319261612561bfa7da1303.jpg)
vaddoc
-
Posts
1,605 -
Joined
-
Last visited
Content Type
Profiles
Forums
Gallery
Events
Everything posted by vaddoc
-
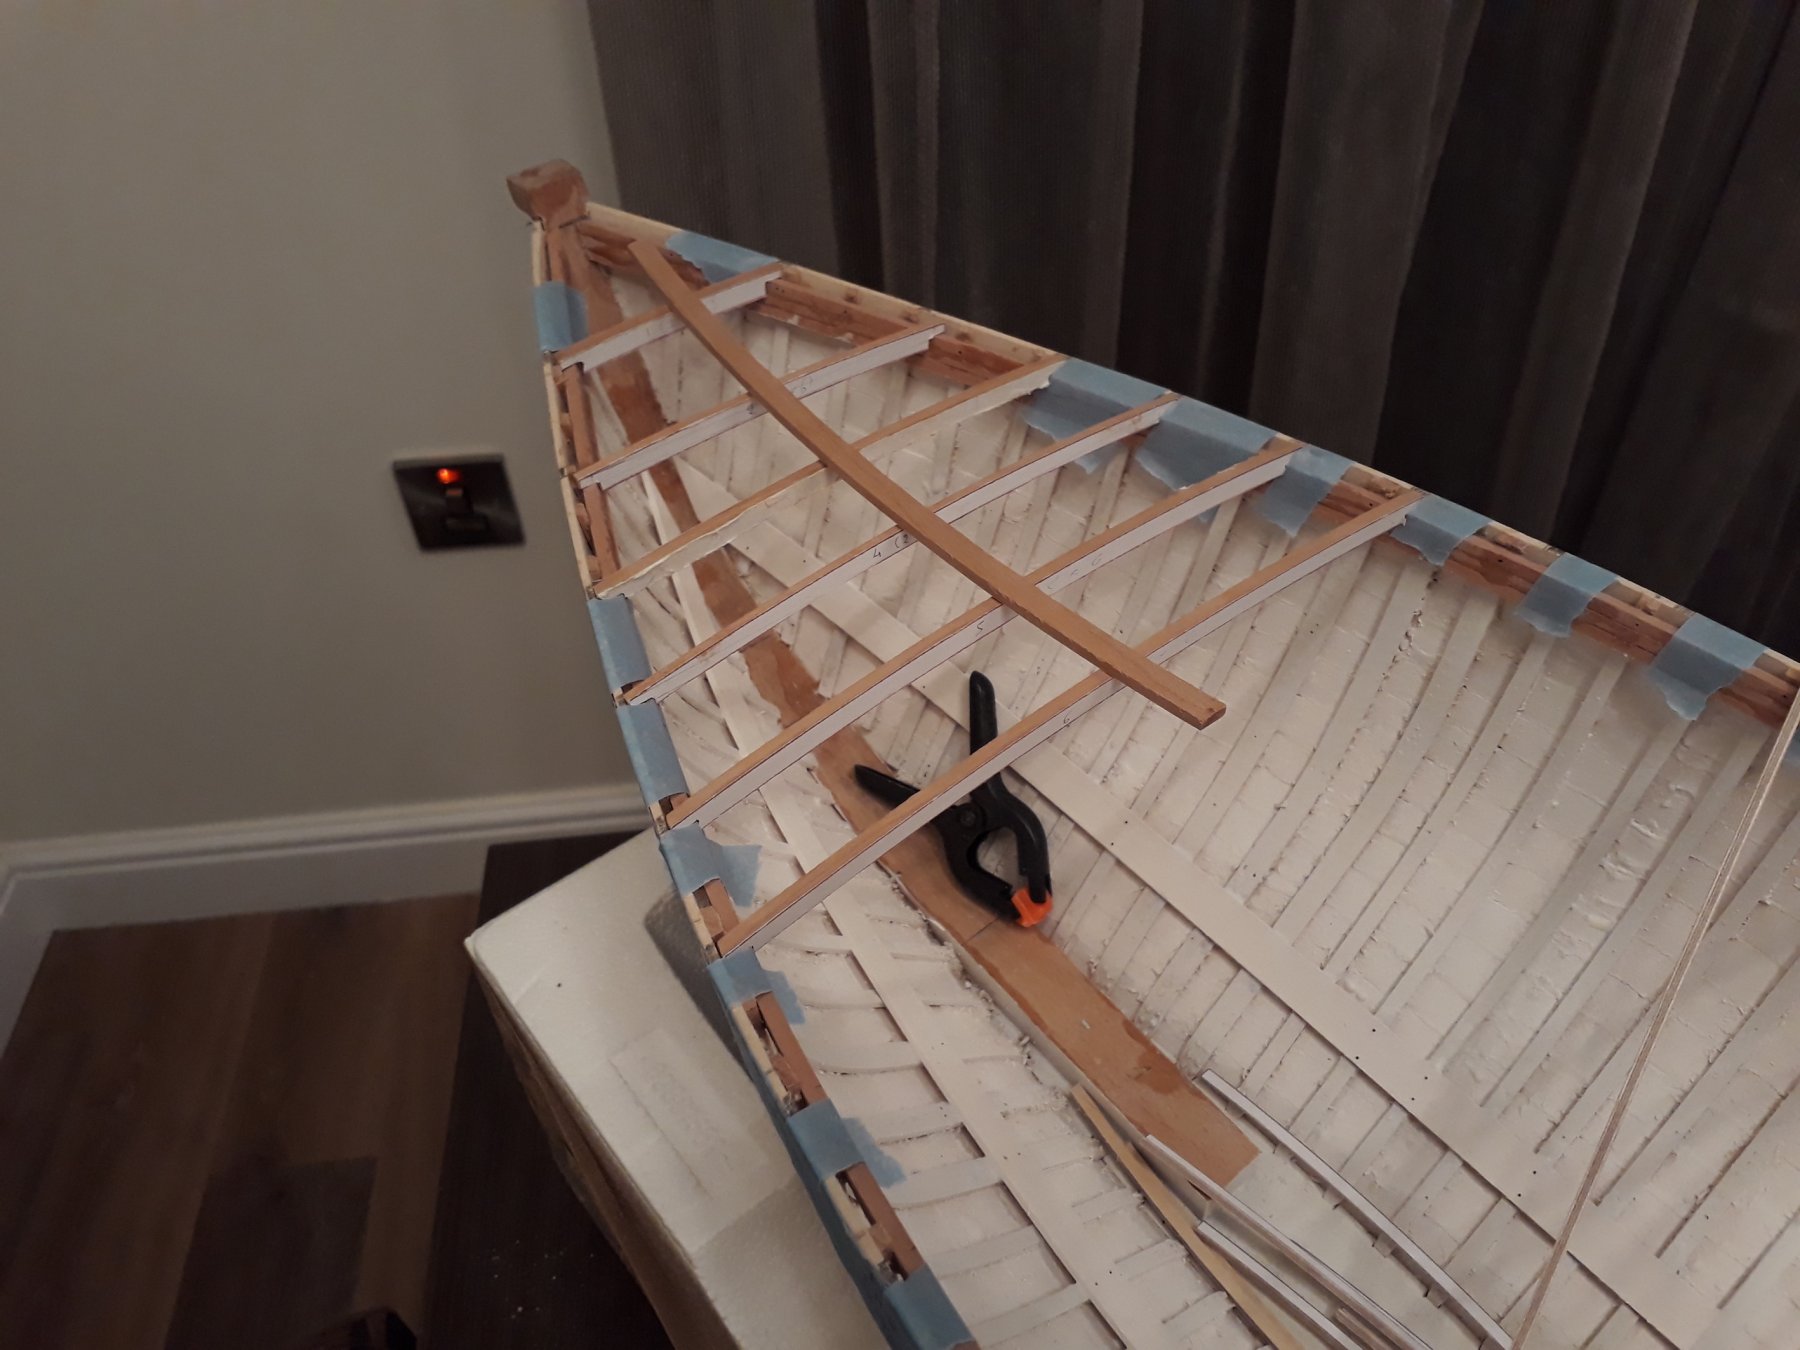
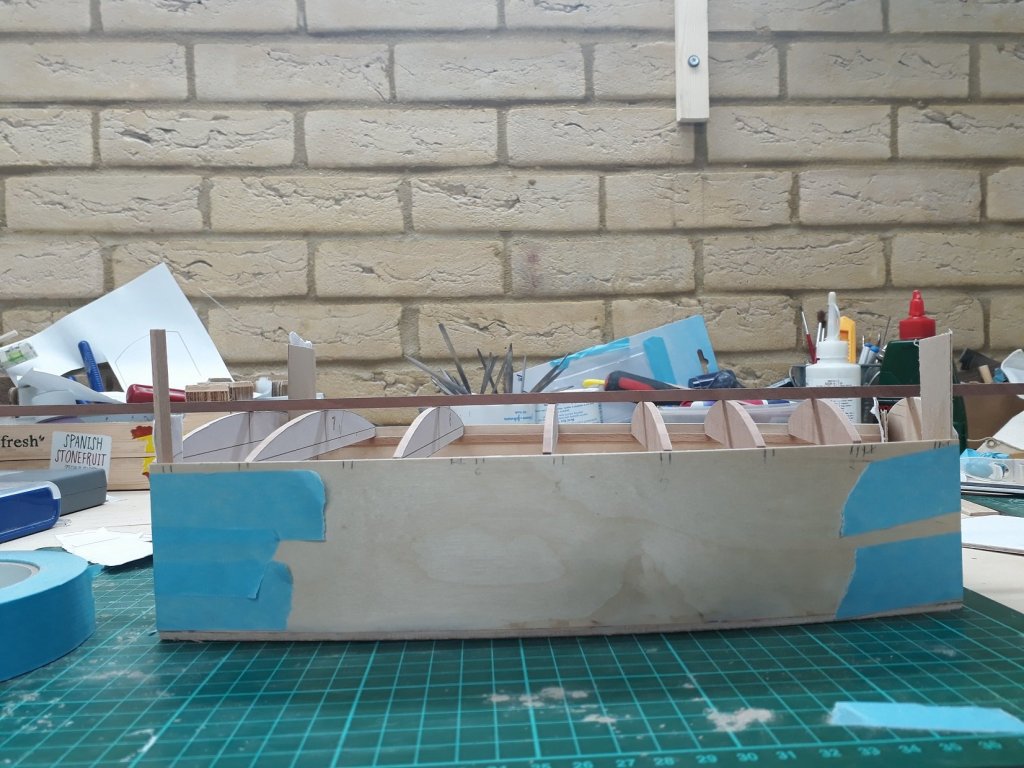
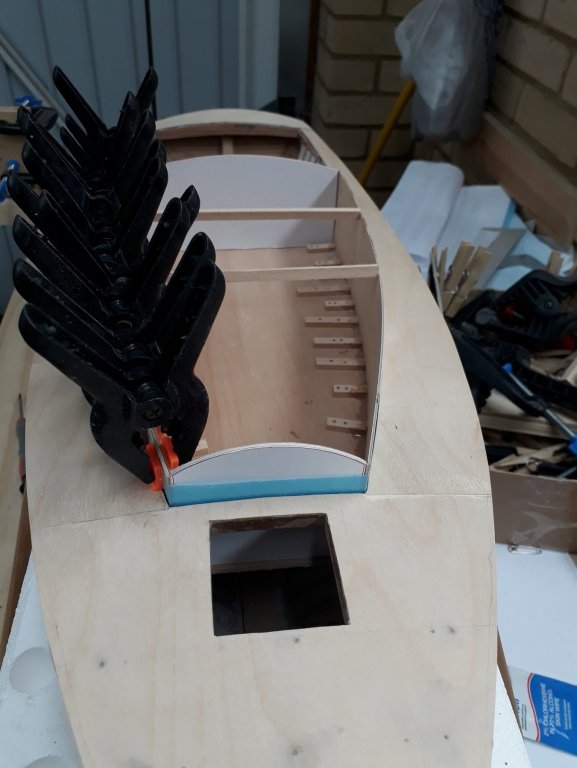
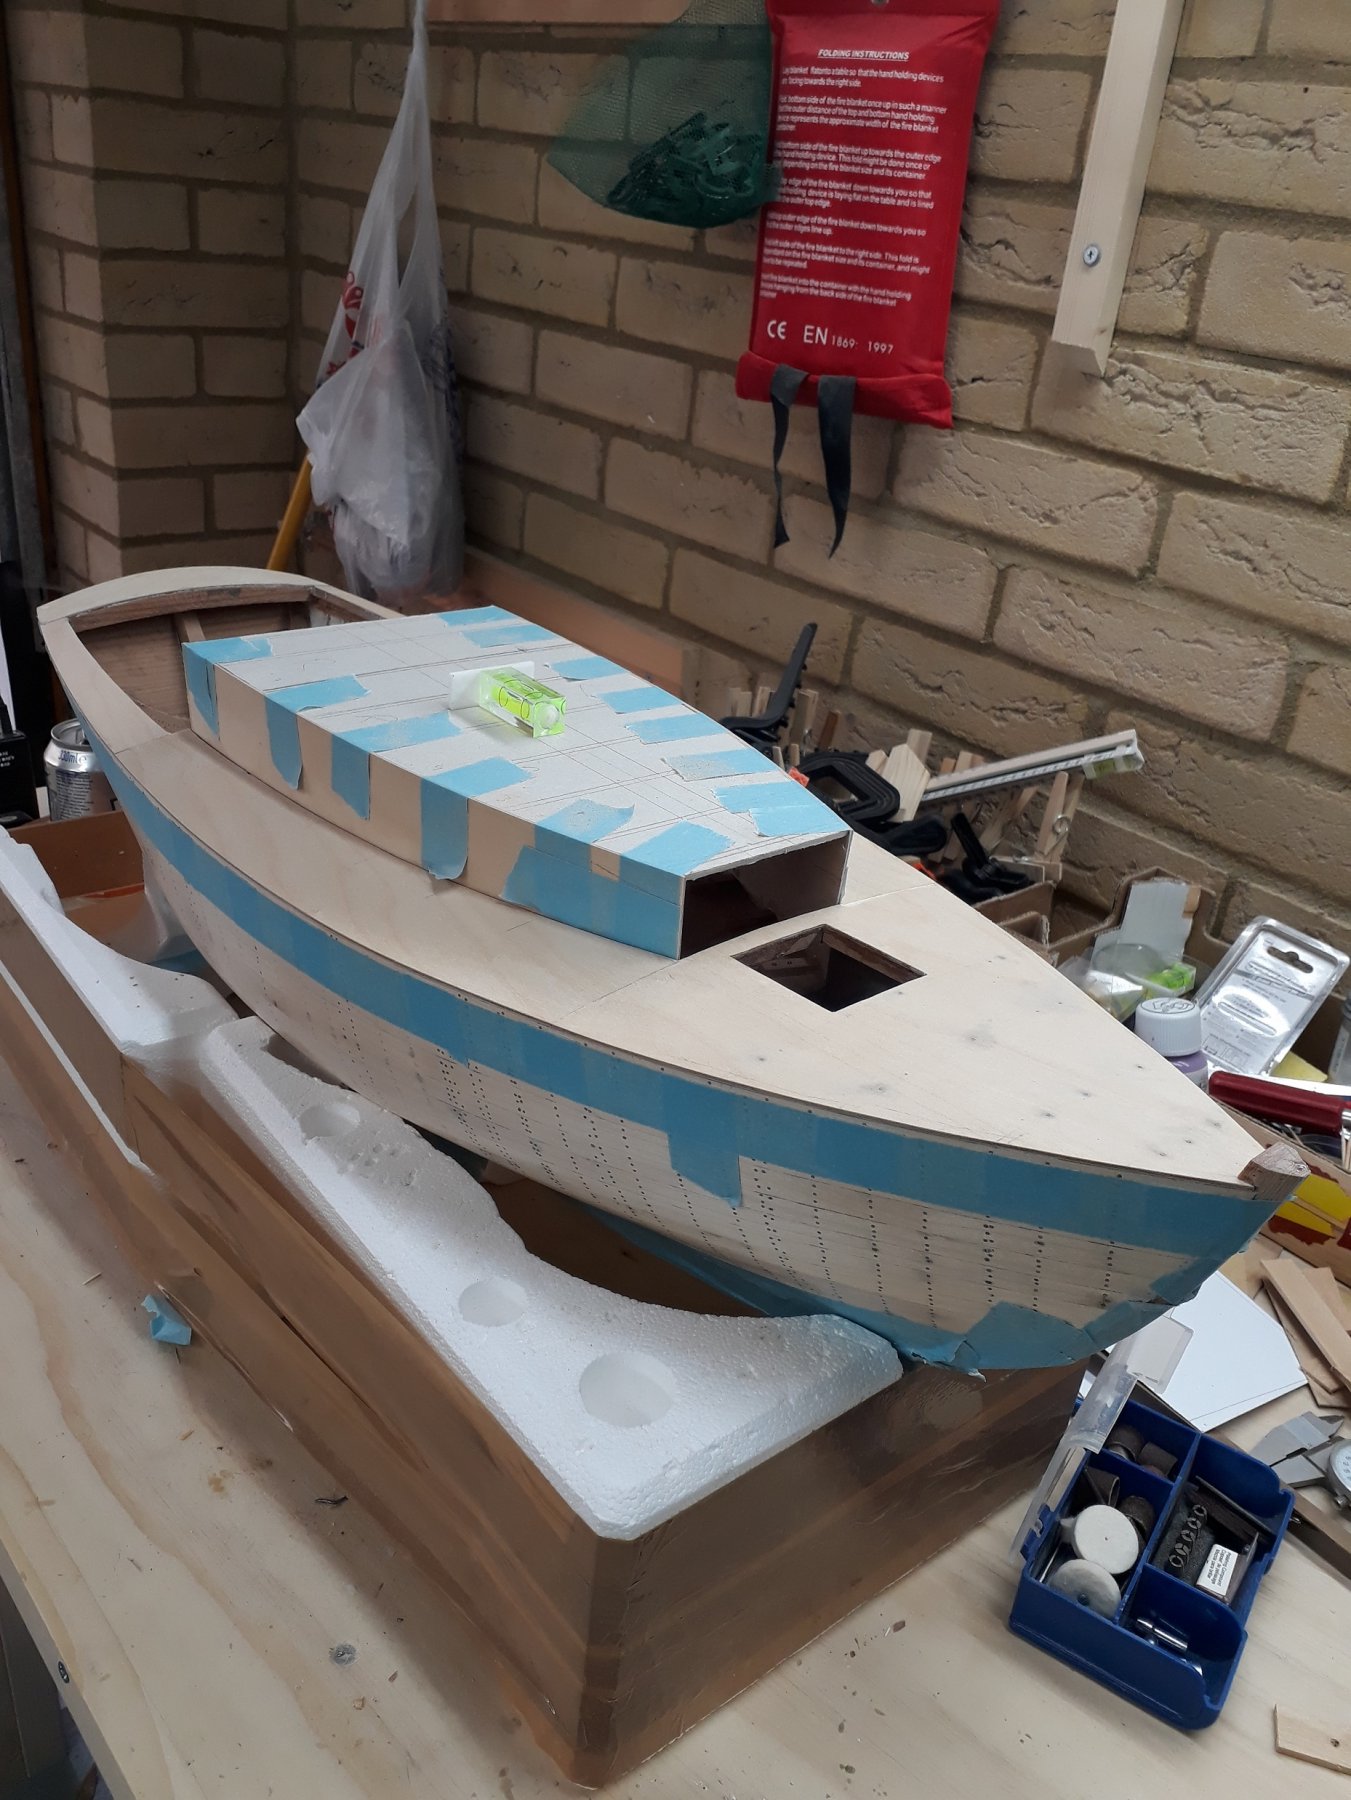
.thumb.jpg.6fd4c1b78768bb3efd745ab810936005.jpg) Just a quick update, I did some more work on the cabin. It is now very strong and rigid, necessary as it will be abused during the rest of the build. I thought about doing the beams properly, with cross members, joints etc as well as a working companion way but I decided to simplify things.
Just a quick update, I did some more work on the cabin. It is now very strong and rigid, necessary as it will be abused during the rest of the build. I thought about doing the beams properly, with cross members, joints etc as well as a working companion way but I decided to simplify things.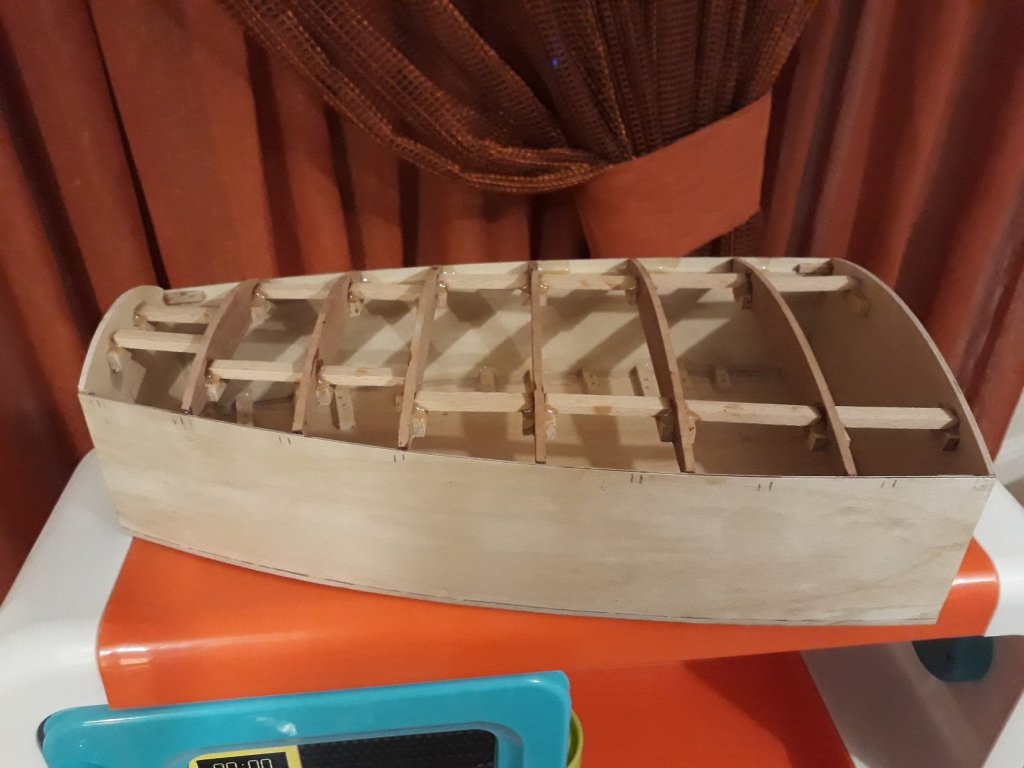
-
I ve used many thousands of treenails in my current boat, mainly to hold the planking in place (no glue used). I also use 1 mm screws to temporarily hold things together and then remove them and fill the holes with tree nails. For a quick way of making them in bulk, at any size have a look at this https://modelshipworld.com/index.php?/topic/13063-tree-nails-in-bulk/&tab=comments#comment-398038
-
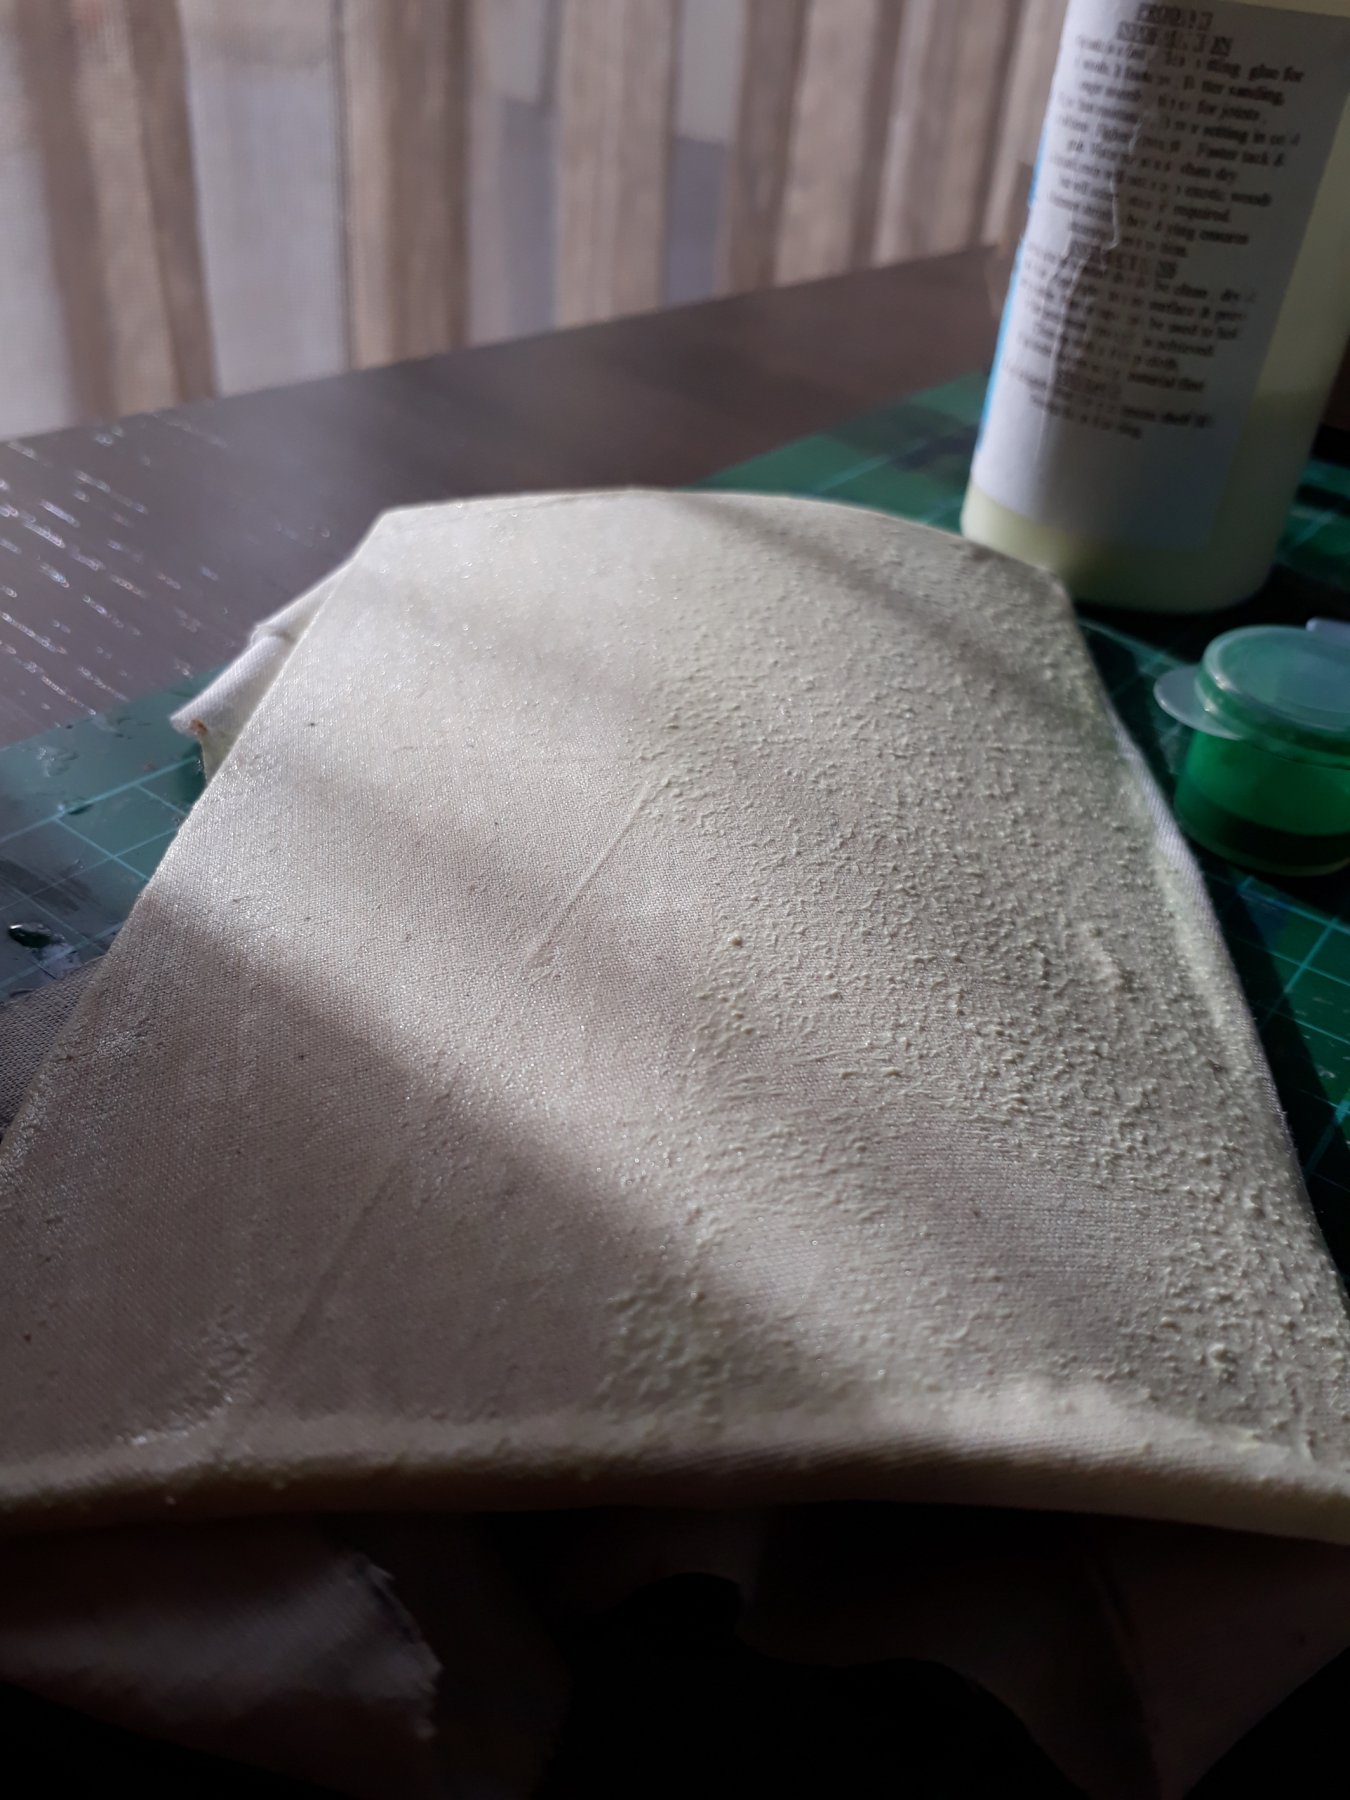
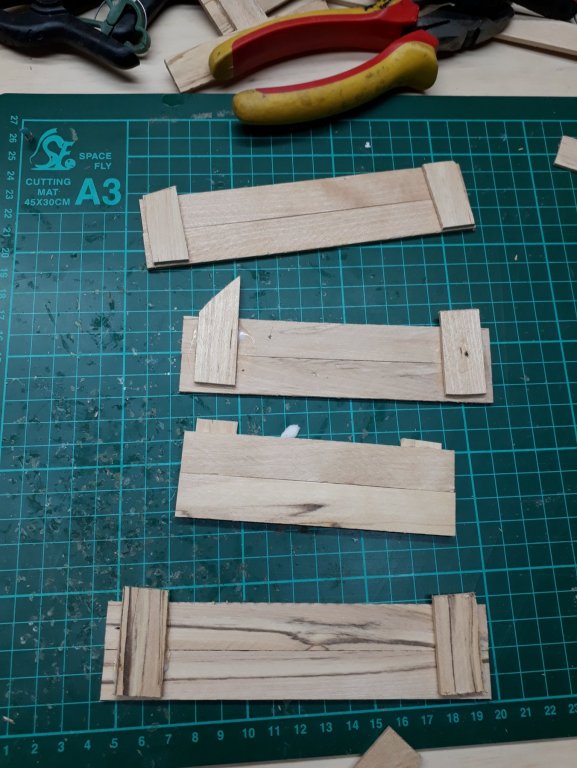
Dear all It is getting increasingly difficult to work on the boat as family and work demands are increasing. Many thanks Patrick! Mark, you are right. The Deben 5 tonner has running backstays. This can clearly be seen in the sketch Andy refers to. Good idea re name plate, maybe chance to try photo etching! Andy, indeed there seems also to be a tabernacle at the cabin roof. Now, I had of course previously seen this sketch but being a landsman and having never heard of running backstays or tabernacles I completely ignored these things! It seems that highfield levers are often used. Also, the cabin roof probably should be exceptionally sturdy if it is to support the mast. I continued experimenting with canvas sheathing and I think I have cracked it. The very fine 400 count cotton cloth is great. I tested a piece, initially glued down with undiluted generic white PVA glue and held under some tension with tape. Then, a coat of very lightly diluted white PVA glue. Finish with very light sanding to make the surface smooth. Excellent result! Making the cabin is becoming a major problem. I had to go back to the CAD plans a dozen times as I kept making mistakes. My bench is now full of beams that were cut on wrong templates. Lots of very nice and expensive wood wasted! Finally, I got it right. Next the beams will be epoxyed in place and the plywood roof will be added. for the rest I ve been scratching my head though for a few days now. The plywood walls need to be covered by some nice wood, not sure how this will be done. Also the canvas on the roof will need some way of wood covering over the edges. I need also to make provisions for the mast, the companion way door and the portholes. Absolutely no idea how to do these yet! I also did a bit of experimenting with silver soldering. It stick things together no doubt about it but there is a training curve to make things look nice. A new skill I need to master and more expenses to get past the admiral. I ordered a few more things and slowly I will experiment over the next few weeks and months.
-
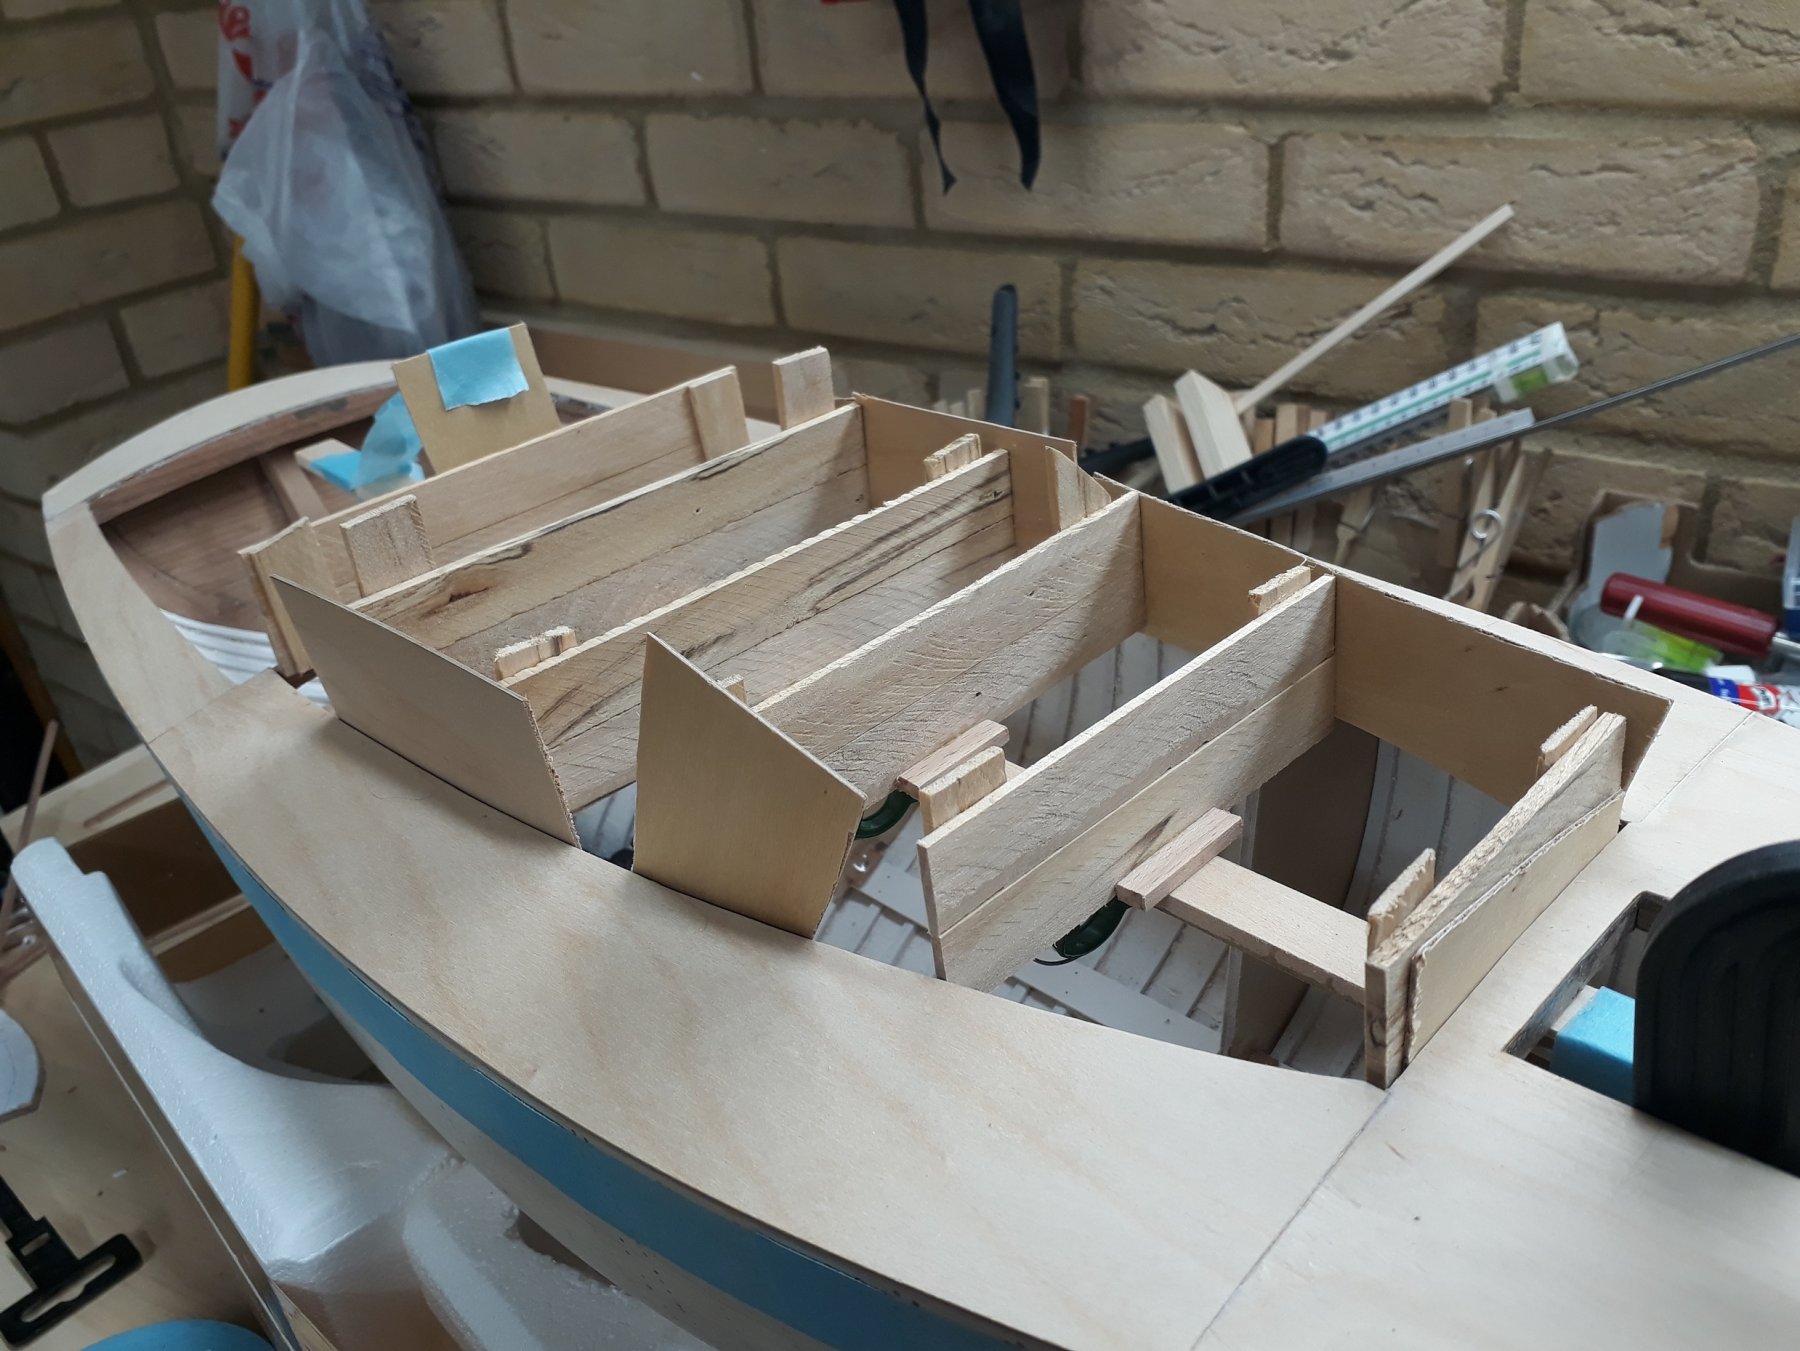
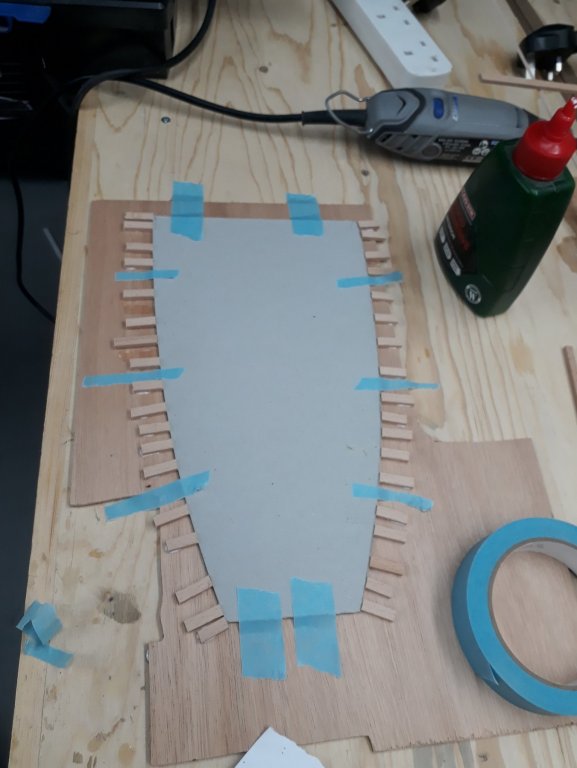
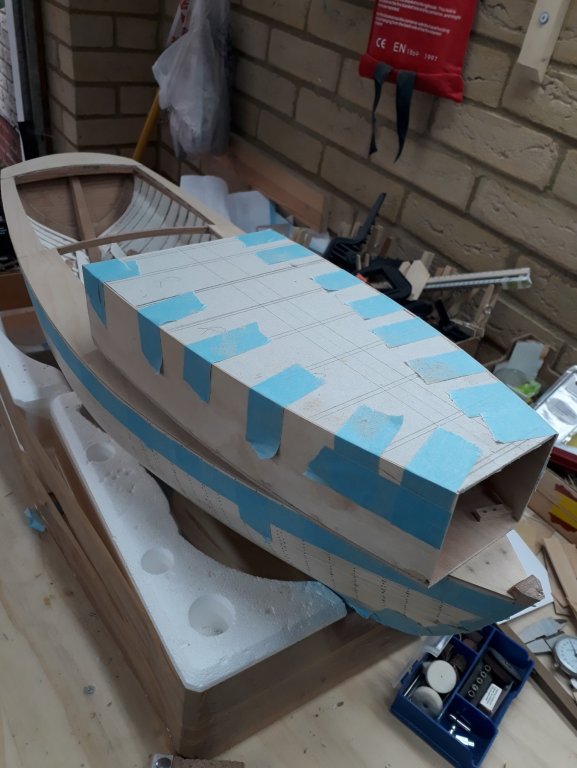
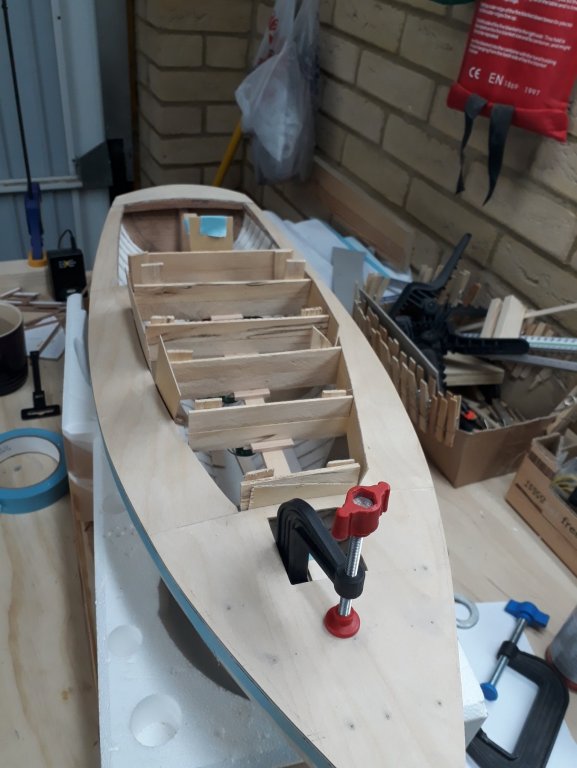
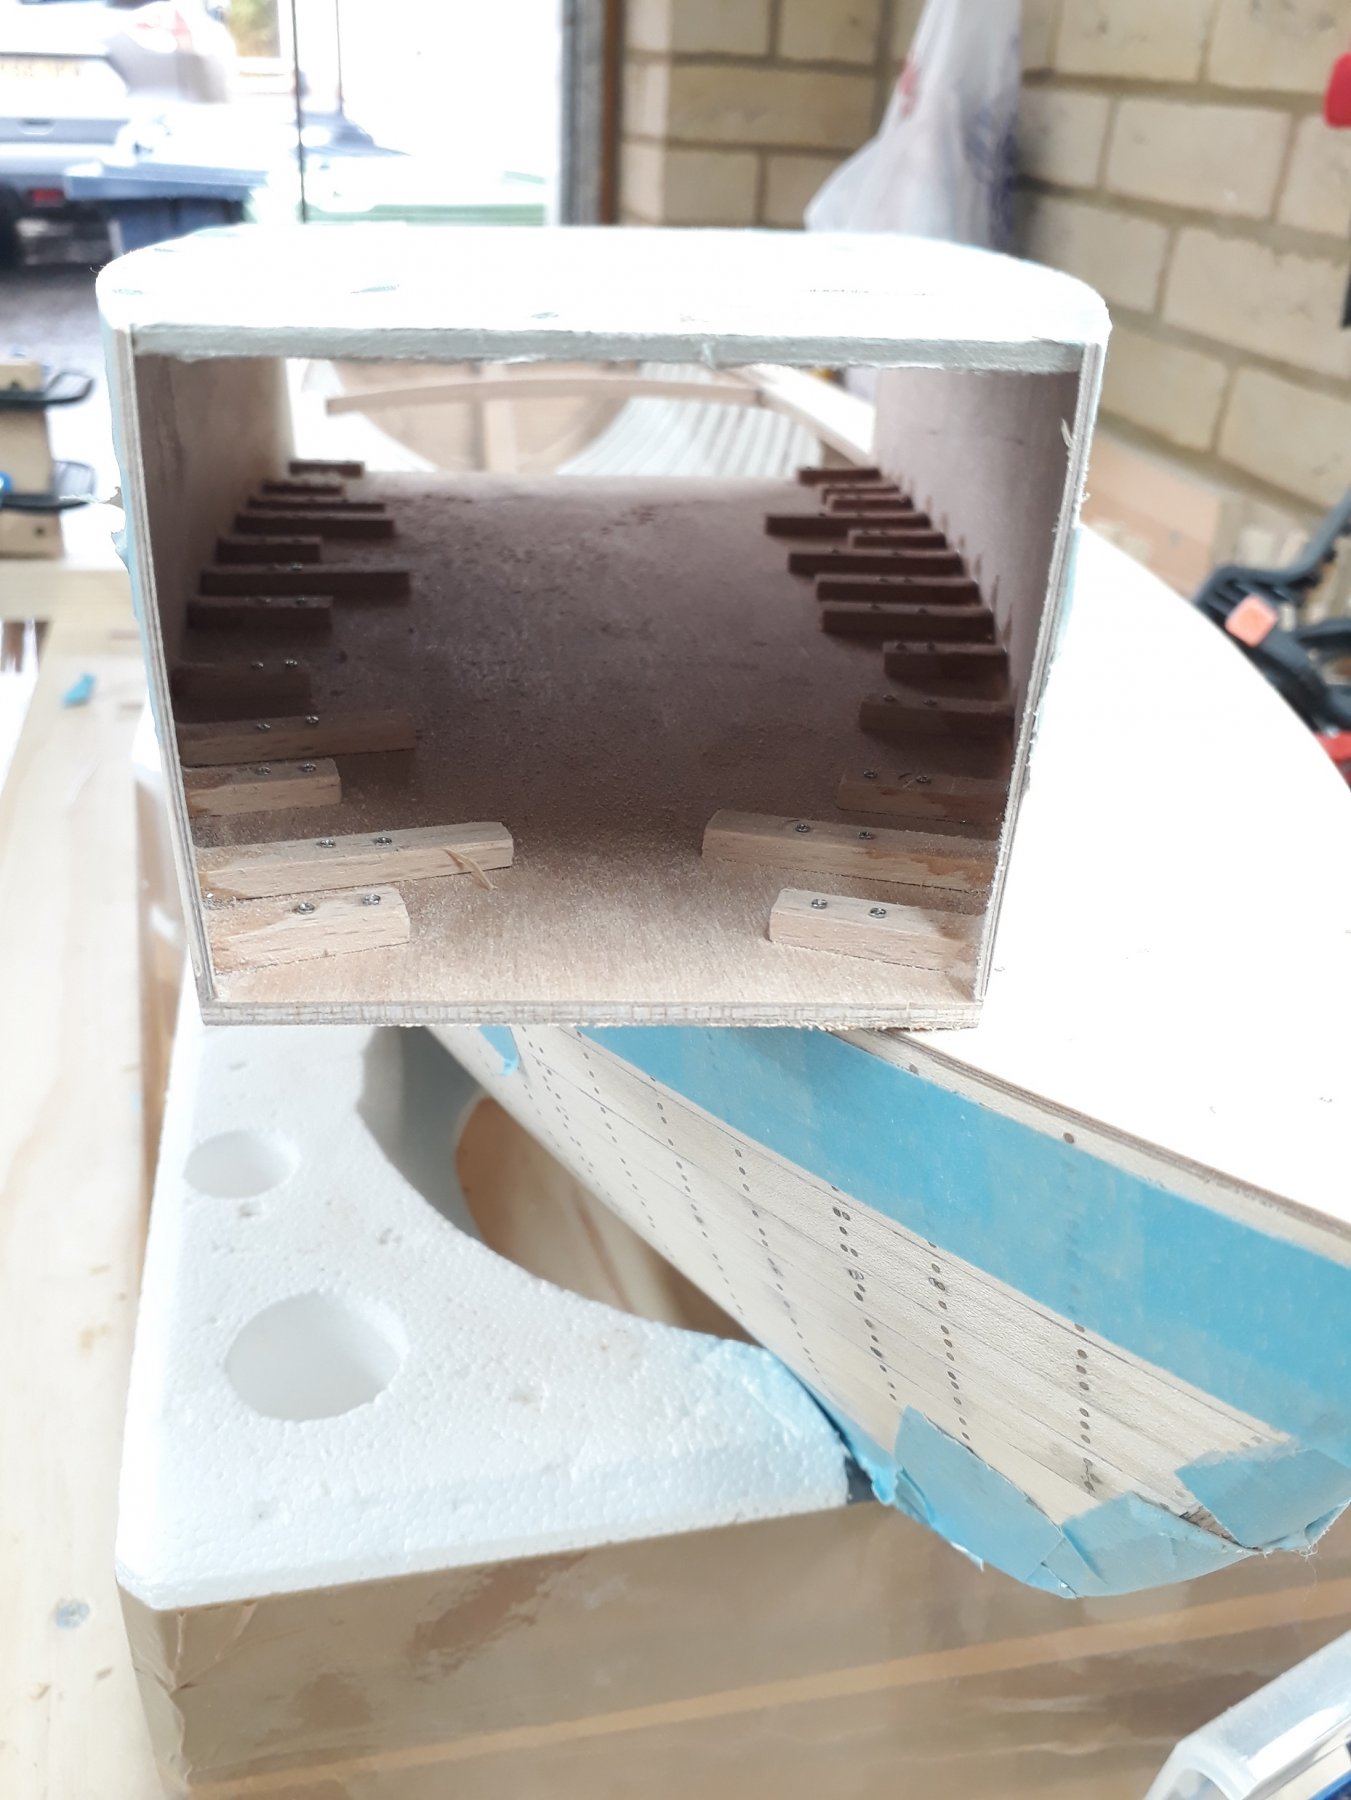
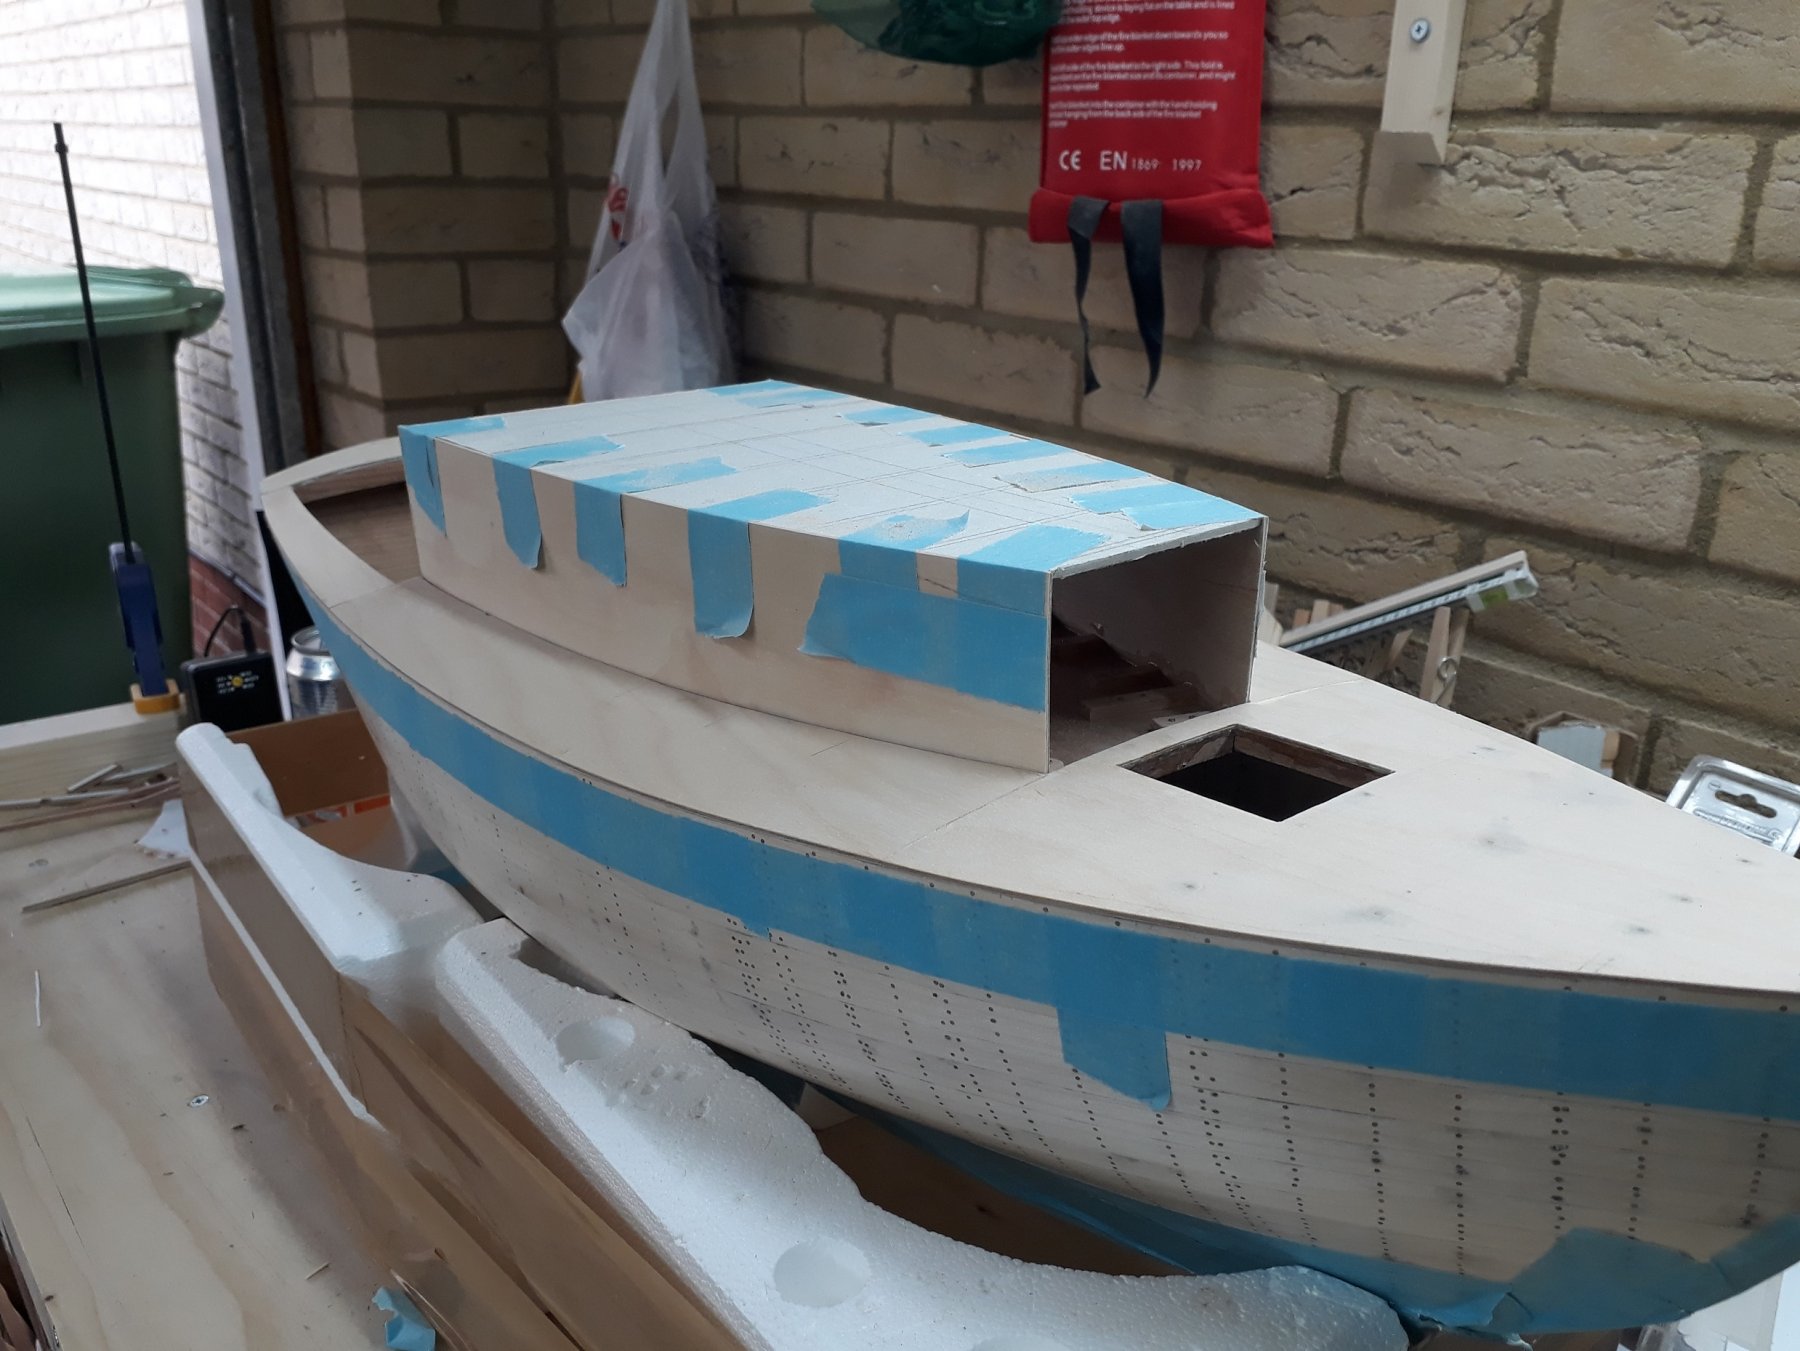
Dear Mark, I am still digesting your post so I will reply later. I continued the work on the cabin, I had to redo the CAD drawing as I had made all sorts of mistakes. However the CAD was at this stage mostly to understand how things would come together. The plan is to make the cabin as a compete and finished unit that later will just slide in the deck opening. I should be able to tilt the unit to make sure the roof is horizontal, as well as slide it up and down. I managed to produce a pretty accurate template of the cabin floor on cardboard (allowing for the cabin wall thickness) which I transferred to plywood. Then with pieces of wood and epoxy I glued the sidewalls on. Some sanding was needed so that the cabin would fit nicely. The cabin will need to be fixed in place, I will use the bulkheads to install some cross beams at the desired height. The roof will be certainly a project on its own. The Deben had a 9% camber which is a lot. As the centerline will be straight, the shape of the arc changes for each beam, so that the same crown height is maintained. Rhino did this in a heartbeat, free hand it would be an impossible task. The beams really should be laminated but I cut corners and made them from 3 mm cherry. I think it should be fine. Of note, there is one beam missing from the photo, which is the most curved of all. I had to transfer the actual dimensions of the cabin to CAD, which was not very successful. I marked the positions of the beams I cut, but they are off a bit. However it does not matter, since the crown height is the same, the position where the beams fit snuggly is the correct one! Next task is to glue the beam self for the beams. This is actually difficult as the sidewall needs first to be fixed to its proper position, as the beam self will act also as a stringer. However, for the sidewalls to be in place, the cardboard roof needs to be taped on but then I have no access. I made some temporary beams which helped a lot. I also made the for and aft walls, these are not yet glued. I decided to put a plywood roof and then canvas on top, rather than planks. The cabin will have wood all around, hopefully varnished. A few things to consider: 1. I must not forget to make holes in the floor and roof of the cabin for the mast! Also, I must remember to glue the mast step. 2. I need to make plans to produce and install some nice round brass portholes. This will be challenging but I need to master metal work as this boat at this scale will have quite a lot of it. 3. I am not sure what wood to use for the cabin outer walls. I would like to imitate mahogany and I really liked a sample of red paduak (I think) but I do not really want to buy new wood. I have a lot of maple, pear and cherry, many thick beech and a lot of 0.5 mm walnut strips. Maybe I can stain some wood but I would need to experiment. Regards


-
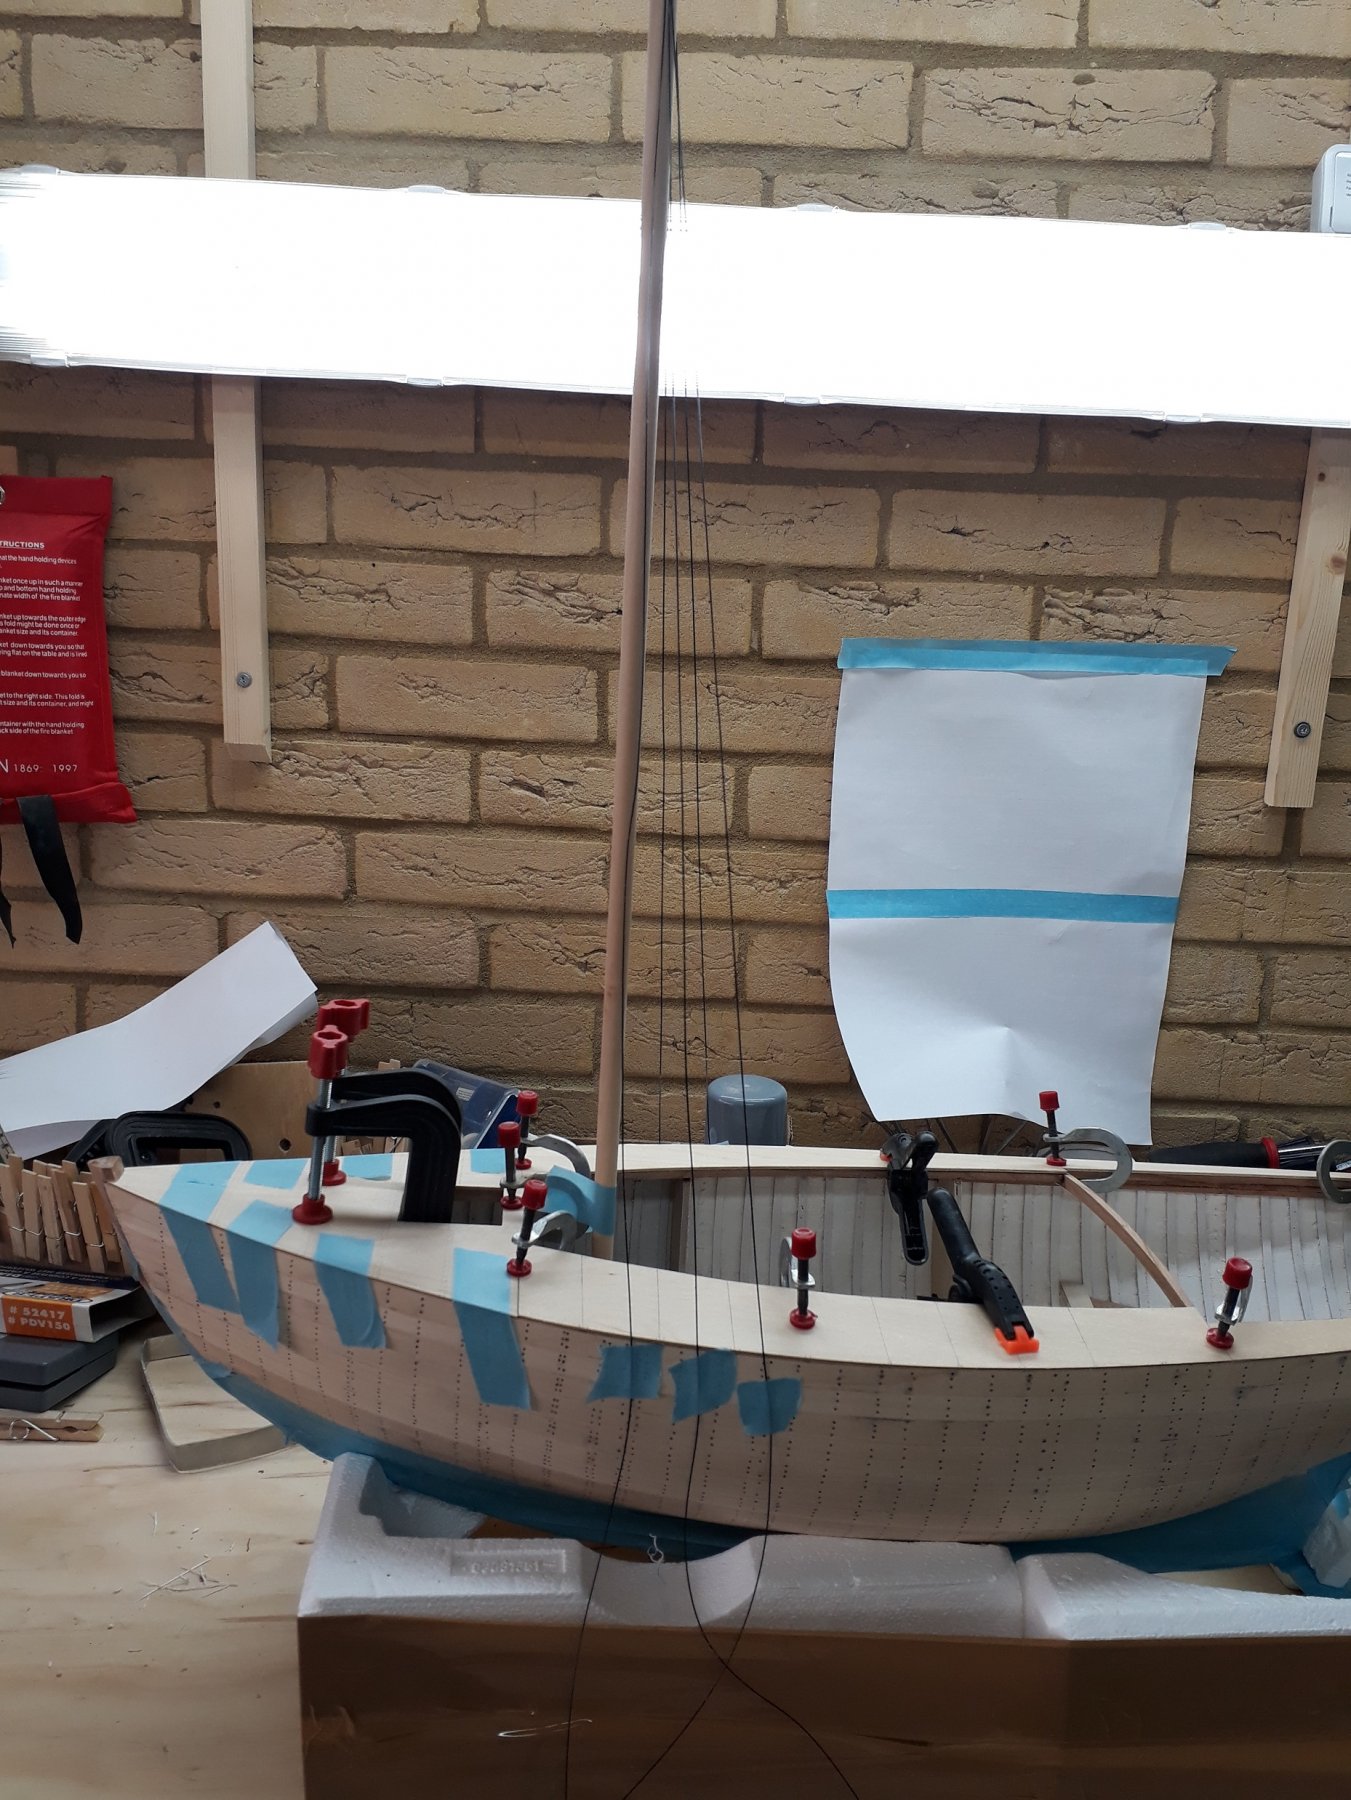
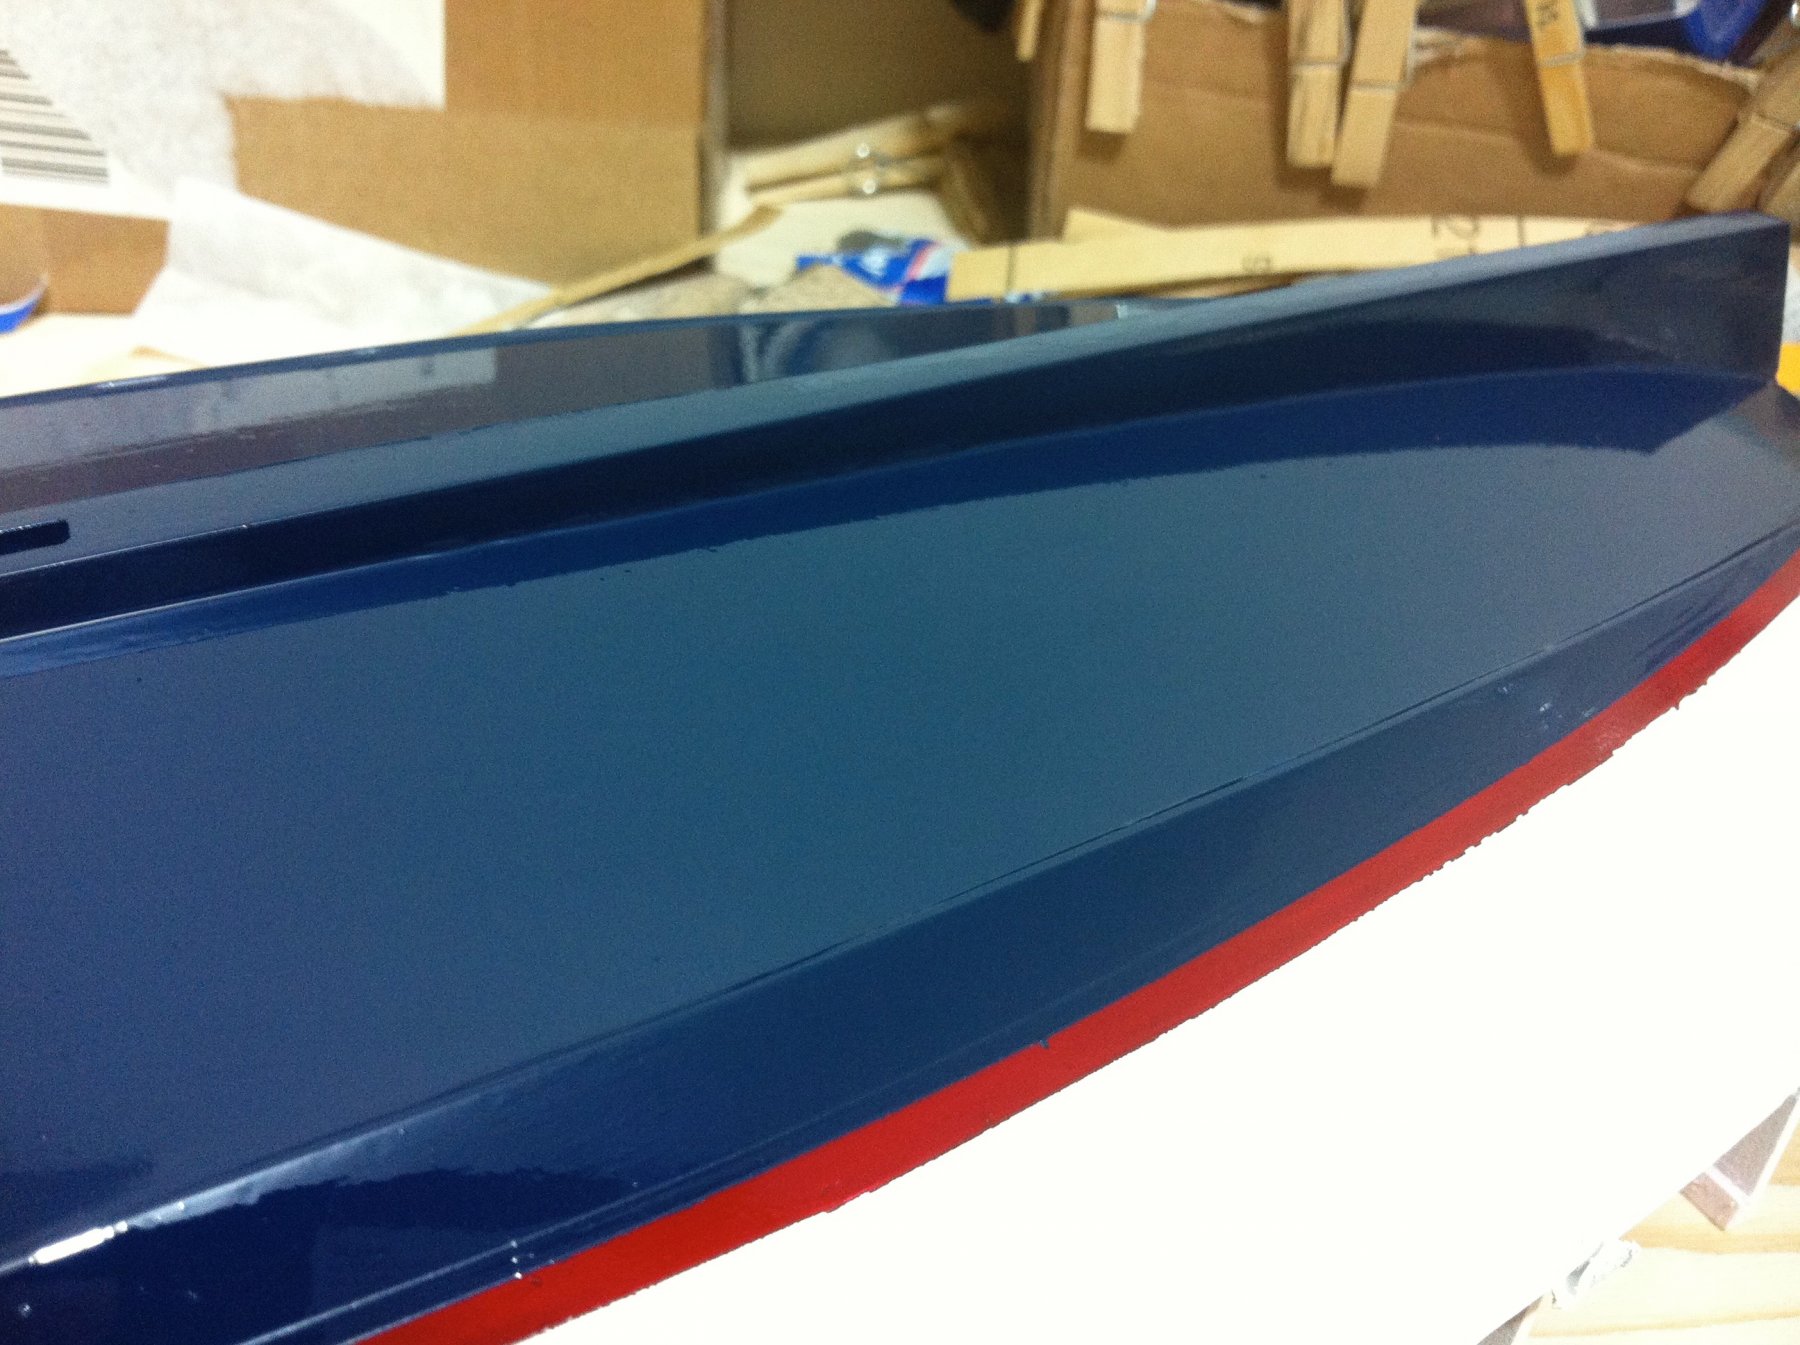
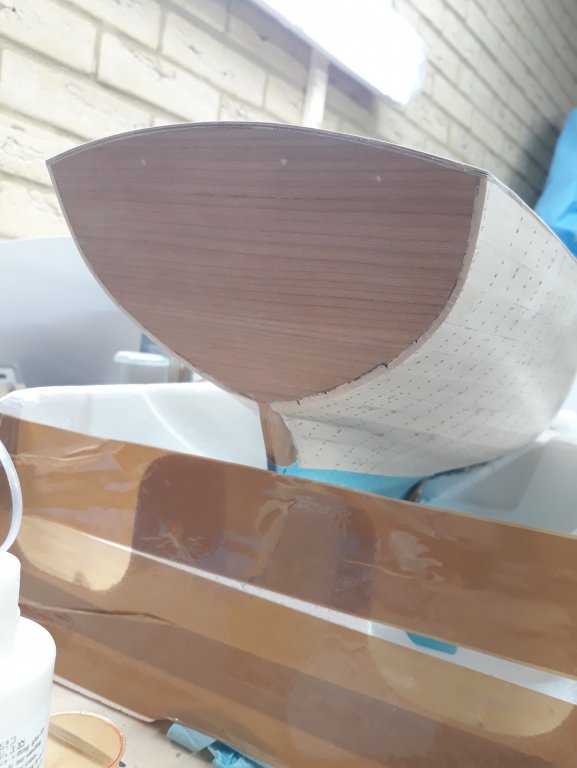
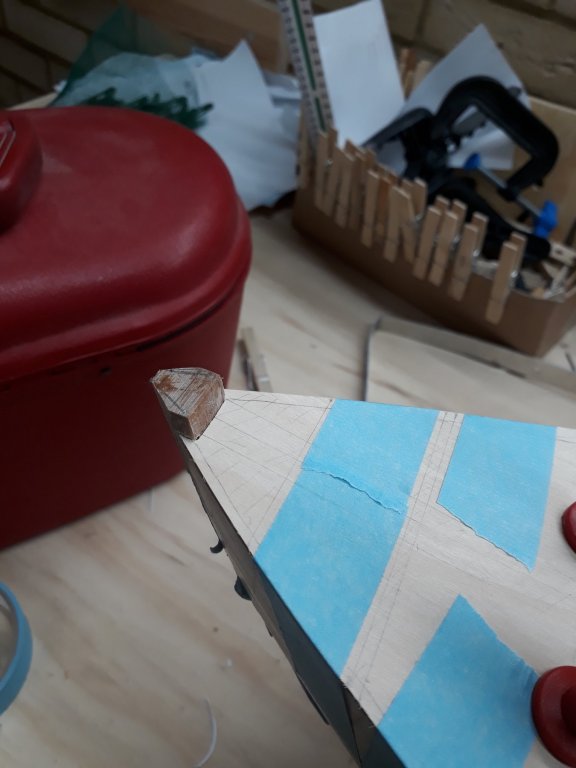
Thanks Mark, it was an option to leave the transom unpainted with maybe tang oil and varnish, as it is (was) a lovely piece of cherry with no defects. Now it will be painted, maybe white. I will use red colour bellow the waterline, white for the line itself and blue above. The rigging is a bit of a puzzle, especially as my sailing experience is almost non-existent. The mast comes out of the cabin roof, there is no king plank to take the strain. So, there must be very strong standing rigging with three set of shrouds. I think it will be gaff rigged, with a bowsprit. Any suggestions of alternatives would be greatly appreciated!
-
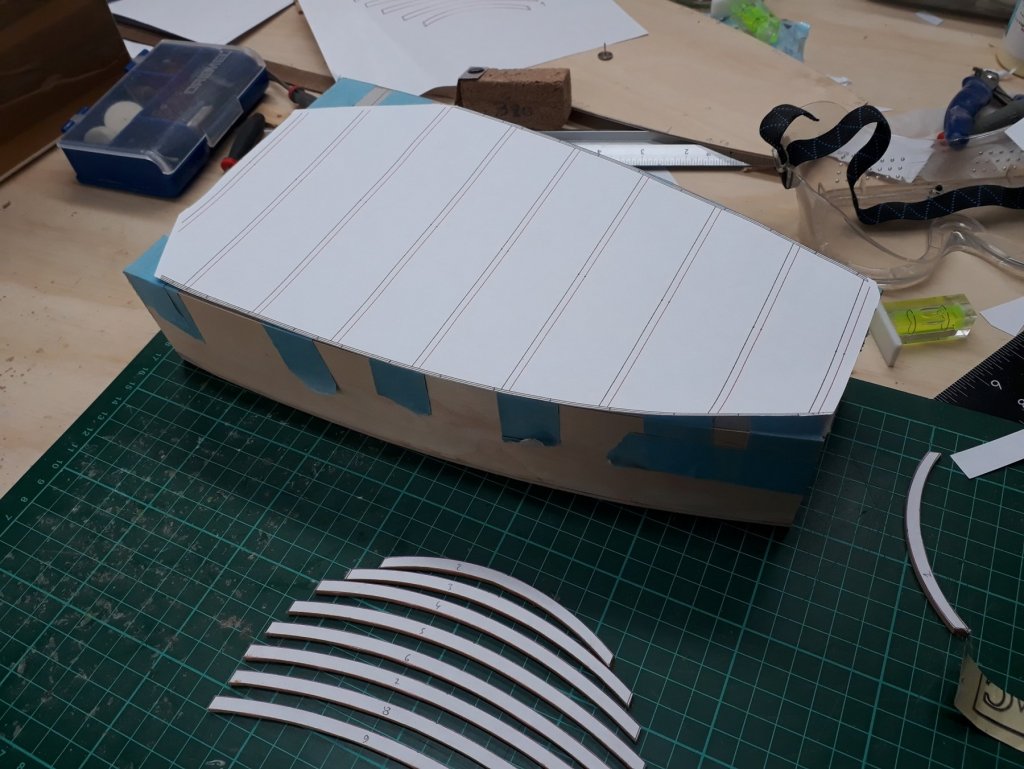
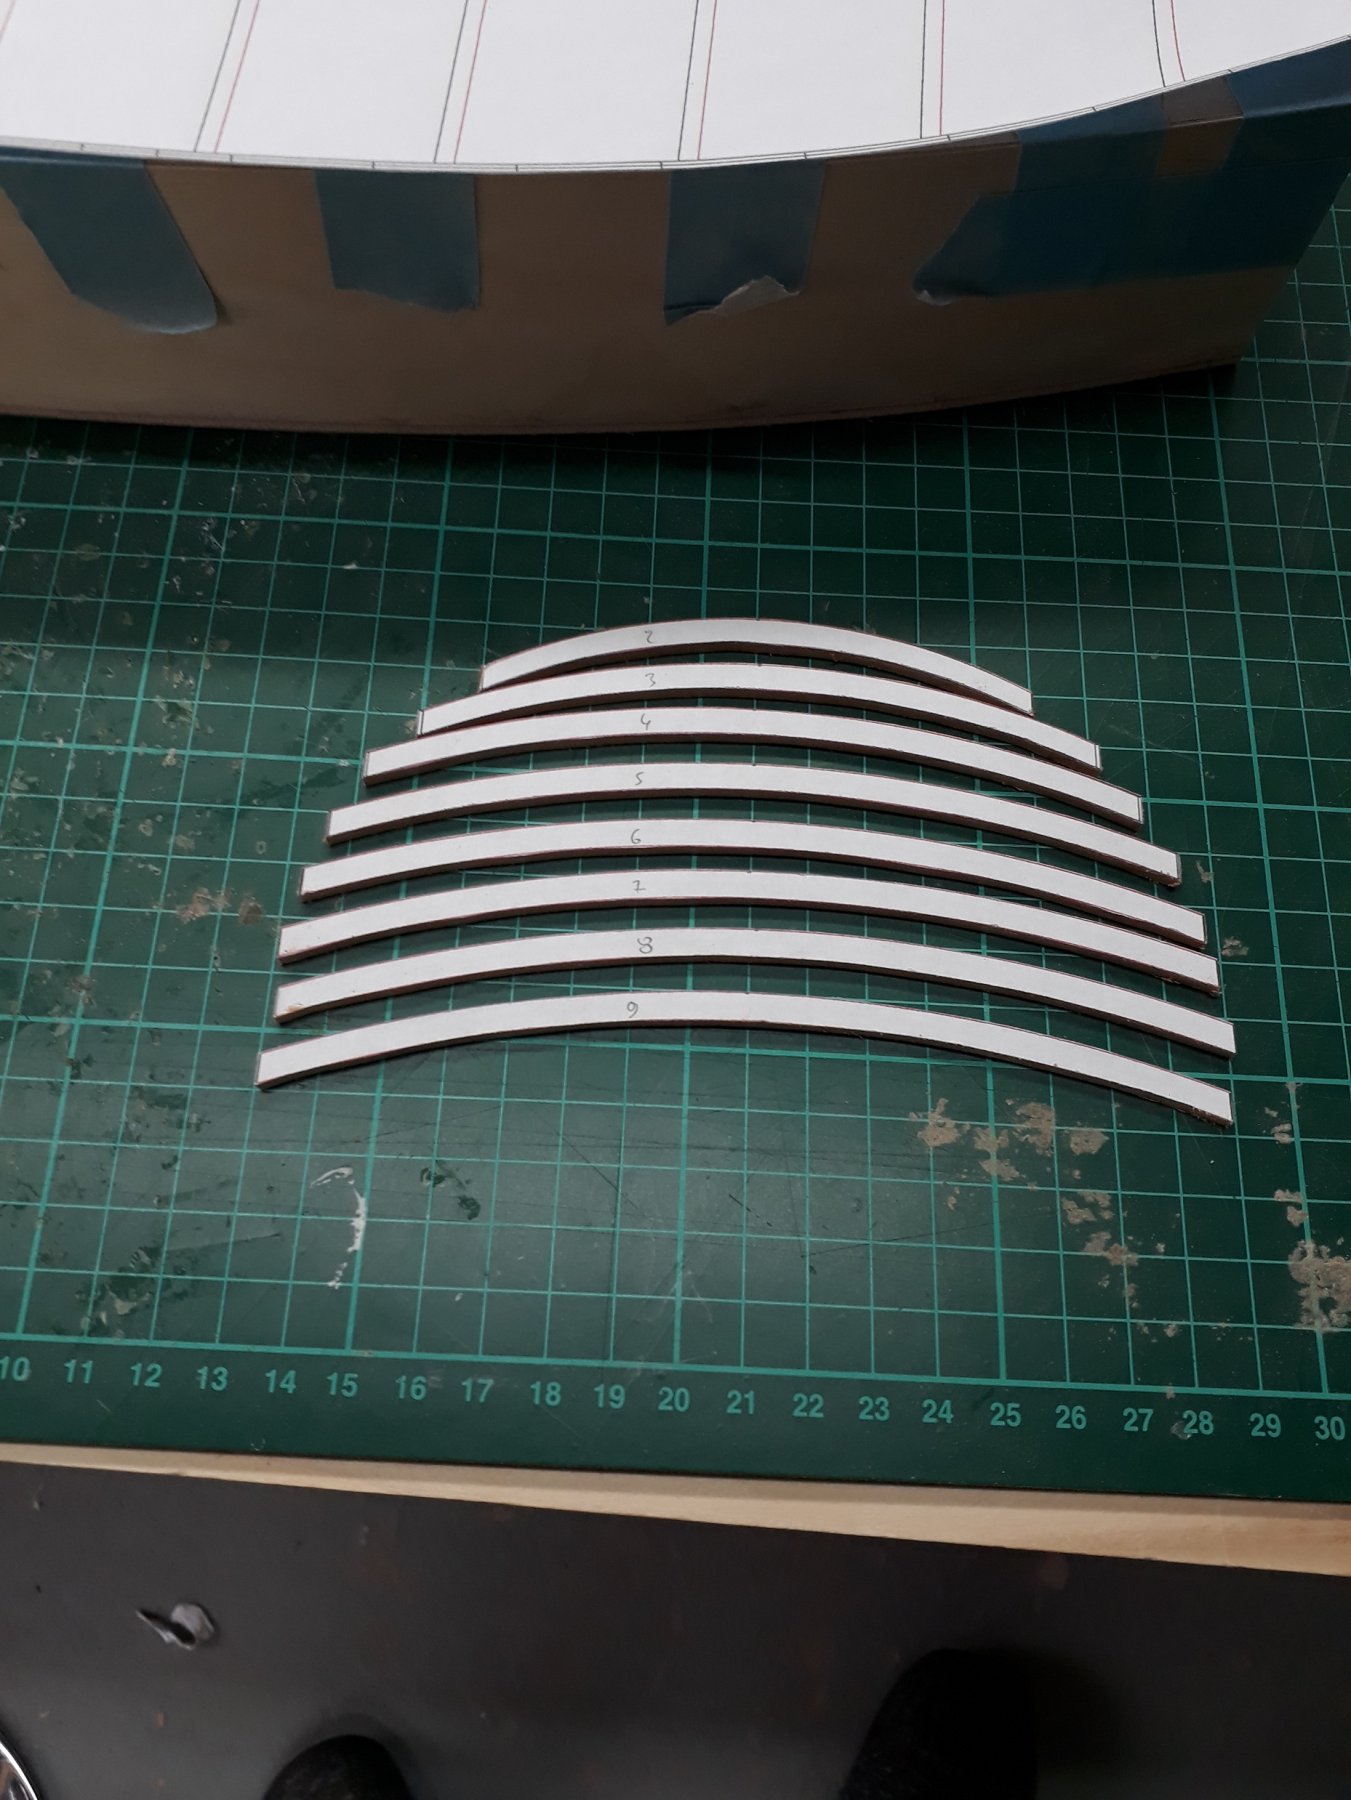
Thanks Druxey. I actually sat down and quickly draw the cabin on CAD, using the actual dimensions that I picked up off the boat. I created the surfaces and then divided the roof top to 28 segments, corresponding to planks about 12 mm wide (I have many 12 mm maple strips). I then unrolled the planks which stayed perfectly straight. This means that no spilling what so ever will be needed. Excellent! This simplifies things a lot!
.thumb.png.f91c367efe2bd014fdb83afb0b051146.png)
-
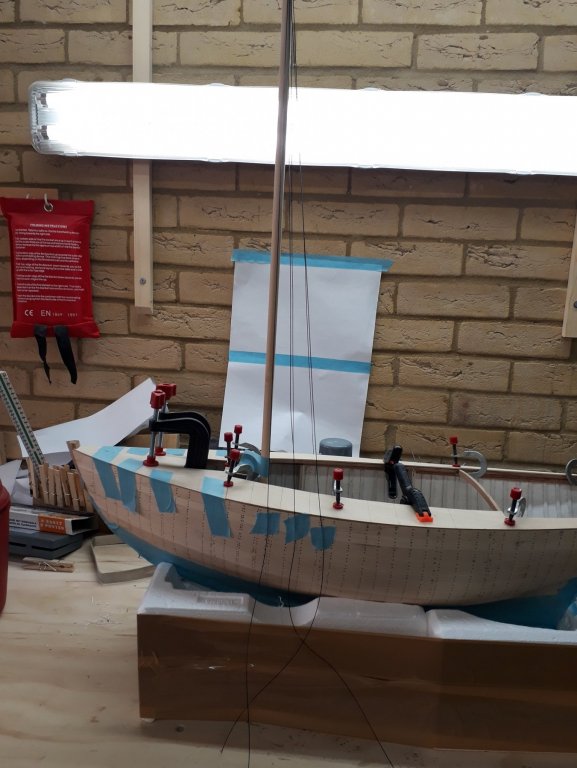
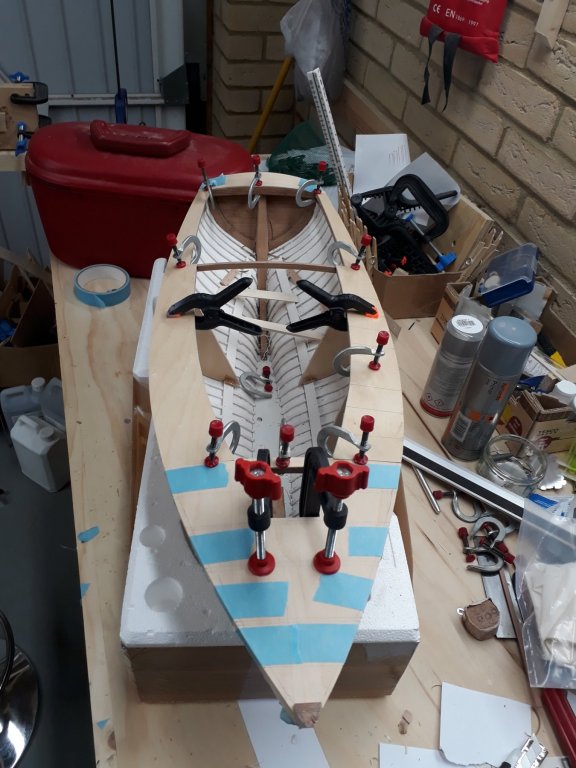
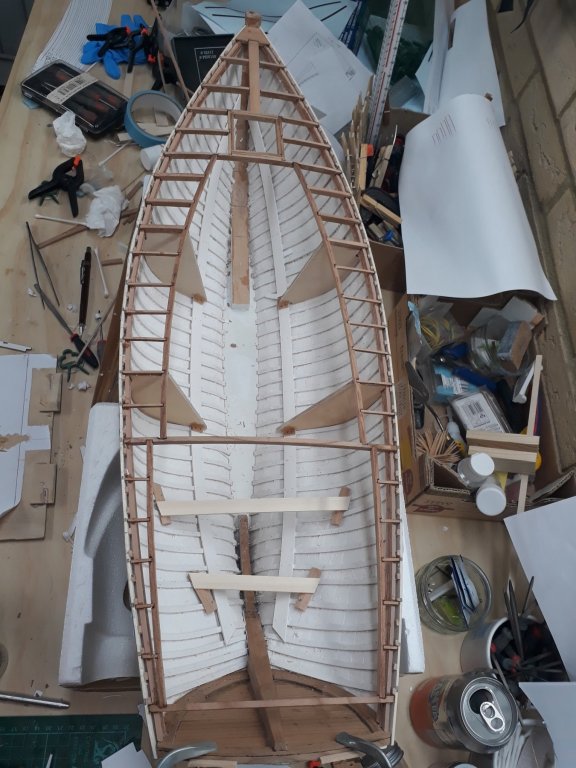
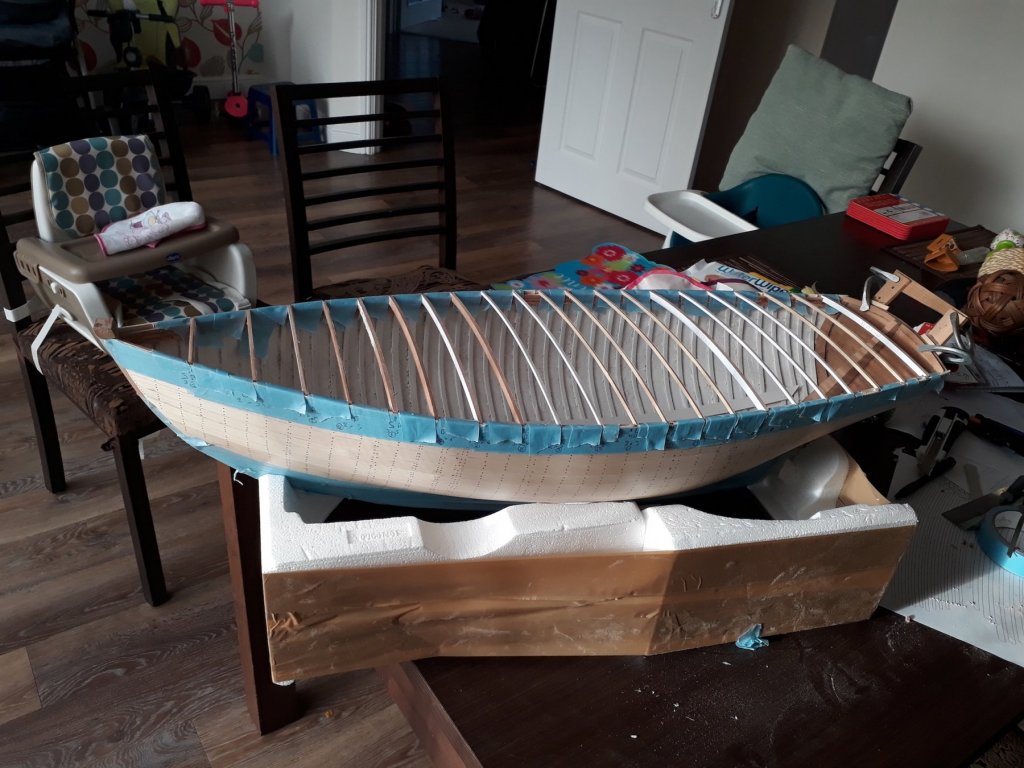
Dear all It has been a while since my last post but life just got in the way again. Furthermore, my trusted macbook which has been my companion in life for the last 10 years suddenly died. This turned out actually to be quite a significant problem, I was so used to living with it that it had become a third arm or something. No loss of data but a major bother to set a new laptop up (windows this time, cannot afford macbook anymore) and transfer data over (have not done it yet). In any case, I managed to do just a bit of work on the boat. I did quite a lot of thinking though as now I think I reached a stage where I need to be careful in which order jobs should be done. I was so worn out most times I worked on the boat that I kept making mistakes. I ended up with a couple of drills embedded deep in the wood and a few marks in the transom, which now definitely needs to be painted. First of all, I got a kind of mast up, just to have an idea how things would work Then, I finished the deck, it came out fine. I also finished sanding the transom. Note the marks from the drills that went too deep. Before I put on the canvas, I think I need to make the cabin. This will be made of plywood, with wood strips on top. There will be some kind of scaffold inside to keep it stable. The roof will be slopped made probably from planks on beams. I initially worked to prepare a temporary scaffold of the shape of the cabin. The more I work and think on the cabin, it becomes clear that this will actually be quite a project on its own. I am not sure how the roof will be made. Once more, this boat despite being small, is a complex one!


-
This is beyond my skills and I live in UK but I wish I could help. Hopefully someone else will be able to.
-
Number of planks?
vaddoc replied to torpedochief's topic in Building, Framing, Planking and plating a ships hull and deck
I think it has to do with the amount of spilling needed and the timber you would have available. In the boat I currently build, the planks needed very significant spilling. So, if I wanted really wide planks, to accommodate the curve the trees would need to be huge. For ships where straight planks were used, these could be wider. Also, it depends on the curve of the hull at the bilge. Very wide planks will not accommodate the turn of the bilge well or would need to be very thick so they could be shaped concave. Much easier with narrow planks. Other possible problems, the more wide the plank, the more difficult not to have defects and the more difficult to steam, handle and bend into place. For models, I think a compromise of the above. Planking is easier with narrow planks but takes much longer. I started with 15 planks each side but were too wide, then wanted 22 but would take forever, finally settled for 17 which proved a sweet spot. My 2 cents... -
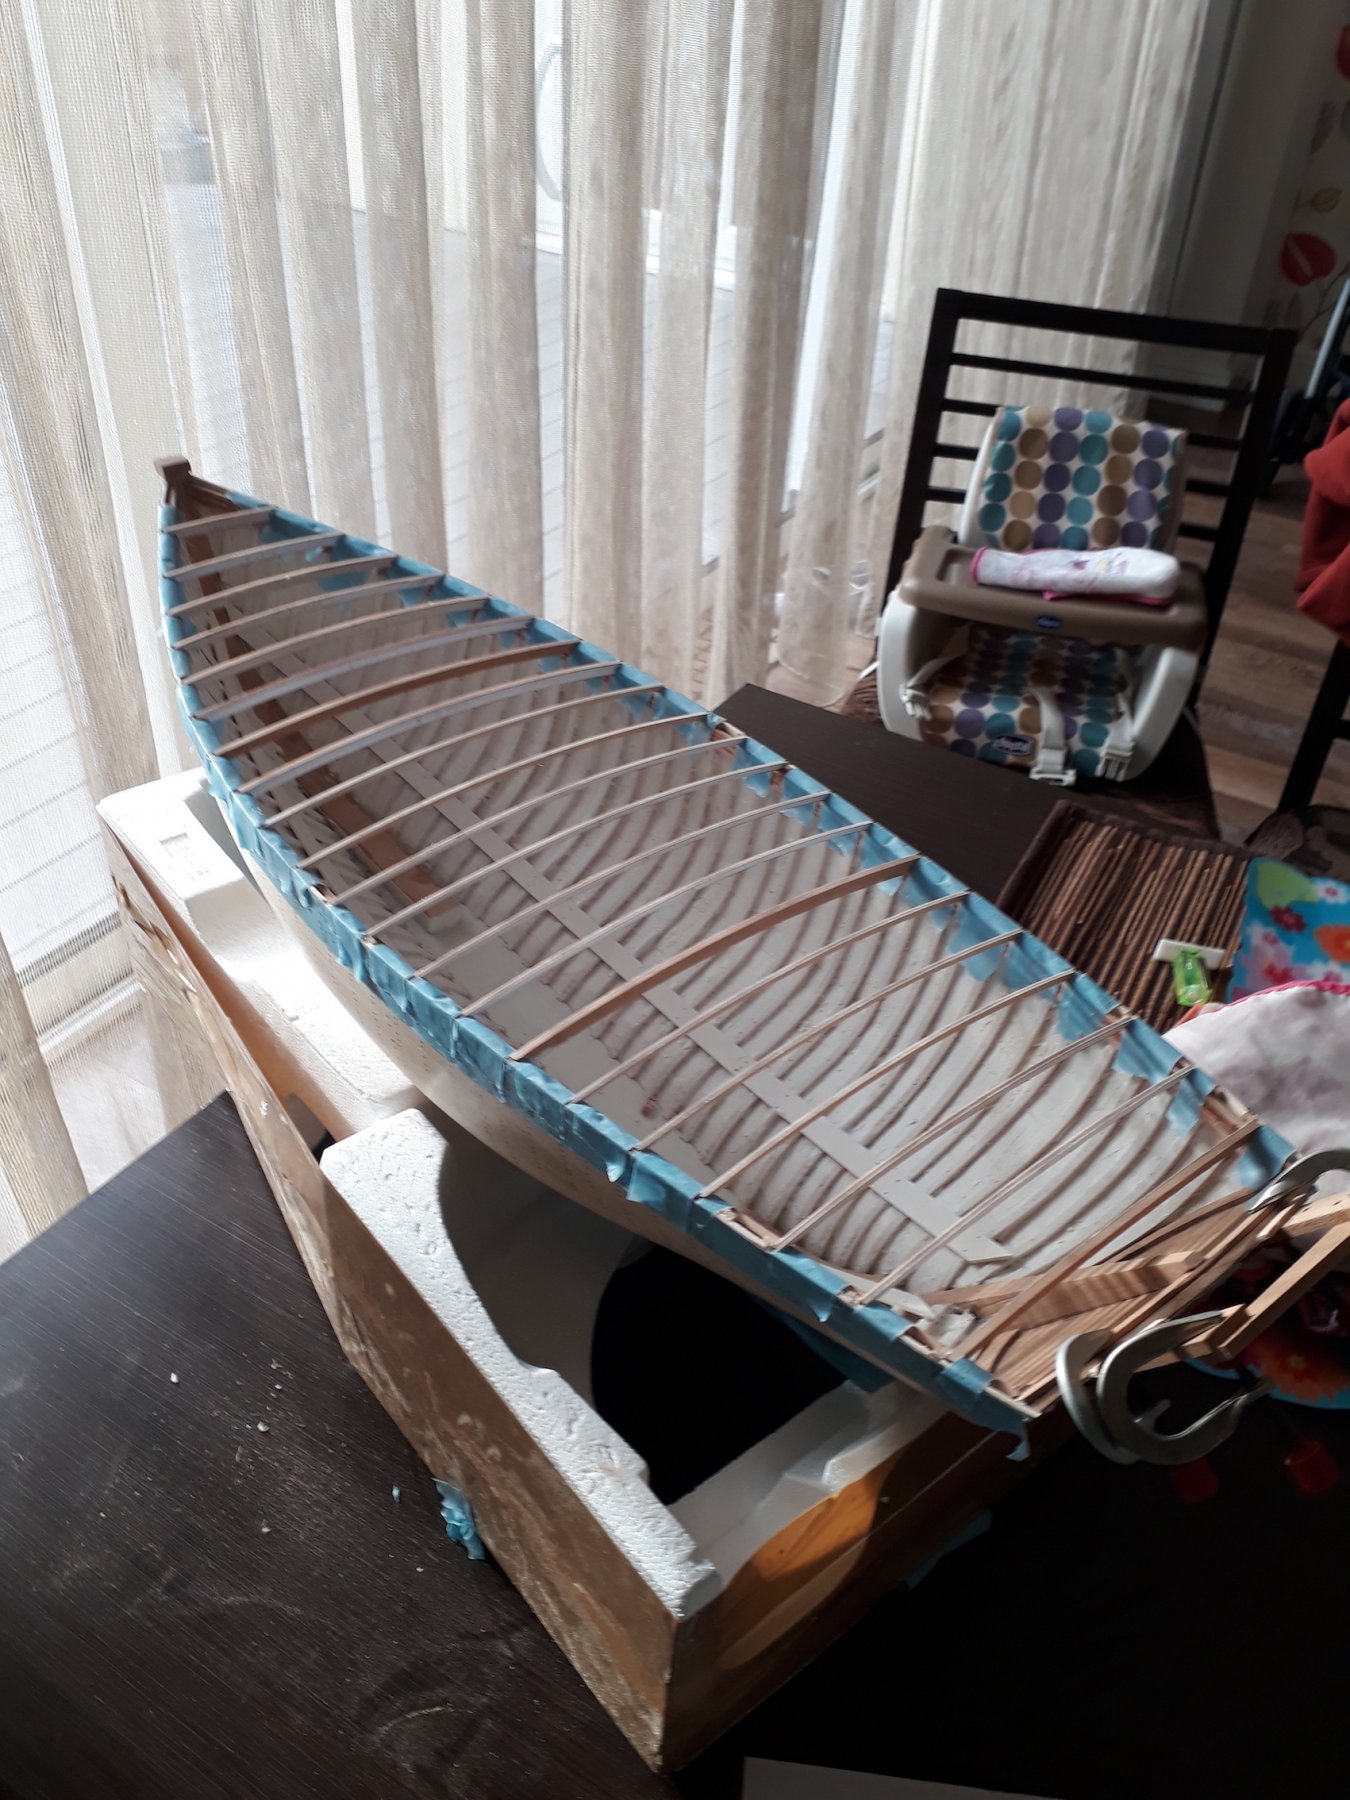
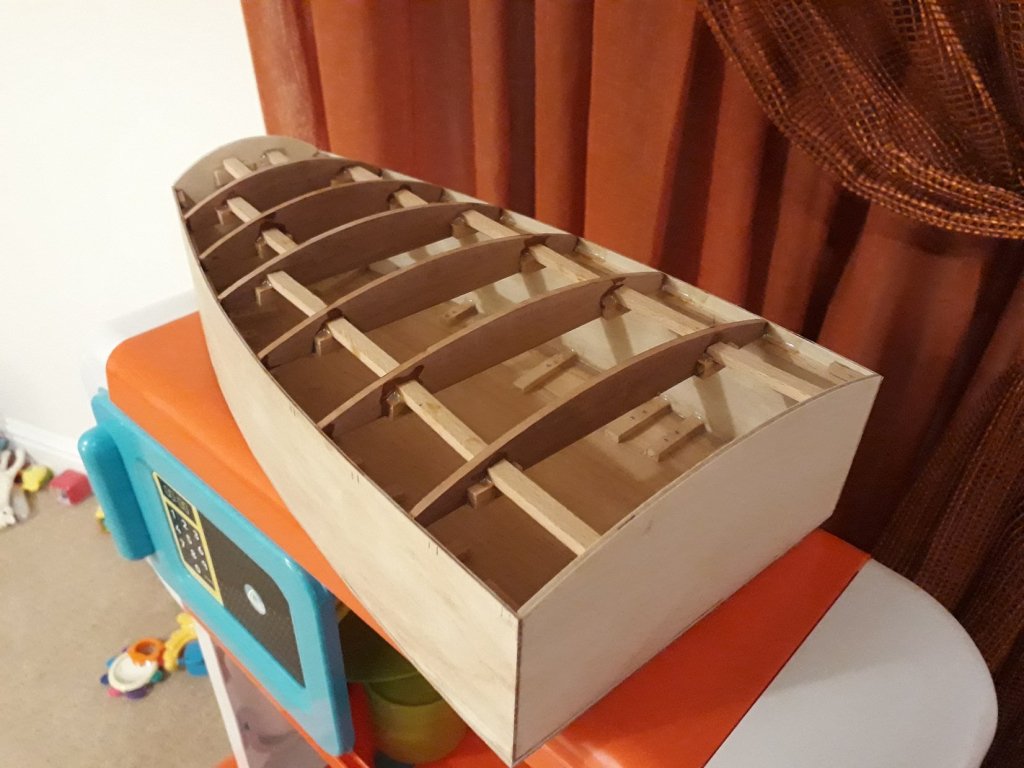
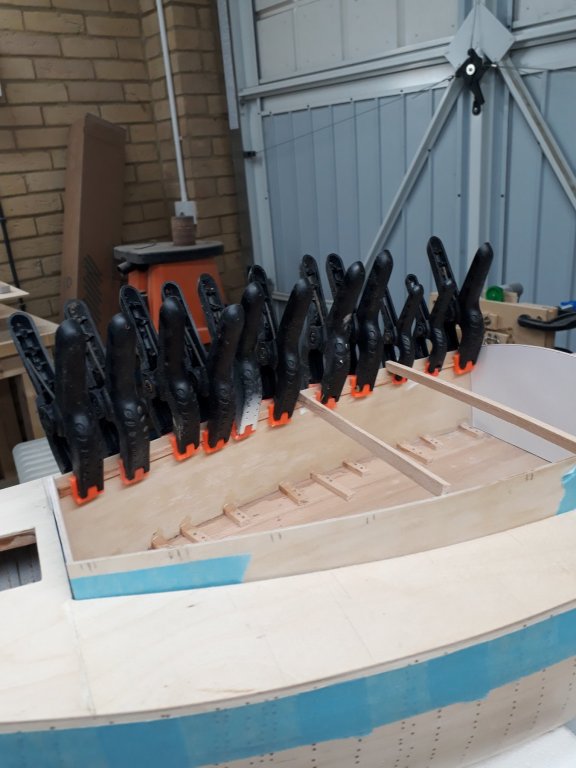
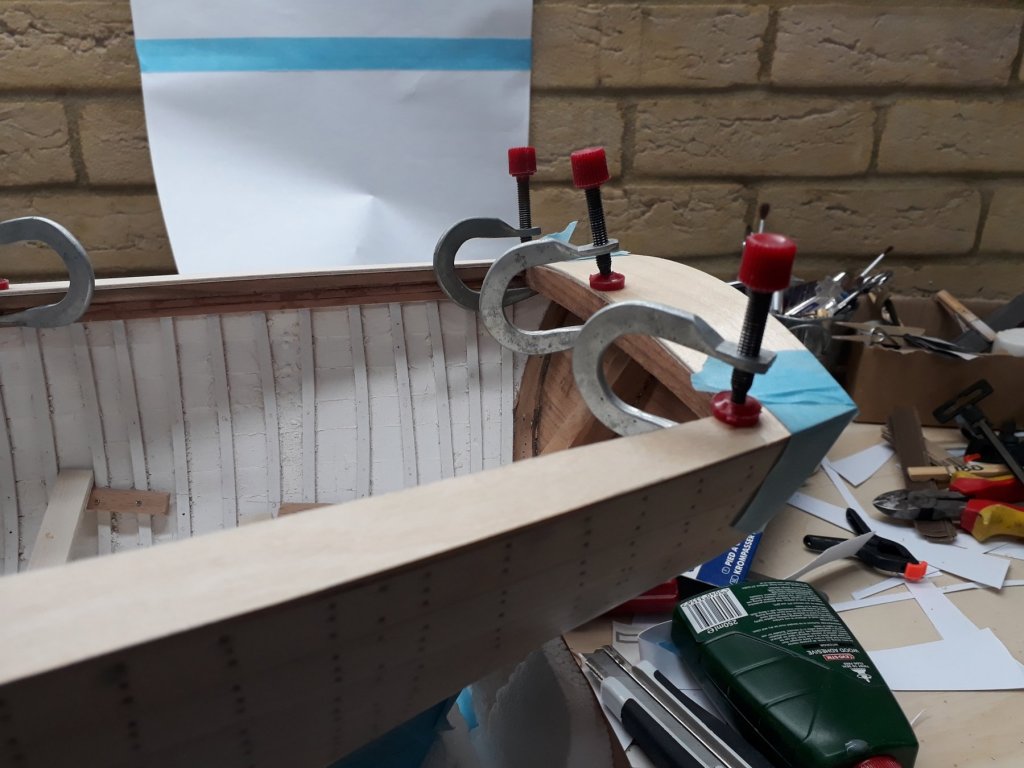
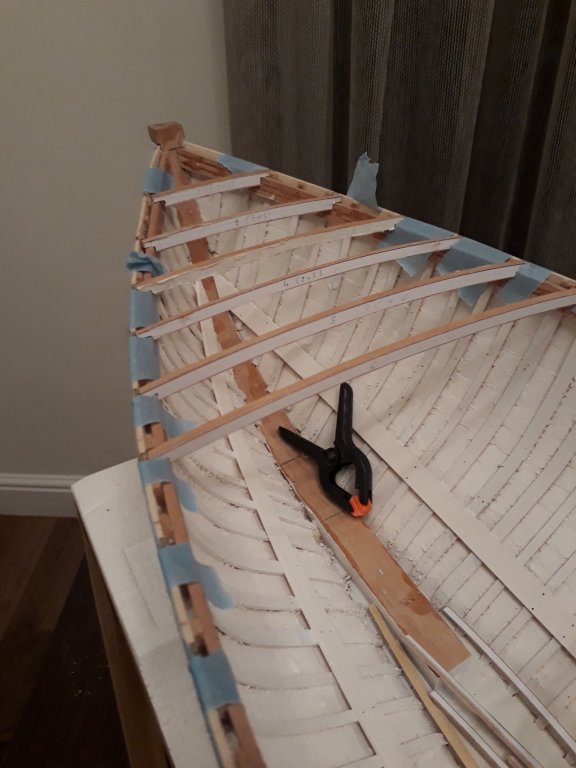
It's not glued yet Andy but the hull stiffened up massively after the stringers and beam selves went on. With the deck epoxied on it will be rock solid!
-
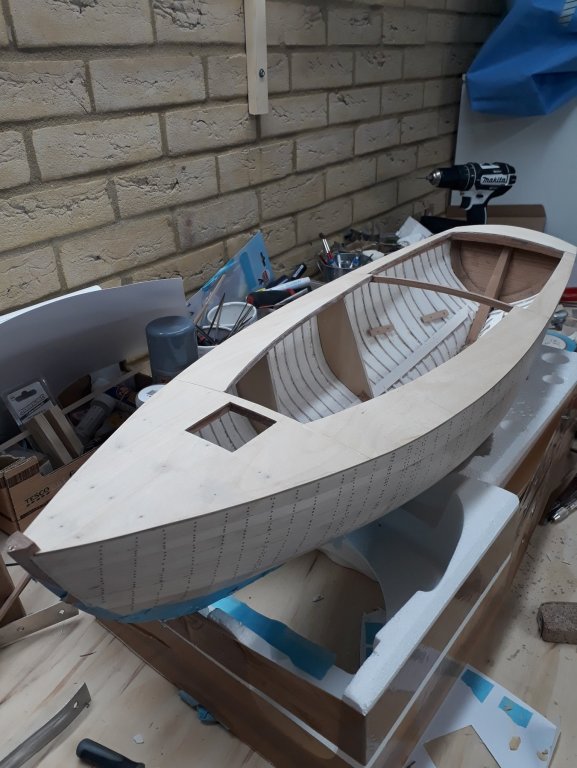
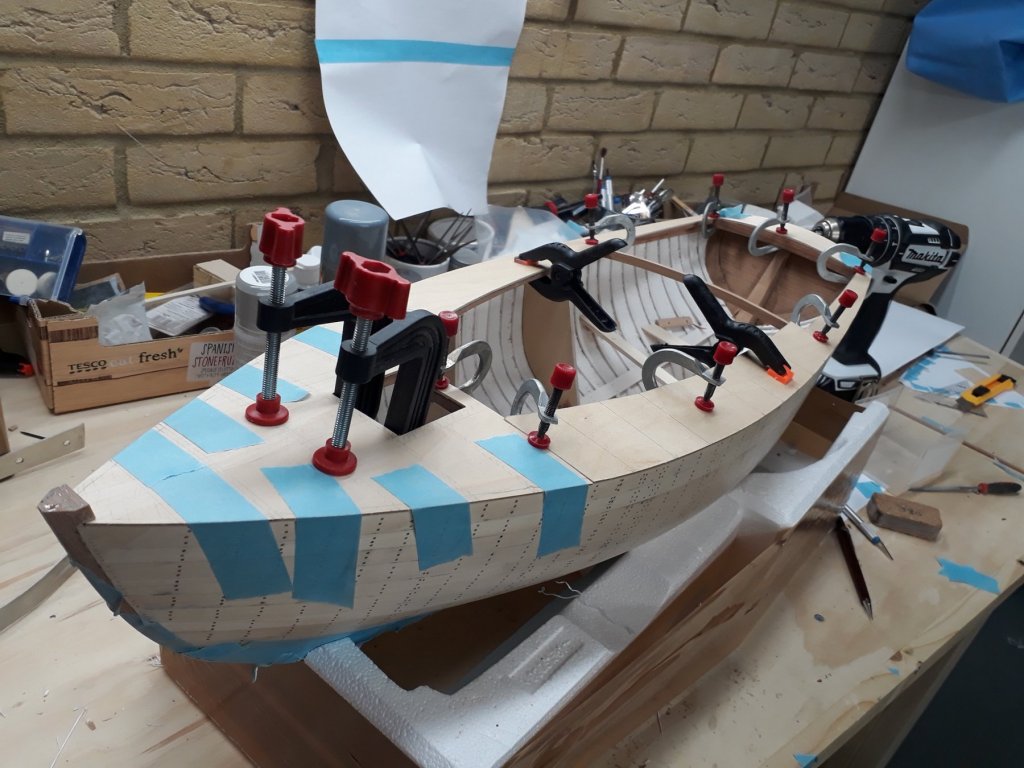
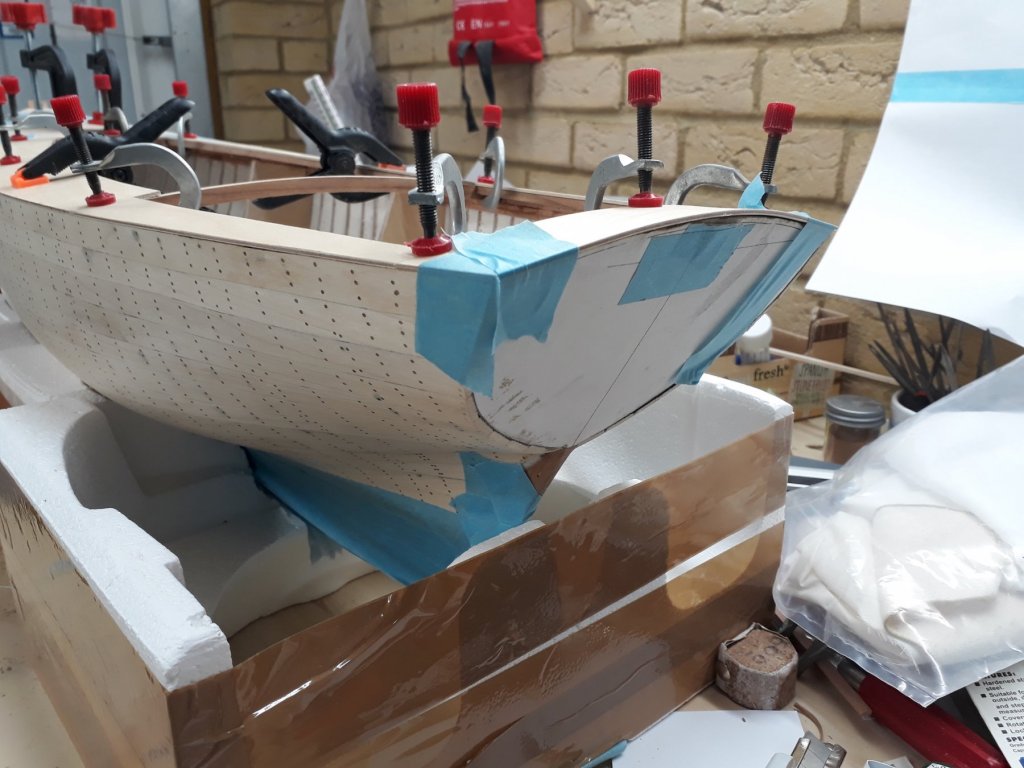
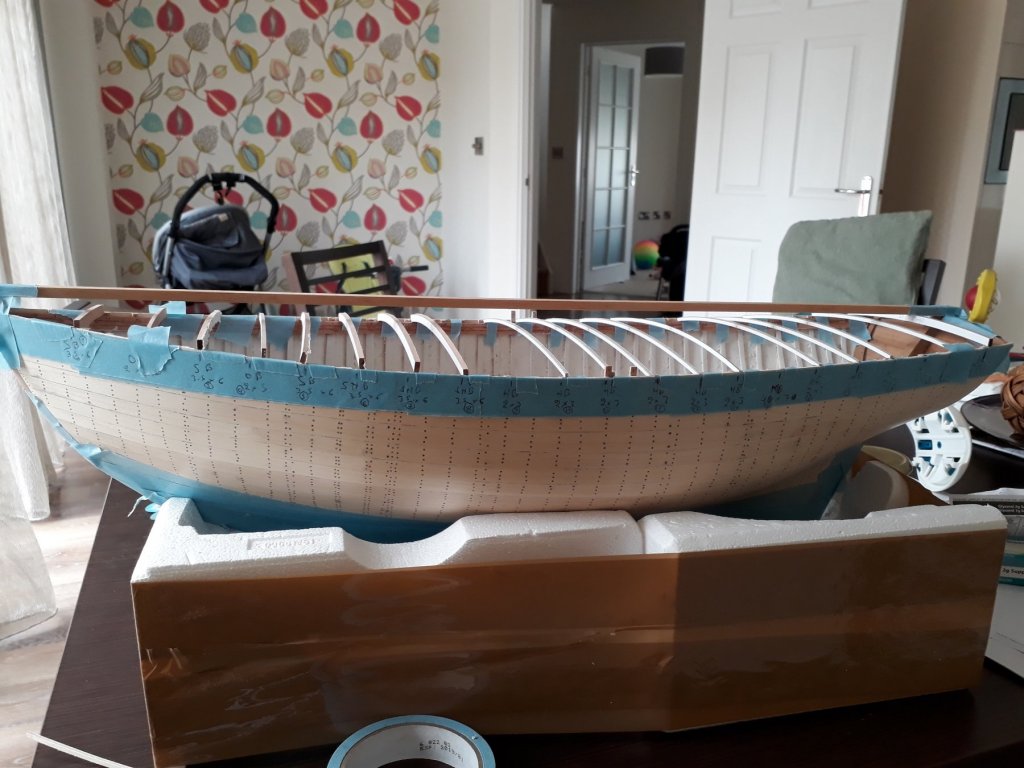
Many thanks to all for your suggestions. There's a lot to consider! I decided to install the deck first. I used 1.5 mm plywood which easily followed the curves except for the stern. The fit of the different pieces came out great, the seems are very small but still some shaping and sanding is needed at the edges. I also shaped the stem, it will need to be cut almost flush with the deck I think but this will be done later on. I am not happy though with the deck at the stern, there is too much spring back pressure in the plywood. I think this is better to laminate from 0.8 mm sheets.

-
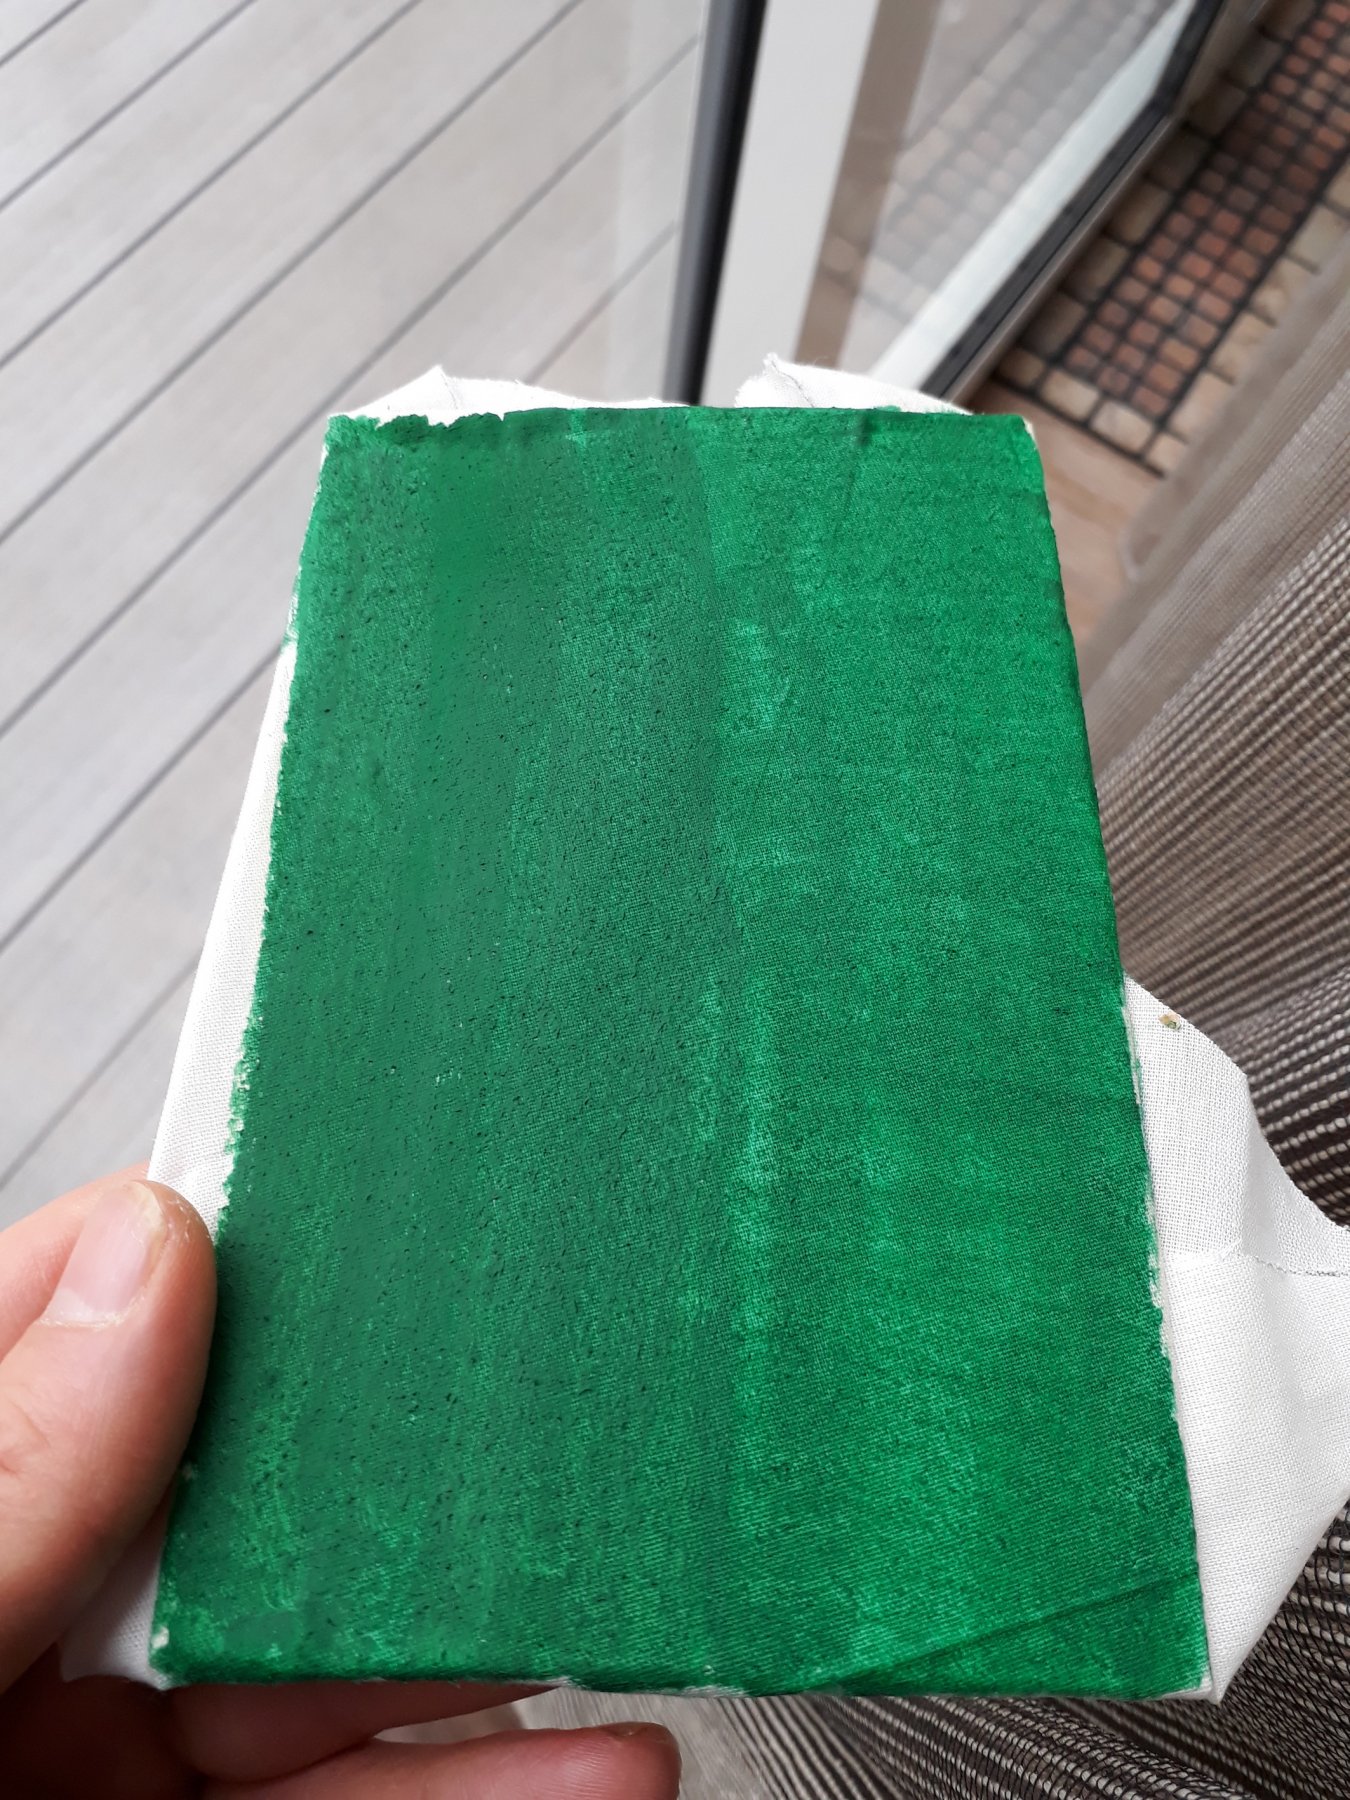
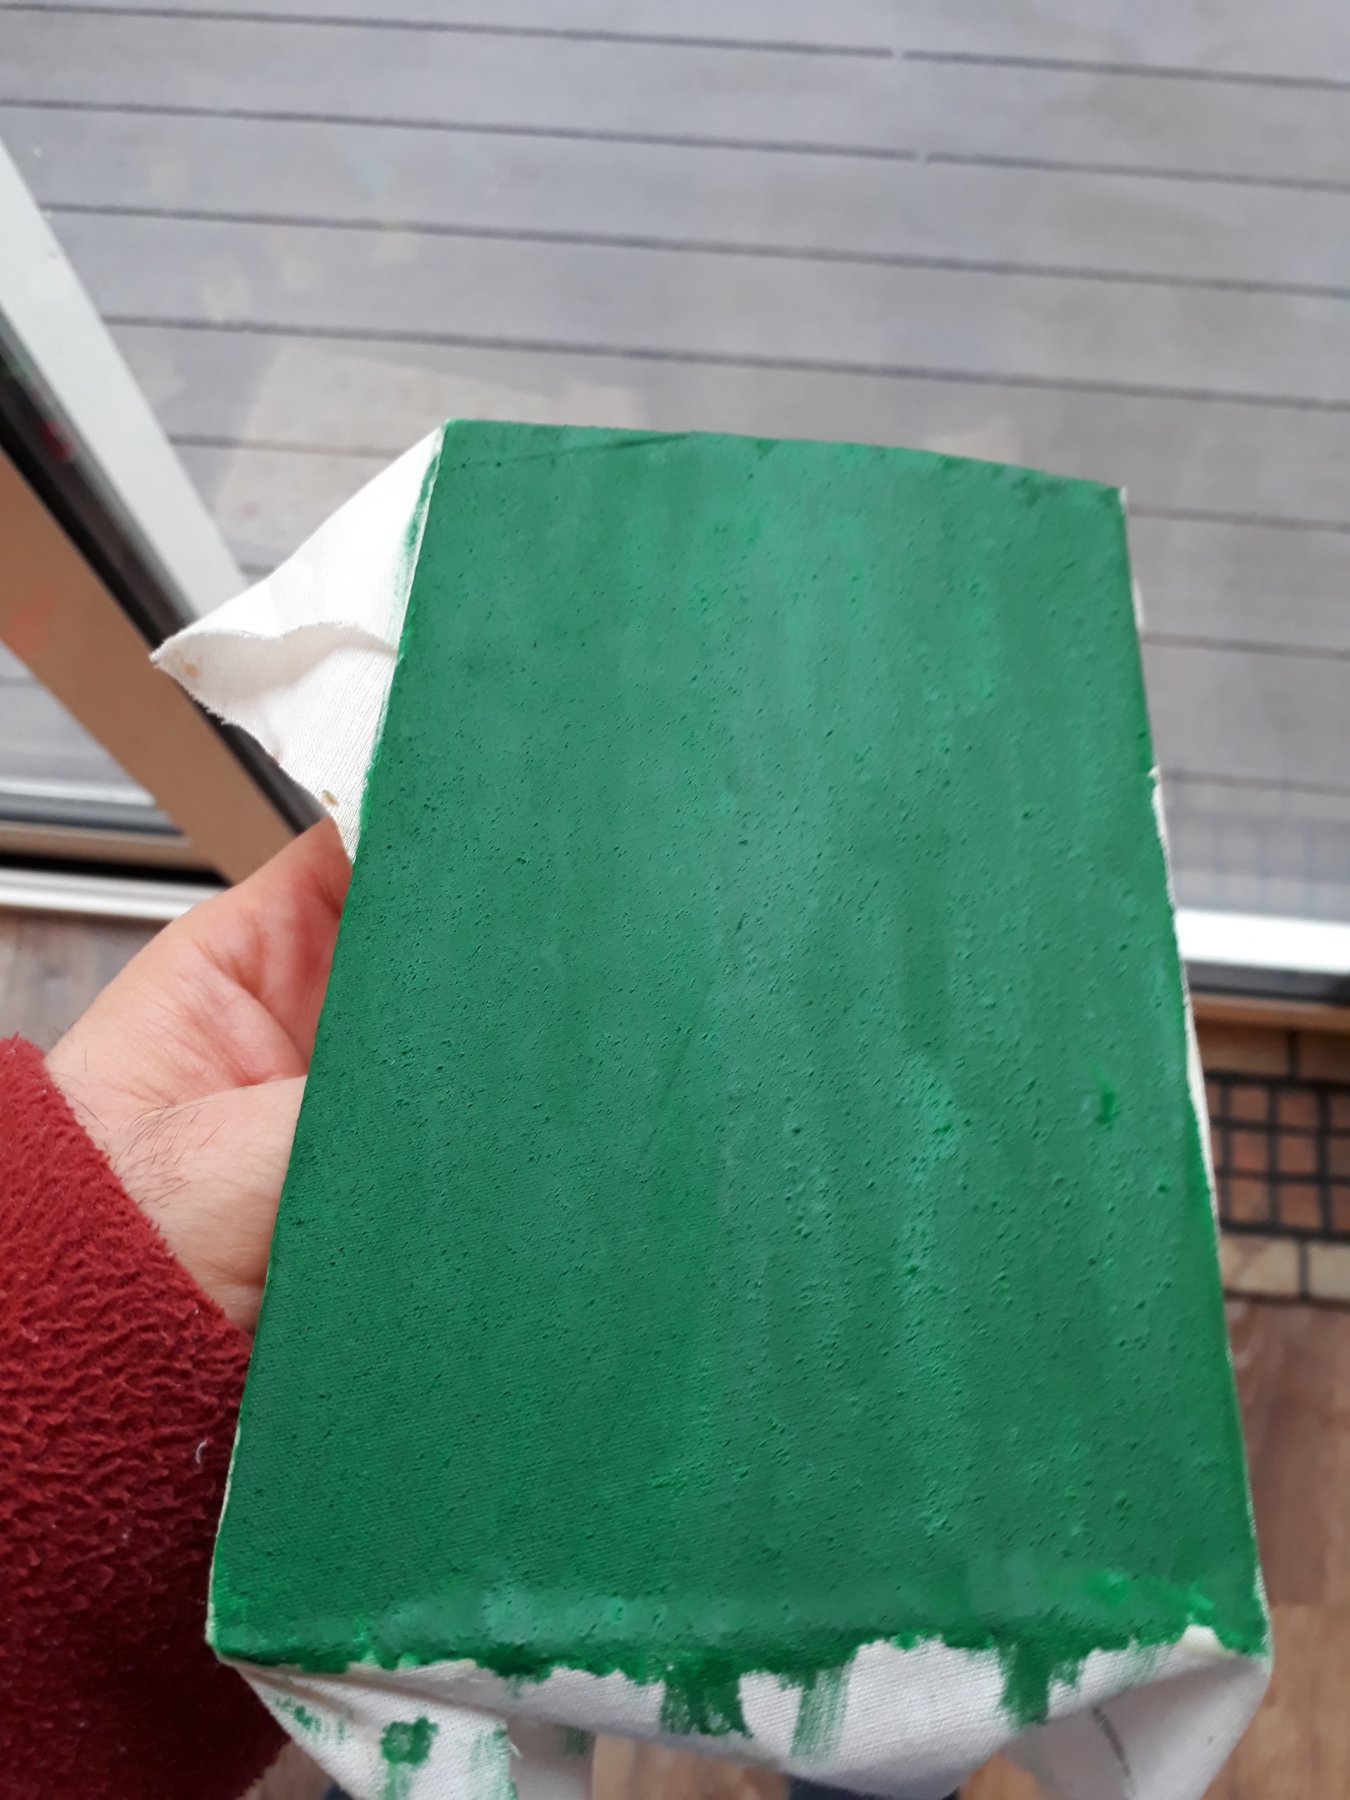
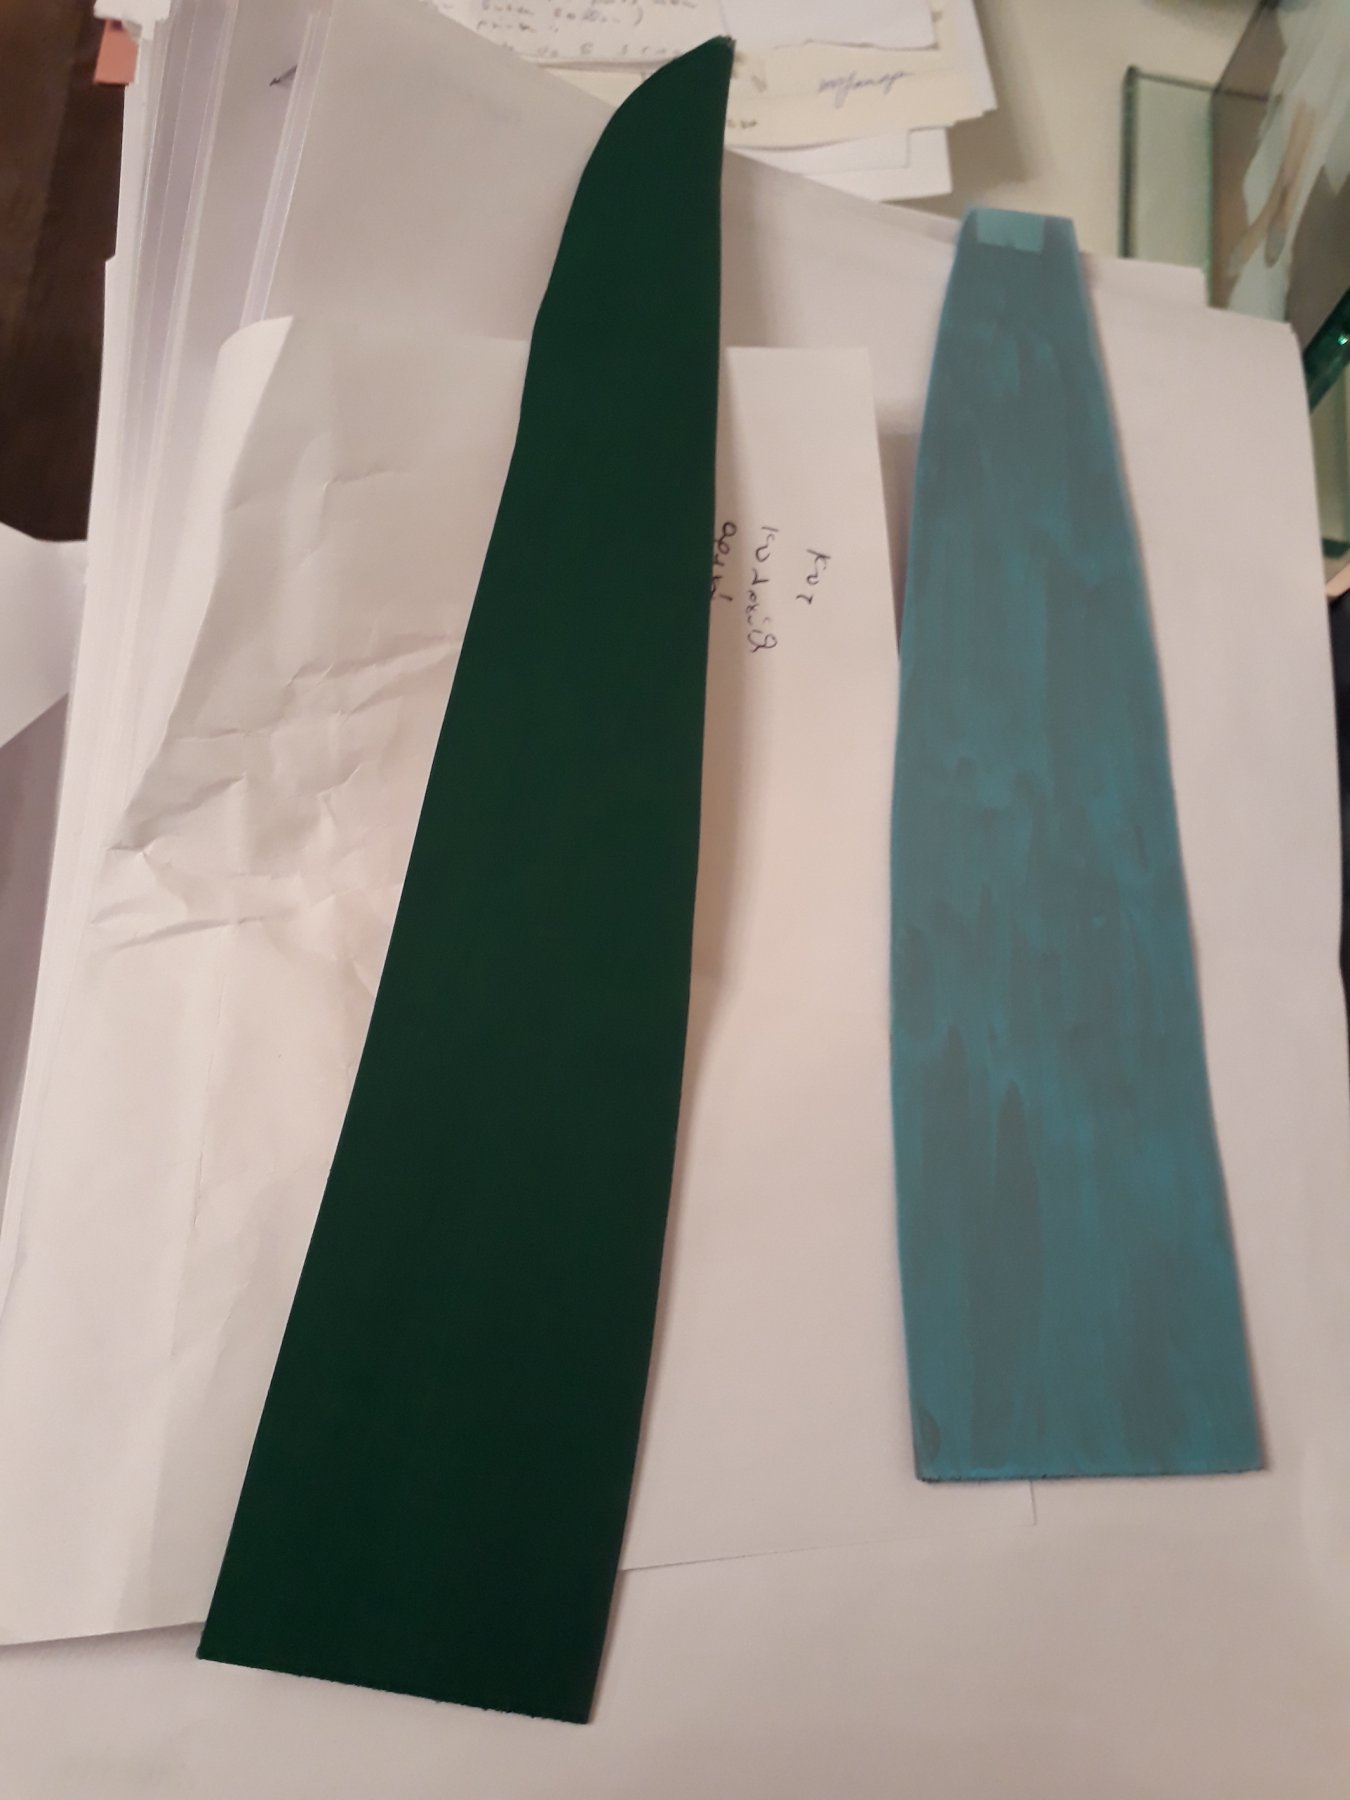
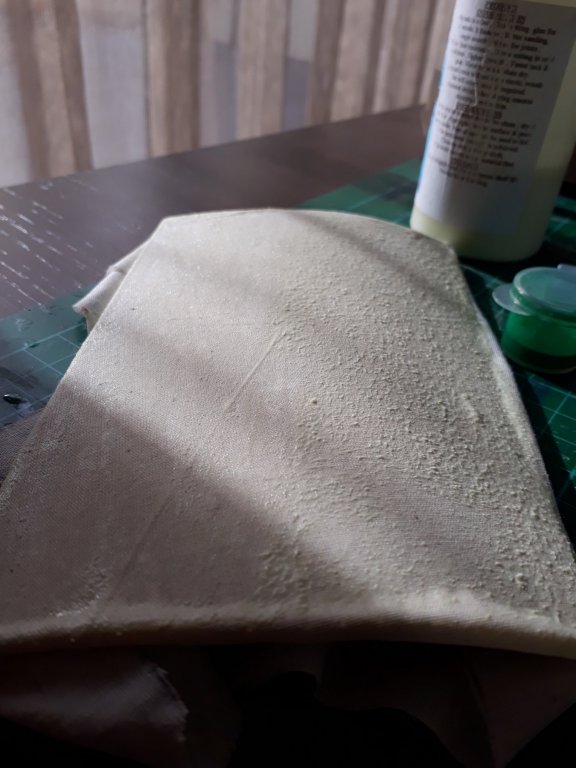
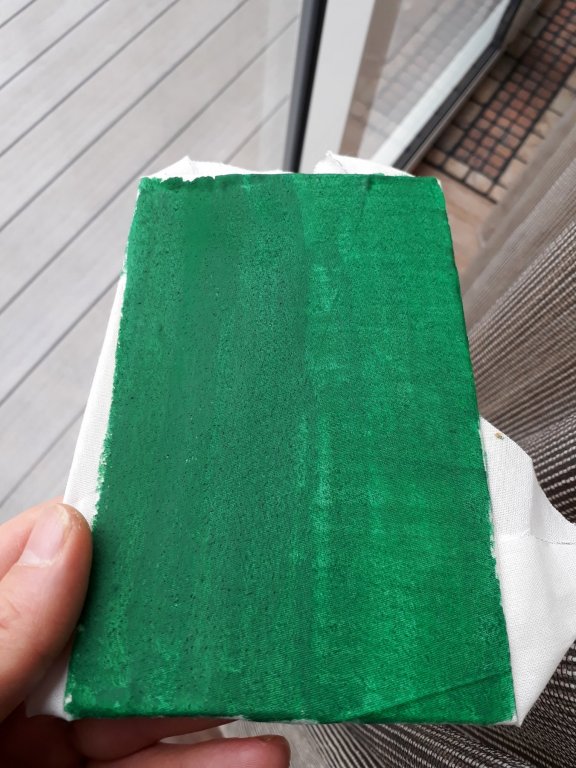
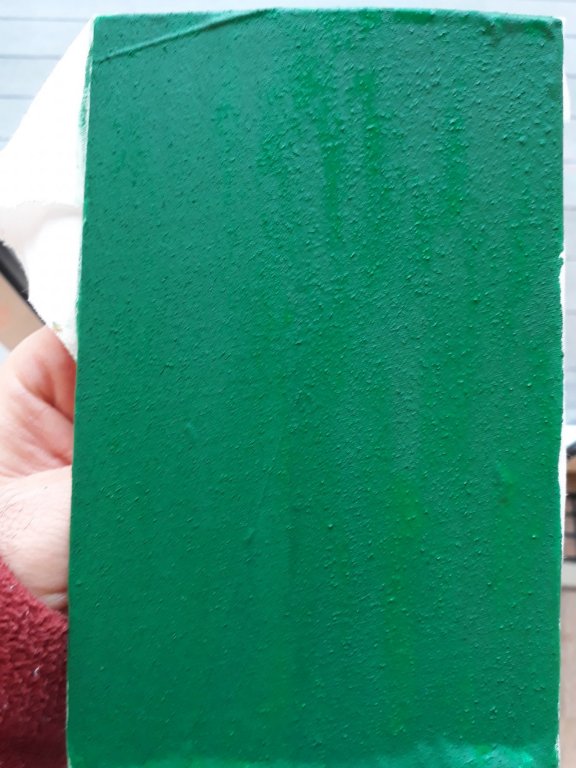
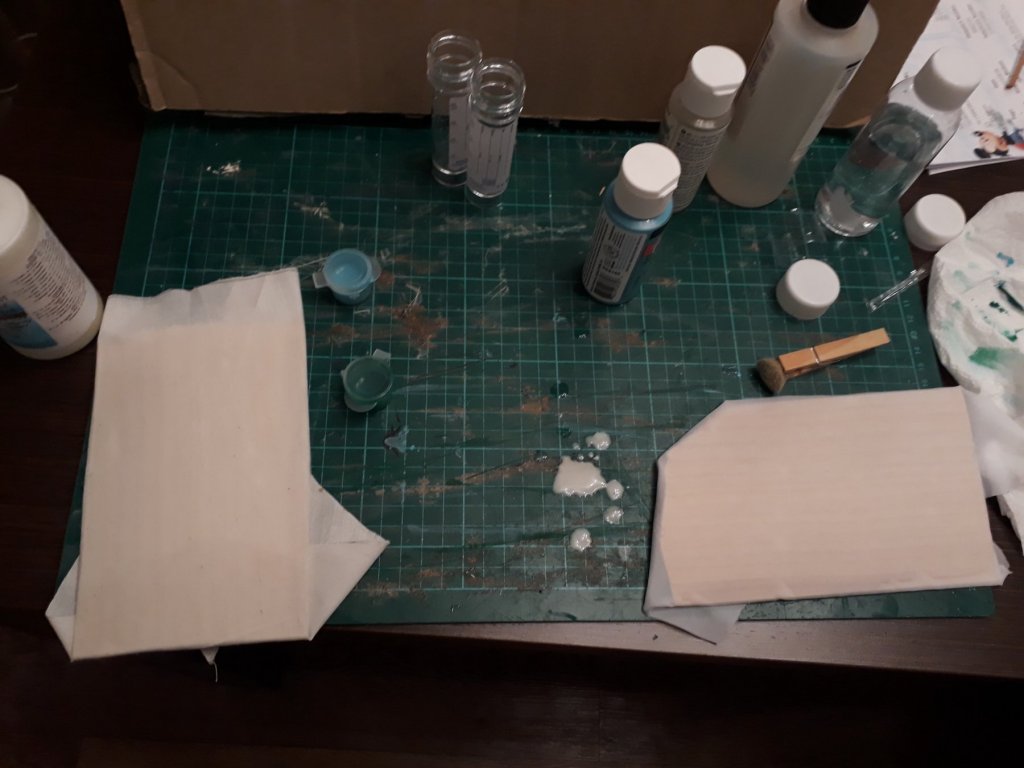
An update on the canvas testing. The synthetic fabric did not glue well. The cotton one did much better so I concentrated on this. I saturated the fabric once more with PVA, but not as diluted as before. This time however, I squeezed the excess off from half the surface. This half came out smoother. Then i applied one coat of acrylic, green as this is the only colour I have. There is a difference between the halves, first picture is wet, second dry After 4 coats there was no difference in colour, but the squeezed side was smoother. I think that indeed a dense high quality cotton fabric is needed for this job, the PVA should be just thinned going on the wood and not too thinned going on top to saturate the fabric. The fabric should be stretched, the excess glue should be squeezed and if needed a second coat of PVA applied. Then, at least 4 coats of acrylic are needed.


-
Mark, I will allow a few days for the acrylic paint on the test pieces to fully cure/set and then I l try toothpaste and probably some automotive paste as well. Mark, I have been silently following your build. I liked your paint job and choice of colours a lot. Looking back, how did you paint the waterline strip? did you first mask the strip, paint everything else, then mask above and bellow the line?
-
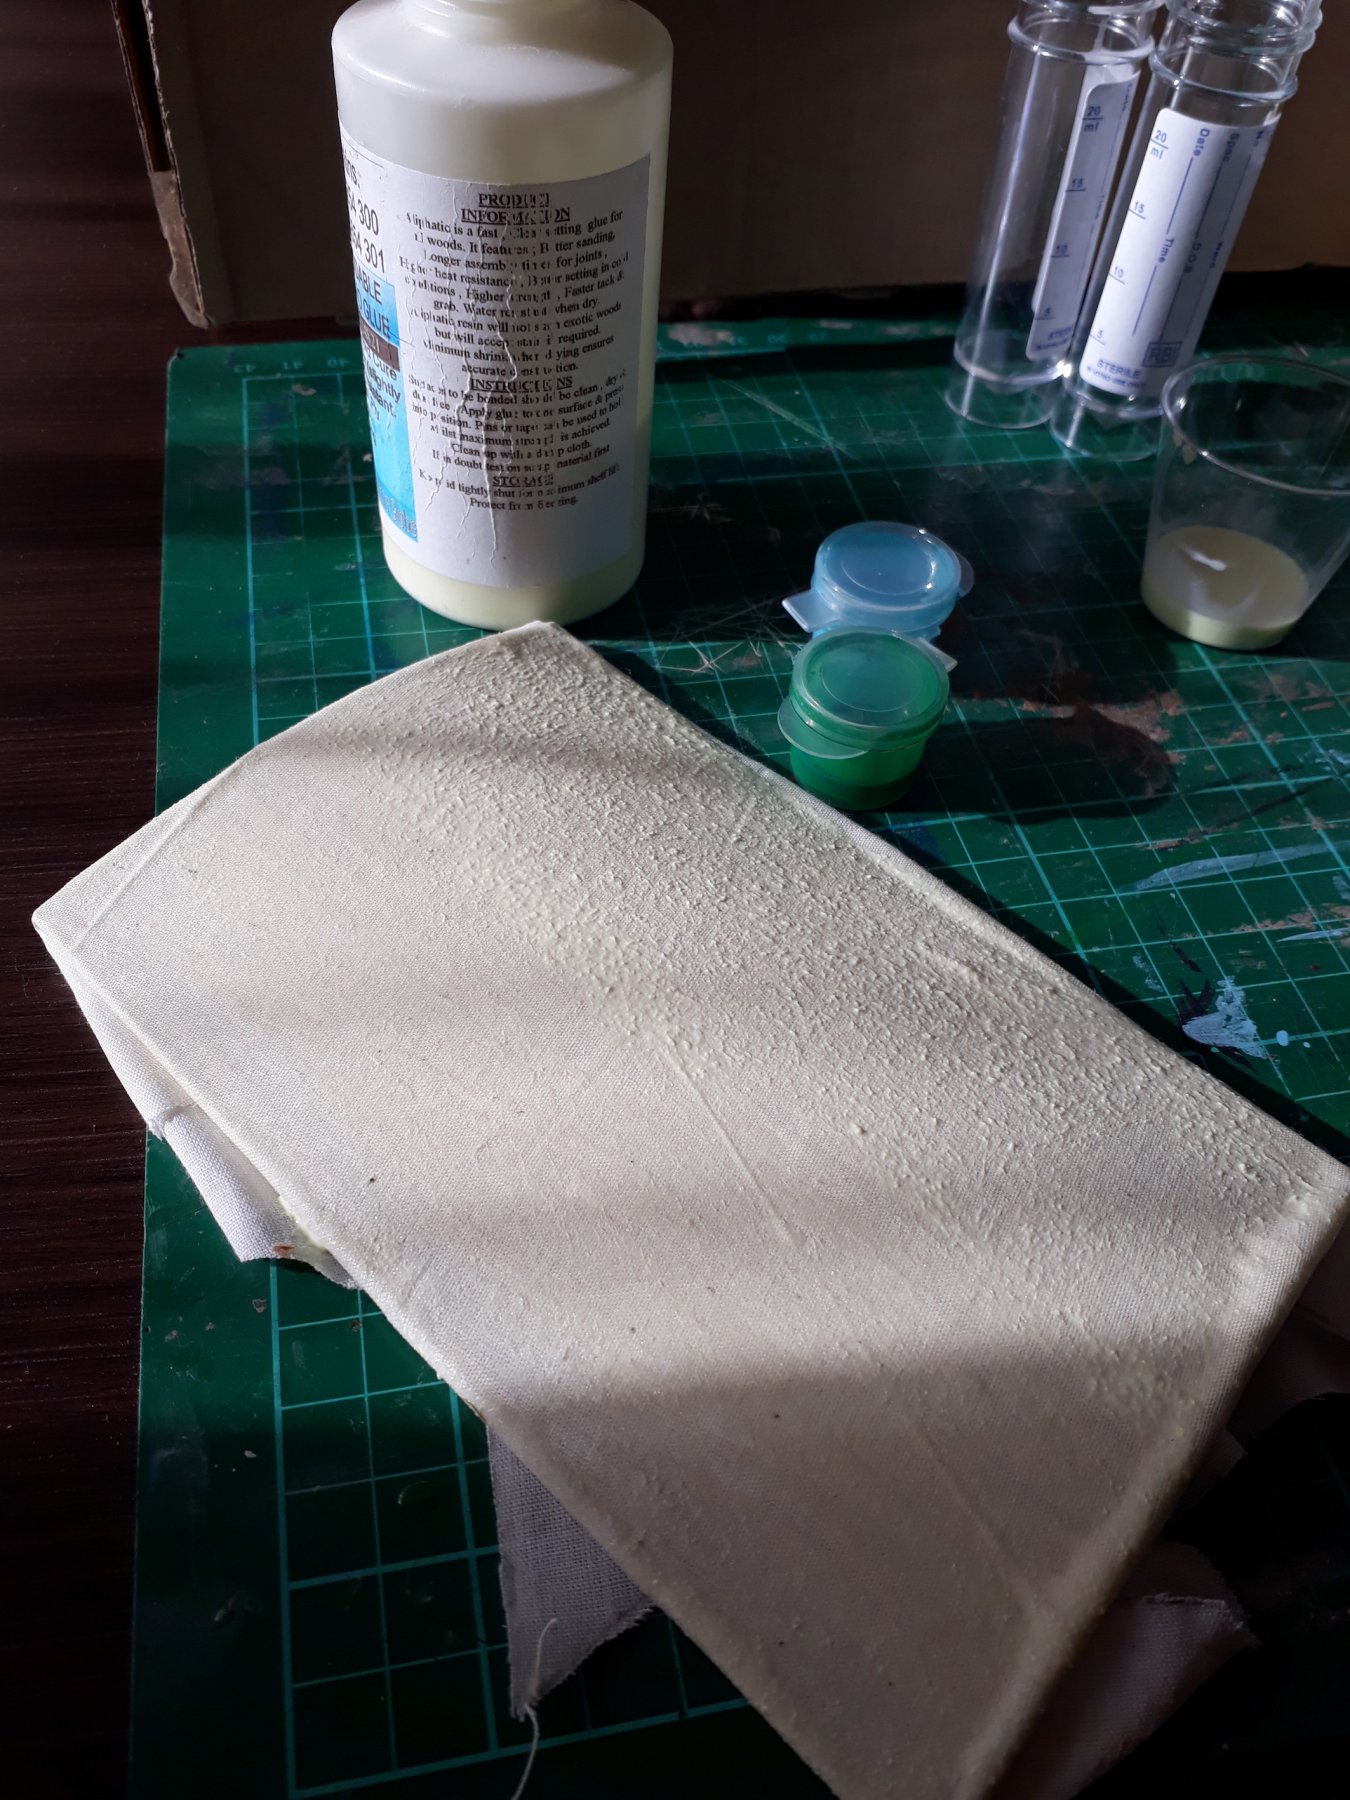
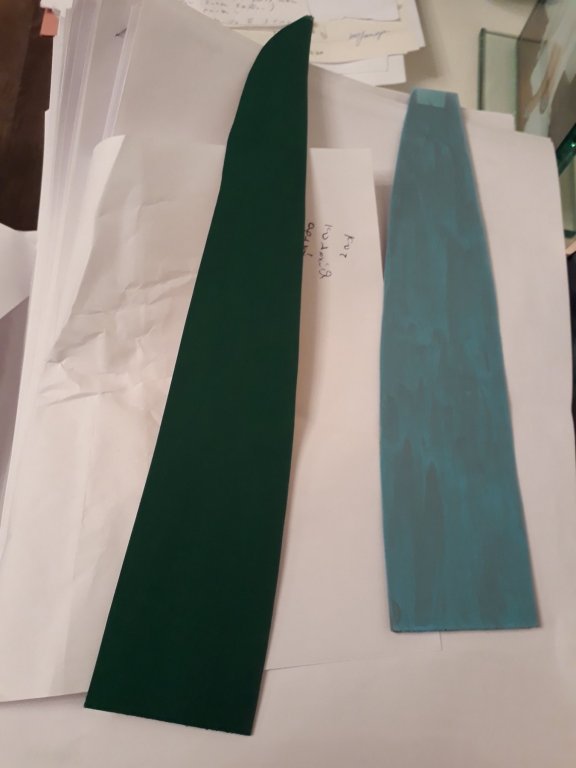
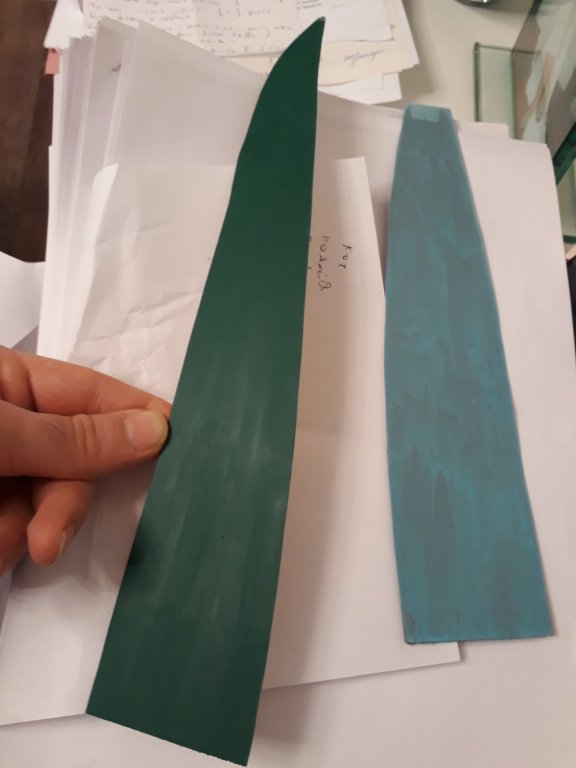
Thank you all, your advice is much appreciated. I did some thinking over the options. In the past I tried acrylics and the result was horrible. No coverage (even using vallejo), terrible brush marks, a complete deal breaker. I then tried automotive primer and Humbrol enamels brush painted. I did have problems with bleeding, actually ay some point I had to sand the whole hull and start again! Painting was the source of countless problems and tragedies but in the end I got a reasonable result but I don't want to go through a similar ordeal. The next pic is from my previous model in 1:12, using blue Humbroll enamel gloss paint (the white was sprayed). I used up two 500 ml primer sprays and two Humbrol white paint sprays for this! The Deben though has a much larger hull. I love enamels but they are just too difficult to use. The automotive primer has very strong fumes and takes 24 h to fully cure. Even using low odour mineral spirits, enamels also have fumes. Enamels also need 24 hours between coats (although 2 coats are enough) and cleaning the brushes always left a mess in the kitchen sink and the admiral fuming worse than the paint. I really don't have the energy for this. I considered carefully things and I think acrylics are the way forward, as well as accepting a much lower standard of finish. To test how low this standard would be I sanded and sealed two pieces of plywood and primed one with Halfords grey primer and the other with Humbrol grey primer. Apart from the stronger fumes of the automotive primer, no difference. Actually the Halfords primer dried as quickly. I now work in a detached garage so the fumes are less of a problem but still were annoying, I will be using Humbrol although more expensive. Then I painted one piece with Vallejo green and the other with Americana (known also as Decoart ) Cyan. I used good quality brushes, 4 coats each and tried to do my best, like as if I was painting the boat. Vallejo wins hands down. Nicer to work, much better coverage, looks like having much more pigment, really nice stuff. There are brush strokes visible when the light shines on the surface, but I think I need to just accept this. I intend in the end to add a couple of coats of varnish (This might be enamel) so maybe this will improve things. I have never sanded paint and I think I will not do it. Next, I did a bit of testing with the canvas sheathing. Andy, I ordered some 300 count fabric as you advised but I had a couple of fabric offcuts laying around, one synthetic and a cotton one. I covered two pieces of maple sheets with diluted PVA, added the fabric and then saturated everything with glue. The fabric is loosely attached, not stretched, I just want to see what will happen. Regards

-
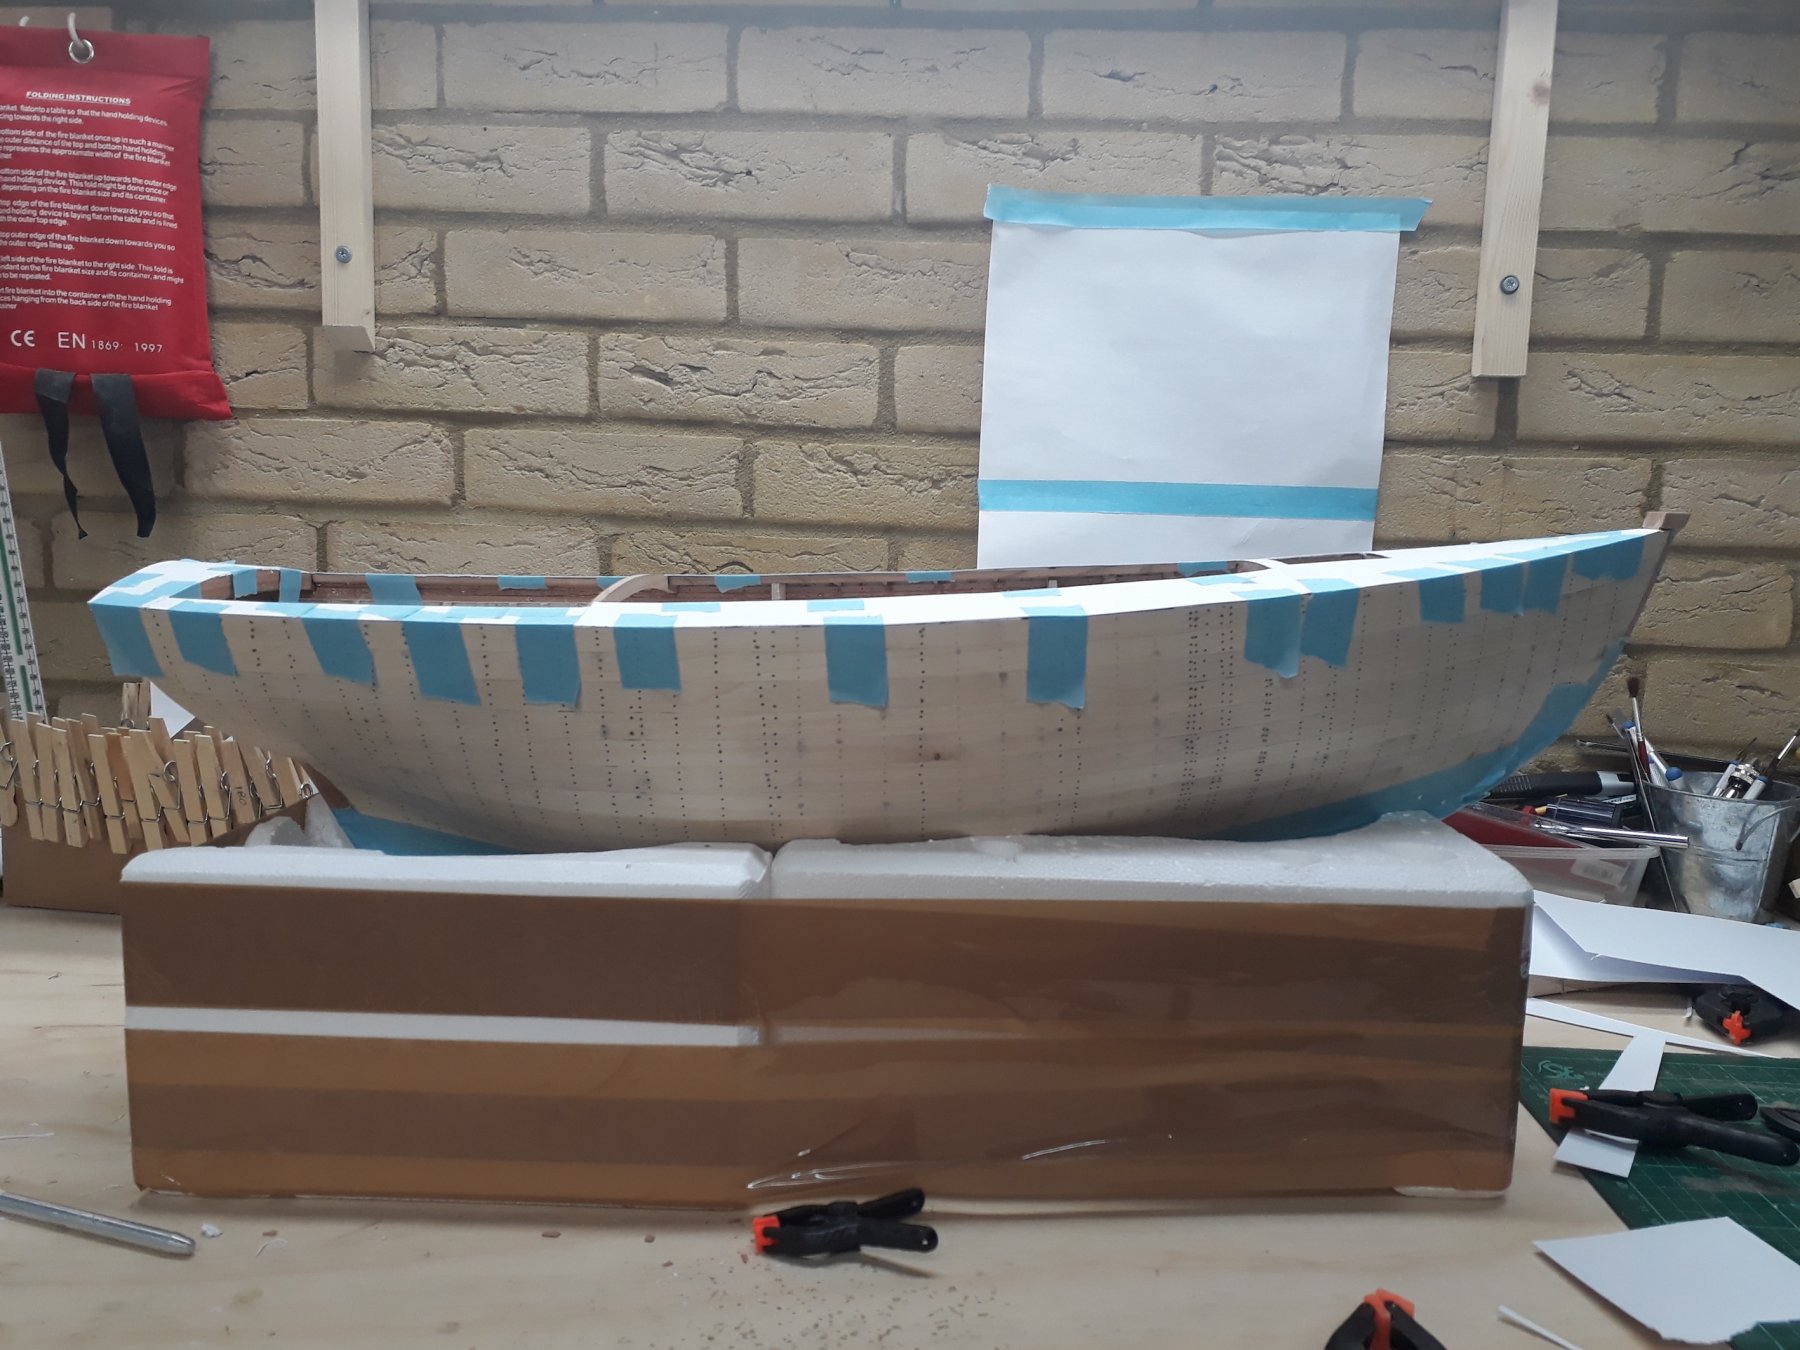
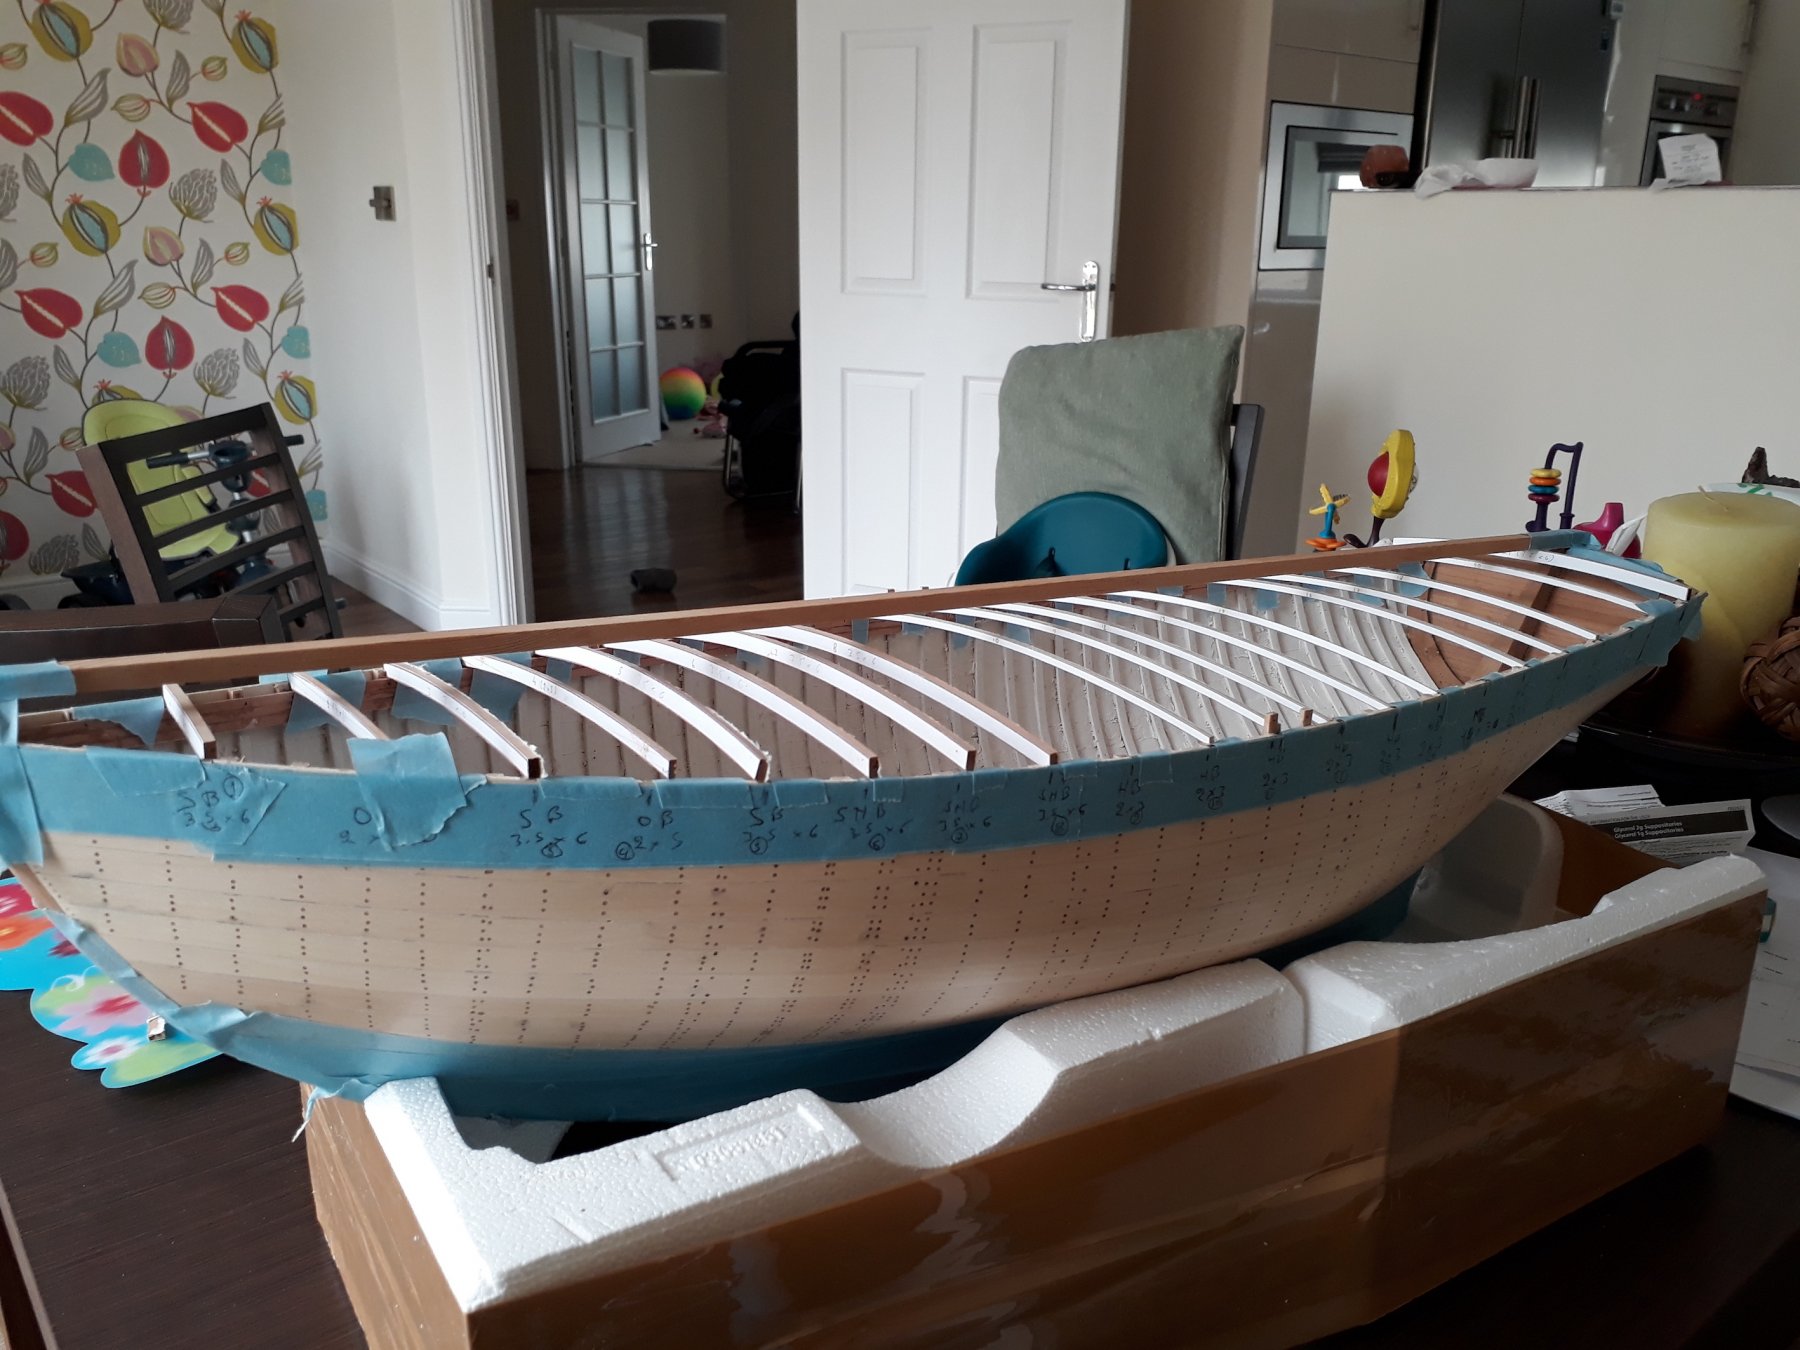
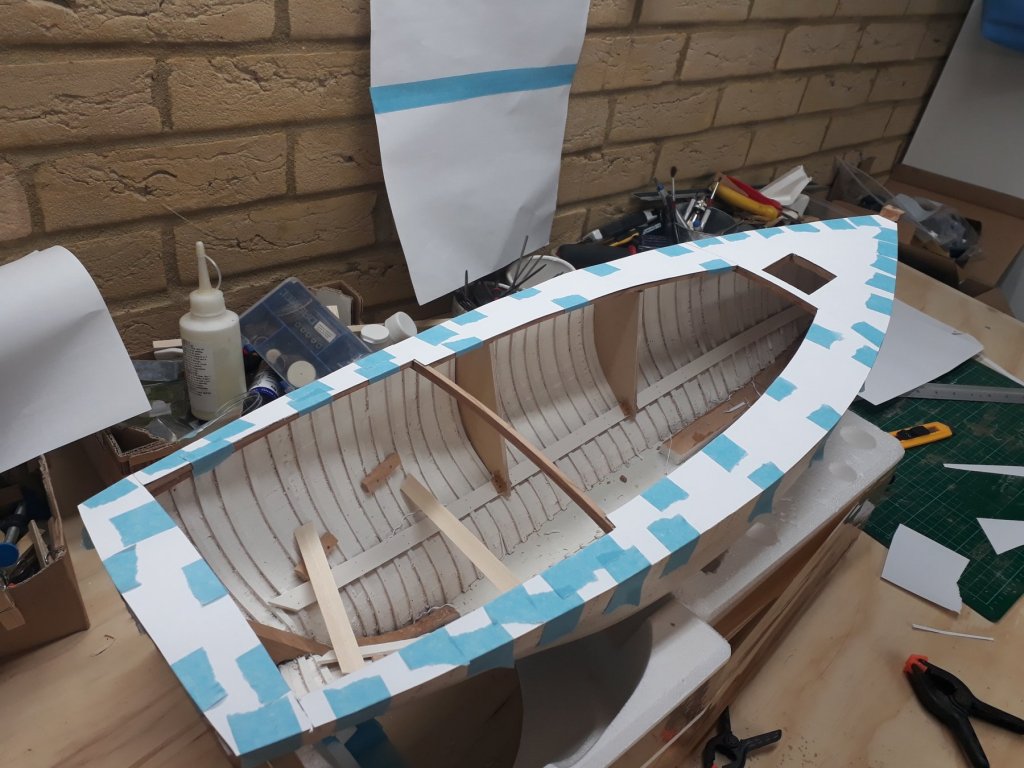
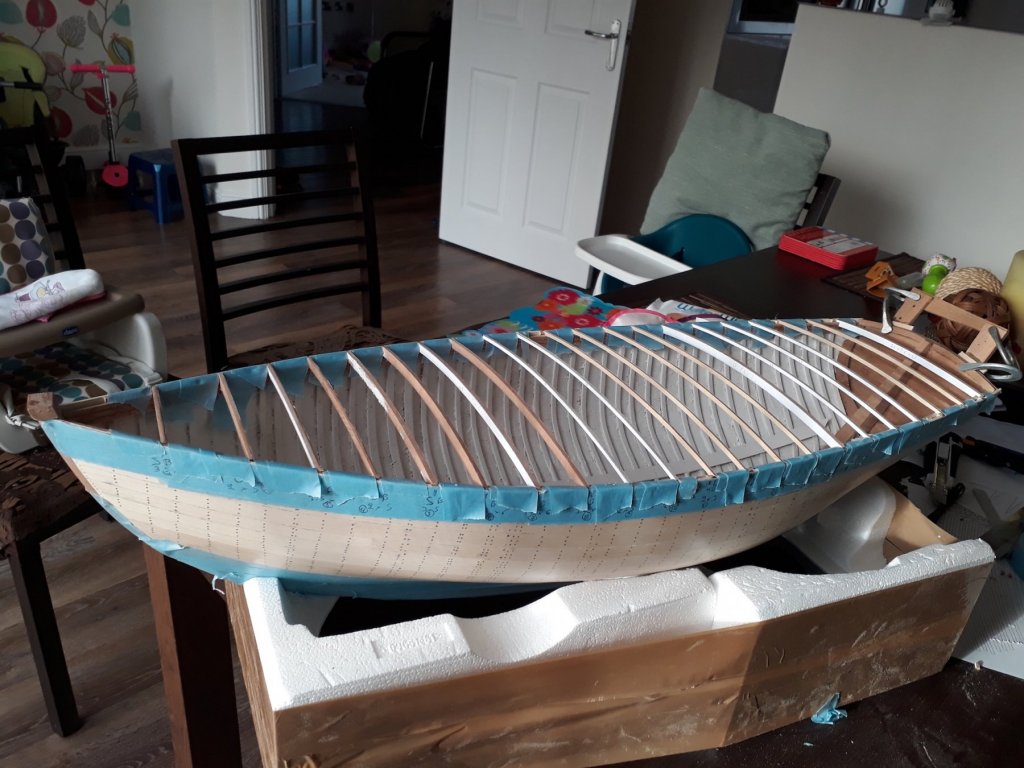
Thank you all for your comments! Druxey, you are are right about the solvents. In my experience so far it has never been a problem, maybe due to the tiny amounts of shellac that I actually have used. For this boat though, which is pretty massive, it might be an issue as I would need to saturate everything with it. I work in my garage which is full of drafts, but still best to avoid solvents. Mark, there are two issues with the deck beams. One is I did not laminate the longitudinal beams but cut them from 4 mm cherry sheet, so they are not as rigid. The second is that these beams are curved so there are significant torsion forces compared to if they were straight. The bulkheads made a huge difference. John and Patrick, much appreciated! Andy I think cotton is the way forward, it should combine well with PVA glue. How will this respond to drilling, painting or gluing anything on it, any advice from your experience? Back to the boat, I hit a bit of a landmark today! The deck beams are finished! I had to add some more timber to the hatch as in the plans it is placed too close to the cabin wall. By adding the timber there is enough width for the deck and also space for the hatch cover to be placed. I used cardboard to see how the deck would work. I think it works! The boat is level in this photo with the waterline completely horizontal Now, decisions need to be taken. 1. I need to experiment with the canvas sheath. I am not sure if the deck hardware should be placed before or after the canvas goes on. 2. I need to think how the upper end of the stem needs to be shaped. It needs to be cut and shaped but I am not sure how. 3. The stem and transom, as they are now, allow for the boat to be turned over and securely kept in place with the waterline horizontal. I can also define easily the waterline. If I do any more work on the deck I will probably loose this advantage. So the hull I think needs to be painted now. 4. For this to happen, I need to cut the propeller aperture and probably also make the rudder. 5. I will soon need to define the position and install the mast foot. I will also need to define the shape and position of the chain plates, as these probably will be placed under the rubrail. 6. The Transom needs work as well. Lots of conflicting priorities! I also have huge concerns with painting such a huge hull, painting is not my strong point. I will spray Humbrol primer on and then I think I will use Humbrol enamel, hand brushing! Then enamel varnish will be brushed on. Hand brushing such a large surface will 99% lead to a disaster but needs to be done and I do not have access to airbrushing or funds to set it up. This will be messy! Regards


-
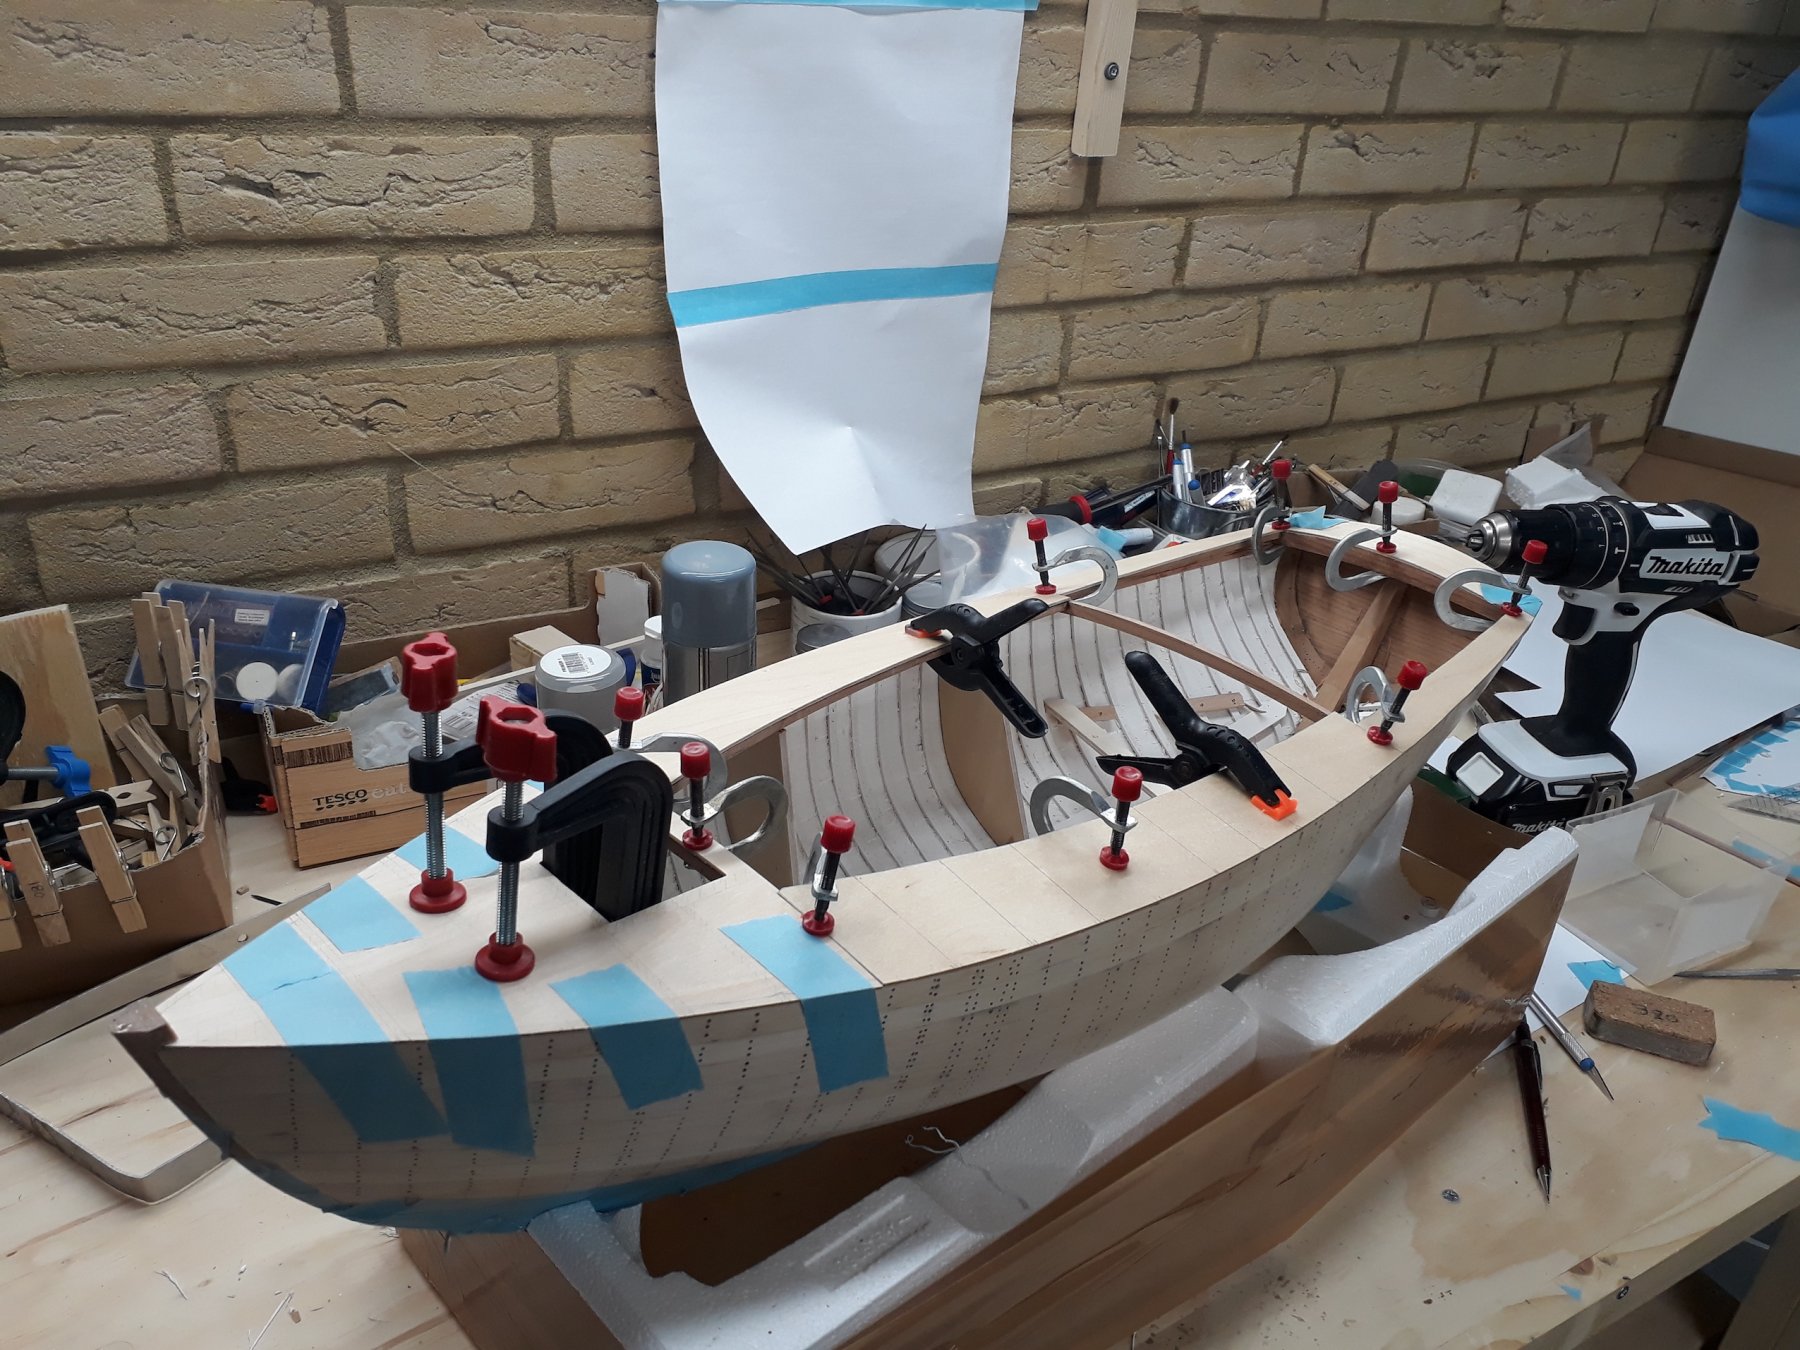
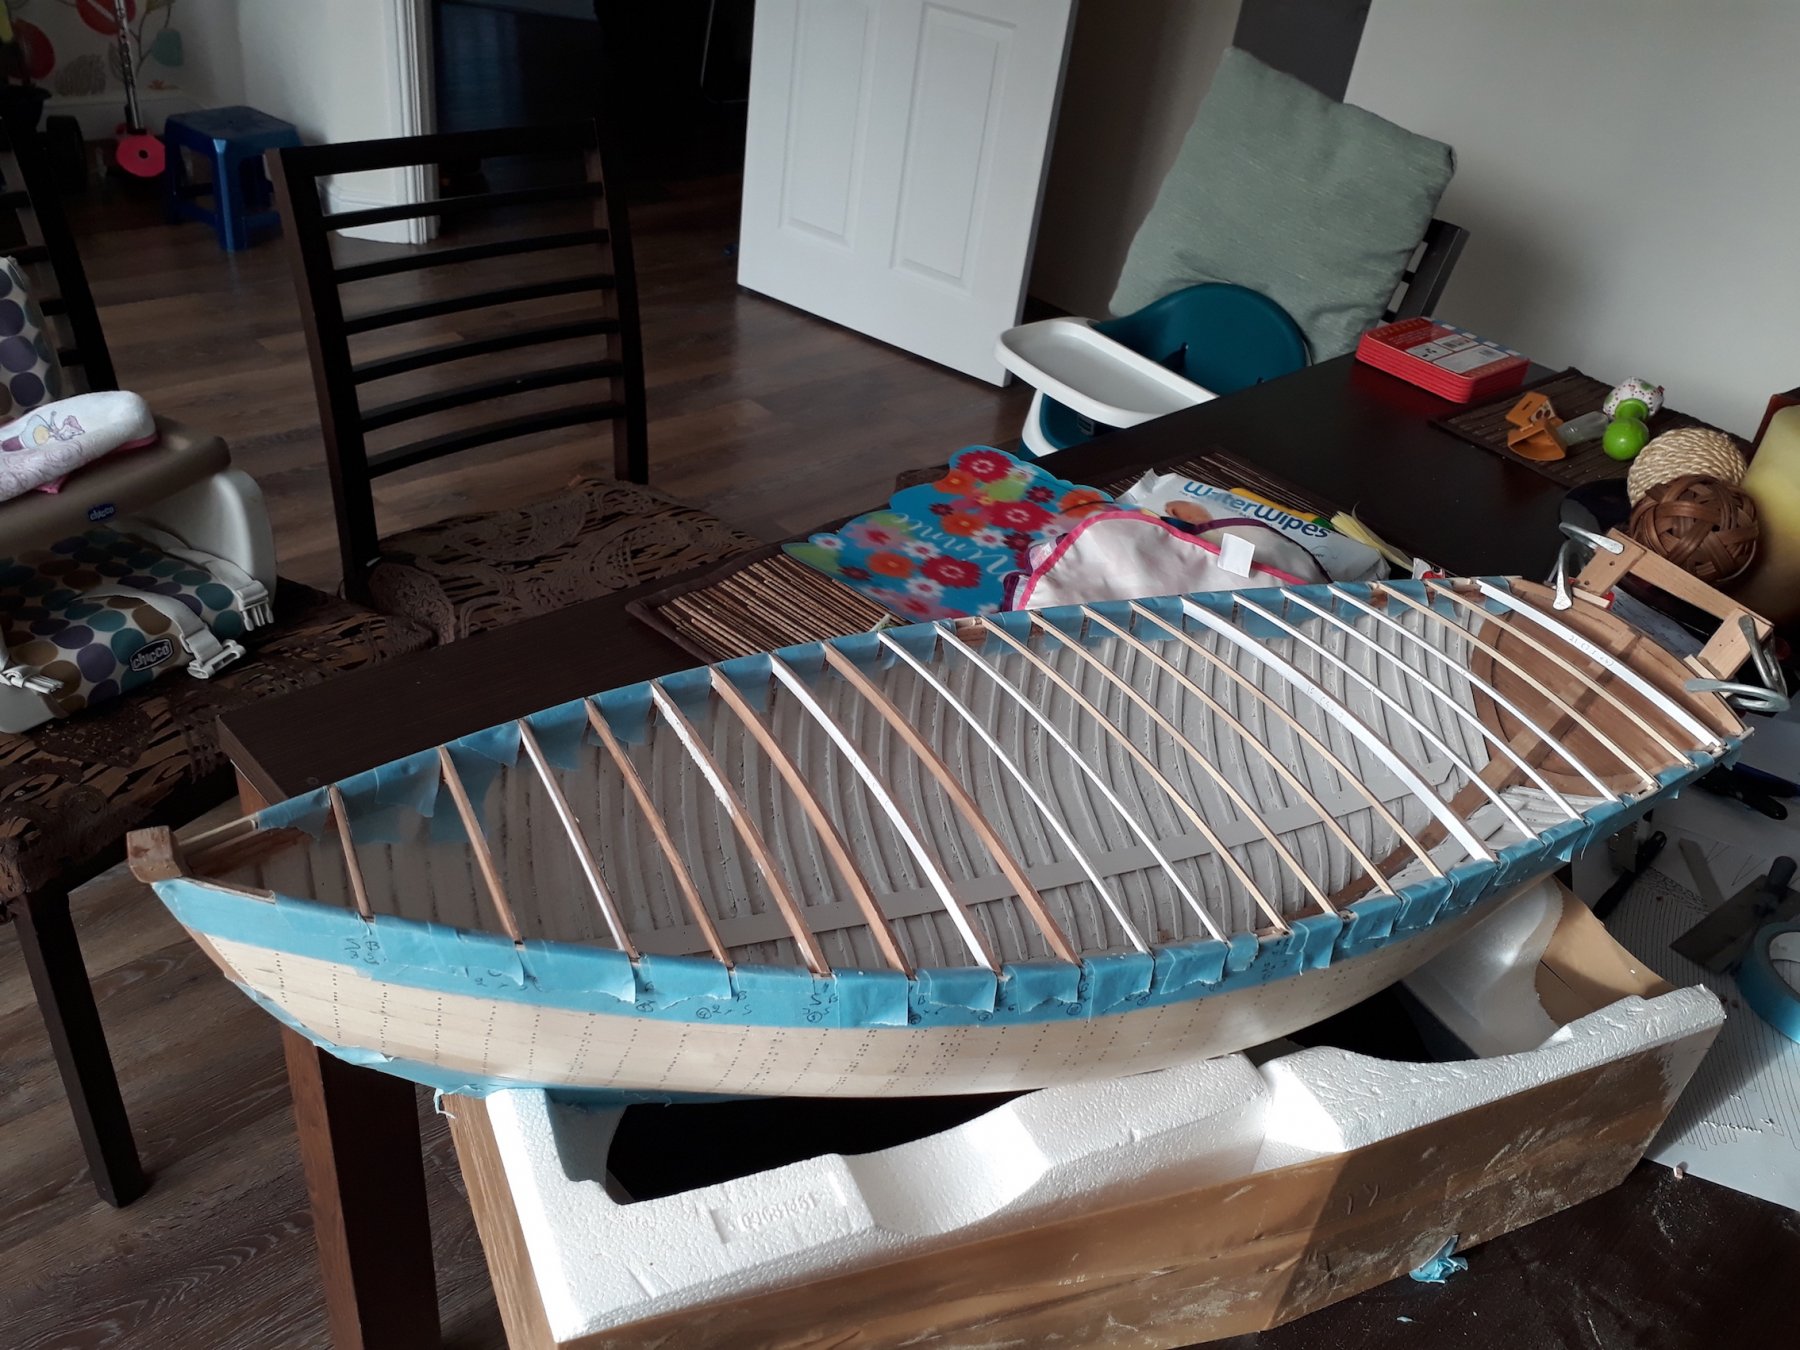
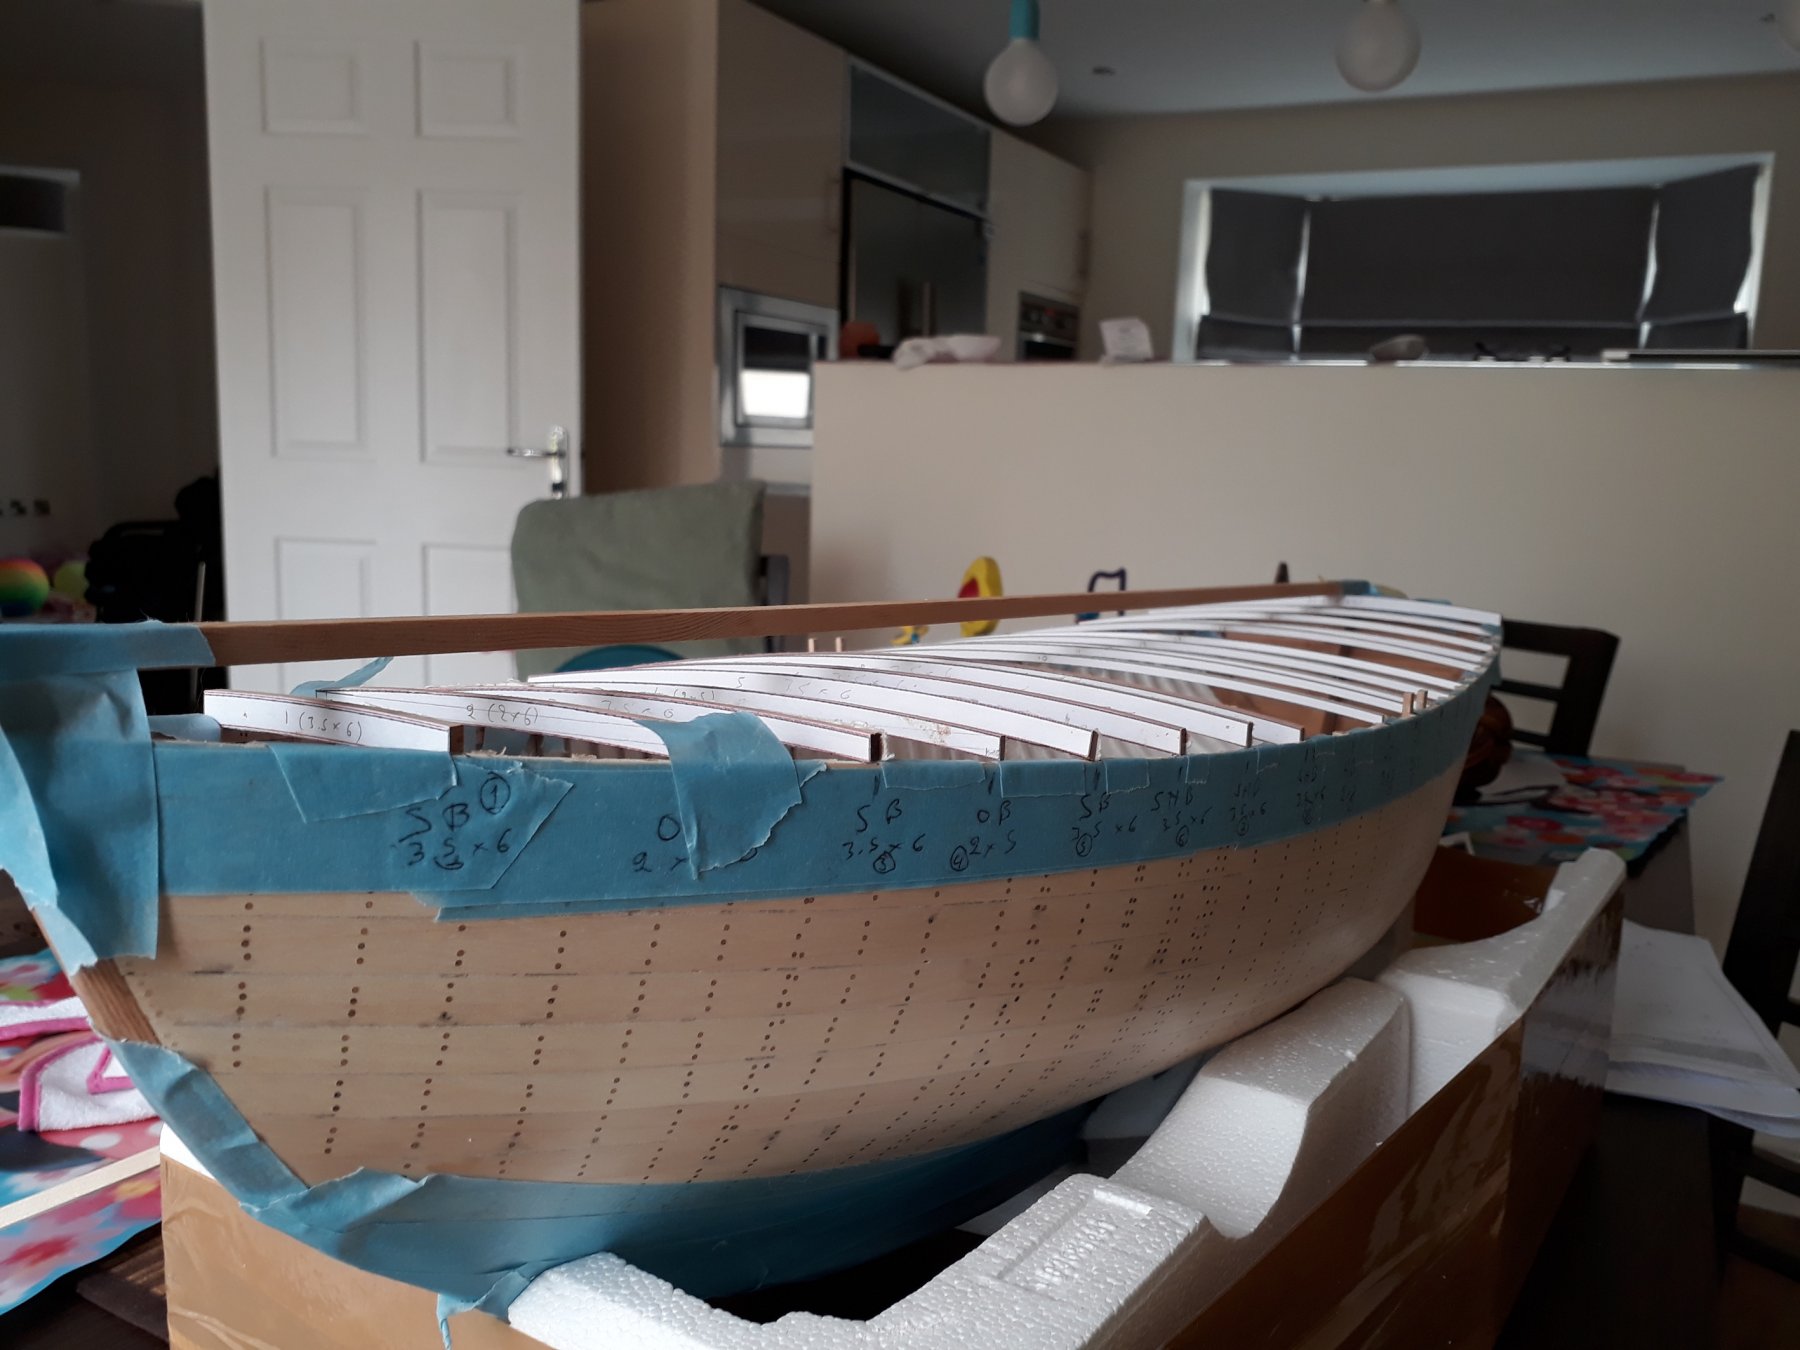
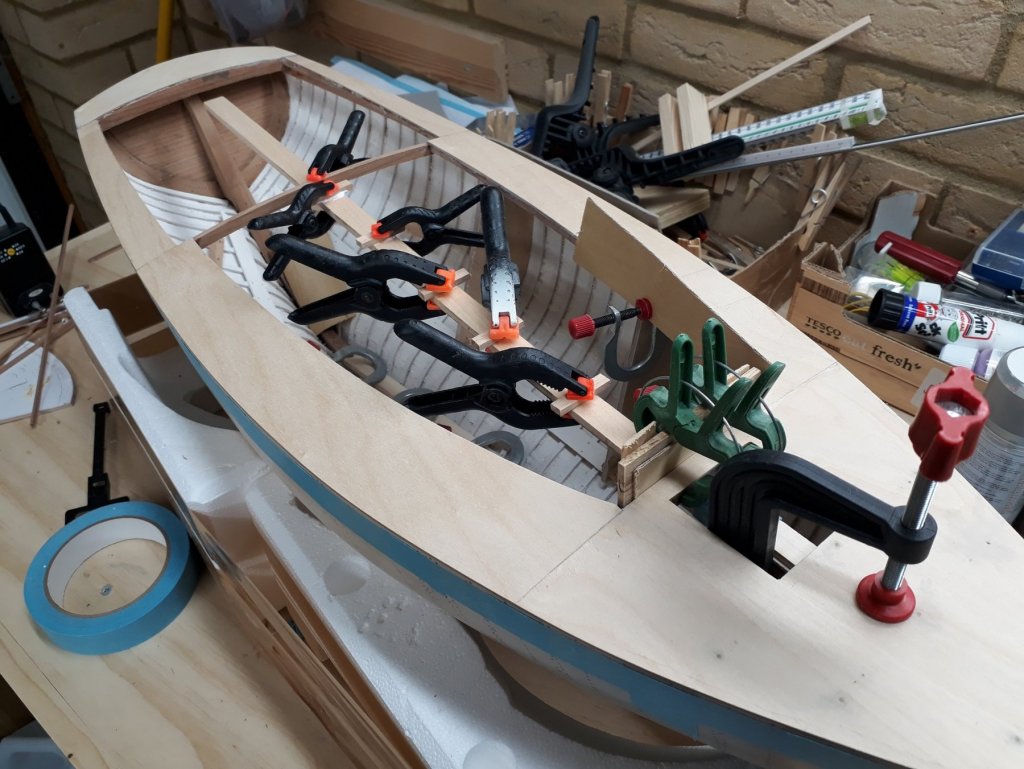
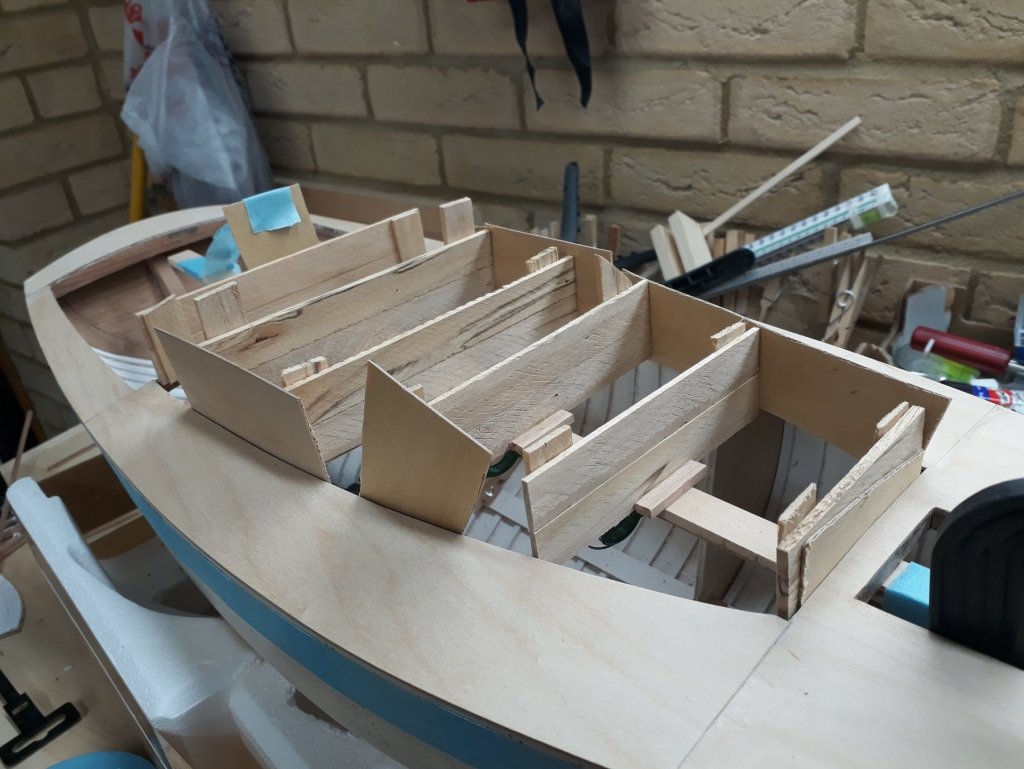
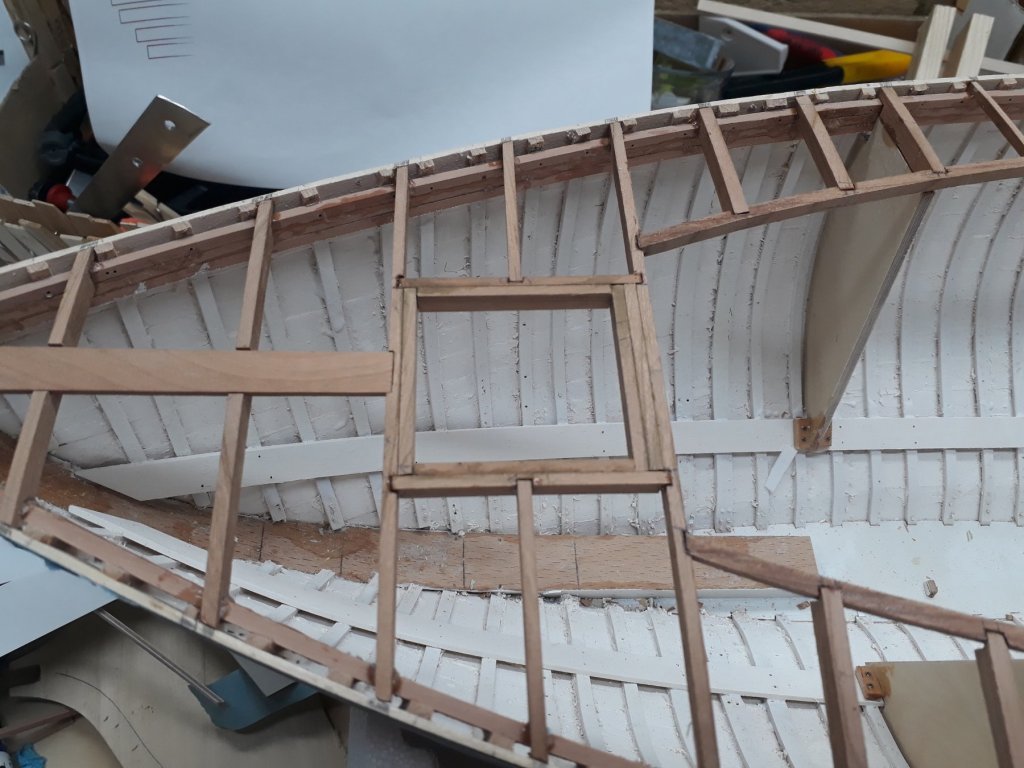
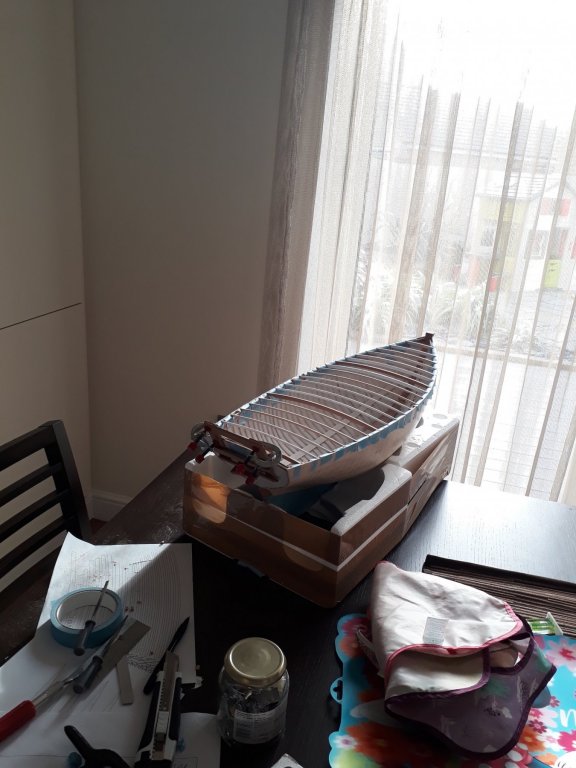
Dear all Time for a quick update. Problems are mounting up both in work and personal life so boat building will likely slow down even further. Druxey, Silkspan or the equivalents appears a good option. Someone used Shellac to glue silk fabric down, wonder if it would work. This has the advantage that can easily be removed with methylated spirits. Some testing will be needed I think. Progress to date: I glued some supports for the cockpit floor. I also finished most of the deck beams. Everything is properly notched and glued with epoxy, took a long time to do it! There are still a few things to do and also to replace the 7th beam from the bow that currently goes across. I used this to temporarily support things but needs to be replaced. However, I realised that the structure is far from rigid because there are no structural bulkheads as I decided not to work on the interior. I used the laminated plywood from the discarded temporary frames to make 4 bulkheads, when epoxied in place should make the deck beams rock solid. It needs to be as during deck fitting it will certainly take some abuse. I must admit, the boat is starting to look nice!
-
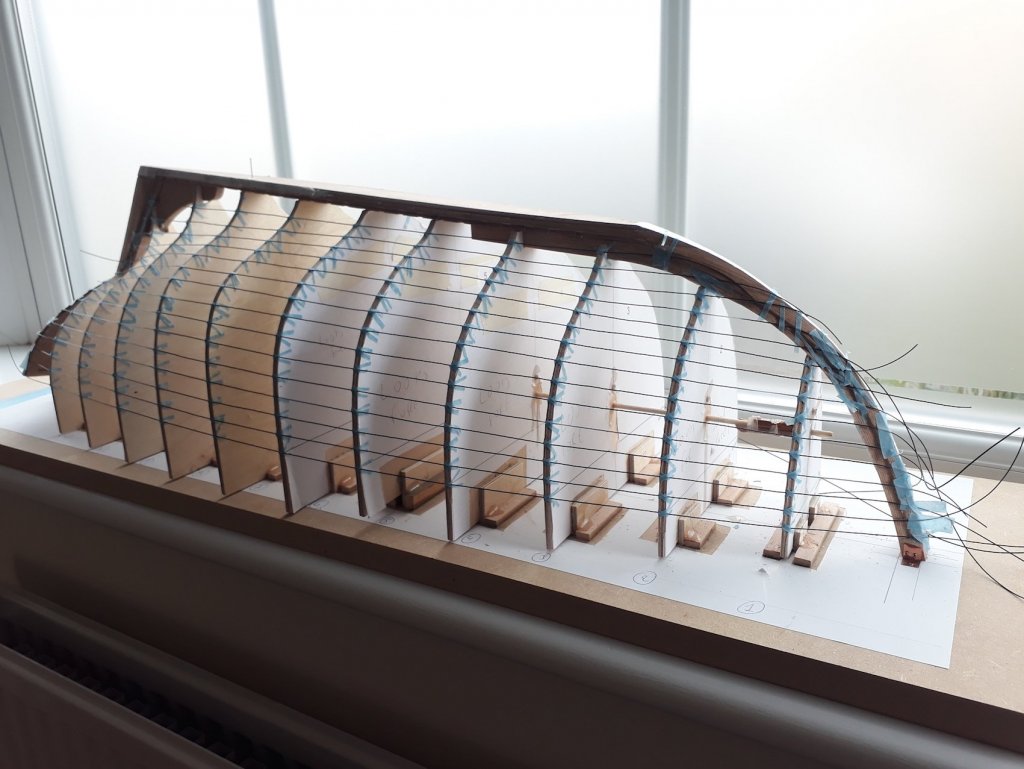
Yes we ve all been there. I remember spending days to laminate and sand a stem in 1:12, only to realise I had sanded the wrong side... Looking at your photos again Hakan, it looks like the garboard needs to rise very little in the bow and be quite narrow and that in the original boat, the bottom planks are heavily spilled to achieve this wide beam. Why don't you try using battens? You can divide the frame in maximum beam to get the widths, as you have done, but the battens also will allow for a fair curve and also will show you where the planks should lie in the rest of the frames and you ll be able to define the start and finish points at the bow/stern. You could use light black fishing line to see how things work and then use card to get the patterns. Just an example Regards
-
Very nice! I very much like the simplicity, just light colour planks on a dark colour spine. And a very wide beam! Does not look like a practice run really. Regarding clinker planking, I think the main advantage is that the overlaps create longitudinal stringers that run the length of the boat adding great strength for weight. Regarding water tightness, I think I remember reading some paper that rated both carvel and clinker as poor. Adding longitudinal stringers internally over the joints of the planks in carvel faired a bit better but only the much more modern cold molded and stitch/plywood techniques were really waterproof.
-
A lathe for masts and spars
vaddoc replied to Don Quixote's topic in Modeling tools and Workshop Equipment
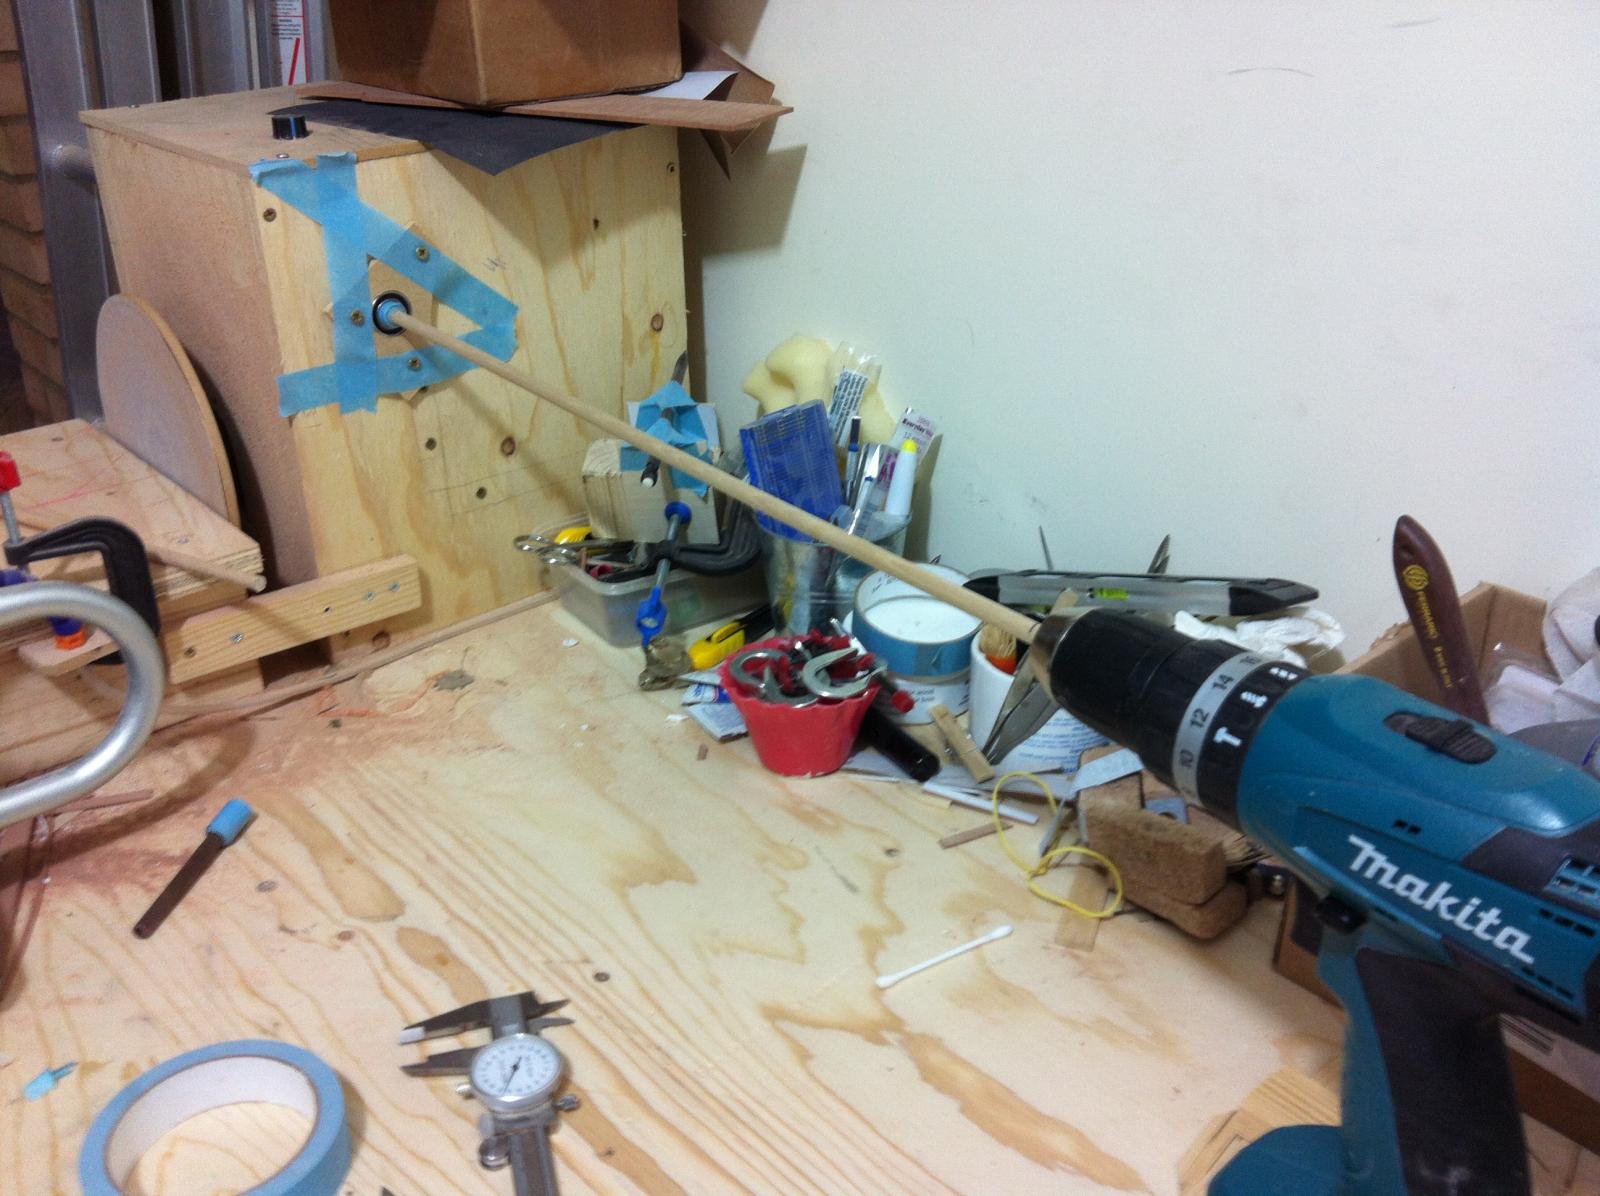
Last time I used a drill and a bearing. The drill was on a simple wooden support to keep the chuck horizontal and the bearing was within a piece of scrap MDF screwed to my disc sander. Worked pretty well.
-
Dear Patrick, I have enjoyed following Shadow very much but the very last photo is amazing. This is a very busy model! I ll wait the "formal" announcement of completion before I congratulate you but I ll also be waiting for your next project, twin hull if I am not mistaken... I ll be watching from the back rows Vaddoc
-
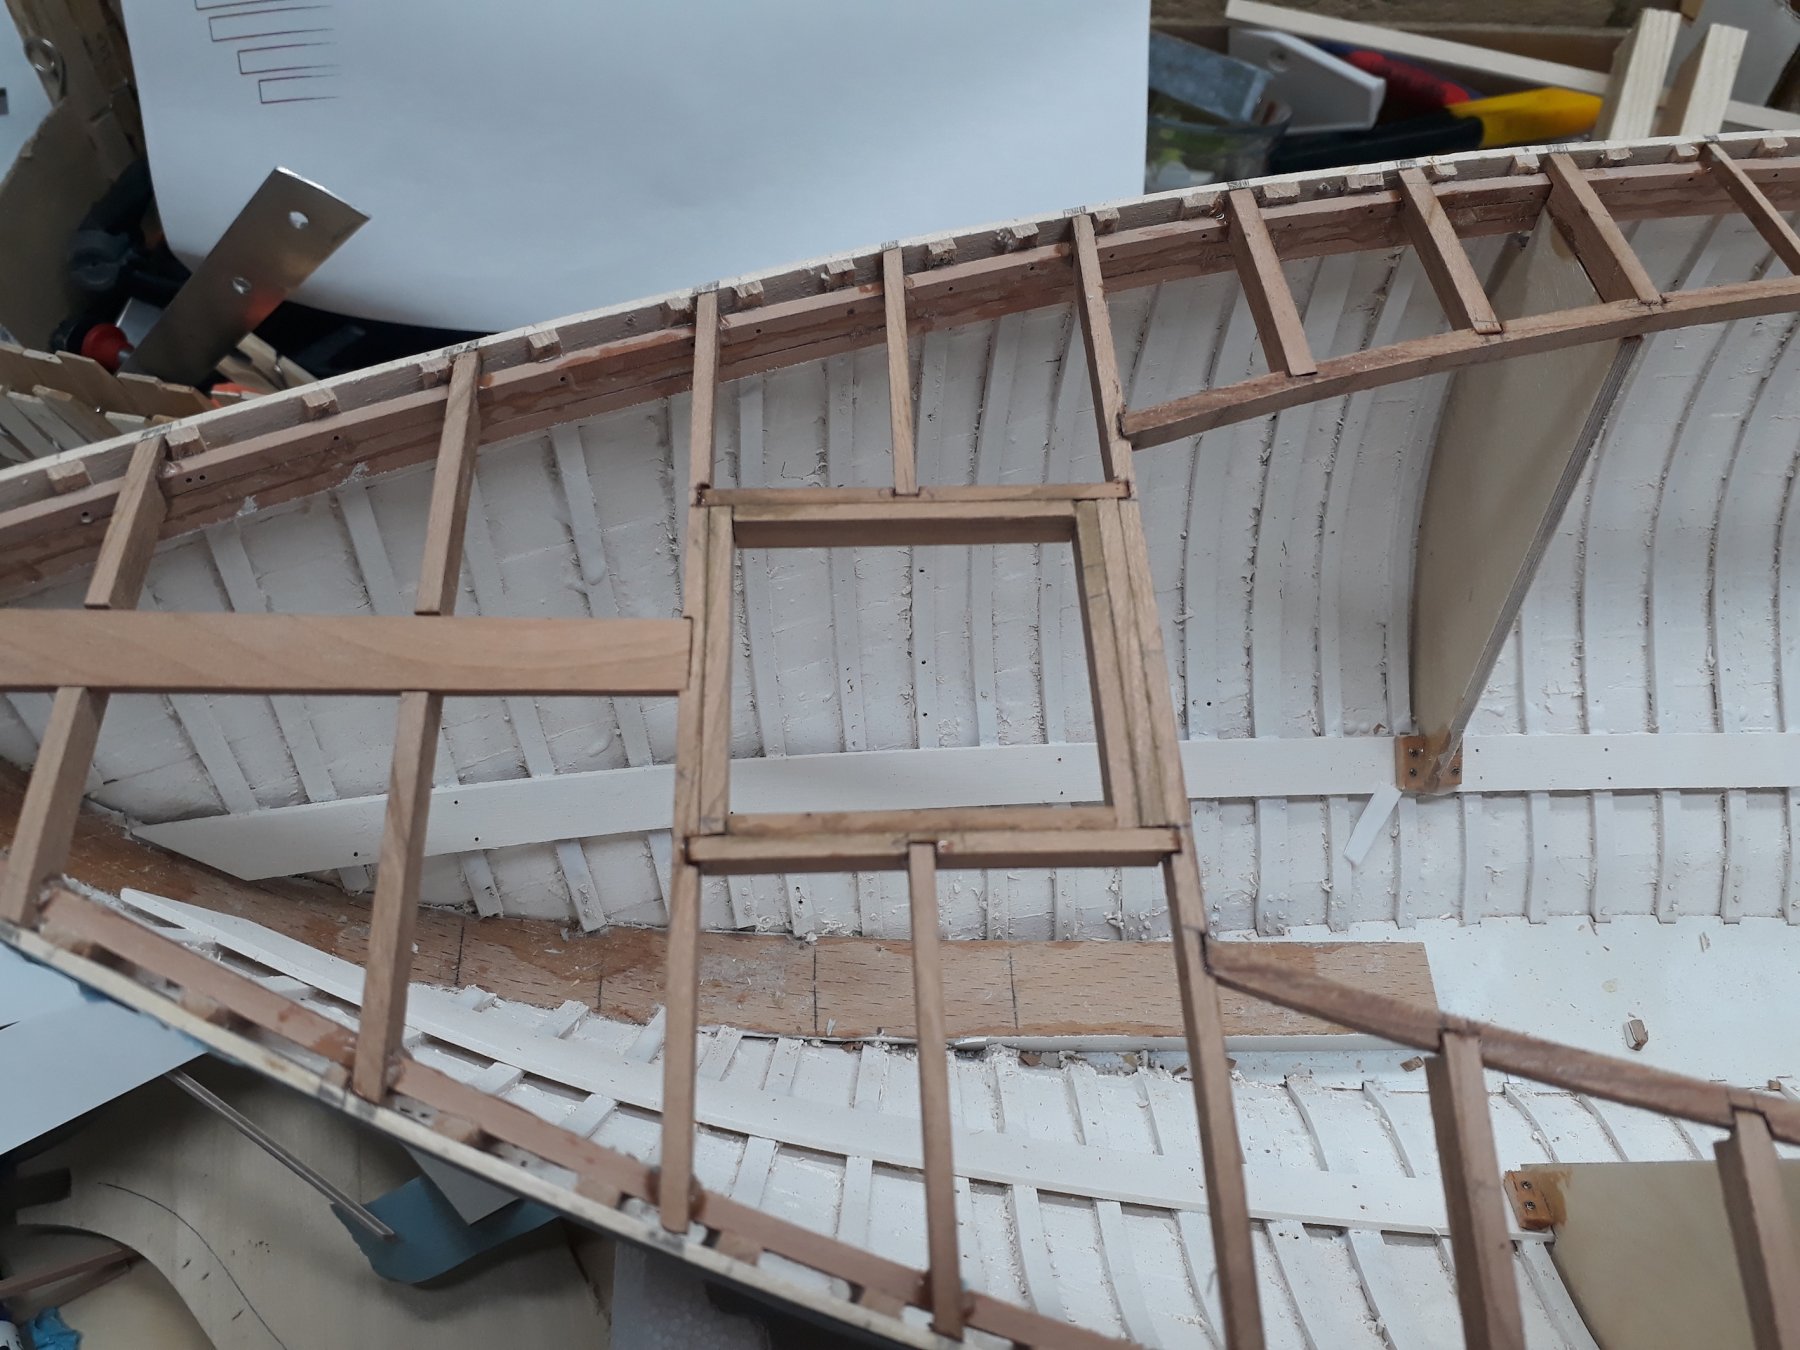
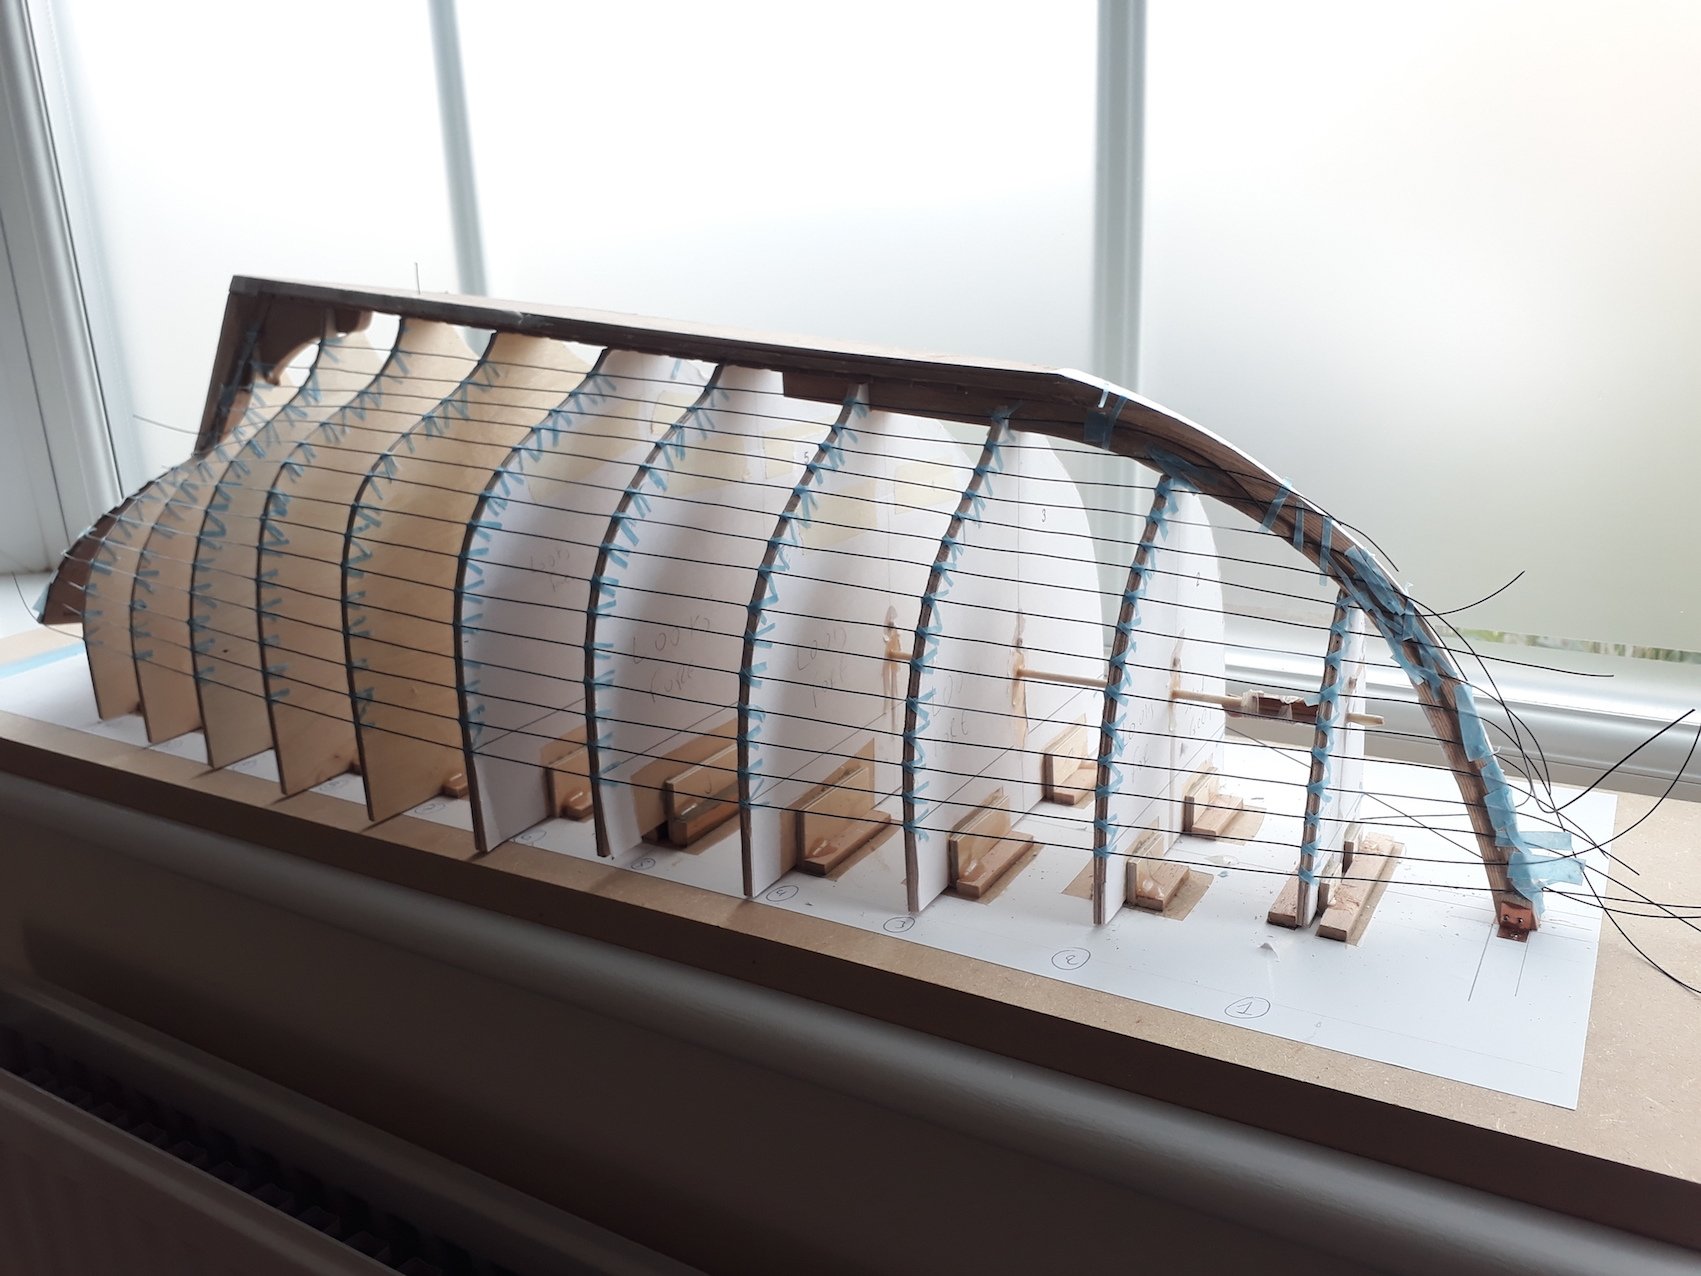
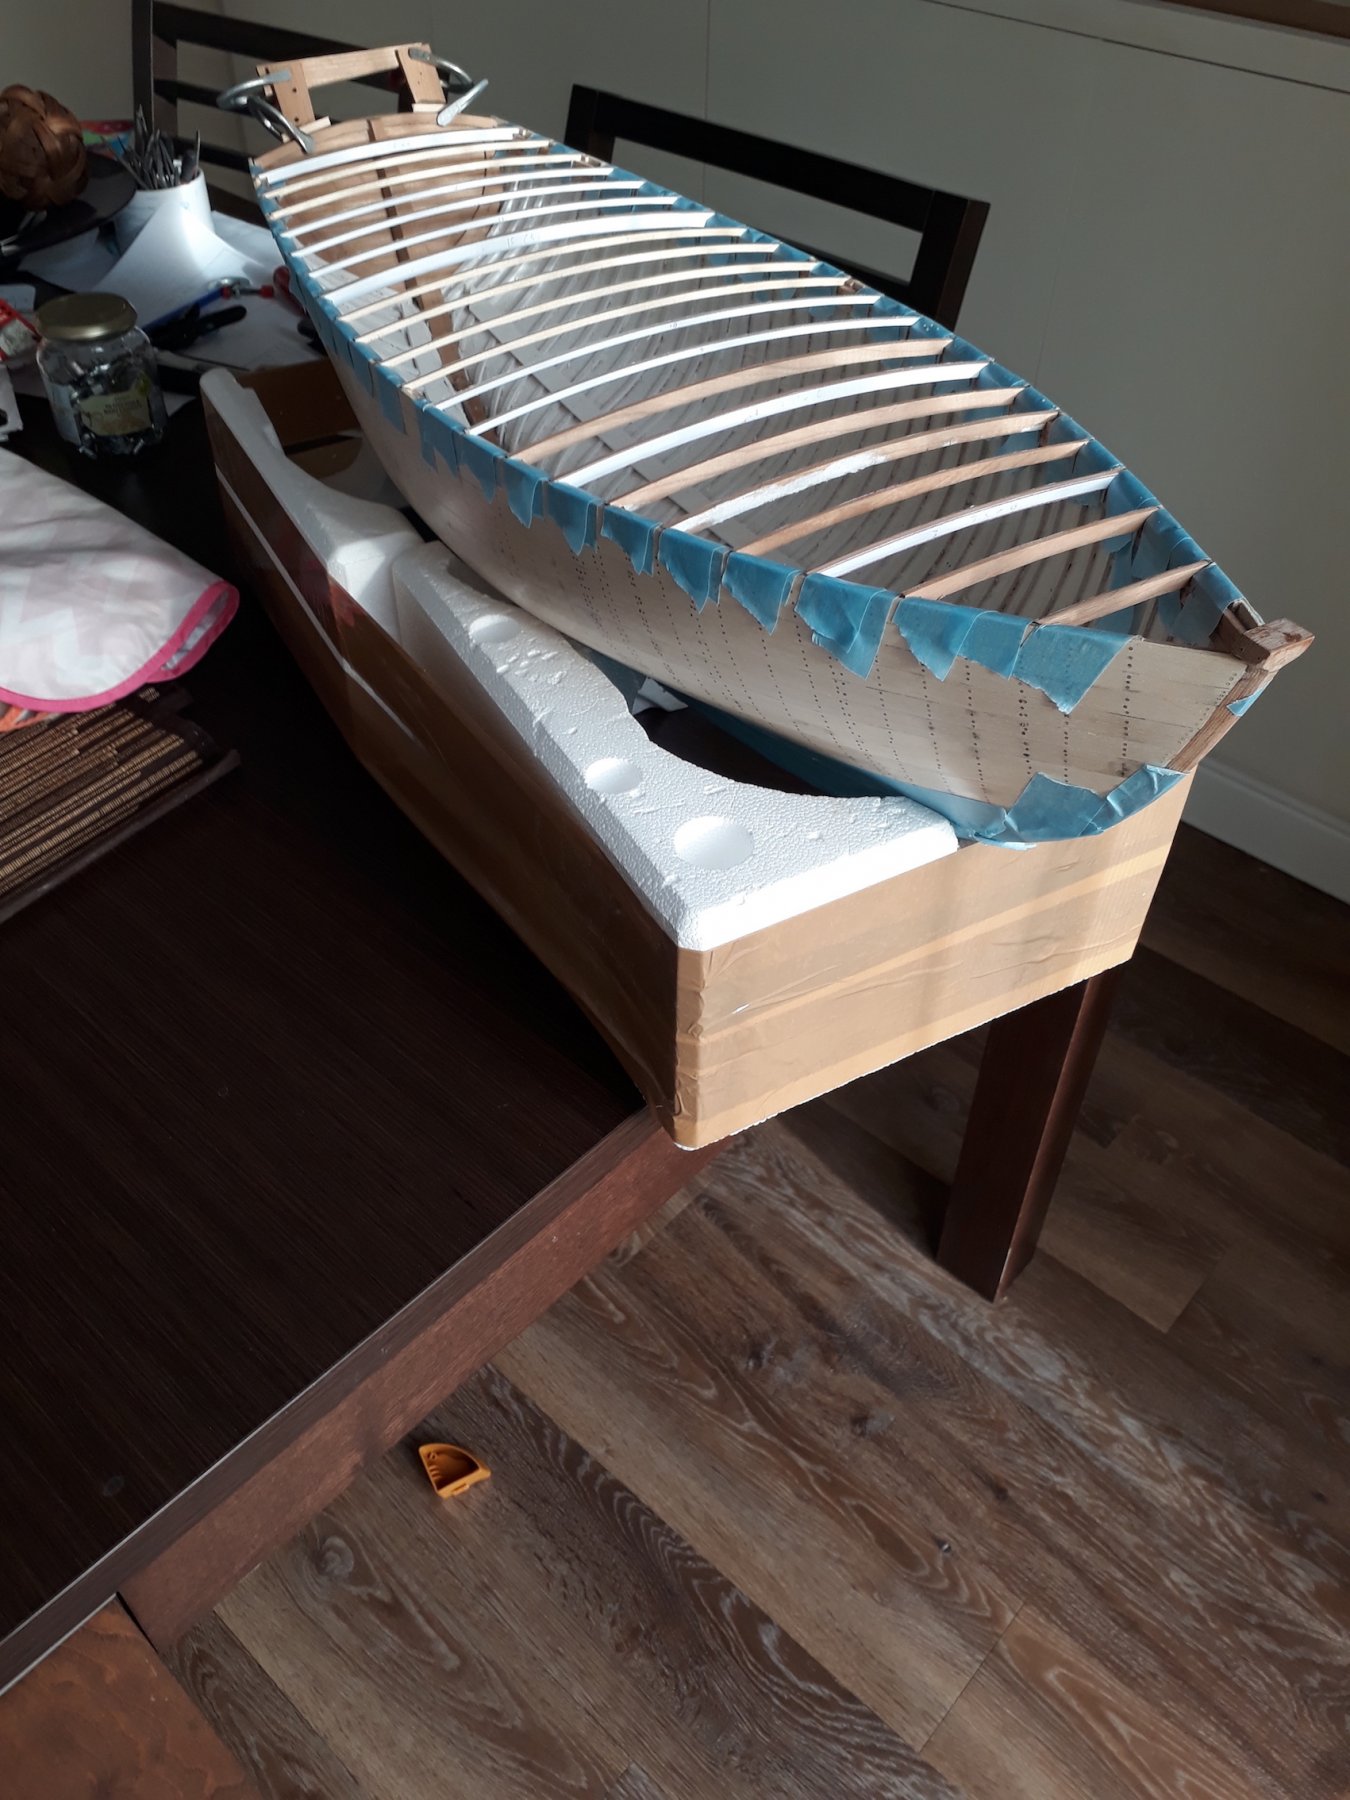
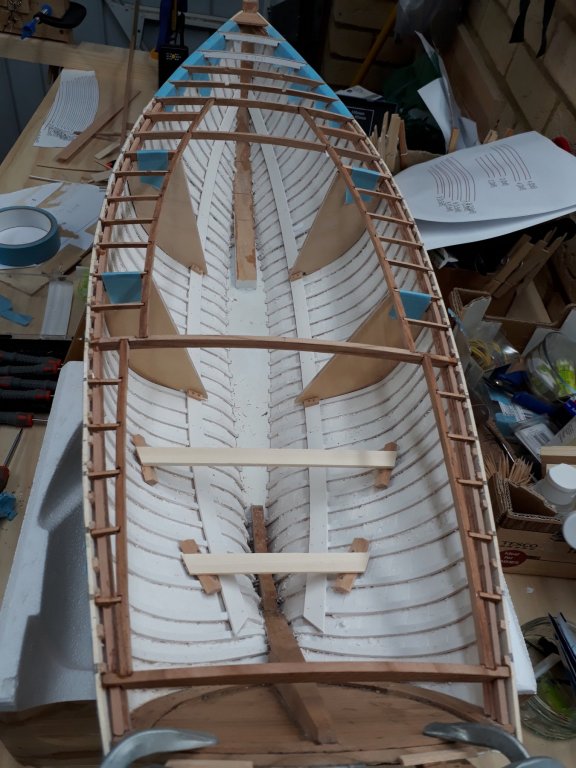
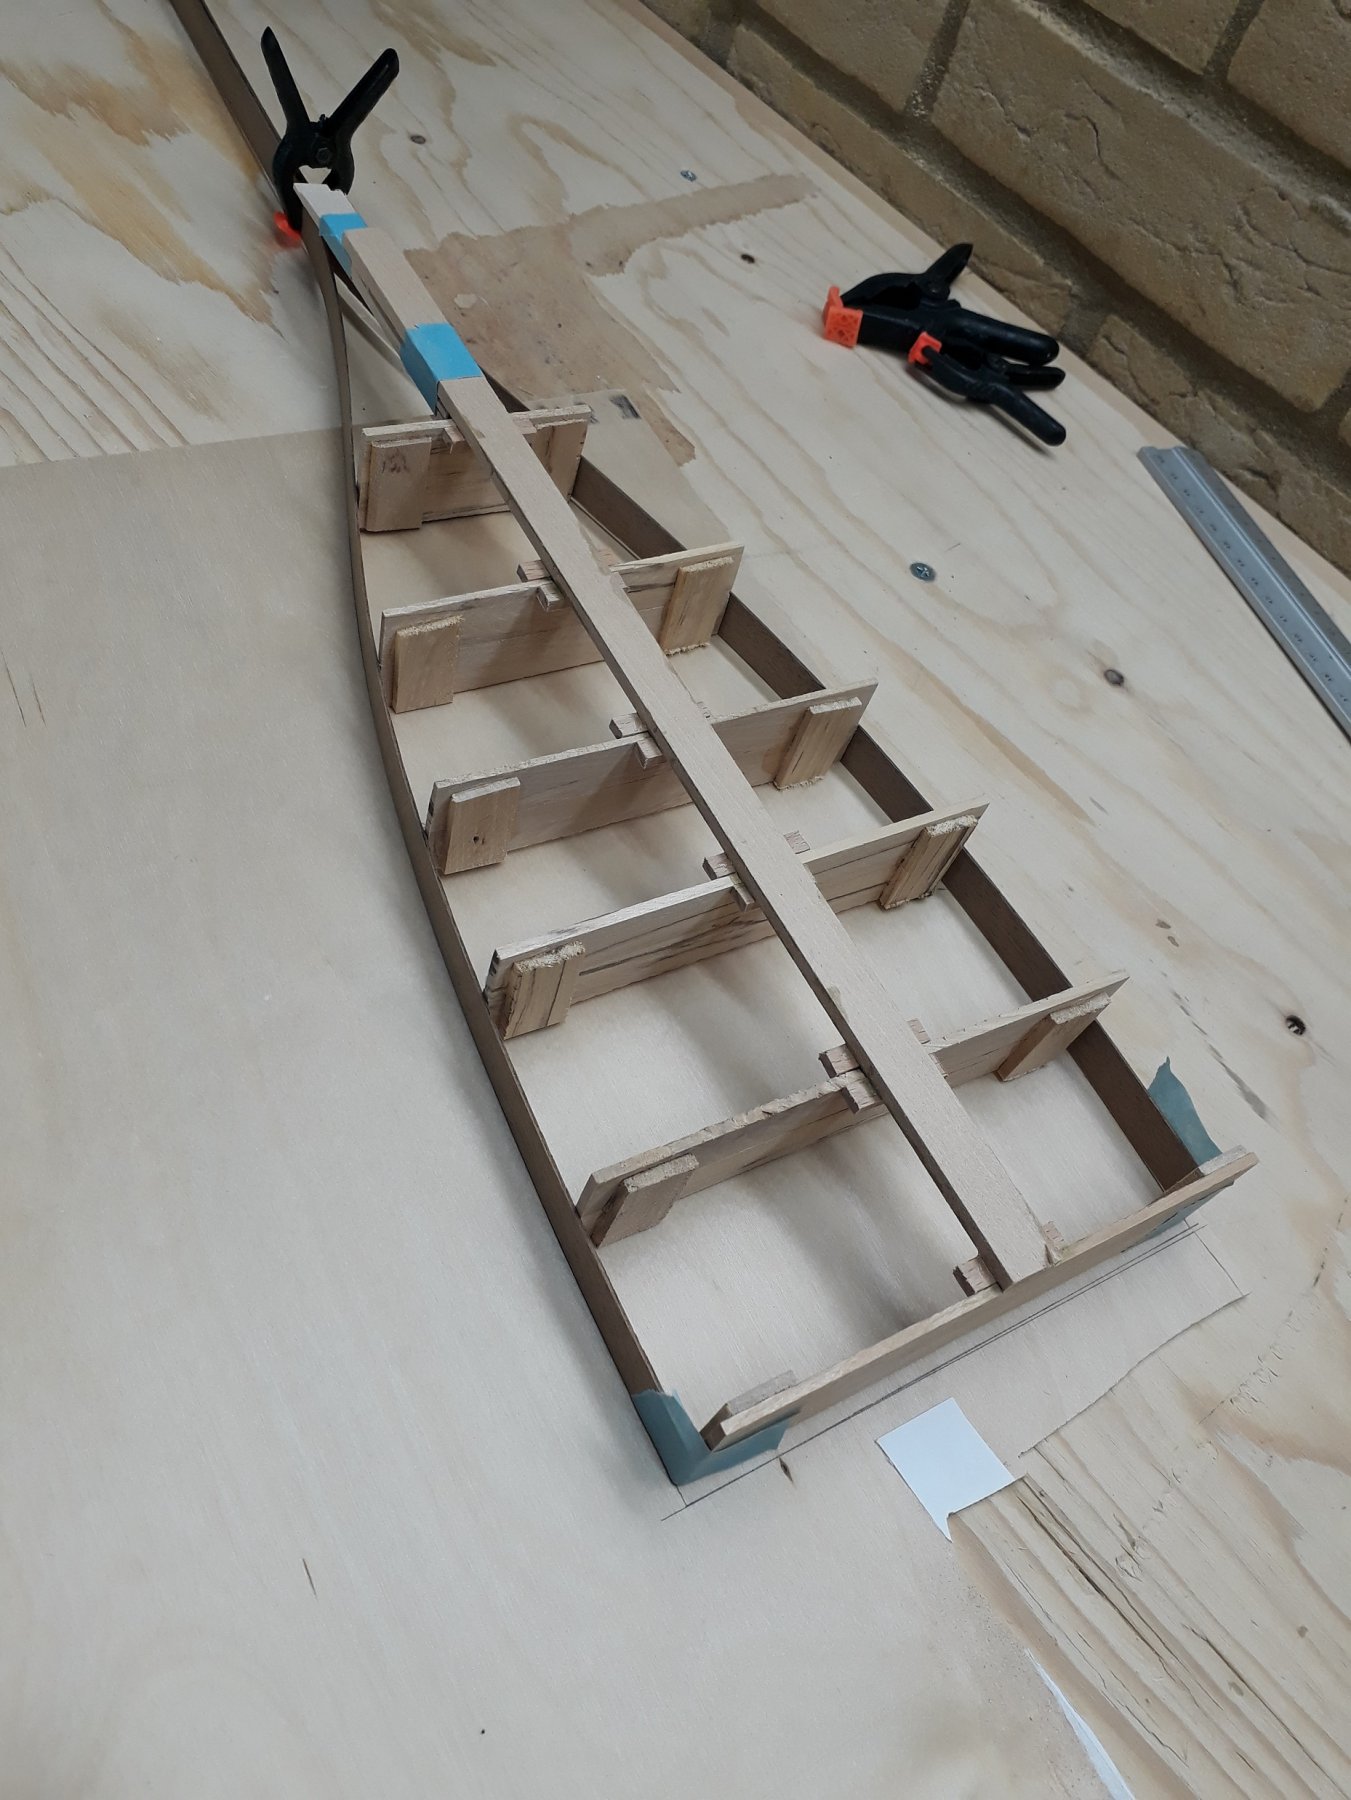
Druxey, this is a small boat with limited deck space, it makes more sense in both the model and the real boat to use plywood. Having said that, planks would be much more versatile. I know very little about canvas sheathing and have never seen it in a model! I think that sanding the plywood with a relatively rough grade and painting straight without sealer or primer, might imitate canvas? Mark, for this boat I am drawing knowledge and ideas from the blog of a couple that built a cold molded sailboat (the chap is a cabinet maker). Their blog is fantastic, worth checking out on http://northseabuilder.blogspot.co.uk. They used 2 layers of 1/4 inch ply, the first one in manageable pieces scarfed over beams and the second one laminated on top. Then they put on the canvas which also covered the deck to sheer joint, ending in a groove. Lovely! EDIT: Fibreglass was used, not canvas! I might do something similar, in 1/10 scale it calls for 0.6 mm ply (0.8 mm much easier to find). 1.5 mm or 2 mm will be very stiff I think. I have used 1 mm screws extensively so far, must have gone through more than 500. Indeed, this double curve is something ply will not really want to do! The boat will have a cabin and I would like all deck components to be made of shiny varnished beautiful wood. This poor little boat does not have a lot more to boast of, its a blue collar boat... On a different note, I finished all cross beams, most temporary, some the actual beams. Isn't this poetry in wood? The structure attached to the transom is just a jig to allow me to find the horizontal level, to make sure beams lie vertically and to later on define the waterline. There is a big problem though. I should have left the transom oversized to allow space for the gunwales. I did not though so it ends up flush with the sheer. I am not sure how to correct this, I think I should define the projection of the deck to the Transom and cut the excess so that the deck rides on the transom. Then it will need gunwale and a rubric, rather difficult to make due to all the angles and curves. Hope this makes sense!


-
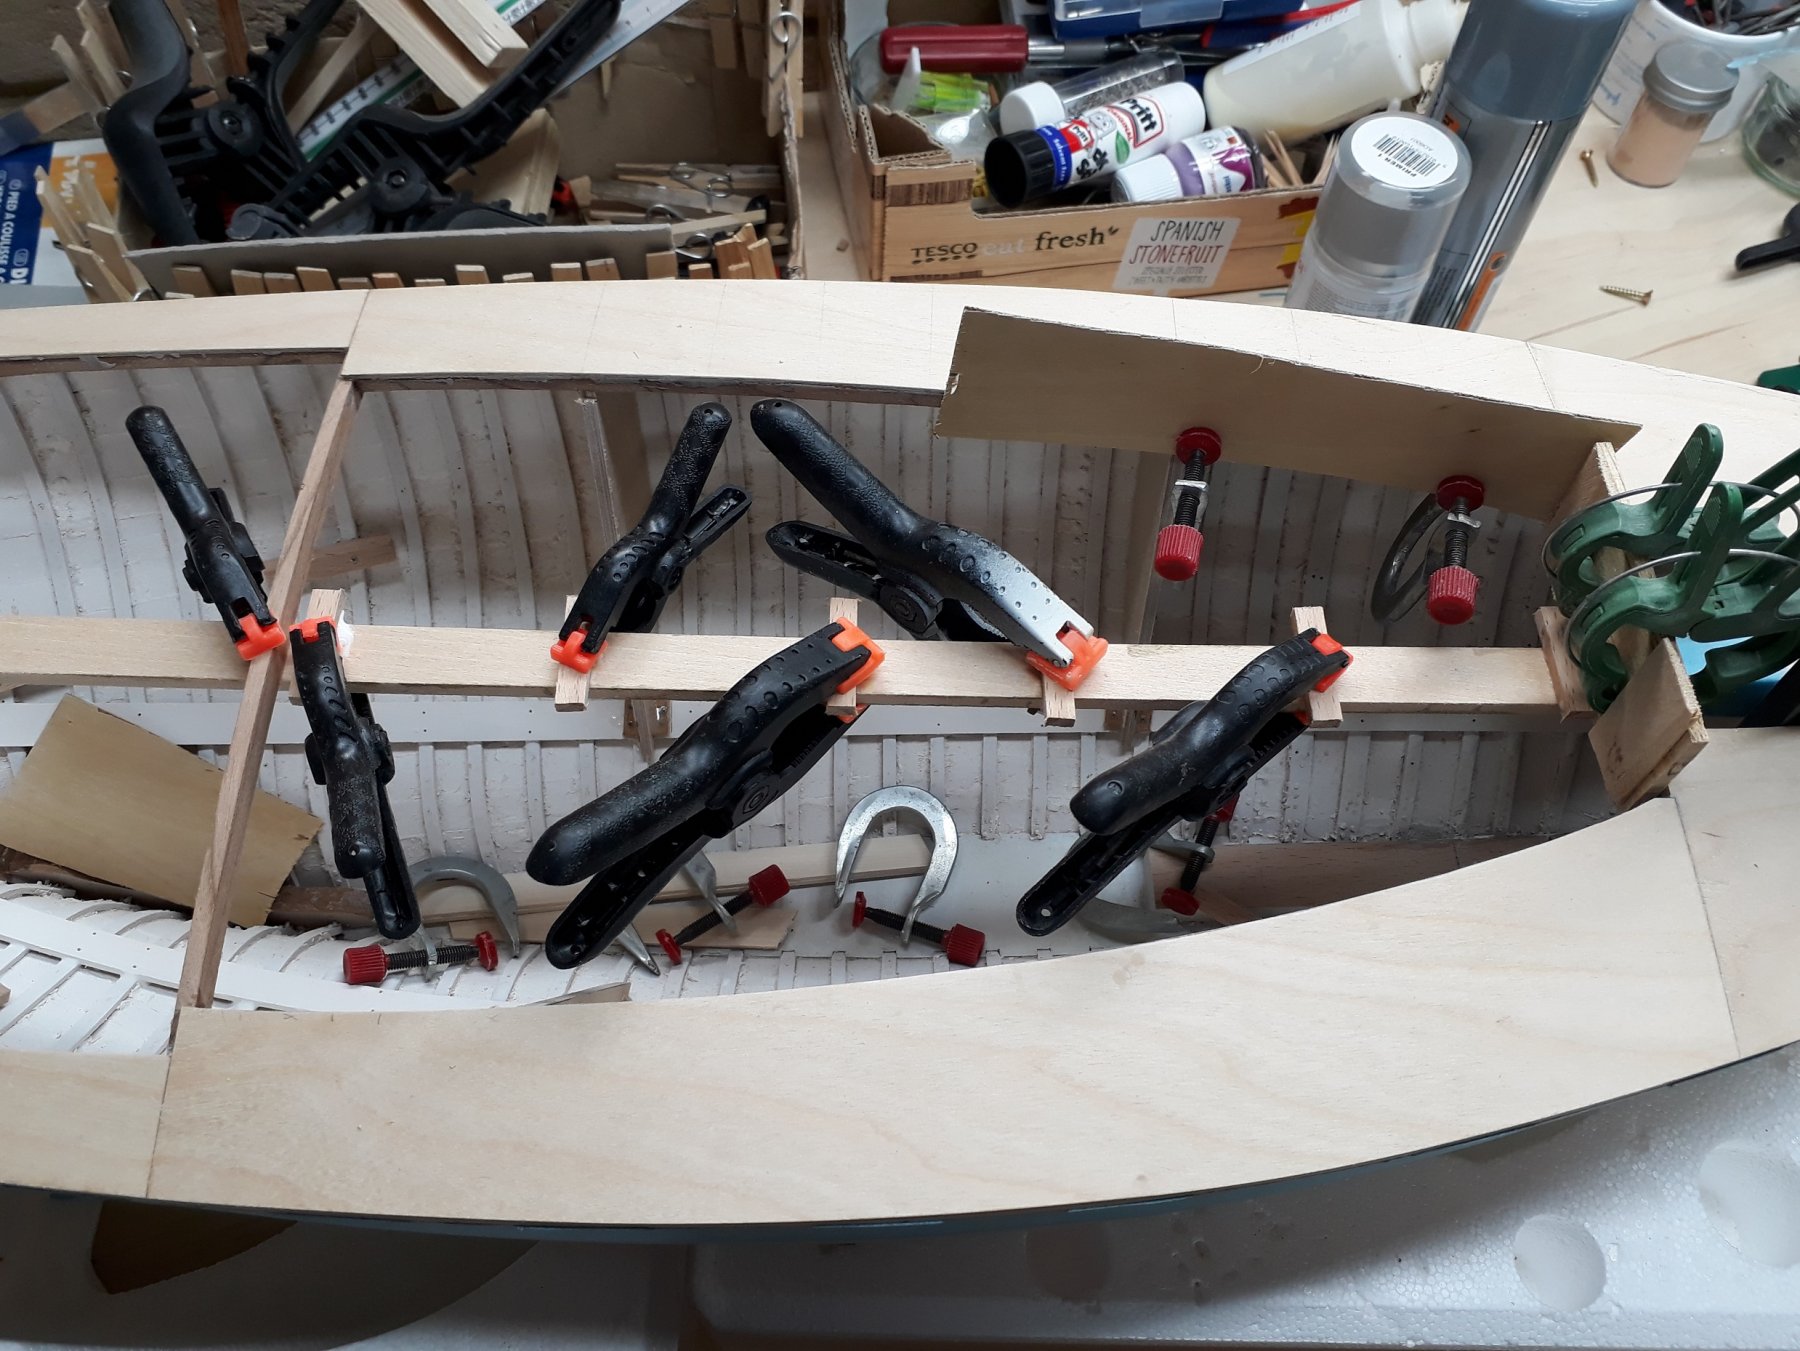
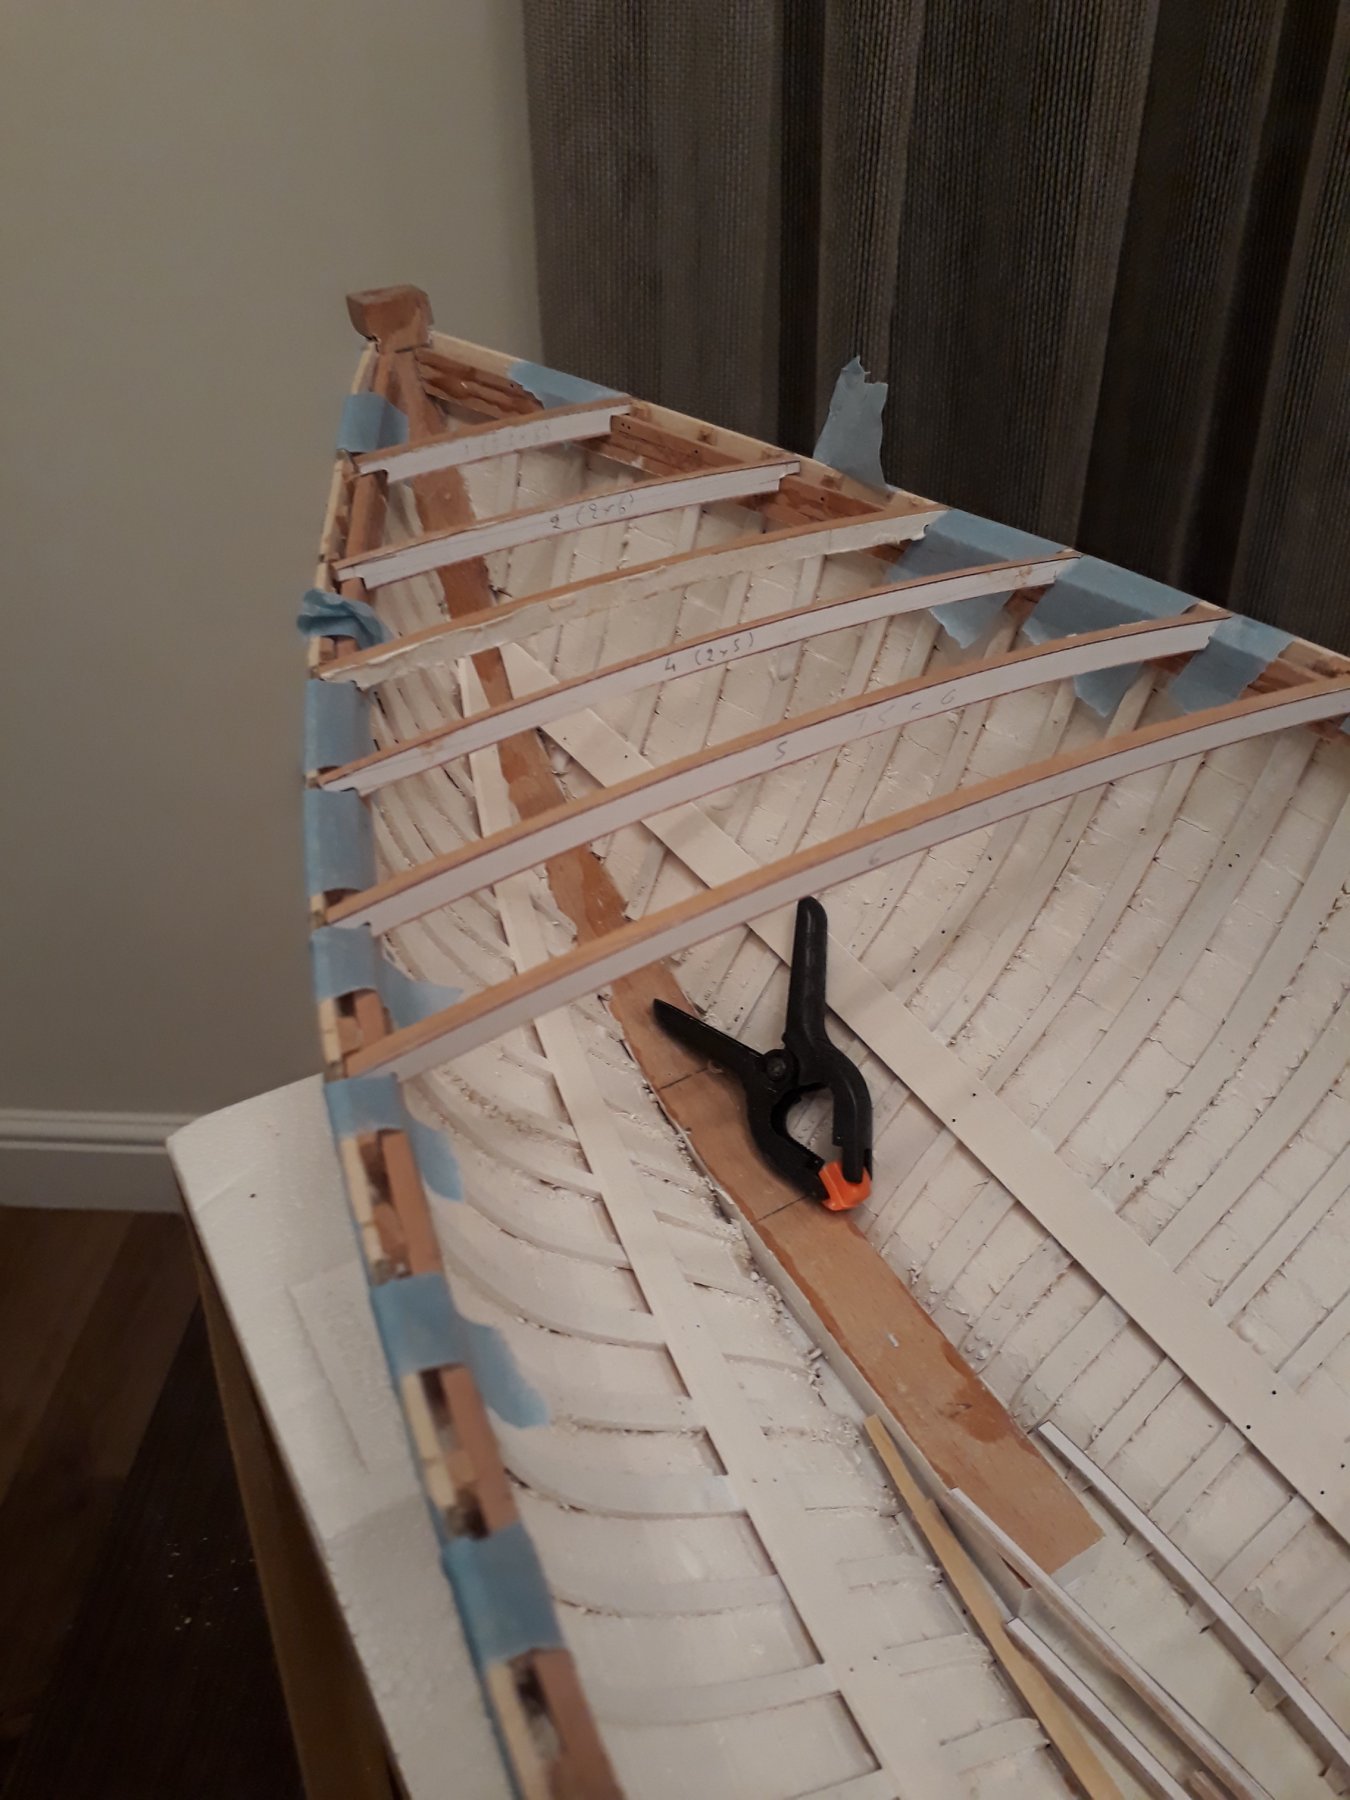
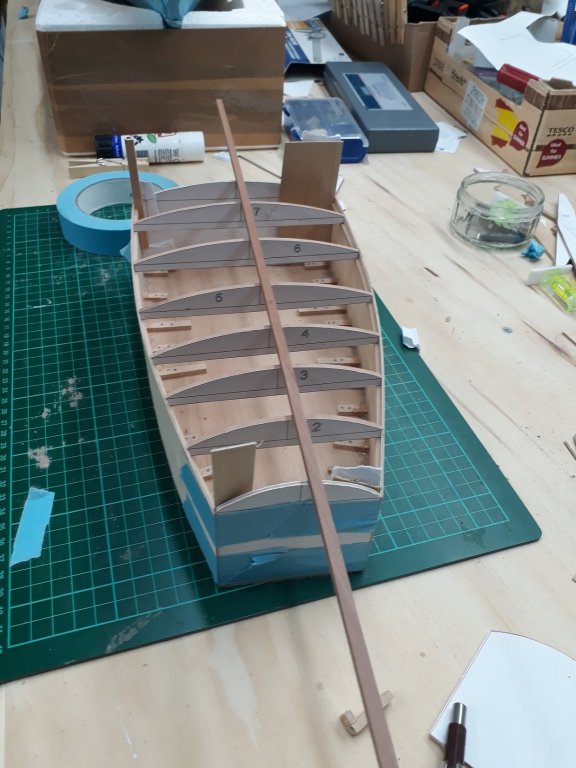
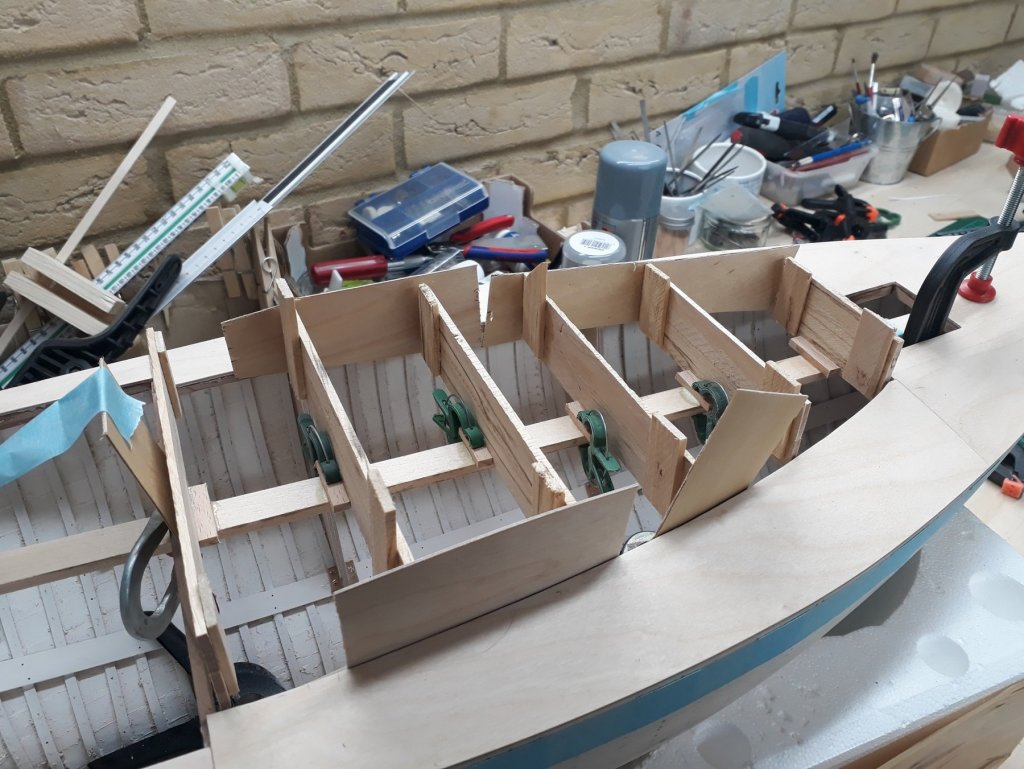
Today I cut the beams, the proper ones from cherry and the temporary ones from plywood. The Dremel moto saw did pretty well considering that the pieces were small. The beams came out fine but my measurements for 2 of the beams were wrong so I had to redo them. In the next photos I have just placed them in their respective places. Strangely I was allowed a lot of time today to work on the boat so I shaped the first 6 beams. I cheated a bit as in the real boat the beam shelves would be notched, not the beams themselves. Considering the circumstances though, it is the better option. I also figured out a way to make sure they stay vertical when the glue goes on. I do have some concerns though. A flat strip resting on the beams does not make contact with all the beams, which is what I expected as the deck centreline follows the curve of the sheer. I intend however to use plywood for the deck, I think that boats of this size do not have planks for deck but plywood with canvas. I am not sure though that the plywood will want to sit on the deck. I think this is called a non developable surface? I think I need to play with the CAD a bit more. There are of course many more beams at the bow as well as a hatch but these will be done later. Vaddoc


.png.a37844a0609ef7f013e22727e0325fea.png)