

.jpg.f26acc9a74319261612561bfa7da1303.jpg)
vaddoc
-
Posts
1,528 -
Joined
-
Last visited
Reputation Activity
-

 vaddoc got a reaction from GrandpaPhil in 21 ft Yawl Longboat for a Sixth Rate by vaddoc - FINISHED - Scale 1:10 - Plans from the National Maritime Museum
Dear all
A lot of work done, time for an update!
Done Craig! Not with Shellac which I dislike but with a water based sealer. Went well and should help
Done!
Yes, the hull is now painted. It sent reasonably well but I have to admit it has been my worst paint job. Poor surface preparation, hasty and a bit sloppy paintjob, near disaster varnishing. So here it goes:
I used grey primer which is supposed to be permanent when dry. Well it is not. I tried to clean the surface with Isopropyl alcohol and immediately started lifting it. Still, no harm done.
Then I masked and taped off the hull using frog tape. I actually forgot I had a large supply of various Tamiya tapes - stupid me. In any case, again no harm done - a bit of bleeding which was covered with the next layer.
Acrylic paint is pretty horrible. It took 20 coats of ivory to cover the grey primer and still did not completely do it. However, being water based means I can work in house which is a huge advantage. I always swear I ll use enamels next time and always seem to end up using acrylics.
No brush marks, Valejo paints are wonderful but surface underneath far from perfect
Acrylic paint is also so easy to scratch, needs a varnish. Again, paint is supposed to dry permanent but trying to clean with IPO started melting the paint. Still, no major harm done.
I used the Valejo polyurethane varnish that previously gave me good results. Not this time! In all honesty though, this varnish is now 6 years old. In any case, it did not brush well although left no brush marks, took ages to dry, and did not seem to have adhered well to the paint as it started lifting in an area I rubbed to remove a drop of PVA glue. I managed to fix this by brushing a bit more varnish but overall, I know this top coat is a bit rubish.
Then, I added the two strips of wood - sanded and coated with Tung oil.
Not long now! Still have to make oars though
Best wishes
Vaddoc
-
 vaddoc got a reaction from mtaylor in 21 ft Yawl Longboat for a Sixth Rate by vaddoc - FINISHED - Scale 1:10 - Plans from the National Maritime Museum
I am not ever playing poker with you Craig! You keep raising on me!
16 feet would be 49 cm.
If you guys could turn a blind eye, we could go for 40 cm that is technically much more feasible and still give the visual impression of a log oar.😉
-
 vaddoc got a reaction from allanyed in 21 ft Yawl Longboat for a Sixth Rate by vaddoc - FINISHED - Scale 1:10 - Plans from the National Maritime Museum
(sigh) Craig, you are of course right. I checked May's book and it does give oar lengths. For a 21 foot boat, oars would be 13 feet length or 396 mm in the model, my oars are 255 mm long. Alright then, back to the drawing board it is! Thankfully, I have plenty of maple.
Vaddoc
-
vaddoc got a reaction from GrandpaPhil in 21 ft Yawl Longboat for a Sixth Rate by vaddoc - FINISHED - Scale 1:10 - Plans from the National Maritime Museum
Dear all
I had a bit of annual leave so I worked a lot on the boat and I have a few more pics to share.
@allanyed Unfortunately Allan, my poor choice of wood means painting the hull is necessary!
Ok, so I made the gunwales which went smoother than I expected. Secured with many screws, later changed to wooden nails. I also installed the two knees at the transom.
So next is the rudder. It will be a basic one based on the dimensions given in May's book and pictures I found on the net. The rudder is now receiving the very many coats of paint needed due to the acrylics' poor coverage.
So while this is cooking, on to the oars it is.
I sat in the computer and made a template. I wanted to use a lighter colour wood like boxwood but I only have maple which is very light colour but also a wonderful wood for modelling. I experimented with a bit of dyes and oils but did not like the outcome. So these oars will be painted.
So first glue the template onto wood. I switched from Pritt to 3M stick glue - difference is day and night, so much better. Then I cut the templates.
Then I laminated them with PVA glue and many many clamps.
The end result
Then lots of brutal sanding with not so miniature tools.
I think it went ok! 4 more to go.
Till next time
Vaddoc
-
 vaddoc got a reaction from shipman in 21 ft Yawl Longboat for a Sixth Rate by vaddoc - FINISHED - Scale 1:10 - Plans from the National Maritime Museum
Dear all
I had a bit of annual leave so I worked a lot on the boat and I have a few more pics to share.
@allanyed Unfortunately Allan, my poor choice of wood means painting the hull is necessary!
Ok, so I made the gunwales which went smoother than I expected. Secured with many screws, later changed to wooden nails. I also installed the two knees at the transom.
So next is the rudder. It will be a basic one based on the dimensions given in May's book and pictures I found on the net. The rudder is now receiving the very many coats of paint needed due to the acrylics' poor coverage.
So while this is cooking, on to the oars it is.
I sat in the computer and made a template. I wanted to use a lighter colour wood like boxwood but I only have maple which is very light colour but also a wonderful wood for modelling. I experimented with a bit of dyes and oils but did not like the outcome. So these oars will be painted.
So first glue the template onto wood. I switched from Pritt to 3M stick glue - difference is day and night, so much better. Then I cut the templates.
Then I laminated them with PVA glue and many many clamps.
The end result
Then lots of brutal sanding with not so miniature tools.
I think it went ok! 4 more to go.
Till next time
Vaddoc
-
vaddoc got a reaction from mtaylor in 21 ft Yawl Longboat for a Sixth Rate by vaddoc - FINISHED - Scale 1:10 - Plans from the National Maritime Museum
(sigh) Craig, you are of course right. I checked May's book and it does give oar lengths. For a 21 foot boat, oars would be 13 feet length or 396 mm in the model, my oars are 255 mm long. Alright then, back to the drawing board it is! Thankfully, I have plenty of maple.
Vaddoc
-
vaddoc got a reaction from GrandpaPhil in 21 ft Yawl Longboat for a Sixth Rate by vaddoc - FINISHED - Scale 1:10 - Plans from the National Maritime Museum
Dear friends
One knows it's been a very long time since his last post, when he needs to search for his log! But here I am, so time for an update and a few photos as there is definitely progress made.
Allow me to shout a word of caution: DO NOT USE BEECH FOR PLANKING! I did read on wood database that it has a lot of movement in service, but the reality is just ridiculous. Any more movement and the wood would grow feet and run out of the shipyard.
First of all the planks shrunk. Initially there was no gap at all as I took pains to make them perfect. Then huge gaps appeared. I filled these in and then the planks shrunk more, with gaps opening once again. Then the boat kept changing shape, sometimes the two sides wanted to come together but others wanted to get away from each other.
The biggest problem was that some planks pulled out of the ribs, as shown in the photo bellow.
I had no idea how to fix it but in the end, the boat just changed shape again and the gaps closed. Magic!
So, next I finished the floor boards and also the small deck aft.
I replaced all the screws with treenails and then, it was time for the thwarts. I used the original drawings which kind of hint where the thwarts should go. The benches aft however took an awful lot of head scratching to understand how they could be arranged, without massive wood work. I used the internet and some common sense and I think I came up with a reasonable solution.
I then made the legs, they came out alright I think.
Then, I made the knees to hold the thwarts. This took a long time as each knee has each individual shape and then had to be drilled, sanded and get a coat of Tung oil.
Then all were assembled, using 30 min Zpoxy which I am certain was the way it was done back in 1750.
Now the boat is structurally solid and complete. Now however it is time to think about painting the hull.
It really needs to be painted but with this cracks between the planks, it is not going to work. So they had to be filled.
I used again Osmo filler which I really like. This is how the hull looked afterwards.
The sanding that followed will be sang by bards for centuries. I went down to 320 grid, I really wanted 400 but I run out of sand paper.
Now, I am sure the cracks will reopen but this is the best I can do! Now, this is a hull that absolutely must be sealed. I never liked shellac and I ve been using for years a water based sealer (Decoart Americana). A coat went on, then sanded to 320 grid. Again, I really wanted 400 but I could not find even a small piece in the shipyard. Then another coat went on, sanded to 600 grid (I found a sheet somewhere)
The hull is as good as it will ever be. When I find time I ll put a coat of primer and paint the hull - Ivory and Prussian blue I think.
A last photo, till next time
Vaddoc
-
 vaddoc got a reaction from Mirabell61 in 21 ft Yawl Longboat for a Sixth Rate by vaddoc - FINISHED - Scale 1:10 - Plans from the National Maritime Museum
Dear friends
Time for another post, some progress but also some unfortunate findings. Lets start.
So, there is an urgent need for the boat to have some structural support but it needs to be built from the bottom up. So, the floor needs to be installed.
I had previously cut the floor supports but I found some were off and needed adjustments or replacement. Finally they were epoxied in place and coated with Tung oil - for no reason at all really!
However, It was then that I noticed a rather big issue. The planks have pulled away from the ribs, the glue in the tree nails failed - but also the pressure from the planks must have been pretty substantial.
I do not think this can be fixed without disassembling the boat and in the end of the day, it does not bother me much. So on we go.
Next, I did some work at the gunwales and attached the stringer and the breast hook.
So far everything is screwed, later on will be replaced with tree nails.
Next, it was time for the false stem to be installed. Again I had to make adjustments but I got a good fit. I used thickened epoxy and it came out pretty good. Especially the joint with the planking, which in the past had caused me headache, came out also fine.
Ok, so far so good. Next it was the floor boards. This took a bit of work and some head scratching but actually came out better than I hoped. I am not sure if it is historically accurate but we do need a floor to walk on - so here it is.
And with some Tung oil on
All the screws need to be replaced with tree nails, so time to make a few hundred. I will be using the last of the cherry wood I saved from the fire wood pile 10 years ago.
Cutting one more slice was difficult, this wood is very hard
This wood is very dry and needs to get some moisture before we can drill the nails out. The slices are now submerged in water.
Till next time
Vaddoc
-
vaddoc got a reaction from mtaylor in 21 ft Yawl Longboat for a Sixth Rate by vaddoc - FINISHED - Scale 1:10 - Plans from the National Maritime Museum
Dear all
I had a bit of annual leave so I worked a lot on the boat and I have a few more pics to share.
@allanyed Unfortunately Allan, my poor choice of wood means painting the hull is necessary!
Ok, so I made the gunwales which went smoother than I expected. Secured with many screws, later changed to wooden nails. I also installed the two knees at the transom.
So next is the rudder. It will be a basic one based on the dimensions given in May's book and pictures I found on the net. The rudder is now receiving the very many coats of paint needed due to the acrylics' poor coverage.
So while this is cooking, on to the oars it is.
I sat in the computer and made a template. I wanted to use a lighter colour wood like boxwood but I only have maple which is very light colour but also a wonderful wood for modelling. I experimented with a bit of dyes and oils but did not like the outcome. So these oars will be painted.
So first glue the template onto wood. I switched from Pritt to 3M stick glue - difference is day and night, so much better. Then I cut the templates.
Then I laminated them with PVA glue and many many clamps.
The end result
Then lots of brutal sanding with not so miniature tools.
I think it went ok! 4 more to go.
Till next time
Vaddoc
-
.thumb.jpg.6fd4c1b78768bb3efd745ab810936005.jpg) vaddoc reacted to iMustBeCrazy in 21 ft Yawl Longboat for a Sixth Rate by vaddoc - FINISHED - Scale 1:10 - Plans from the National Maritime Museum
vaddoc reacted to iMustBeCrazy in 21 ft Yawl Longboat for a Sixth Rate by vaddoc - FINISHED - Scale 1:10 - Plans from the National Maritime Museum
They look way too short to me, you didn't make them half scale did you?
-
 vaddoc got a reaction from Bedford in 21 ft Yawl Longboat for a Sixth Rate by vaddoc - FINISHED - Scale 1:10 - Plans from the National Maritime Museum
Dear all
I had a bit of annual leave so I worked a lot on the boat and I have a few more pics to share.
@allanyed Unfortunately Allan, my poor choice of wood means painting the hull is necessary!
Ok, so I made the gunwales which went smoother than I expected. Secured with many screws, later changed to wooden nails. I also installed the two knees at the transom.
So next is the rudder. It will be a basic one based on the dimensions given in May's book and pictures I found on the net. The rudder is now receiving the very many coats of paint needed due to the acrylics' poor coverage.
So while this is cooking, on to the oars it is.
I sat in the computer and made a template. I wanted to use a lighter colour wood like boxwood but I only have maple which is very light colour but also a wonderful wood for modelling. I experimented with a bit of dyes and oils but did not like the outcome. So these oars will be painted.
So first glue the template onto wood. I switched from Pritt to 3M stick glue - difference is day and night, so much better. Then I cut the templates.
Then I laminated them with PVA glue and many many clamps.
The end result
Then lots of brutal sanding with not so miniature tools.
I think it went ok! 4 more to go.
Till next time
Vaddoc
-
 vaddoc got a reaction from G.L. in 21 ft Yawl Longboat for a Sixth Rate by vaddoc - FINISHED - Scale 1:10 - Plans from the National Maritime Museum
Dear all
I had a bit of annual leave so I worked a lot on the boat and I have a few more pics to share.
@allanyed Unfortunately Allan, my poor choice of wood means painting the hull is necessary!
Ok, so I made the gunwales which went smoother than I expected. Secured with many screws, later changed to wooden nails. I also installed the two knees at the transom.
So next is the rudder. It will be a basic one based on the dimensions given in May's book and pictures I found on the net. The rudder is now receiving the very many coats of paint needed due to the acrylics' poor coverage.
So while this is cooking, on to the oars it is.
I sat in the computer and made a template. I wanted to use a lighter colour wood like boxwood but I only have maple which is very light colour but also a wonderful wood for modelling. I experimented with a bit of dyes and oils but did not like the outcome. So these oars will be painted.
So first glue the template onto wood. I switched from Pritt to 3M stick glue - difference is day and night, so much better. Then I cut the templates.
Then I laminated them with PVA glue and many many clamps.
The end result
Then lots of brutal sanding with not so miniature tools.
I think it went ok! 4 more to go.
Till next time
Vaddoc
-
 vaddoc got a reaction from giampieroricci in 21 ft Yawl Longboat for a Sixth Rate by vaddoc - FINISHED - Scale 1:10 - Plans from the National Maritime Museum
Dear all
A lot of work done, time for an update!
Done Craig! Not with Shellac which I dislike but with a water based sealer. Went well and should help
Done!
Yes, the hull is now painted. It sent reasonably well but I have to admit it has been my worst paint job. Poor surface preparation, hasty and a bit sloppy paintjob, near disaster varnishing. So here it goes:
I used grey primer which is supposed to be permanent when dry. Well it is not. I tried to clean the surface with Isopropyl alcohol and immediately started lifting it. Still, no harm done.
Then I masked and taped off the hull using frog tape. I actually forgot I had a large supply of various Tamiya tapes - stupid me. In any case, again no harm done - a bit of bleeding which was covered with the next layer.
Acrylic paint is pretty horrible. It took 20 coats of ivory to cover the grey primer and still did not completely do it. However, being water based means I can work in house which is a huge advantage. I always swear I ll use enamels next time and always seem to end up using acrylics.
No brush marks, Valejo paints are wonderful but surface underneath far from perfect
Acrylic paint is also so easy to scratch, needs a varnish. Again, paint is supposed to dry permanent but trying to clean with IPO started melting the paint. Still, no major harm done.
I used the Valejo polyurethane varnish that previously gave me good results. Not this time! In all honesty though, this varnish is now 6 years old. In any case, it did not brush well although left no brush marks, took ages to dry, and did not seem to have adhered well to the paint as it started lifting in an area I rubbed to remove a drop of PVA glue. I managed to fix this by brushing a bit more varnish but overall, I know this top coat is a bit rubish.
Then, I added the two strips of wood - sanded and coated with Tung oil.
Not long now! Still have to make oars though
Best wishes
Vaddoc
-
 vaddoc got a reaction from FriedClams in 21 ft Yawl Longboat for a Sixth Rate by vaddoc - FINISHED - Scale 1:10 - Plans from the National Maritime Museum
Dear all
A lot of work done, time for an update!
Done Craig! Not with Shellac which I dislike but with a water based sealer. Went well and should help
Done!
Yes, the hull is now painted. It sent reasonably well but I have to admit it has been my worst paint job. Poor surface preparation, hasty and a bit sloppy paintjob, near disaster varnishing. So here it goes:
I used grey primer which is supposed to be permanent when dry. Well it is not. I tried to clean the surface with Isopropyl alcohol and immediately started lifting it. Still, no harm done.
Then I masked and taped off the hull using frog tape. I actually forgot I had a large supply of various Tamiya tapes - stupid me. In any case, again no harm done - a bit of bleeding which was covered with the next layer.
Acrylic paint is pretty horrible. It took 20 coats of ivory to cover the grey primer and still did not completely do it. However, being water based means I can work in house which is a huge advantage. I always swear I ll use enamels next time and always seem to end up using acrylics.
No brush marks, Valejo paints are wonderful but surface underneath far from perfect
Acrylic paint is also so easy to scratch, needs a varnish. Again, paint is supposed to dry permanent but trying to clean with IPO started melting the paint. Still, no major harm done.
I used the Valejo polyurethane varnish that previously gave me good results. Not this time! In all honesty though, this varnish is now 6 years old. In any case, it did not brush well although left no brush marks, took ages to dry, and did not seem to have adhered well to the paint as it started lifting in an area I rubbed to remove a drop of PVA glue. I managed to fix this by brushing a bit more varnish but overall, I know this top coat is a bit rubish.
Then, I added the two strips of wood - sanded and coated with Tung oil.
Not long now! Still have to make oars though
Best wishes
Vaddoc
-
vaddoc reacted to Wintergreen in 21 ft Yawl Longboat for a Sixth Rate by vaddoc - FINISHED - Scale 1:10 - Plans from the National Maritime Museum
Trials and tribulations!
But the end result looks very good. Your perseverance paid off Vaddoc.
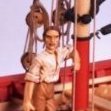
I am also glad to see that there is some kind of time study official in the vicinity to keep an eye on you 😉 😄
Keep it up!
-
 vaddoc got a reaction from Ainars in 21 ft Yawl Longboat for a Sixth Rate by vaddoc - FINISHED - Scale 1:10 - Plans from the National Maritime Museum
Dear all
A lot of work done, time for an update!
Done Craig! Not with Shellac which I dislike but with a water based sealer. Went well and should help
Done!
Yes, the hull is now painted. It sent reasonably well but I have to admit it has been my worst paint job. Poor surface preparation, hasty and a bit sloppy paintjob, near disaster varnishing. So here it goes:
I used grey primer which is supposed to be permanent when dry. Well it is not. I tried to clean the surface with Isopropyl alcohol and immediately started lifting it. Still, no harm done.
Then I masked and taped off the hull using frog tape. I actually forgot I had a large supply of various Tamiya tapes - stupid me. In any case, again no harm done - a bit of bleeding which was covered with the next layer.
Acrylic paint is pretty horrible. It took 20 coats of ivory to cover the grey primer and still did not completely do it. However, being water based means I can work in house which is a huge advantage. I always swear I ll use enamels next time and always seem to end up using acrylics.
No brush marks, Valejo paints are wonderful but surface underneath far from perfect
Acrylic paint is also so easy to scratch, needs a varnish. Again, paint is supposed to dry permanent but trying to clean with IPO started melting the paint. Still, no major harm done.
I used the Valejo polyurethane varnish that previously gave me good results. Not this time! In all honesty though, this varnish is now 6 years old. In any case, it did not brush well although left no brush marks, took ages to dry, and did not seem to have adhered well to the paint as it started lifting in an area I rubbed to remove a drop of PVA glue. I managed to fix this by brushing a bit more varnish but overall, I know this top coat is a bit rubish.
Then, I added the two strips of wood - sanded and coated with Tung oil.
Not long now! Still have to make oars though
Best wishes
Vaddoc
-
 vaddoc got a reaction from dvm27 in 21 ft Yawl Longboat for a Sixth Rate by vaddoc - FINISHED - Scale 1:10 - Plans from the National Maritime Museum
Dear all
A lot of work done, time for an update!
Done Craig! Not with Shellac which I dislike but with a water based sealer. Went well and should help
Done!
Yes, the hull is now painted. It sent reasonably well but I have to admit it has been my worst paint job. Poor surface preparation, hasty and a bit sloppy paintjob, near disaster varnishing. So here it goes:
I used grey primer which is supposed to be permanent when dry. Well it is not. I tried to clean the surface with Isopropyl alcohol and immediately started lifting it. Still, no harm done.
Then I masked and taped off the hull using frog tape. I actually forgot I had a large supply of various Tamiya tapes - stupid me. In any case, again no harm done - a bit of bleeding which was covered with the next layer.
Acrylic paint is pretty horrible. It took 20 coats of ivory to cover the grey primer and still did not completely do it. However, being water based means I can work in house which is a huge advantage. I always swear I ll use enamels next time and always seem to end up using acrylics.
No brush marks, Valejo paints are wonderful but surface underneath far from perfect
Acrylic paint is also so easy to scratch, needs a varnish. Again, paint is supposed to dry permanent but trying to clean with IPO started melting the paint. Still, no major harm done.
I used the Valejo polyurethane varnish that previously gave me good results. Not this time! In all honesty though, this varnish is now 6 years old. In any case, it did not brush well although left no brush marks, took ages to dry, and did not seem to have adhered well to the paint as it started lifting in an area I rubbed to remove a drop of PVA glue. I managed to fix this by brushing a bit more varnish but overall, I know this top coat is a bit rubish.
Then, I added the two strips of wood - sanded and coated with Tung oil.
Not long now! Still have to make oars though
Best wishes
Vaddoc
-
 vaddoc got a reaction from CiscoH in 21 ft Yawl Longboat for a Sixth Rate by vaddoc - FINISHED - Scale 1:10 - Plans from the National Maritime Museum
Dear all
A lot of work done, time for an update!
Done Craig! Not with Shellac which I dislike but with a water based sealer. Went well and should help
Done!
Yes, the hull is now painted. It sent reasonably well but I have to admit it has been my worst paint job. Poor surface preparation, hasty and a bit sloppy paintjob, near disaster varnishing. So here it goes:
I used grey primer which is supposed to be permanent when dry. Well it is not. I tried to clean the surface with Isopropyl alcohol and immediately started lifting it. Still, no harm done.
Then I masked and taped off the hull using frog tape. I actually forgot I had a large supply of various Tamiya tapes - stupid me. In any case, again no harm done - a bit of bleeding which was covered with the next layer.
Acrylic paint is pretty horrible. It took 20 coats of ivory to cover the grey primer and still did not completely do it. However, being water based means I can work in house which is a huge advantage. I always swear I ll use enamels next time and always seem to end up using acrylics.
No brush marks, Valejo paints are wonderful but surface underneath far from perfect
Acrylic paint is also so easy to scratch, needs a varnish. Again, paint is supposed to dry permanent but trying to clean with IPO started melting the paint. Still, no major harm done.
I used the Valejo polyurethane varnish that previously gave me good results. Not this time! In all honesty though, this varnish is now 6 years old. In any case, it did not brush well although left no brush marks, took ages to dry, and did not seem to have adhered well to the paint as it started lifting in an area I rubbed to remove a drop of PVA glue. I managed to fix this by brushing a bit more varnish but overall, I know this top coat is a bit rubish.
Then, I added the two strips of wood - sanded and coated with Tung oil.
Not long now! Still have to make oars though
Best wishes
Vaddoc
-
vaddoc got a reaction from mtaylor in 21 ft Yawl Longboat for a Sixth Rate by vaddoc - FINISHED - Scale 1:10 - Plans from the National Maritime Museum
Dear all
A lot of work done, time for an update!
Done Craig! Not with Shellac which I dislike but with a water based sealer. Went well and should help
Done!
Yes, the hull is now painted. It sent reasonably well but I have to admit it has been my worst paint job. Poor surface preparation, hasty and a bit sloppy paintjob, near disaster varnishing. So here it goes:
I used grey primer which is supposed to be permanent when dry. Well it is not. I tried to clean the surface with Isopropyl alcohol and immediately started lifting it. Still, no harm done.
Then I masked and taped off the hull using frog tape. I actually forgot I had a large supply of various Tamiya tapes - stupid me. In any case, again no harm done - a bit of bleeding which was covered with the next layer.
Acrylic paint is pretty horrible. It took 20 coats of ivory to cover the grey primer and still did not completely do it. However, being water based means I can work in house which is a huge advantage. I always swear I ll use enamels next time and always seem to end up using acrylics.
No brush marks, Valejo paints are wonderful but surface underneath far from perfect
Acrylic paint is also so easy to scratch, needs a varnish. Again, paint is supposed to dry permanent but trying to clean with IPO started melting the paint. Still, no major harm done.
I used the Valejo polyurethane varnish that previously gave me good results. Not this time! In all honesty though, this varnish is now 6 years old. In any case, it did not brush well although left no brush marks, took ages to dry, and did not seem to have adhered well to the paint as it started lifting in an area I rubbed to remove a drop of PVA glue. I managed to fix this by brushing a bit more varnish but overall, I know this top coat is a bit rubish.
Then, I added the two strips of wood - sanded and coated with Tung oil.
Not long now! Still have to make oars though
Best wishes
Vaddoc
-
vaddoc reacted to iMustBeCrazy in 21 ft Yawl Longboat for a Sixth Rate by vaddoc - FINISHED - Scale 1:10 - Plans from the National Maritime Museum
Looks great! I really like the colour choices.
I think you and I suffer from the same issue, the desire to make a wooden hull hewn with hand tools look like fibreglass popped from a mould.
At least it's single banked, only six to make.
-
vaddoc got a reaction from G.L. in 21 ft Yawl Longboat for a Sixth Rate by vaddoc - FINISHED - Scale 1:10 - Plans from the National Maritime Museum
Dear all
A lot of work done, time for an update!
Done Craig! Not with Shellac which I dislike but with a water based sealer. Went well and should help
Done!
Yes, the hull is now painted. It sent reasonably well but I have to admit it has been my worst paint job. Poor surface preparation, hasty and a bit sloppy paintjob, near disaster varnishing. So here it goes:
I used grey primer which is supposed to be permanent when dry. Well it is not. I tried to clean the surface with Isopropyl alcohol and immediately started lifting it. Still, no harm done.
Then I masked and taped off the hull using frog tape. I actually forgot I had a large supply of various Tamiya tapes - stupid me. In any case, again no harm done - a bit of bleeding which was covered with the next layer.
Acrylic paint is pretty horrible. It took 20 coats of ivory to cover the grey primer and still did not completely do it. However, being water based means I can work in house which is a huge advantage. I always swear I ll use enamels next time and always seem to end up using acrylics.
No brush marks, Valejo paints are wonderful but surface underneath far from perfect
Acrylic paint is also so easy to scratch, needs a varnish. Again, paint is supposed to dry permanent but trying to clean with IPO started melting the paint. Still, no major harm done.
I used the Valejo polyurethane varnish that previously gave me good results. Not this time! In all honesty though, this varnish is now 6 years old. In any case, it did not brush well although left no brush marks, took ages to dry, and did not seem to have adhered well to the paint as it started lifting in an area I rubbed to remove a drop of PVA glue. I managed to fix this by brushing a bit more varnish but overall, I know this top coat is a bit rubish.
Then, I added the two strips of wood - sanded and coated with Tung oil.
Not long now! Still have to make oars though
Best wishes
Vaddoc
-
 vaddoc got a reaction from Wintergreen in 21 ft Yawl Longboat for a Sixth Rate by vaddoc - FINISHED - Scale 1:10 - Plans from the National Maritime Museum
Dear all
A lot of work done, time for an update!
Done Craig! Not with Shellac which I dislike but with a water based sealer. Went well and should help
Done!
Yes, the hull is now painted. It sent reasonably well but I have to admit it has been my worst paint job. Poor surface preparation, hasty and a bit sloppy paintjob, near disaster varnishing. So here it goes:
I used grey primer which is supposed to be permanent when dry. Well it is not. I tried to clean the surface with Isopropyl alcohol and immediately started lifting it. Still, no harm done.
Then I masked and taped off the hull using frog tape. I actually forgot I had a large supply of various Tamiya tapes - stupid me. In any case, again no harm done - a bit of bleeding which was covered with the next layer.
Acrylic paint is pretty horrible. It took 20 coats of ivory to cover the grey primer and still did not completely do it. However, being water based means I can work in house which is a huge advantage. I always swear I ll use enamels next time and always seem to end up using acrylics.
No brush marks, Valejo paints are wonderful but surface underneath far from perfect
Acrylic paint is also so easy to scratch, needs a varnish. Again, paint is supposed to dry permanent but trying to clean with IPO started melting the paint. Still, no major harm done.
I used the Valejo polyurethane varnish that previously gave me good results. Not this time! In all honesty though, this varnish is now 6 years old. In any case, it did not brush well although left no brush marks, took ages to dry, and did not seem to have adhered well to the paint as it started lifting in an area I rubbed to remove a drop of PVA glue. I managed to fix this by brushing a bit more varnish but overall, I know this top coat is a bit rubish.
Then, I added the two strips of wood - sanded and coated with Tung oil.
Not long now! Still have to make oars though
Best wishes
Vaddoc
-
vaddoc got a reaction from shipman in 21 ft Yawl Longboat for a Sixth Rate by vaddoc - FINISHED - Scale 1:10 - Plans from the National Maritime Museum
Dear all
A lot of work done, time for an update!
Done Craig! Not with Shellac which I dislike but with a water based sealer. Went well and should help
Done!
Yes, the hull is now painted. It sent reasonably well but I have to admit it has been my worst paint job. Poor surface preparation, hasty and a bit sloppy paintjob, near disaster varnishing. So here it goes:
I used grey primer which is supposed to be permanent when dry. Well it is not. I tried to clean the surface with Isopropyl alcohol and immediately started lifting it. Still, no harm done.
Then I masked and taped off the hull using frog tape. I actually forgot I had a large supply of various Tamiya tapes - stupid me. In any case, again no harm done - a bit of bleeding which was covered with the next layer.
Acrylic paint is pretty horrible. It took 20 coats of ivory to cover the grey primer and still did not completely do it. However, being water based means I can work in house which is a huge advantage. I always swear I ll use enamels next time and always seem to end up using acrylics.
No brush marks, Valejo paints are wonderful but surface underneath far from perfect
Acrylic paint is also so easy to scratch, needs a varnish. Again, paint is supposed to dry permanent but trying to clean with IPO started melting the paint. Still, no major harm done.
I used the Valejo polyurethane varnish that previously gave me good results. Not this time! In all honesty though, this varnish is now 6 years old. In any case, it did not brush well although left no brush marks, took ages to dry, and did not seem to have adhered well to the paint as it started lifting in an area I rubbed to remove a drop of PVA glue. I managed to fix this by brushing a bit more varnish but overall, I know this top coat is a bit rubish.
Then, I added the two strips of wood - sanded and coated with Tung oil.
Not long now! Still have to make oars though
Best wishes
Vaddoc
-
 vaddoc got a reaction from whitejamest in 21 ft Yawl Longboat for a Sixth Rate by vaddoc - FINISHED - Scale 1:10 - Plans from the National Maritime Museum
Dear all
A lot of work done, time for an update!
Done Craig! Not with Shellac which I dislike but with a water based sealer. Went well and should help
Done!
Yes, the hull is now painted. It sent reasonably well but I have to admit it has been my worst paint job. Poor surface preparation, hasty and a bit sloppy paintjob, near disaster varnishing. So here it goes:
I used grey primer which is supposed to be permanent when dry. Well it is not. I tried to clean the surface with Isopropyl alcohol and immediately started lifting it. Still, no harm done.
Then I masked and taped off the hull using frog tape. I actually forgot I had a large supply of various Tamiya tapes - stupid me. In any case, again no harm done - a bit of bleeding which was covered with the next layer.
Acrylic paint is pretty horrible. It took 20 coats of ivory to cover the grey primer and still did not completely do it. However, being water based means I can work in house which is a huge advantage. I always swear I ll use enamels next time and always seem to end up using acrylics.
No brush marks, Valejo paints are wonderful but surface underneath far from perfect
Acrylic paint is also so easy to scratch, needs a varnish. Again, paint is supposed to dry permanent but trying to clean with IPO started melting the paint. Still, no major harm done.
I used the Valejo polyurethane varnish that previously gave me good results. Not this time! In all honesty though, this varnish is now 6 years old. In any case, it did not brush well although left no brush marks, took ages to dry, and did not seem to have adhered well to the paint as it started lifting in an area I rubbed to remove a drop of PVA glue. I managed to fix this by brushing a bit more varnish but overall, I know this top coat is a bit rubish.
Then, I added the two strips of wood - sanded and coated with Tung oil.
Not long now! Still have to make oars though
Best wishes
Vaddoc
-
 vaddoc got a reaction from Canute in Switching from plastic to wooden kits - which tools do I need?
You could come over to the dark side and scratch build a simple boat.