catopower
-
Posts
1,908 -
Joined
-
Last visited
9 Followers


.thumb.jpeg.fc5d633a7b34428fcf19419a73d56d55.jpeg)
About catopower

- Birthday 06/17/1962
Recent Profile Visitors
11,035 profile views


-
 Ryland Craze reacted to a post in a topic:
USS Bagley (DD-386) by catopower - 1/200 - Avangard - CARD
Ryland Craze reacted to a post in a topic:
USS Bagley (DD-386) by catopower - 1/200 - Avangard - CARD
-
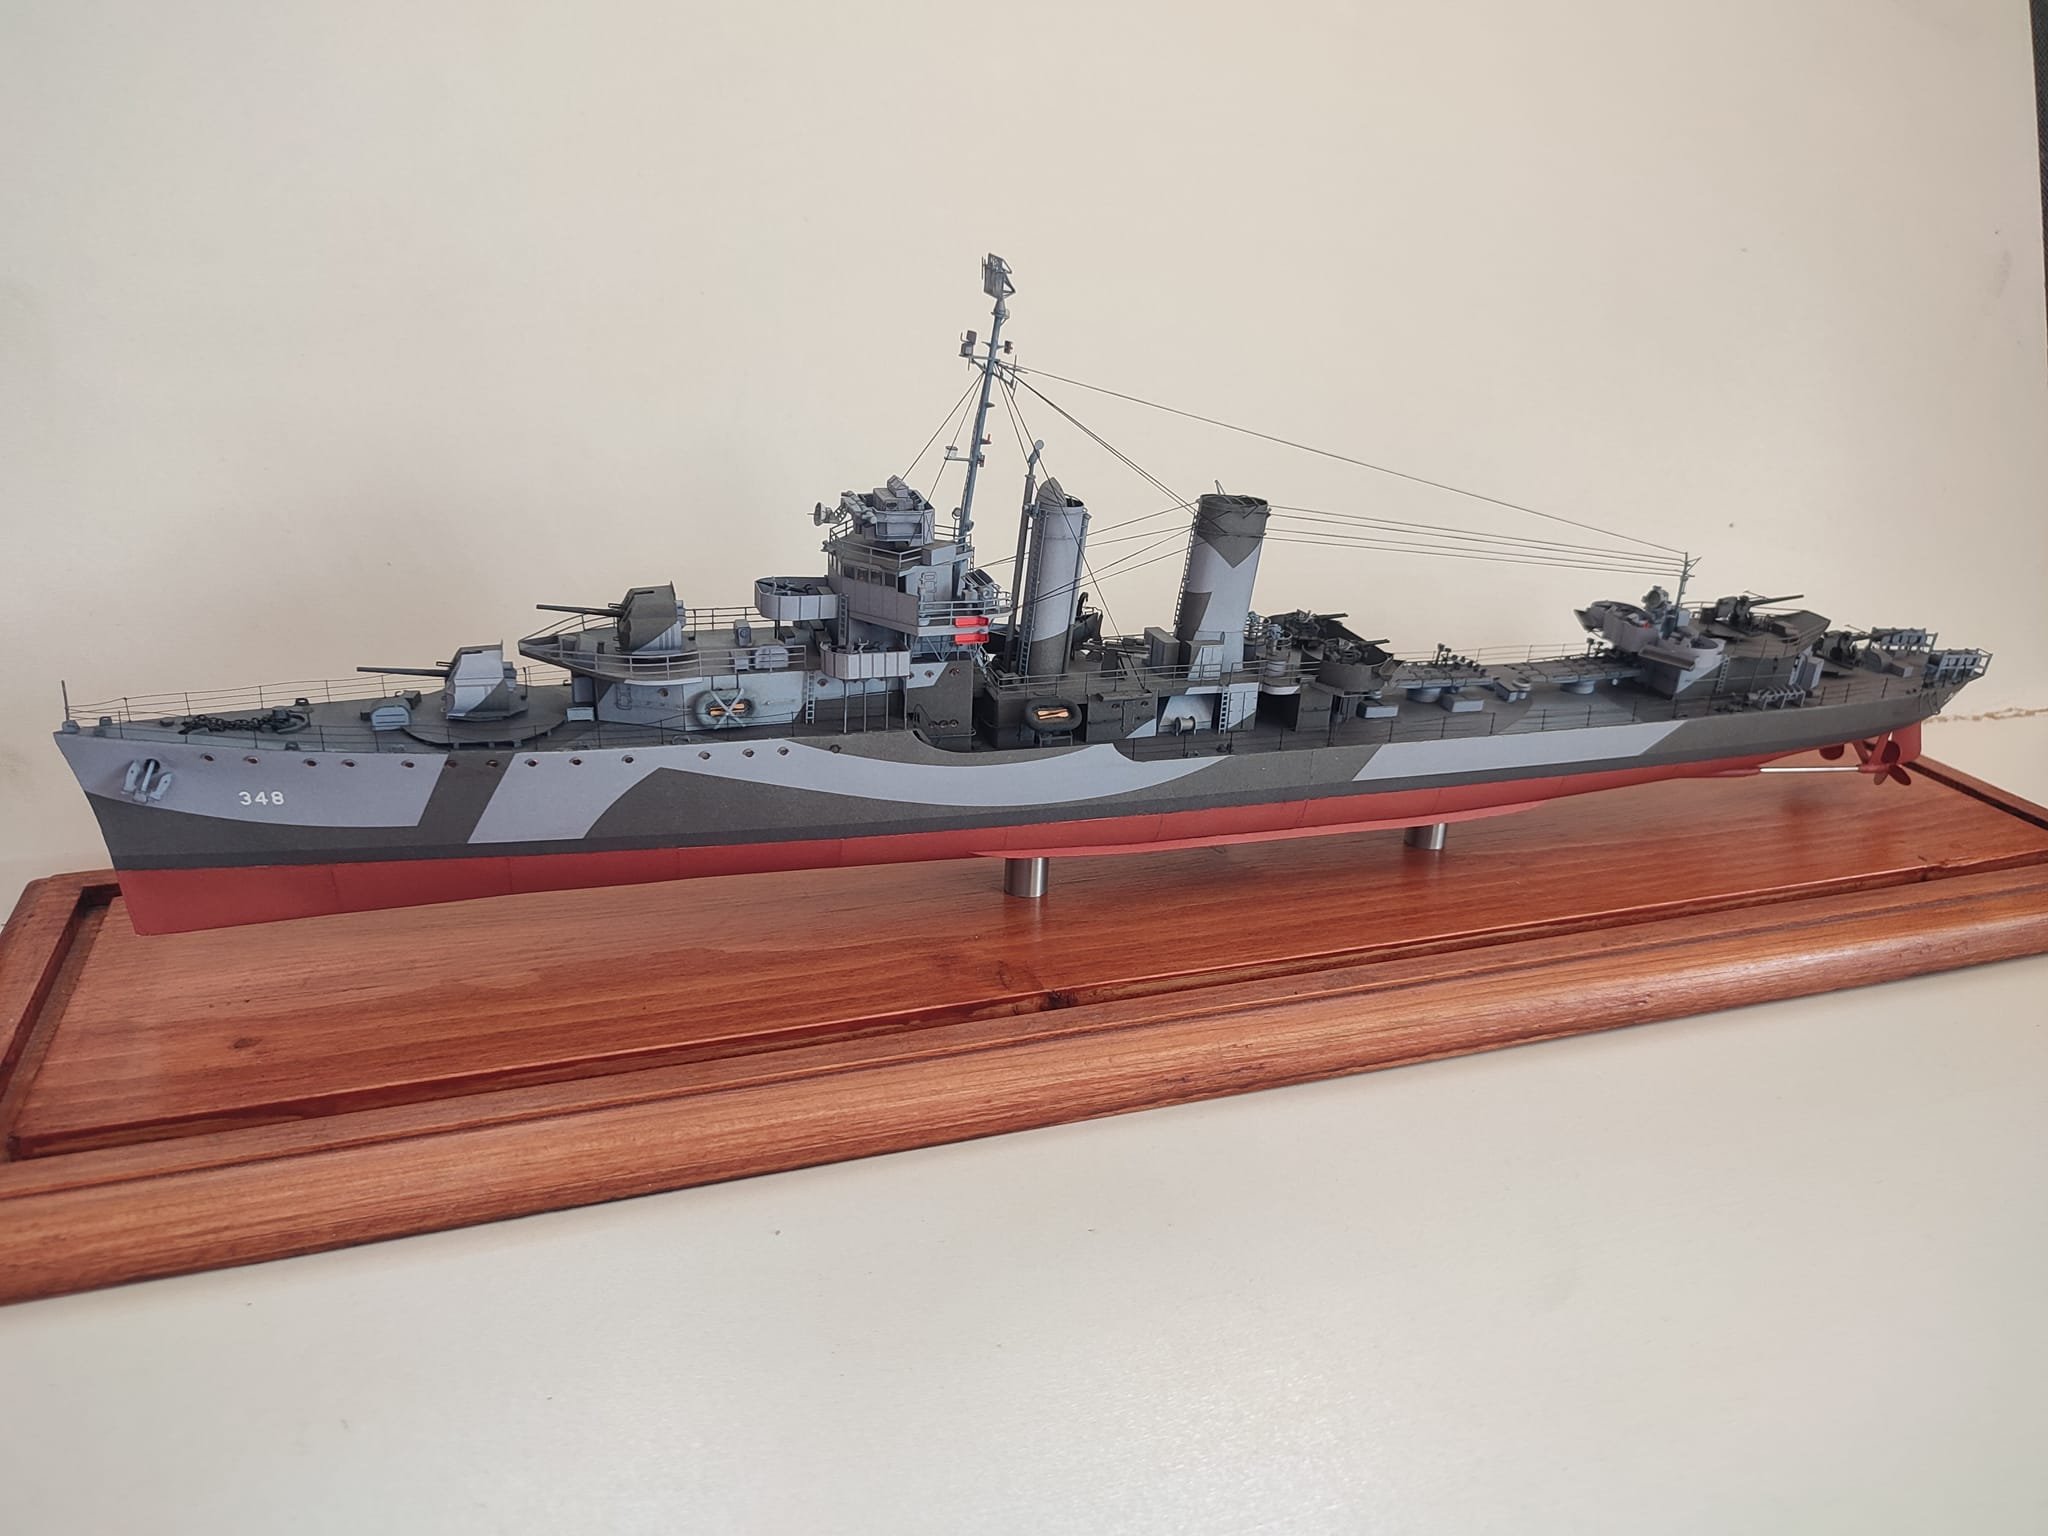
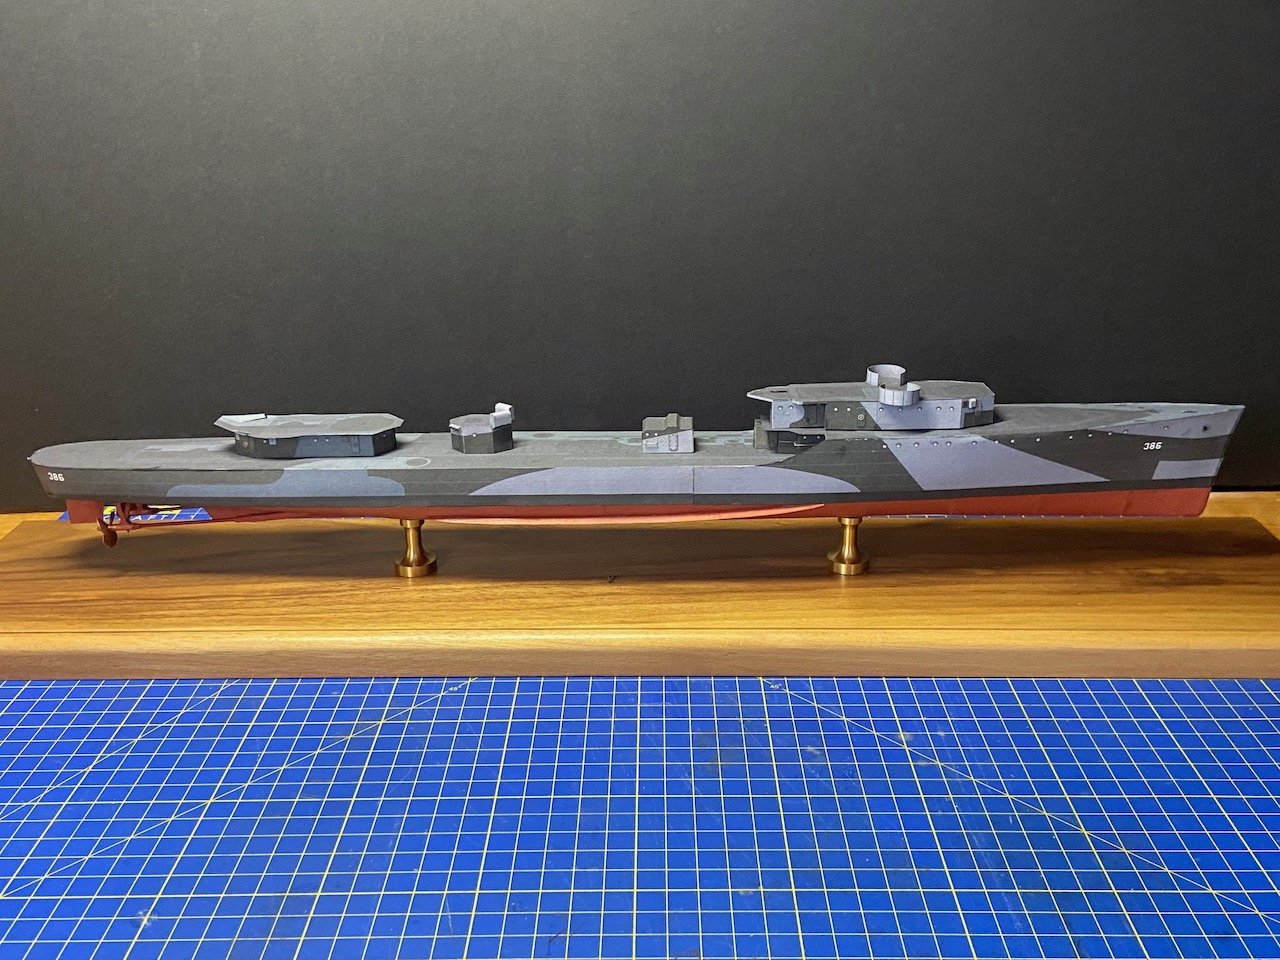
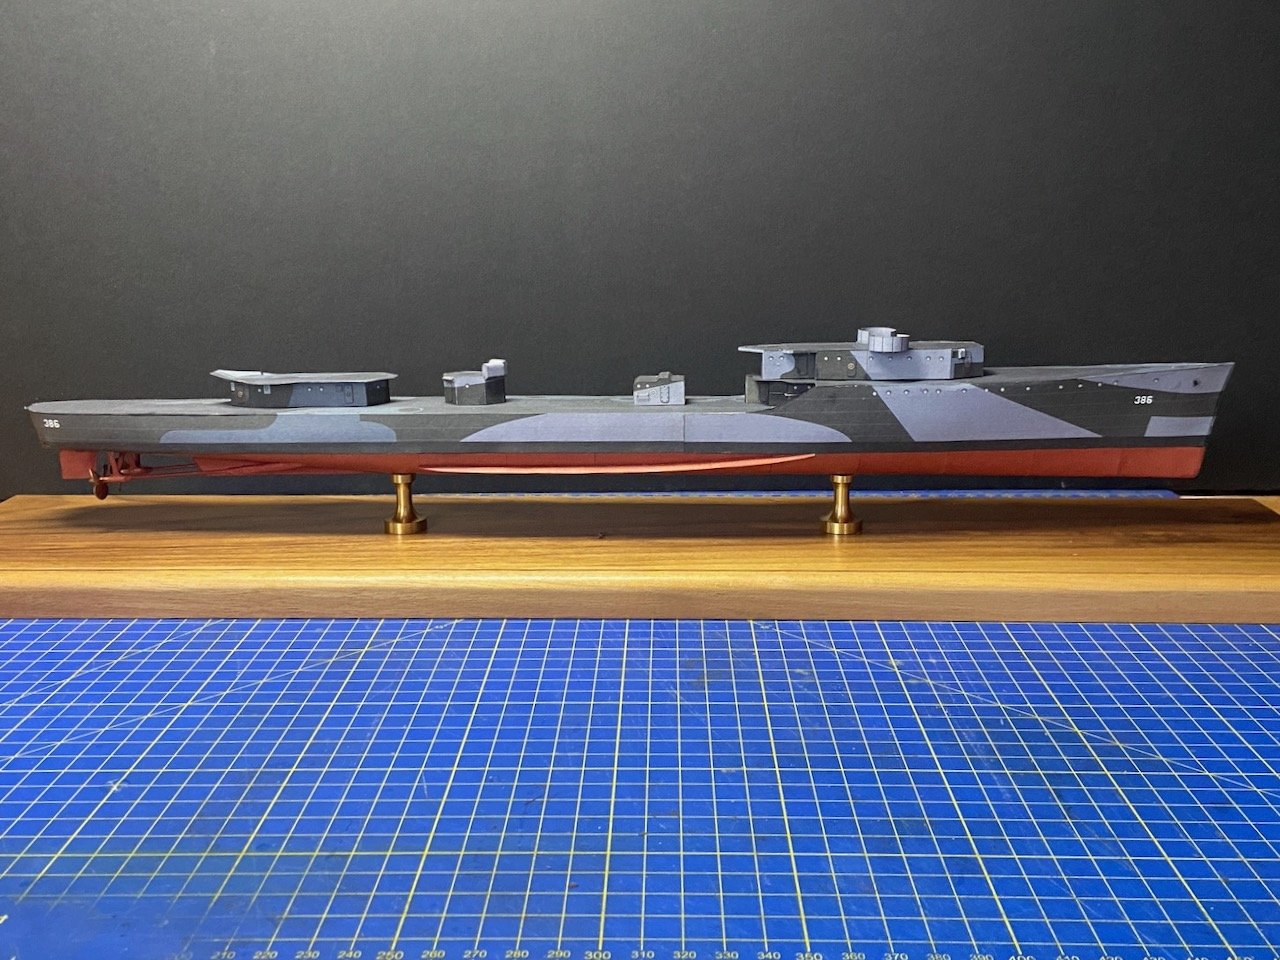
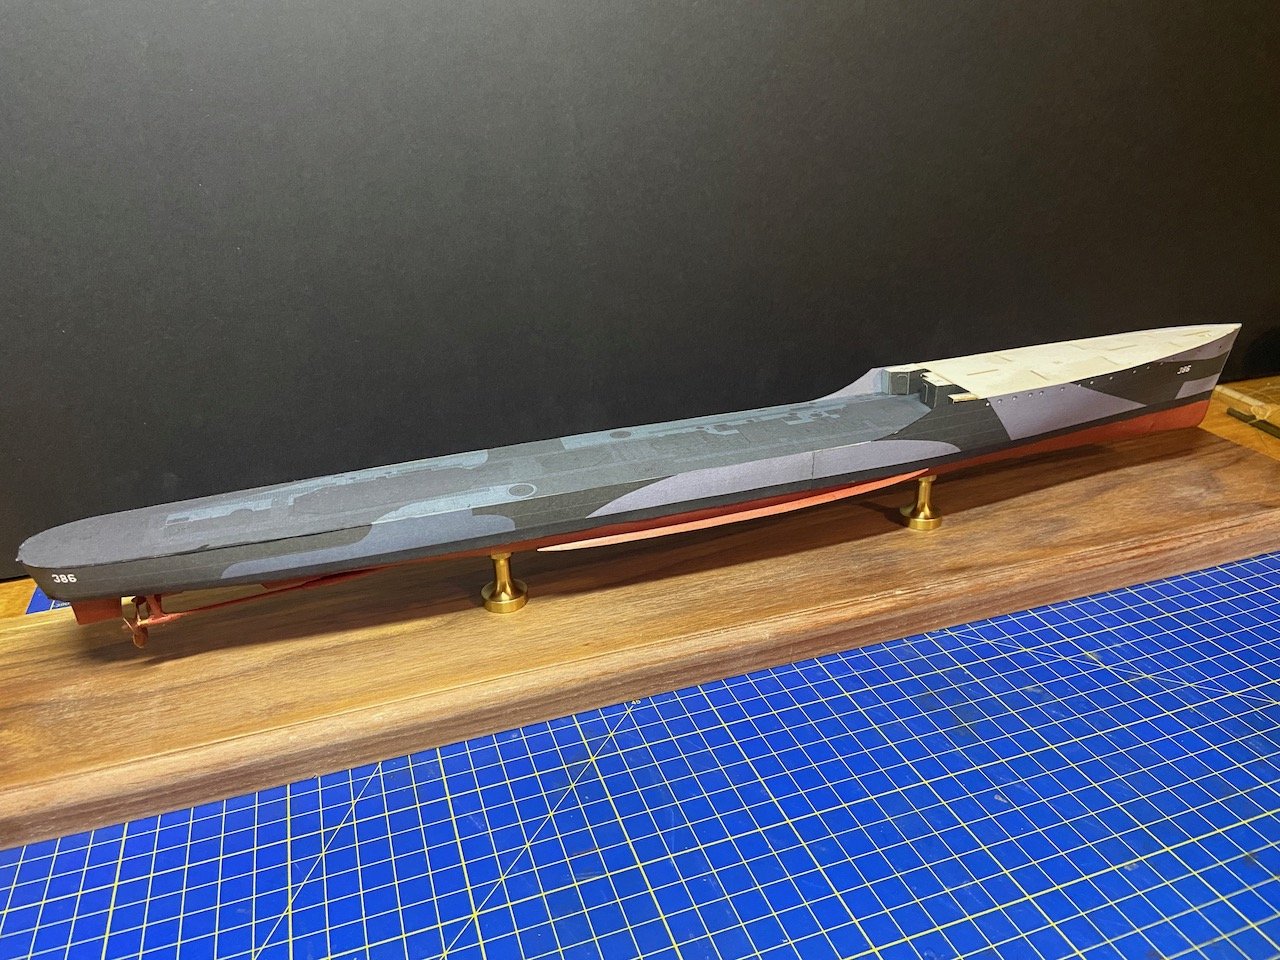
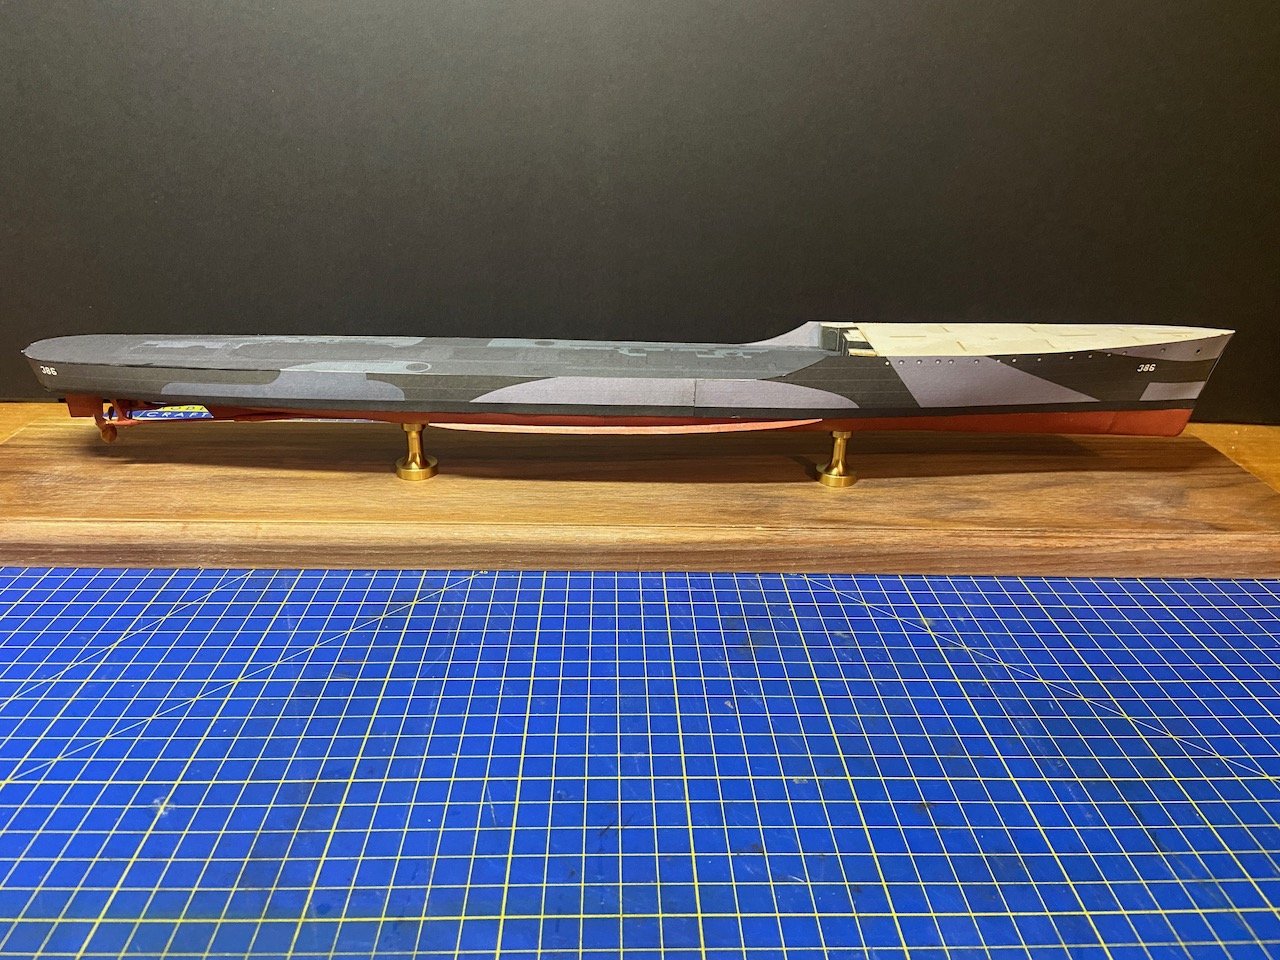
 Thank you James! No time to work on USS Bagley until tomorrow, but here's how she looks today, with deck structures test fit. Long ways to go... I'm now considering how I want to deal with the railings. I have some PE railings I purchased, but it would be nice to make railings that have their stanchions in the right locations. That might be a bit much for me to deal with though. On V108, I used PE railings and modified them in places, so that I had stanchions properly located at corners. I suppose I can try that on this model too. Just have a lot more corners to worry about here.
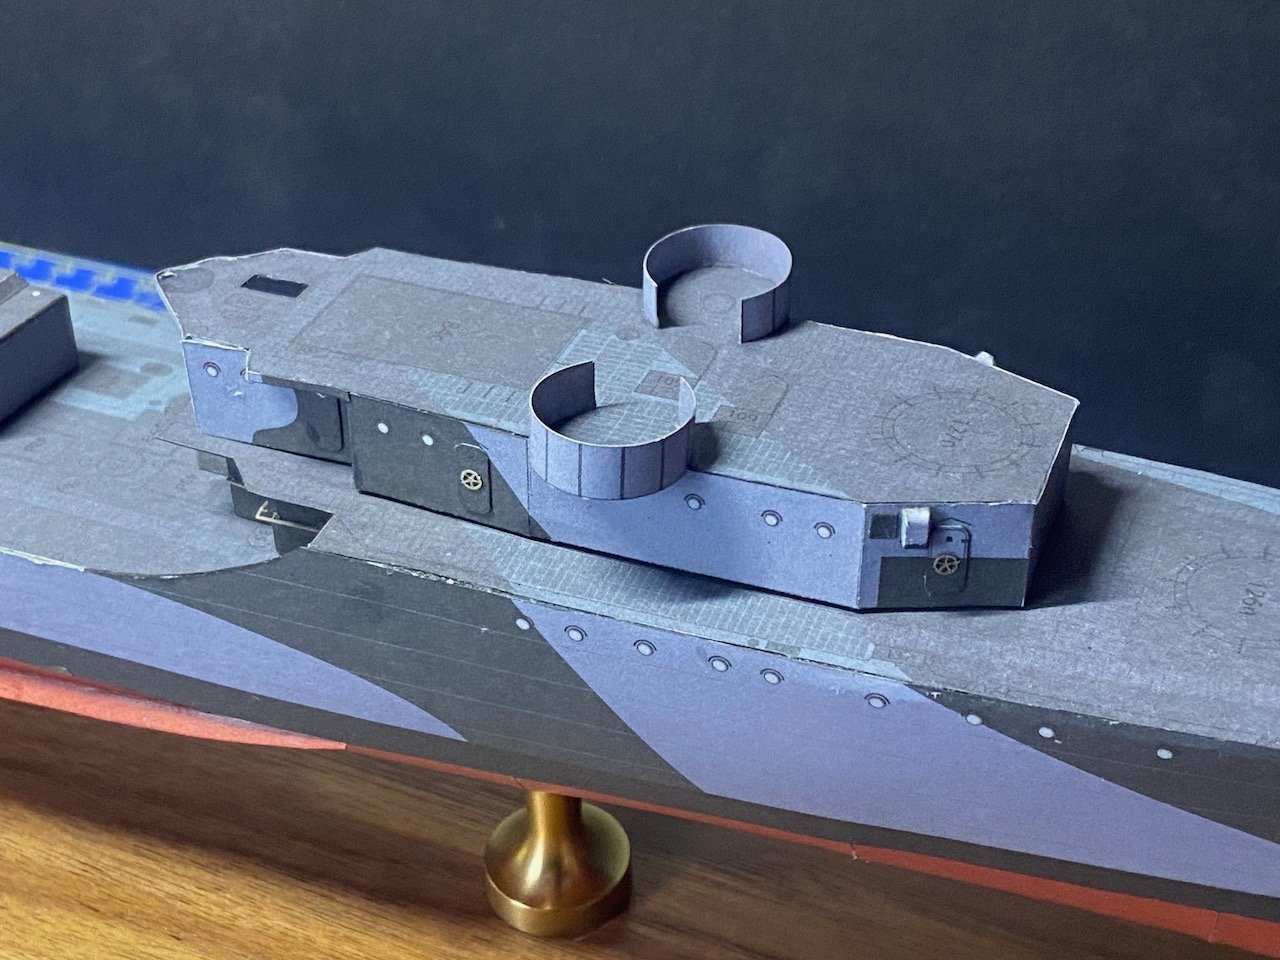
-
Ryland Craze reacted to a post in a topic:
USS Bagley (DD-386) by catopower - 1/200 - Avangard - CARD
-
Canute reacted to a post in a topic:
USS Bagley (DD-386) by catopower - 1/200 - Avangard - CARD
-
ccoyle reacted to a post in a topic:
USS Bagley (DD-386) by catopower - 1/200 - Avangard - CARD
-
sheepsail reacted to a post in a topic:
USS Bagley (DD-386) by catopower - 1/200 - Avangard - CARD
-
druxey reacted to a post in a topic:
USS Bagley (DD-386) by catopower - 1/200 - Avangard - CARD
-
yvesvidal reacted to a post in a topic:
USS Bagley (DD-386) by catopower - 1/200 - Avangard - CARD
-
James H reacted to a post in a topic:
USS Bagley (DD-386) by catopower - 1/200 - Avangard - CARD
-
GrandpaPhil reacted to a post in a topic:
USS Bagley (DD-386) by catopower - 1/200 - Avangard - CARD
-
catopower reacted to a post in a topic:
USS Bagley (DD-386) by catopower - 1/200 - Avangard - CARD
-
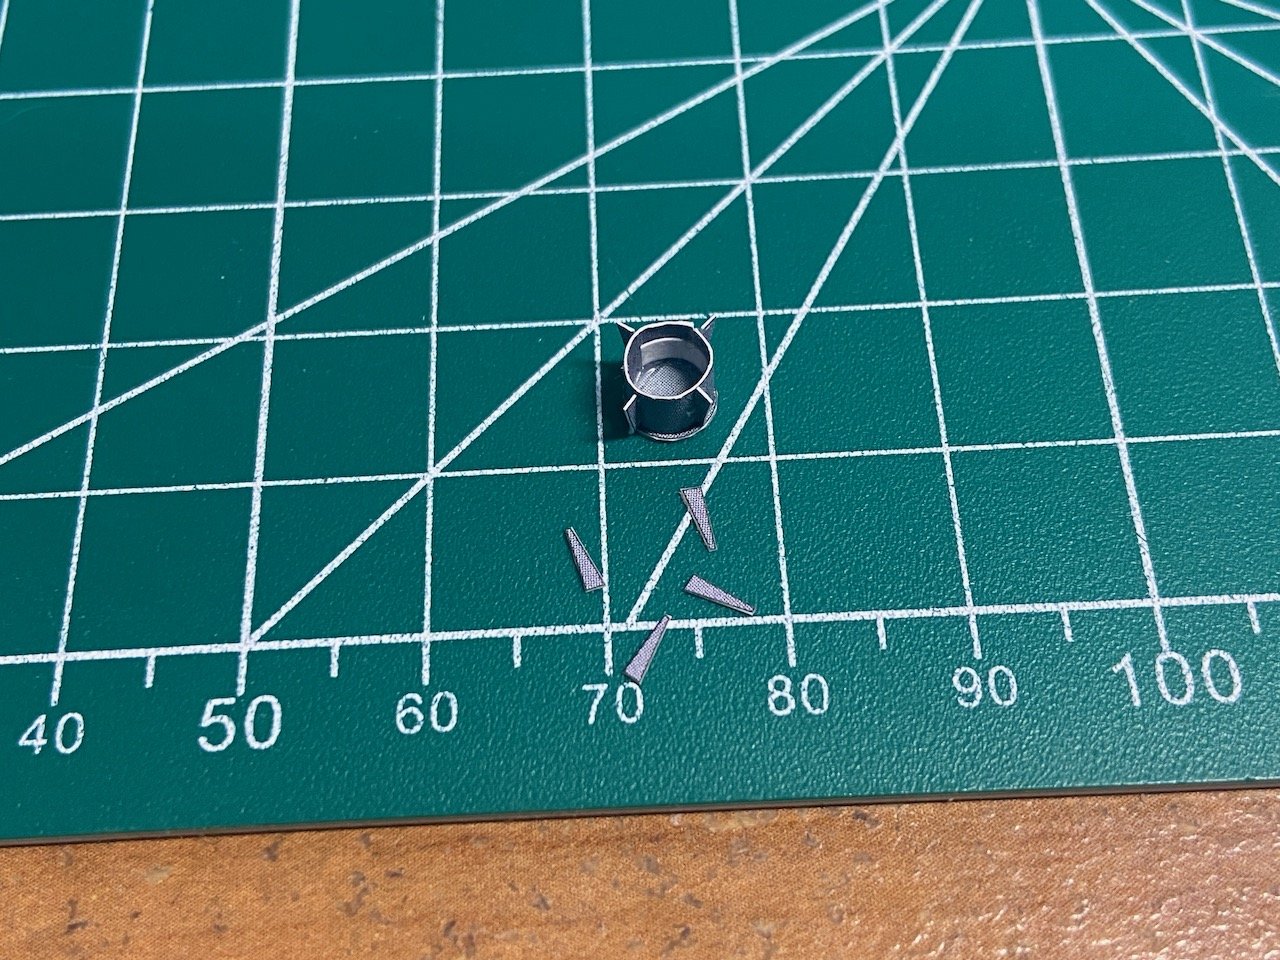
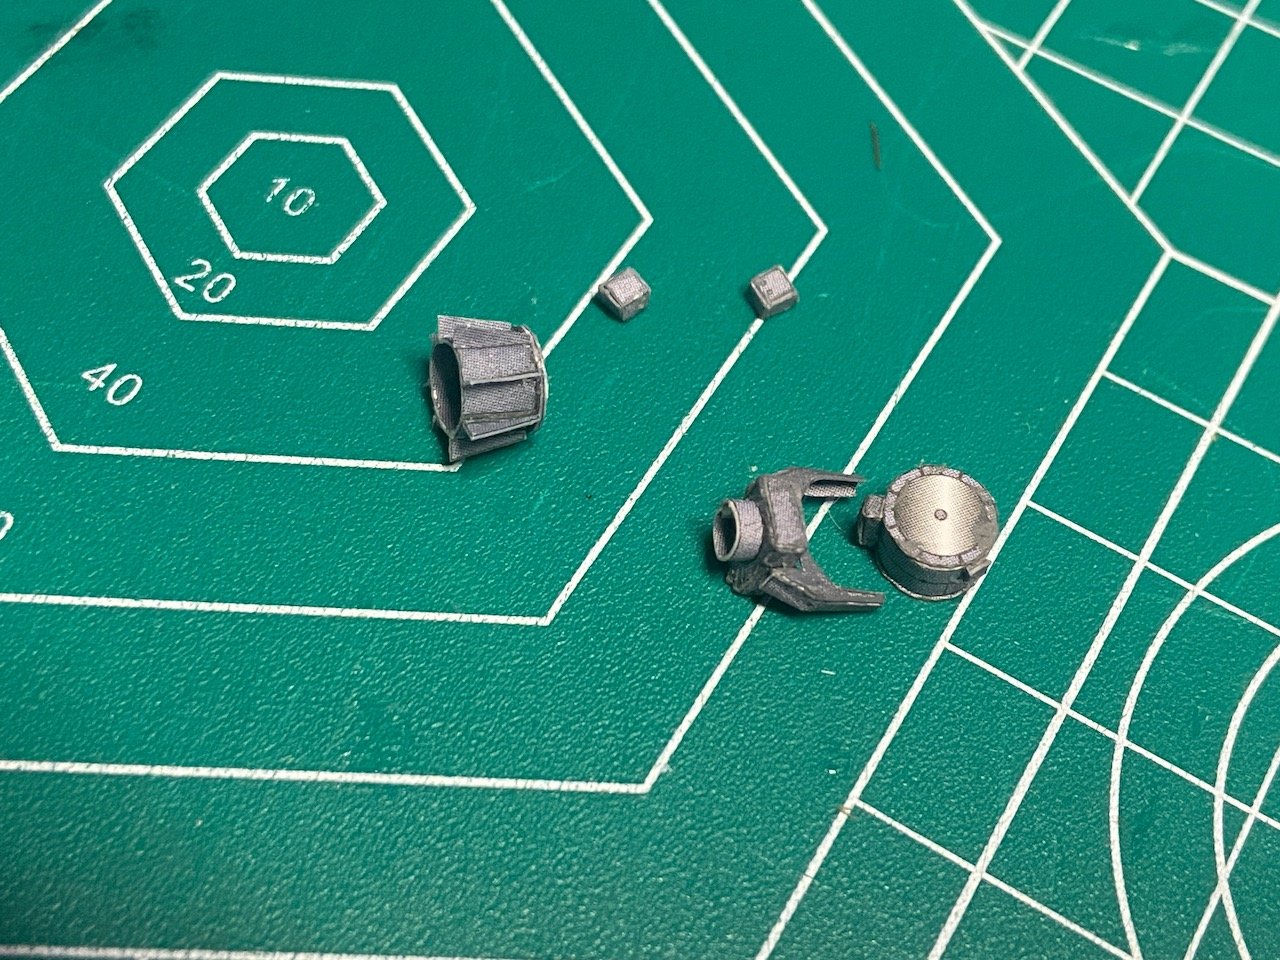
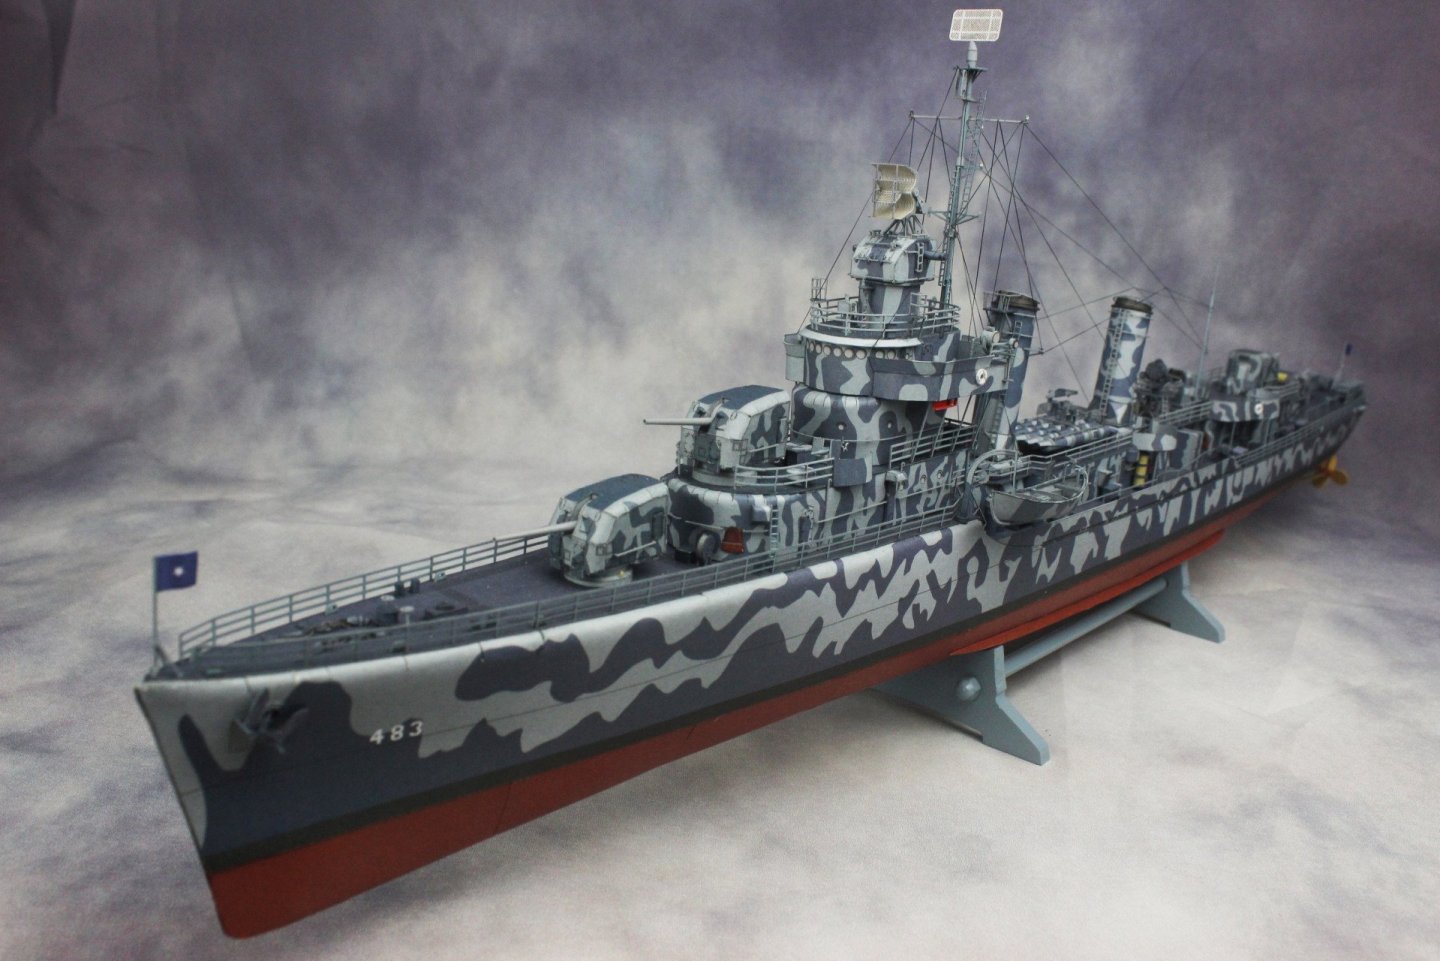
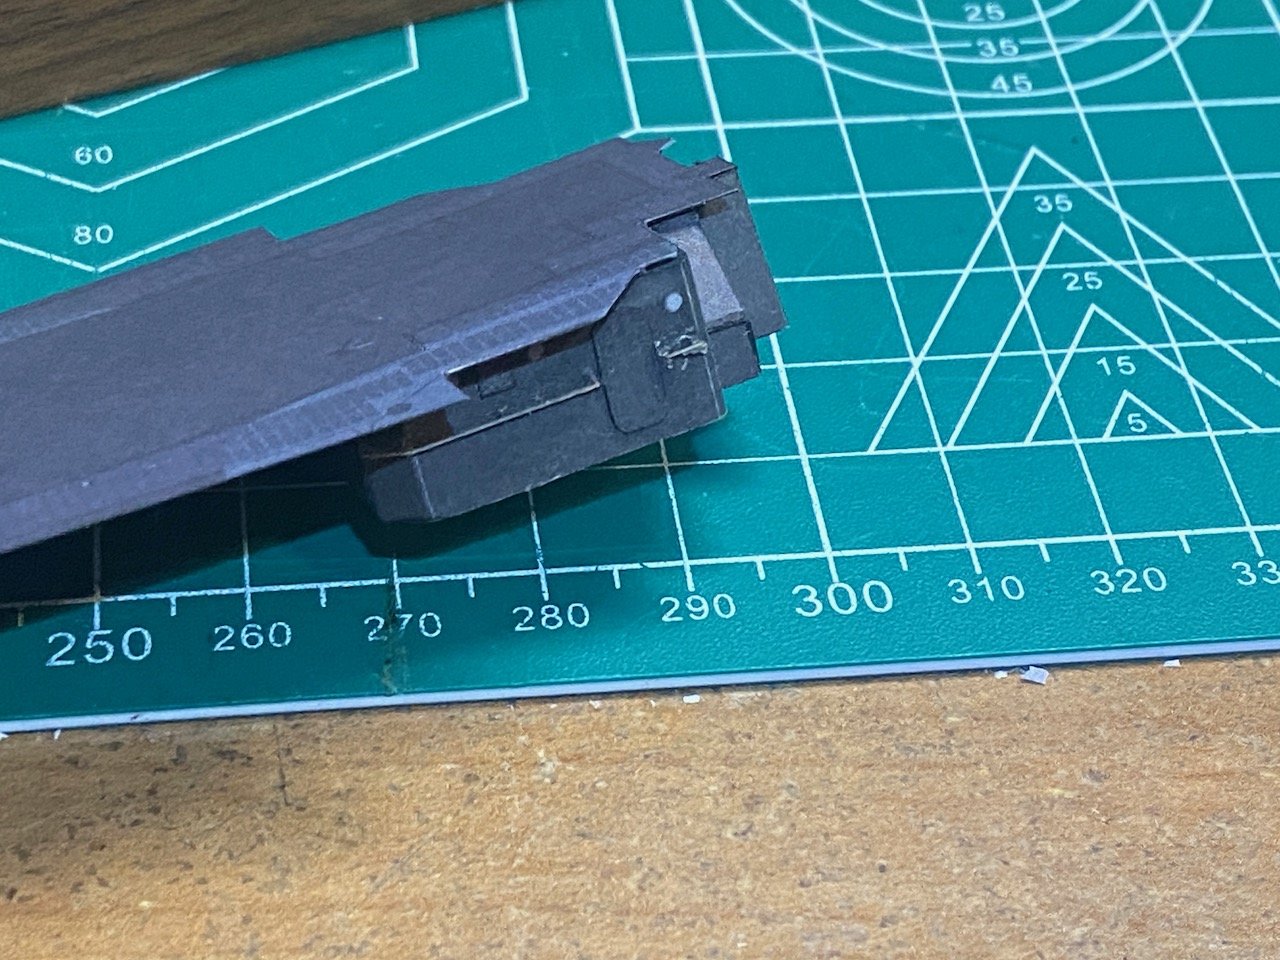
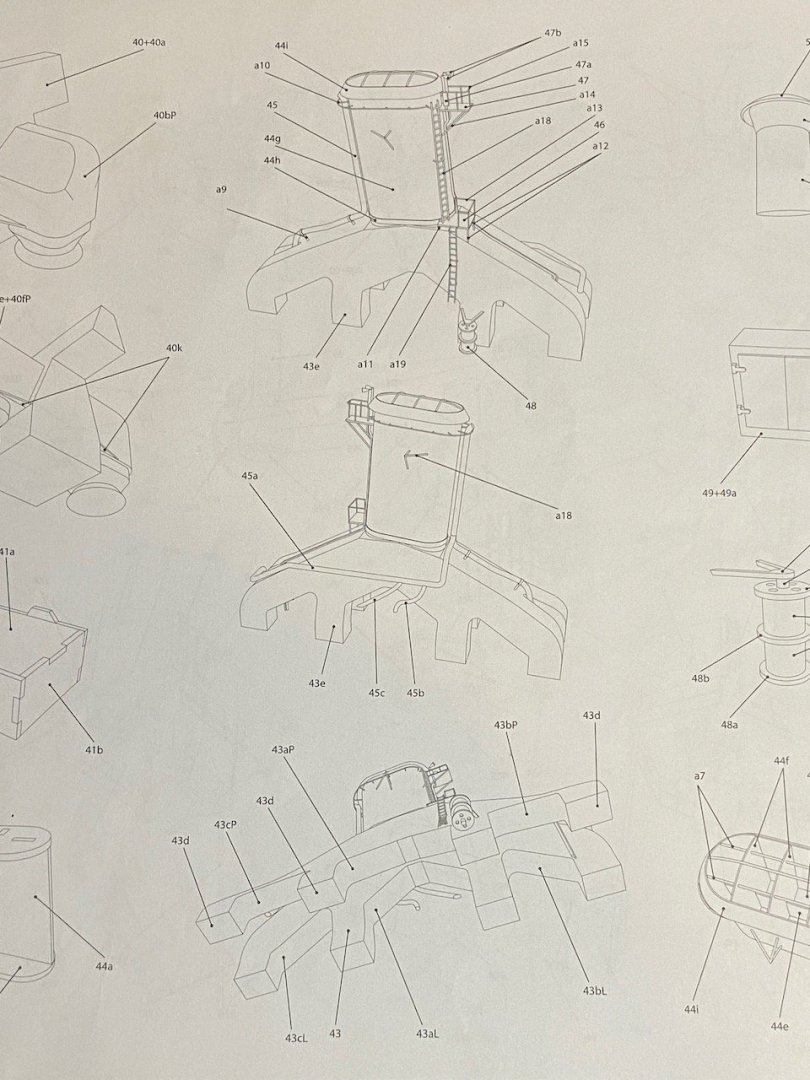
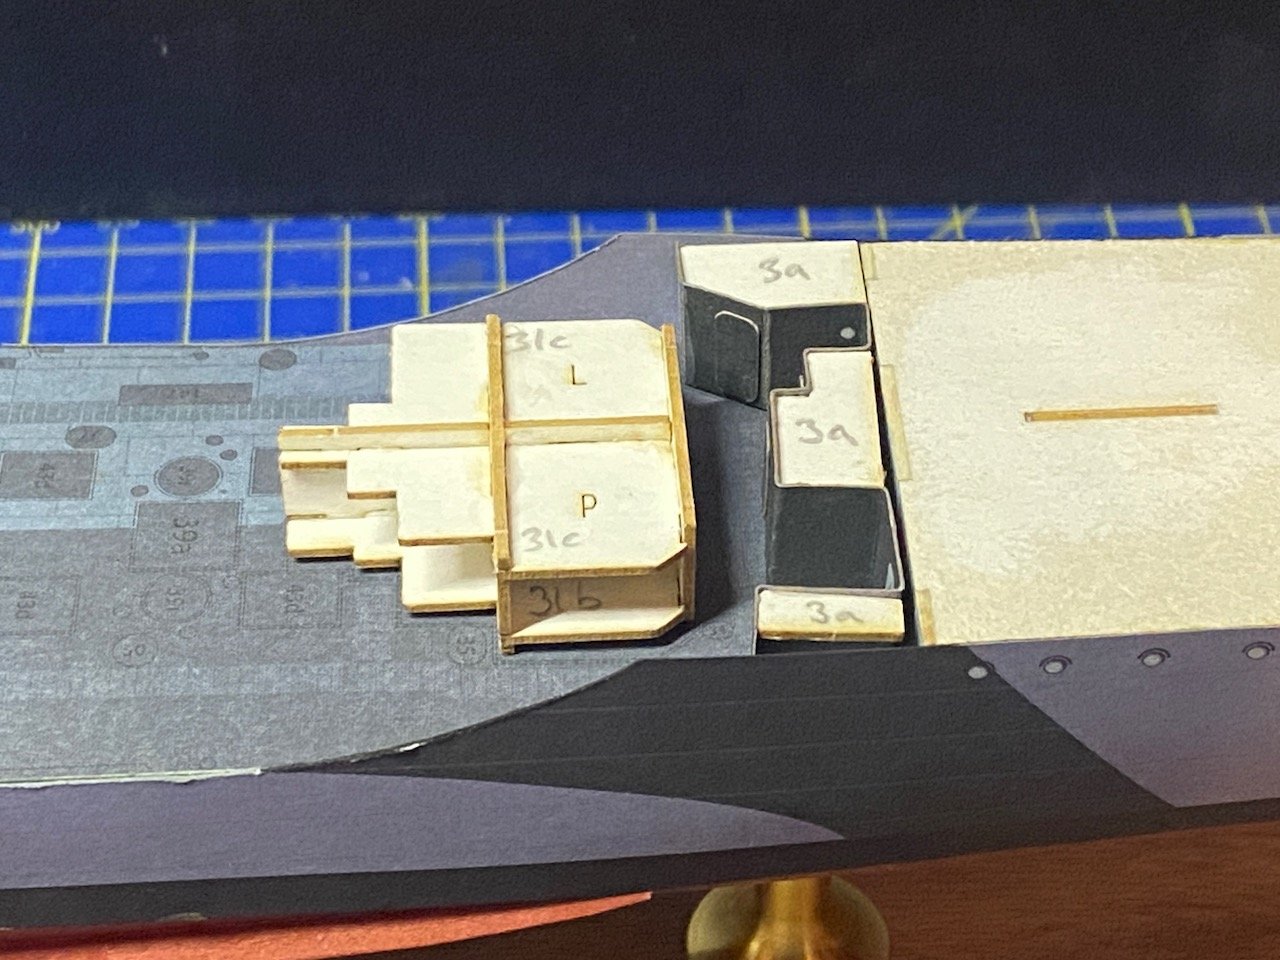
I know, but when you're a moody person, it can get you into a lot of trouble... 😶 These paper models are friggin' addictive! And, unfortunately, I'm finding the Avangard kits to be too alluring. Now that I've posted that picture of USS Aaron Ward, I'm thinking it's an awfully interesting looking build. But, I was also realizing Avangard's other Treaty Era destroyer kit, USS Farragut, is also calling to me, as the ship has the Mare Island connection of having been named after the first Commandant of Mare Island, David Glasgow Porter... Clearly, there are way too many interesting models to build, and I can't go fast enough. I've been working on the construction of the Bagley's large searchlight, located amidships, and it's slow going. Lots of parts. In between work on that, I've had to take breaks and work on things less involved. However, if this keeps up, I'm going to run out of those less involved assemblies, and it's going to be nothing but tiny, tiny details with lots of parts in a pretty short time. Just not yet! Searchlight base construction... Various searchlight parts assembled. Not shown are the seats for the operators, and two little pieces that fit on top of the searchlight... This short tower is where the searchlight will be mounted. There are also 5 other small instruments that fit up here. I don't know the details, but they kind of look a lot like the instruments you would find on the bridge. was this a backup, in case the main bridge was damaged? Note above and below, I was relieved to discover that the hatch wheels were provided in the laser cut details set. I'd been trying to figure out how I was going to make these wheels look decent, given that they are just way too small for me to cut the individual spokes of the printed parts, and those areas between the spokes were plain white as provided. The printed wheels were black. I don't know what color they would have actually been. I just left these laser-cut parts unpainted. They all come in basic gray. Anyway, this is an example of one of those less demanding details, gluing on the hatches, ventilator grilles, etc.


-
Hey Canute, I just realized you were responding to my statement about how it might have been easier to build the USS Aaron Ward, which is different from the 4-stack flush deck USS Ward of WWI/WWII. I mentioned the Aaron Ward, because Avangard also makes a kit of that ship: I never intended to get sucked into building steel navy ships again, but here i am... 😬
-
catopower reacted to a post in a topic:
USS Bagley (DD-386) by catopower - 1/200 - Avangard - CARD
-
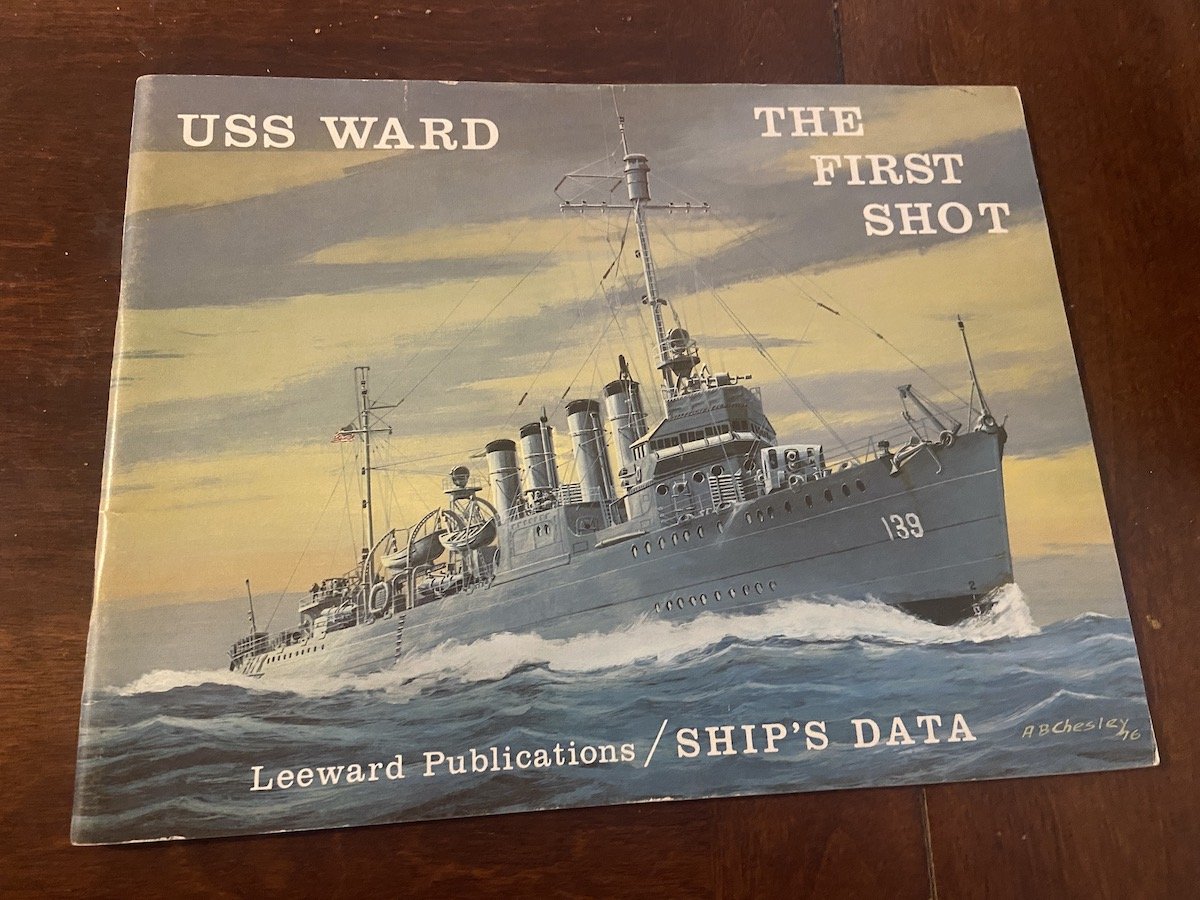
Thanks for the advice Druxey, Chris! Too late for this model, but I suspect that it must be very similar to other models. Something I'll watch out for in the future. Hi Ken, funny you should mention USS Ward. This just came in the mail today... ... And, I'm going to be acquiring the old Bluejacket kit from a friend of mine, probably next month. I'm planning on making that my first Steel Navy wooden ship model. The main thing there is that it has direct connections with Mare Island where our ship model club has many connections. Plus, there's a great brewery and taproom right in front of the historic ships from Hyde Street Pier, and a nice whiskey distillery nearby, just at the top end of the building ways.
-
catopower reacted to a post in a topic:
USS Bagley (DD-386) by catopower - 1/200 - Avangard - CARD
-
catopower reacted to a post in a topic:
USS Bagley (DD-386) by catopower - 1/200 - Avangard - CARD
-
By the way, I've been scratching my head over the question of the model's part no. 1. I couldn't find reference to it anywhere in the instructions. I ended up reaching out to Avangard and they identified the part for me. They also showed me where it goes and all, but I still don't really understand what that black line across the part is for. Also, there is no icon indicating the the part should be rolled, so I don't really get how the part fits. Avangard folks instructed me to fold it into shape and glue it into place, but it's still not clear how it's folded and how it is supposed to fit. In my case, I've used filler inside the hull, so there's no room to fit this part. I've since dug out the area of the hawse hole, so this part really isn't necessary now.

-
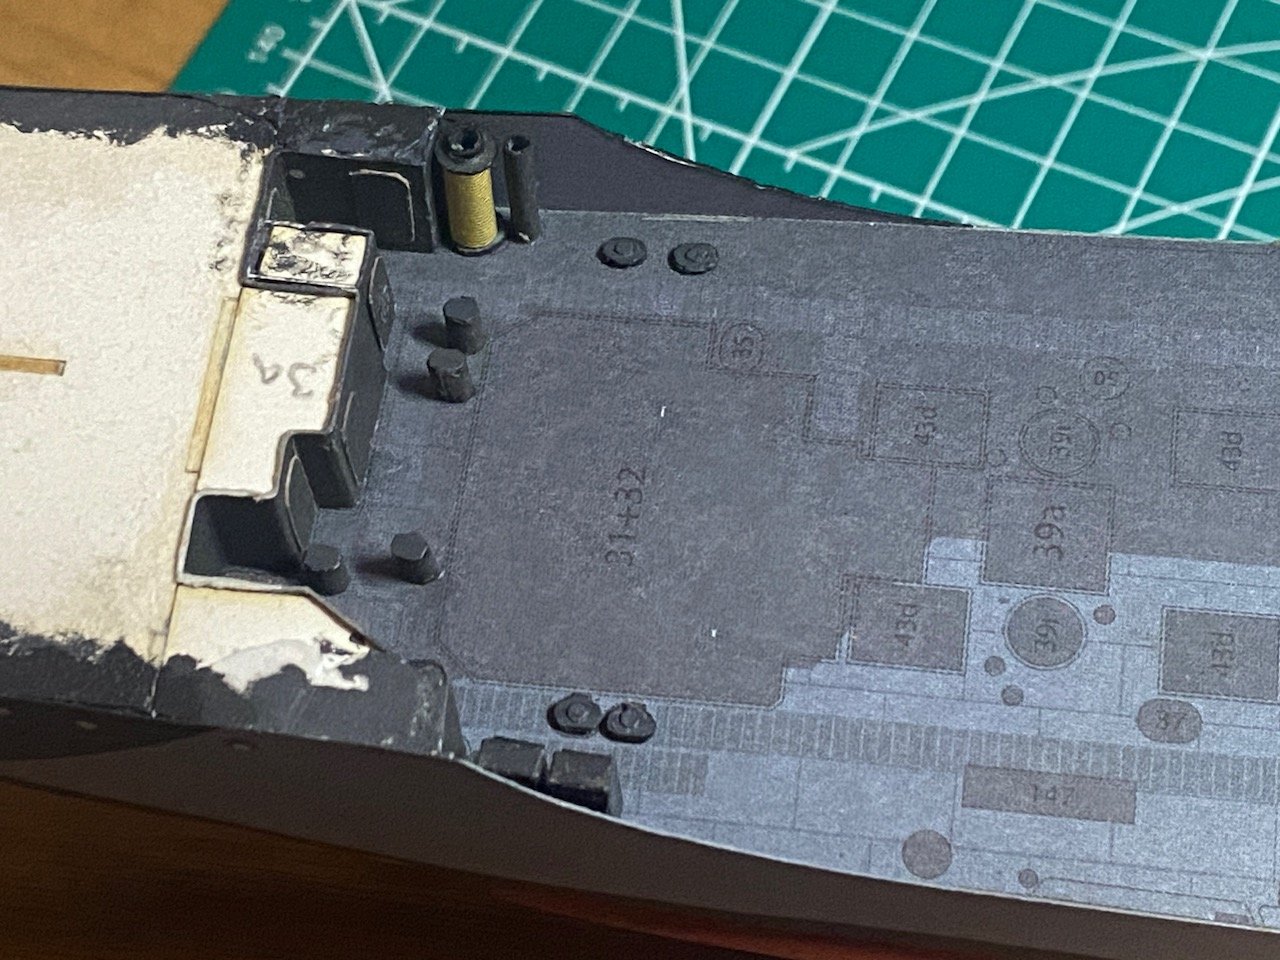
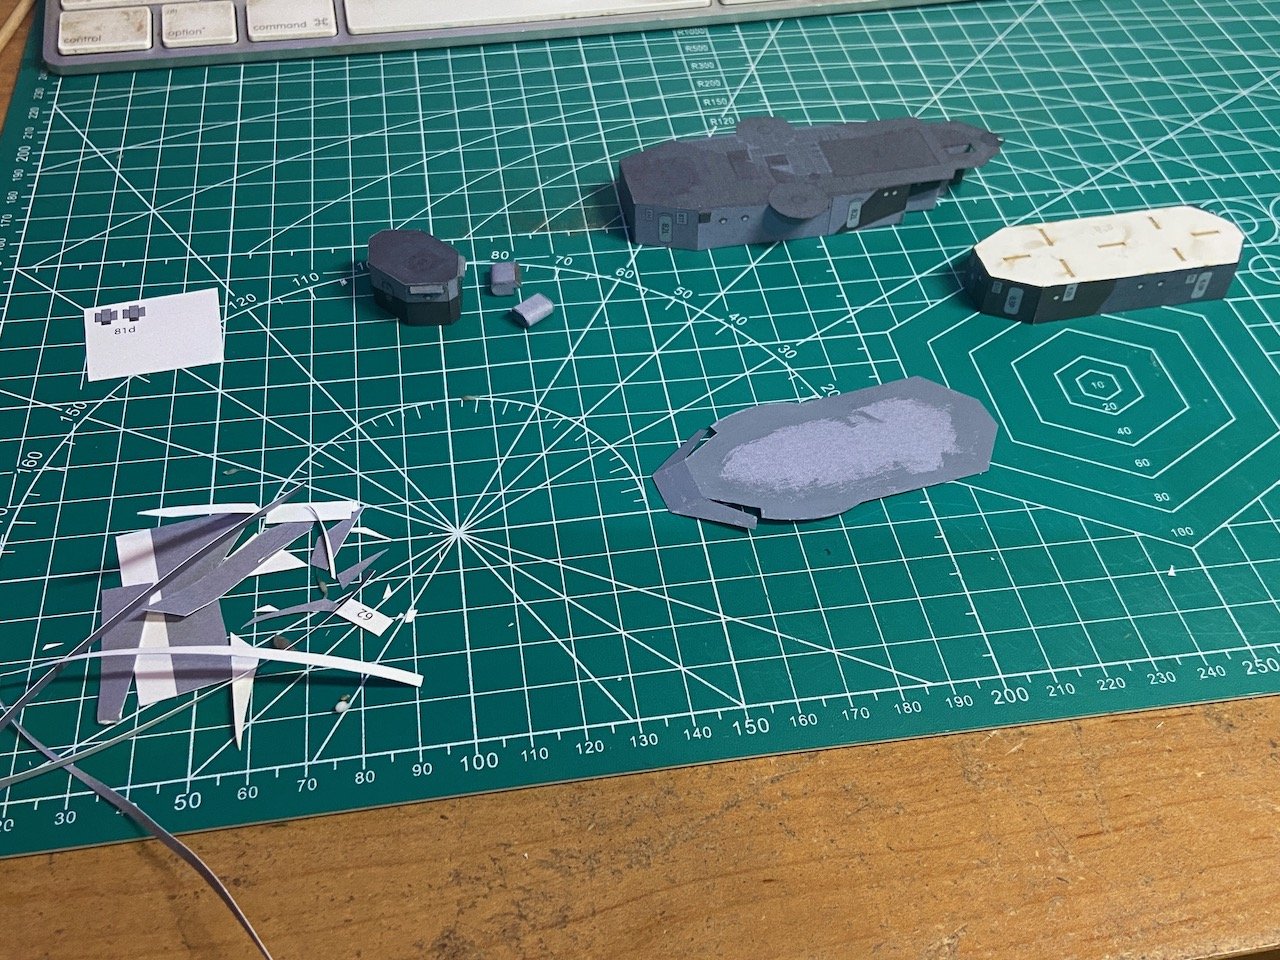
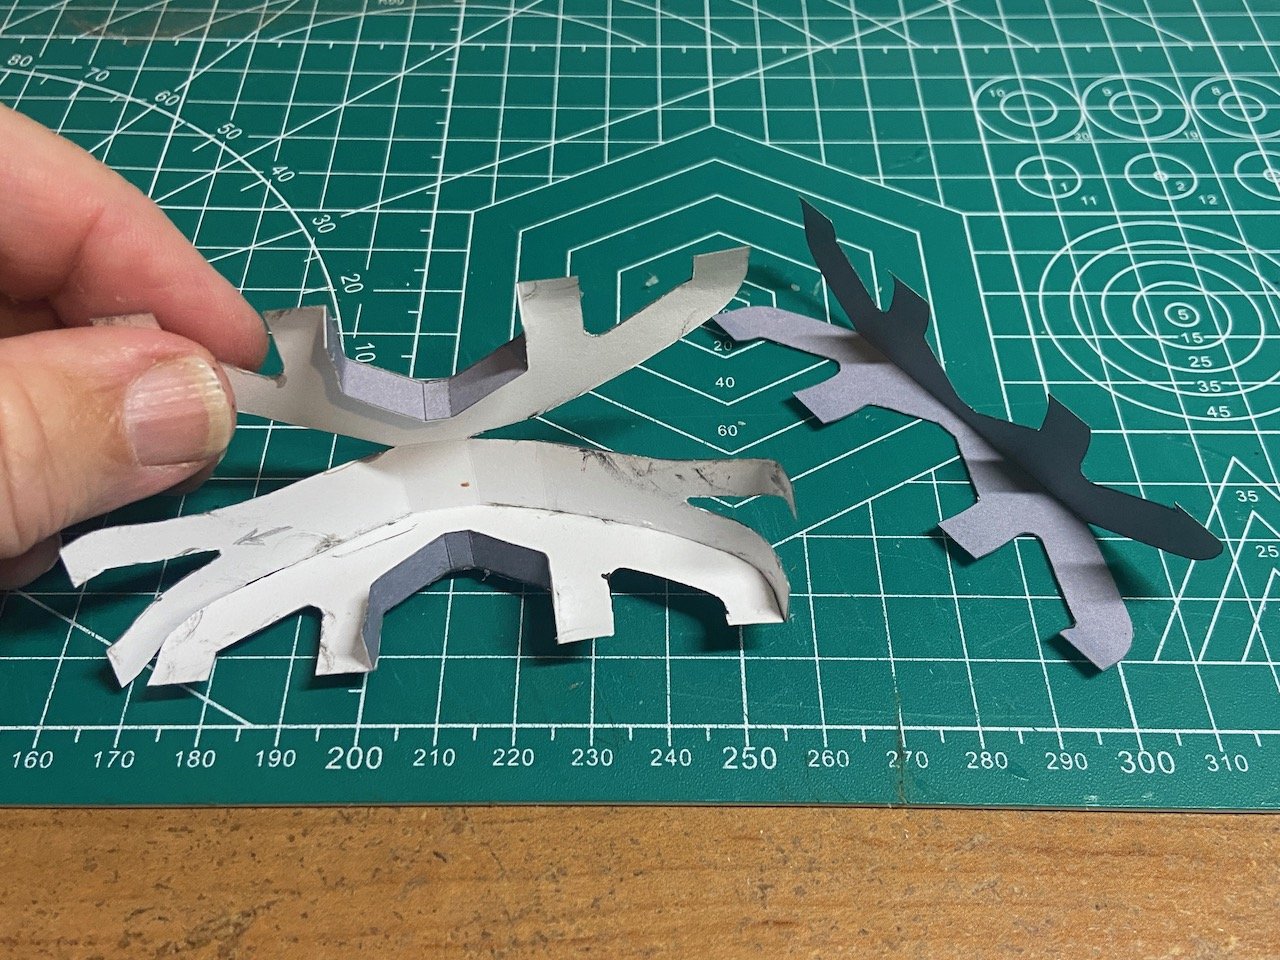
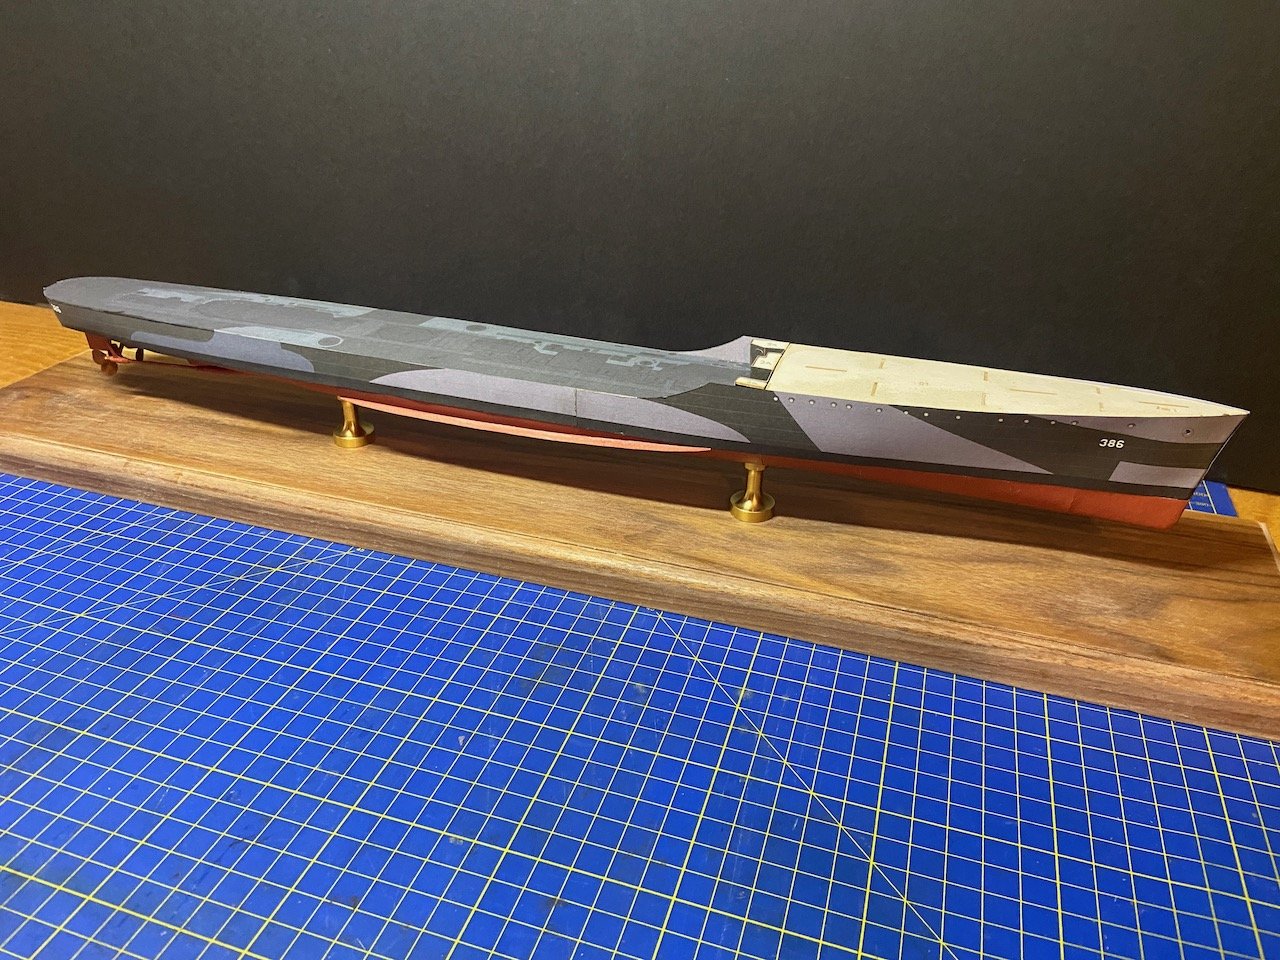
Took a little time off, but got back to things. Finished the details that go underneath the forecastle deck, mostly deck hatches and what look like trash cans, but I know they're not. In order to make sure the forecastle deck is located perfectly over this structure underneath, I though it best to glue the structure first to the underside of the deck, THEN glue the whole thing down on the model. I need to clean off a little string of glue from the railing, but it's really hard to spot it outside of these photos. Anyway, the deck fit pretty well in place, though it took a lot of careful adjustment to get it positioned properly. Now, I'm dealing with little details, starting with the superstructure on top of the forecastle, which includes the forward gun mounts and the bridge. Separately, I started working on a couple other deck structures that will fit further aft on the main deck. At the bottom left corner is my pile of paper clippings. I keep cleaning up this pile, but it grows back quickly! ... Meanwhile, I started working on what seems to me to be the most convoluted structure on this paper ship model, the ducting for the funnel. Leads me to wonder if some other subject would have been easy for a paper model of this type, like the U.S.S. Aaron Ward or something? I'm having to move very slowly with this structure, as it consists of 8 ducts that bend and twist their way into a single unit, topped by the funnel. Took me a while just to visualize how the parts went together, even with the multiple views in the instructions. It's going to take me a while to finish this octopus of a structure. I'm taking it a little at a time while I work on other details – lots and lots of other details...

-
catopower reacted to a post in a topic:
Hello from the Netherlands!
-
catopower reacted to a post in a topic:
Two masted schooner by lawrence101 - RESTORATION - similar to the Emma C Berry
-
Nicely done, congratulations! You must be proud of your accomplishment, she's a fine looking ship!
- 110 replies
-
- 1
-
-
- san ildefonso
- occre
- (and 1 more)
-
catopower reacted to a post in a topic:
San Ildefonso by gsxdent59 - FINISHED - OcCre - 1/70
-
catopower reacted to a post in a topic:
Portland Scale Ship Co. news and updates
-
catopower reacted to a post in a topic:
hello moderator just made a signature mistake
-
Beautiful model James! I just got mine last week. Since Ages of Sail now carries these kits, it's way too easy for me to buy them for myself! Question: What color oil paint did you use here? You mentioning using a warmer oil color, what would your choice be then?
-
catopower reacted to a post in a topic:
33' Royal/Admiral's Barge by James H – FINISHED - Vanguard Models - 1:48 scale - 3D-printed
-
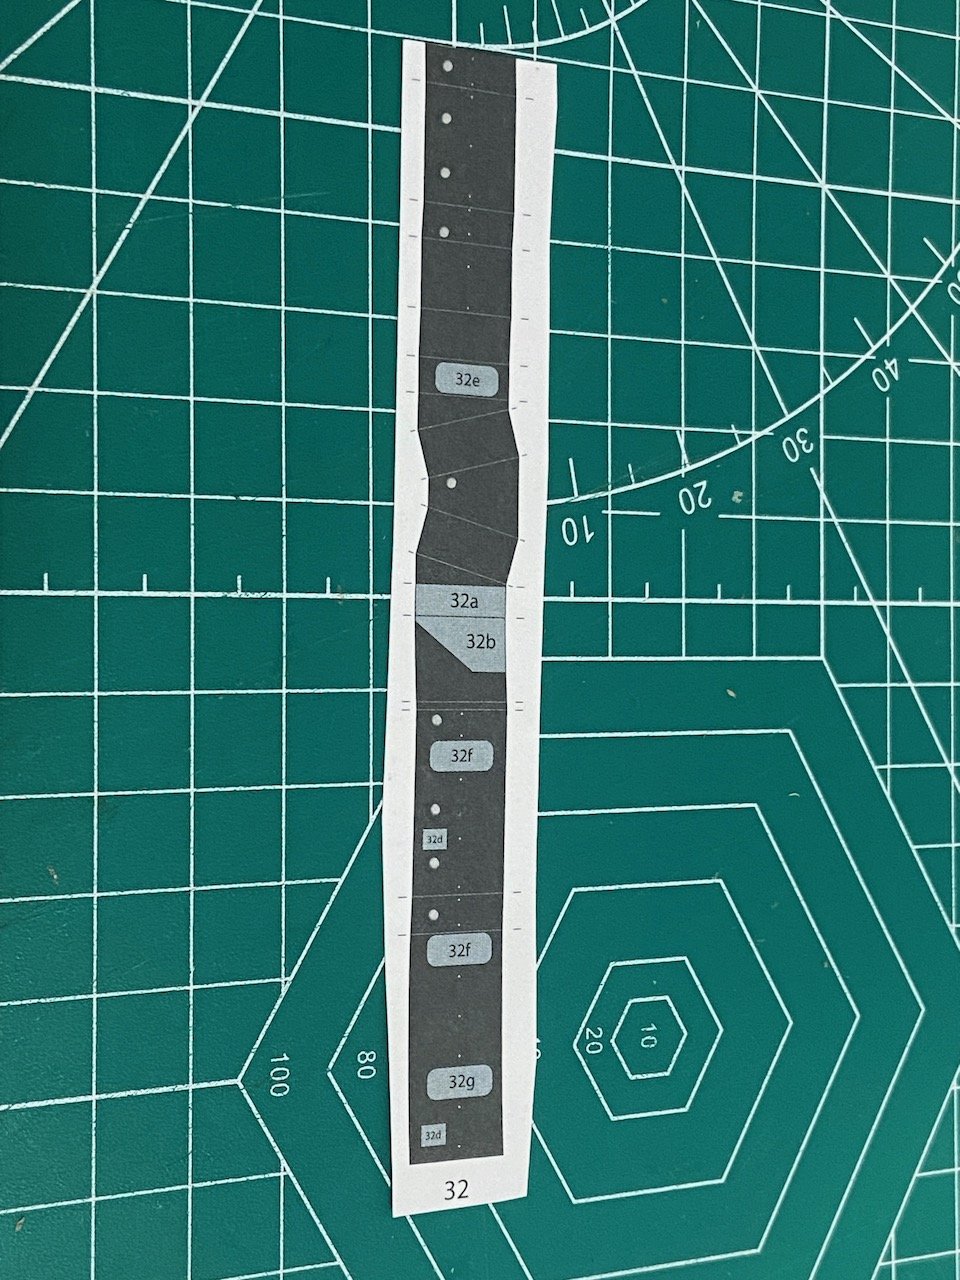
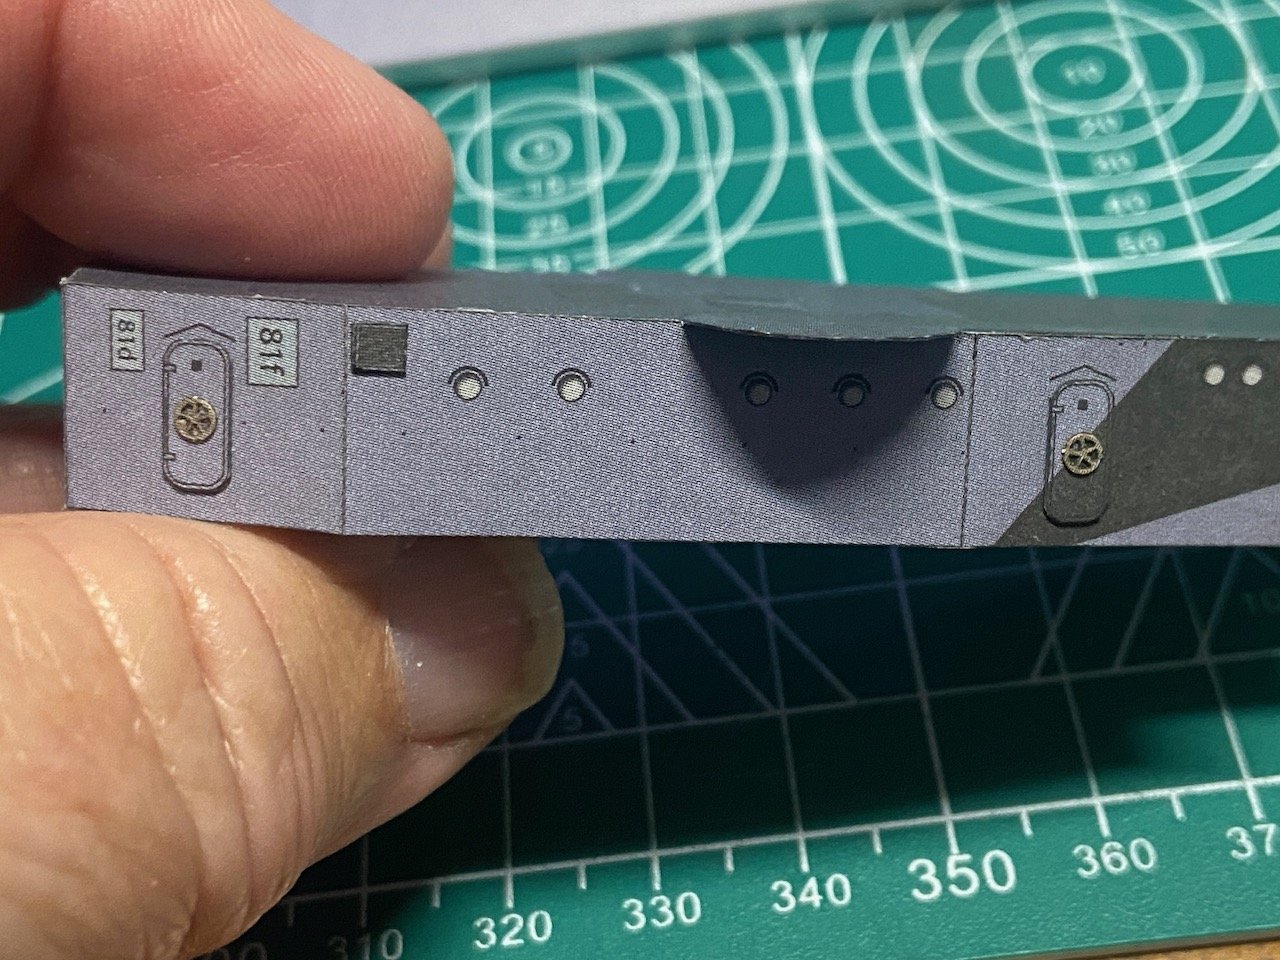
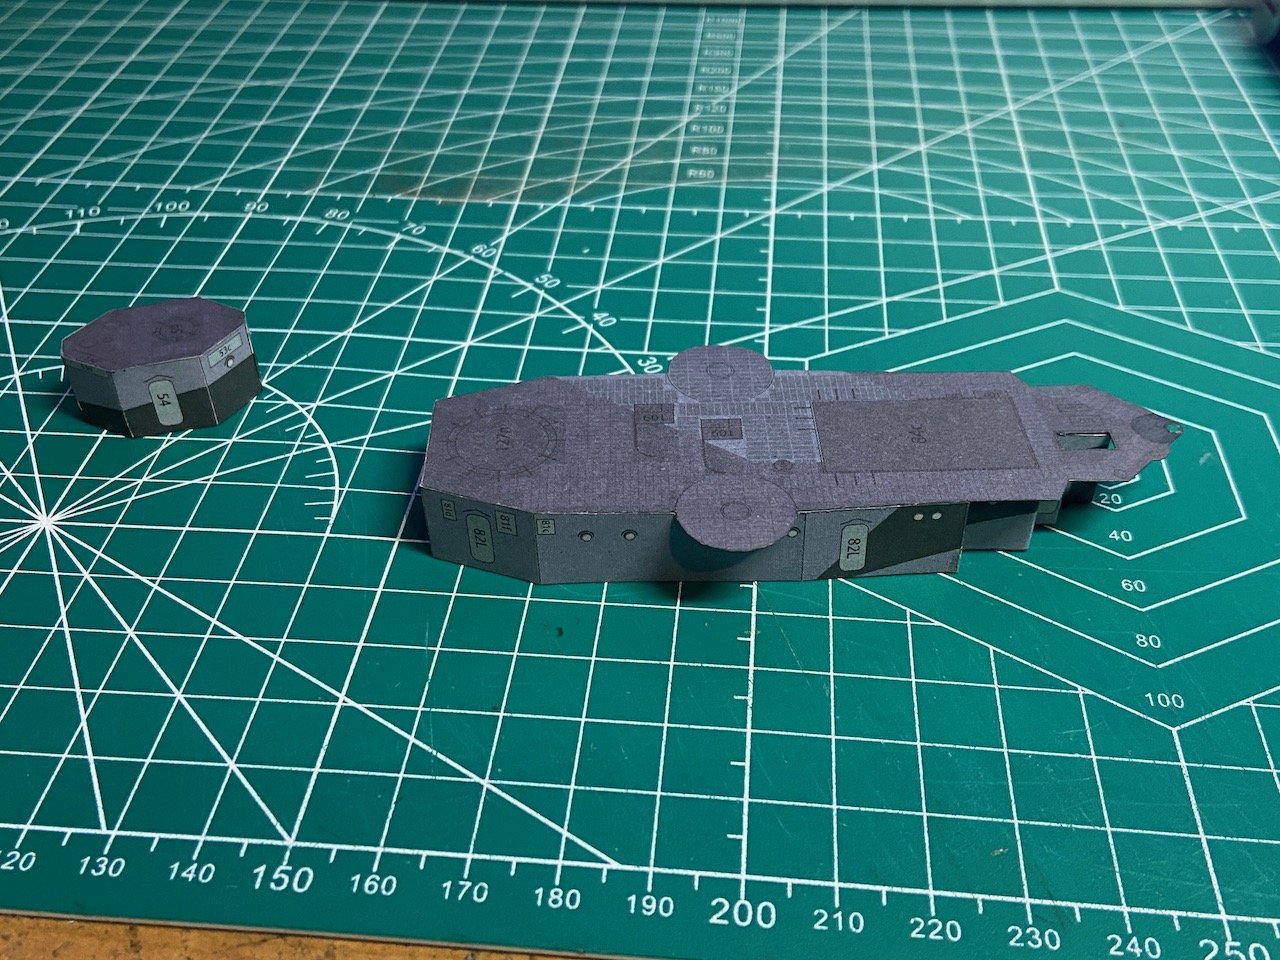
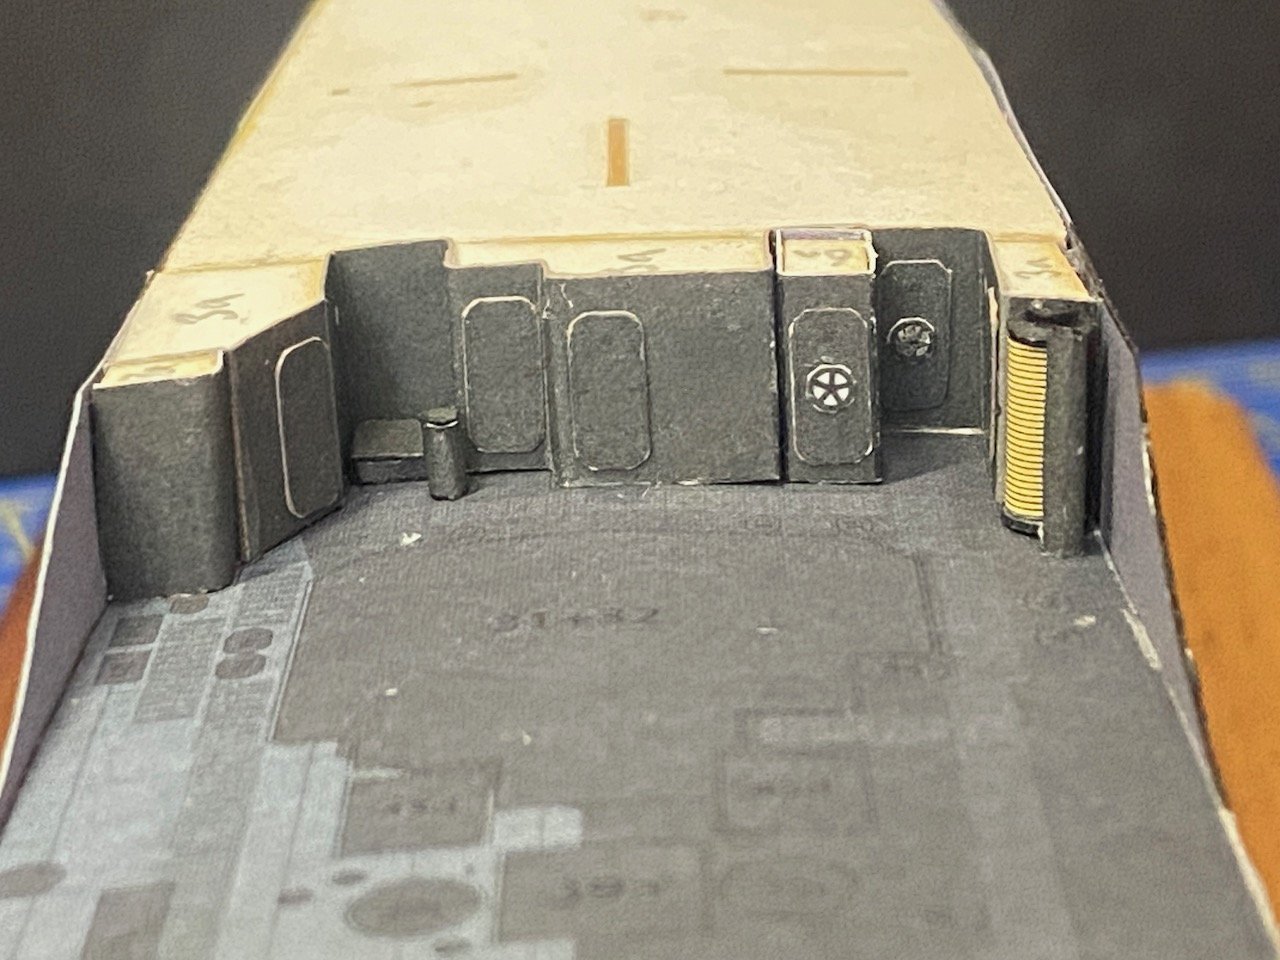
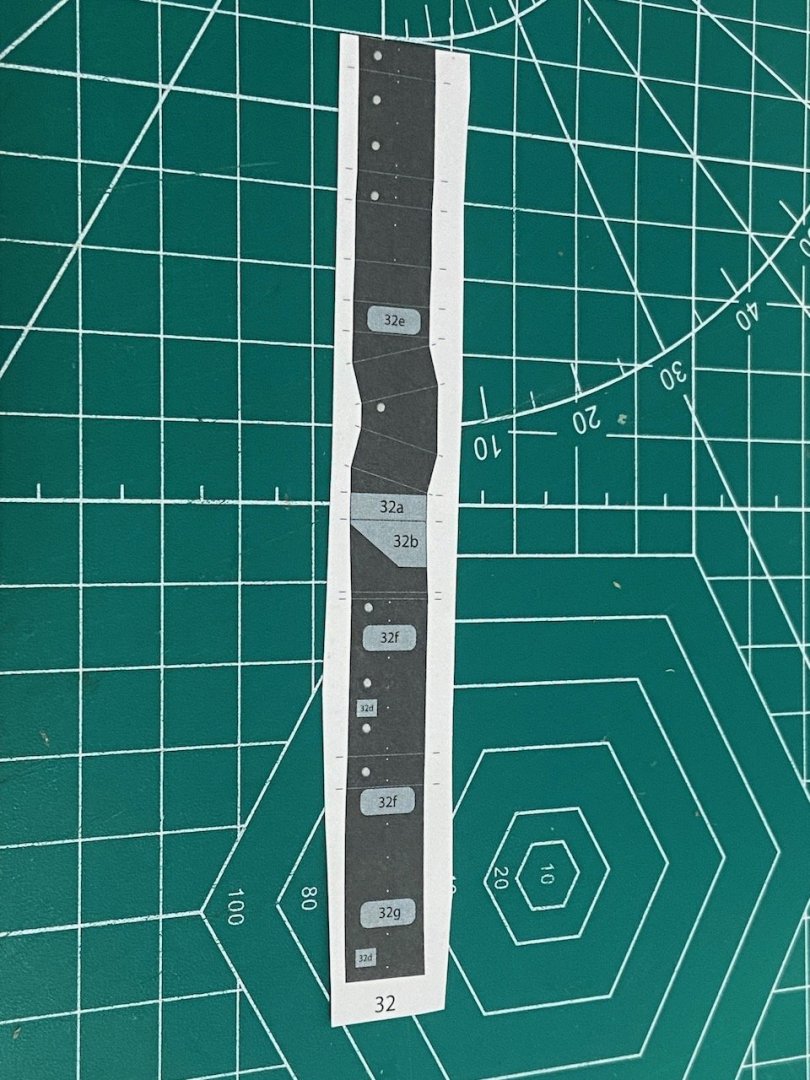
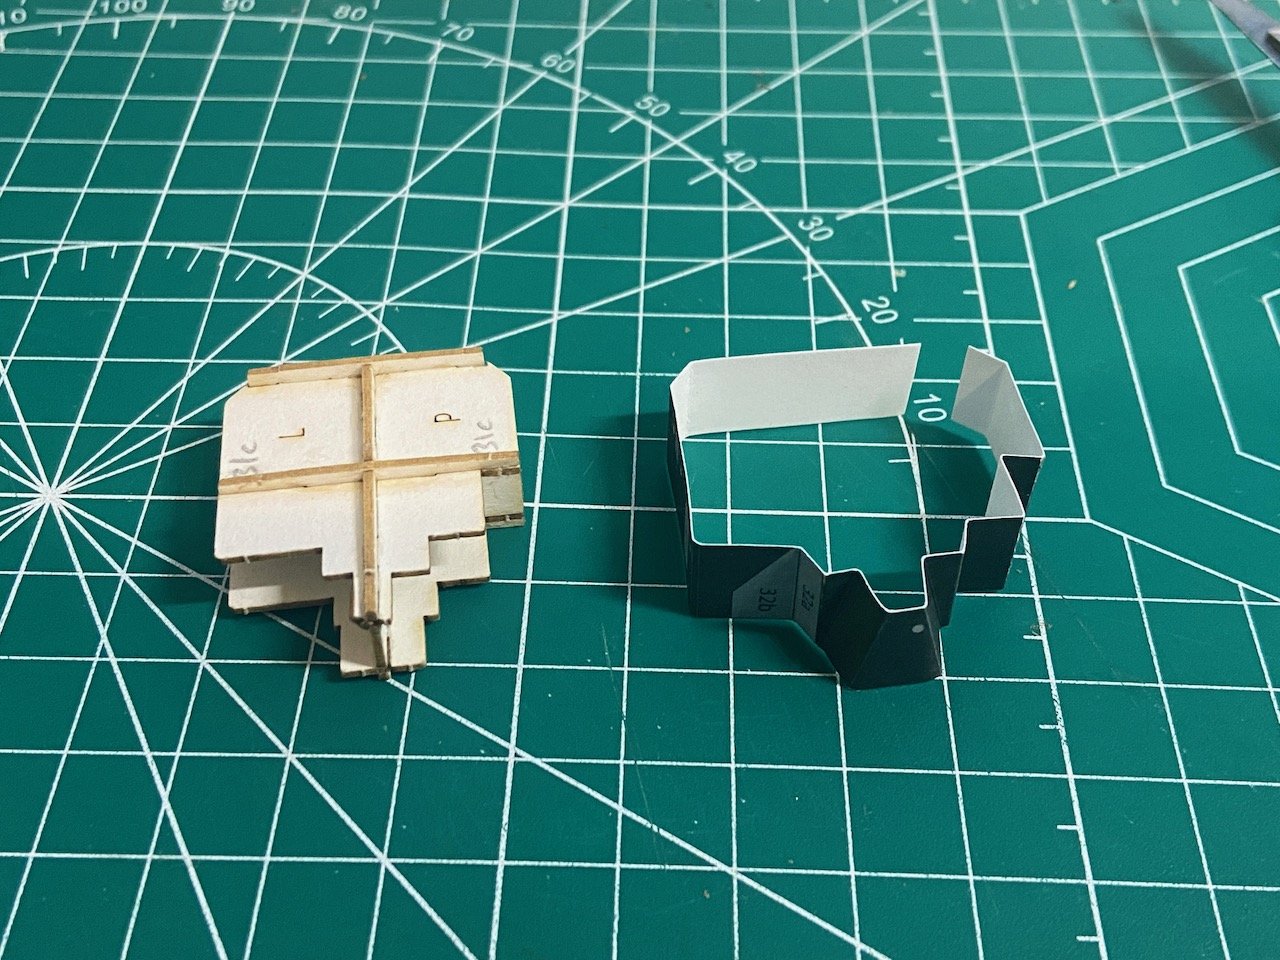
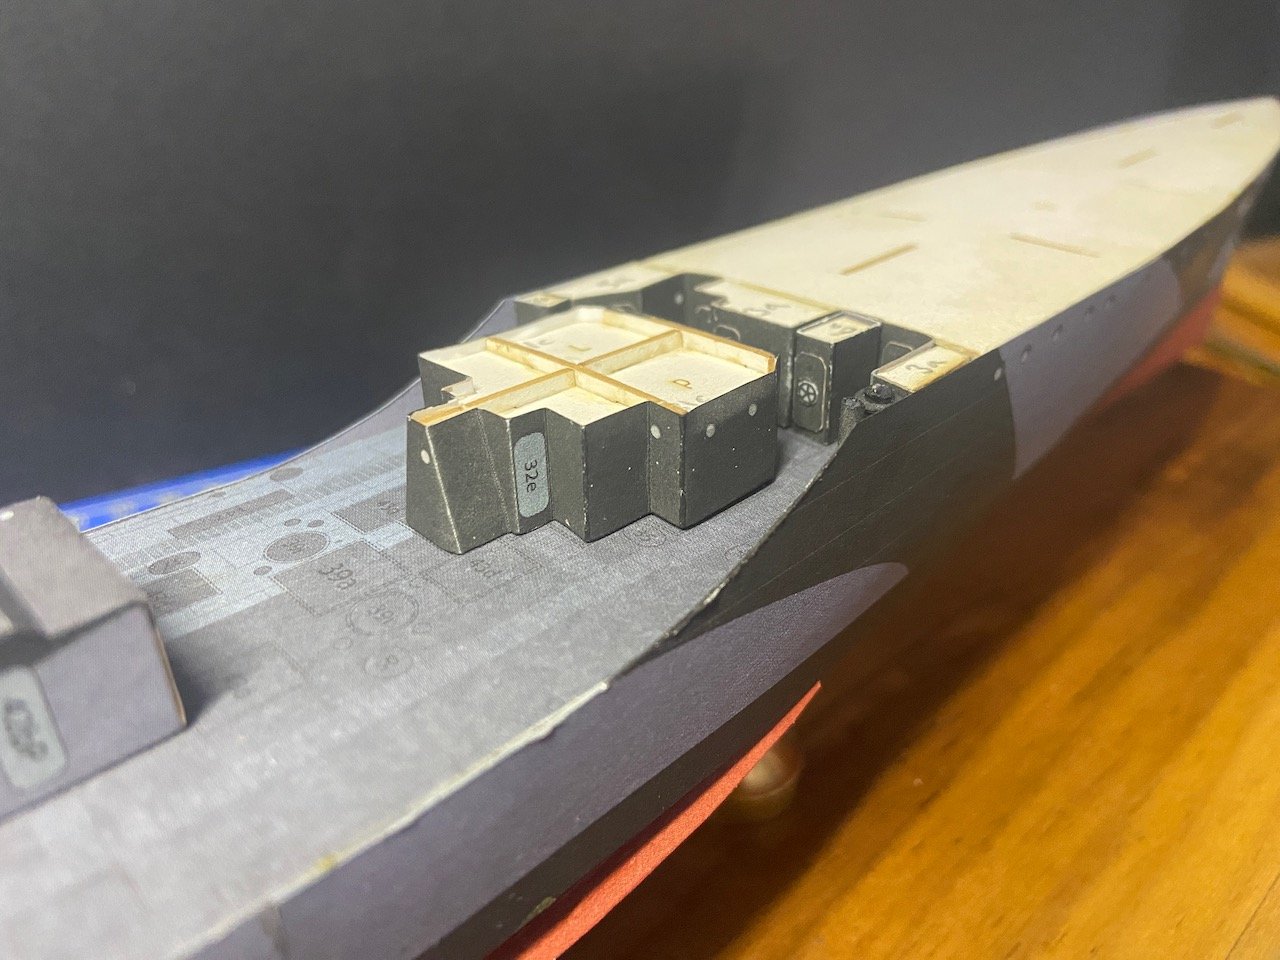
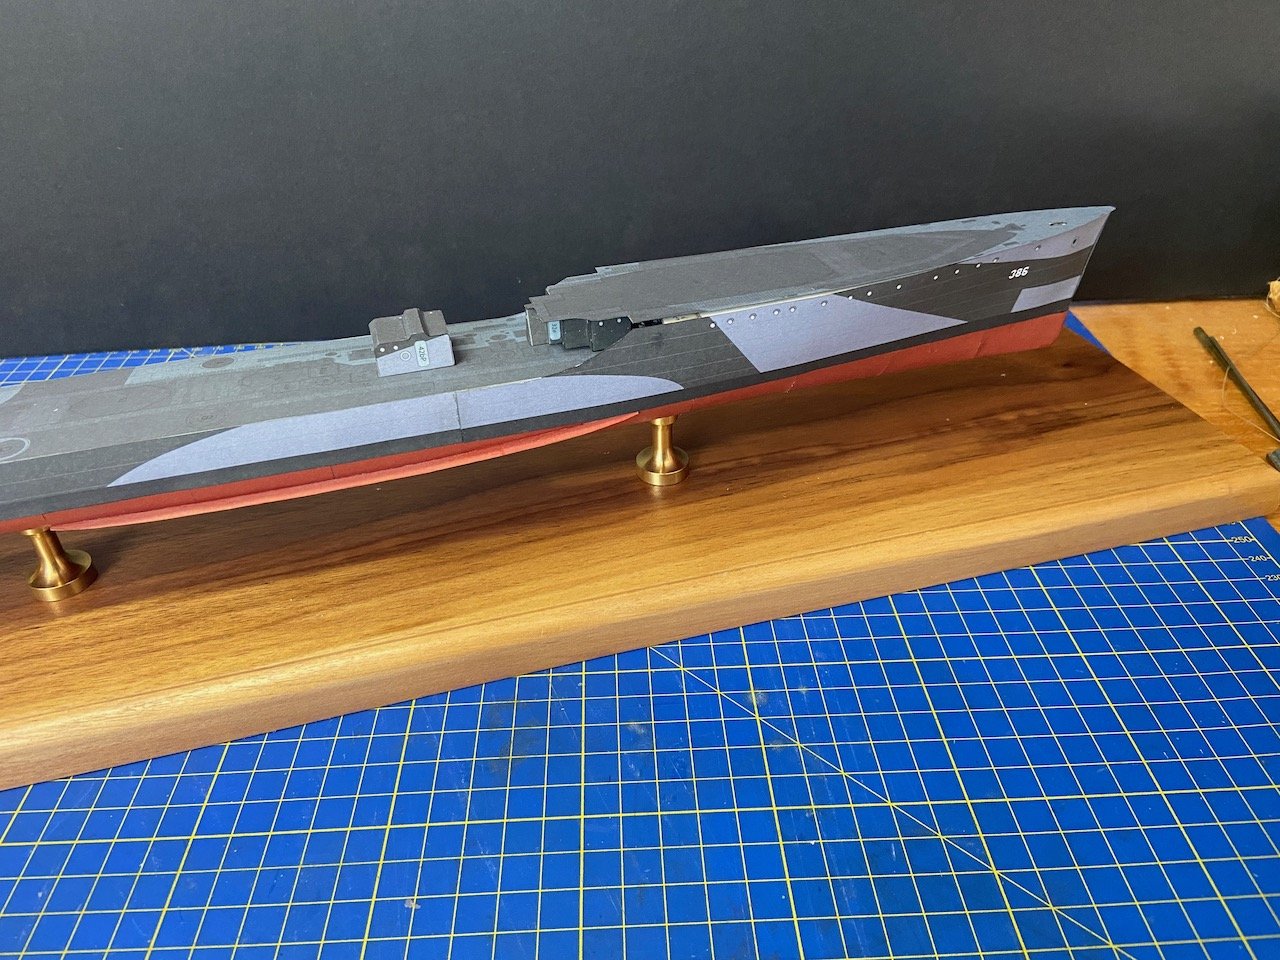
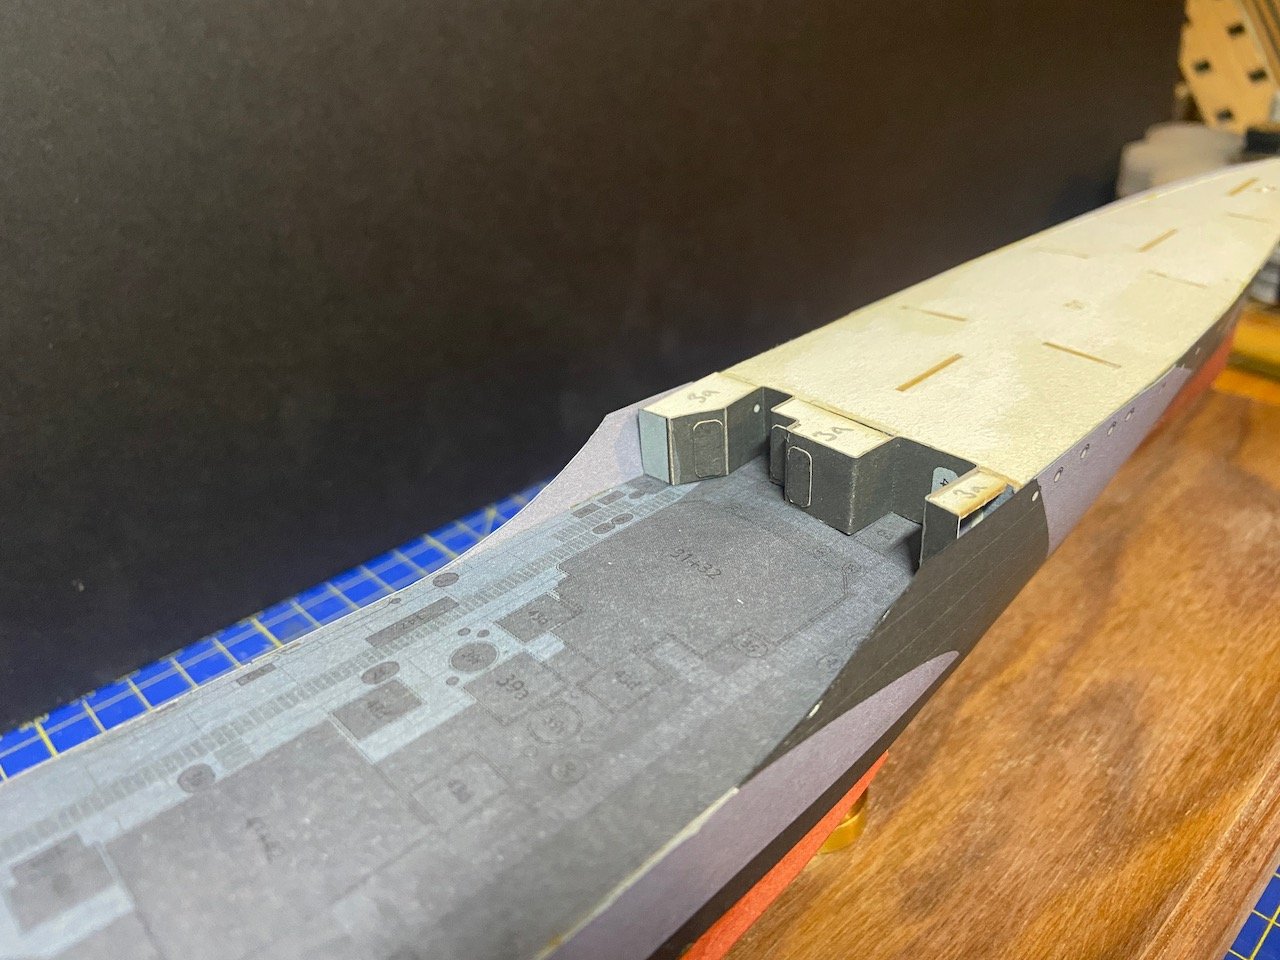
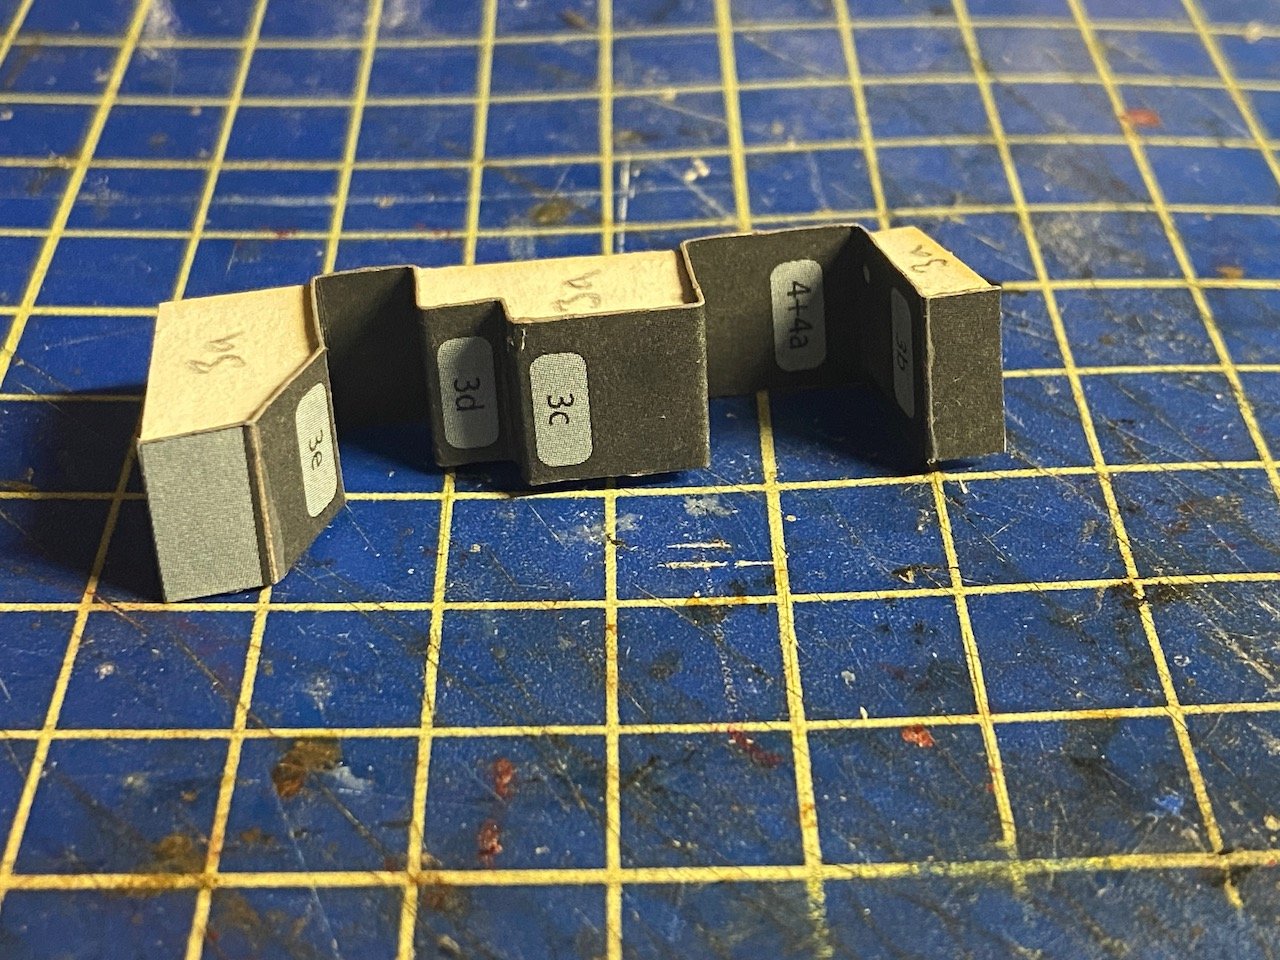
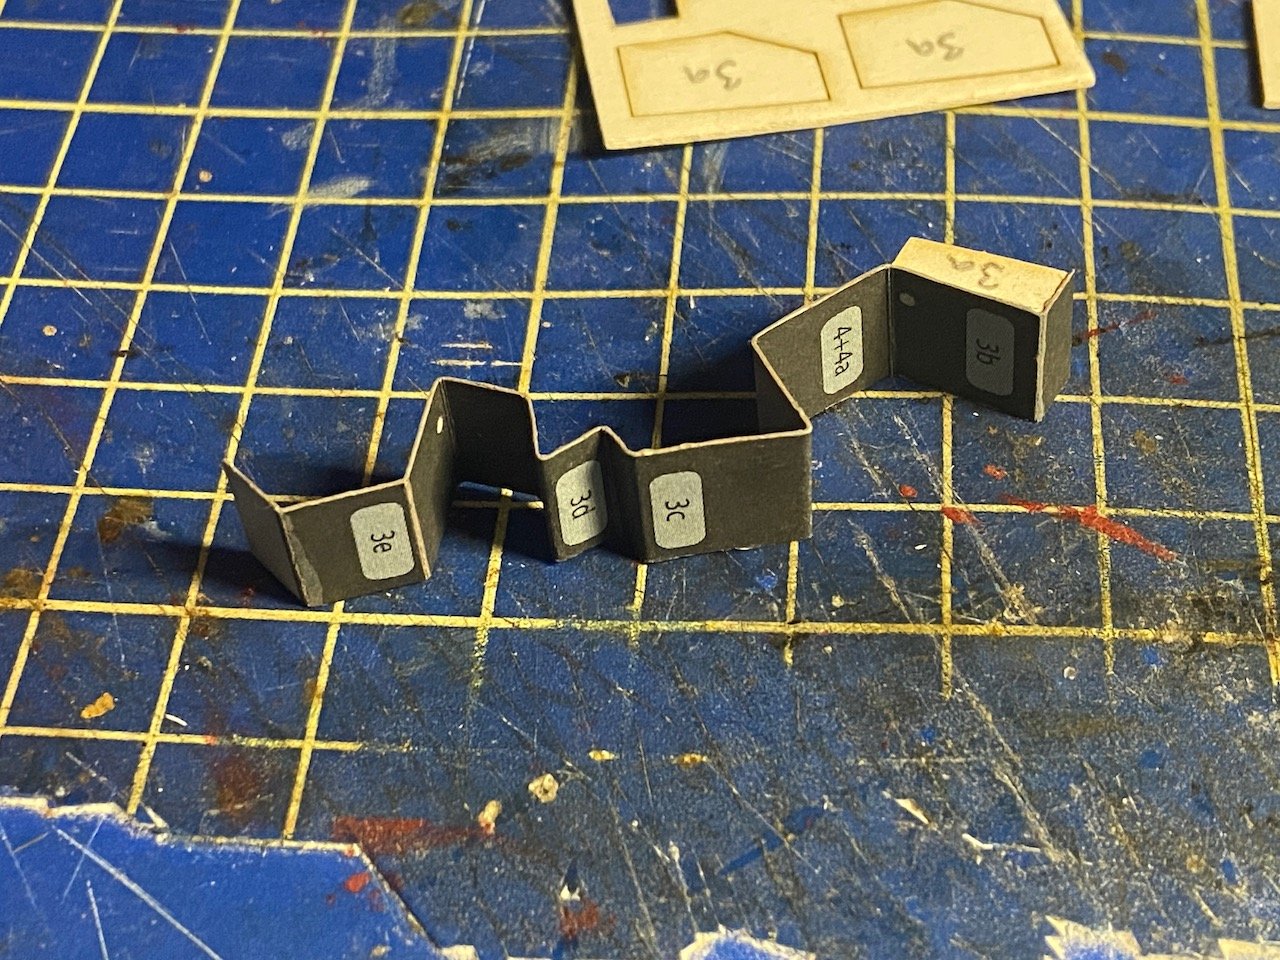
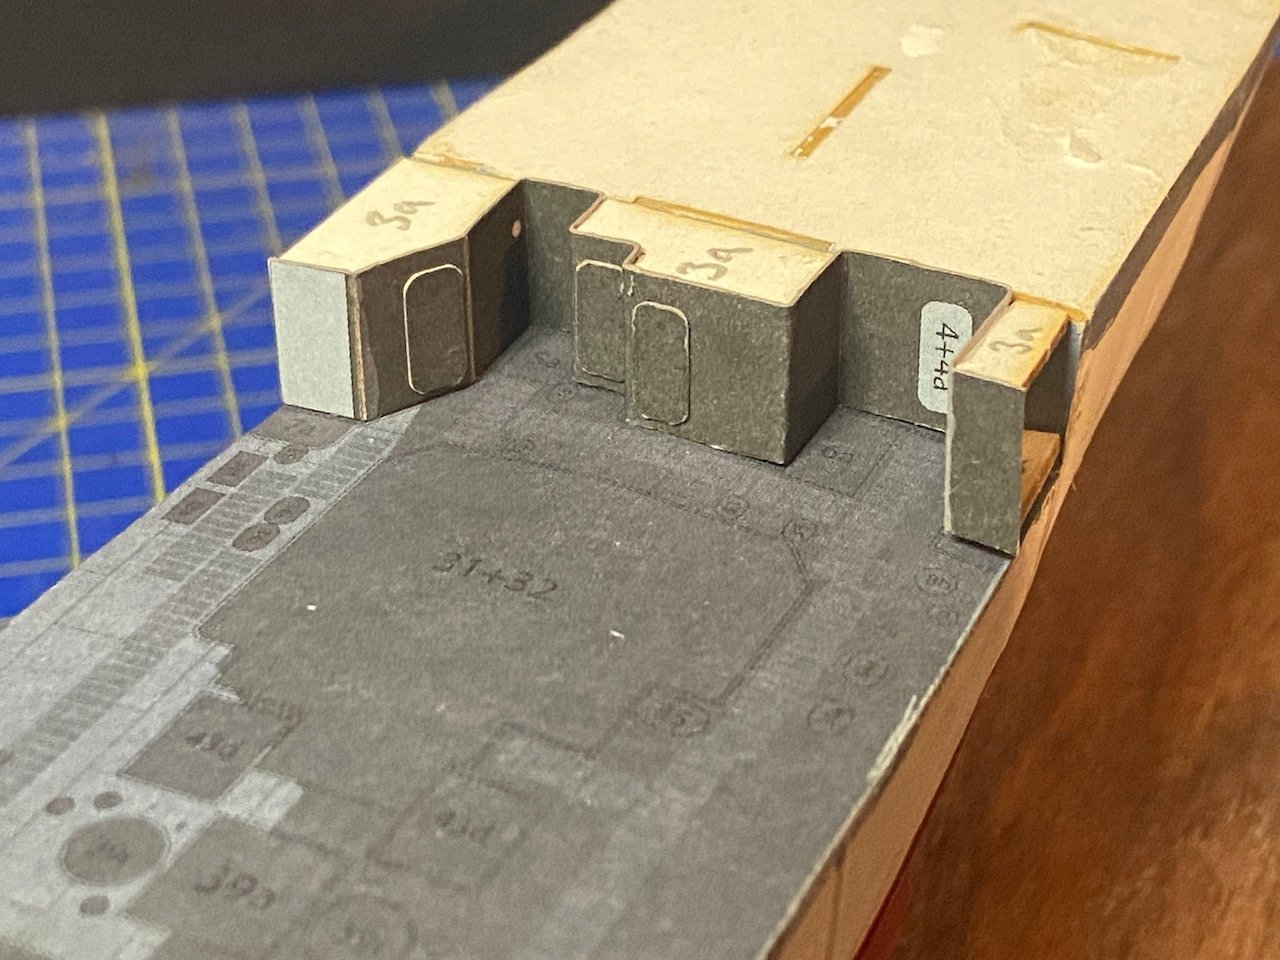
At this stage in the build, the ship doesn't change much, and each step forward represents hours of work to add small details. Mostly at this point, ship construction is a matter of building each of the structures first, then gluing them into place on the deck. The only major step will be getting to the point where I am able to glue the forecastle deck into place. I managed to add all the details for what I'll call the forecastle bulkhead. I'm still learning and working out the best way to deal with certain items, like the spoked wheels on the watertight doors. Those are printed with a white area between the spokes. I tried cutting them out on one of the wheels, and I just managed to tear up the details. Fortunately, it's on one of the doors that will be tucked way under the forecastle deck, so nearly impossible to see at later stages. The one thing that seemed helpful is that I soaked the wheels with thin CA glue, prior to cutting. The result was that the white areas turned a little darker, so the contrasts are not so pronounced. I also have come to the conclusion that while I've been using paint marker pens for edging the white paper parts, thinned paint applied with a brush, may be give better results. Also, paint markers are very limited in color shades, whereas brush-applied paints are easily mixed to create any desired shades of color, even if it's all just about shades of gray. Next up was this complicated piece, requiring 16 folds. Using those little marking just outside the part, I line up a straightedge across them, score along the fold lines with the back side of my scalpel, fold lightly along the scores, just to make sure I scored them sufficiently. The last step was to then cut the paper close to the part. After that comes test fitting, to make sure the part fits the internal structure properly. After that, I can glue it on the structure. However, it occurred to me that this piece fits underneath the forecastle deck. That means that this particular structure has to fit the camber of the main deck below it, as well as of the forecastle deck above it. That's why this particular structure has the vertical parts sticking up above the flat, horizontal parts, as well as down below the lower flat, horizontal pieces. Meanwhile, all the other structures that fit on the deck are flat on top, and the upper structures are flat on both top and bottom. Below, you can see my test fit of this structure, as well as another at the far left of the picture. And below is another test fit of the forecastle deck. This test fit was very useful, as the irregular shape at the aft end of that deck has to fit perfectly on the hull as well as this structure underneath it. That lead me to realize that it's more important to alight this structure with the forecastle deck, than it is to align the structure with fuzzy markings on the main deck. And, finally, I proceeded to add the fine details to these two deck structures. That involved breaking into the laser-cut details set I ordered with this kit. These details are extremely fine parts, mostly railing, cut from thin gray card stock. These were pretty easy to add. I think they were easier than photo-etched brass that I've used on plastic kits. Not sure if I should paint them to match the camouflage. I actually like the way they look, and I don't think they are significant enough to ruin the effect of the camouflage. Anyway, the structure on the left is ready to mount on the model as soon as I add some details to the main deck around where this piece will fit.

-
Unable to help myself, I ordered the 33' Royal/Admiral's Barge in 1/48-scale. I'm picking it up at Ages of Sail tomorrow. Can't wait! I'm looking at building this as a standalone display model... 🤗
- 1 reply
-
- 1
-
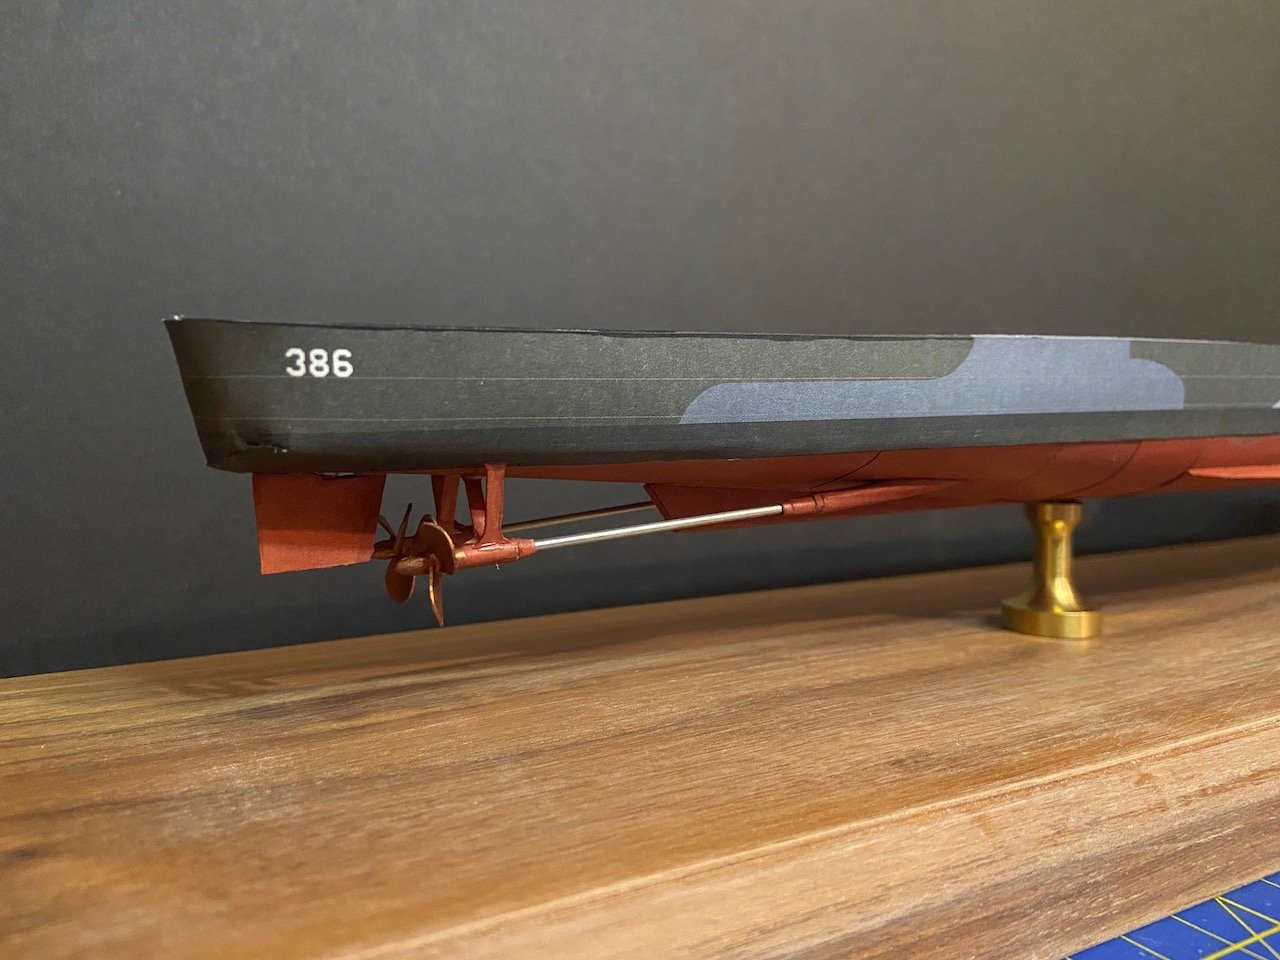
-
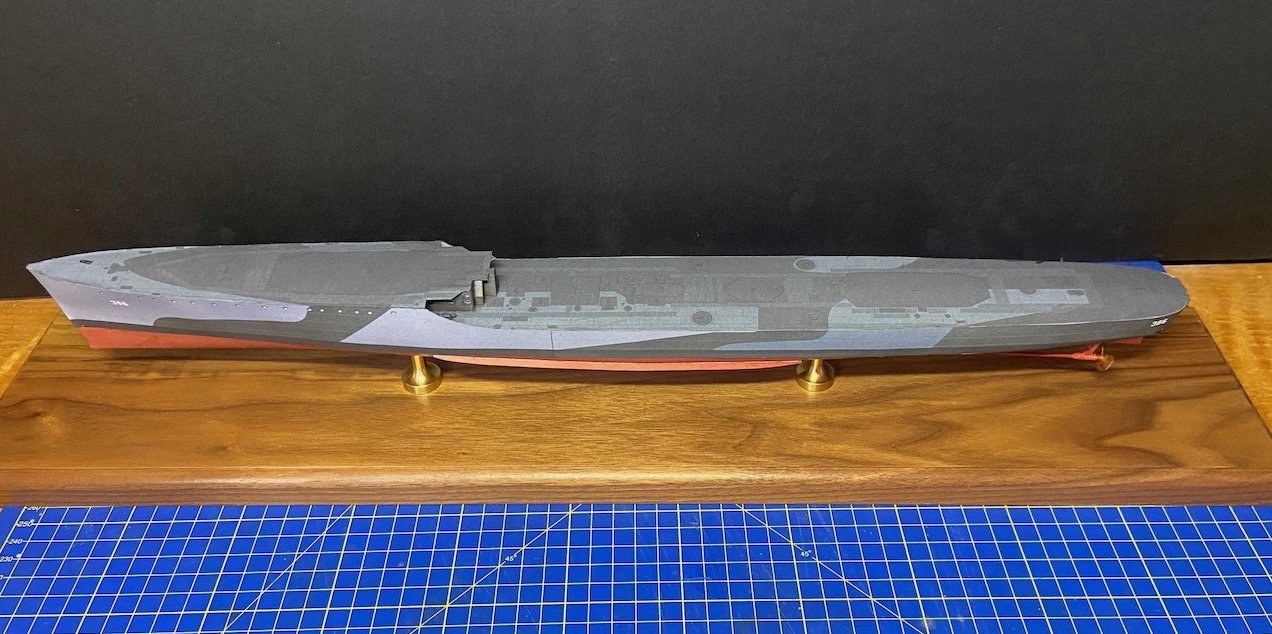
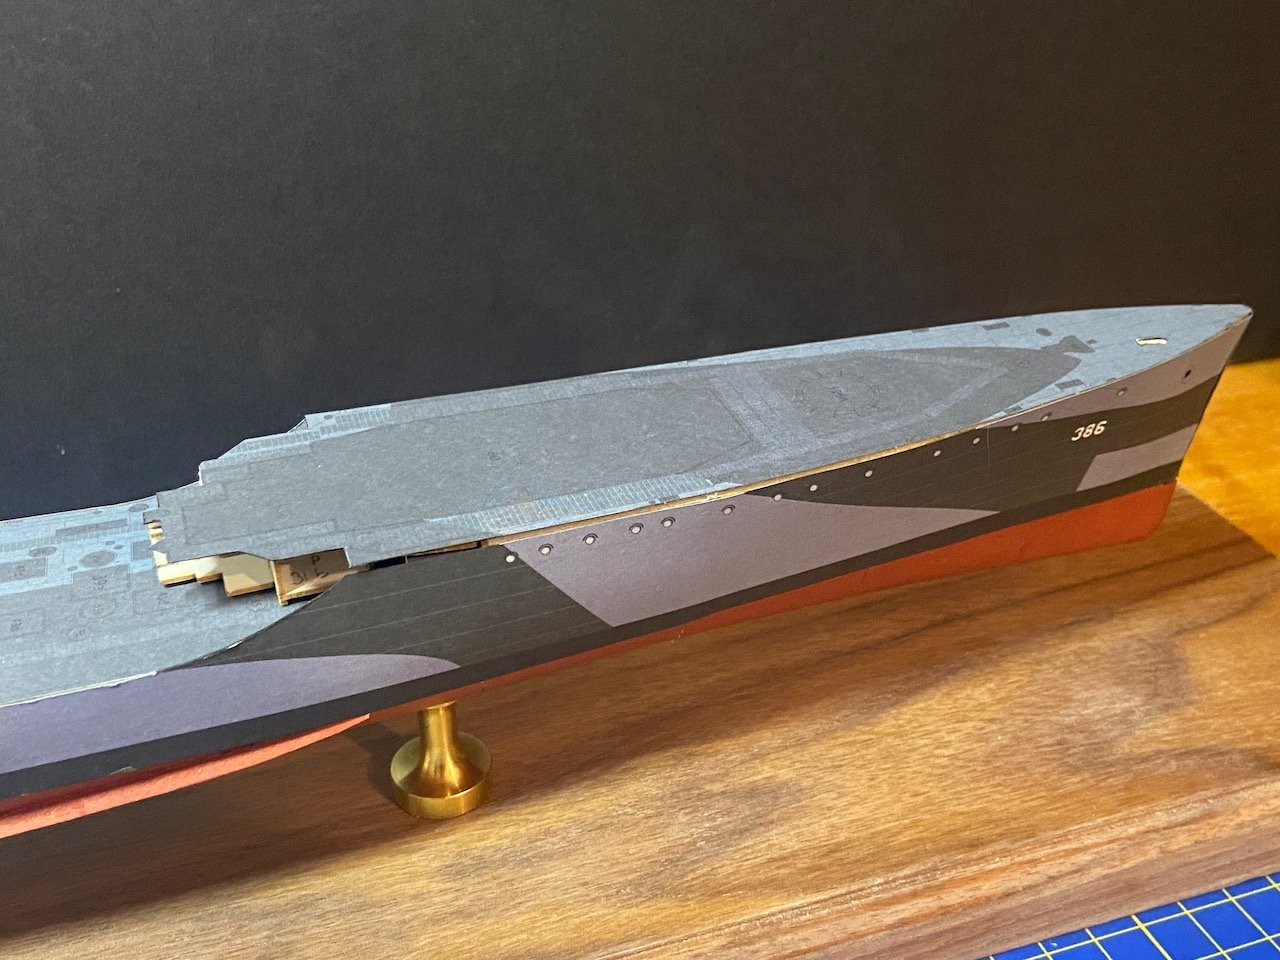
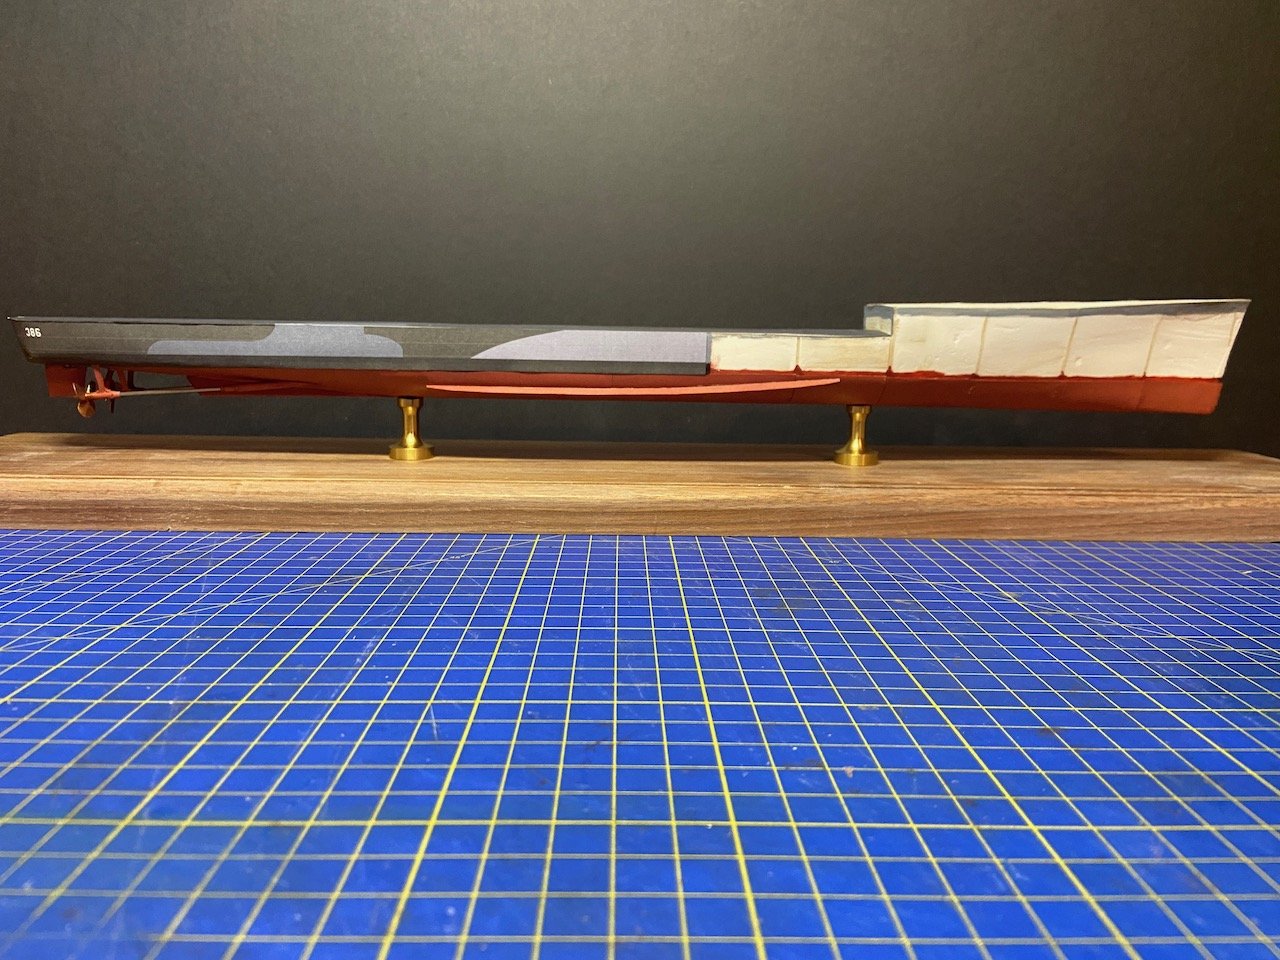
ddp, thanks for the comments. I've now painted the shafts. It's not a great paint job since the shafts are steel and I have no way to remove them for painting without damaging the model. But, they should be fine. They will not be handled in any way, so I don't anticipate any rubbing off or flaking off of the paint. Next, while it seems like a minor update to the model, I added the forward hull plates. This was actually a big step for me. I really wasn't sure how well the whole hull would go together in the end. Now I know! I think it's all come together pretty well, and I'm hopeful that this will turn out to be a nice looking model. I thought I'd have to mount the forecastle deck first, but I did a lot of test fitting, and I think it will go on okay at a later stage. Also, note how the first deck detail assembly fits in behind the forecastle, and I needed to make sure it fits correctly under the deck, done with that test fit of the forecastle deck, as well as fitting flush against the portion of the hull plates that extend above the main deck. That first deck detail assembly is still only a test fit, but I'm much closer to making it permanent now. In the following photo, you can see another structure that fits under the forecastle, and how the forecastle deck will eventually cover those assemblies. So, as you can see, there's a lot to do yet, before I can fit that deck into place.
-
Looking good SaltyDog! I missed your build log until just now. How long is the hull? I have some projects in 1/72 scale. If I recall correctly, Le Cert was a pretty good sized cutter.
-
That's not my understanding. When I brought up this question elsewhere, I was told that propeller shafts were bare stainless steel. Anyway, if I do need to paint the shafts, it's easy enough to do. In the meantime, I've been able to turn my attention to the first of the deck details. The main bulkhead piece requires a lot of folding and bending. Little registration marks printing alongside the part indicate the fold locations, most of them anyway. And a test fitting of the piece, after I've added most of the watertight doors. More details to add to this assembly yet.
-
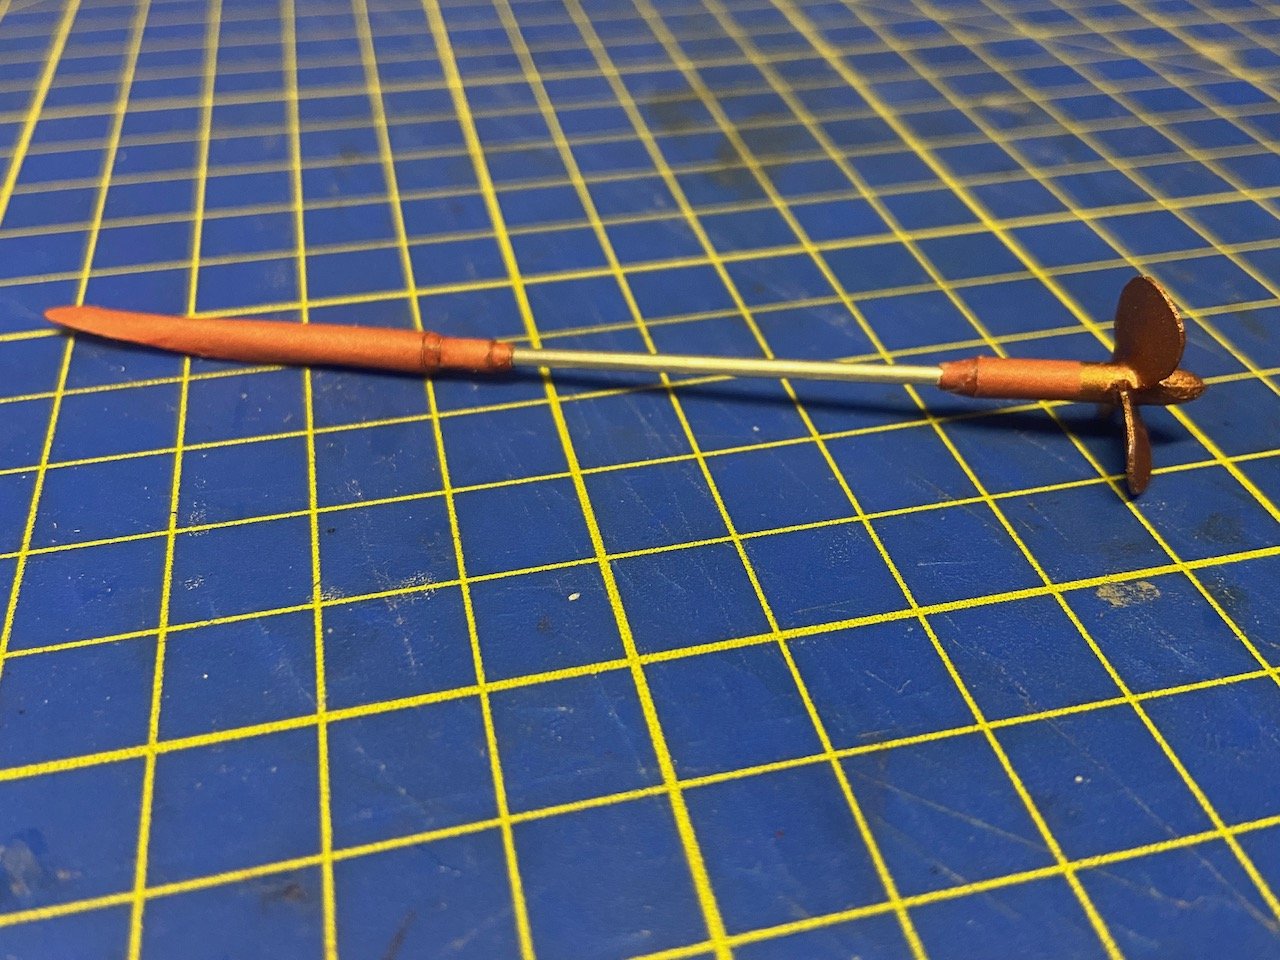
Bagley construction was on a very brief pause. Was all set to finish off the underwater hull details when I realized I was short on the rod. Got this far... But, then I discovered that the local ACE Hardware had some in stock. Ran over to pick it up and I was able to finish the propeller shafts, rudder, and all. I'm pretty happy with the way this assembly turned out, and VERY happy to be done with it!
-
Hi GrandpaPhil, actually, I found them more intimidating to think about than to actually make. Once I started making them, construction went along pretty quickly and easily. The things that are nerve wracking to me are little conical rings that make up the propeller shaft housings and all. The Bagley has three of these conical rings for each shaft. 😕