DONATION DRIVE - SUPPORT MSW - DO YOUR PART TO KEEP THIS GREAT FORUM GOING!
×


Bedford
-
Posts
1,297 -
Joined
-
Last visited
Content Type
Profiles
Forums
Gallery
Events
Everything posted by Bedford
-
 Ah yes, the Claytons update !!
 -
Were I an insecure man I would have to stop following this build, it could make me feel incredibly inadequate
- 662 replies
-
- 4
-

-
- bonhomme richard
- frigate
- (and 1 more)
-
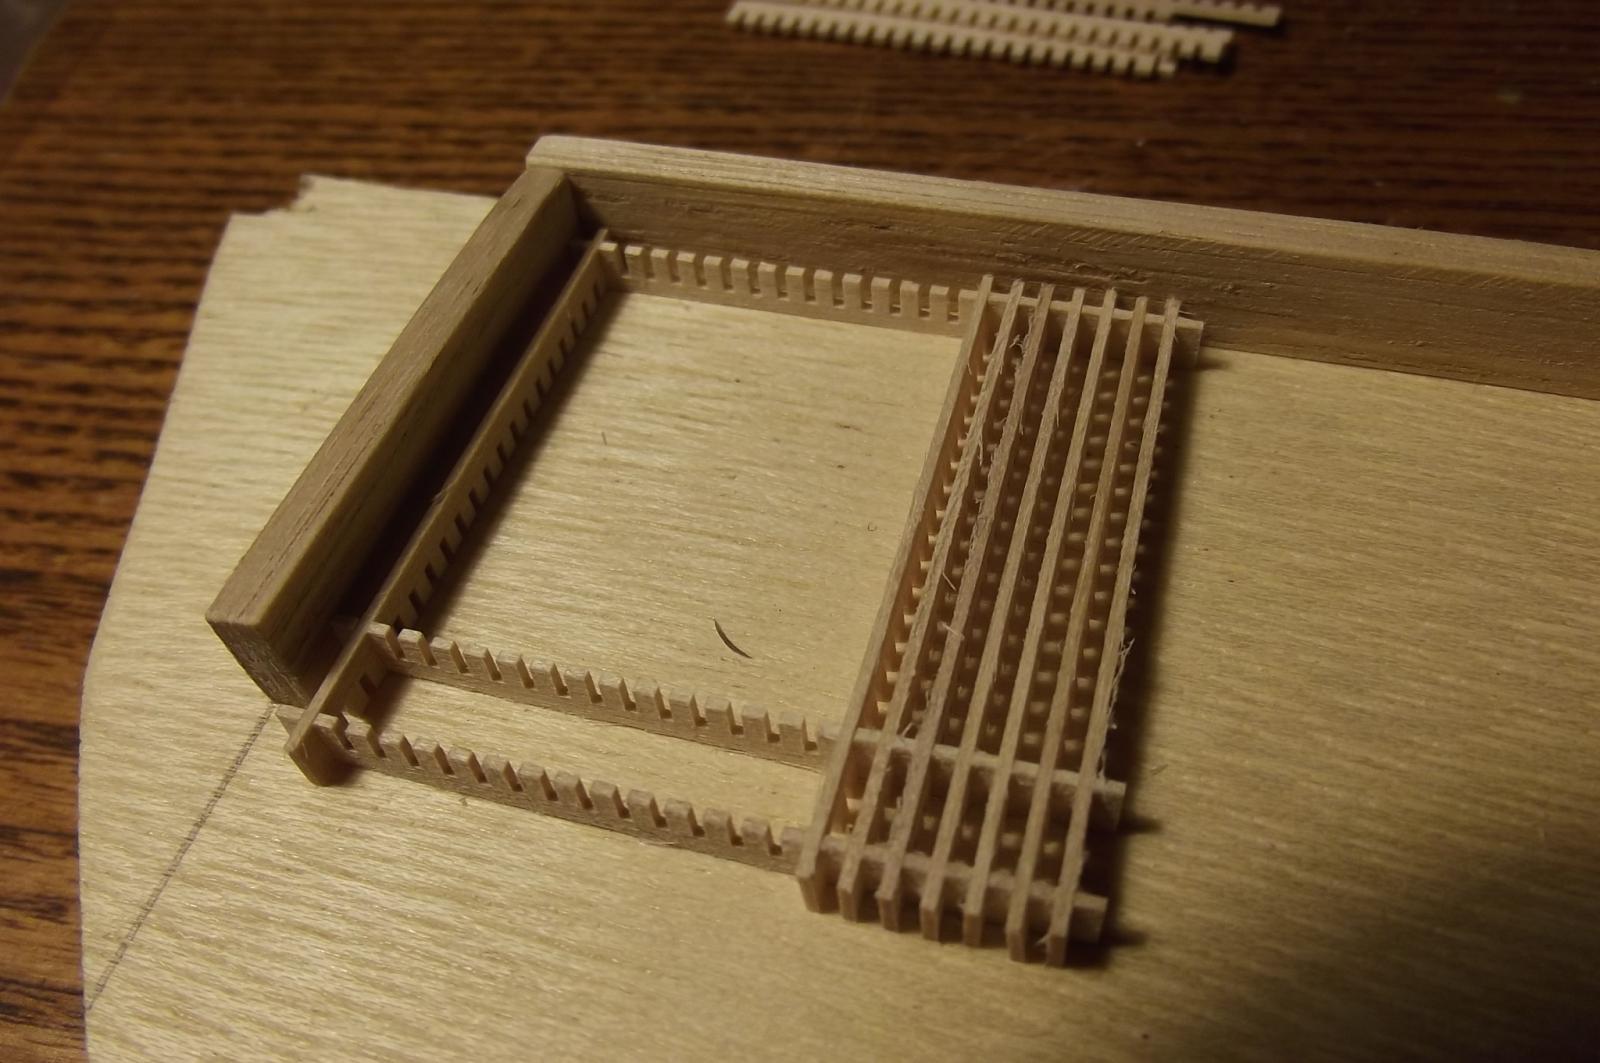
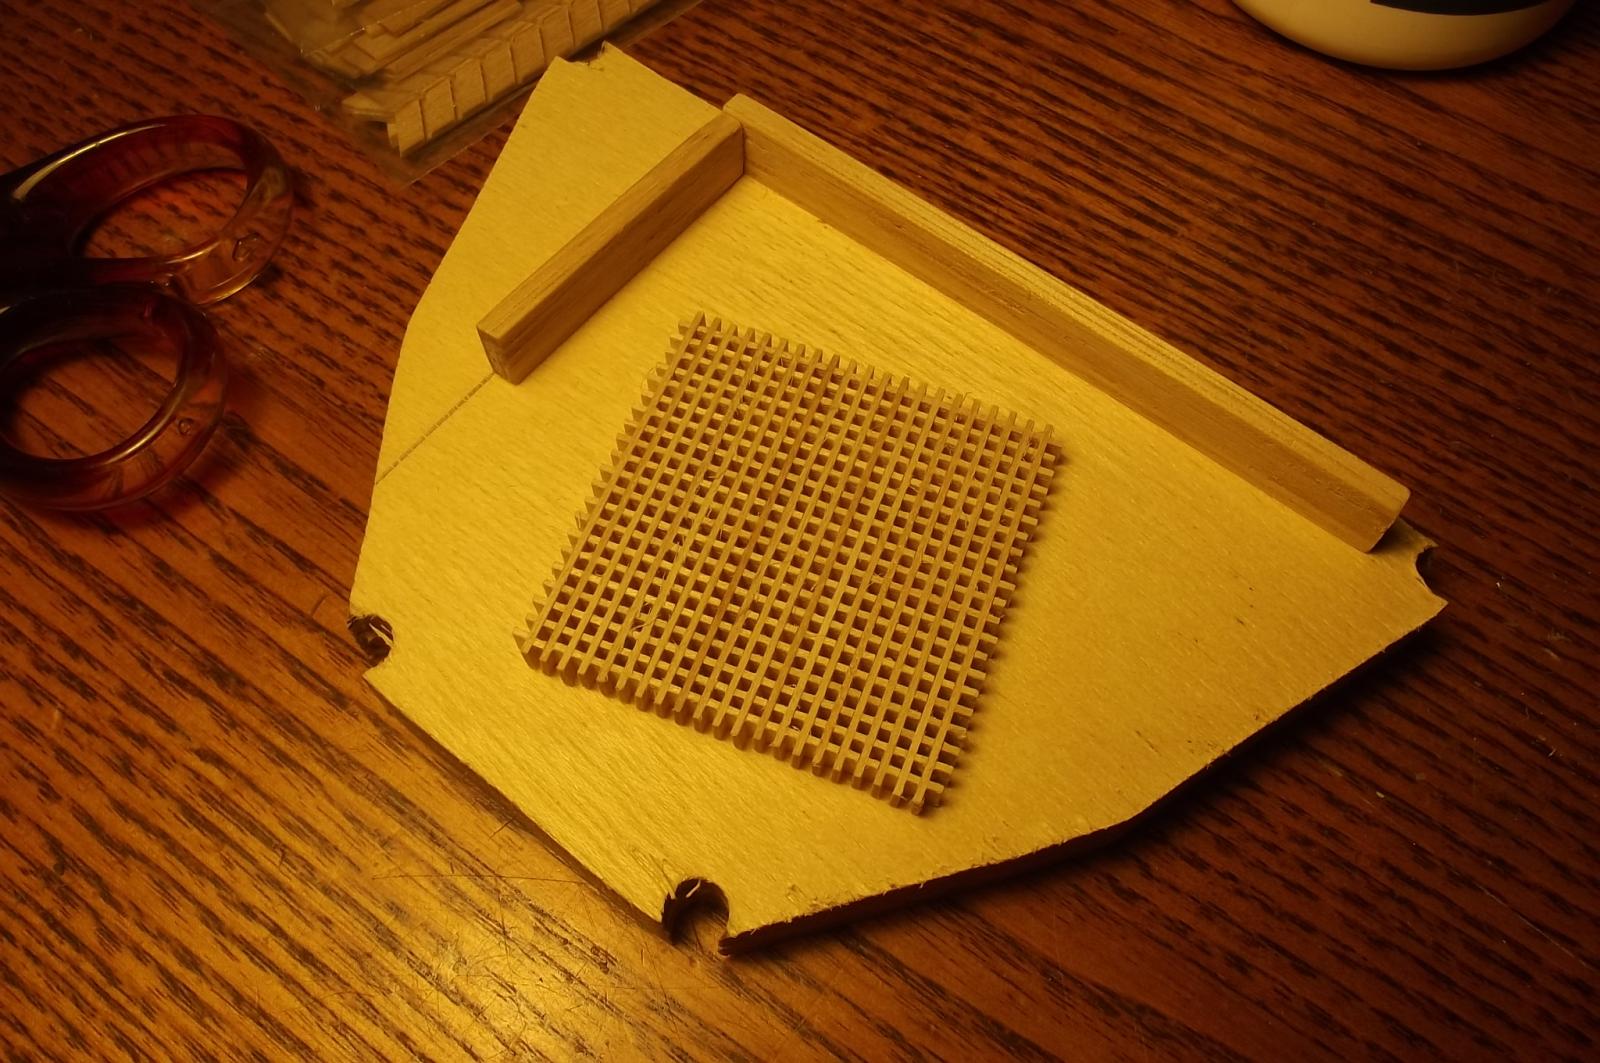
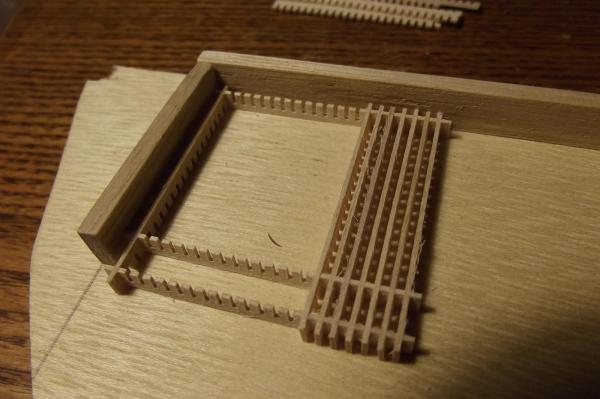
Small update, I made one of the grates for the helm, as I said before, the quality is much better than expected for the price. All the cuts are clean and acurate and the timber has a fine grain so not much splintering although there are a few "hairs". I made a right angle fence to make the grate against. All the pieces just slipped straight into position.


-
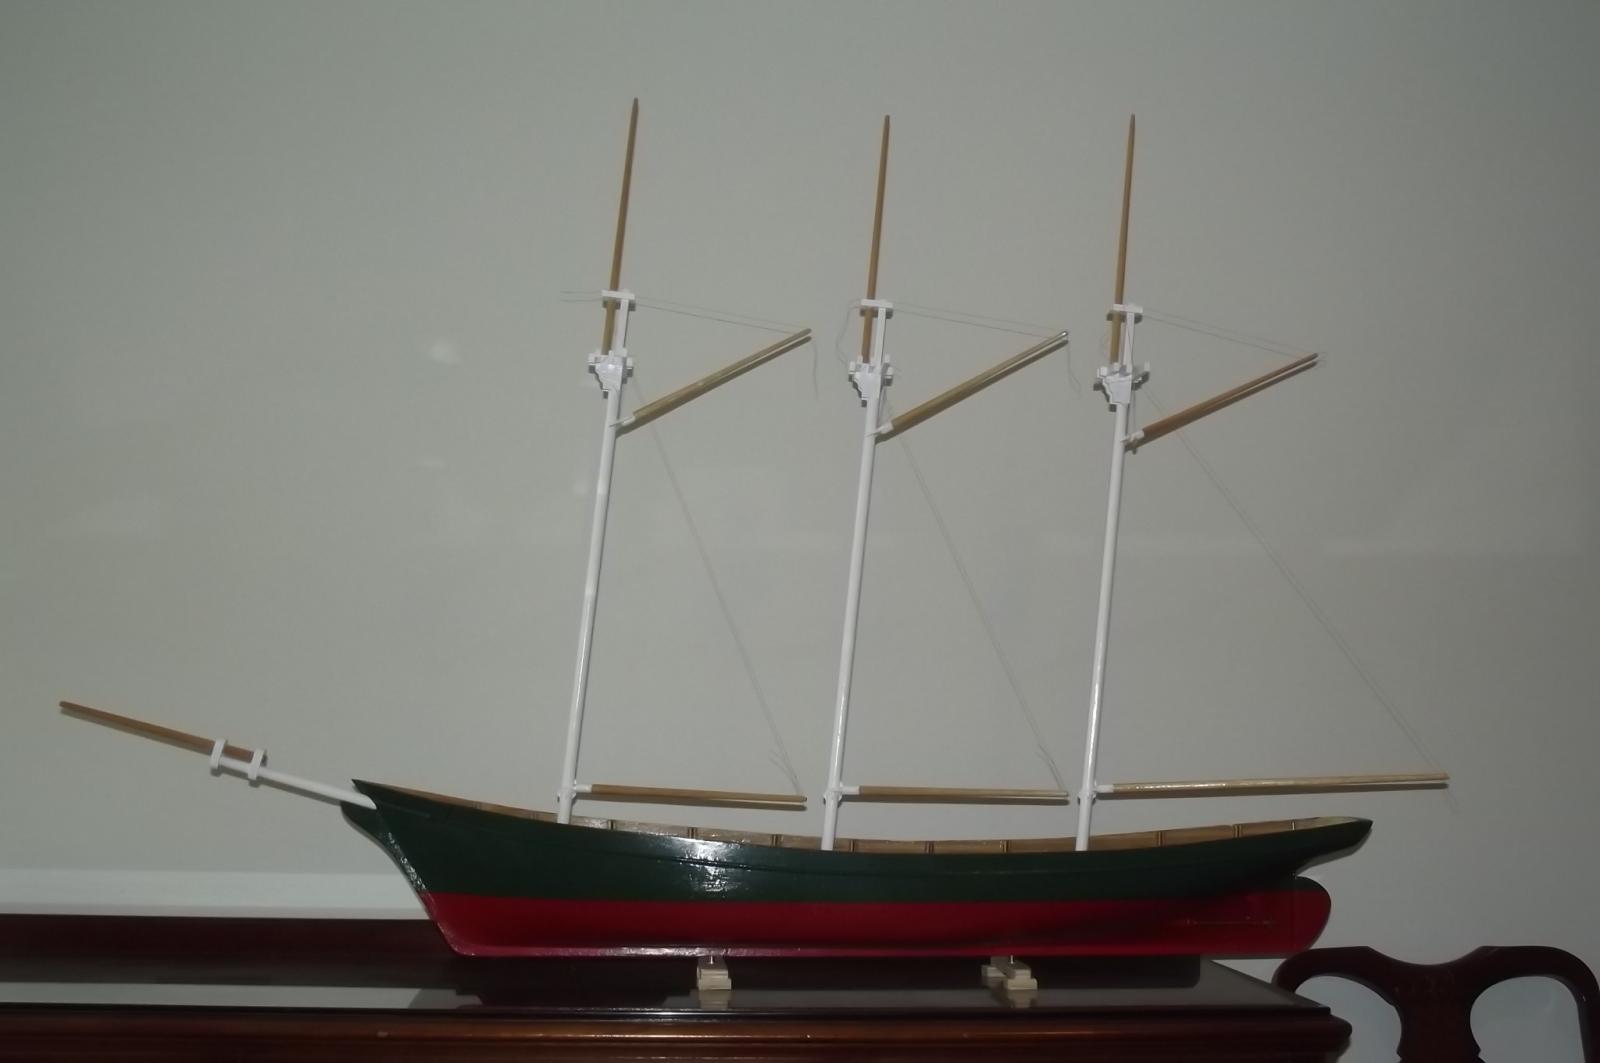
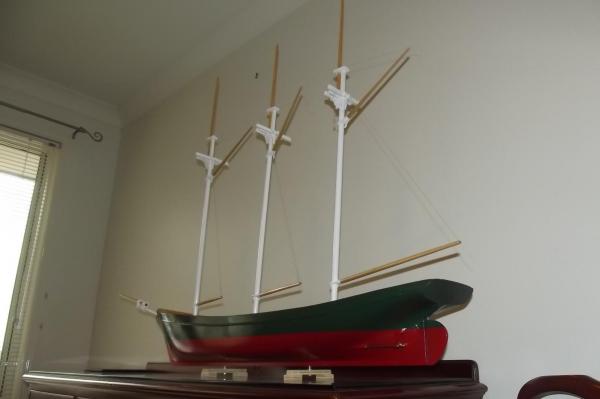
Thanks, I love looking at her, she feels right. Yes Robbyn the masts and bowsprit will stay white, with a lot of ships of this era the masts were made of iron and therefore painted. The James Craig is a good example of this although in her case because she is a barque she has the fore and main made of iron and painted while the much smaller mizzen is timber. The top masts and bowsprit jib boom will stay varnished. One of the reasons for the iron masts and often the yards, is that they were the ships' cranes and iron was more reliable and stronger than timber. Top and top gallant masts and yards were still timber. I hope my hardware turns up soon, it's driving me nuts not being able to do anything to her. Steve
-
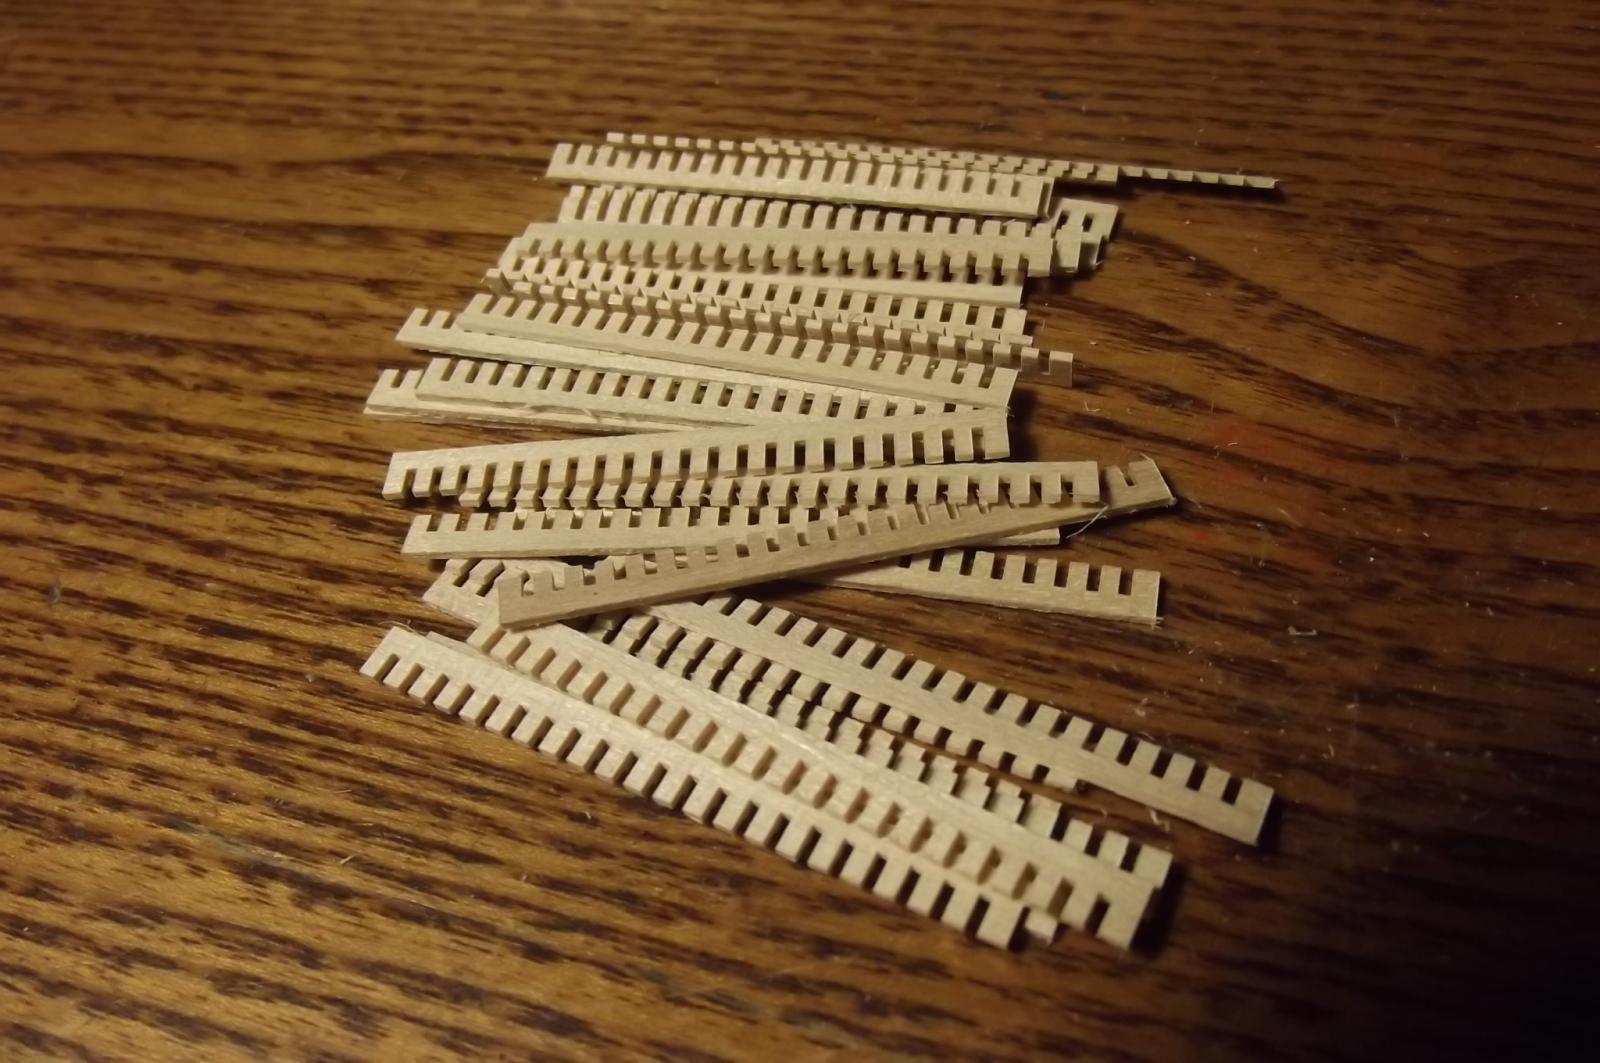
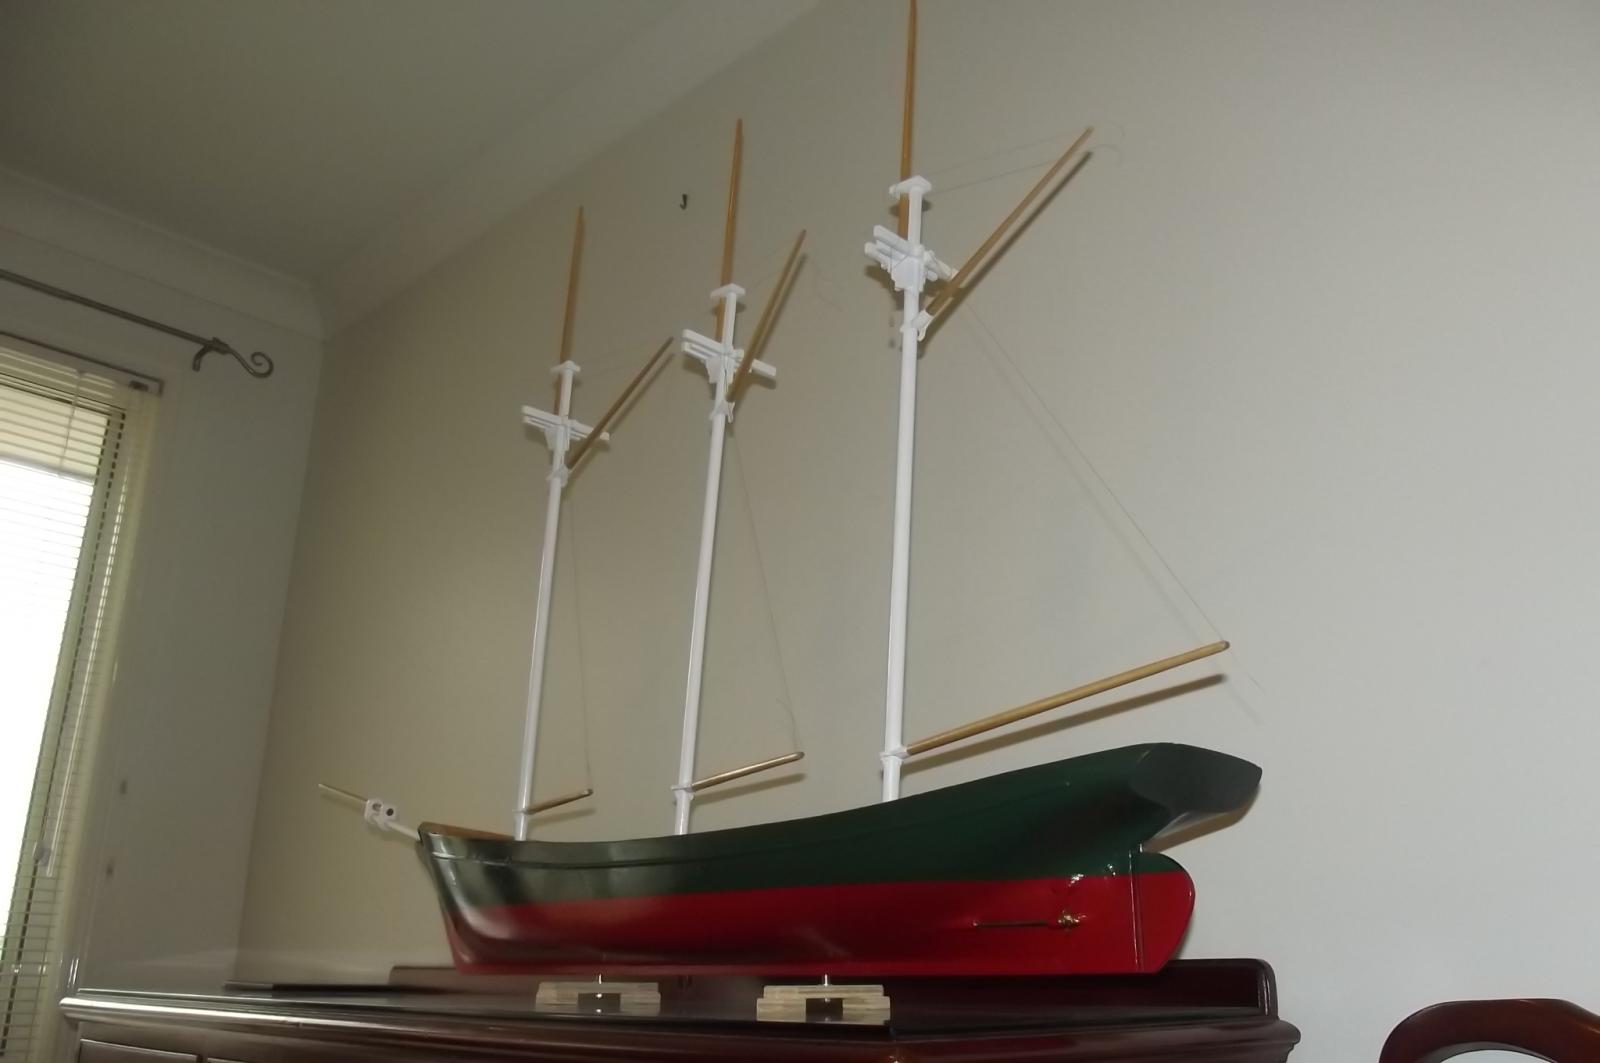
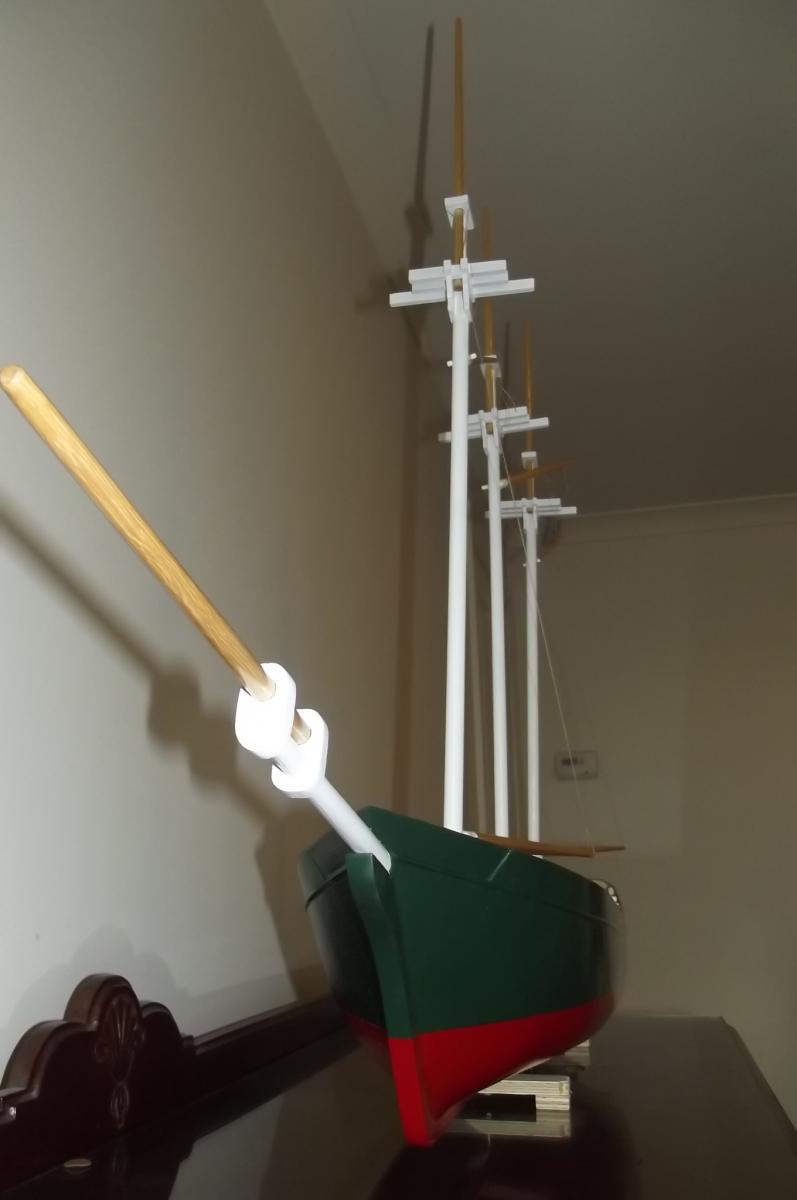
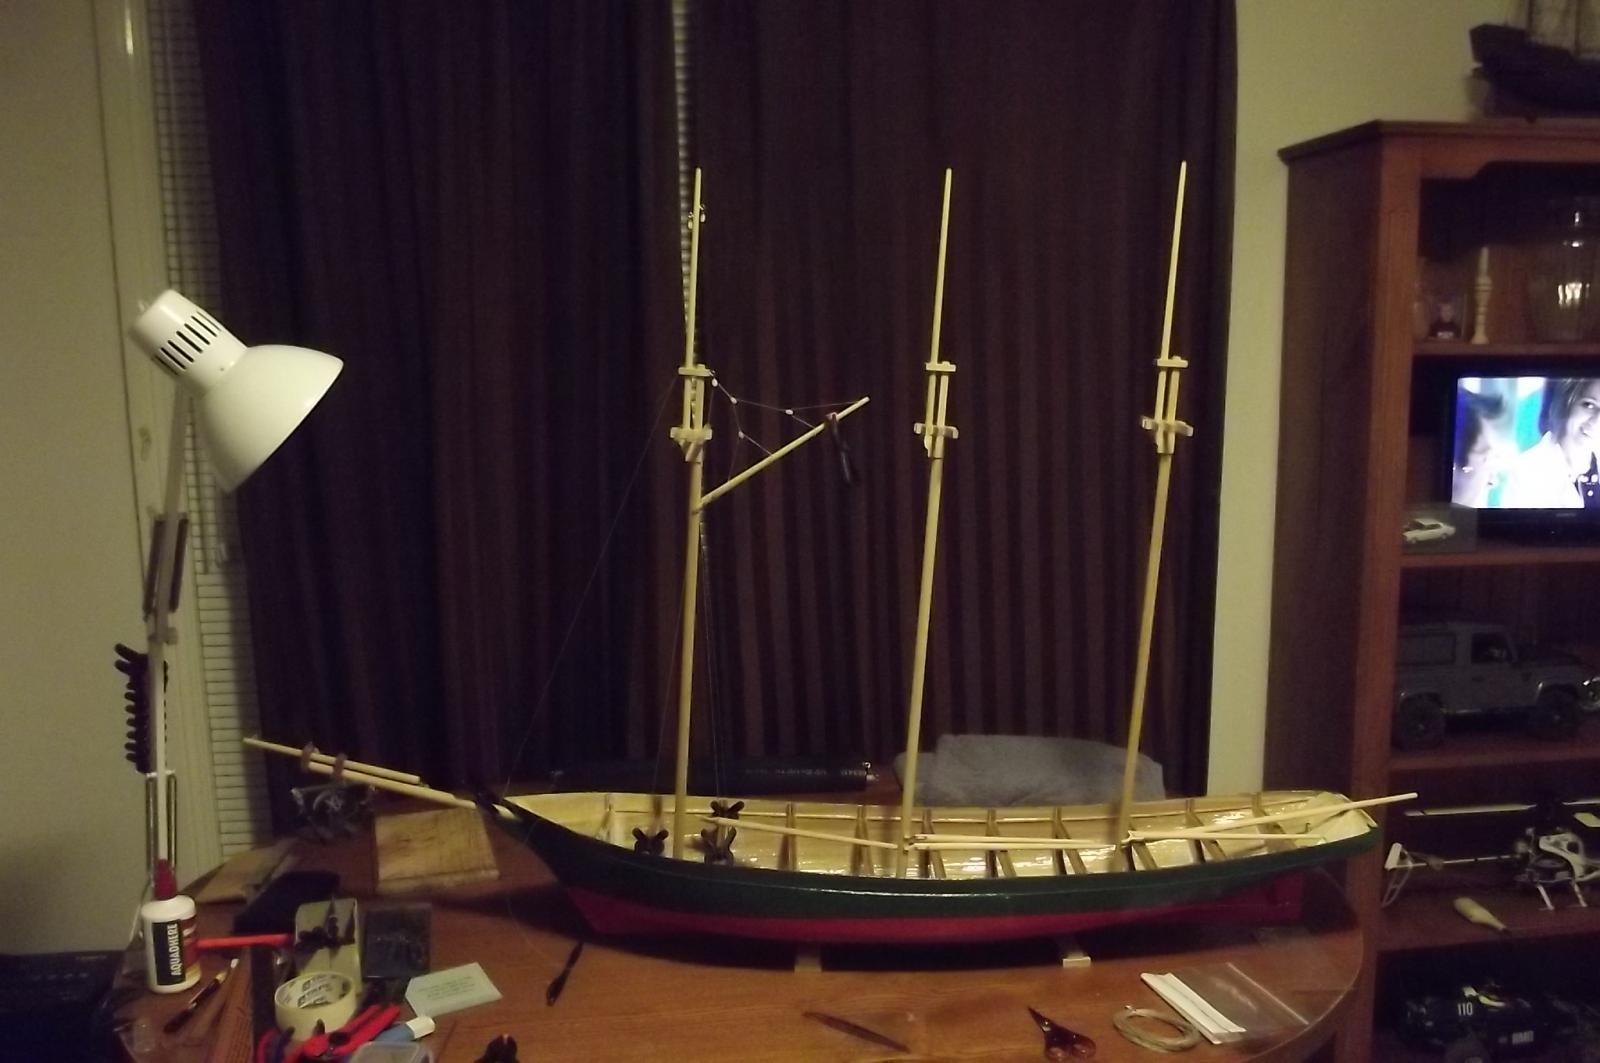
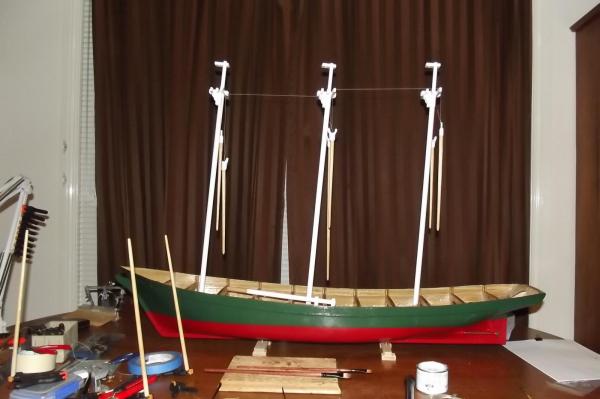
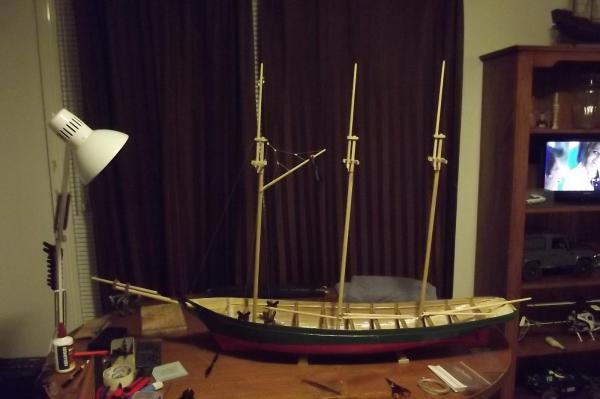
I wish I had more to post but between starting a new job and feeling drained because of it and hardware not showing up I have not been able to do much. I have received wooden stairs and gratings from an ebay supplier in the UK, better quality than I have had from model suppliers for a more money so I am very happy with them. All I can do is dry fit things and see how she will look so here are a few new pics.


-
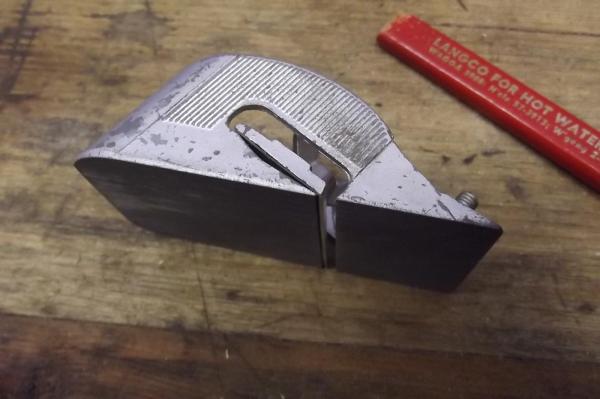
Blade you don't need a lot of tools, they just make it easier, My first was done with a hobby knife, a set of small files, razor saw which is a small saw like a tennon saw with a very thin blade, a small mitre box for cutting 45deg angles and the most useful tool of all I reckon, a razor plane. Oh, a handful of different grades of sandpaper too
-
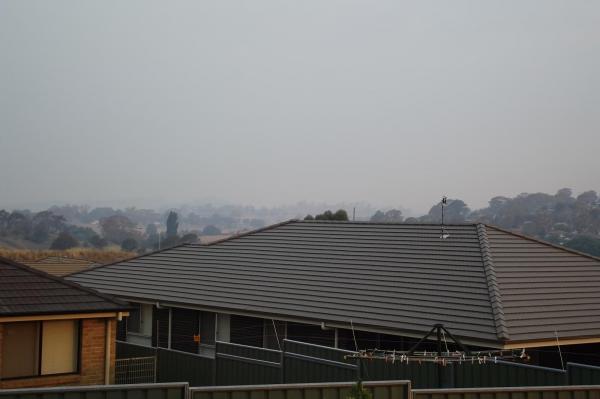
Australian bush fires are like no other because our bush is designed to burn, a lot of it has to burn to release seeds. Trouble is the greenies won't let the required controlled burns be carried out as much as they should like the aboriginals have done for 40000 years so when a fire does break out there is so much fuel on the forest floor it is like hell. Anyway, back to the topic at hand, no updates because I am still waiting for hardware.
-
Just a very brief tangent from the thread, this is the veiw out the back of my house at the moment. That's bushfire smoke. I have no idea how far away they are but there are a bunch of men and women out there doing it pretty flamin tough at the moment trying to get it under control.


-
Building has come to a grinding halt as I wait for hardware to turn up. There is always painting to do though.
-
There are two reasons I chose this type of ship. One, her lines, who can argue? Two, SYMETRY. All masts are the same height and rake, I am going for standoff scale so all gafs are the same length and set at the same angle therefore all tops'ls are identical and can be controlled as one. I will set all booms at the same angle as well and as long as I attach the sheets and lazy jacks at the same distance from the mast on all of them then they will all be identical as far as controlling them goes so they will be controlled as one so I don't have to do a lot of adapting and tensioning, I will only have to do it once for each set of sails. Not sure about the lazy jacks for the stays'ls yet but I'll sort them out one way or another.
-
Jerry, it's all about the challenge my friend so I will try and make her work the way I want. There will actually be 10 to 12 litres worth of space below decks and all I have to put in there is two motors and a battery pack. I can cut out rib sections as required but won't have to do much I think. it is just a matter of guiding some halyards etc and remember her displacement will be 5.7Kg so weight is of no concern at all. As Donald Sutherland said in Kelly's Heroes "Have a little faith Moriarity, have a litte faith"! Michael, thank you I knew someone would help me with that one. Steve
-
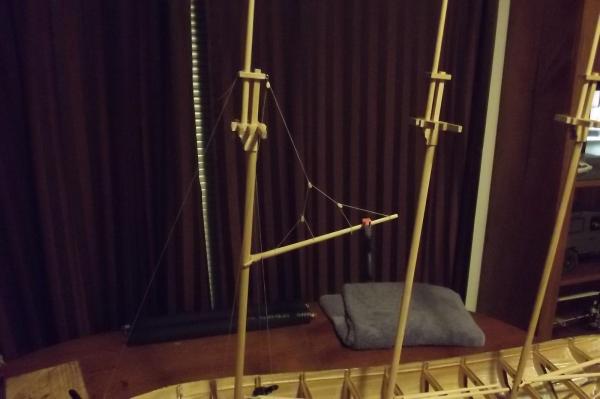
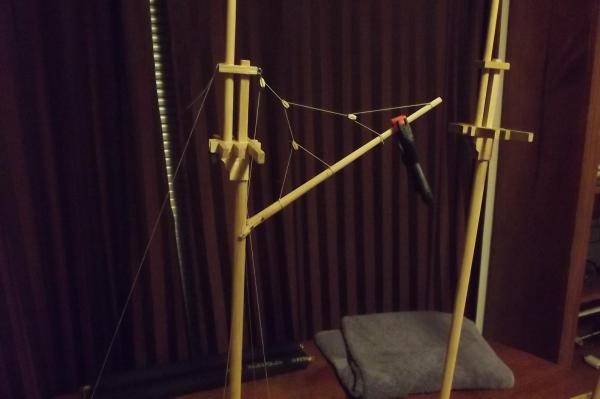
Yeah blade, it isn't really that hard, I've built a few kits so I now how it all goes together. Being scratch built only means I have to select the timbers and fittings myself and cut everything myself. In this case it helped that I know how they are rigged because there was nothing in the plans about that. Bob, you're the man. That is my plan exactly. The halyard will be a closed loop so as the gaf is drawn up the slack side of the halyard will run out with the sail, I know there will be a name for the lines that run out across a sail for the purpose of gathering it when it is taken in, somebody? when I haul the gaf down that side of the loop will pull and the sail will be attached to it at several points as it was in the real thing. I am only planning one pull per sail as the forward edge is controlled by its attachment to the mast. I just hope the mizzen sail isn't too big for this to work. I have measured both sides of each pull against my half scale plan and there will only be 20 or so mm variation in the pulls so a single block on a spring below decks on the haul down side of the loop should take care of that. Floyd, the tops'ls will be drawn in and out via a block on the end of the gaf and have the same closed loop as the sails below so they will gather against the top mast. The stays'ls will again employ a closed loop but I am not yet sure how they will go. I am not going to use a commercial rc sail cloth, I have read about a bloke in the U.S. that has a Grand Banks schooner ( like Bluenose) with masts 6 feet tall and uses cotton for the sails. Thats what I am thinking for this, maybe a nylon that is like cotton or even scotch guarding the cotton to try and reduce its propensity to absorb water. Using this kind of fabric will allow sails to raise and lower as well as allow me a bit of colour choice, harking back to the James Craig, her sails are a light grey. Well there you go, I have given away all my secrets ! Floyd, thanks to your input I have reduced the number and type of servos I will use to :- rudder, sail tacking, stays'l tacking, halyard, tops'l halyard, stays'l halyard and motor control. I will need 7 channels. Due to the length of throw that will be needed I have opted for a drum winch servo to tack the sails while needing a horned servo to tack the stays'ls, this will go in the forward deck house which should have plenty of room for it. The rest will go in the rear deckhouse depending on available room in the forward one after setting up the stays'l control.
-
Thanks guys. The input and encouragement keeps us all going. Floyd I have thought about that a lot and think I have it all sorted and should be able to control the sail cloth as the gaf lowers. My theory on how to do this was confirmed when I sailed aboard James Craig, where posible I do it the way it was done and I'm hopeful that it will work. She will carry tops'ls, as Jerry said earlier the gaf just becomes part of the whole sail and the tops are controlled by the sails below but they too will be set by remote. The fact that there will be a bit of running rigging on one side of them shouldn't pose to much or a problem as it will move with them. Again I am not out for speed or performance, rather grace and style. If all else fails and I can't get the sails to come down the way I want them to then at least I can motor out and then raise them, only lowering them when she makes birth. I set myself these challenges because as Bob will appreciate, I love a mechanical challenge !
-
That's it Michael. When I say "A working model" that's what I mean. I have the sheets pretty well worked out, again it means stand-off scale because as Jerry said "you can't put trained squirrels aboard" I have found a 12 turn sail winch servo which will be ideal for raising the sails as I will only need a 32mm drum so once again the plan is for all servos to go in the deck houses which means I can just glue down the deck for the most part as I should never have to get in there. Without a sail on it the gaf raises from the rear due to the weight at the yoke so I will have to make sails before being able to test it properly and iron out the kinks. It will be an added challenge, makes me use the grey matter !
-
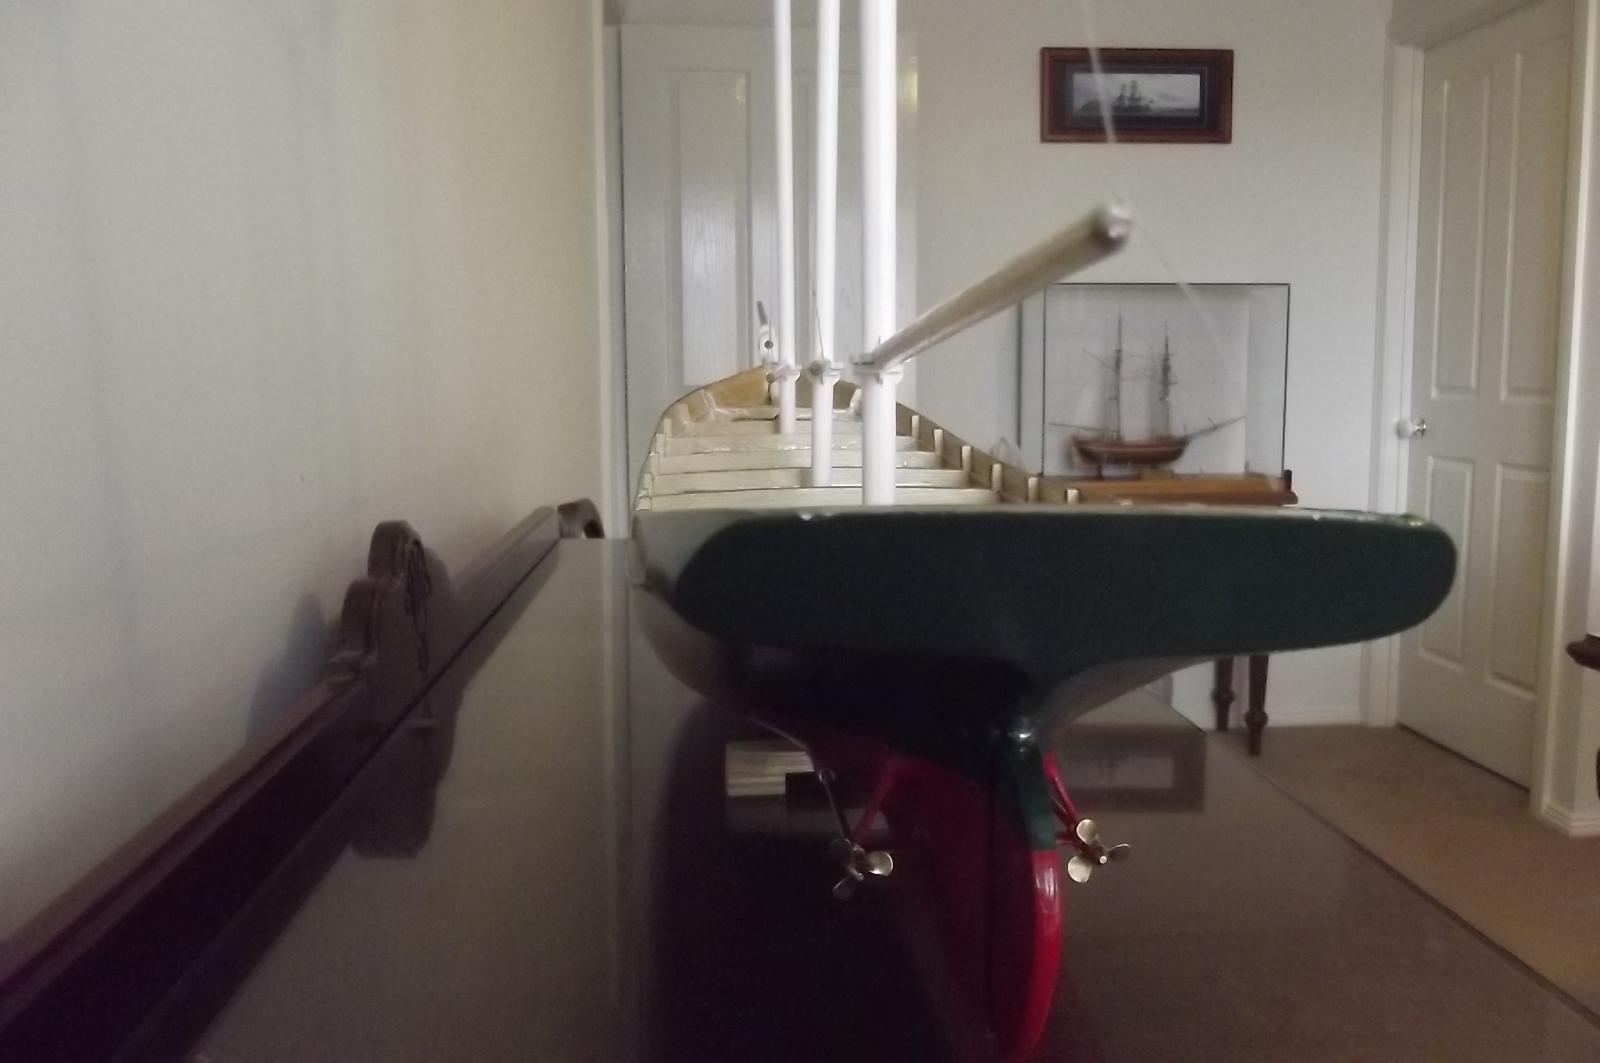
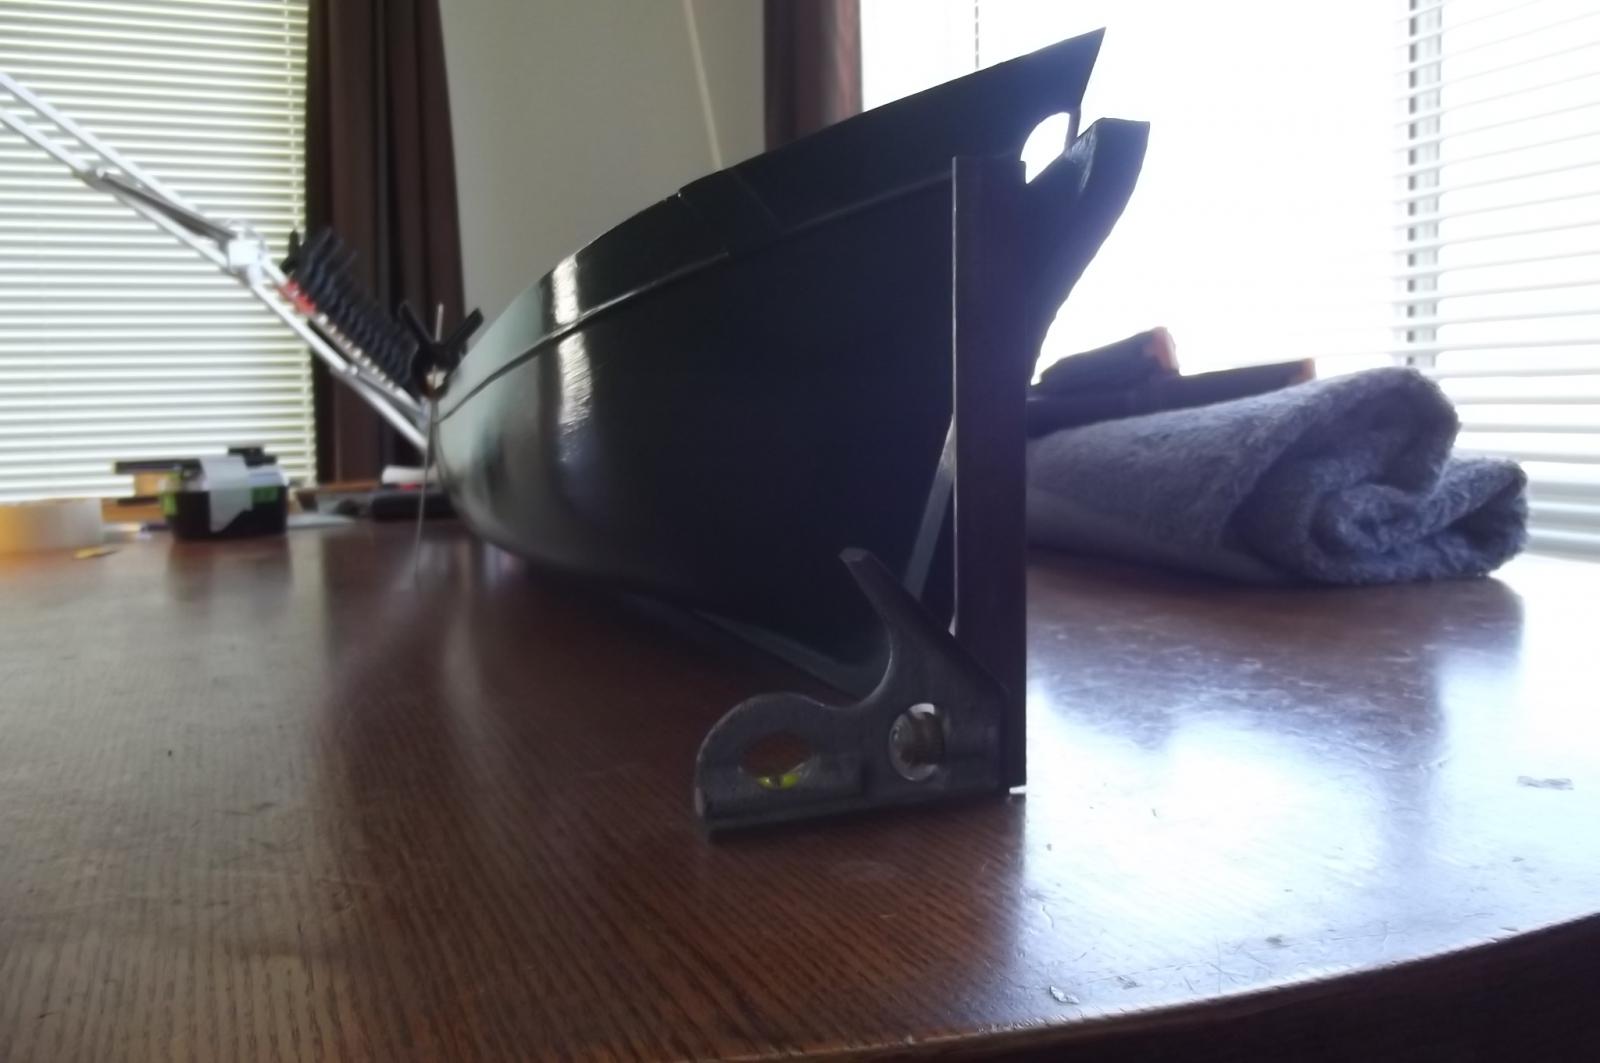
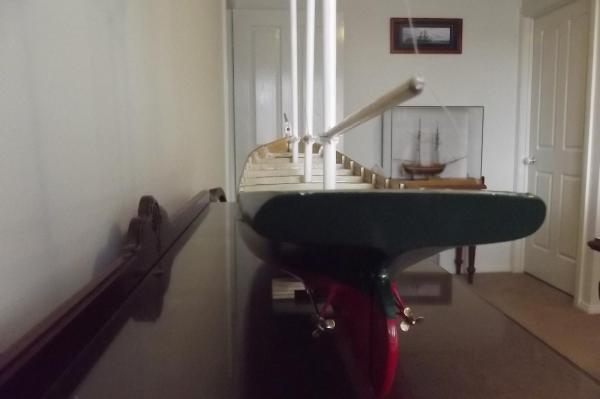
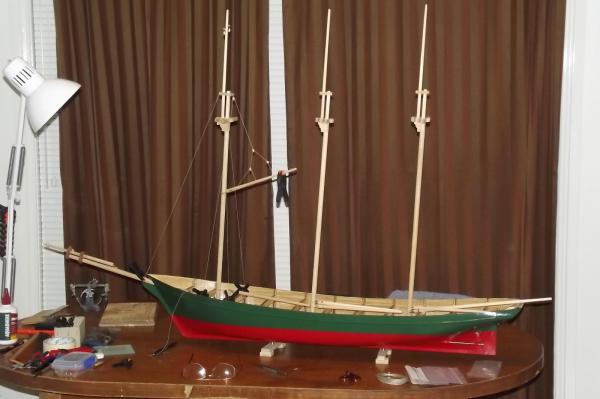
A little bit of progress. Sometimes when I catch a glimpse of her in the corner of my eye, with the masts standing, she looks like the real thing in for a refit. First a little stern shot, I think the props are a tad small so I might have to go the 25mm ones. See if you can work out what I am planning for her. Some may think I'm mad but it's what I do.

-
Bob, she has beautiful lines, I'm enjoying this.
-
Michael, where needed I will buy decent quality tools and equipment. I know which things need to be top quailty and which can be decent, I shy away from cheap stuff as it always lets you down. With some things though I know that improvisation is the way to go and there is always something around to make a temporary waterline marker with.
-
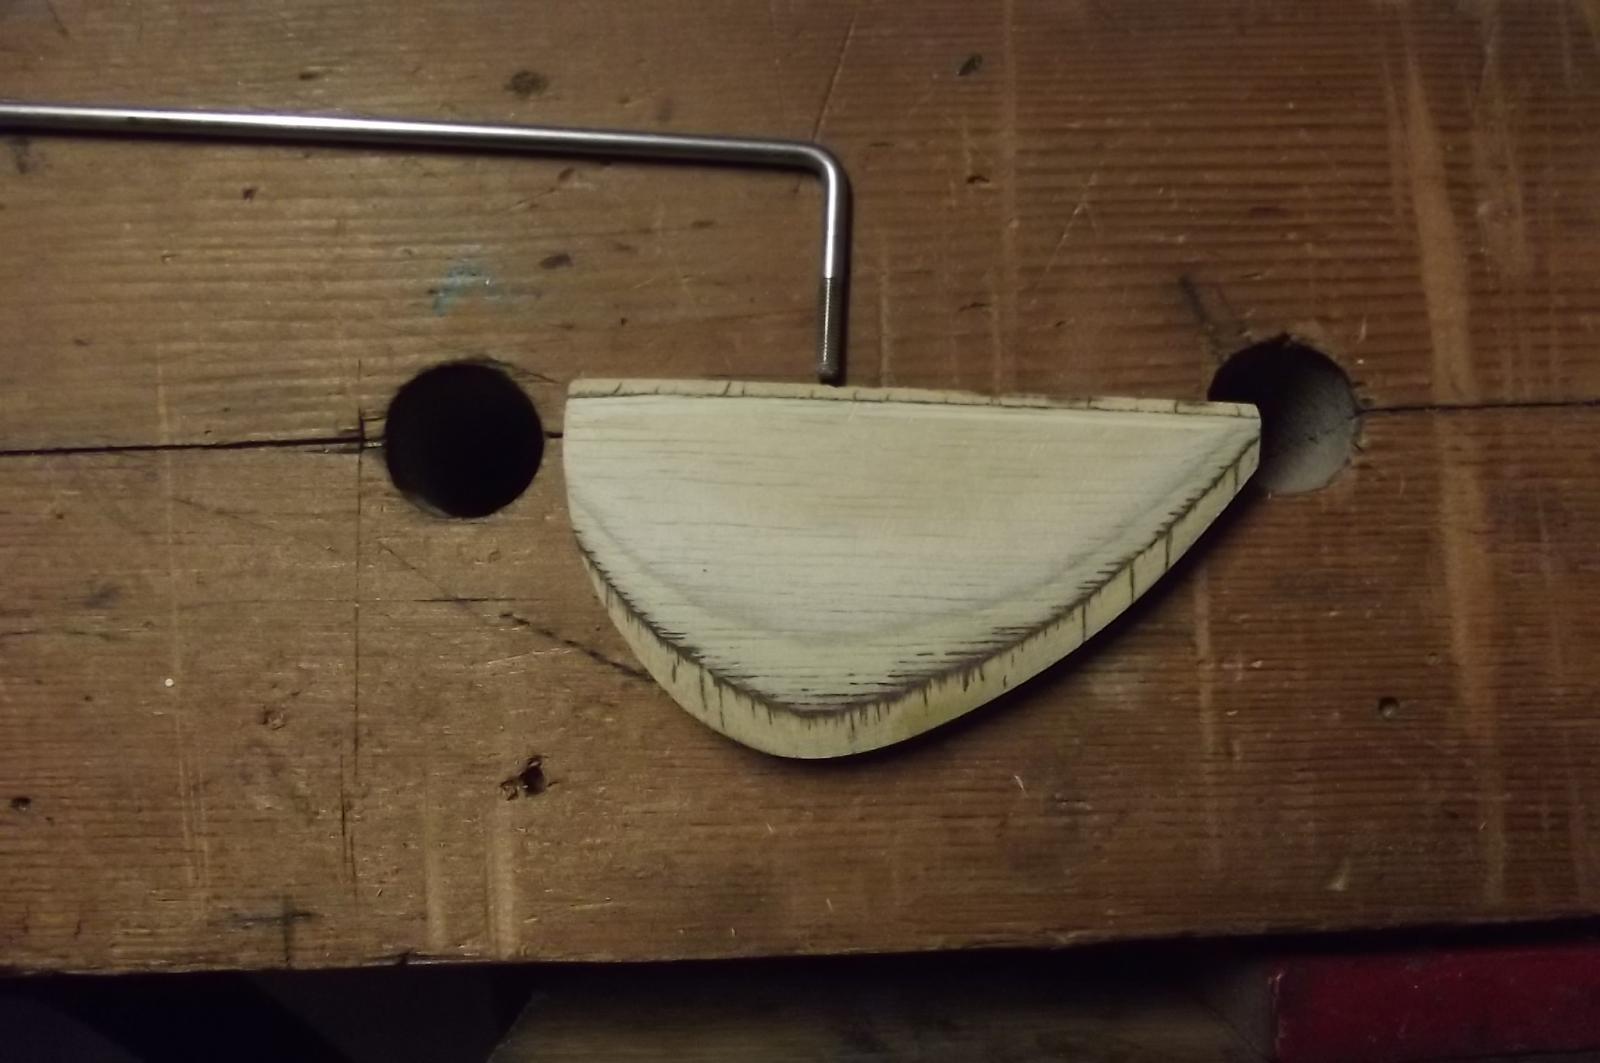
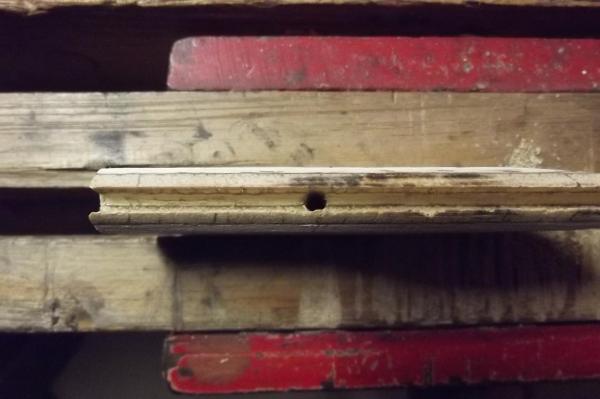
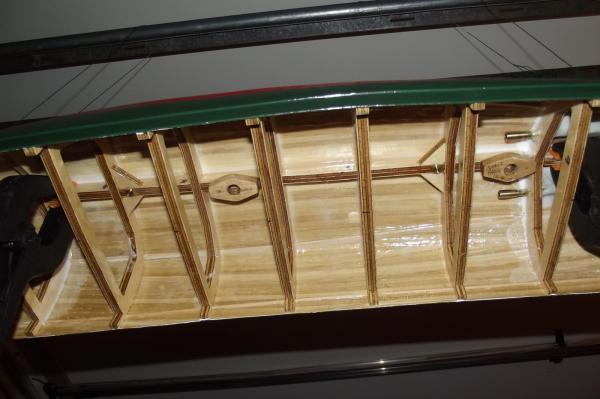
I have tapped the keel nuts and epoxied them in, so as not to waste too much epoxy I made the rudder too and epoxied the rudder post into it and coated the wood in epoxy. I needed to make sure the keel nuts would set square to the keel so I drilled two holes in a piece of timber at the same spacing and organised some wires to suspend that with the boat hanging below, this should ensure they are square. I'm flamin' glad it is a lot cooler than when I did the last lot of epoxy work, the keel nuts fell out when I was trying to screw the bolts into them to hang it so I had to dive in with fingers and got epoxy all over them in the process of refitting them, thankfully I had plenty of time to get it all sorted before the epoxy started going off. Did I mention that I LOVE alcohol ! yes that kind too but I mean the isopropyl alcohol, it makes cleaning up an epoxy drama so easy. I am sipping a very nice scotch at the moment too The steel shaft goes into the groove machined in the rudder and the right angle section goes into the hole in the groove, should be plain to see I think, I have done this in the past with nitro speed boats so I reckon it should be more than strong enough for a schooner. Not sure if I will bother with false brass hinges as they just mean more holes in the hull. The brass keel nuts are long enough that they protrude beyond the keel. Two reasons, on display they will be the pedestals it rests on and more importantly, when trying to mount the sailing keel it would be hard to get the screws to line up with the holes when working underneath the hull but I will drill holes in the keel that will accept the nuts so they act as dowells. That should make fitting the keel much easier. In this pic you can see the braces I fitted between the keel and ribs adjacent to the keel nuts to take any lateral strain the keel imposes during sailing.


-
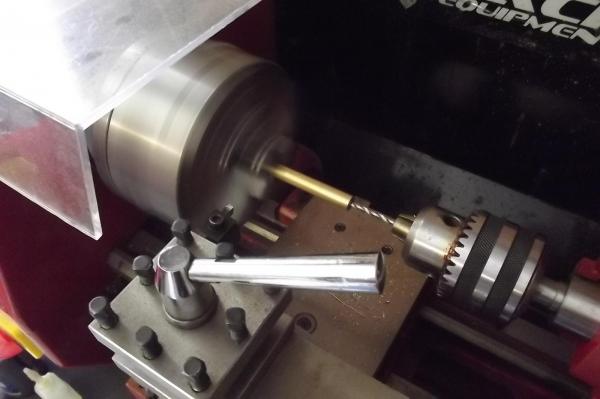
There you go, it was worth posting the waterline marking process! Thanks Robbyn, it is almost ready to be bolted down by the keel and never go upside down again. Yes, the lathe / mill is an excellent addition to any model shipyard, I made the masts on it and now brass fittings, who knows what will come off it next. Steve
-
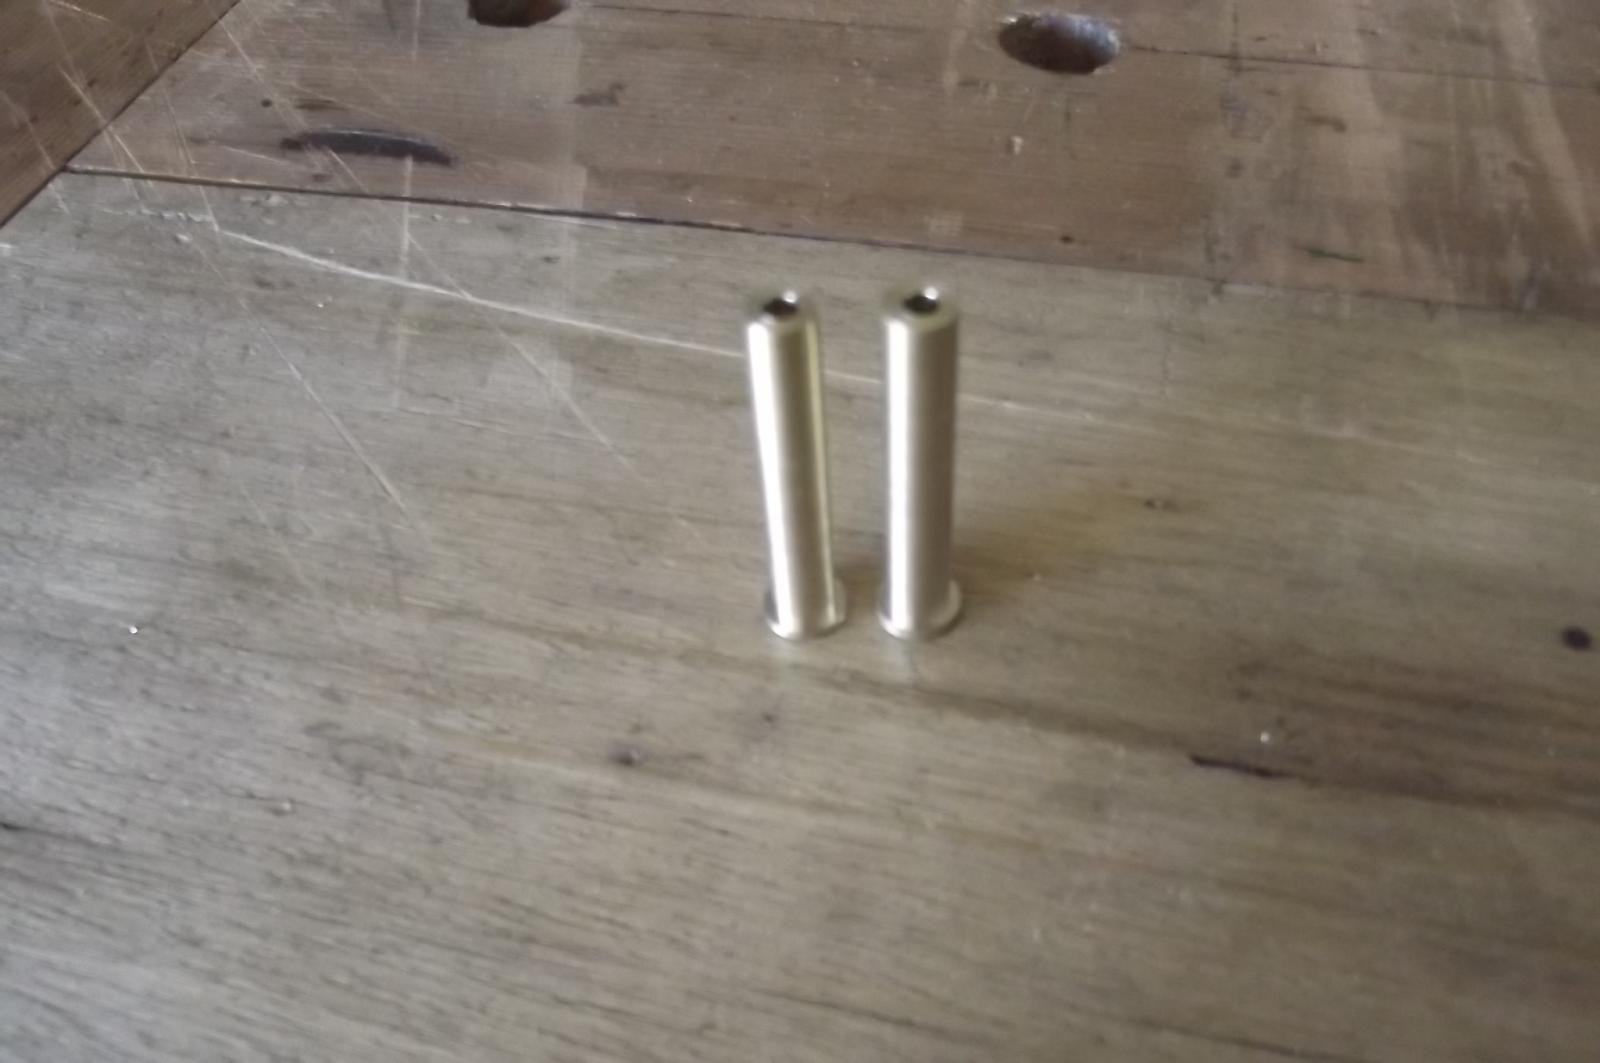
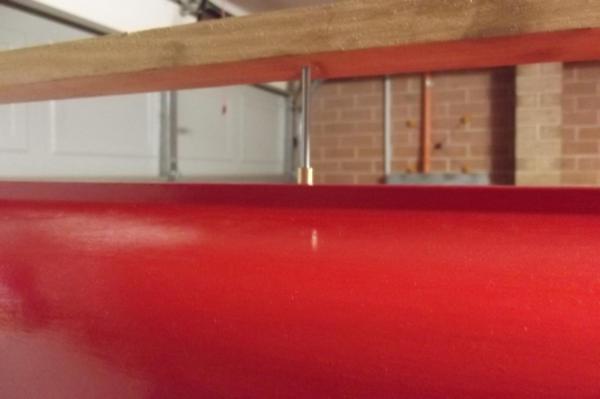
I am no fitter/machinist but I love having a lathe ! I have turned the blind nuts that will go through the keel to mount the sailing keel, they will also be used to mount her on display. All I have to do now is get a tap and cut the threads and I can epoxy them in. Since I bent a prop shaft and had to order a full replacement assembly I now have one set left over albeit useless for driving a boat. It is however quite good enough for steering a boat. I have cut the outer tube quite short and epoxied it through the keel and I will use the bent shaft to attach the rudder to after bending it some more. I have two bearings for it but the one that would go inside the boat is too long and would put the tiller above deck so I turned a second outer bearing which will make it all nice and neat. In spite of appearances the hole through both bushes is the same, 3mm. Yes you can easily tell which one I made by the finish but re-read the first sentence in this post

-
Floyd, I couldn't have done it without the design team at ryobi, artline and the manufacturer of garden ties who chose a cardboard backing of exactly the right thickness.
-
Just rec'd a brass bar I ordered, I see lathe work in my near future. This will become the "through keel" blind nuts the sailing keel will mount to as well as all manner of deck parts from portholes to binnacle potentially.
-
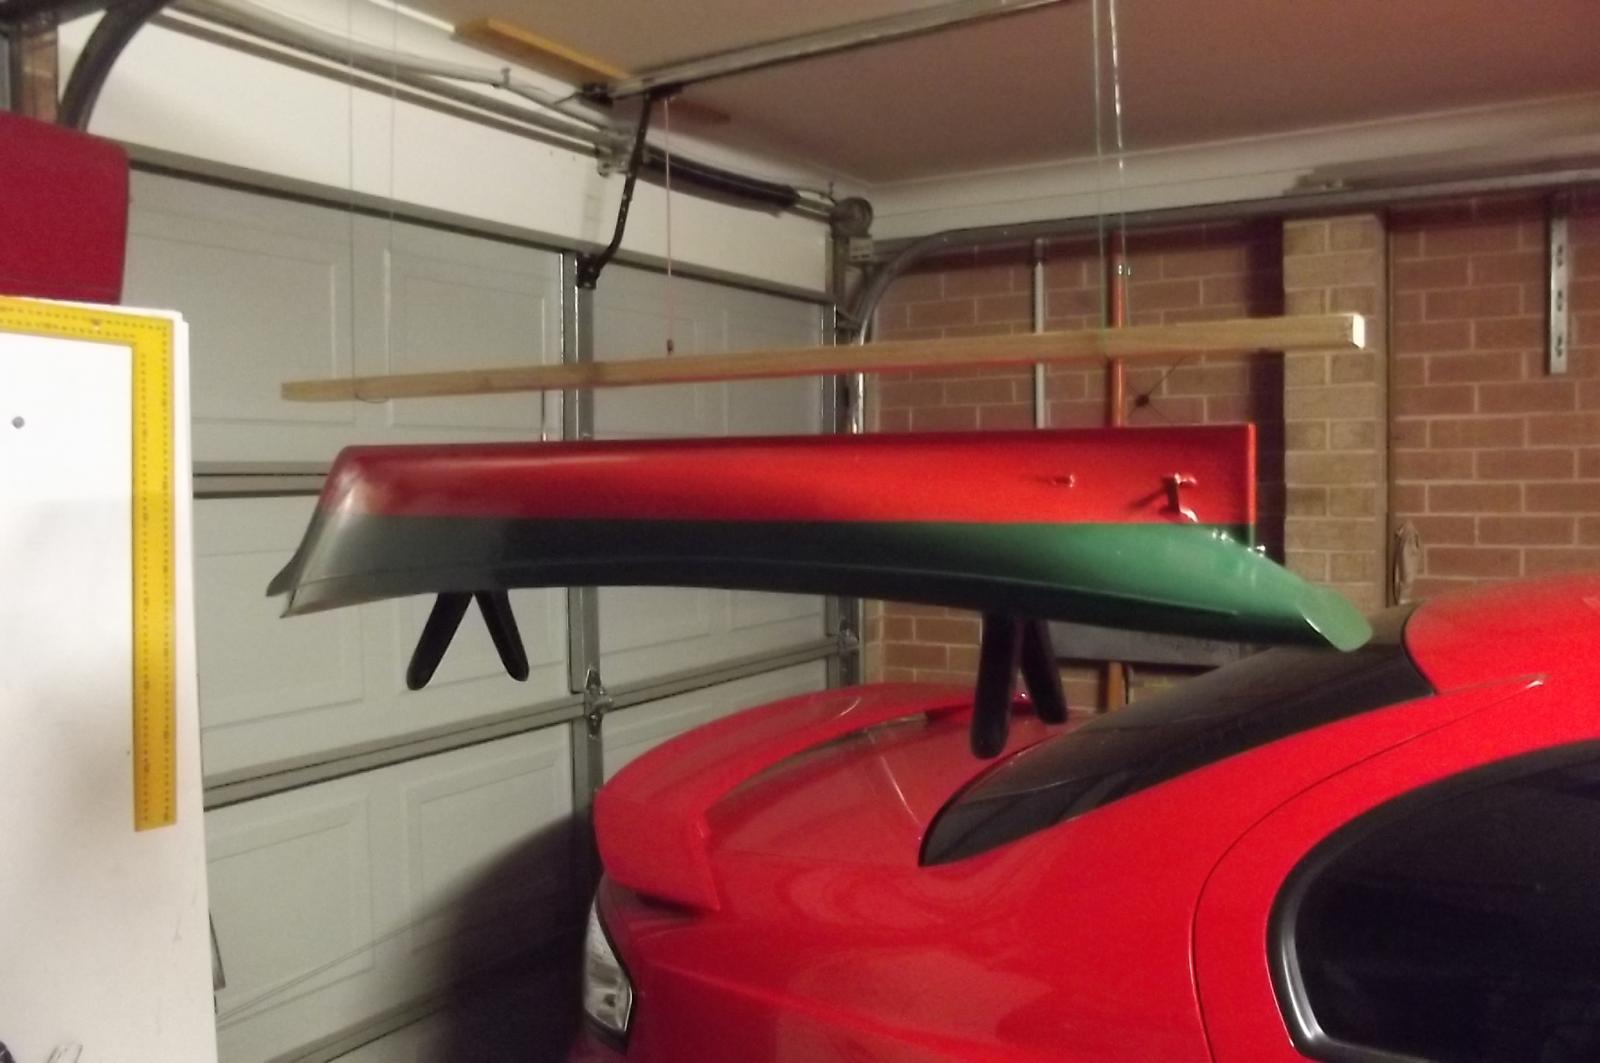
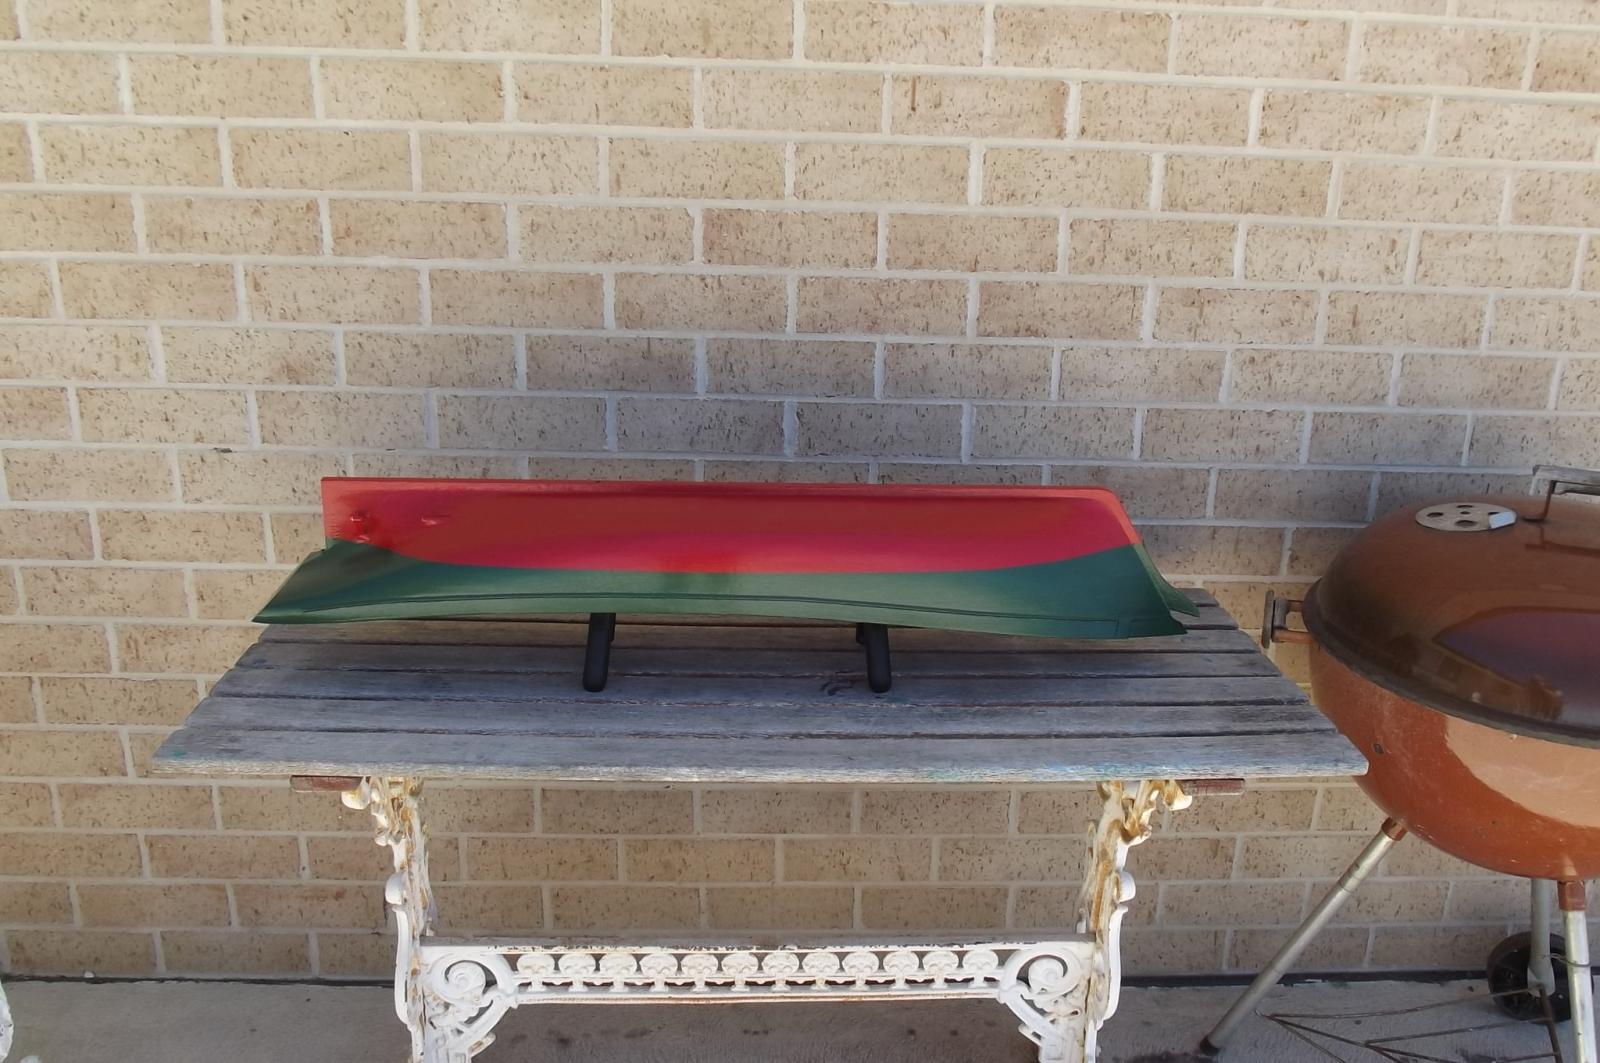
Even more paint! The red is a bit more, well, RED than I expected but we will wait and see what she looks like after it bakes dry for a day or two. I am including a few pics of how I marked the water line on her, I know most of us know how but it may be of help to someone some day and I know I didn't need to mark the waterline on the wooden prop, that was just were I went first so I could measure and confirm my jig was correct. I have marked the waterline at my sailing waterline rather than the fully loaded waterline which would be 6 or 7mm higher, I did this for asthetics and practicality for when I come to final setup.


-
She's going to be a nice little boat John and since you can work around that error it is a case of "What error"? Steve